Vendor Returns
The vendor return module is used for tracking returns back to a vendor, and for capturing all costs associated with a vendor return. The vendor return module has links to shipping for tracking returned product, and to Accounts Payable for ensuring credits are applied correctly. The vendor return module is also responsible for capturing vendor scrap and returned material quantities for generating vendor quality reports.
Creating a New Vendor Return
To create a new vendor return, select ‘Vendor Return’ from the new menu option.
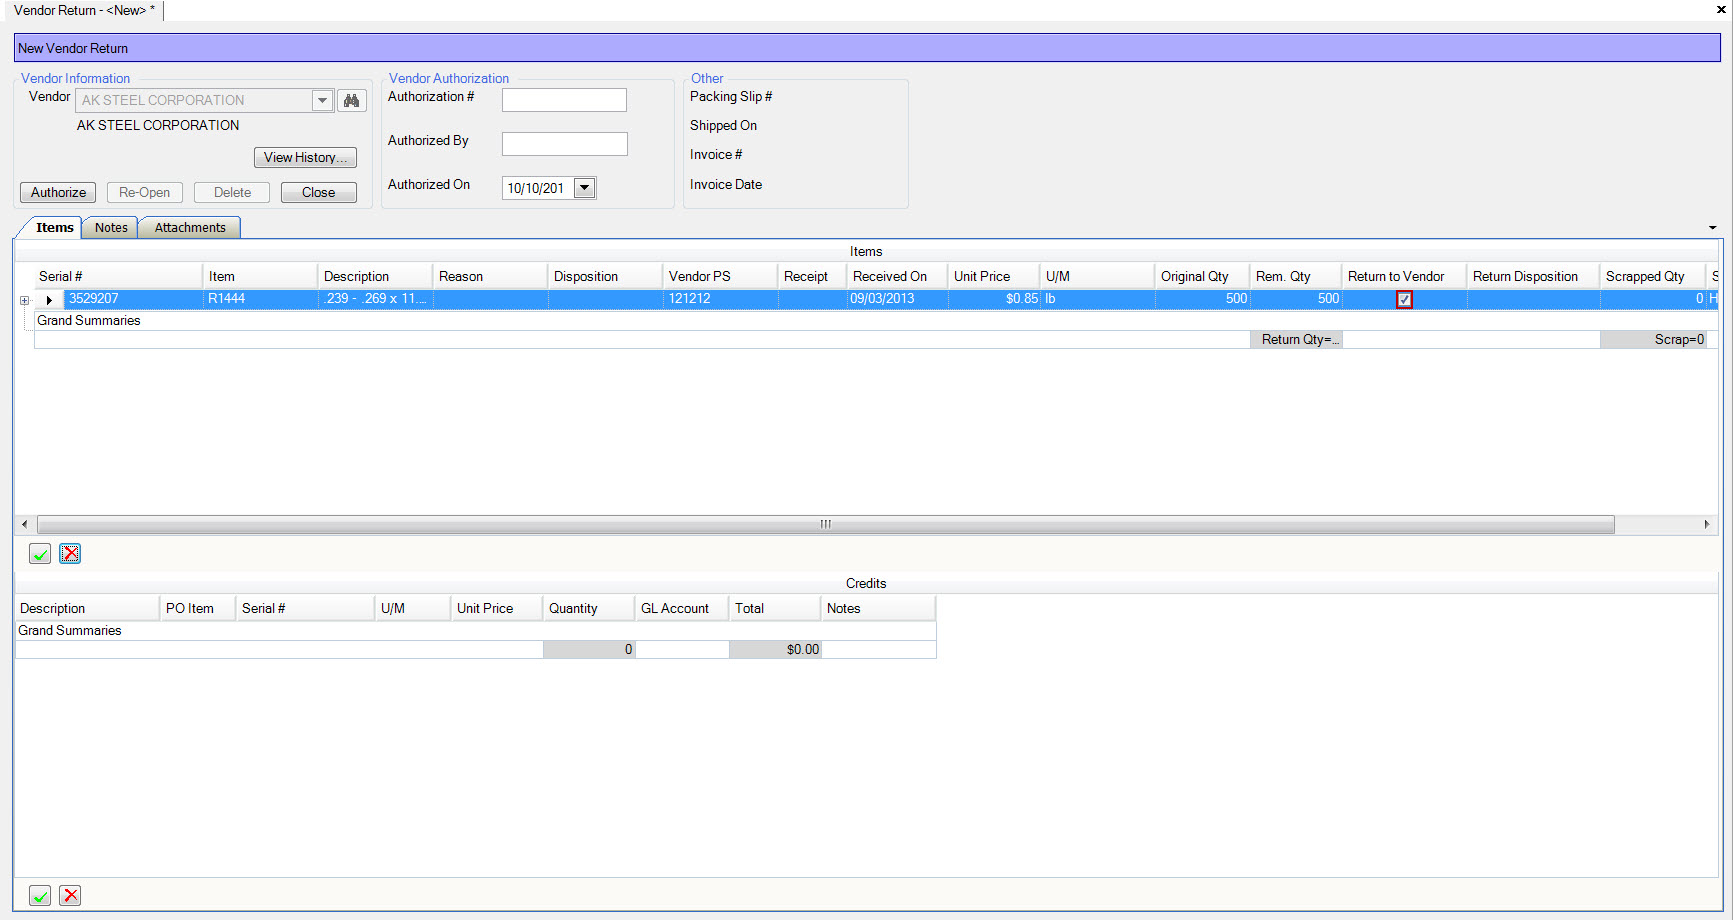
This will open a new ‘Vendor Return Screen’.
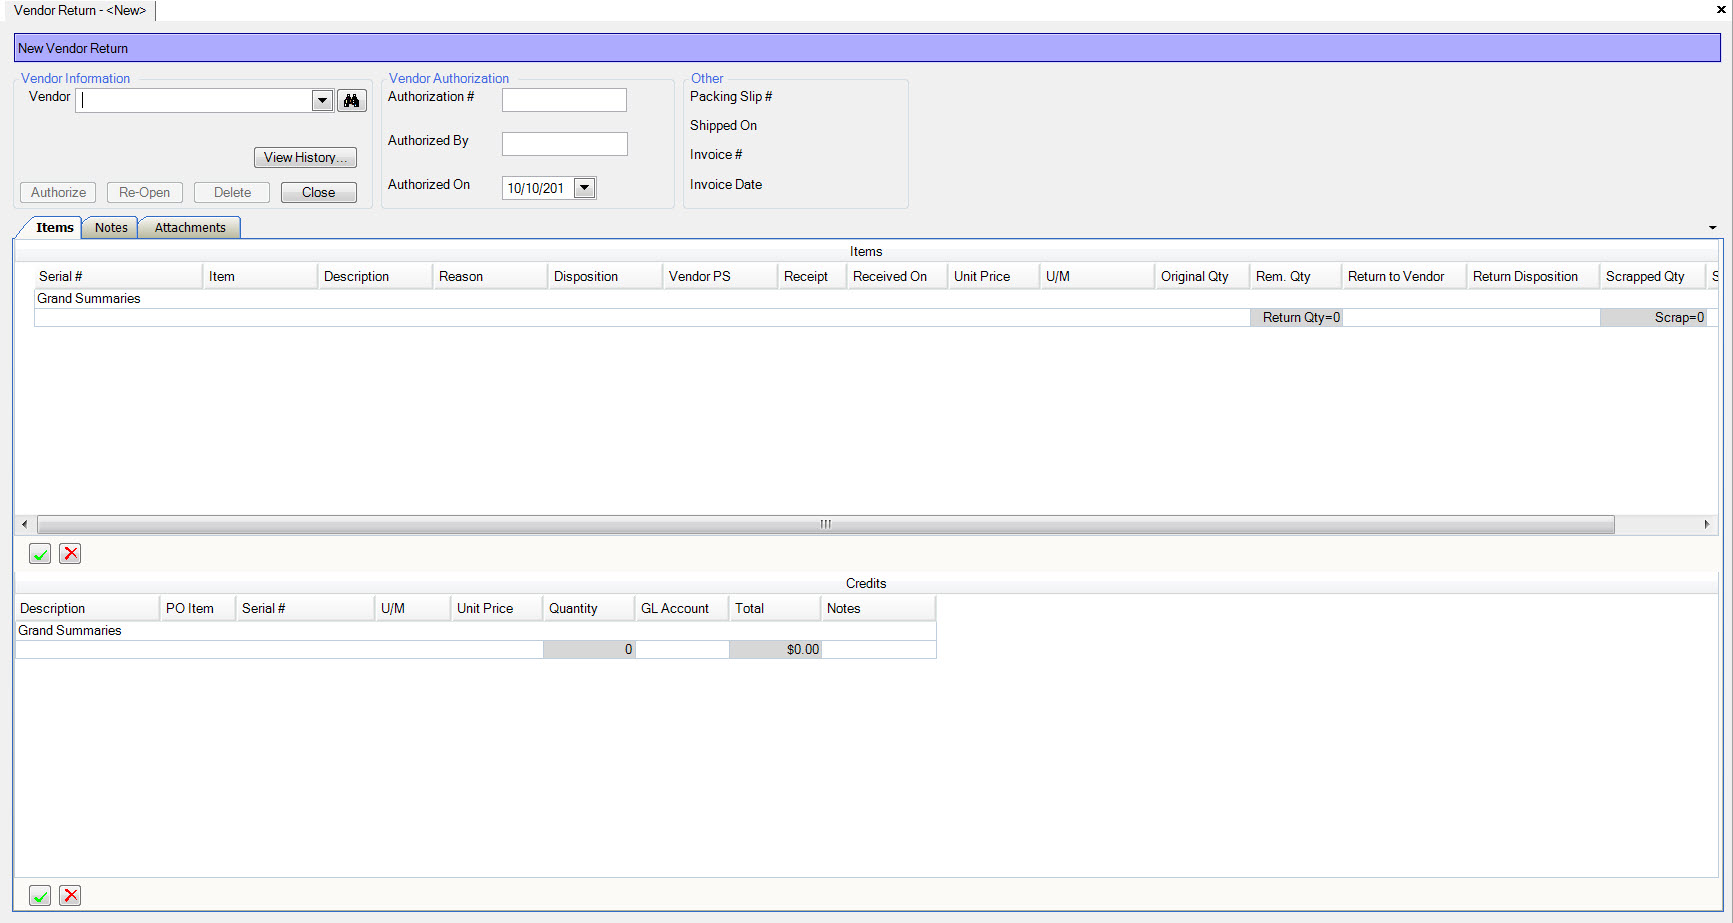
Start by entering the vendor. You can either type the vendor name, select from the drop down list, or use the search function by clicking the  button.
Once the vendor is selected, you can add purchased item tags to the vendor return by clicking the
button.
Once the vendor is selected, you can add purchased item tags to the vendor return by clicking the  button.
A new serial # row will appear. You can either type the serial #, or use the  button to initiate a search.
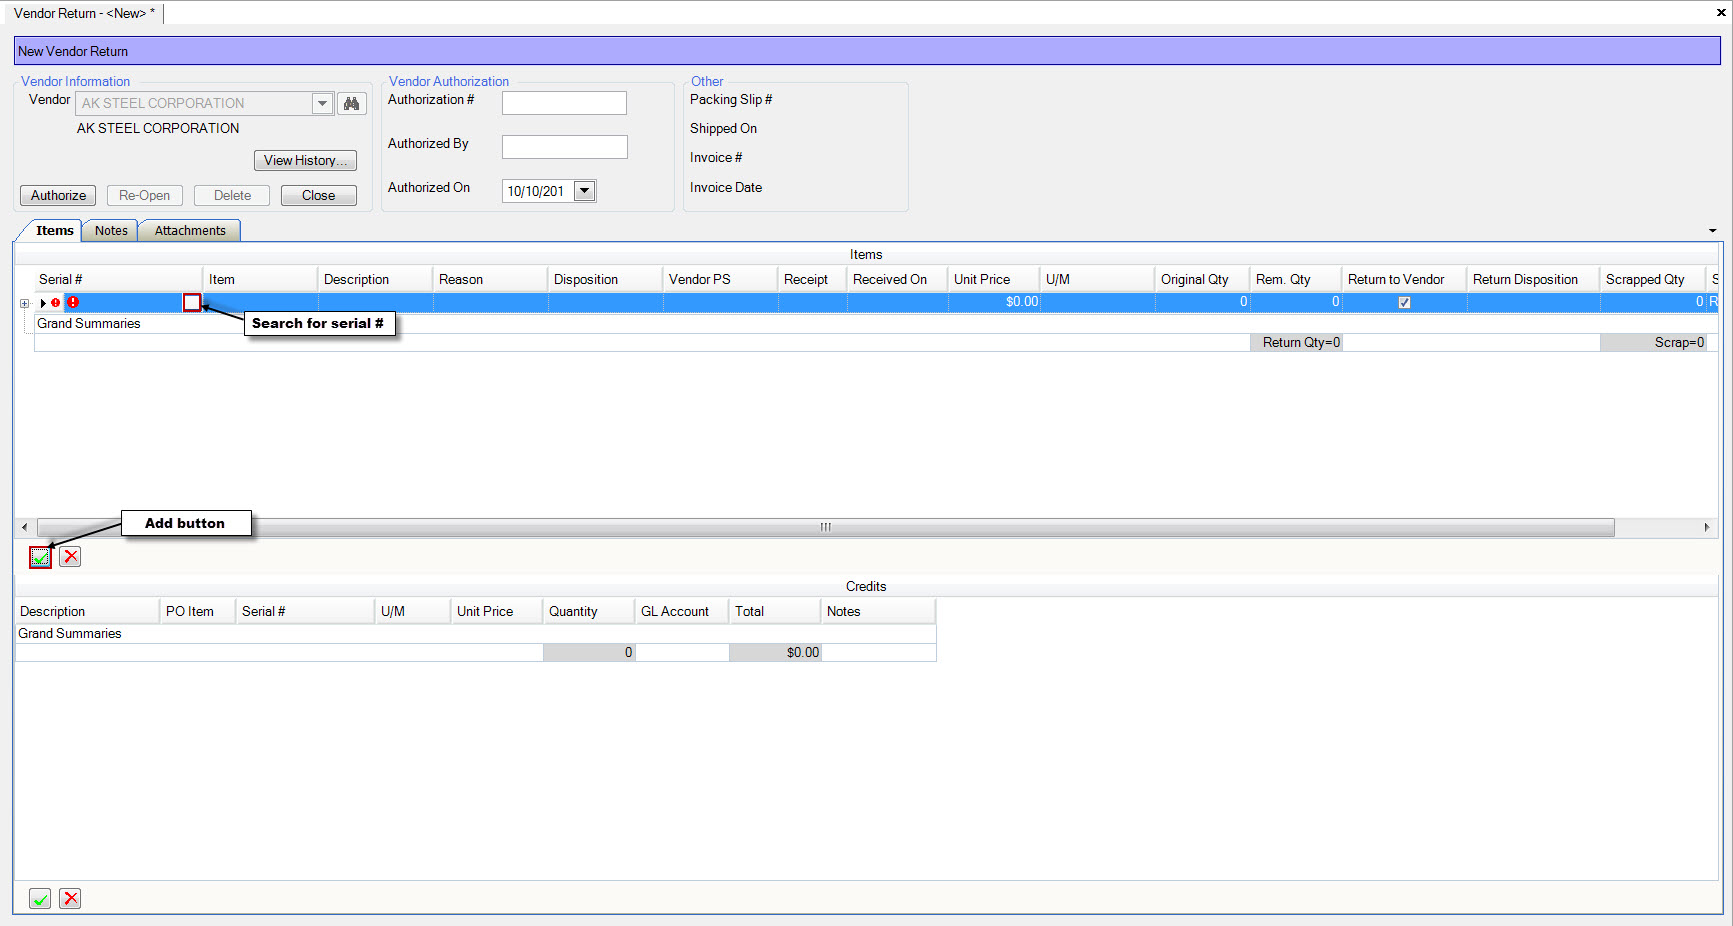
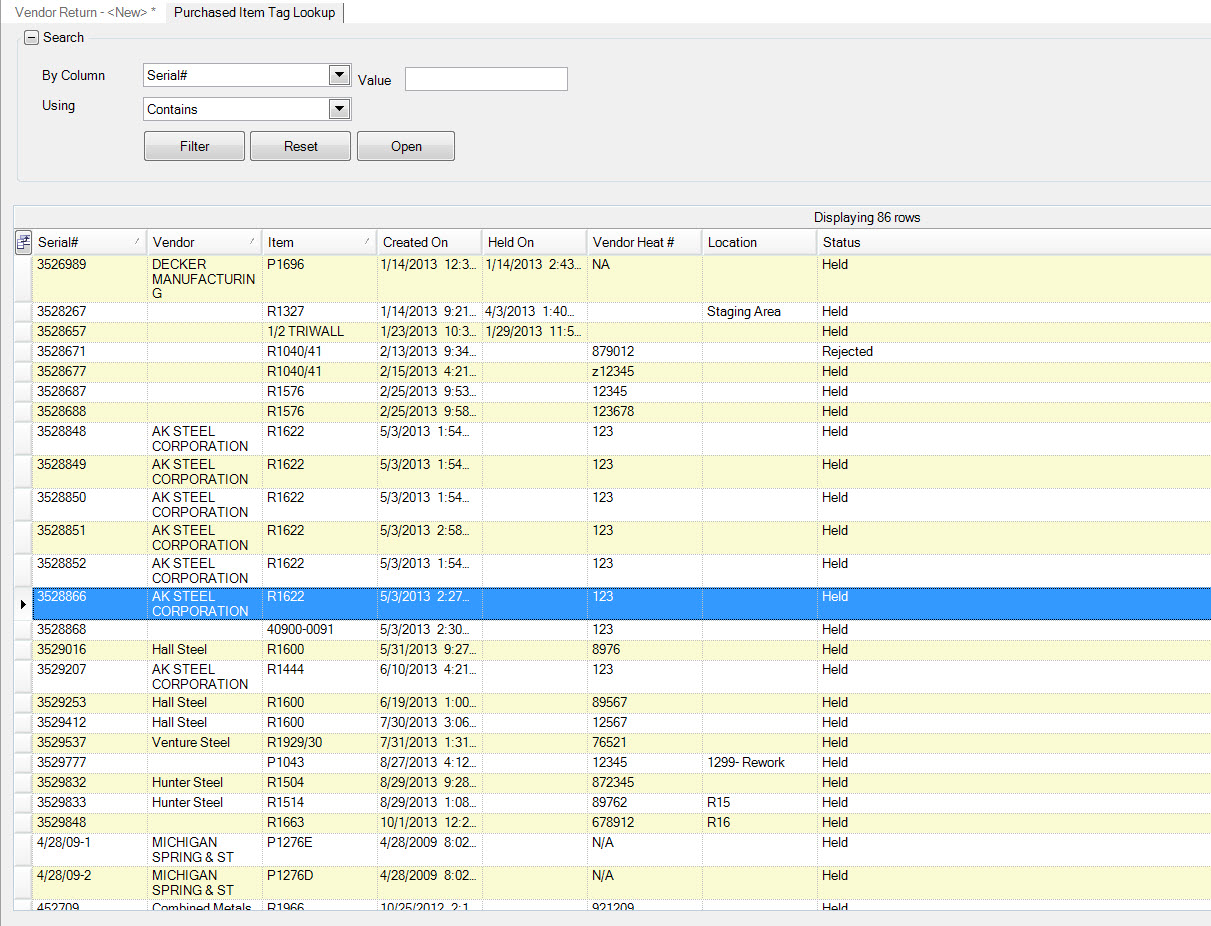
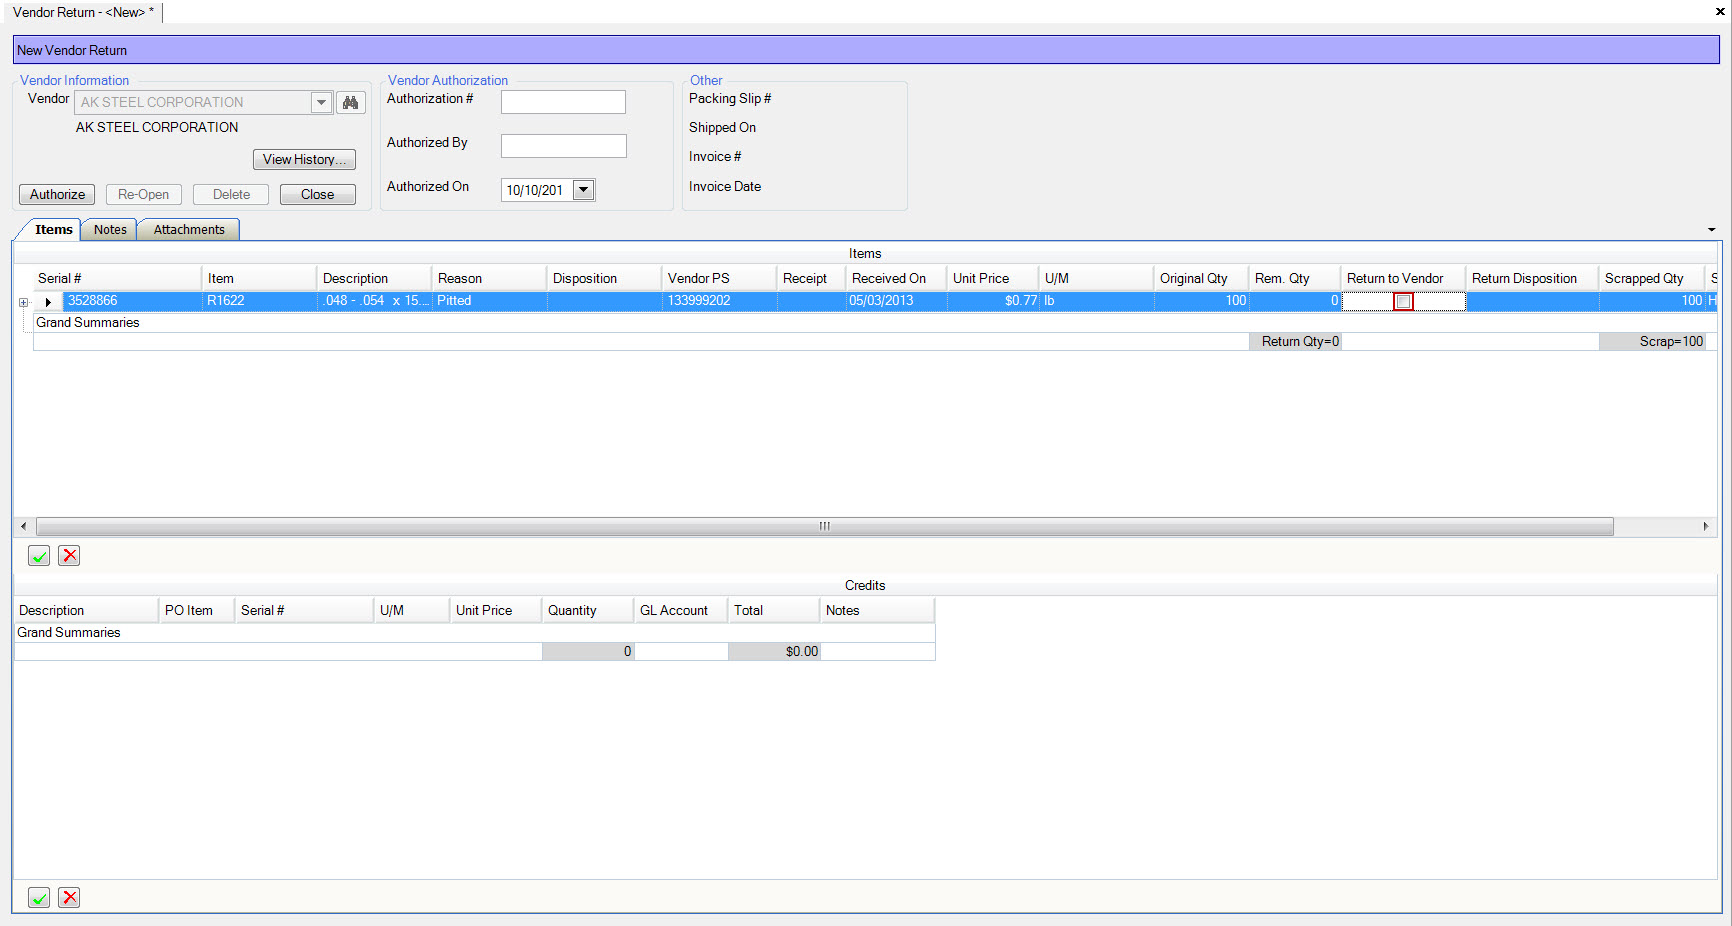
You can only add held or rejected tags to a vendor return. Once you select the serial #, the tag details will appear.
You can return the serial number to the vendor, record internal scrap against the vendor, or both. The quantities recorded as part of the vendor return will be used to generate a vendor quality report that measures the amount of product with quality issues against the vendor.
Returning to a Vendor
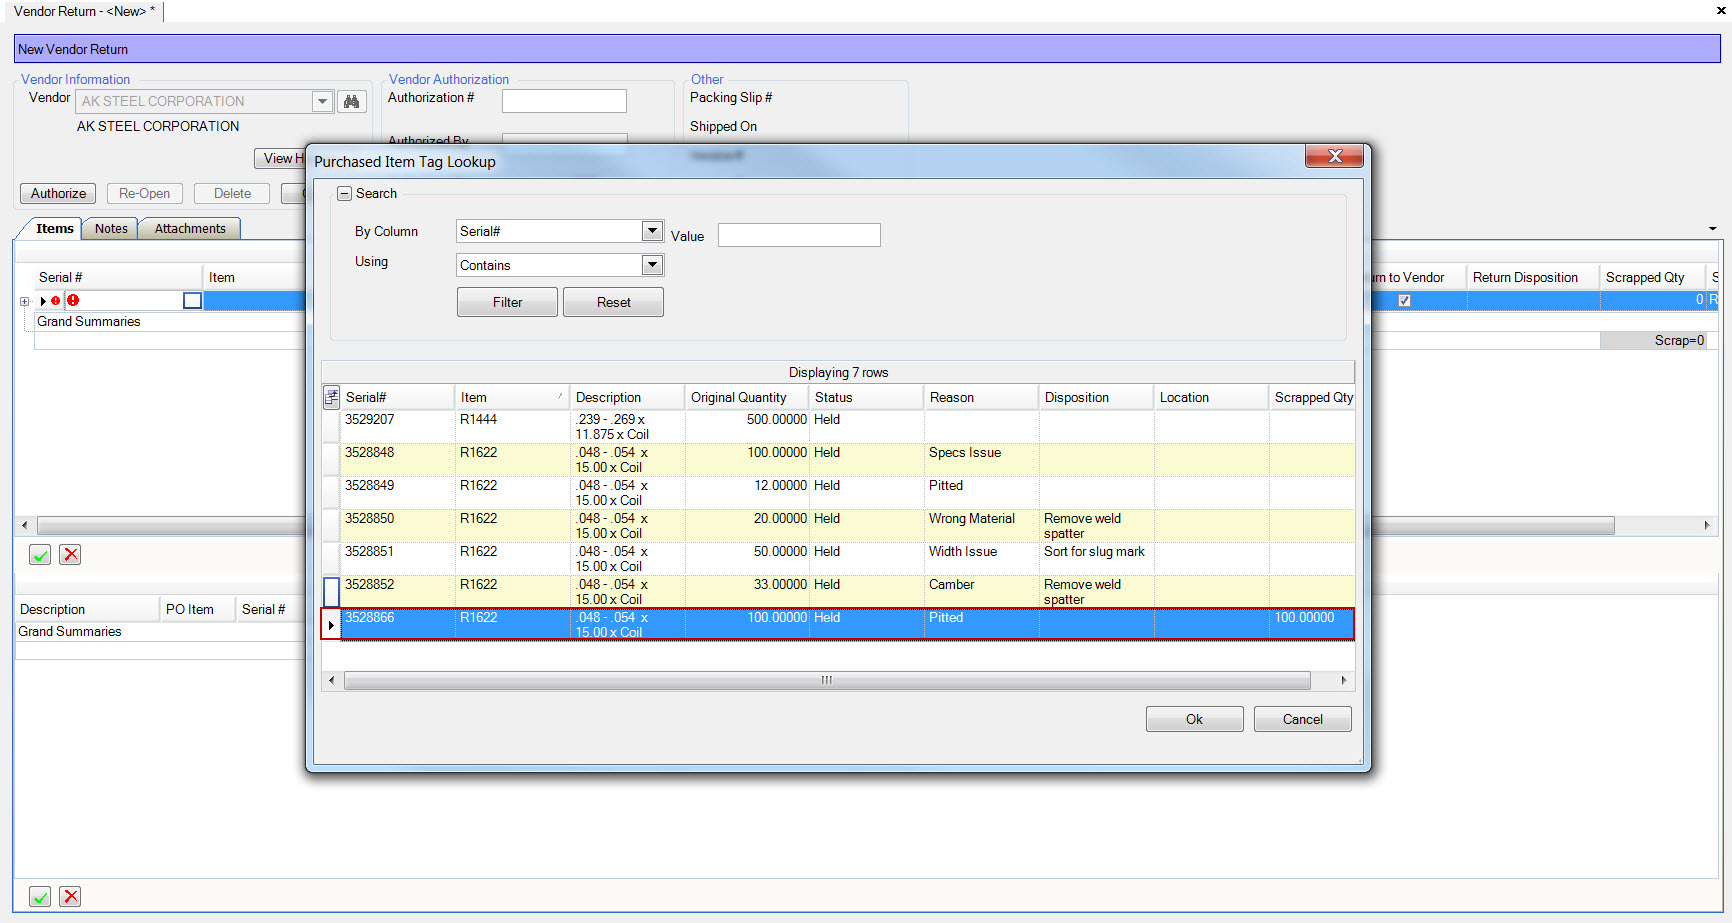
When the button is used the Purchased Item Tag lookup screen is displayed, select the serial number
to return to the vendor and click the |images/okbutton.jpg| button.
To return a serial number back to the vendor, check the ‘return to vendor’ checkbox. The quantity to return will default to the remaining quantity on the serial number.
Recording Internal Scrap
To record internal scrap against the vendor the transactions must be created beforehand using the Q/A module on the handheld scanner or the held purchased tags function in the Q/A module in ShopEdge.
Click the  button to display the Purchased Item Tag lookup screen.
Then select the serial number for the item to scrap by double clicking the row.
button to display the Purchased Item Tag lookup screen.
Then select the serial number for the item to scrap by double clicking the row.
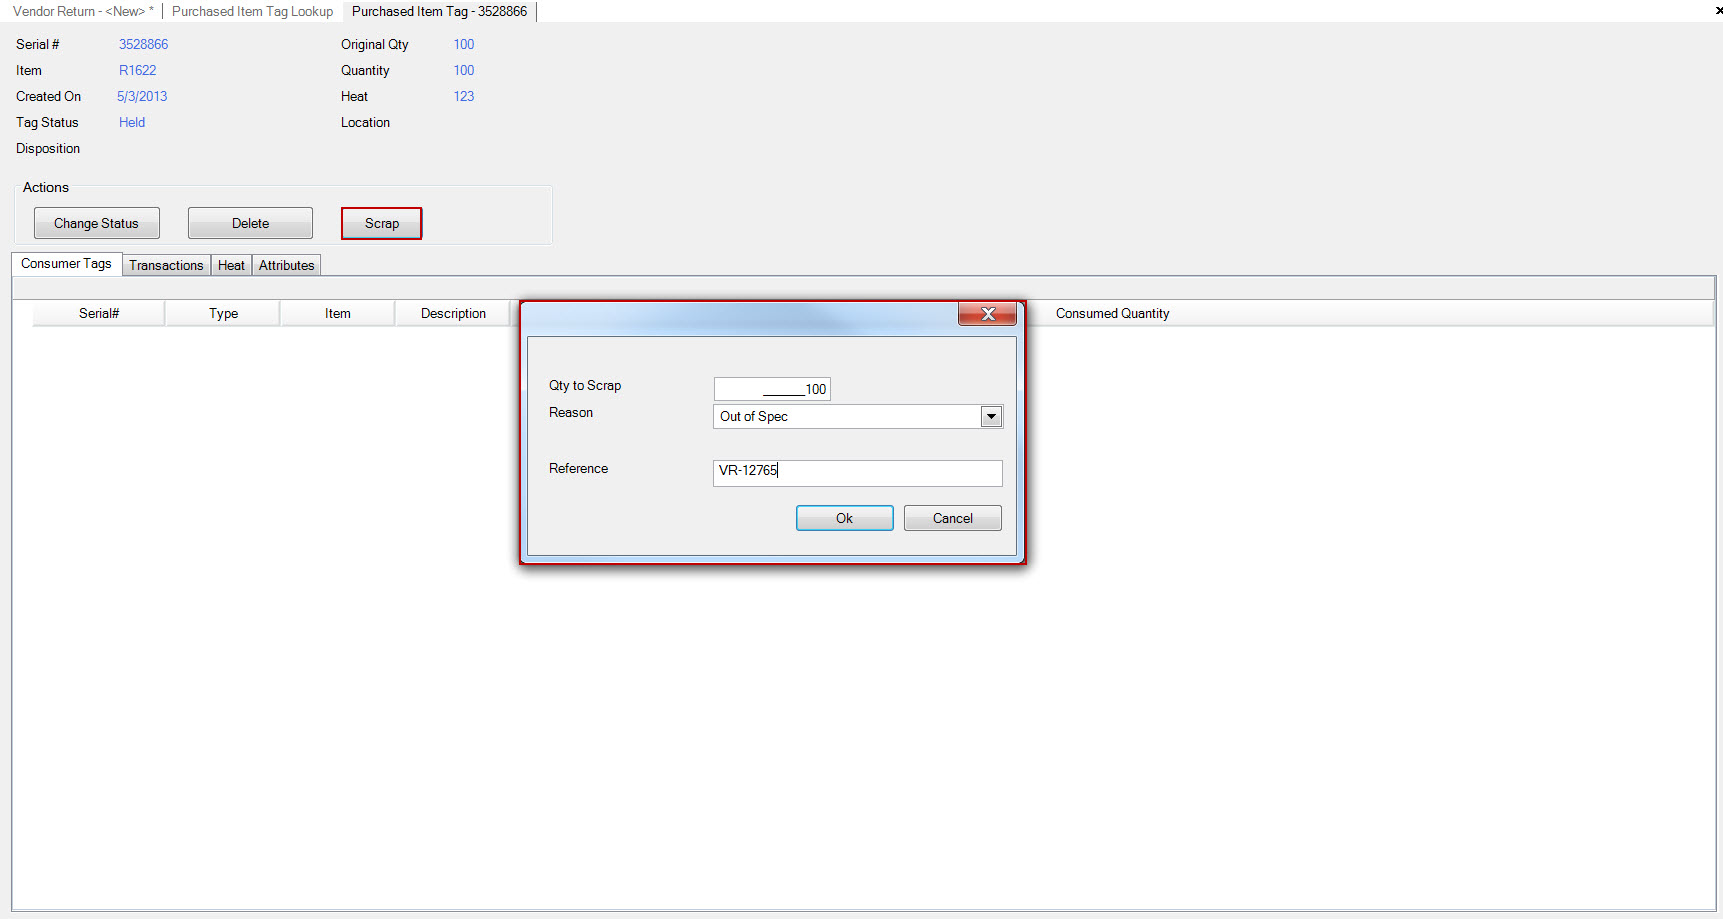
The Purchased Item Tag detail will be displayed. Click on the  button and a screen will be displayed
with the Qty to Scrap, Reason and Reference. The Qty to Scrap will default to the quantity remaining on the tag and this can be changed. Select a Reason and enter a Reference
and click the |images/okbutton.jpg| button.
button and a screen will be displayed
with the Qty to Scrap, Reason and Reference. The Qty to Scrap will default to the quantity remaining on the tag and this can be changed. Select a Reason and enter a Reference
and click the |images/okbutton.jpg| button.
Note
*** Purchased Item Scrap Reasons are located in the Purchasing module under Admin ***
To record the internal scrap against the vendor, click the button and the Purchased Item Tag lookup screen is displayed.
Select the serial number to scrap and click the |images/okbutton.jpg| button.
To record the internal scrap against the vendor, uncheck the ‘Return to Vendor’ checkbox. The scrap quantity will default to the remaining quantity on the serial number.
The scrap transactions against the tag can also be displayed by clicking the plus icon beside the row. Select the appropriate transaction(s) to record against the vendor by clicking the ‘include’ check box.

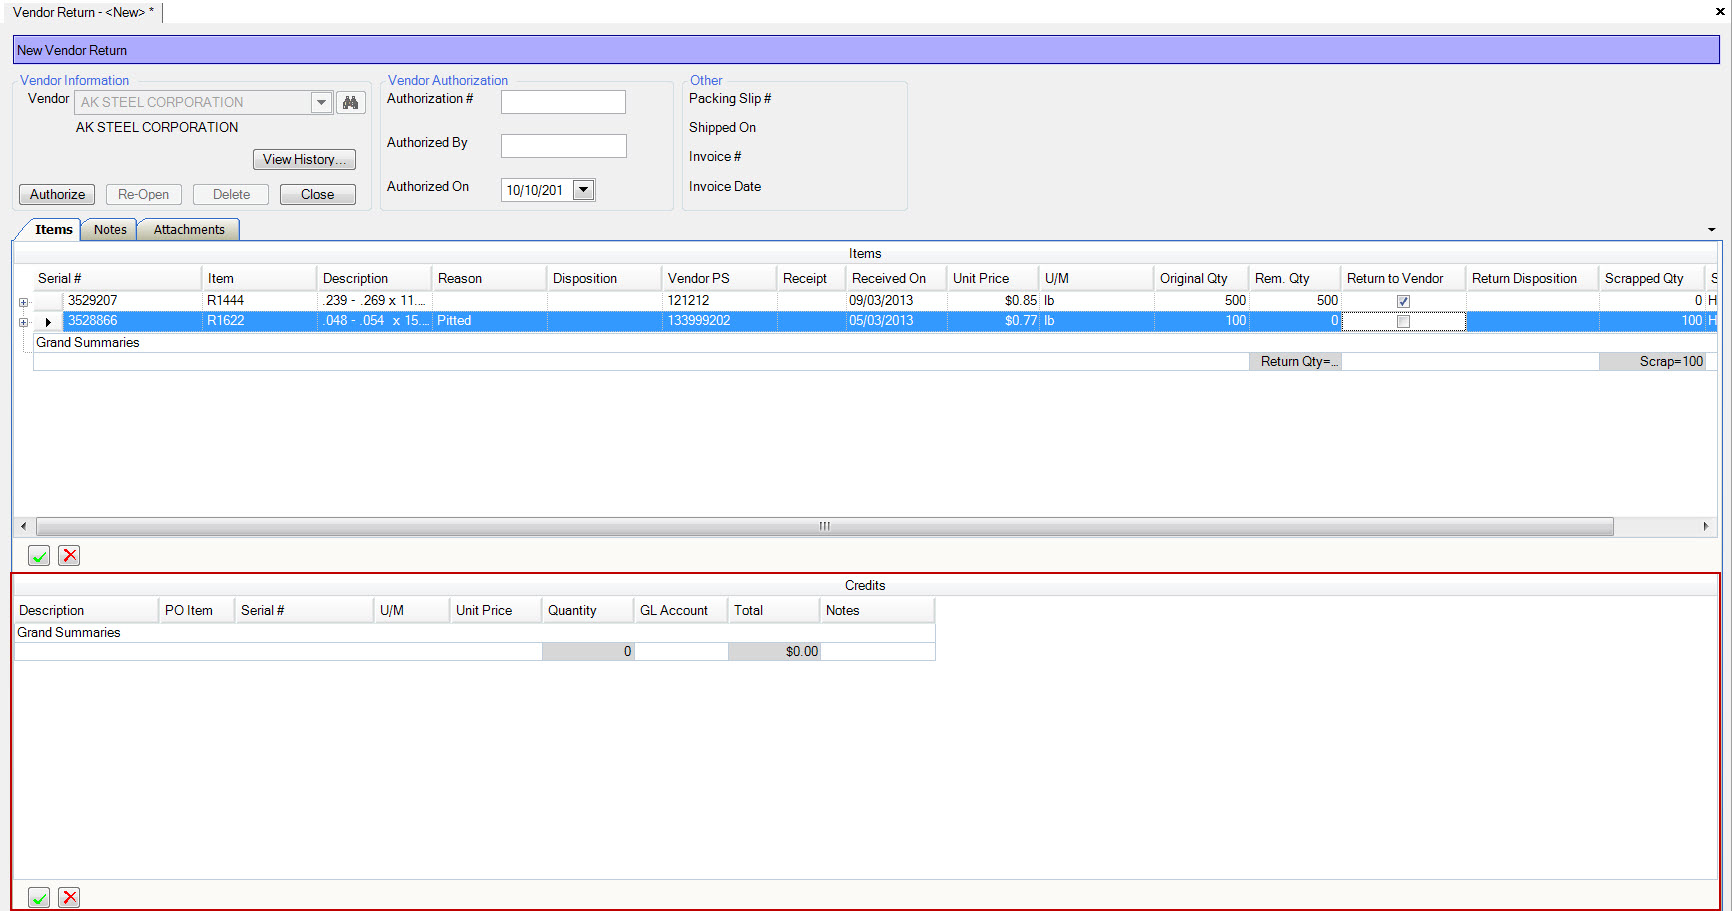
Adding Credits
You can add credits to the vendor return by adding line items on the ‘credits’ tab.
You can add as many credit lines as you want by using the button at the bottom of the screen
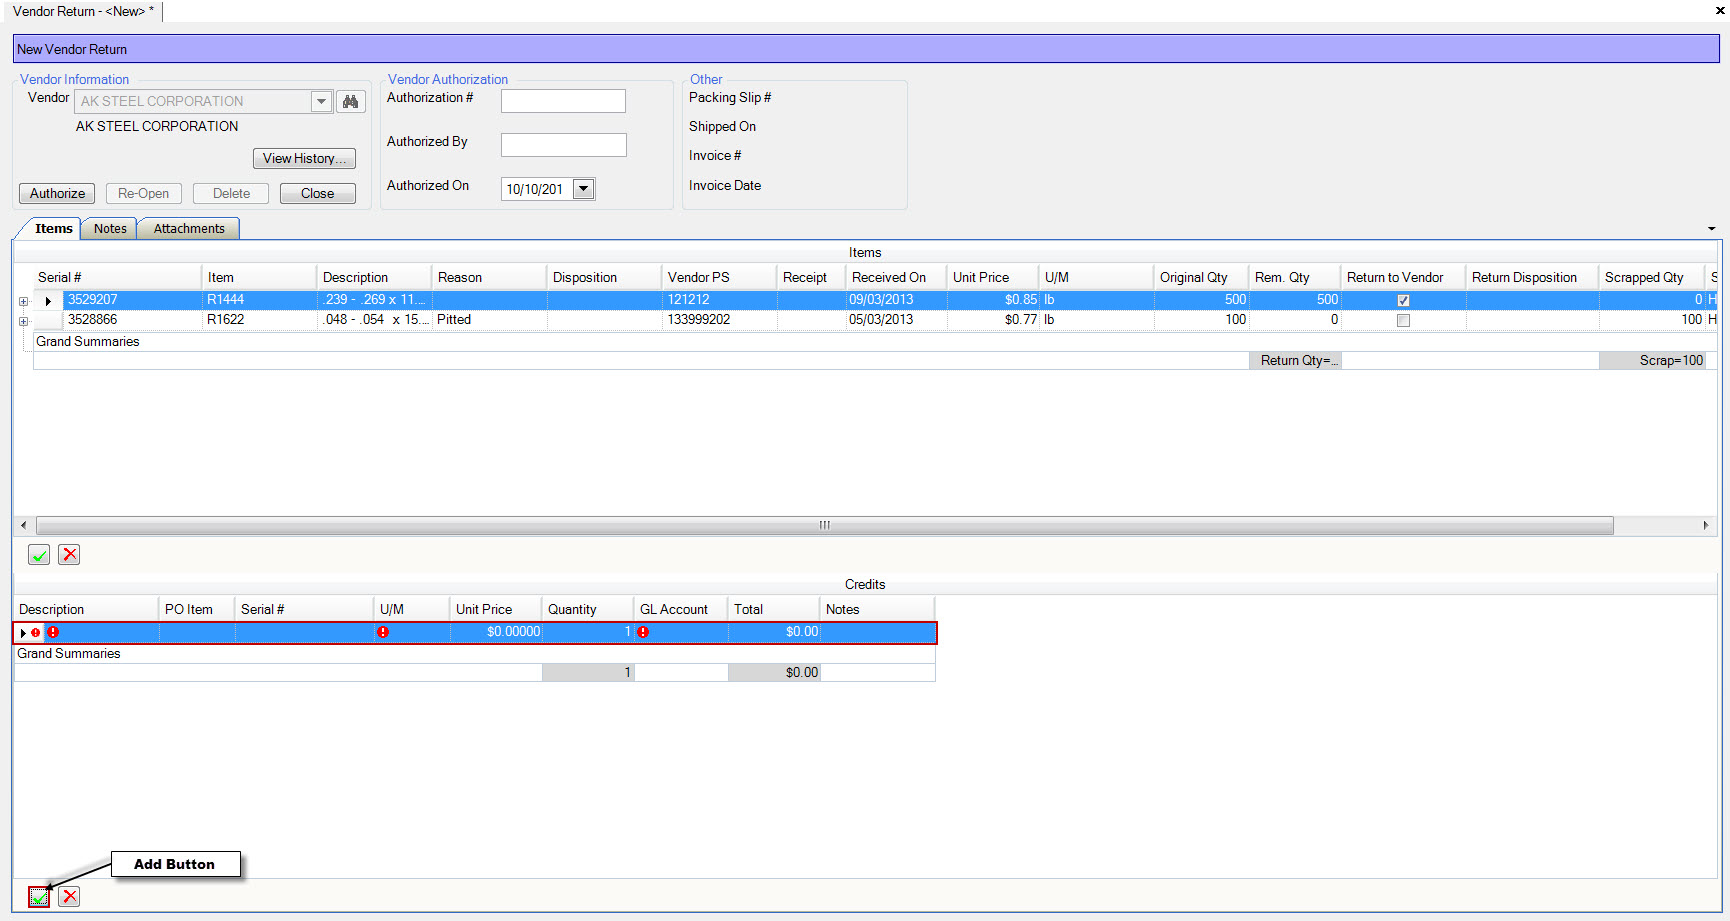
Enter the required credits information.
Note
***** The quantity must be entered as a Negative Quantity in order to flow through correctly to AP *****
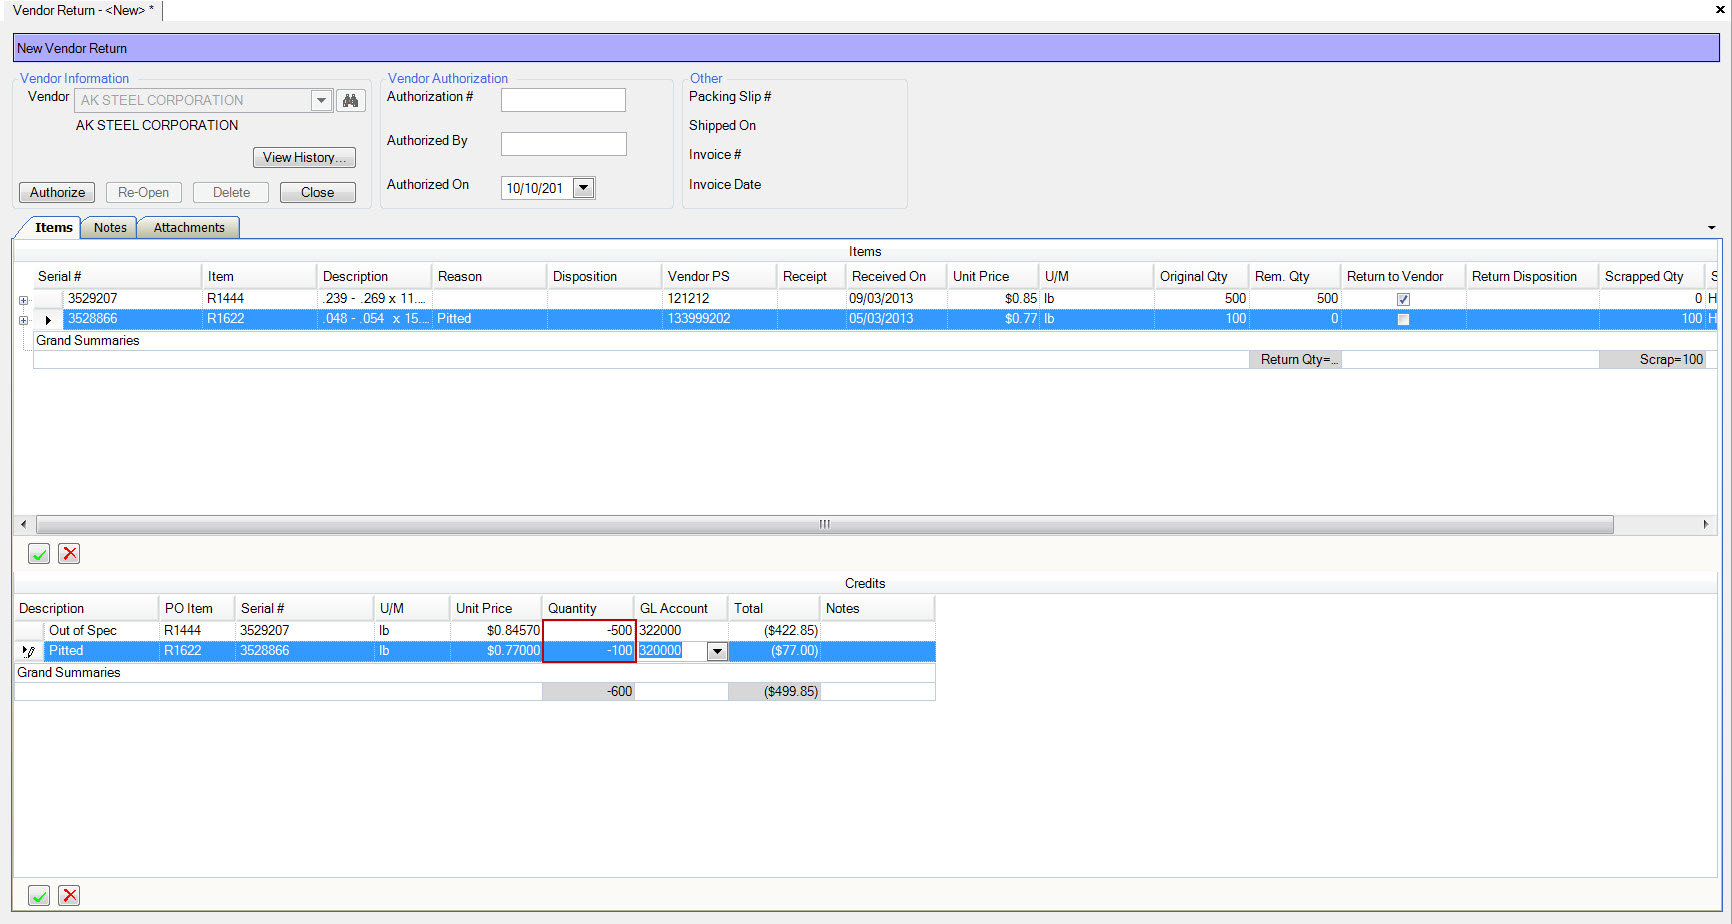
Any credits you add to the vendor return will show as a non-invoiced credit in the accounts payable module.
Authorizing a Vendor Return
Once you’ve completed the vendor return by adding the items and credits, you can authorize the return by completing the vendor authorization information, then click the ‘authorize’ button. Once the return has been authorized, you can no longer make changes, and the credits will be created in the accounts payable module. You can re-open the return any time by clicking ‘re-open’.
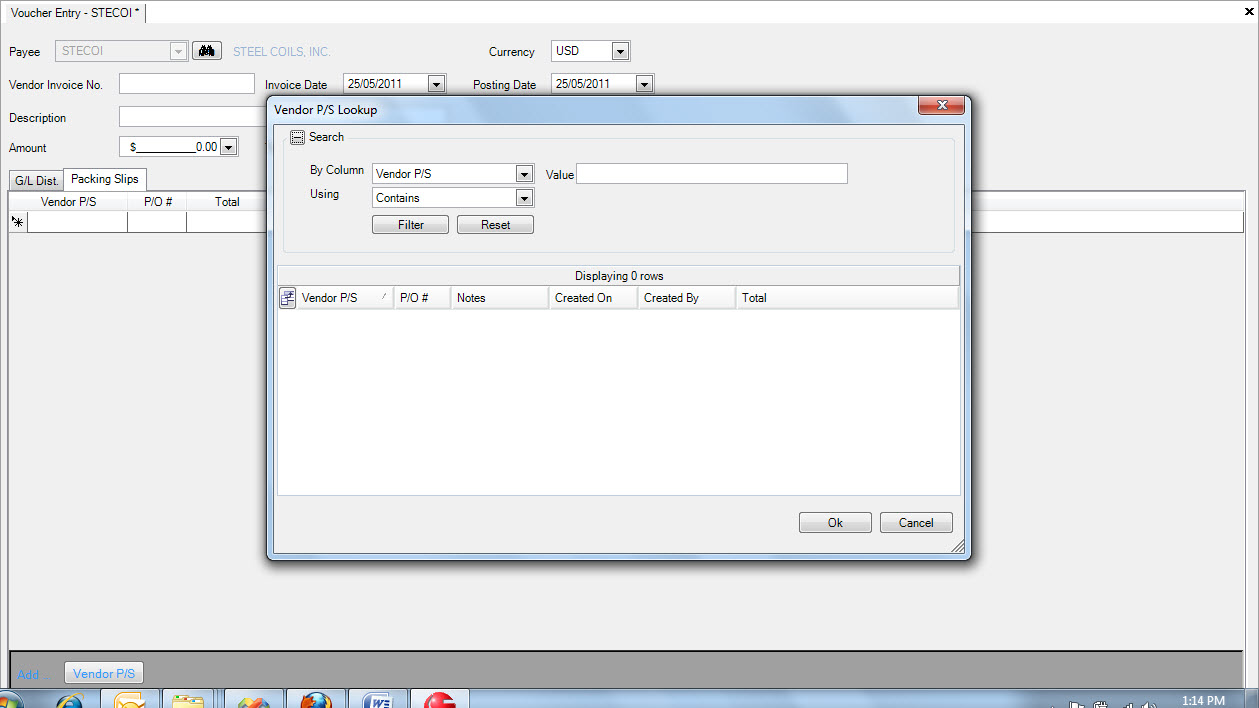
Vendor Credit Notes
To create a credit note for the vendor, start by creating a new A/P Voucher. Then click add vendor p/s on the packing slips tab. The vendor return will show as a credit that can be invoiced. The system will keep track of any credits that have not been invoiced by maintaining them in the list until invoiced.
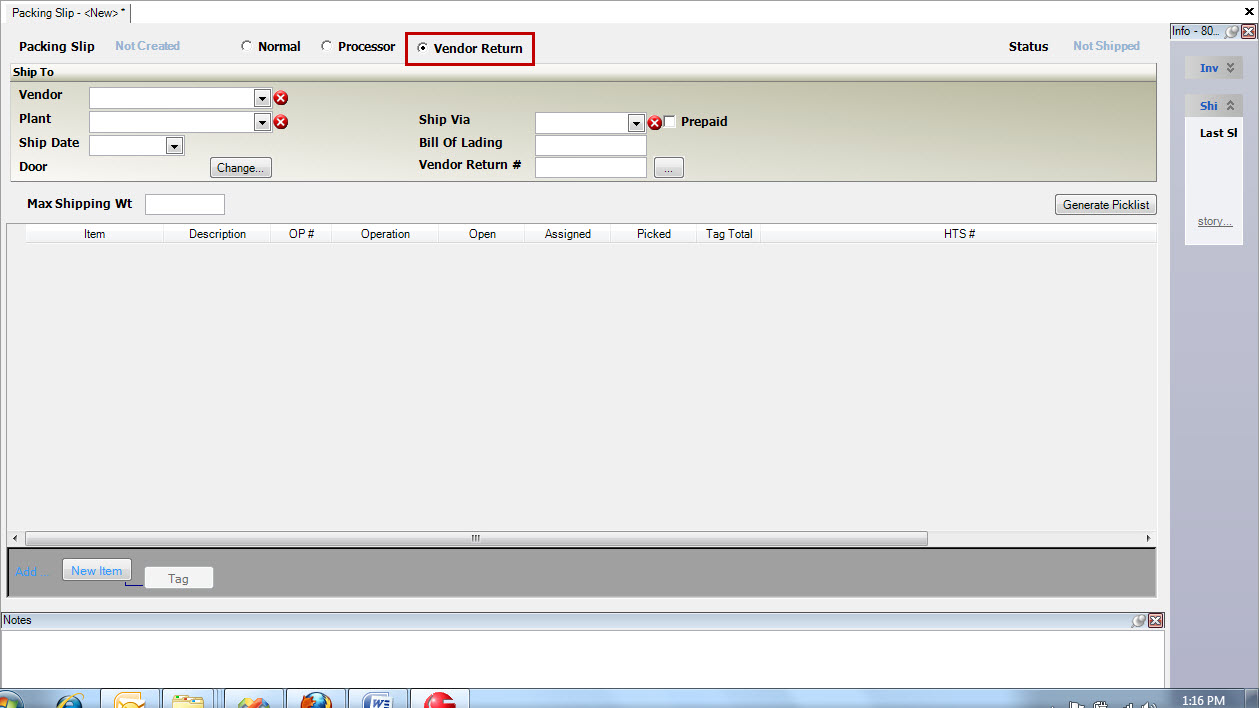
Shipping to a Vendor
To ship back to a vendor against the return, create a new packing slip, and select the ‘vendor return’ type.
Then select the vendor return # by typing in the number or using the lookup.
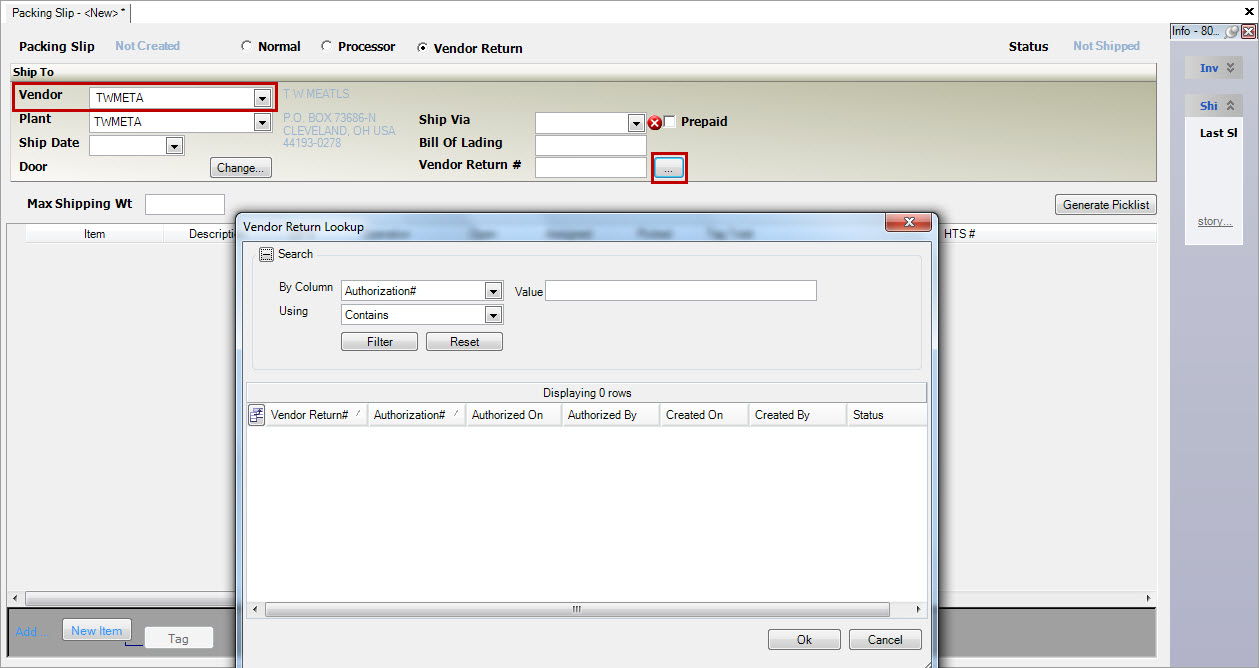
Once you select the return, the tags will be added to the packing slip for shipping.