Admin
The Quality Assurance (Q/A) Admin is used to view, add, edit, and/or delete Gauge Types, Gauge Components, Gauge Storage Locations, Out of Spec Reasons, Material Property Types, Material Properties, Held Dispositions, and Scrap Grades.
To view the Q/A Admin screen, navigate to the  tab and click on the
  icon. The Q/A Admin screen will be displayed.
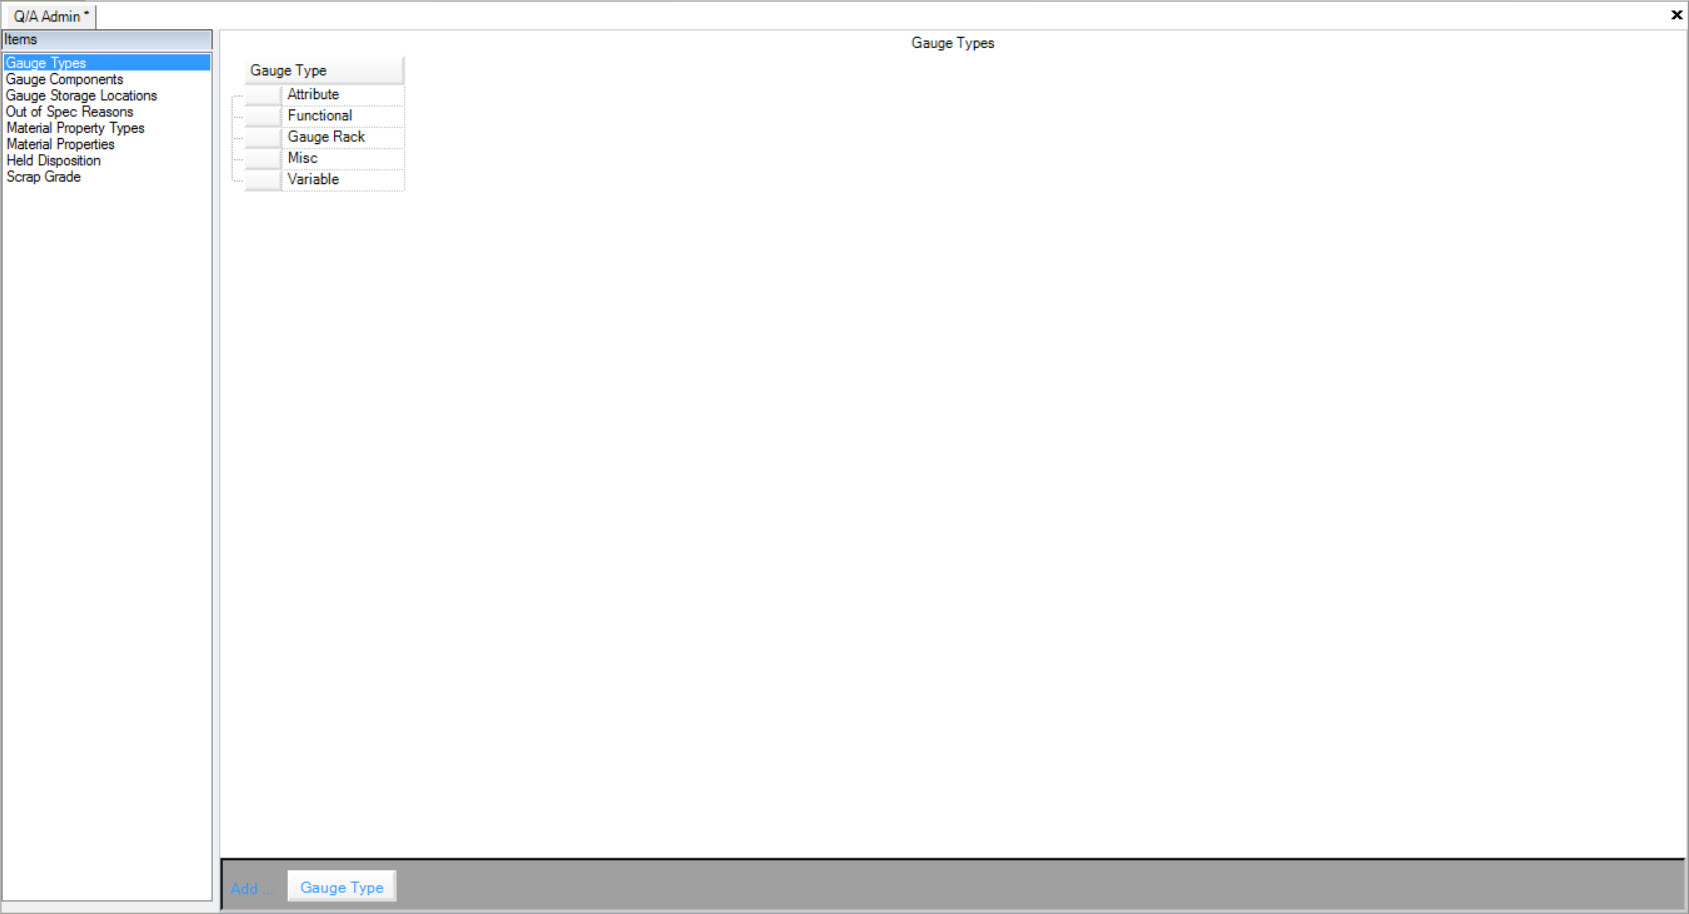
Viewing Gauge Types
To view all available Gauge Types in the system, navigate to the tab and click on the icon. The Q/A Admin screen will be displayed.
Make sure to select the  tab located to the left of the screen under Items.
All available Gauge Types will be displayed.
Adding Gauge Types
To add a new Gauge Type, navigate to the tab and click on the icon. The Q/A Admin screen will be displayed.
Make sure to select the tab located to the left of the screen under Items.
Click on the 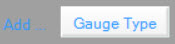 button located at the bottom of the screen.
A new row will appear where users can enter in a Gauge Type.
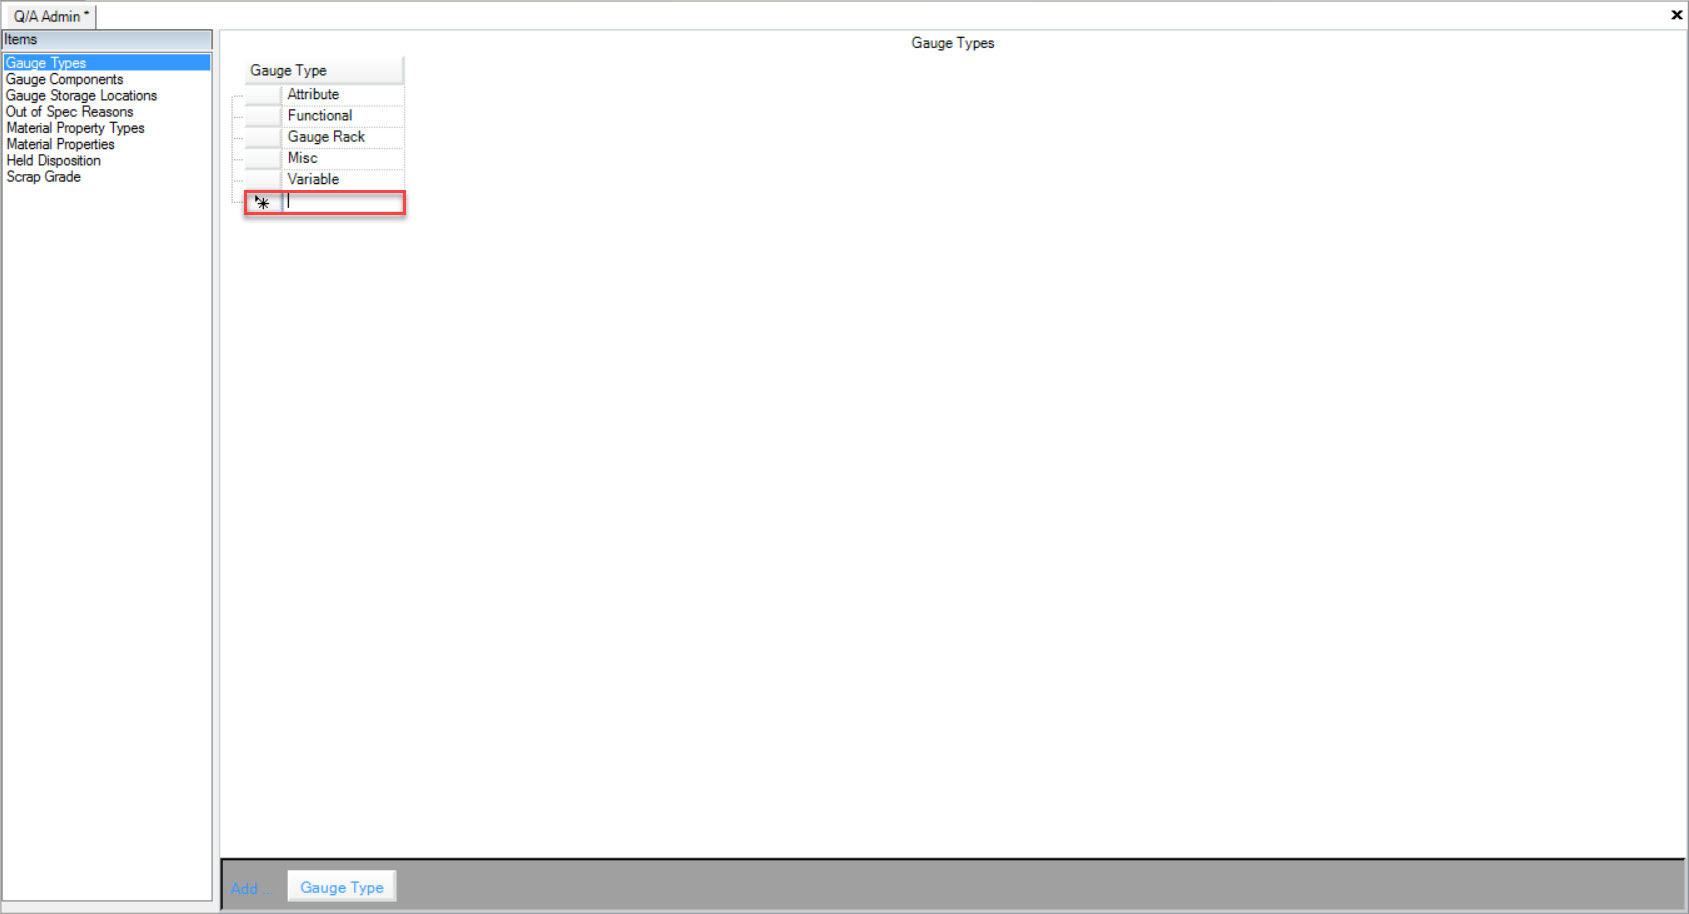
Note
There cannot be duplicates of the same Gauge Type. Each Gauge Type must have a different name.
Make sure to save your changes before exiting the screen.
Editing Gauge Types
To edit a Gauge Type, navigate to the tab and click on the icon. The Q/A Admin screen will be displayed.
Make sure to select the tab located to the left of the screen under Items.
Locate the Gauge Type you wish to edit and make the necessary changes.
Make sure to save your changes before exiting the screen.
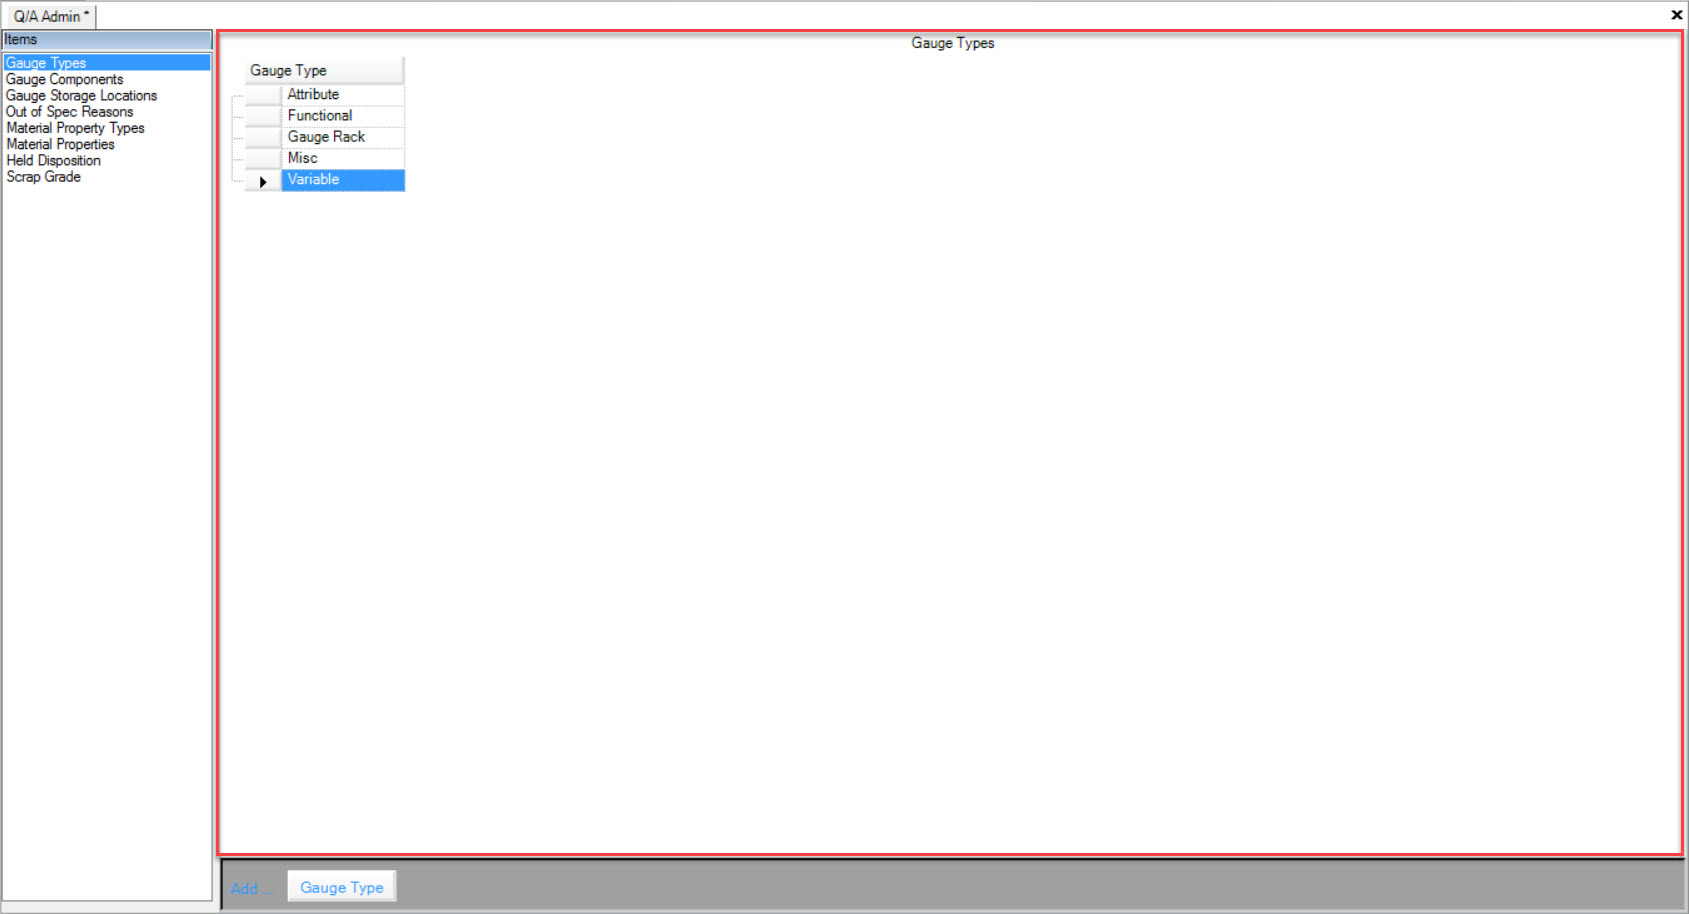
Deleting Gauge Types
To delete a Gauge Type, navigate to the tab and click on the icon. The Q/A Admin screen will be displayed.
Make sure to select the tab located to the left of the screen under Items.
Locate the Gauge Type you wish to delete and highlight the appropriate row. Use your Delete key and when the system prompts you, select Yes.
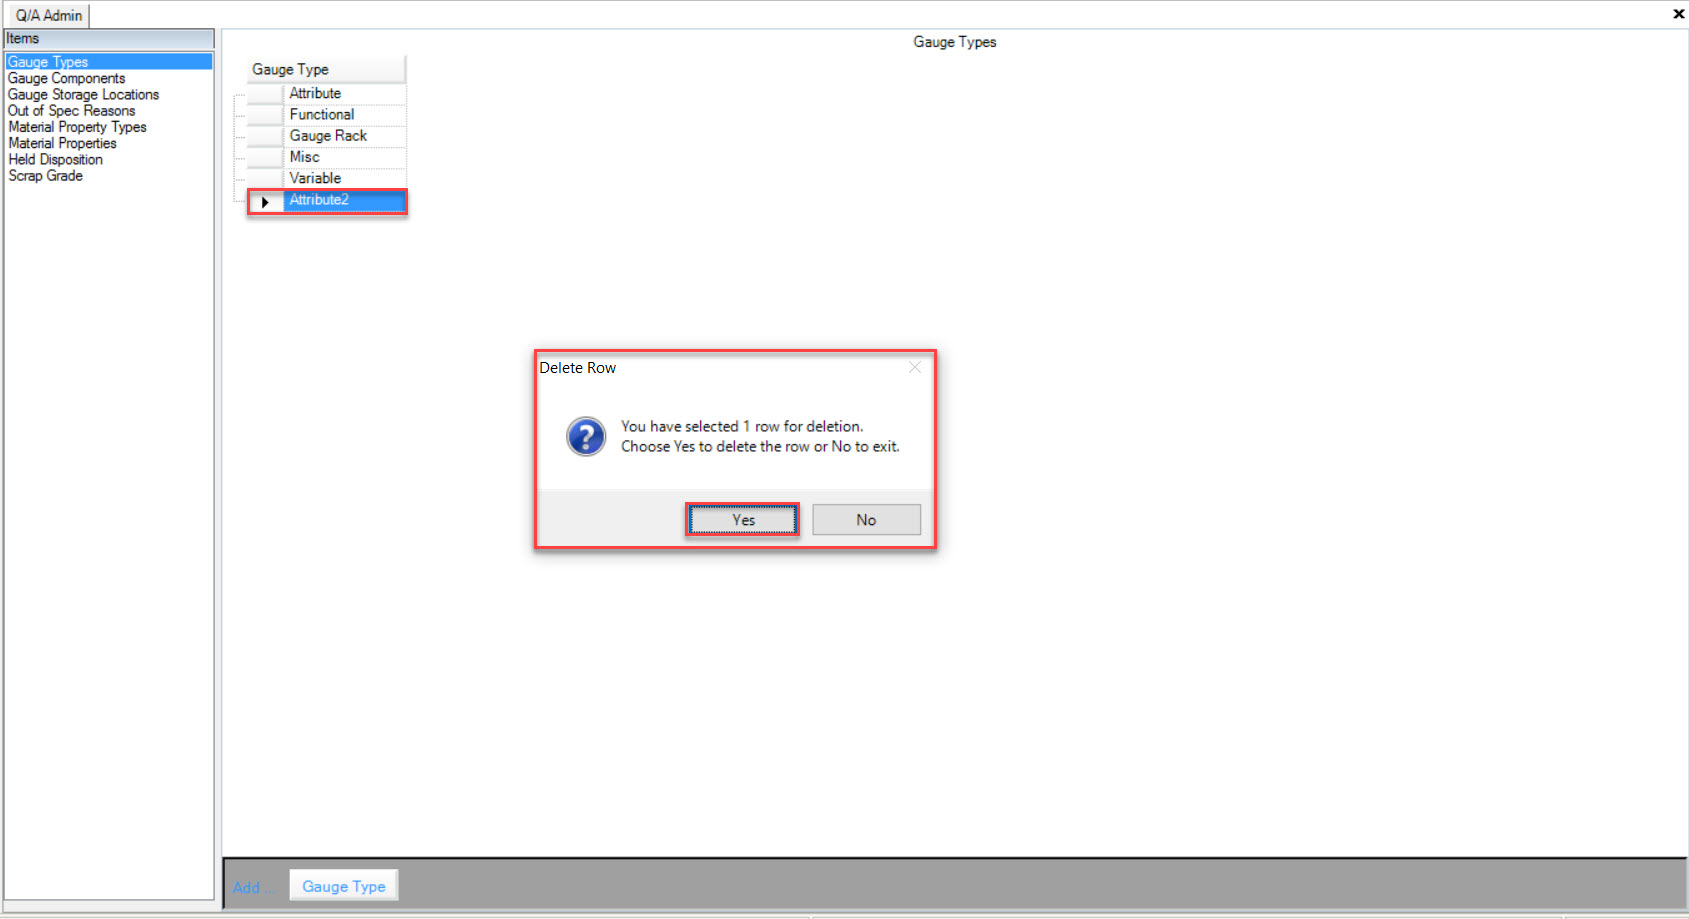
The highlighted Gauge Type will be deleted.
Make sure to save your changes before exiting the screen.
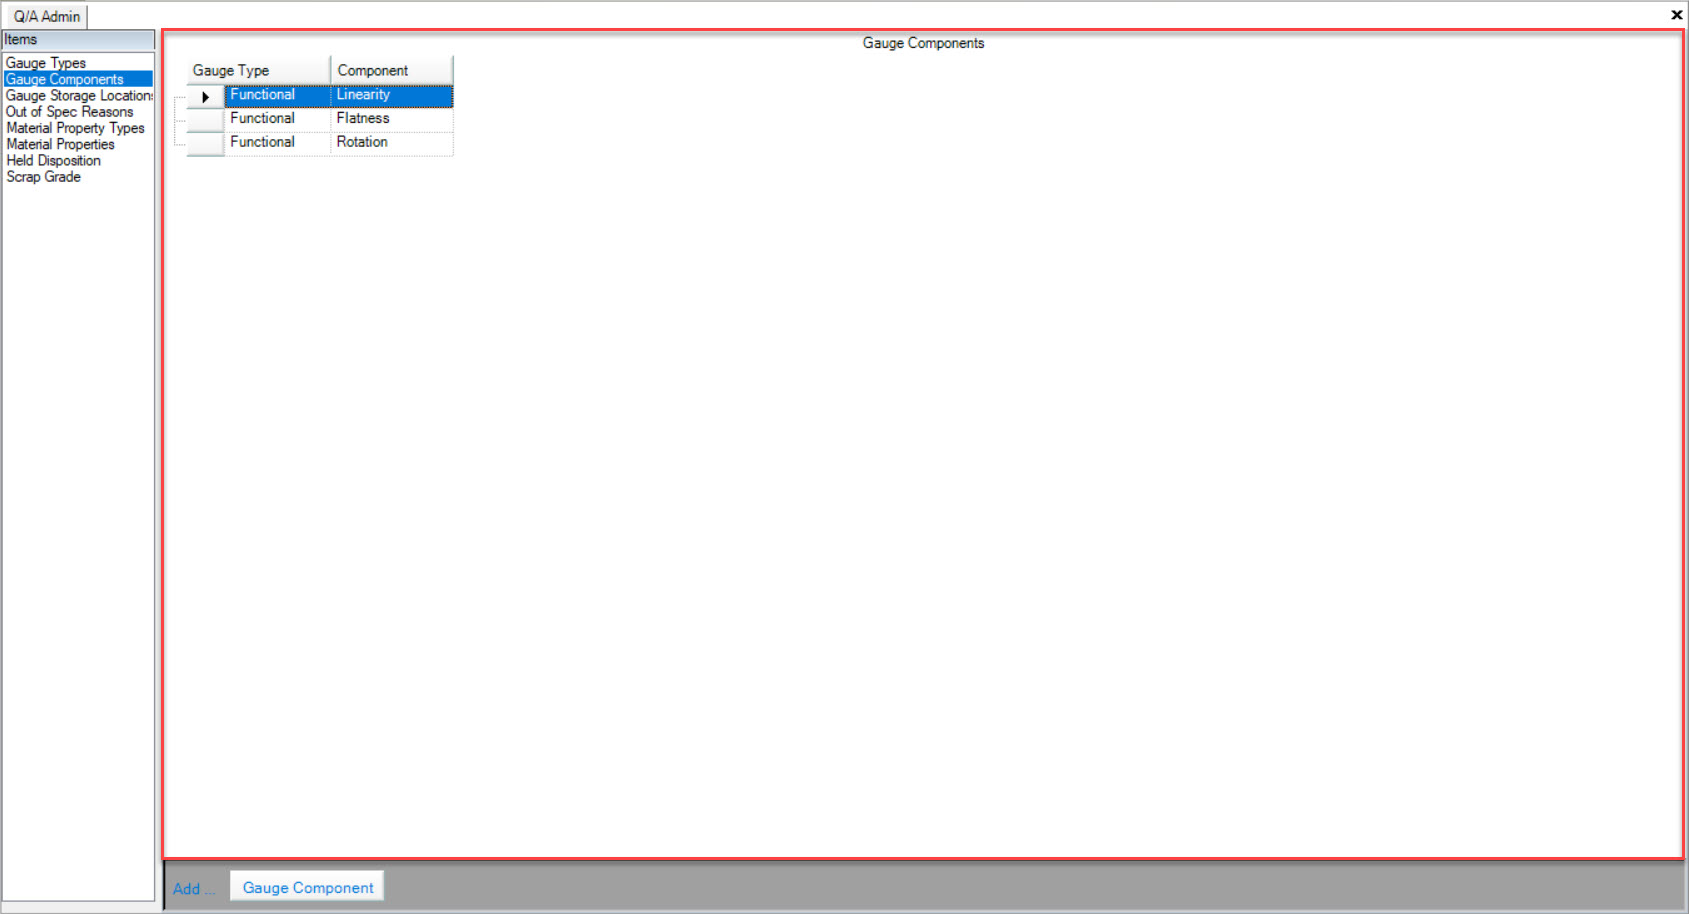
Viewing Gauge Components
Gauge Components are the part of a gauge that needs calibrating such as a dial.
To view all Gauge Components in the system, navigate to the tab and click on the icon. The Q/A Admin screen will be displayed.
Make sure to select the  tab located to the left of the screen under Items.
All available Gauge Components will be displayed.
Adding Gauge Components
To add a Gauge Component, navigate to the tab and click on the icon. The Q/A Admin screen will be displayed.
Make sure to select the tab located to the left of the screen under Items.
Click on the  button located at the bottom of the screen.
A new row will appear where users can select a Gauge Type using the available drop-down menu and enter in a Component.
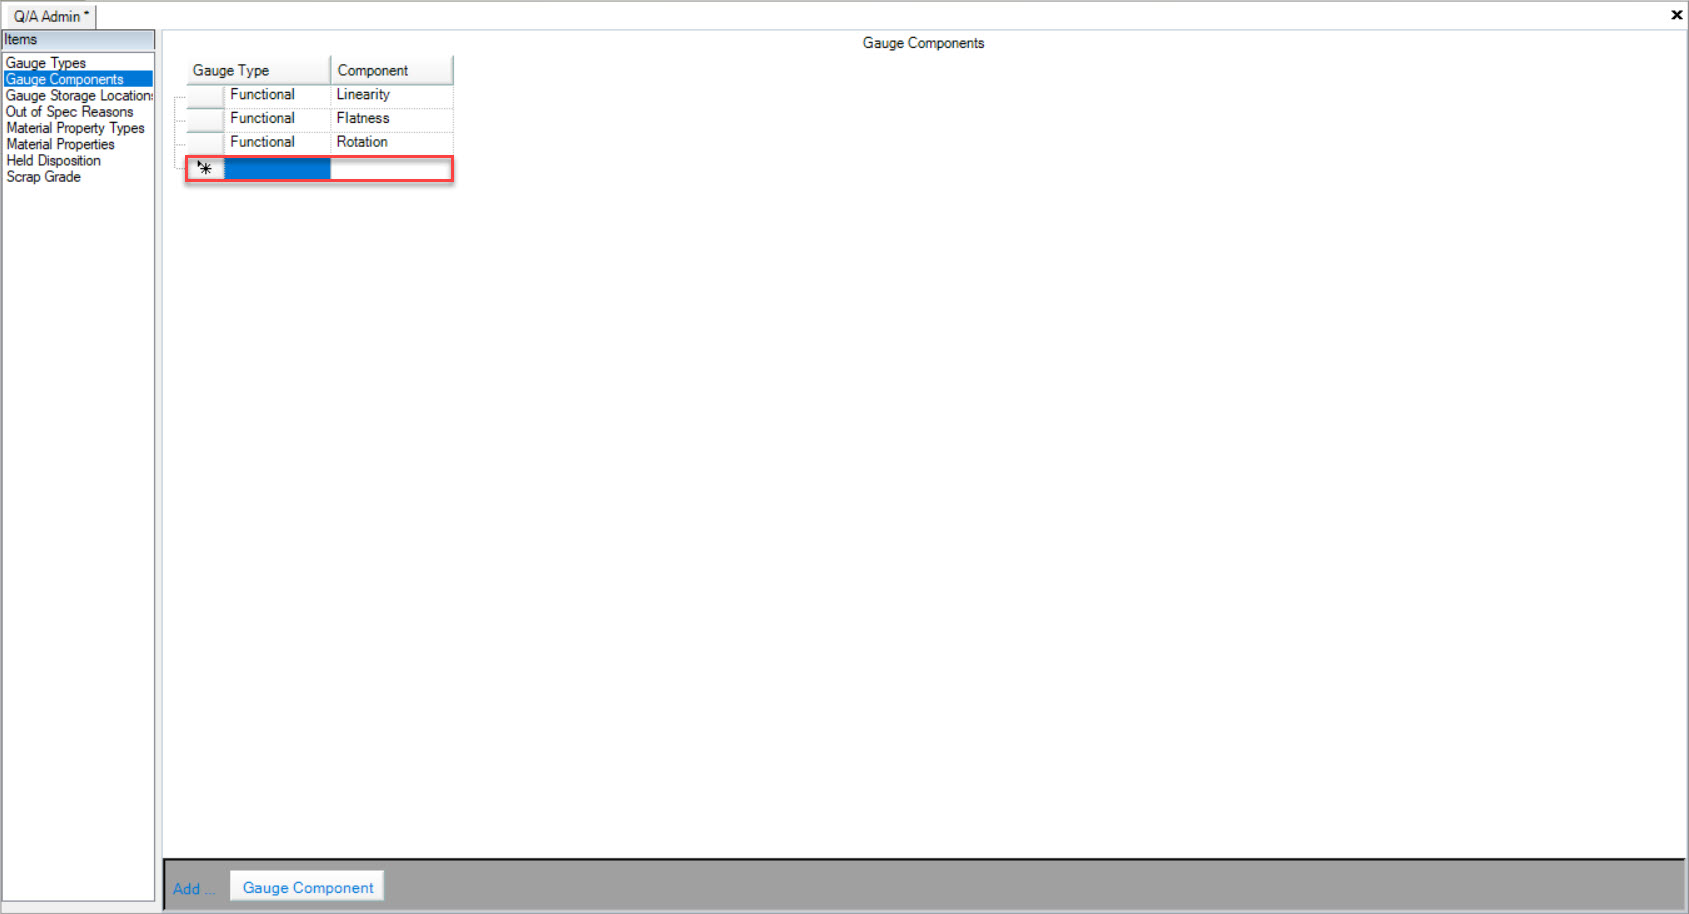
Make sure to save your changes before exiting the screen.
Editing Gauge Components
To edit a Gauge Component, navigate to the tab and click on the icon. The Q/A Admin screen will be displayed.
Make sure to select the tab located to the left of the screen under Items.
Locate the Gauge Component you wish to edit and make the necessary changes using the available drop-down menu and textbox.
Make sure to save your changes before exiting the screen.
Deleting Gauge Components
To delete a Gauge Component, navigate to the tab and click on the icon. The Q/A Admin screen will be displayed.
Make sure to select the tab located to the left of the screen under Items.
Locate the Gauge Component you wish to delete and highlight the appropriate row. Use your Delete key and when they system prompts you, select Yes.
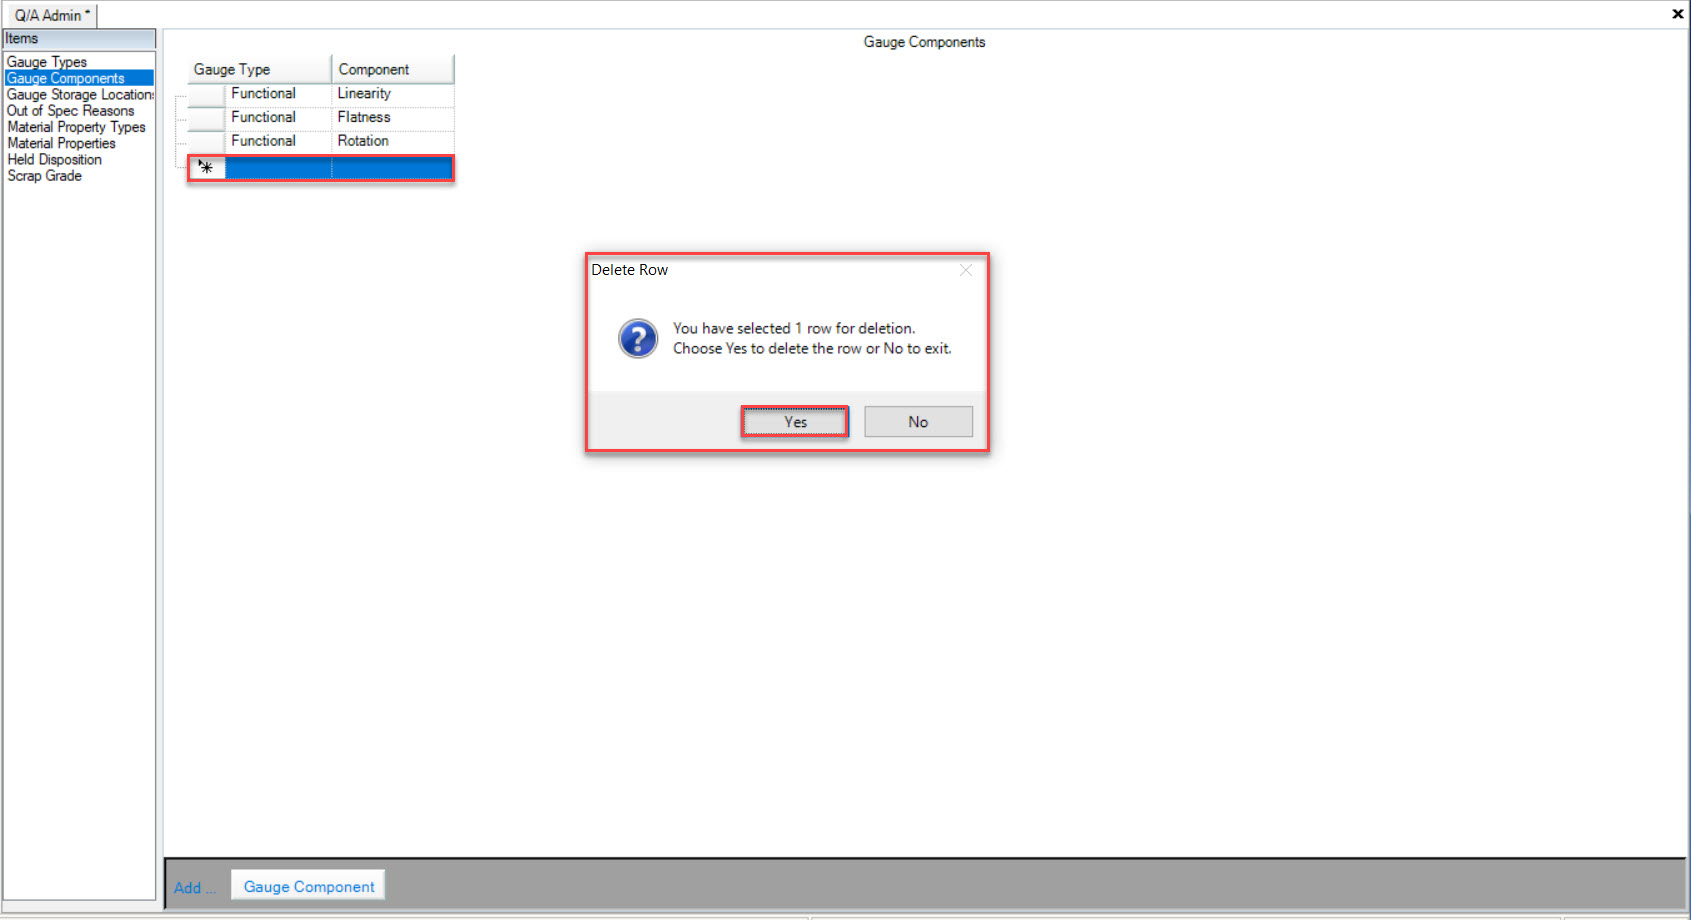
The highlighted Gauge Component will be deleted.
Make sure to save your changes before exiting the screen.
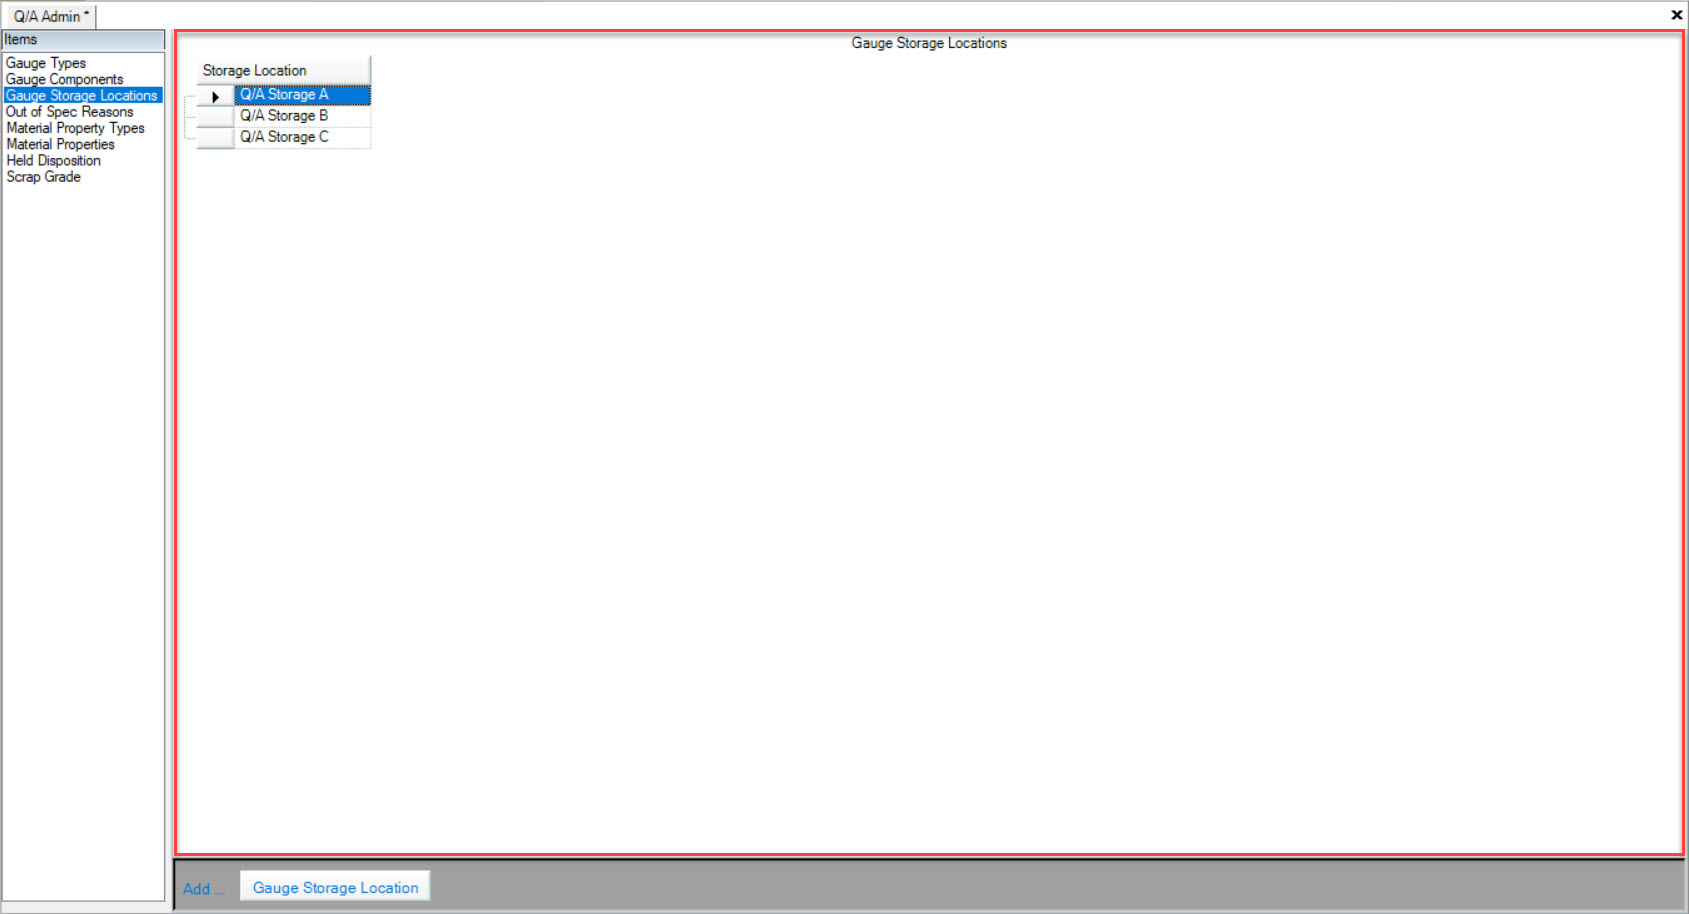
Viewing Gauge Storage Locations
To view all Gauge Storage Locations in the system, navigate to the tab and click on the icon. The Q/A Admin screen will be displayed.
Make sure to select the  tab located to the left of the screen under Items.
All available Gauge Storage Locations will be displayed.
Adding Gauge Storage Locations
To add a Gauge Storage Location, navigate to the tab and click on the icon. The Q/A Admin screen will be displayed.
Make sure to select the tab located to the left of the screen under Items.
Click on the  button located at the bottom of the screen.
A new row will appear where users can enter the appropriate Gauge Storage Location name.
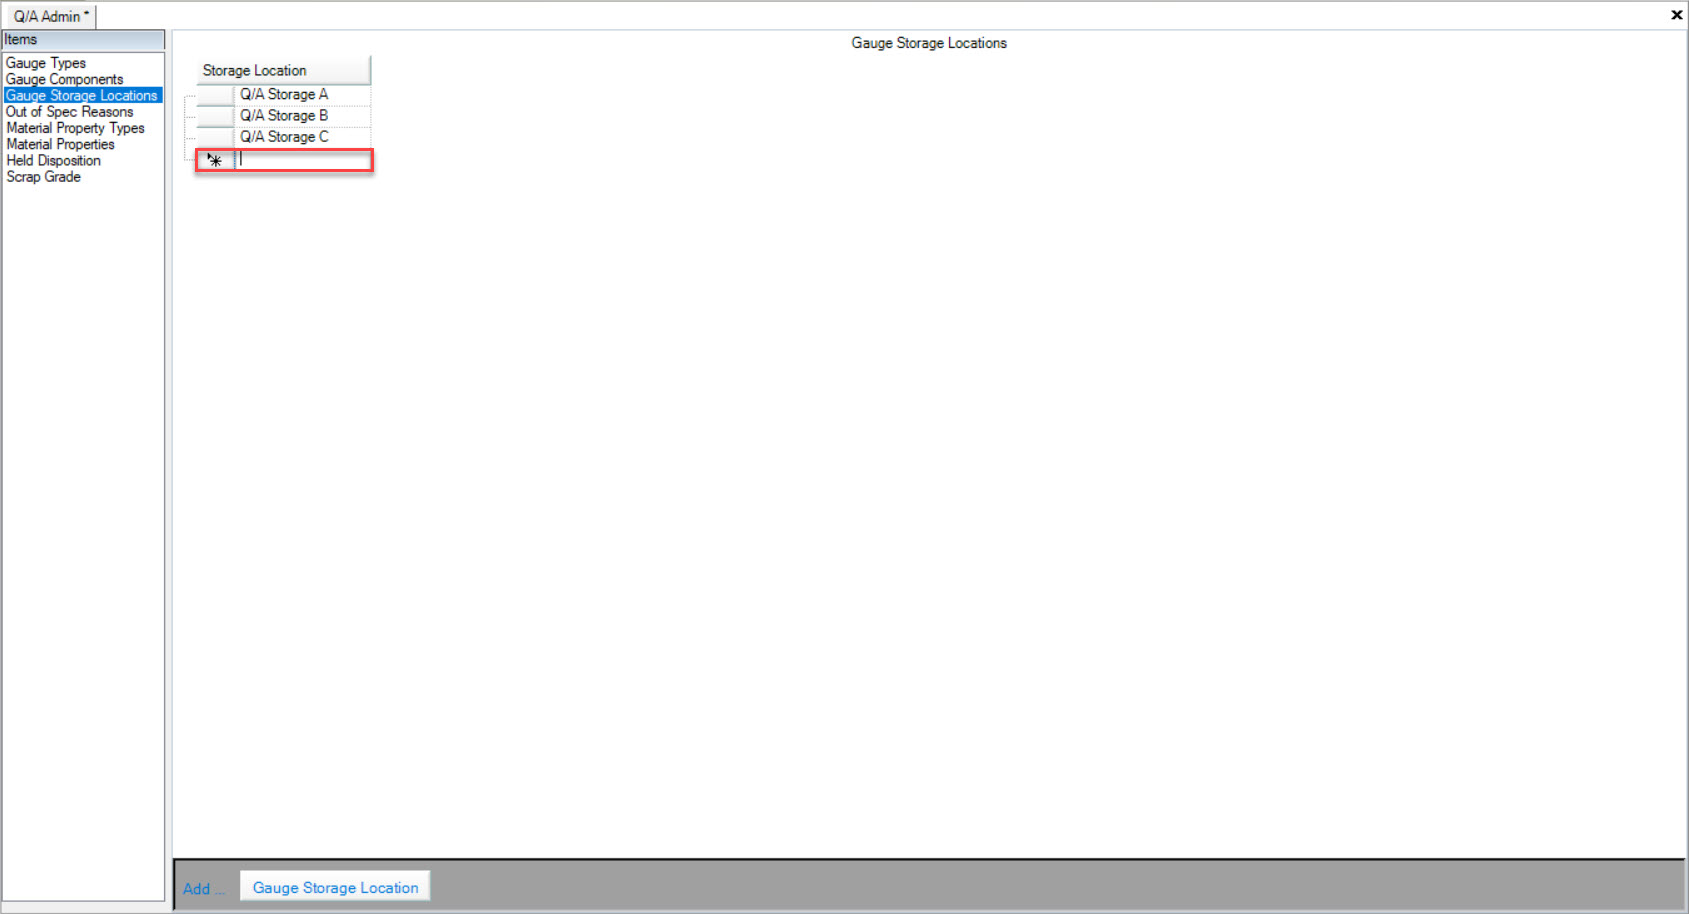
Make sure to save your changes before exiting the screen.
Editing Gauge Storage Locations
To edit a Gauge Storage Location, navigate to the tab and click on the icon. The Q/A Admin screen will be displayed.
Make sure to select the tab located to the left of the screen under Items.
Locate the Gauge Storage Location you wish to edit and make the necessary changes using the available textbox.
Make sure to save your changes before exiting the screen.
Deleting Gauge Storage Locations
To delete a Gauge Storage Location, navigate to the tab and click on the icon. The Q/A Admin screen will be displayed.
Make sure to select the tab located to the left of the screen under Items.
Locate the Gauge Storage Location you wish to delete and highlight the appropriate row. Use your Delete key and when the system prompts you, select Yes.
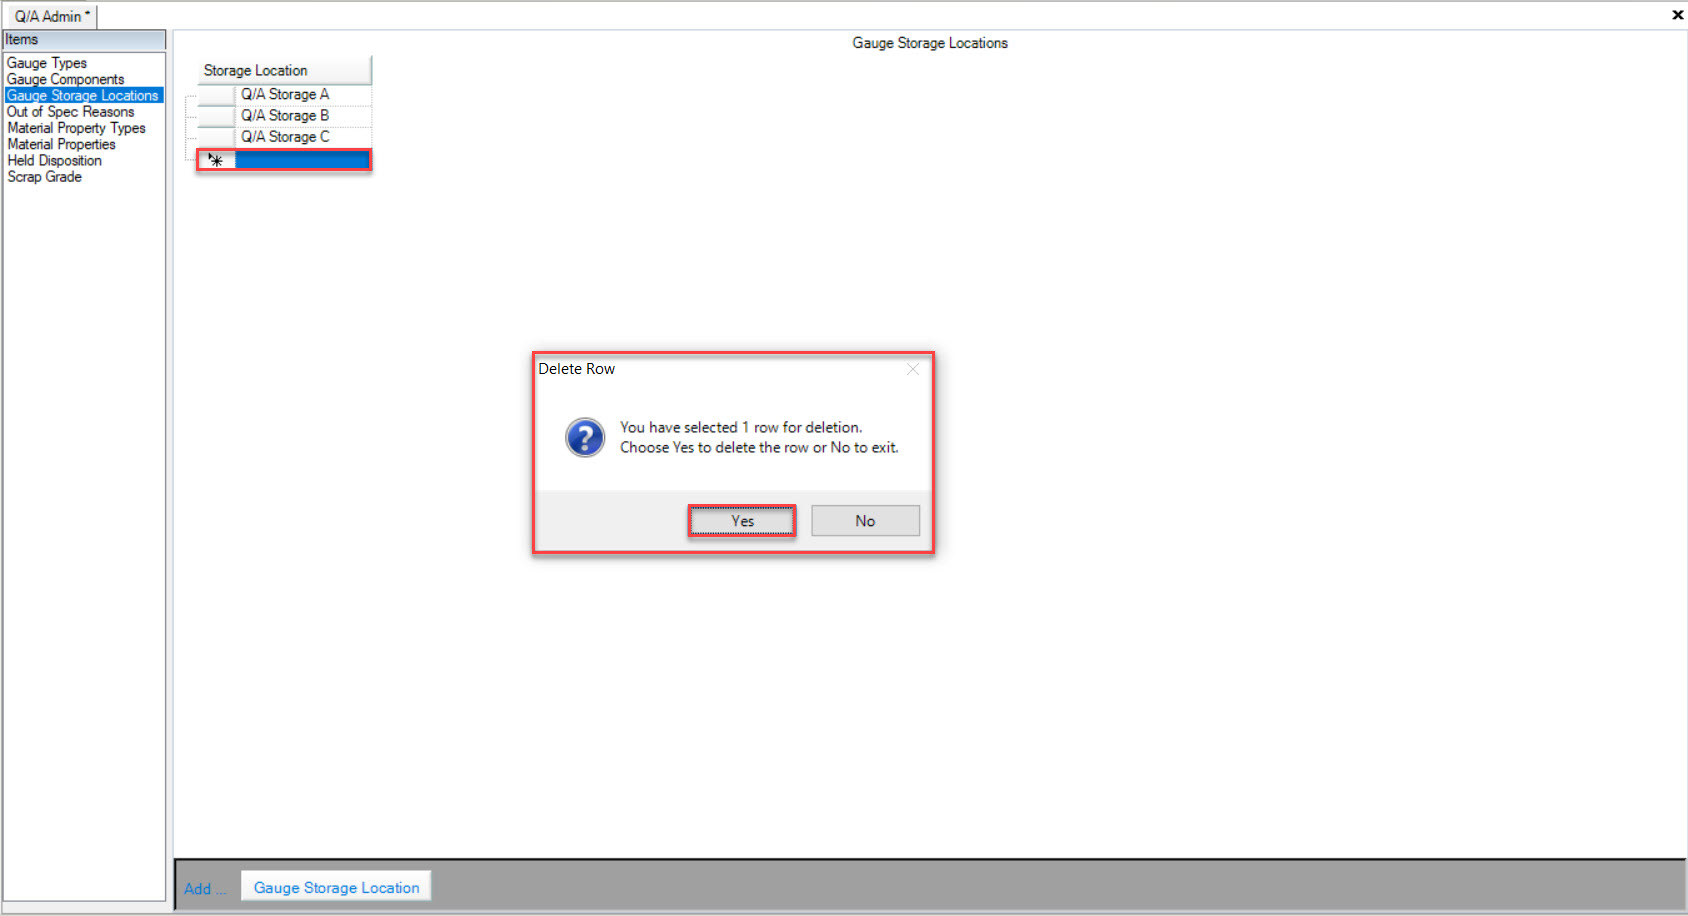
The highlighted Gauge Storage Location will be deleted.
Make sure to save your changes before exiting the screen.
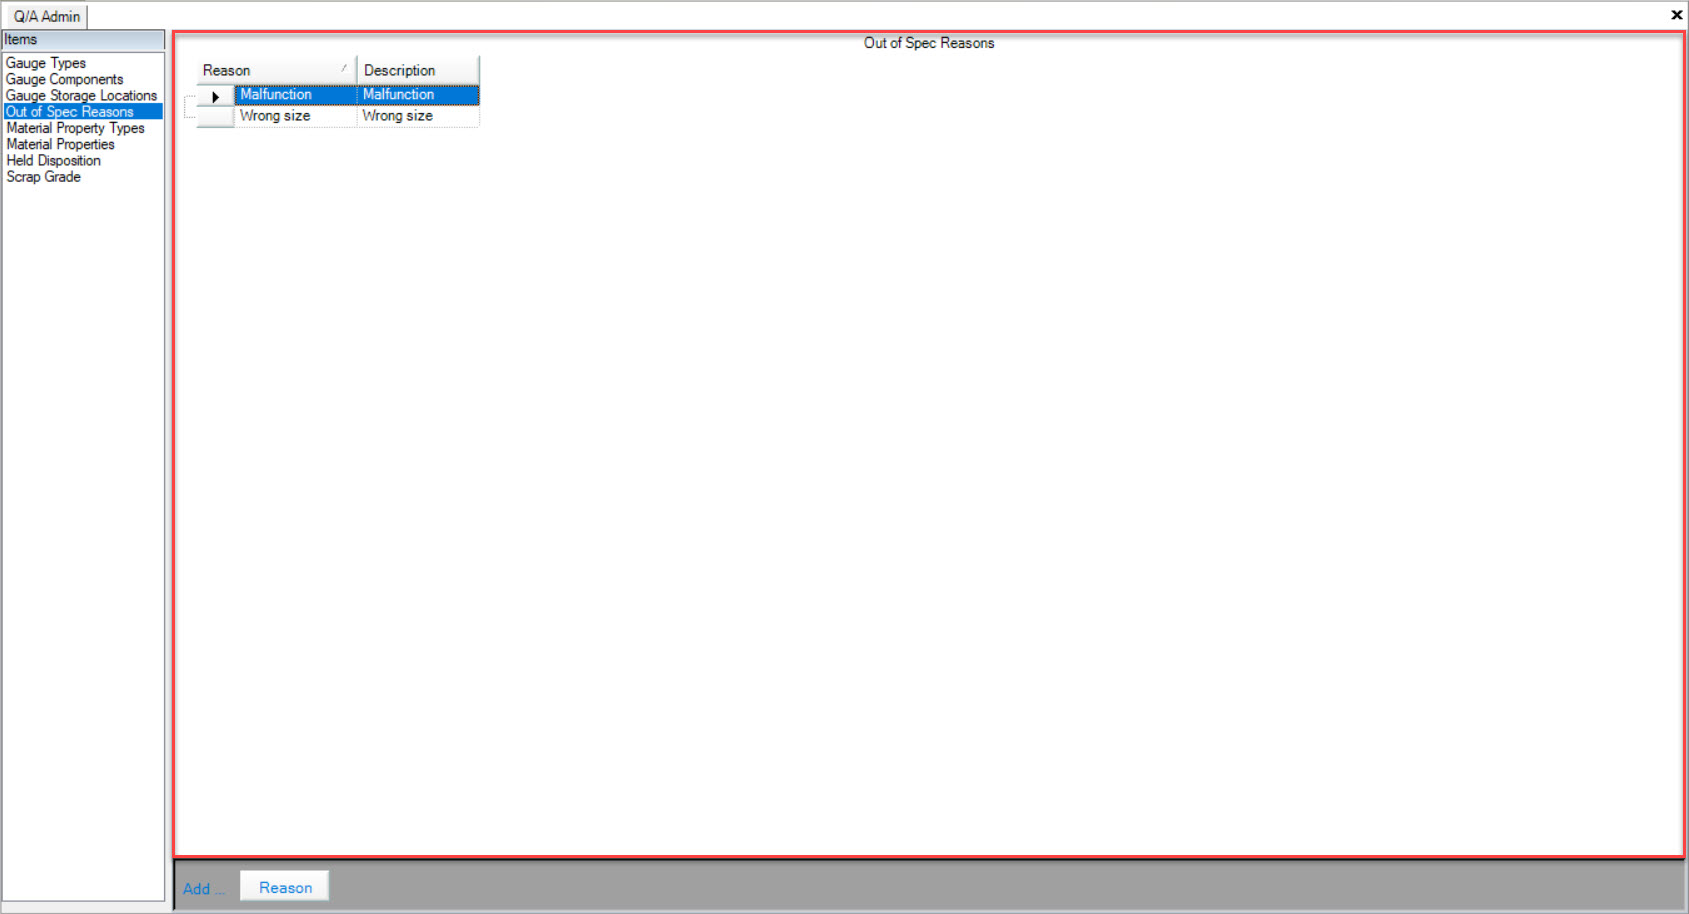
Viewing Out of Spec Reasons
To view Out of Spec Reasons in the system, navigate to the tab and click on the icon. The Q/A Admin screen will be displayed.
Make sure to select the  tab located to the left of the screen under Items.
All available Out of Spec Reasons will be displayed.
Adding Out of Spec Reasons
To add an Out of Spec Reason, navigate to the tab and click on the icon. The Q/A Admin screen will be displayed.
Make sure to select the tab located to the left of the screen under Items.
Click on the 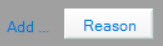 button located at the bottom of the screen.
A new row will appear where users can enter in the Reason and Description.
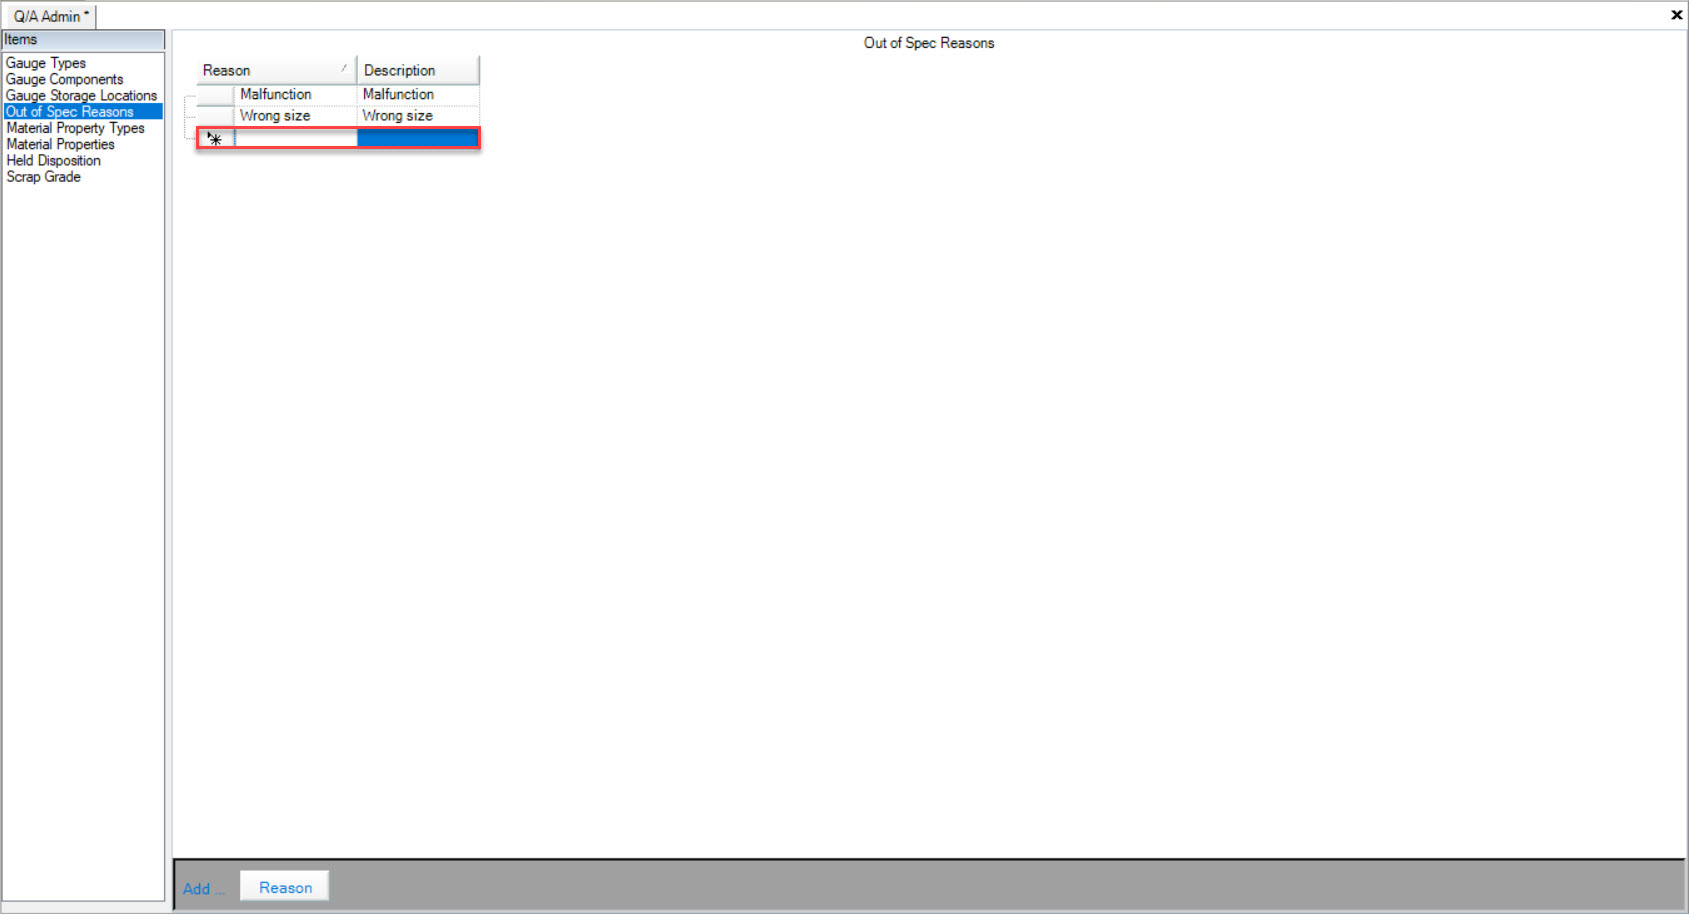
Make sure to save your changes before exiting the screen.
Editing Out of Spec Reasons
To edit an Out of Spec Reason, navigate to the tab and click on the icon. The Q/A Admin screen will be displayed.
Make sure to select the tab located to the left of the screen under Items.
Locate the Out of Spec Reason you wish to edit and make the necessary changes using the available textboxes.
Make sure to save your changes before exiting the screen.
Deleting Out of Spec Reasons
To delete an Out of Spec Reason, navigate to the tab and click on the icon. The Q/A Admin screen will be displayed.
Make sure to select the tab located to the left of the screen under Items.
Locate the Out of Spec Reason you wish to delete and highlight the appropriate row. Use your Delete key and when the system prompts you, select Yes.
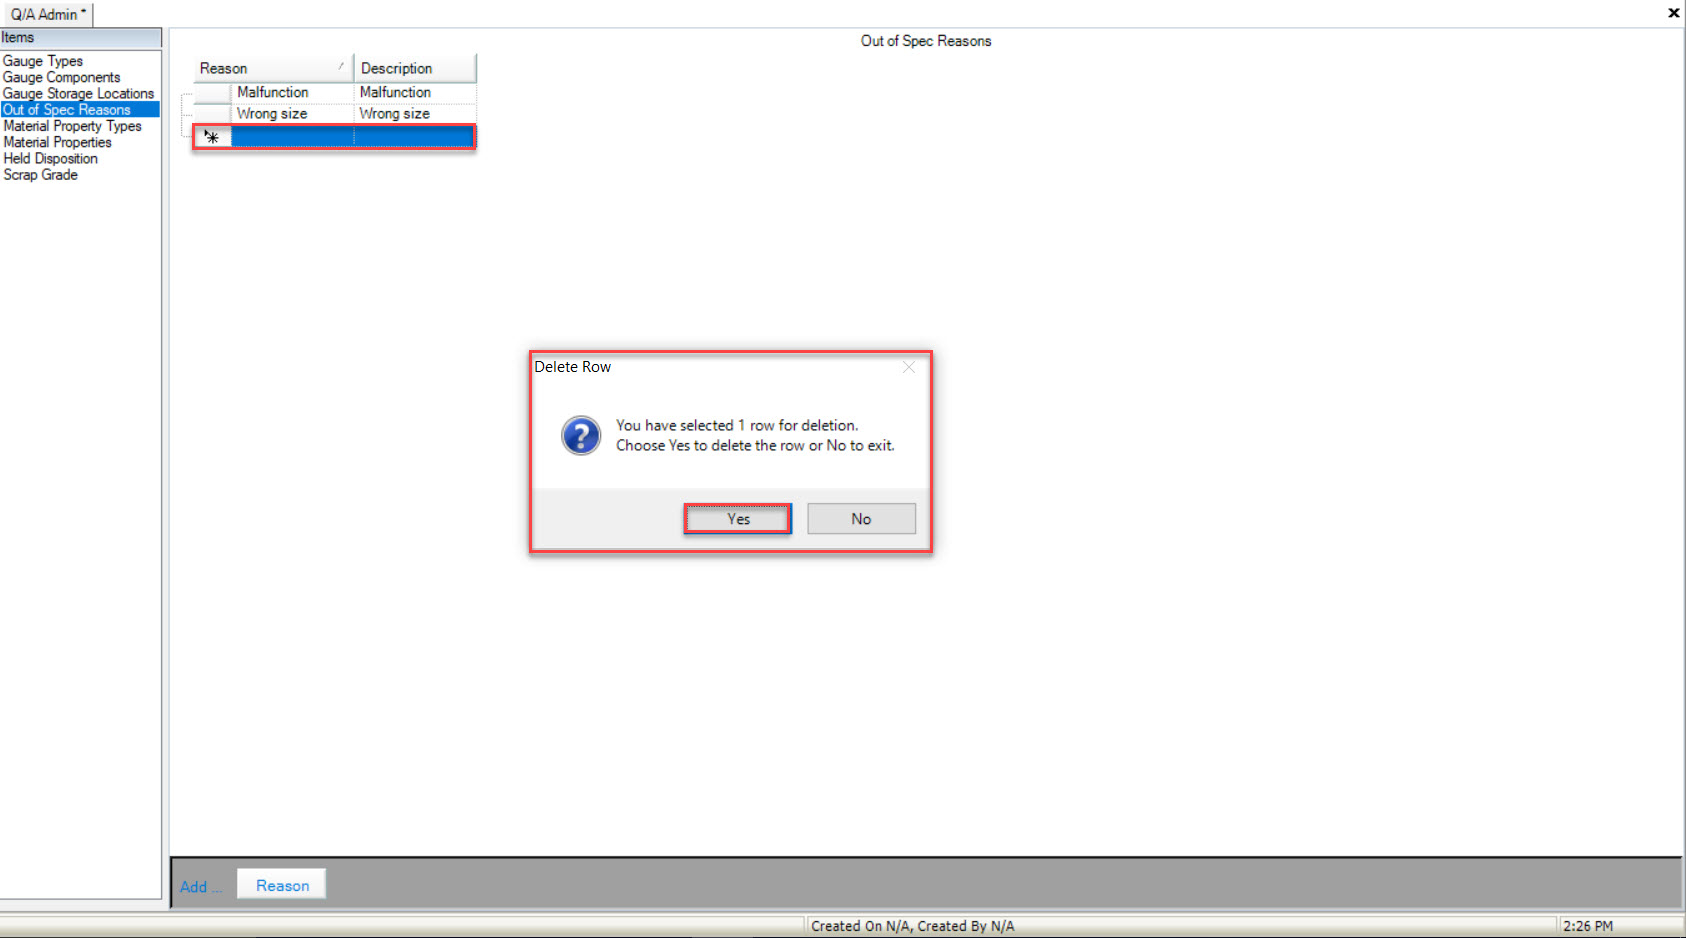
The highlighted Out of Spec Reason will be deleted.
Make sure to save your changes before exiting the screen.
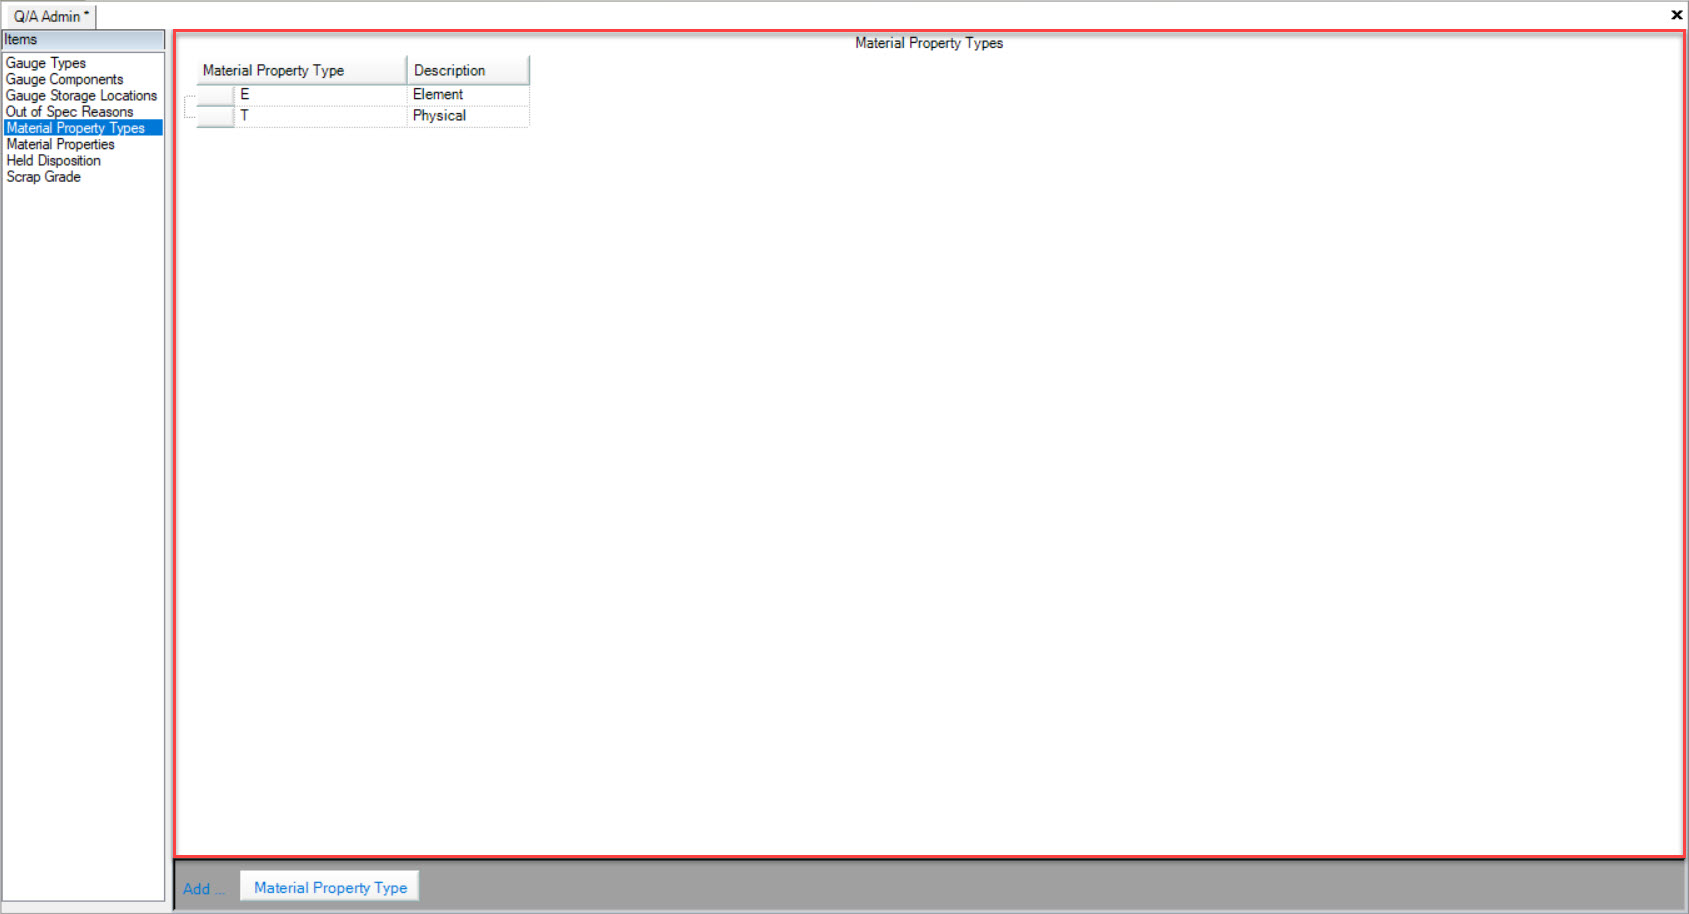
Viewing Material Property Types
To view all Material Property Types in the system, navigate to the tab and click on the icon. The Q/A Admin screen will be displayed.
Make sure to select the  tab located to the left of the screen under Items.
All available Material Property Types will be displayed.
Adding Material Property Types
To add a Material Property Type, navigate to the tab and click on the icon. The Q/A Admin screen will be displayed.
Make sure to select the tab located to the left of the screen under Items.
Click on the  button located at the bottom of the screen.
A new row will appear where users can enter in a Material Property Type and Description.
Make sure to save your changes before exiting the screen.
Editing Material Property Types
To edit a Material Property Type, navigate to the tab and click on the icon. The Q/A Admin screen will be displayed.
Make sure to select the tab located to the left of the screen under Items.
Locate the Material Property Type you wish to edit and make the necessary changes using the available textboxes.
Make sure to save your changes before exiting the screen.
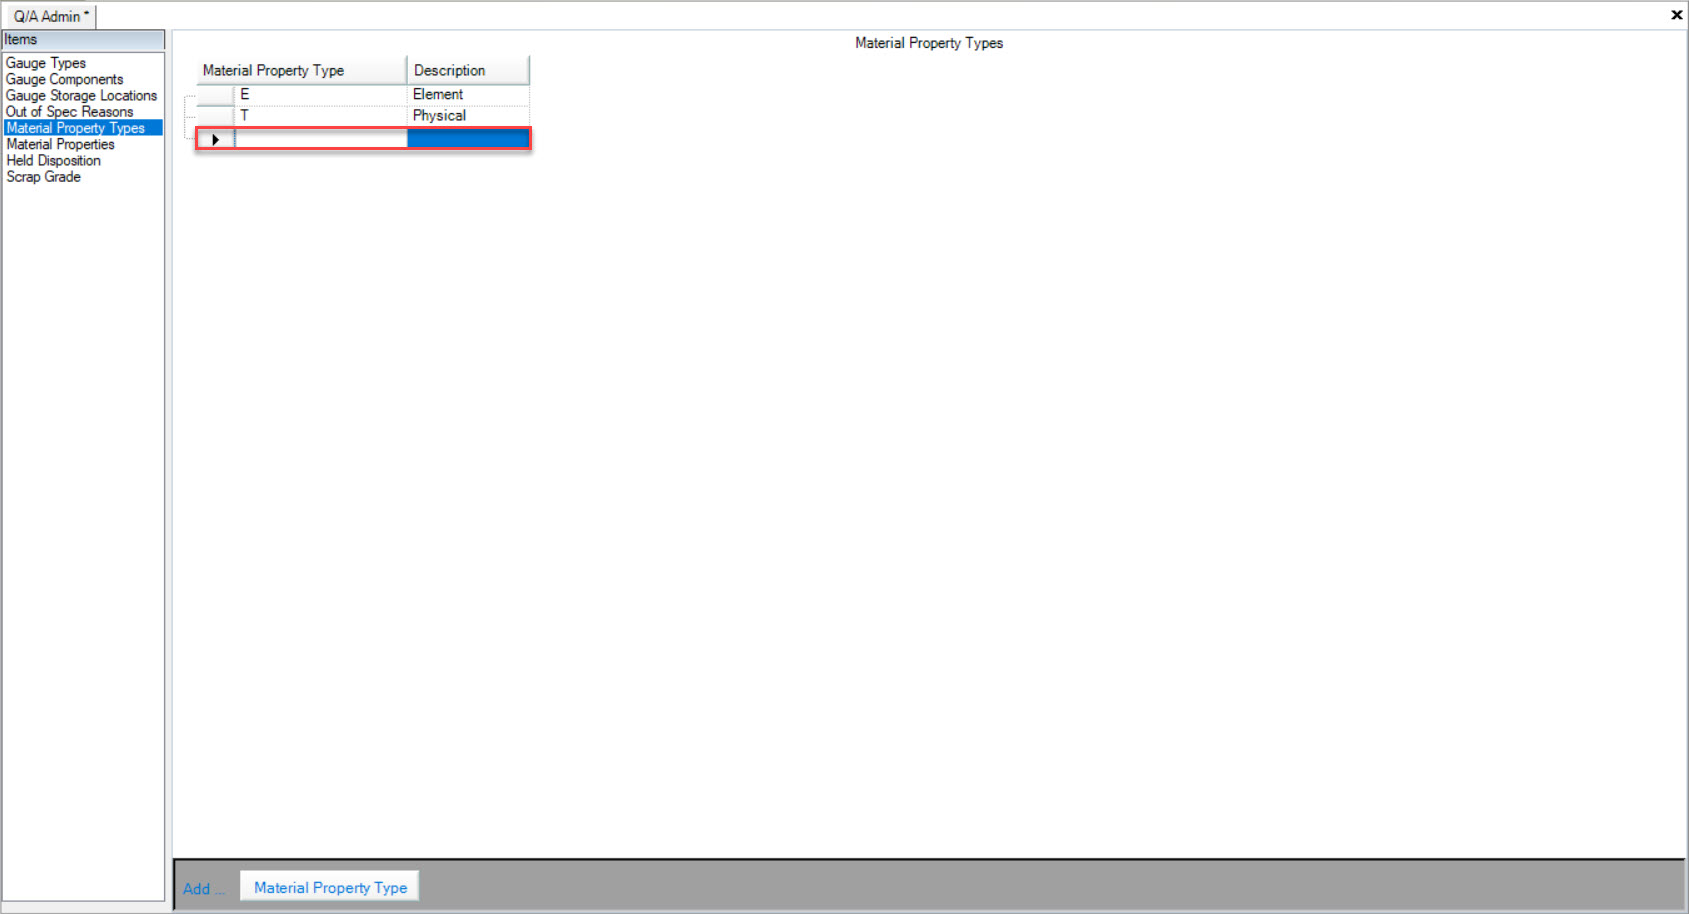
Deleting Material Property Types
To delete a Material Property Type*, navigate to the tab and click on the icon. The Q/A Admin screen will be displayed.
Make sure to select the tab located to the left of the screen under Items.
Locate the Material Property Type you wish to delete and highlight the appropriate row. Use your Delete key and when the system prompts you, select Yes.
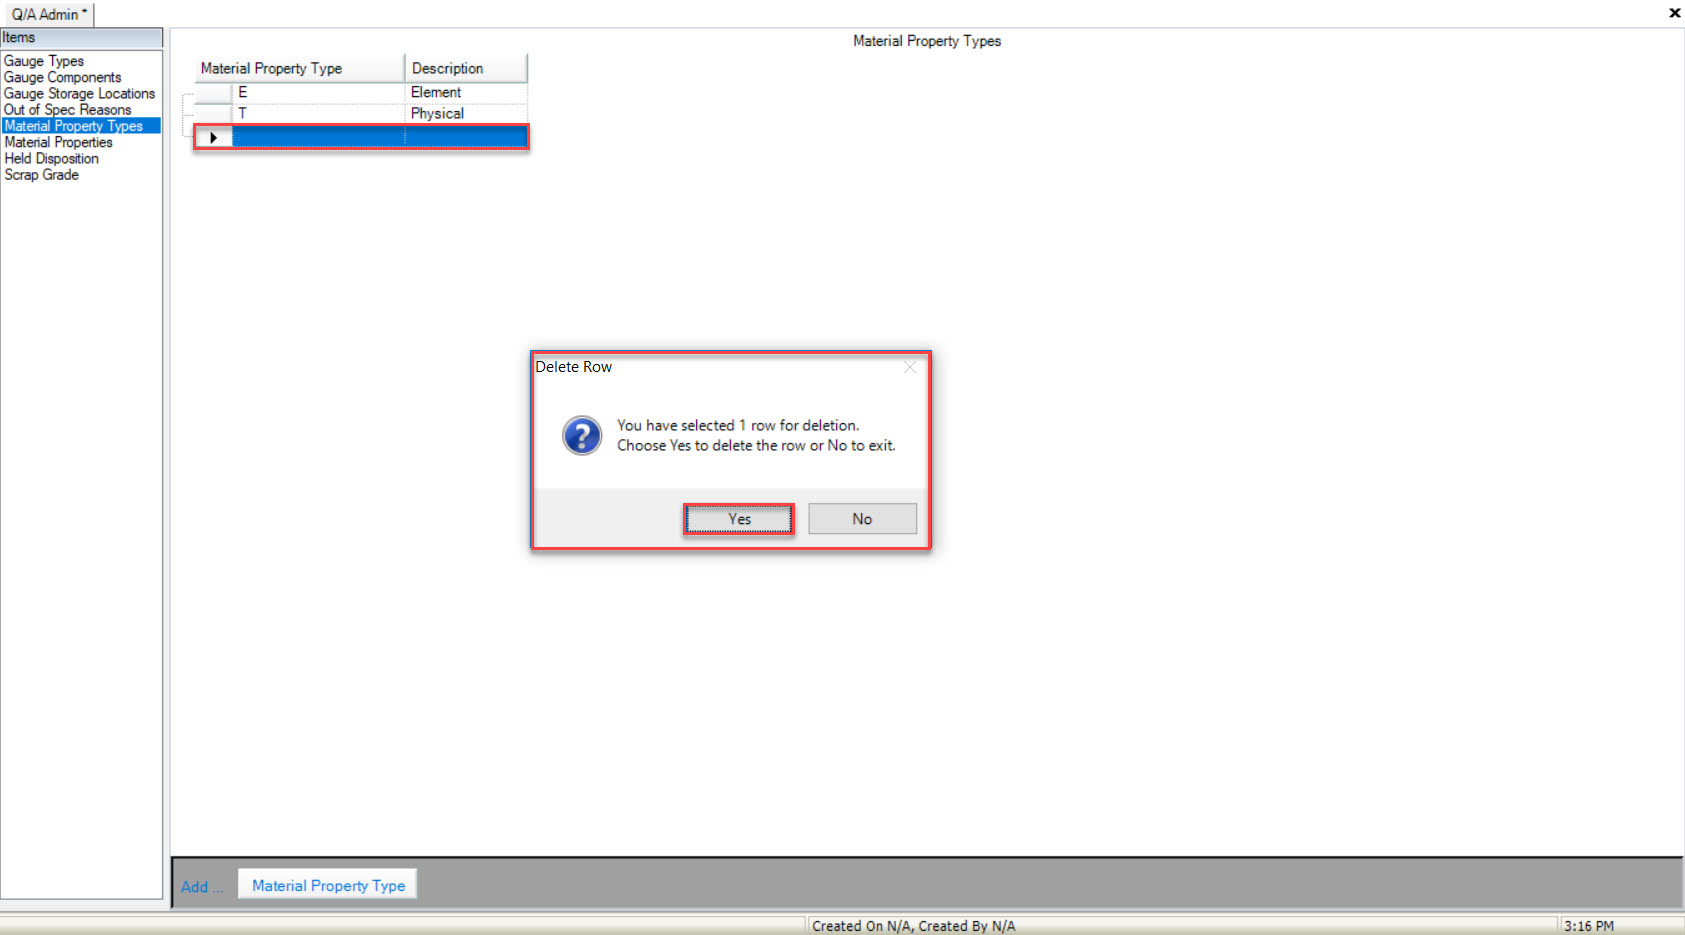
The highlighted Material Property Type will be deleted.
Make sure to save your changes before exiting the screen.
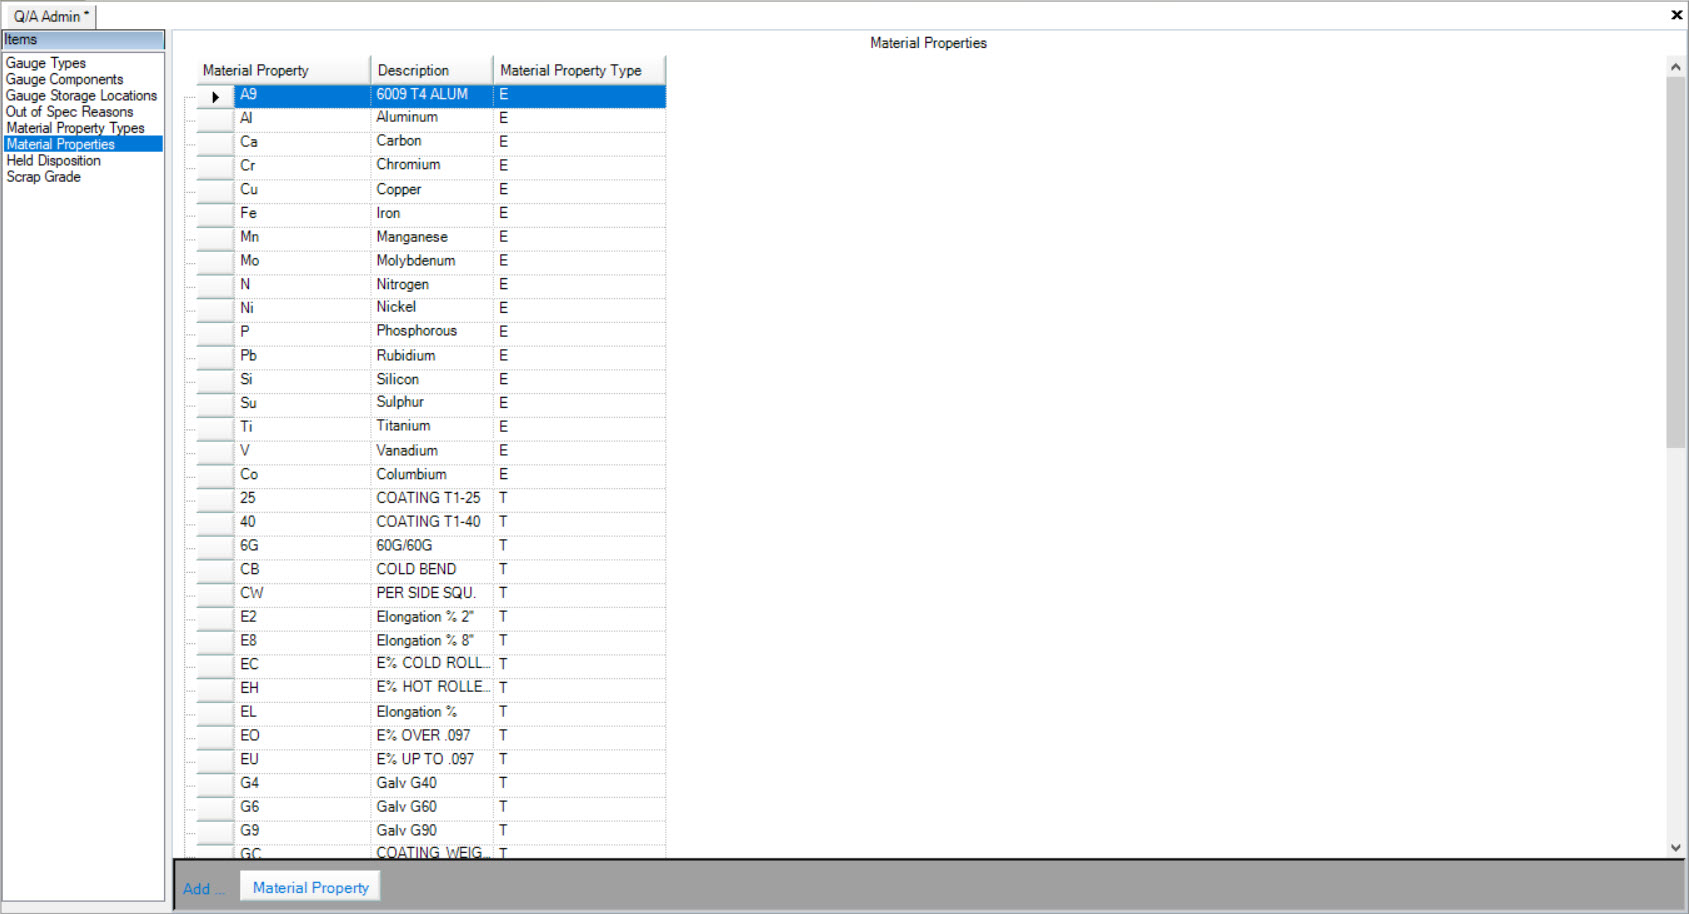
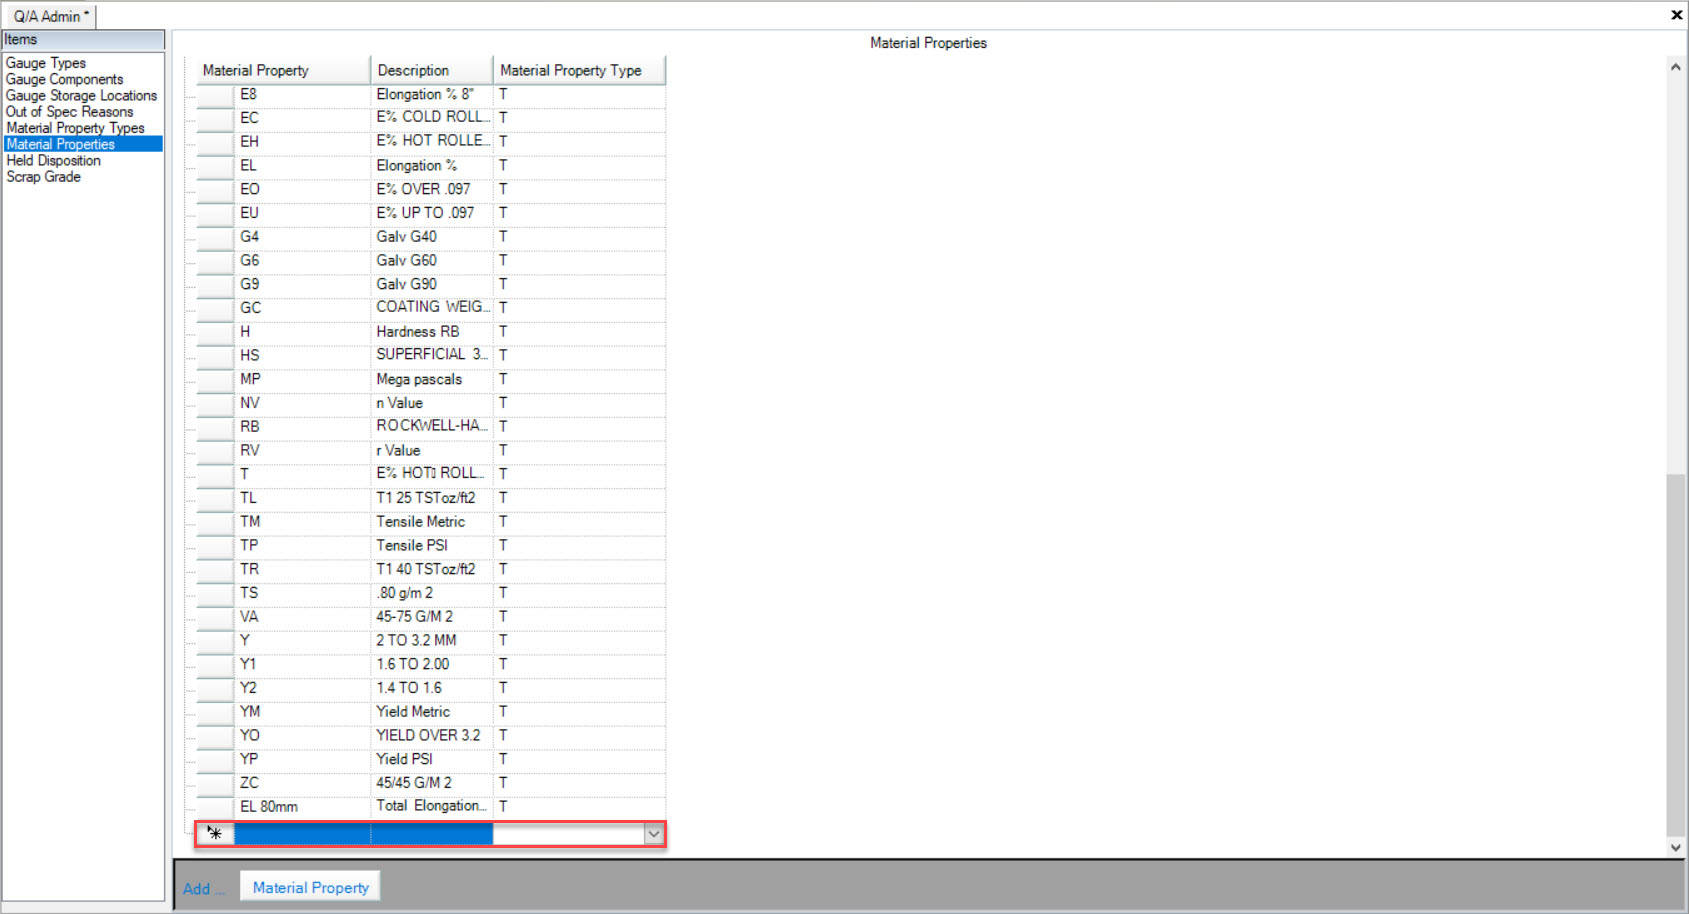
Viewing Material Properties
To view all Material Properties in the system, navigate to the tab and click on the icon. The Q/A Admin screen will be displayed.
Make sure to select the  tab located to the left of the screen under Items.
All available Material Properties will be displayed.
Adding Material Properties
To add a Material Property, navigate to the tab and click on the icon. The Q/A Admin screen will be displayed.
Make sure to select the tab located to the left of the screen under Items.
Click on the 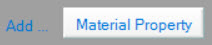 button located at the bototm of the screen.
A new row will appear where users can enter in the Material Property and Description, and select the Material Property Type using the available textboxes and drop-down menu.
Make sure to save your changes before exiting the screen.
Editing Material Properties
To edit a Material Property, navigate to the tab and click on the icon. The Q/A Admin screen will be displayed.
Make sure to select the tab located to the left of the screen under Items.
Locate the Material Property you wish to edit and make the necessary changes using the available textboxes and drop-down menu.
Make sure to save your changes before exiting the screen.
Deleting Material Properties
To delete a Material Property, navigate to the tab and click on the icon. The Q/A Admin screen will be displayed.
Make sure to select the tab located to the left of the screen under Items.
Locate the Material Property you wish to delete and highlight the appropriate row. Use your Delete key and when the system prompts you, select Yes.
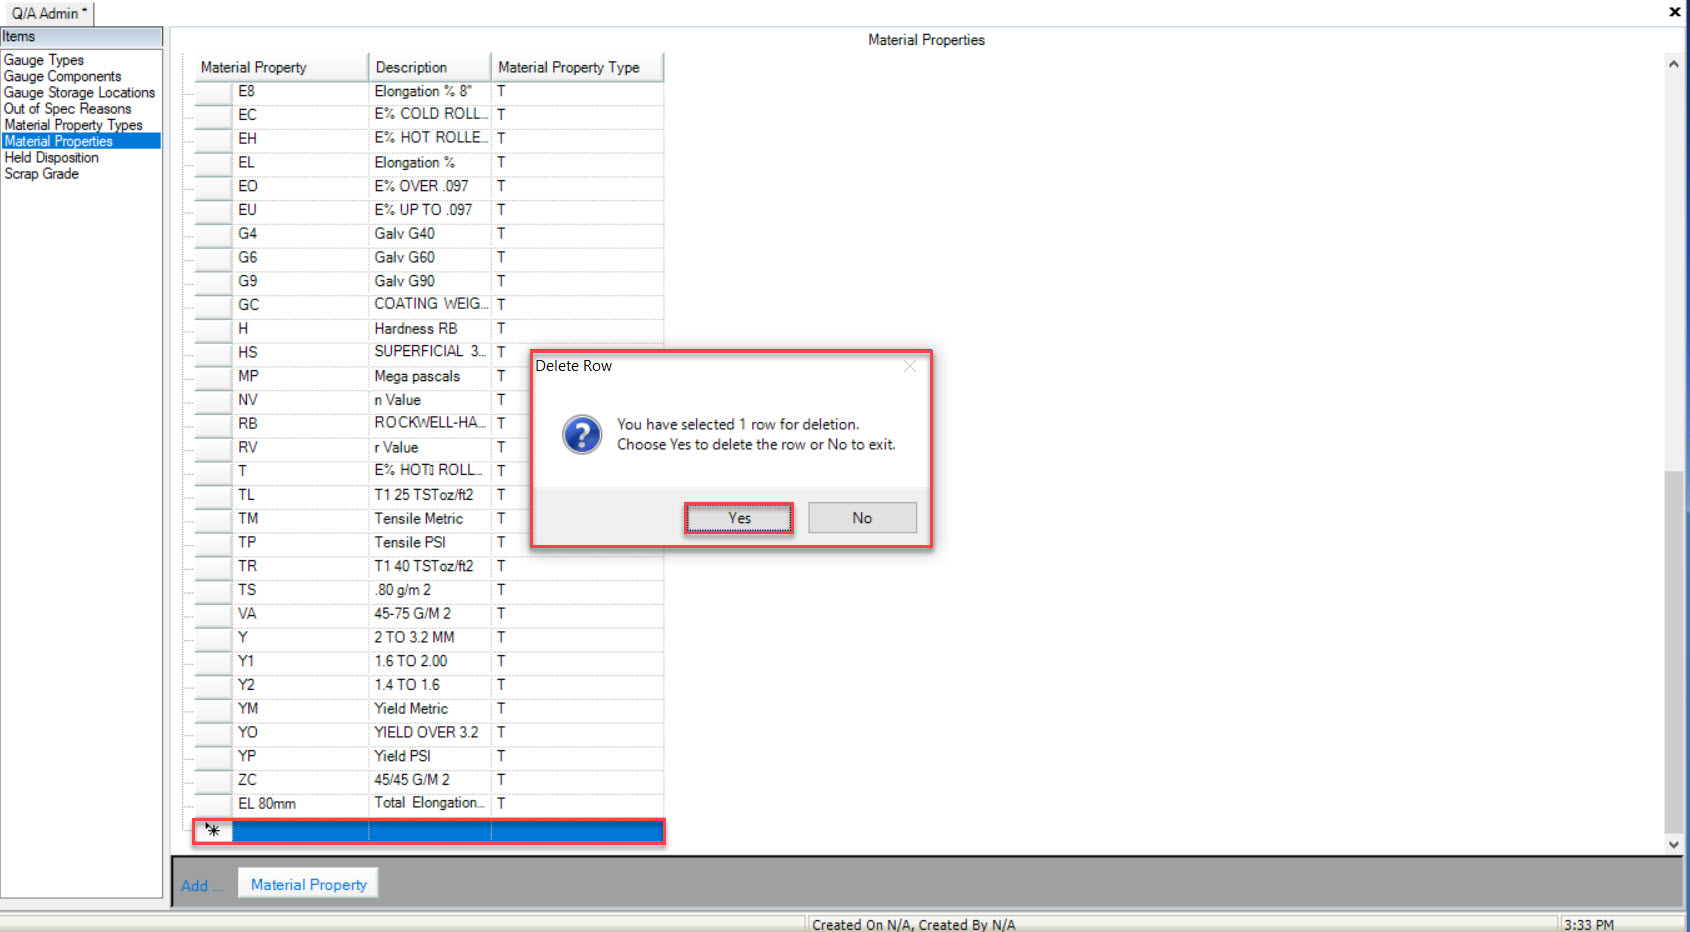
The highlighted Material Property will be deleted.
Make sure to save your changes before exiting the screen.
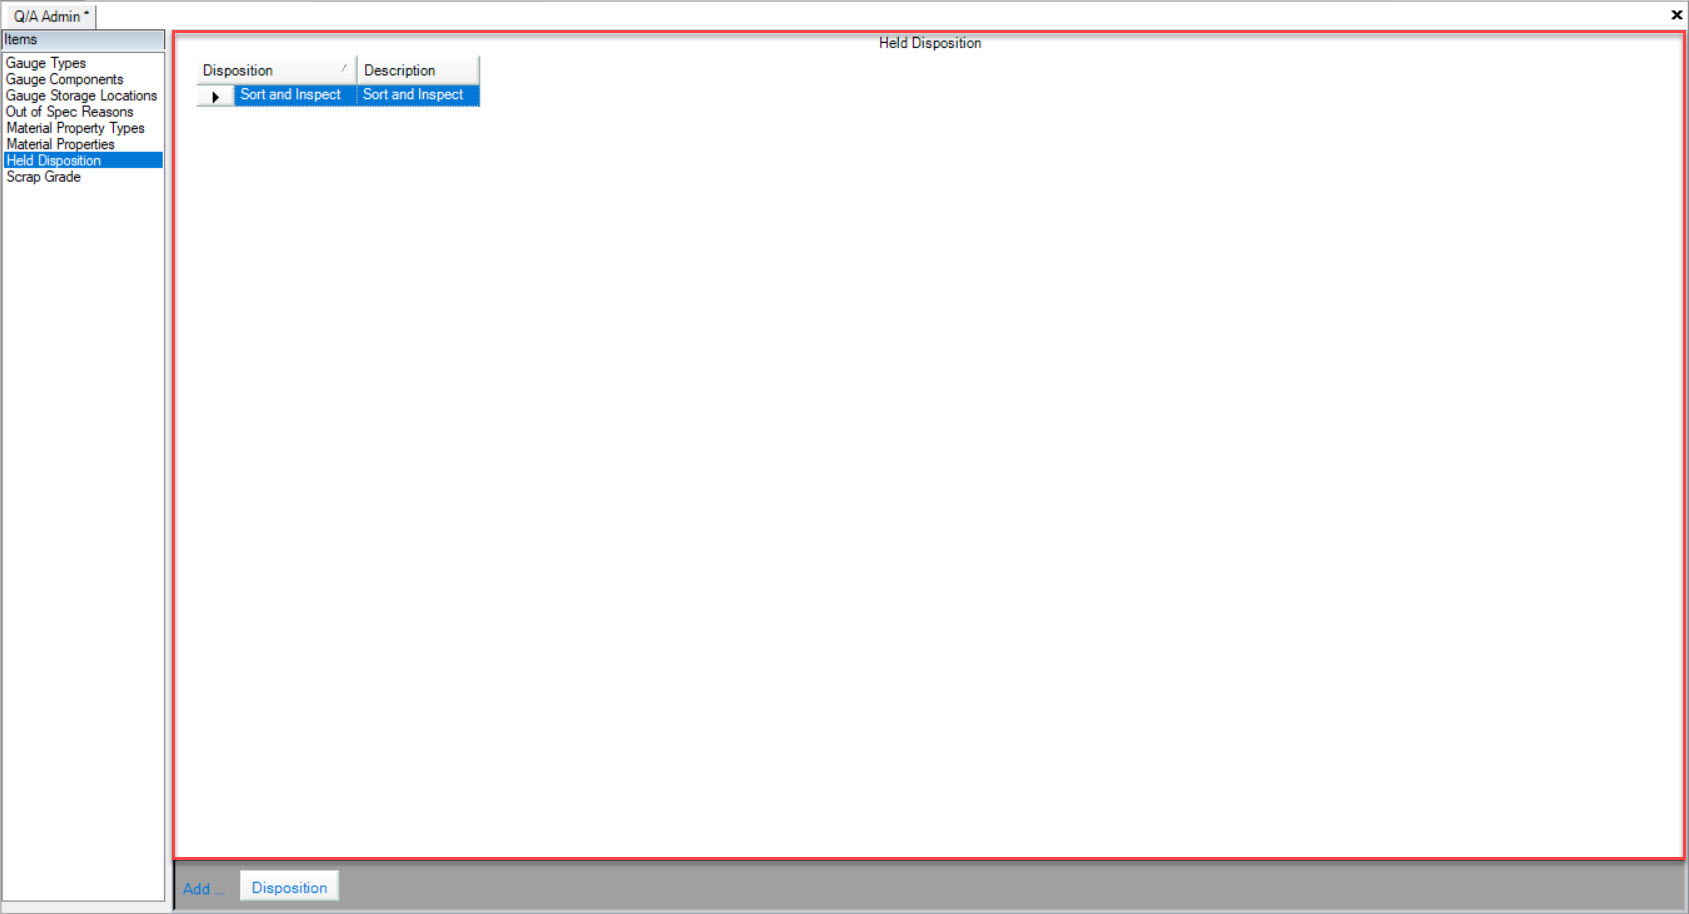
Viewing Held Dispositions
To view all Held Dispositions in the system, navigate to the tab and click on the icon. The Q/A Admin screen will be displayed.
Make sure to select the  tab located to the left of the screen under Items.
All available Held Dispositions will be displayed.
Adding a Held Disposition
To add a Held Disposition, navigate to the tab and click on the icon. The Q/A Admin screen will be displayed.
Make sure to select the tab located to the left of the screen under Items.
Click on the 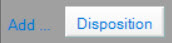 button located at the bottom of the screen.
A new row will appear where users can enter in the Disposition and Description using the available textboxes.
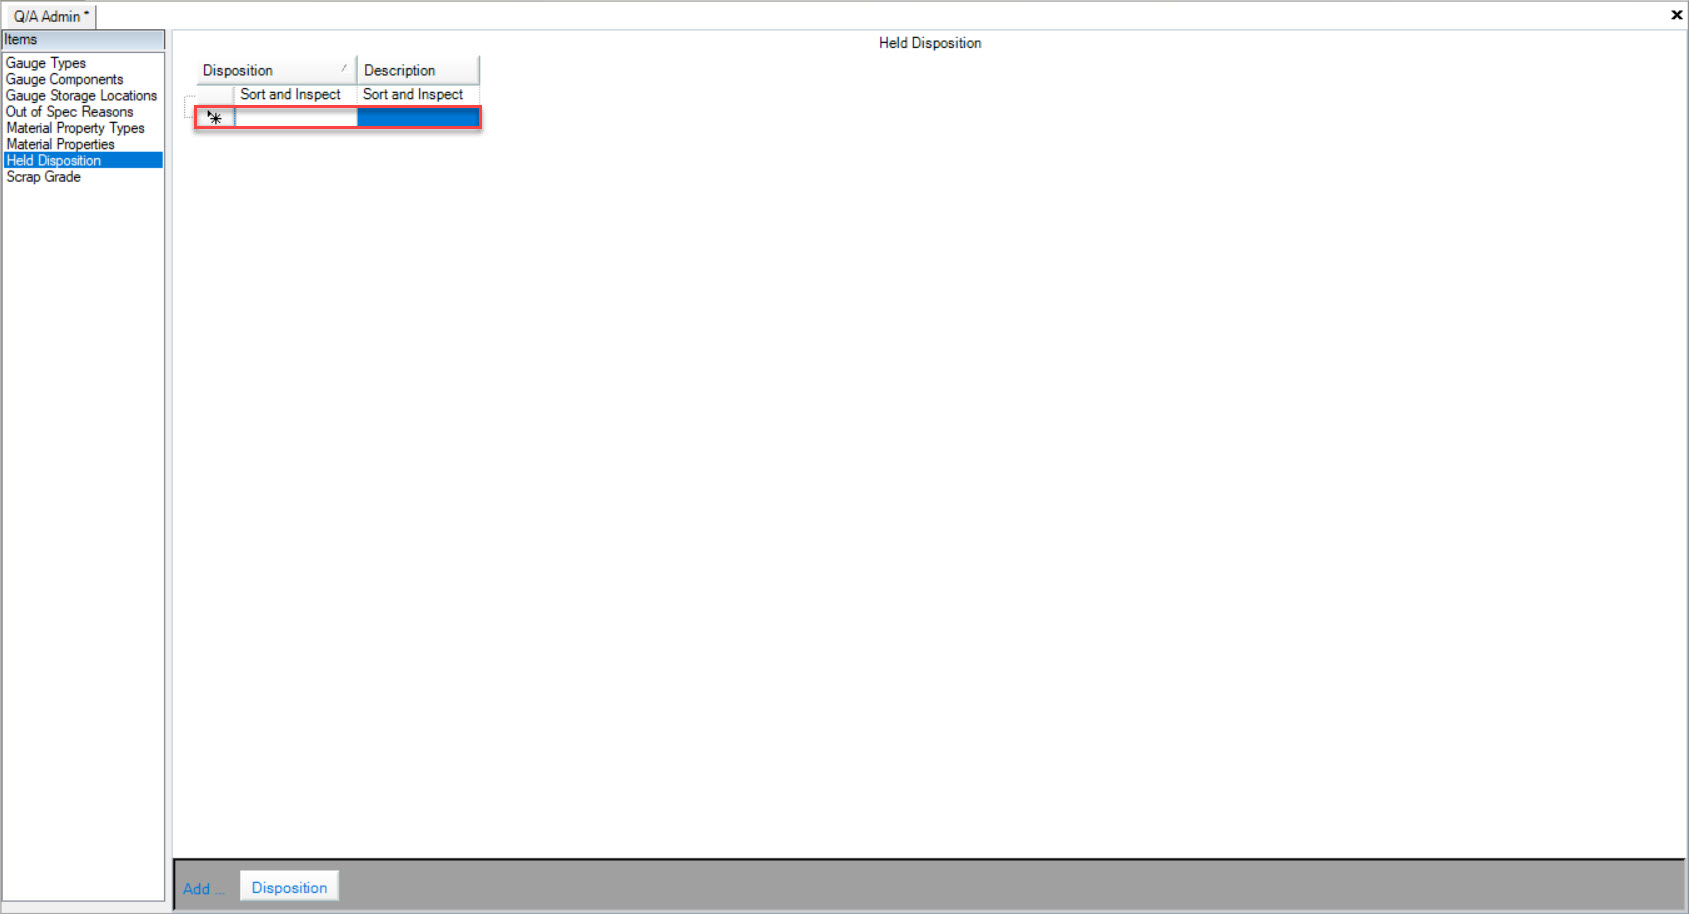
Make sure to save your changes before exiting the screen.
Editing a Held Disposition
To edit a Held Disposition, navigate to the tab and click on the icon. The Q/A Admin screen will be displayed.
Make sure to select the tab located to the left of the screen under Items.
Locate the Held Disposition you wish to edit and make the necessary changes using the available textboxes.
Make sure to save your changes before exiting the screen.
Deleting a Held Disposition
To delete a Held Disposition, navigate to the tab and click on the icon. The Q/A Admin screen will be displayed.
Make sure to select the tab located to the left of the screen under Items.
Locate the Held Disposition you wish to delete and highlight the appropriate row. Use your Delete key and when the system prompts you, select Yes.
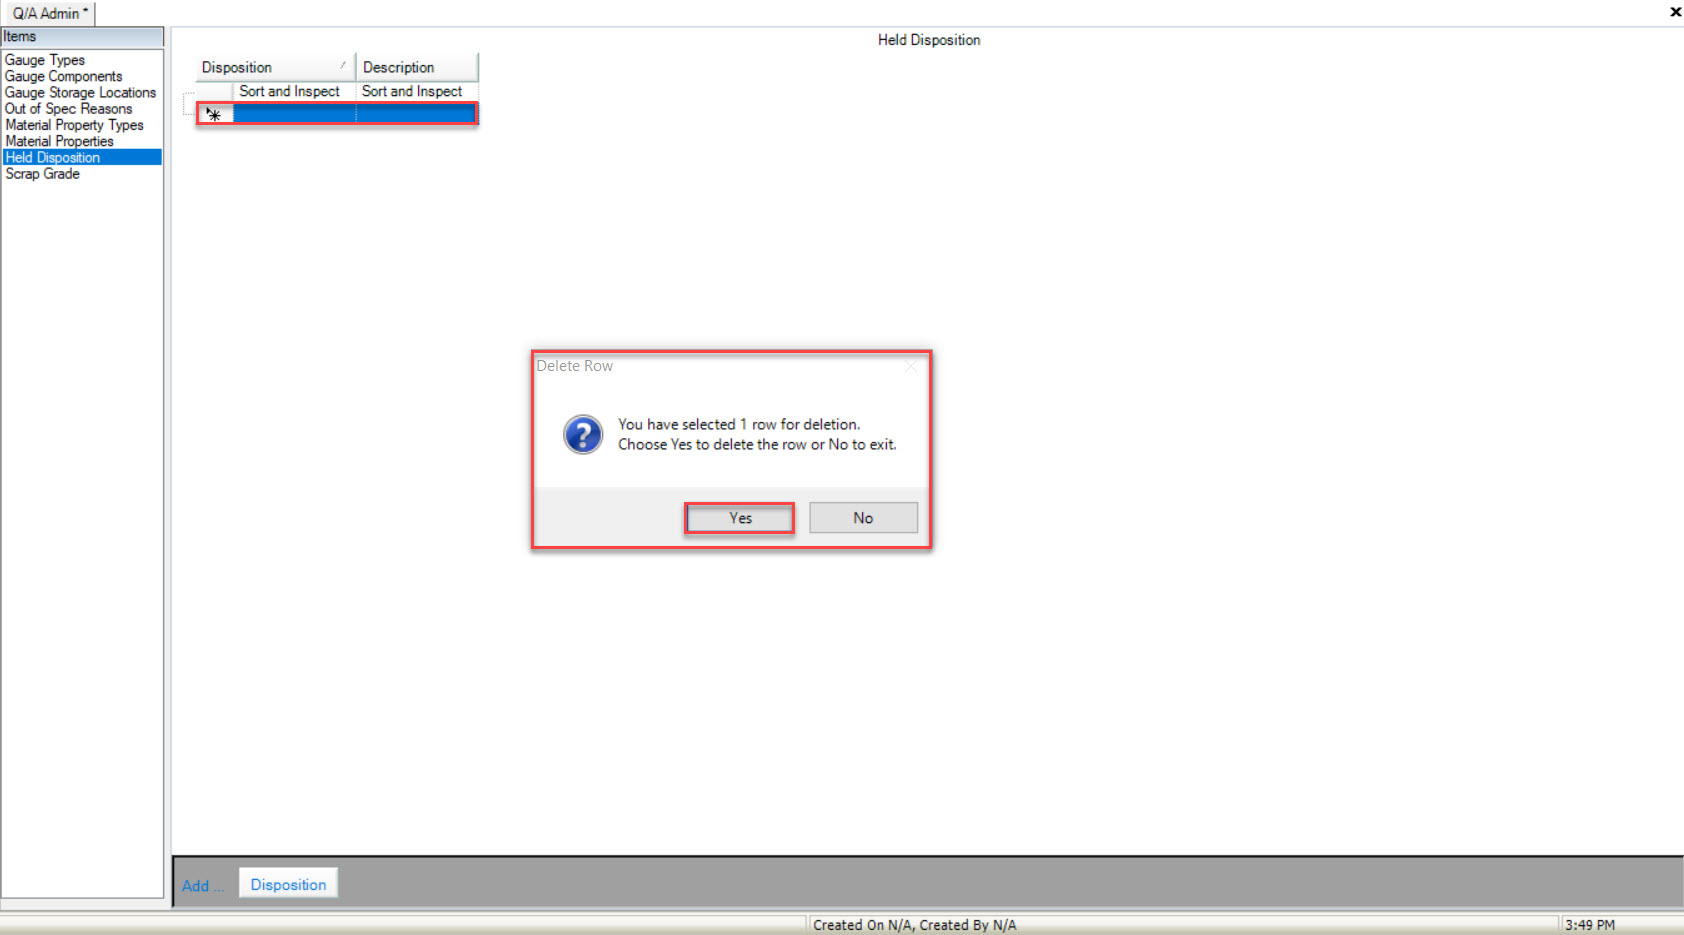
The highlighted Held Disposition will be deleted.
Make sure to save your changes before exiting the screen.
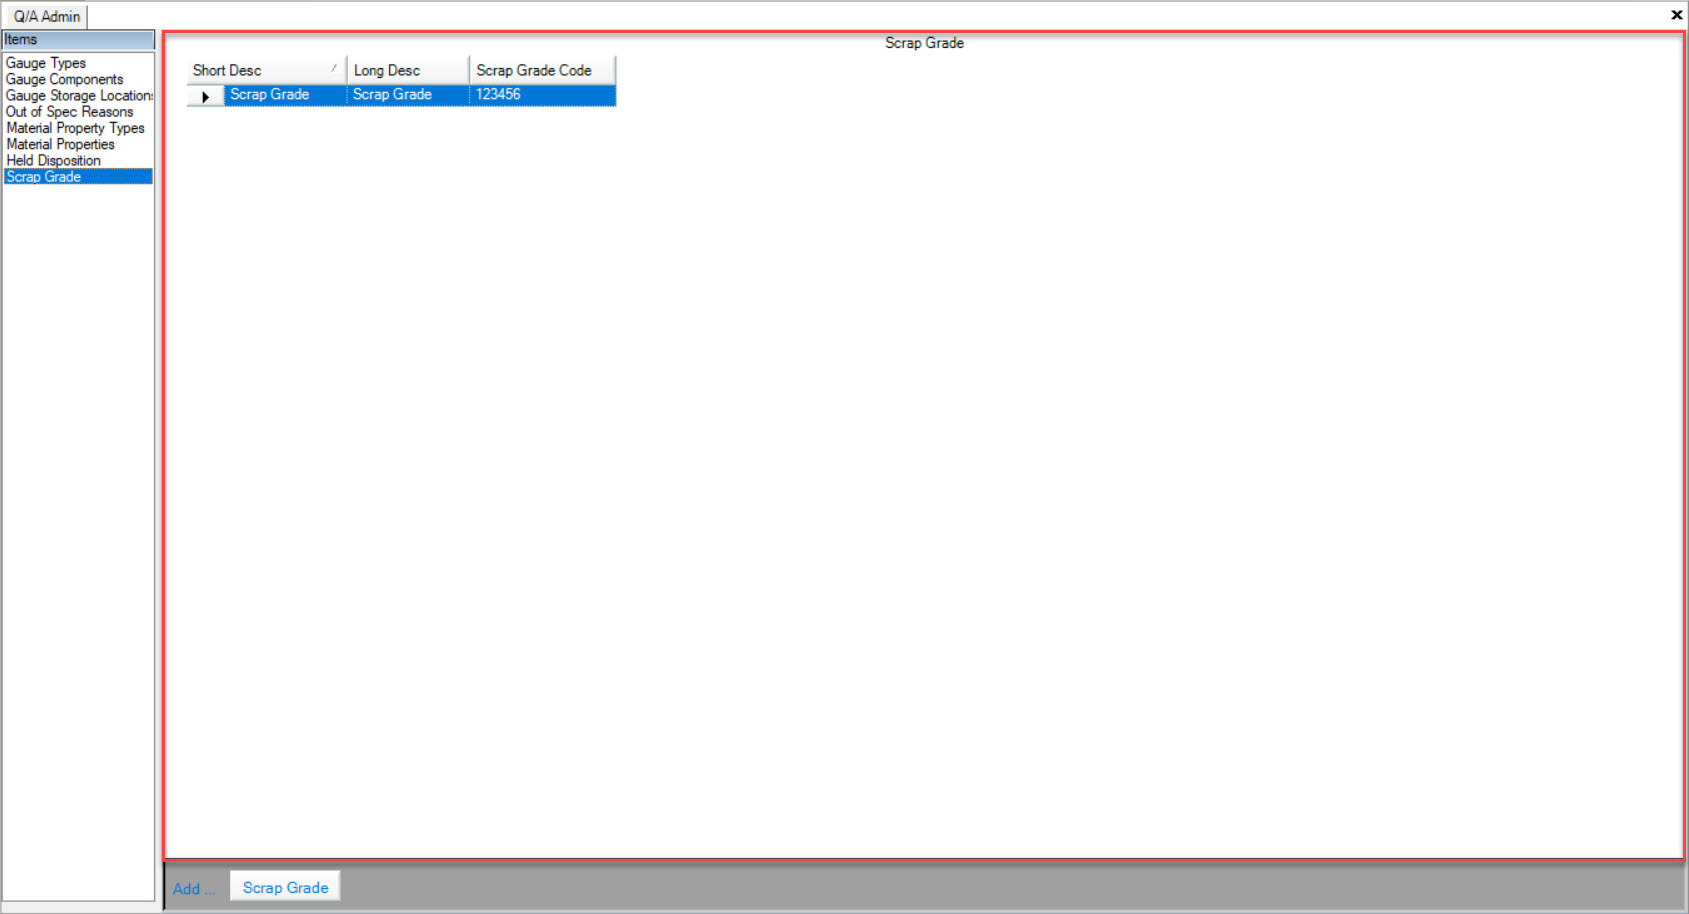
Viewing Scrap Grade
To view all Scrap Grades in the system, navigate to the tab and click on the icon. The Q/A Admin screen will be displayed.
Make sure to select the  tab located to the left of the screen under Items.
All available Scrap Grades will be displayed.
Adding a Scrap Grade
To add a Scrap Grade, navigate to the tab and click on the icon. The Q/A Admin screen will be displayed.
Make sure to select the tab located to the left of the screen under Items.
Click on the 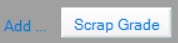 button located at the bottom of the screen.
A new row will appear where users can enter in a Short Description, Long Description, and Scrap Grade Code using the available textboxes.
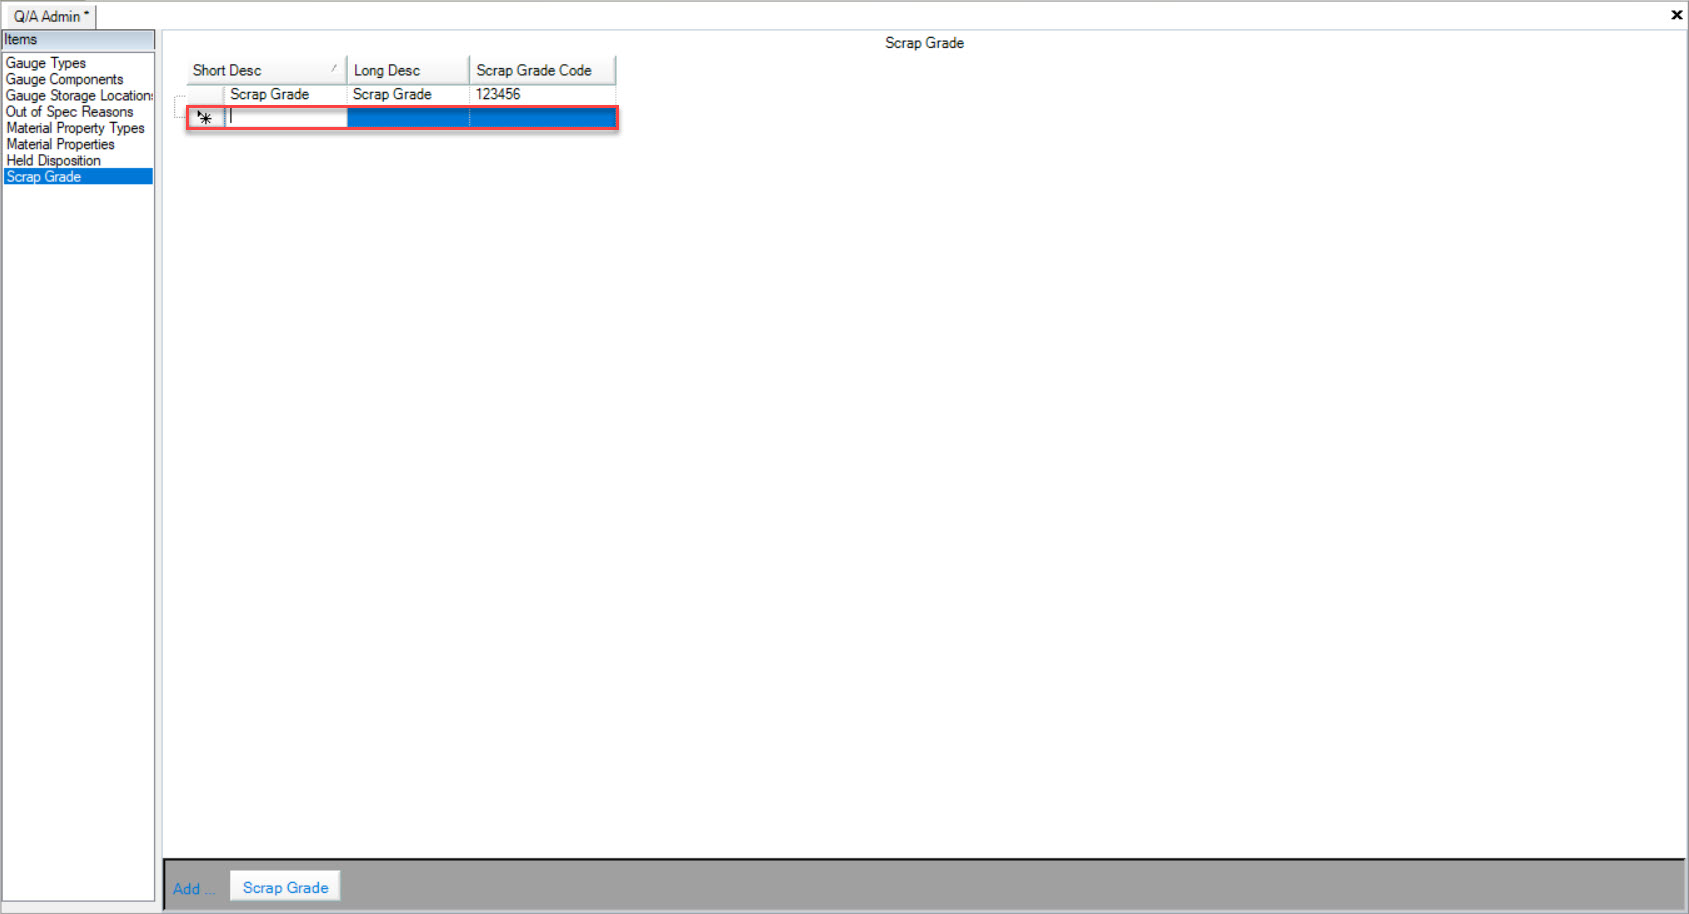
Make sure to save your changes before exiting the screen.
Editing a Scrap Grade
To edit a Scrap Grade, navigate to the tab and click on the icon. The Q/A Admin screen will be displayed.
Make sure to select the tab located to the left of the screen under Items.
Locate the Scrap Grade you wish to edit and make the necessary changes using the available textboxes.
Make sure to save your changes before exiting the screen.
Deleting a Scrap Grade
To delete a Scrap Grade, navigate to the tab and click on the icon. The Q/A Admin screen will be displayed.
Make sure to select the tab located to the left of the screen under Items.
Locate the Scrap Grade you wish to delete and highlight the appropriate row. Use your Delete key and when the system prompts you, select Yes.
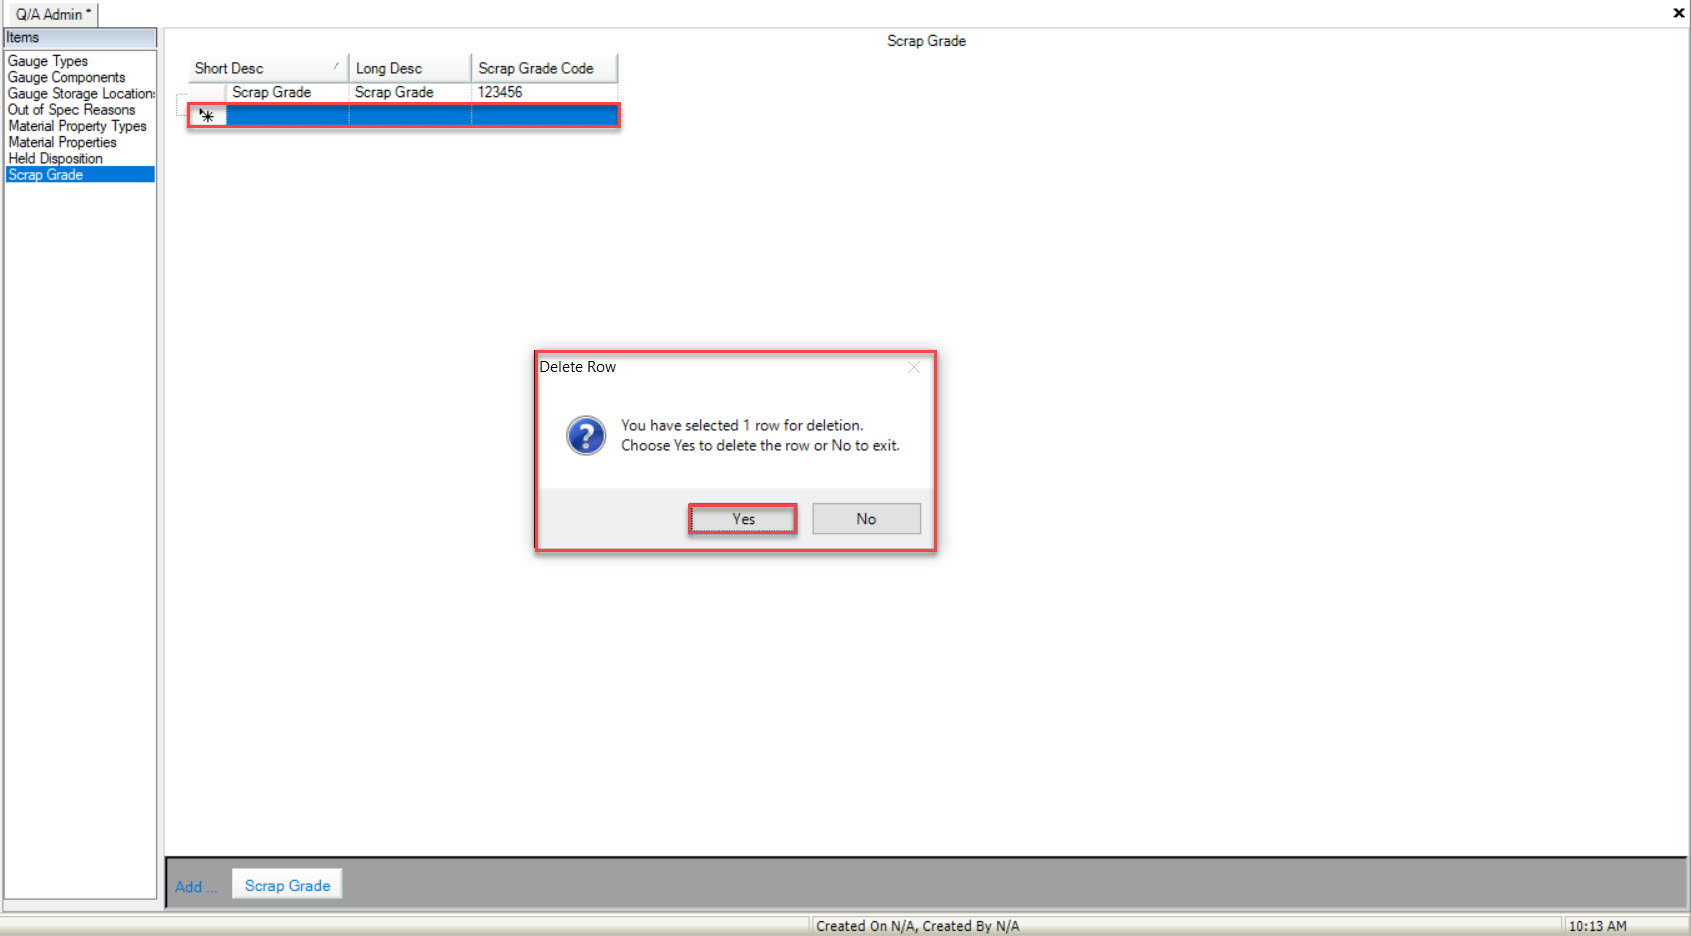
The highlighted Scrap Grade will be deleted.
Make sure to save your changes before exiting the screen.