Dock Audit Management
Users have the ability to manage Dock Audits in the system by using the module Dock Audit Management. Users can add, edit, complete, or make Dock Audits inactive along with enabling automatic Dock Audits for aged tags in the system.
To view Dock Audit Management, navigate to the  tab and click on the
  icon.
icon.
The Dock Audit Management screen will be displayed.
Note
Please note that this functionality is for ShopEdge Version 2018.2.0.0 and newer.
Active Dock Audits
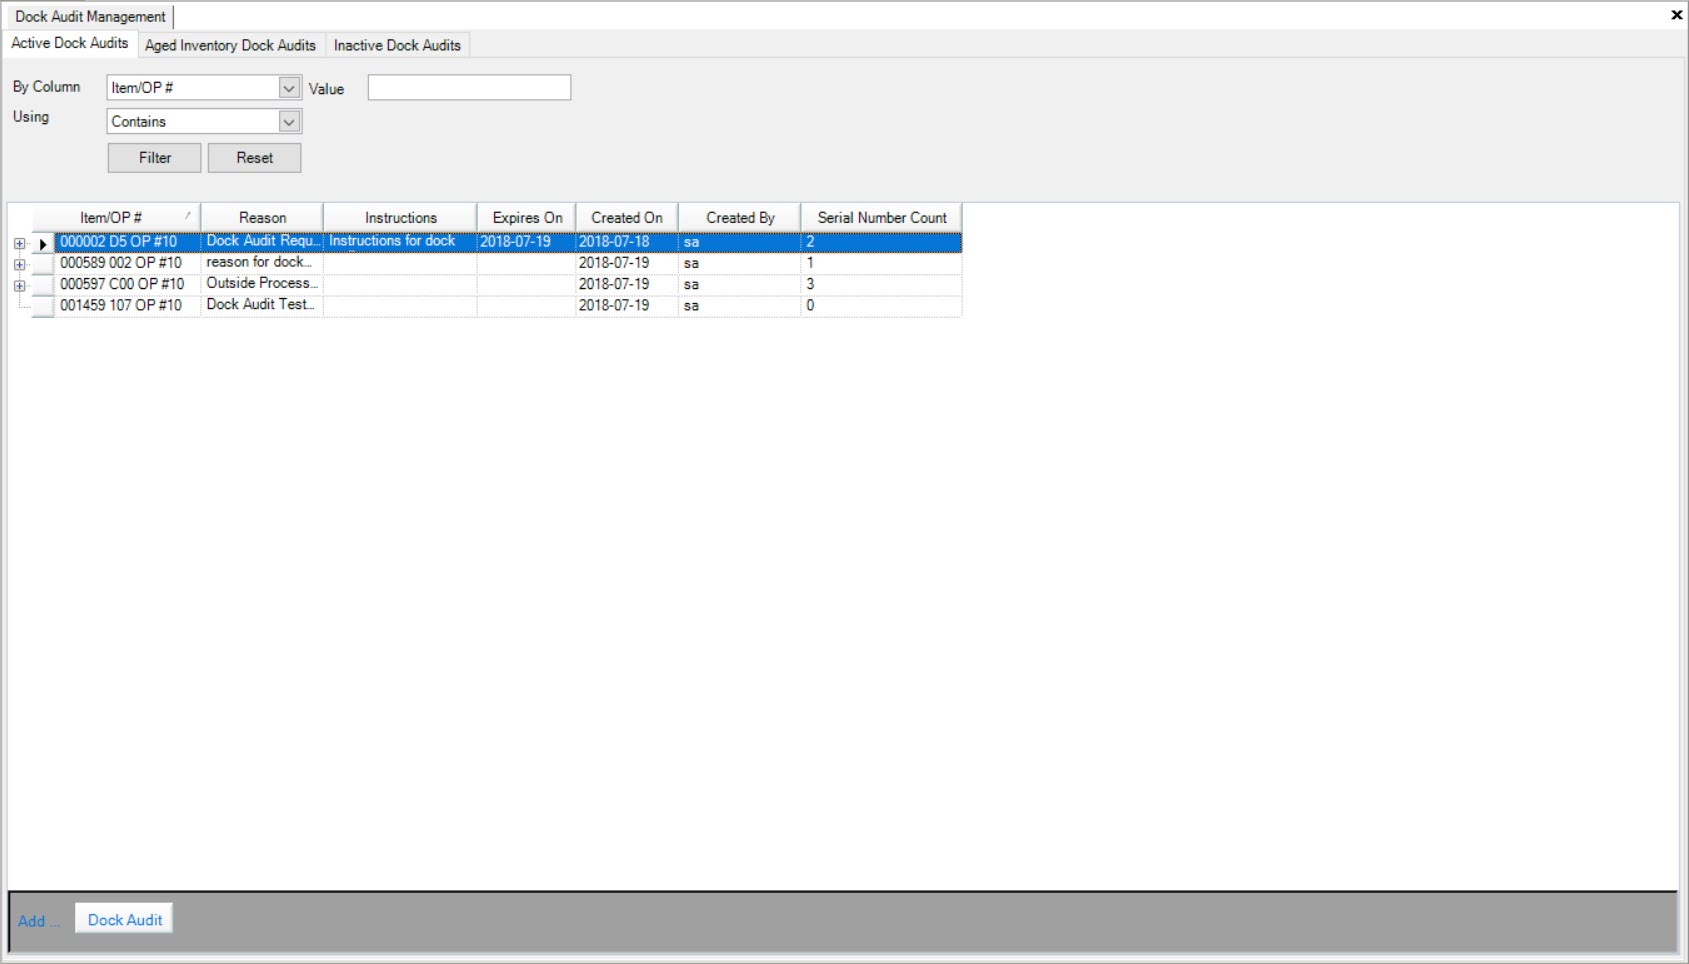
The Active Dock Audits tab provides a list of any Dock Audit that has not expired or been made inactive for a Manufactured Item in the system.
Viewing Active Dock Audits
To view Active Dock Audits in the system, navigate to the  tab and click on the
  icon.
icon.
The Dock Audit Management screen will be displayed.

Make sure to select the  tab.
tab.
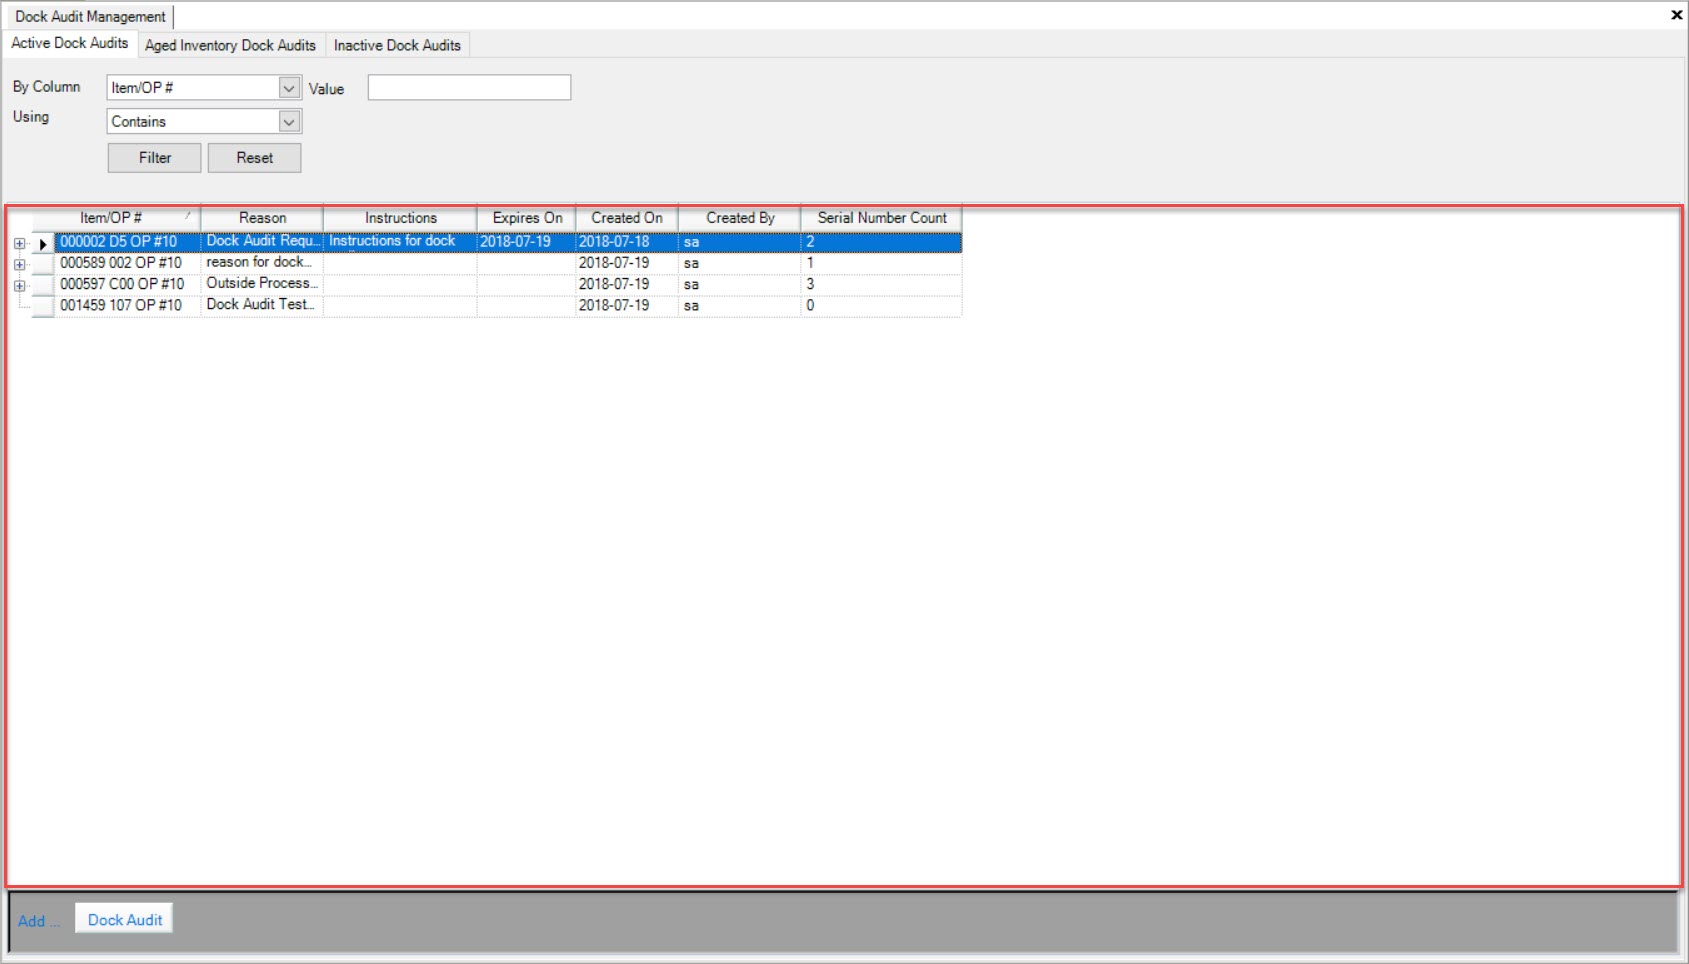
All active Dock Audits in the system will appear.
Adding a New Dock Audit
To add a Dock Audit, navigate to the  tab and click on the
  icon.
icon.
The Dock Audit Management screen will be displayed.

Make sure to select the  tab.
tab.
Next, click on the  button located at the bottom of the screen.
The Add Dock Audit window will appear. Make sure to fill in the required fields such as the OP # and Reason, and if necessary complete the Instructions, and Expires On fields by using the available drop-downs and textboxes.
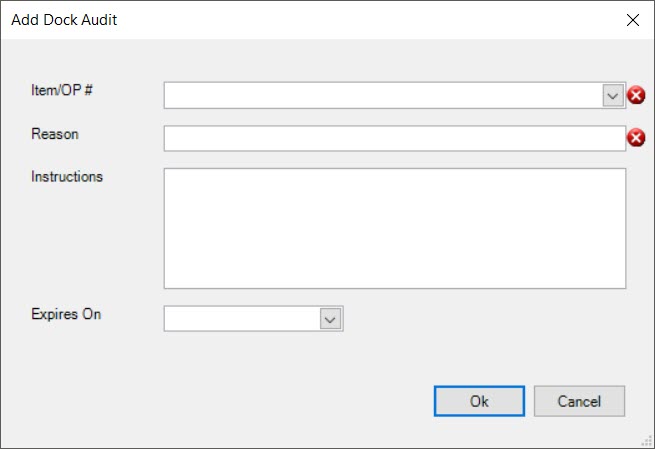
Once the appropriate fields have been completed, click on the  button.
Note
There can only be one active Dock Audit per operation in the system.
The new Dock Audit will be added to the Active Dock Audits tab, and will also be visible when opening the Manufacture Routing.
Make sure to save your changes before exiting the screen.
Adding Serial Numbers to an Active Dock Audit
To add a serial number to an active Dock Audit, navigate to the  tab and click on the
  icon.
icon.
The Dock Audit Management screen will be displayed.

Make sure to select the  tab.
tab.
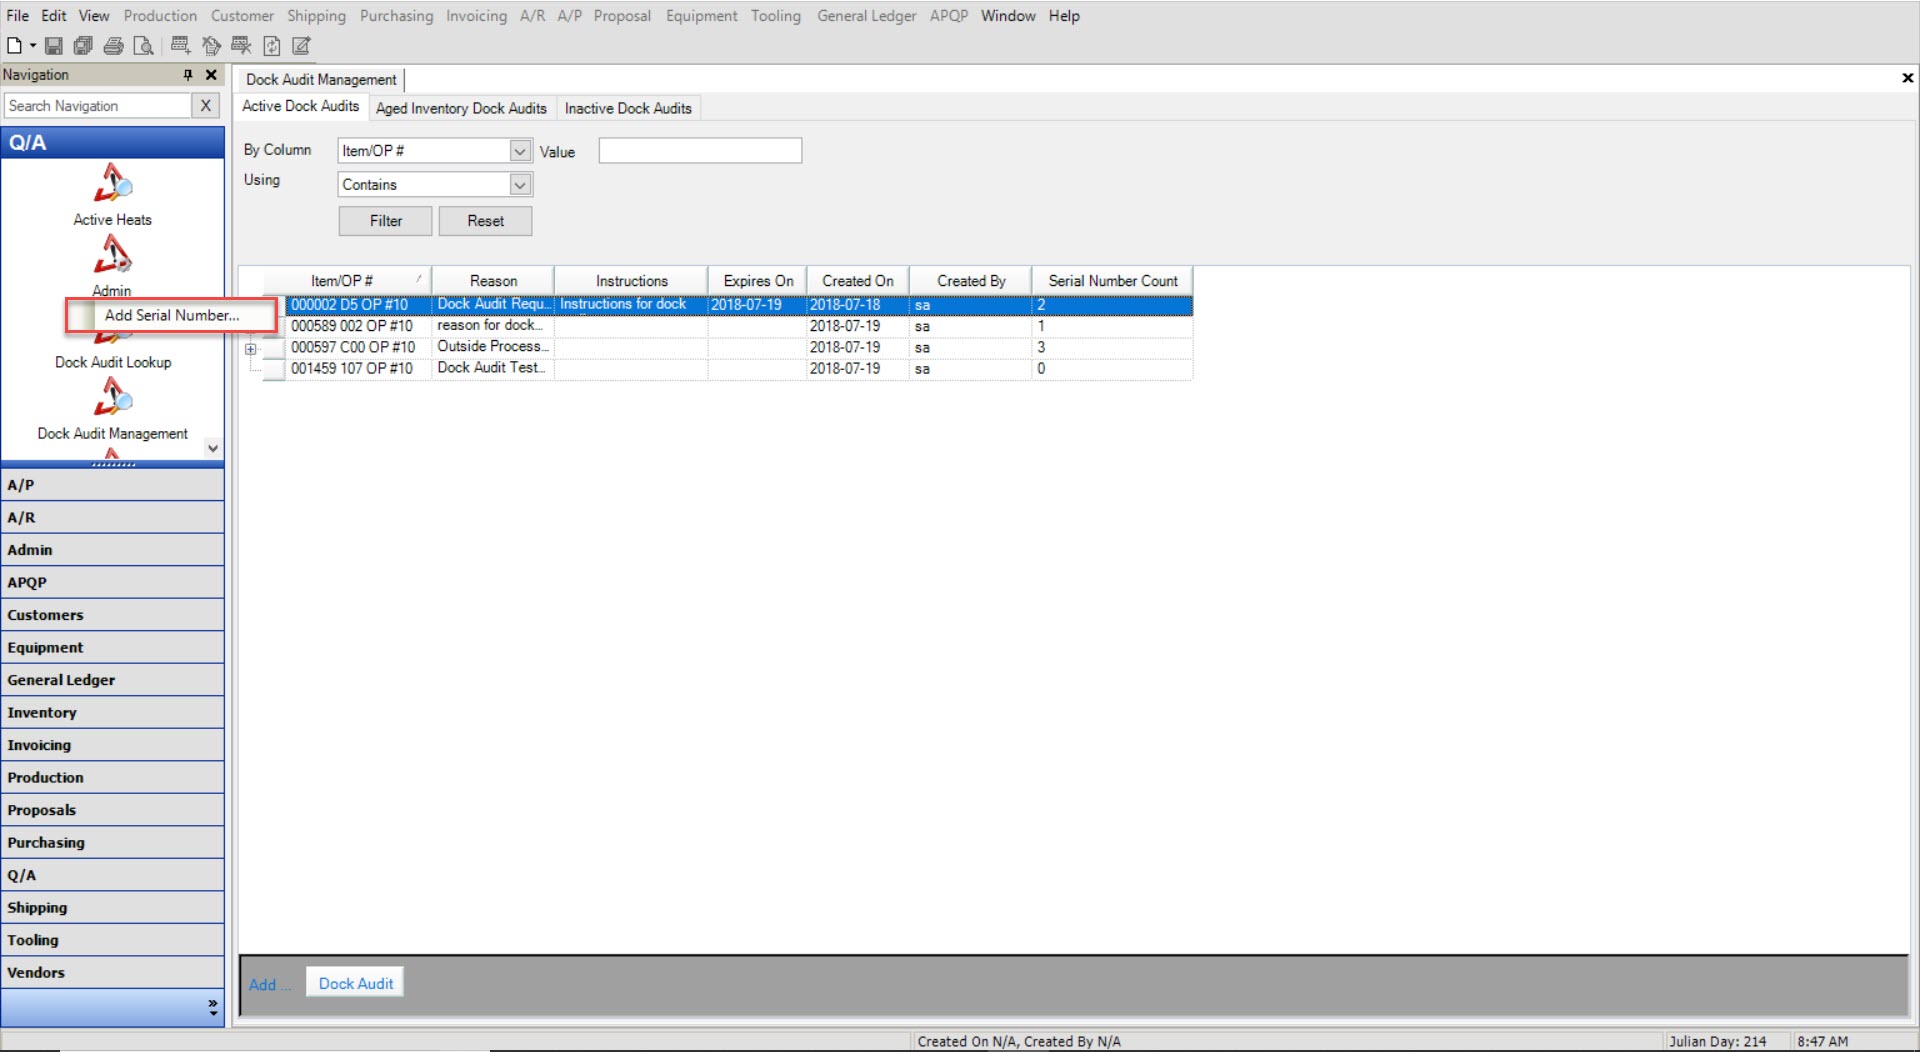
Next, locate the Dock Audit you wish to add a serial number to and right-click on the appropriate row. Select the Add Serial Number... option.
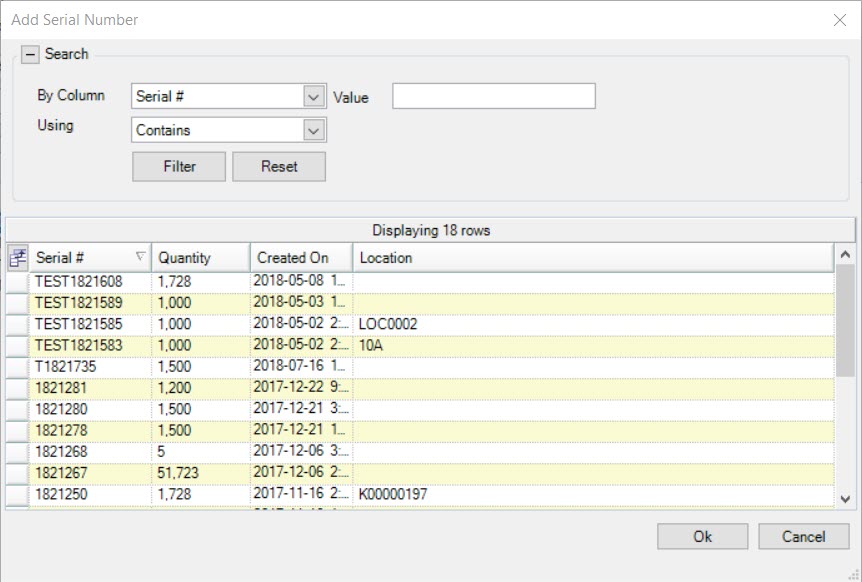
The Add Serial Number window will appear. Users must select a serial number and then, click on the  button.
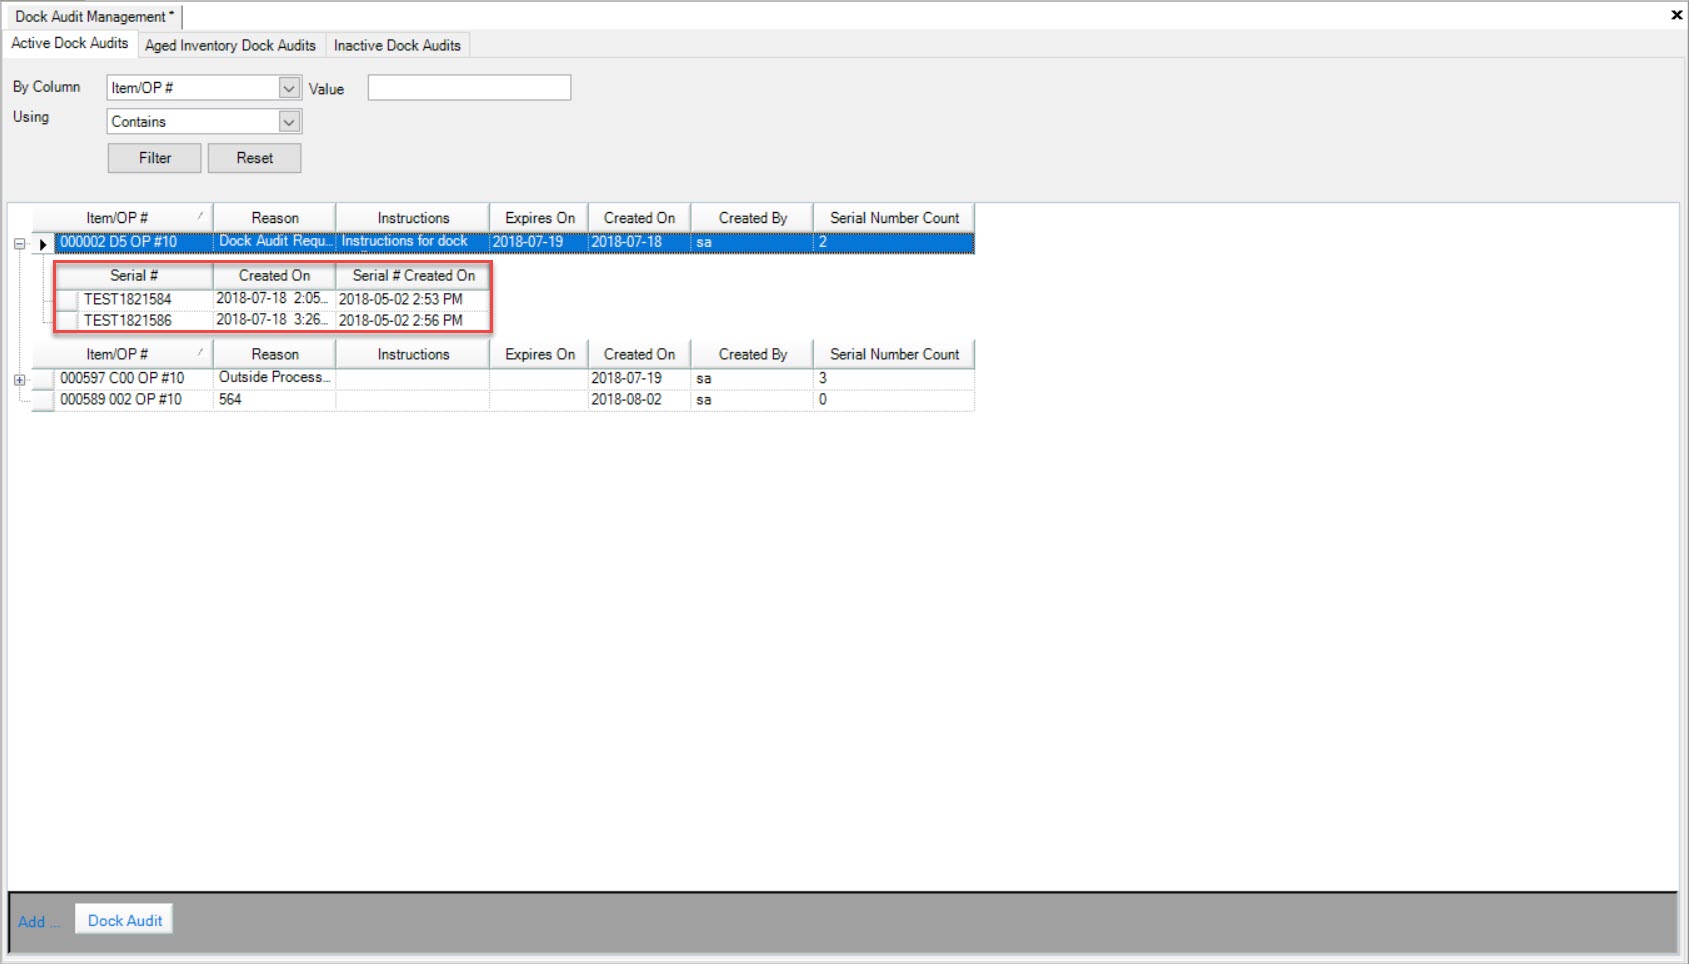
The selected serial number will be added to the Dock Audit.
Make sure to save your changes before exiting the screen.
Editing an Active Dock Audit
To edit an active Dock Audit, navigate to the  tab and click on the
  icon.
icon.
The Dock Audit Management screen will be displayed.

Make sure to select the  tab.
tab.
Next, locate the Dock Audit you wish to edit and double-click on the appropriate row.
The Edit Dock Audit window will appear.
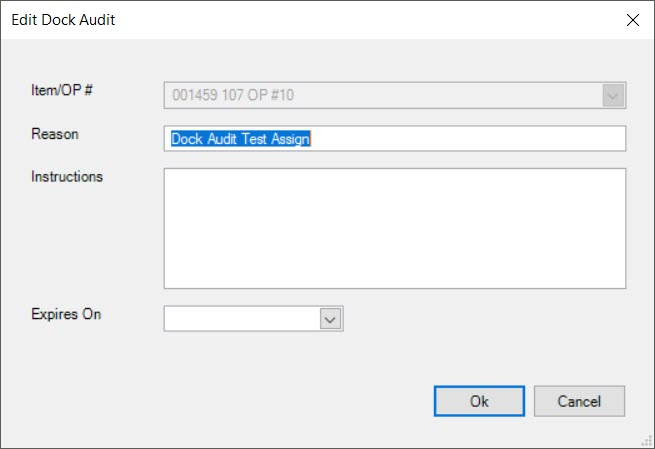
Make the necessary changes using the available textboxes and drop-downs and click the  button.
Make sure to save your changes before exiting the screen.
Completing an Active Dock Audit for a Serial Number
To complete a Dock Audit for a serial number, navigate to the  tab and click on the
  icon.
icon.
The Dock Audit Management screen will be displayed.

Make sure to select the  tab.
tab.
Next, locate the Dock Audit you wish to complete for a serial number and click on the plus button to expand the row. Right-click on the appropriate serial number and select the Complete Dock Audit... option.
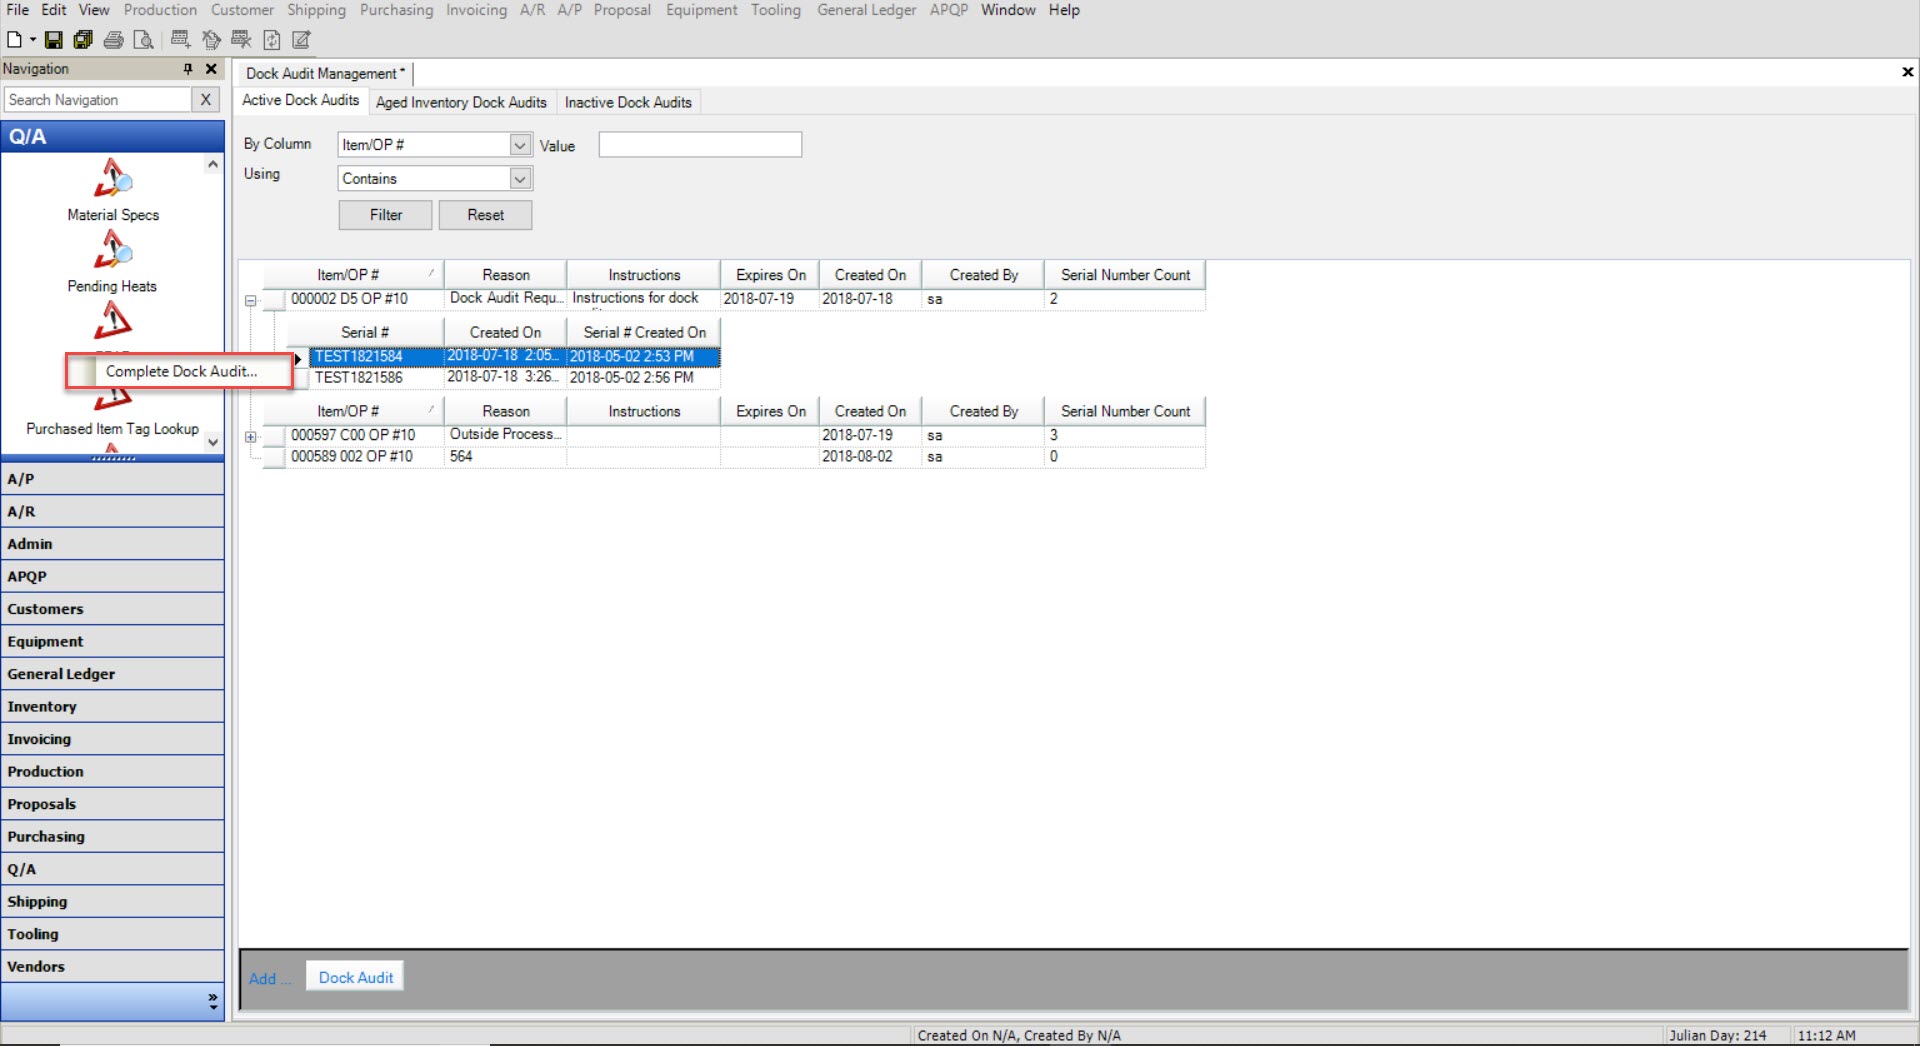
The Complete Dock Audit window will appear where users must first select if the selected Dock Audit passed or failed.
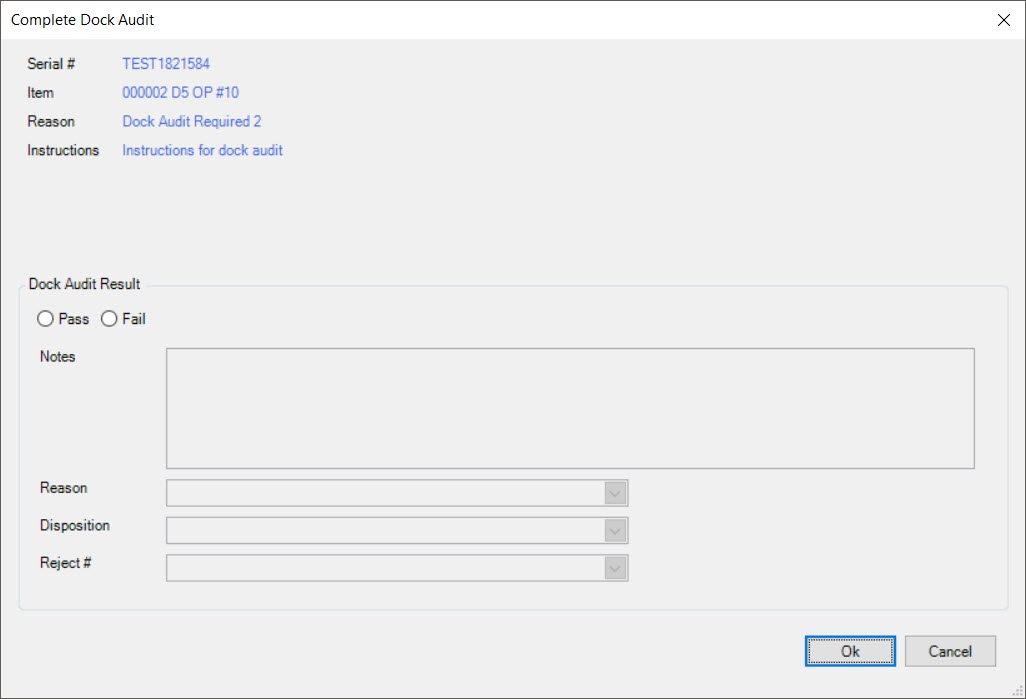
If the Dock Audit passed, users must fill in any necessary notes and then, click on the  button.
If the Dock Audit failed, users must fill in any necessary notes, and select a Reason, Disposition, and Reject # if necessary. Then, click on the  button.
The selected Serial Number will be removed from the Item once the Dock Audit has been complete.
Make sure to save your changes before exiting the screen.
Making an Active Dock Audit Inactive
To make an active Dock Audit inactive, navigate to the  tab and click on the
  icon.
icon.
The Dock Audit Management screen will be displayed.

Make sure to select the  tab.
tab.
Locate the Dock Audit you wish to make inactive and highlight the appropriate row. Use your Delete key and when the Delete Dock Audit window appears, select Yes.
The selected Dock Audit will be removed from the Active Dock Audits tab and placed under the Inactive Dock Audits tab.
Make sure to save your changes before exiting the screen.
Aged Inventory Dock Audits
Aged Inventory Dock Audits allow users to automatically enable Dock Audits for tags that have been in the system for a period of time.
To view Aged Inventory Dock Audits, navigate to the  tab and click on the
  icon.
icon.
The Dock Audit Management screen will be displayed.

Make sure to select the  tab.
tab.
The Serial Numbers that are aged in the system will be listed.
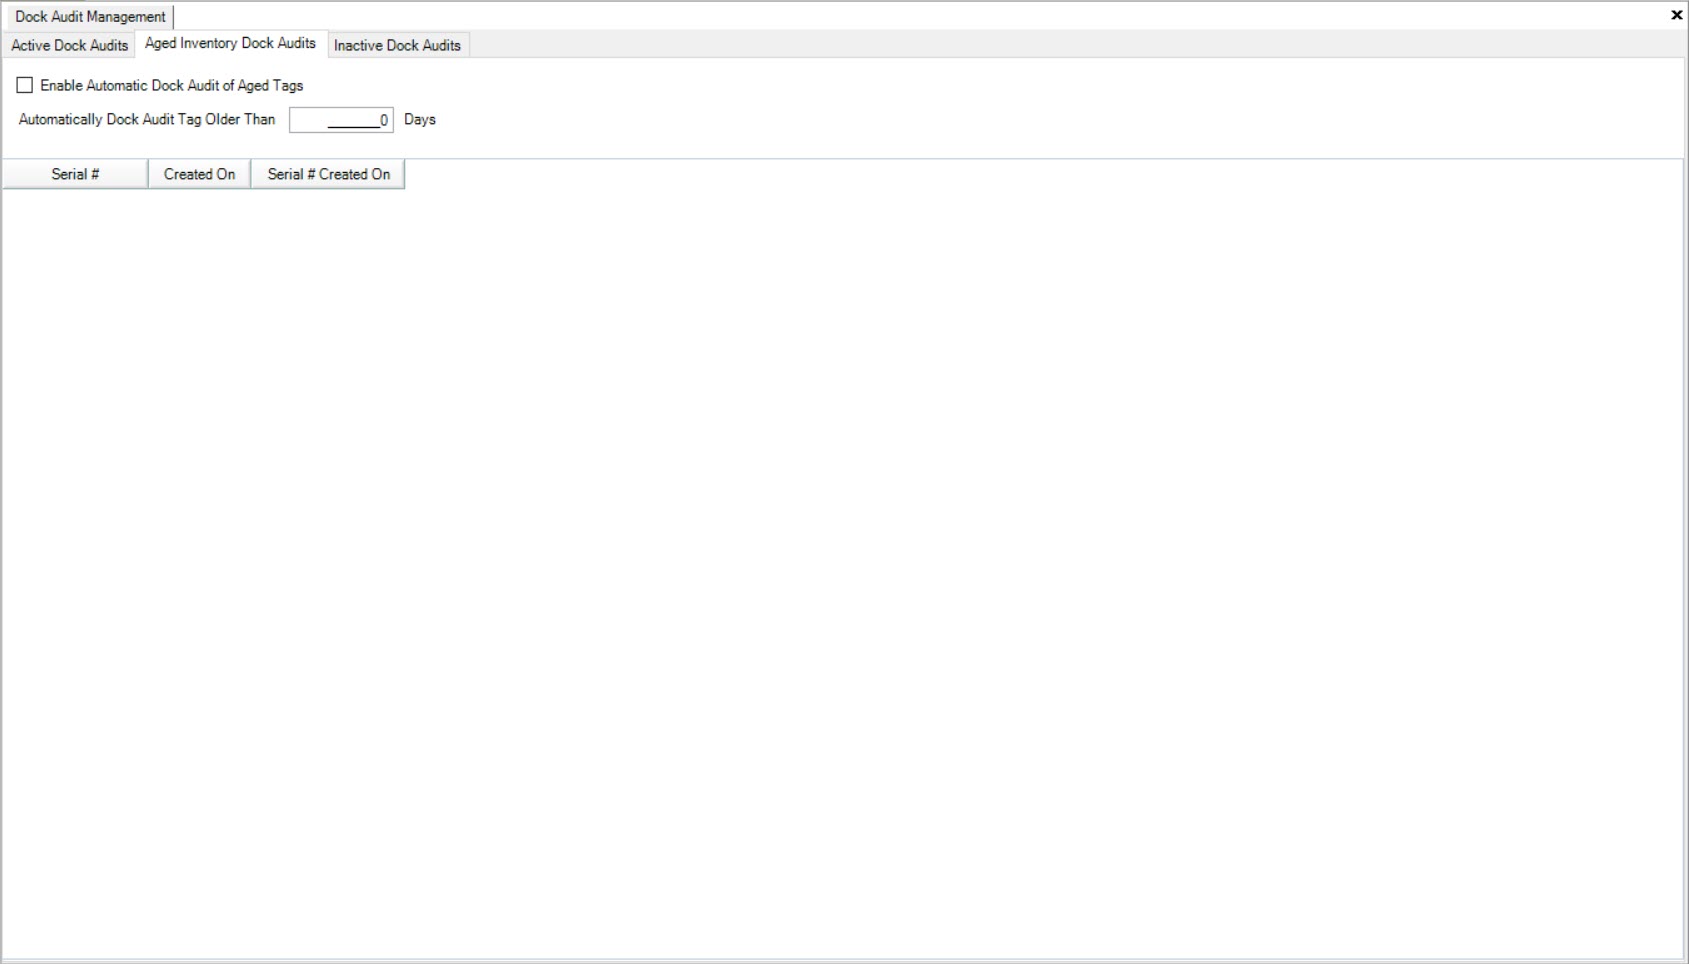
Enabling Automatic Dock Audit for Serial Numbers
Dock Audits can be enabled for Serial Numbers wil a Created On date older than a specified number of days.
To enable automatic Dock Audits for aged Serial Numbers in the system, navigate to the  tab and click on the
 icon.
icon.
The Dock Audit Management screen will be displayed.

Make sure to select the  tab.
tab.
Select the Enable Automatic Dock Audit of Aged Serial Numbers checkbox and enter in the amount of days.
Make sure to save your changes before exiting the screen.
The aged Serial Numbers in the system for the amount of days that you entered will receive an automatic Dock Audit, and will appear in the table showing the Serial Number, the Dock Audit Created On date, and the Serial # Created On date.
Inactive Dock Audits
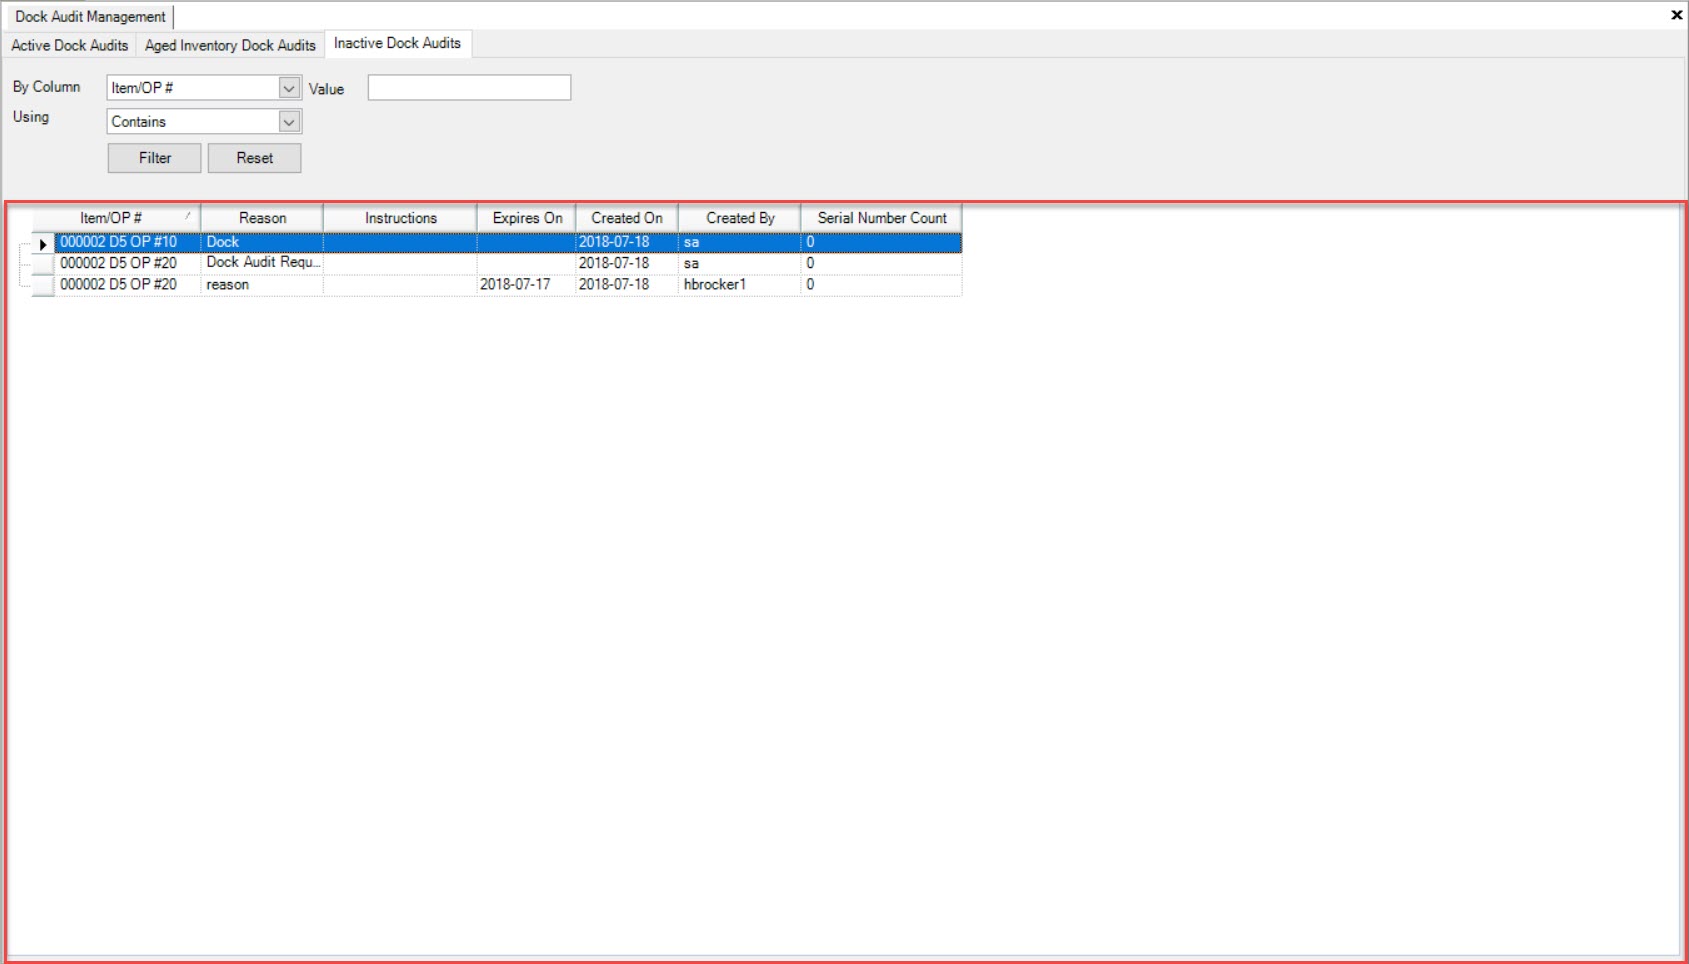
Dock Audits become inactive when they are deleted from the Active Dock Audits tab, or when the expiry date becomes past due.
To view inactive Dock Audits, navigate to the  tab and click on the
  icon.
icon.
The Dock Audit Management screen will be displayed.

Make sure to select the  tab.
tab.
A list of inactive Dock Audits will be displayed.
