Quality Rejects
Quality Rejects are used in the ShopEdge system to provide better reporting by linking Quality Transactions to Quality Rejects for scrap, rework and labour hours.
To view all Quality Rejects in the system, navigate to the  tab and click on the
  icon. The Quality
Reject Lookup screen will be displayed.
icon. The Quality
Reject Lookup screen will be displayed.
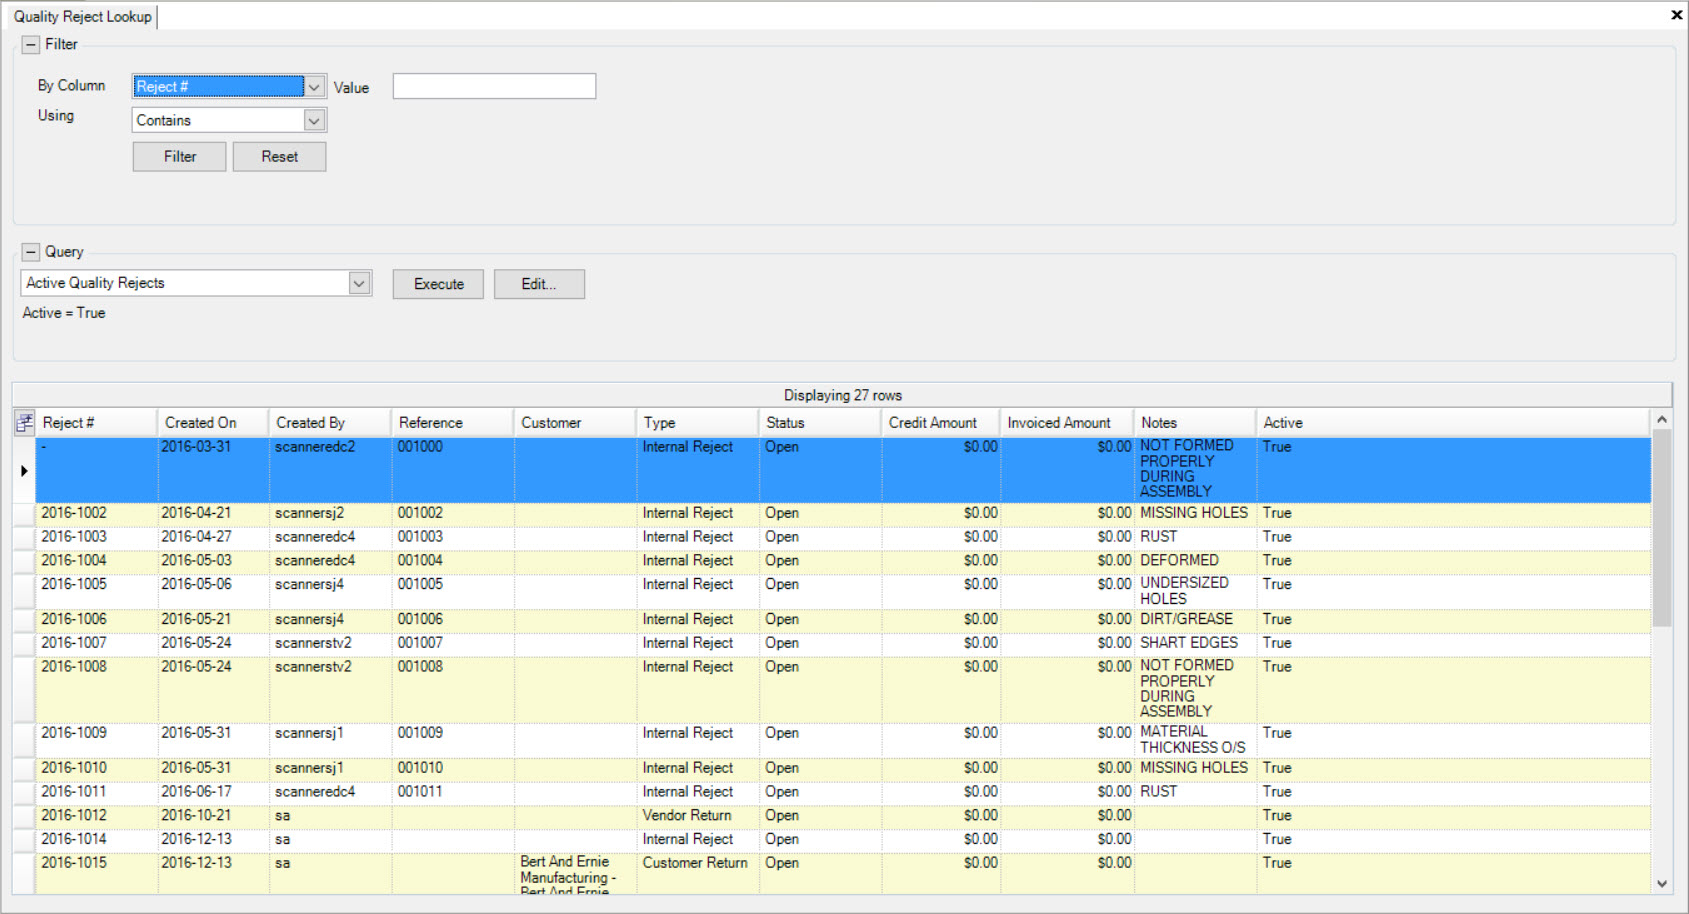
All available Quality Rejects in the system will be displayed with details including the Reject #, Created On date, Created By, Reference, Customer, Type, Status, Credit Amount, Invoiced Amount, Notes, and whether or not the Quality Reject is Active.
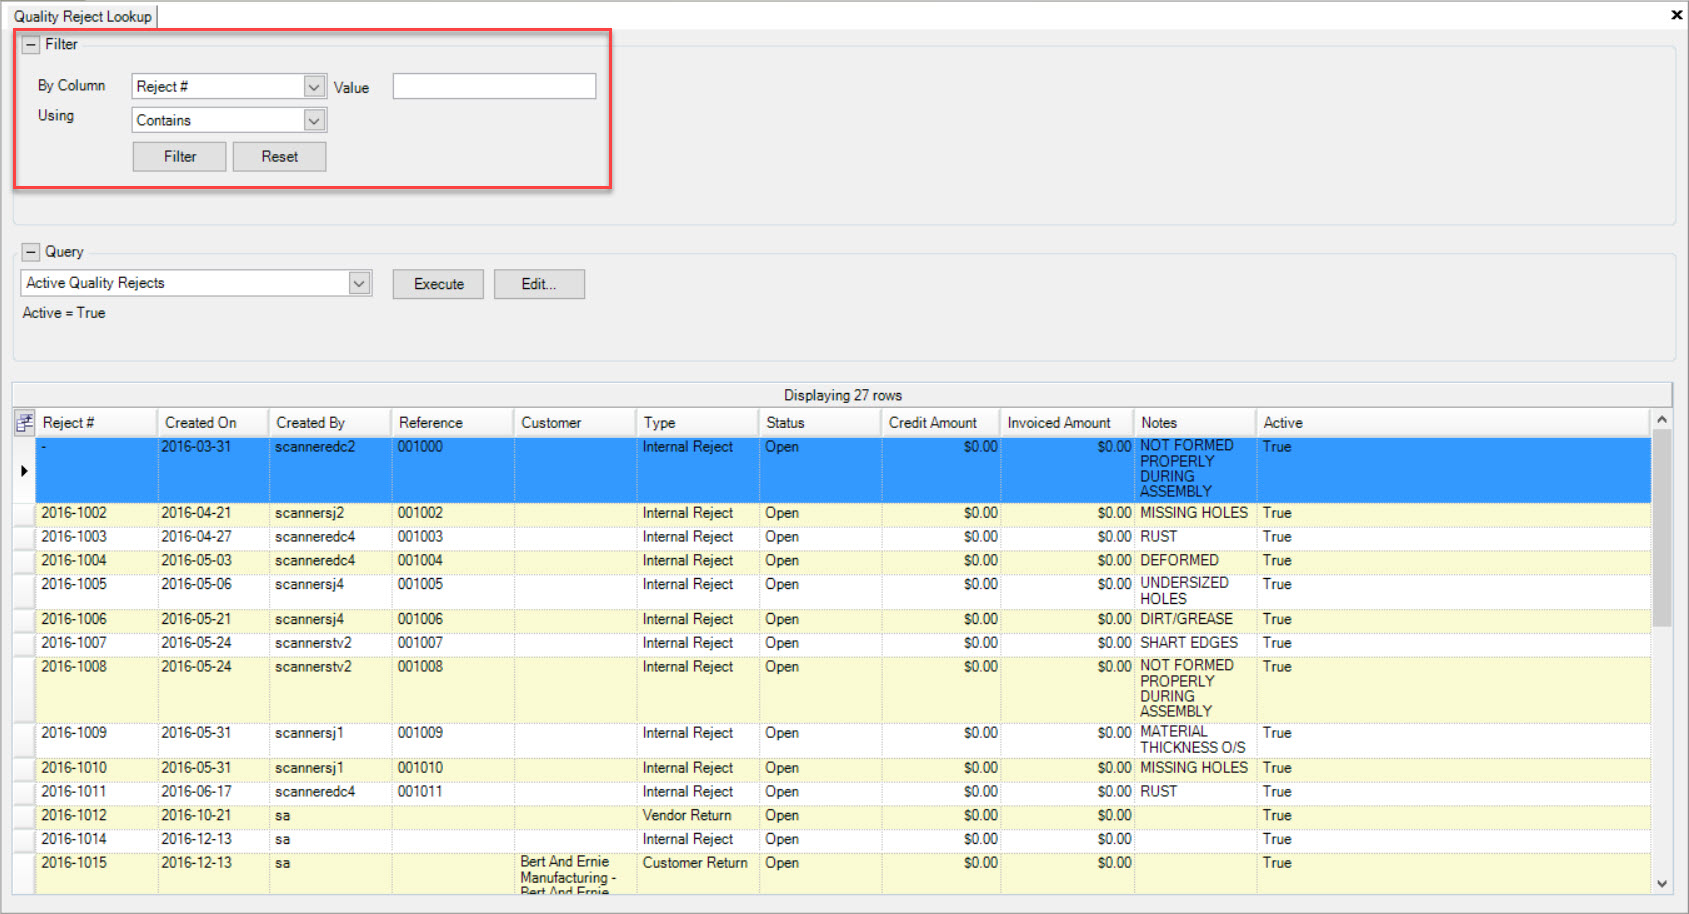
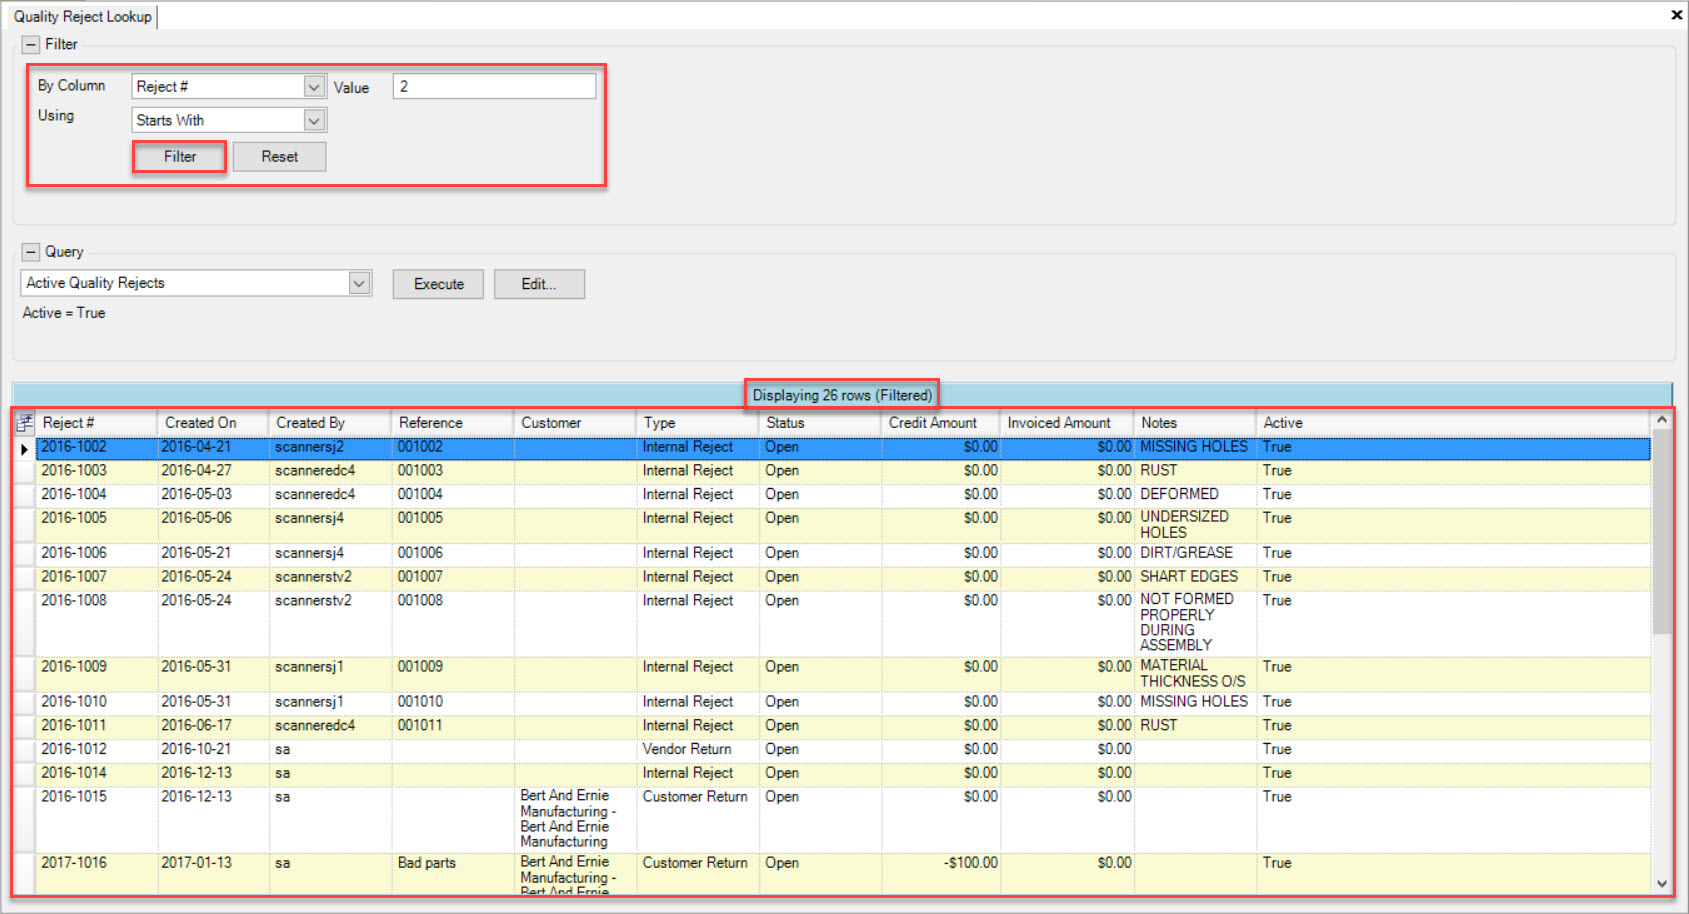
To search for a Quality Reject, users can use the search filter located at the top of the screen. Simply select a Column, Contains, Exact Match, Starts With, or Between, and enter in an
amount in the Value field. Then, click on the  button. The system will populate your search accordingly.
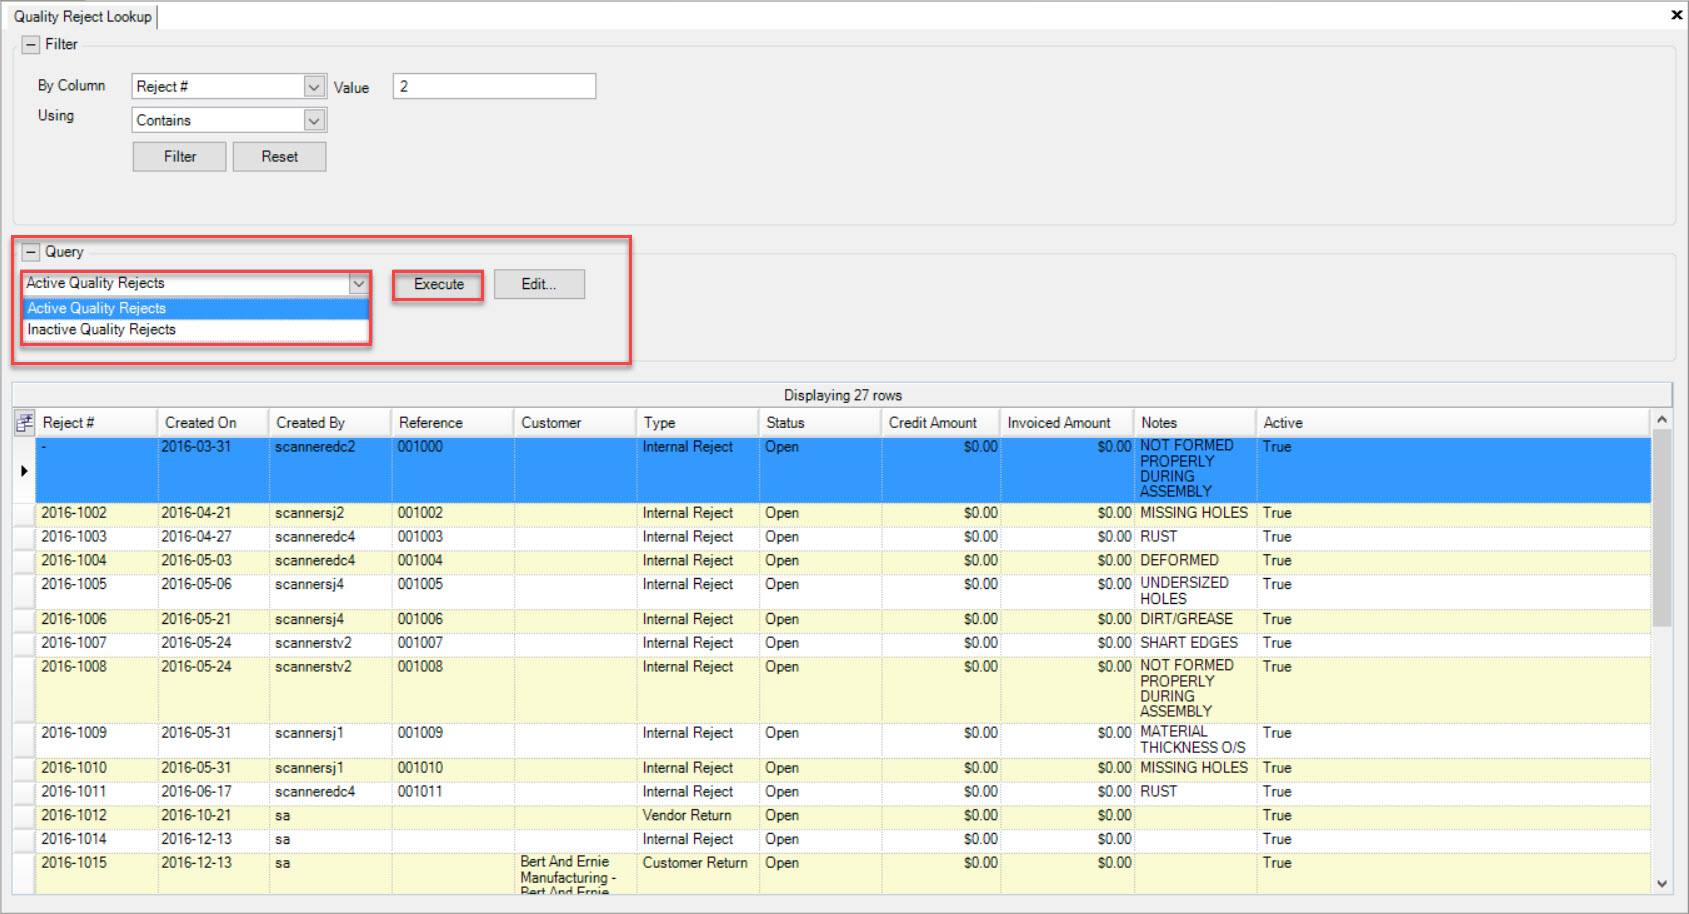
Users also have the ability to use the Query to search by Active or Inactive Quality Rejects. Simply select the preferred option from the available drop-down menu, and click on the
 button. The system will populate your search accordingly.
To open a Quality Reject, simply double-click on the appropriate row of the Quality Reject you wish to view. The Quality Reject detail screen will appear.

Users will be able to view all of the details regarding the selected Quality Reject.
Note
Depending on the type of Quality Reject (Internal, Customer, or Vendor) you have selected to open, the screen may display differently.
Creating a new Quality Reject
There are three ways in the system to create a new Quality Reject. The first way is to press the Ctrl + Shift + 7 keys. The second way is to nagivate to File > New > Quality Reject.
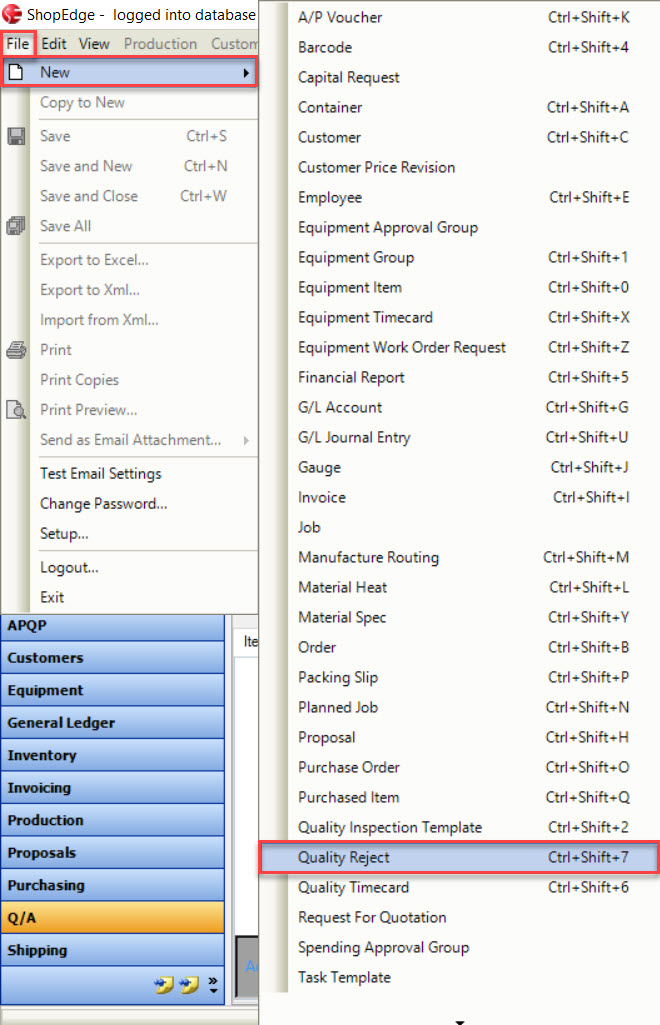
The last way is to click on the  button and select the Quality Reject option.
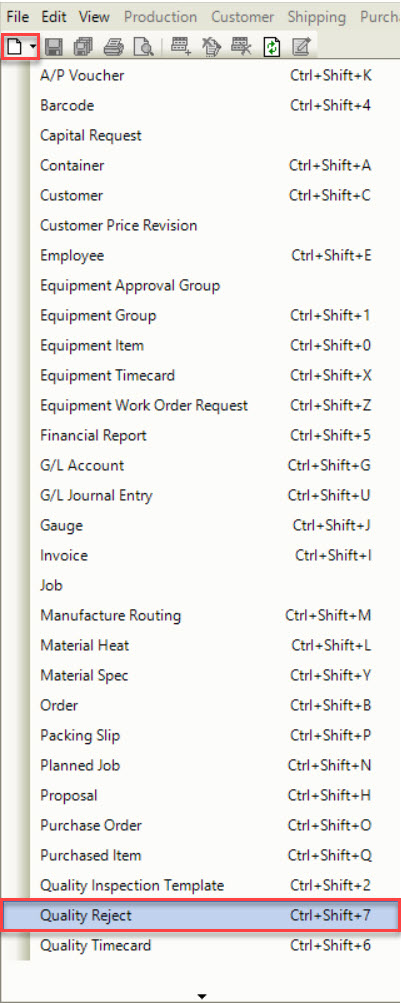
All of these will open a new Quality Reject screen.
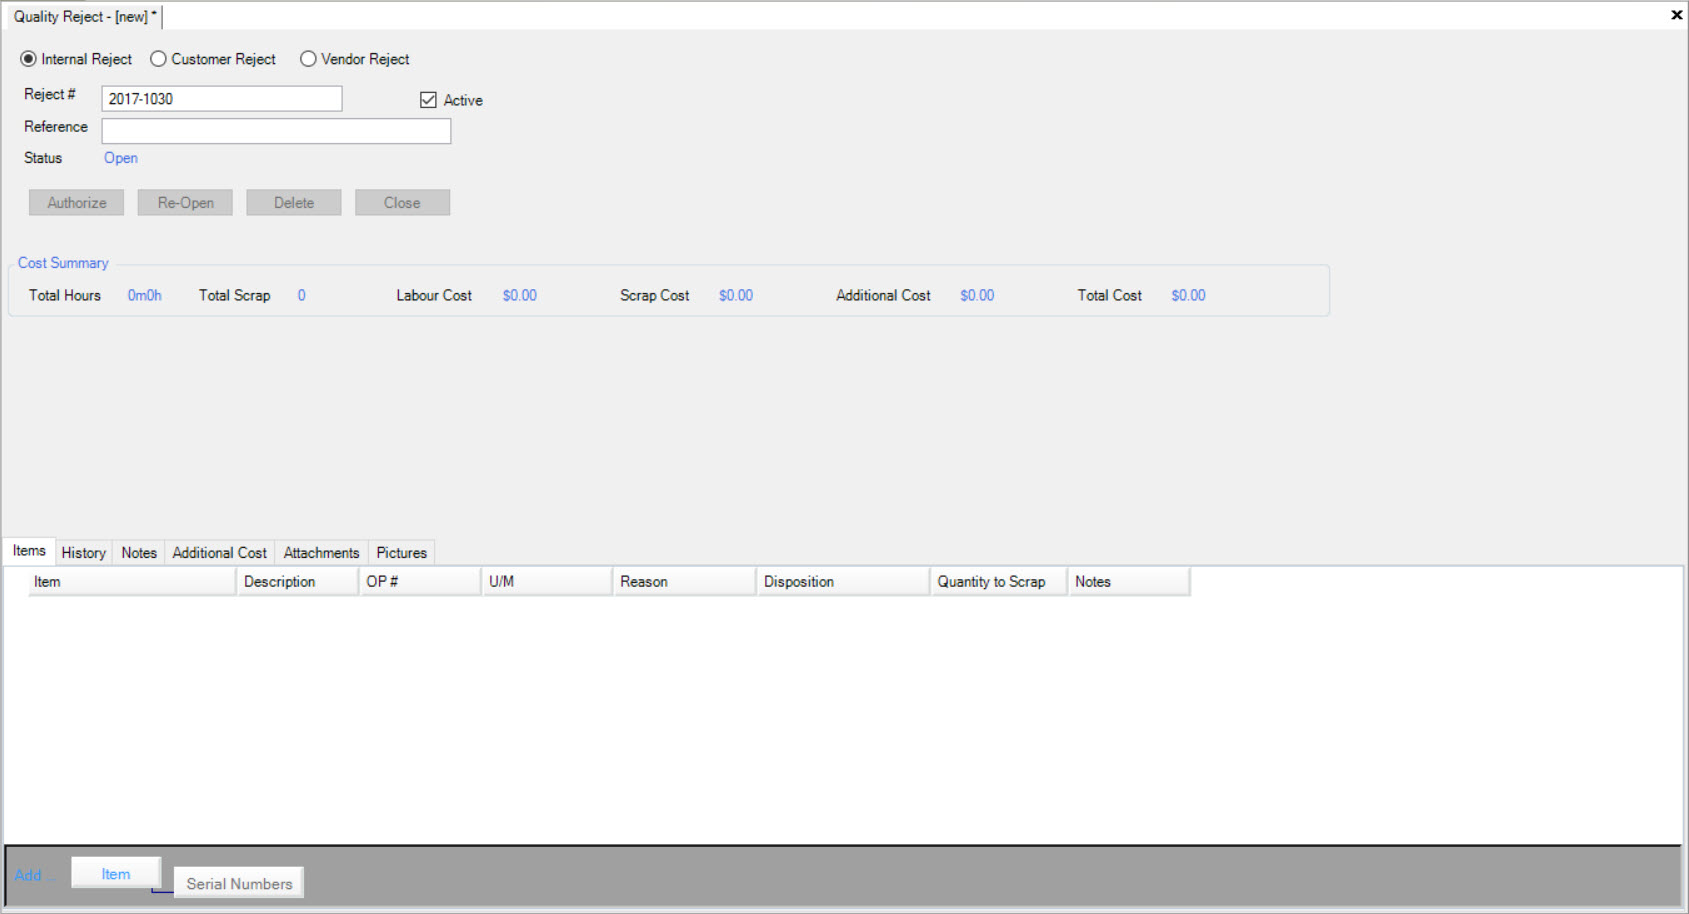
There are three different types of Quality Rejects that can be created; Internal, Customer, or Vendor.
Internal Rejects are made when a part has to be scrapped before leaving the warehouse.
Customer Rejects are when a part has been sent to a Customer, but the Customer notices a malfunction with it (rust, dents, etc.).
Vendor Rejects are when material to create a part is sent to a warehouse, but the material has to be scrapped for reasons such as rust, dents, etc.
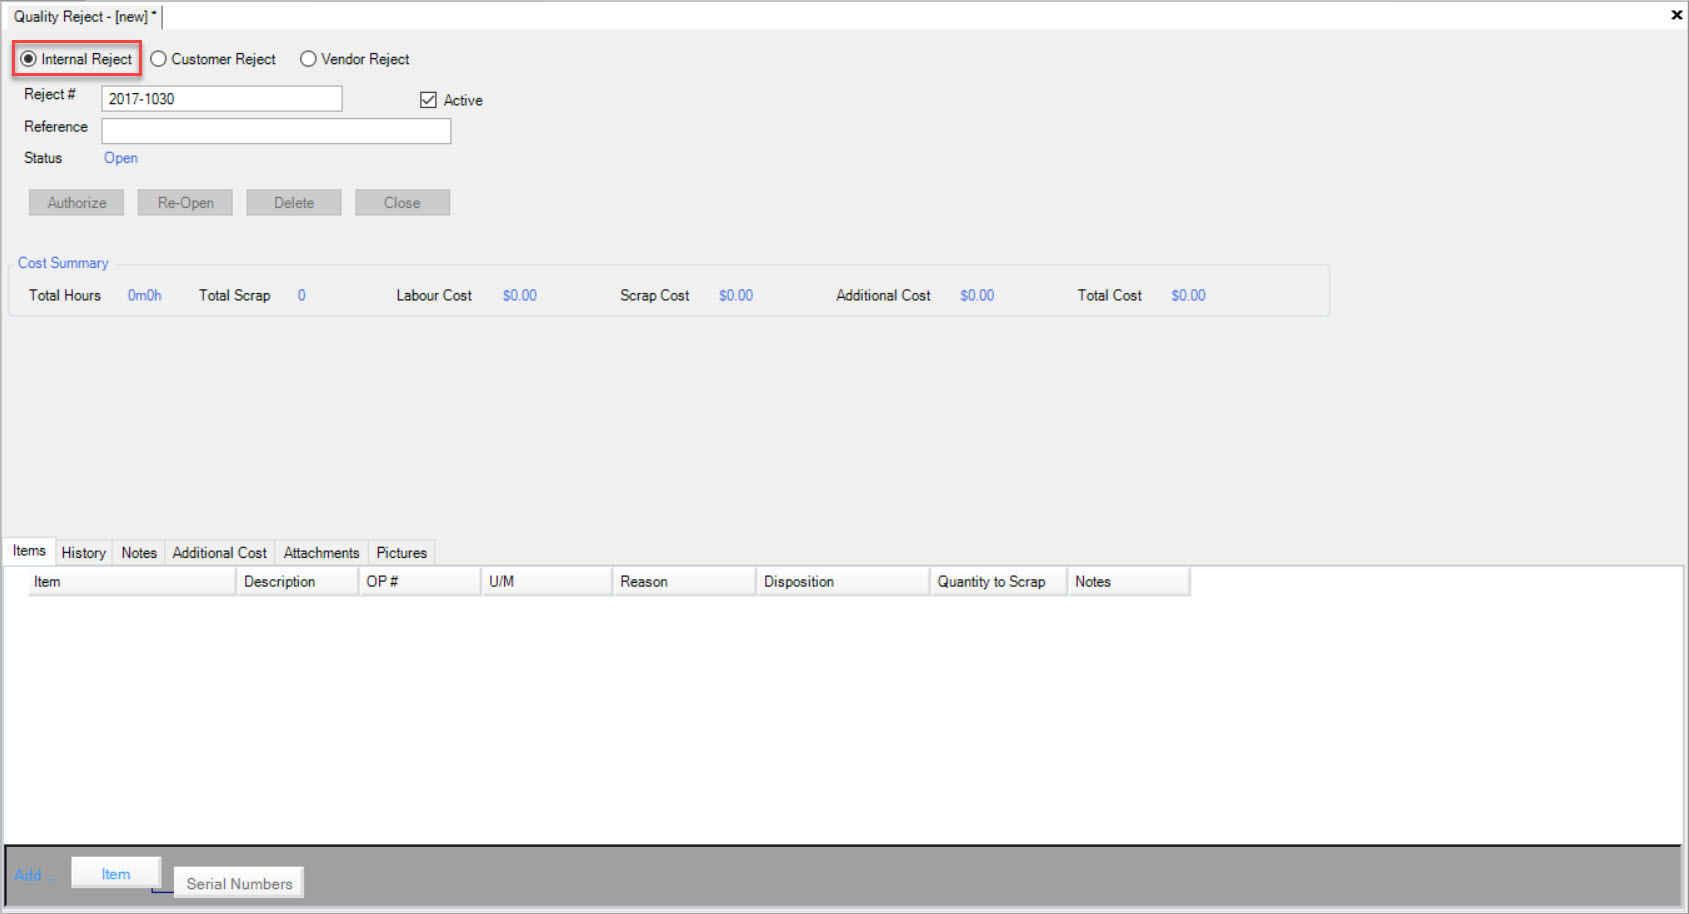
Internal Rejects
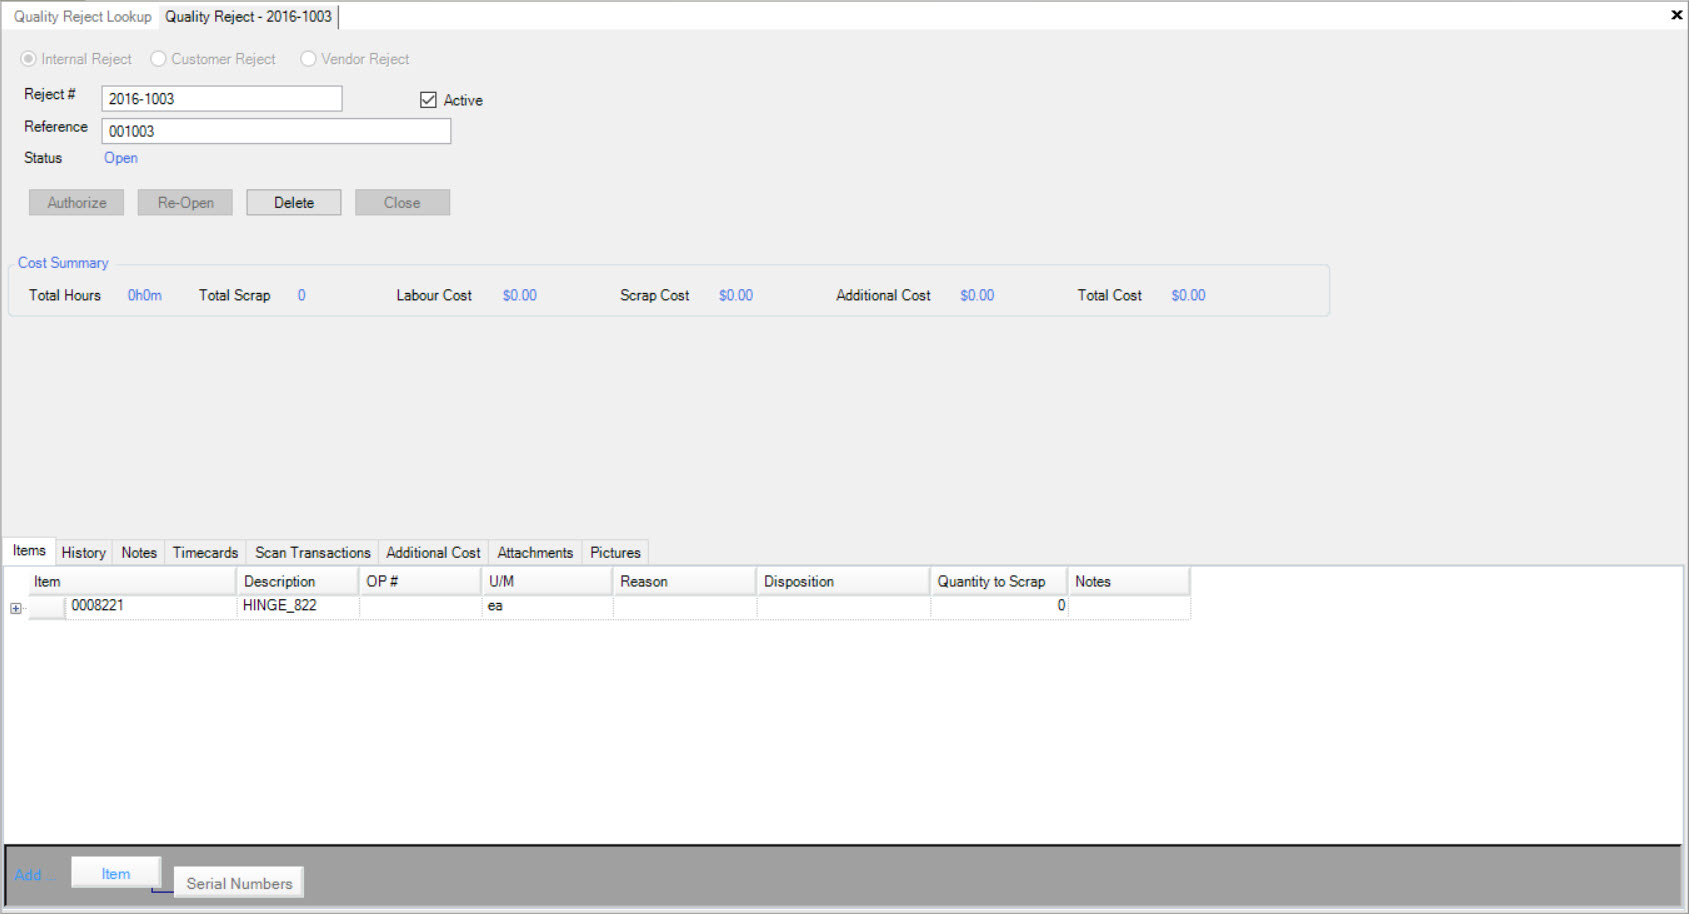
To create an Internal Reject, make sure to select the Internal Reject option on the new Quality Reject screen.
The system will automatically create a Reject #, the Status will default to Open, and the Active checkbox will be selected by default as well. This can be changed if needed.

Note
Although the Reject # is automatically created, users have the ability to change it. The Reject # is unique and there cannot be duplicates. If the Reject # entered is a duplicate, the system will prompt you to enter in a different number.
Users must enter in a Reference and then the new Internal Reject can be saved.
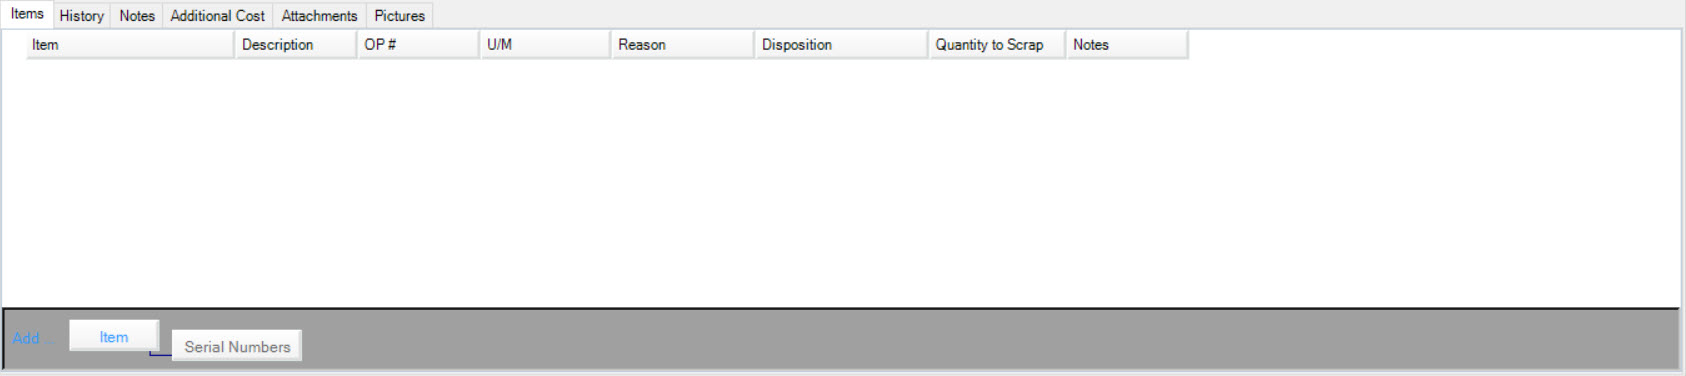
Internal Reject Items Tab
To view Items on a new or existing Internal Reject, make sure to select the  tab located on the opened Internal Reject screen.
Users will be able to view all Items attached to the Internal Reject as well as add, edit, or delete Items. Serial Numbers can also be added, edited, or deleted from Items on a Quality Reject.
Adding an Item to an Internal Reject
To add an Item to an Internal Reject, make sure to select the tab located on the Internal Reject screen.
Then, click on the 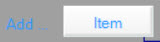 button located at the bottom of the screen.
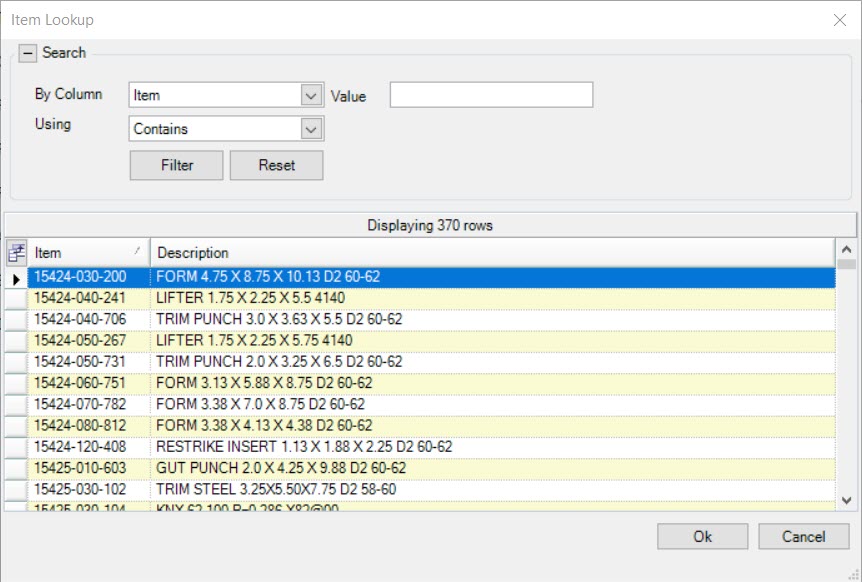
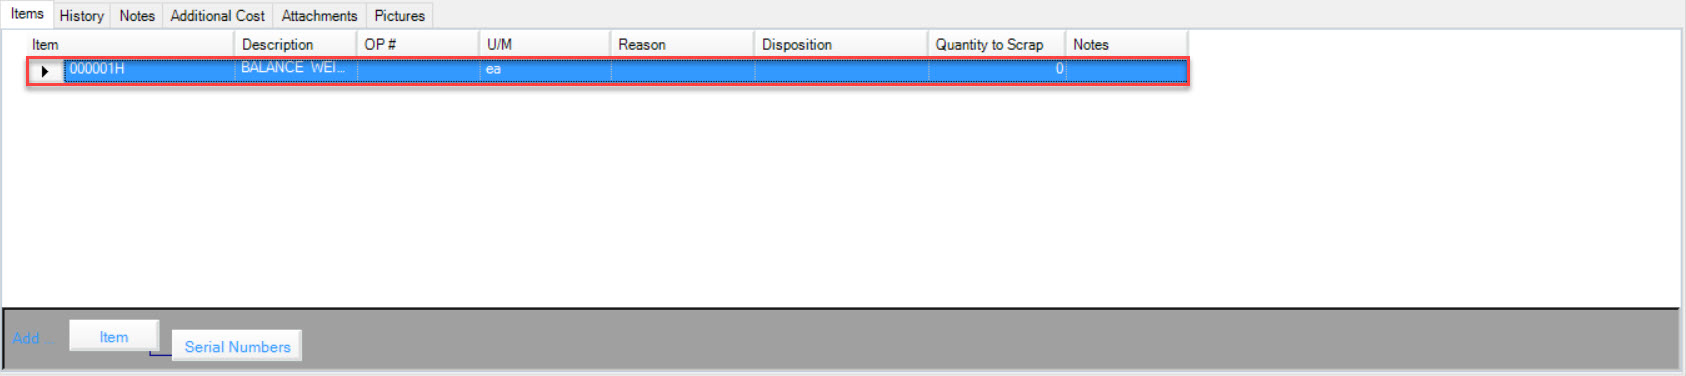
The Item Lookup window will appear where users can select an Item. Highlight the appropriate row and click on the  button. The selected Item
will be added.
button. The selected Item
will be added.
Note
Users have the ability to add more than one Item at a time. To do so, simply hold the Shift key as you are highlighting the appropriate Items. Then, click on the button.
If users wish to add a Serial Number to an Item, simply highlight the row of the Item you wish to add it to and click on the  button
located at the bottom of the screen.
button
located at the bottom of the screen.
Note
The button will only become available once an Item has been added to an Internal Reject.
A new row will appear below the Item row where users must select the Serial Number. To do so, click on the  button located in the Serial # column
textbox.
button located in the Serial # column
textbox.
The Serial Number Lookup window will appear where users can select the appropriate Serial Number to add to the Internal Reject. Simply highlight the appropriate one and click on the
button.
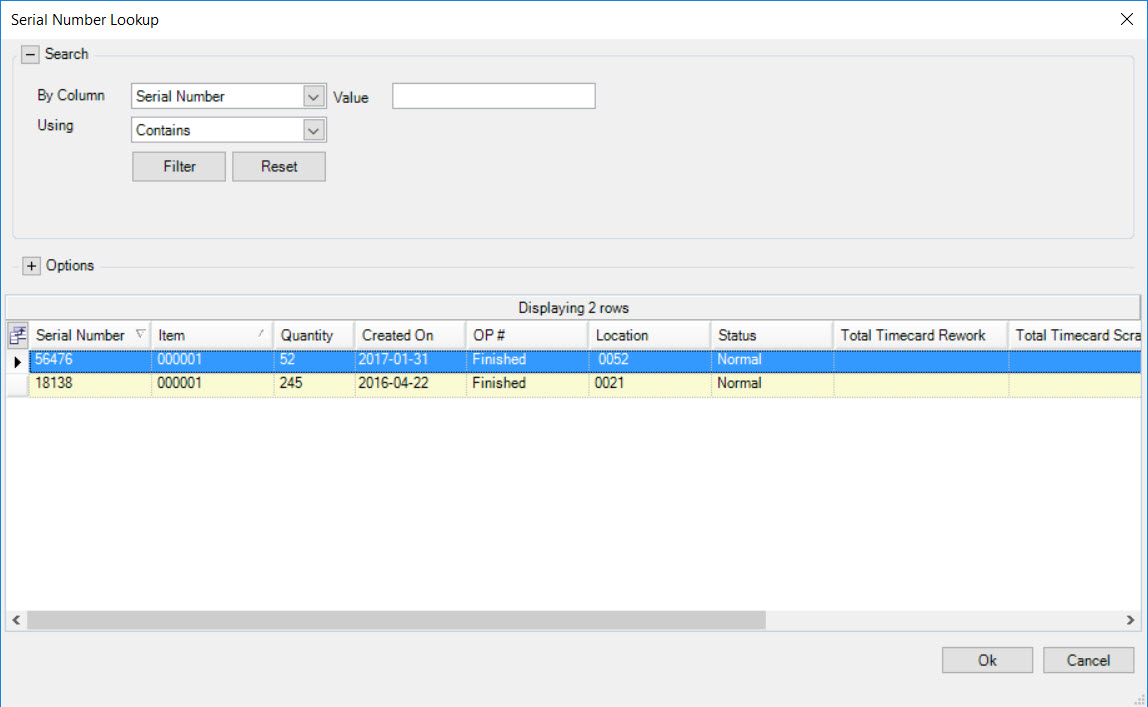
The selected Serial Number will be added to the Item and the Quantity, Status, and Location will automatically default to the information on the Serial Number Lookup window.
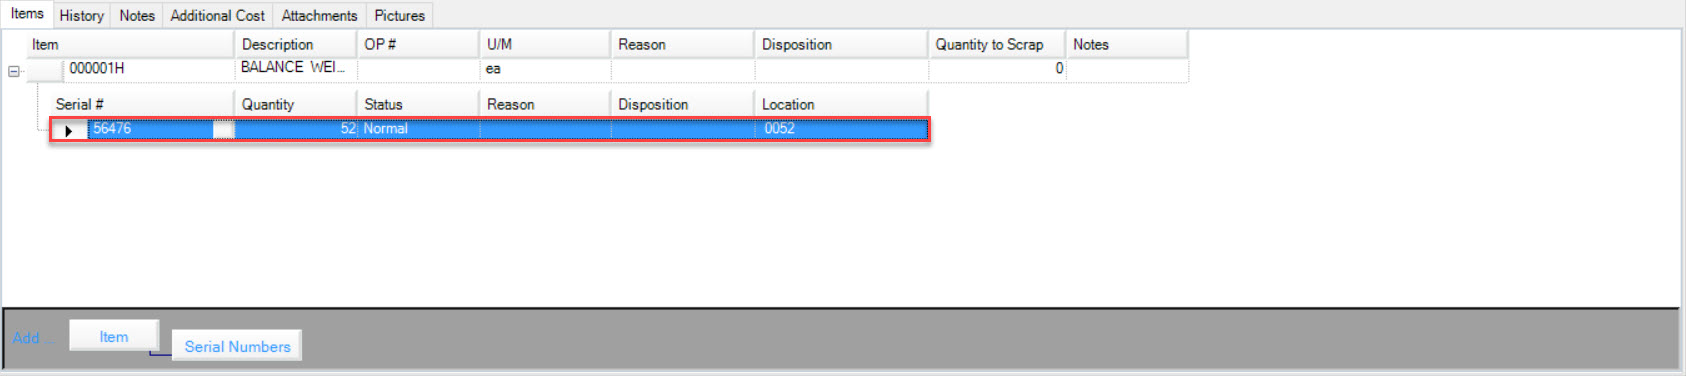
Make sure to save your changes before exiting the screen.
Editing an Item on an Internal Reject
To edit an Item on an Internal Reject, make sure to select the tab located on the Internal Reject detail screen.
Locate the Item you wish to edit and make the necessary changes using the available textboxes and drop-down menus. Users can also change the Item by clicking on the
button located in the Item column textbox.
The Item Lookup window will appear where users can select an Item. Highlight the appropriate row and and click on the button. The selected Item
will be added in place of the existing Item.
Make sure to save your changes before exiting the screen.
If users wish to edit a Serial Number attached to an Item, simply locate the Serial Number and make the necessary changes using the available textboxes. Users can also change the
Serial Number by clicking on the button located in the Serial # column textbox.
The Serial Number Lookup window will appear where users can select the appropriate Serial Number to add to the Internal Reject. Simply highlight the appropriate one and click on the
button.
The selected Serial Number will be added to the Item replacing the existing one.
Make sure to save your changes before exiting the screen.
Deleting an Item on an Internal Reject
To delete an Item on an Internal Reject, make sure to select the tab located on the Internal Reject detail screen.
Locate the Item you wish to delete and highlight the appropriate row. Use your Delete key and the Item will be deleted immediately.
If there is a Serial Number attached to the selected Item for deletion, it will be deleted as well.
To delete a Serial Number, simply locate the Serial Number and highlight the appropriate row. Use your Delete key and the Serial Number will be deleted immediately.
Make sure to save your changes before exiting the screen.
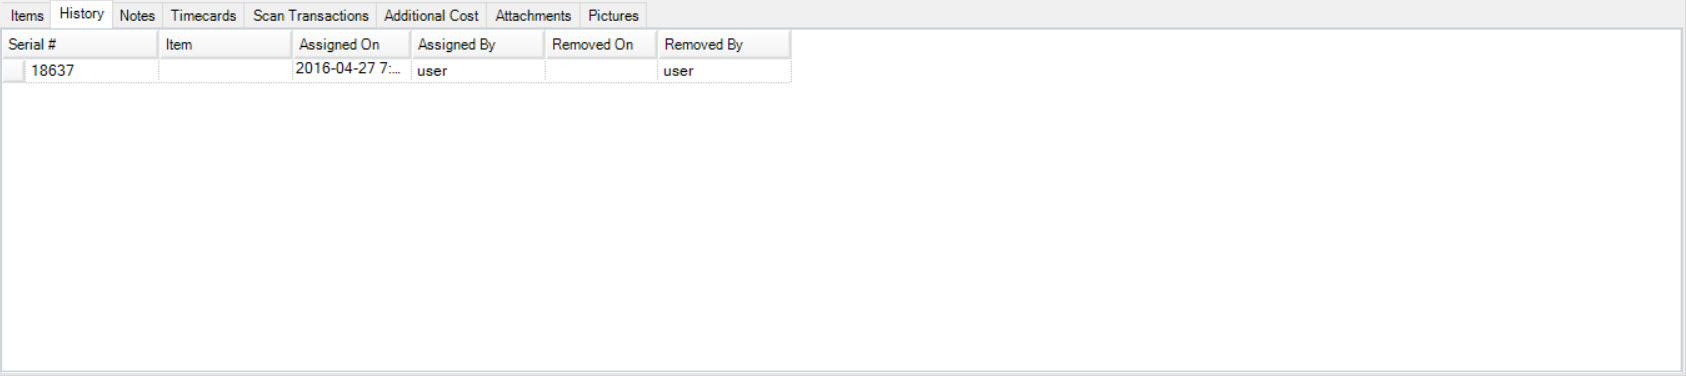
Internal Reject History Tab
The  tab located on an Internal Reject screen, displayes the history of the Internal Reject.
Note
The tab is available on both a new and existing Internal Reject. History details can only be viewed on an existing Internal Reject in the system once a Timecard has been created.
To view the history of an Internal Reject, navigate to the tab and click on the icon. The Quality
Reject Lookup screen will be displayed.
Locate and double-click on the appropriate row of the Internal Reject you wish to view. The Internal Reject detail screen will appear.
Make sure to select the tab located on the Internal Reject screen.
Users will be able to view the History of the Internal Reject.
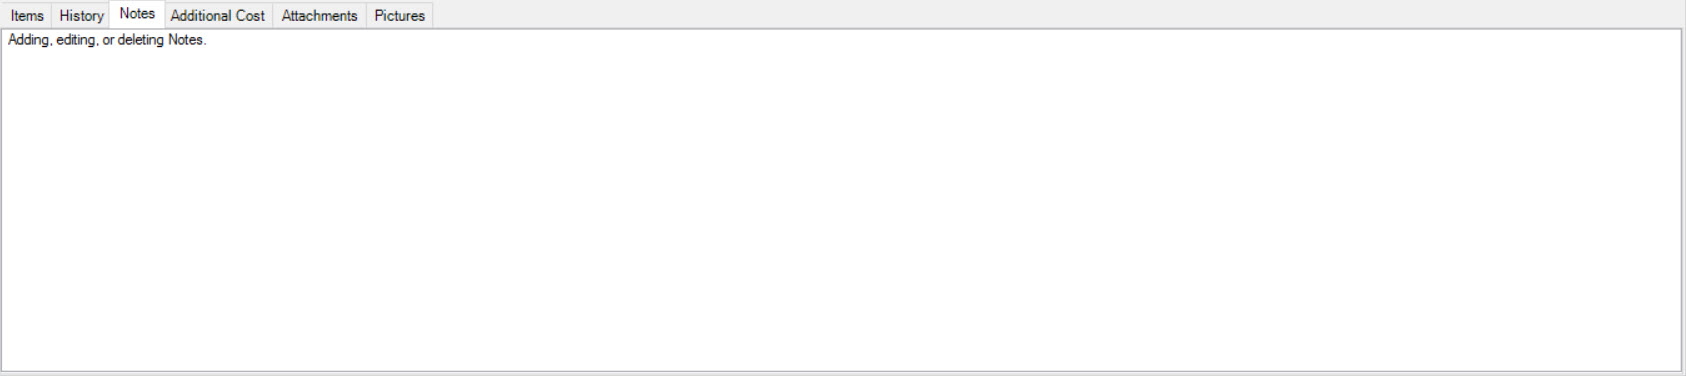
Internal Reject Notes Tab
Users have the ability to add, edit, or delete Notes from a new or existing Internal Reject.
To add, edit, or delete Notes from an Internal Reject, make sure to select the  tab located on the Internal Reject screen.
Using the available textbox, users are able to add, edit, or delete any necessary Notes for the Internal Reject.
Make sure to save your changes before exiting the screen.
Internal Reject Timecards Tab
Timecards will be added to an Internal Reject after users have created a Quality Timecard.
Note
Please see Quality Assurance > Quality Timecards for more information on how to create a Quality Timecard.
To view Timecards on an existing Internal Reject, navigate to the tab and click on the icon. The
Quality Reject Lookup screen will be displayed.
Locate and double-click on the appropriate row of the Internal Reject you wish to view. The Internal Reject detail screen will appear.
Make sure to select the  located on the Internal Reject detail screen.
The system will display any Timecards that have been assigned to the Internal Reject.
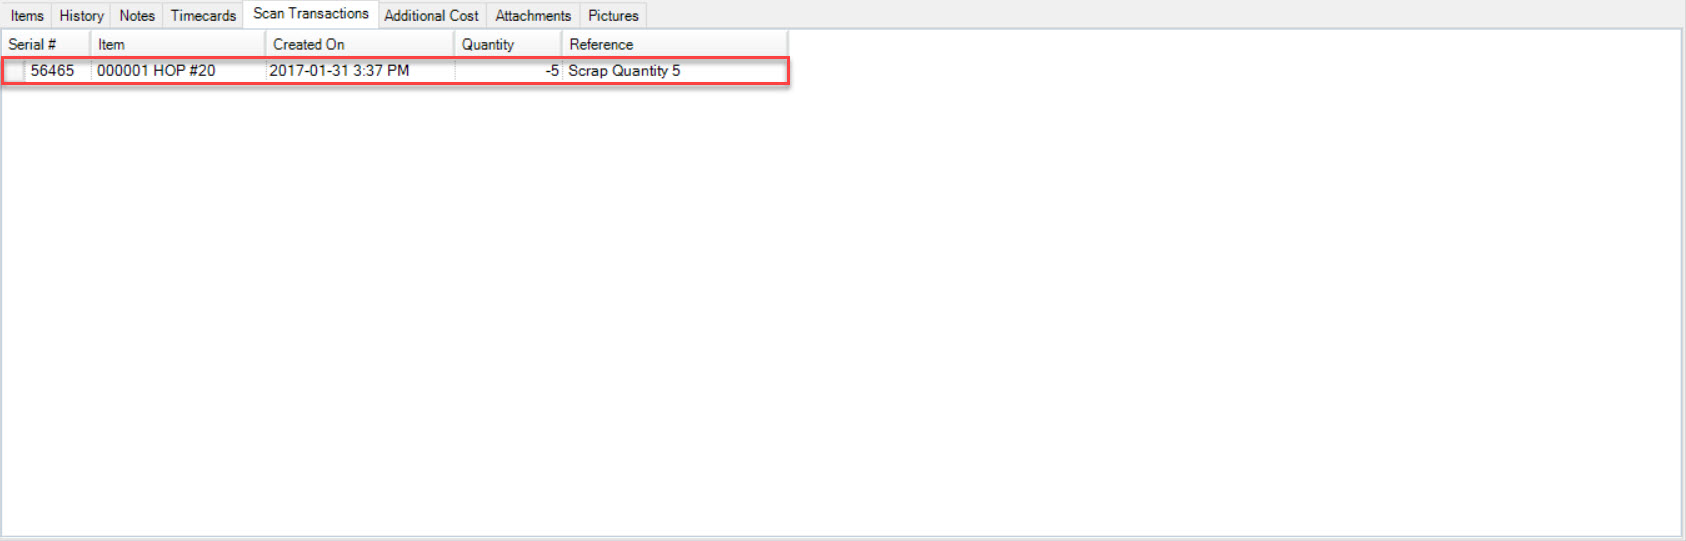
Internal Reject Scan Transactions Tab
Scan Transactions on a Quality Reject, display a list of Serial Numbers that have been scanned for a particular Reject.
To view Scan Transactions for an Internal Reject, navigate to the tab and click on the icon. The
Quality Reject Lookup screen will be displayed.
Locate and double-click on the appropriate row of the Internal Reject you wish to view Scan Transactions for. The Internal Reject detail screen will appear.
Make sure to select the  tab located on the Internal Reject detail screen.
All of the Scan Transactions that have occurred for the selected Internal Reject will be displayed.
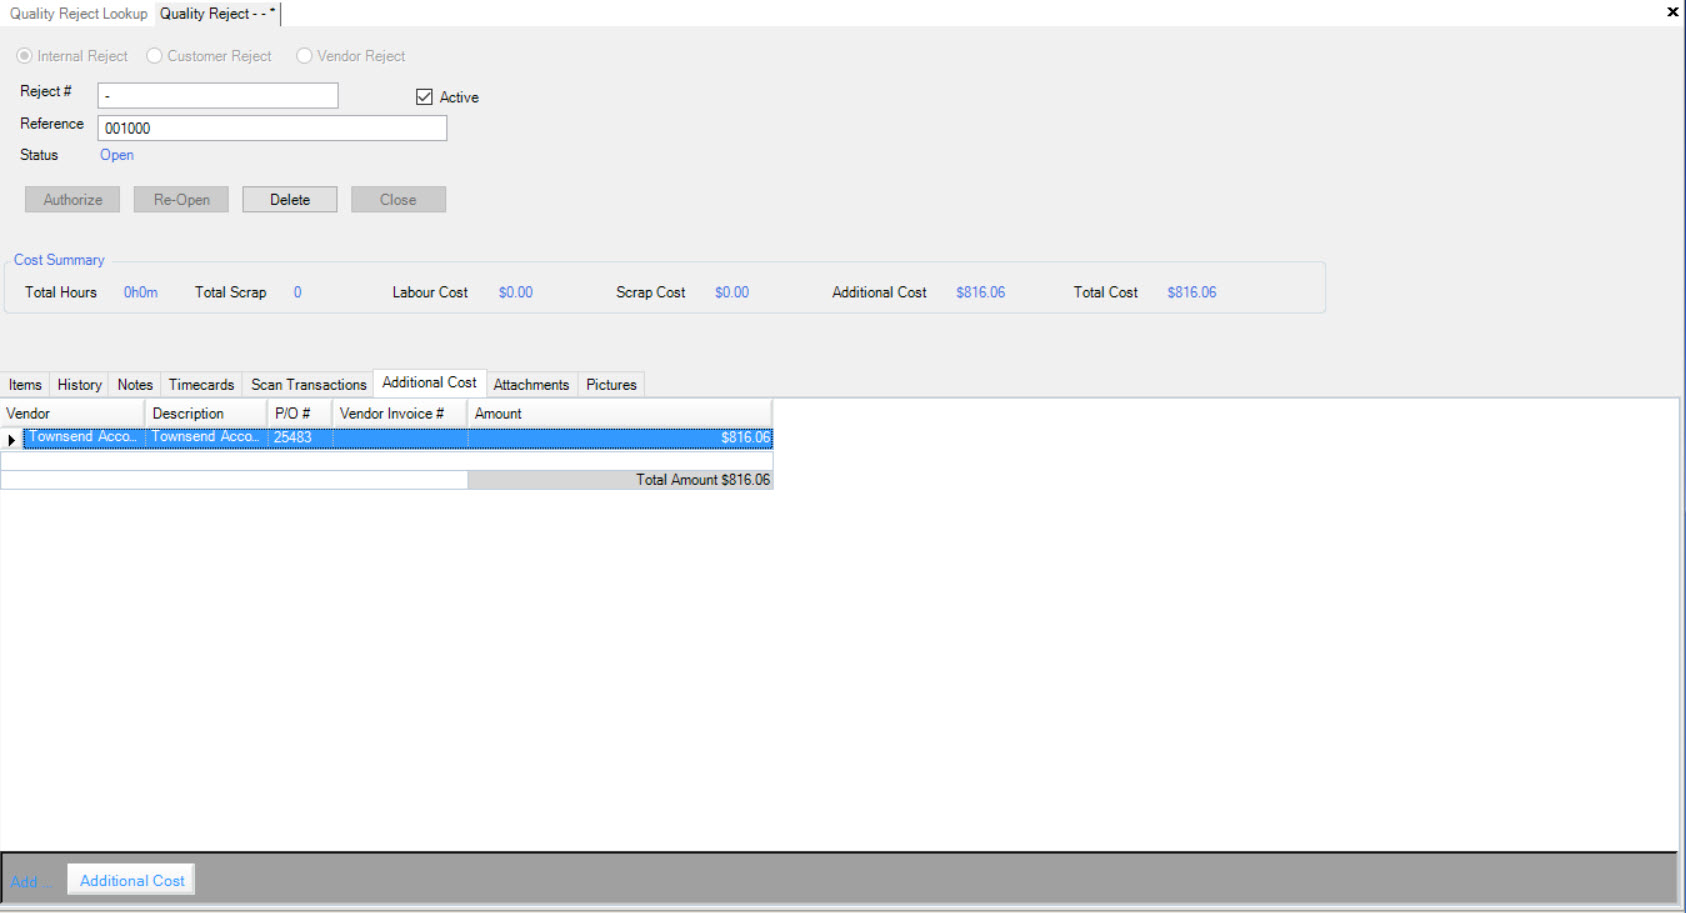
Internal Reject Additional Cost Tab
To view Additional Costs on an Internal Reject, navigate to the tab and click on the icon. The
Quality Reject Lookup screen will be displayed.
Locate and double-click on the appropriate row of the Internal Reject you wish to view Additional Costs for. The Internal Reject detail screen will appear.
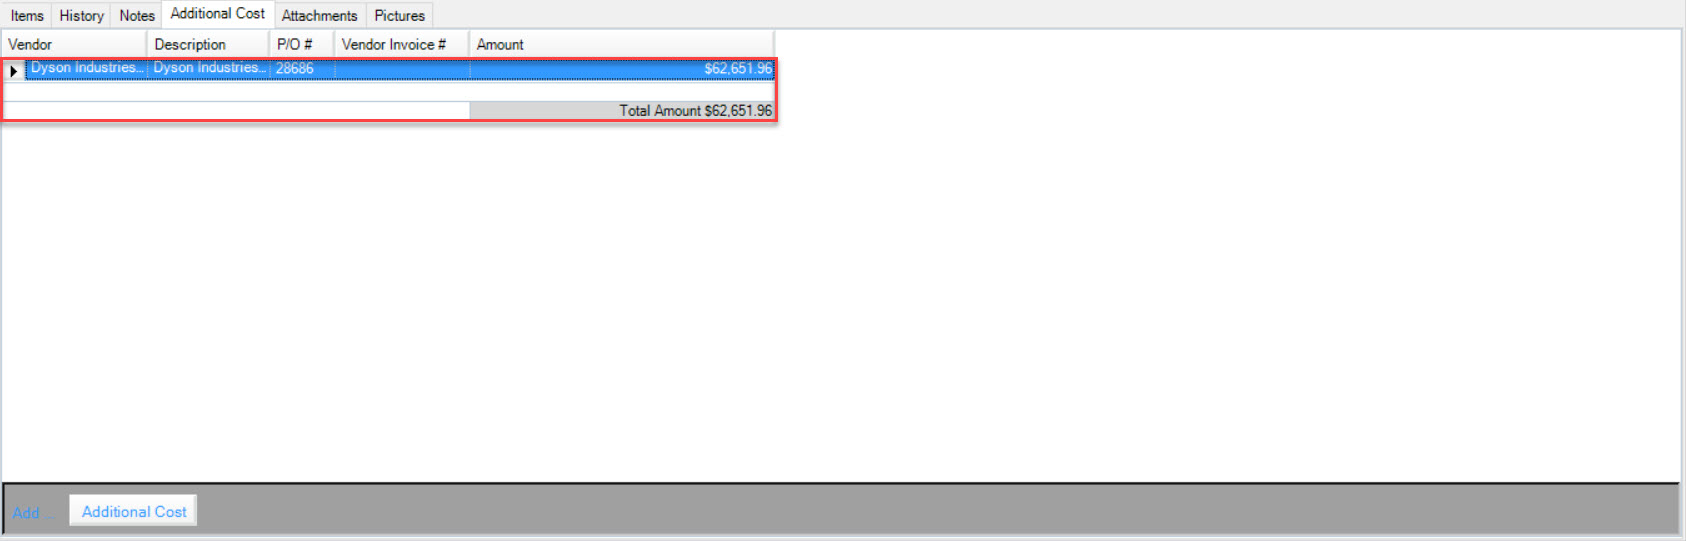
Make sure to select the  tab located on the Internal Reject detail screen.
All of the Additional Costs for the Internal Reject will be displayed (when available).
Adding an Additional Cost to an Internal Reject
To add an Additional Cost to a new or existing Internal Reject, make sure to select the tab located on the Internal Reject detail
screen.
Click on the  button located at the bottom of the screen.
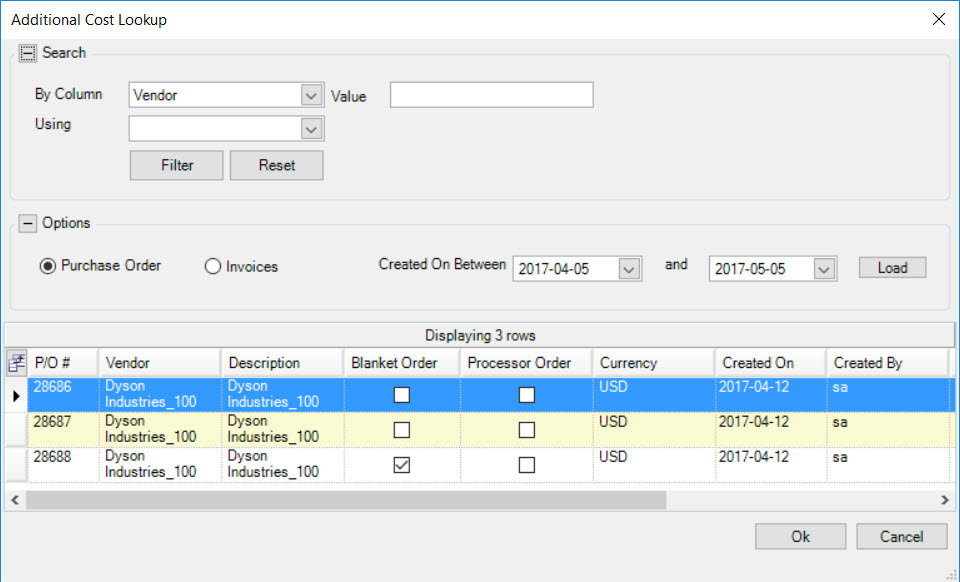
The Additional Cost Lookup window will appear where users can select an Additonal Cost. Simply highlight the appropriate row and click on the
button.
Note
In the Additional Cost Lookup window, users have the option to search for Additional Costs by Purchase Order or by Invoices as well as selecting a from and to Created On date.
Note
Users may also add multiple Additonal Costs to an Internal Reject by holding your Shift key while selecting.
The selected Additional Cost will be added to the Internal Reject.
Make sure to save your changes before exiting the screen.
Deleting an Additional Cost on an Internal Reject
To delete an Additional Cost on an Internal Reject, make sure to select the tab located on the Internal Reject detail screen.
Locate the Additional Cost you wish to delete and highlight the appropriate row. Use your Delete key and when the system prompts you, select Yes.
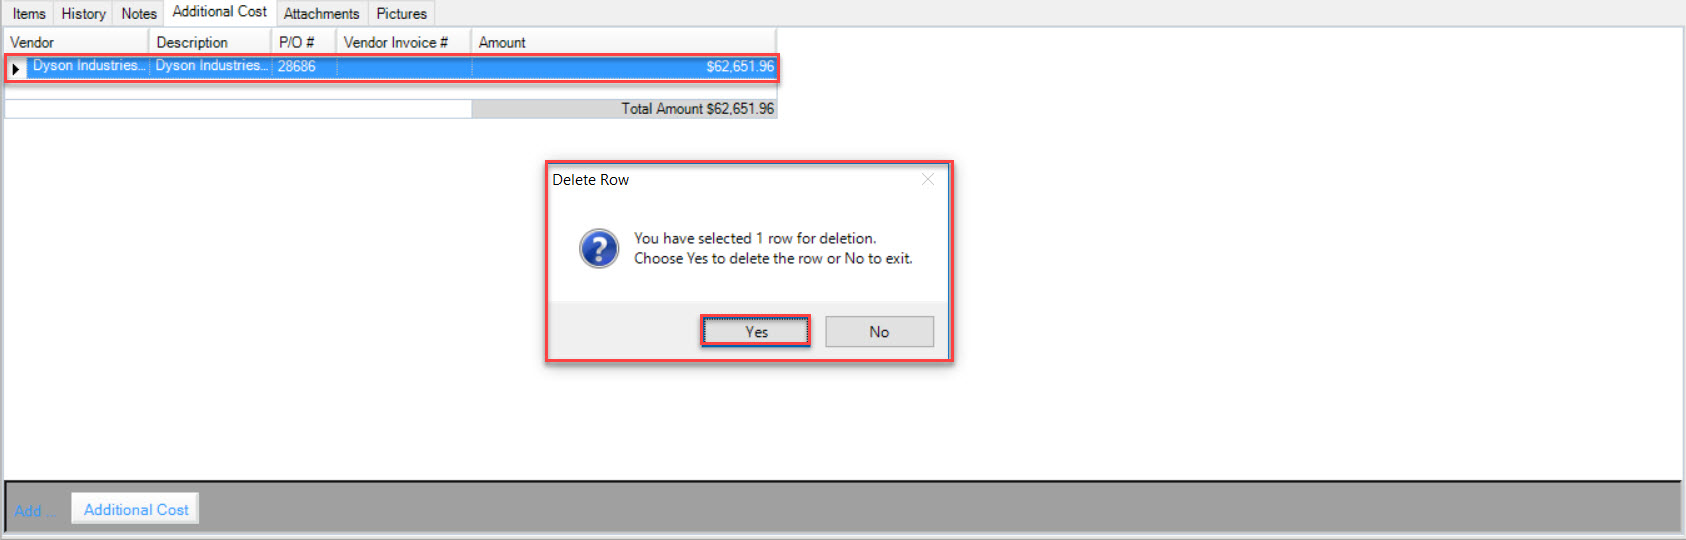
The highlighted Additional Cost will be deleted.
Make sure to save your changes before exiting the screen.
Internal Reject Attachments Tab
Users have the ability to add and/or delete Attachments on a new or existing Internal Reject.
To view Attachments on an Internal Reject, navigate to the tab and click on the icon. The
Quality Reject Lookup screen will be displayed.
Locate and double-click on the appropriate row of the Internal Reject you wish to view Attachments for. The Internal Reject detail screen will appear.
Make sure to select the  tab loated on the Interal Reject detail screen.
The available Attachments for the selected Internal Reject will be displayed.

Adding an Attachment to an Internal Reject
To add an Attachment to a new or existing Internal Reject, make sure to select the tab loated on the Interal Reject detail screen.
Click on the  button located at the bottom of the screen.
A window will appear that allows users to select an Attachment from their computer. Once the Attachment has been selected, click on the  button.
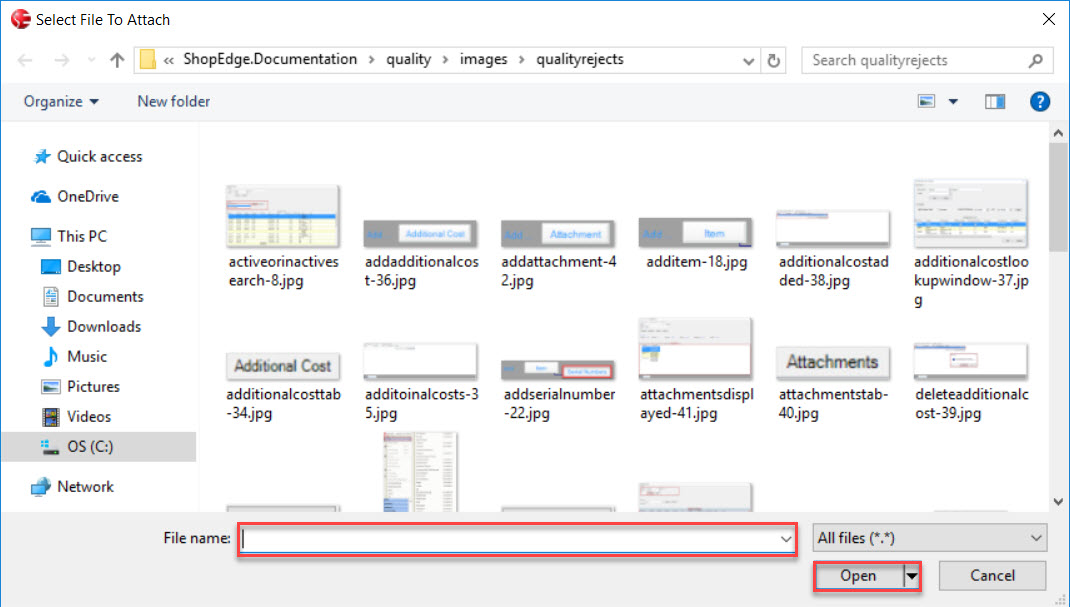
The selected Attachment will be added to the Internal Reject.
Make sure to save your changes before exiting the screen.
Deleting an Attachment from an Internal Reject
To delete an Attachment from a new or existing Internal Reject, make sure to select the tab loated on the Interal Reject detail screen.
Locate the Attachment you wish to delete and highlight the appropriate row. Use your Delete key and when the system prompts you, select Yes.
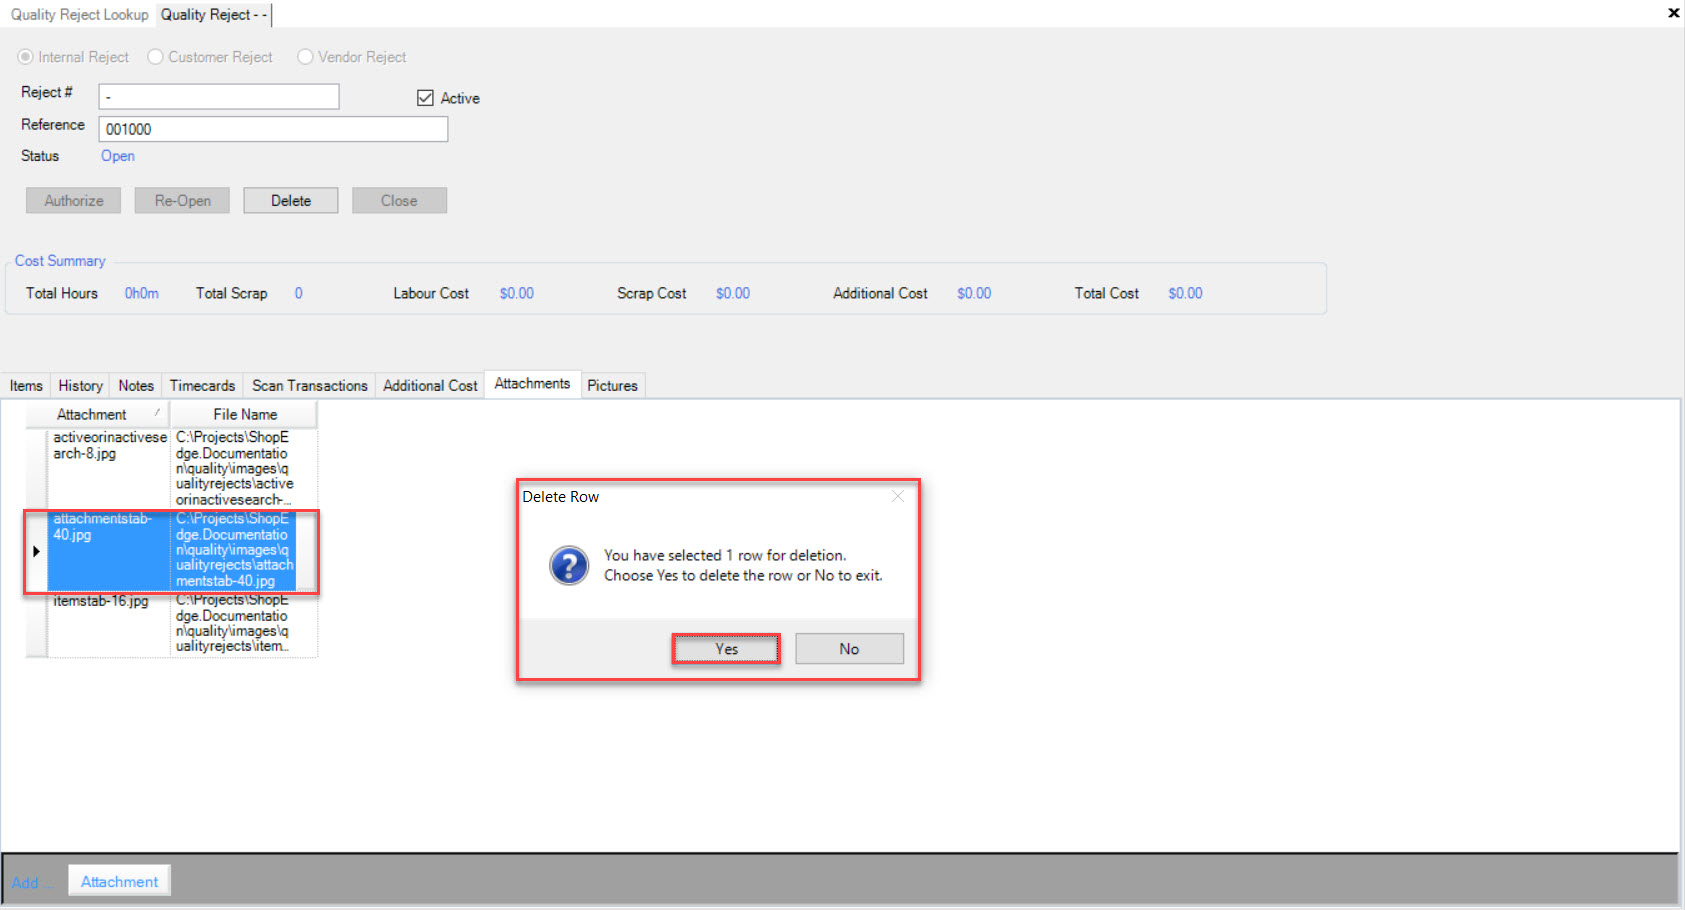
The selected Attachment will be deleted.
Make sure to save your changes before exiting the screen.
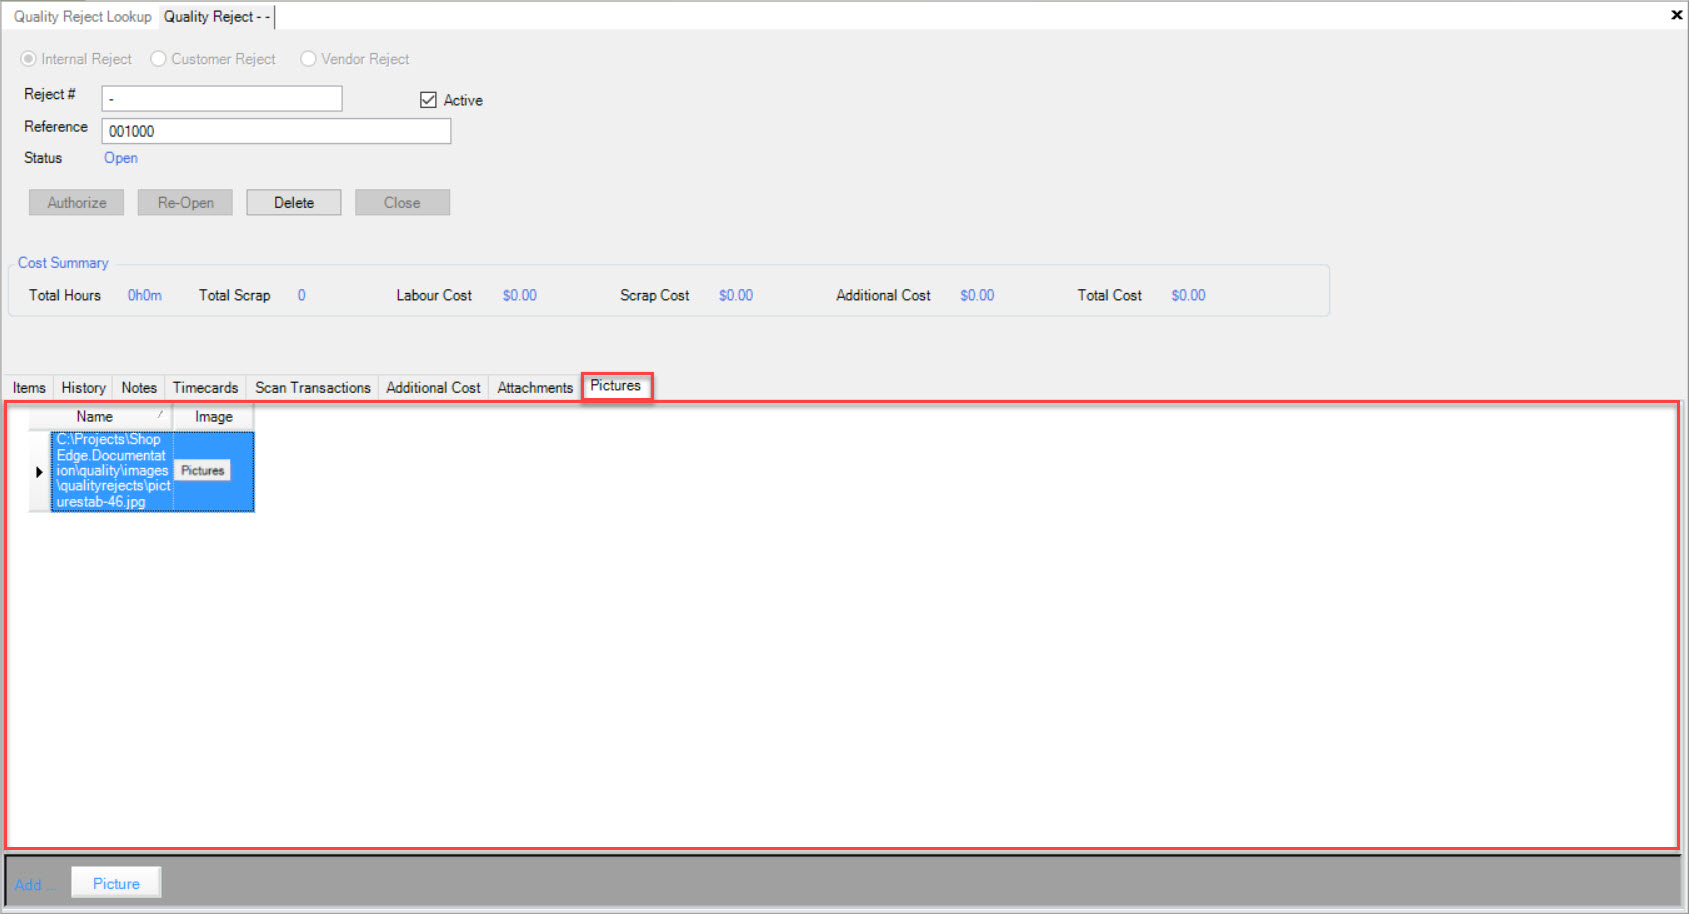
Internal Reject Pictures Tab
Users have the ability to add or delete Pictures to a new or existing Quality Reject.
To view Pictures on an Internal Reject, navigate to the tab and click on the icon. The
Quality Reject Lookup screen will be displayed.
Locate and double-click on the appropriate row of the Internal Reject you wish to view Attachments for. The Internal Reject detail screen will appear.
Make sure to select the  tab located on the Internal Reject detail screen.
Users will be able to view all available Pictures attached to the selected Internal Reject.
Adding a Picture to an Internal Reject
To add a Picture to a new or existing Internal Reject, make sure to select the tab loated on the Interal Reject detail screen.
Click on the 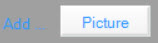 button located at the bottom of the screen.
A window will appear that allows users to select a Picture from their computer. Once a Picture has been selected, click on the button.
The selected Picture will be added to the Internal Reject.
Make sure to save your changes before exiting the screen.
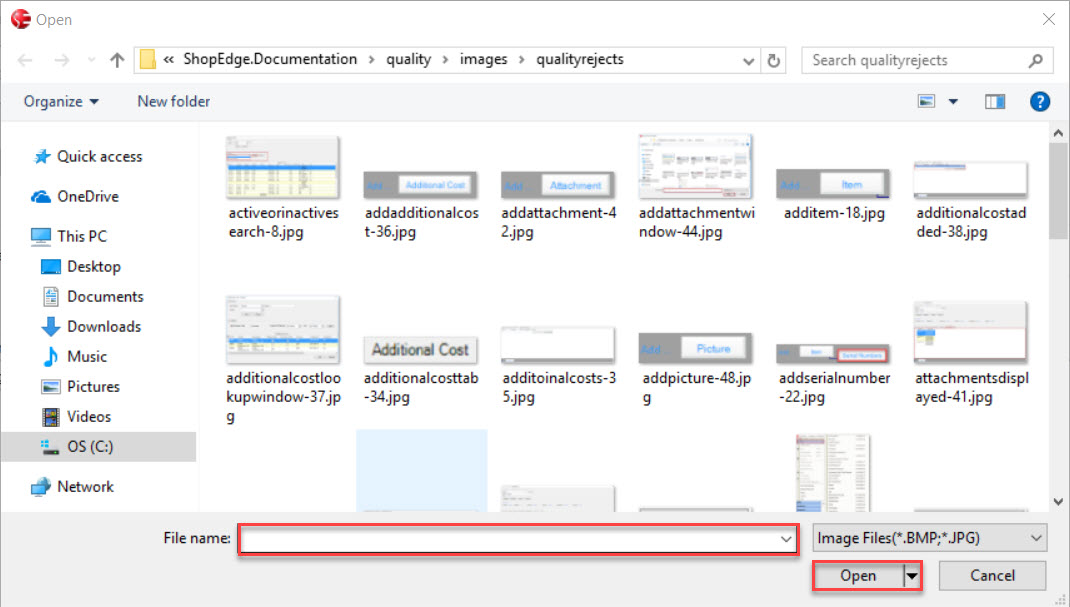
Deleting a Picture from an Internal Reject
To delete a Picture, make sure to select the tab loated on the Interal Reject detail screen.
Locate the Picture you wish to delete and highlight the appropriate row. Use your Delete key and when the system prompts you, select Yes.
The selected Picture will be deleted.
Make sure to save your changes before exiting the screen.
Customer Rejects
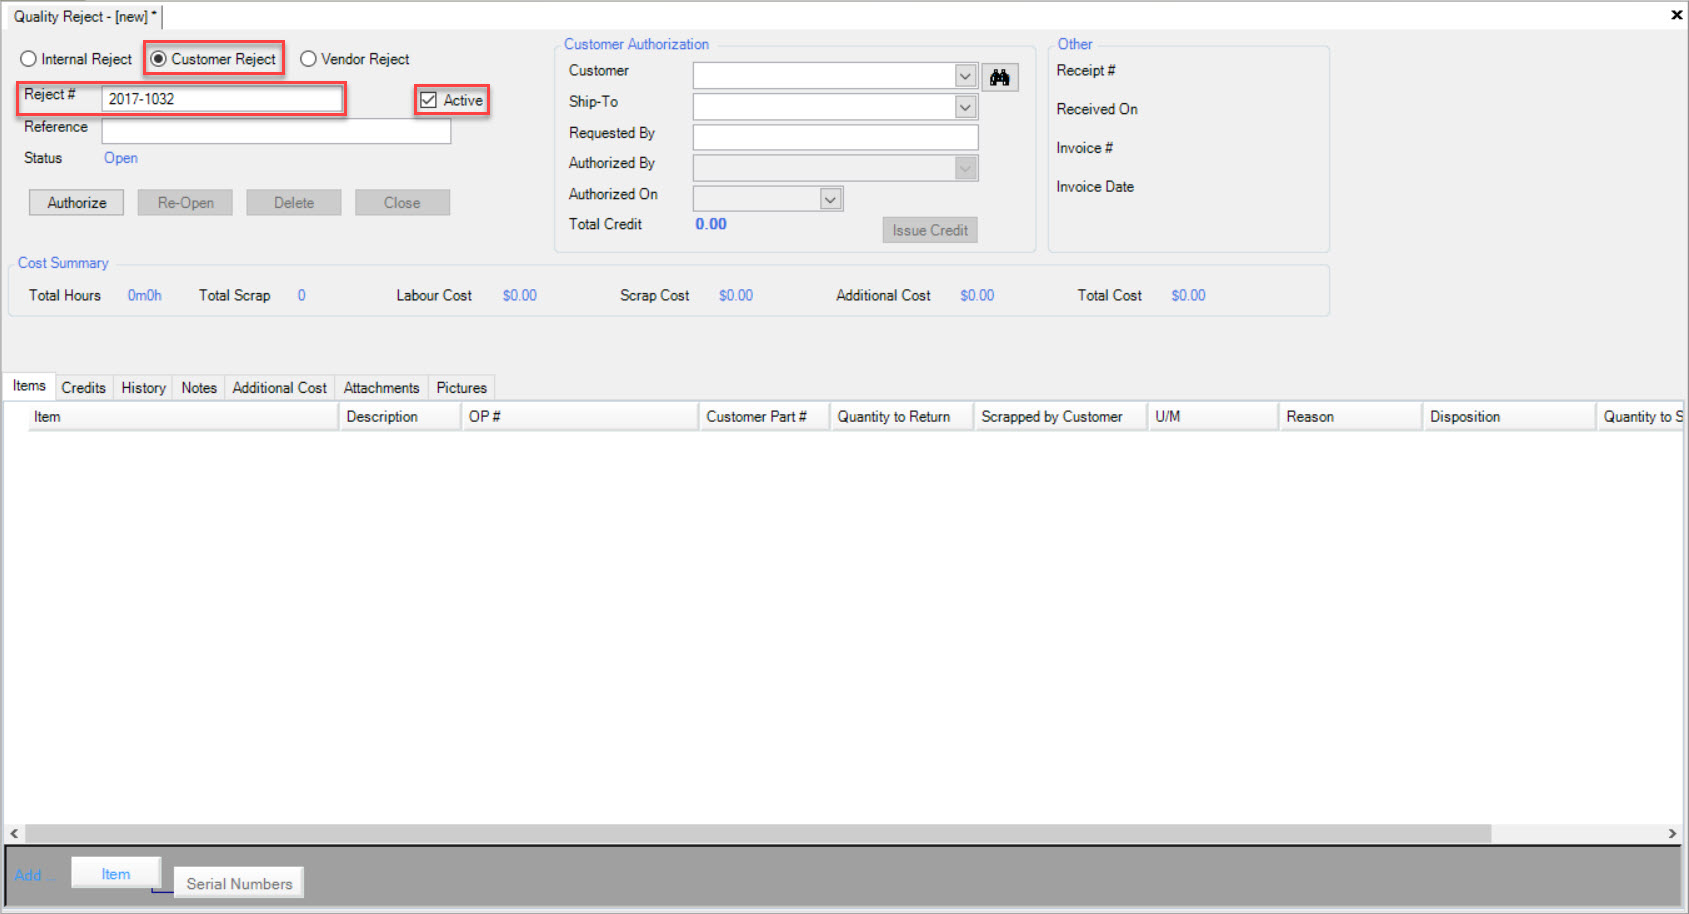
To create a Customer Reject, make sure to select the Customer Reject option on the new Quality Reject screen.
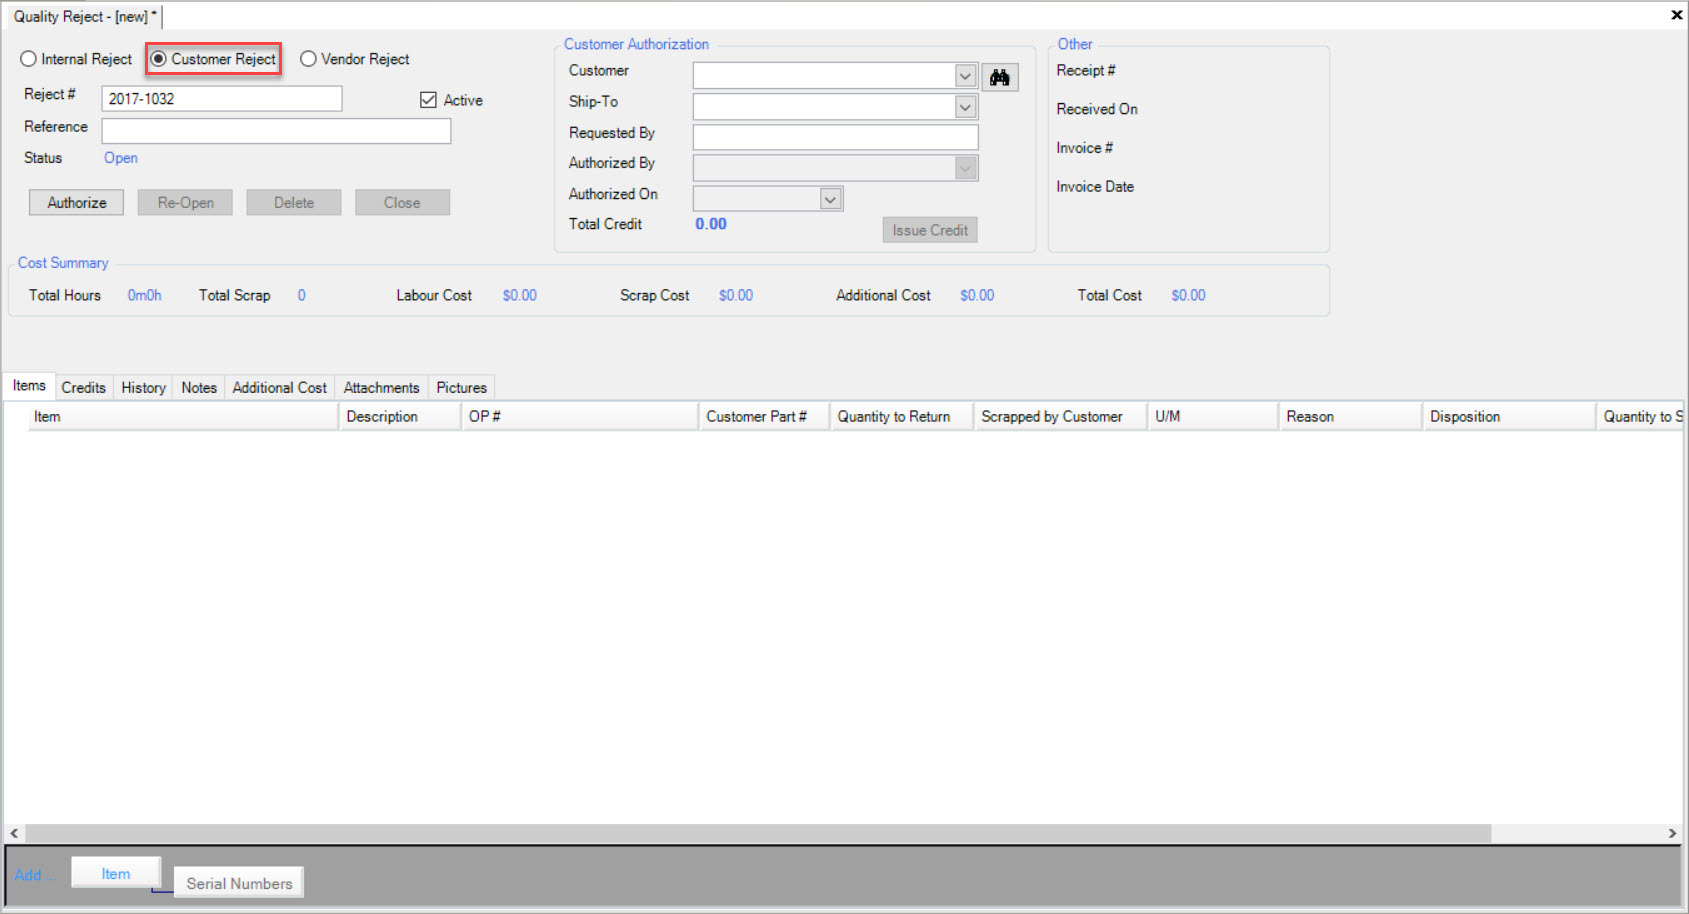
The system will automatically create a Reject #, the Status will default to Open, and the Active checkbox will be selected by default as well. This can be changed if needed.
Note
Although the Reject # is automatically created, users have the ability to change it. The Reject # is unique and there cannot be duplicates. If the Reject # entered is a duplicate, the system will prompt users to enter in a different number.
Users have the option of entering in a Reference.
Next, users must complete the Custome Authorization information for the new Customer Reject.
The Customer can be selected two ways. The first way is to use the available drop-down menu and select the Customer.
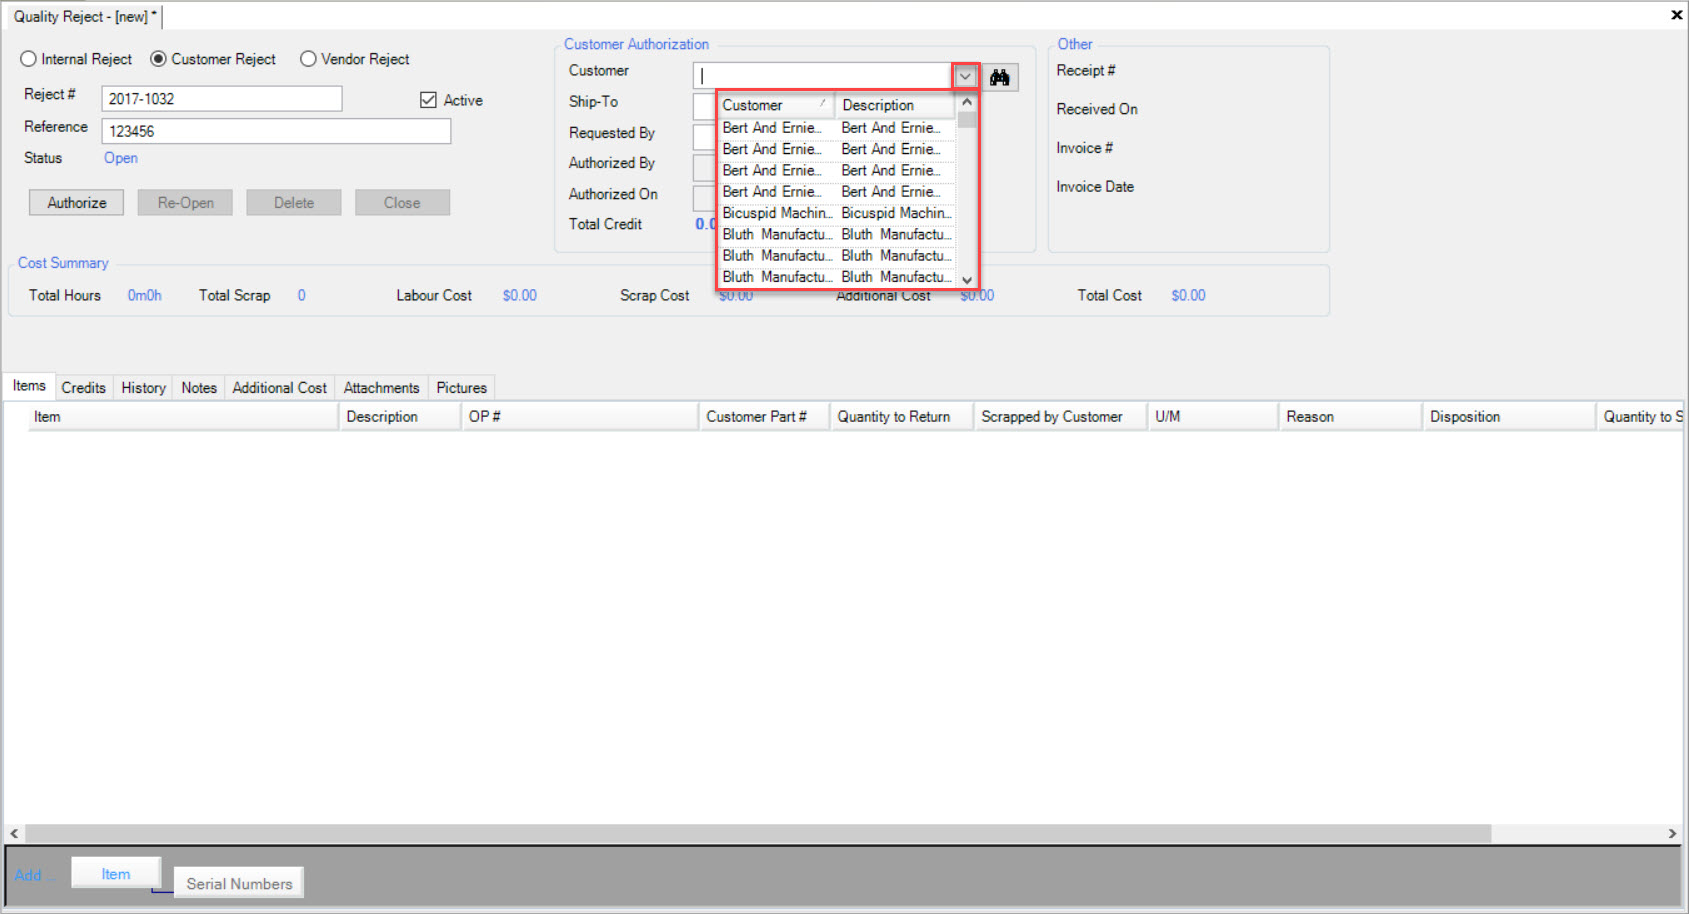
The second way is to click on the  button.
The Find Customer window will be displayed. Users can highlight the row of the Customer they wish to select and click on the button.

Once a Customer has been selected, users must select a Ship-To and enter in who it is Requested By.
Make sure to save your changes before exiting the screen.
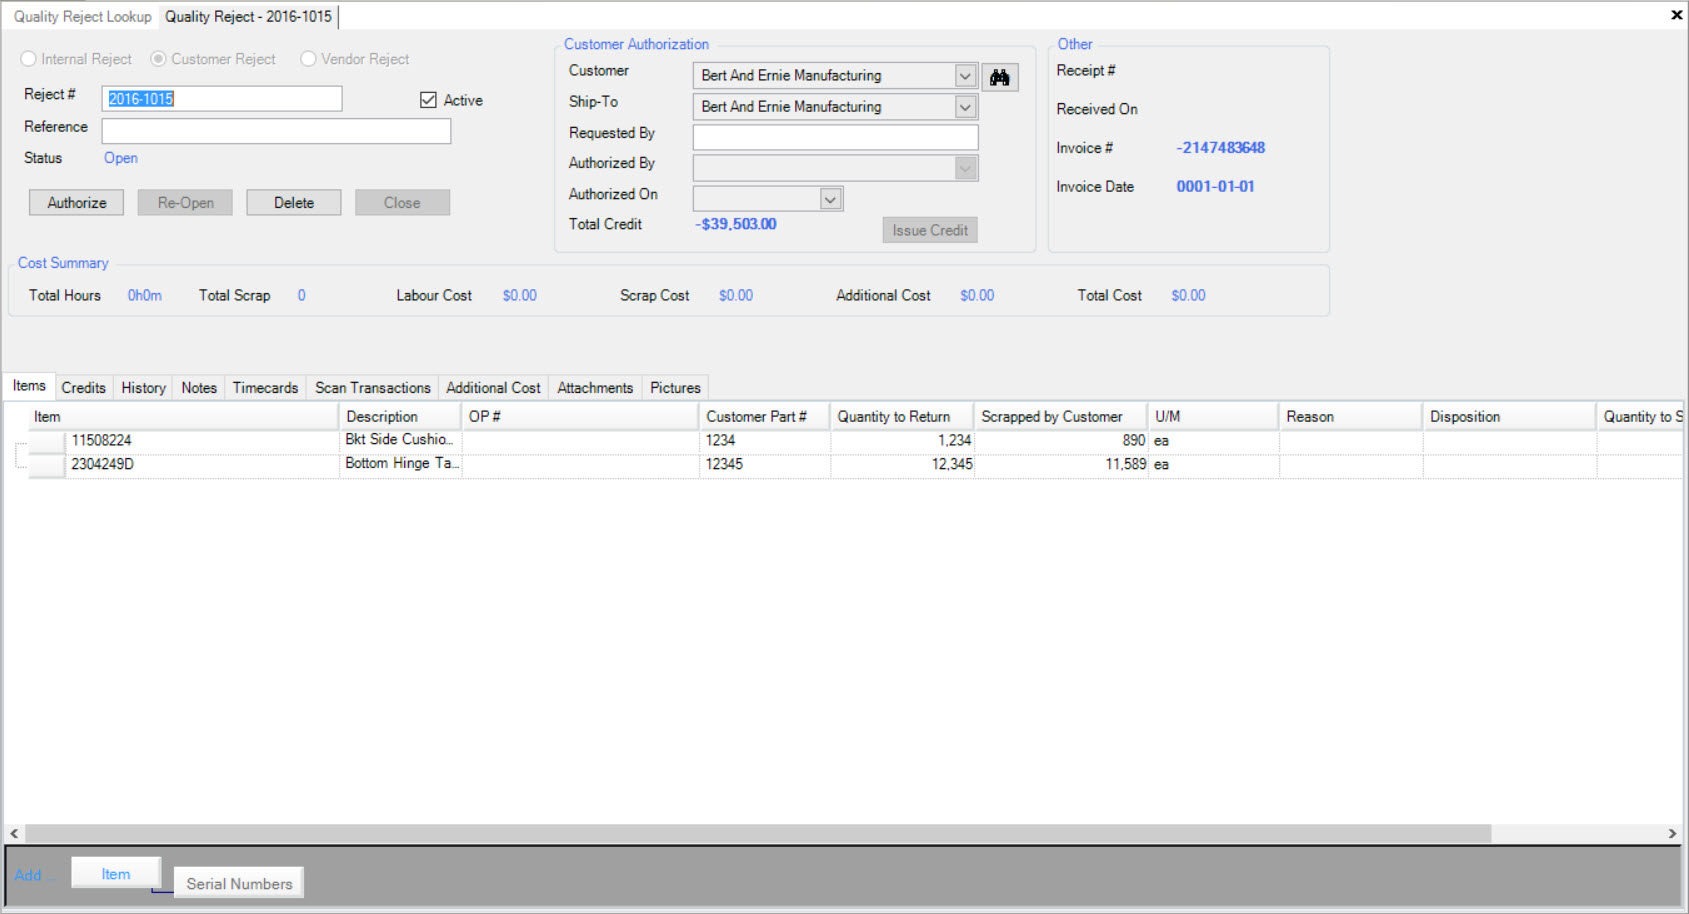
Customer Reject Items Tab
To view Items on a new or existing Customer Reject, make sure to select the tab located on the opened Customer Reject screen.
Users will be able to view all Items attached to the Customer Reject with the ability to add, edit, or delete Items. Serial Numbers can also be added, edited, or deleted from Items on a Customer Reject.
Adding an Item to a Customer Reject
To add an Item to a Customer Reject, make sure to select the tab located on the opened Customer Reject screen.
Click on the button located at the bottom of the screen.
The Item Lookup window will appear where users can select an Item based on the Customer. Simply highlight the appropriate row and click on the
button.
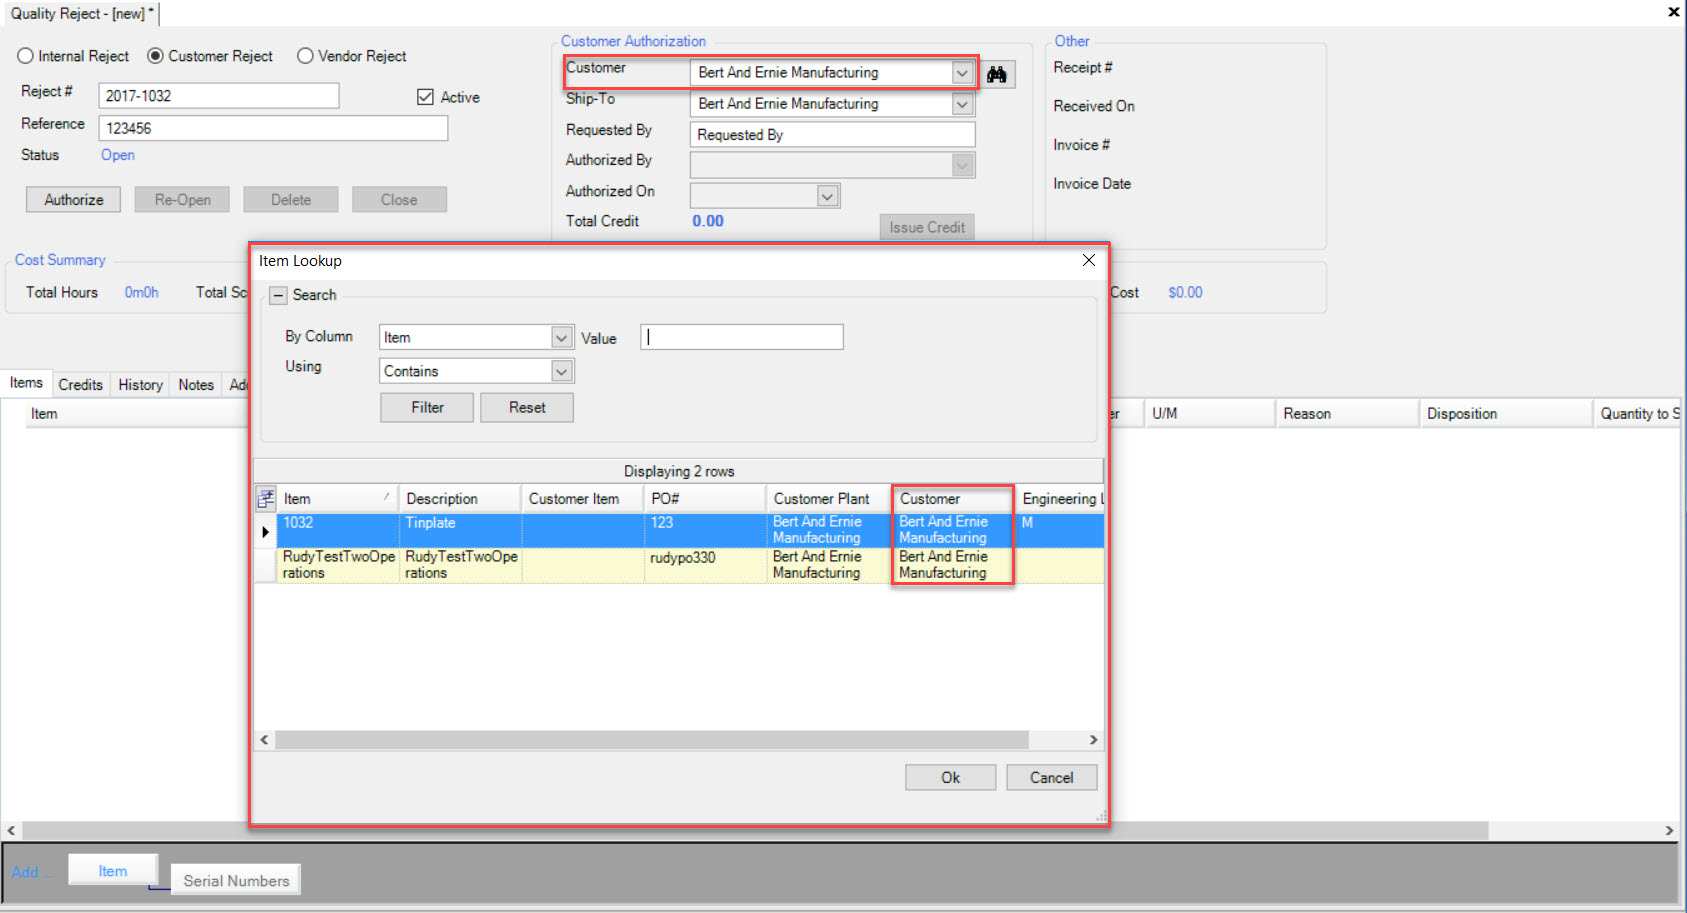
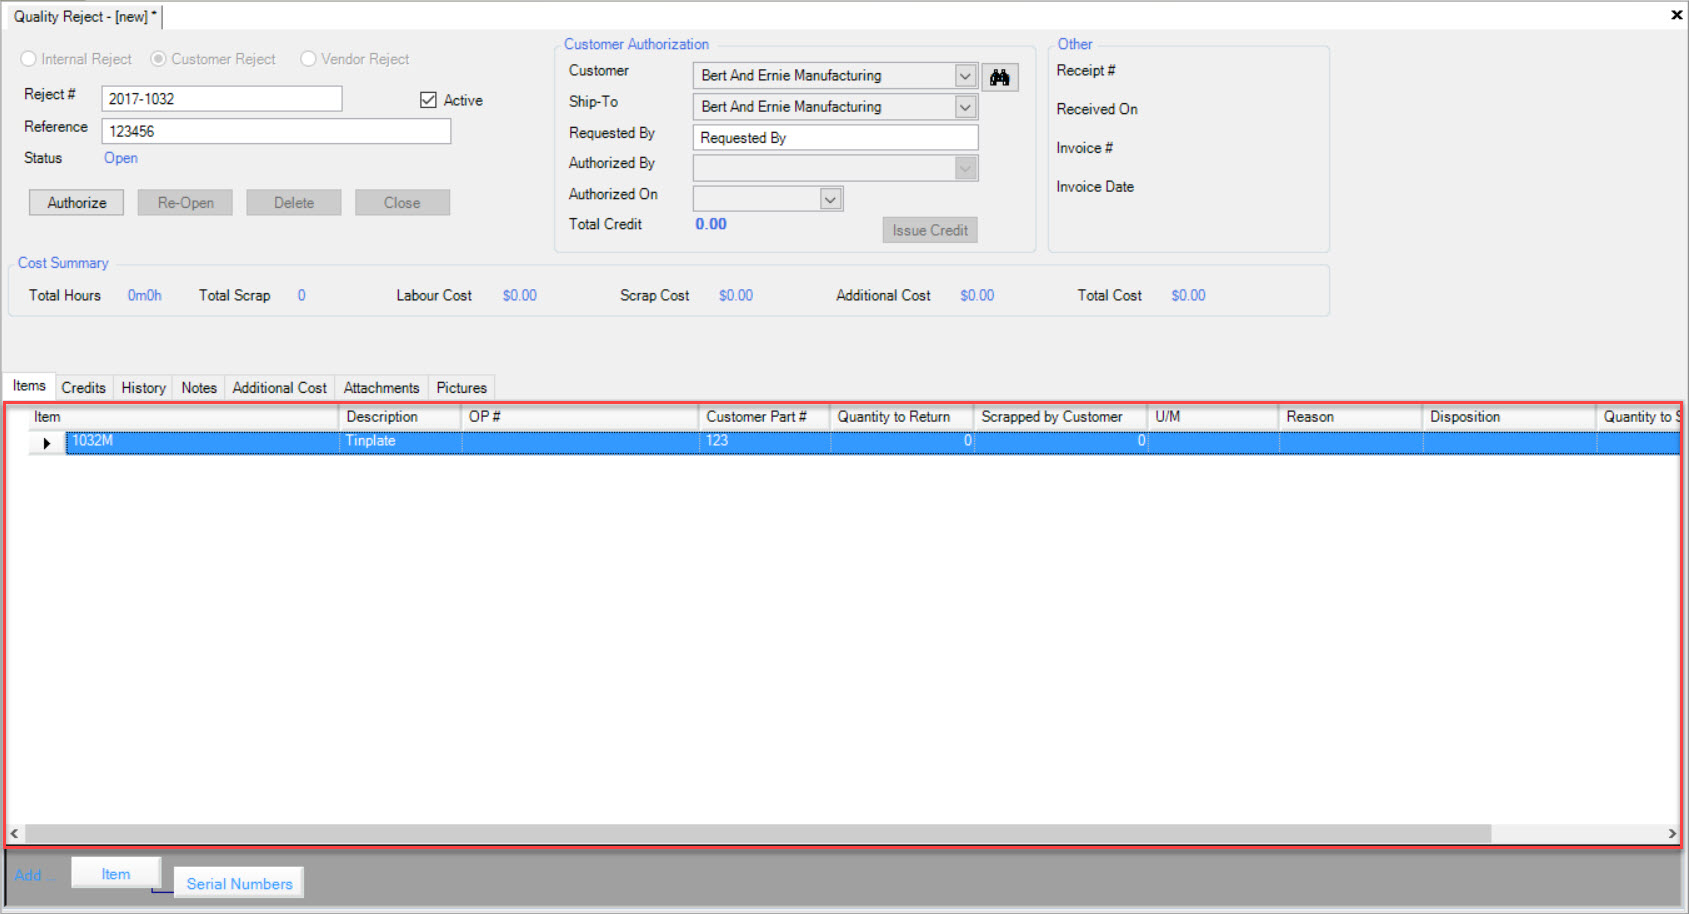
The selected Item will be added.
Note
Users have the ability to add more than one Item at a time. To do so, simply hold the Shift key as you are highlighting the appropriate Items. Then, click on the button.
As Items are added, Credits are automatically created and will be available to view once the Customer Reject Items have been added and saved.
If users wish to add a Serial Number to an Item, simply highlight the row of the Item you wish to add it to and click on the button
located at the bottom of the screen.
Note
The button will only become available once an Item has been added to a Customer Reject.
A new row will appear below the Item row where users must select the Serial Number. To do so, click on the button located in the Serial #
column textbox.
The Serial Number Lookup window will appear where users can select the appropriate Serial Number to add to the Customer Reject. Simply highlight the appropriate one and click
on the button.
The selected Serial Number will be added to the Item and the Quantity, Status, and Location will automatically default to the information on the Serial Number Lookup window.
Make sure to save your changes before exiting the screen.
Editing an Item on a Customer Reject
To edit an Item on a Customer Reject, make sure to select the tab located on the opened Customer Reject screen.
Locate the Item you wish to edit and make the necessary changes using the available textboxes and drop-down menus. Users can also change the Item by clicking on the
button located in the Item column textbox.
The Item Lookup window will appear where users can select an Item. Highlight the appropriate row and click on the button. The selected
Item will be added in place of the existing Item.
Make sure to save your changes before exiting the screen.
If users wish to edit a Serial Number attached to an Item, simply locate the Serial Number and make the necessary changes using the available textboxes. Users can also change
the Serial Number by clicking on the button located in the Serial # column textbox.
The Serial Number Lookup window will appear where users can select the appropriate Serial Number to add to the Customer Reject. Simply highlight the appropriate Serial
Number and click on the button.
The selected Serial Number will be added to the Item, replacing the existing Serial Number.
Make sure to save your changes before exiting the screen.
Deleting an Item from a Customer Reject
To delete an Item on a Customer Reject, make sure to select the tab located on the Customer Reject detail screen.
Locate the Item you wish to delete and highlight the appropriate row. Use your Delete key and the Item will be deleted immediately.
If there is a Serial Number attached to the selected Item for deletion, it will be deleted as well.
To delete a Serial Number, simply locate the Serial Number and highlight the appropriate row. Use your Delete key and the Serial Number will be deleted immediately.
Make sure to save your changes before exiting the screen.
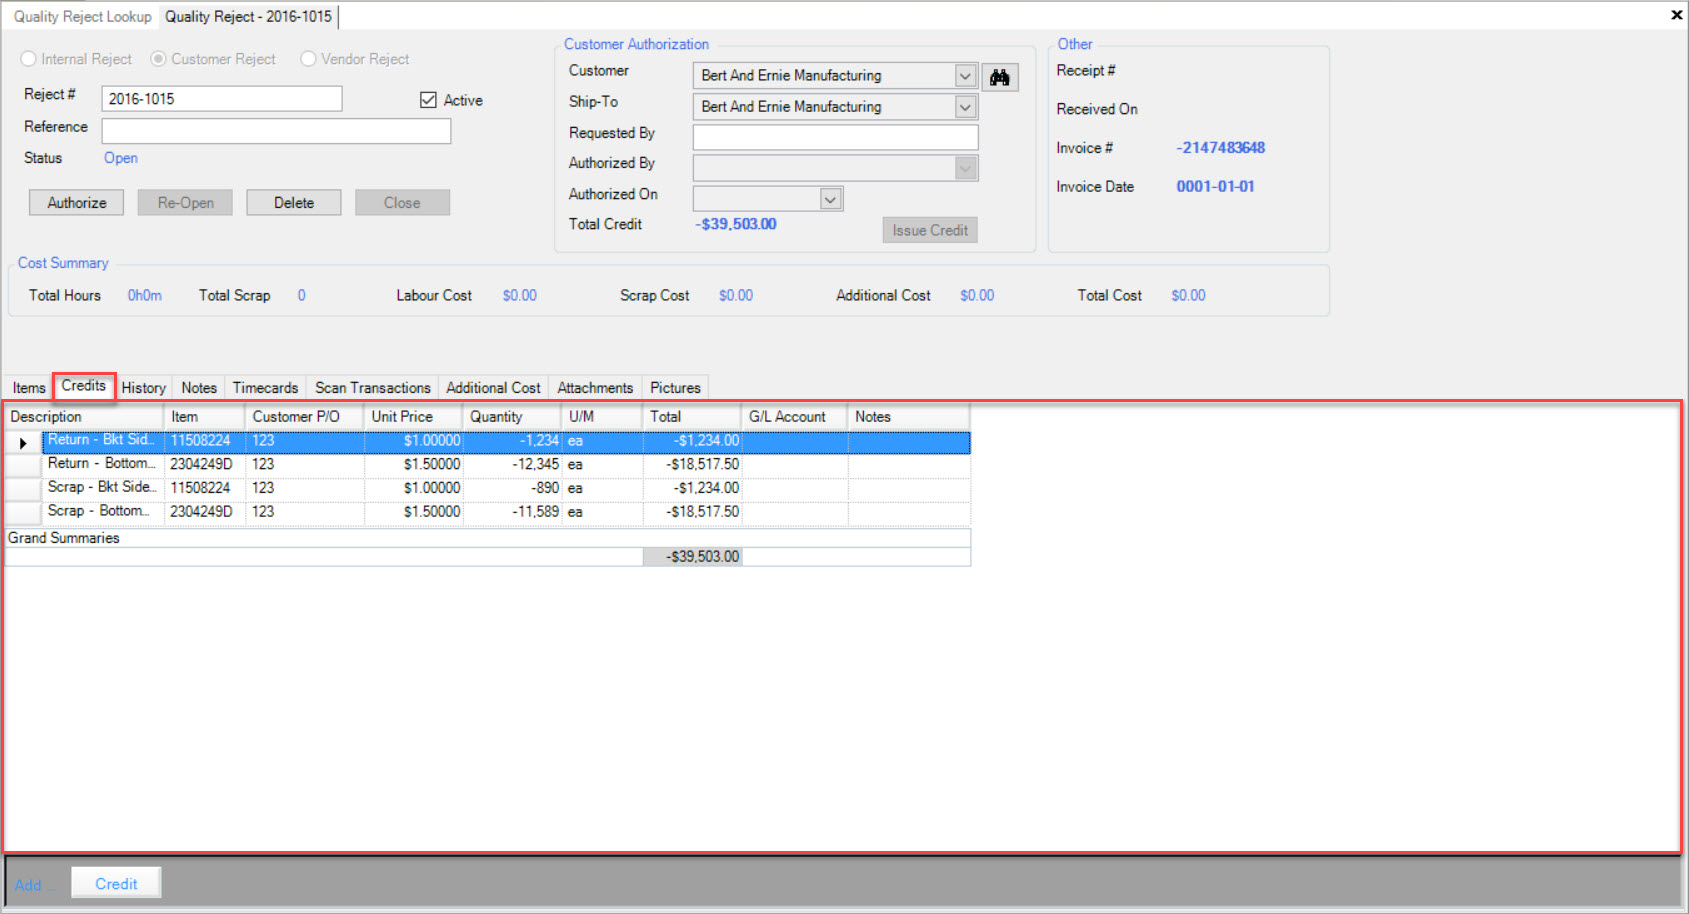
Customer Reject Credits Tab
Users have the ability to add, edit, and delete Credits on a Customer Reject. On a Customer Reject, Credits are automatically created when an Item has been added. Users still have the ability to add, edit, and/or delete them.
To view Credits that are attached to a Customer Reject, navigate to the tab and click on the icon. The
Quality Reject Lookup screen will be displayed.
Locate and double-click on the appropriate row of the Customer Reject you wish to view Credits for. The Customer Reject detail screen will appear.
Make sure to select the  tab located on the Customer Reject detail screen.
The Credits attached to the Customer Reject will be listed.
Adding a Credit to a Customer Reject
To add a Credit to an existing Customer Reject, make sure to select the tab located on the Customer Reject detail screen.
Click on the  button located at the bottom of the screen.
A new row will appear where users can enter in the necessary information such as the Description and Unit of Measure, using the available textboxes and drop-down menus.
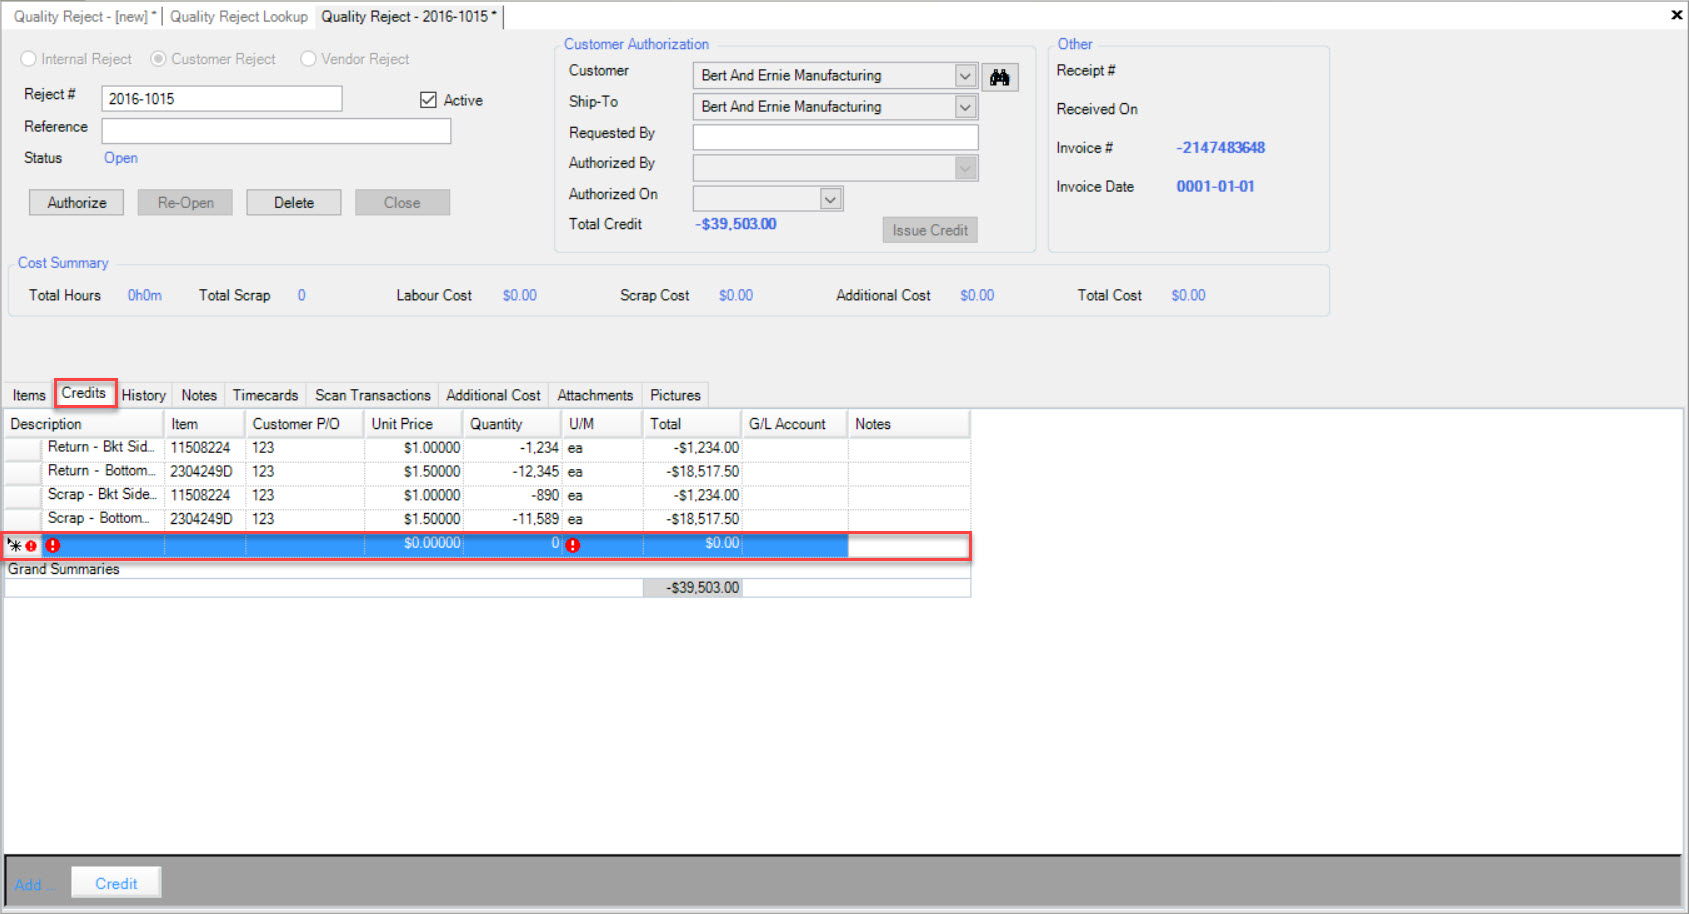
Once the necessary information has been entered in, the Grand Summaries Total will adjust accordingly.
Make sure to save your changes before exiting the screen.
Editing a Credit on a Customer Reject
To edit a Credit on a Customer Reject, make sure to select the tab located on the Customer Reject detail screen.
Locate the Credit you wish to edit and make the necessary changes using the available textboxes and drop-down menus.
Once the necessary changes have been made, make sure to save before exiting the screen.
Deleting a Credit from a Customer Reject
To delete a Credit from a Customer Reject, make sure to select the tab located on the Customer Reject detail screen.
Locate the Credit you wish to delete and highlight the appropriate row. Use your delete key and when the system prompts you, select Yes.
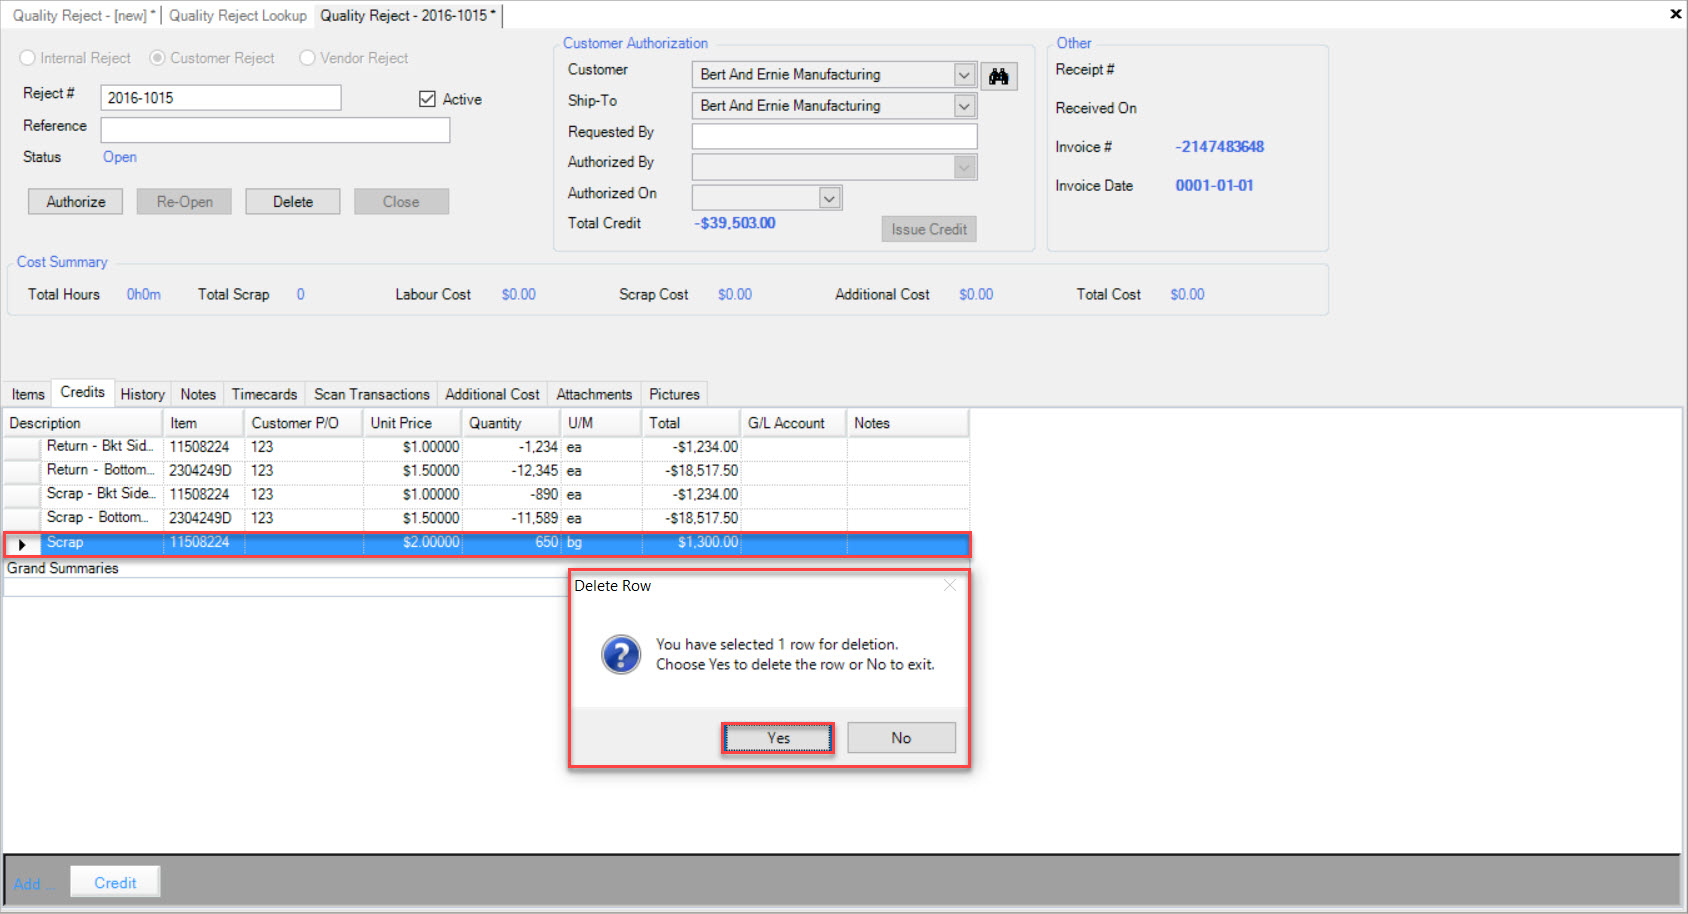
The selected Credit will be deleted.
Make sure to save your changes before exiting the screen.
Customer Reject History Tab
The tab located on an Customer Reject screen, displayes the history of the Customer Reject.
Note
The tab is available on both a new and existing Customer Reject. History details can only be viewed on an existing Customer Reject in the system once a Timecard has been created.
To view the history of a Customer Reject, navigate to the tab and click on the icon. The Quality
Reject Lookup screen will be displayed.
Locate and double-click on the appropriate row of the Customer Reject you wish to view. The Customer Reject detail screen will appear.
Make sure to select the tab located on the Customer Reject detail screen.
Users will be able to view the History of the Customer Reject based on the Timecards created.

Customer Reject Notes Tab
Users have the ability to add, edit, or delete Notes from a new or existing Customer Reject.
To add, edit, or delete Notes from a Customer Reject, make sure to select the tab located on the Customer Reject screen.
Using the available textbox, users are able to add, edit, or delete any necessary Notes for the Customer Reject.
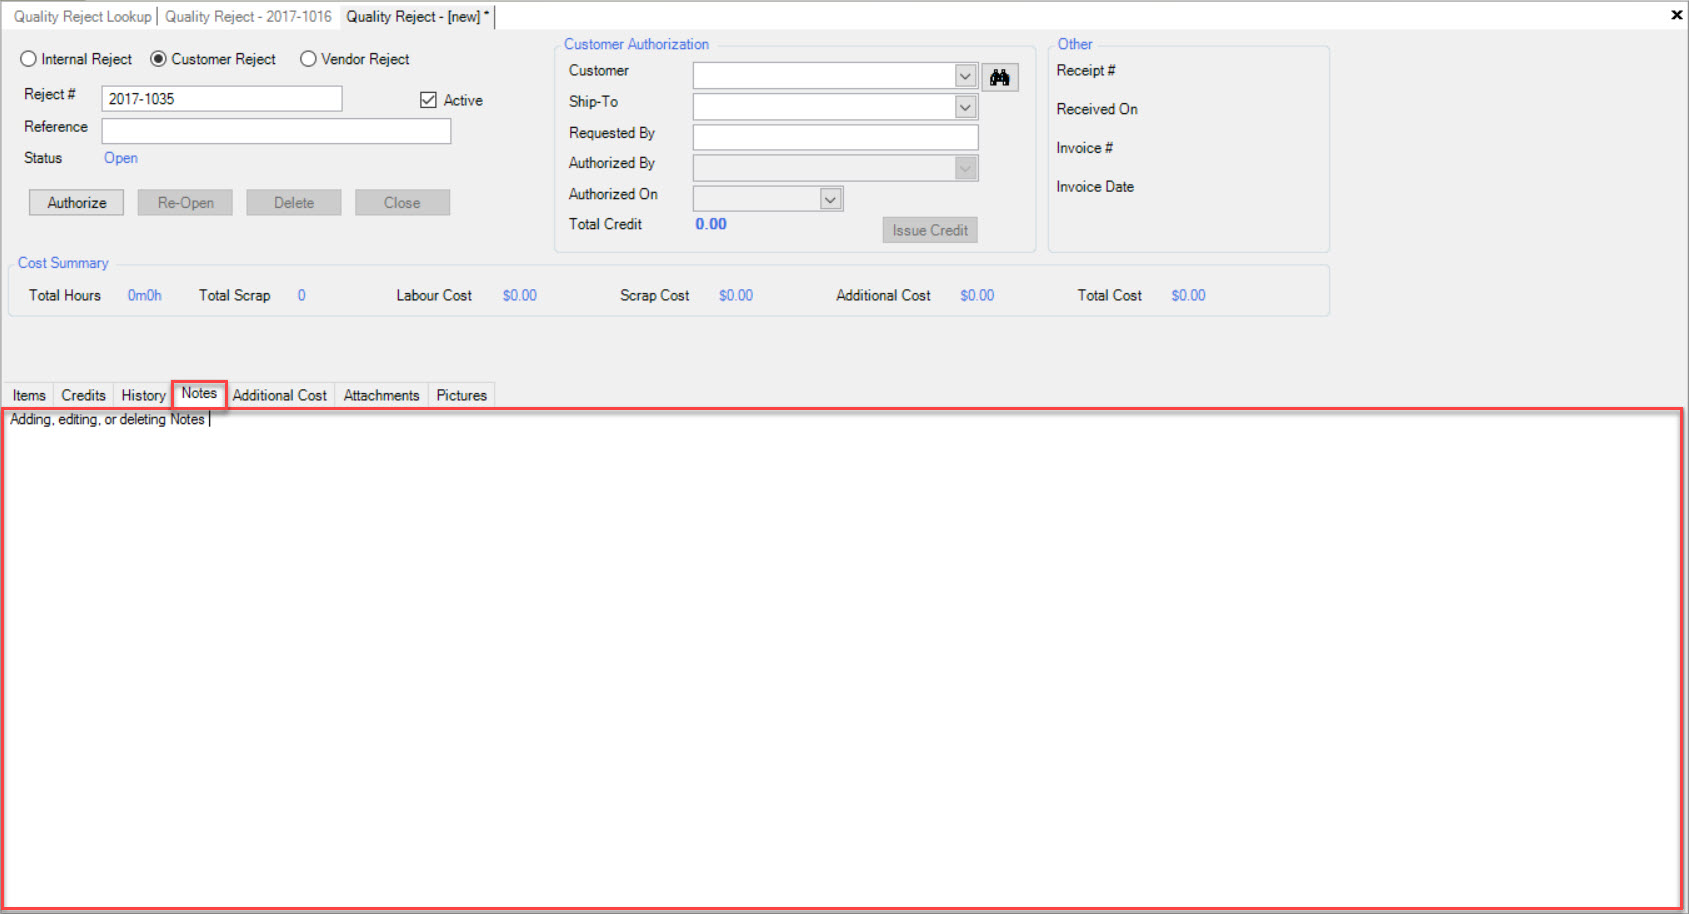
Make sure to save your changes before exiting the screen.
Customer Reject Timecards Tab
Timecards will be added to a Customer Reject after users have created a Quality Timecard.
Note
Please see Quality Assurance > Quality Timecards for more information on how to create a Quality Timecard.
To view Timecards on an existing Customer Reject, navigate to the tab and click on the icon. The
Quality Reject Lookup screen will be displayed.
Locate and double-click on the appropriate row of the Customer Reject you wish to view. The Customer Reject detail screen will appear.
Make sure to select the located on the Customer Reject detail screen.
The system will display any Timecards that have been assigned to the Customer Reject.
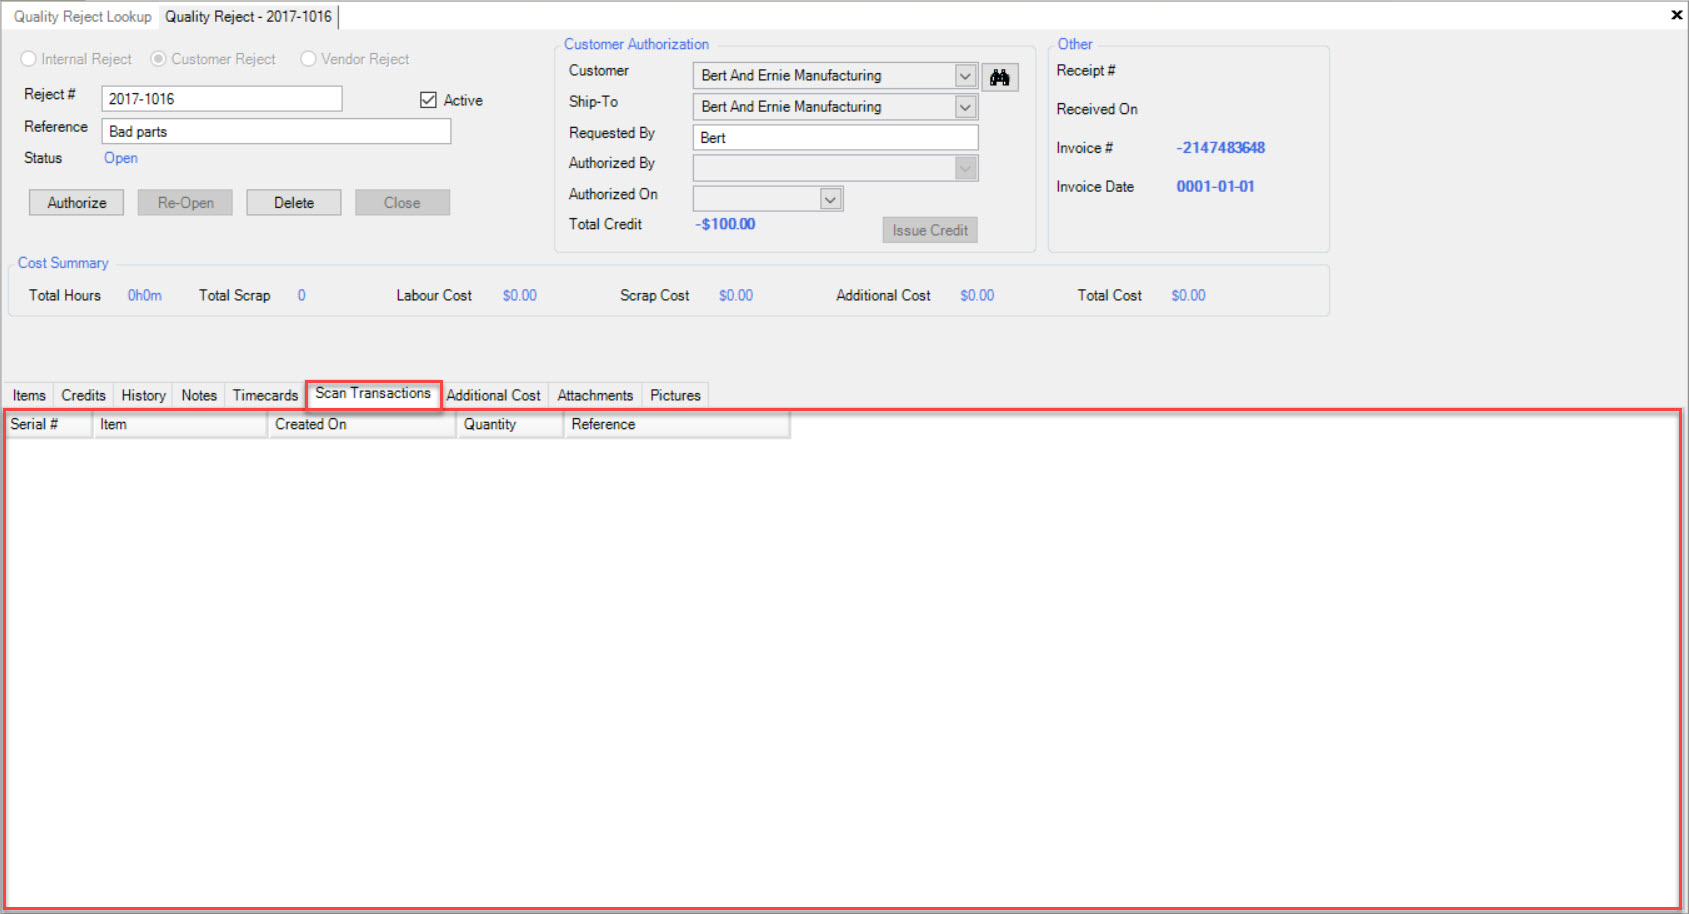
Customer Reject Scan Transactions Tab
Scan Transactions on a Quality Reject, display a list of Serial Numbers that have been scanned for a particular Reject.
To view Scan Transactions for a Customer Reject, navigate to the tab and click on the icon. The
Quality Reject Lookup screen will be displayed.
Locate and double-click on the appropriate row of the Customer Reject you wish to view Scan Transactions for. The Customer Reject detail screen will appear.
Make sure to select the tab located on the Customer Reject detail screen.
All of the Scan Transactions that have occurred for the selected Customer Reject will be displayed.
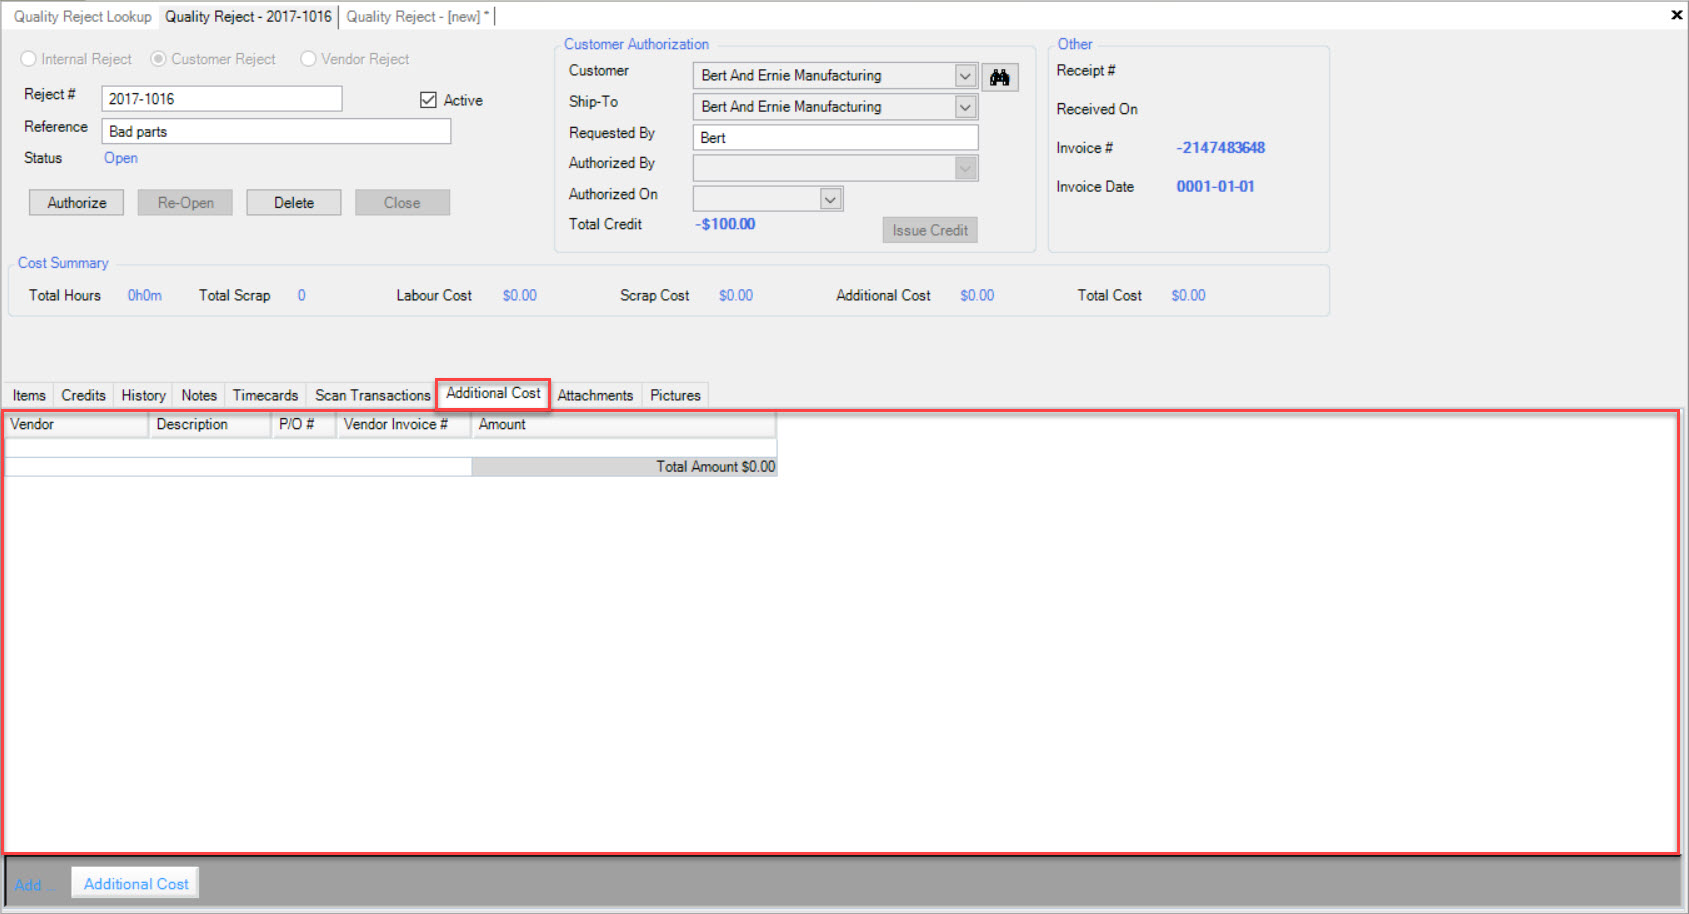
Customer Reject Additional Cost Tab
To view Additional Costs on a Customer Reject, navigate to the tab and click on the icon. The
Quality Reject Lookup screen will be displayed.
Locate and double-click on the appropriate row of the Customer Reject you wish to view Additional Costs for. The Customer Reject detail screen will appear.
Make sure to select the tab located on the Customer Reject detail screen.
All of the Additional Costs for the Customer Reject will be displayed (when available).
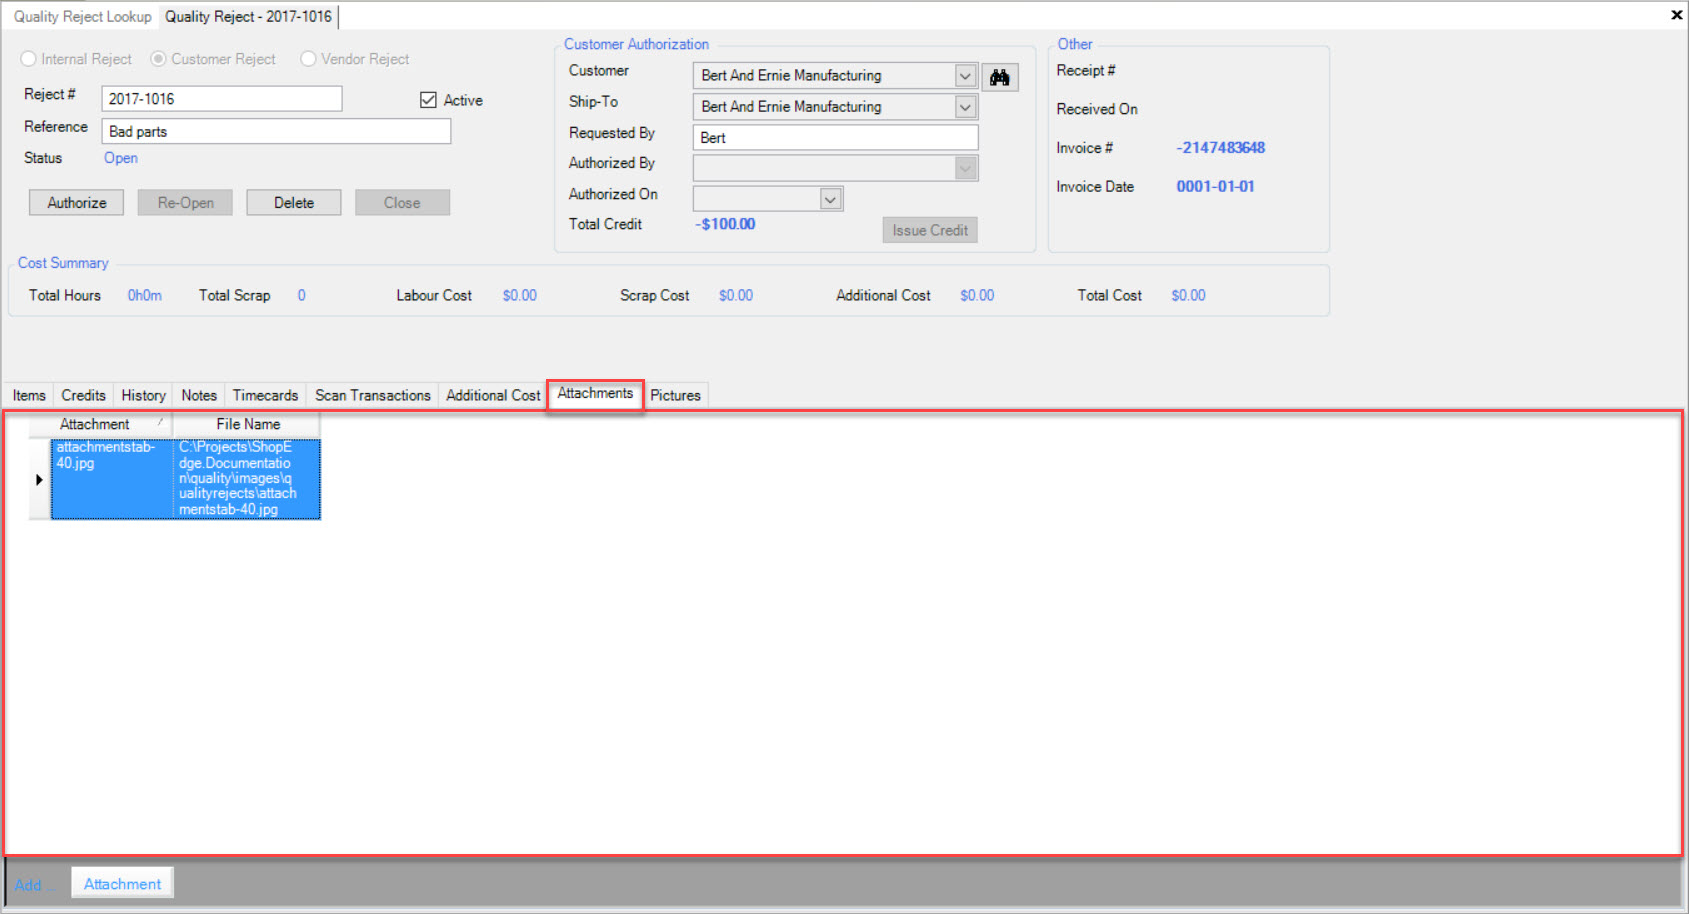
Customer Reject Attachments Tab
Users have the ability to add and/or delete Attachments on a new or existing Customer Reject.
To view Attachments on a Customer Reject, navigate to the tab and click on the icon. The
Quality Reject Lookup screen will be displayed.
Locate and double-click on the appropriate row of the Customer Reject you wish to view Attachments for. The Customer Reject detail screen will appear.
Make sure to select the tab loated on the Customer Reject detail screen.
The available Attachments for the selected Customer Reject will be displayed.
Adding an Attachment to a Customer Reject
To add an Attachment to a new or existing Customer Reject, make sure to select the tab loated on the Customer Reject detail screen.
Click on the button located at the bottom of the screen.
A window will appear that allows users to select an Attachment from their computer. Once the Attachment has been selected, click on the button.
The selected Attachment will be added to the Customer Reject.
Make sure to save your changes before exiting the screen.
Deleting an Attachment from a Customer Reject
To delete an Attachment from a new or existing Customer Reject, make sure to select the tab loated on the Customer Reject detail screen.
Locate the Attachment you wish to delete and highlight the appropriate row. Use your Delete key and when the system prompts you, select Yes.
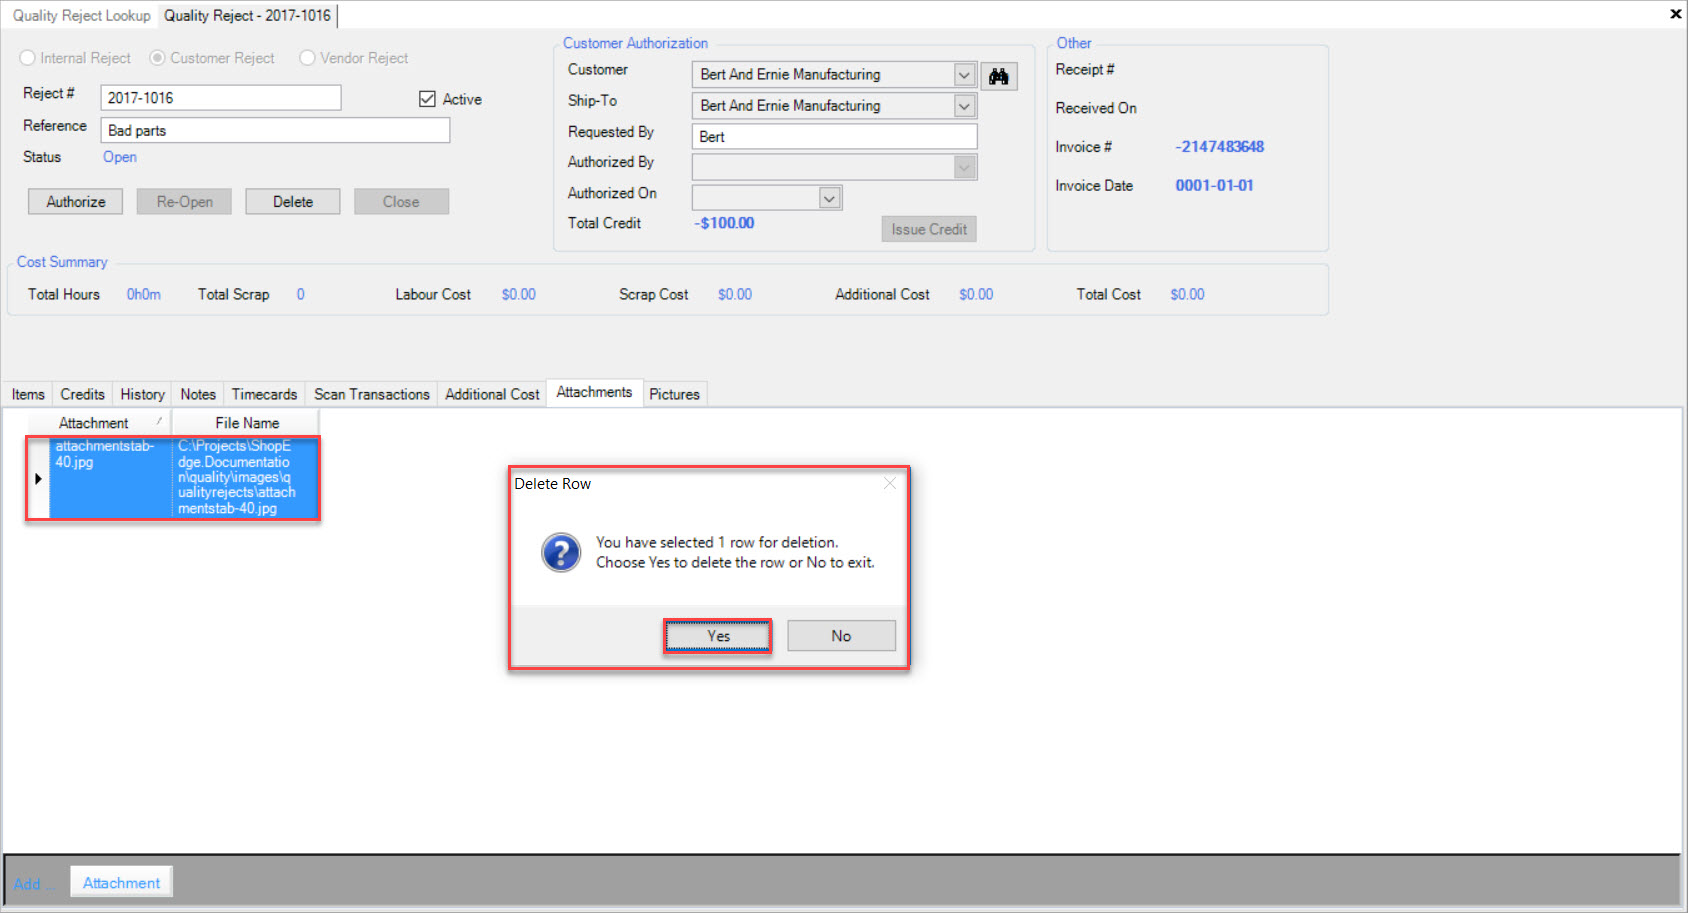
The selected Attachment will be deleted.
Make sure to save your changes before exiting the screen.
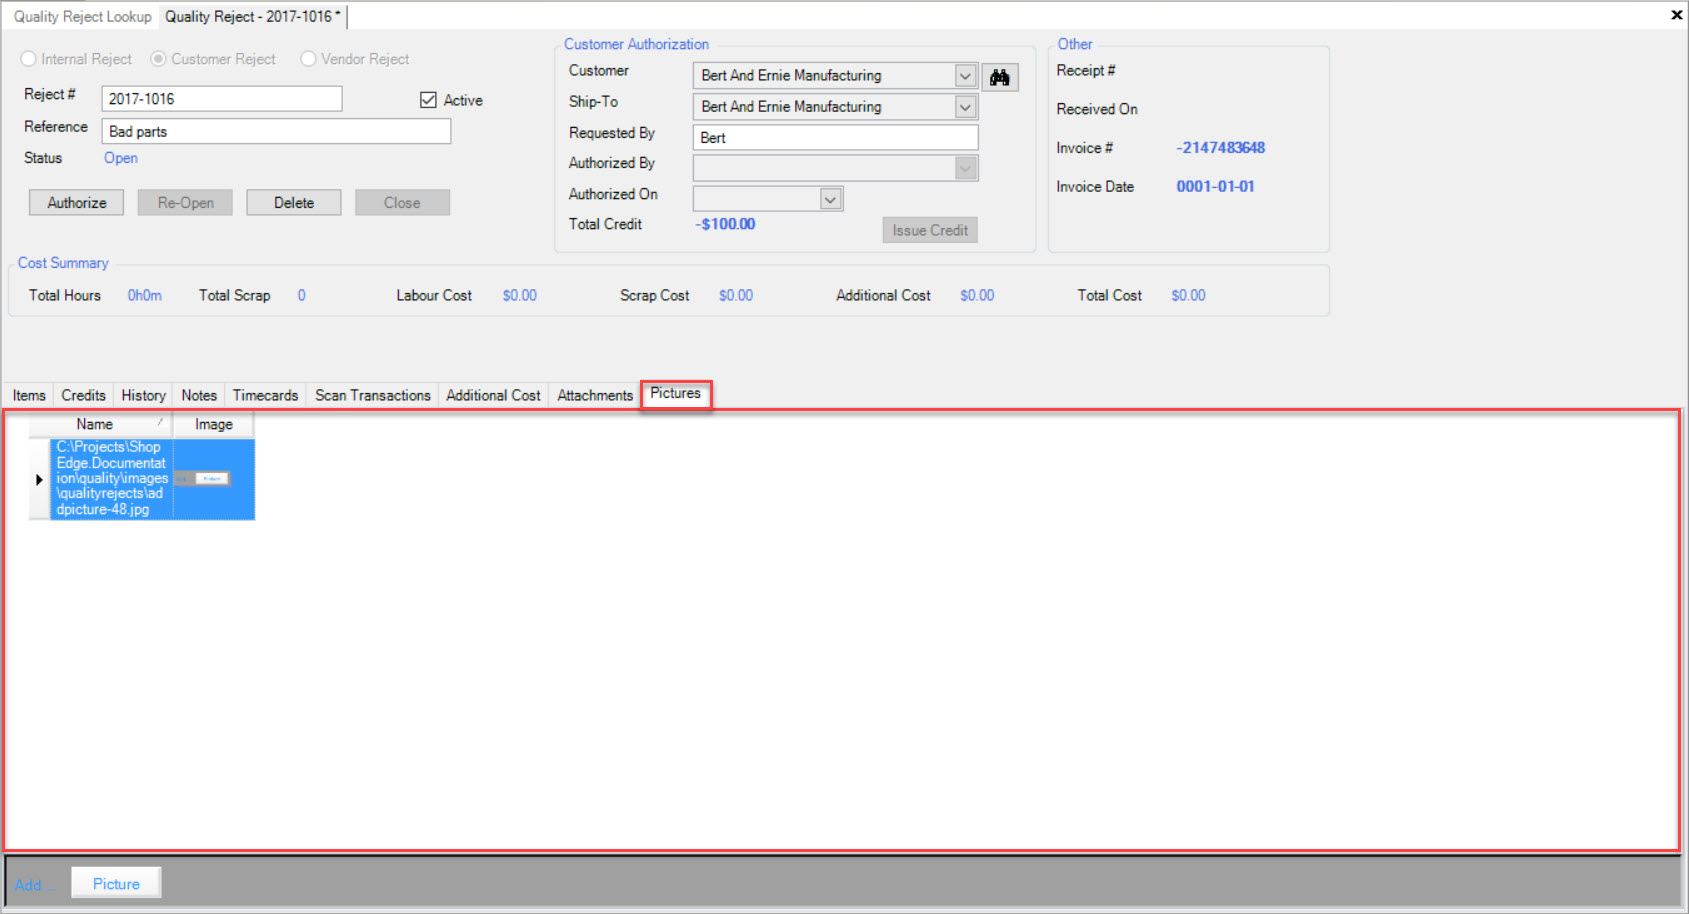
Customer Reject Pictures Tab
Users have the ability to add or delete Pictures to a new or existing Quality Reject.
To view Pictures on a Customer Reject, navigate to the tab and click on the icon. The
Quality Reject Lookup screen will be displayed.
Locate and double-click on the appropriate row of the Customer Reject you wish to view Pictures for. The Customer Reject detail screen will appear.
Make sure to select the tab located on the Customer Reject detail screen.
Users will be able to view all available Pictures attached to the selected Customer Reject.
Adding a Picture to a Customer Reject
To add a Picture to a new or existing Customer Reject, make sure to select the tab loated on the Customer Reject detail screen.
Click on the button located at the bottom of the screen.
A window will appear that allows users to select a Picture from their computer. Once a Picture has been selected, click on the button.
The selected Picture will be added to the Customer Reject.
Make sure to save your changes before exiting the screen.
Deleting a Picture from a Customer Reject
To delete a Picture from a new or existing Customer Reject, make sure to select the tab loated on the Customer Reject detail screen.
Locate the Picture you wish to delete and highlight the appropriate row. Use your Delete key and when the system prompts you, select Yes.
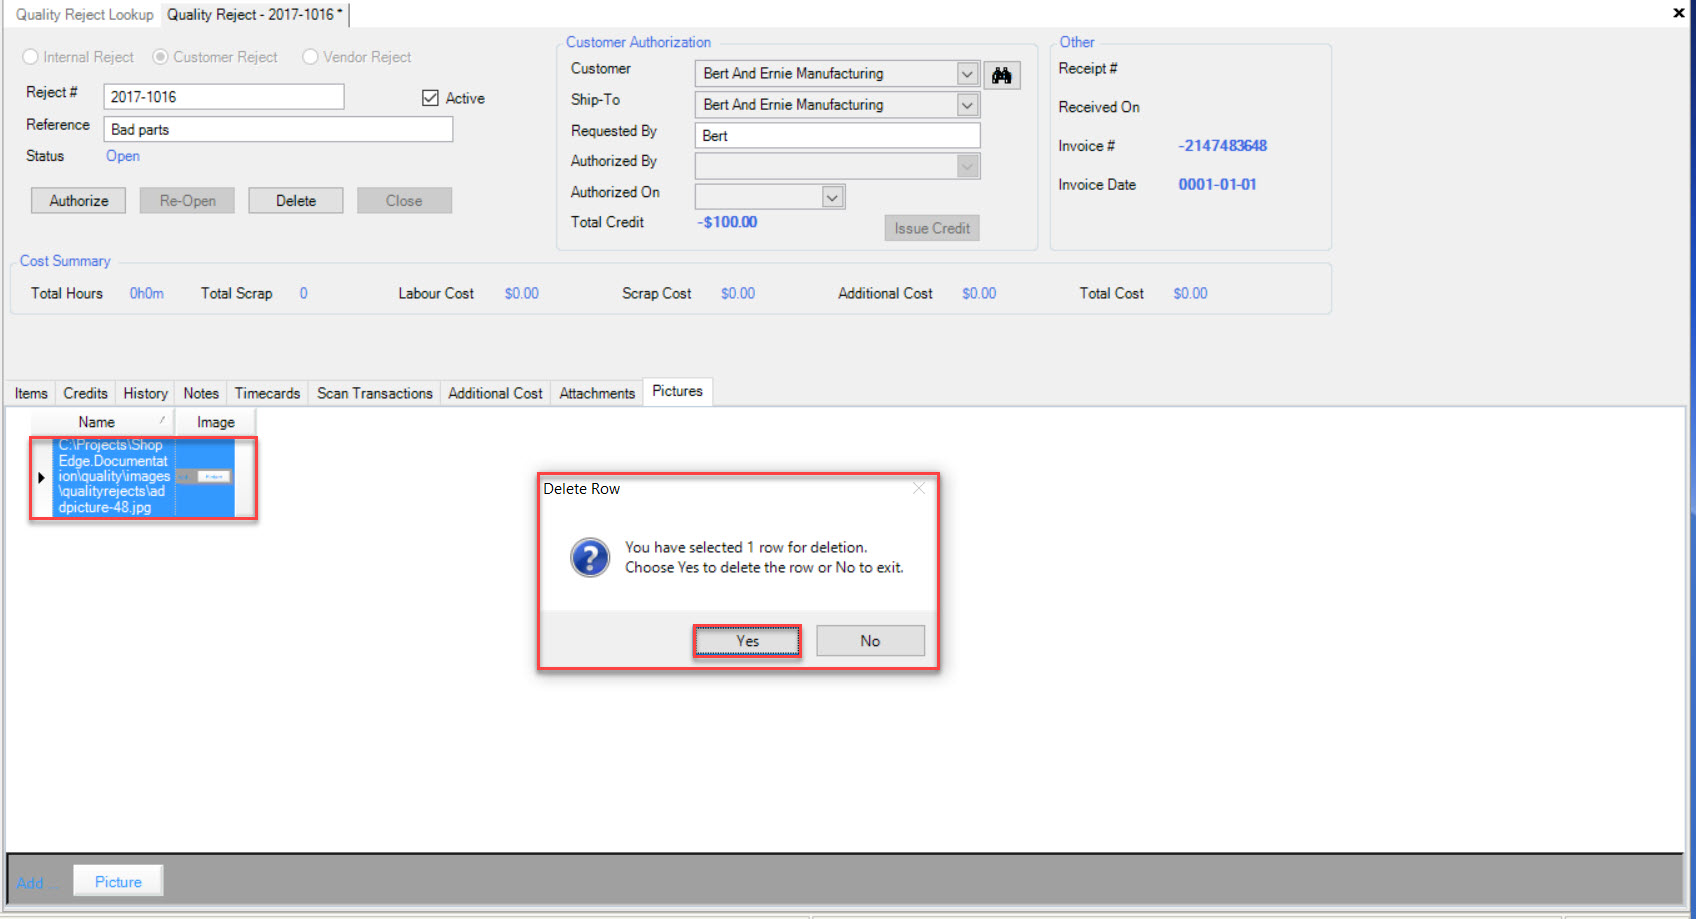
The selected Picture will be deleted.
Make sure to save your changes before exiting the screen.
Authorizing a Customer Reject
Authorizing a Customer Reject allows for the Credits to be issued. Credits cannot be issued until a Customer Reject has been authorized by a user with permissions to do so.
To authorize a Customer Reject, navigate to the tab and click on the icon. The
Quality Reject Lookup screen will be displayed.
Locate and double-click on the appropriate row of the Customer Reject you wish to authorize. The Customer Reject detail screen will appear.
Next, click on the  button located on the Customer Reject detail screen.
The Customer Reject will be authorized automatically. Users will not be able to make any changes to the Customer Reject as it will change to a read-only format.
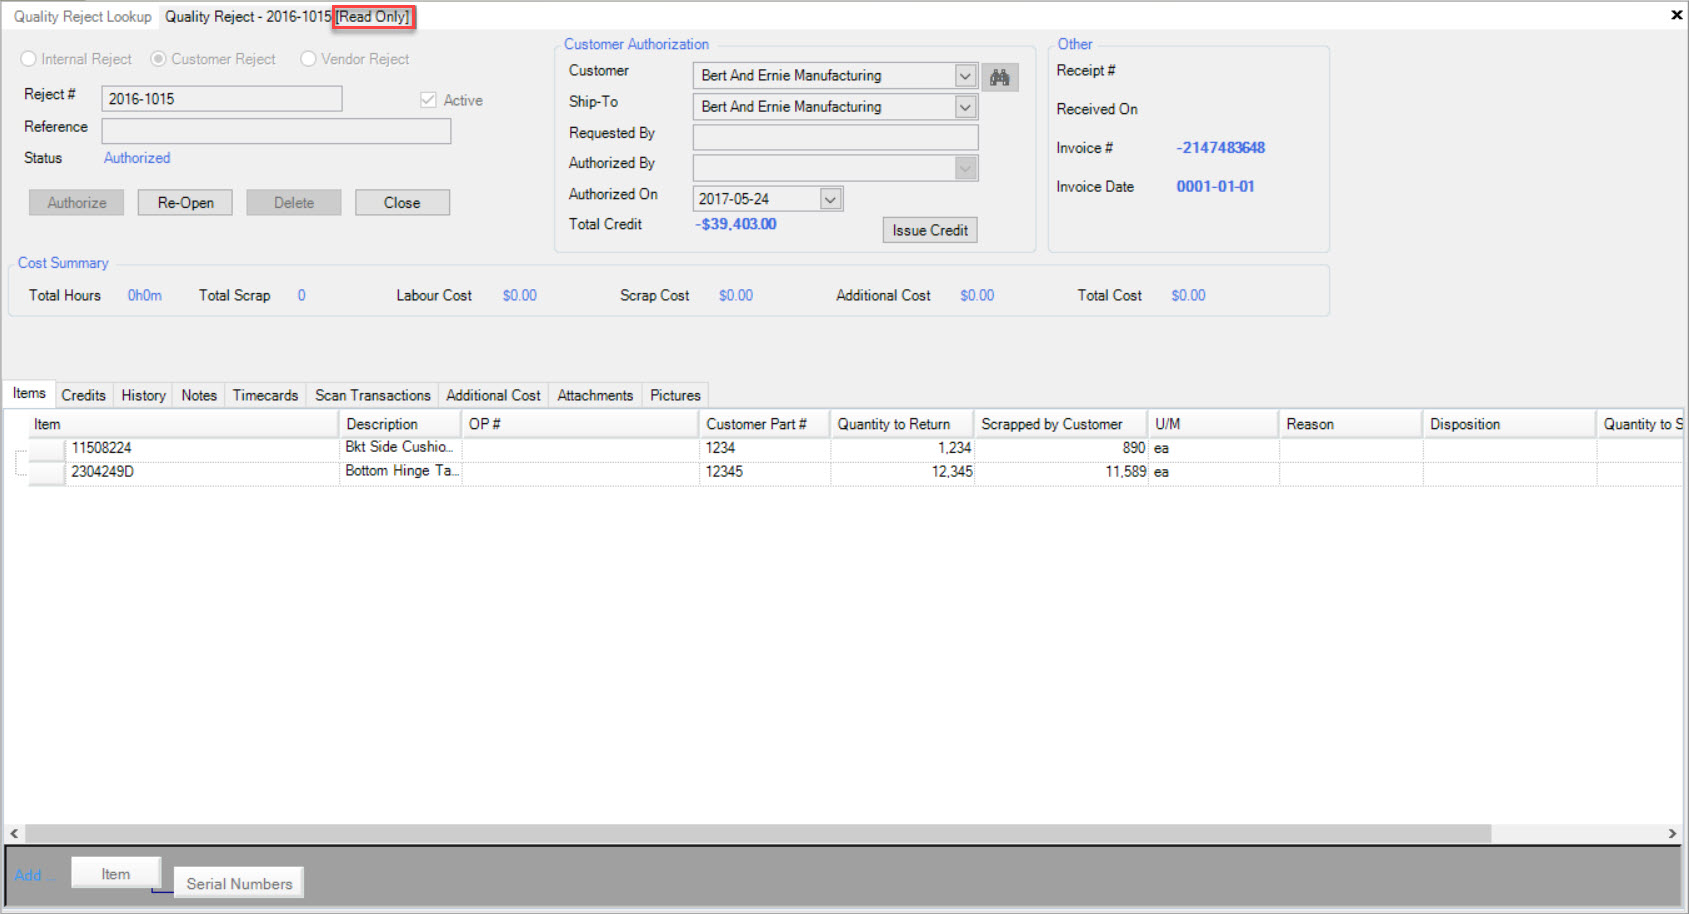
Issuing a Credit for a Customer Reject
Once a Customer Reject has been authorized, users are then able to issue a Credit.
To issue a Credit on an authorized Customer Reject, click on the  button located on the Customer Reject detail screen.
Note
The button only becomes available when a Customer Reject has been authorized.
The system will populate a new Invoice for the Credit on the Customer Reject with the header information filled in based on the information provided on the Customer Reject.
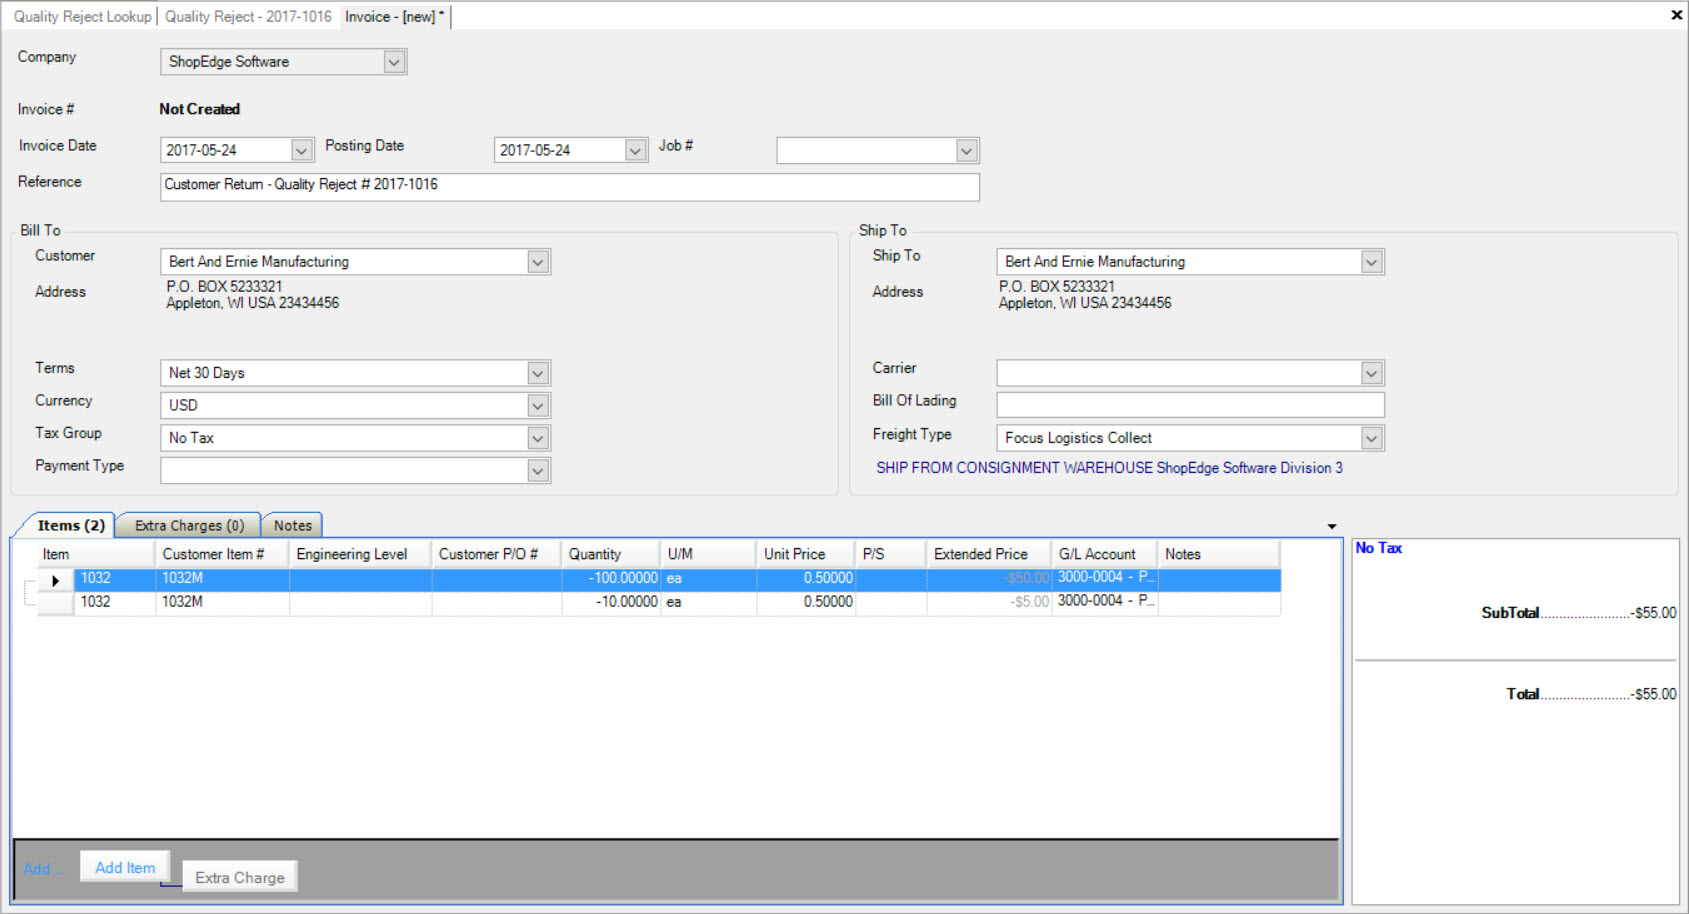
Users must review the Invoice. If users wish to add, edit, or delete any information on the new Invoice that the system populated, please see Invoicing > Creating Invoices.
Once the Invoice has been reviewed and appropriate changes have been made, make sure to save your changes before exiting the screen.
Re-opening a Customer Reject
To re-open a Customer Reject, navigate to the tab and click on the icon. The
Quality Reject Lookup screen will be displayed.
Locate and double-click on the appropriate row of the Customer Reject you wish to re-open. The Customer Reject detail screen will appear.
Then, click on the  button located on the Customer Reject detail screen.
The Customer Reject will be re-opened allowing users to make any necessary adjustments.
Note
If users wish to issue a Credit, they must click on the button.
Closing a Customer Reject
To close a Customer Reject, navigate to the tab and click on the icon. The
Quality Reject Lookup screen will be displayed.
Locate and double-click on the appropriate row of the Customer Reject you wish to re-open. The Customer Reject detail screen will appear.
Note
The status of the Customer Reject must be Authorized for users to have the ability to close it.
Then, click on the  button located on the Customer Reject detail screen.
The Customer Reject will automatically be closed.
Note
If users wish to re-open a Customer Reject, they can do so by clicking on the button.
Printing a Quality Reject
Users have the ability to print Quality Rejects in the system.
To do so, navigate to the tab and click on the icon. The Quality Reject Lookup screen will be displayed.
Locate and double-click on the appropriate row of the Quality Reject you wish to print. The Quality Reject detail screen will appear (Internal or Customer).
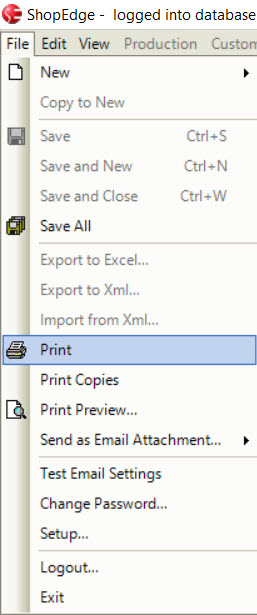
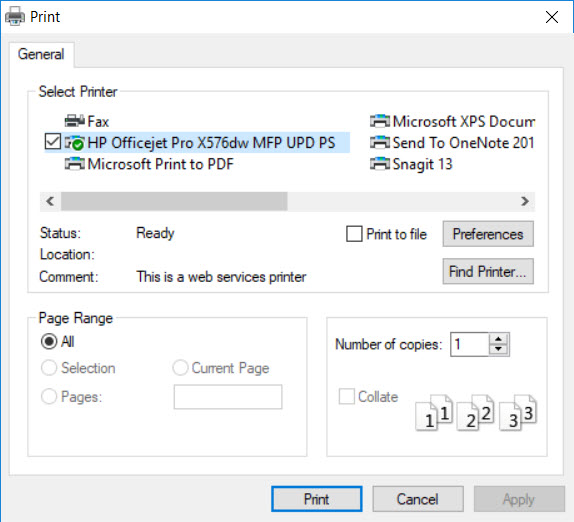
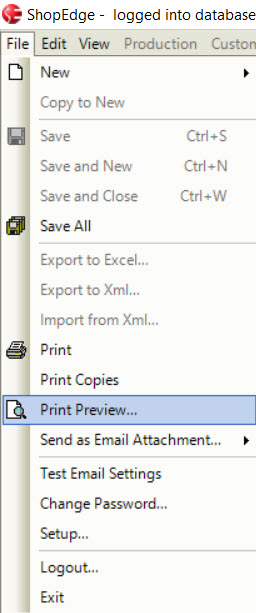
To print the selected Quality Reject, navigate to File > Print. The Print window will appear where users can select the appropriate printing settings and then, click on the
 button.
Note
Users can also navigate to File > Print Copies to perform a print as well.
The selected Quality Reject* will be printed.
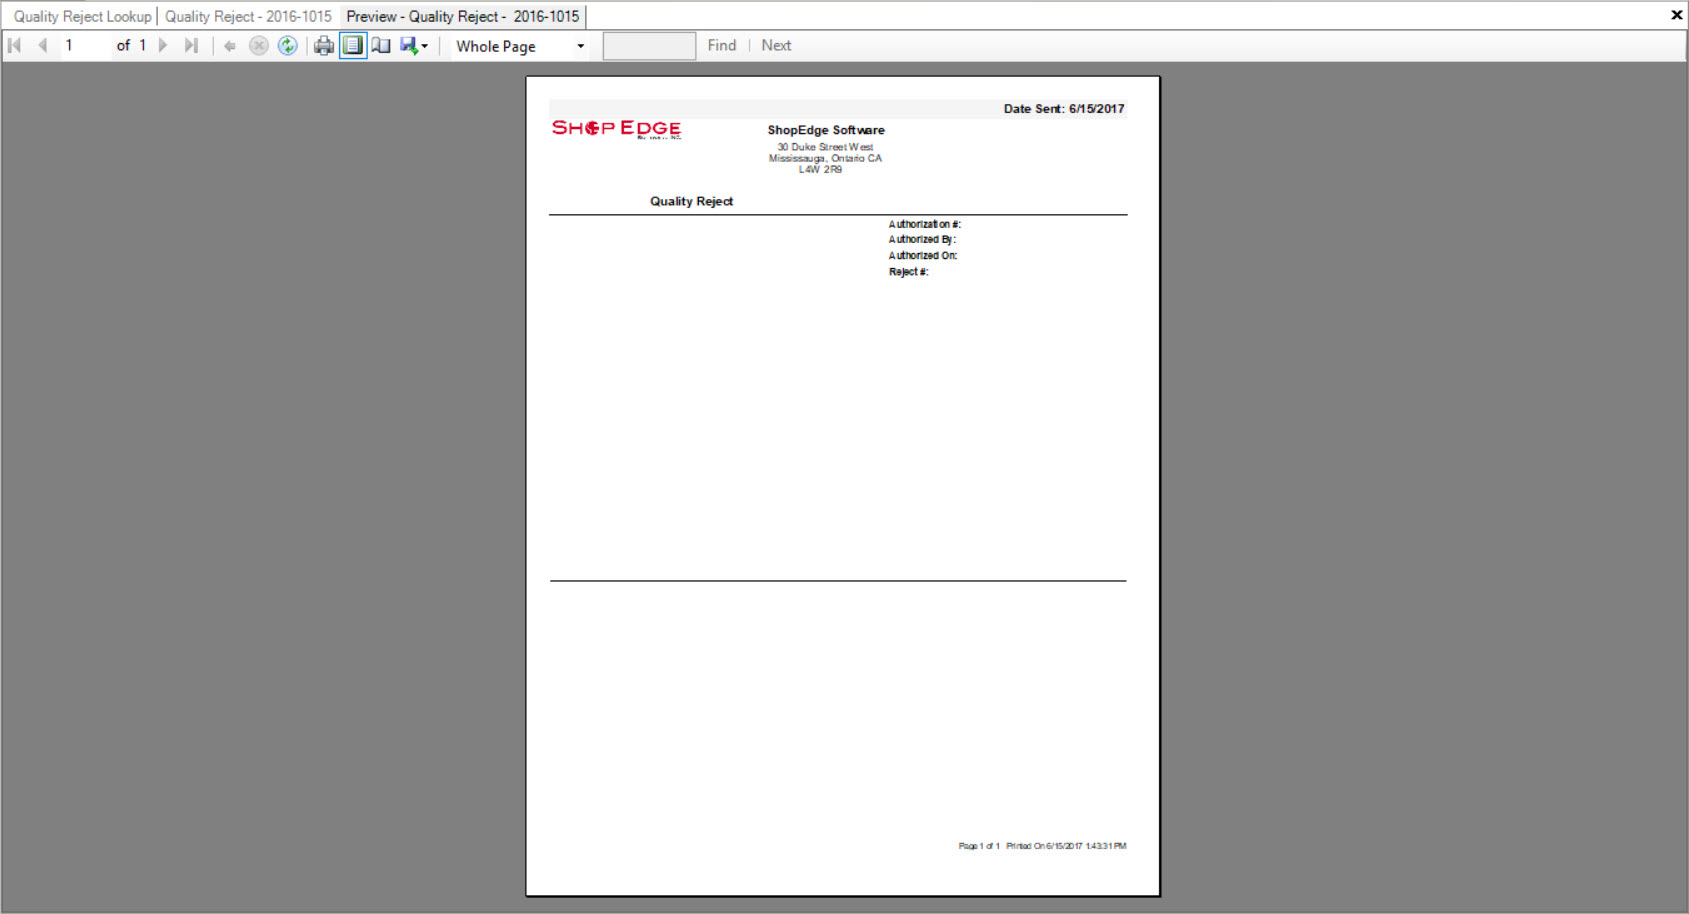
Print Previewing a Quality Reject
Users have the ability to print preview a Quality Reject in the system.
To do so, navigate to the tab and click on the icon. The Quality Reject Lookup screen will be displayed.
Locate and double-click on the appropriate row of the Quality Reject you wish to print preview. The Quality Reject detail screen will appear (Internal or Customer).
To print preview the selected Quality Reject, navigate to File > Print Preview.
The Preview - Quality Reject screen will be displayed.
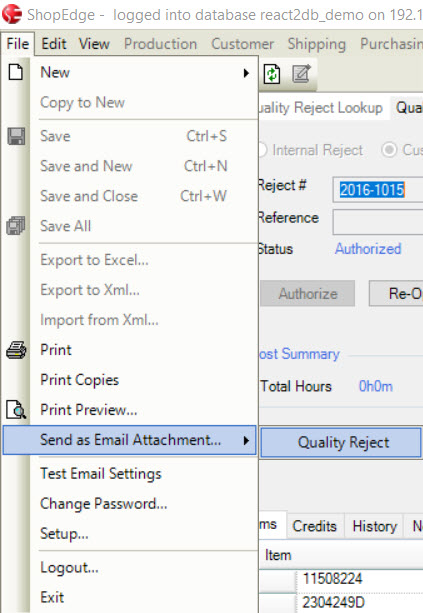
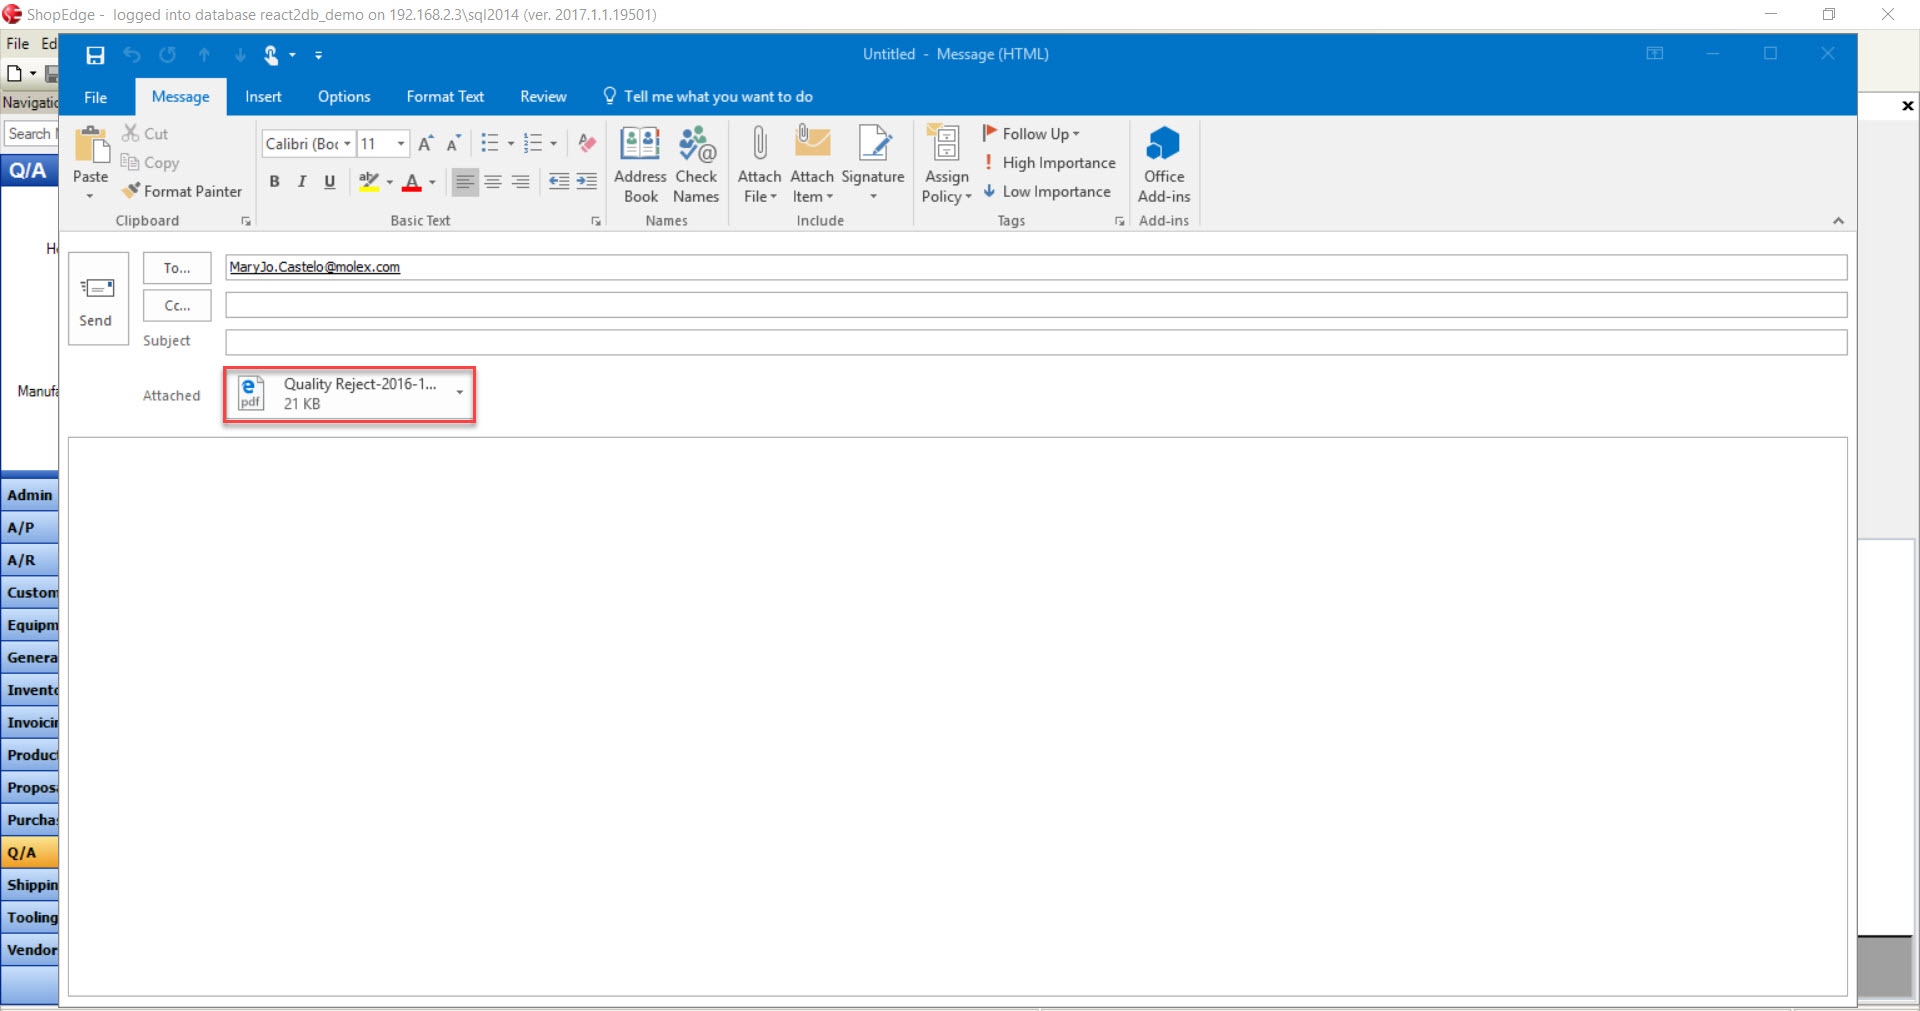
Sending a Quality Reject as an Email Attachment
Users have the ability to send a Quality Reject as an Email Attachment in the system.
To do so, navigate to the tab and click on the icon. The Quality Reject Lookup screen will be displayed.
Locate and double-click on the appropriate row of the Quality Reject you wish to send as an Email Attachment. The Quality Reject detail screen will appear (Internal or Customer).
Navigate to File > Send as Email Attachment... > Quality Reject.
The Send Email Attachments window will appear. Select the export format and Contact you wish to send the Quality Reject as an Email Attachment to, and click on the button.
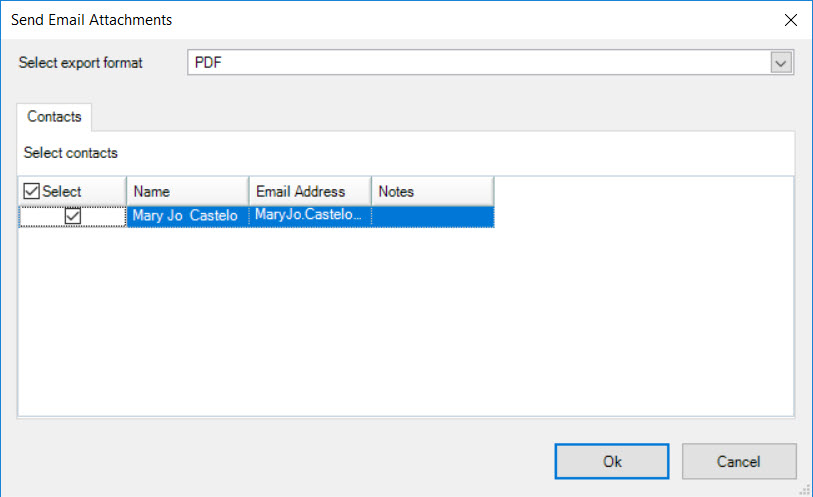
The Email provider will open with the Quality Reject attached to it. Complete the Email and send.
Deleting a Quality Reject
To delete a Quality Reject, navigate to the tab and click on the icon. The Quality
Reject Lookup screen will be displayed.
Locate and double-click on the appropriate row of the Quality Reject you wish to view. The Quality Reject detail screen will appear.
Note
The status of the Quality Reject must be open in order to delete it.
Then, click on the  button located on the Quality Reject detail screen.
Note
Users require specific permissions in order to delete Quality Rejects from the system.
The selected Quality Reject will be deleted from the system.
Make sure to save your changes before exiting the screen.