Material Specs
Materical Specifications (Specs) are created when users need to define a new Purchased Item. To view all available Material Specs. in the system, navigate to the
 tab and click on the
  icon. The Material Specification Lookup screen will be displayed.
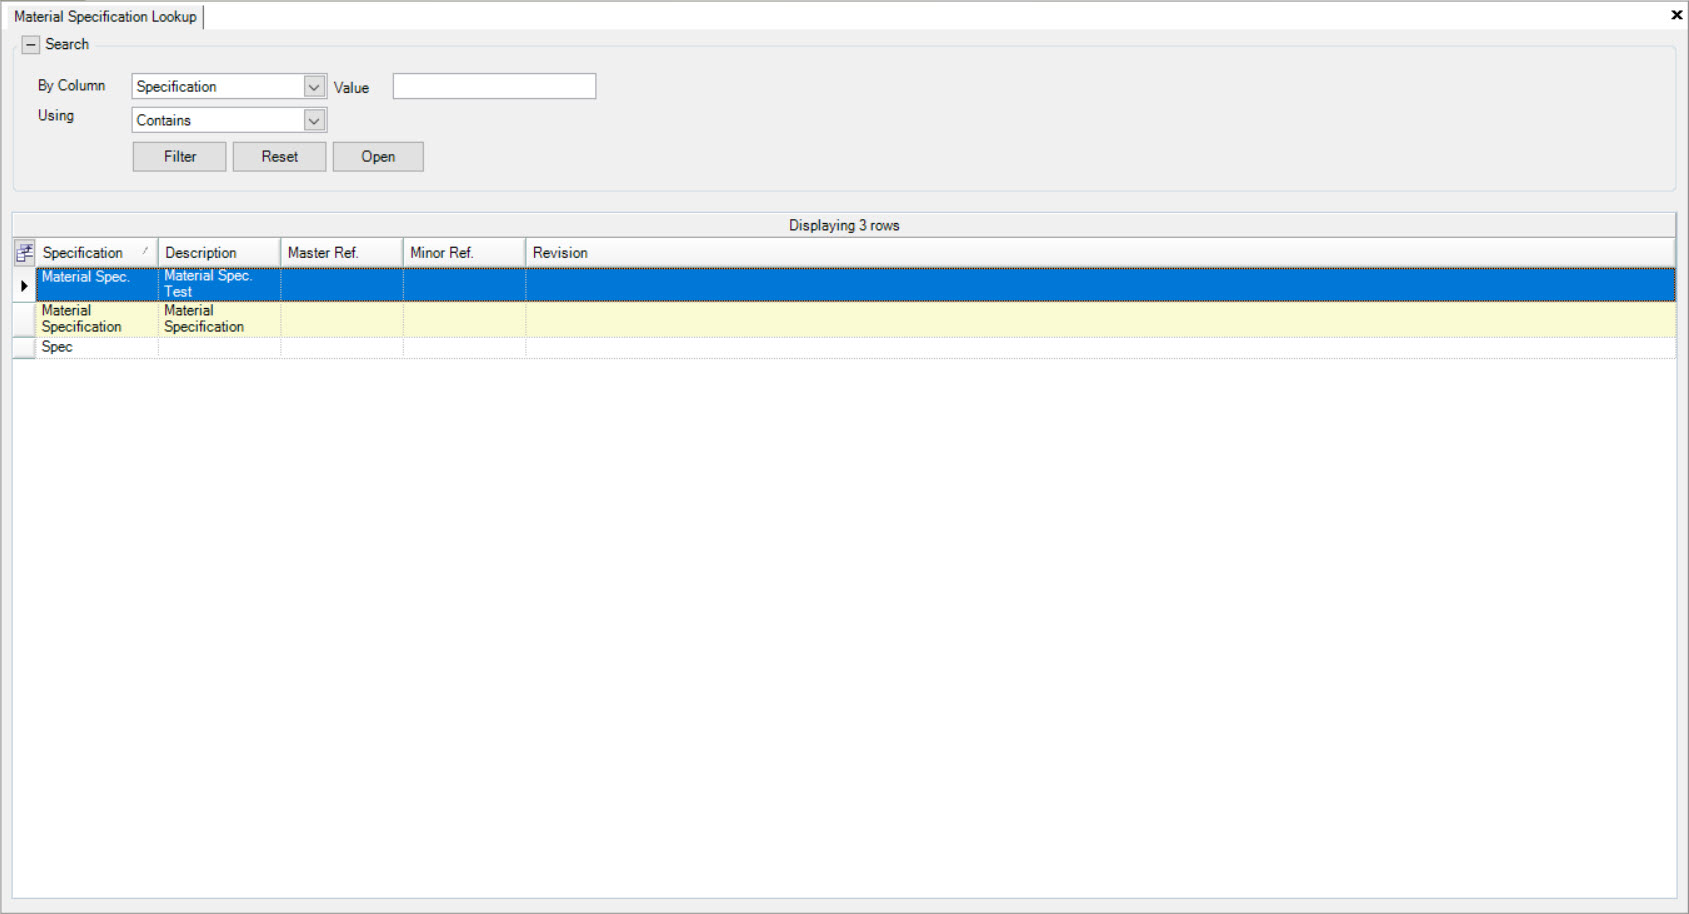
All of the available Material Specs. in the system will be displayed.
To open an existing Material Spec., simply double-click on the appropriate row. The Material Spec. detail screen will be displayed.
Creating a New Material Specification
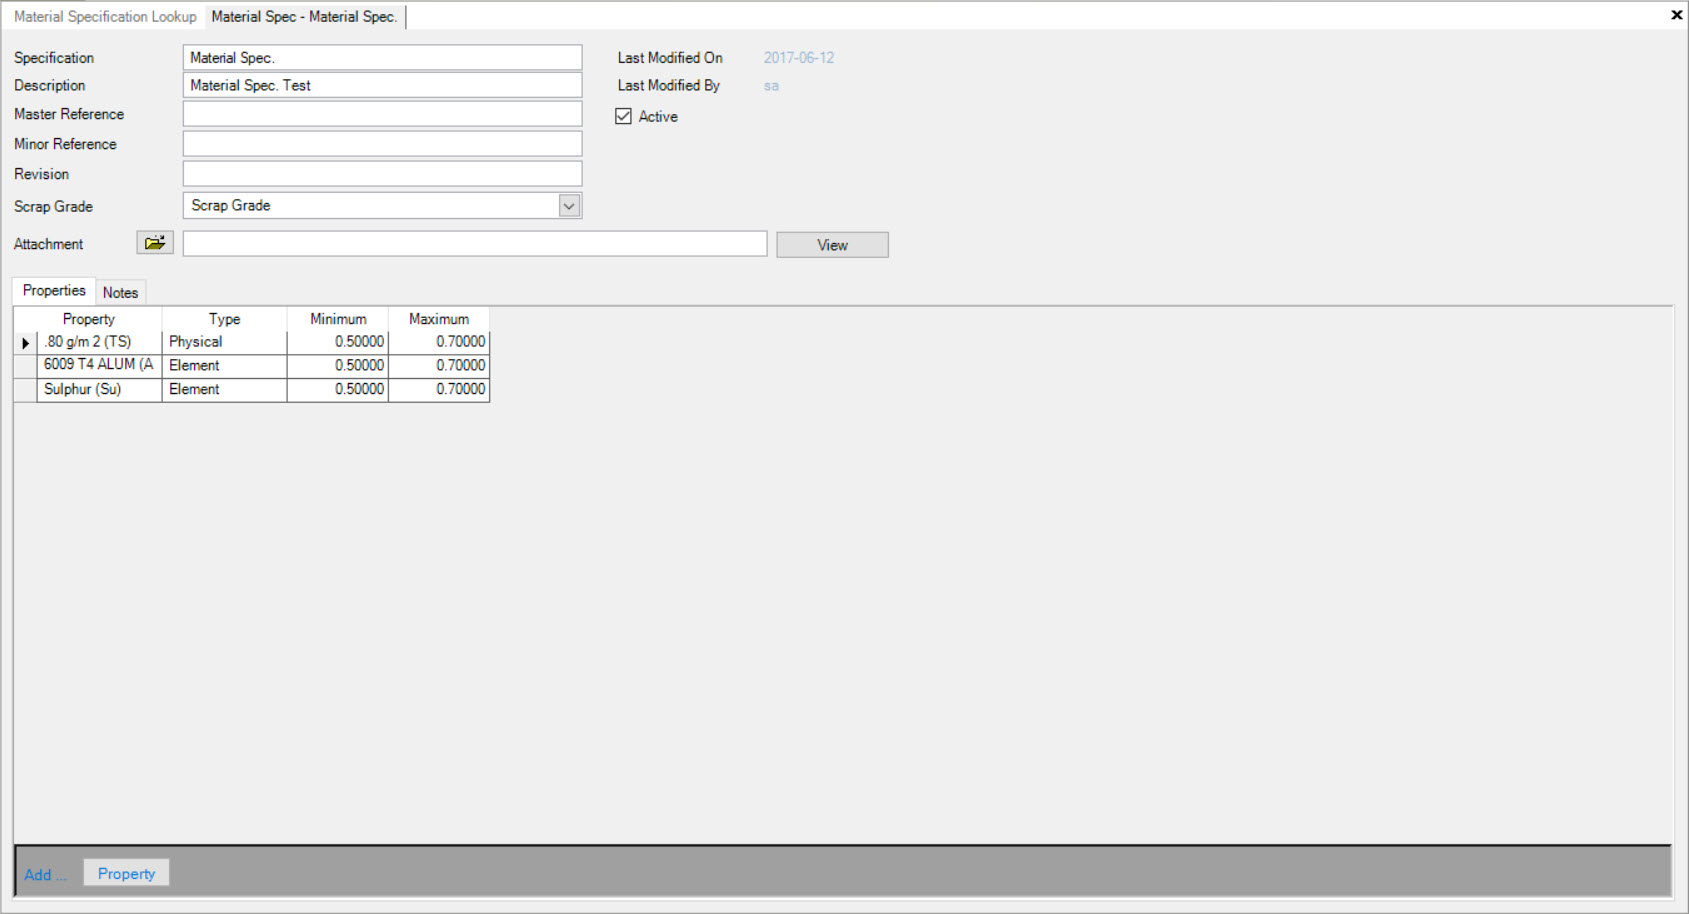
Each Purchased Item must be defined with a Material Spec. and will be measured against these to see if the incoming material is acceptable.
Note
Users can create a dummy (excluding Elements and Physicals) Material Spec. for Purchased Items not requiring an acceptable level of measurement.
There are three ways in the system to create a new Material Spec.. The first is click the Ctrl + Shift + Y keys. The second way is to navigate to File > New > Material Spec option.
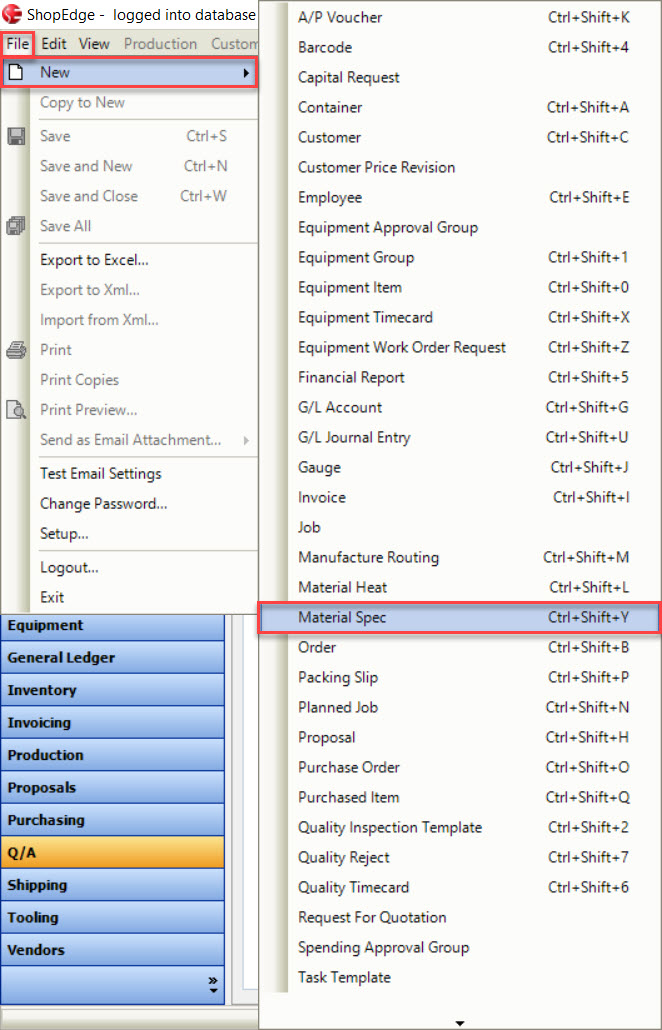
The last way is to navigate to the  button, and select Material Spec. option.
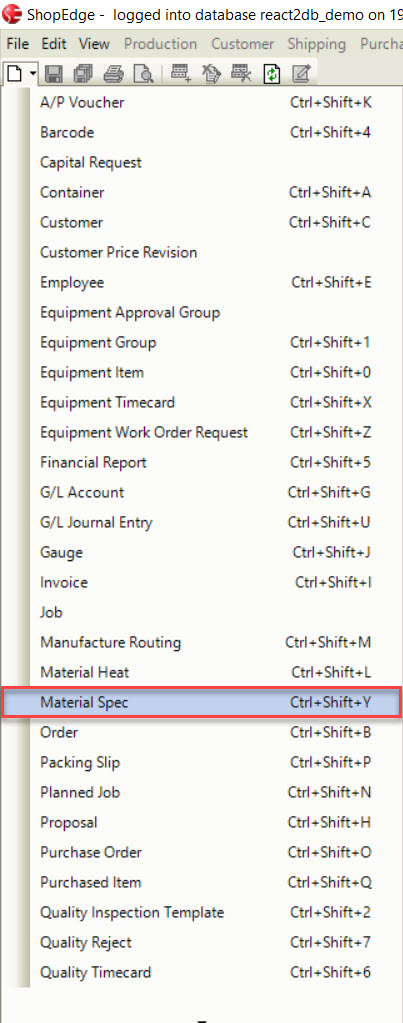
All of these options will open a new Material Spec. screen.
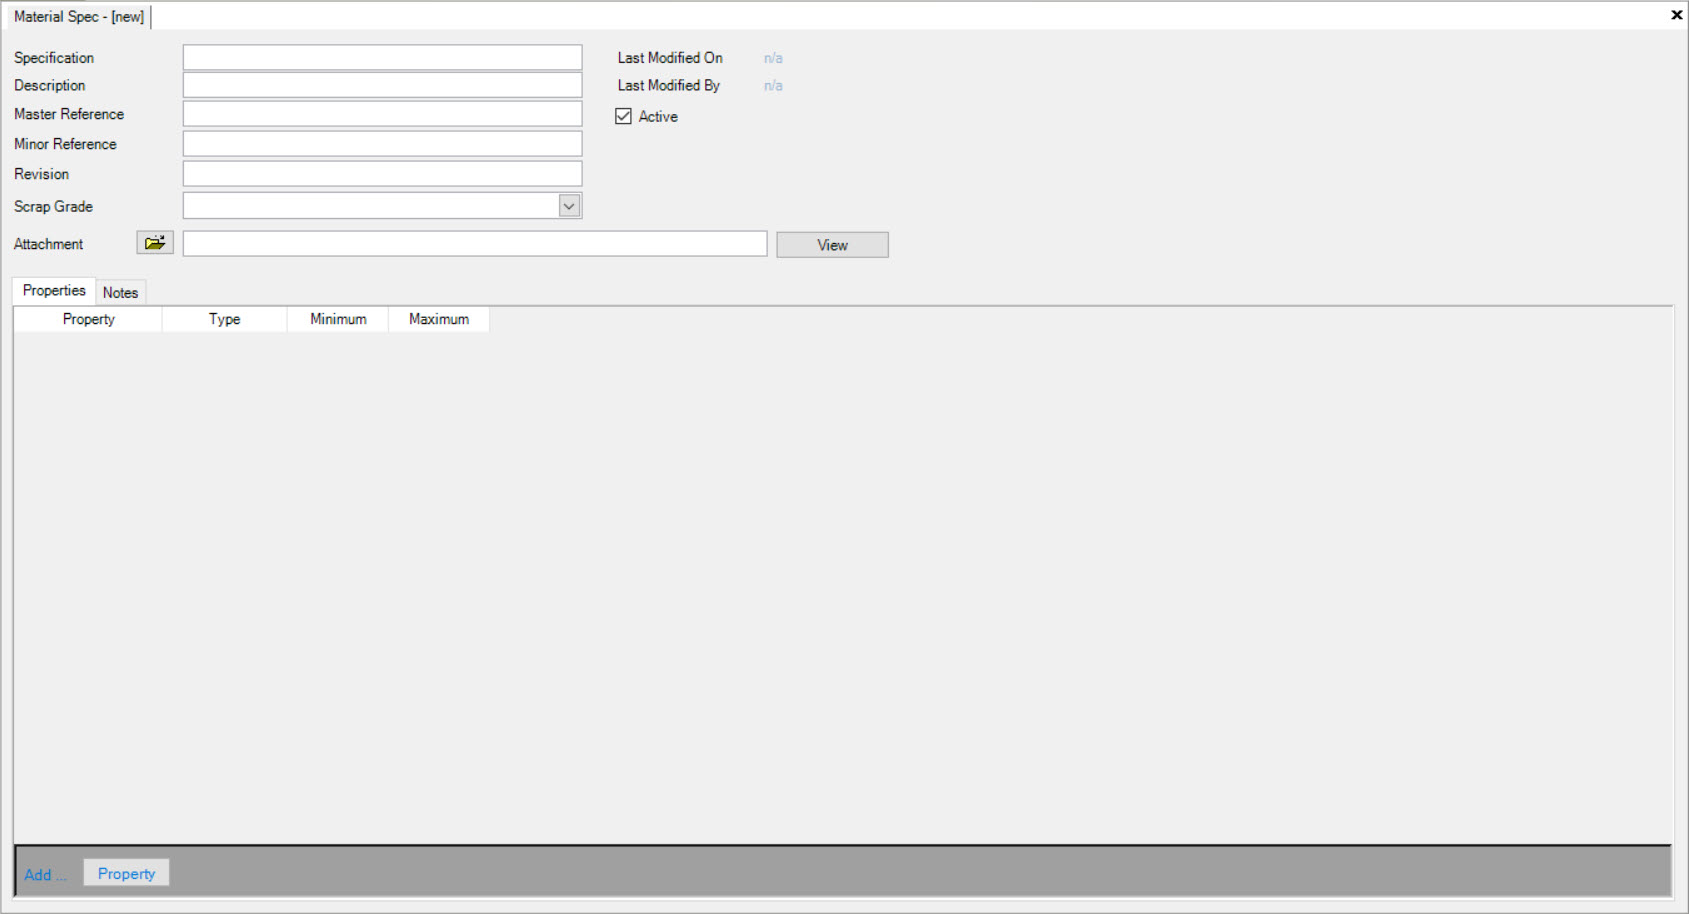
Users must enter in a Specification, Description, Master Reference, Minor Reference, and Revision. Users can also select a Scrap Grade using the available drop-down menu. The Active checkbox will be selected automatically but users have the ability to de-select it if necessary. The Last Modified On and Last Modified By information will be populated by the system once the Material Spec. has been saved.
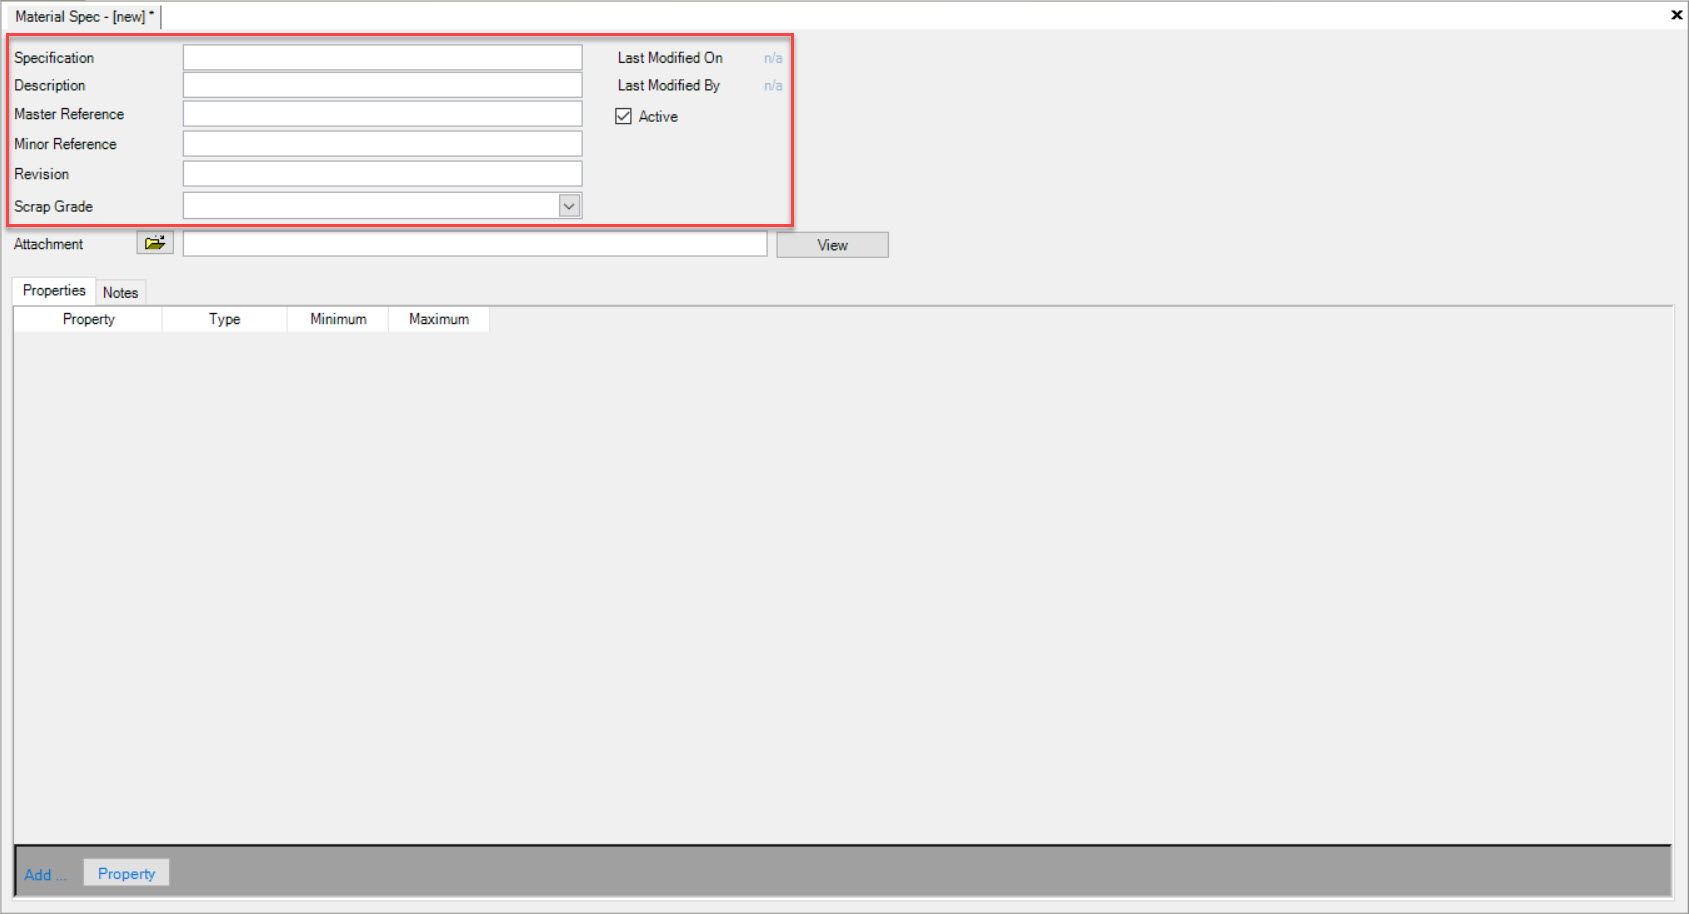
Once the header information has been entered in, make sure to save your changes before exiting the screen.
Adding an Attachment to a Material Spec
Users have the ability to add an Attachment to a new or existing Material Spec..
To add an Attachment, click on the  button located next to the Attachment field.
Users will then be able to select an Attachment from their computer. Once an Attachment has been selected, click on the  button.
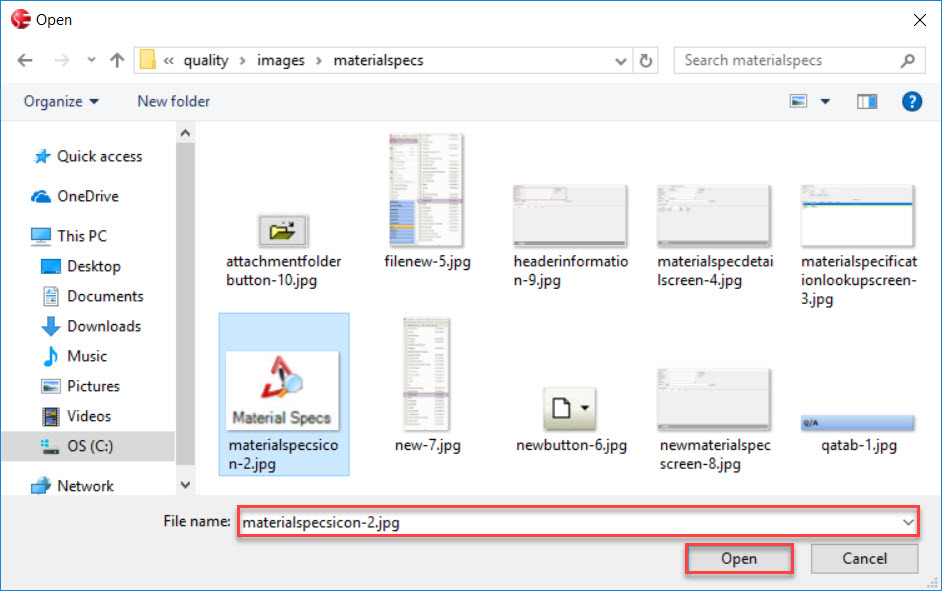
The selected Attachment will be added.
Make sure to save your changes before exiting the screen.
Note
Users can edit or delete the Attachment at anytime. To edit simply follow the steps for adding an Attachment and to delete an Attachment, simply delete the file in the Attachment field.
Viewing an Attachment
To view an Attachment for a new or existing Material Spec., simply click on the  button.
The Attachment will appear.
Property Tab
To view Properties attached to an existing Material Spec., navigate to the tab and click on the icon.
The Material Specification Lookup screen will be displayed.
Locate and double-click on the Material Spec. you wish to view. The Material Spec. detail screen will be displayed.
Make sure to select the  tab.
tab.
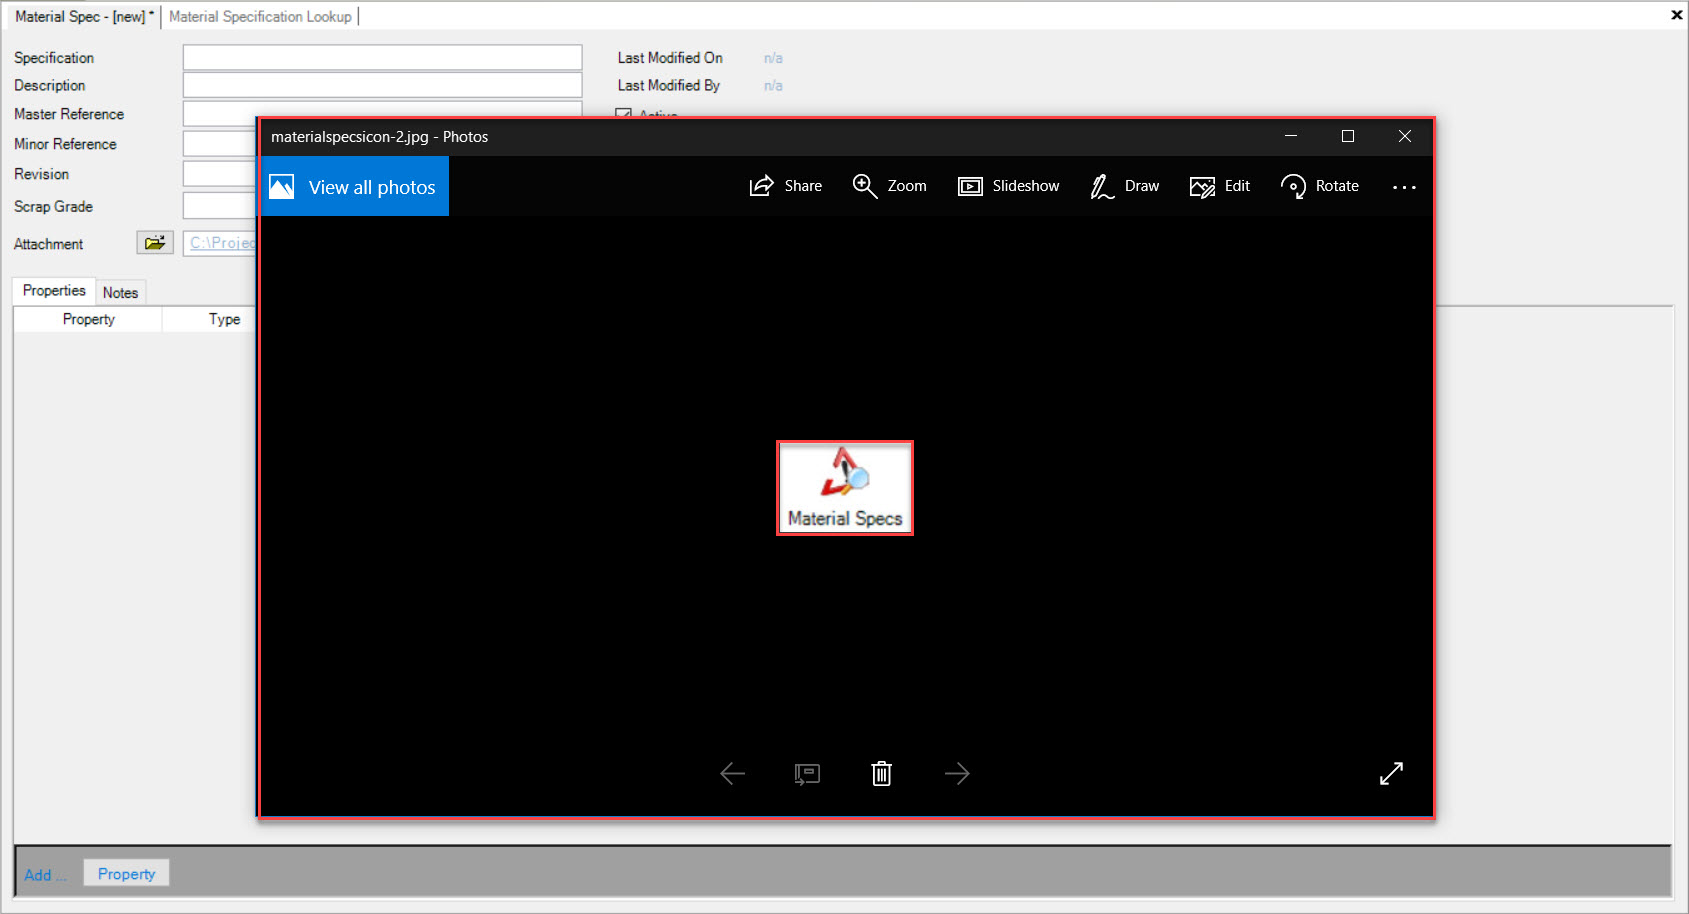
All of the Properties attached to the selected Material Spec. will be displayed.
Adding a Property
To add a Property to a new or existing Material Spec., make sure to select the tab.
Click on the  button located at the bottom of the screen.
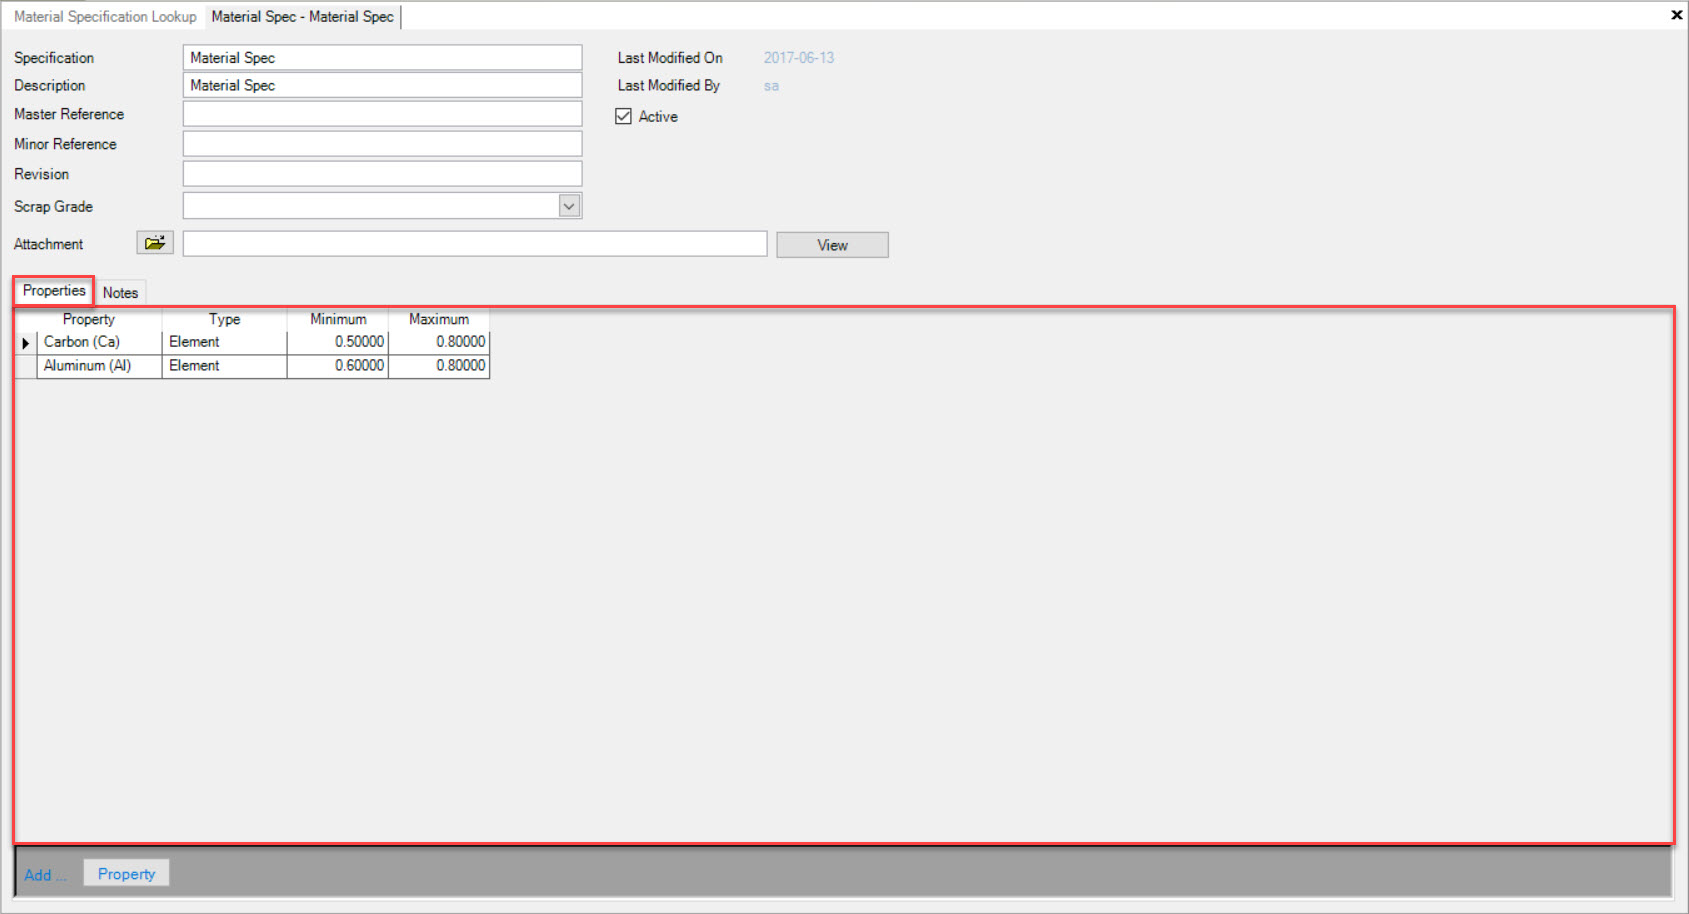
The Find Property window will appear. Users can select a Property to add to the Material Spec. by highlighting the appropriate row and clicking on the  button.
Note
If users wish to add more than one Property at time, they may do so by holding the Ctrl key while selecting the appropriate Properties. Then, click on the button.
The selected Property will be added to the Material Spec..
Users will then have to fill out a Minimum and Maximum value for each added Property before saving.

Make sure to save your changes before exiting the screen.
Deleting a Property
To delete a Property from a Material Spec., make sure to select the tab.
Locate the Property you wish to delete and highlight the appropriate row. Use your Delete key and when the system prompts you, select Yes.
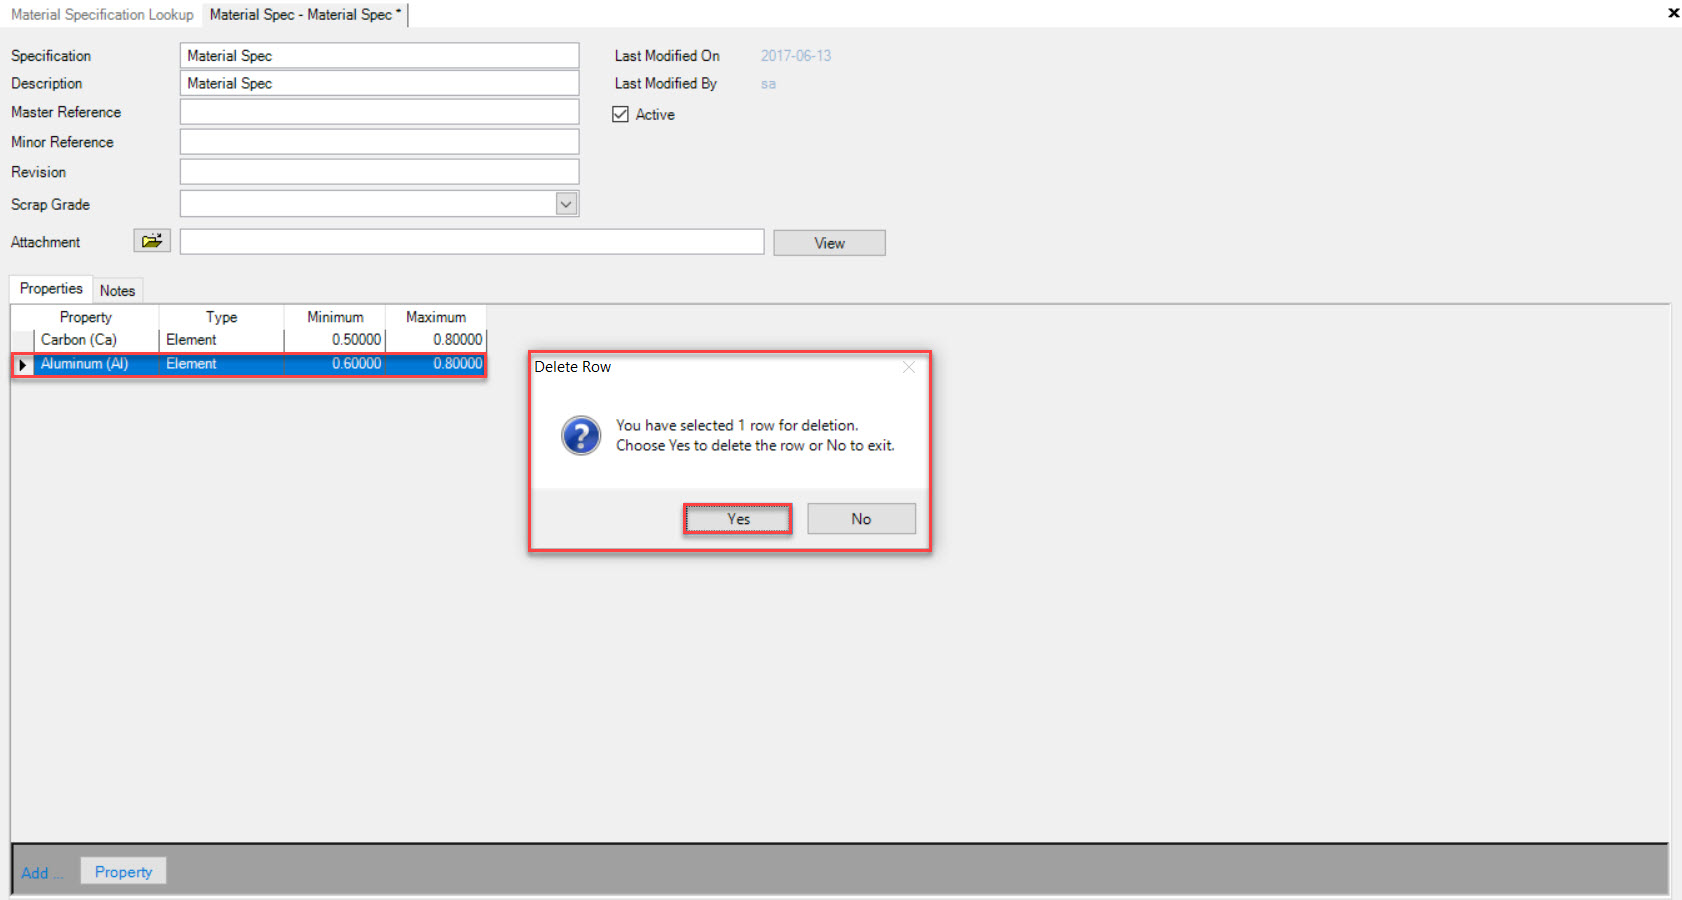
The selected Property will be deleted.
Make sure to save your changes before exiting the screen.
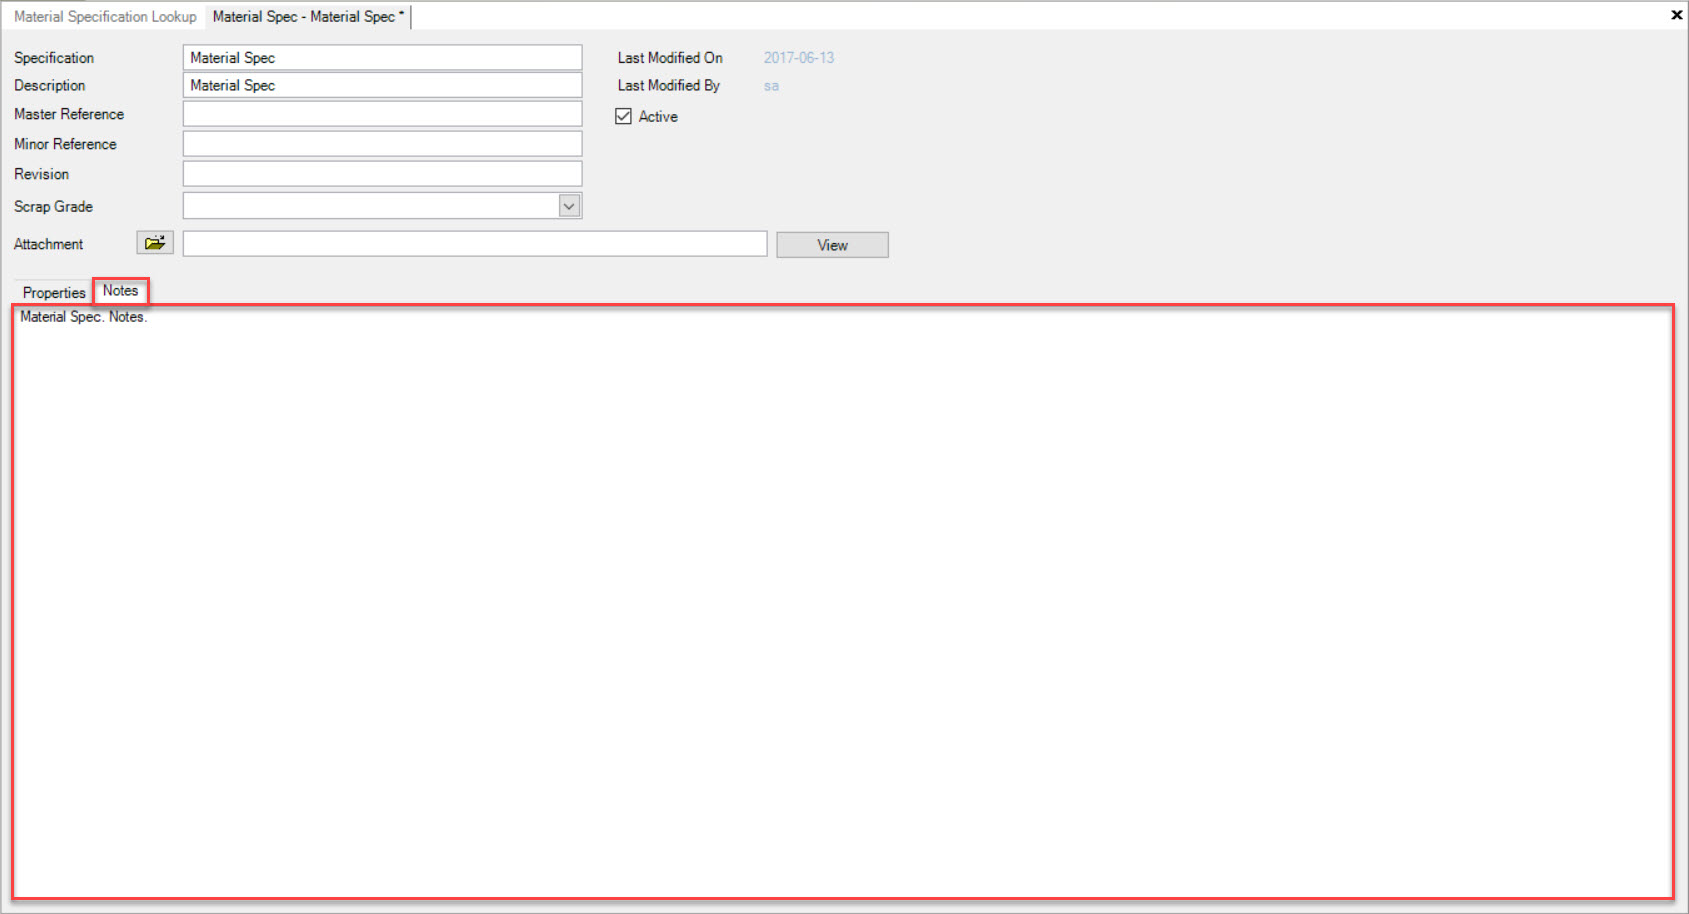
Notes Tab
To view Notes for an existing Material Spec., navigate to the tab and click on the icon.
The Material Specification Lookup screen will be displayed.
Locate and double-click on the Material Spec. you wish to view. The Material Spec. detail screen will be displayed.
Make sure to select the  tab.
tab.
All Material Spec. Notes will be displayed.
Adding, Editing, and/or Deleting Notes
To add, edit, and/or delete Material Spec. Notes, make sure to select the tab.
Using the available textbox, users may enter new Notes, and edit or delete existing Notes.

Make sure to save your changes before exiting the screen.