Purchased Item Tag Lookup
The Purchased Item Tag Lookup displays all available Purchased Item Tags in the system. To view all available Purchased Item Tags, navigate to the  tab and click on the
 ![]() icon. The Purchased Item Tag Lookup screen will be displayed.
icon. The Purchased Item Tag Lookup screen will be displayed.
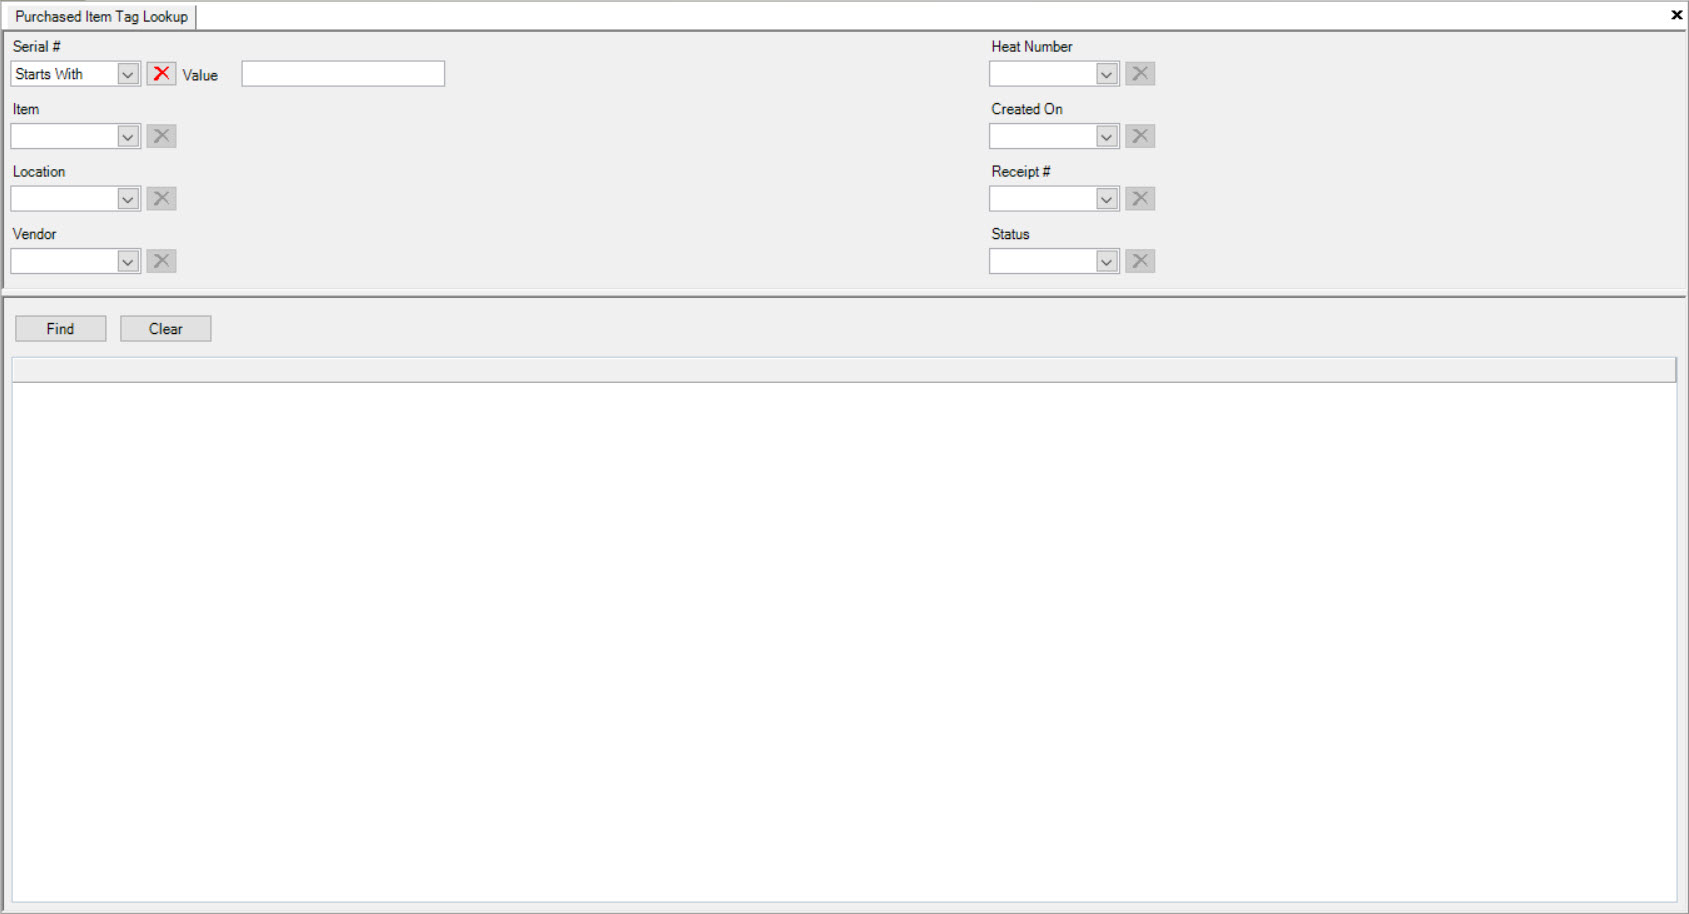
Users are than able to search for Purchased Item Tags using a variety of one or more search filters.
If users would like to search by Serial #, simply select an option from the drop-down menu (Contains, Exact Match, or Starts With) and then enter in a Value.

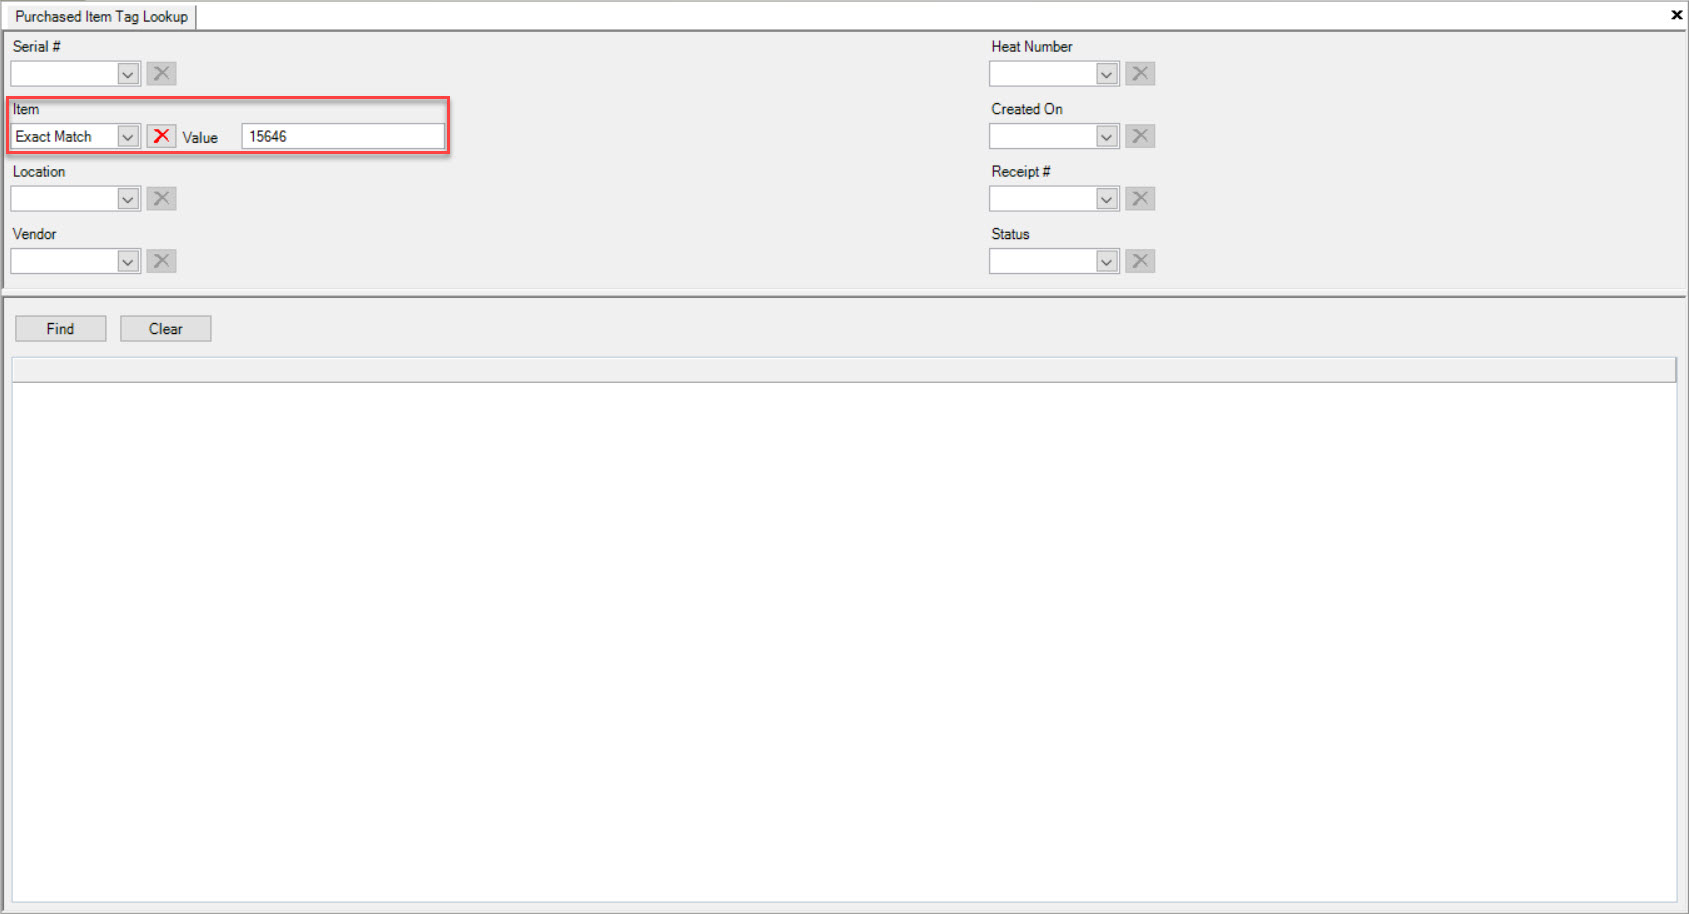
If users would like to search by Item, simply select an option from the drop-down menu (Contains, Exact Match, or Starts With) and then enter in a Value.
If users would like to search by Location, simply select an option from the drop-down menu (Contains, Exact Match, or Starts With) and then enter in a Value.
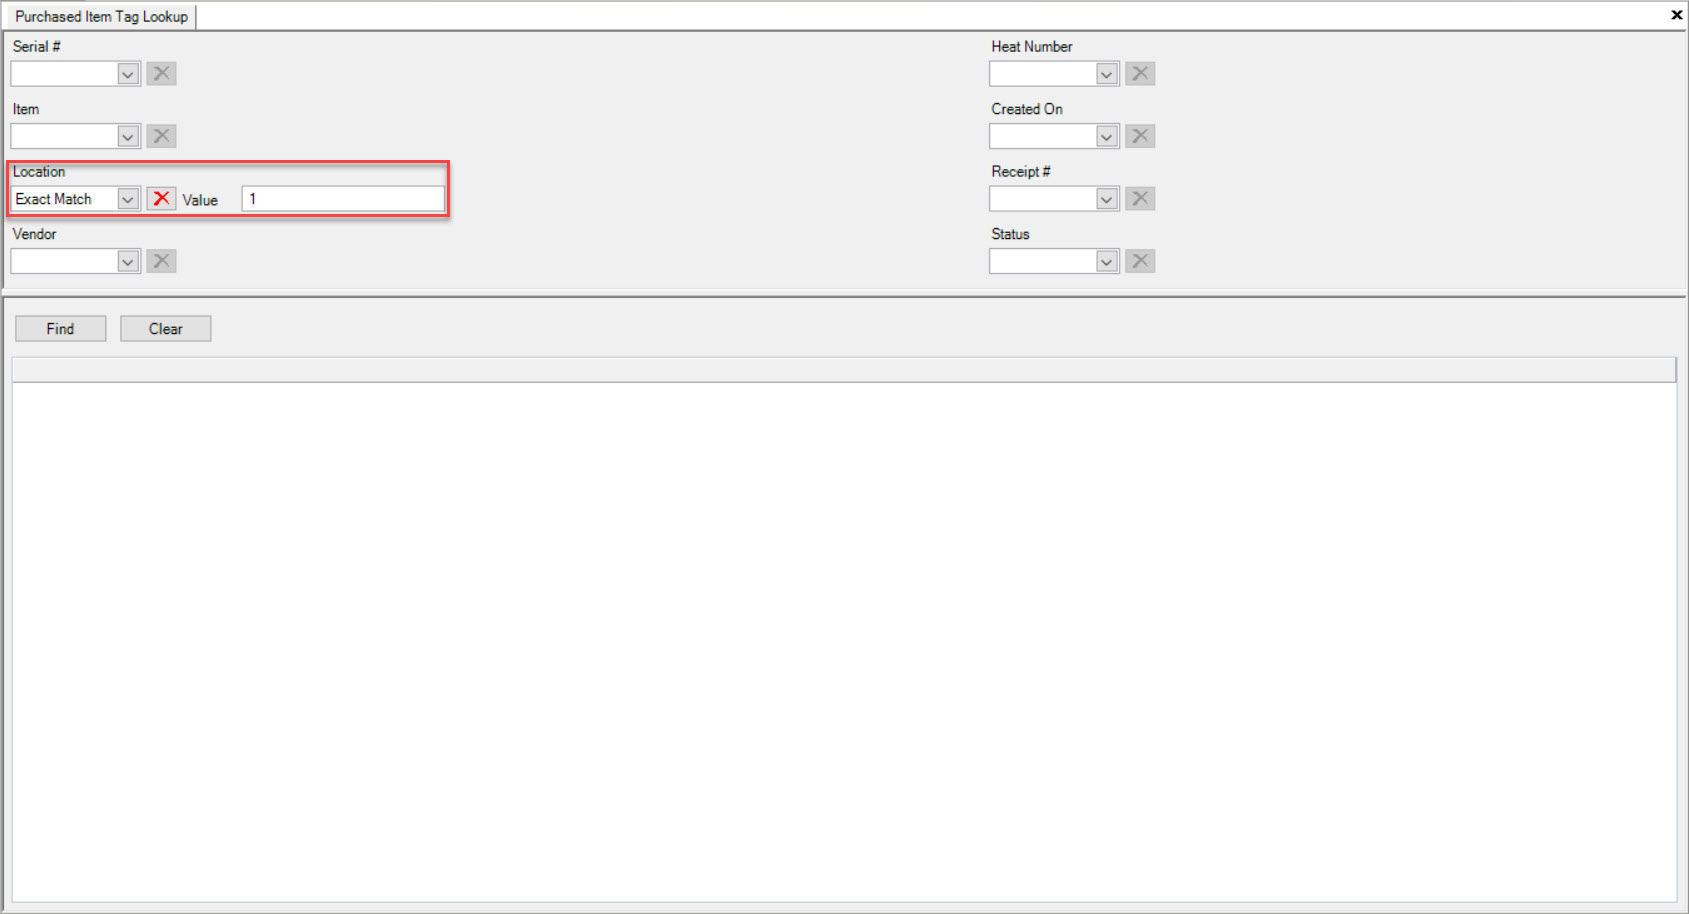
If users would like to search by Vendor, simply select an option from the drop-down menu (Contains, Exact Match, or Starts With) and then enter in a Value.
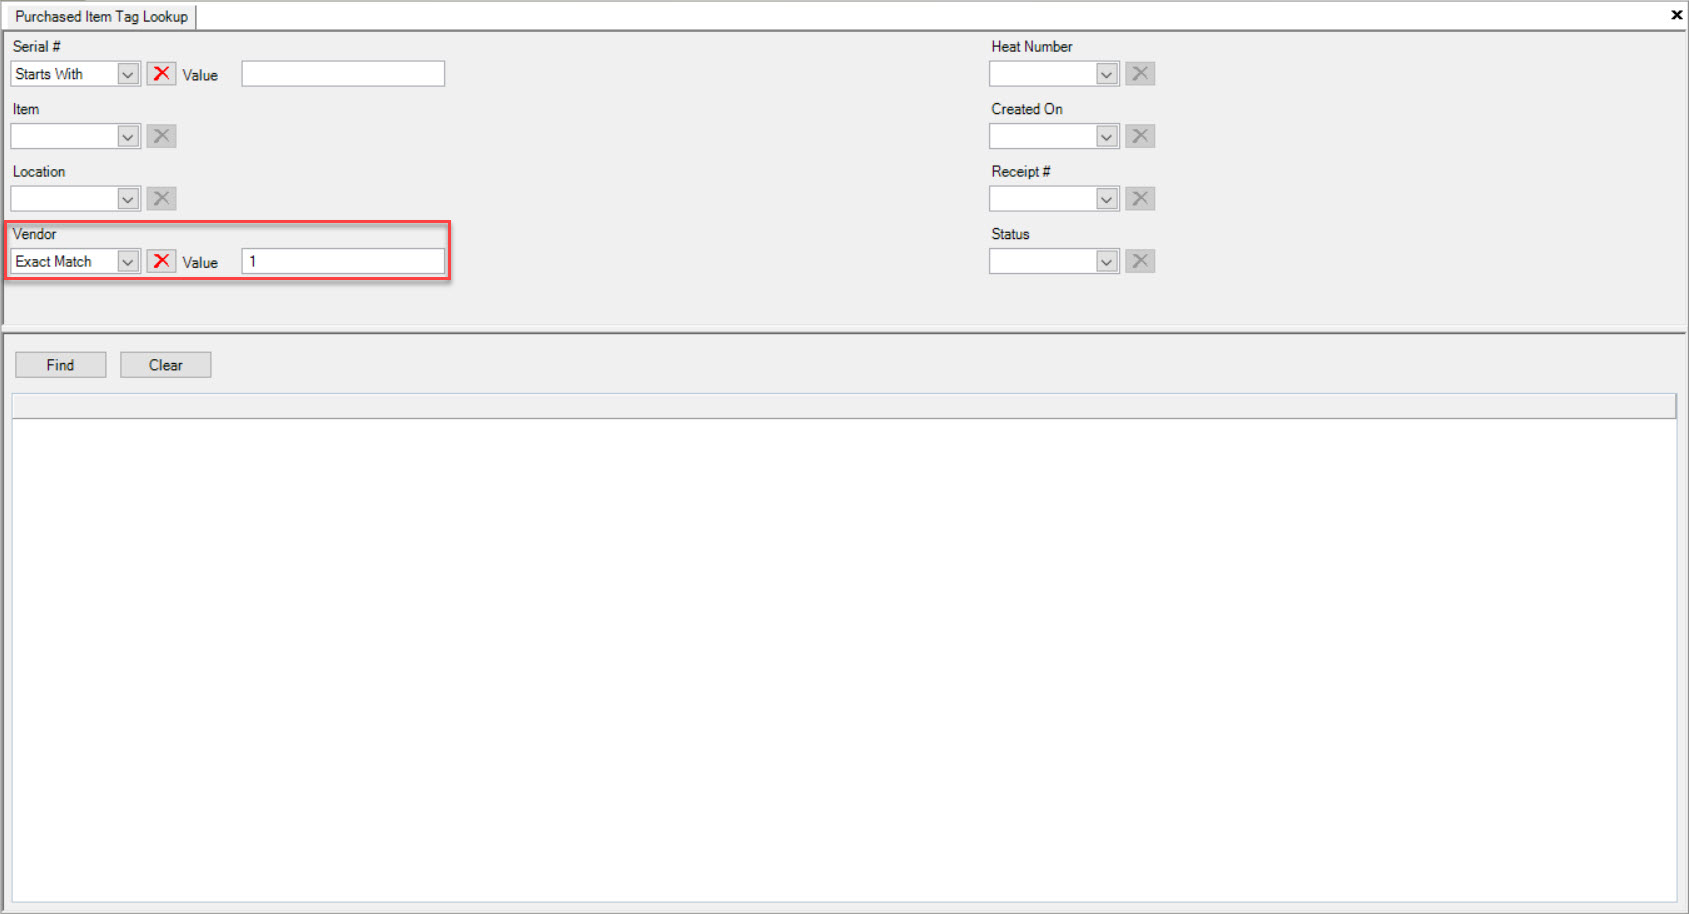
If users would like to search by Heat Number, simply select an option from the drop-down menu (Contains, Exact Match, or Starts With) and then enter in a Value.
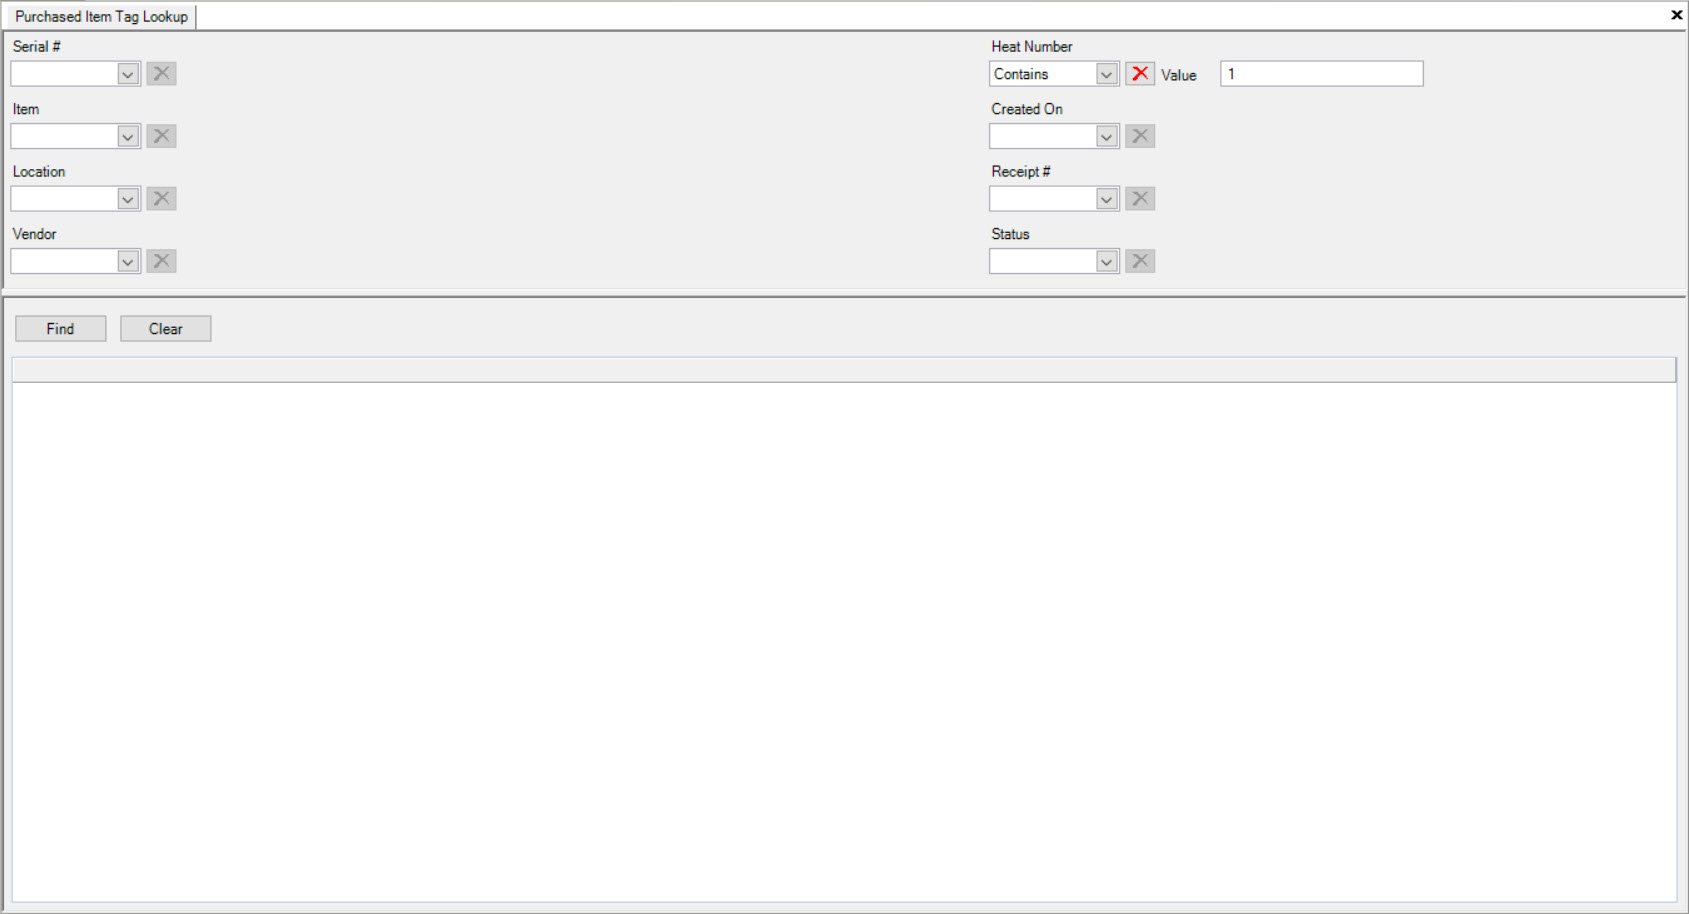
If users would like to search by Created On, simply select an option from the drop-down menu (Equal To, Greater Than, Greater Than or Equal To, Less Than and Greater Than, Less Than, Less Than or Equal To, or Range) and then select a date using the Value drop-down menu.
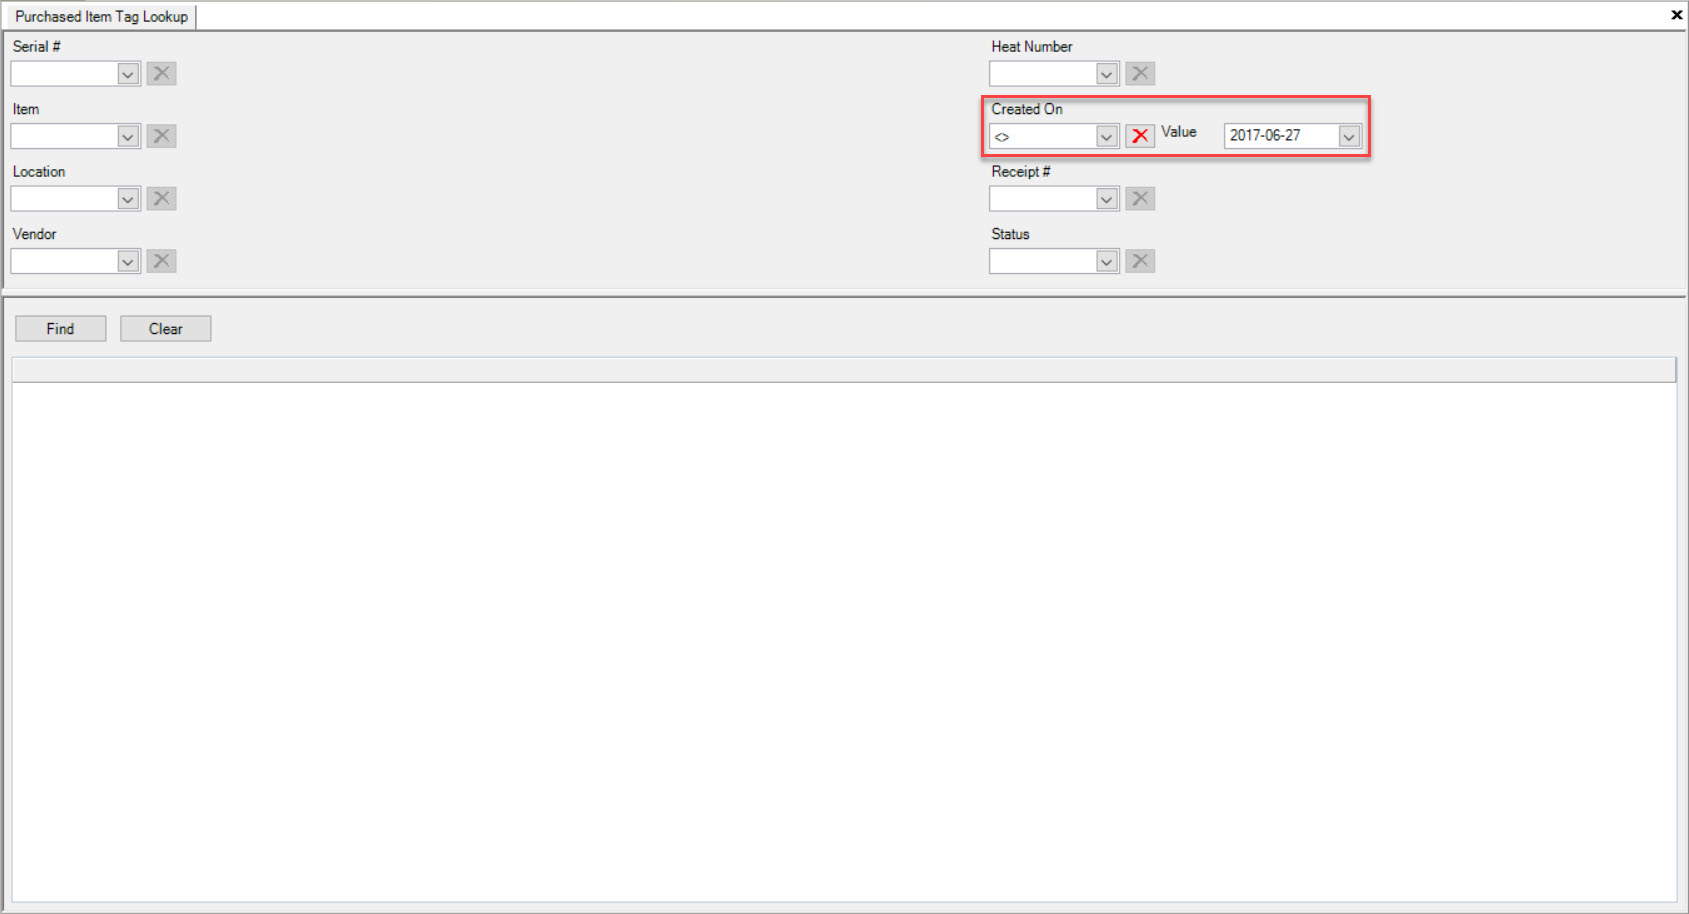
If users would like to search by Receipt #, simply select an option from the drop-down menu (Equal To, Greater Than, Greater Than or Equal To, Less Than and Greater Than, Less Than, Less Than or Equal To, or Range) and then enter in a Value.

If users would like to search by Status, simply select In from the drop-down menu and then select one or more of the options (All, Audit, Consumed, Deleted, Held, Normal, Picked, Rejected, Scrapped, and/or Shipped) from the second drop-down menu.
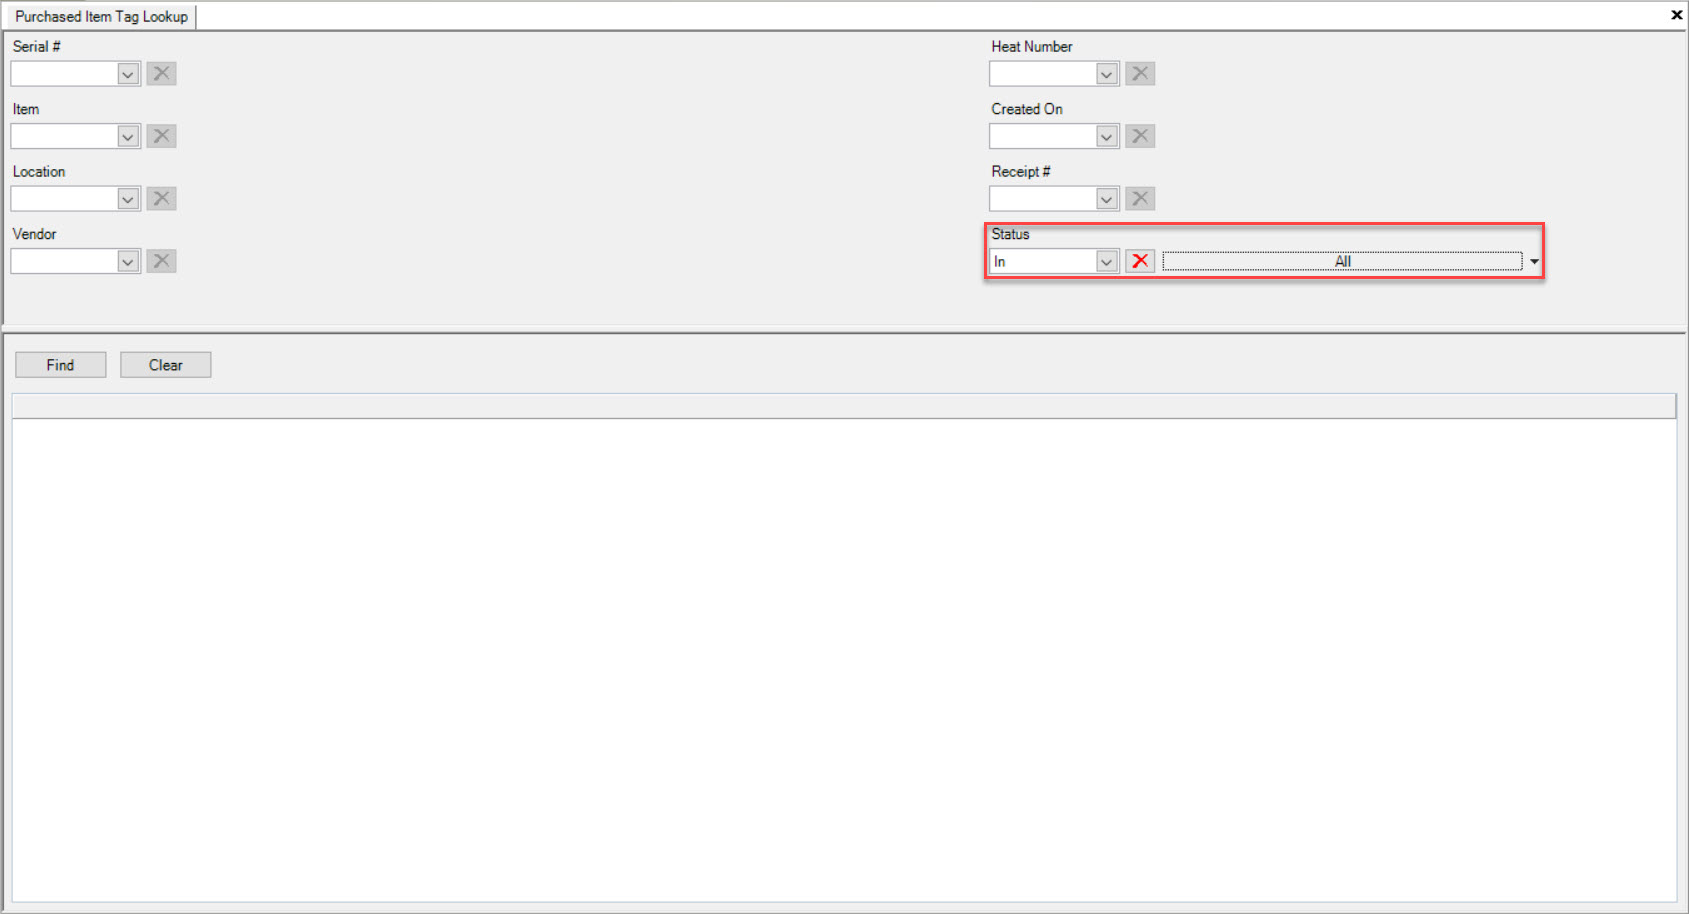
Once users have selected the appropriate search filters, click on the  button. The system will populate the Purchased Item Tags appropriately.
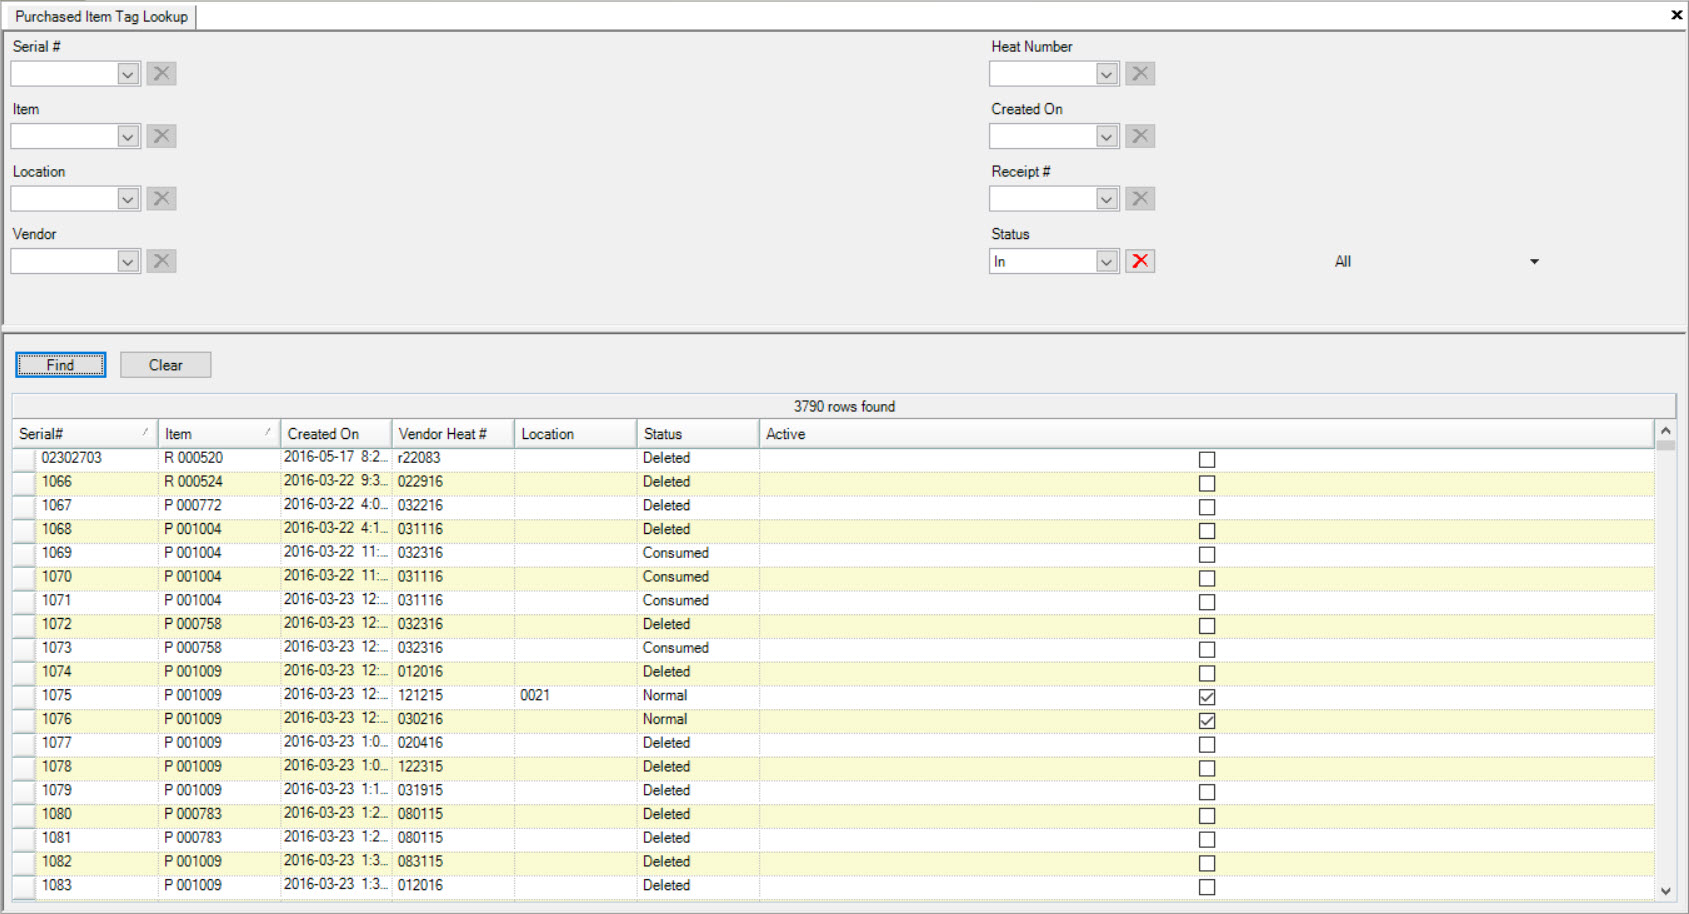
Viewing a Purchased Item Tag
To view a Purchased Item Tag in the system, navigate to the  tab and click on the
 ![]() icon.
The Purchased Item Tag Lookup screen will be displayed.
icon.
The Purchased Item Tag Lookup screen will be displayed.
Use one or more of the search filters and click on the  button. The system will populate the Purchased Item Tags appropriately.
Locate the Purchased Item Tag you wish to view and double-click on the appropriate row. The Purchased Item Tag detail screen will appear.
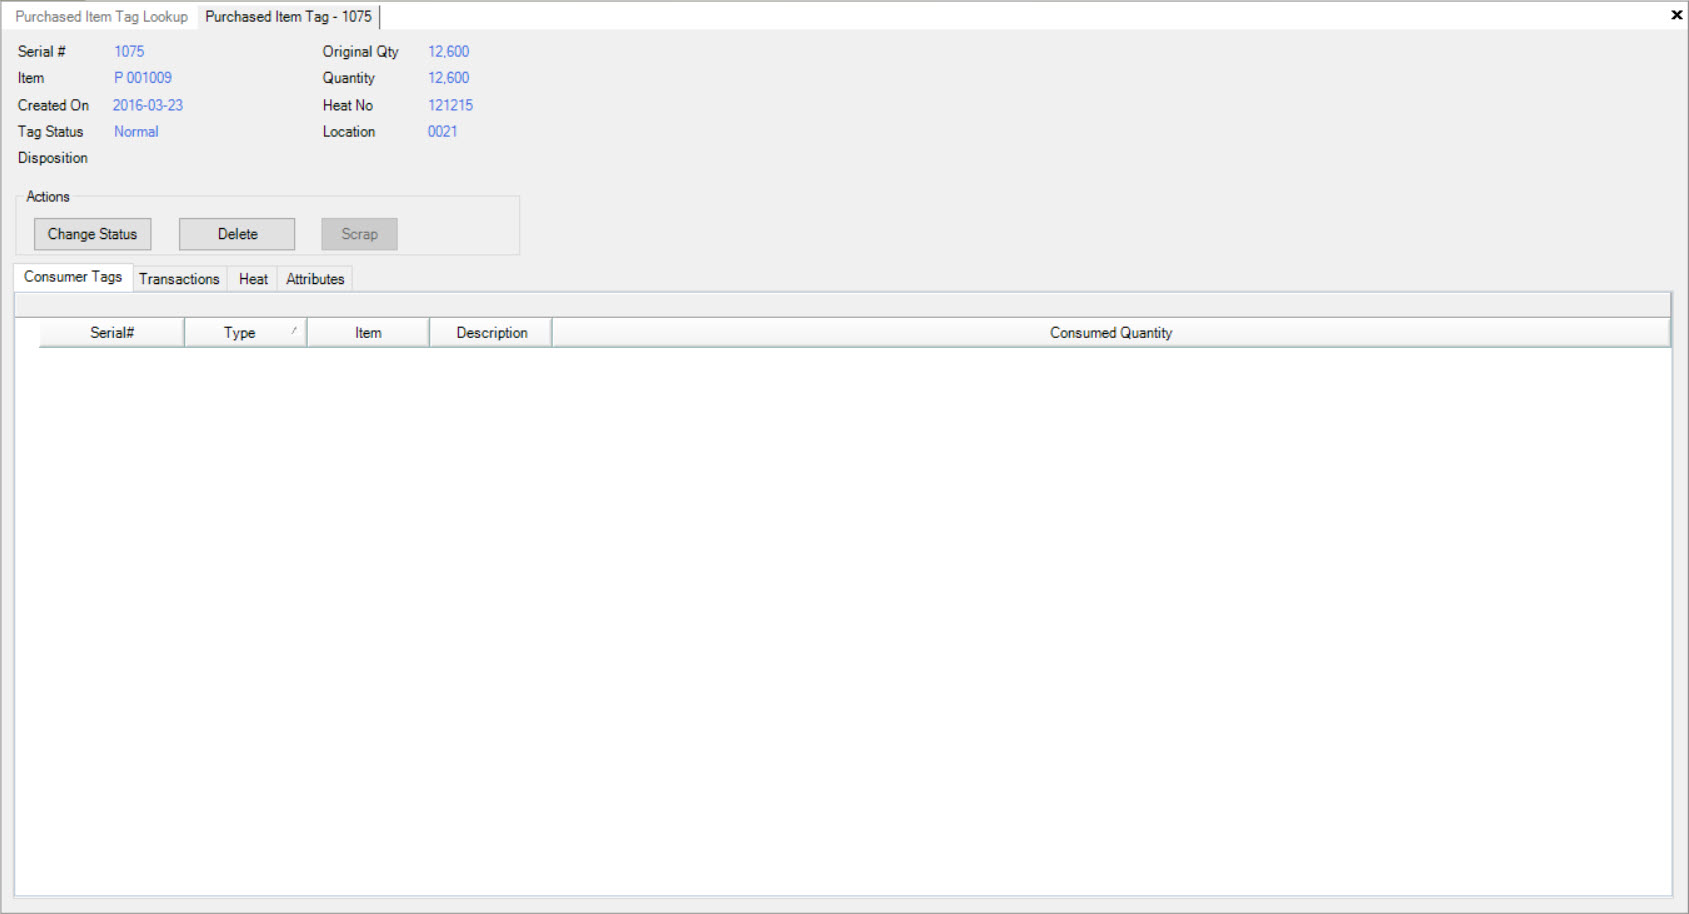
Changing a Purchased Item Tag Status
Users have the ability to change the Status of a Purchased Item Tag. To do so, navigate to the  tab and click on the
 ![]() icon.
The Purchased Item Tag Lookup screen will be displayed.
icon.
The Purchased Item Tag Lookup screen will be displayed.
Use one or more of the search filters and click on the  button. The system will populate the Purchased Item Tags appropriately.
Locate the Purchased Item Tag you wish to change the Status of and double-click on the appropriate row. The Purchased Item Tag detail screen will appear.

Click on the  button. The Change Status window will appear.
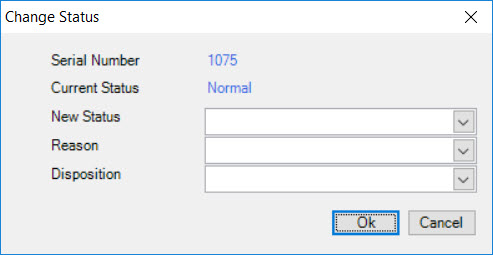
The Serial Number and Current Status will be displayed but users must select a New Status, Reason, and Disposition using the available drop-down menus. Then, click on the
 button.
The Tag Status will automatically update.
Re-activating a Purchased Item Tag
Users have the ability to re-activate a Purchased Item Tag. To do so, navigate to the  tab and click on the
 ![]() icon.
The Purchased Item Tag Lookup screen will be displayed.
icon.
The Purchased Item Tag Lookup screen will be displayed.
Use one or more of the search filters and click on the  button. The system will populate the Purchased Item Tags appropriately.
Locate the Purchased Item Tag you wish to re-activate and double-click on the appropriate row. The Purchased Item Tag detail screen will appear.

Click on the  button. The Inventory Adjustment window will appear.
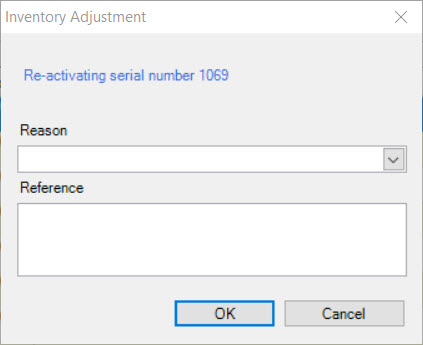
Users must select a Reason and enter in a Reference. Then, click on the  button.
The Tag Status will automatically default back to the original Status.
Deleting a Purchased Item Tag
Users have the ability to delete a Purchased Item Tag. To do so, navigate to the  tab and click on the
 ![]() icon.
The Purchased Item Tag Lookup screen will be displayed.
icon.
The Purchased Item Tag Lookup screen will be displayed.
Use one or more of the search filters and click on the  button. The system will populate the Purchased Item Tags appropriately.
Locate the Purchased Item Tag you wish to delete and double-click on the appropriate row. The Purchased Item Tag detail screen will appear.

Click on the  button. The Inventory Adjustment window will appear.

Users must select a Reason and enter in a Reference. Then, click on the  button.
The Tag Status will automatically change to Deleted.
Scrapping a Purchased Item Tag
Users have the ability to scrap a Purchased Item Tag in the system. To do so, navigate to the  tab and click on the
 ![]() icon.
The Purchased Item Tag Lookup screen will be displayed.
icon.
The Purchased Item Tag Lookup screen will be displayed.
Use one or more of the search filters and click on the  button. The system will populate the Purchased Item Tags appropriately.
Locate the Purchased Item Tag you wish to delete and double-click on the appropriate row. The Purchased Item Tag detail screen will appear.

Click on the
Consumer Tags Tab
To view Consumer Tags on a Purchased Item Tag, navigate to the  tab and click on the
 ![]() icon.
The Purchased Item Tag Lookup screen will be displayed.
icon.
The Purchased Item Tag Lookup screen will be displayed.
Use one or more of the search filters and click on the  button. The system will populate the Purchased Item Tags appropriately.
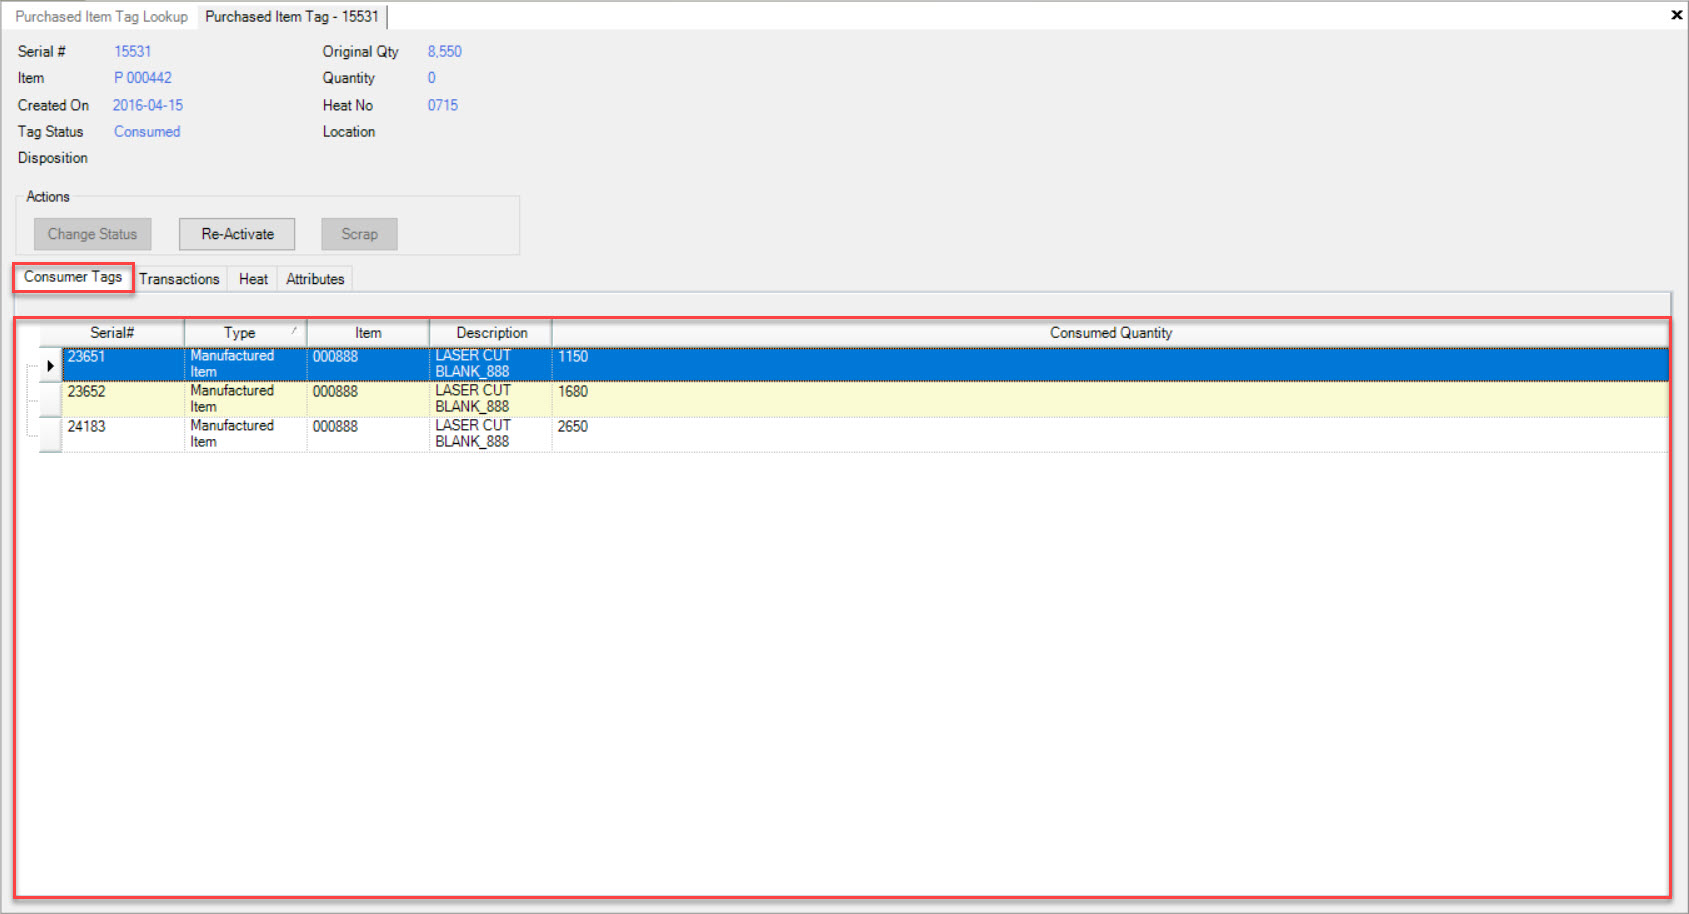
Locate the Purchased Item Tag you wish to view Consumer Tags for and double-click on the appropriate row. The Purchased Item Tag detail screen will appear.

Make sure to select the  tab.
tab.
All of the Consumer Tags attached to the selected Purchased Item Tag will be displayed.
Opening a Manufactured Item Tag from the Consumer Tags Tab
Users have the ability to open a Manufactured Item Tag from the Consumer Tags tab on the Purchased Item Tag detail screen.
To do so, navigate to the  tab and click on the
 ![]() icon.
The Purchased Item Tag Lookup screen will be displayed.
icon.
The Purchased Item Tag Lookup screen will be displayed.
Use one or more of the search filters and click on the  button. The system will populate the Purchased Item Tags appropriately.
Locate the Purchased Item Tag you wish to open a Manufactured Item Tag from and double-click on the appropriate row. The Purchased Item Tag detail screen will appear.

Make sure to select the  tab.
tab.
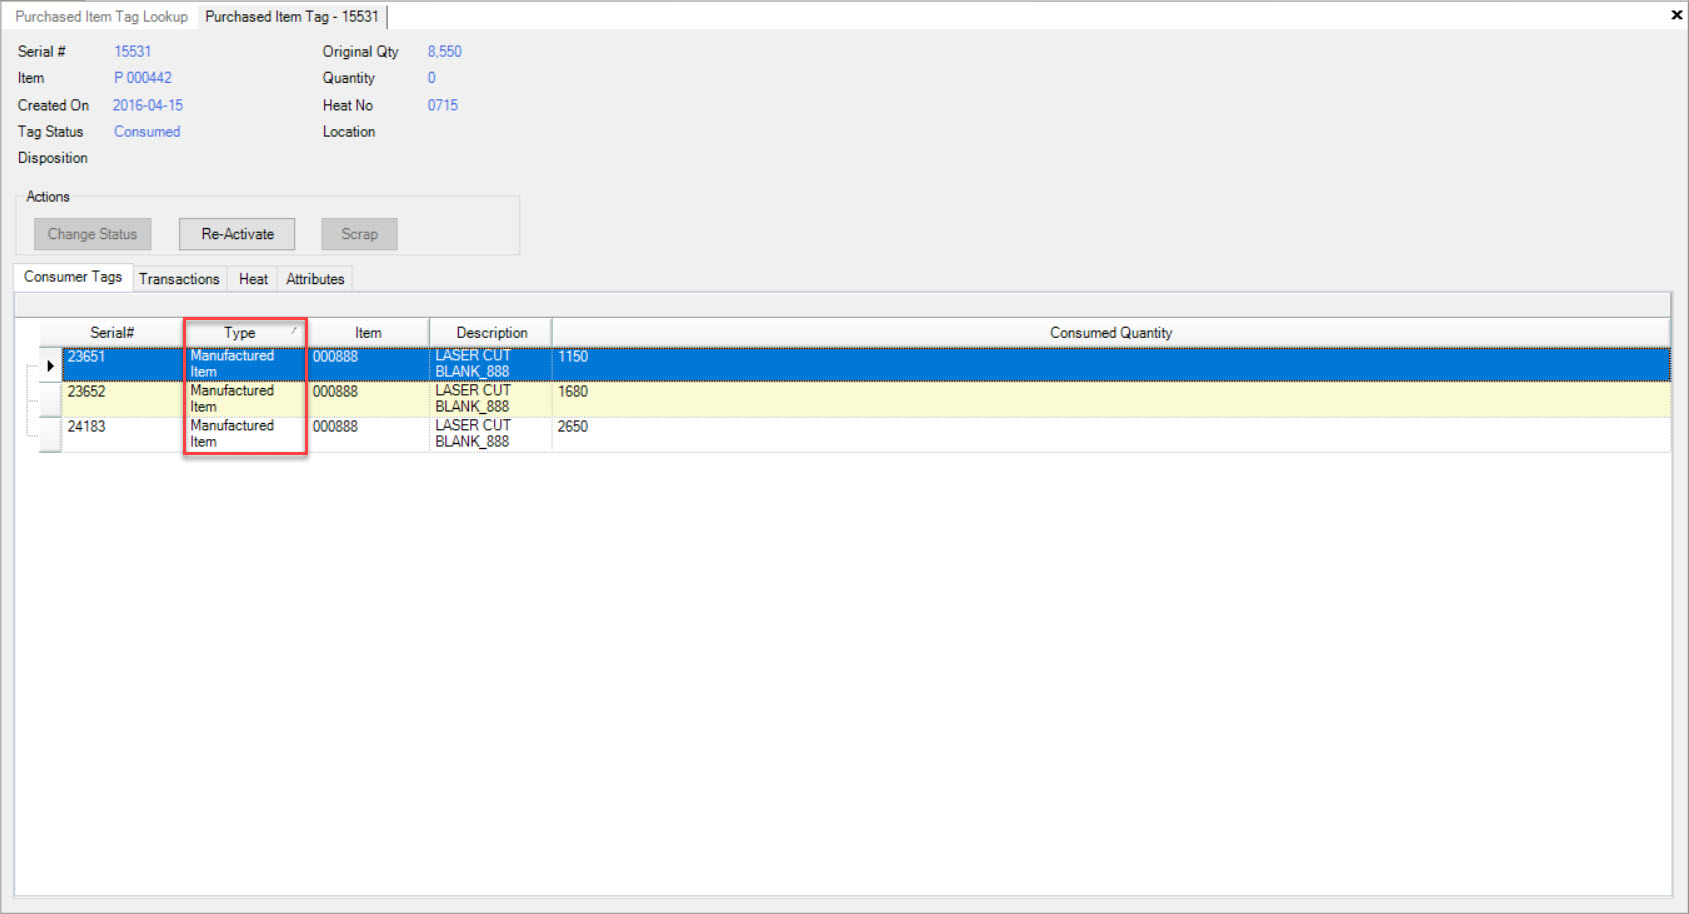
Next, locate and double-click on the row of the appropriate Manufactured Item Tag you wish to open.
Note
The type of the Serial # under the  tab will be displayed under the Type column. This is where users can identify that the selected Serial # is in fact, a Manufactured Item Tag.
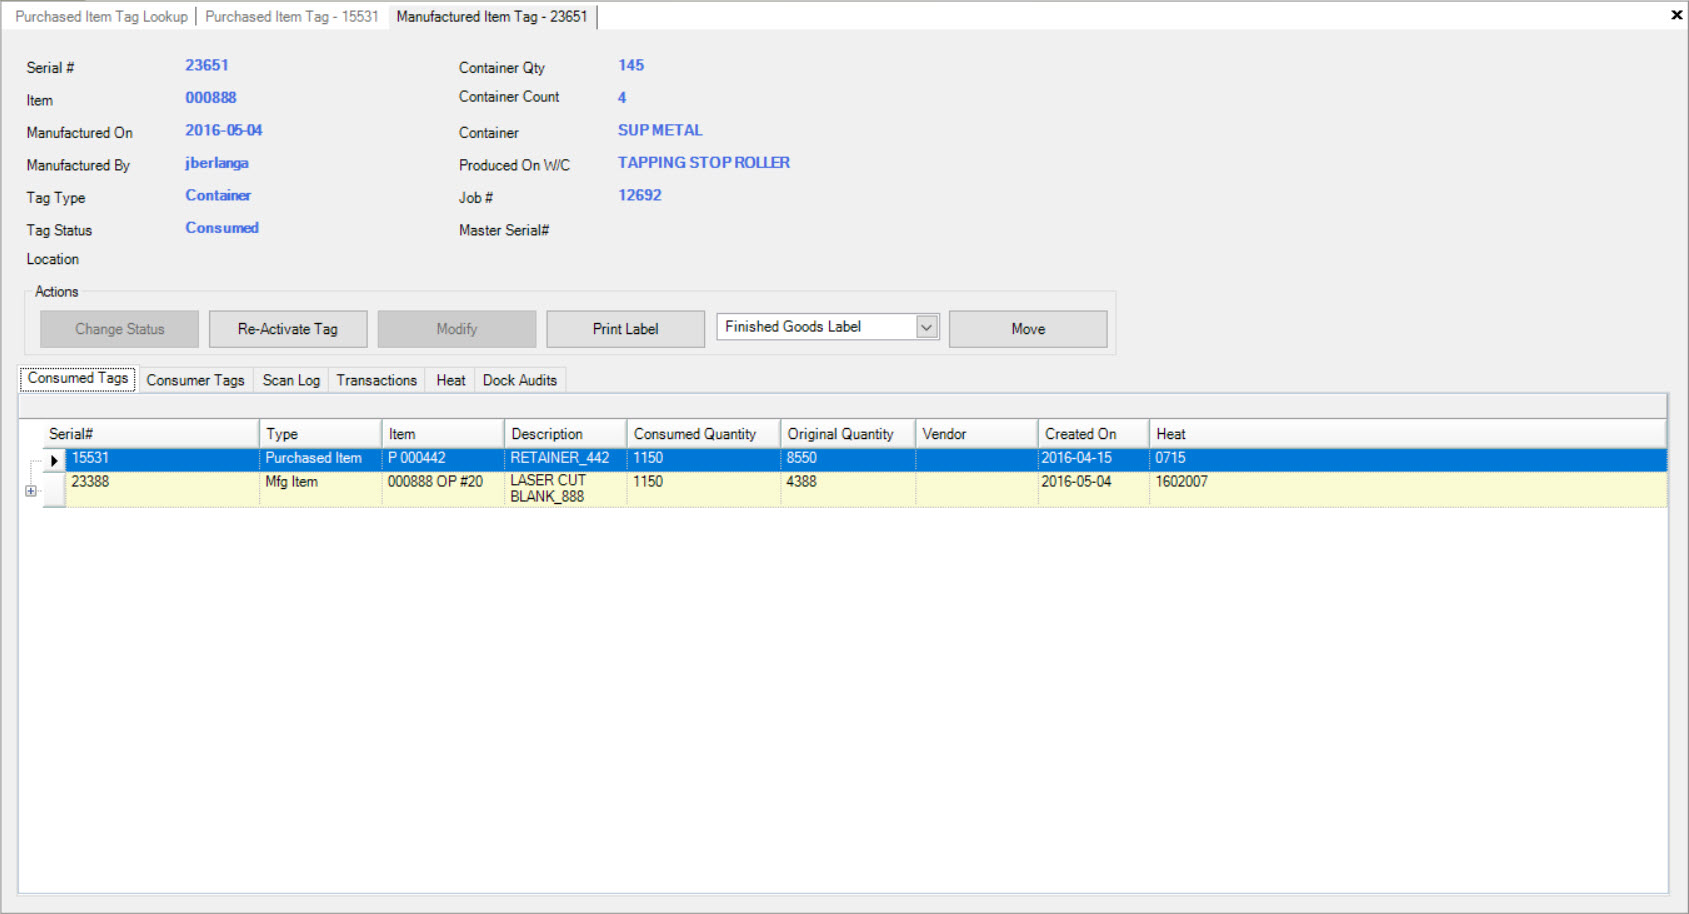
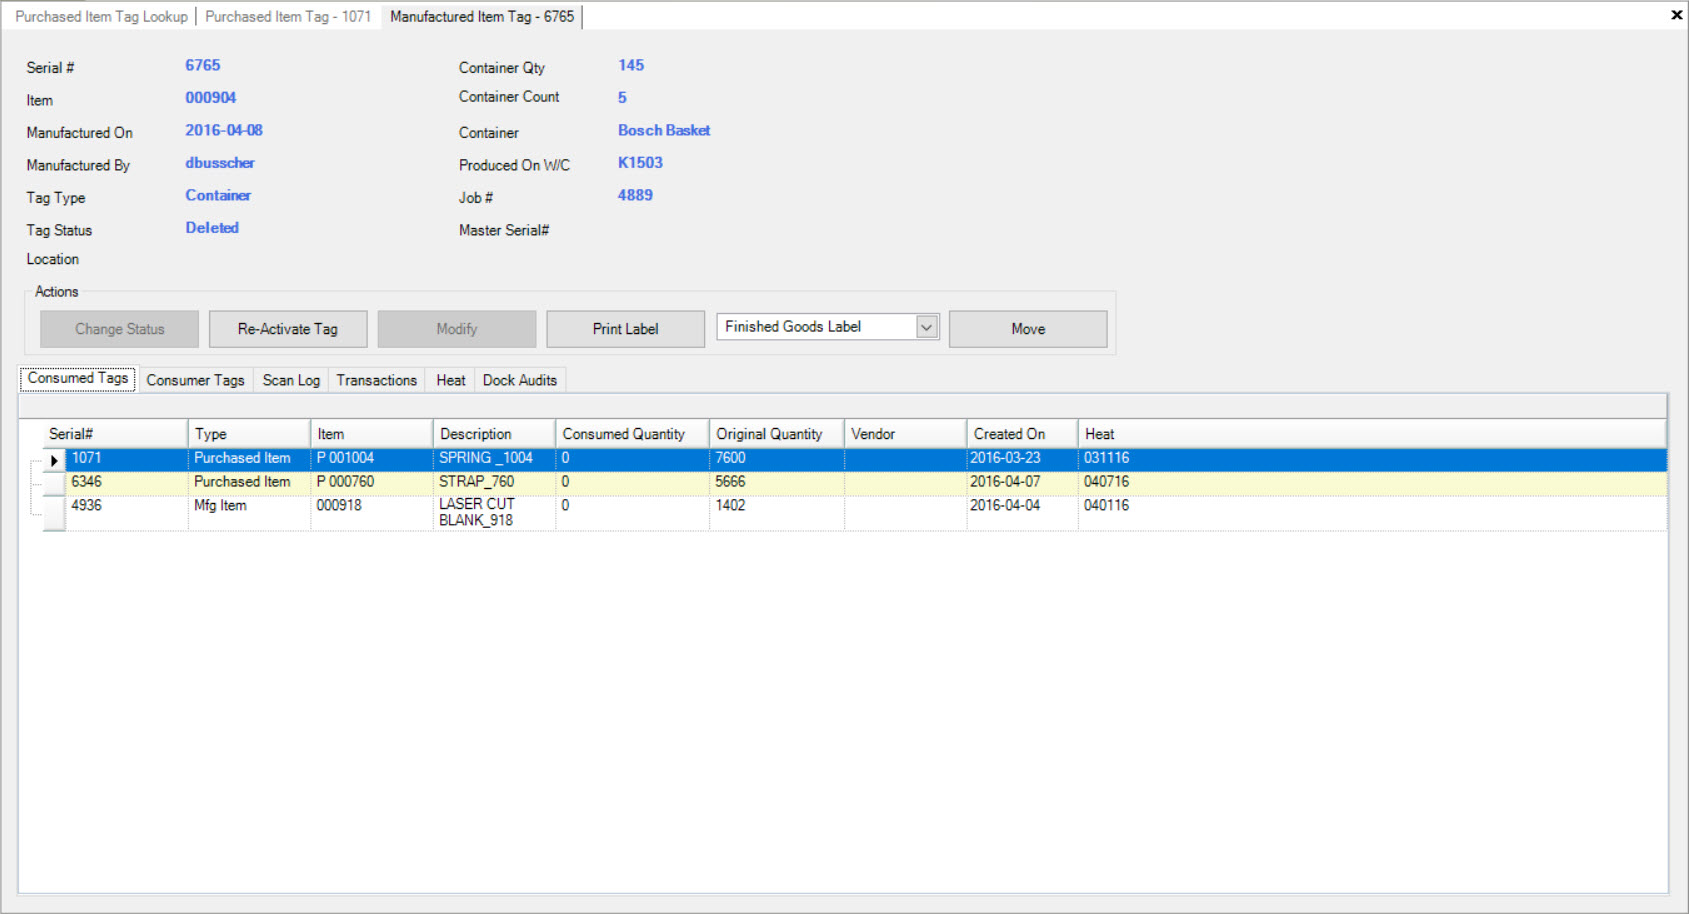
Once you have double-clicked on the appropriate row, the Manufactured Item Tag detail screen will be displayed.
Note
For more information on Manufactured Item Tags, please see Quality Assurance > Manufactured Item Tag Lookup.
Transactions Tab
To view Transactions on a Purchased Item Tag, navigate to the  tab and click on the
 ![]() icon.
The Purchased Item Tag Lookup screen will be displayed.
icon.
The Purchased Item Tag Lookup screen will be displayed.
Use one or more of the search filters and click on the  button. The system will populate the Purchased Item Tags appropriately.
Locate the Purchased Item Tag you wish to open a Manufactured Item Tag from and double-click on the appropriate row. The Purchased Item Tag detail screen will appear.

Make sure to select the  tab.
tab.
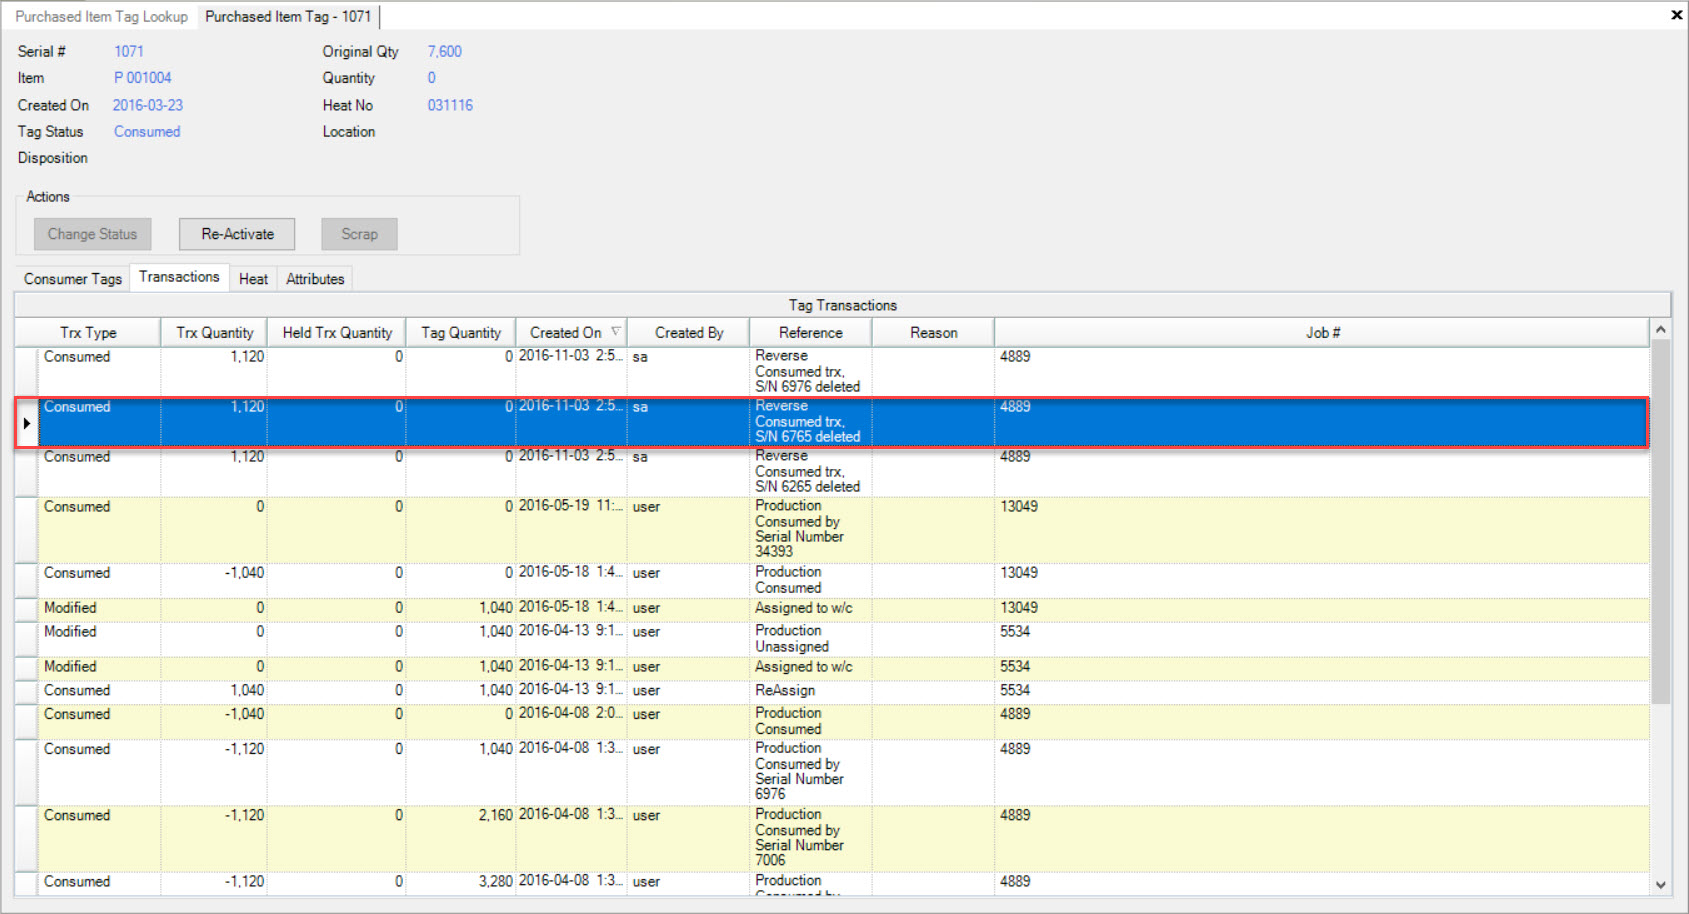
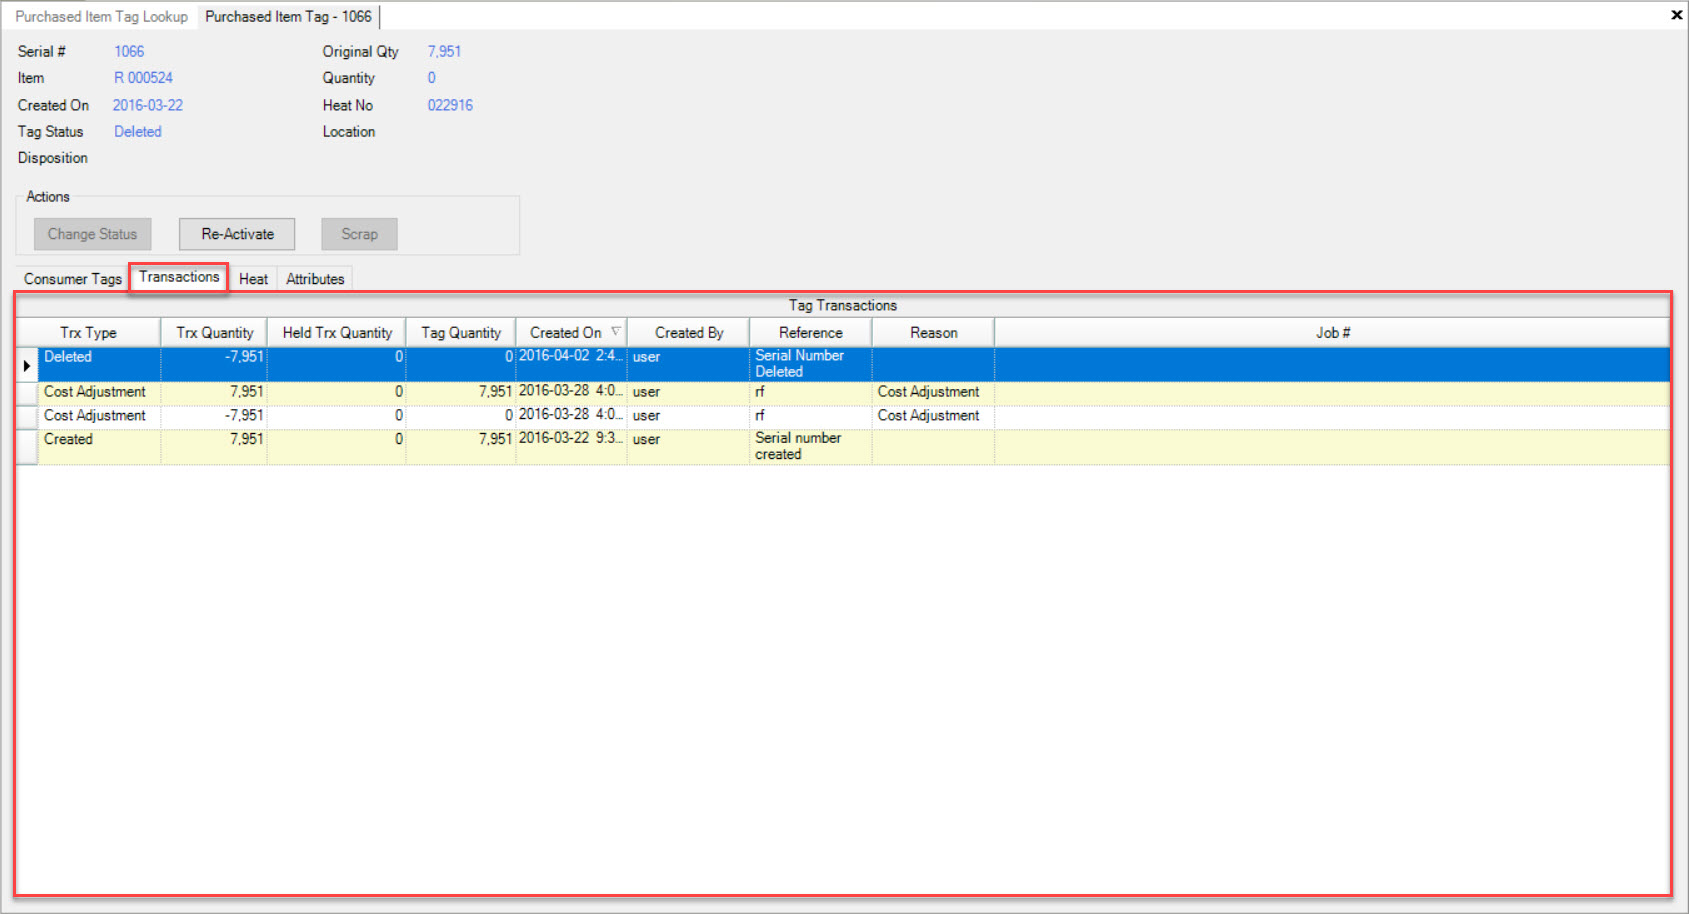
Users will be able to view all available Transactions related to the selected Purchased Item Tag with details including the Trx. Type, Trx. Quantity, Held Trx. Quantity, Tag Quantity, Created On date, Created By, Reference, Reason, and Job #.
Note
If users wish to open a Manufactured Item Tag from the  tab, simply double-click on the appropriate row. The Manufactured Item Tag detail screen will be displayed.
Heat Tab
To view Heats on a Purchased Item Tag, navigate to the  tab and click on the
 ![]() icon.
The Purchased Item Tag Lookup screen will be displayed.
icon.
The Purchased Item Tag Lookup screen will be displayed.
Use one or more of the search filters and click on the  button. The system will populate the Purchased Item Tags appropriately.
Locate the Purchased Item Tag you wish to view Heats for and double-click on the appropriate row. The Purchased Item Tag detail screen will appear.

Make sure to select the  tab.
tab.
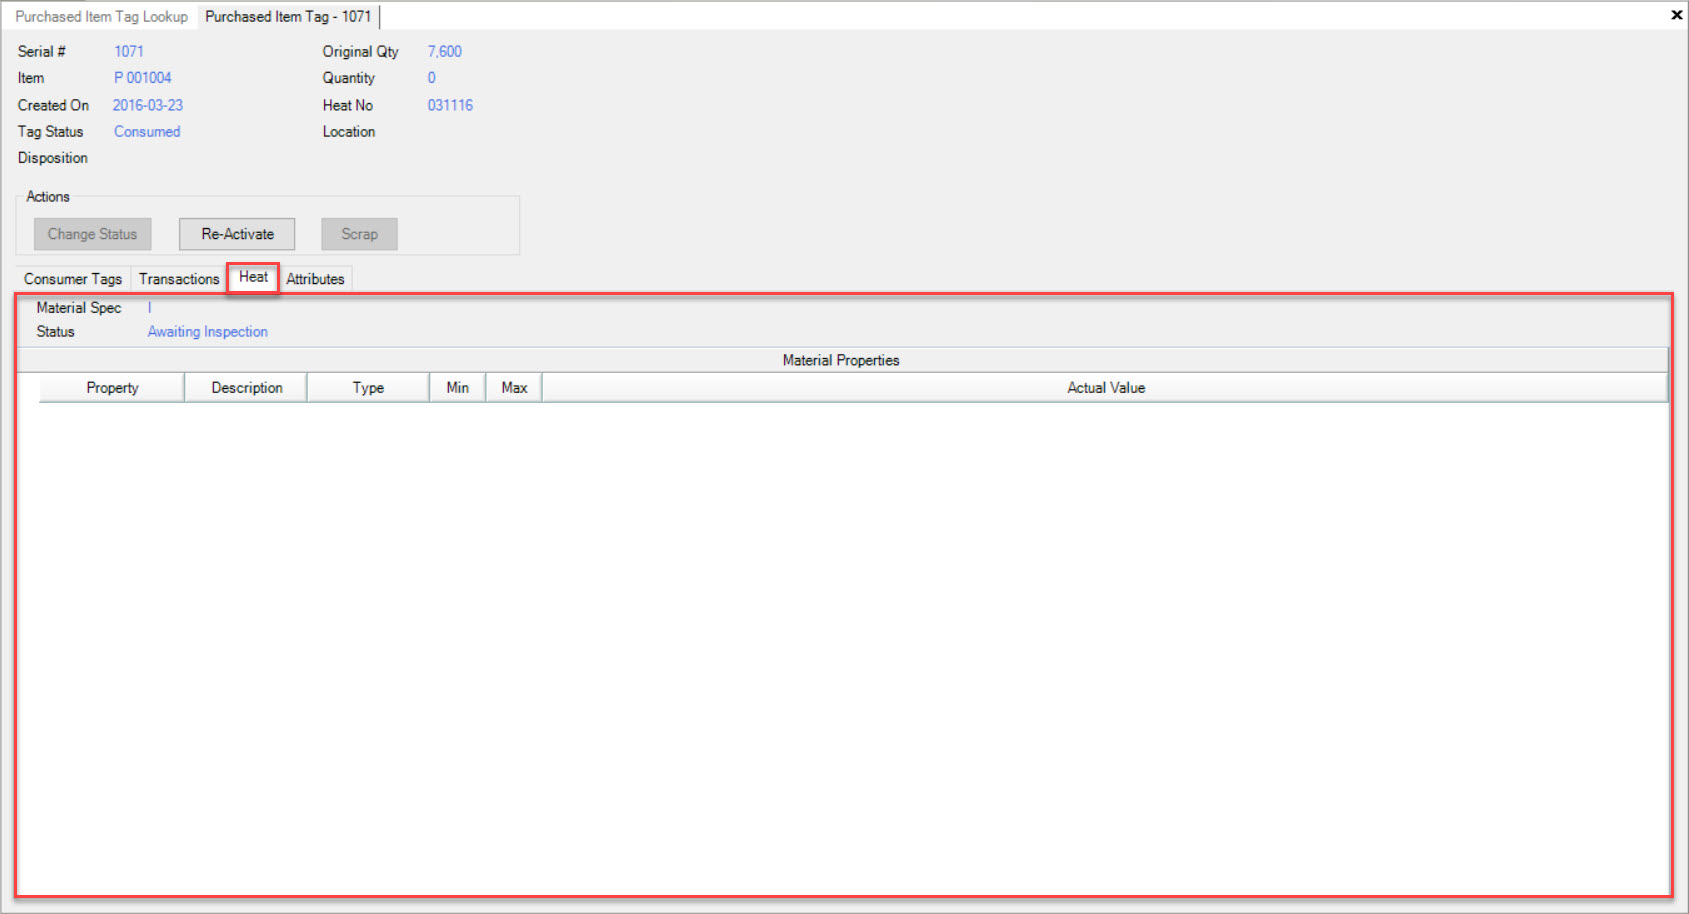
Users will be able to view all available Heats related to the selected Purchased Item Tag including details such as the Property, Description, Type, Min., Max., and Actual Value.
Attributes Tab
To view Attributes on a Purchased Item Tag, navigate to the  tab and click on the
 ![]() icon.
The Purchased Item Tag Lookup screen will be displayed.
icon.
The Purchased Item Tag Lookup screen will be displayed.
Use one or more of the search filters and click on the  button. The system will populate the Purchased Item Tags appropriately.
Locate the Purchased Item Tag you wish to view Attributes for and double-click on the appropriate row. The Purchased Item Tag detail screen will appear.

Make sure to select the  tab.
tab.
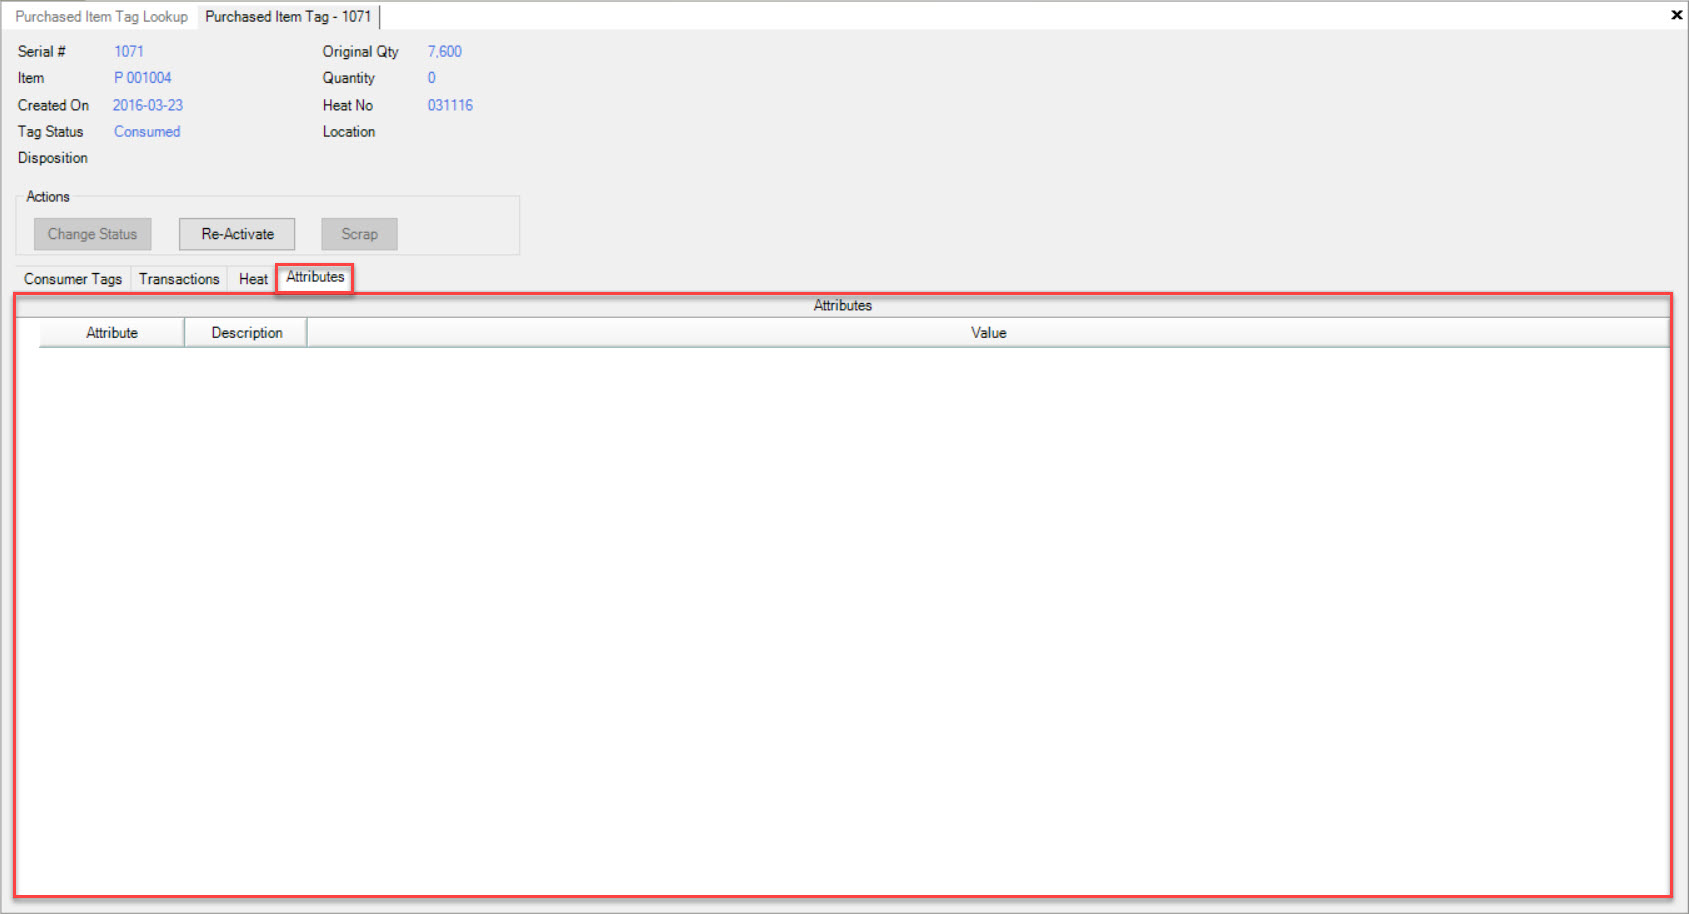
Users will be able to view all available Attributes for the selected Purchased Item Tags including details such as the Attribute, Description, and Value.
