Quality Inspection Template Lookup
Quality Inspection Templates Lookup displays all available Quality Inspection Templates in the system.
To view all available Quality Inspection Templates, navigate to the  tab and click on the
 icon. The Quality Inspection Template Lookup screen will be displayed.
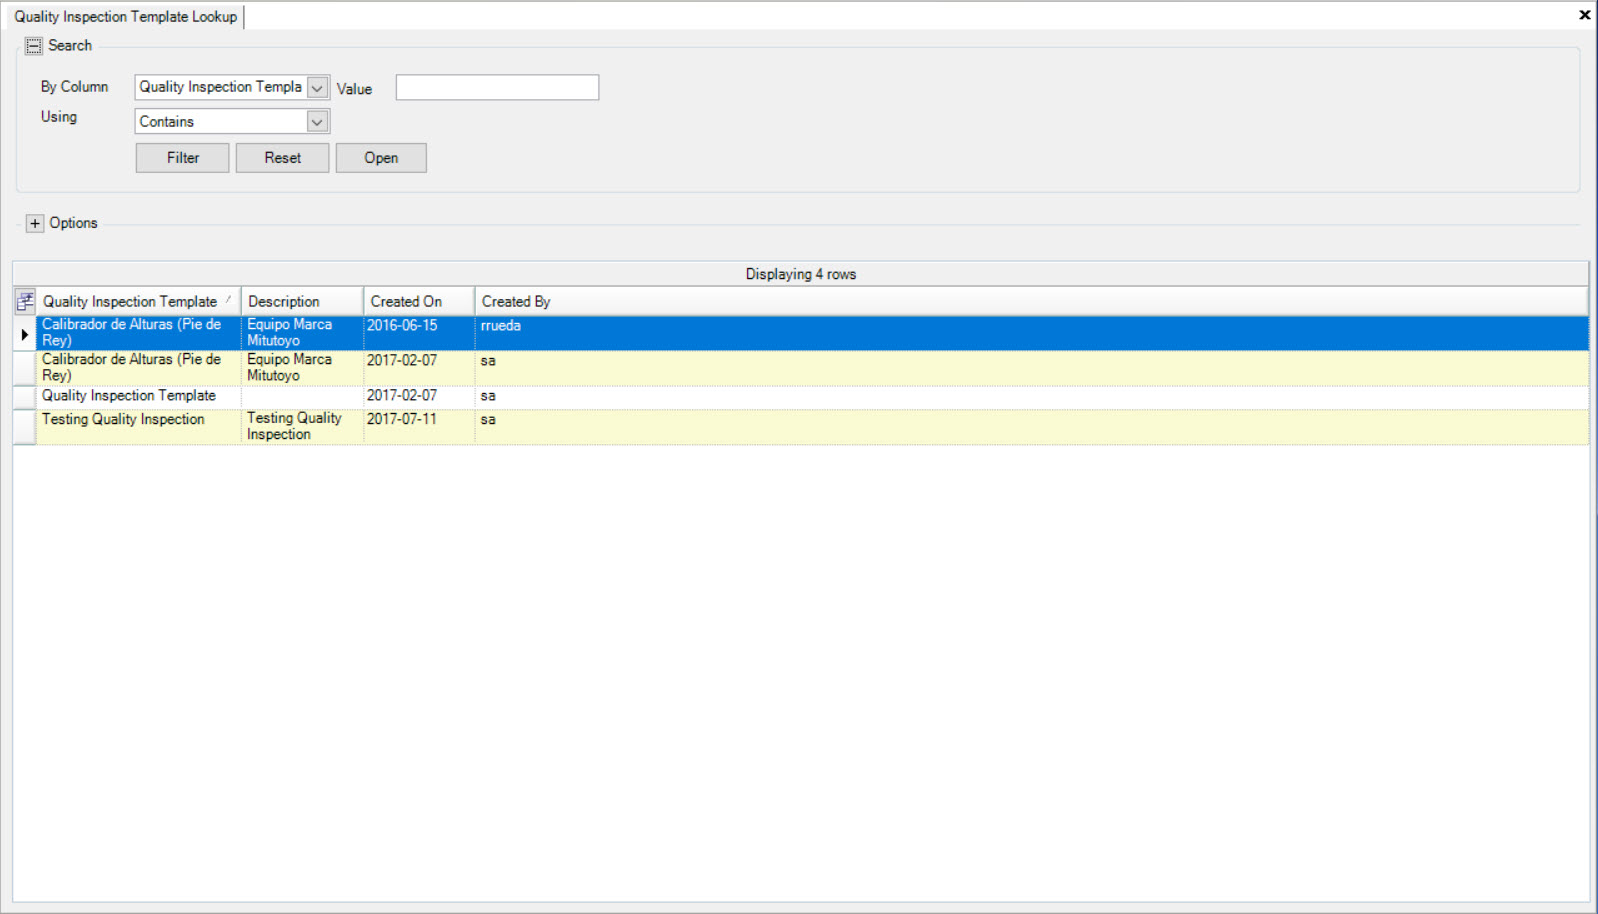
Users will be able to view all available Quality Inspection Templates with details including the Quality Inspection Template, Description, Created On date, and Created By.
Viewing a Quality Inspection Template
To view an existing Quality Inspection Template, navigate to the tab and click on the
icon. The Quality Inspection Template Lookup screen will be displayed.
Locate the Quality Inspection Template you wish to view and double-click on the appropriate row. The Quality Inspection Template detail screen will be displayed.
Quality Inspection Operator Settings
There are a few Quality Inspection parameters that need to be set up in the system before a Quality Inspection can occur.
Setting up Permissions for Out of Spec Overrides
If users wish to have a Team Lead or a Manager override an Out of Spec Measurement at the Operator Level, you need to set up a permission for that particular user in the system.
To do so, navigate to the  tab and click on the
  icon.
The Security screen will be displayed.
icon.
The Security screen will be displayed.
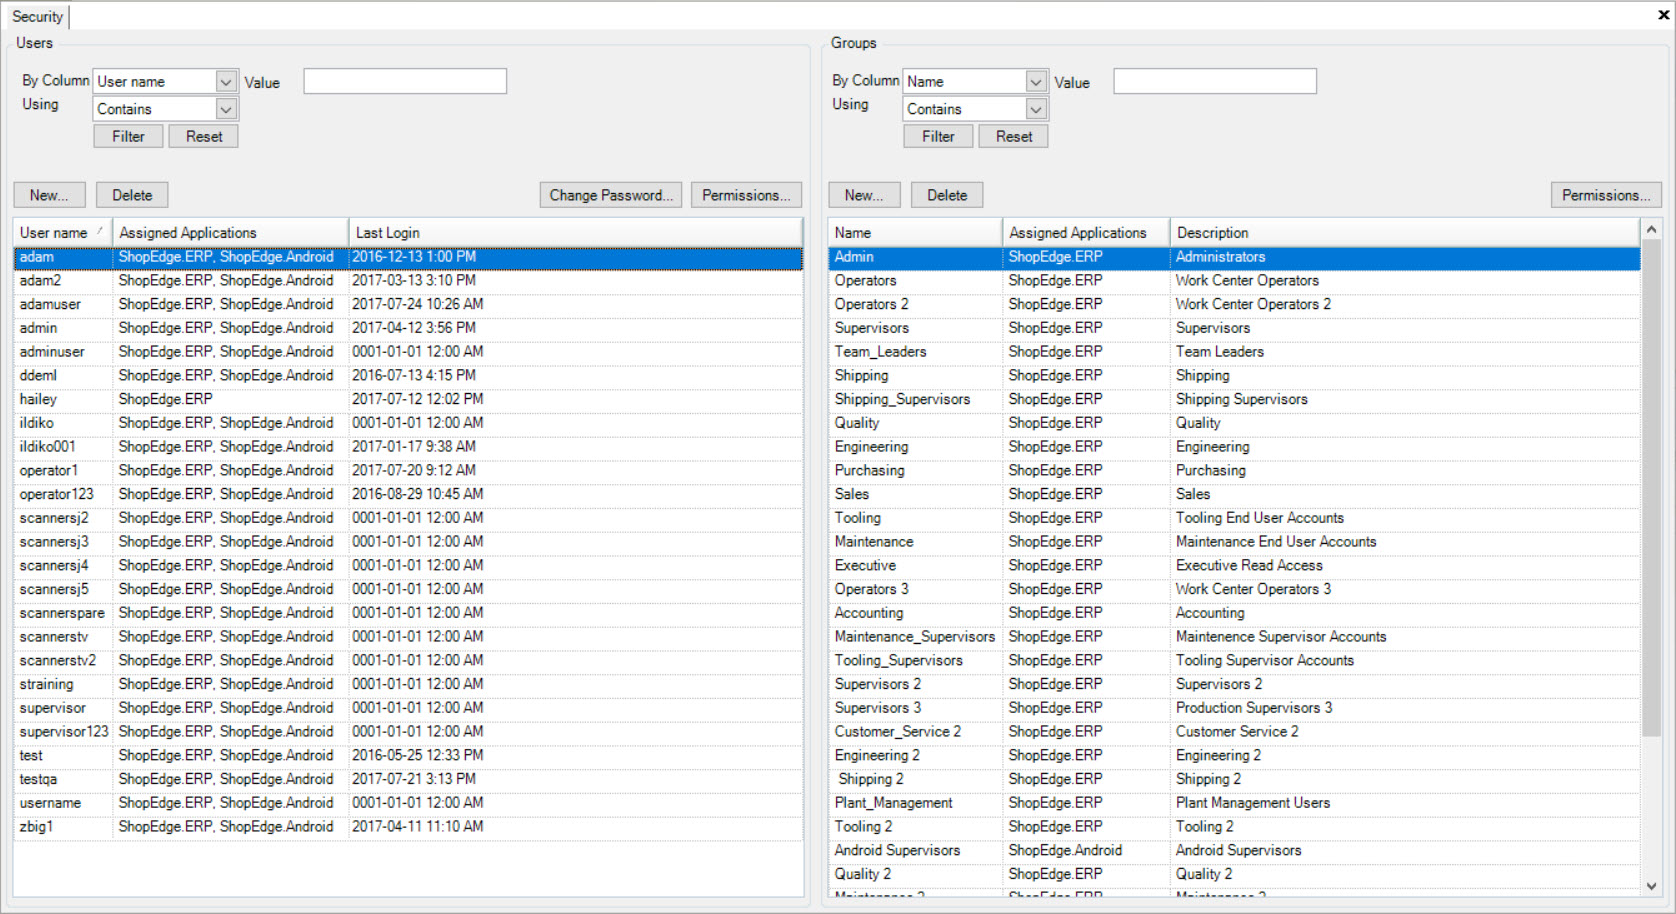
Next, highlight the user (left of the screen) or group (right of the screen) you wish to change the permissions for, and click on the 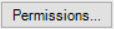 button. The Permissions screen will be displayed for the selected user or group.
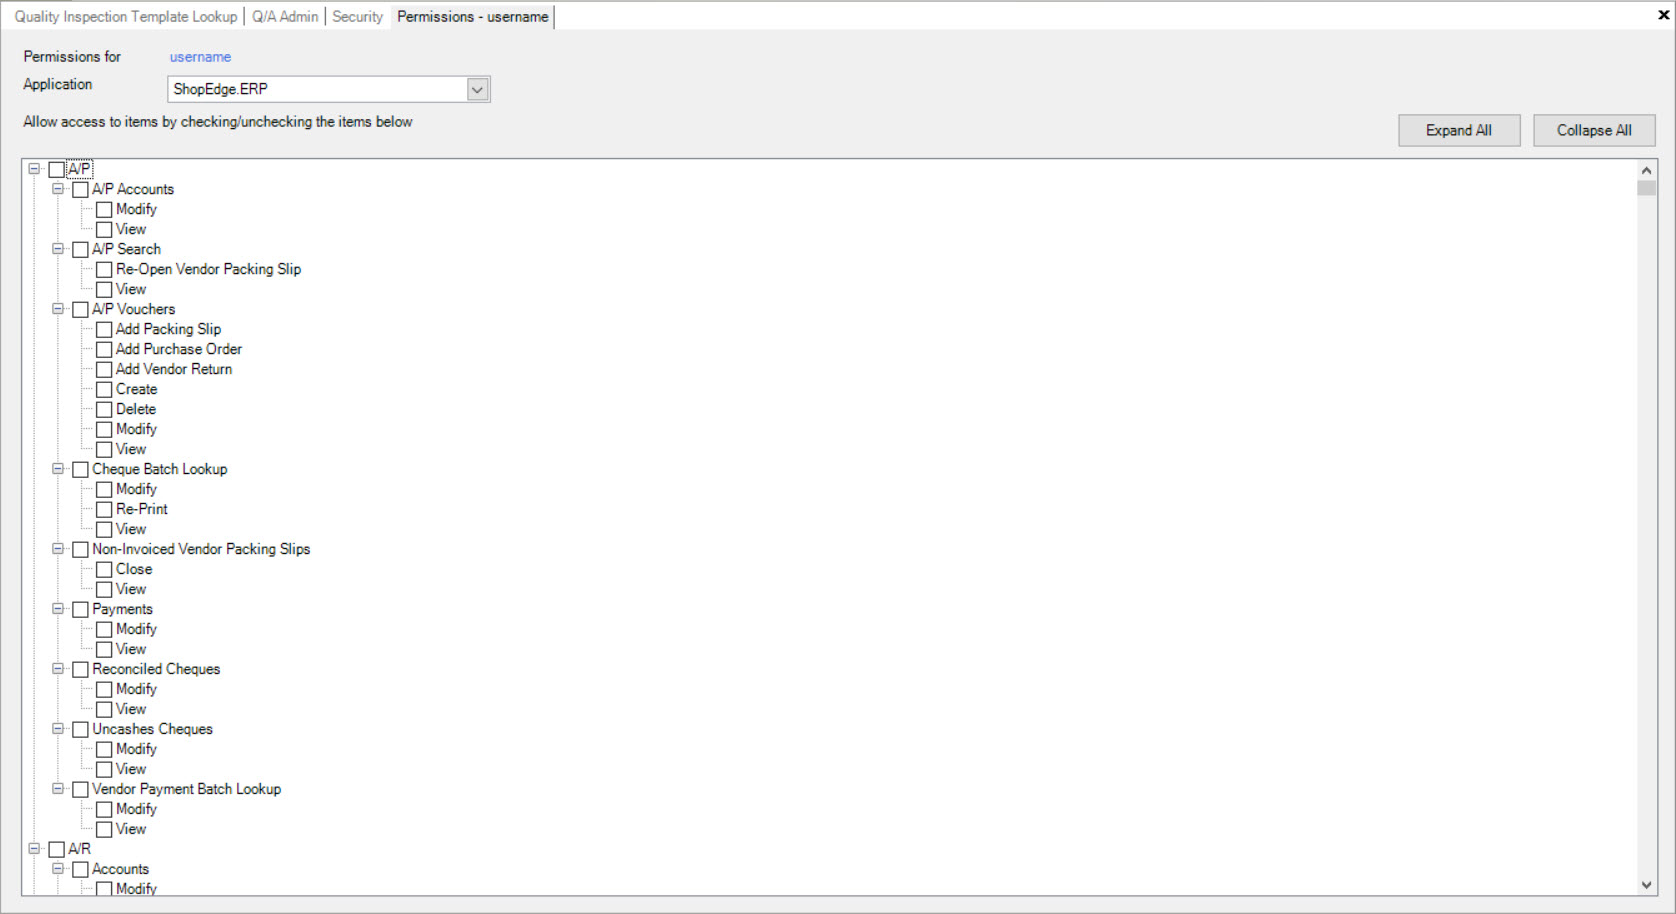
Locate the Q/A checkbox and expand it by clicking on the plus sign button if it has not already been expanded. Locate the Override Out-of-Spec option and expand it. Then, select the appropriate checkbox to enable this option.
Make sure to save your changes before exiting the screen.
Setting up Reason Codes for Out of Spec Measurements
If users wish to have an Operator select a Reason Code for an Out of Spec Measurement, you have to enter them in the system.
To do so, navigate to the tab and click on the  icon.
The Q/A Admin screen will be displayed.
icon.
The Q/A Admin screen will be displayed.
Select the Out of Spec Reasons tab located to the left of the screen under Items. Then, click on the 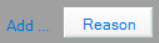 button located
at the bottom of the screen. You will then be able to enter in a Reason and Description using the available textboxes.
button located
at the bottom of the screen. You will then be able to enter in a Reason and Description using the available textboxes.
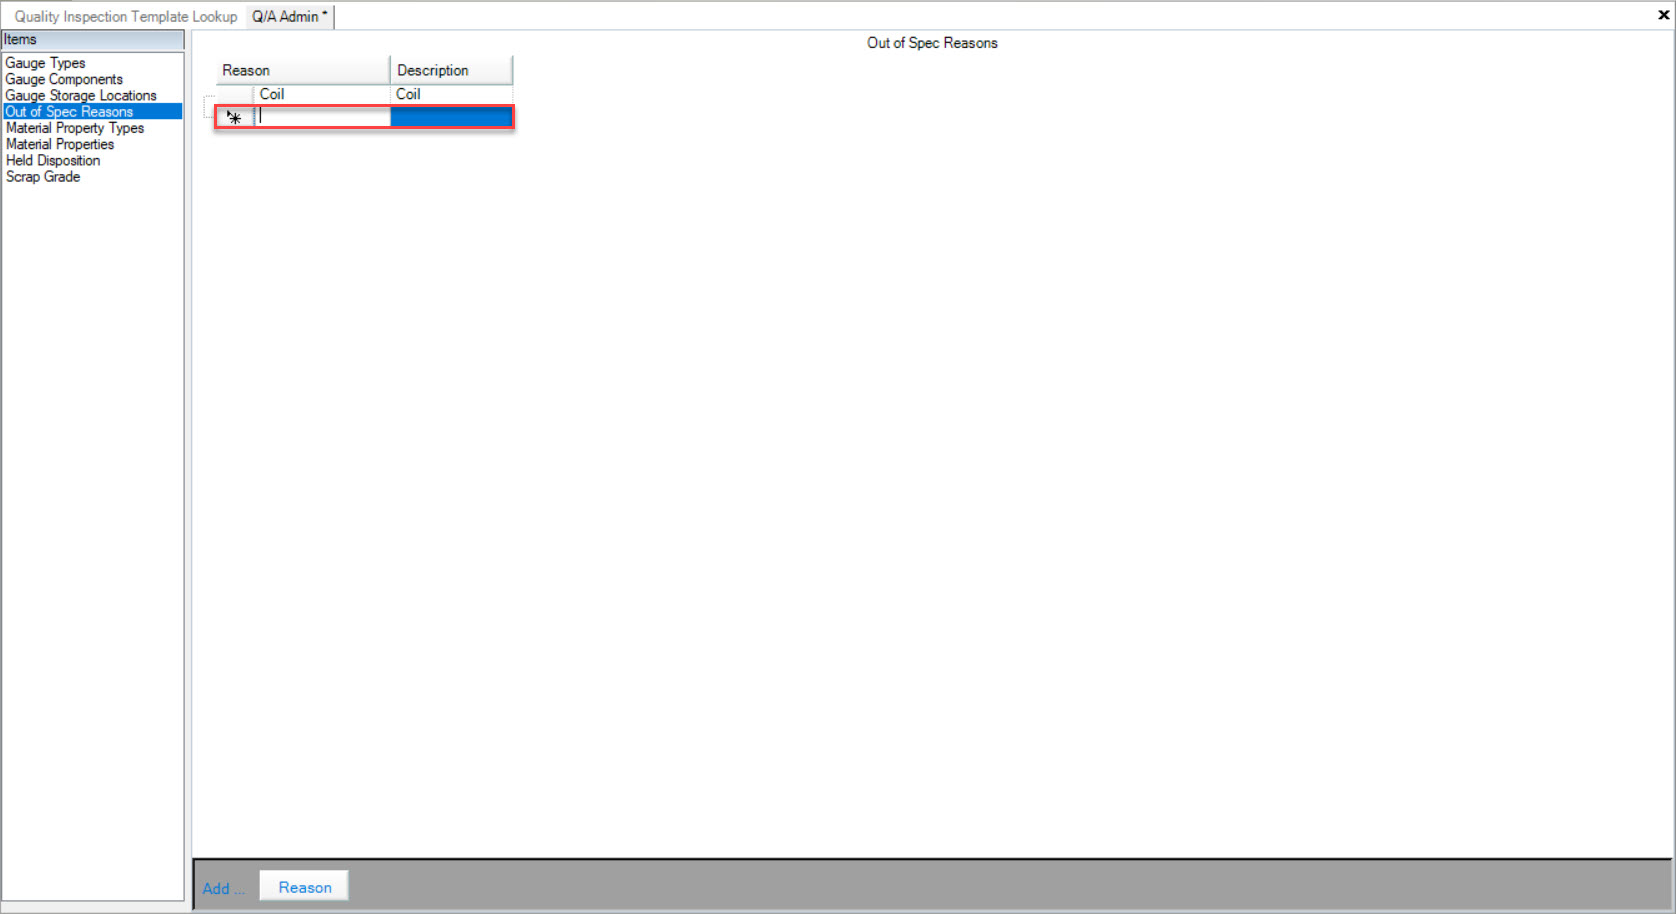
Make sure to save your changes before exiting the screen.
Reason Required for Out of Spec Measurement
If users wish to have an Operator enter in a reason when an Out of Spec Measurement is recorded, navigate to File > Setup....
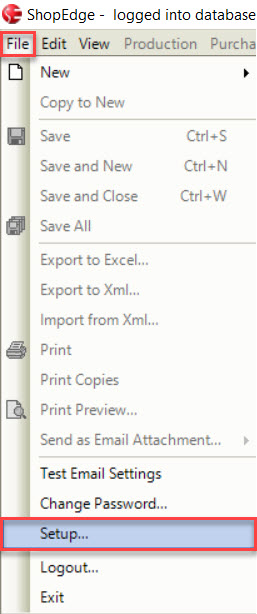
Select the Quality Inspection tab, and then click on the Out of Spec Reason Required checkbox beside.
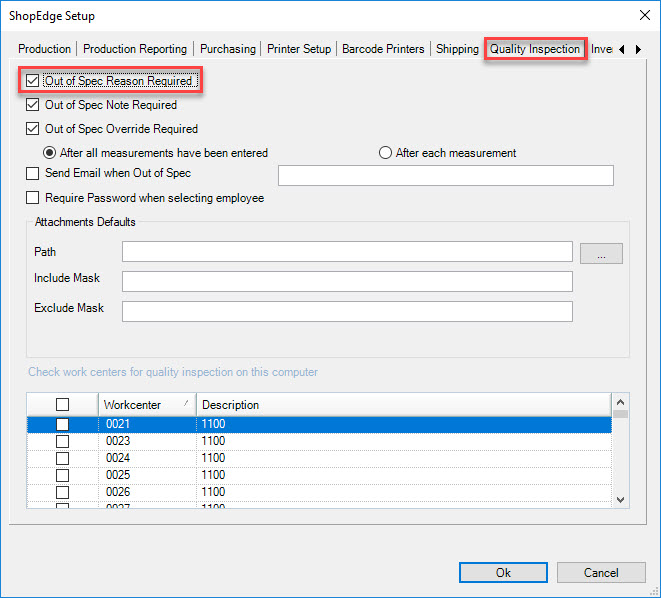
Click on the  button to save your settings.
Note Required for Out of Spec Measurement
If users wish to have an Operator enter in a note when an Out of Spec Measurement is recorded, navigate to File > Setup....
Select the Quality Inspection tab, and then select the Out of Spec Note Required checkbox.
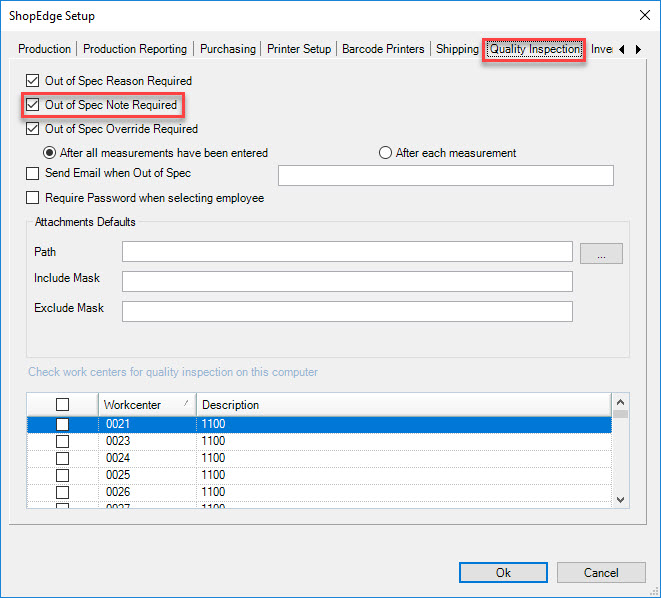
Click on the button to save your settings.
Override Required for Out of Spec Measurement
If users wish to have a Supervisor/Lead hand override an ‘out of spec’ measurement entered by the operator, navigate to File > Setup...
Select the Quality Inspection tab, and then select the Out of Spec Override Required checkbox. You will then be given two options as to when the override should occur:
- After all measurements have been entered; or
- After each measurement
Select the option accordingly.
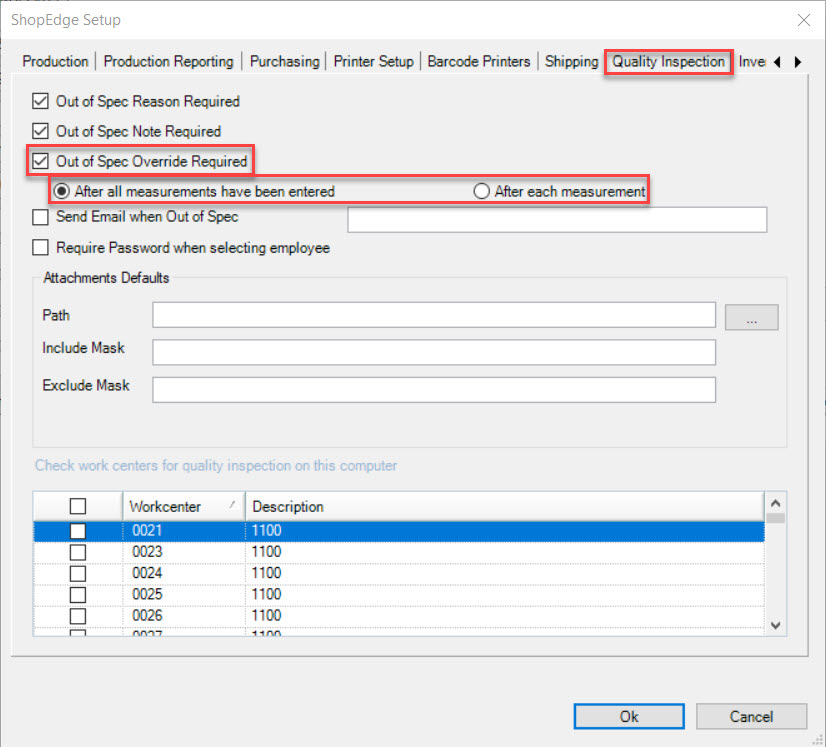
Click on the button to save your settings.
Note
Users must also set up an override permission in the system for a user/group. Please see Quality Assurance > Quality Inspection Template Lookup > Setting Up Permissions for Out of Spec Overrides.
Email Notifications when Measurements are Out of Spec
To set up an Email notification from the system when an Out of Spec Measurement is recorded by an Operator, navigate to File > Setup....
Select the Quality Inspection tab, and then select the Send Email when Out of Spec checkbox and enter in the Email Address in the available textbox.
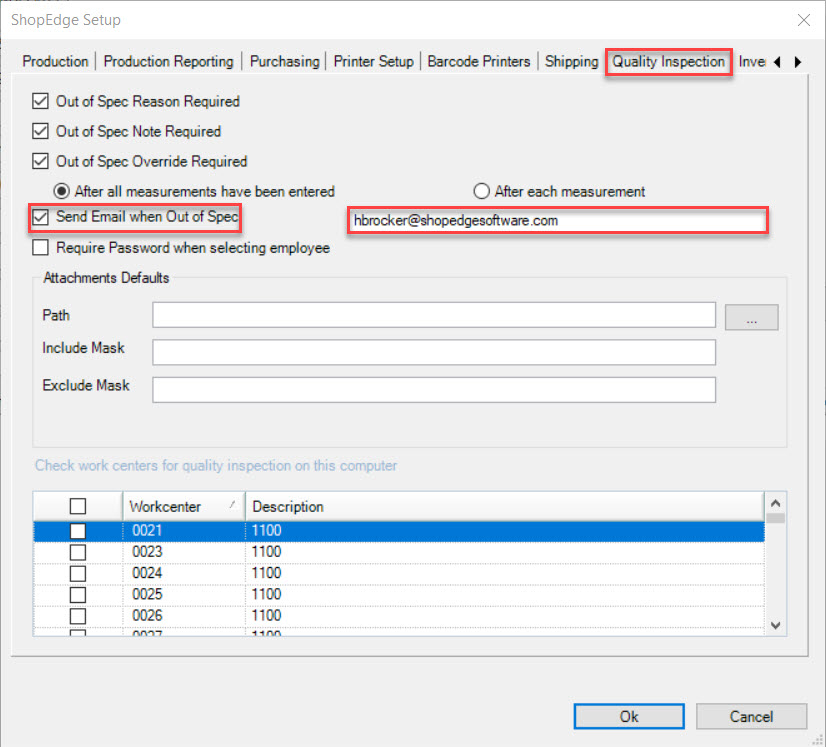
Click on the button to save your settings.
Assigning a Computer to a Workcenter Timer
In order for the system to know which computer belongs to which Workcenter, users must assign each computer to the appropriate Workcenter.
To do so, navigate to File > Setup....
Select the Quality Inspection tab, and then select Workcenter(s) you wish to assign the computer to by selecting the appropriate checkbox(es).
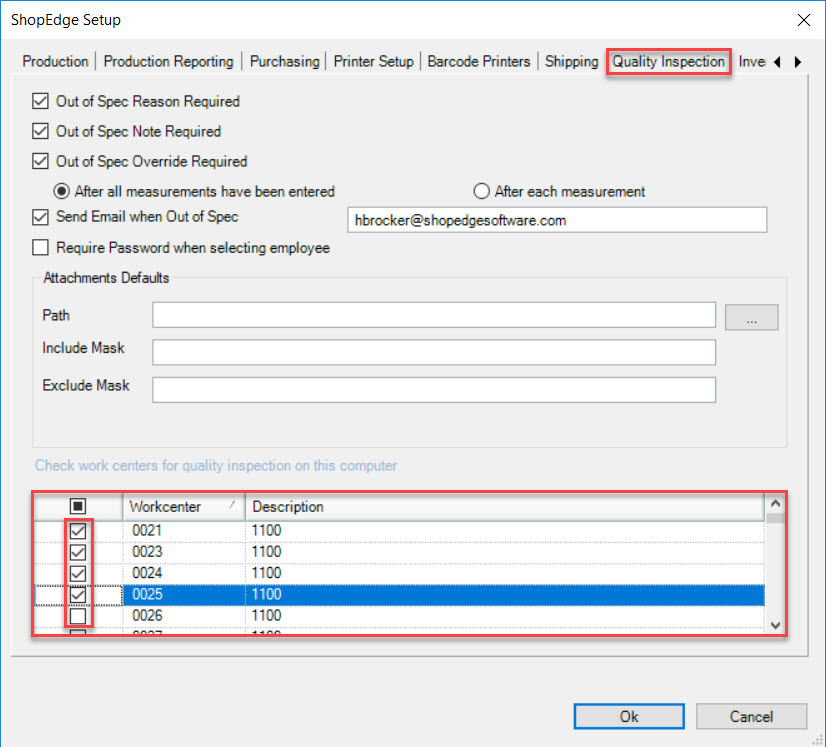
Click on the button to save your settings.
Note
Computers can be assigned to more than one Workcenter.
Creating a New Quality Inspection Template
There are three ways to create a new Quality Inspection Template in the system. The first way is to press the Ctrl + Shift + 2 keys. The second way is to navigate to File > New > Quality Inspection Template.
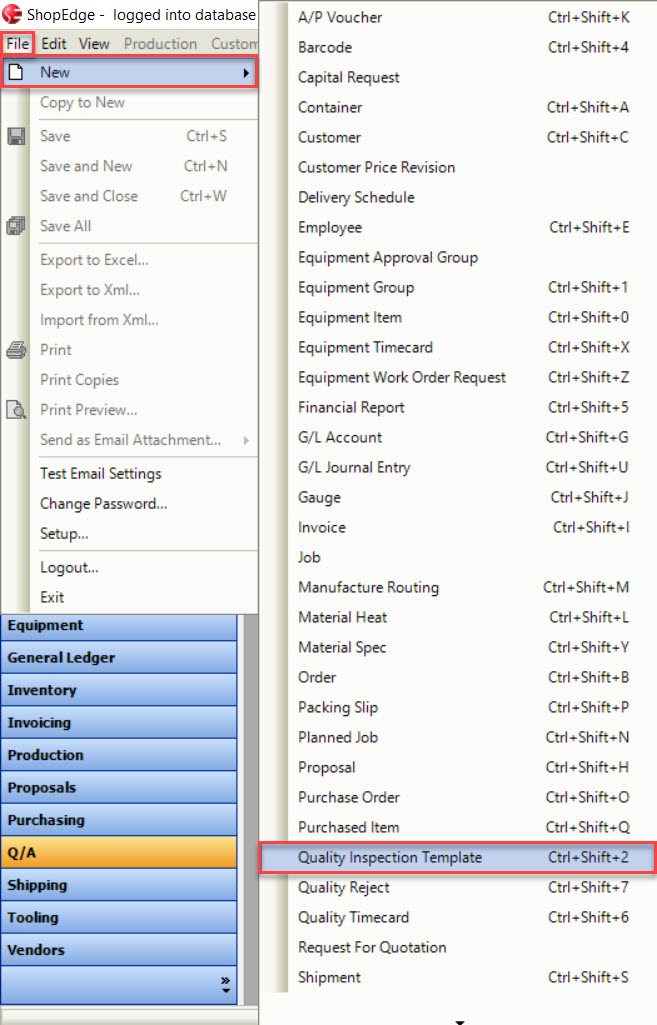
The last way is to click on the  button and then select the Quality Inspection Template option.
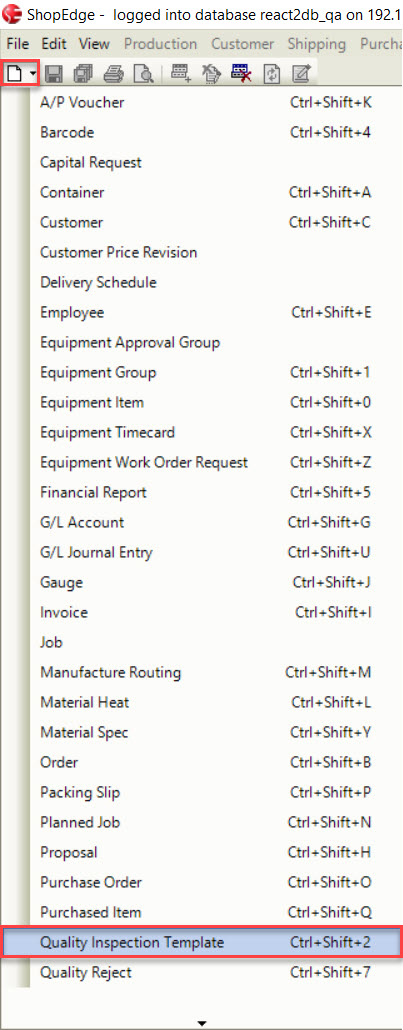
All of these options will open a new Quality Inspection Template screen.
Note
Addng a Quality Inspection Template to the system will allow users to apply it to one or multiple Items. If users wish to add a Quality Inspection Template directly to an Item, please see Production > Manufacture Routings > Adding a New Manufacture Routing > Quality Inspection.
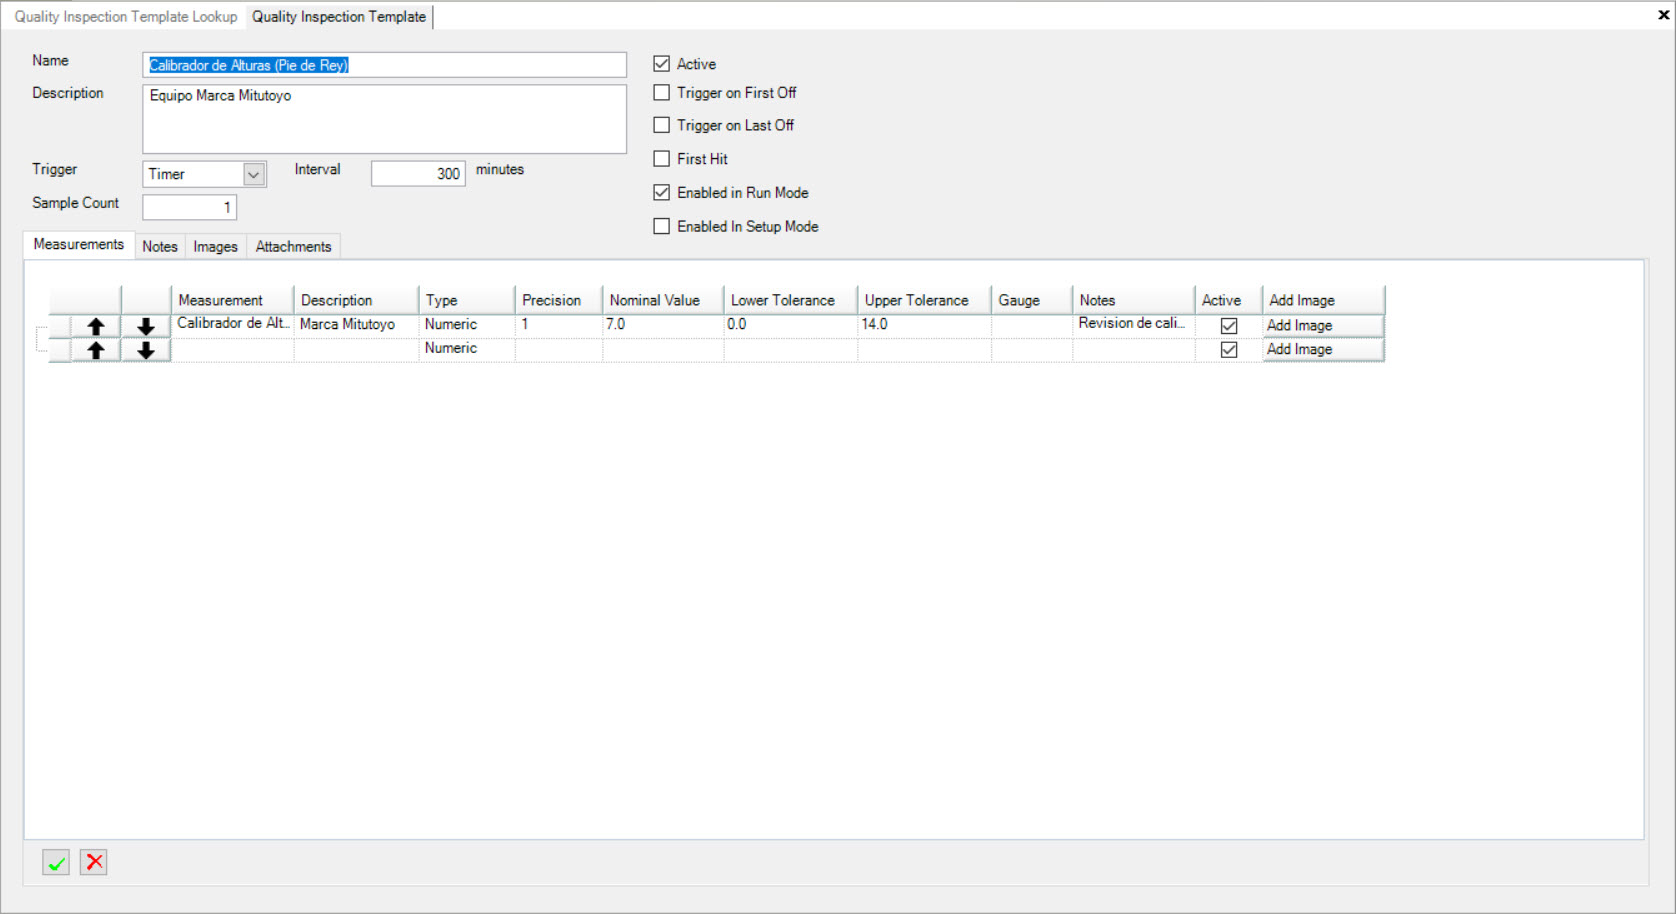
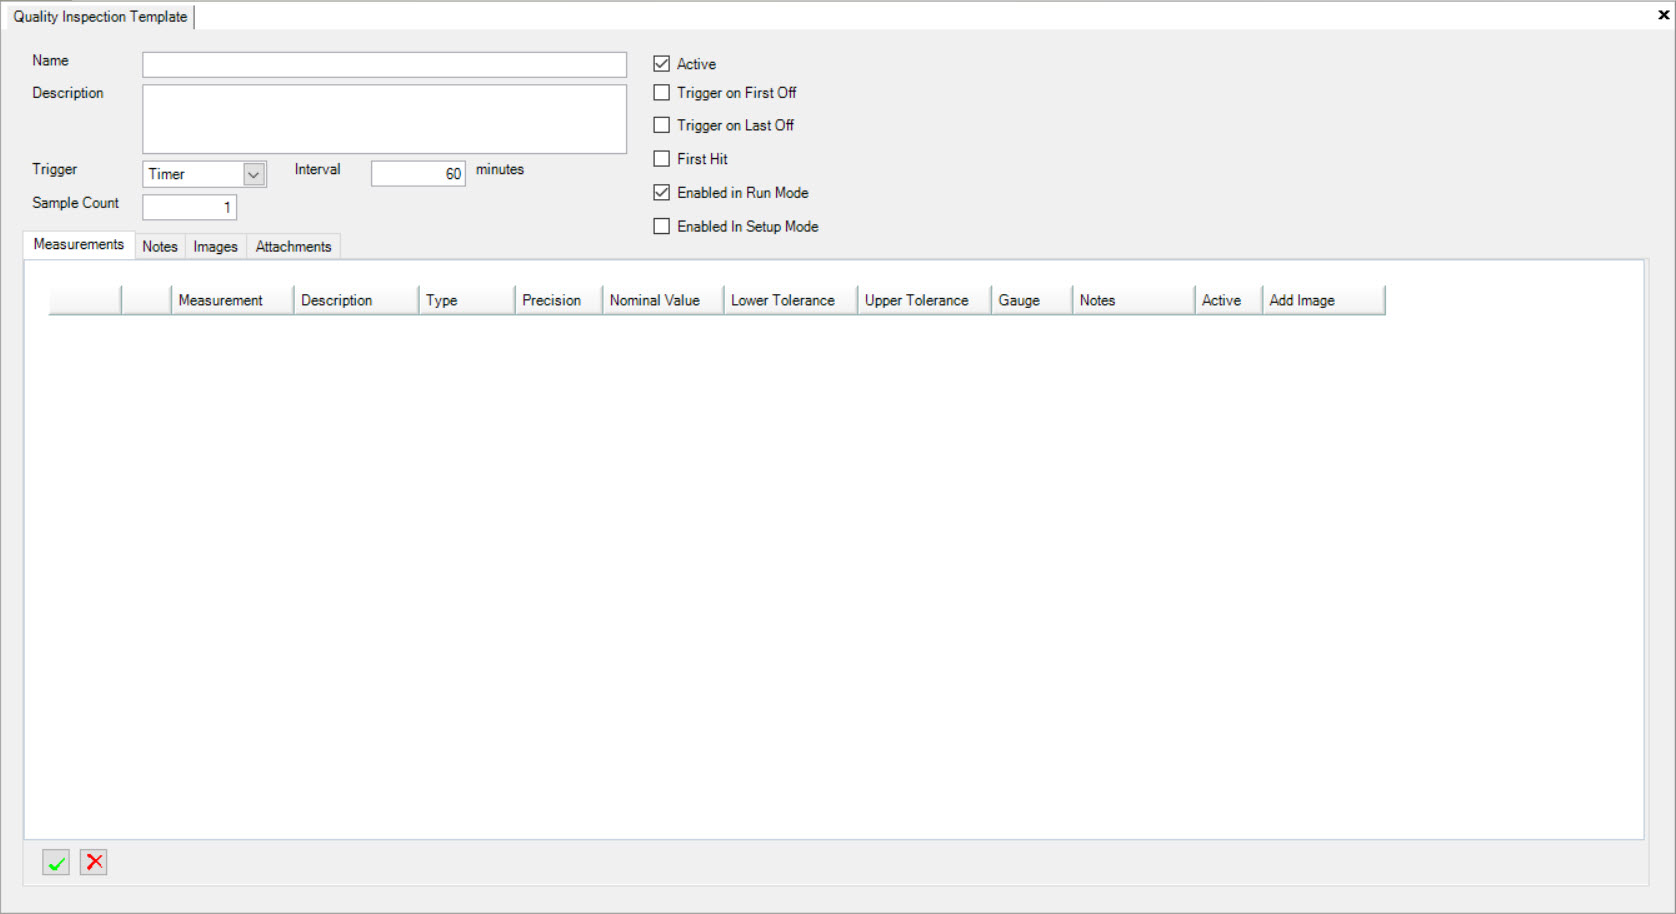
Once users open a new Quality Inspection Template screen, the Name and Description must be completed. Users can then select a Trigger Interval (None or Timer) using the available drop-down menu and enter in the preferred minutes. A Sample Count Quantity can be entered in to indicate how many checks for the Quality Inspection should occur.

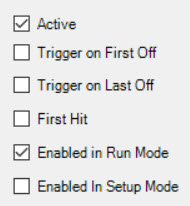
Next, users can select or de-select the following checkboxes: Active, Trigger on First Off (Quality Inspections begin before a Job starts), Trigger on Last Off (Quality Inspections must occur before a Job is finished), First Hit, Enabled in Run Mode, and/or Enabled in Setup Mode.
Note
The Active and Enabled in Run Mode will be checked by default but can be overriden if necessary.
Once the header information has been completed, make sure to save your changes before exiting the screen.
Quality Inspection Template Measurements Tab
To view the Measurements tab on a new or existing Quality Inspection Template, make sure to select the  tab.
tab.
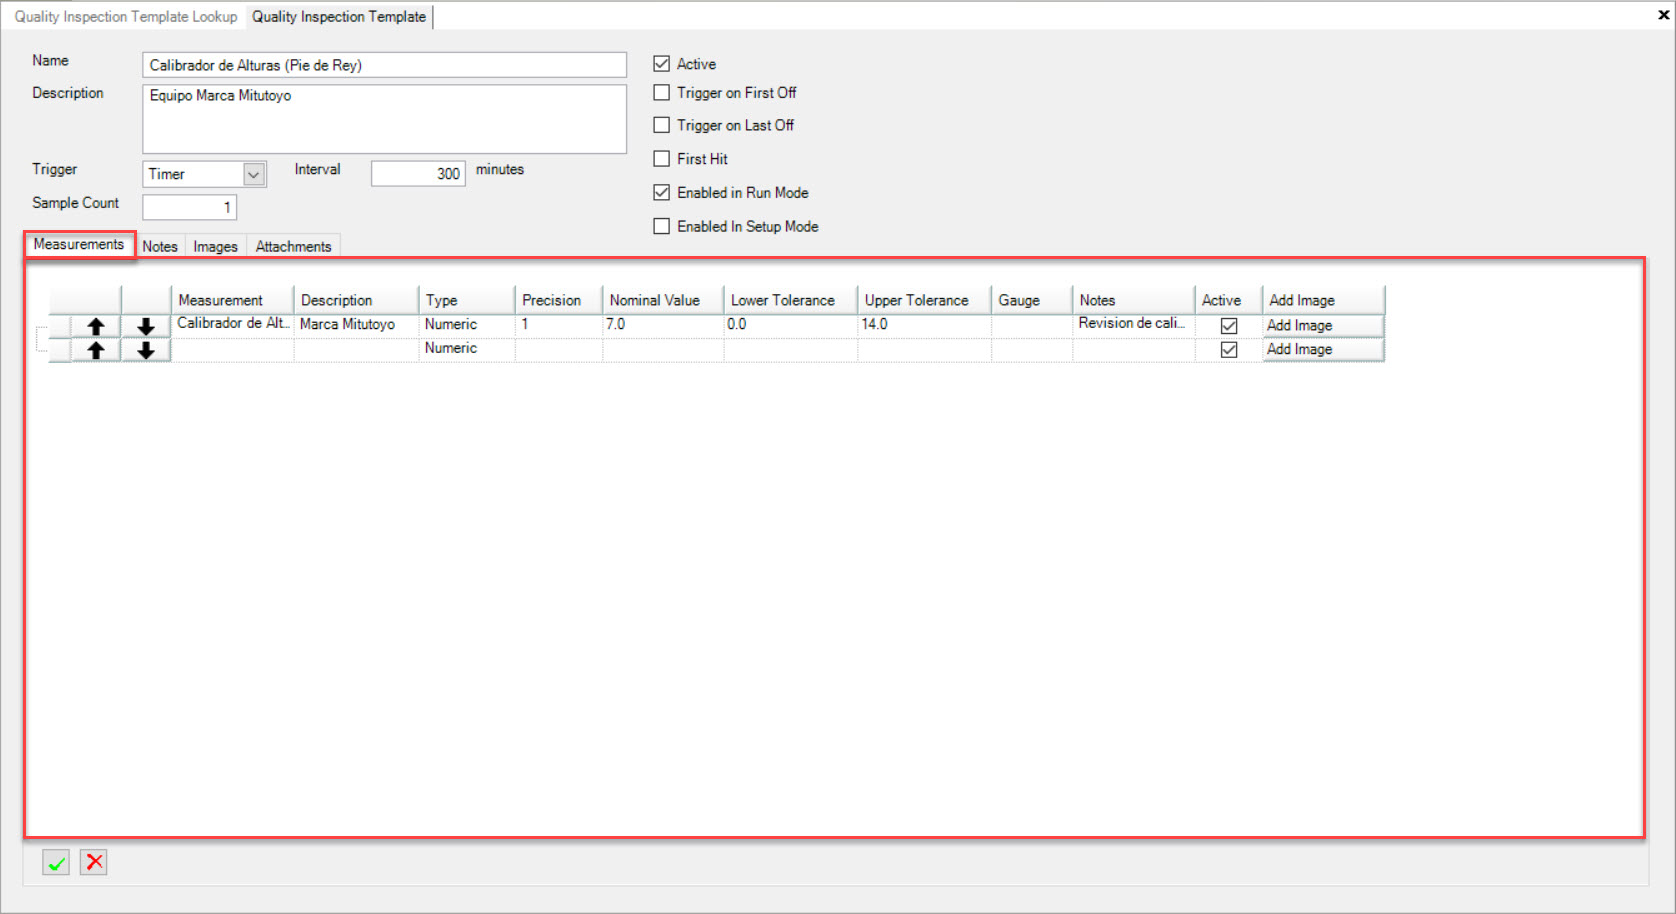
Users will be able to view all of the Measurements for the selected Quality Inspection Template including details such as the Description, Type, Precision, Nominal Value, Lower Tolerance, Upper Tolerance, Gauge, Notes, and Active.
Adding a Measurement
To add a Measurement to a new or existing Quality Inspection Template, make sure to select the tab.
Then, click on the  button located at the bottom of the screen.
The Measurement Definition window will appear.
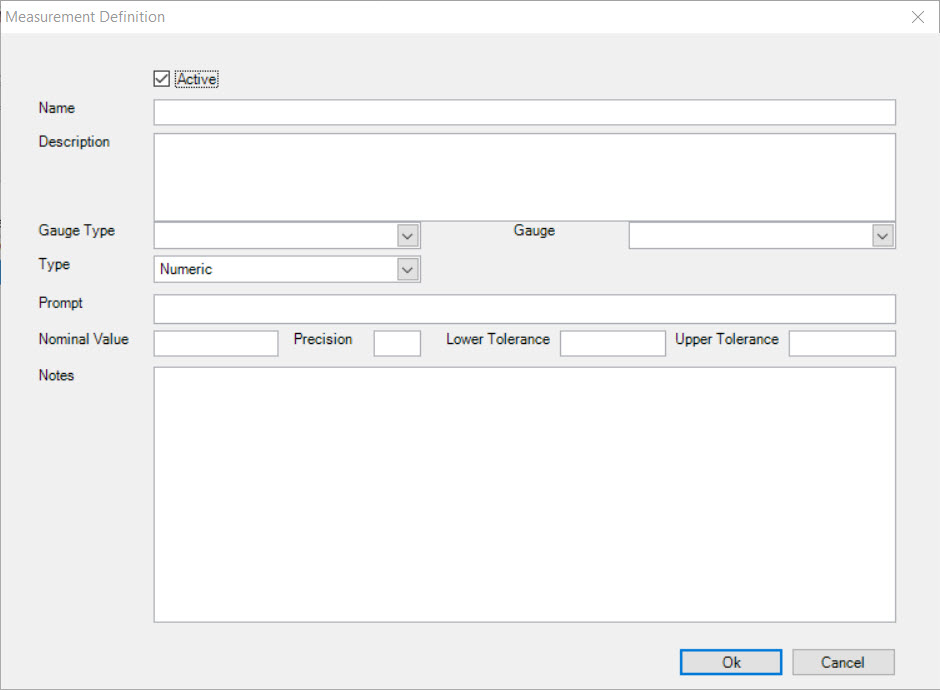
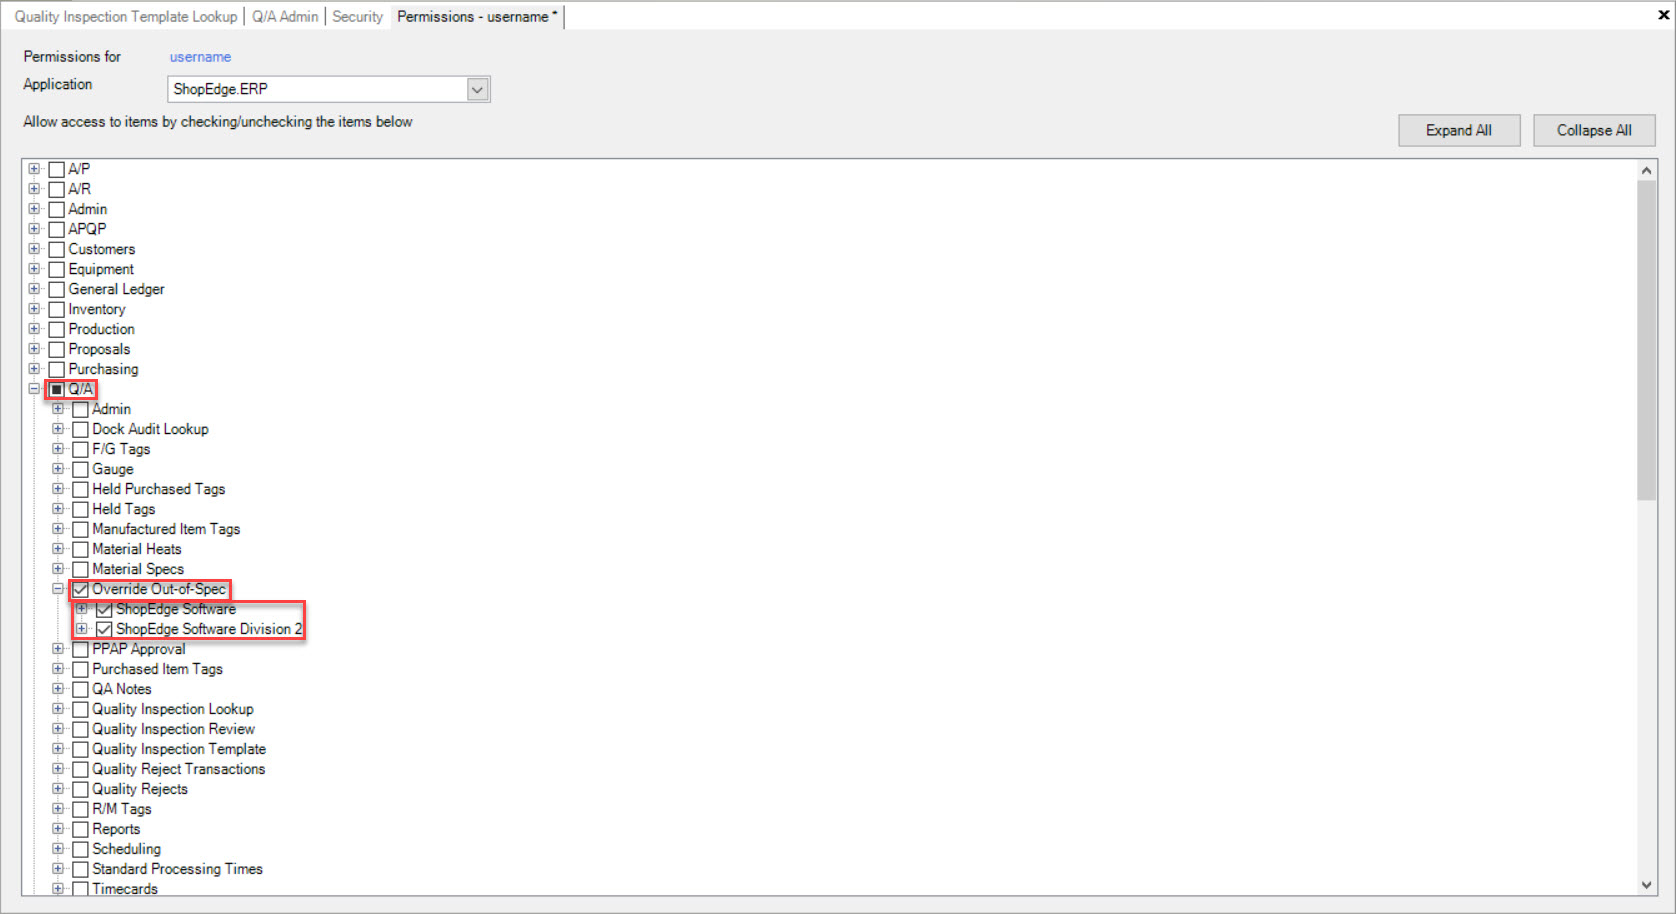
Users must enter in the Name, Description, and select a Gauge Type (Attribute, Functional, Gauge Rack, Misc., or Variable), Gauge, and Type. Next, enter in the Prompt, Nominal Value, Precision, Lower Tolerance, Upper Tolerance, and any Notes in the available textboxes.
Note
Depending on the Type (Multi-Value, Numeric, or Yes/No) that is selected, there will be additional fields to be filled in.
Once all of the fields have been completed, click on the button.
The Measurement will be added to the Quality Inspection Template.
Make sure to save your changes before exiting the screen.
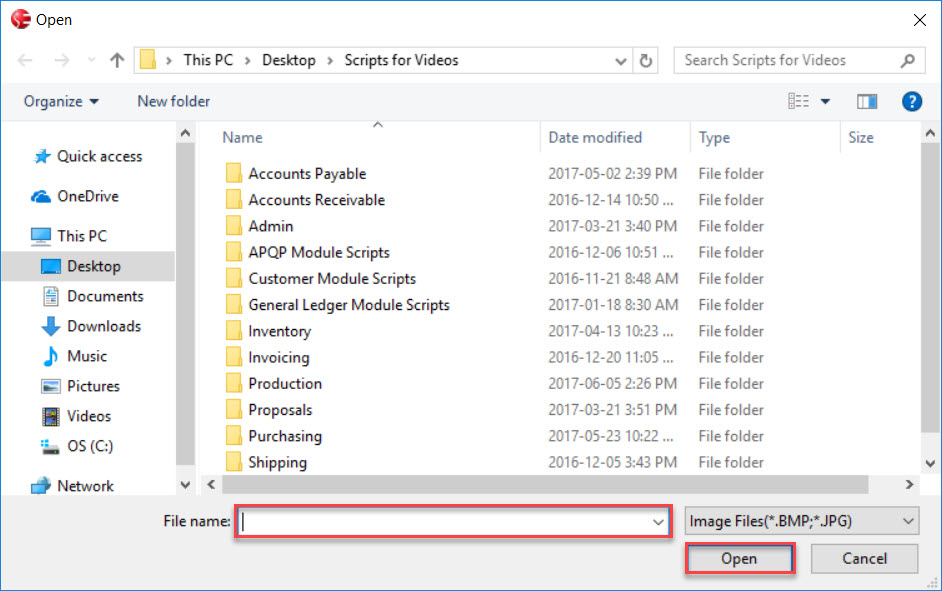
Adding an Image to a Measurement
Users have the ability to add an Image to a Measurement on a new or existing Quality Inspection Template.
To do so, make sure to select the tab on the Quality Inspection Template detail screen.
Locate the Measurement you wish to add an Image to and click on the  button in the appropriate row.
Users are then able to select an Image from their computer. Once an Image has been selected, click on the  button.
The selected Image will be added to the Measurement. To view the Image, simply click on the plus sign located to the left of the Measurement row.
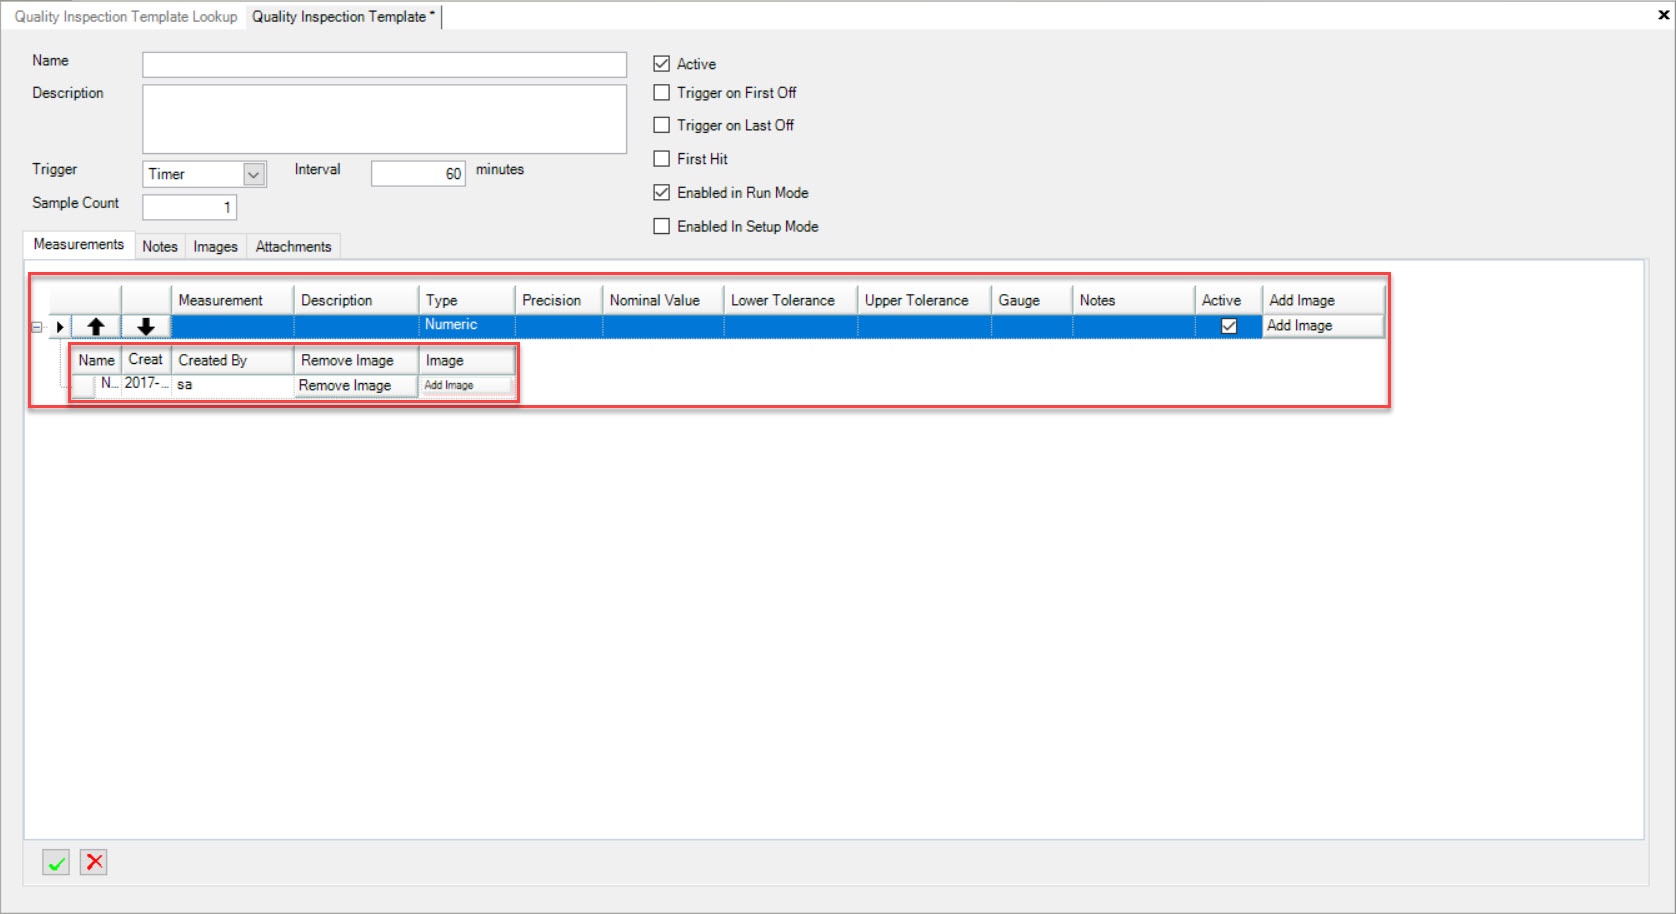
Make sure to save your changes before exiting the screen.
Removing an Image from a Measurement
To remove an Image from a Measurement on a new or existing Quality Inspection Template, make sure to select the tab.
Locate the Measurement you wish to remove an Image from and click on the plus sign located to the left of the row.
Click on the  button located in the Image row.
The Image will be removed immediately. Make sure to save your changes before exiting the screen.
Resequencing Measurements
Users have the ability to resequence Measurements on a new or existing Quality Inspection Template. To do so, make sure to select the
tab.
Users have the option to move Measurements up or down in sequence by using the available arrows.
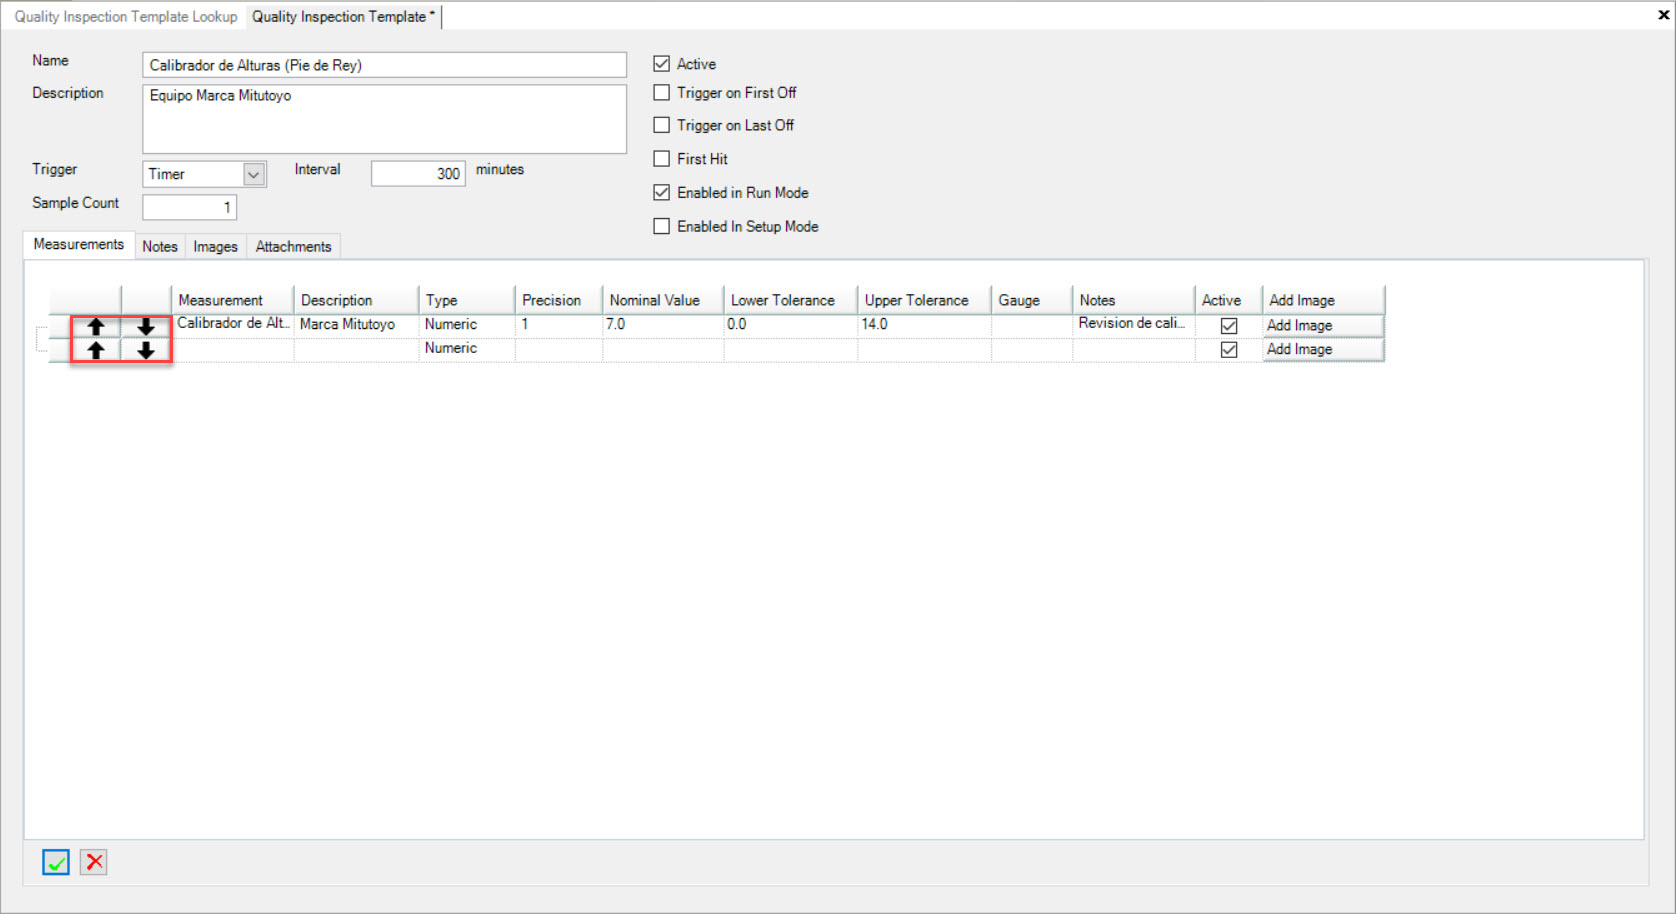
To move a Measurement up in sequence, click on the  button in the appropriate row.
To move a Measurement down in sequence, click on the  button in the appropriate row.
Once the Measurements have been resequenced, make sure to save your changes before exiting the screen.
Editing a Measurement
To edit a Measurement on a Quality Inspection Template, navigate to the tab and click on the
icon. The Quality Inspection Template Lookup screen will be displayed.
Locate the Quality Inspection Template you wish to edit a Measurement for and double-click on the appropriate row. The Quality Inspection Template detail screen will be displayed.
Make sure to select the tab.
Locate the Measurement you wish to edit and make the necessary changes using the available textboxes, drop-downs, and checkbox.
Make sure to save your changes before exiting the screen.
Deleting a Measurement
To delete a Measurement from a Quality Inspection Template, navigate to the tab and click on the
icon. The Quality Inspection Template Lookup screen will be displayed.
Locate the Quality Inspection Template you wish to delete a Measurement from and double-click on the appropriate row. The Quality Inspection Template detail screen will be displayed.
Make sure to select the tab.
Locate the Measurement you wish to delete and highlight the appropriate row. Then, click on the  button located at the bottom
of the screen.
button located at the bottom
of the screen.
The highlighted Measurement will be immediately deleted from the Quality Inspection Template.
Make sure to save your changes before exiting the screen.
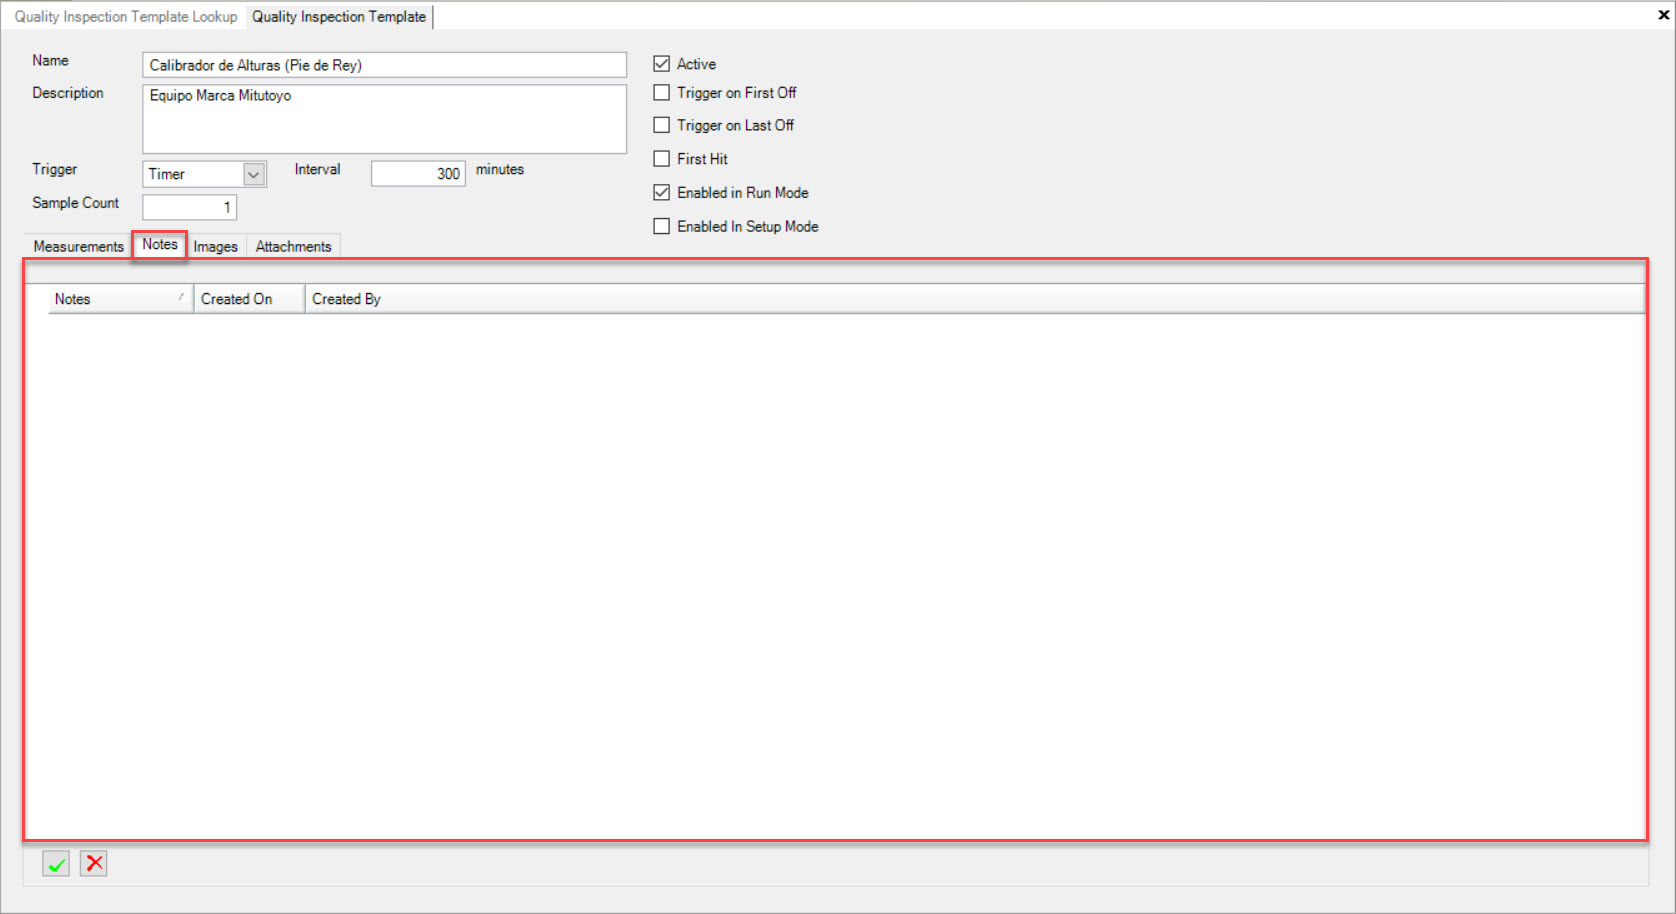
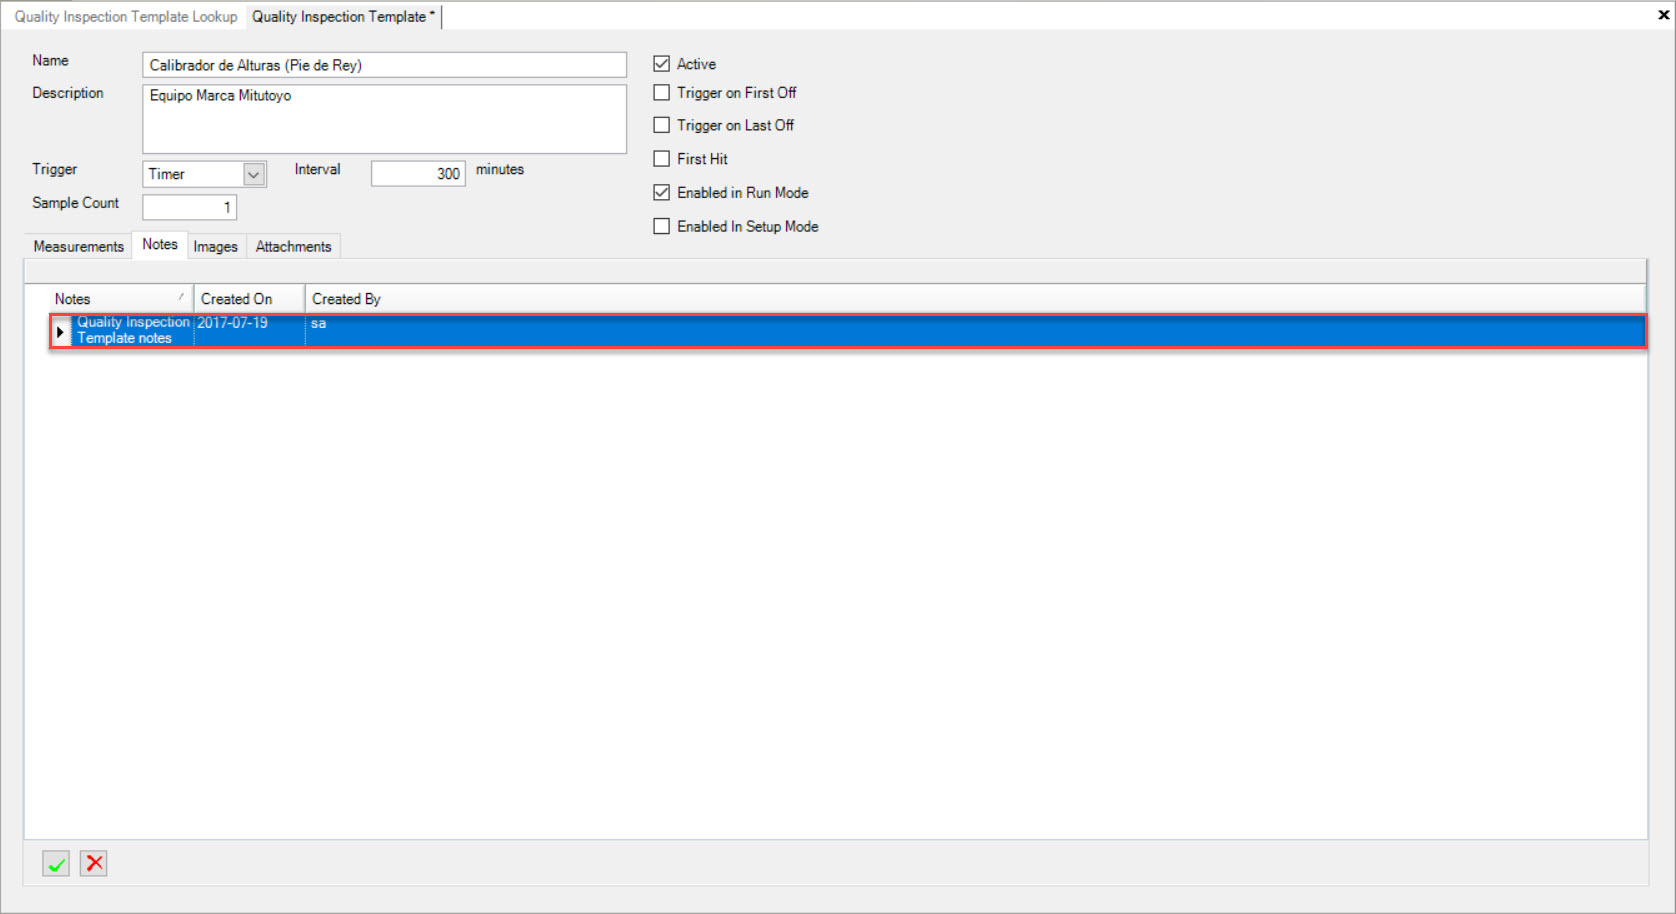
Quality Inspection Template Notes Tab
To view Notes on a new or existing Quality Inspection Template, make sure to select the  tab located on the
Quality Inspection Template detail screen.
tab located on the
Quality Inspection Template detail screen.
Users will be able to view all of the Notes attached to the Quality Inspection Template including details such as the Notes, Created On date, and Created By.
Adding a Note
To add a Note to a new or existing Quality Inspection Template, make sure to select the tab located on the
Quality Inspection Template detail screen.
Click on the located at the bottom of the screen.
The Notes window will appear where users can enter in any necessary Notes for the Quality Inspection Template. Then, click on the
button.

The Notes will be added to the Quality Inspection Template.
Make sure to save your changes before exiting the screen.
Editing a Note
To edit a Note on a Quality Inspection Template, navigate to the tab and click on the
icon. The Quality Inspection Template Lookup screen will be displayed.
Locate the Quality Inspection Template you wish to edit a Note for and double-click on the appropriate row. The Quality Inspection Template detail screen will be displayed.
Make sure to select the tab.
Double-click on the row of the Note you wish to edit and make the necessary changes in the Notes window. Then, click on the
button.
Make sure to save your changes before exiting the screen.
Deleting a Note
To delete a Note from a Quality Inspection Template, navigate to the tab and click on the
icon. The Quality Inspection Template Lookup screen will be displayed.
Locate the Quality Inspection Template you wish to delete a Note from and double-click on the appropriate row. The Quality Inspection Template detail screen will be displayed.
Make sure to select the tab.
Locate the Note you wish to delete and highlight the appropriate row. Then, click on the button located at the bottom of
the screen.
The highlighted Note will be deleted immediately. Make sure to save your changes before exiting the screen.
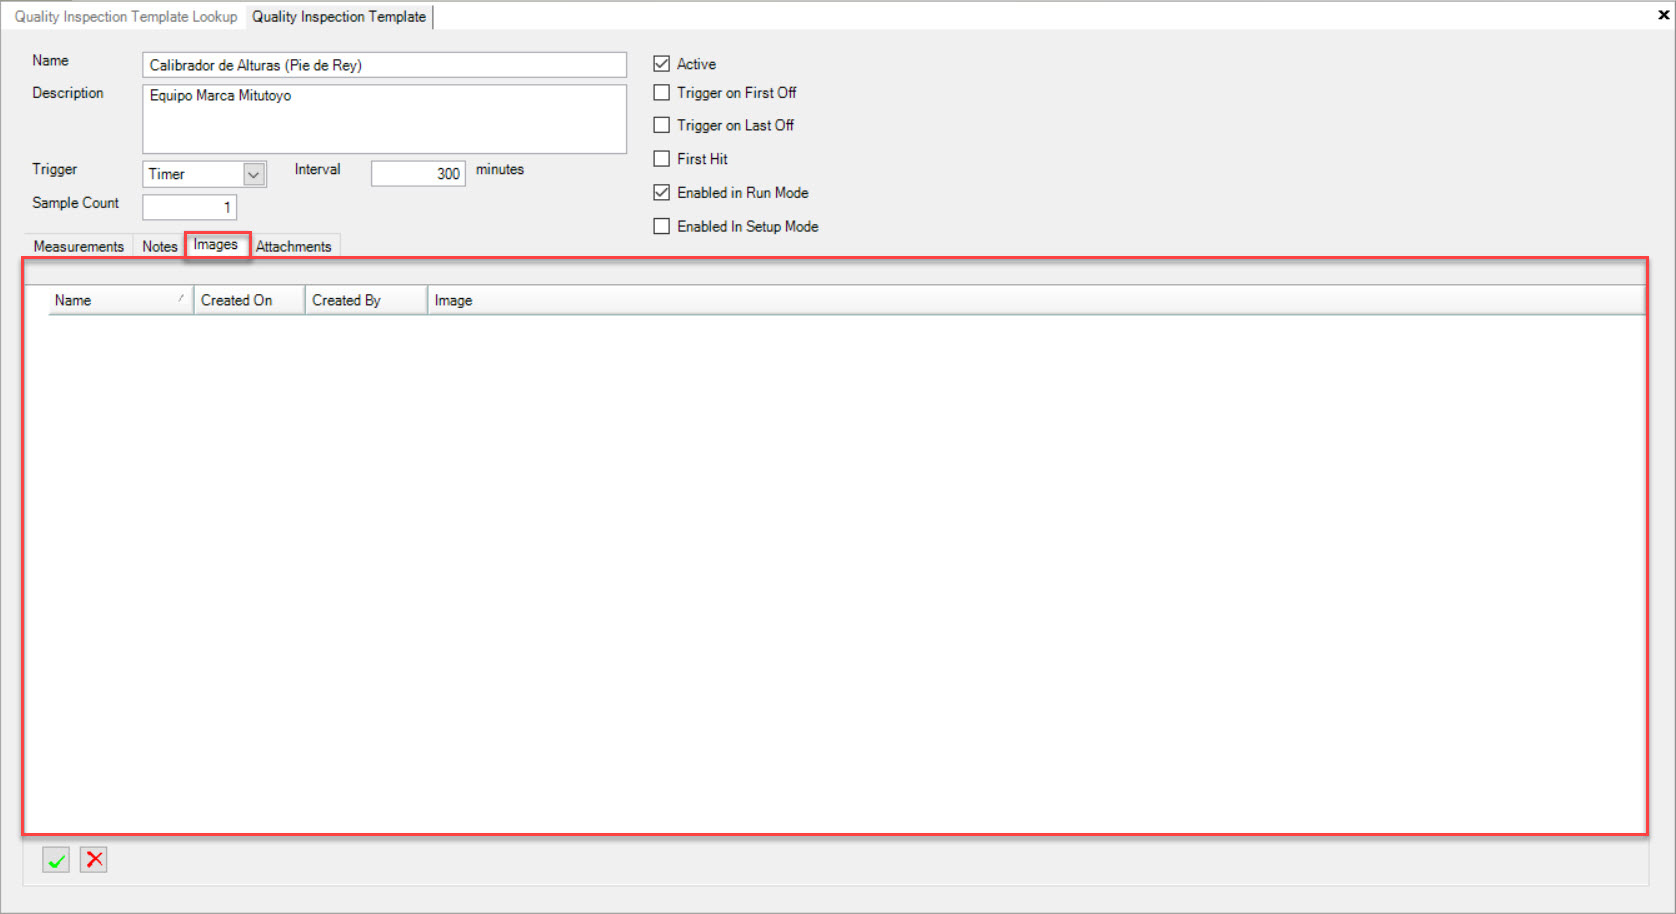
Quality Inspection Template Images Tab
To view the Images tab on a new or existing Quality Inspection Template, make sure to select the  tab located on the
Quality Inspection Template detail screen.
tab located on the
Quality Inspection Template detail screen.
Users will be able to view all of the Images attached to the Quality Inspection Template including details such as the Name, Created On date, Created By, and the Image.
Adding an Image
To add an Image to a new or existing Quality Inspection Template, make sure to select the tab located on the
Quality Inspection Template detail screen.
Click on the button located at the bottom of the screen.
Users will then be able to select an Image from their computer. Once an Image has been selected, click on the
button.
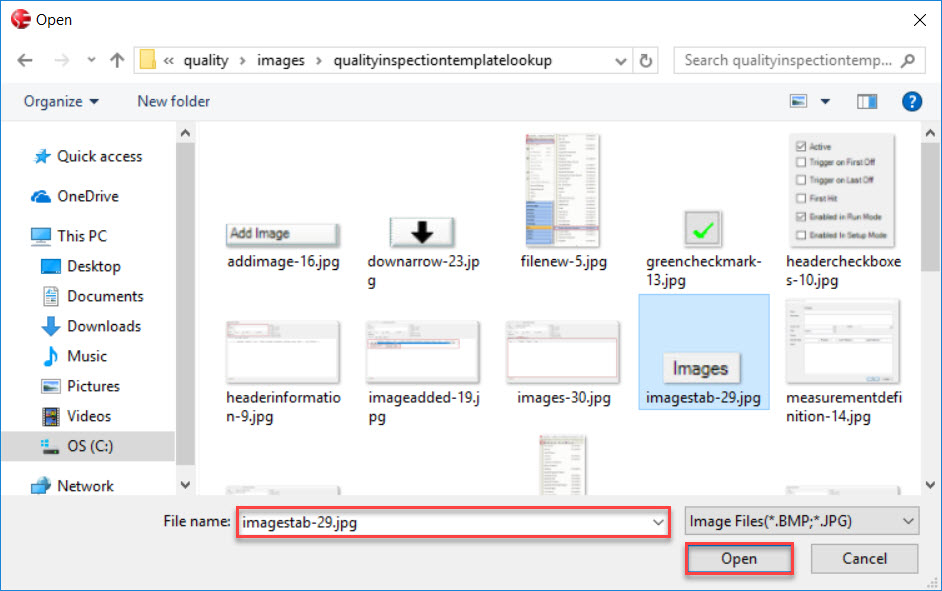
The selected Image will be added to the Quality Inspection Template.
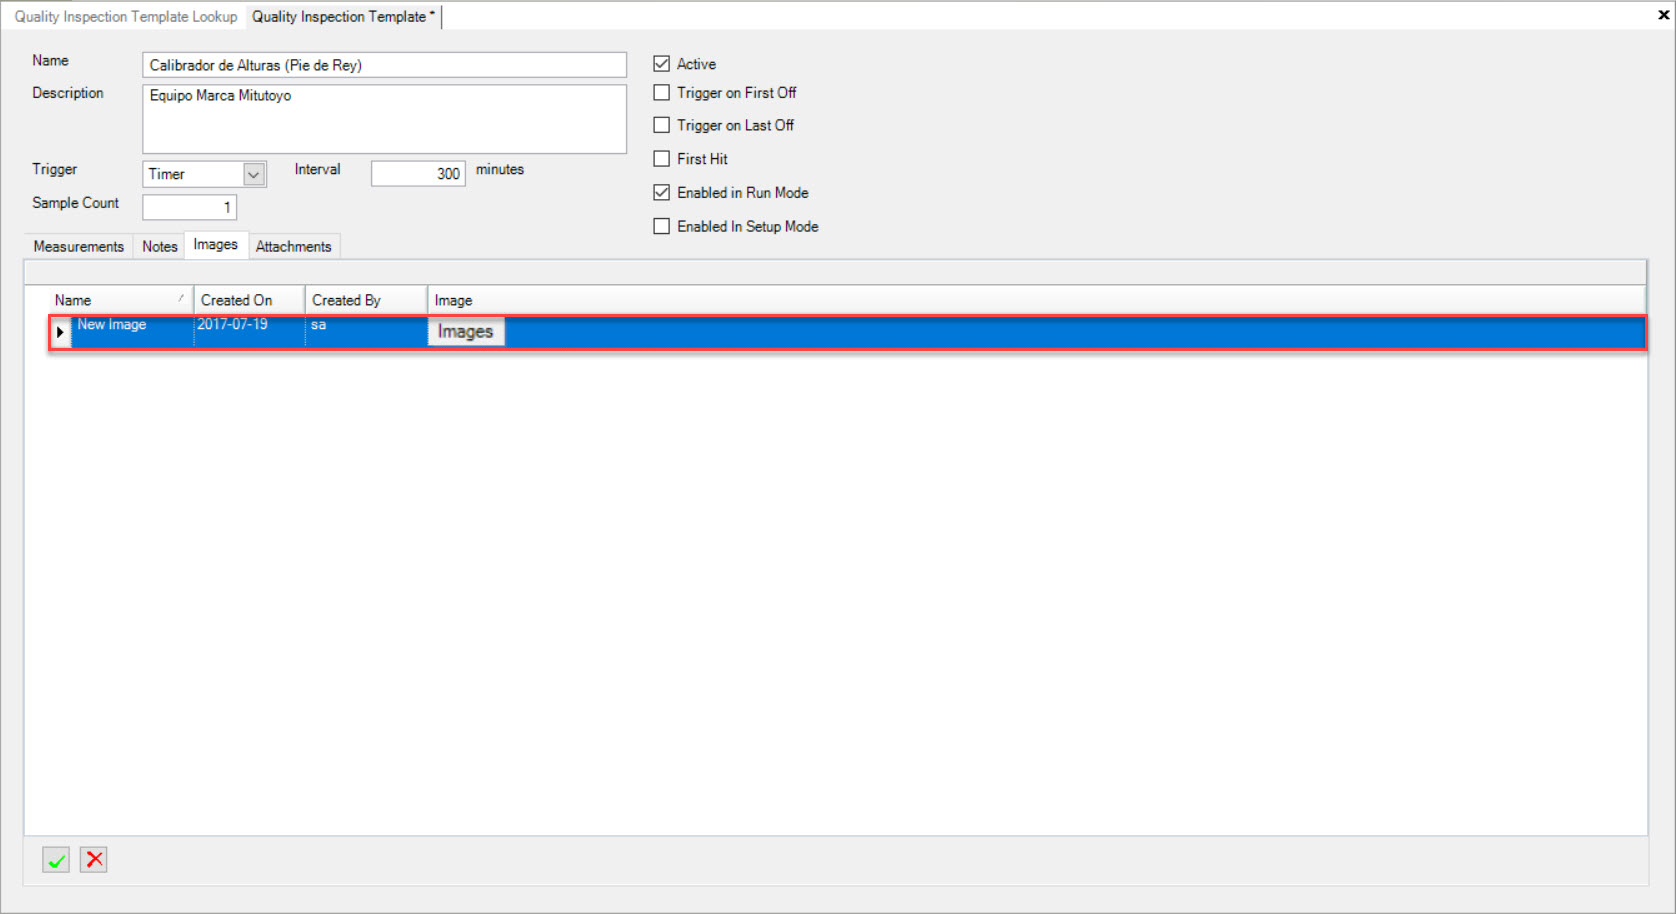
Make sure to save your changes before exiting the screen.
Deleting an Image
To delete an Image from a Quality Inspection Template, navigate to the tab and click on the
icon. The Quality Inspection Template Lookup screen will be displayed.
Locate the Quality Inspection Template you wish to delete an Image from and double-click on the appropriate row. The Quality Inspection Template detail screen will be displayed.
Make sure to select the tab.
Locate the Image you wish to delete and highlight the appropriate row. Then, click on the button located at the bottom of
the screen.
The highlighted Image will be deleted immediately from the Quality Inspection Template.
Make sure to save your changes before exiting the screen.
Quality Inspection Template Attachments Tab
To view Attachments on a new or existing Quality Inspection Template, make sure to select the  tab located
on the Quality Inspection Template detail screen.
tab located
on the Quality Inspection Template detail screen.
Users will be able to view all of the Attachments with details including the Attachment, File Name, Created On date, and Created By.

Adding an Attachment
To add an Attachment to a new or existing Quality Inspection Template, make sure to select the tab located
on the Quality Inspection Template detail screen.
Users have the option to select a Folder by clicking on the  button located to the right of the Folder row.
Next, users are able to enter in Included Files Mask and/or Excluded Files Mask for the selected Folder.
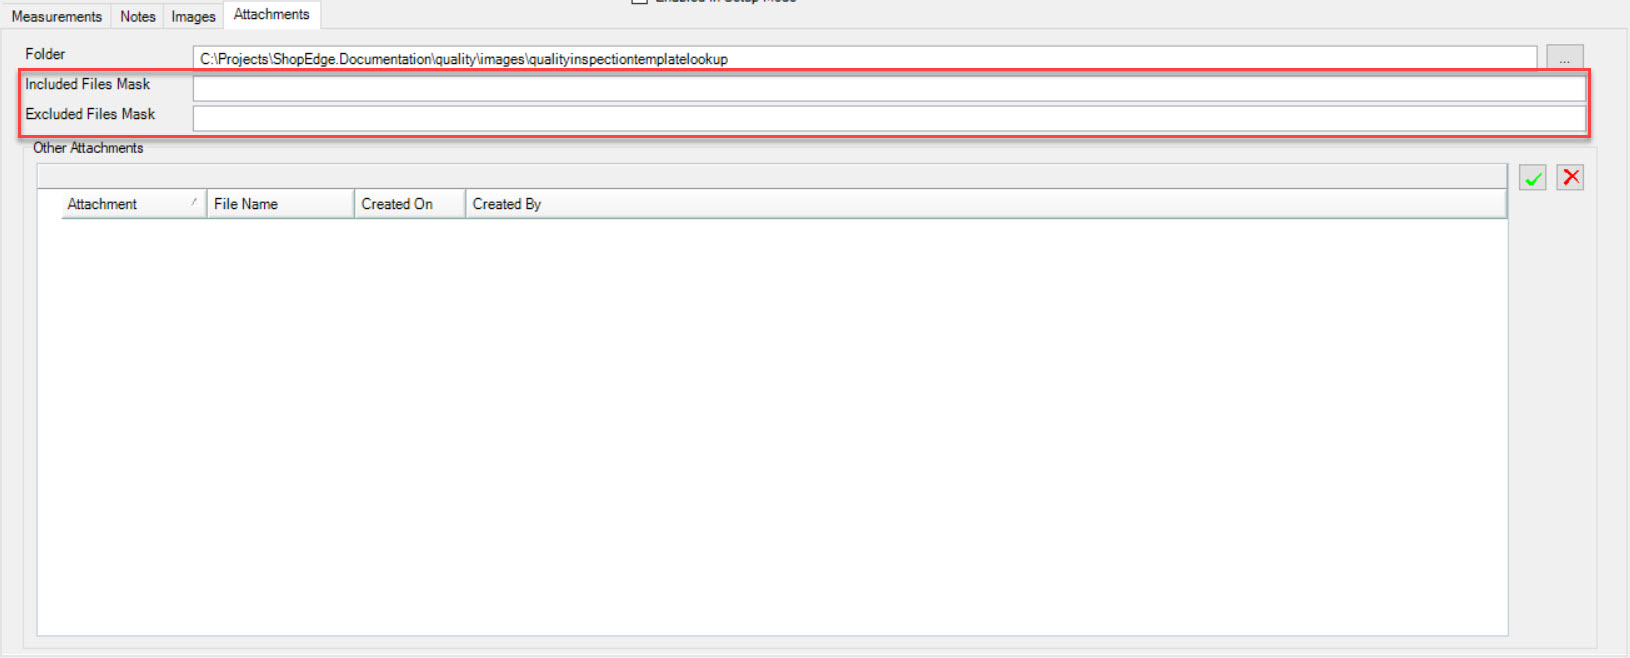
If users only want to add an Attachment by Folder, make sure to save your changes at this point.
If users wish to add an additional Attachment, click on the button.
Users will then be able to select an Attachment from their computer. Once an Attachment has been selected, click on the
button.
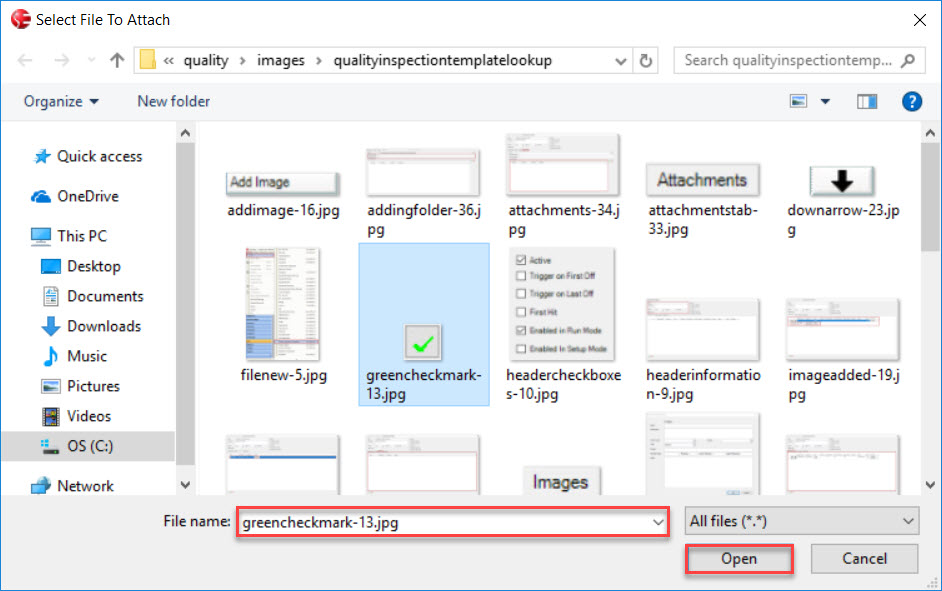
The selected Attachment will be added to the Other Attachments section under the tab.
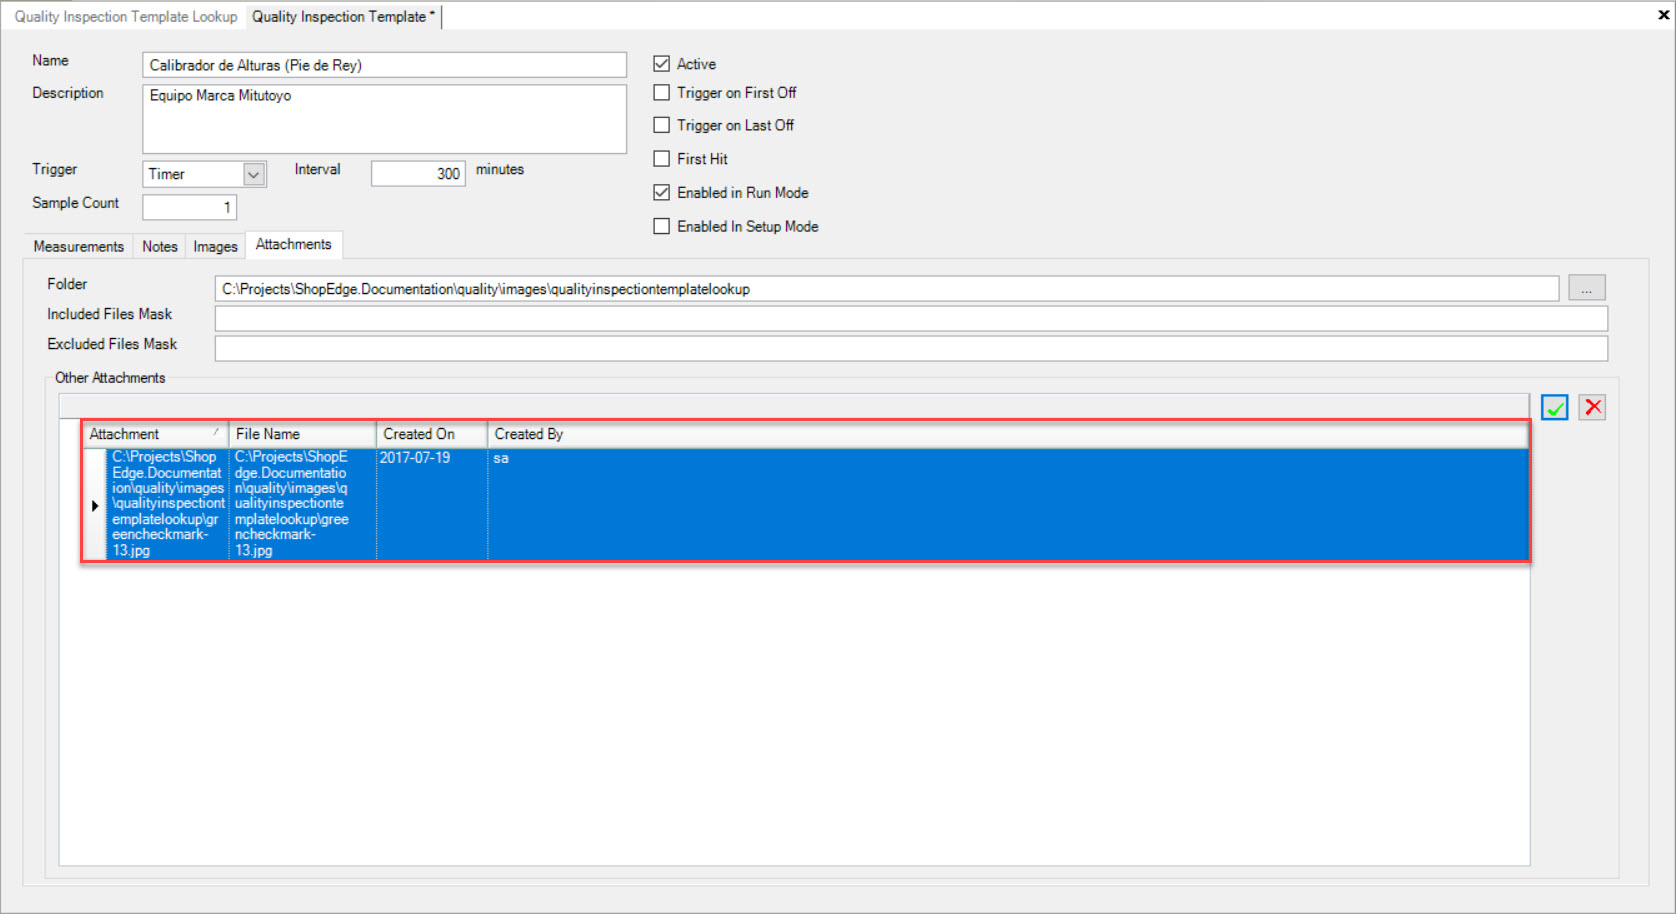
Make sure to save your changes before exiting the screen.
Deleting an Attachment
To delete an Attachment from a Quality Inspection Template, navigate to the tab and click on the
icon. The Quality Inspection Template Lookup screen will be displayed.
Locate the Quality Inspection Template you wish to delete an Attachment from and double-click on the appropriate row. The Quality Inspection Template detail screen will be displayed.
Make sure to select the tab.
Locate the Attachment you wish to delete and highlight the appropriate row. Then, click on the button.
The highlighted Attachment will be deleted immediately from the Quality Inspection Template.
Make sure to save your changes before exiting the screen.
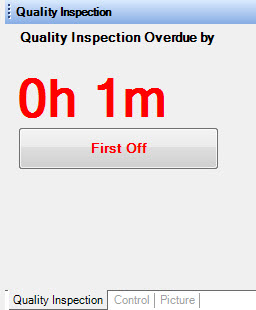
Quality Inspections on the Operator Schedule
All of the Quality Inspection Template information for an Item at a Workcenter can be found by navigating to the  tab in the top right corner of the Operator Schedule screen.
Once an Operator starts a Job, the Quality Inspection timer (if required) will become visible to the Operator, indicating when the next Quality Inspection is due.
Note
The timer will not start until the First Off check is completed if one is required.
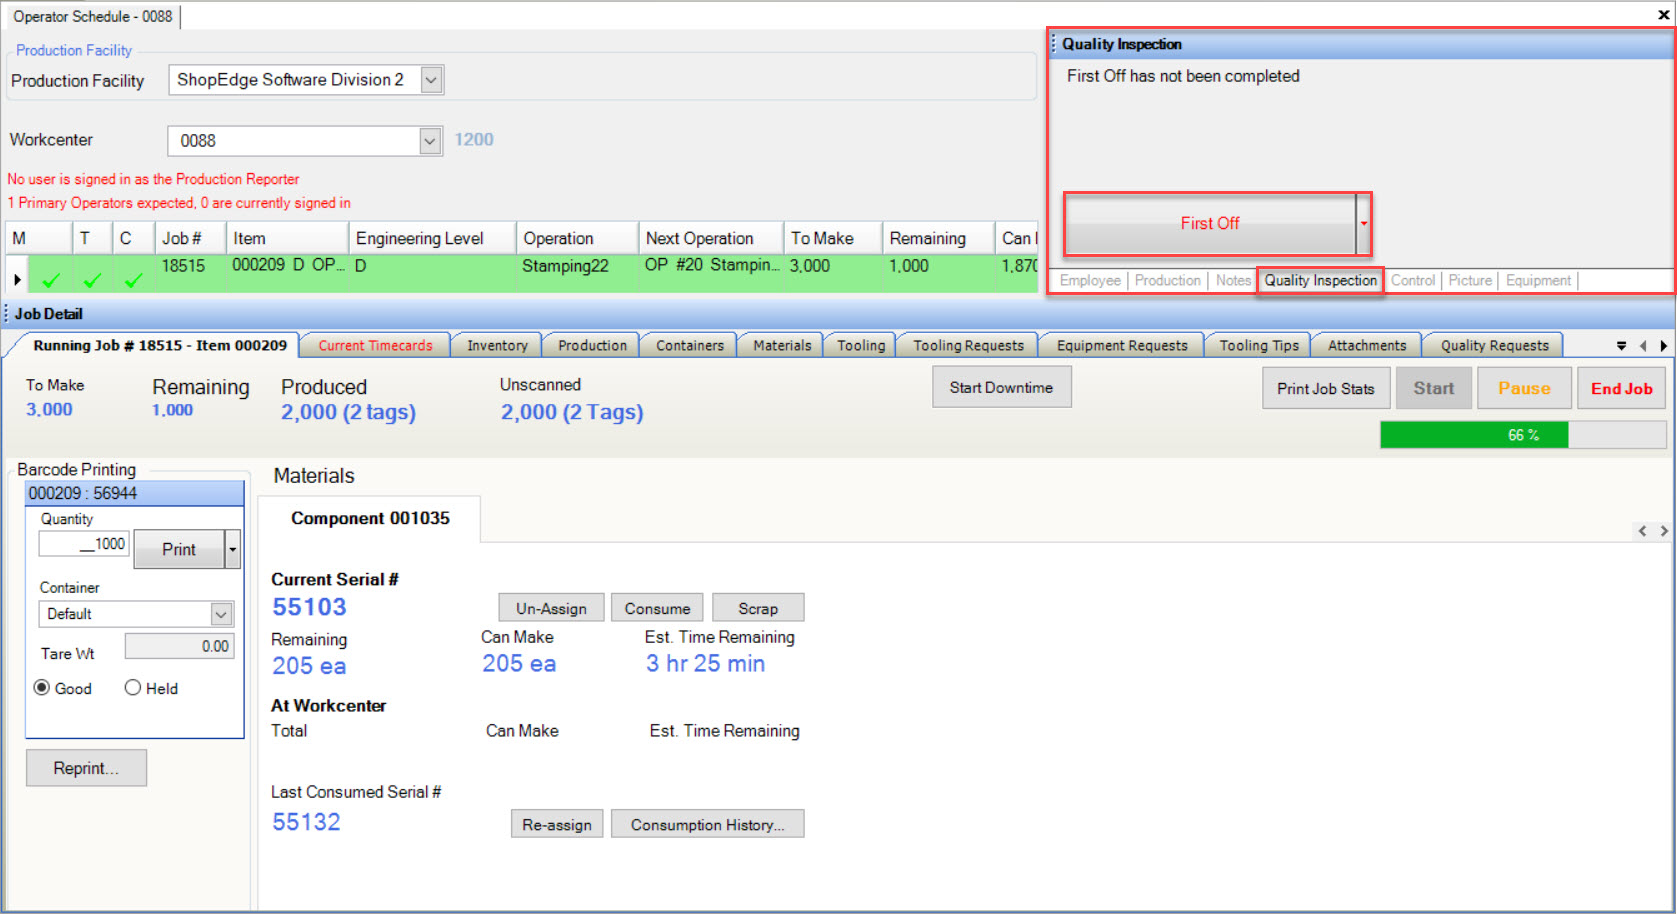
Note
If the Quality Inspection timer is red, this indicates that it is overdue, and should be completed immediately.
Note
For more information regarding Quality Inspection functions on the Operator Schedule, please see Production > Operator Schedule > Right Control Panel > Quality Inspection.