Gauge Listing
The Gauge Listing tool displays all available Gauges in the system. Gauge Calibration is used for recording in the system.
To view Gauge Listing, navigate to the  tab and click on the
  icon. The Gauge Listing screen will be displayed.
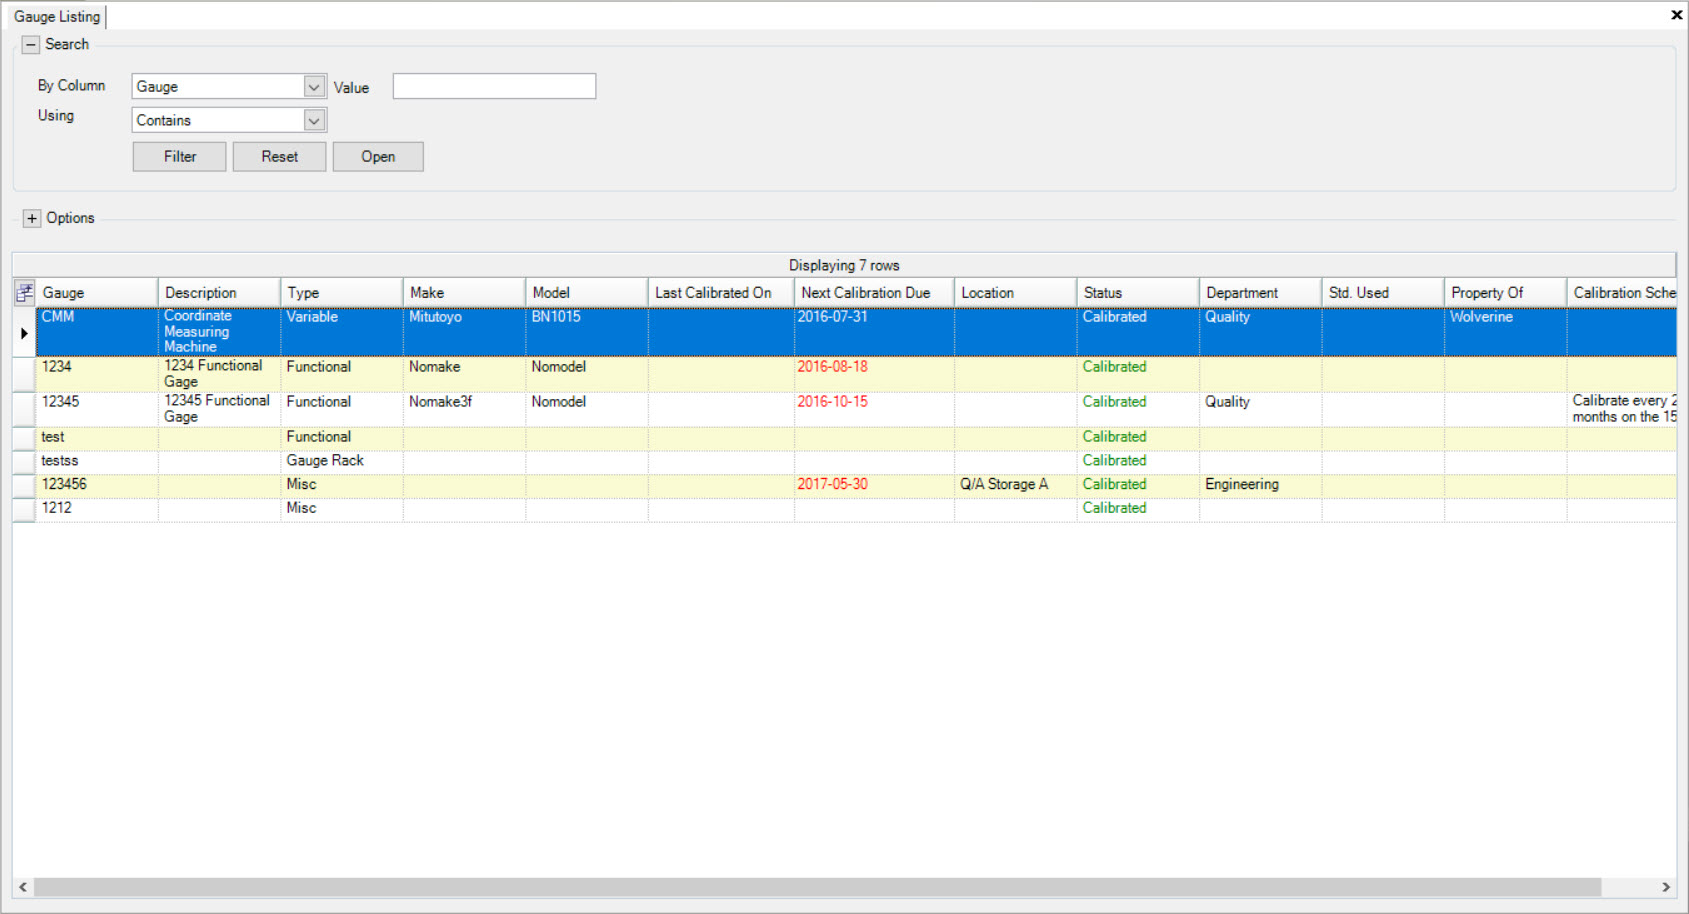
All available Gauges in the system will be displayed with details suchs as the Gauge, Description, Type, Make, Model, Last Calibrated On date, Next Calibration Due date, Location, Status, Department, Std. Used, Property Of, and Calibration Schedule.
Note
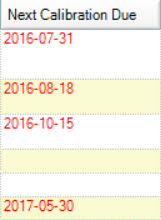
If a Gauge is overdue, the Next Calibration Due date will display in red.
Viewing a Gauge
To open a Gauge, navigate to the tab and click on the icon. The Gauge Listing screen will be displayed.
Locate the Gauge you wish to view and double-click on the appropriate row. The Gauge detail screen will be displayed.
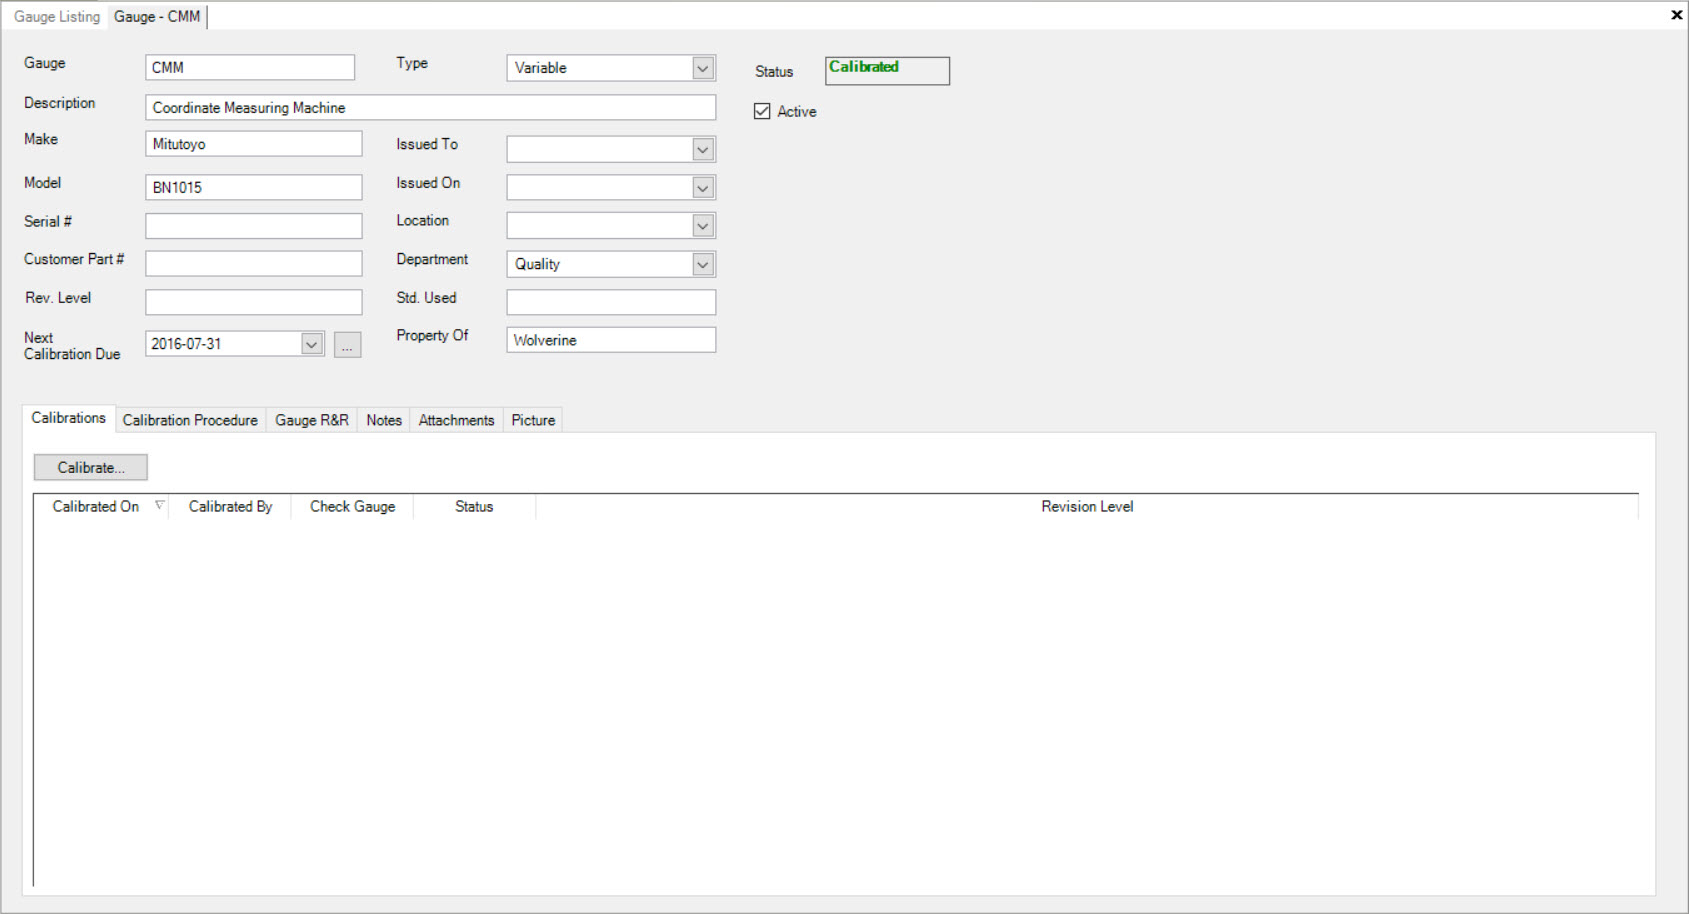
Users will be able to view the details of the Gauge.
Note
To make any necessary changes to a Gauge detail screen, please see Gauge Listing > Creating a New Gauge.
Creating a New Gauge
There are three different ways to add a new Gauge to the system. The first way is to select the Ctrl + Shift + J keys. The second way is to navigate to File > New > Gauge.
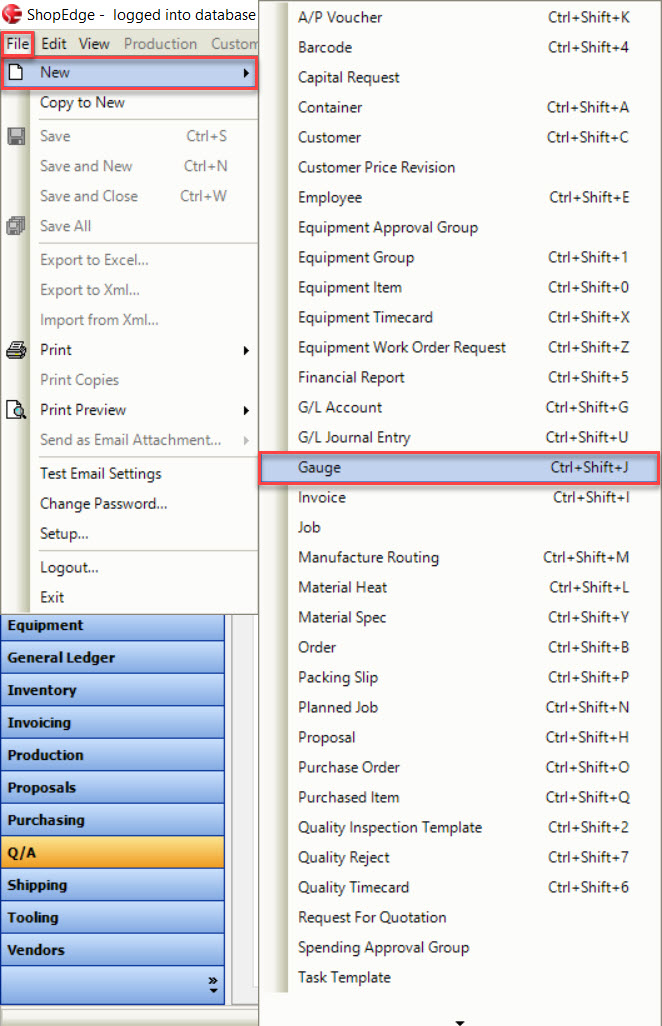
The last way is to click on the  button and select the Gauge option.
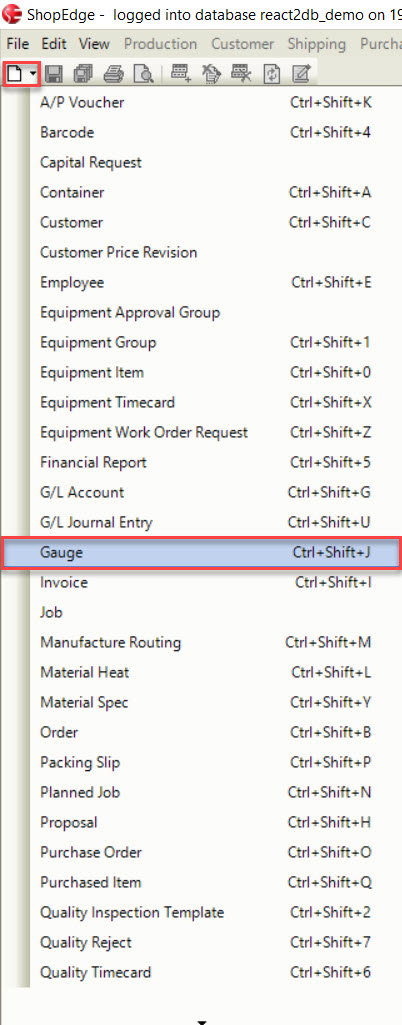
All three of these options will open a new Gauge screen.
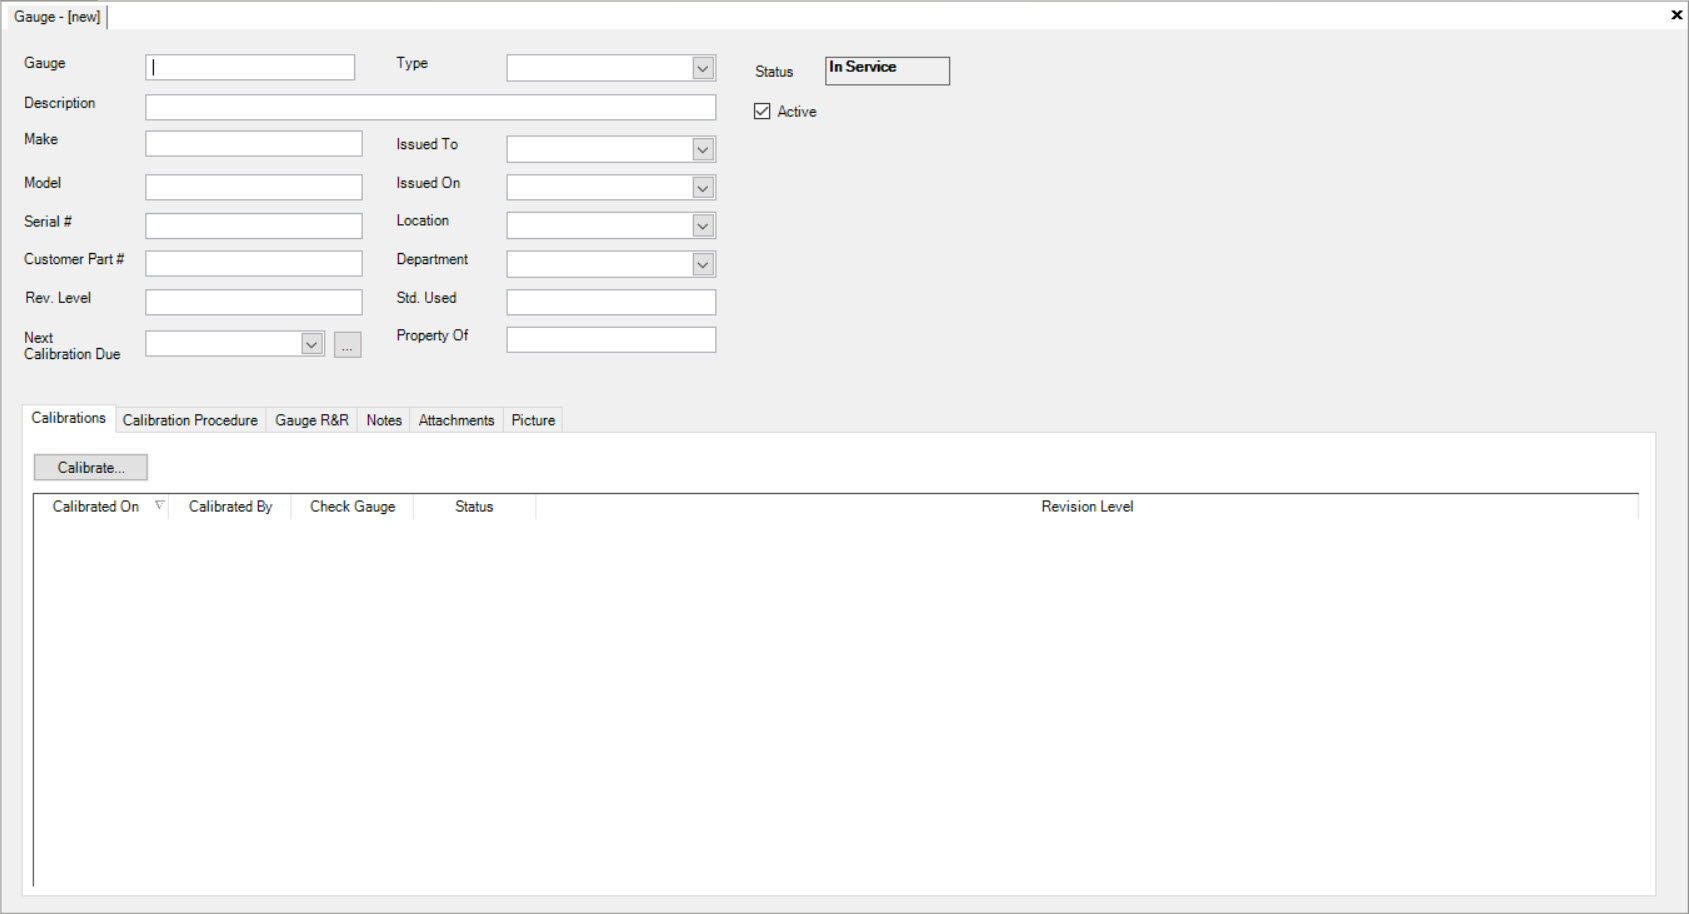
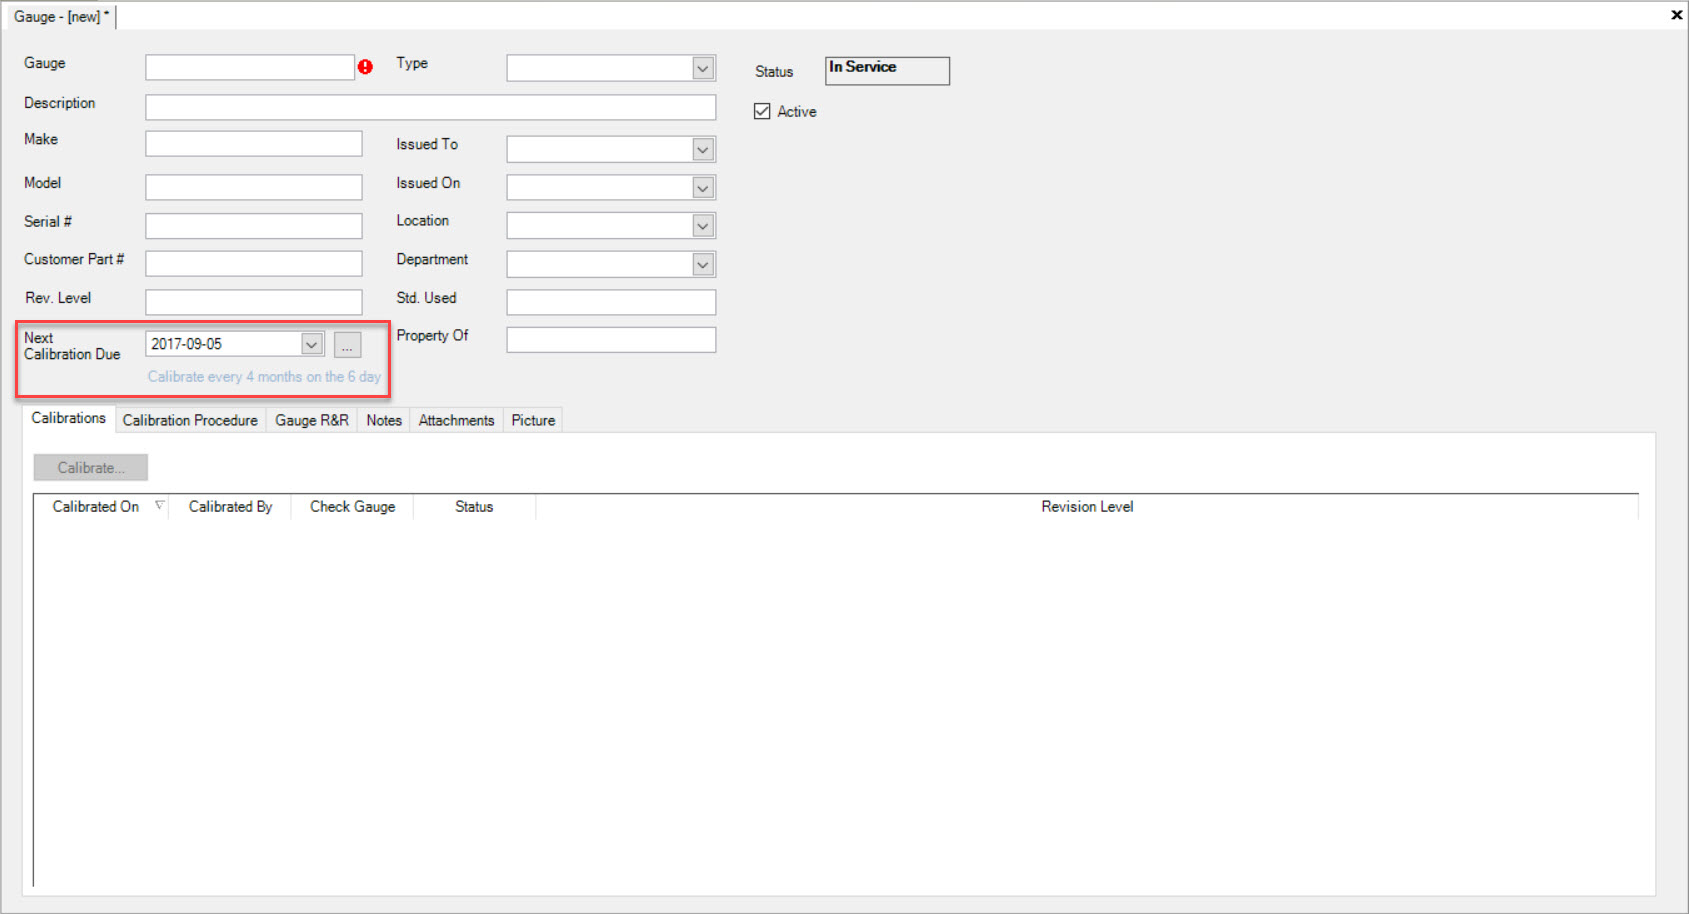
Users must complete the header information including the Gauge, Description, Make, Model, Serial #, Customer Part #, Rev. Level, Type, Issued To, Issued On, Location, Department, Std. Used, and Property Of.
The Status will default to In Service and the Active checkbox will be checked but can be de-selected if necessary.
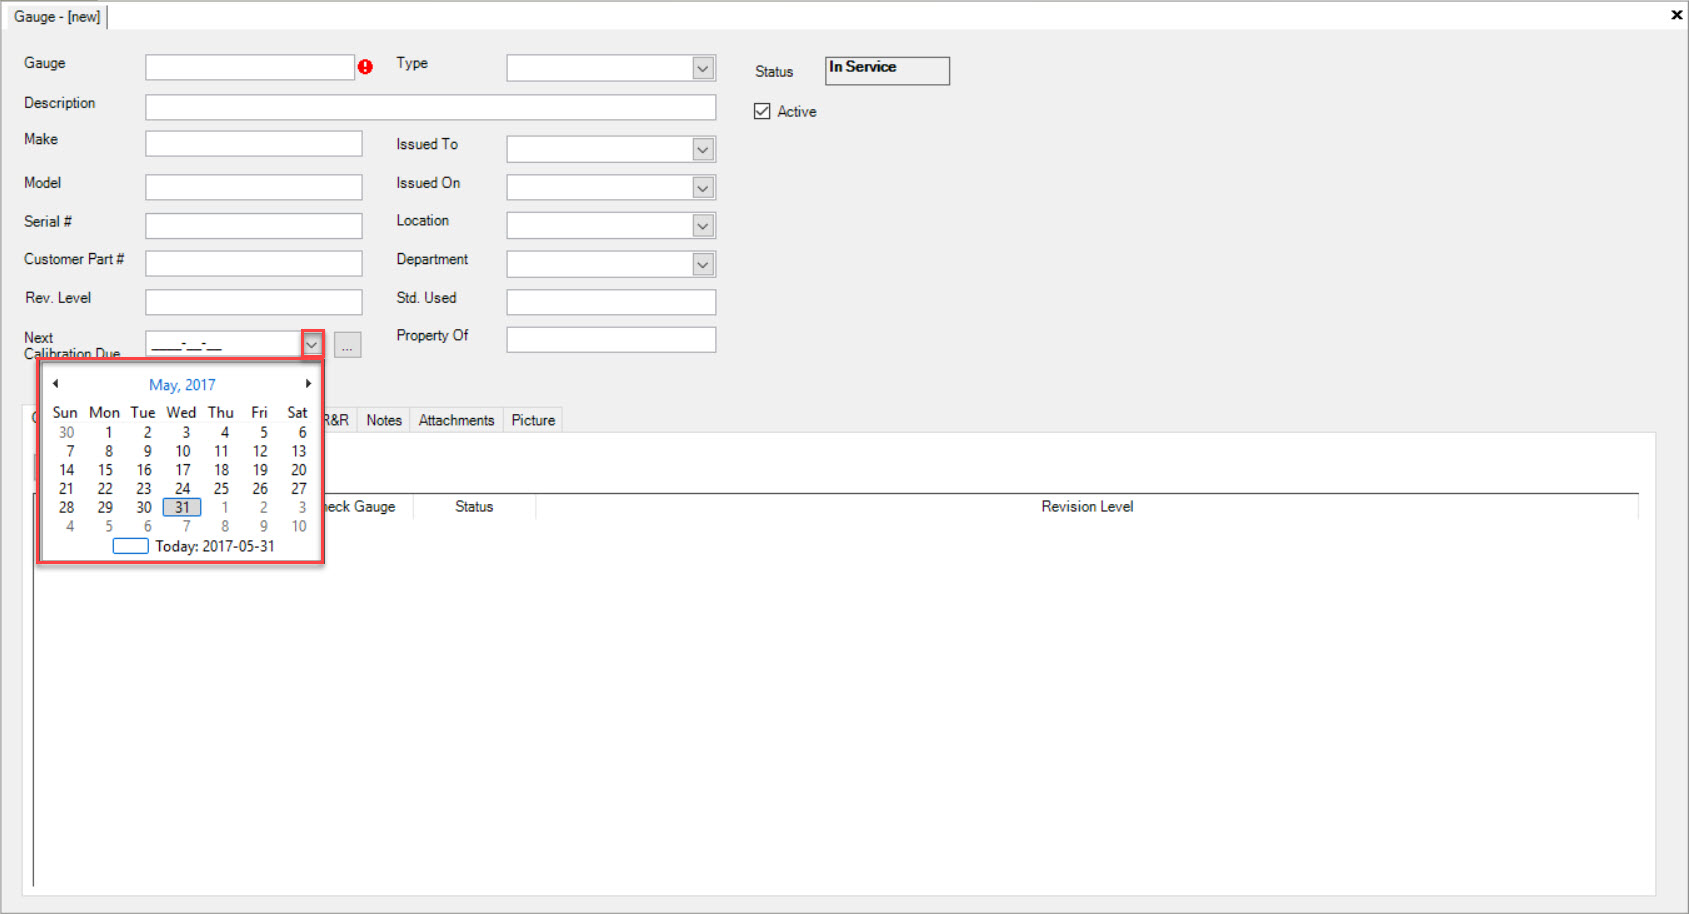
Users must also select a Next Calibration Due date by using the available drop-down menu for a one-time Next Calibration Due date.
Note
If users wish to set a Calibration Schedule, please see Gauge Listing > Setting a Gauge Calibration Schedule.
Once the header information has been entered in, make sure to save your changes before exiting the screen.
Settting a Gauge Calibration Schedule
If users wish to set multiple Next Calibration Due dates for a new or existing Gauge, navigate to the tab and click on the
icon. The Gauge Listing screen will be displayed.
Locate the Gauge you wish to create a Calibration Schedule for and double-click on the appropriate row. The Gauge detail screen will be displayed.
Click on the  button located next to the drop-down menu for the Next Calibration Due date field.
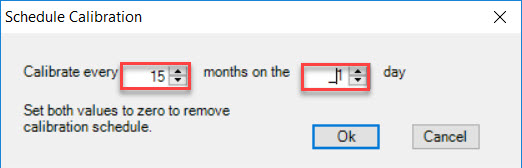
The Schedule Calibration window will appear.
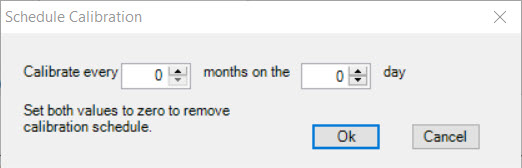
Users can select the amount of months they would like the Gauge to be calibrated on and then, select the day of the month they would like it to occur on.
Note
If users wish to remove the Calibration Schedule, simply enter in zero for both fields and click on the  button.
Once the months and day are selected, click on the button to complete the Calibration Schedule. The Calibration Schedule will be displayed below the
Next Calibration Due textbox.
Make sure to save your changes before exiting the screen.
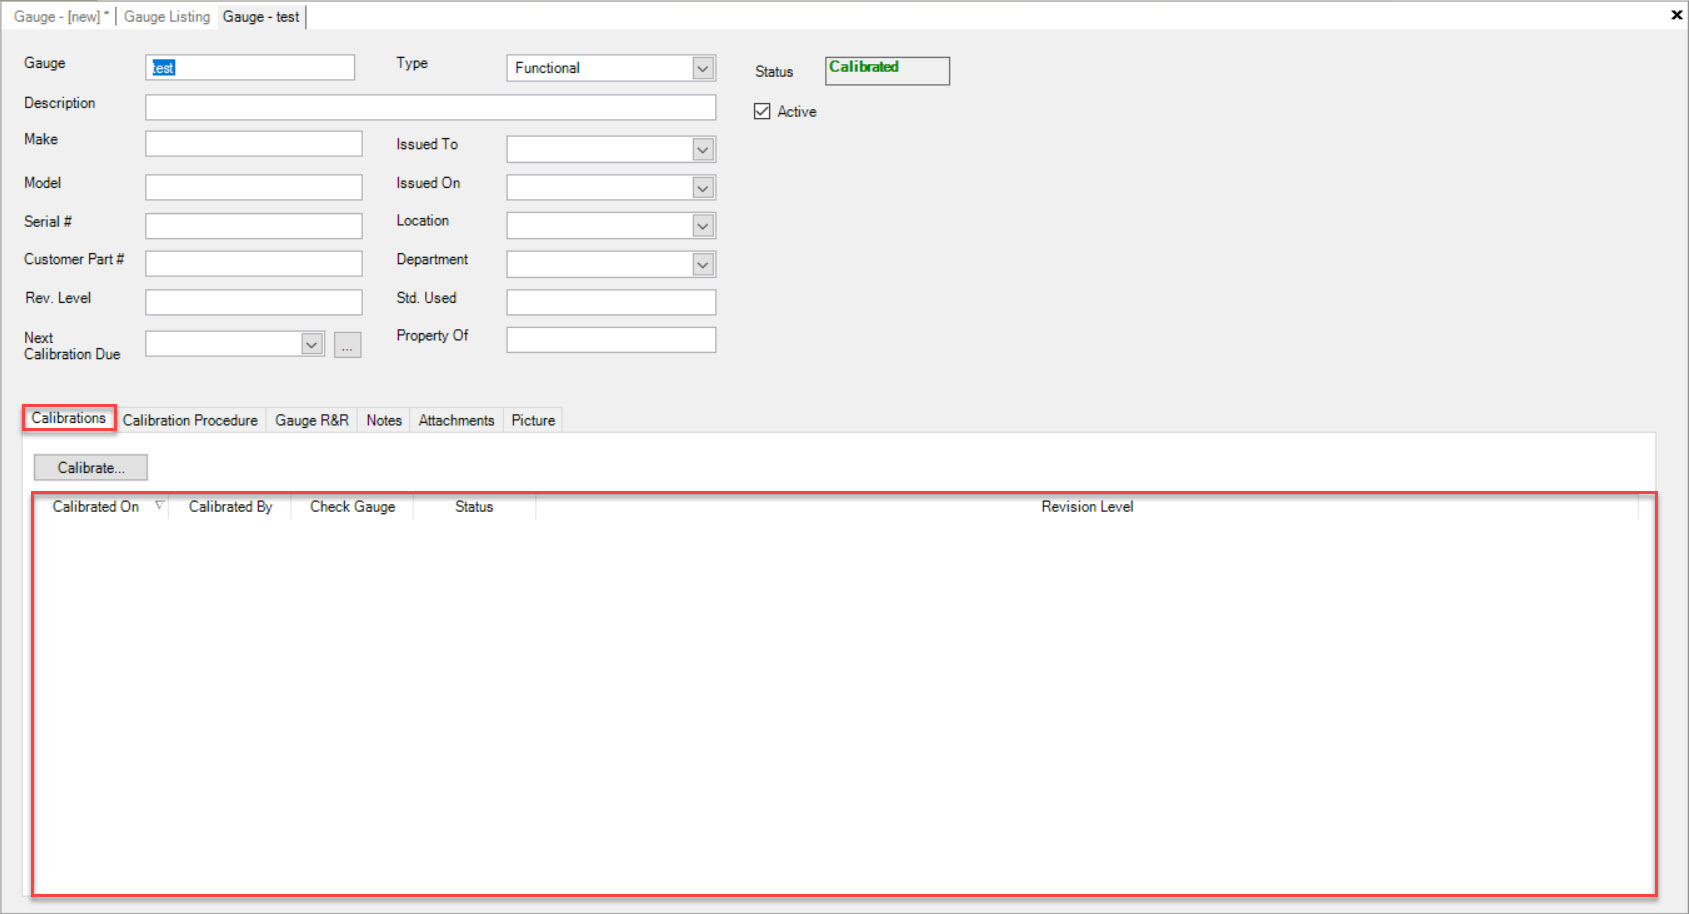
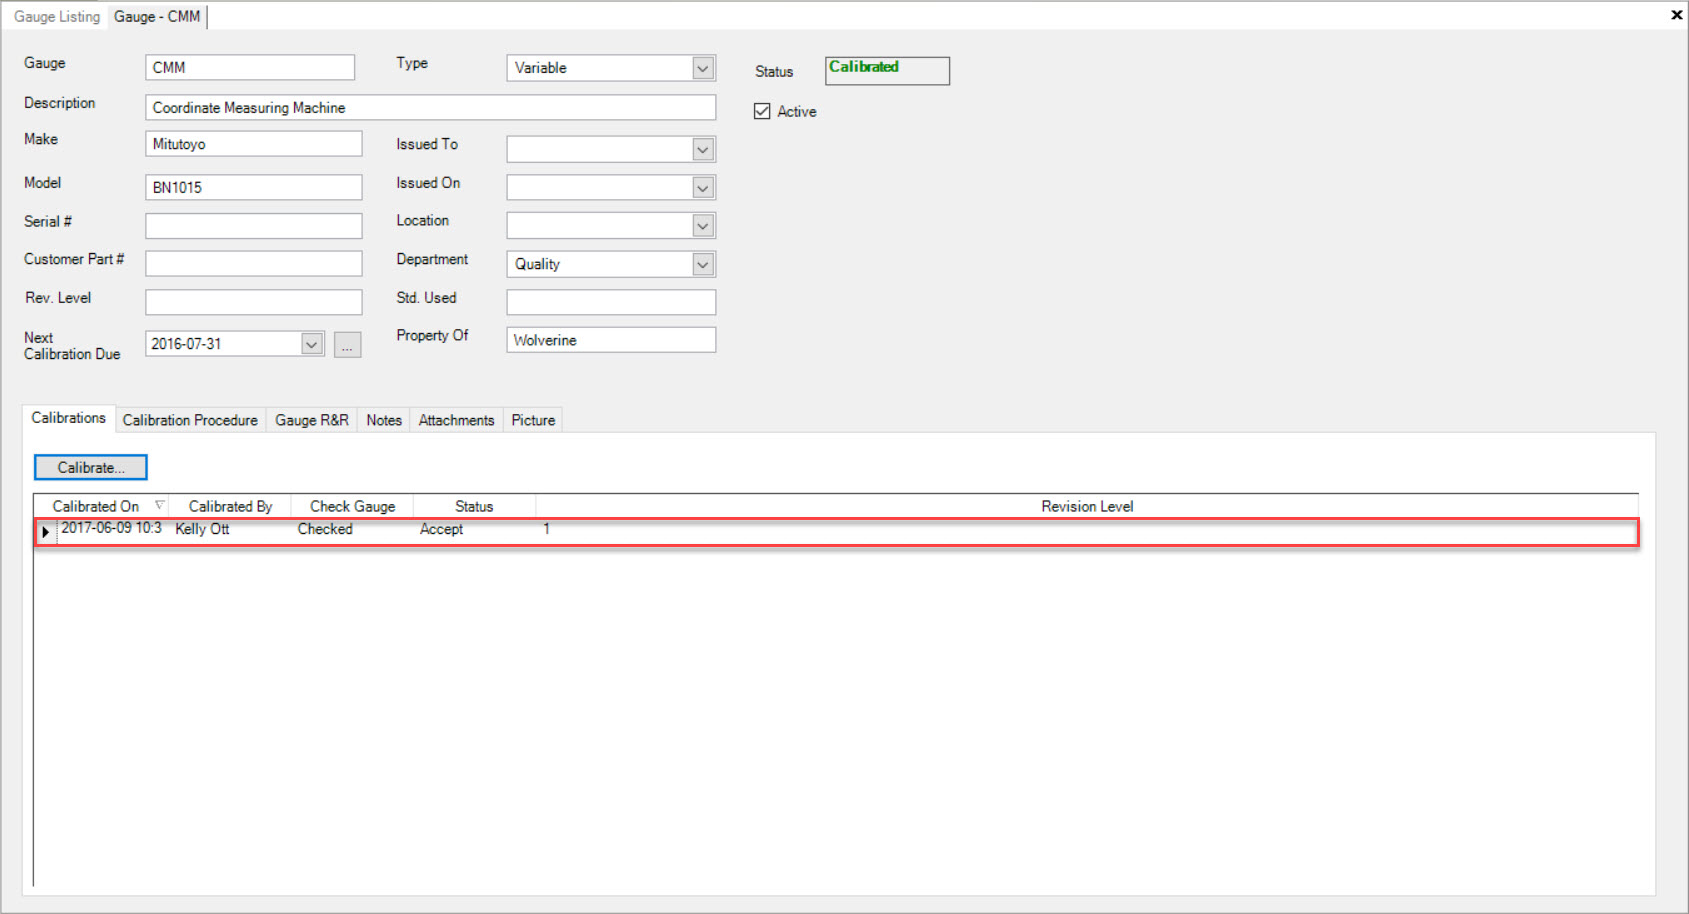
Calibrations Tab
The  tab displays all of the Calibration Dates for the selected Gauge. This is also where users can calibrate a Gauge.
To view previous Calibration Dates for a Gauge, navigate to the tab and click on the
icon. The Gauge Listing screen will be displayed.
Locate the Gauge you wish to view previous Calibration Dates for and double-click on the appropriate row. The Gauge detail screen will be displayed.
Make sure to select the tab.
If the selected Gauge has been previously calibrated, the details will be displayed.
Note
To calibrate a Gauge, please see Quality Assurance > Gauge Listing > Calibrating a Gauge.
Calibration Procedure Tab
Users can add a Calibration Procedure for a Gauge under the  tab.
tab.
To view a Calibration Procedure for a Gauge in the system, navigate to the tab and click on the
icon. The Gauge Listing screen will be displayed.
Locate the Gauge you wish to view a Calibration Procedure for and double-click on the appropriate row. The Gauge detail screen will be displayed.
Make sure to select the tab.
If there has been a Calibration Procedure created for the selected Gauge, users will be able to view it with details including the Procedure Description, Measurements, and Visuals.

Adding Measurements
Users have the ability to add Measurements under the tab.
To add a Measurement, make sure to select the  tab to display the existing Calibration Measurements if available.
Click on the  button and a new row will be displayed where users can select and enter in the necessary information.
Once the necessary information has been entered in, make sure to save your changes before exiting the screen.
Editing Measurements
To edit a Measurement under the tab, make sure to select the tab.
Locate the Measurement you wish to edit and make the necessary changes using the available textboxes and drop-down menus.
Make sure to save before exiting the screen.
Deleting Measurements
To delete a Measurement from a Calibration Procedure, make sure to select the tab.
Locate the Measurement you wish to delete and highlight the appropriate row. Use your Delete key and when the system prompts you, select Yes.
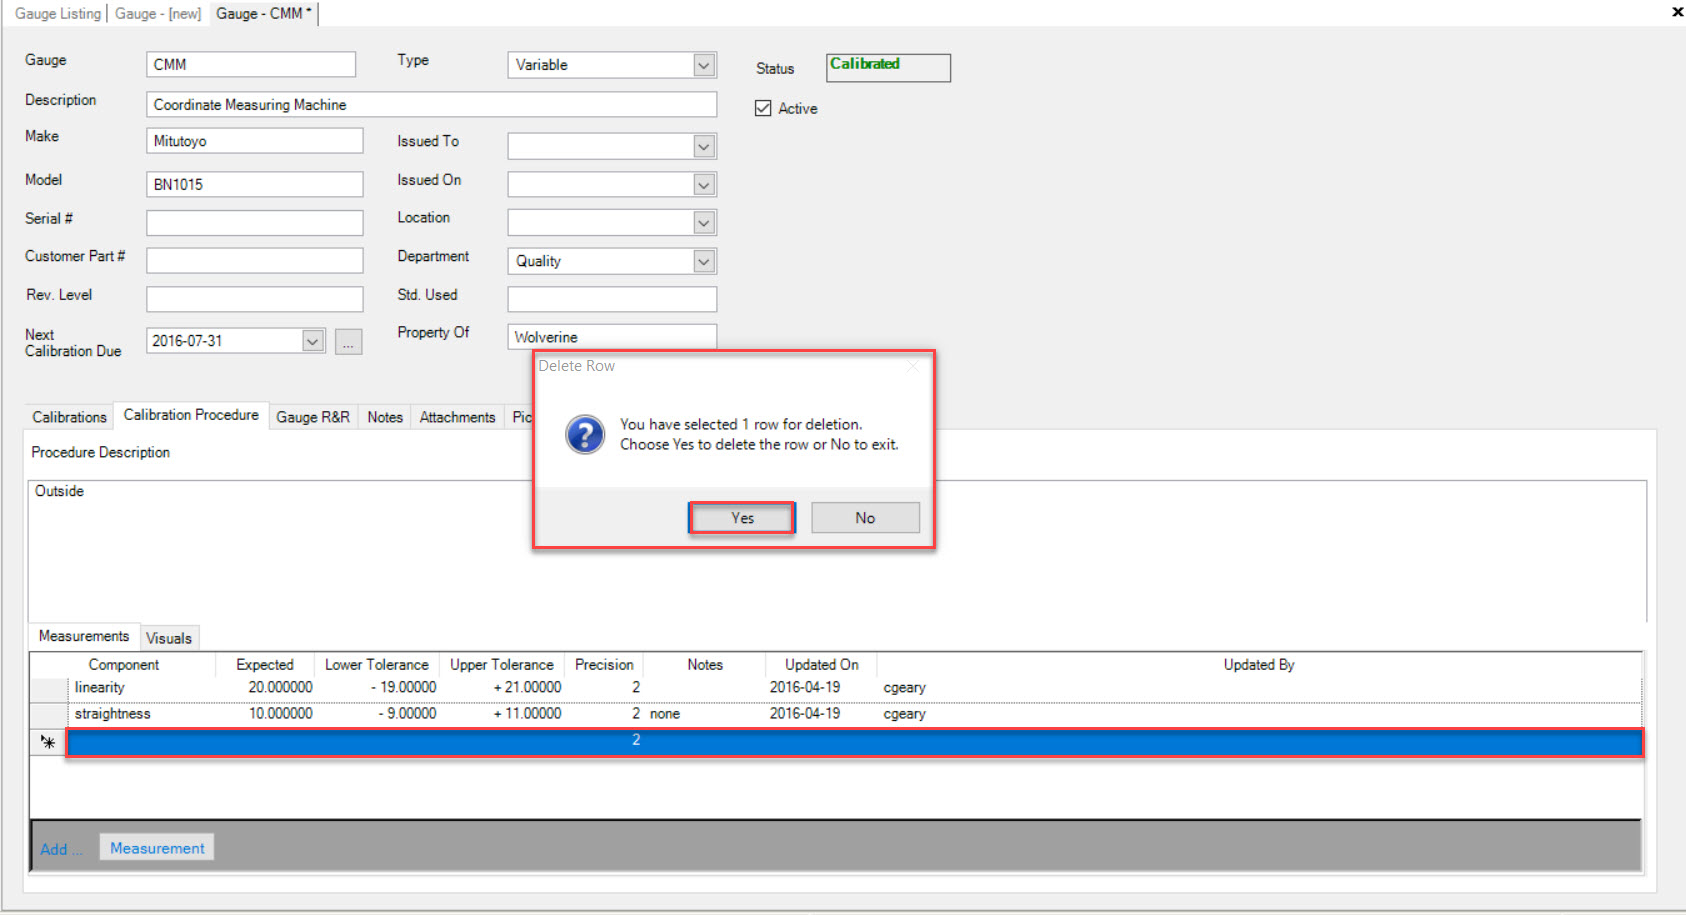
The selected Measurement will be deleted.
Make sure to save your changes before exiting the screen.
Adding Visual Inspections
Users have the ability to add Visual Inspections under the tab.
To add a Visual Inspection, make sure to select the  tab to display the existing Visual Inspections if available.
Click on the 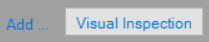 button and a new row will be displayed where users can enter in the necessary information.
Once the necessary information has been entered, make sure to save your changes before exiting the screen.
Editing Visual Inspections
To edit a Visual Inspection under the tab, make sure to select the tab.
Locate the Visual Inspection you wish to edit and make the necessary changes using the available textboxes and drop-down menus.
Make sure to save before exiting the screen.
Deleting Visual Inspections
To delete a Visual Inspection from a Calibration Procedure, make sure to select the tab.
Locate the Visual Inspection you wish to delete and highlight the appropriate row. Use your Delete key and when the system prompts you, select Yes.
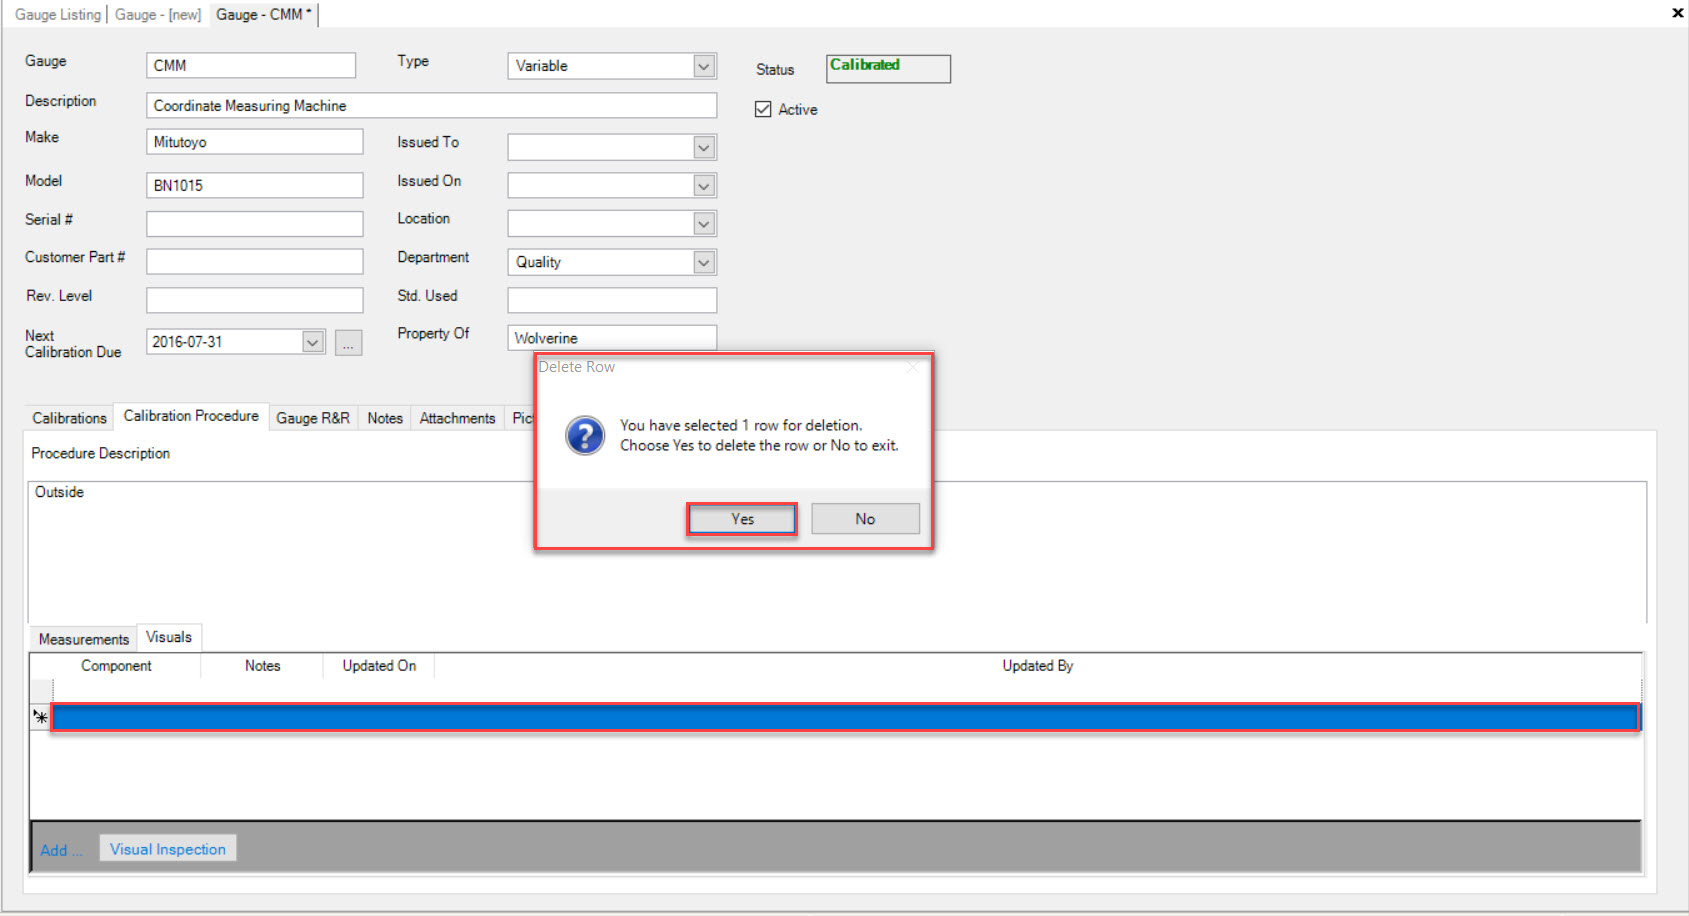
The selected Visual Inspection will be deleted.
Make sure to save your changes before exiting the screen.
Gauge R&R Tab
To view the Gauge R&R (Repeatability and Reproducibility Study) tab, make sure to select the  tab located on the Gauge detail screen.
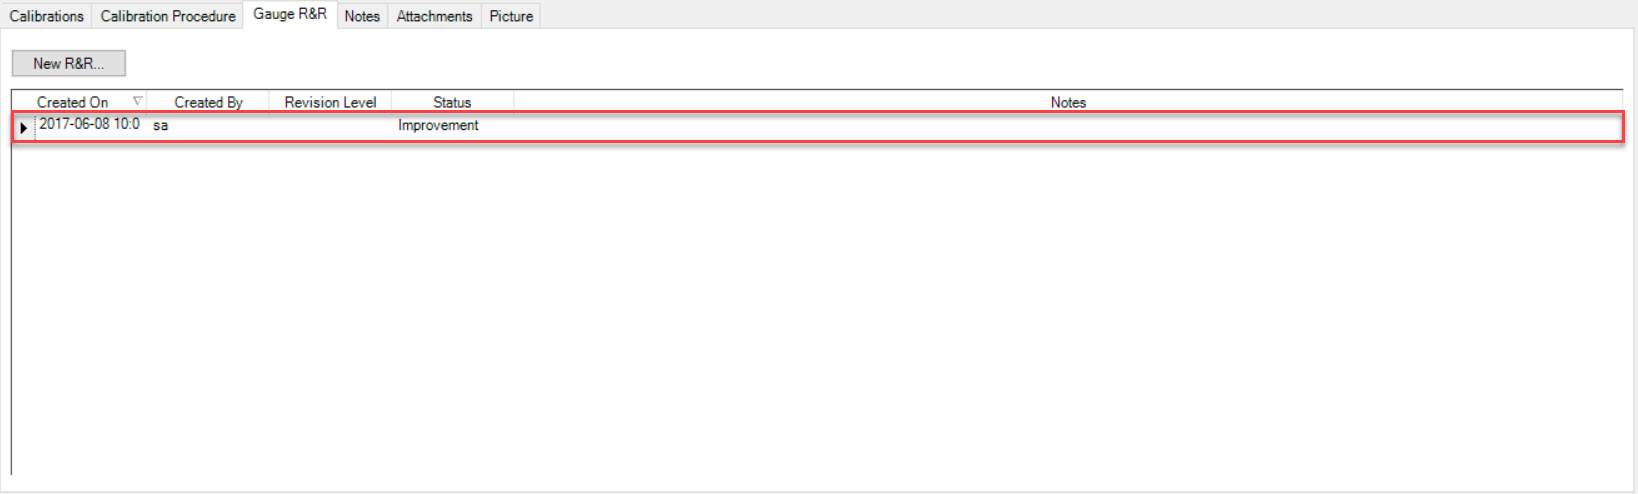
All previous Gauge R&R’s created for a Gauge will be displayed.
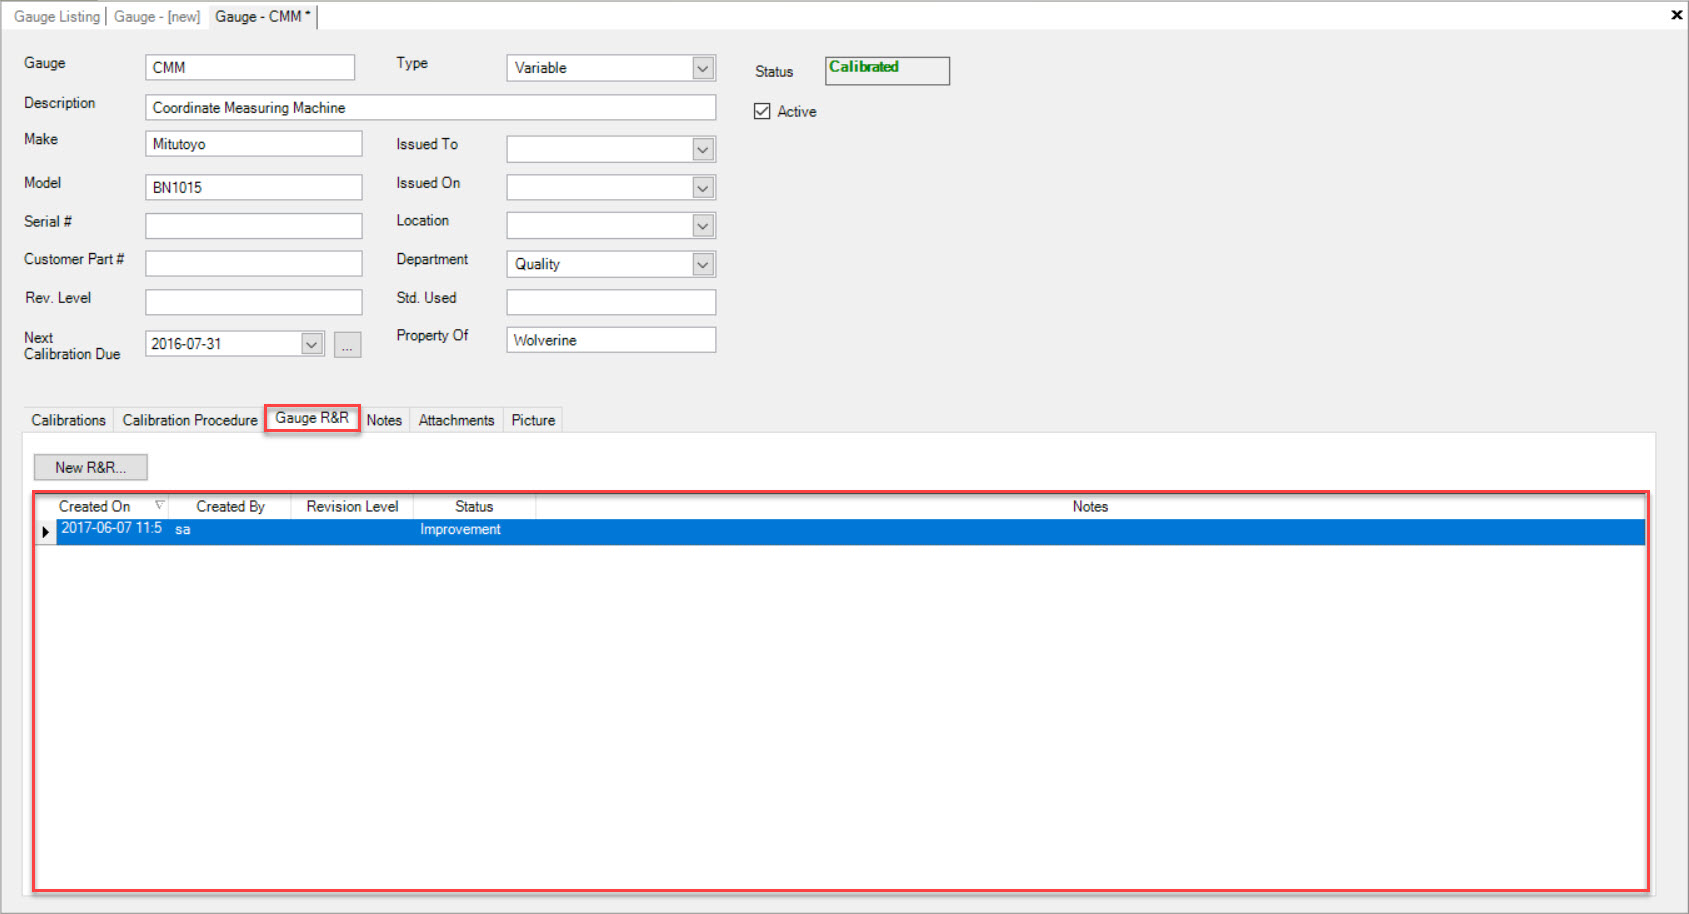
The details include the Created On date, Created By, Revision Level, Status, and Notes.
Adding a New Gauge R&R
To add a new Gauge R&R to a new or existing Gauge, make sure to select the tab.
Click on the 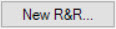 button.
The Gauge R&R window will appear.
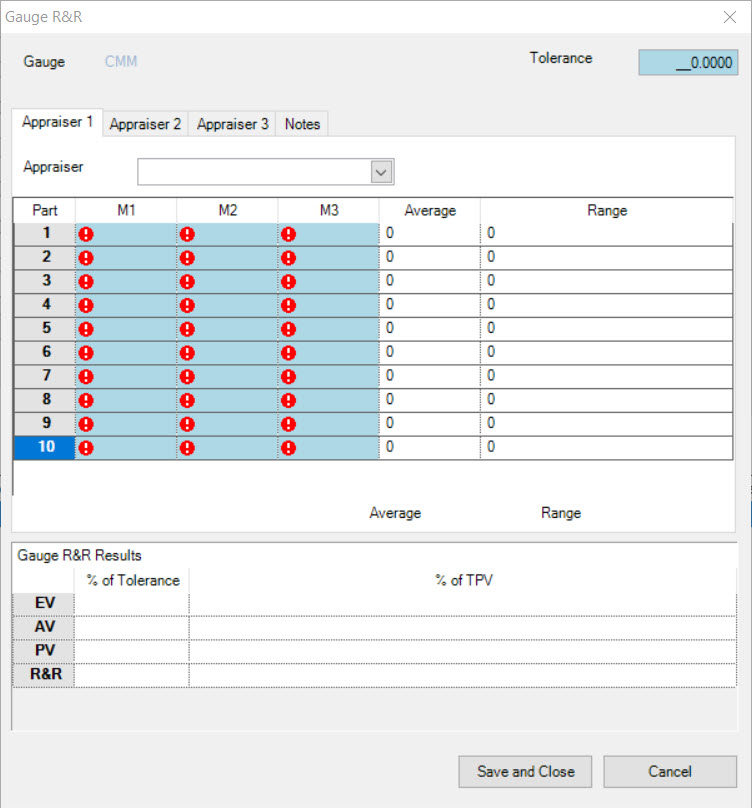
Users can enter in a Tolerance at the top right of the Gauge R&R window.
Next, users must select an Appraiser from the available drop-down menu.
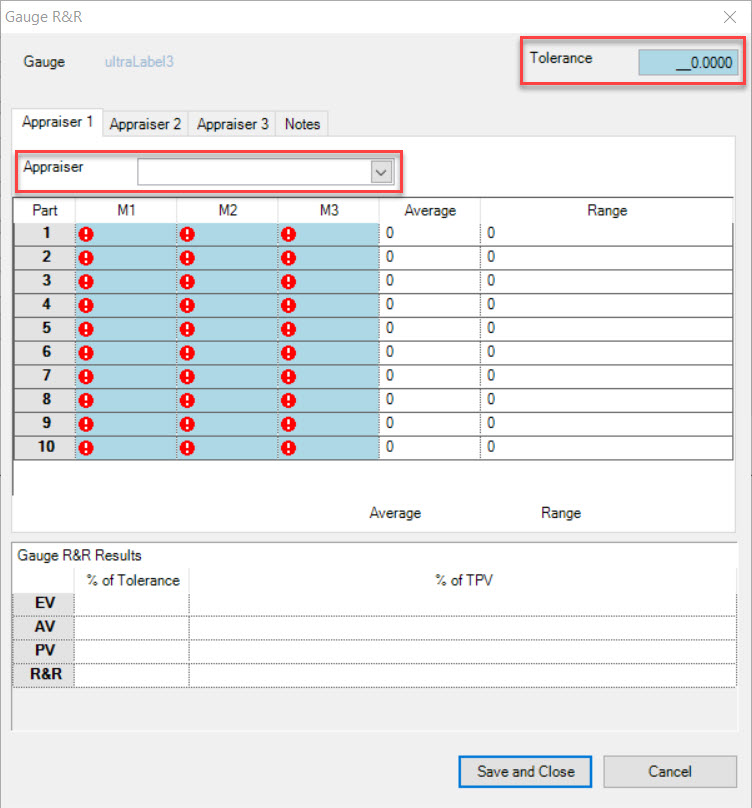
Users will then have to enter in for all 10 Parts, an M1, M2, and M3. The system will calculate the Average and Range automatically.
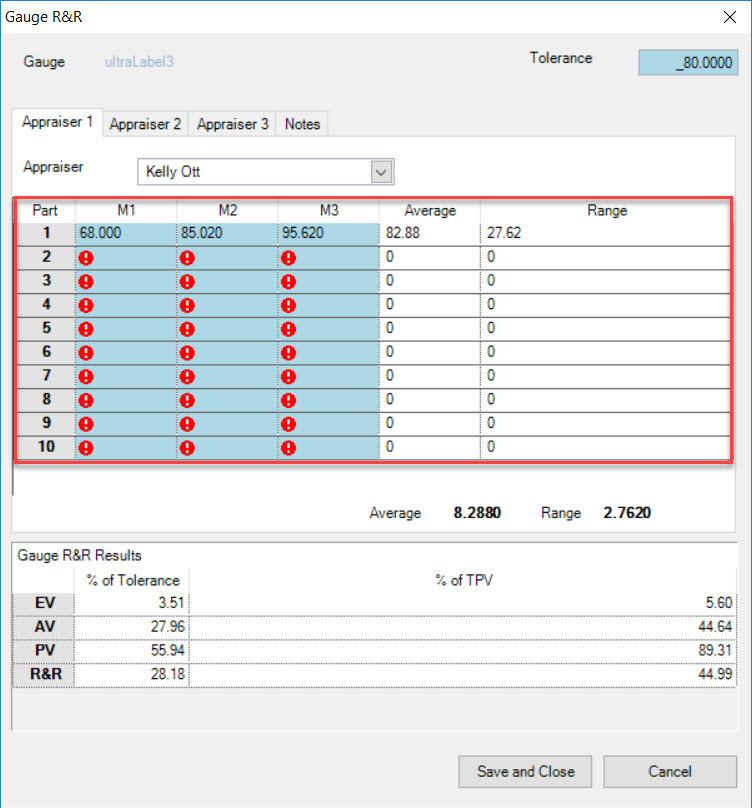
Users must follow the above steps in order to complete the different tabs of Appraiser 1, Appraiser 2, and Appraiser 3. All of the information must be completed in order to save the Gauge R&R.
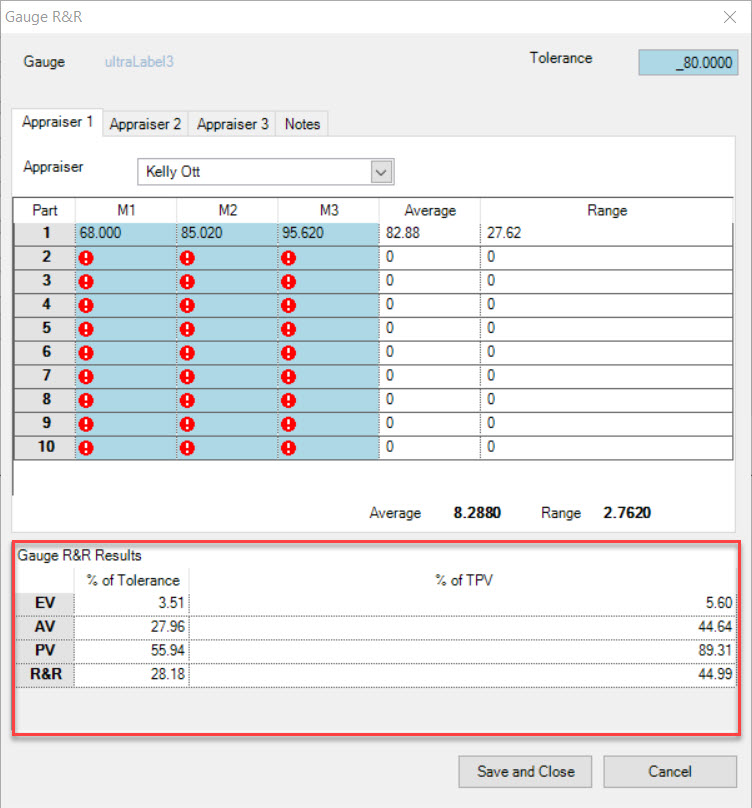
The system will also calculate the Gauge R&R Results located at the bottom of the window which will include all of the Appraisers.
If users wish to add Notes, simply select the  tab.
tab.
Add, edit, or delete any necessary Notes for the Gauge R&R using the available textbox.
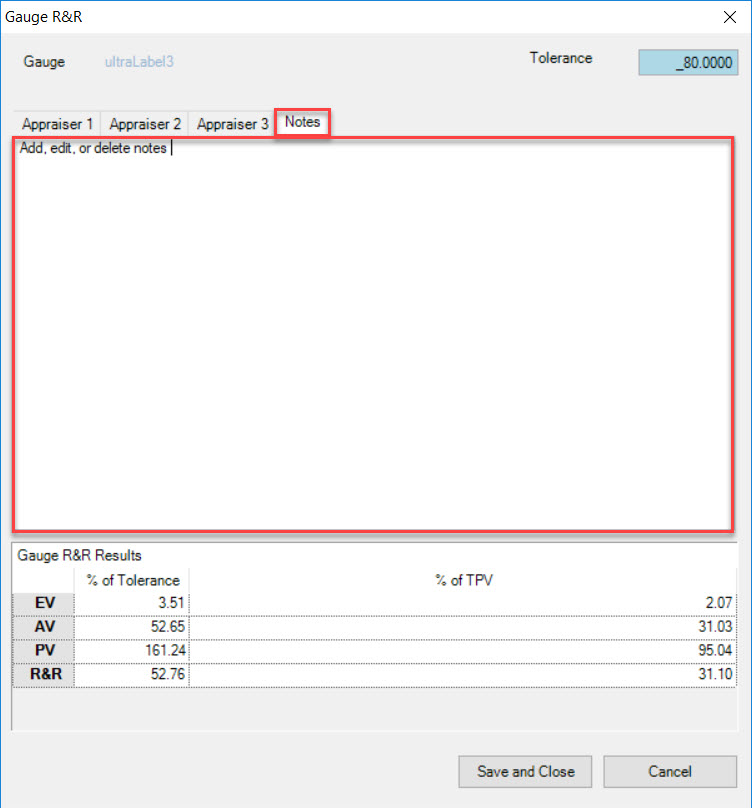
Once all necessary information has been entered in for the new Gauge R&R, click on the  button.
Note
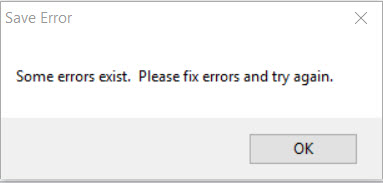
If the neccessary information has not all been completed, a Save Error window will appear. Users must complete all fields before saving.
Once the Gauge R&R has been saved, it will be added to the list below.
Editing a Gauge R&R
To edit a Gauge R&R for a Gauge in the system, navigate to the tab and click on the icon.
The Gauge Listing screen will be displayed.
Locate the Gauge you wish to edit a Gauge R&R for and double-click on the appropriate row. The Gauge detail screen will be displayed.
Make sure to select the tab.
Locate and double-click on the row of the Gauge R&R you wish to edit. The Gauge R&R window will appear where users can make any necessary changes.
Once the necessary changes have been made, click on the button.
The selected Gauge R&R will be updated.
Note
Users do not have the ability to delete a Gauge R&R.
Notes Tab
Users have the ability to add, edit, or delete Notes from a new or existing Gauge in the system.
To view Notes on a Gauge, navigate to the tab and click on the icon.
The Gauge Listing screen will be displayed.
Locate the Gauge you wish to view the Notes for and double-click on the appropriate row. The Gauge detail screen will be displayed.
Make sure to select the tab.
Users will be able to view any Notes for the selected Gauge.
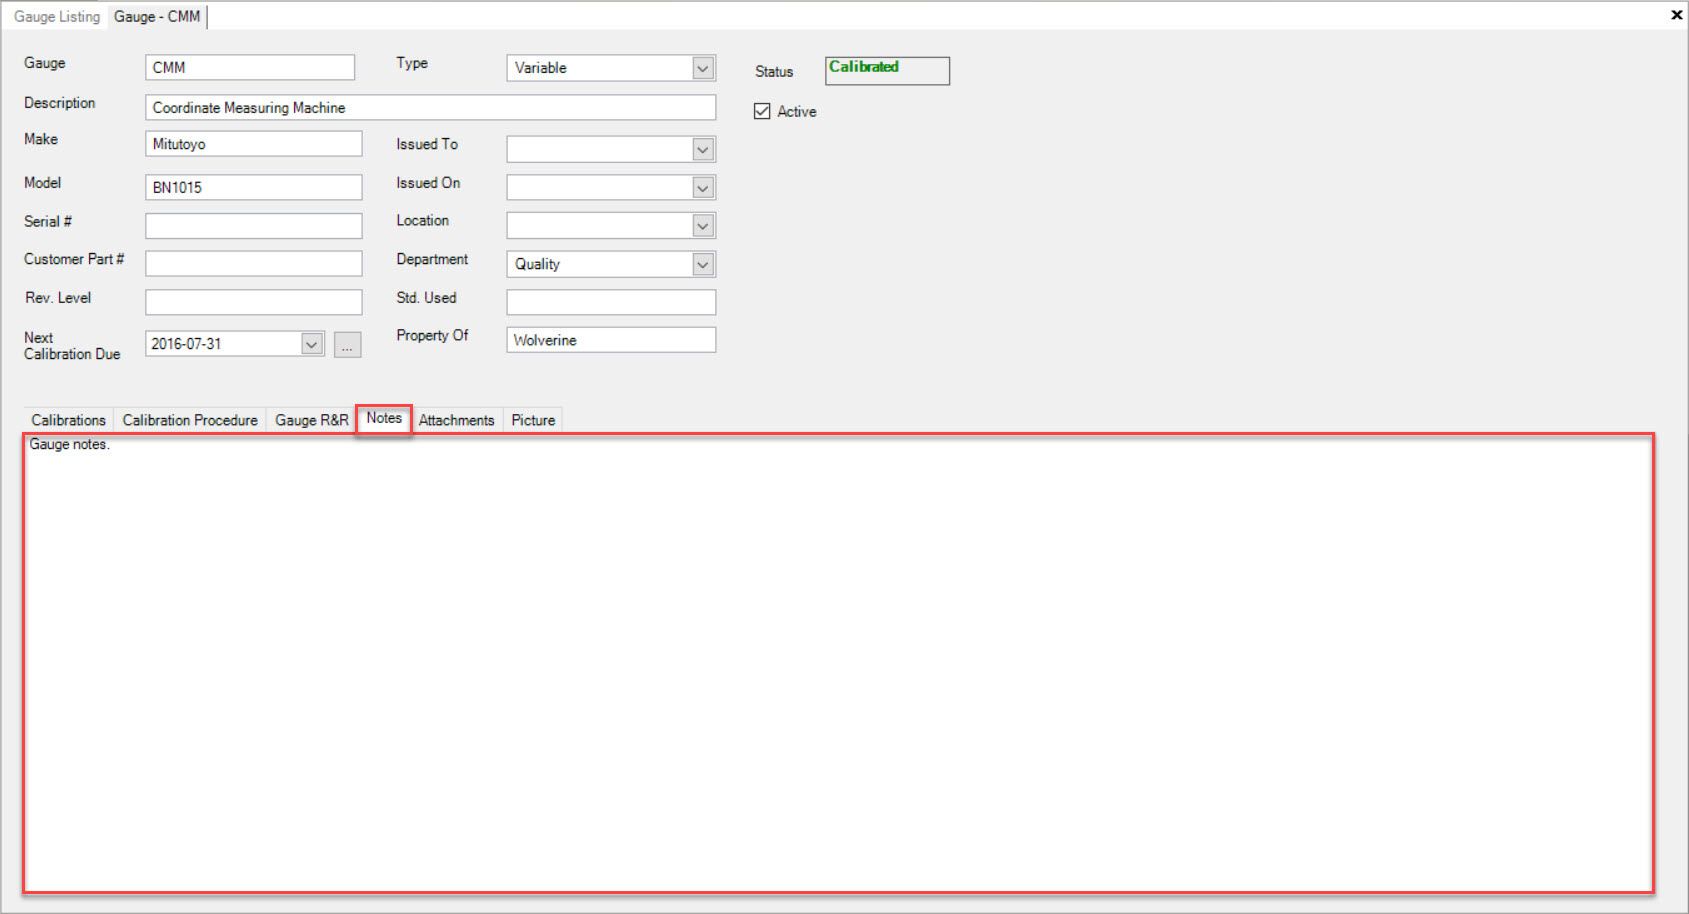
Here, users can also add, edit, or delete the Gauge Notes if necessary using the available textbox.
Once any necessary changes have been made, make sure to save before exiting the screen.
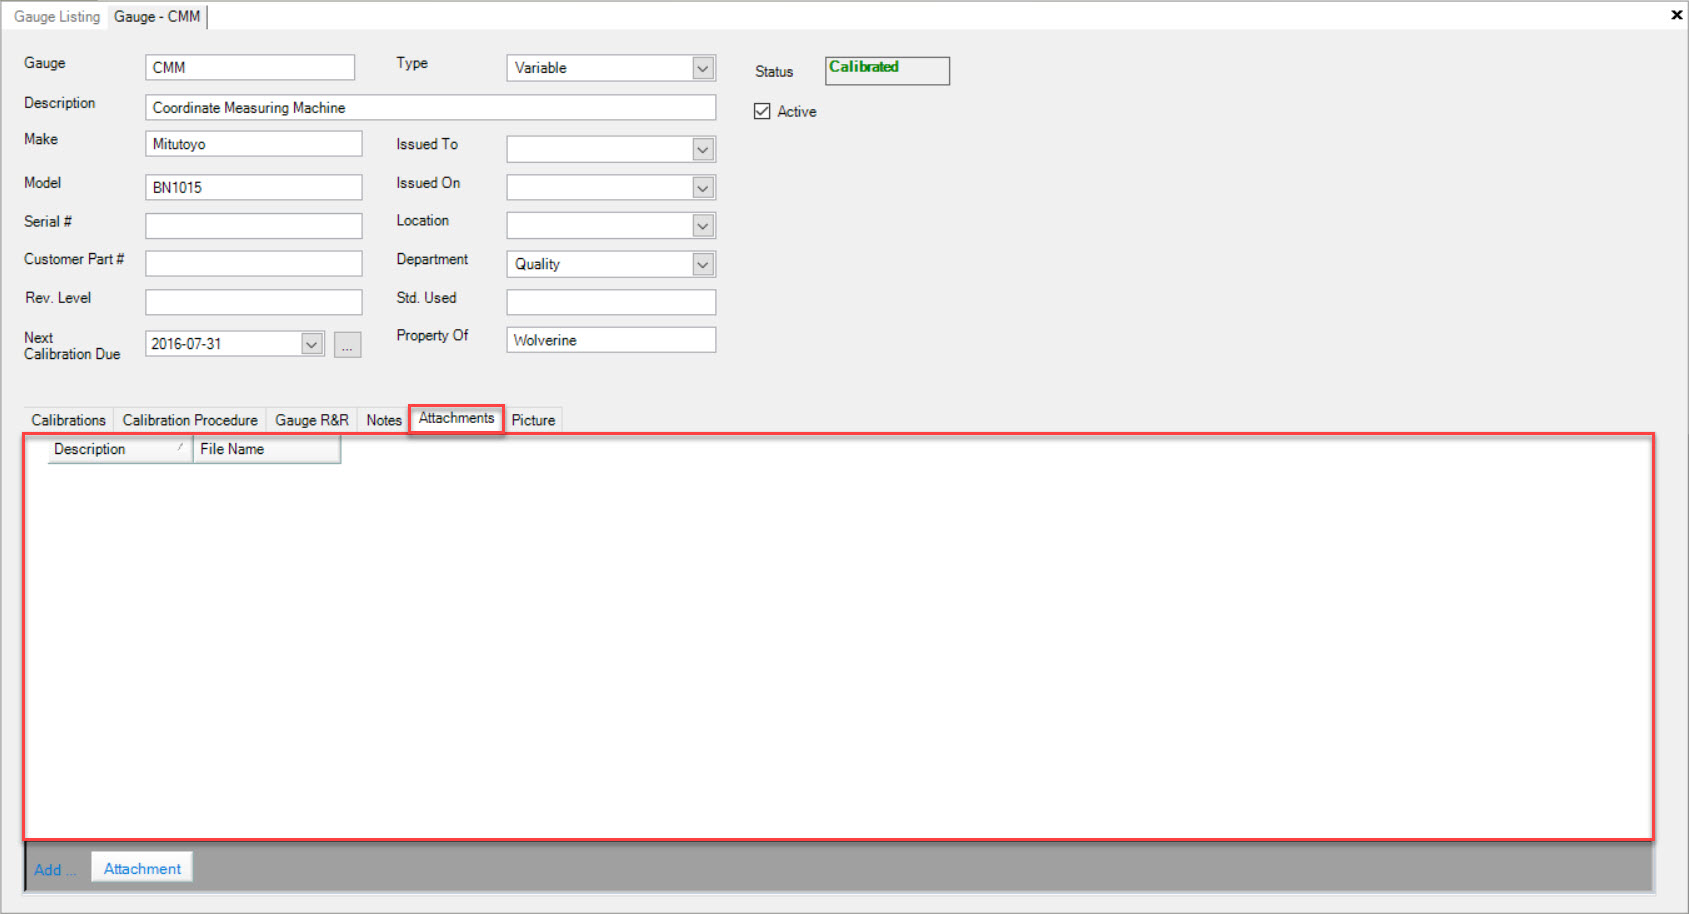
Attachments Tab
To view Attachments on a Gauge, navigate to the tab and click on the icon.
The Gauge Listing screen will be displayed.
Locate the Gauge you wish to view the Attachments for and double-click on the appropriate row. The Gauge detail screen will be displayed.
Make sure to select the  tab.
tab.
Users will be able to view Attachments for the selected Gauge if they exist.
Adding Attachments
To add an Attachment to a new or existing Gauge, make sure to select the tab.
Then, click on the  button located at the bottom of the screen.
Users will then be able to select an Attachment from their computer. Once an Attachment has been selected, click on the  button.

The selected Attachment will be added to the Gauge.
Make sure to save your changes before exiting the screen.
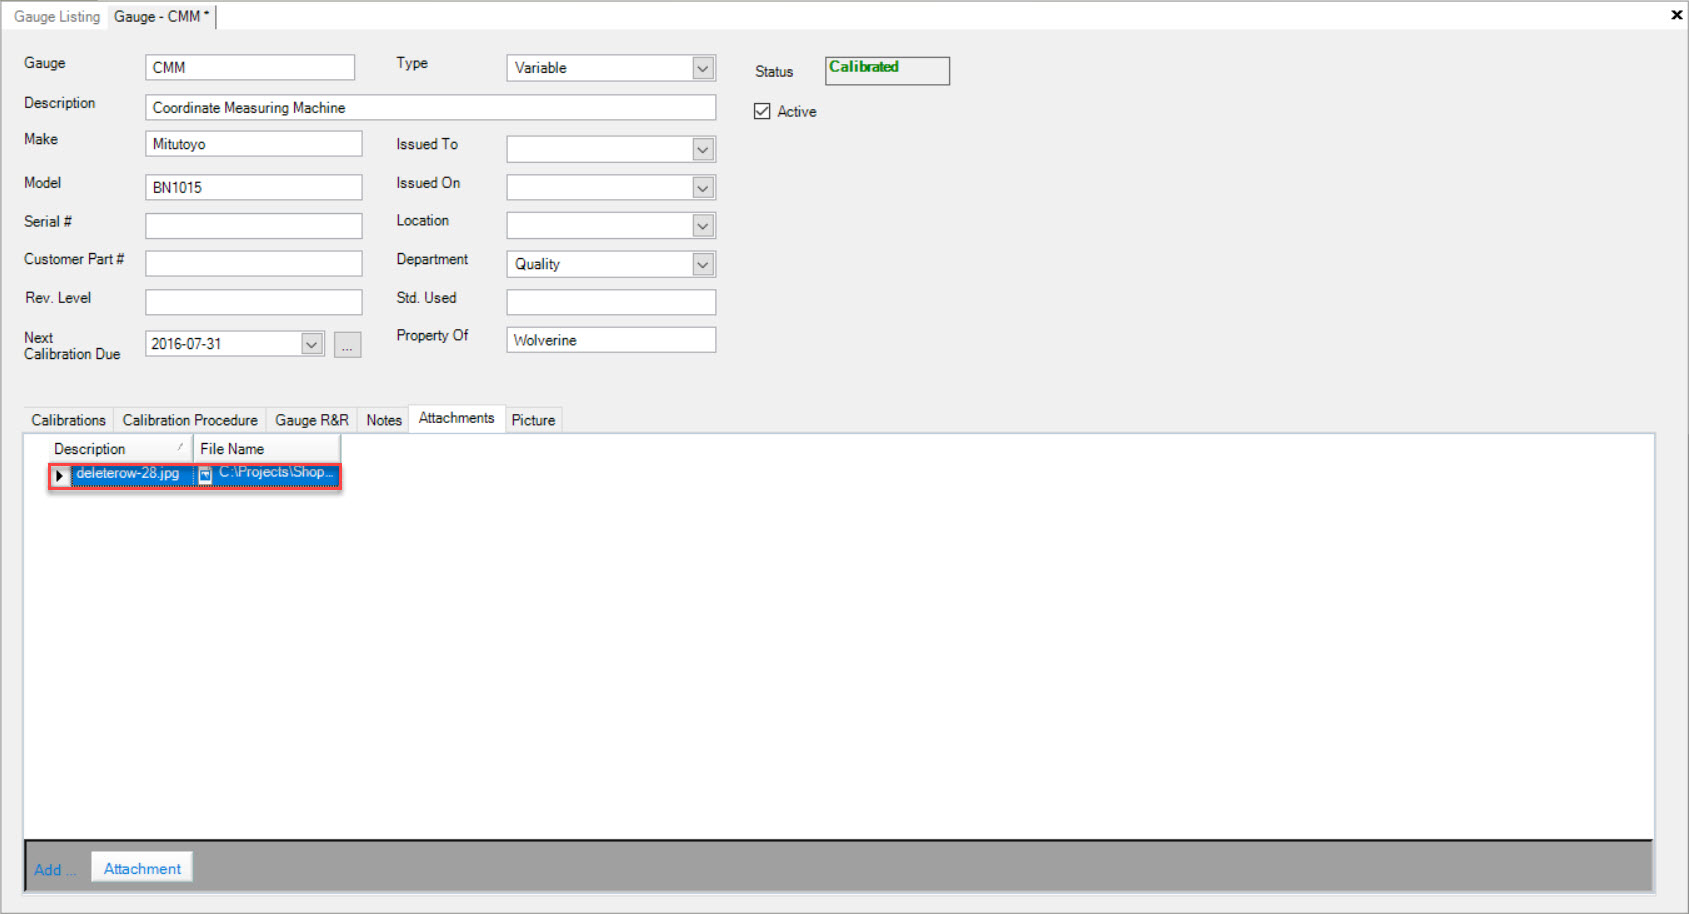
Deleting Attachments
To delete an Attachment from a Gauge, navigate to the tab and click on the icon.
The Gauge Listing screen will be displayed.
Locate the Gauge you wish to delete an Attachment from and double-click on the appropriate row. The Gauge detail screen will be displayed.
Make sure to select the tab.
Locate the Attachment you wish to delete and highlight the appropriate row. Use your Delete key and when the system prompts you, select Yes.
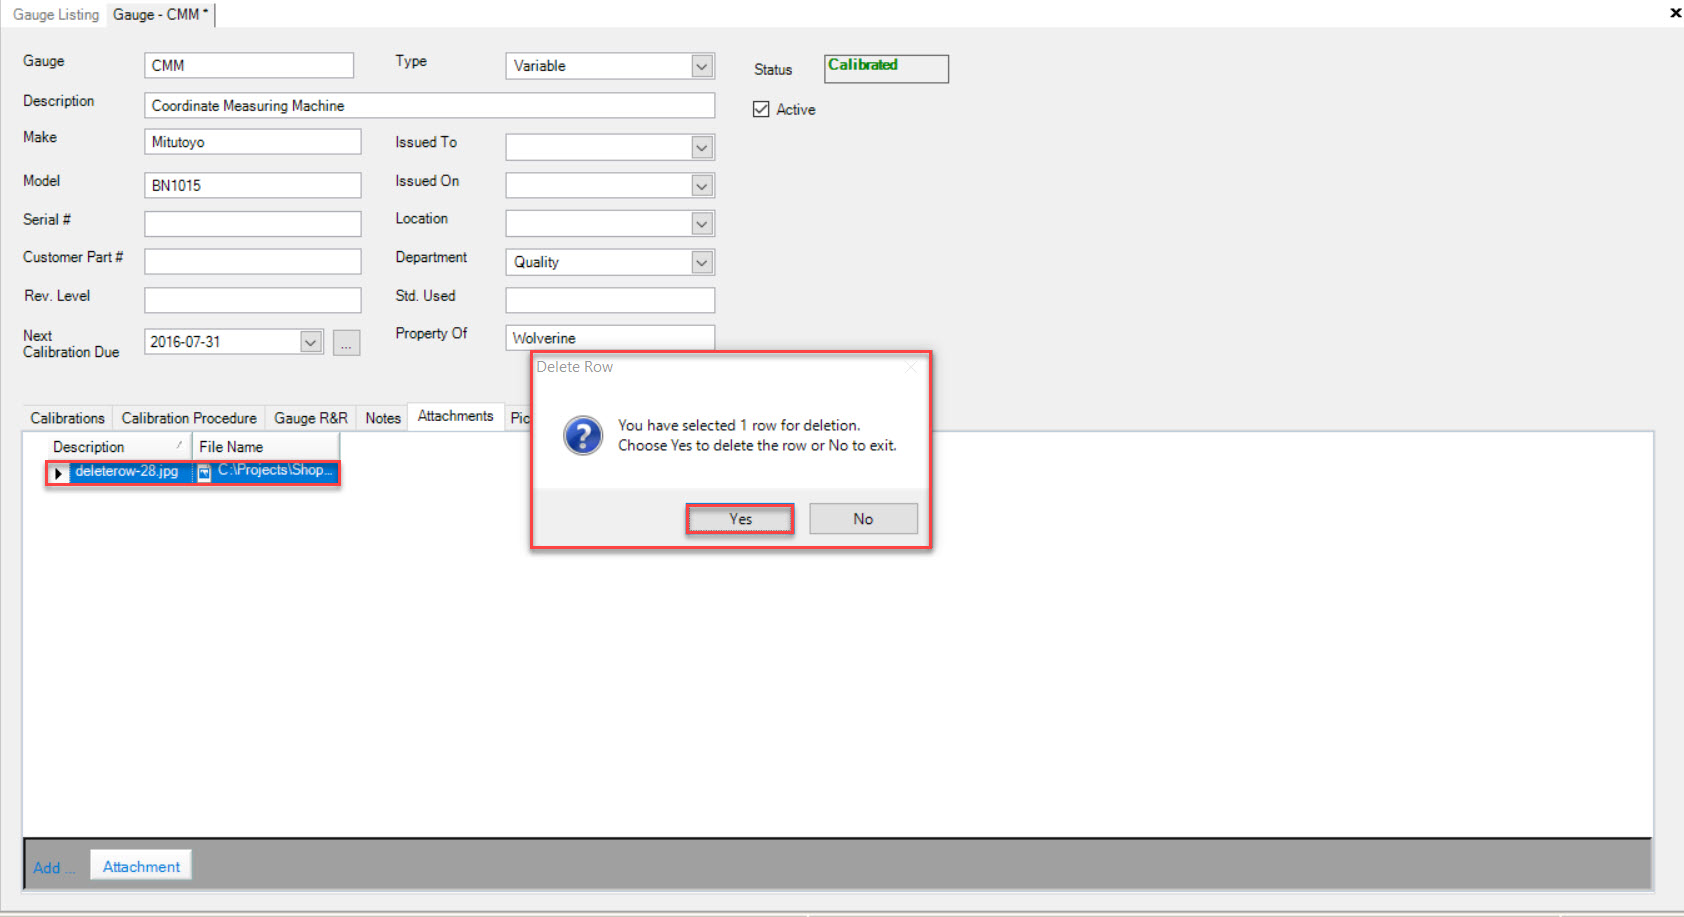
The selected Attachment will be deleted from the Gauge.
Make sure to save your changes before exiting the screen.
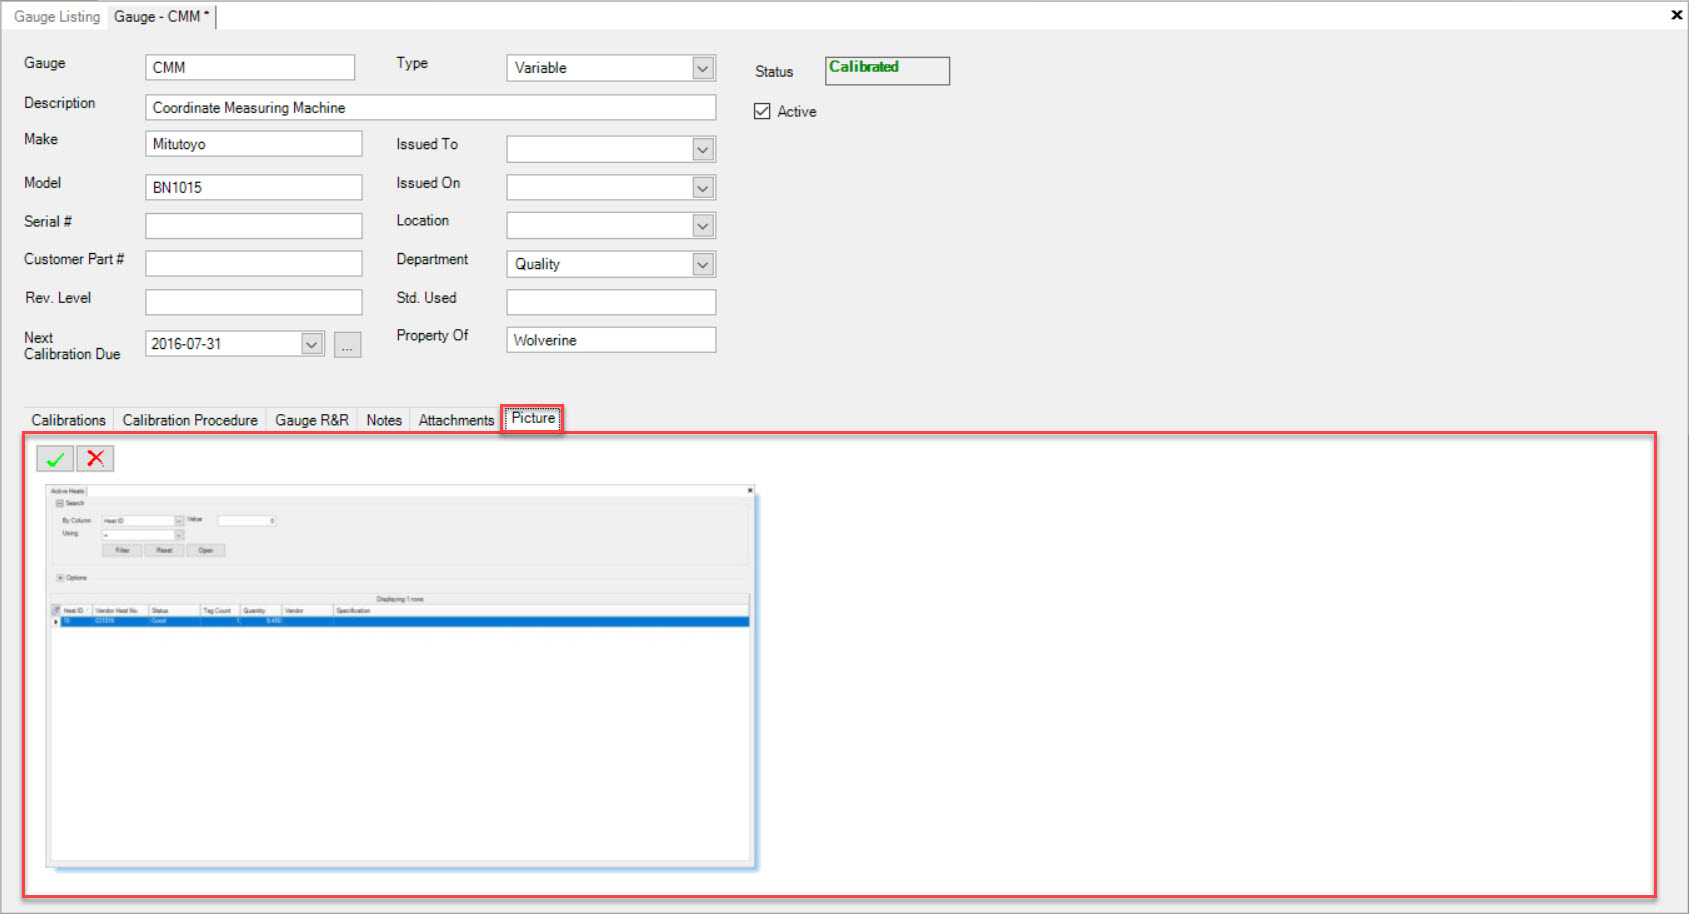
Picture Tab
To view a Picture on a Gauge, navigate to the tab and click on the icon.
The Gauge Listing screen will be displayed.
Locate the Gauge you wish to view the Pictures for and double-click on the appropriate row. The Gauge detail screen will be displayed.
Make sure to select the  tab.
tab.
Users will be able to view the Picture for the selected Gauge if one exists.
Adding a Picture
To add a Picture to a new or existing Gauge, make sure to select the tab.
Then, click on the  button.
Users will be able to select a Picture from their computer. Once a Picture has been selected, click on the button.

The selected Picture will be added to the Gauge.
Make sure to save your changes before exiting the screen.
Note
Users are only able to add one Picture per Gauge.
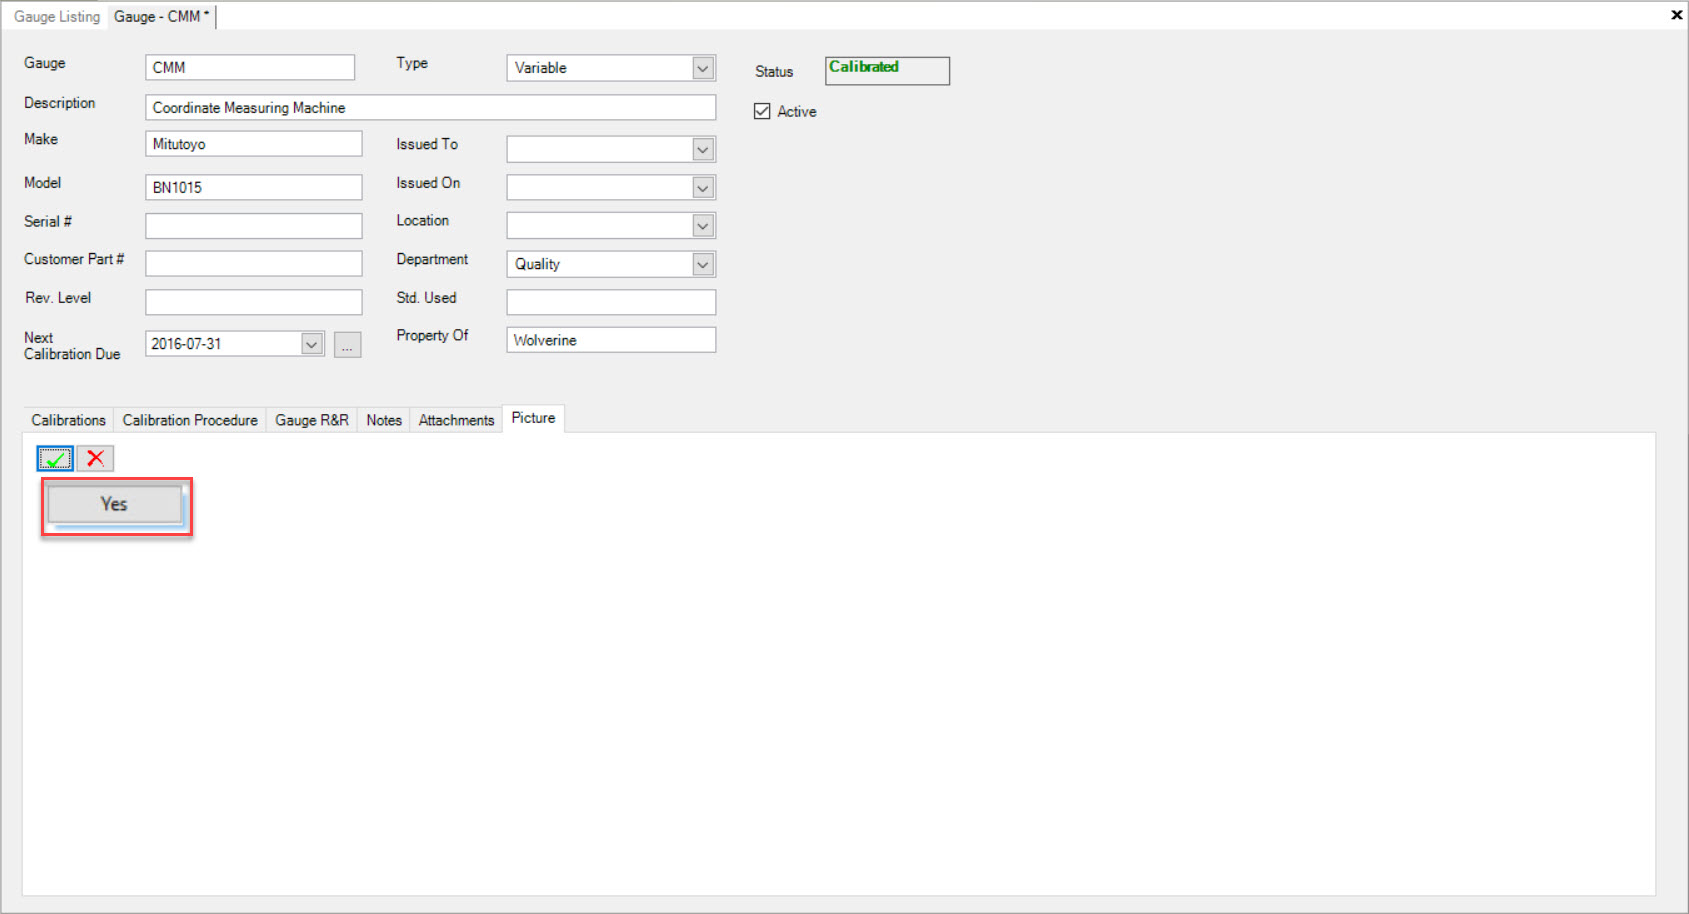
Deleting a Picture
To delete a Picture from a Gauge, make sure to select the tab.
Then, click on the  button.
The picture will be deleted immediately.
Make sure to save your changes before exiting the screen.
Calibrating a Gauge
To calibrate a new or existing Gauge, make sure to select the tab.
Next, click on the  button.
The Gauge Calibration window will appear.
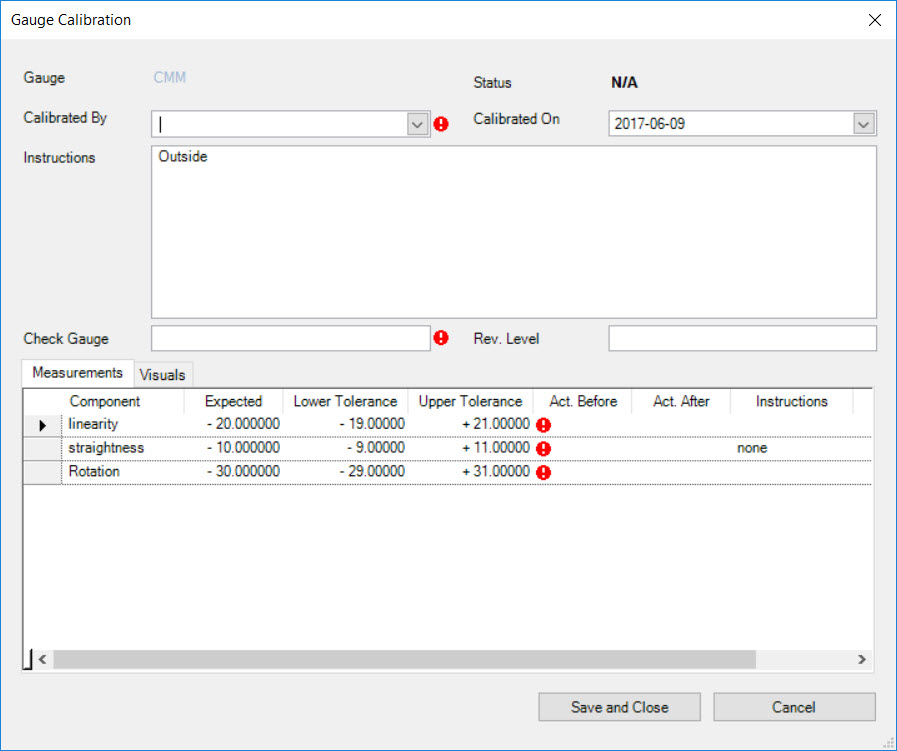
Users must enter in the necessary information such as the Calibrated By and Check Gauge fields. The Calibrated On date will automatically default to the current date but can be
overriden if needed. The information in the Instructions field (if any exists) replicates what has been entered in under the
tab in the Procedure Description textbox. More information can also be added if necessary. The Revision Level can also be entered in.
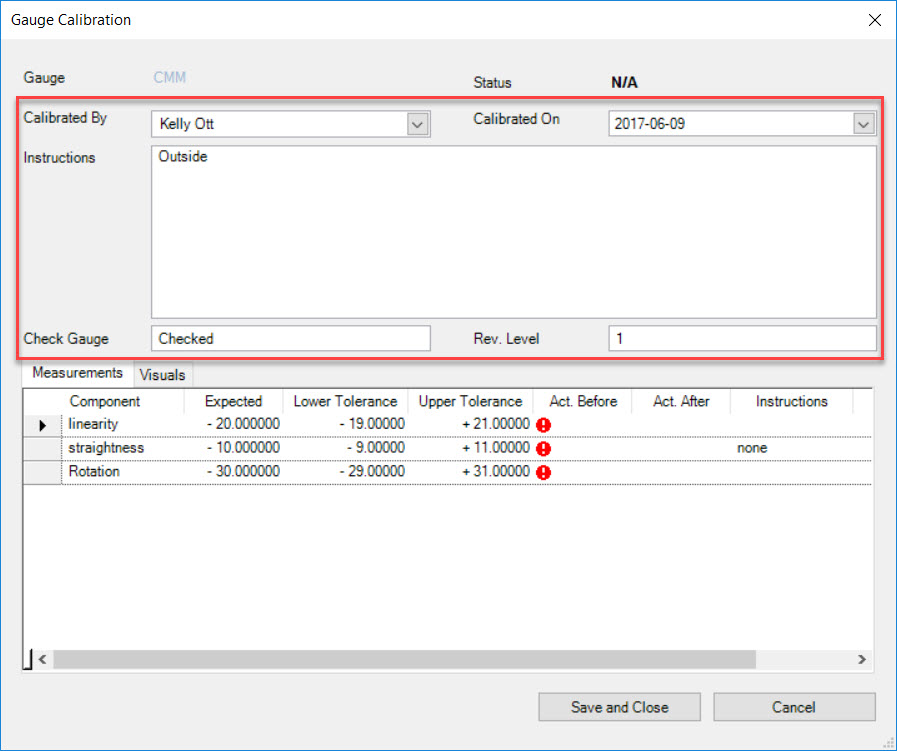
Next, the Measurements and Visual Inspections that were added under the tab will be displayed under the corresponding
tabs on the Gauge Calibration window.
For Measuremnts, users must enter in the required fields such as the Act. Before column for each Measurement.
Note
If users wish to add in Measurement Notes, simply enter them under the Notes column in the appropriate row textbox.
Note
The Status of the Gauge Calibration will automatically change to Reject.
For Visual Inspections, users must select or de-select the appropriate checkboxes under the Accept and Reject columns.
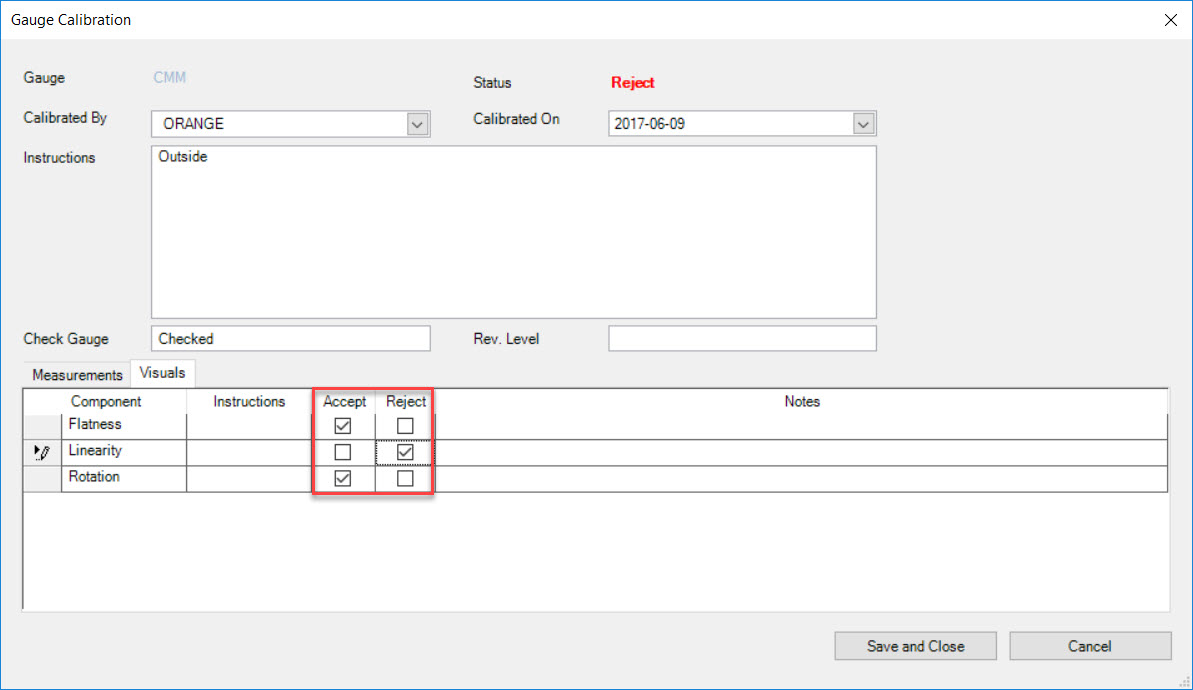
Note
If users wish to add in Visual Inspection Notes, simply enter them under the Notes column in the appropriate row textbox.
Note
The Status of the Gauge Calibration will remain in Reject unless all of the Visual Inspections have been selected as Accepted, then the Status will change to Accept.
Once all of the necessary fields have been completed, click on the button.
The Gauge Calibration will be saved below.
Print Preview/Print a Calibration Worksheet
Users have the ability to Print Preview and Print a Calibration Worksheet in the system.
To do so, navigate to the tab and click on the icon. The Gauge Listing screen will be displayed.
Locate the Gauge you wish to Print Preview/Print a Calibration Worksheet from and double-click on the appropriate row. The Gauge detail screen will be displayed.
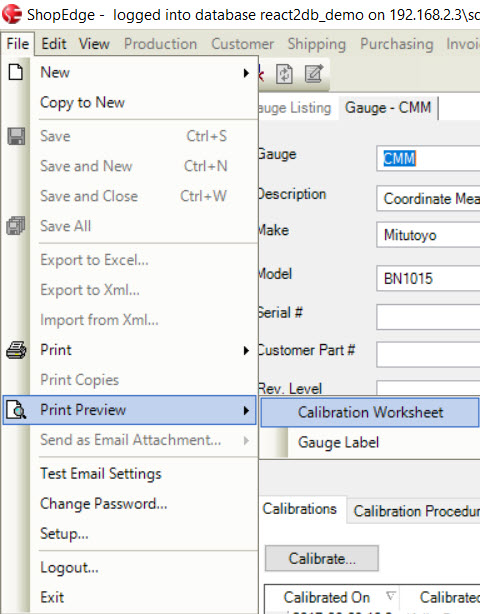
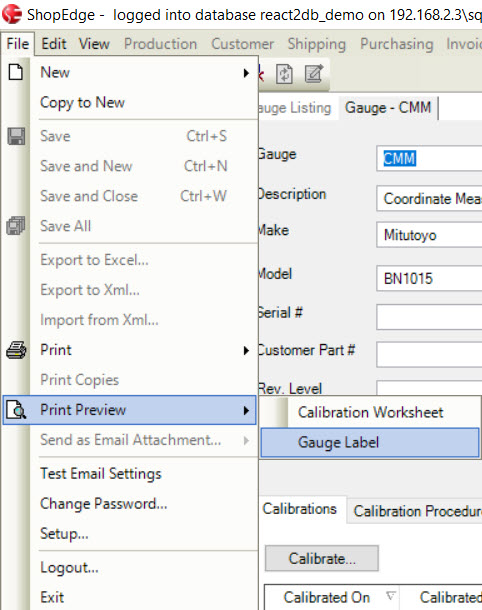
To Print Preview the Calibration Worksheet, navigate to File > Print Preview > Calibration Worksheet.
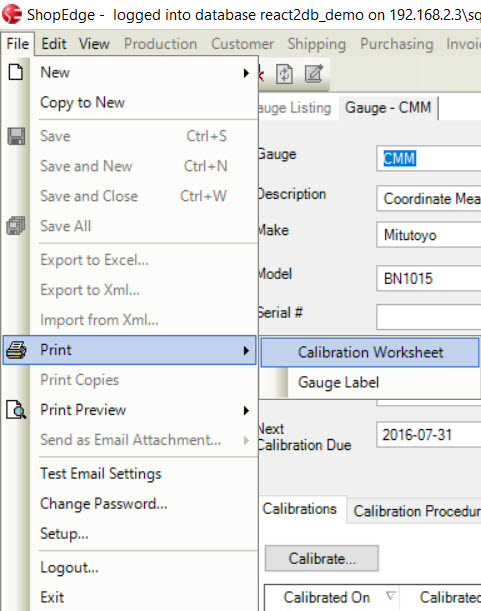
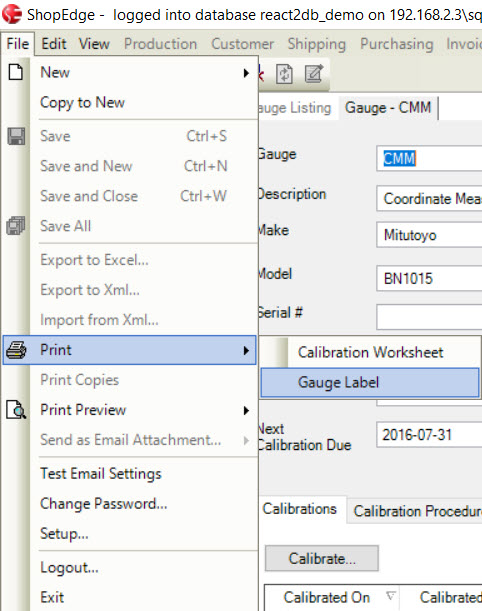
To Print the Calibration Worksheet, navigate to File > Print > Calibration Worksheet.
The Print window will appear where users must select the appropriate printing properties and then, select the  button.
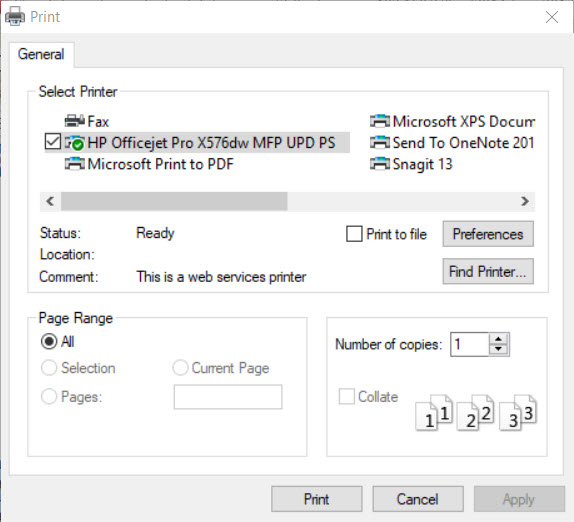
The Calibration Worksheet will be printed.
Print Preview/Print a Gauge Label
Users have the ability to Print Preview and Print a Gauge Label in the system.
To do so, navigate to the tab and click on the icon. The Gauge Listing screen will be displayed.
Locate the Gauge you wish to Print Preview/Print a Gauge Label from and double-click on the appropriate row. The Gauge detail screen will be displayed.
To Print Preview the Gauge Label, navigate to File > Print Preview > Gauge Label.
To Print the Gauge Label, navigate to File > Print > Gauge Label.
The Print window will appear where users must select the appropriate printing properties and then, select the button.
The Gauge Label will be printed.
Deleting a Gauge
There are two ways to delete a Gauge from the system. The first way is to navigate to the tab and click on the icon.
The Gauge Listing screen will be displayed.
Locate the Gauge you wish to delete and highlight the appropriate row. Then, click on the  button located at the top of the screen.
A window will appear confirming that the selected Gauge will be deleted. Click on the button to confirm.
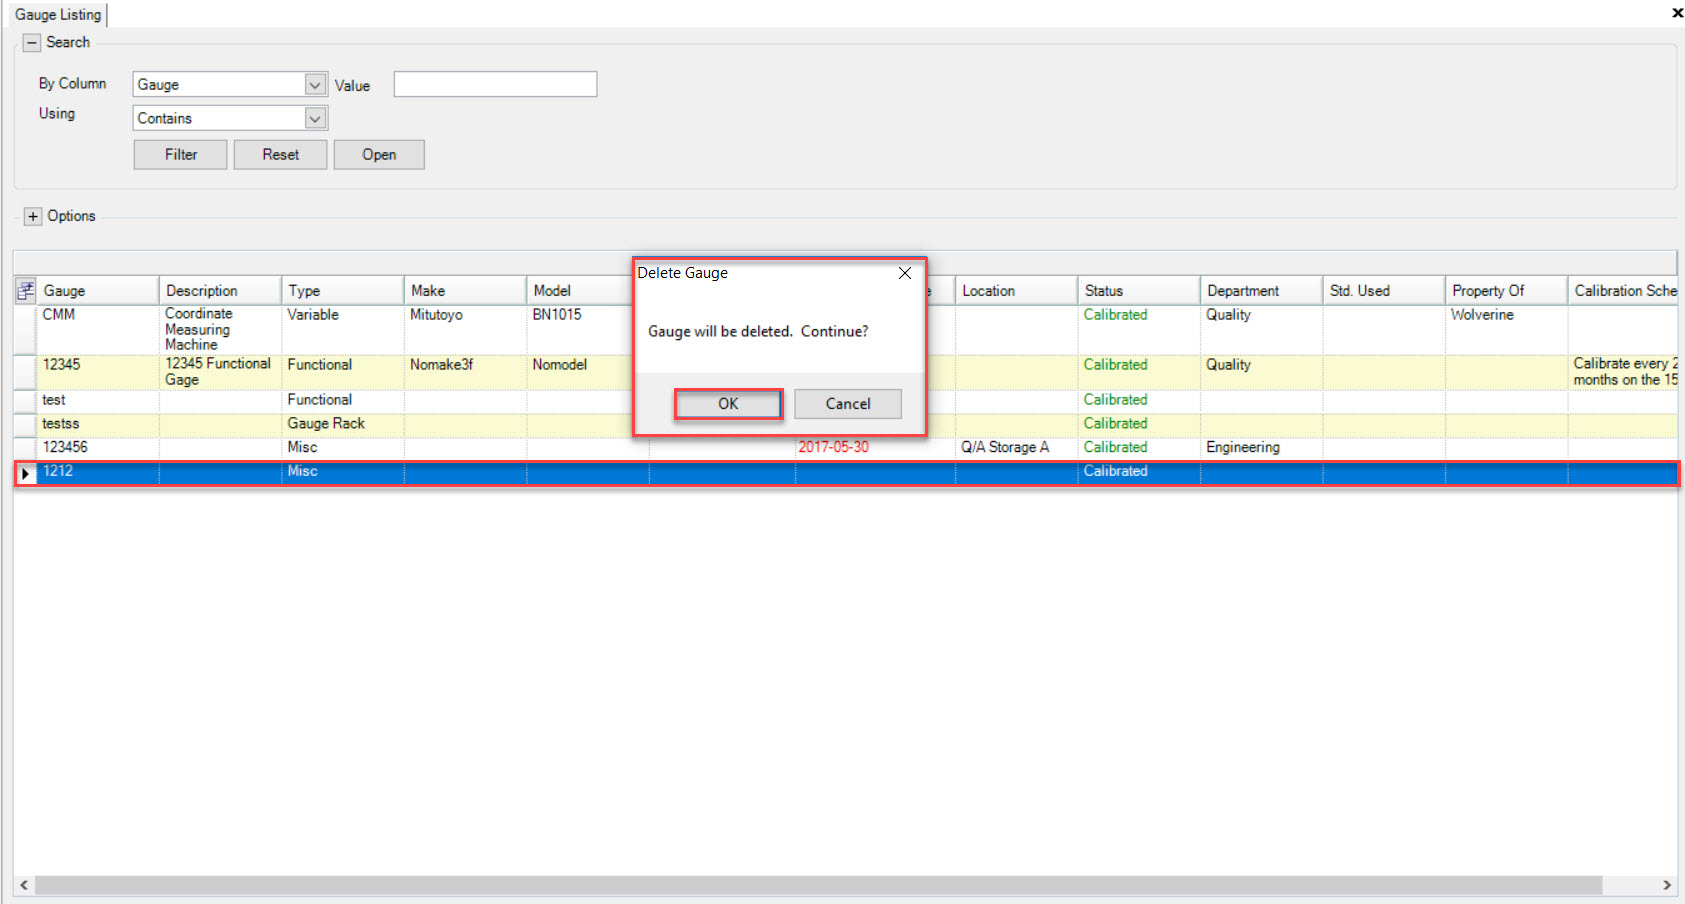
The selected Gauge will be deleted.
The second way to delete a Gauge is to navigate to the tab and click on the icon.
The Gauge Listing screen will be displayed.
Locate the Gauge you wish to delete and double-click on the appropriate row. The Gauge detail screen will be displayed.
Next, click on the button located at the top of the screen.
A window will appear confirming that the selected Gauge will be deleted. Click on the button to confirm.
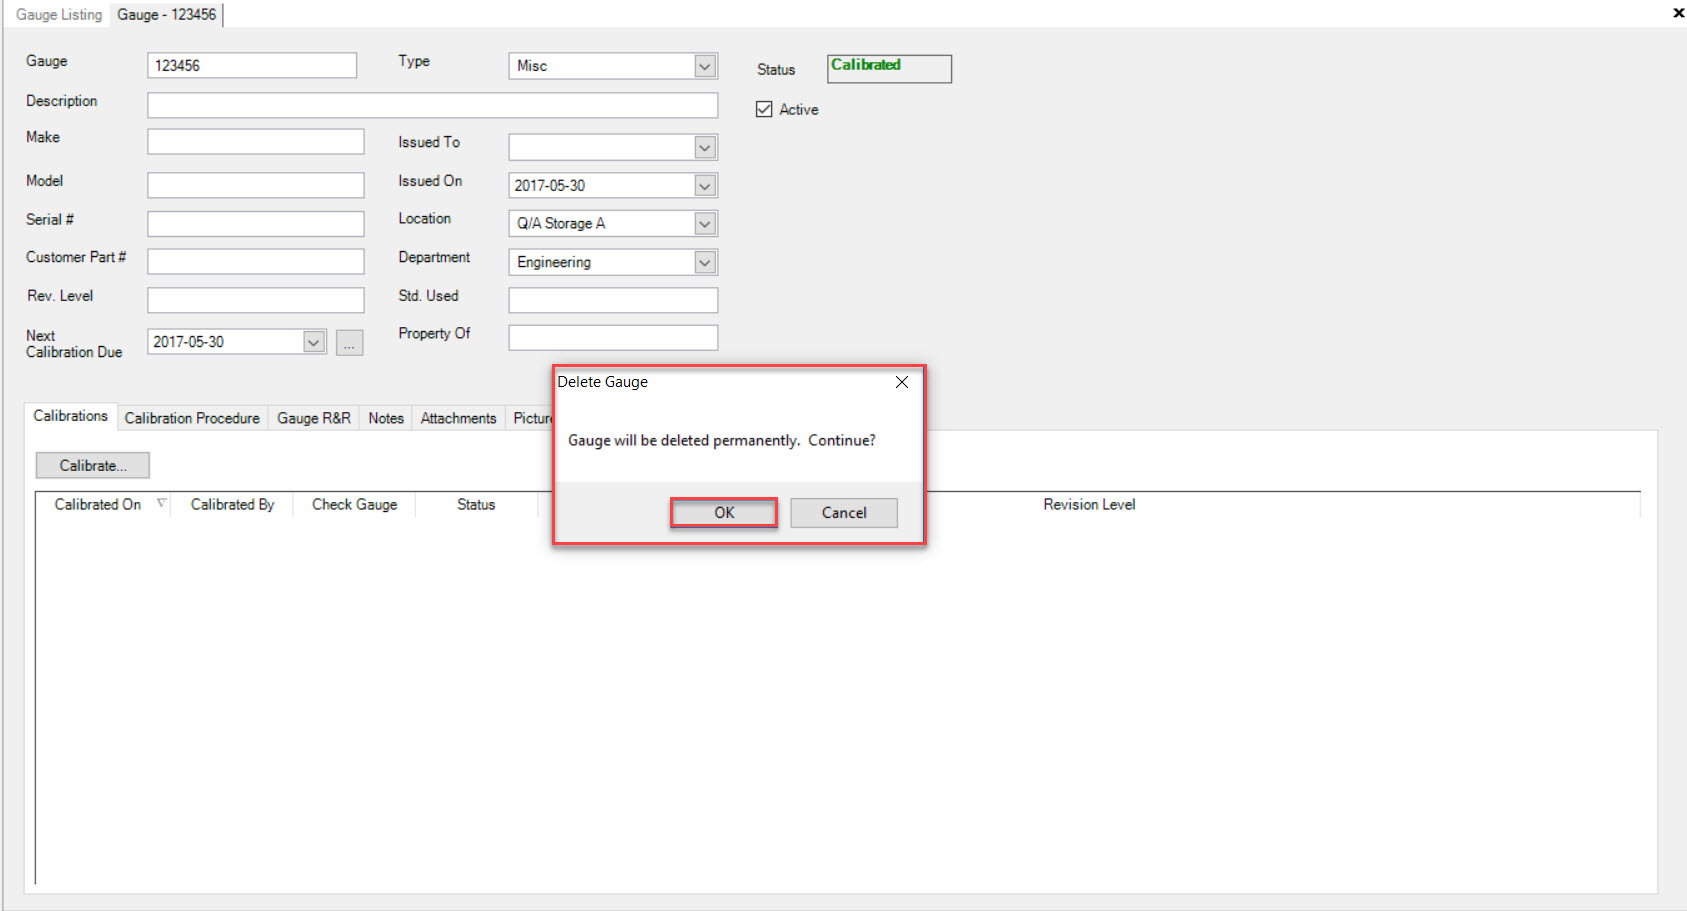
The selected Gauge will be deleted.