Quality Timecards
Quality Timecards are used in the ShopEdge system to record Q/A Labour Hours for Employees for Quality Time Tracking, Scrap, and Rework. This information provides enhanced reporting by linking Quality Transactions to reject numbers for Scrap, Rework, and Labour Hours. Inventory Transactions will be created to record the movement of Inventory from Held Inventory to Scrap, and Held Inventory back to On Hand Inventory, eliminating the need for manual Inventory Adjustments. Existing Quality Timecards can be modified and deleted and all adjusting Transactions will be created accordingly.
Quality Timecards can be found in the system by navigating to the  tab and clicking on the
  icon. The
Quality Timecards screen will be displayed.
icon. The
Quality Timecards screen will be displayed.
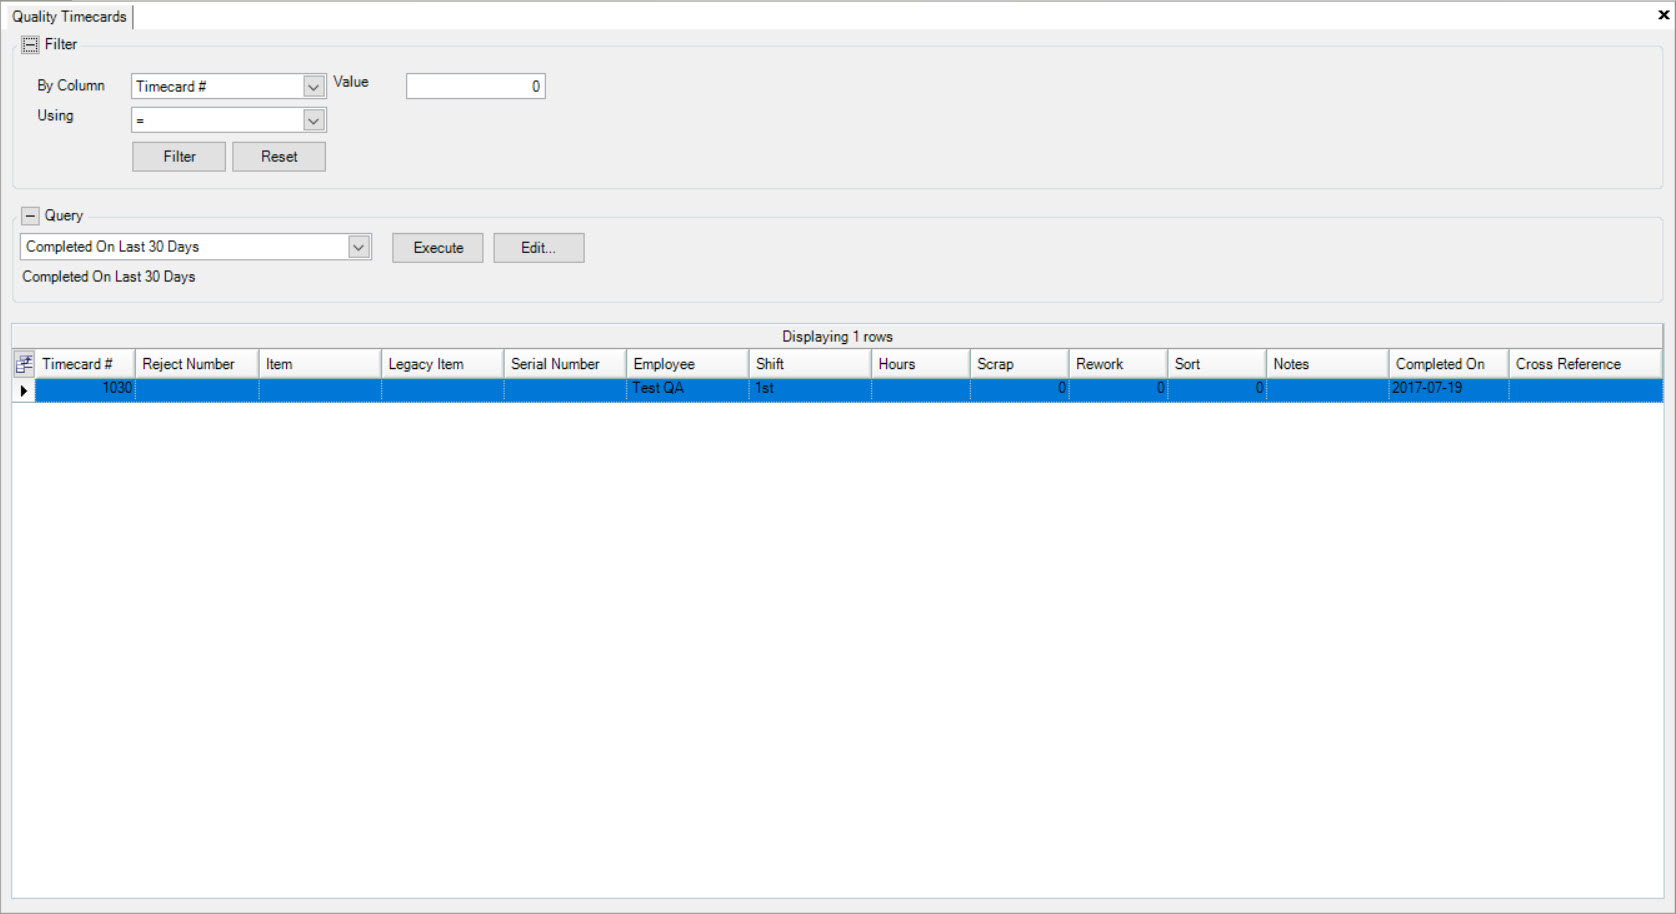
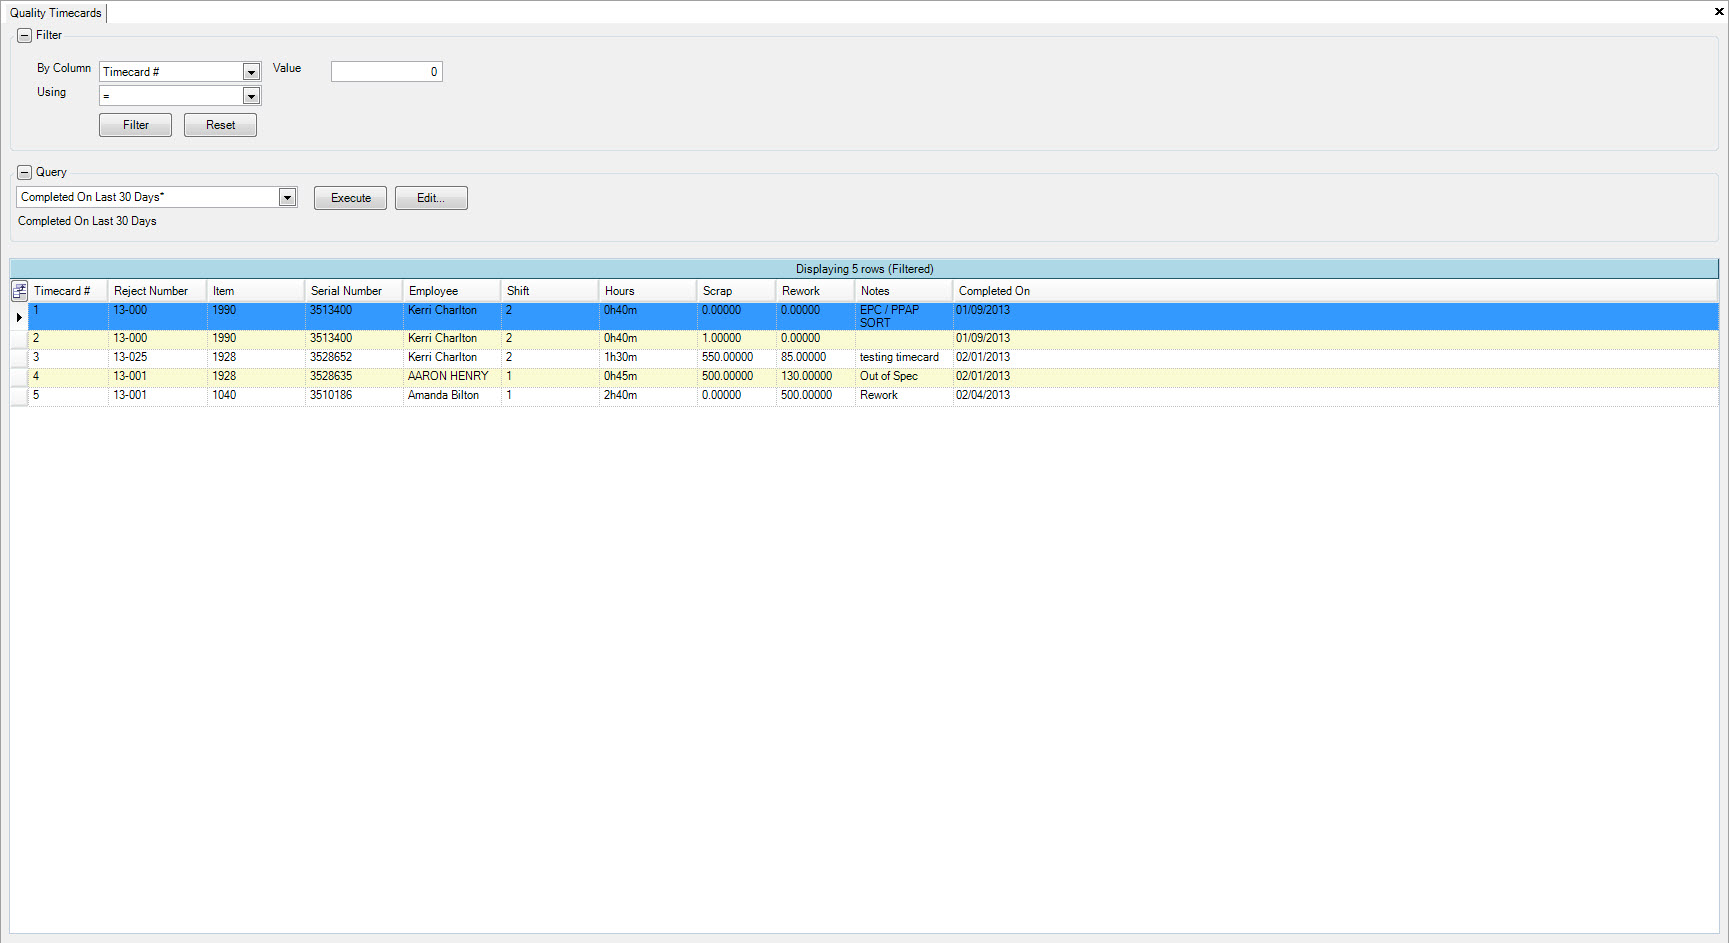
Users will be able to view all available Quality Timecards in the system including details such as the Timecard #, Reject Number, Item, Legacy Item, Serial Number, Employee, Shift, Hours, Scrap, Rework, Sort, Notes, Completed On date, and Cross Reference.
Opening Existing Quality Timecards
To open an existing Quality Timecard in the system, navigate to the tab and click on the icon. The
Quality Timecards screen will be displayed.
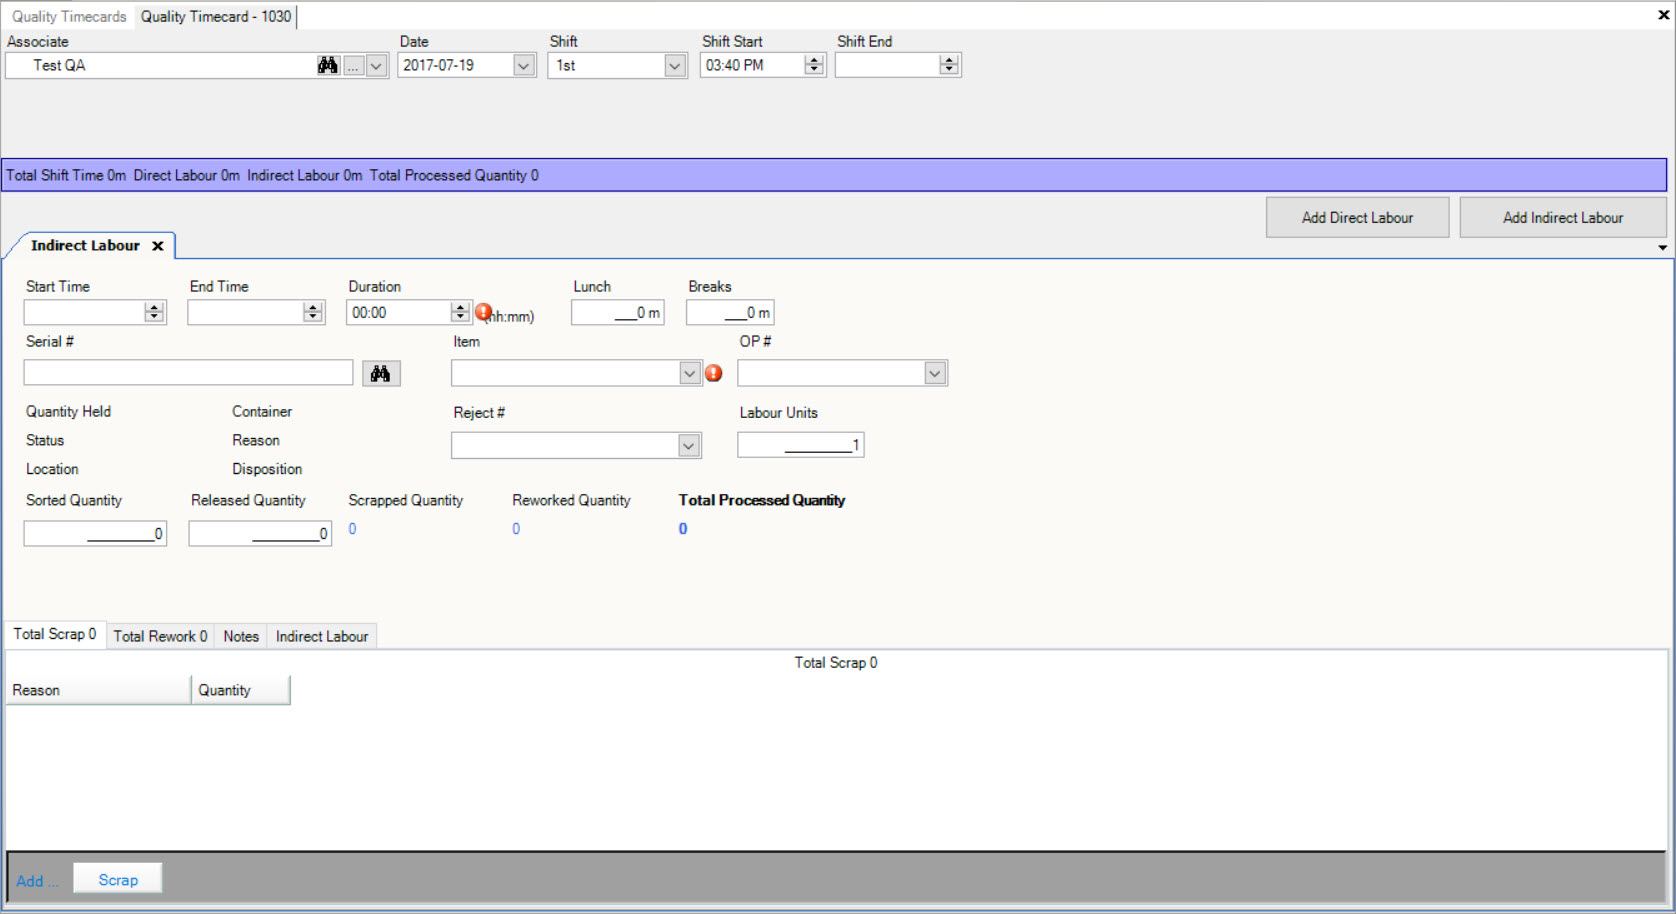
Locate the Quality Timecard you wish to view and double-click on the appropriate row. The Quality Timecard detail screen will be displayed.
Viewing Quality Timecards from Production Inventory
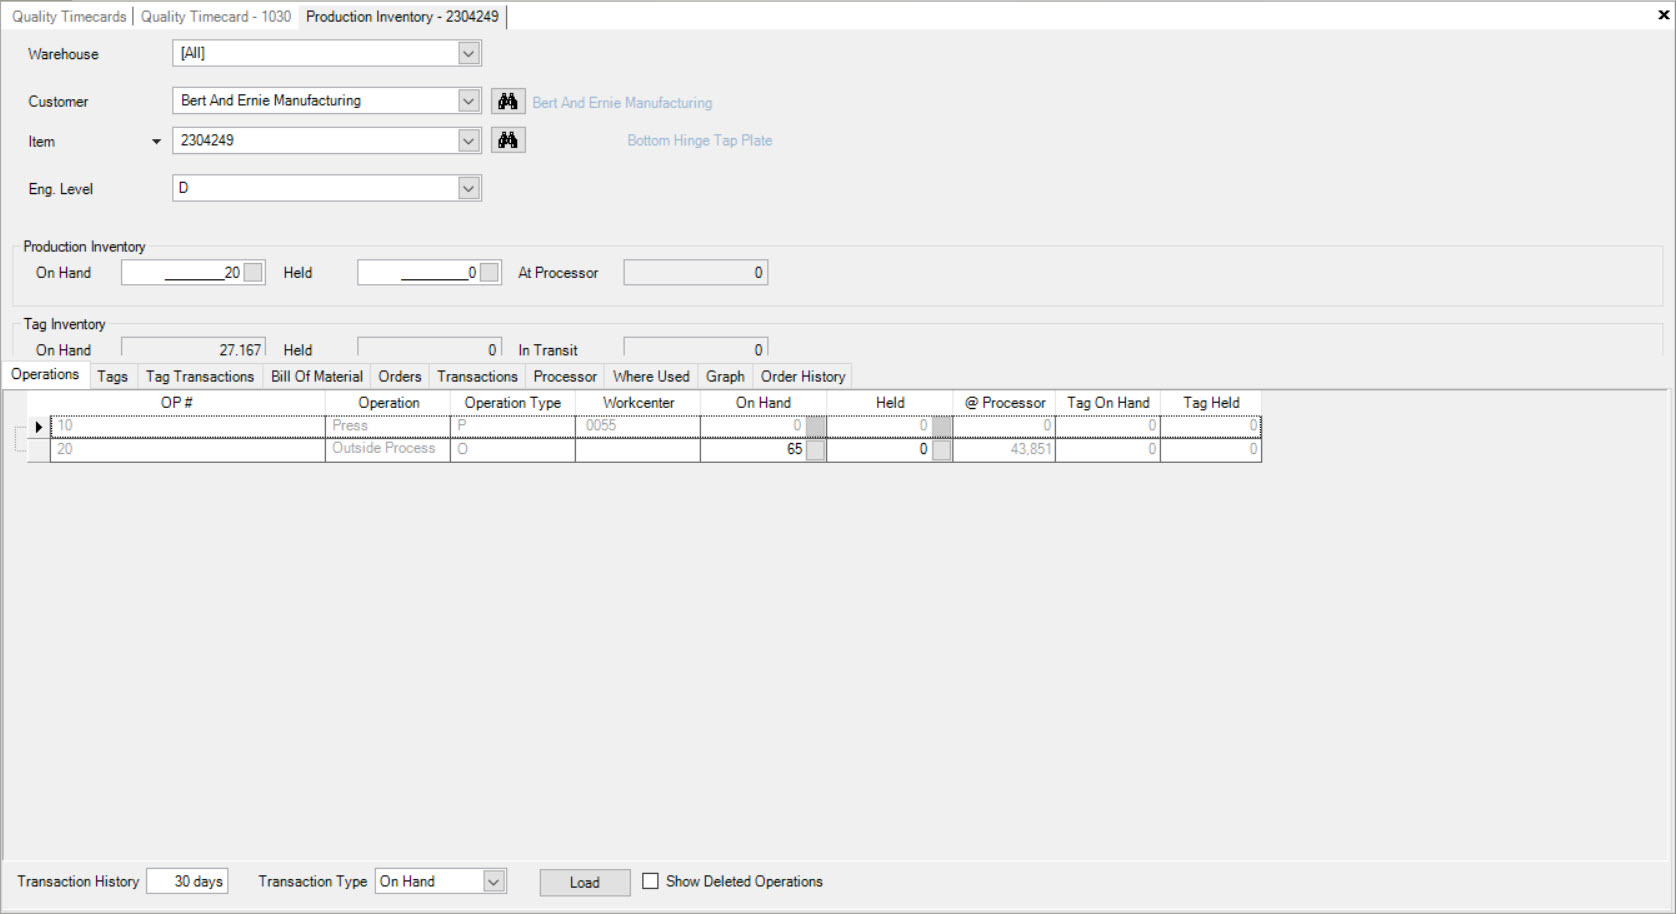
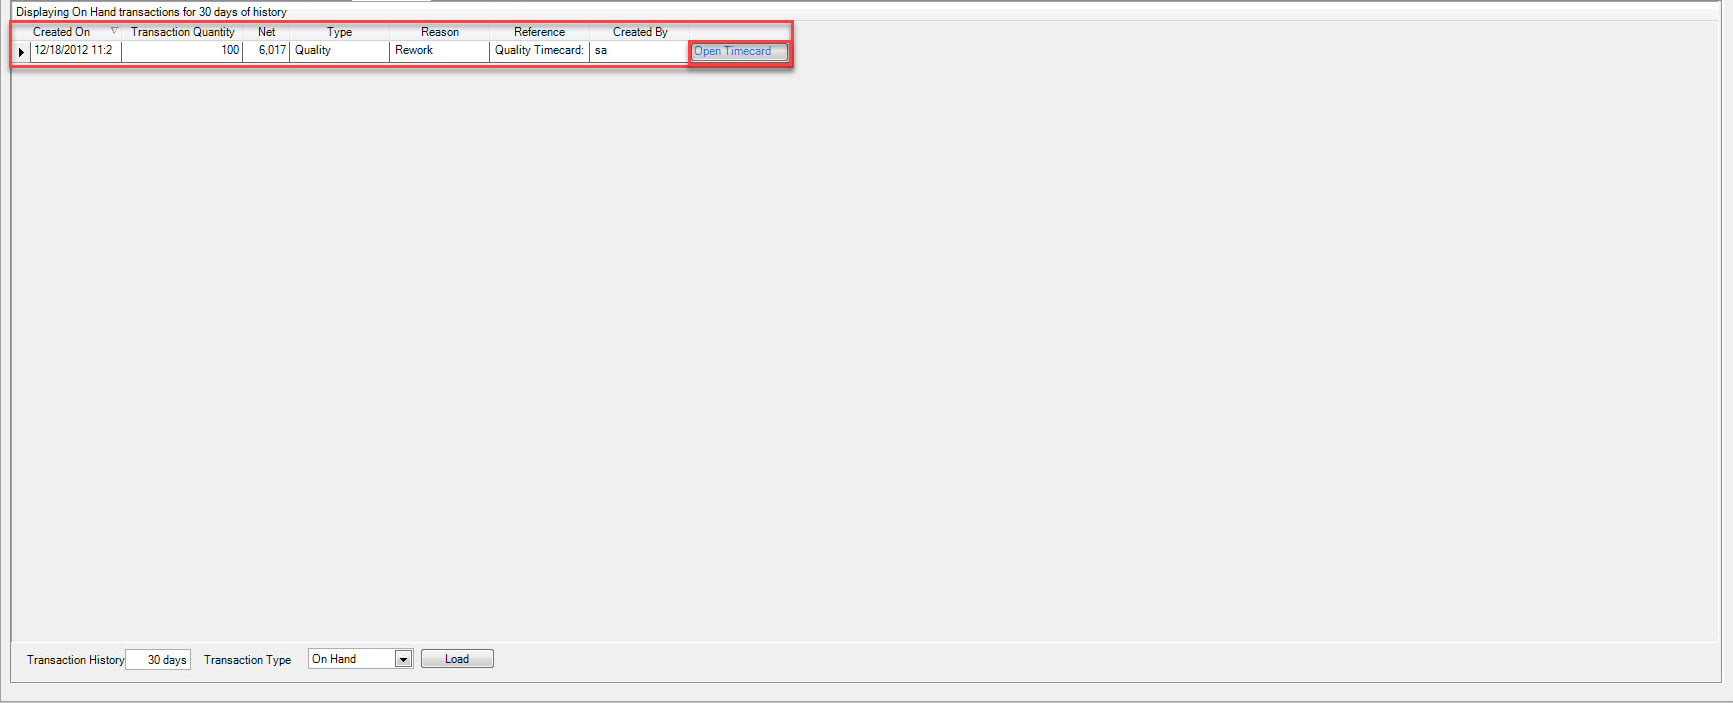
Quality Timecards can also be viewed and opened from the Production Inventory screen.
To do so, navigate to the  tab and click on the
  icon. The Production Inventory screen will be
displayed. Select a Warehouse, Customer, and Item. Then, select the
icon. The Production Inventory screen will be
displayed. Select a Warehouse, Customer, and Item. Then, select the  tab where you will be able to view all Packing Slips for the select Item. Click
on the Open Timecard option to view the appropriate Quality Timecard.
tab where you will be able to view all Packing Slips for the select Item. Click
on the Open Timecard option to view the appropriate Quality Timecard.
Creating a New Quality Timecard
There are three different ways to create a new Quality Timecard in the system. The first way is to press the Ctrl + Shift + 6 keys. The second way is to navigate to File > New > Quality Timecard.
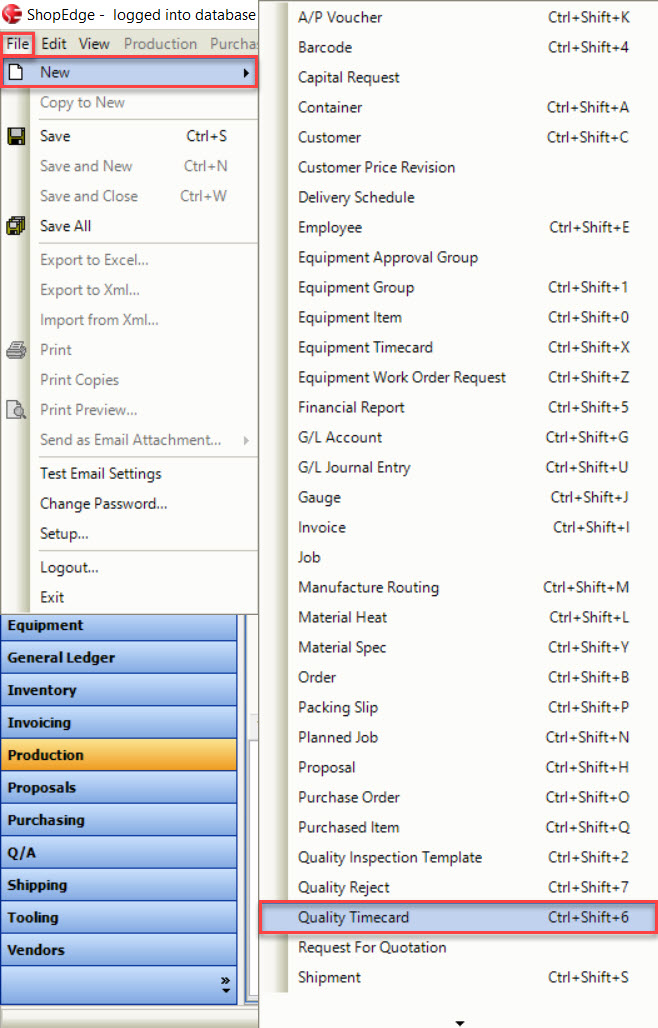
The last way is to click on the  button and select the Quality Timecard option.

All of these three options will open a new Quality Timecard screen.
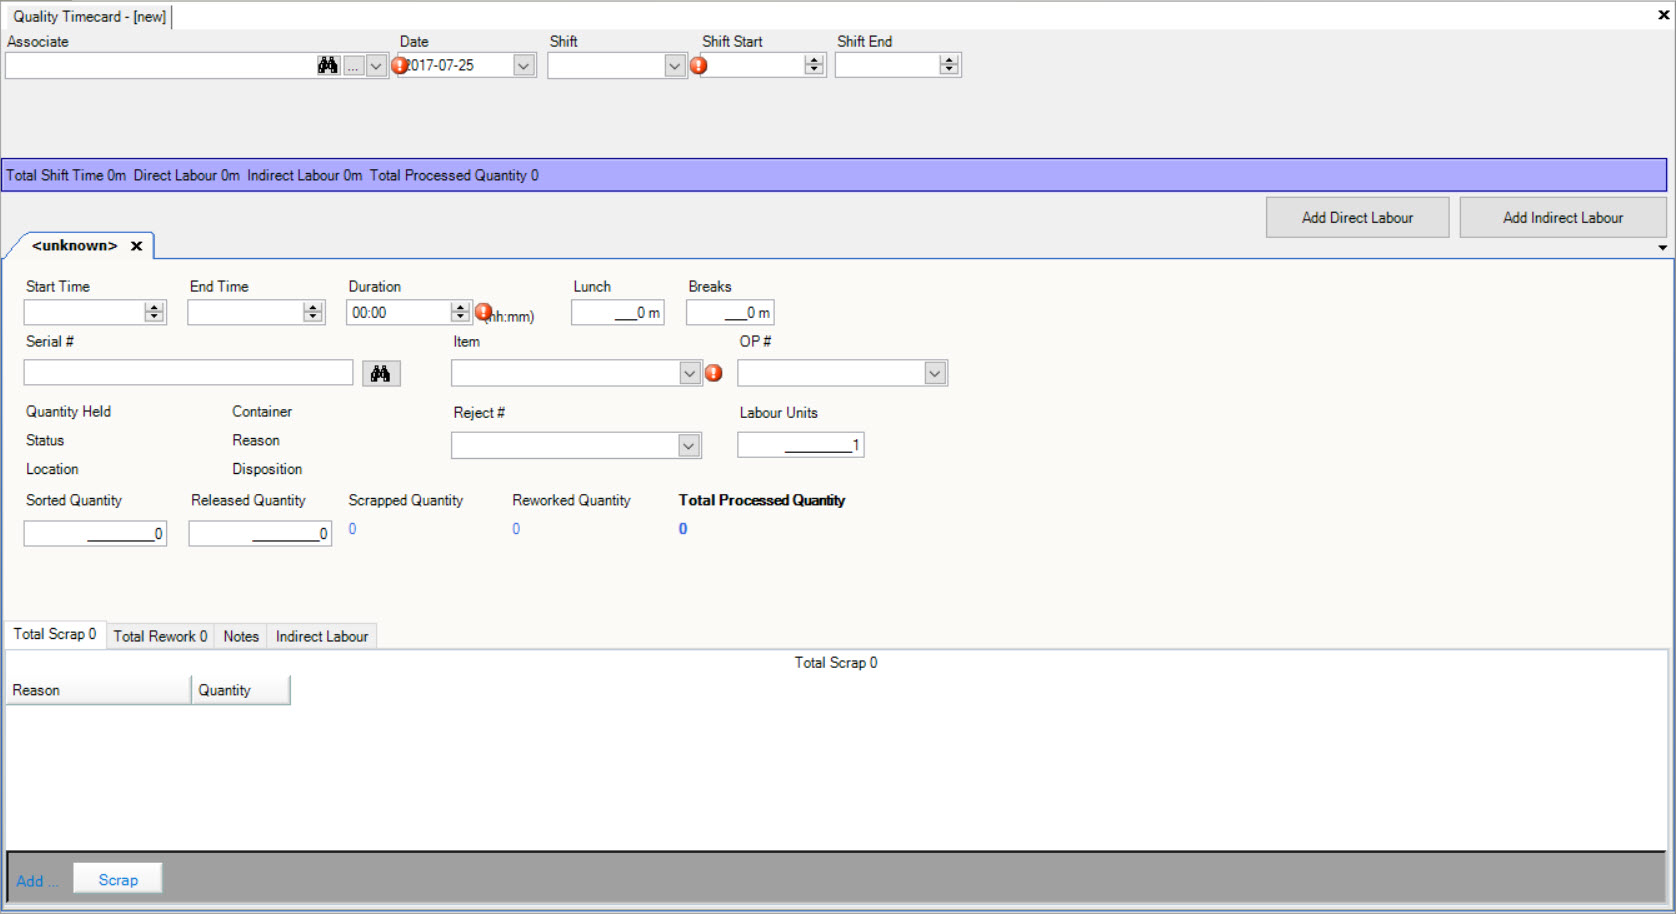
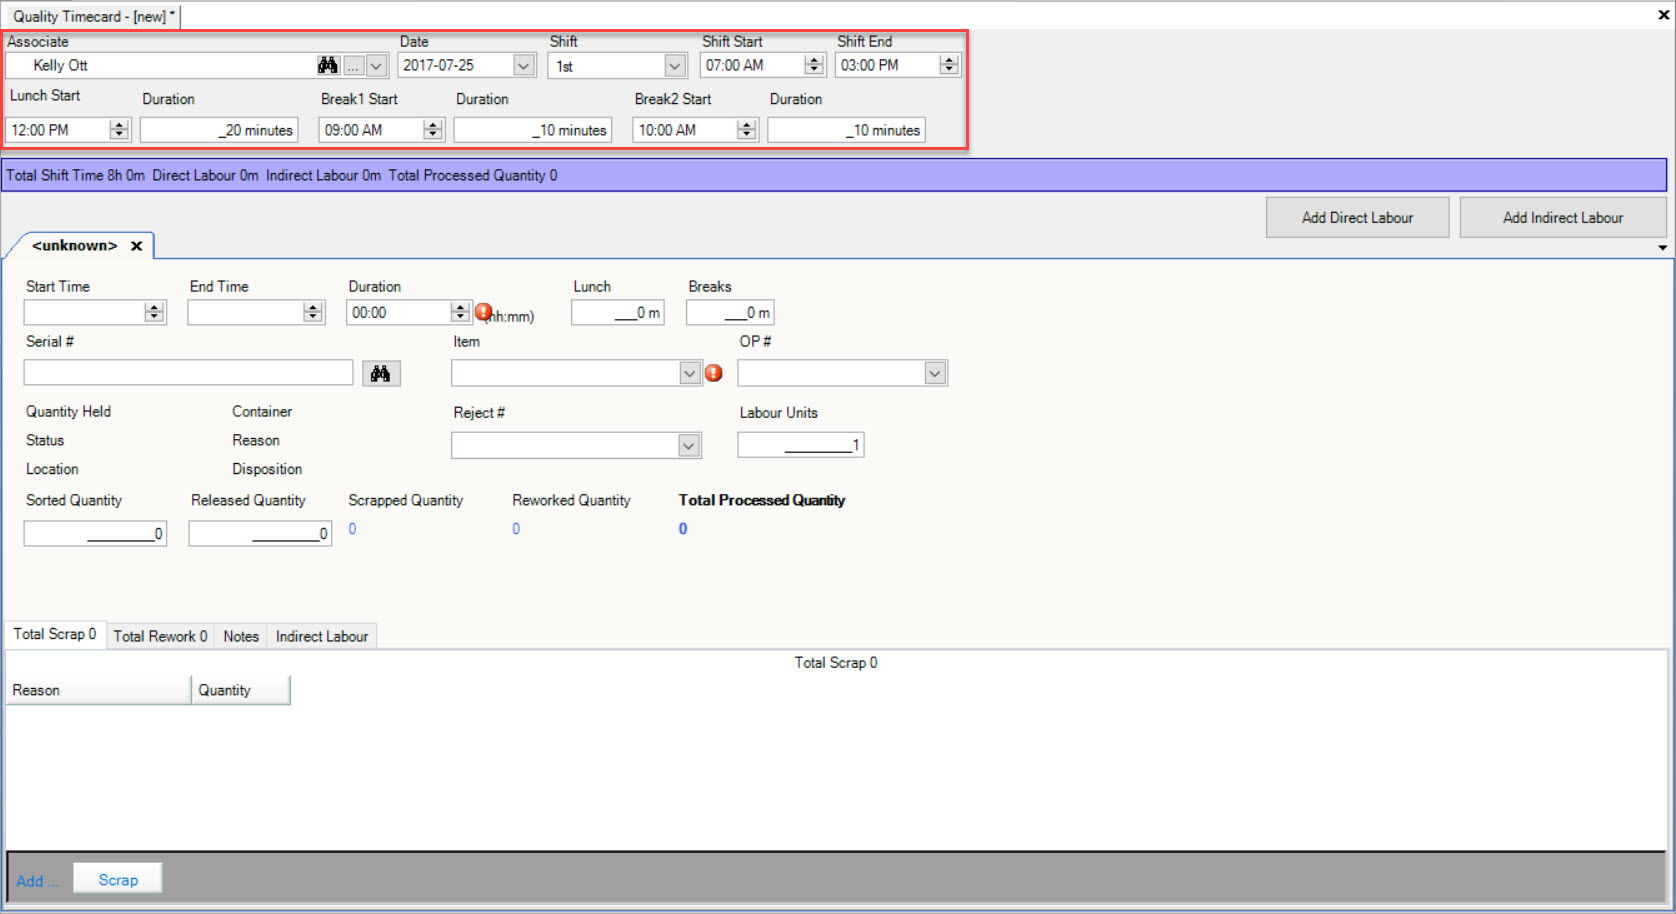
Users must select an Associate for the new Quality Timecard. There are three different ways to enter in an Associate. The first way is to simply enter in the Associate’s name manually in the
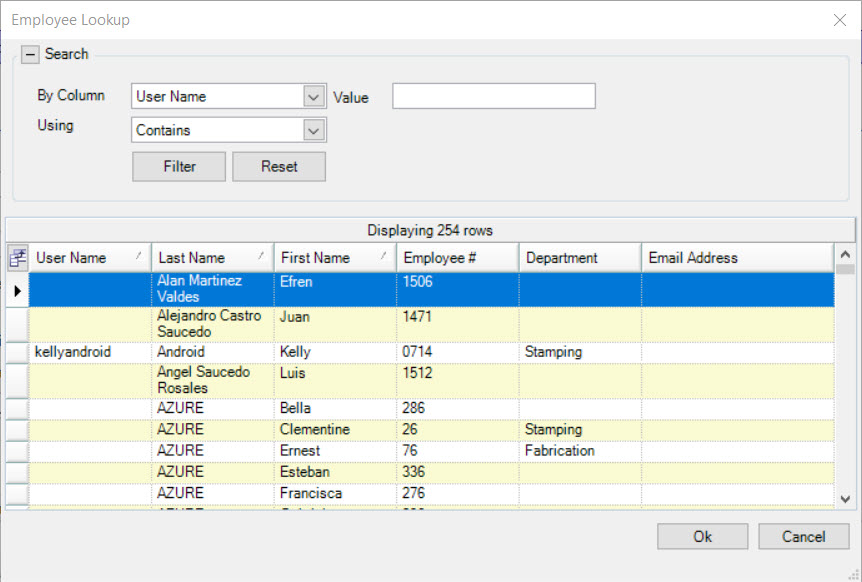
available textbox. The second way is to click on the  button. The Employee Lookup window will appear where users must select the appropriate
Associate and click on the
button. The Employee Lookup window will appear where users must select the appropriate
Associate and click on the  button.
The last way is to use the available drop-down menu to locate the Associate you wish to create a new Quality Timecard for.
Note
Users can also click on the  button in order to add more Employees to the new Quality Timecard. The Employees window will appear where users can click on the
 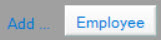 button. A new row will appear that allows users to select an Employee using the available drop-down menu. Once an Employee has been added, click on the button.

The Date will automatically default to the current date but can be changed if necessary. Users must then select a Shift and then a Shift Start and a Shift End time. Once a Shift has been selected, users will also be able to select and enter in the Lunch Start, Duration, Break1 Start, Duration, and Break2 Start, and Duration.
Make sure to save your changes before exiting the screen.
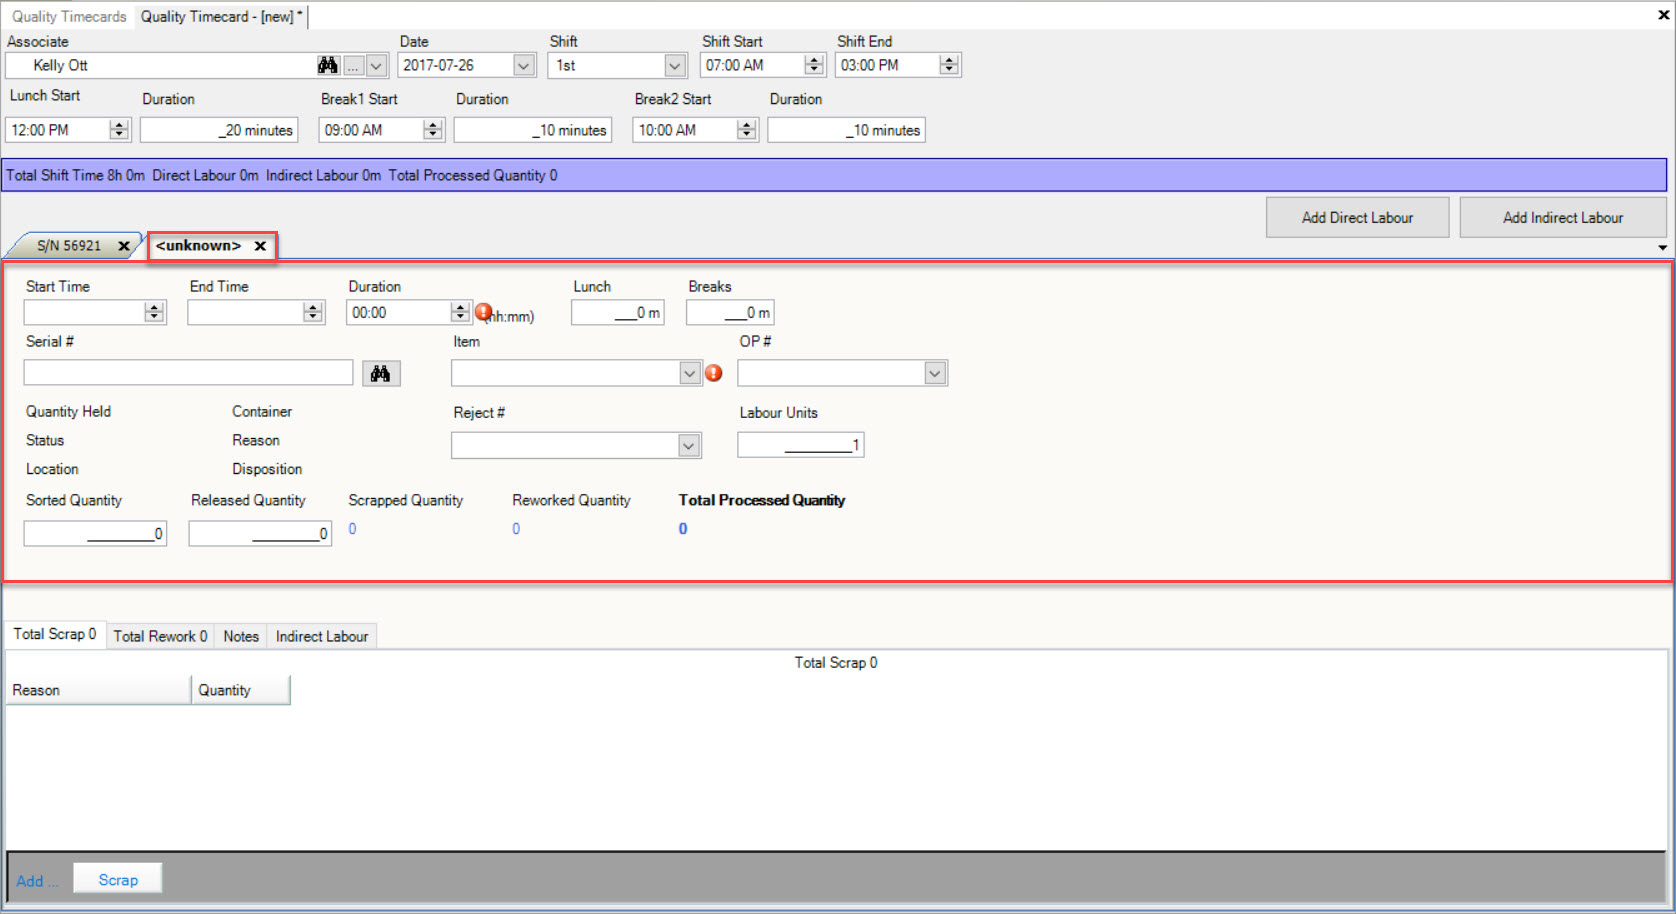
Adding Direct Labour
When a new Quality Timecard is created, a tab will already be available for users to add Direct Labour.
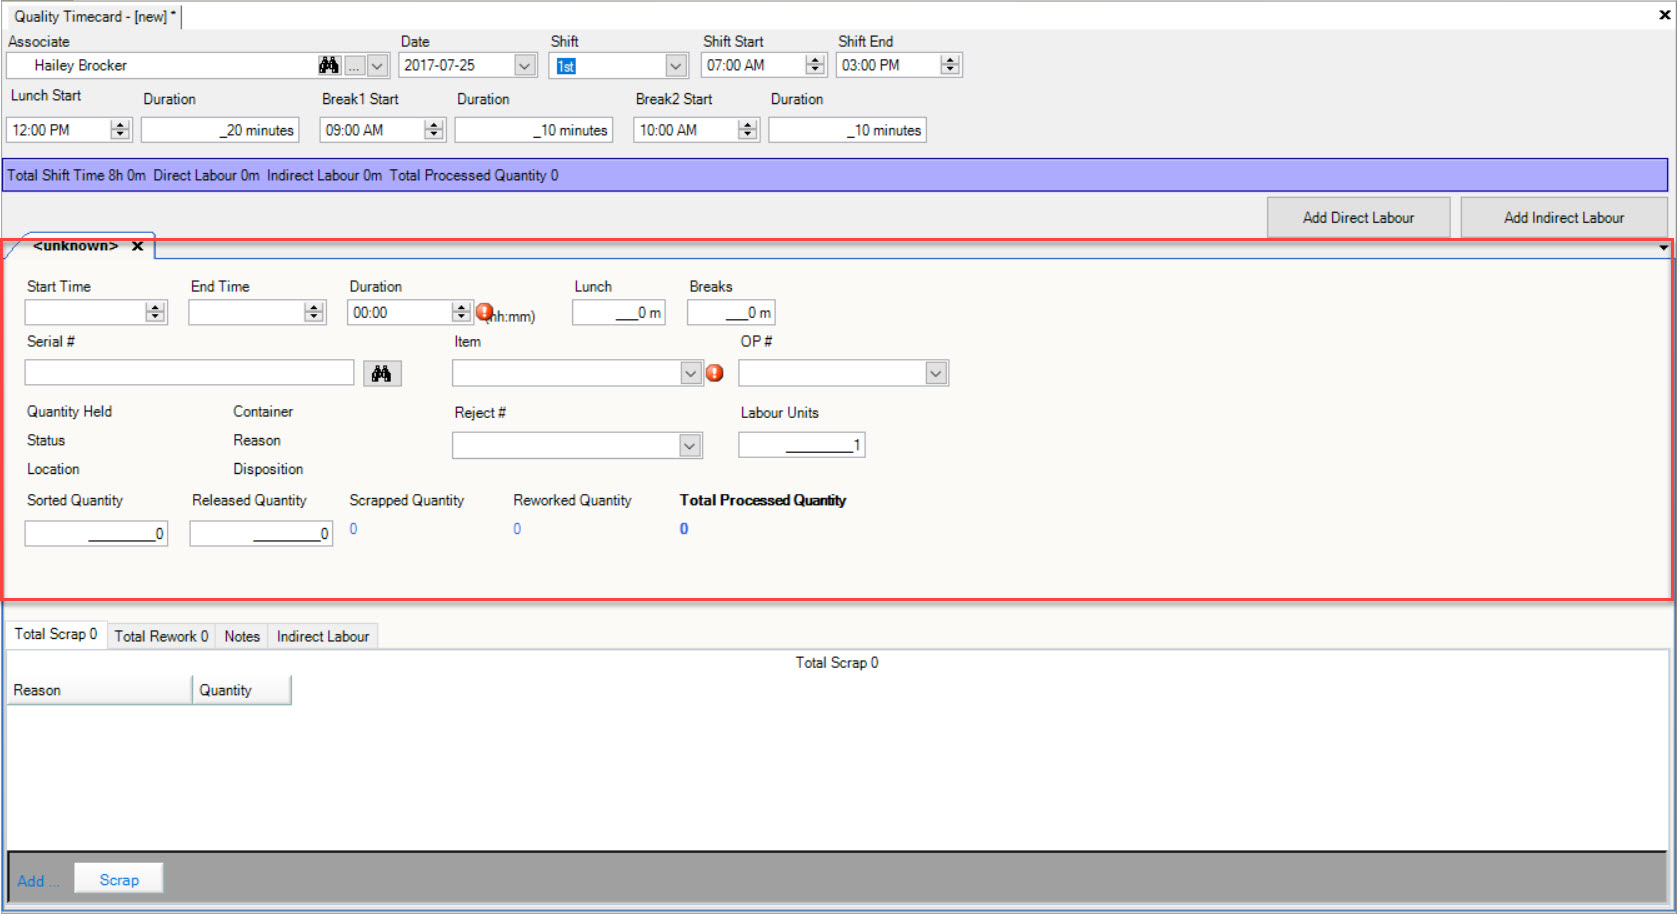
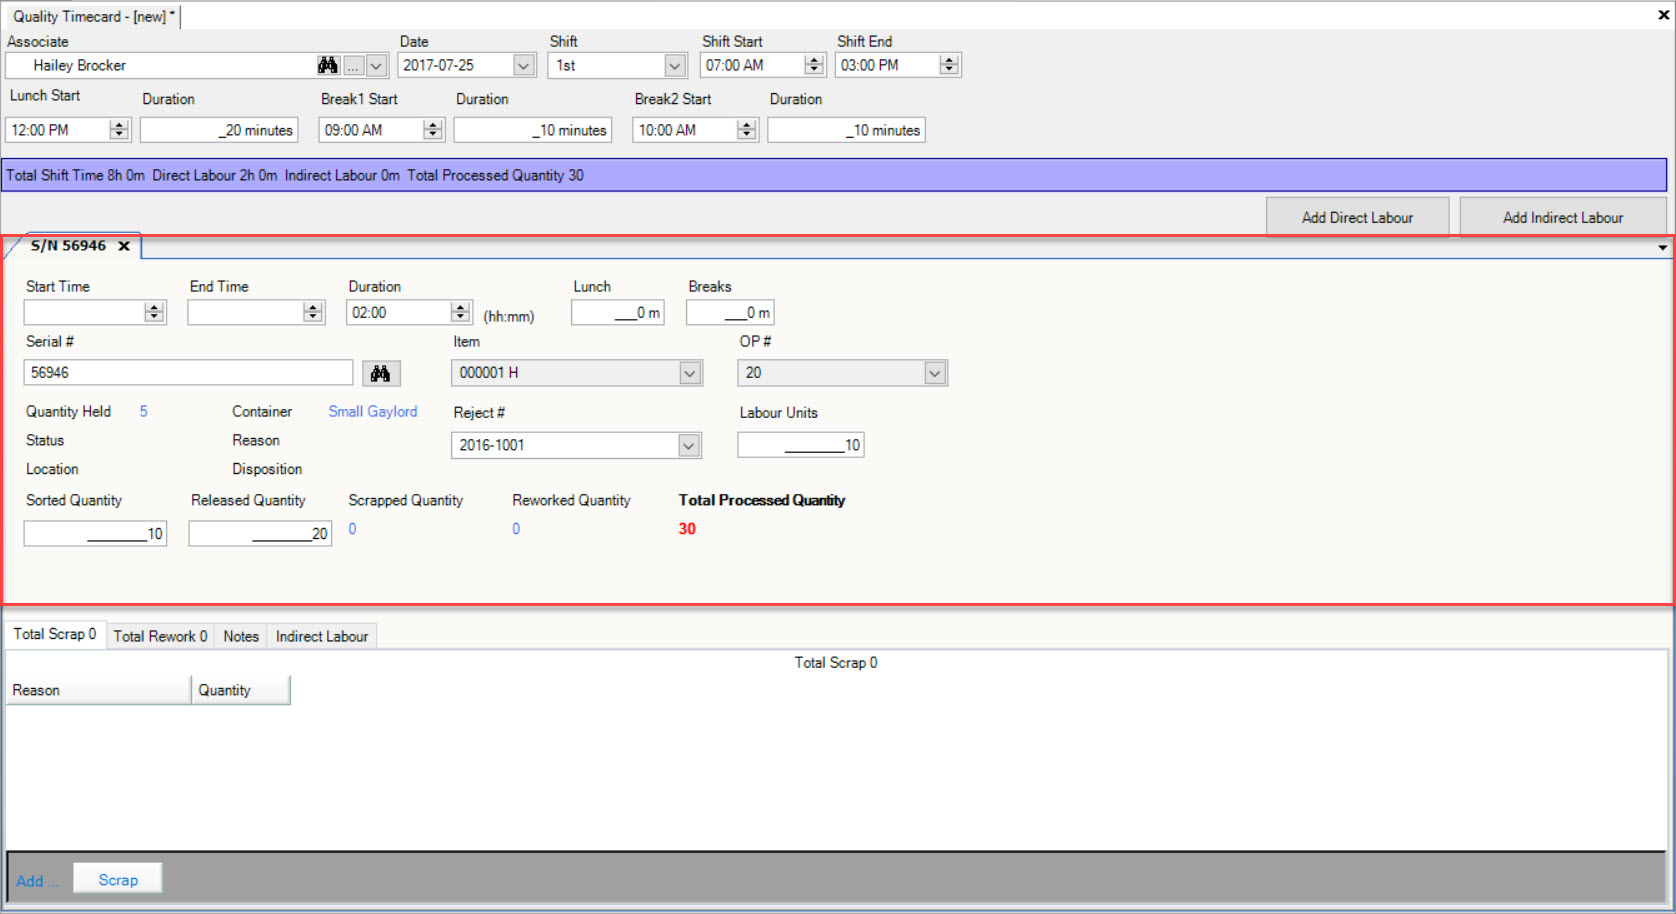
Users will need to enter in a Start Time, End Time, and Duration as well as minutes for Lunch and Breaks.
Next, users must manually enter in a Serial # or use the available button. If users choose to use the button,
the Serial # Lookup window will appear. Users must select a Serial # and then, click on the button. The Serial # will be added to the Direct Labour tab
and the Item and OP # will default based on the information of the Serial #.
Users can then select the Reject # and enter in the Labour Units, Sorted Quantity, and Released Quantity.
Make sure to save your changes before exiting the screen.
Note
If users wish to add more Direct Labour to a Quality Timecard, simply click on the 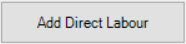 button and a new tab will appear. Users must follow the previous steps to add more Direct Labour.
Editing Direct Labour
To edit Direct Labour on a Quality Timecard, navigate to the tab and click on the icon. The
Quality Timecards screen will be displayed.
Locate the Quality Timecard you wish to edit Direct Labour for and double-click on the appropriate row. The Quality Timecard detail screen will be displayed.
Select the Direct Labour tab that you wish to edit and make the necessary changes using the available textboxes and drop-down menus.
Make sure to save your changes before exiting the screen.
Deleting Direct Labour
To delete Direct Labour from a Quality Timecard, navigate to the tab and click on the icon. The
Quality Timecards screen will be displayed.
Locate the Quality Timecard you wish to delete Direct Labour from and double-click on the appropriate row. The Quality Timecard detail screen will be displayed.
Select the Direct Labour tab that you wish to delete and click on the  button located on the Direct Labour tab.
Note
Users cannot delete the defaulted Direct Labour; there must always be at least one Direct Labour tab open.
Once the button has been clicked, the selected Direct Labour tab will be removed.
Make sure to save your changes before exiting the screen.
Notes Tab
Editing a Quality Timecard
To make changes to an existing Quality Timecard navigate to the tab, click on the icon.
The ‘Quality Timecard Lookup’ will be displayed, search for the timecard you wish to maintain. Double-click on the timecard row to bring up the ‘Quality Timecard Detail’
screen.
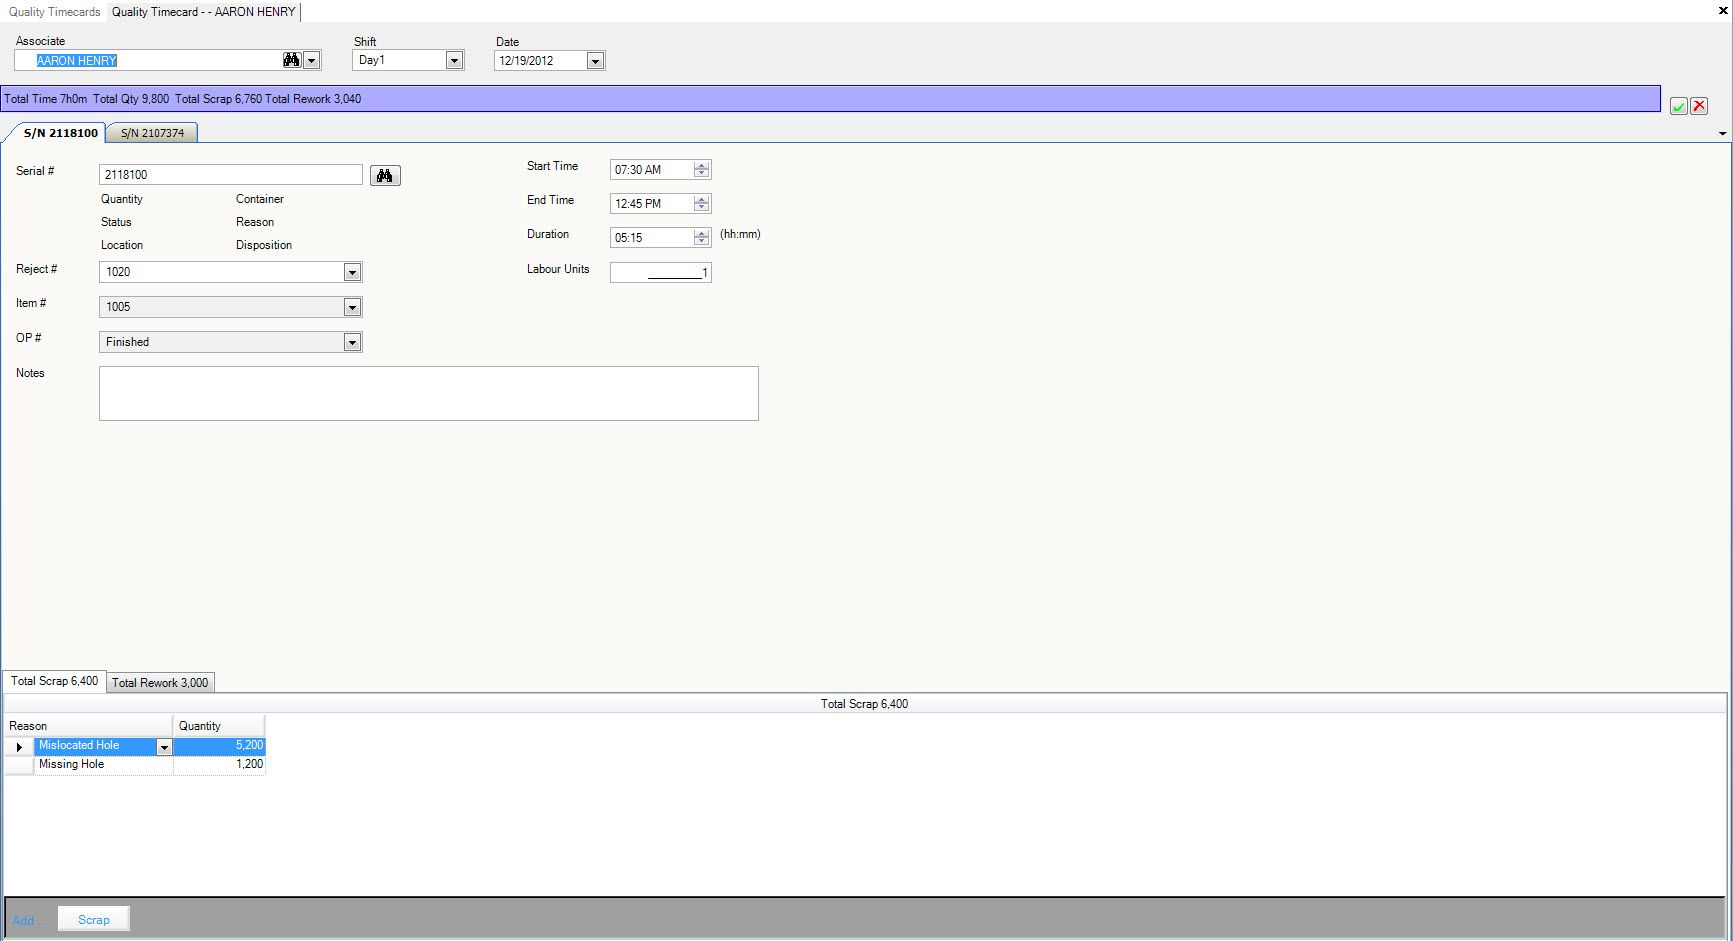
Modify the Item #, Op #, Workcenter, Counter Start, Counter End, Start Time and End Time.
Click the  icon to save.
Deleting a Quality Timecard
To delete a timecard for an employee simply click on the timecard you wish to delete, and click the  .
.
Click the icon to save.
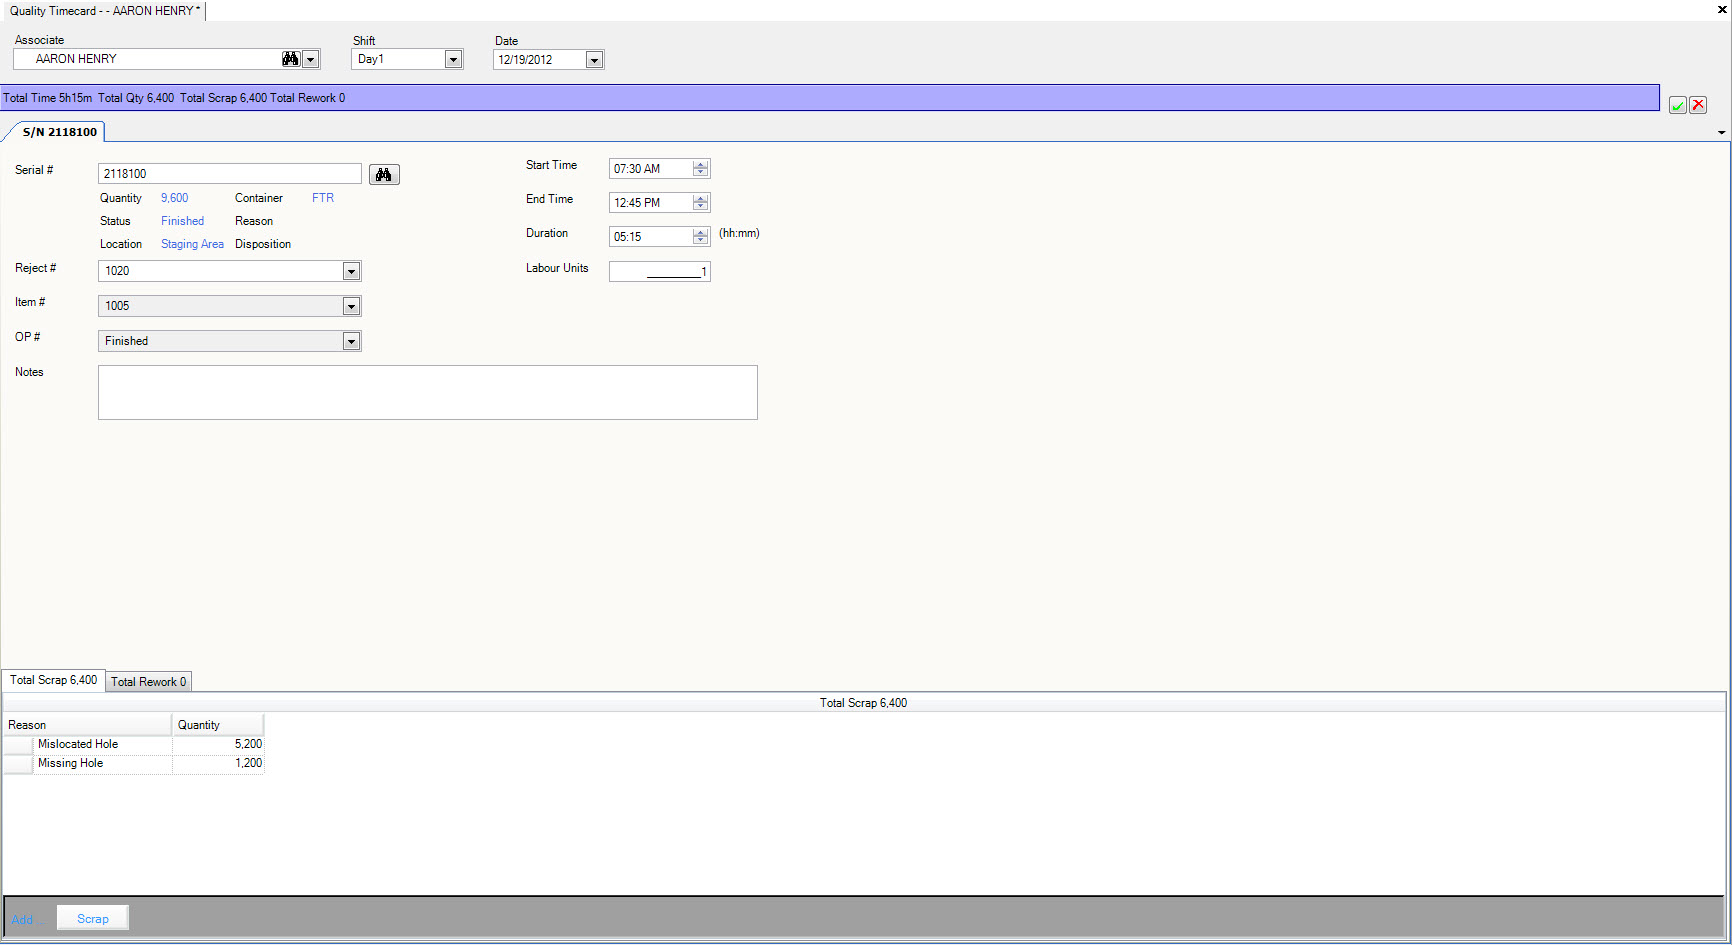
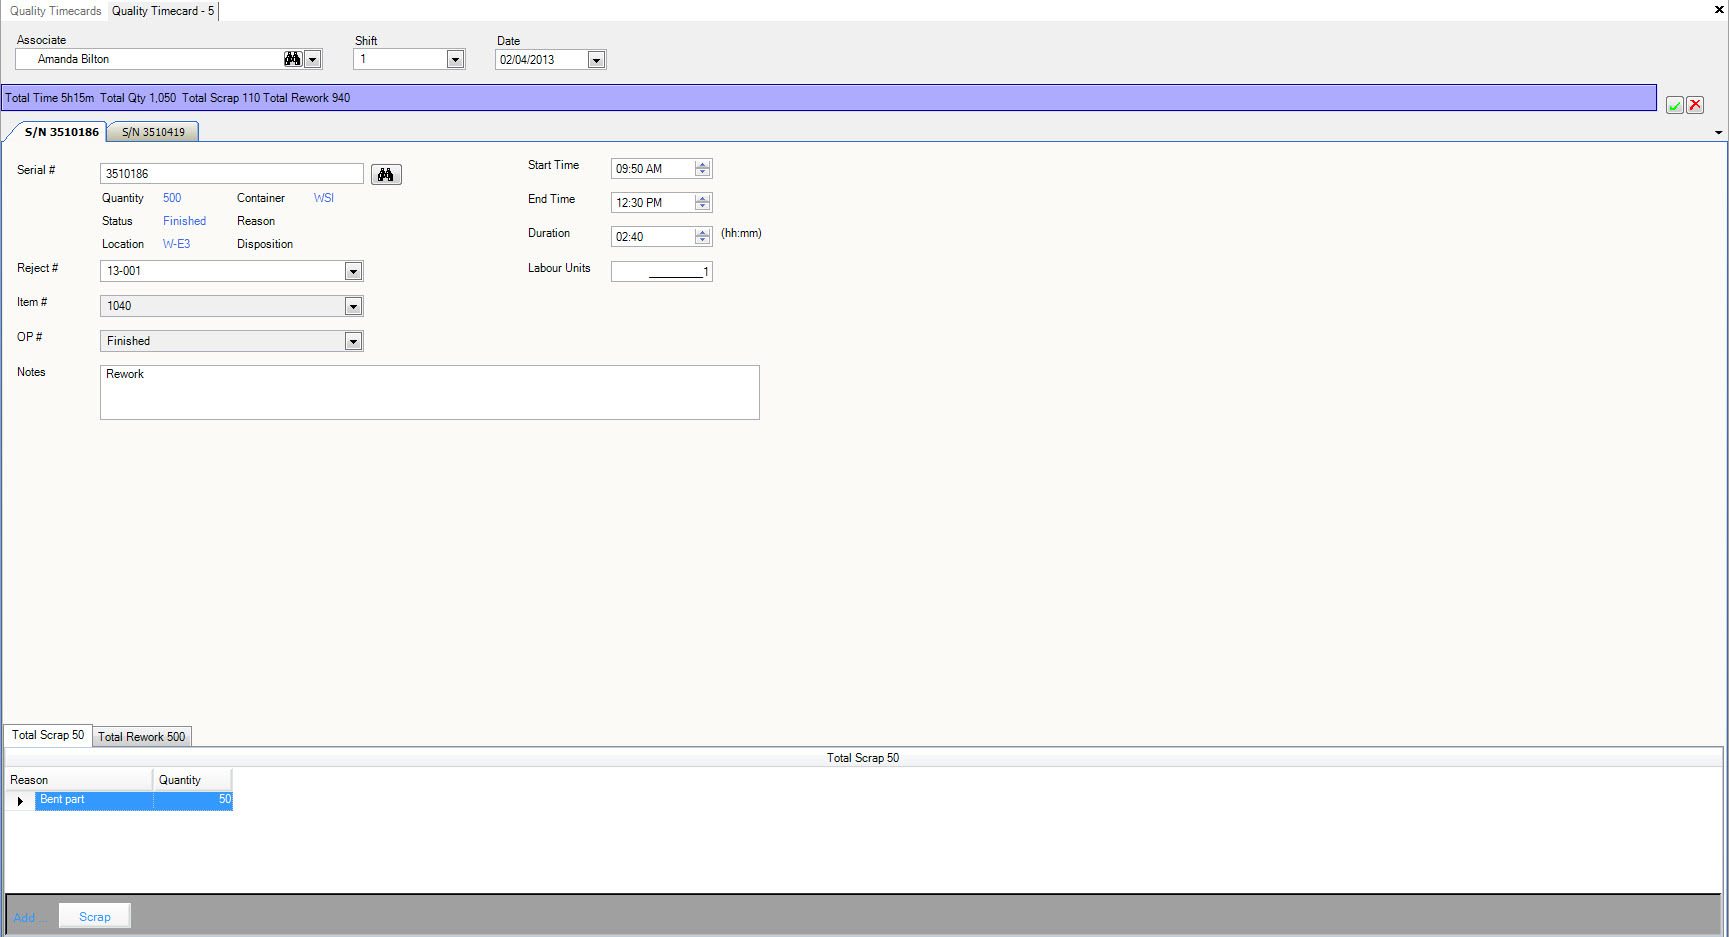
Entering in Scrap
To enter in scrap click on the  tab,
click the |images/scrapbutton.jpg| button and the Scrap row will be displayed so that the scrap information can be entered.
tab,
click the |images/scrapbutton.jpg| button and the Scrap row will be displayed so that the scrap information can be entered.
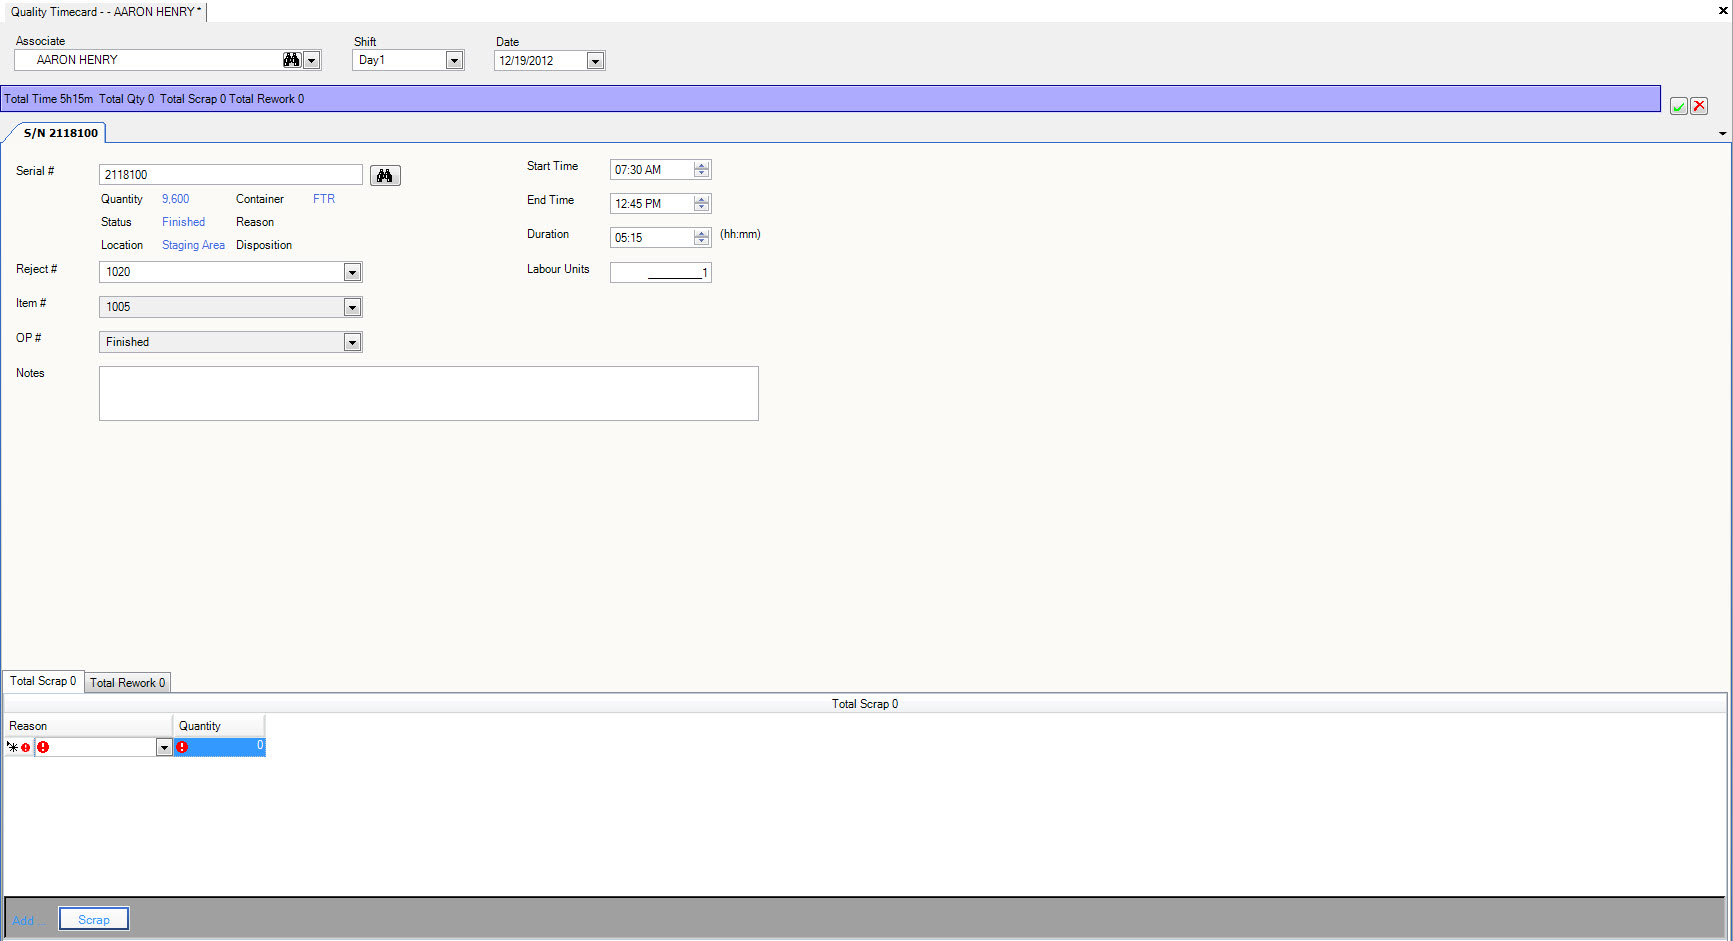
Select the scrap reason from the dropdown box and enter the quantity. If you wish to add additional scrap reasons and quantities,
click the  button and a new Scrap row will be displayed.
Entering in Rework
To enter in rework click on the  tab,
click the
tab,
click the  button and the Rework row will be displayed so that the rework information can be entered.
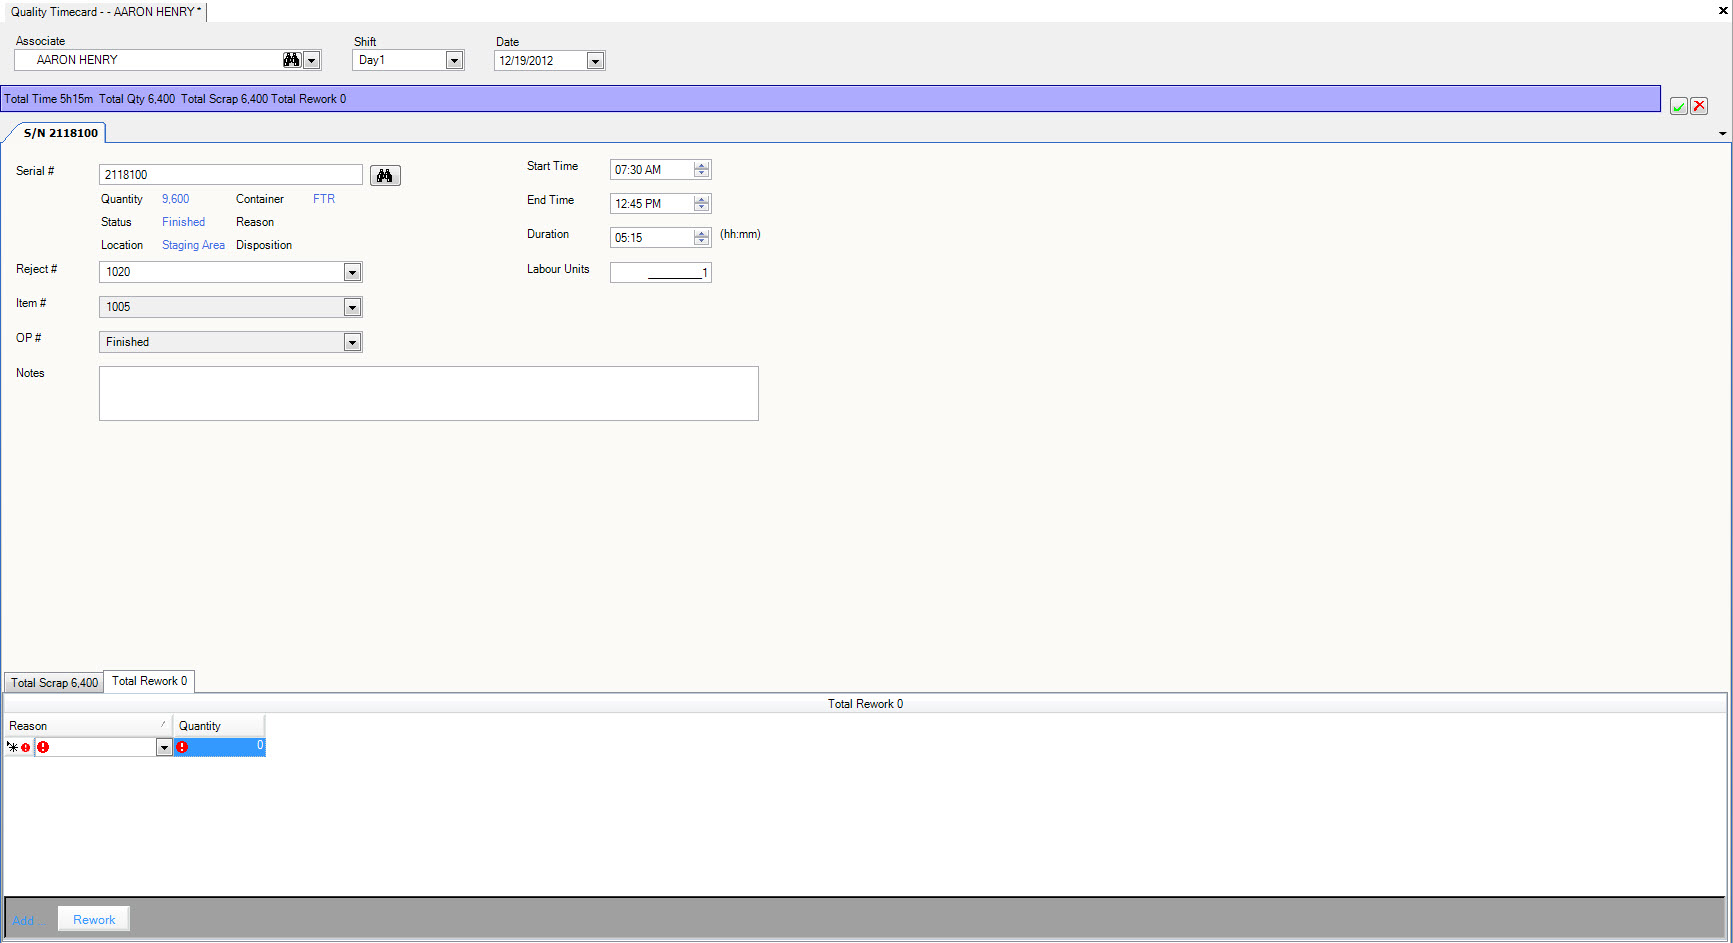
Select the rework reason from the dropdown box and enter the quantity. If you wish to add additional rework reasons and quantities,
click the button and a new Rework row will be displayed.
Deleting Scrap or Rework on the Timecard
To delete the scrap on the timecard, click and highlight the row you wish to delete, then press the Delete key on the keyboard.
A window with the message ‘Delete selected rows?’ will appear, click the |images/qualitytimecards/yesbutton.jpg| button. The scrap will be removed from the timecard.
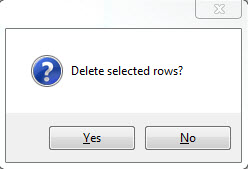
To delete the rework on the timecard, click and highlight the row you wish to delete, then press the Delete key on the keyboard.
A window with the message ‘Delete selected rows?’ will appear, click the |images/qualitytimecards/yesbutton.jpg| button. The rework will be removed from the timecard.
Click the icon to save.