Payment Terms
To view Payment Terms, navigate to the  tab and click on the
  icon. This will open the
Payment Terms screen.
icon. This will open the
Payment Terms screen.

These Payment Terms can be applied to both Vendors and Customers for Purchasing and Invoicing functions.
Users will be able to view Payment Terms, Description, Payment Due, Discount %, Discount Days, and whether or not the Payment Terms are Active.
Adding a New Payment Term
To add a new Payment Term in the system, navigate to the tab and click on the icon. This will open the
Payment Terms screen.
Click on the  button located at the bottom of the screen.
The New Payment Terms window will appear.
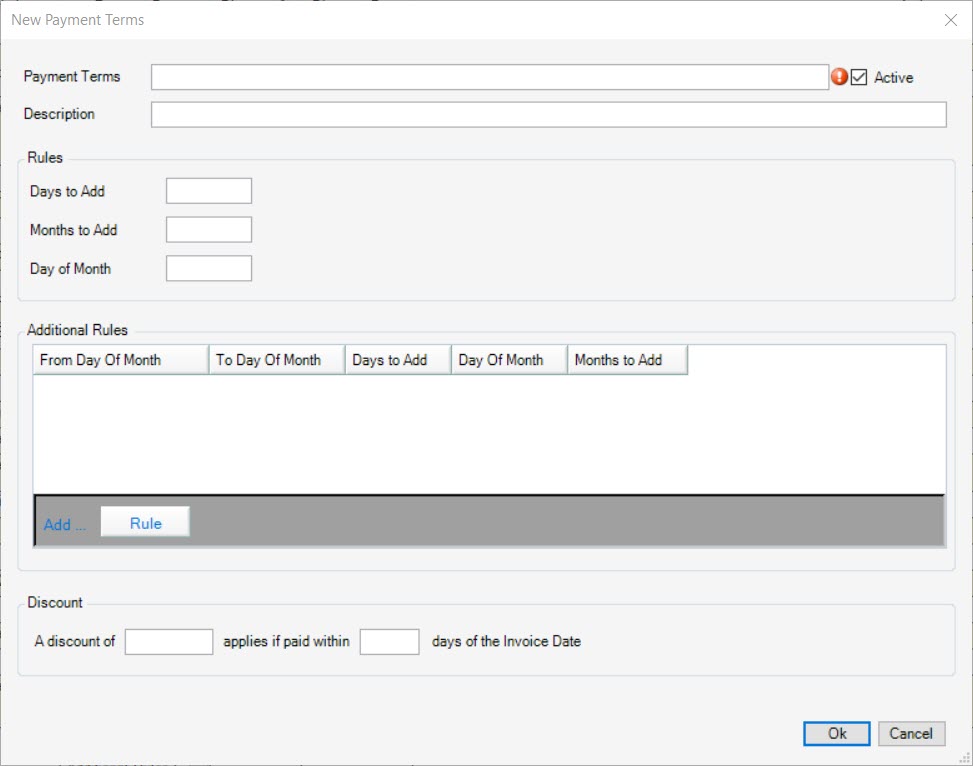
Users must enter in the Payment Terms name (example: Net 30 Days), and it will automatically default to Active which can be overridden if necessary. The Description can be entered as well.
Next, users can enter in Rules including Days to Add (example: after ____ days, the payment will be due), Months to Add (example: after ____ months, the payment will be due), and/or Day of Month (example: on the ____ day, the payment will be due).
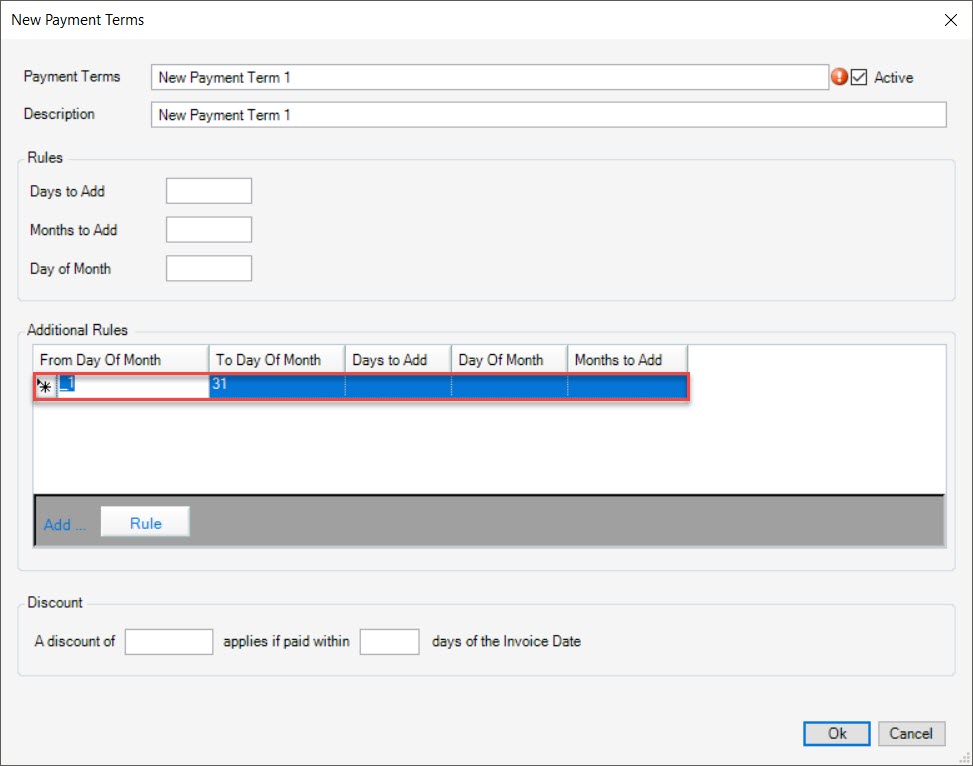
If users wish to add additional Rules to the Payment Term, simple click on the  button.
A new row will appear where users can enter in From Day of Month, To Day of Month, Days to Add, Day of Month, and/or Months to Add.
Note
To delete an additional rule, simply highlight the appropriate row. Use your Delete key and when the system prompts you, select Yes. The selected additional rule will be deleted.
Users also have the ability to add a discount if necessary. Simply enter the discount in the first textbox, and then enter in the amount of days in which the discount would applied in the second textbox.
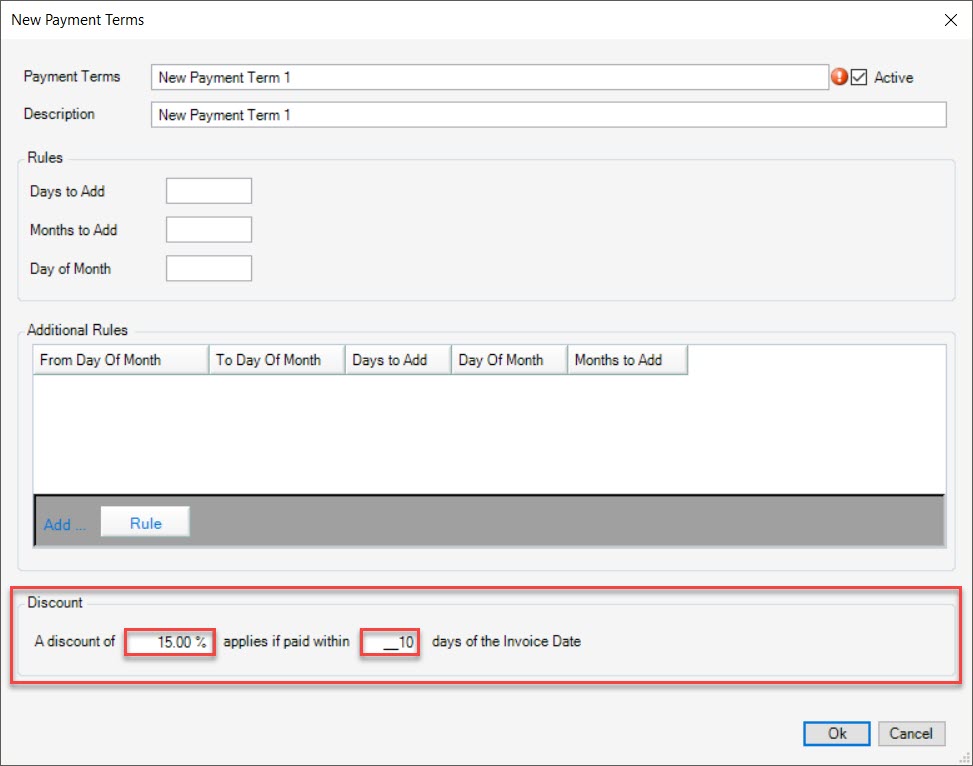
Discounts, if applicable, will be applied on the Payment screen for Vendor Invoices and on the Cash Receipt screen for Customer payments.
Once the appropriate information has been entered, click on the  button.
The new Payment Term will appear in the lookup. Make sure to save before exiting the screen.
Editing a Payment Term
To edit a Payment Term, navigate to the tab and click on the icon. This will open the
Payment Terms screen.
There are two ways to open an existing Payment Term in order to edit. The first way is to locate the Payment Term you wish to edit and double-click on the appropriate row.
The second way is to locate the Payment Term you wish to edit and then, click on the 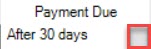 button located under the Payment Due column.
Both of these ways will open the Edit Payment Terms window.
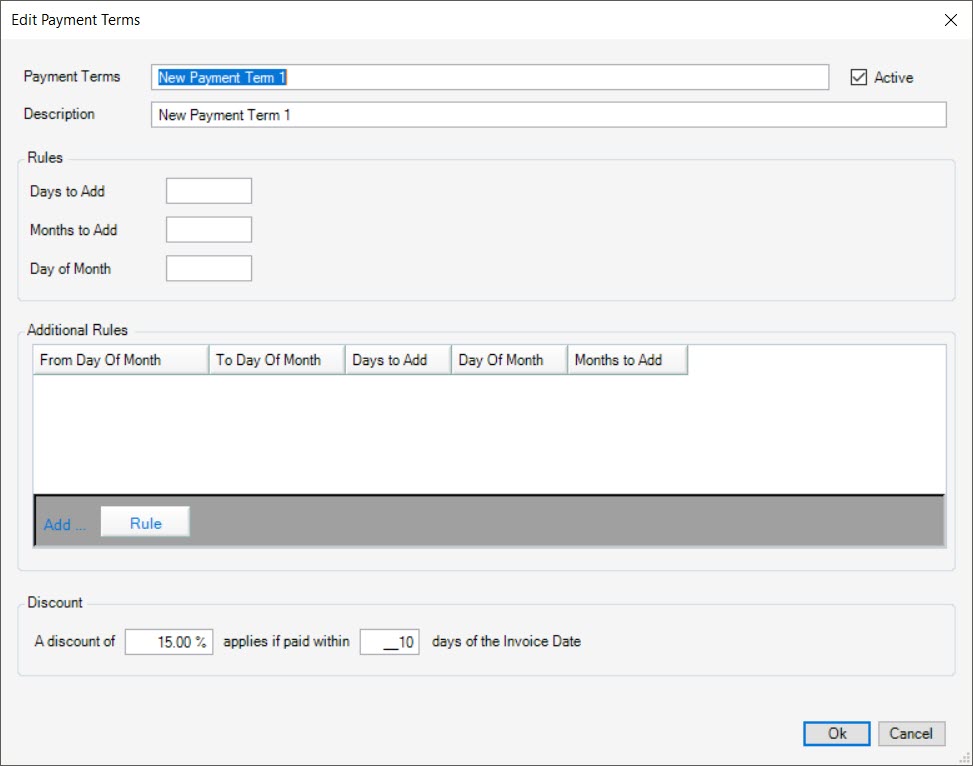
Users can make the necessary changes and then, click on the button.
Make sure to save before exiting the screen.
Deleting a Payment Term
To delete a Payment Term, navigate to the tab and click on the icon. This will open the
Payment Terms screen.
Locate the Payment Term you wish to delete and highlight the appropriate row. Use your Delete key and when the system prompts you, select Yes.
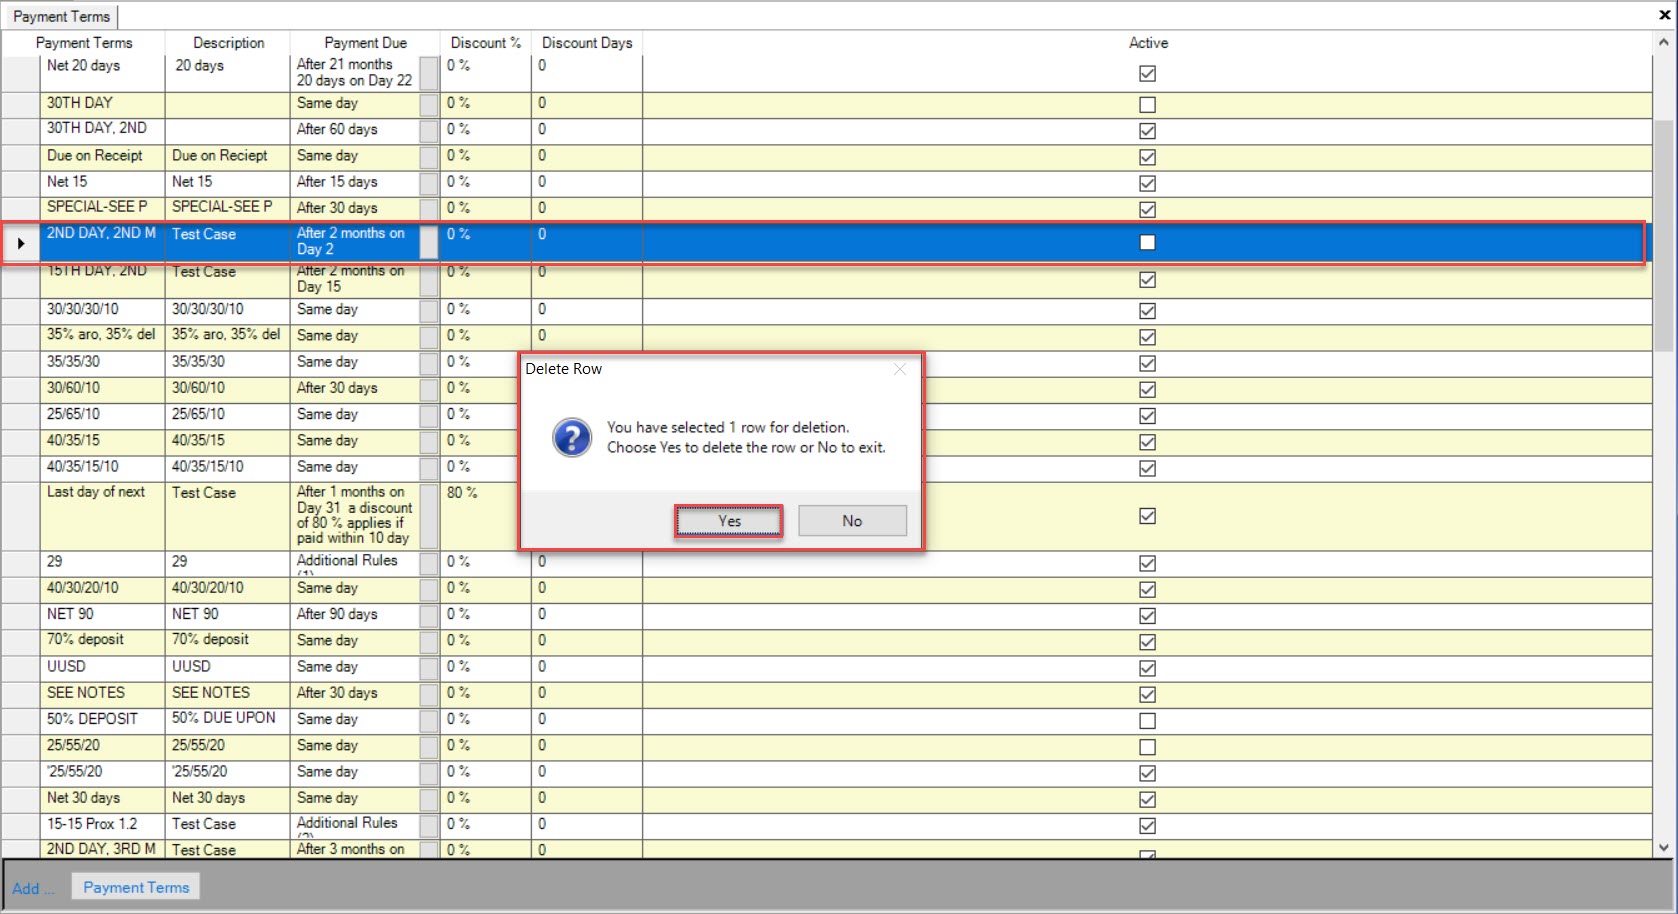
The selected Payment Term will be deleted. Make sure to save your changes before exiting the screen.