Company
The Company section allows users to enter in important information regarding their Companies.
Adding a Company
To add a Company, navigate to the  tab and click on the
 ![]() icon.
icon.
The Company Screen will be displayed.
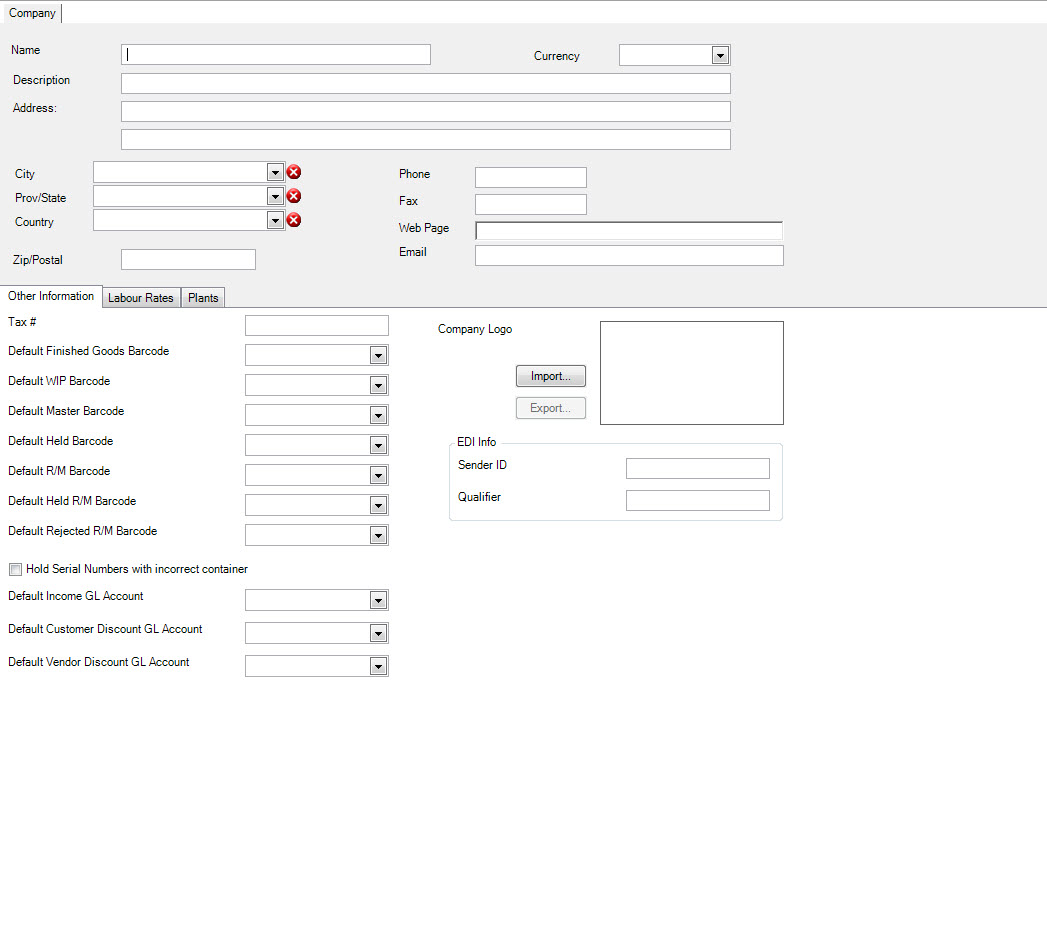
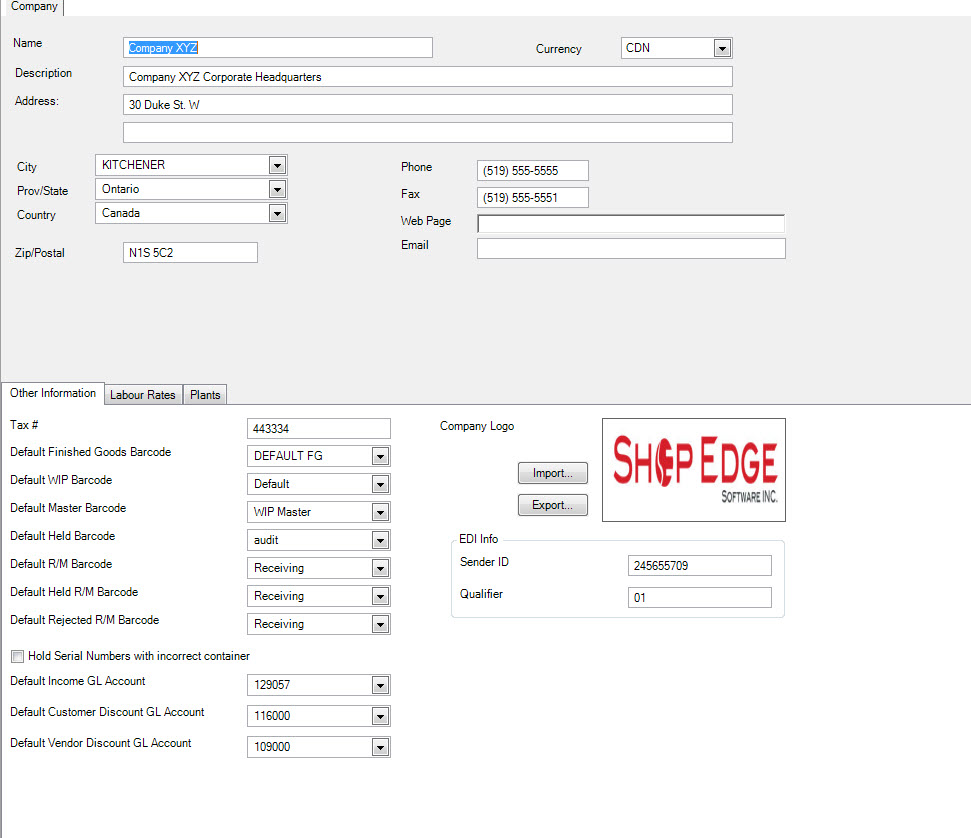
Enter the Company Name, Description, Address, Currency, City, Prov/State, Country, Zip/Postal Code, Phone/Fax numbers, Web Page and Email address.
The Other Information tab allows users to select from the drop-down lists and assign the default Barcodes and G/L account numbers. A Company logo can also be imported by
clicking on the  button.
The Default Barcode information is selected for Finished Goods, WIP, Master, Held, Raw Material, Held Raw Material and Rejected Raw Material labels. If you do not have item or customer-specific Barcode labels selected on the Manufacture Routing screen for Items, there are default label templates that will print every time you print a Barcode label.
The Company EDI parameters (Sender Identifier and Qualifier), which are used to send and receive transmissions with your trading partners, are also entered here. For more detailed information please see the module on EDI.
There are multiple mandatory fields that must be completed before the Company can be saved in the system.
Adding Labour Rates
To add Labour Rates to a Company, click on the  tab.
tab.
In the Labour Rates screen, users are able to fill in fields such as the Overhead %, Overhead Rate /hr, Setup Rate /hr, and Scrap Rate.

Adding Company Locations
To add a Company Location click on the  tab.
tab.
Click on the  from the
  and the new Company Location screen will be displayed.
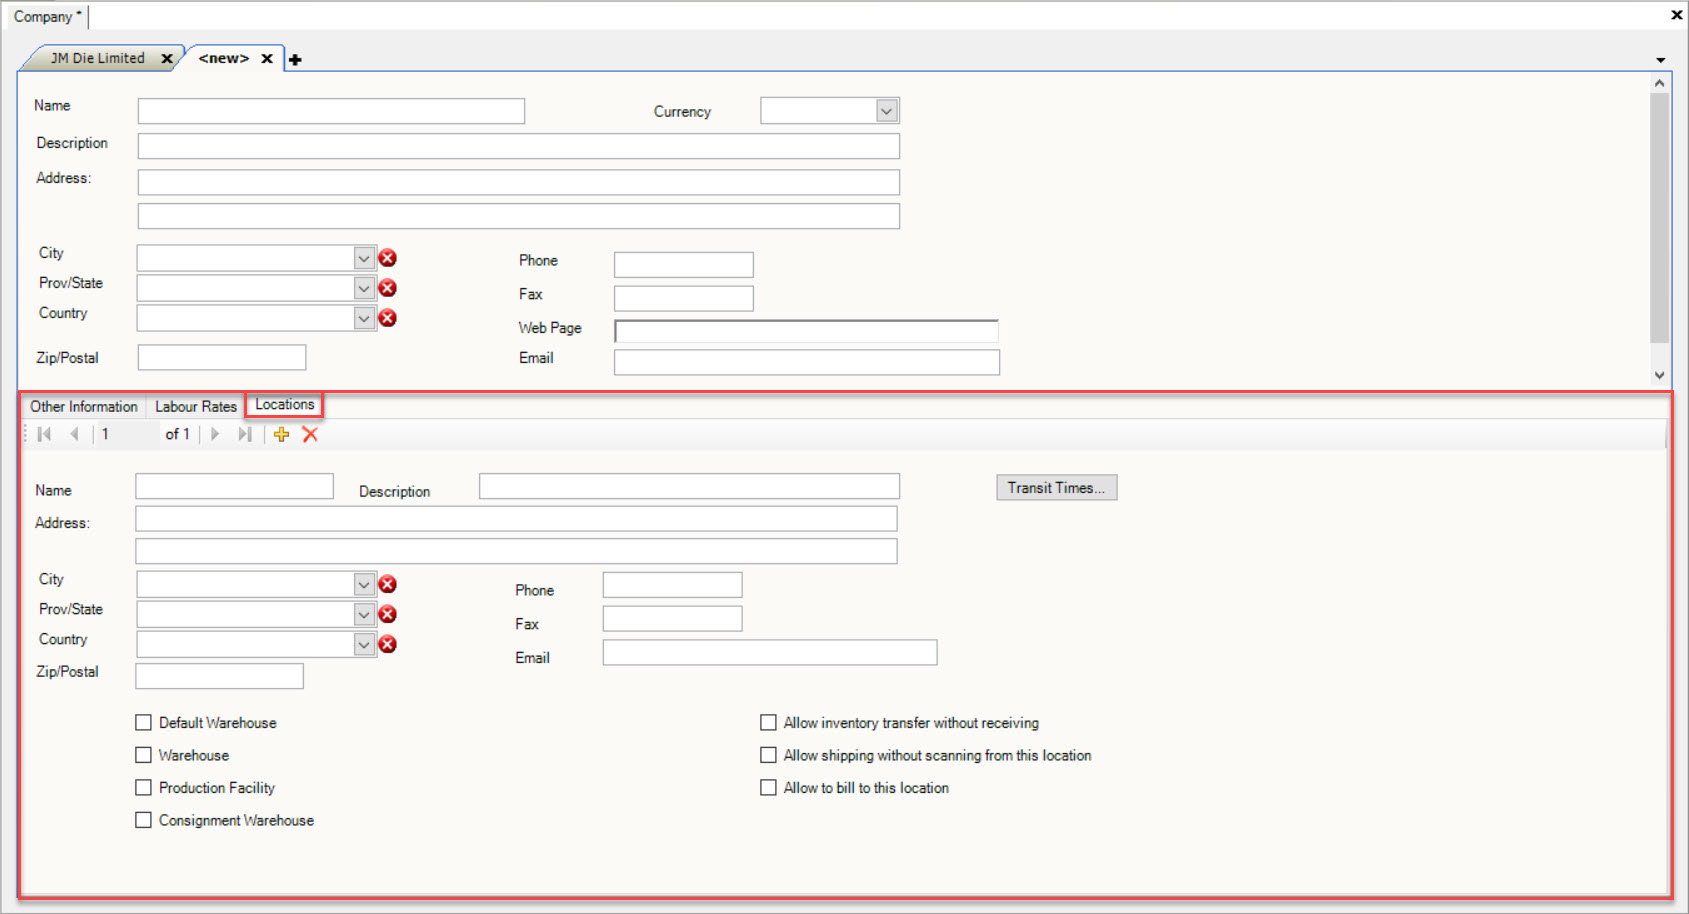
Fill in the necessary fields such as the Company Location Name, Description, Address, City, Prov/State, Country, Zip/Postal Code, Phone/Fax numbers, Web Page and Email address. If this is the Default Warehouse and/or Warehouse make sure the appropriate boxes are selected located at the bottom of the screen.

Default Warehouse
When this option is selected, this is the Ship To location that will show on a Purchase Order form, and will be on the Ship From location selected on a Packing Slip (unless another Warehouse has been selected on the Ship To tab for a Customer).
Warehouse
Setting a location as a Warehouse allows users to manage inventory at different locations. The Warehouse will be visible on the Production Inventory, R/M Inventory, and Locations screen in ShopEdge. Having this selected will only function when the Inventory By Location licence key is enabled. Setting a Warehouse will also enable users to select from the Ship From or Ship To drop-down menus when creating an Inventory Transfer Packing Slip. Consignment Warehouses MUST also be flagged as a Warehouse.
Production Facility
Setting a location as a Production Facility will allow users to set workcenters, shift availability, routings, and plan a production schedule for a particular facility. Having this selected will only function when the Production By Location licence key is enabled.
Consignment Warehouse
Locations can be flagged as Consignment Warehouses in the system. Locations must be flagged as both a Warehouse and Consignment Warehouse. If items are shipped on an Inventory Transfer Packing Slip to a Consignment Warehouse, the Packing Slip will be marked as Closed and therefore will not appear under the Non-Invoiced Packing Slip list.
Consignment Warehouses can be linked to Customer Ship To locations. First, add the location in the system under Admin > Company. Then, link the Ship To location to the Consignment Warehouse on the Customer screen under the Ship To tab. At the time of shipping, the inventory will be relieved and moved to the Consignment Warehouse, but there will be no sale recorded, and nothing will show up on the A/R Aging report.
When a Customer informs you what items and quantities to bill them for, users can create an invoice in ShopEdge. If the Customer sends you items in an Excel format, there is an option to import the items to the invoice using the Import... function at the top of the Invoice form.
Having this option selected will only function when the Inventory By Location licence key is enabled.
Allow Inventory Transfer without Receiving
If this option is selected, the serial numbers on the Inventory Transfer Packing Slip will be moved to the destination Warehouse automatically at the time of shipping. The location will be defaulted to the Default Tag location that is selected on the location. Having this option selected will only function when the Inventory By Location licence key is enabled.
Allow Shipping without Scanning from this Location
If this option is selected, serial numbers can be added to a Packing Slip but they do not have to be picked by location. Having this option selected will only function when the Inventory By Location licence key is enabled.
Allow to Bill to this Location
If this option is selected, the location will appear in the Bill To drop-down menu on the Purchase Order screen (independent of whether or not it is a Warehouse).
Users also have the ability to add Transit Times by click on the  button.
The Transit Days window will appear.
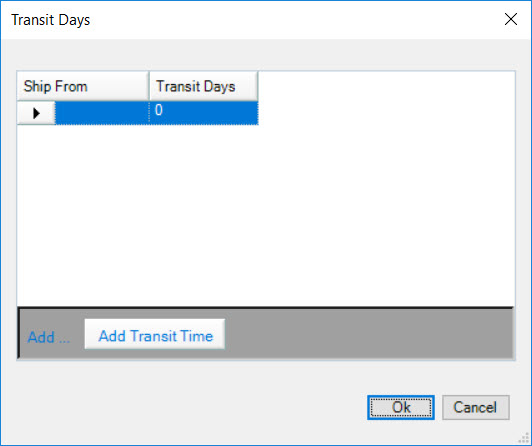
Here, you are able to add in Transit Time(s) for Shipping purposes. Click on the  button.
A new row will appear where users can fill in the Ship To, and the amount of Transit Days. Click on the  button when you have added the appropriate Transit
Times.
Note
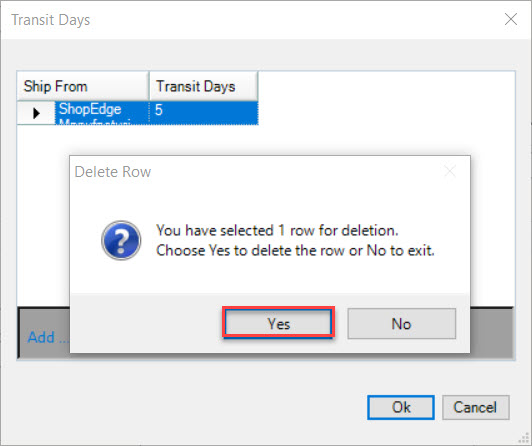
If you wish to delete a Transit Time, simply highlight the row of the one you wish to delete. Use your Delete key and when the system prompts you, select Yes.
Note
Users may add as many Company Locations as needed by simply clicking on the  button each time you would like to add a new one.
After entering in all of the necessary information for a Company, make sure to save your changes before exiting the screen.
Note
The system will only allow users to have a total of 2 Companies.
Deleting a Company Location
If you wish to delete a Location from a Company, navigate to the  tab and click on the
 ![]() icon.
icon.
The Company screen will be displayed.

Click on the  tab and the Company Location screen will be displayed.

Select the Company Location you wish to delete by using the arrow buttons in the tool bar. Then, click on the  to delete the company.

The Company Location will be deleted.
Make sure to save your changes before exiting the screen.