Admin
The Admin module gives those with access the ability to view, add, edit, or delete the following:
- Departments
- User Defined Fields
- User Defined Label Sizes
- Barcode Printers
- Tax Groups
- Tax Codes
- Tax Group Assignments
- Work Schedules
Departments
To view Departments, navigate to the  tab and click on the
 ![]() icon. The Admin screen will be displayed.
icon. The Admin screen will be displayed.
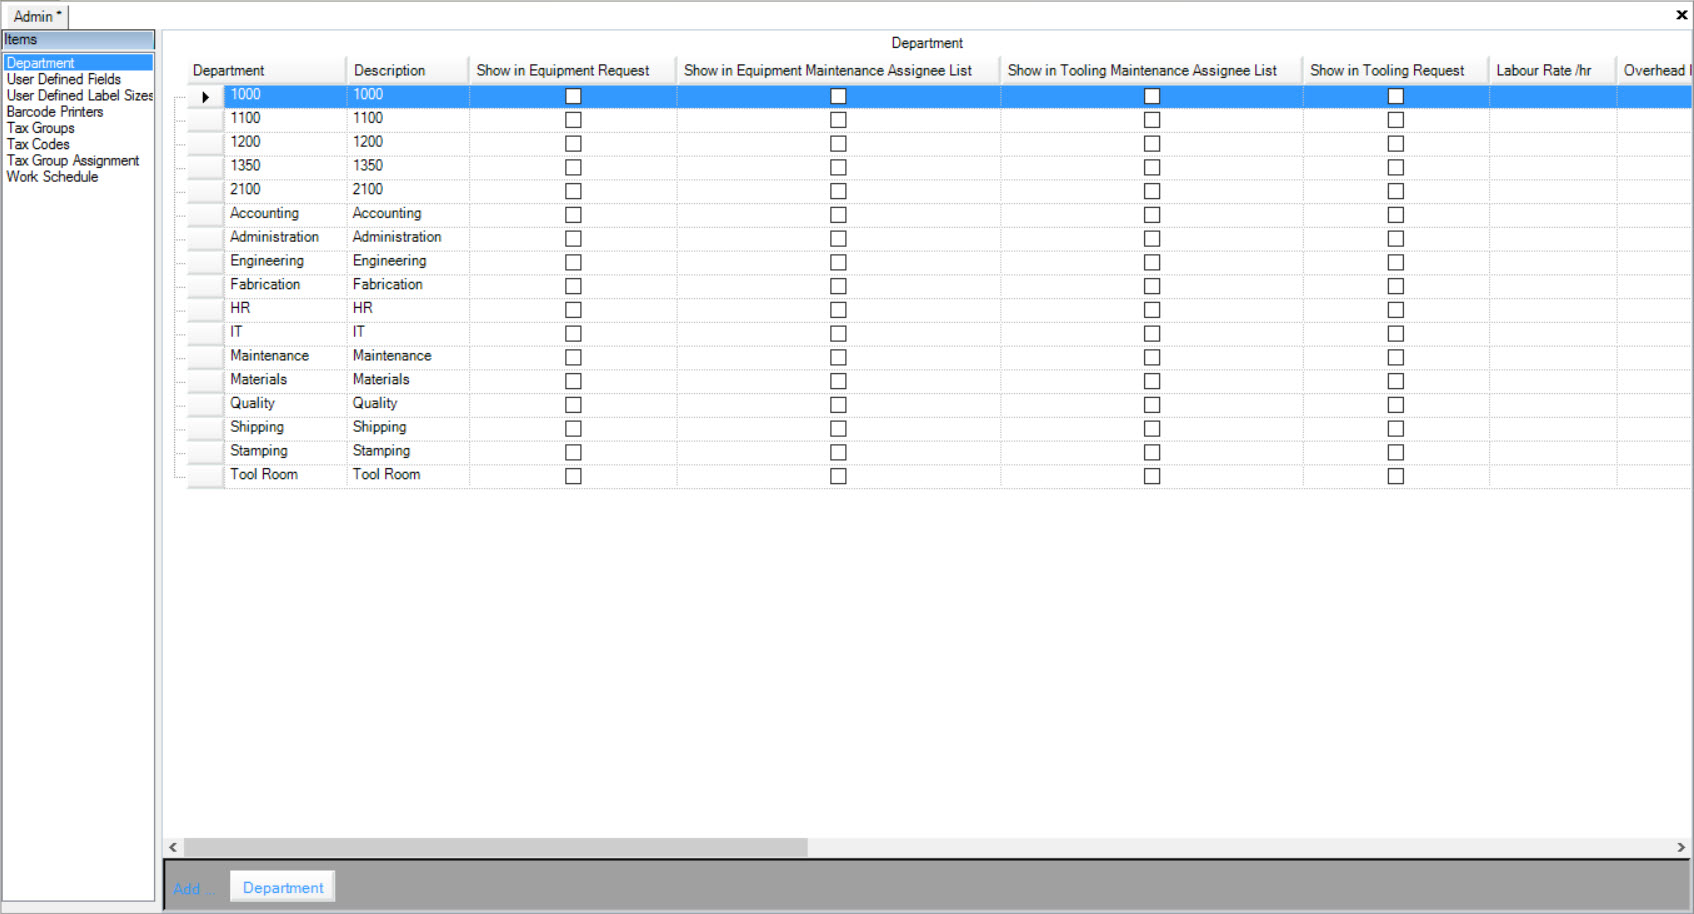
Make sure to select the Department tab to the left of the Admin screen.
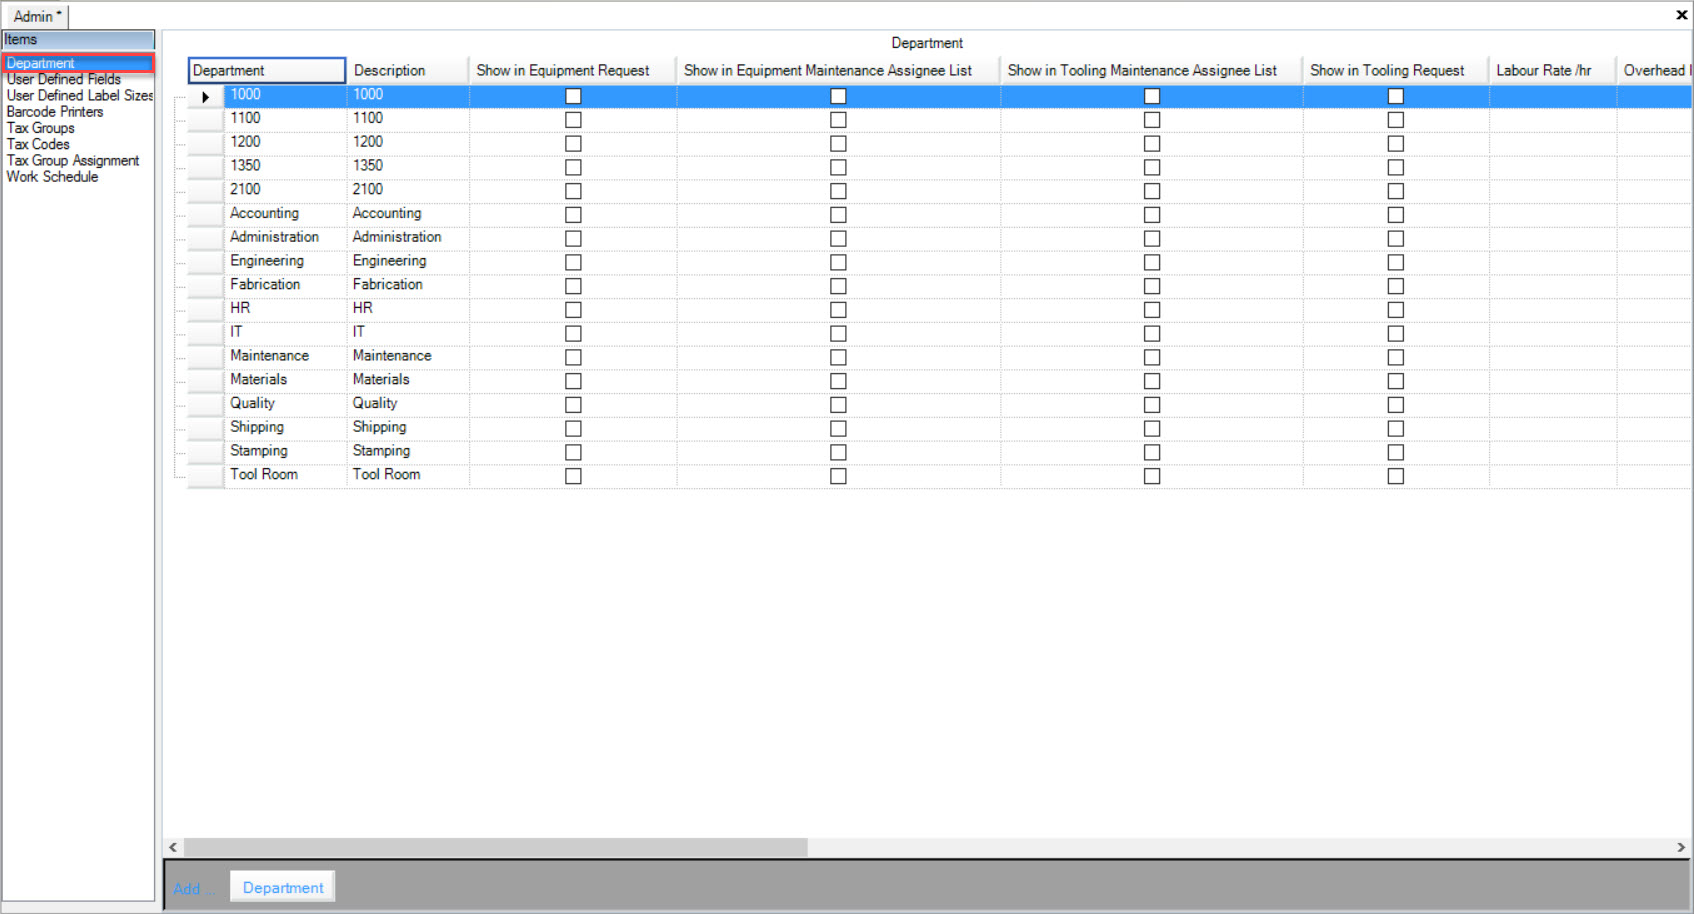
Users will be able to view all Departments in the system.

Adding a Department
To add a Department, navigate to the  tab and click on the
 ![]() icon. The Admin screen will be displayed.
icon. The Admin screen will be displayed.

Make sure to select the Department tab to the left of the Admin screen.

Click on the  button located at the bottom of the screen. A new row will appear where users can fill in the necessary information and select or de-select
the appropriate checkboxes.
Make sure to save your changes before exiting the screen.
Editing a Department
To edit a Department, navigate to the  tab and click on the
 ![]() icon. The Admin screen will be displayed.
icon. The Admin screen will be displayed.

Make sure to select the Department tab to the left of the Admin screen.

Located the Department you wish to edit and use the appropriate text boxes, drop-down menus, and checkboxes to make the necessary changes.
Make sure to save your changes before exiting the screen.
Deleting a Department
To edit a Department, navigate to the  tab and click on the
 ![]() icon. The Admin screen will be displayed.
icon. The Admin screen will be displayed.

Make sure to select the Department tab to the left of the Admin screen.

Located the Department you wish to delete and highlight the appropriate row. Use your Delete key and when the system prompts you, select Yes.
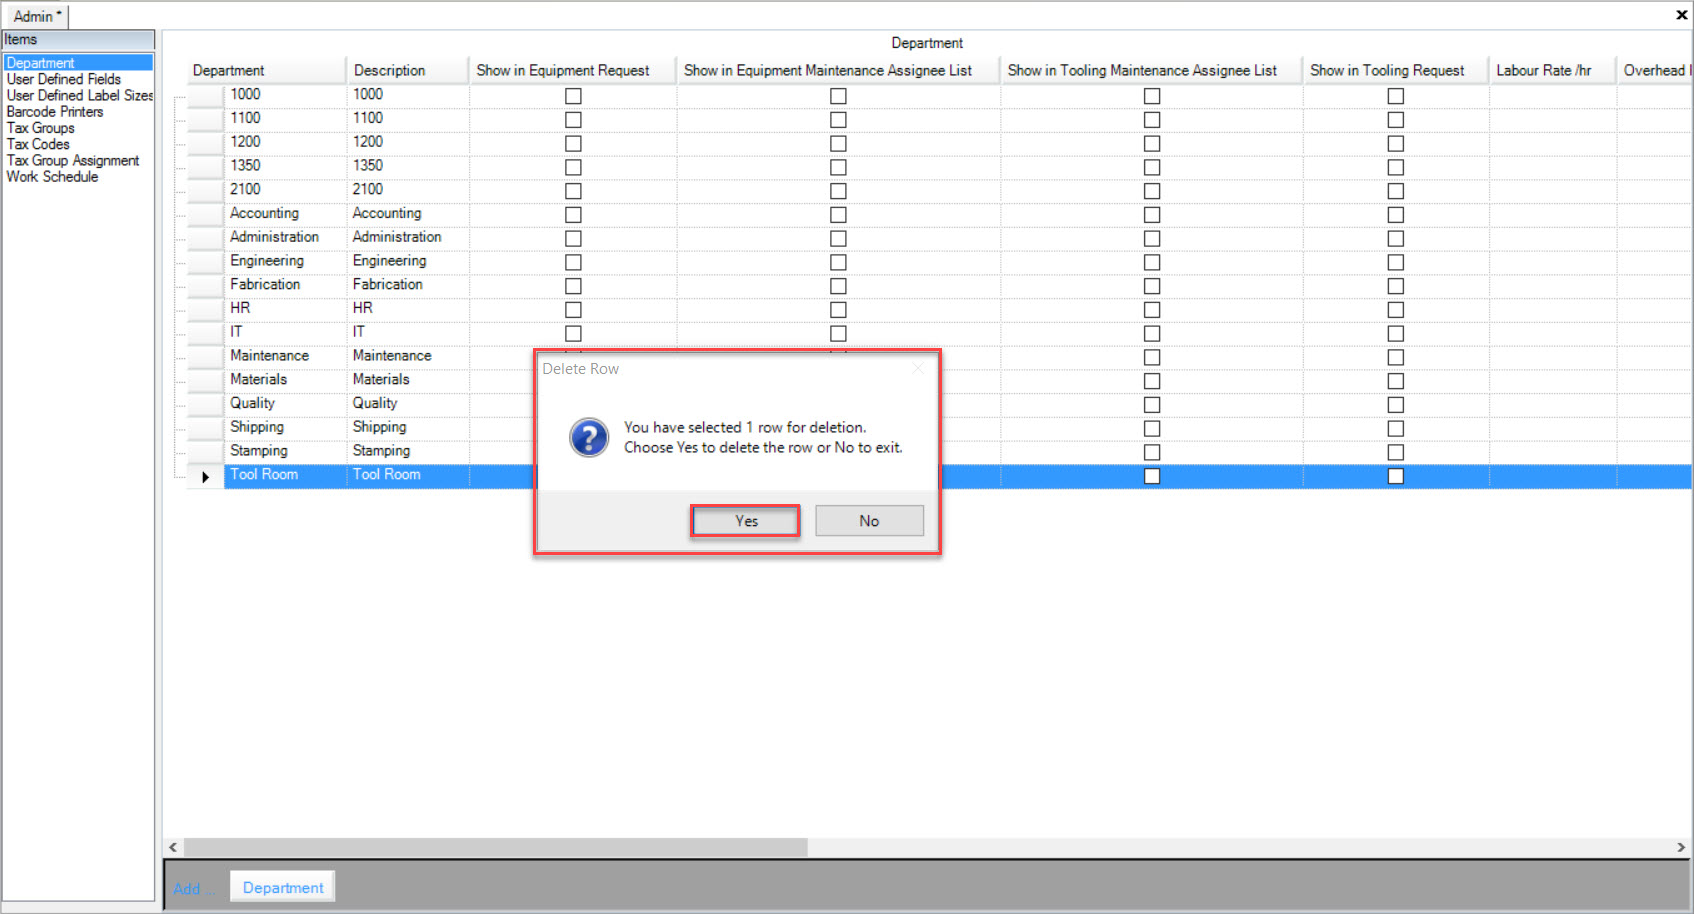
Make sure to save your changes before exiting the screen.
User Defined Fields
To view User Defined Fields, navigate to the  tab and click on the
 ![]() icon. The Admin screen will be displayed.
icon. The Admin screen will be displayed.

Make sure to select the User Defined Fields tab to the left of the Admin screen.
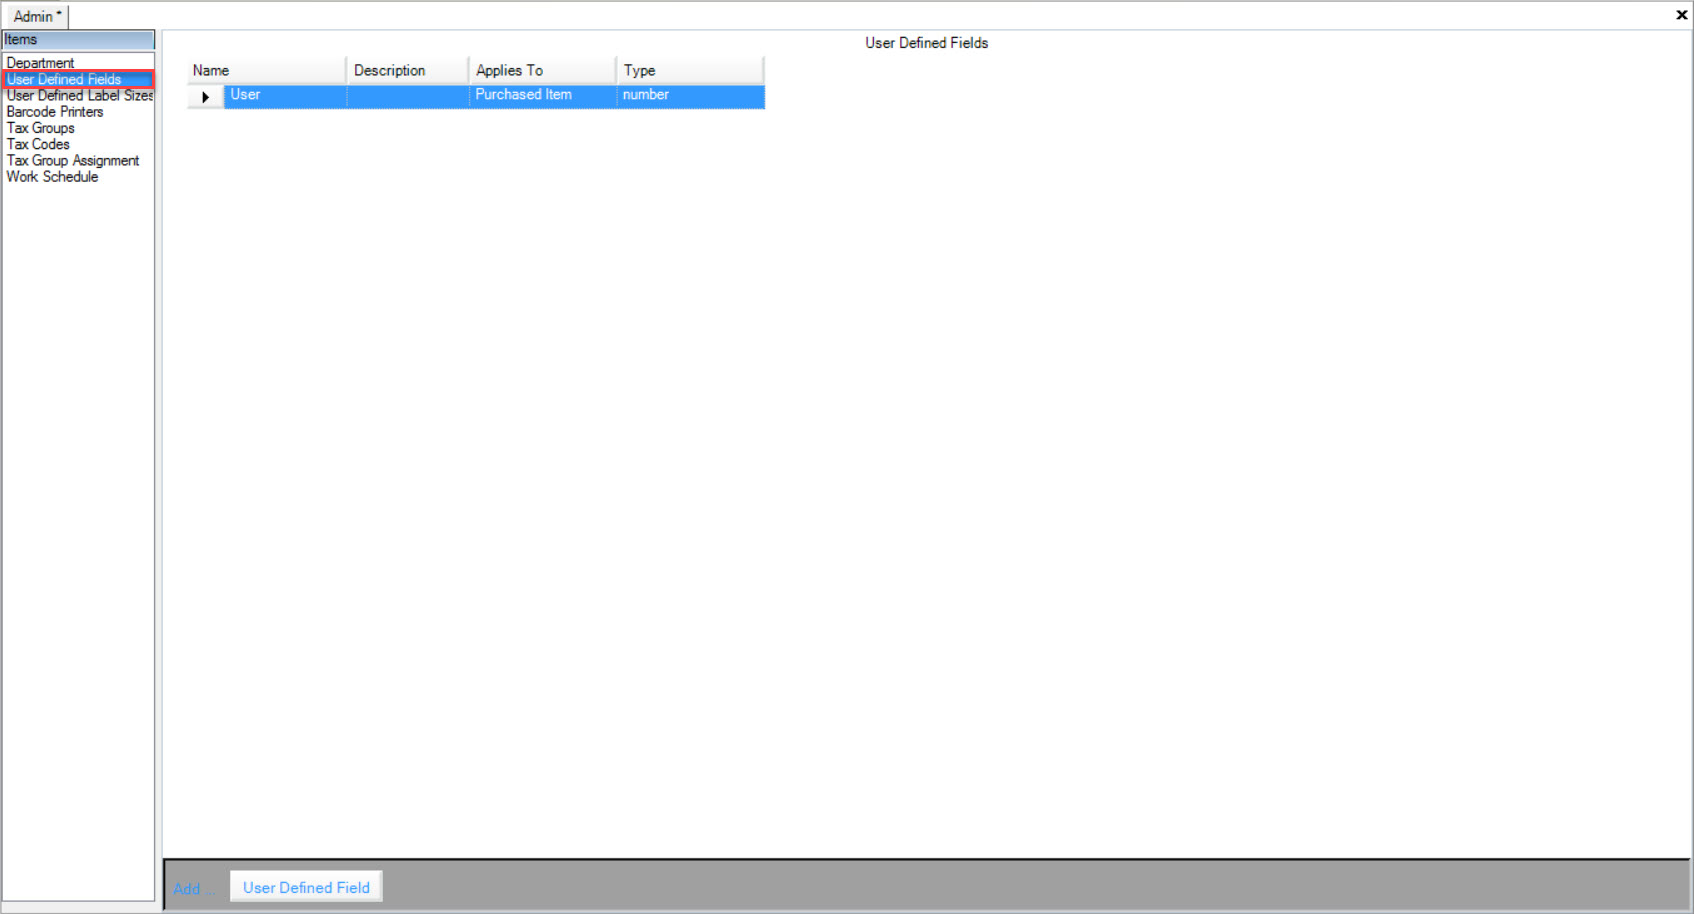
Users will be able to view all User Defined Fields in the system.
Adding a User Defined Field
To add a User Defined Field, navigate to the  tab and click on the
 ![]() icon. The Admin screen will be displayed.
icon. The Admin screen will be displayed.

Make sure to select the User Defined Fields tab to the left of the Admin screen.

Click on the  button located at the bottom of the screen.
A new row will appear where users can fill in the necessary fields.
Make sure to save your changes before exiting the screen.
Editing a User Defined Field
To add a User Defined Field, navigate to the  tab and click on the
 ![]() icon. The Admin screen will be displayed.
icon. The Admin screen will be displayed.

Make sure to select the User Defined Fields tab to the left of the Admin screen.

Located the User Defined Field you wish to edit and make the necessary changes using the appropriate text boxes and drop-down menus
Make sure to save your changes before exiting the screen.
Deleting a User Defined Field
To add a User Defined Field, navigate to the  tab and click on the
 ![]() icon. The Admin screen will be displayed.
icon. The Admin screen will be displayed.

Make sure to select the User Defined Fields tab to the left of the Admin screen.

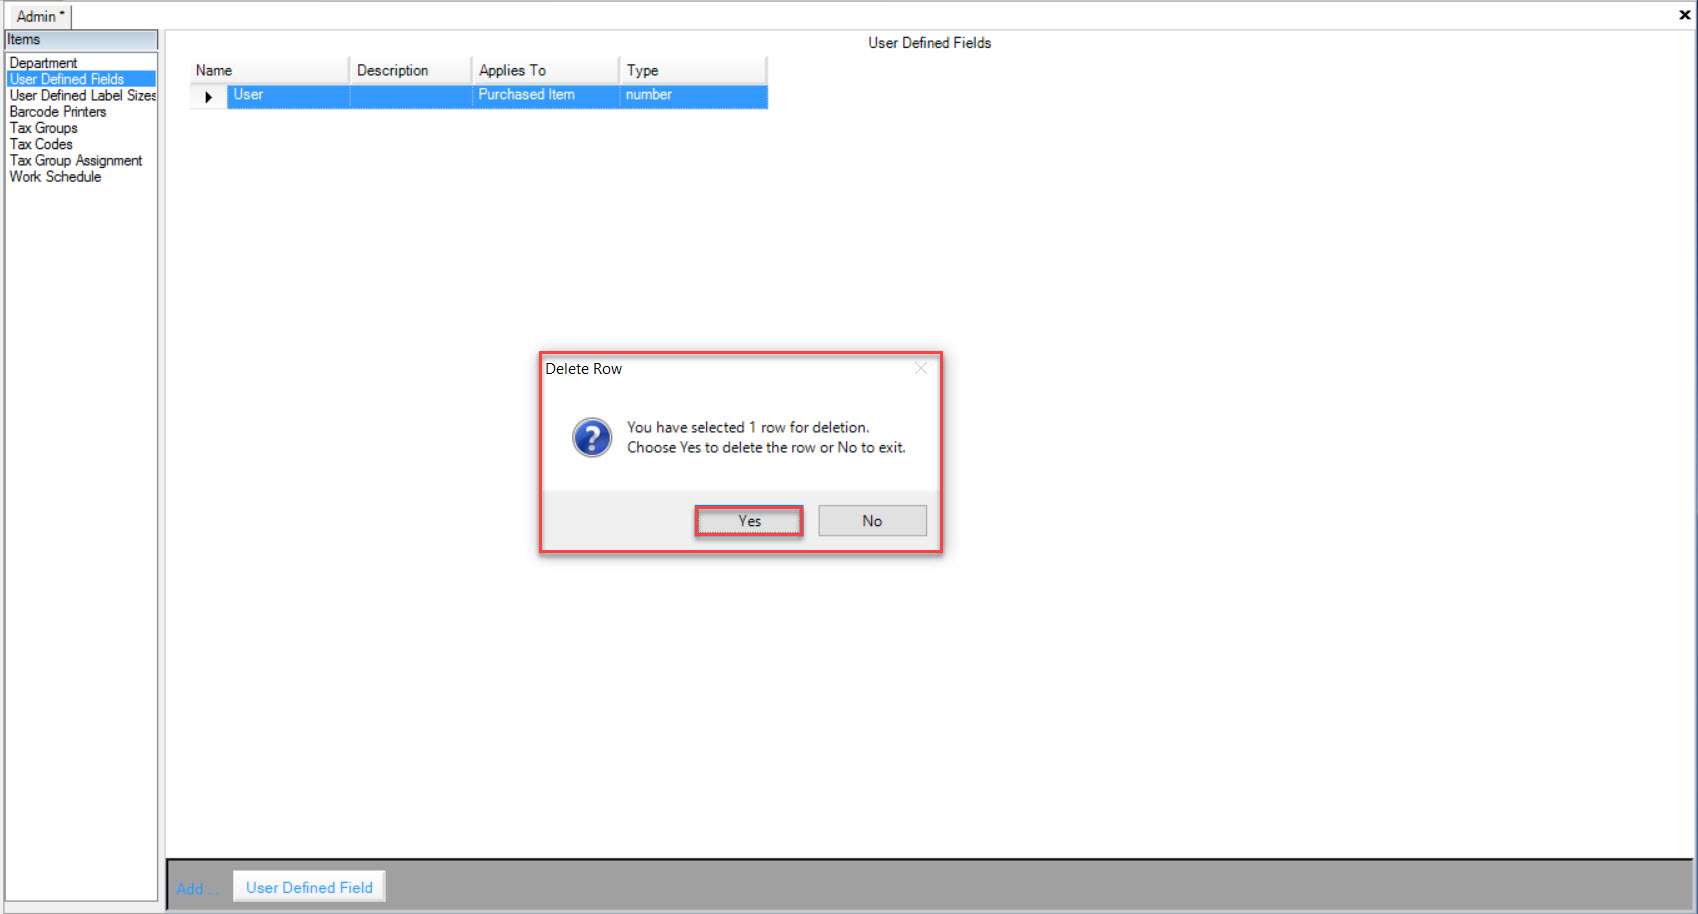
Located the User Defined Field you wish to delete and highlight the appropriate row. Use your Delete key and when the system prompts you, select Yes.
Make sure to save your changes before exiting the screen.
User Defined Label Sizes
To view User Defined Label Sizes, navigate to the  tab and click on the
 ![]() icon. The Admin screen will be displayed.
icon. The Admin screen will be displayed.

Make sure to select the User Defined Label Sizes tab to the left of the Admin screen.
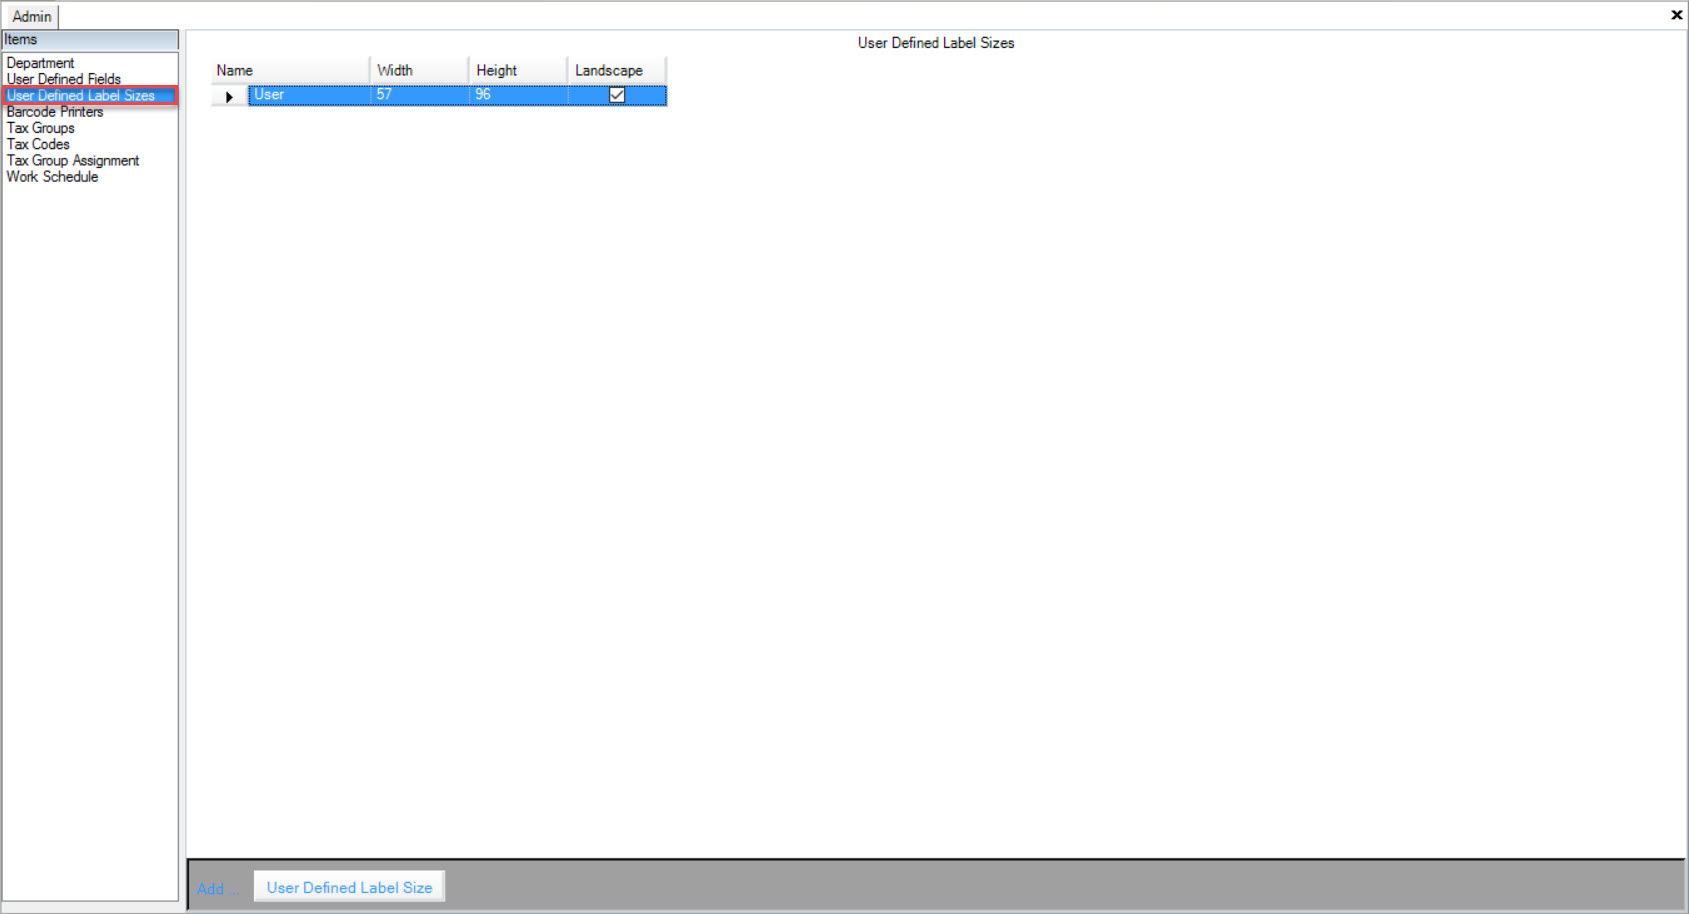
Users will now be able to view all User Defined Label Sizes in the system. The Name, Width, Height, and whether or not it is Landscape will be shown.
Adding a User Defined Label Size
To add a User Defined Label Size, navigate to the  tab and click on the
 ![]() icon. The Admin screen will be displayed.
icon. The Admin screen will be displayed.

Make sure to select the User Defined Label Sizes tab to the left of the Admin screen.

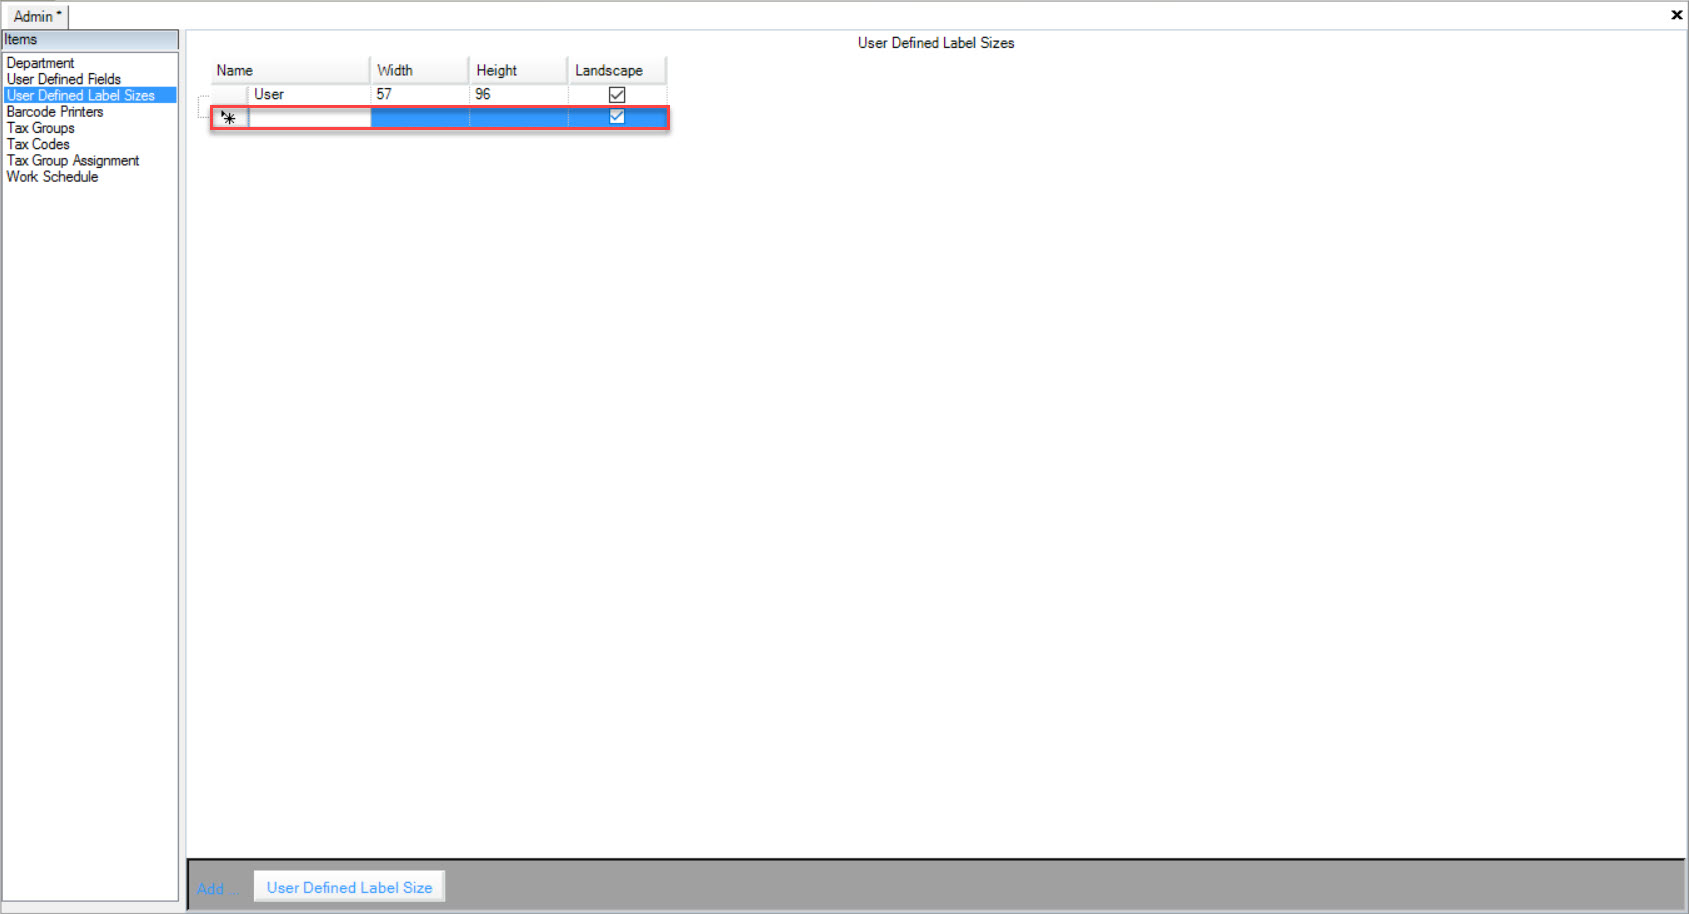
Click on the  button located at the bottom of the screen.
A new row will appear where users can fill in the necessary information such as the Name, Width, Height, and check whether or not the Label is Landscape.
Make sure to save your changes before exiting the screen.
Editing a User Defined Label Size
To add a User Defined Label Size, navigate to the  tab and click on the
 ![]() icon. The Admin screen will be displayed.
icon. The Admin screen will be displayed.

Make sure to select the User Defined Label Sizes tab to the left of the Admin screen.

Located the User Defined Label Size you wish to edit and make the necessary changes by using the appropriate textboxes and checkmark.
Make sure to save your changes before exiting the screen.
Deleting a User Defined Label Size
To delete a User Defined Label Size, navigate to the  tab and click on the
 ![]() icon. The Admin screen will be displayed.
icon. The Admin screen will be displayed.

Make sure to select the User Defined Label Sizes tab to the left of the Admin screen.

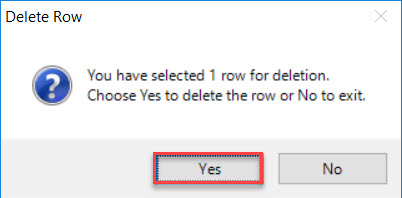
Located the User Defined Label Size you wish to delete and highlight the appropriate row. Use your Delete key and when the system prompts you, select Yes.
Make sure to save your changes before exiting the screen.
Barcode Printers
To view Barcode Printers, navigate to the  tab and click on the
 ![]() icon. The Admin screen will be displayed.
icon. The Admin screen will be displayed.

Make sure to select the Barcode Printers tab to the left of the Admin screen.
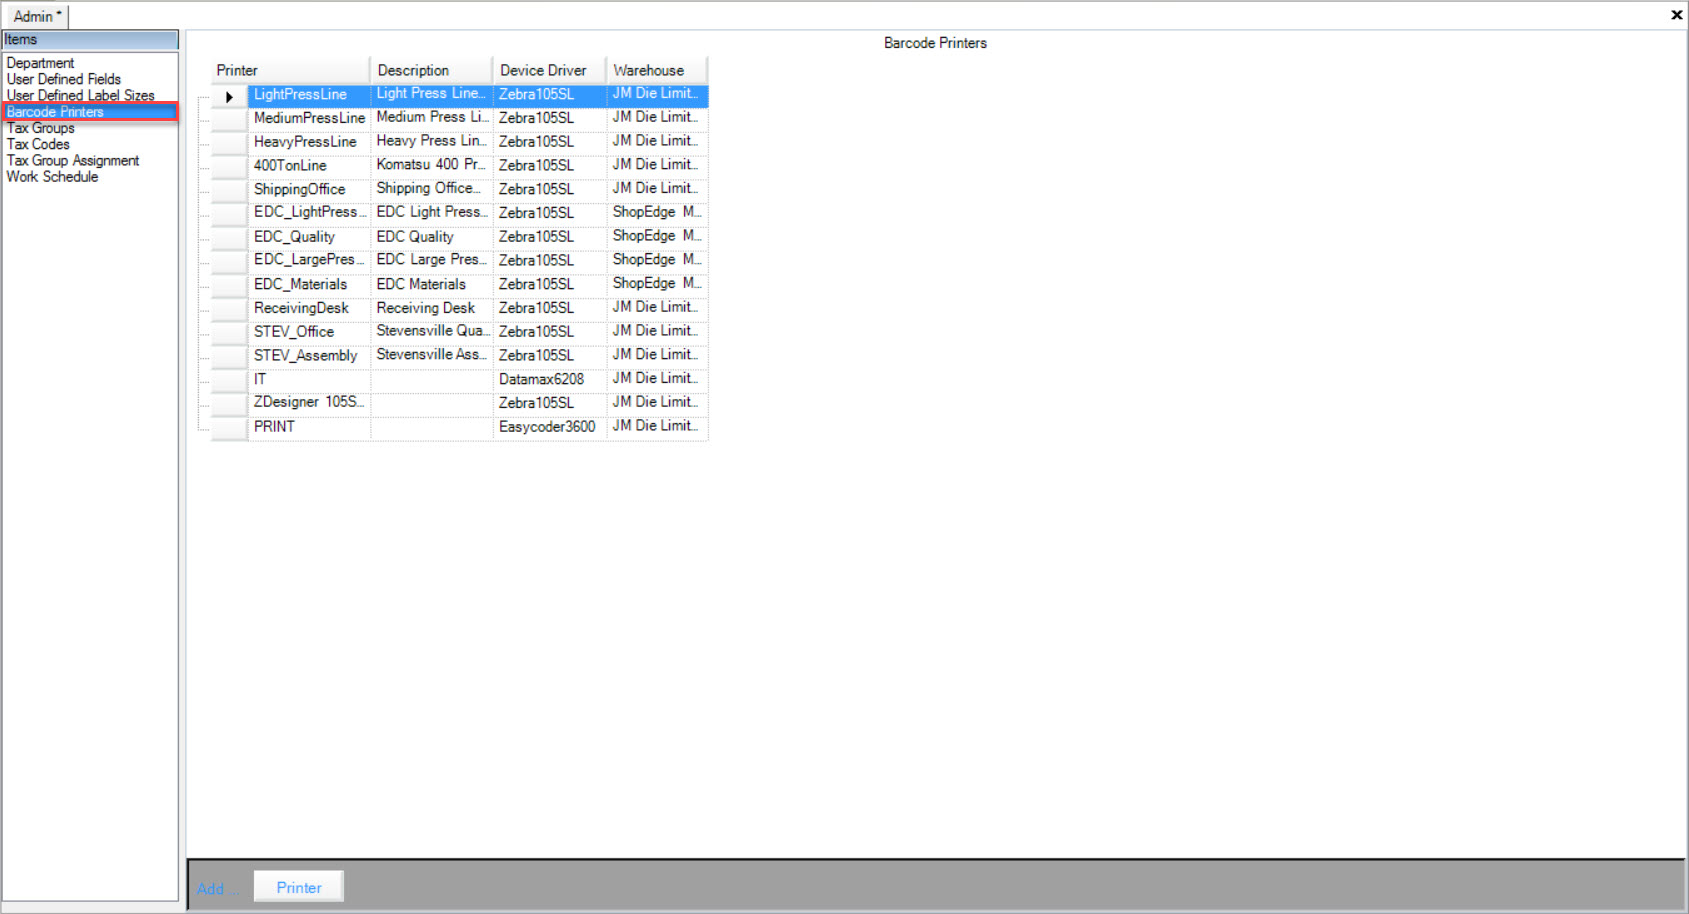
Users will now be able to view all Barcode Printers in the system. The Printers, Descriptions, Device Drivers, and Warehouses will be listed in the screen.
Adding a Barcode Printer
To add a Barcode Printer, navigate to the  tab and click on the
 ![]() icon. The Admin screen will be displayed.
icon. The Admin screen will be displayed.

Make sure to select the Barcode Printers tab to the left of the Admin screen.

Click on the  button located at the bottom of the screen.
A new row will appear where users can fill in the necessary fields such as the Printer Name, Description, Device Driver, and Warehouse.
Make sure to save your changes before exiting the screen.
Editing a Barcode Printer
To edit a Barcode Printer, navigate to the  tab and click on the
 ![]() icon. The Admin screen will be displayed.
icon. The Admin screen will be displayed.

Make sure to select the Barcode Printers tab to the left of the Admin screen.

Locate the Barcode Printer you wish to edit and make the necessary changes using the appropriate textboxes and drop-down menus.
Make sure to save your changes before exiting the screen.
Deleting a Barcode Printer
To delete a Barcode Printer, navigate to the  tab and click on the
 ![]() icon. The Admin screen will be displayed.
icon. The Admin screen will be displayed.

Make sure to select the Barcode Printers tab to the left of the Admin screen.

Locate the Barcode Printer you wish to delete and highlight the appropriate row. Use your Delete key and when the system prompts you, select Yes.
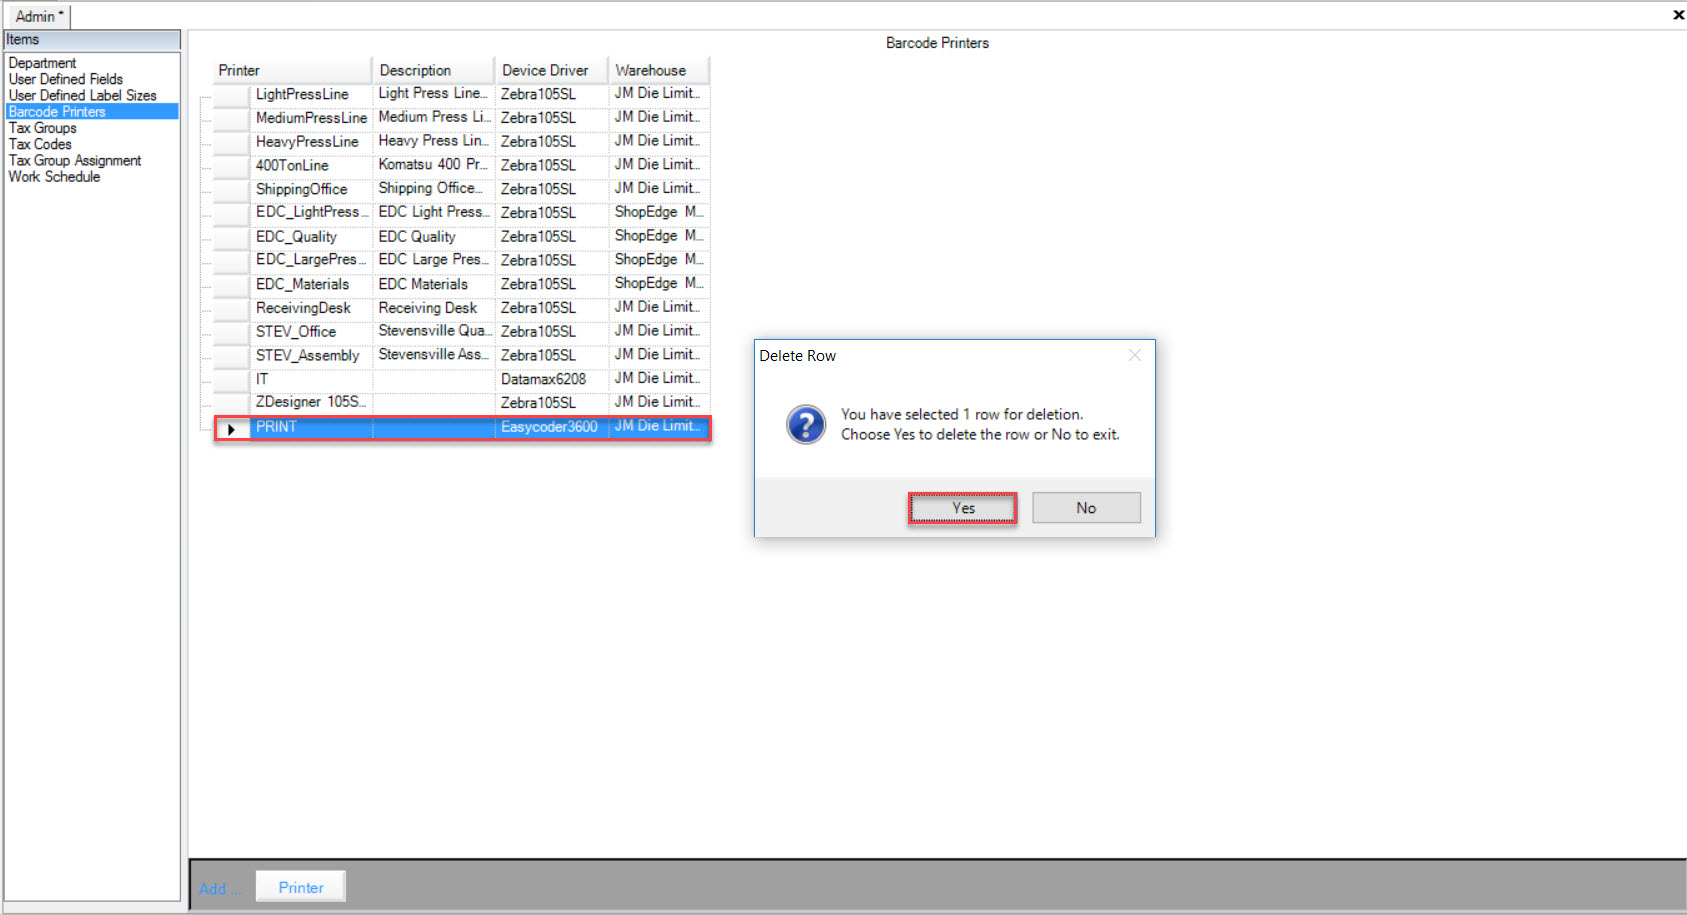
Make sure to save your changes before exiting the screen.
Tax Groups
To view Tax Groups, navigate to the  tab and click on the
 ![]() icon. The Admin screen will be displayed.
icon. The Admin screen will be displayed.

Make sure to select the Tax Groups tab to the left of the Admin screen.
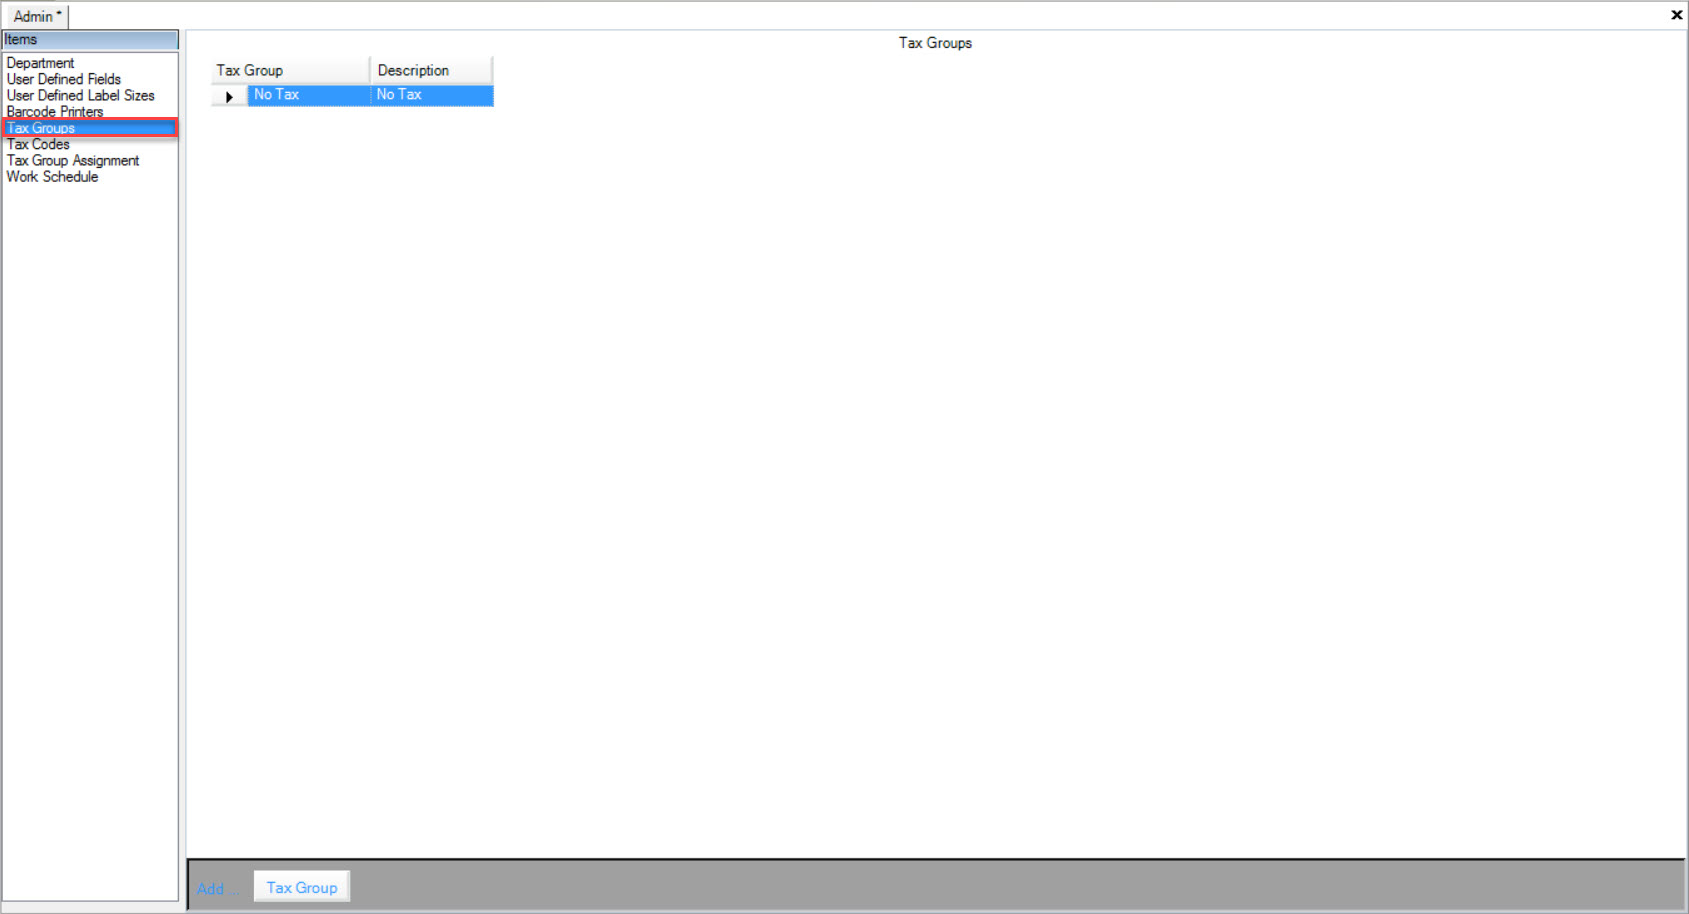
Users will now be able to view all Tax Groups in the system. Tax Group Names, and Descriptions will be shown in the screen.
Adding a Tax Group
To add a Tax Group, navigate to the  tab and click on the
 ![]() icon. The Admin screen will be displayed.
icon. The Admin screen will be displayed.

Make sure to select the Tax Groups tab to the left of the Admin screen.

Click on the  button located at the bottom of the screen.
A new row will appear where users can fill in the necessary fields such as the Tax Group Name, and Description.
Make sure to save your changes before exiting the screen.
Editing a Tax Group
To edit a Tax Group, navigate to the  tab and click on the
 ![]() icon. The Admin screen will be displayed.
icon. The Admin screen will be displayed.

Make sure to select the Tax Groups tab to the left of the Admin screen.

Locate the Tax Group that you wish to edit and make the necessary changes using the appropriate textboxes.
Make sure to save your changes before exiting the screen.
Deleting a Tax Group
To delete a Tax Group, navigate to the  tab and click on the
 ![]() icon. The Admin screen will be displayed.
icon. The Admin screen will be displayed.

Make sure to select the Tax Groups tab to the left of the Admin screen.

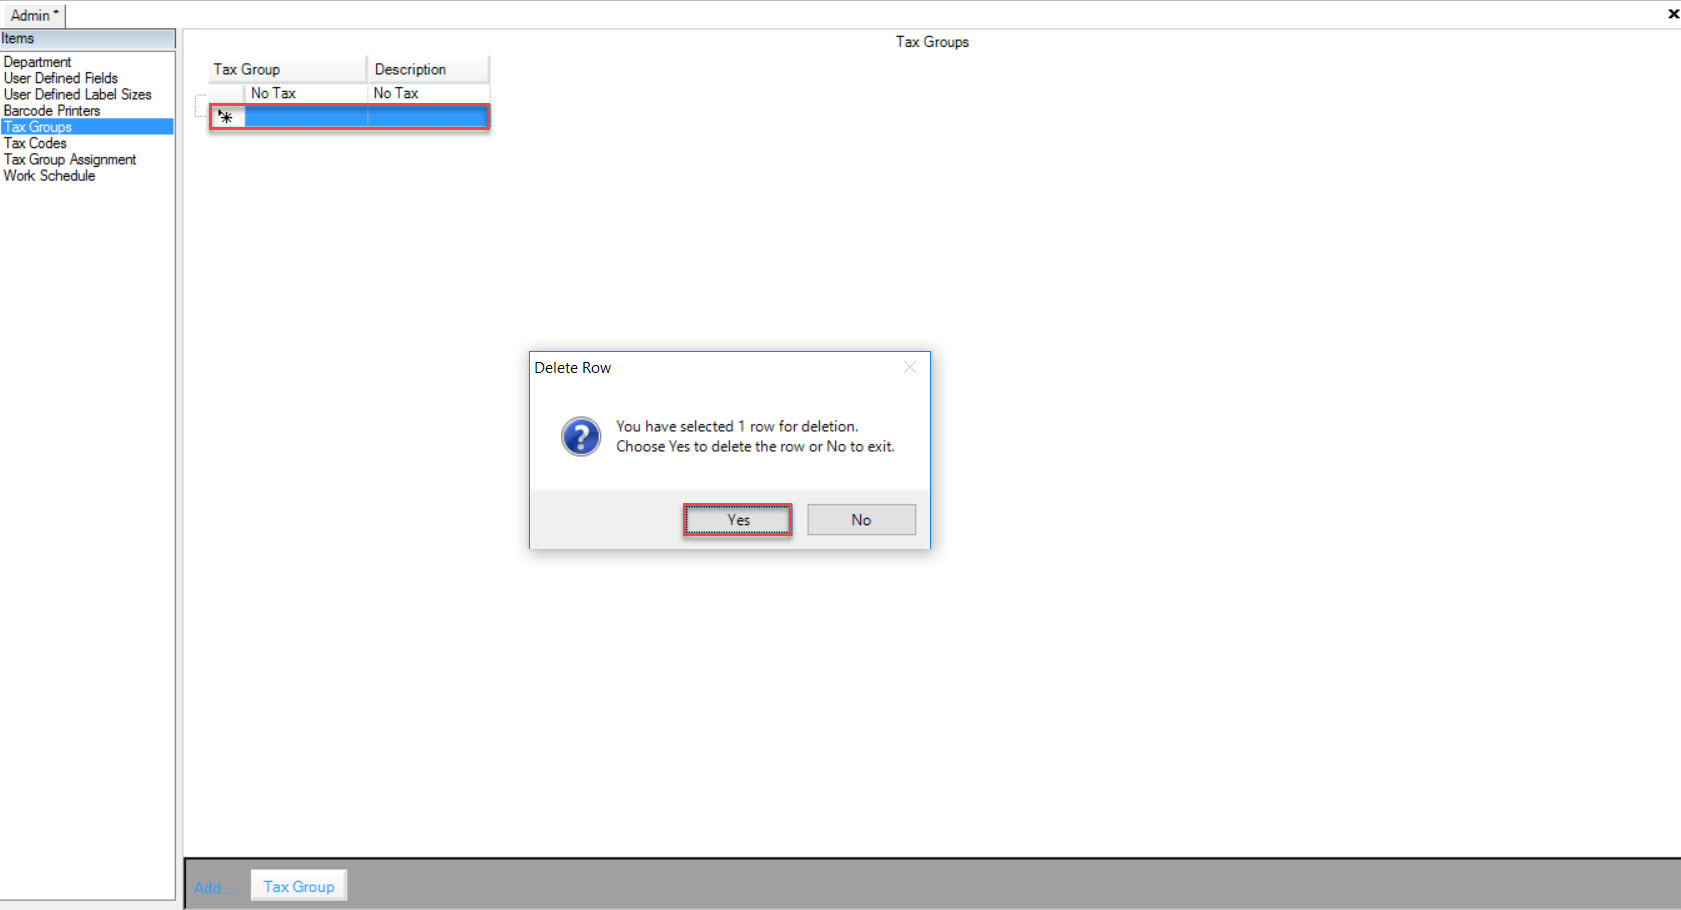
Locate the Tax Group that you wish to delete and highlight the appropriate row. Use your Delete key and when the system prompts you, select Yes.
Note
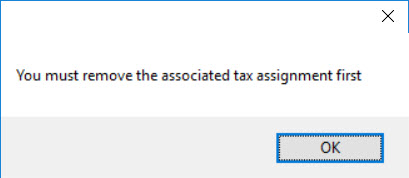
You must delete the associated Tax Group Assignment first before the system will allow you to delete the Tax Group.
Make sure to save your changes before exiting the screen.
Tax Codes
To view Tax Codes, navigate to the  tab and click on the
 ![]() icon. The Admin screen will be displayed.
icon. The Admin screen will be displayed.

Make sure to select the Tax Codes tab to the left of the Admin screen.
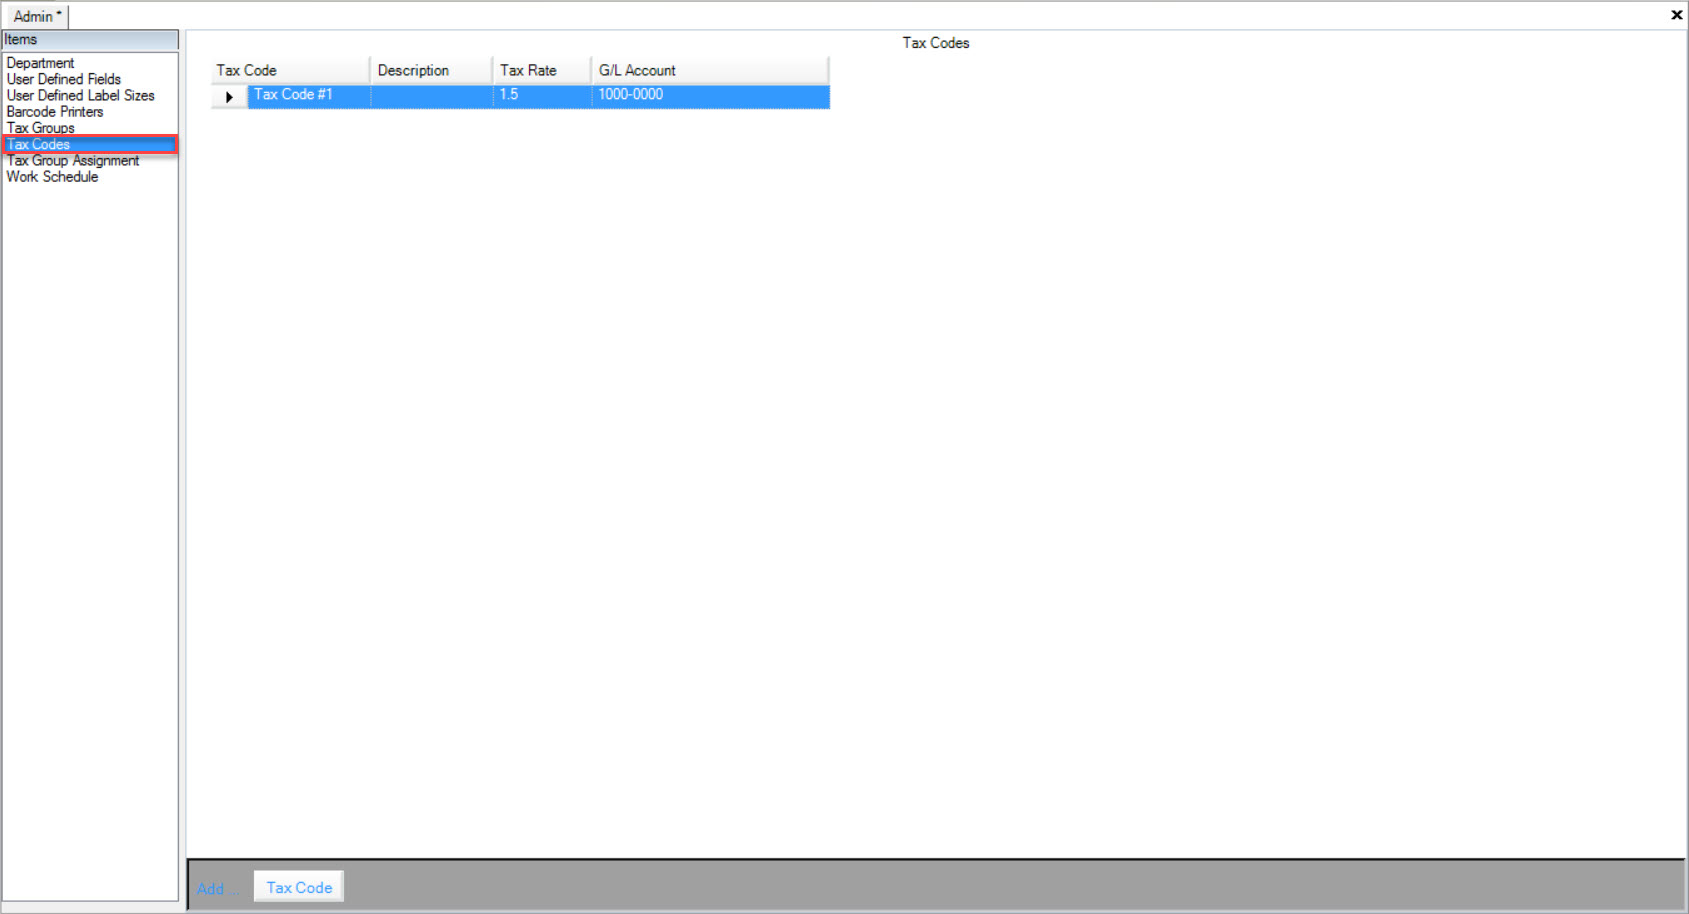
Users will now be able to view all Tax Codes in the system. The Tax Code Name, Description, Tax Rate, and G/L Account of each Tax Code will be displayed.
Adding a Tax Code
To add a Tax Code, navigate to the  tab and click on the
 ![]() icon. The Admin screen will be displayed.
icon. The Admin screen will be displayed.

Make sure to select the Tax Codes tab to the left of the Admin screen.

Click on the  button located at the bottom of the screen.
A new row will appear where users can fill in the necessary fields such as the Tax Code Name, Description, Tax Rate, and G/L Account.
Make sure to save your changes before exiting the screen.
Editing a Tax Code
To edit a Tax Code, navigate to the  tab and click on the
 ![]() icon. The Admin screen will be displayed.
icon. The Admin screen will be displayed.

Make sure to select the Tax Codes tab to the left of the Admin screen.

Locate the Tax Code you wish to edit and make the necessary changes using the appropriate textboxes and drop-down menu.
Make sure to save your changes before exiting the screen.
Deleting a Tax Code
To delete a Tax Code, navigate to the  tab and click on the
 ![]() icon. The Admin screen will be displayed.
icon. The Admin screen will be displayed.

Make sure to select the Tax Codes tab to the left of the Admin screen.

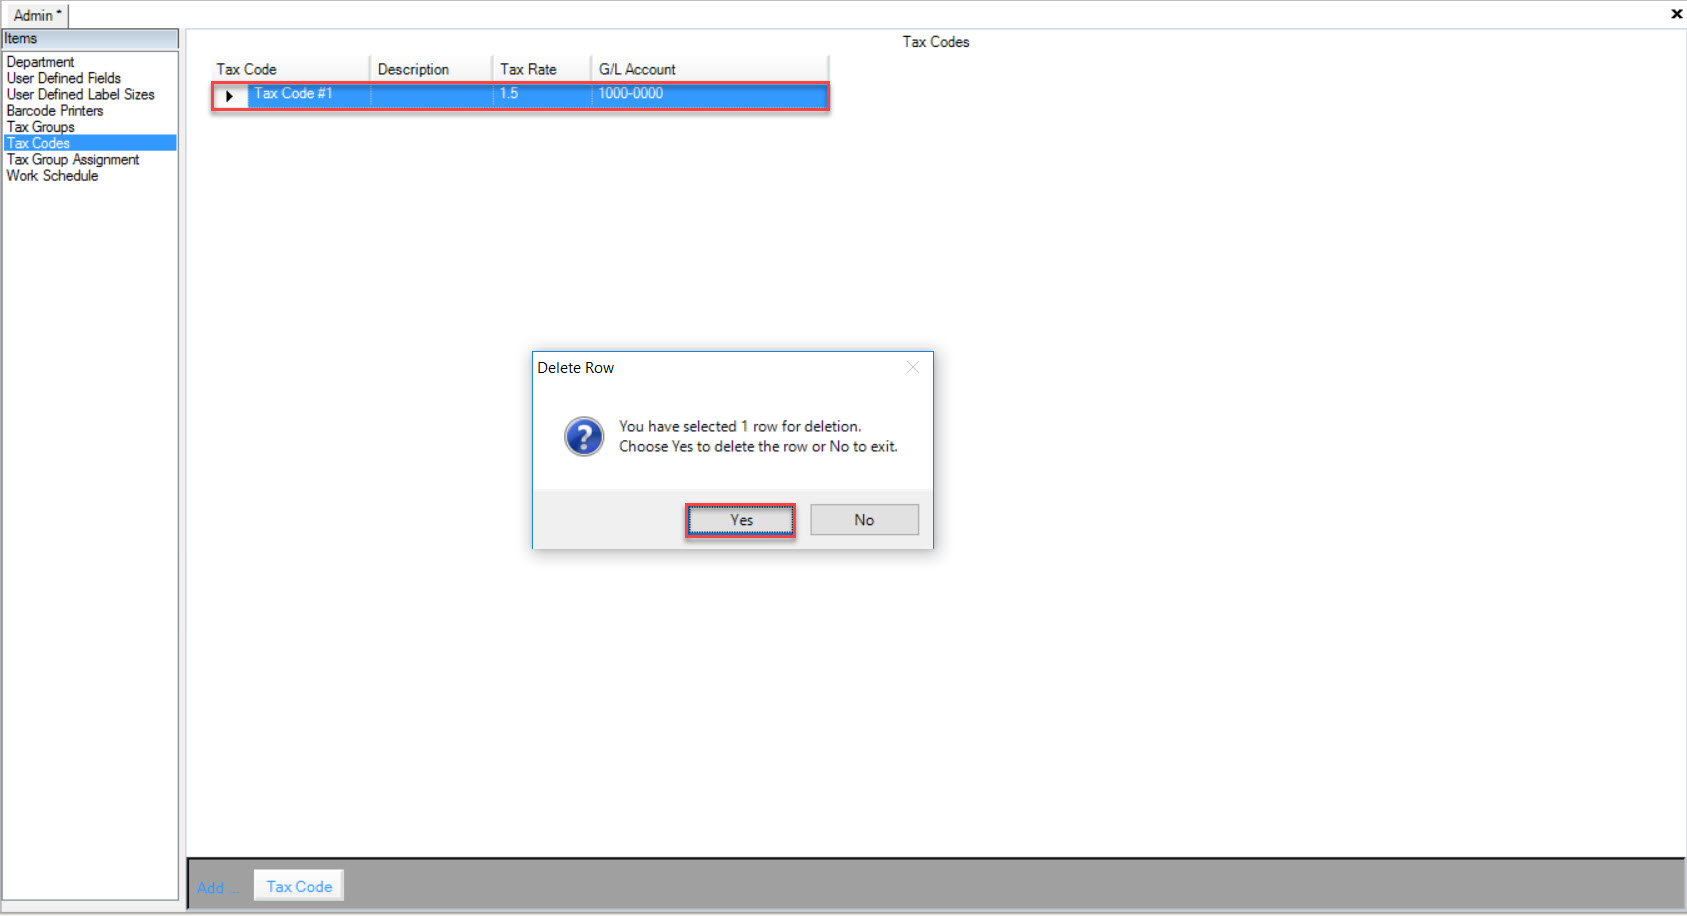
Locate the Tax Code you wish to delete and highlight the appropriate row. Use your Delete key and when the system prompts you, select Yes.
Make sure to save your changes before exiting the screen.
Tax Group Assignments
To view Tax Group Assignments, navigate to the  tab and click on the
 ![]() icon. The Admin screen will be displayed.
icon. The Admin screen will be displayed.

Make sure to select the Tax Group Assignments tab to the left of the Admin screen.
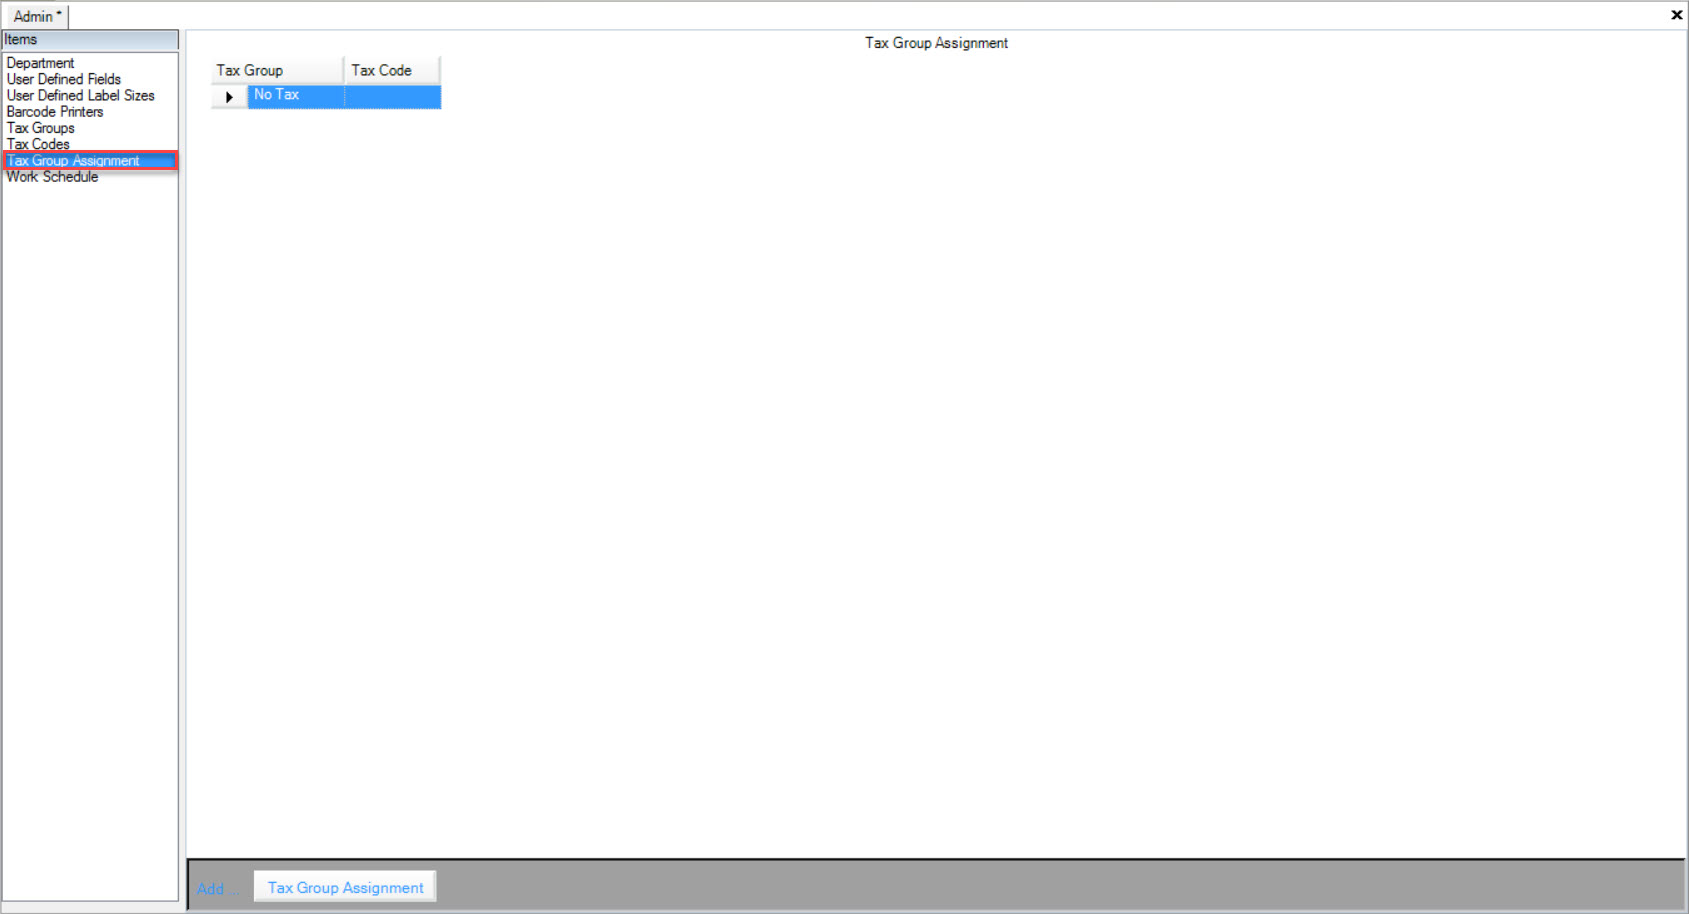
Users will now be able to view all Tax Group Assignments in the system. The Tax Group, and Tax Code for each Tax Group Assignment will be displayed.
Adding a Tax Group Assignment
To add a Tax Group Assignments, navigate to the  tab and click on the
 ![]() icon. The Admin screen will be displayed.
icon. The Admin screen will be displayed.

Make sure to select the Tax Group Assignments tab to the left of the Admin screen.

Click on the  button located at the bottom of the screen.
A new row will appear where users can fill in the necessary fields such as the Tax Group, and Tax Code.
Make sure to save your changes before exiting the screen.
Editing a Tax Group Assignment
To edit a Tax Group Assignment, navigate to the  tab and click on the
 ![]() icon. The Admin screen will be displayed.
icon. The Admin screen will be displayed.

Make sure to select the Tax Group Assignments tab to the left of the Admin screen.

Locate the Tax Group Assignment you wish to edit and make the necessary changes using the appropriate textboxes or drop-down menus.
Make sure to save your changes before exiting the screen.
Deleting a Tax Group Assignment
To delete a Tax Group Assignment, navigate to the  tab and click on the
 ![]() icon. The Admin screen will be displayed.
icon. The Admin screen will be displayed.

Make sure to select the Tax Group Assignments tab to the left of the Admin screen.

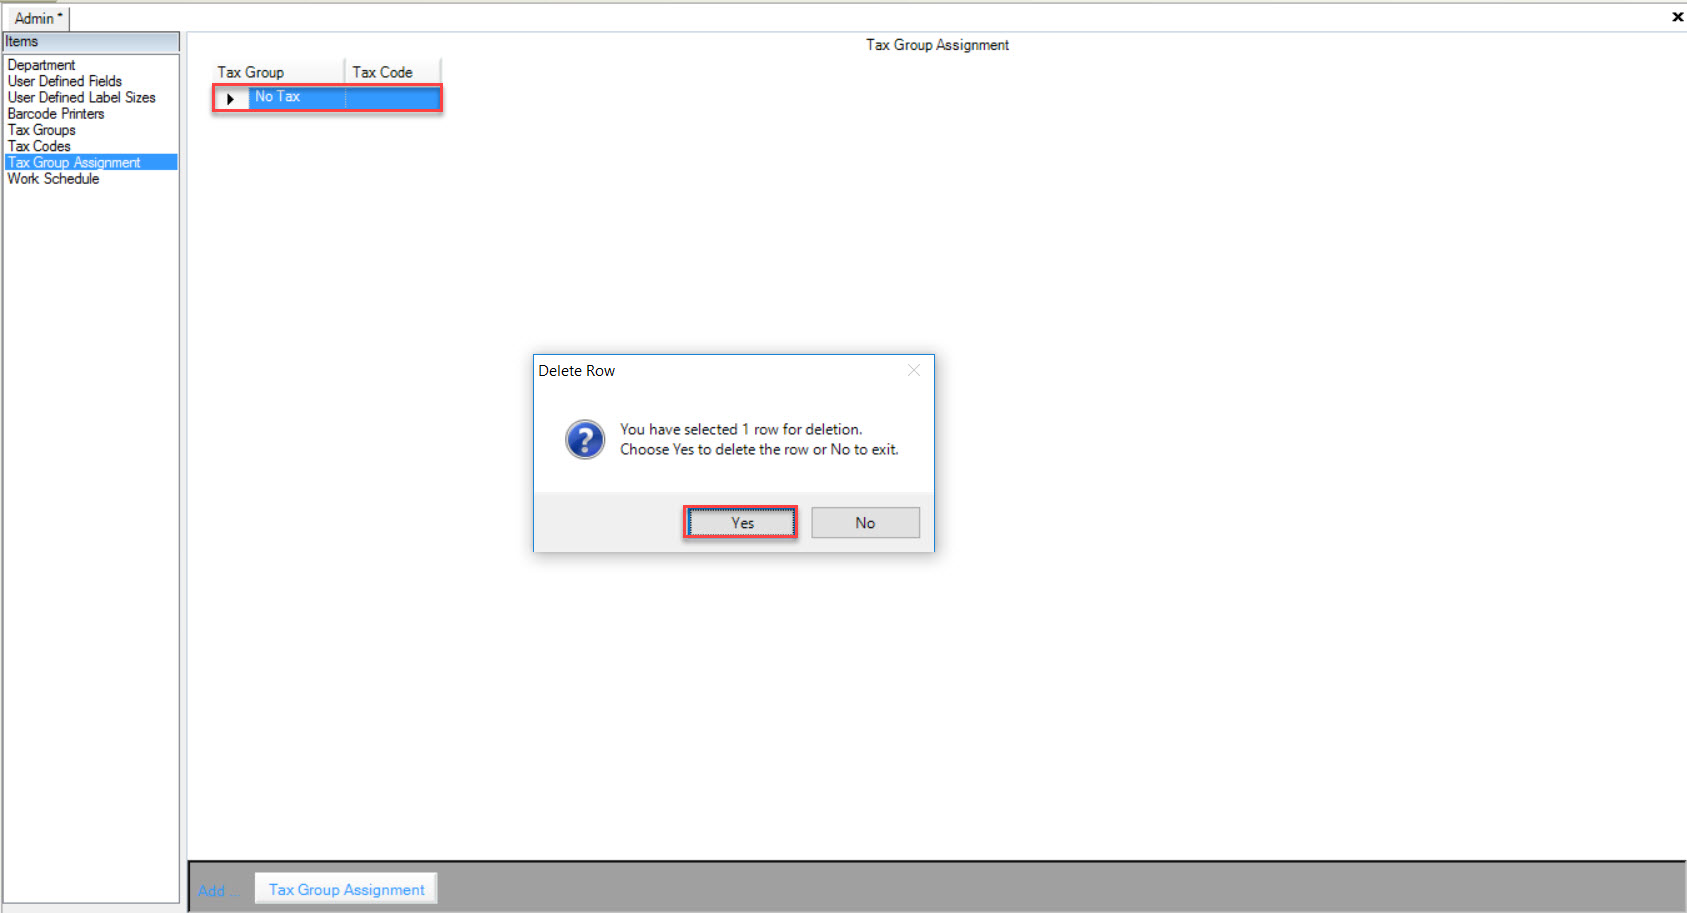
Locate the Tax Group Assignment you wish to delete and highlight the appropriate row. Use your Delete key and when the system prompts you, select Yes.
Note
Now you will be able to delete the appropriate Tax Group matching the Tax Group Assignment that was just deleted.
Make sure to save your changes before exiting the screen.
Work Schedules
To view Work Schedules, navigate to the  tab and click on the
 ![]() icon. The Admin screen will be displayed.
icon. The Admin screen will be displayed.

Make sure to select the Work Schedule tab to the left of the Admin screen.
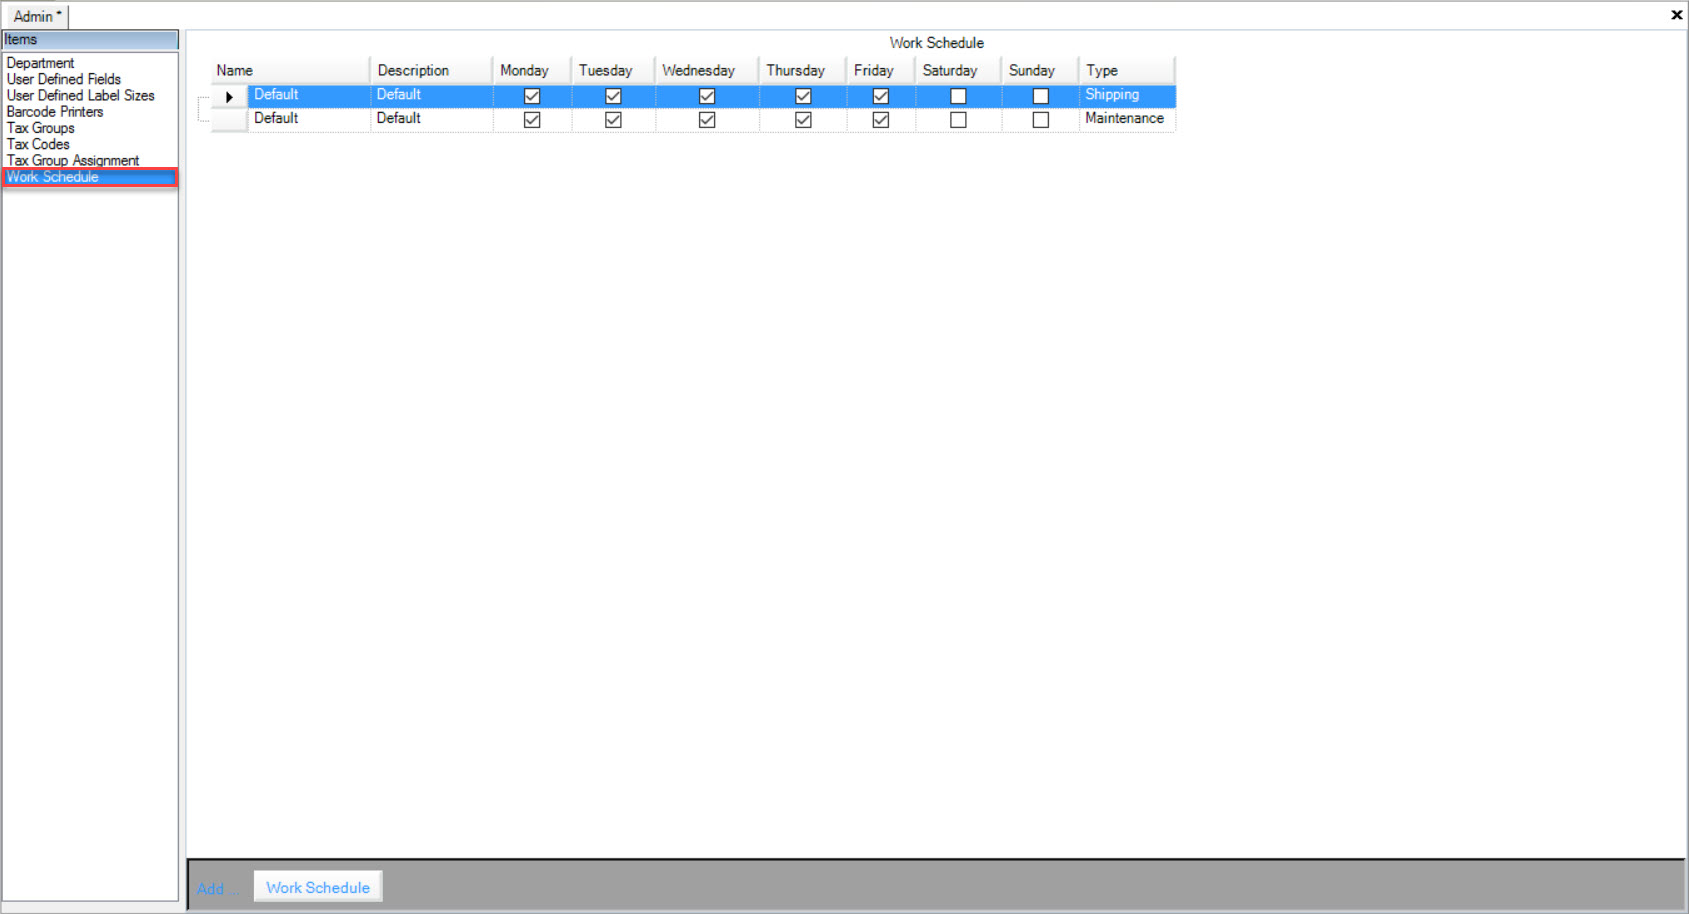
Users will be able to view all Work Schedules in the system. The Name, Description, selected Days, and Type for each Work Schedule will be displayed.
Adding a Work Schedule
To add a Work Schedule, navigate to the  tab and click on the
 ![]() icon. The Admin screen will be displayed.
icon. The Admin screen will be displayed.

Make sure to select the Work Schedule tab to the left of the Admin screen.

Click on the  button located at the bottom of the screen.
A new row will appear where users can fill in the necessary fields such as the Name, Description, select the Days, and the Type.
Make sure to save your changes before exiting the screen.
Editing a Work Schedule
To edit a Work Schedule, navigate to the  tab and click on the
 ![]() icon. The Admin screen will be displayed.
icon. The Admin screen will be displayed.

Make sure to select the Work Schedule tab to the left of the Admin screen.

Locate the Work Schedule you wish to edit and make the necessary changes using the appropriate textboxes, checkboxes, and drop-down menus.
Make sure to save your changes before exiting the screen.
Deleting a Work Schedule
To delete a Work Schedule, navigate to the  tab and click on the
 ![]() icon. The Admin screen will be displayed.
icon. The Admin screen will be displayed.

Make sure to select the Work Schedule tab to the left of the Admin screen.

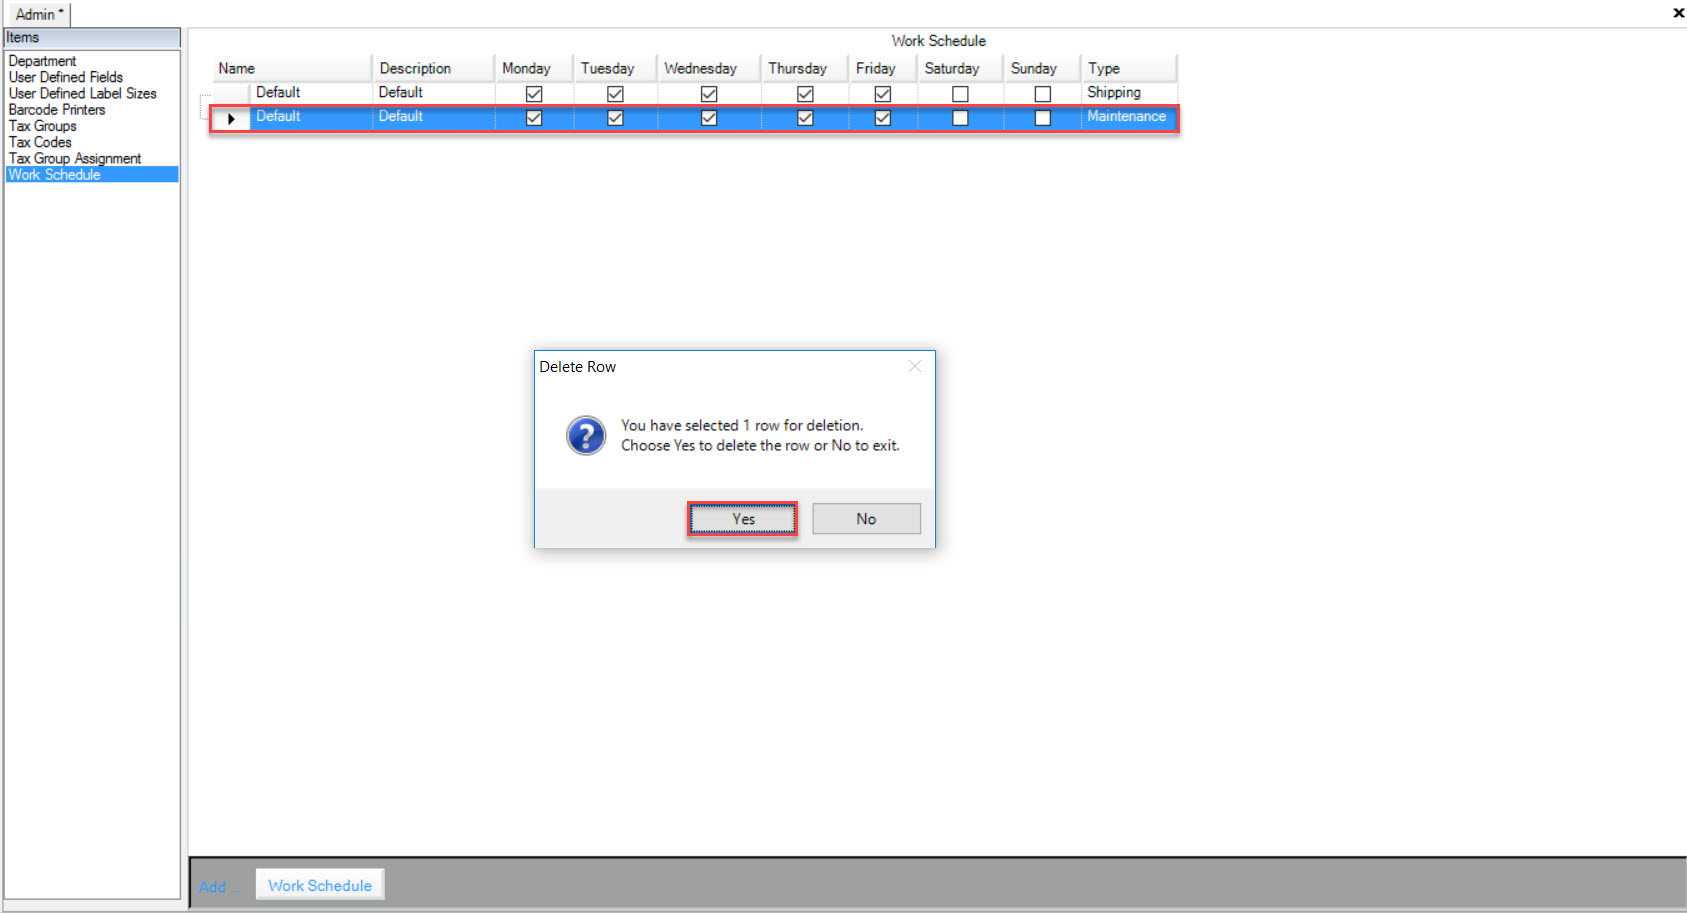
Locate the Work Schedule you wish to delete and highlight the appropriate row. Use your Delete key and when the system prompts you, select Yes.
Make sure to save your changes before exiting the screen.