Barcodes
Barcodes are an integral part of the ShopEdge system for tracking Inventory, as well as Shipping and Receiving. The system includes an integrated Barcode designer to design and maintain all Barcodes that you could need.
To view Barcodes, navigate to the  tab and click on the
  icon.
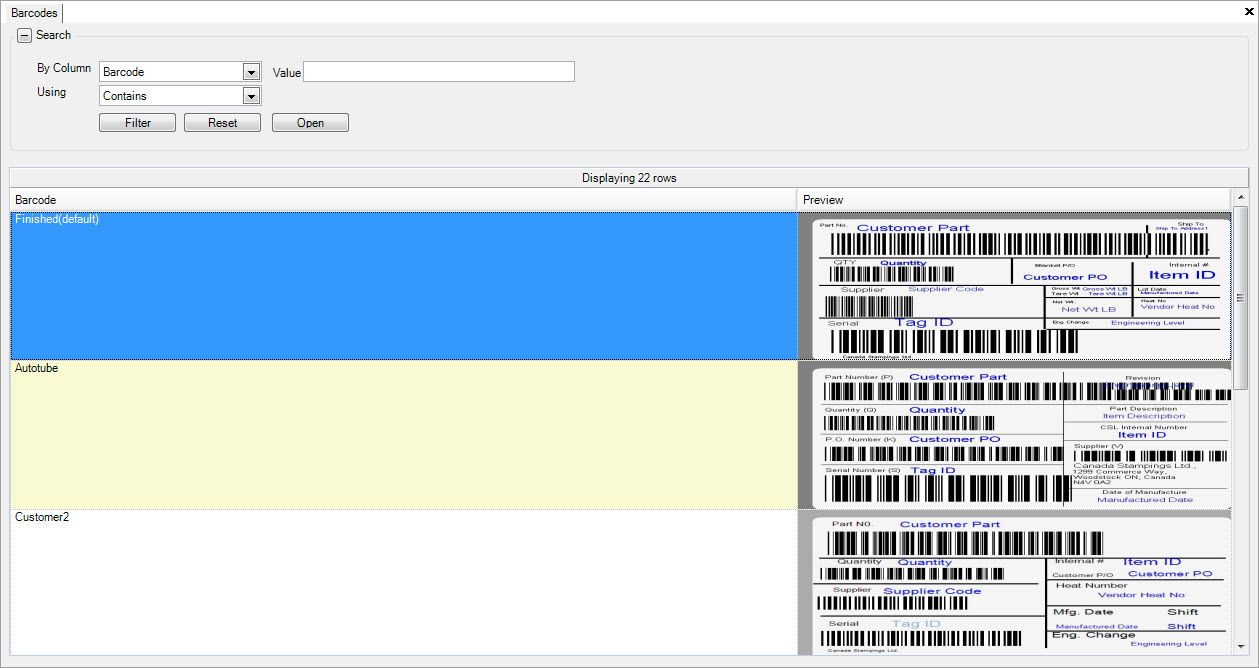
This will open the Barcodes screen, where you can view and maintain all existing Barcodes in the system.
icon.
This will open the Barcodes screen, where you can view and maintain all existing Barcodes in the system.
Editing Barcodes
To edit a Barcode, navigate to the tab and click on the icon. This will open the Barcodes
screen that lists all existing Barcodes in the system.
Locate the Barcode you wish to edit and double-click on the appropriate row. This will open the Barcode detail screen.
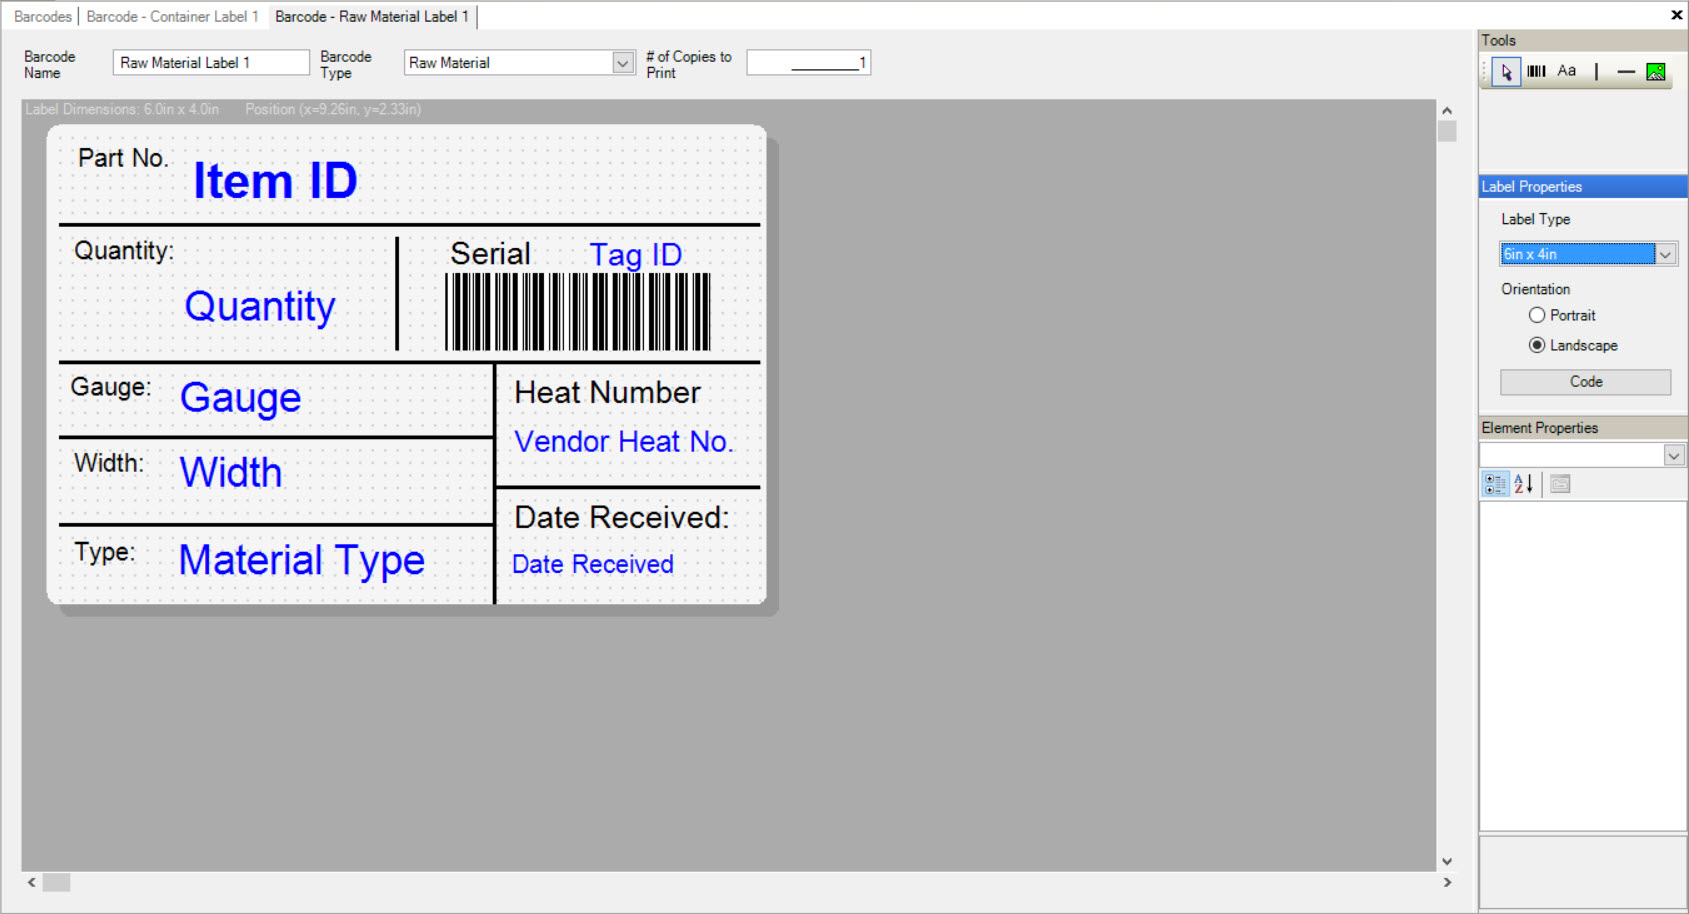
The editing tools are located to the right side of the screen, including Tools, and Label and Element Properties.
Make the necessary changes and save before exiting the screen.
Designing a New Barcode
There are three ways in the system to design a new barcode label. The first way is to press the Ctrl + Shift + U keys. The second way is to navigate to File > New > Barcode.
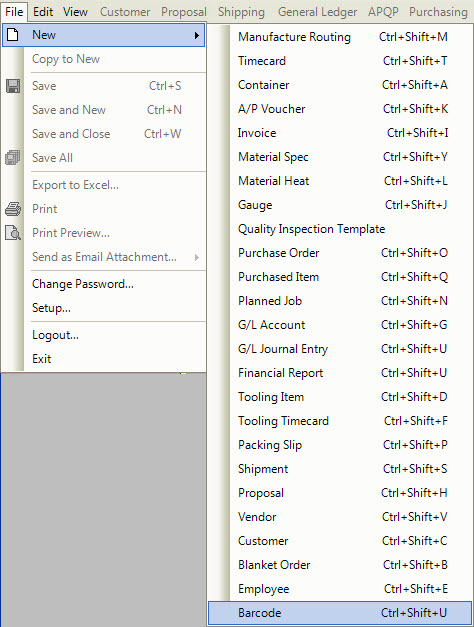
The last way is to click on the  button, and then on the Barcode option.
All of these three options will open a new Barcode screen.
You can also copy an existing Barcode Label and create a new label with all of the same elements and design.
To do so, open the Barcode you wish to copy. Under the File menu, select Copy to New. The system will create a new Barcode with the same name and include the suffix “copy”.
Make sure to give the Barcode a new name before saving your changes.
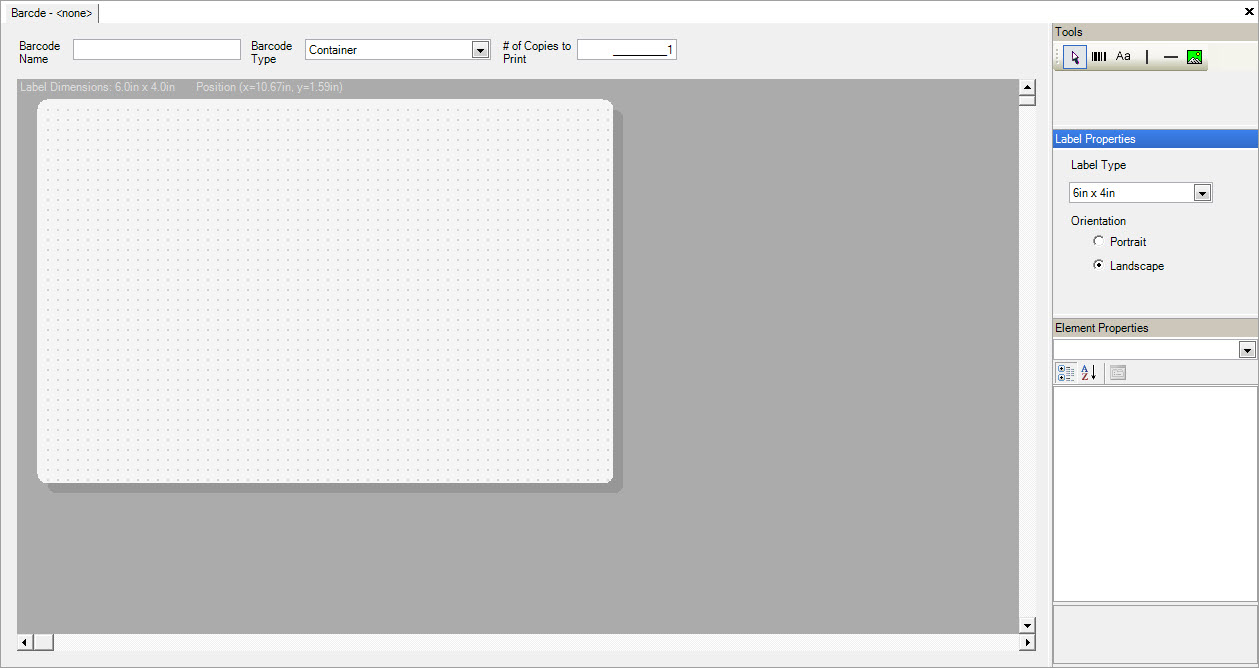
Naming a New Barcode
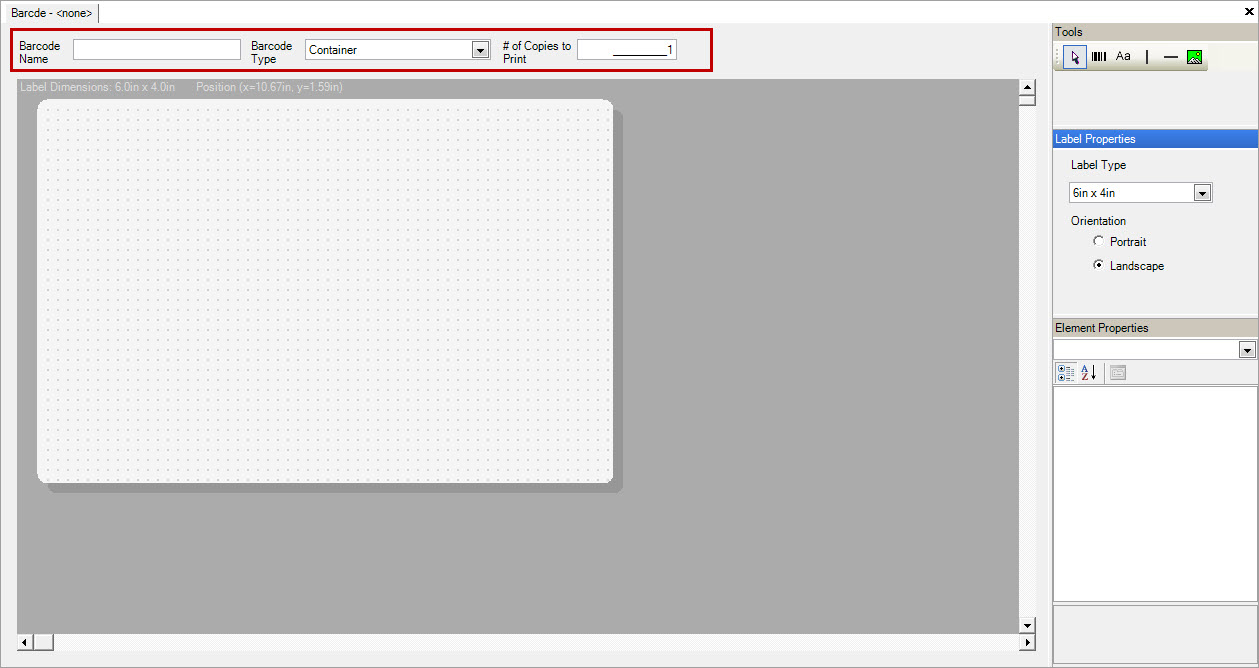
There is standard Barcode information that needs to be entered:
- Barcode Name - Name used to identify the Barcode Label
- Barcode Type - Type of Barcode Label which defines the data available to be displayed on the label
- Container - Container Label
- Master - Master Label
- Shipping - Shipping Label
- Raw Material - Raw Material Label
- Gauge - Gauge Label
- # of Copies to Print - Number of copies that will be printed
The next step is to define the Barcode layout.
Defining a Barcode Layout
To define the Barcode size and layout, use the Label Properties menu to the right of the screen.
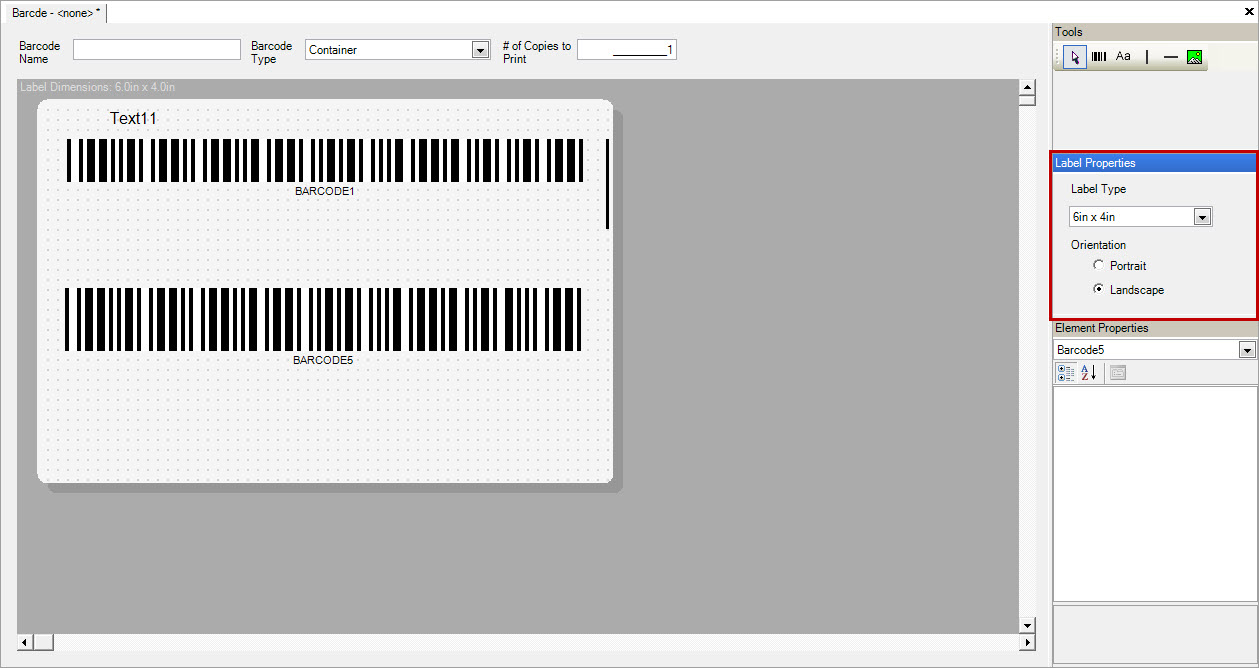
- Label Type - Size of the Label is the length and width and can be selected from the drop-down list
- Orientation - Portrait or Landscape
The next step is to add various elements to the Barcode label.
Adding a New Barcode Element
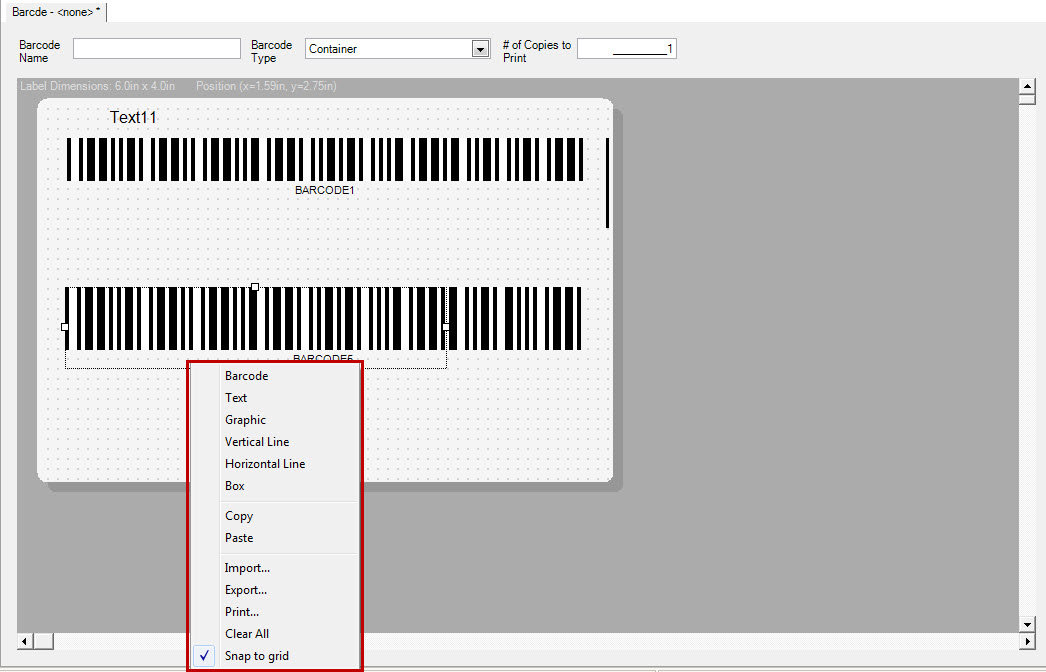
To the right of the screen, under the Tools menu, you can select a new element to add to the Barcode, such as a Barcode, Text, Line, or Image.
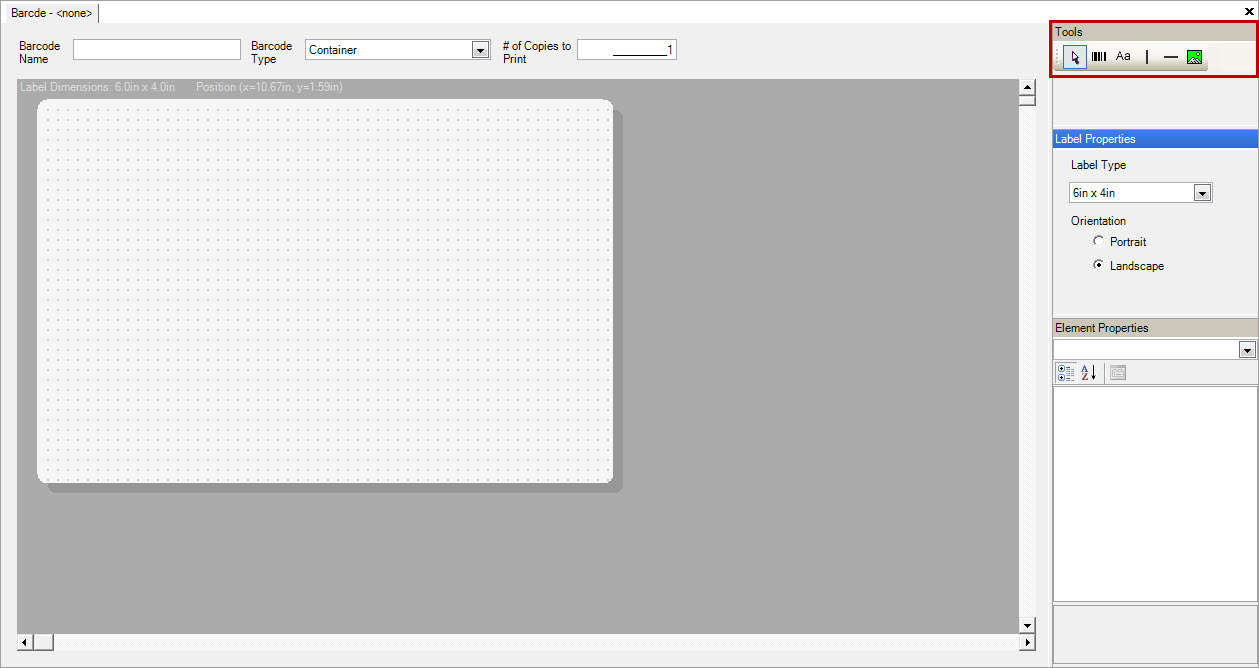
 - Barcode
 - Text
 - Vertical Line
 - Horizontal Line
 - Image
Using the mouse, select the element and drag it to the position required on the label layout.
Once you have added a new element, you can then select it using the  Pointer Tool, and modify the Element’s Properties located at the bottom right of the screen.
You can also use the quick launch menu to add new elements to the Barcode by right-clicking on the Barcode to view the menu.
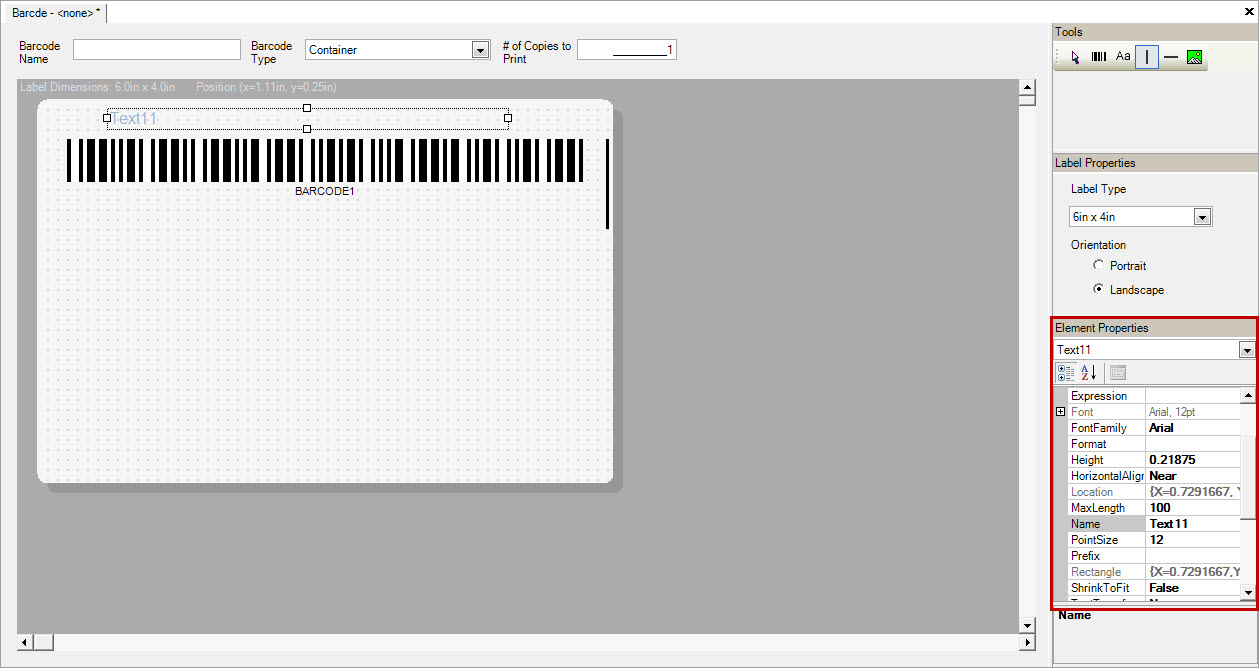
Once you have added a new Element to the Barcode, you can select it by clicking on it. Then, you can edit the Element Properties under the Element Properties section.
The available Element Properties depends on the type of Element you have added. For the definition of each Element Property, please see the documentation section called Description of Element Properties.
Adding Barcode Images
When adding images to a Barcode, select the icon and drag it onto the Barcode. A black box will appear on the Barcode.
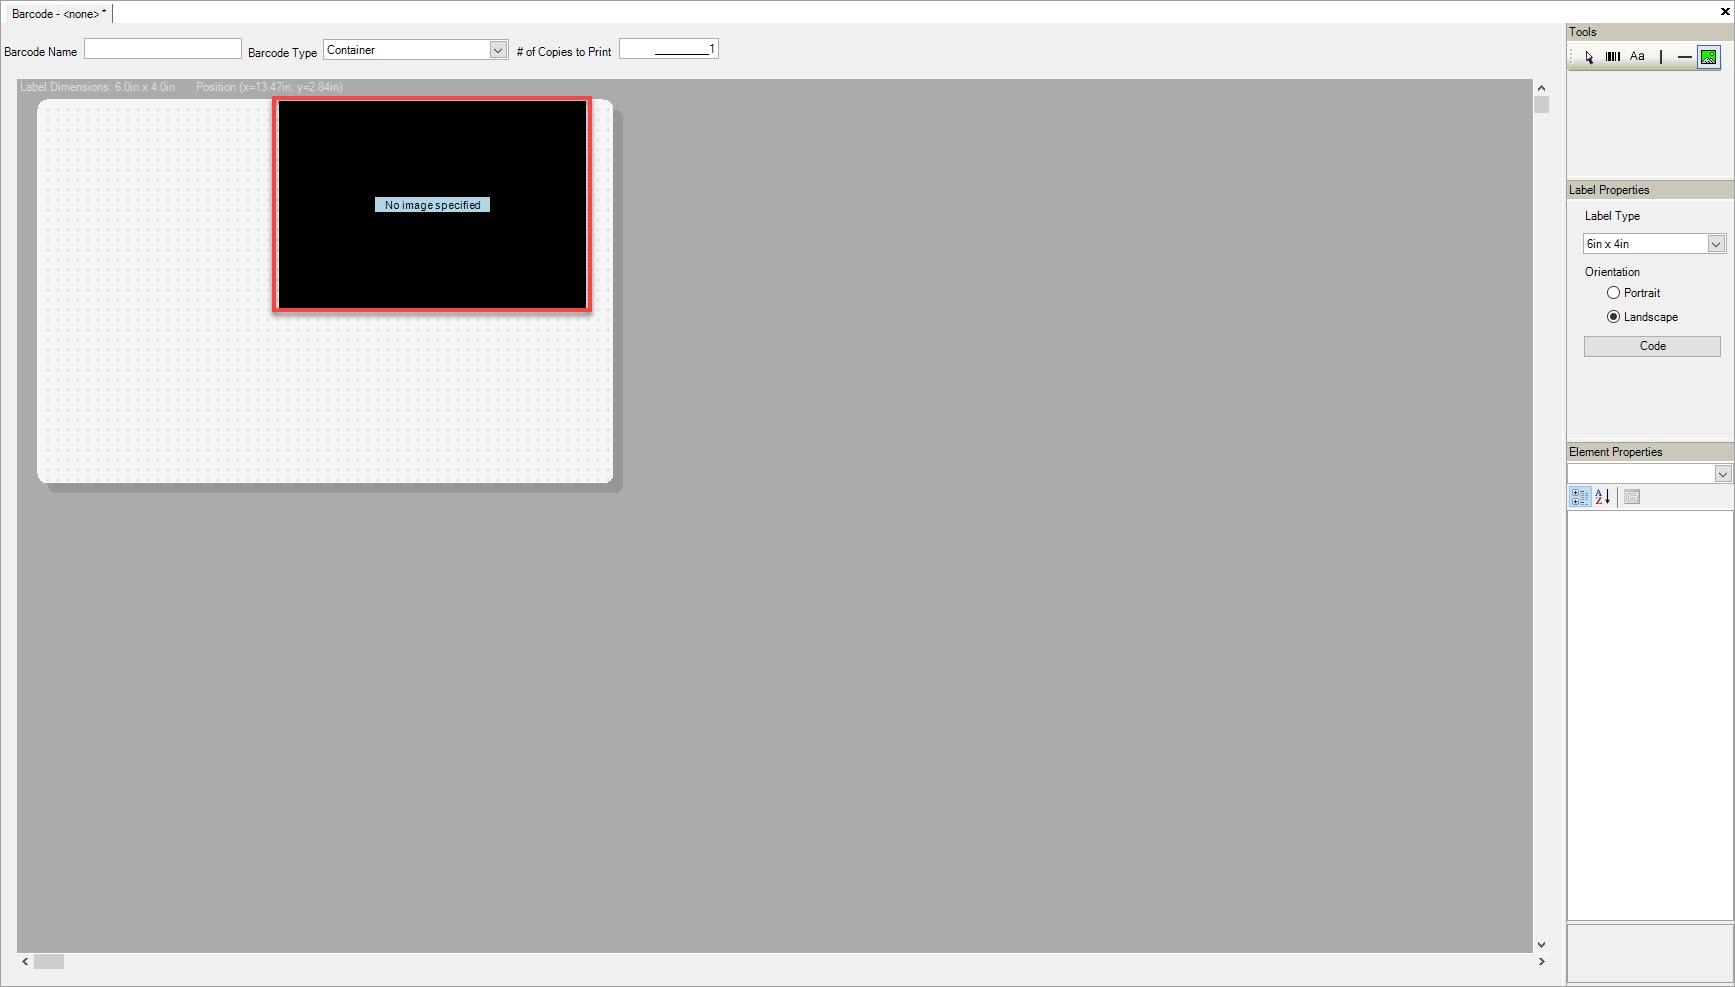
Click on the black box so that the Element Properties appear to the bottom right of the screen.
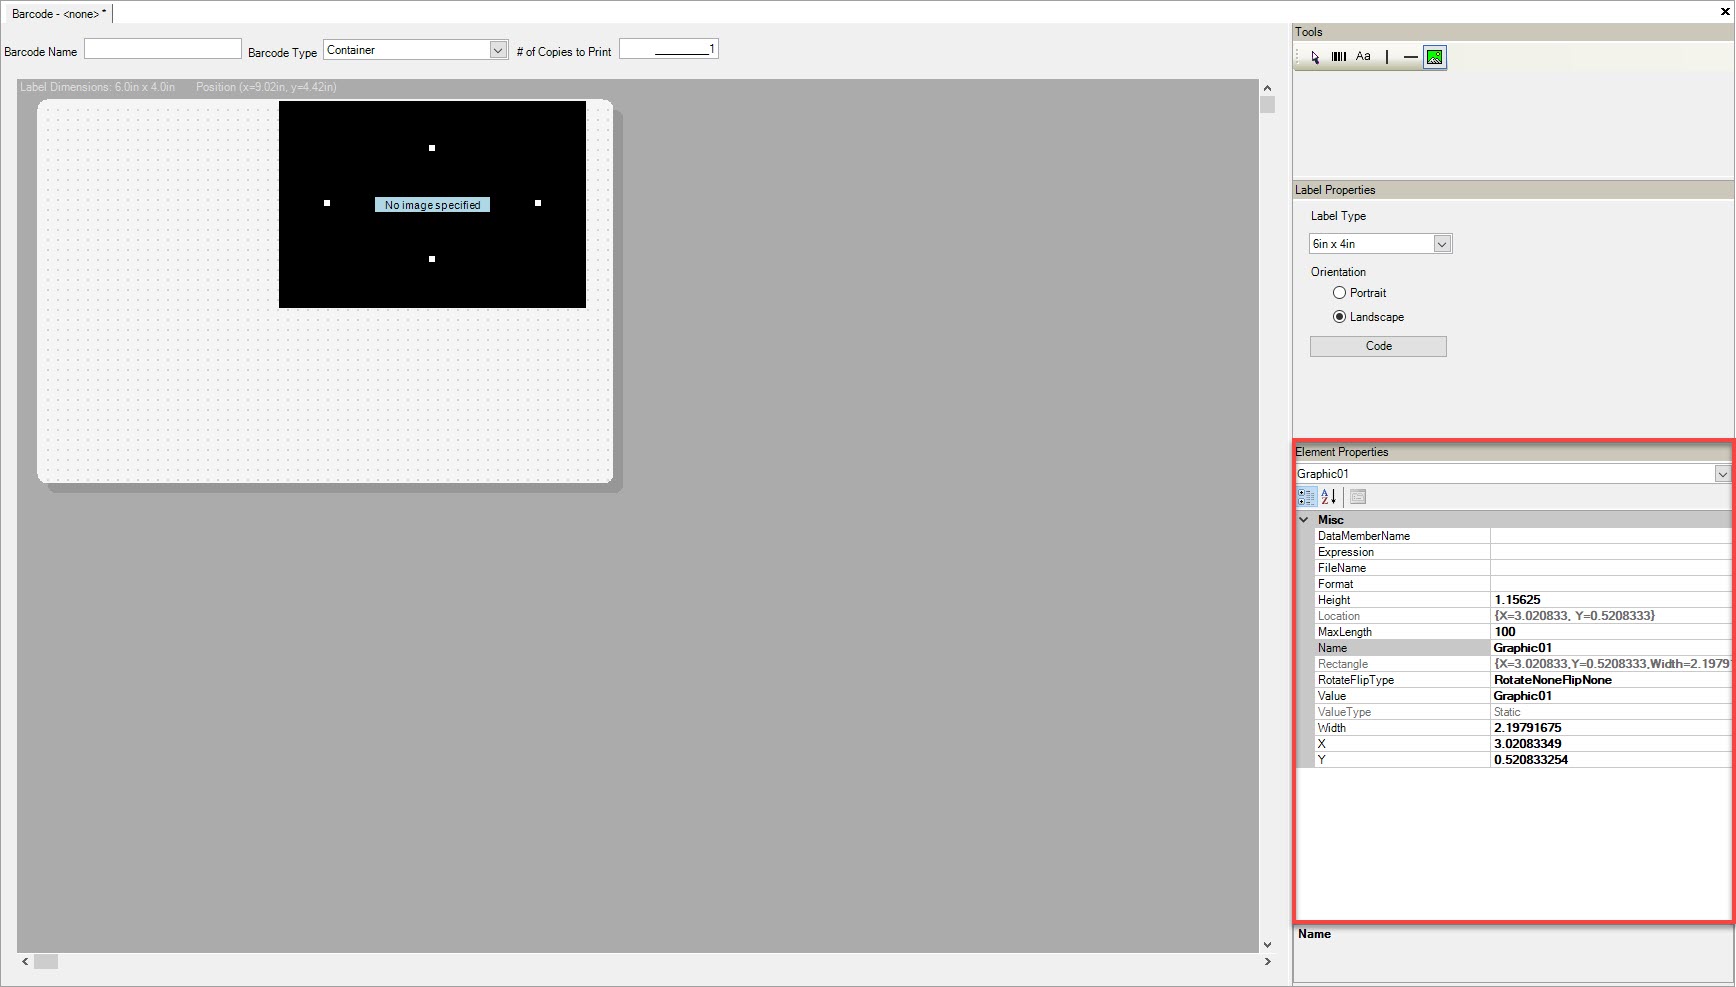
Make sure to select the lookup box for the FileName located under the Element Properties.

A window will appear where users can search and select an image to upload as the file. Once a file is selected, select Open.
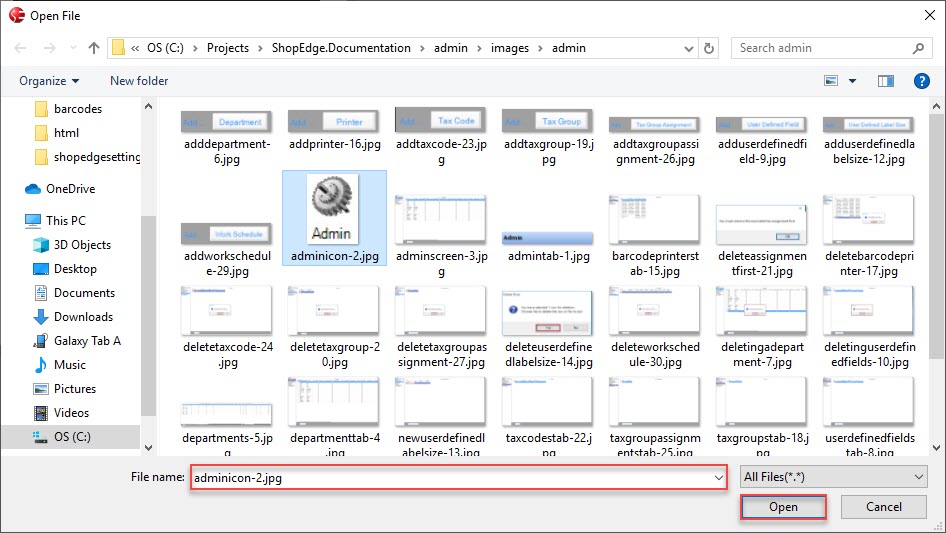
The selected image will appear on the Barcode.
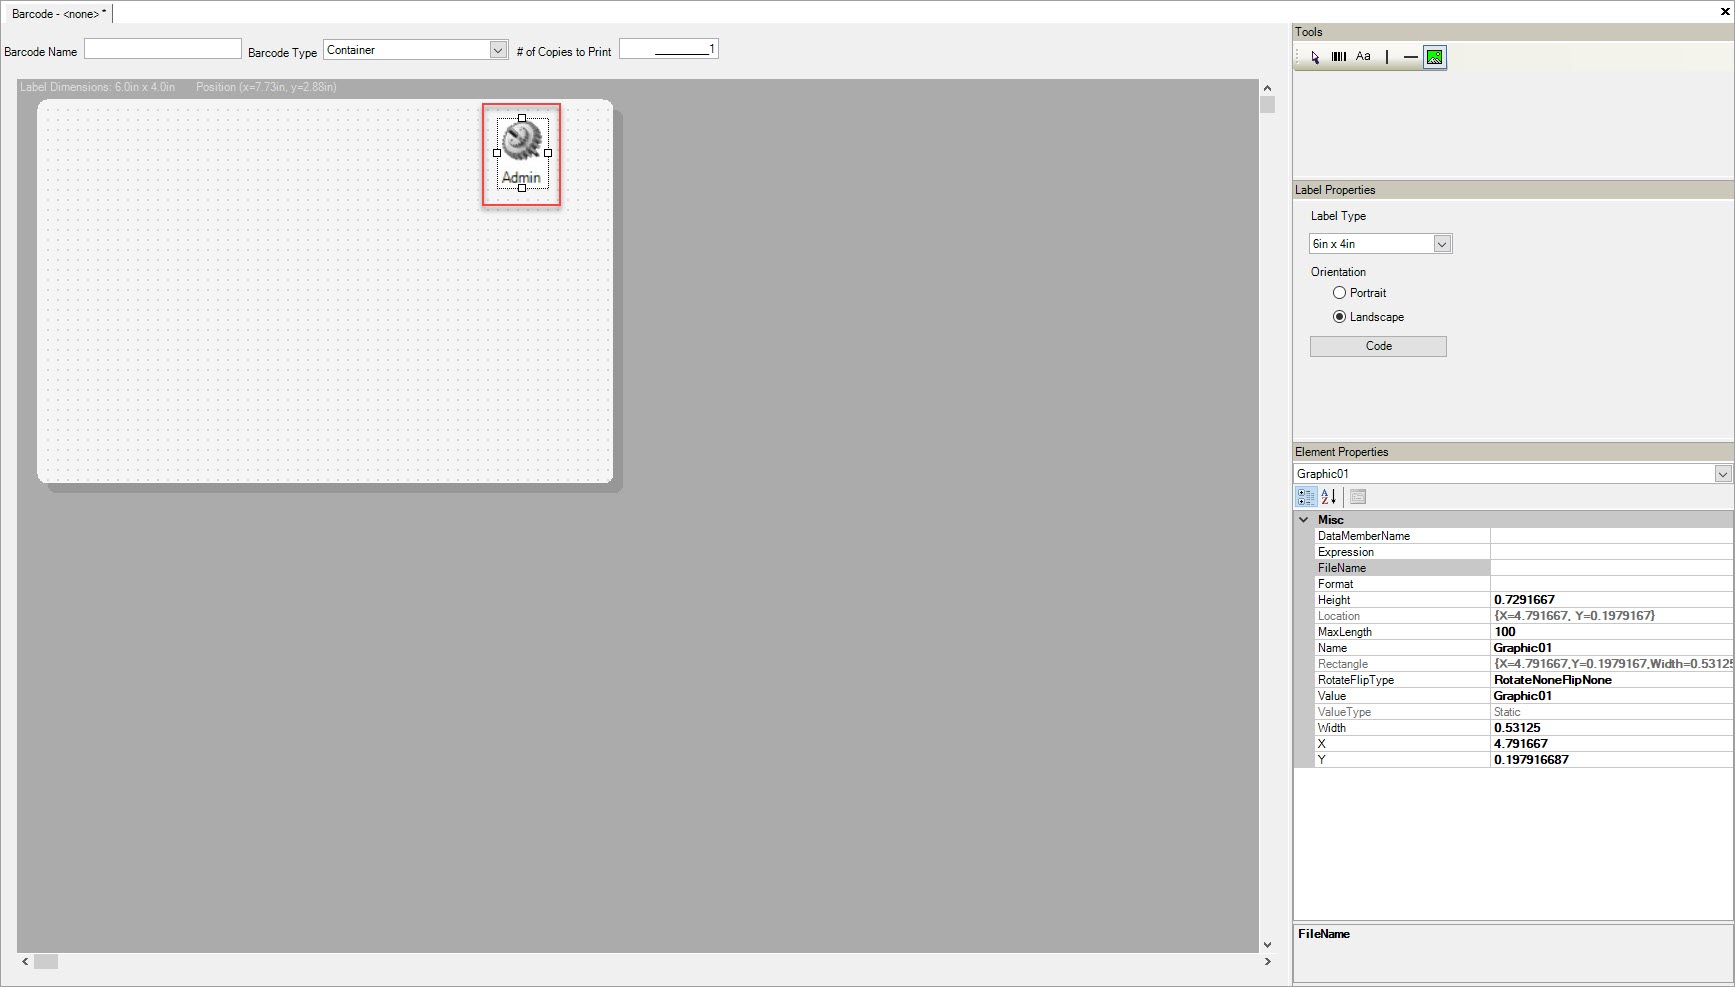
Make sure to save before exiting the screen.
Description of the Element Properties
Barcode Element Properties
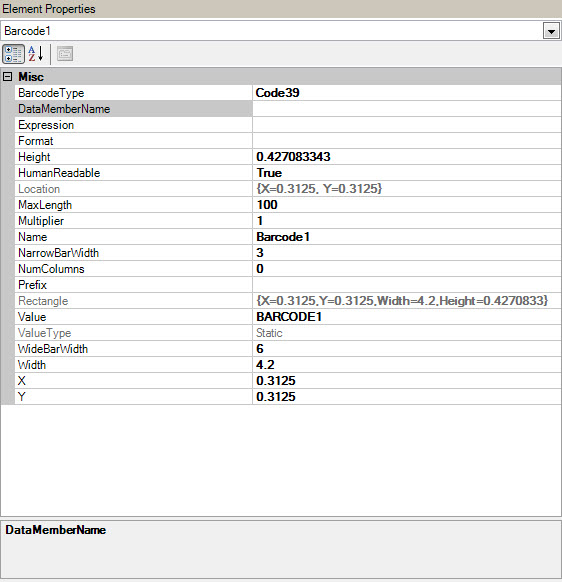
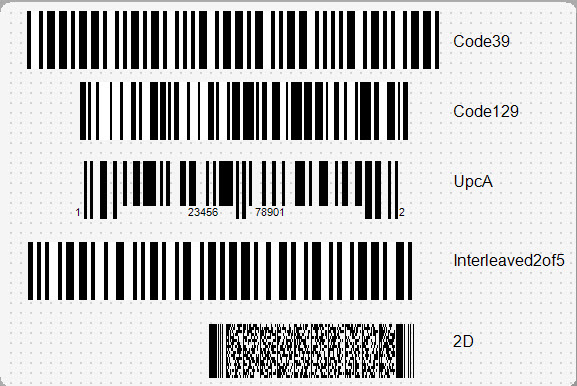
Barcode Type - The type of Barcode can be selected from the drop-down box
- Code39 - A Linear Barcode that is used for Inventory tracking and other coding purposes in manufacturing and other industries.
An alphanumeric code that can encode digits zero through nine, upper case letters A through Z, and a few special characters such as a dollar sign.
- Code128 - A Linear Barcode that is used by the Shipping and Packaging industries. This code is designed to be very compact.
It uses the least amount of space of all of the one dimensional types of Barcodes and is perfect for squeezing a lot of information onto a Shipping label. It can be used for alphanumeric or numeric Barcodes. It can make use of 128 ASCII characters.
- Pdf417 - Is a two dimensional Barcode that is a portable data file which securely stores large amounts of data. It can encode signatures, fingerprints, and photographs.
Some states use PDF417 Barcodes on their driver’s licenses to encode Names, Addresses, Driving Records, and Driver Photographs. Airline tickets and some packages also use this type of Barcode.
Interleaved2of5 - Compact numeric code, widely used in industry such as air cargo.
QR Code - Is a machine-readable optical label that contains information about the item to which it is attached.
- DataMatrix - A two-dimensional matrix Barcode, which encodes text or raw data in a pattern of black and white square modules. Usual data size is from a few bytes up to 2 kilobytes.
By adding error correction codes (according to the ECC200 standard) the symbols can be read even if they are partially damaged.
UPC-A - The Universal Product Code, or UPC, is a one dimensional or linear Barcode that is seen by more people than any of the other types of Barcodes.
- UPC symbols are required in the Retail industry and in the Food Service industry. Since it was adopted for international use, the UPC is also called the European Article Numbering code, or EAN.
The UPC has a fixed length of twelve digits and it uses numbers only.
Note
See Barcode Type examples.
DataMemberName - The Available fields will be displayed by clicking on the
 button.
Note
See Selecting Available Fields for an Element.
Expression - Click on the
button and the Expression Entry window will be displayed.Note
See Entering an Expression for an Element.
Format - When a date is selected from the Available Fields the date format can be selected from the drop-down box.
Height - Height of the Barcode Element.
HumanReadable - The Barcode data will be printed below the Barcode if true is selected from the drop-down box, if false is selected it will not be printed.
Location - The X and Y location on the Barcode layout.
MaxLength - Maximum length of the value being printed.
Multiplier - Used in the 2 dimensional Barcode.
Name - Name assigned by ShopEdge.
NarrowBarWidth - Narrowest width of bar in the Barcode.
NumColumns - Used in the 2 dimensional Barcode.
Prefix - Select the Prefix from the drop-down box or leave blank.
Rectangle - The X and Y location and Width and Height of the element.
Value - The Value that is printed on the label if Static is displayed in the Value Type.
Value Type - When an Available field is selected in the DataMemberName Dynamic is displayed, otherwise Static will be displayed and the Value text will be printed.
Wide Bar Width - Widest width of bar in the Barcode.
Width - Width of the Barcode Element.
X - X Location on Label
Y - Y Location on Label
Text Element Properties

Bold - The text data will be printed bold if true is selected from the drop-down box, if false is selected it will not be printed bold.
Border - The Border size of the text.
ClipText - The text data will be clipped if true is selected from the drop-down box, if false is selected it will not be clipped.
DataMemberName - The Available fields will be displayed by clicking on the
button.Note
See Selecting Available Fields for an Element.
Expression - Click on the
button and the Expression Entry window will be displayed.Note
See Entering an Expression for an Element.
Font - The Font can be expanded by selecting the plus sign (+). The Name, Size, Unit, Bold, Italic and Underline are displayed.
FontFamily - The Font Family is Arial, Courier.
Format - When a date is selected from the Available Fields, the date format can be selected from the drop-down box.
Height - Height of the Text Element.
HorizontalAlignment - The Horizontal Alignment of the text can be Near, Center or Far.
Location - The X and Y location on the Barcode layout.
MaxLength - Maximum length of the value being printed.
Name - Name assigned by ShopEdge.
PointSize - The size of text characters, measured in units called points.
Prefix - Select the Prefix from the drop-down box or leave blank.
Rectangle - The X and Y location and Width and Height of element.
ShrinkToFit - The text data will shrink to fit if true is selected from the drop-down box, if false is selected it will not shrink to fit.
TextTransform - The text data can be changed to Upper case, Lower case or not changed (None) by selecting from the drop-down box.
Underline - The text data will be underlined if true is selected from the drop-down box, if false is selected it will not be underlined.
UseOutlineFont - The text data will use an Outline font if true is selected from the drop-down box, if false is selected it will not use an Outline font.
Value - The Value that is printed on the label if Static is displayed in the Value Type.
ValueType - When an Available field is selected in the DataMemberName Dynamic is displayed, otherwise Static will be displayed and the Value text will be printed.
VerticalAlignment - The Vertical Alignment of the text can be Near, Center or Far.
Width - Width of Text Element.
WrapText - The text data will be wrapped if true is selected from the drop-down box, if false is selected it will not be wrapped.
X - X Location on Label.
Y - Y Location on Label.
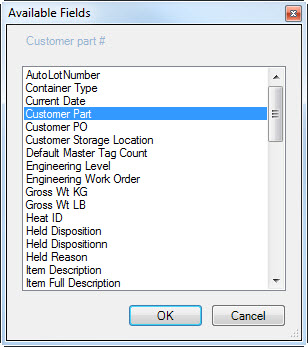
Selecting Available Fields for an Element
When you would like to add a data field to an Element, click the more box in the DataMemberName field. The Available Fields window will be displayed. Select the required field and press OK.
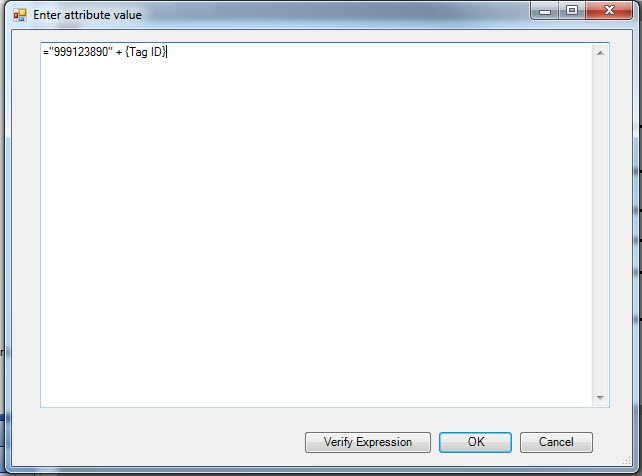
Entering an Expression for an Element
Expressions are used to combine various data into one Element. To add an Expression, click on the more box in the Expression field. The Enter Attribute Value window will be displayed. Enter the expression and press OK.
Examples of using an expression
- To concatenate the Duns # and Serial #, enter = 999999999 + {Tag ID}
- To concatenate the Supplier Code and Serial #, enter = {Supplier Code} + {Tag ID}
- To concatenate the Supplier Code and Serial # with a - in the middle, enter = {Supplier Code} + - + {Tag ID}
Note
The Available field name must be the exact same as listed in the Available fields window
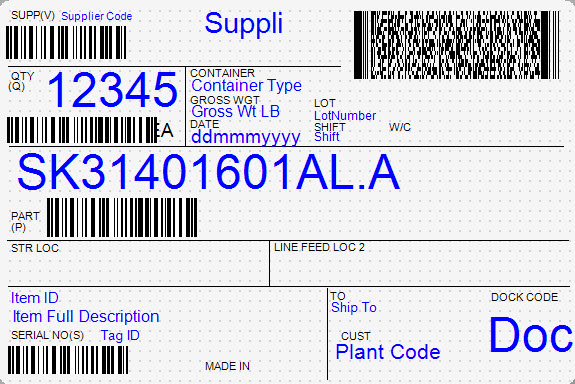
Completed Barcode example