Employees
The Employees section allows users to view and maintain all Employees as well as add new Employees when necessary.
To view the Employees lookup screen, navigate to the  tab and click on the
  icon. The Employees lookup screen
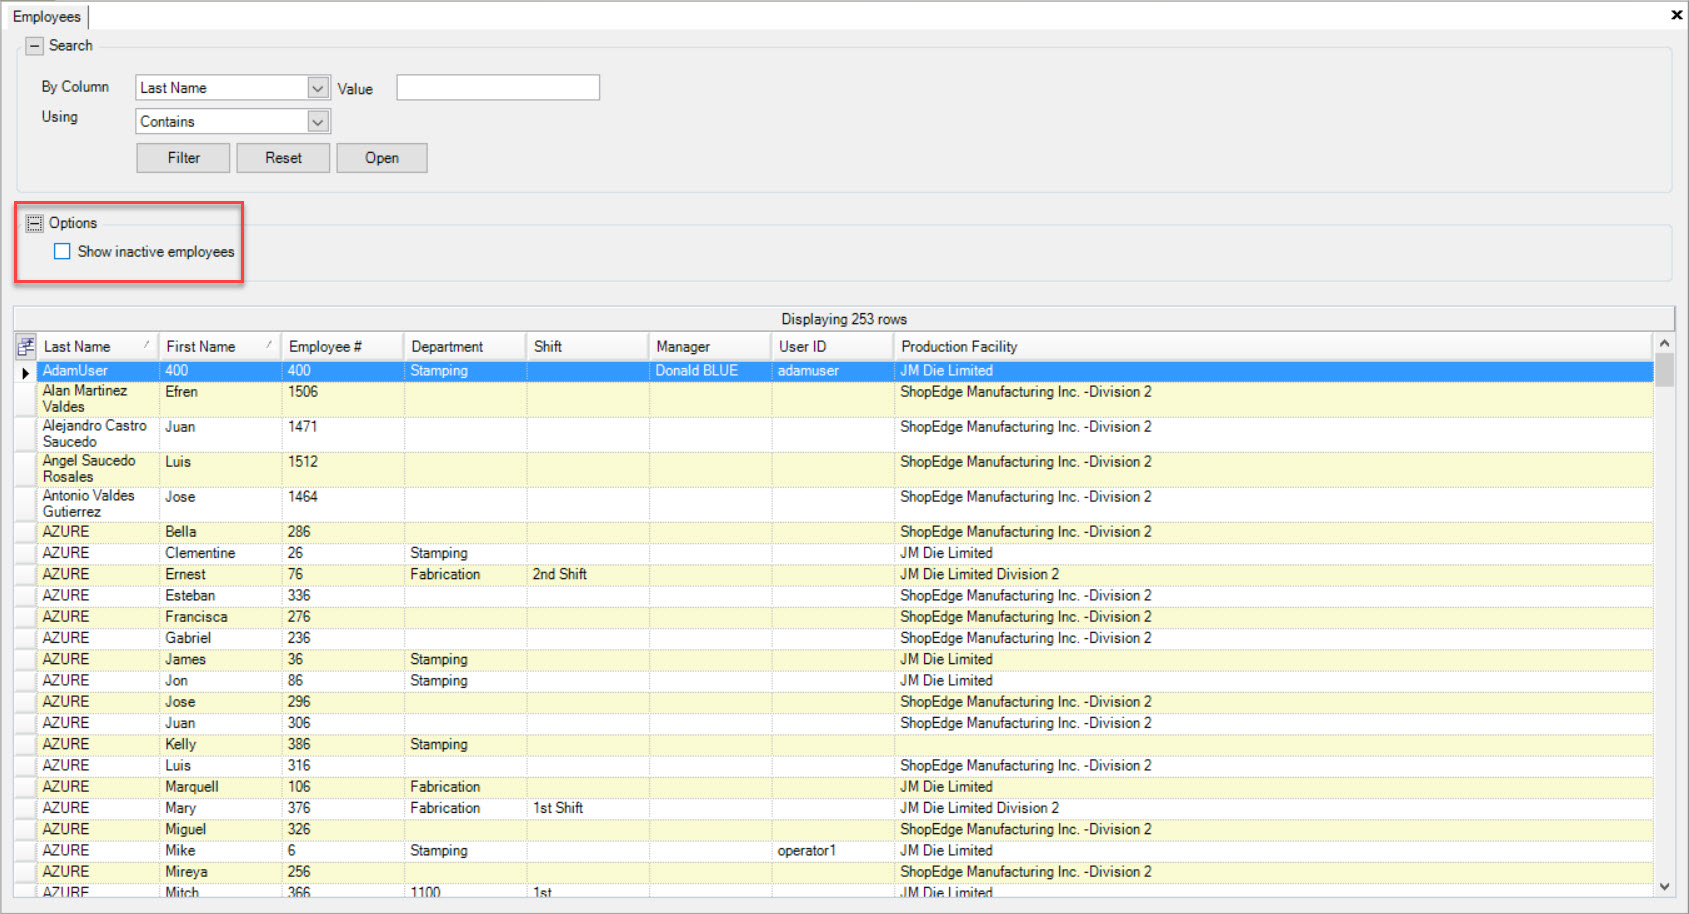
will be displayed showing a list of all Employees in the system.
icon. The Employees lookup screen
will be displayed showing a list of all Employees in the system.

Columns displayed include: Last Name, First Name, Employee #, Department, Shift, Manager, User ID, and Production Facility.
Adding a New Employee
There are three different ways to add a new Employee to the system. The first way is to press the Ctrl + Shift + E keys. The second way is to navigate to File > New > Employee.
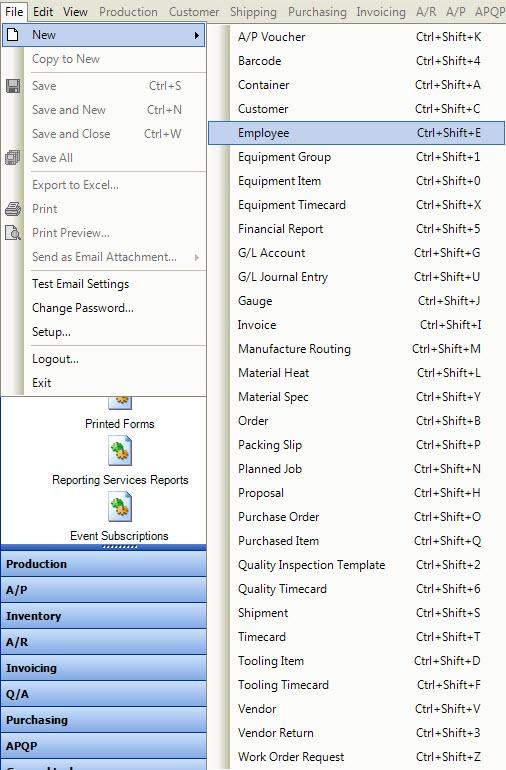
The last way is the click on the  button, and then on the Employee option.
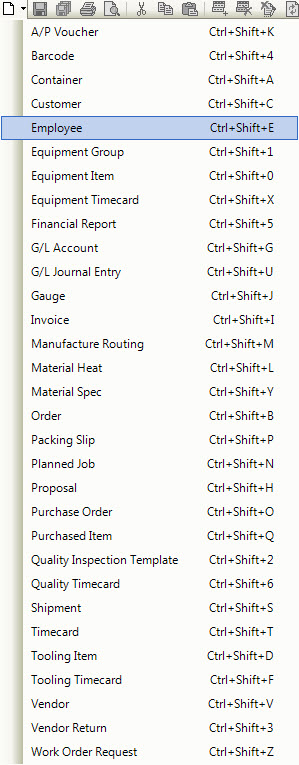
All of these three options will open a new Employee screen.
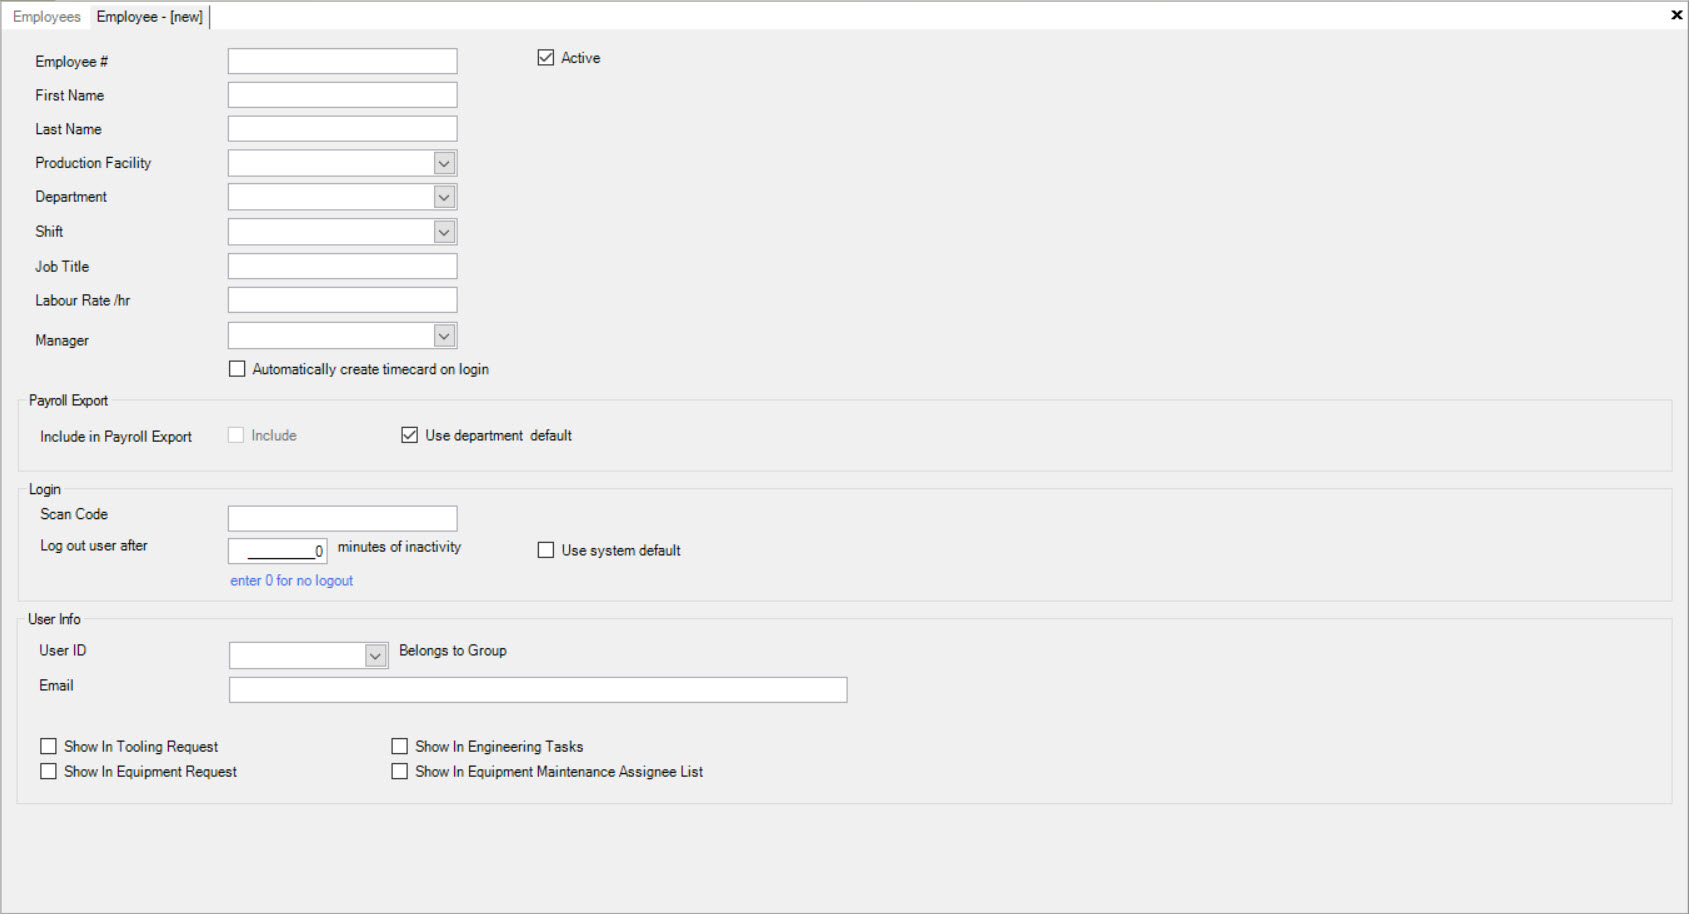
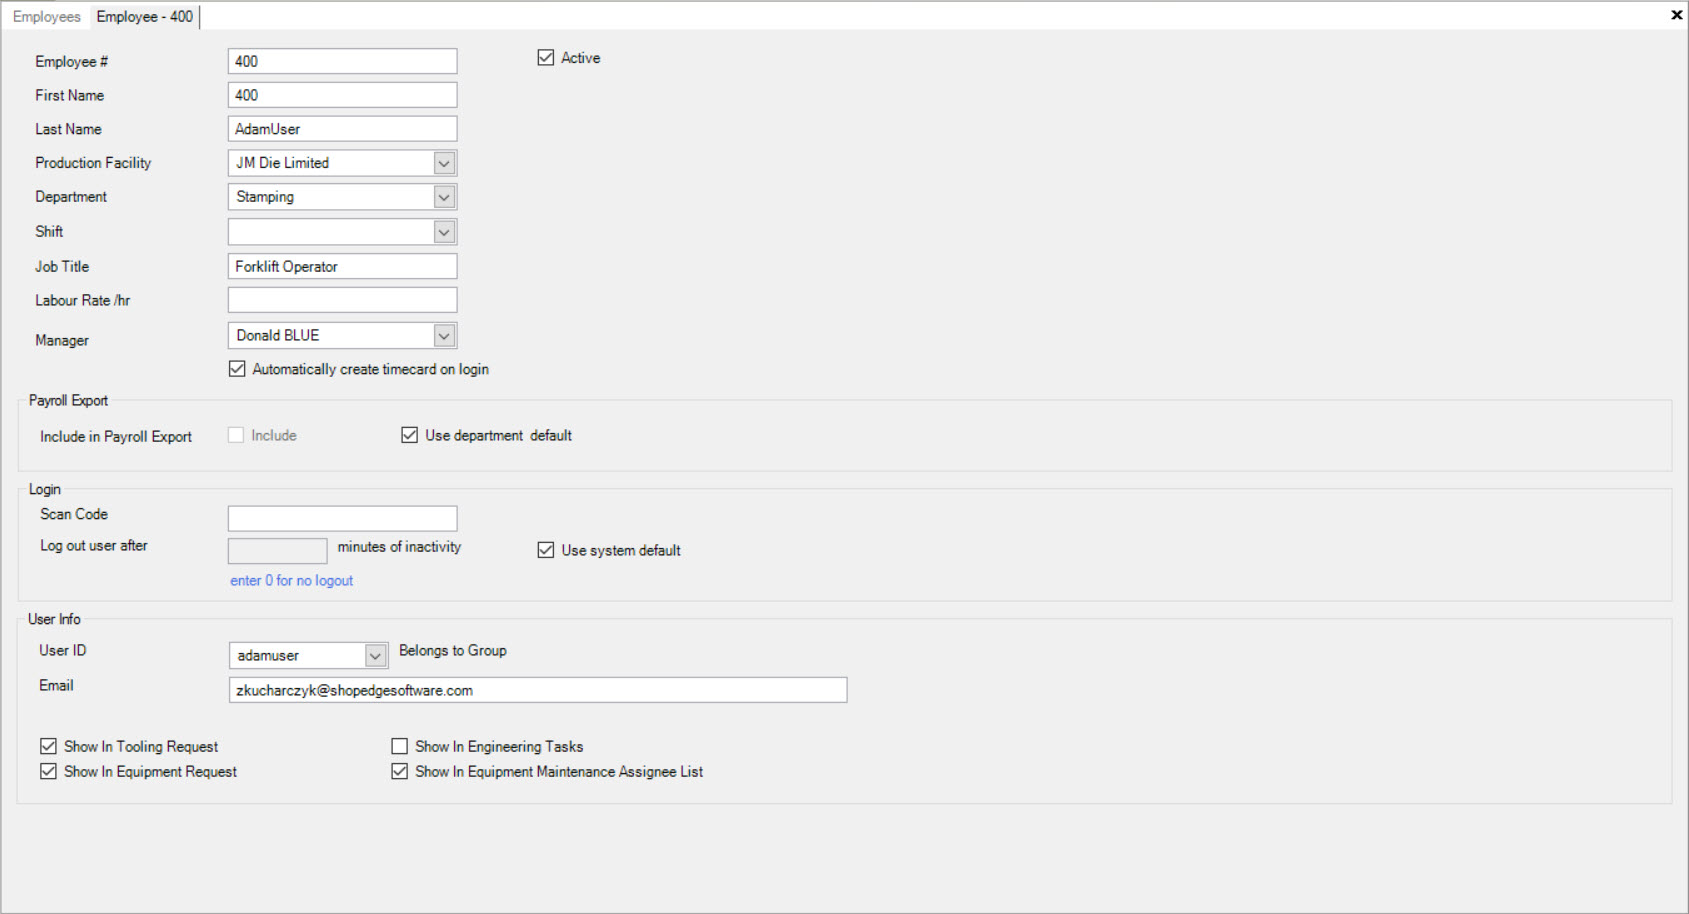
Enter the Employee #, First and Last Name, Job Title, and Labour Rate /hr. Select from the drop-down menus (or manually enter in) the Production Facility, Department, Shift, and Manager. If you would like the Employee to be active, make sure that the Active box is checked off. If you wish to make an Employee inactive, make sure to de-select the Active box.
If you would like the system to automatically create a Timecard upon logging in, check the Automatically create timecard on login checkbox. This will prompt the user to record a shift start time at the beginning of their shift, and a shift end time when they leave. This is a function for users who are using the ShopEdge system for payroll reporting.
After starting their shift, Employees can also track both Production and Non-Production time throughout the duration of their shift. Make sure to select whether you would like to
include the Employee in the Payroll Export, or use the Department Default for this option which can be found by navigating to the tab and clicking on the
|images/employees/adminicon-1.jpg| icon to view the Departments.
The login information allows a Scan Code to be defined which would enable the Employee to use a Barcode scanner by scanning a Barcode label with the corresponding Scan Code. The Employee can also be logged off after a number of minutes if no activity has occurred at the workstation; use 0 for no logout. You can also select Use System Default which is found by navigating the **File > Setup... The login information is found on the first tab.
The Employee can be assigned to a User ID that has been created in the Security screen. To see a list of all available Users, use the drop-down menu. If the user is assigned to a Group, the Group Name will show beside Belongs to Group. An Employee E-mail Address can be entered in the system as well.
Check the Show in Tooling Request and Show in Equipment Request to allow the Employee to be selected when creating a Tooling or Equipment Request. Show in Engineering Tasks is related to the APQP module and Show in Equipment Maintenance Assignee List enables the Employee to be selected when creating planned maintenance for an Equipment Item.
Make sure to save your changes before exiting the screen.
The user can now find this Employee among other Employees by navigating to the tab
and clicking on the icon.
Finding and Editing an Employee
To locate an Employee in the system, navigate to the tab and click on the icon.
This will open the Employees lookup screen.
You may use the search filter at the top of the screen to find the Employee you are looking for. If the Employee is no longer with your Company, or considered inactive, make sure that the option menu is expanded and the Show Inactive Employees box is selected.
Once you have found the Employee you are looking for, double-click on the appropriate row to open the Employee detail screen. You may then make any necessary adjustments to the Employee information, or activity.
Make sure to save your changes before exiting the screen.
Deleting an Employee
If an Employee is no longer working for your Company and there is no chance of them returning, you may wish to delete that Employee from the system.
To do so, navigate to the tab and click on the icon. The Employeees lookup screen will be displayed.
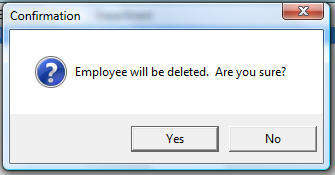
Find the Employee you wish to delete, highlight the appropriate row and select the  button located in the menu. The system will then
prompt you for confirmation.
button located in the menu. The system will then
prompt you for confirmation.
Make sure to save your changes before exiting the screen.
Making an Employee Inactive
When an Employee is no longer working with your Company whether it is permanent or temporary, you may wish to change their status to inactive instead of deleting them.
To do this, navigate to the tab and click on the icon. The Employees lookup screen will be displayed.
Search for the Employee you wish to make inactive using the Employees lookup screen, and double-click on the appropriate row.
The Employee detail screen will be displayed. Make the Employee inactive by unchecking the Active box.
Make sure to save your changes before exiting the screen.