Purchased Items
Purchased items include any items that you need to purchase for your business, including raw material, components, and non-stock items.
Creating a New Purchased Item
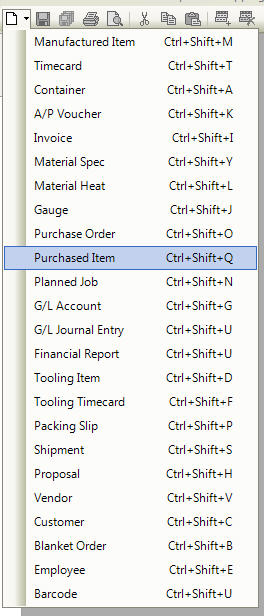
There are three ways to create a new purchased item in the system. The first way is to press the Ctrl + Shift + Q keys. The second way is to navigate to File > New > Purchased Item
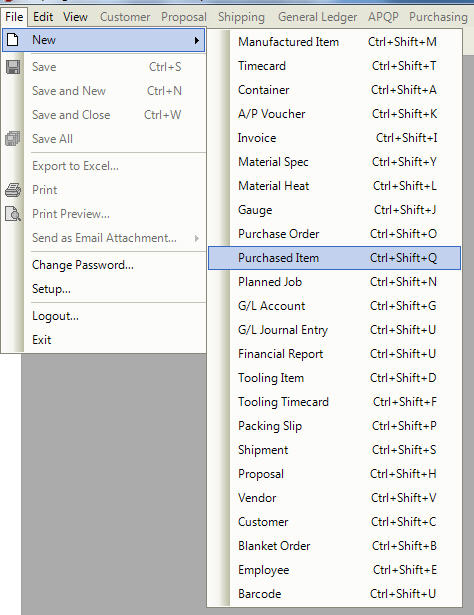
The last way is to click on the |images/newbutton.jpg| button, and then on the Purchased Item option.
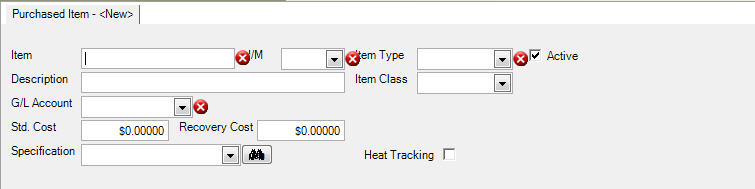
All of these three options will open a New Purchased Item Screen.
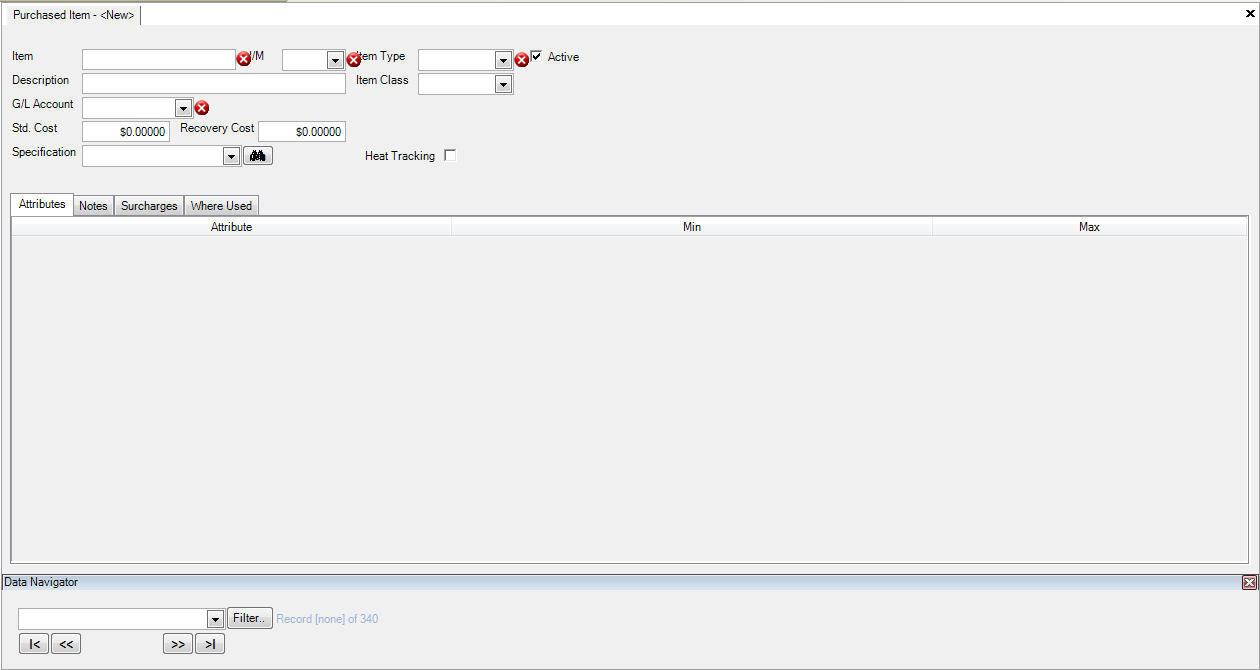
There are various fields in the system that must be completed in order to save the purchased item. These fields are indicated with a  .
.
Note
The P/O Item gets the G/L Account from here, which is why a G/L Account must be defined and selected. The Heat Tracking check box must be clicked before the system will allow the entry of Tags in P/O Receiving. A valid Specification is required for all items being added. For items that do not have a required Specification, create a general Material Specification in the Q/A Module as a place holder.
Maintaining a Purchased Item
If you wish to make changes to an existing purchased item, the first thing you need to do is find the purchased item that you wish to make changes to.
Opening a Purchased Item
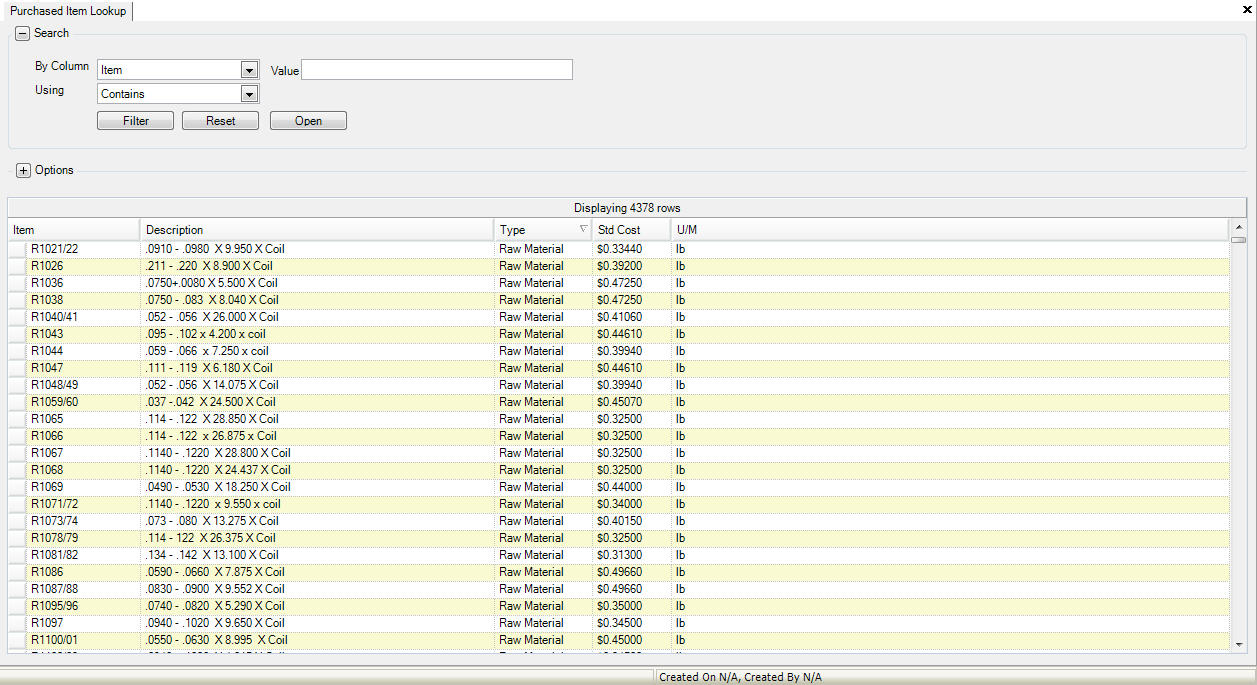
If you wish to modify a purchased item, simply use the Purchased Item Lookup to find the purchased item you are looking for.
You can access the lookup screen by navigating to the |images/purchasing.jpg| tab,
and clicking on the 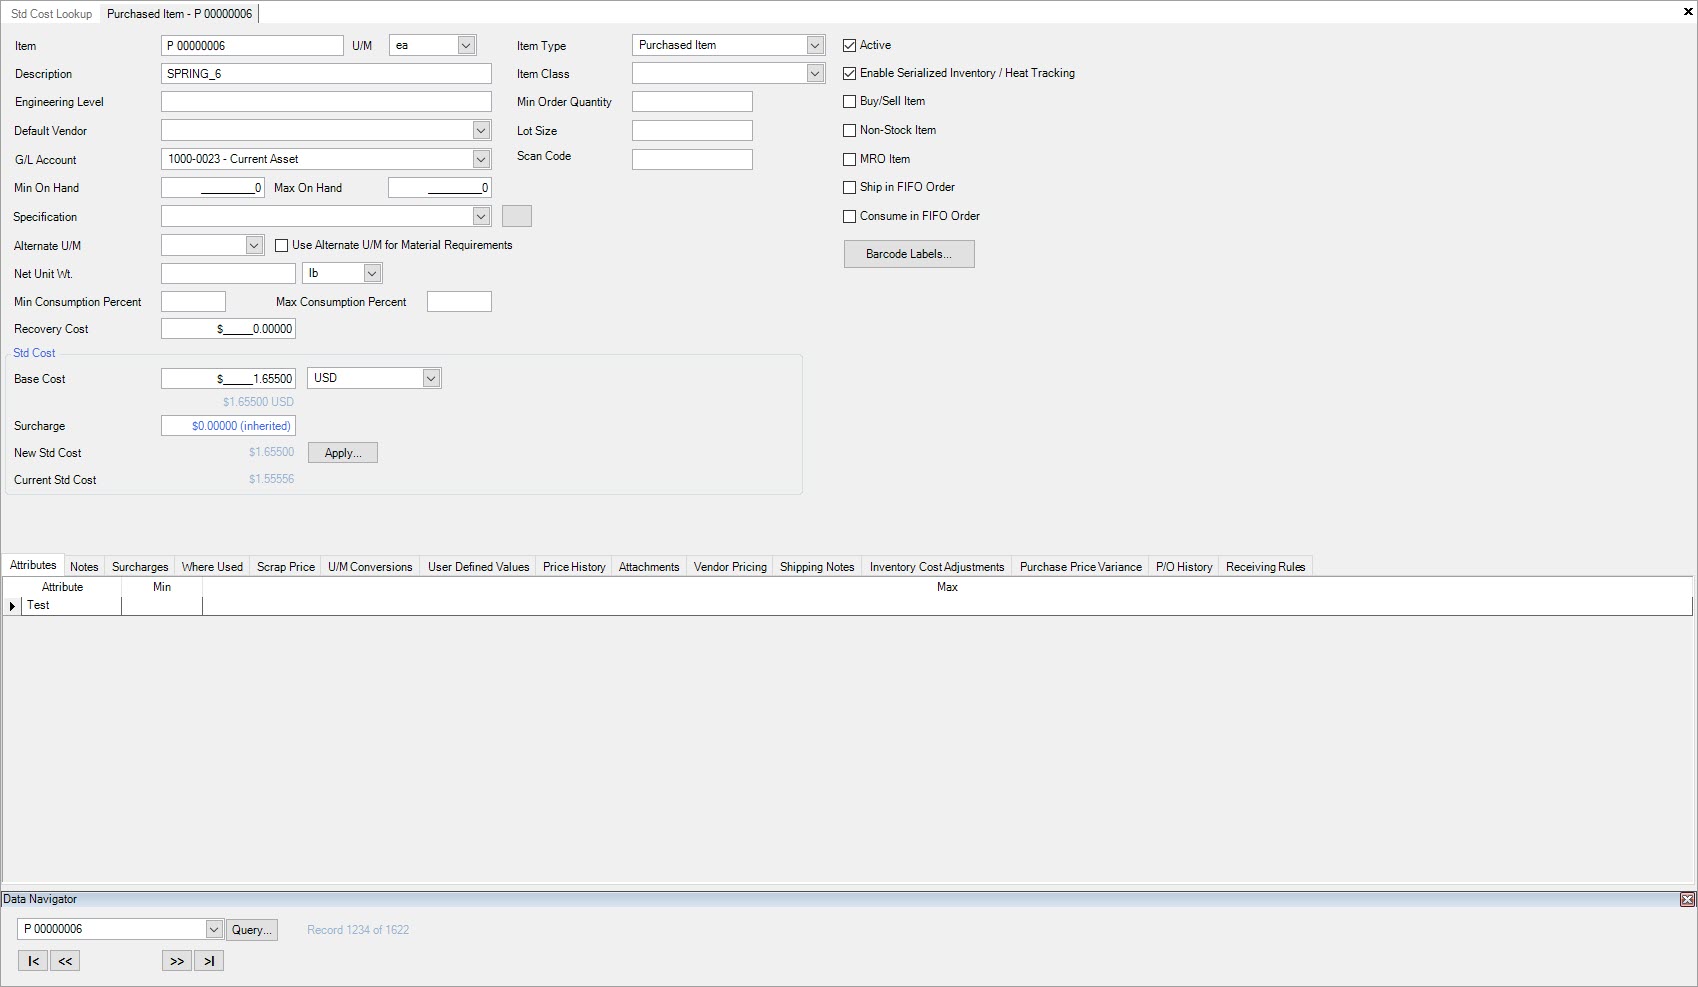 icon. This will bring up the Purchased Item Lookup Screen.
Modifying a Purchased Item
Once you have the item open that you wish to modify, you can then make changes to the item name, description, cost fields, etc. You can also choose to make the item inactive or active by clicking on the check box provided. Make sure to save your item before exiting the screen.
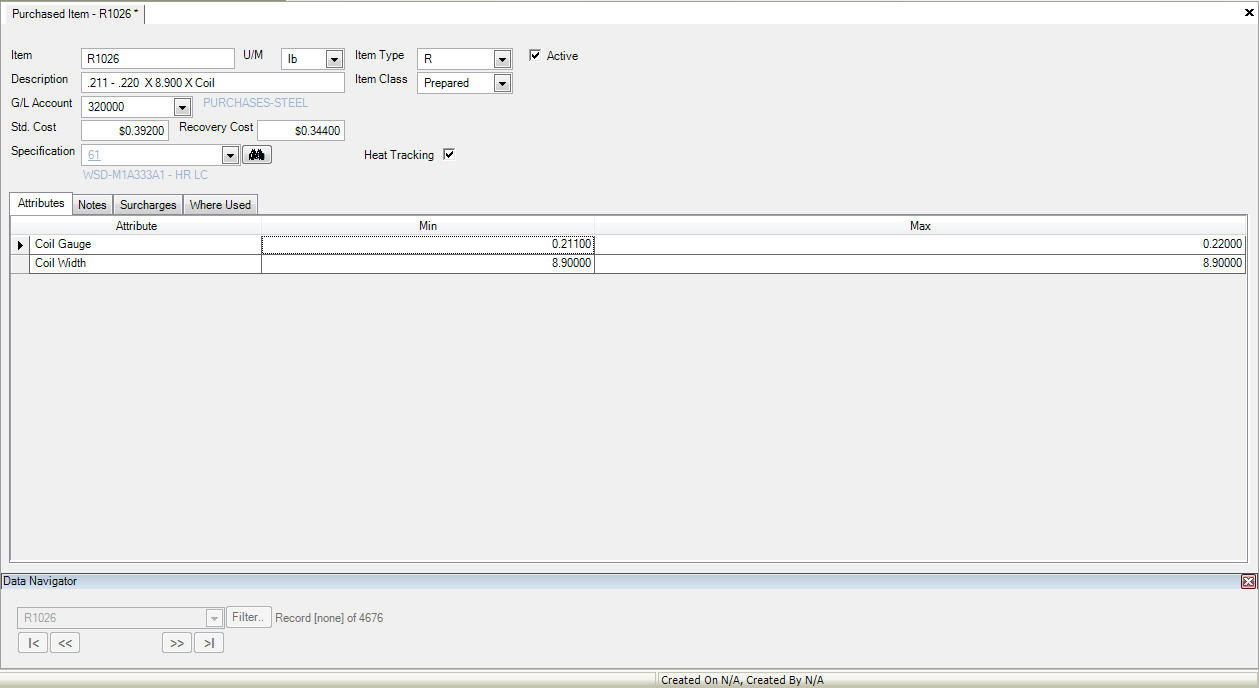
Modifying an Attribute
You have the ability to control an attribute’s measurements so on the receipt of an item, if it is out of tolerance, it will be given a held status. The attributes are automatically established
based on the Item Type that is selected for a purchased item. You can only modify the min/max measurements of an attribute, not the actual attribute itself. This is maintained under the
 tab.
tab.
Adding a Note to a Purchased Item
To add a note to a purchased item, select the  tab, and enter in a note in the space provided. Save your changes before exiting.
Surcharges
Surcharges can be tracked in the system by vendors at the purchased item level, in case you need different surcharges for different vendors for the same item.
To add a new surcharge, navigate to the  tab and click on the
  button at the bottom of the screen. A new row will be added, where you can enter in the vendor
surcharge details including vendor, unit price, G/L account, effective date, as well as add a remaining amount. To add an amount, click on the
button at the bottom of the screen. A new row will be added, where you can enter in the vendor
surcharge details including vendor, unit price, G/L account, effective date, as well as add a remaining amount. To add an amount, click on the  button
at the right of the screen.
button
at the right of the screen.
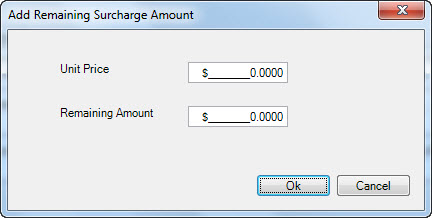
The Amount window will open, where you can add a unit price, as well as a remaining surcharge amount. Click on the |images/okbutton.jpg| button to add the amount.
Where Used
The  tab allows you to view where a purchased item is used; for which f/g items it is used to manufacture.
Scrap Price
Scrap price allows users to enter in a scrap price per pound used to pass the recovery cost back to the customer (where the customer might own the material). Click on the button
to add a new scrap price.
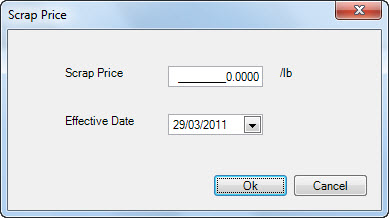
Enter in the price per pound, select the effective date, and click the |images/okbutton.jpg| button.
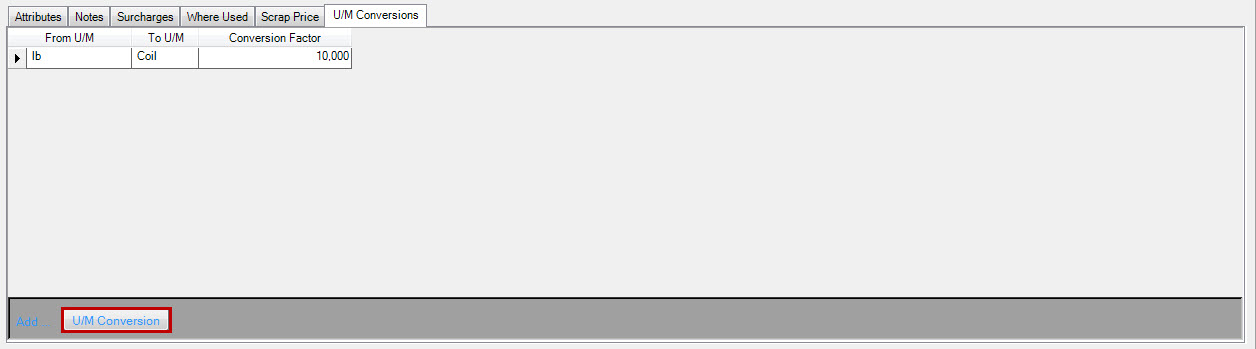
U/M Conversions
U/M conversions allows users to enter in a conversion for a purchased item for purchasing purposes. For example, if you order in lbs and you want to convert to a 10,000lb
coil, add a row by clicking on the  button
and enter in the From U/M as lb, To U/M as coil, and the conversion factor as 10,000. Save your changes.
button
and enter in the From U/M as lb, To U/M as coil, and the conversion factor as 10,000. Save your changes.