Receiving
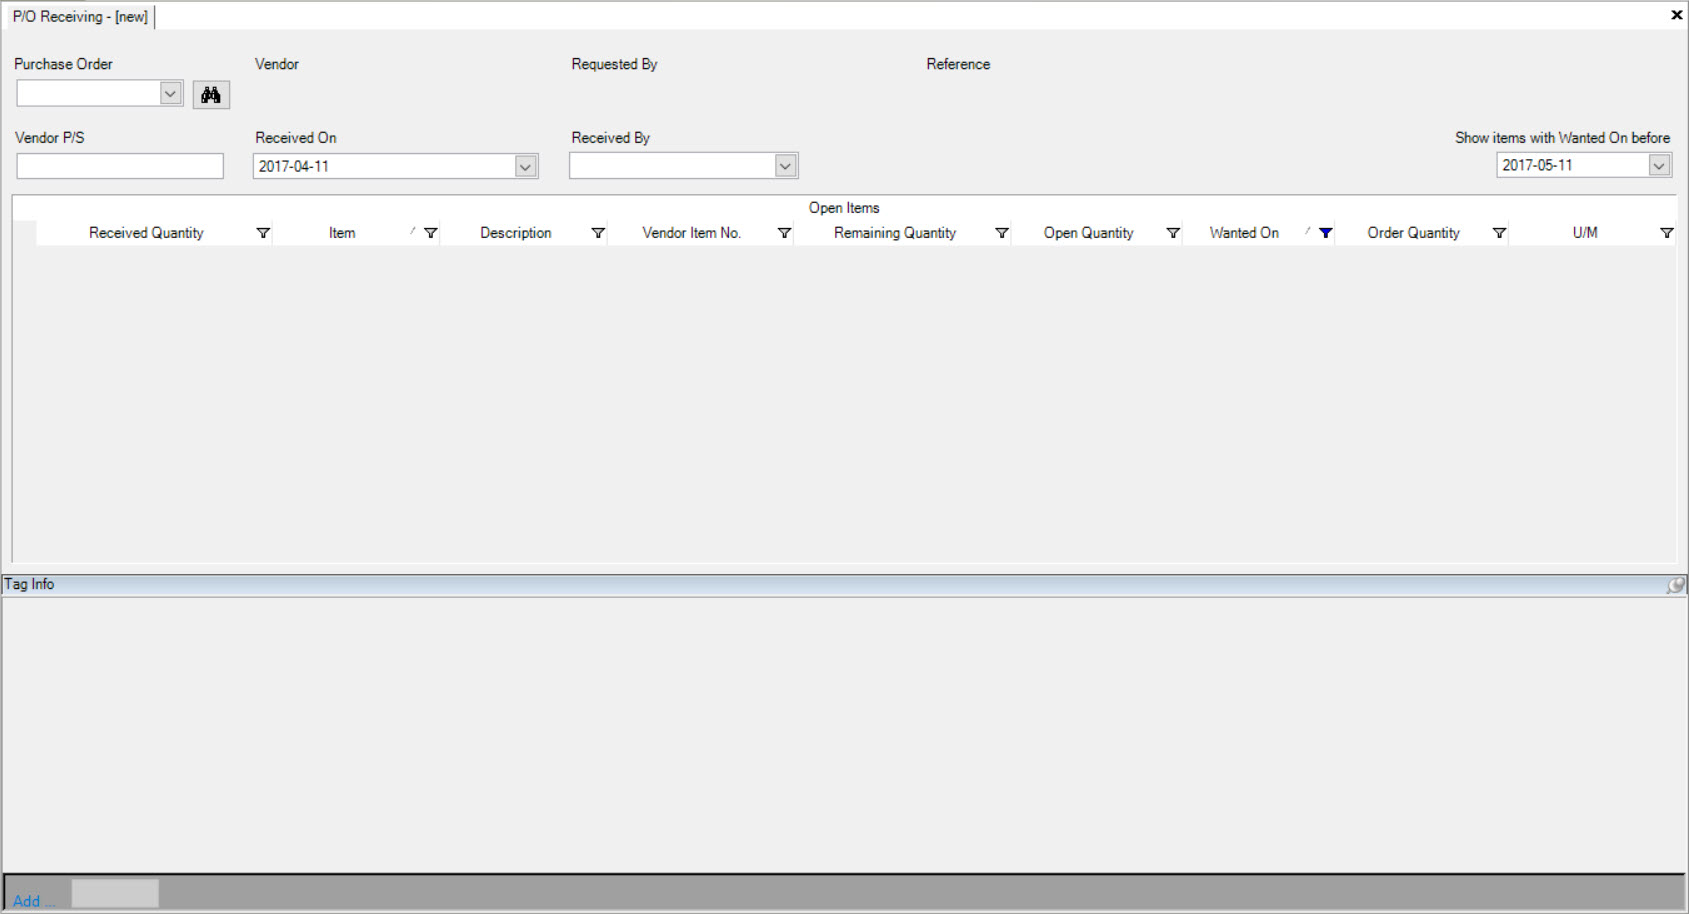
The Receiving section allows users to receive Purchase Orders in the system.
To view the Receiving screen, navigate to the  tab and click on the
 ![]() icon. The Receiving screen will be displayed.
icon. The Receiving screen will be displayed.

Receiving a Purchase Order
To receive a Purchase Order in the system, navigate to the  tab and click on the
 ![]() icon. The Receiving screen will be displayed.
icon. The Receiving screen will be displayed.

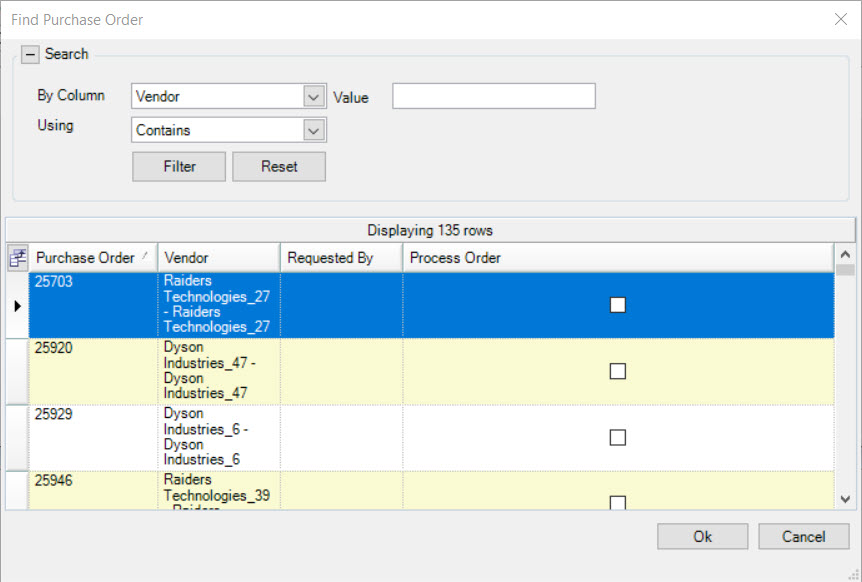
Select a Purchase Order by using the available drop-down menu or by clicking on the  button.
The Find Purchase Order window will appear. Users can locate the Purchase Order they wish to receive, highlight the appropriate row and then, click on the  button.

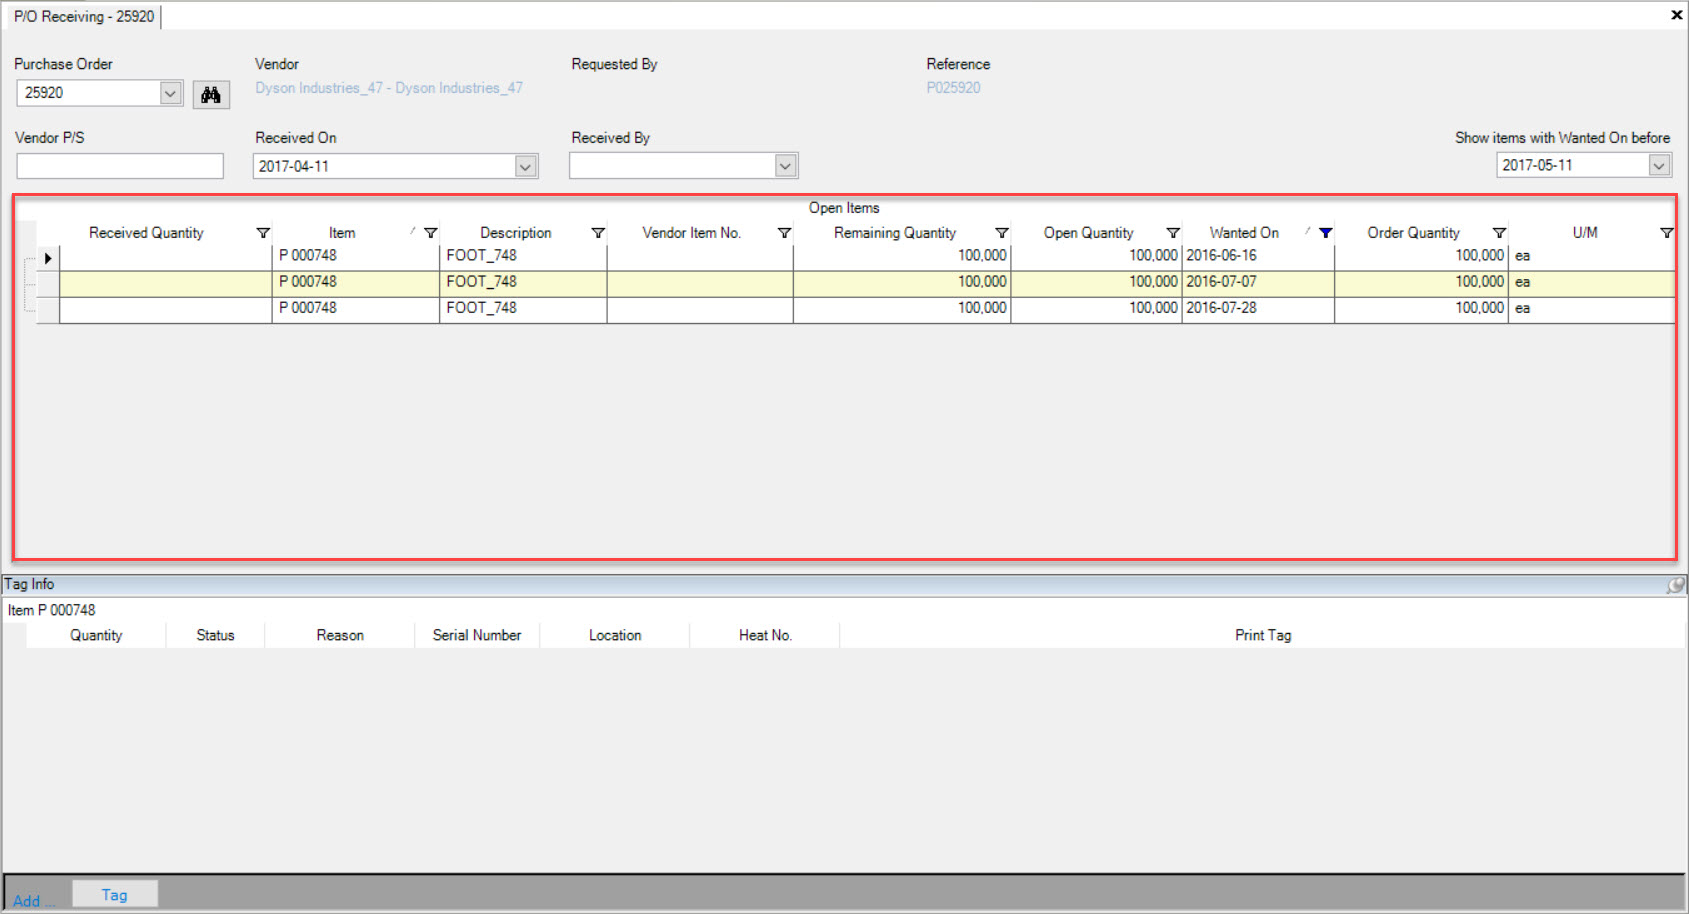
Once a Purchase Order has been selected, the system will populate the Items for that Purchase Order.

Users can enter in the Vendor P/S, and select who the Purchase Order will be Received By. The Received On date will default to the current date but can be changed if necessary. A Wanted On before date can be selected in order for the system to only populate Items that are wanted on before the Wanted On date.
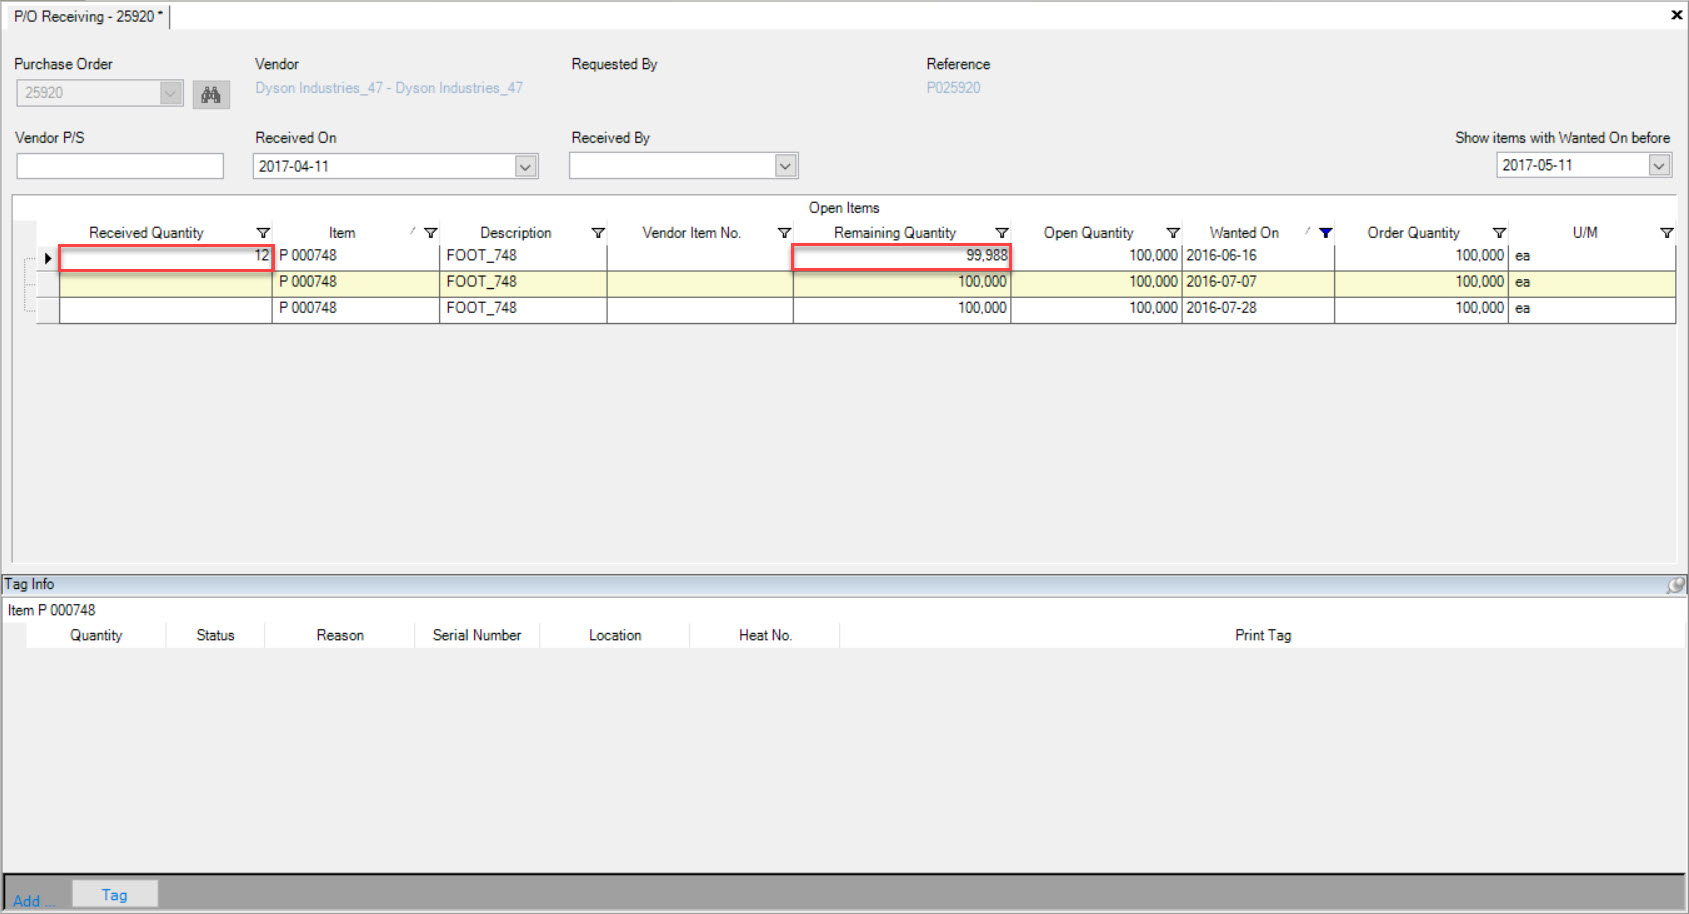
Next, users can enter in the Received Quantity for each Item for the selected Purchase Order. The Remaining Quantity will adjust accordingly.

Once the necessary information has been entered in, make sure to save your changes before exiting the screen.
Adding a Tag to a Purchase Order that is being Received
To add a Tag to an Item on a Purchase Order, navigate to the  tab and click on the
 ![]() icon. The Receiving screen will be displayed.
icon. The Receiving screen will be displayed.

Select a Purchase Order by using the available drop-down menu or by clicking on the  button.
The Find Purchase Order window will appear. Users can locate the Purchase Order they wish to add a Tag to, highlight the appropriate row and then, click on the  button.

Once a Purchase Order has been selected, the system will populate the Items for that Purchase Order.

Highlight the appropriate row of the Item you wish to add a Tag to and then click on the  button located at the bottom of the screen.
A new row will appear under the Tag Info section of the Receiving screen.
Make sure to fill in the necessary fields and save your changes before exiting the screen.