Admin
The Admin module gives those with access the ability to view, add, edit, or delete the following:
- Unit of Measure
- Material Status
- Purchased Item Class
- User Defined Fields
- Capital Request User Defined Fields
- Purchased Item Scrap Reasons
To view the Purchasing Admin screen, navigate to the  tab and click on the
 ![]() icon. The Purchasing Admin screen will appear.
icon. The Purchasing Admin screen will appear.
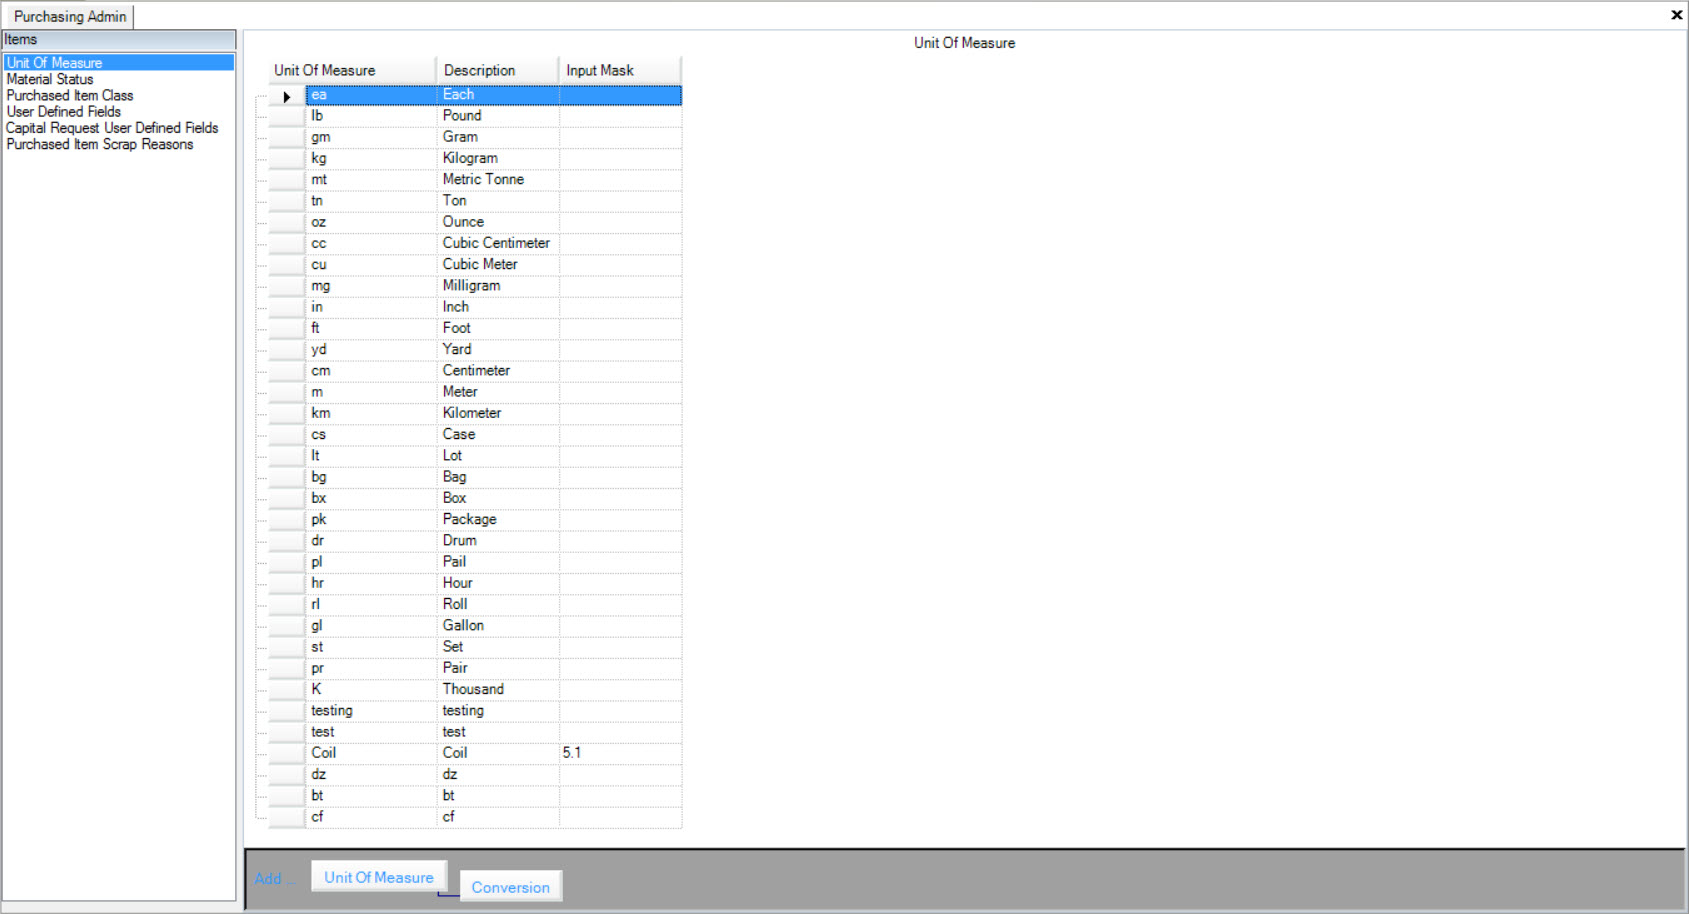
Unit of Measure
To view all available Units of Measure, navigate to the  tab and click on the
 ![]() icon. The Purchasing Admin screen will appear.
icon. The Purchasing Admin screen will appear.

Make sure to select the Unit of Measure tab located to the left of the screen.
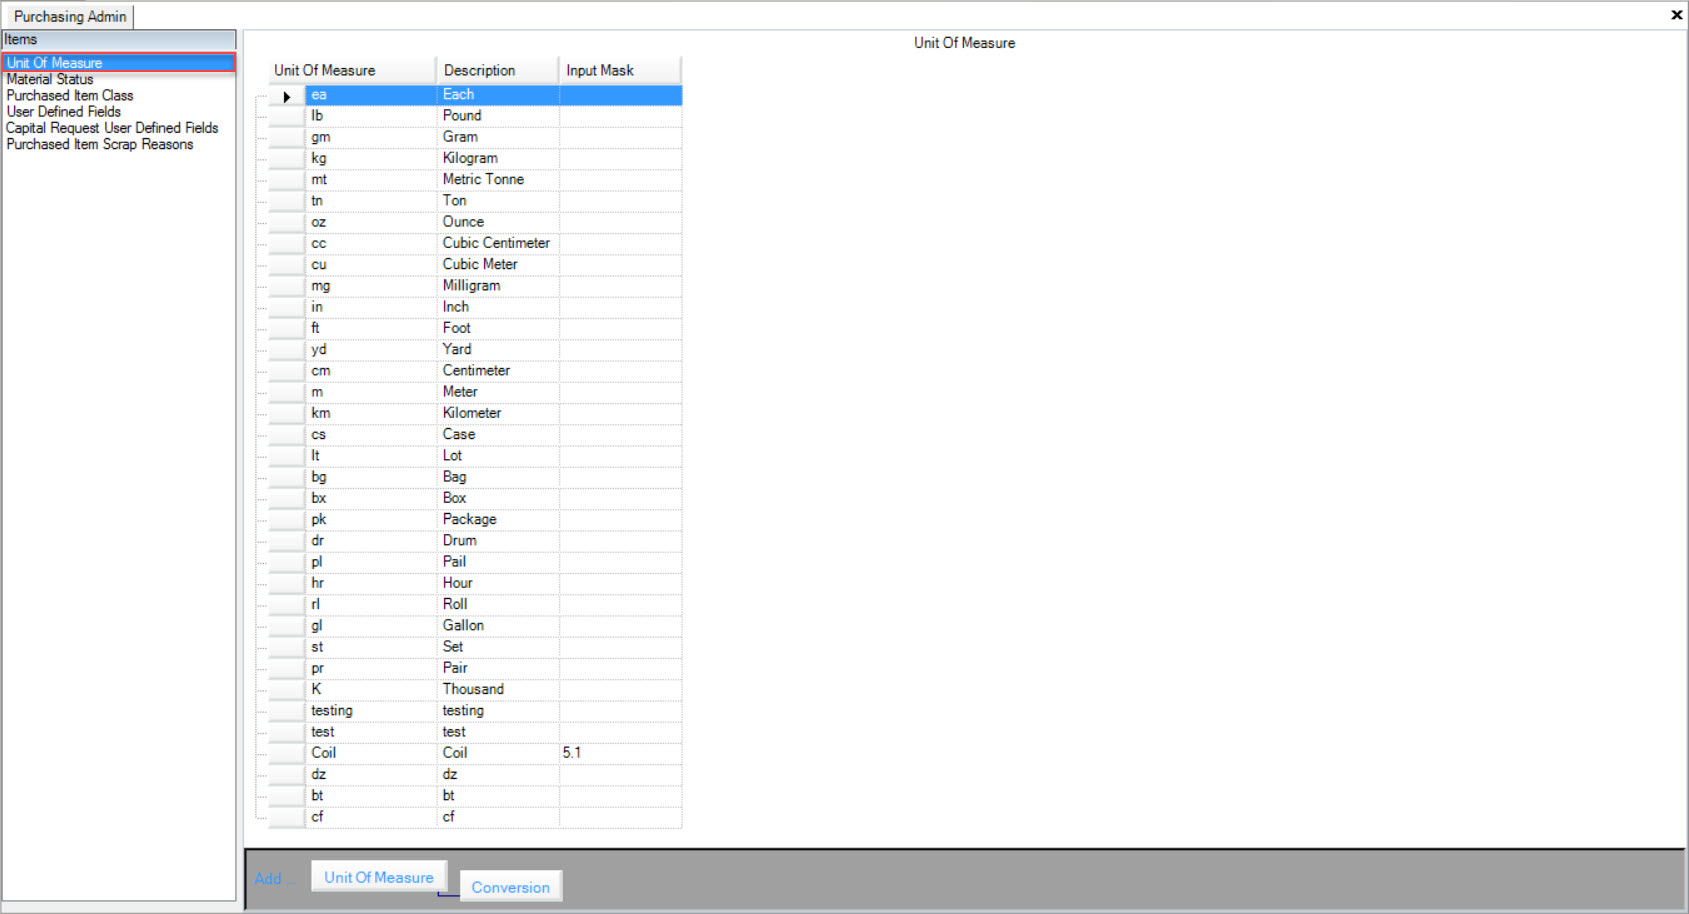
Users will be able to view all available Units of Measure in the system.
Adding a Unit of Measure
To add a Unit of Measure, navigate to the  tab and click on the
 ![]() icon. The Purchasing Admin screen will appear.
icon. The Purchasing Admin screen will appear.

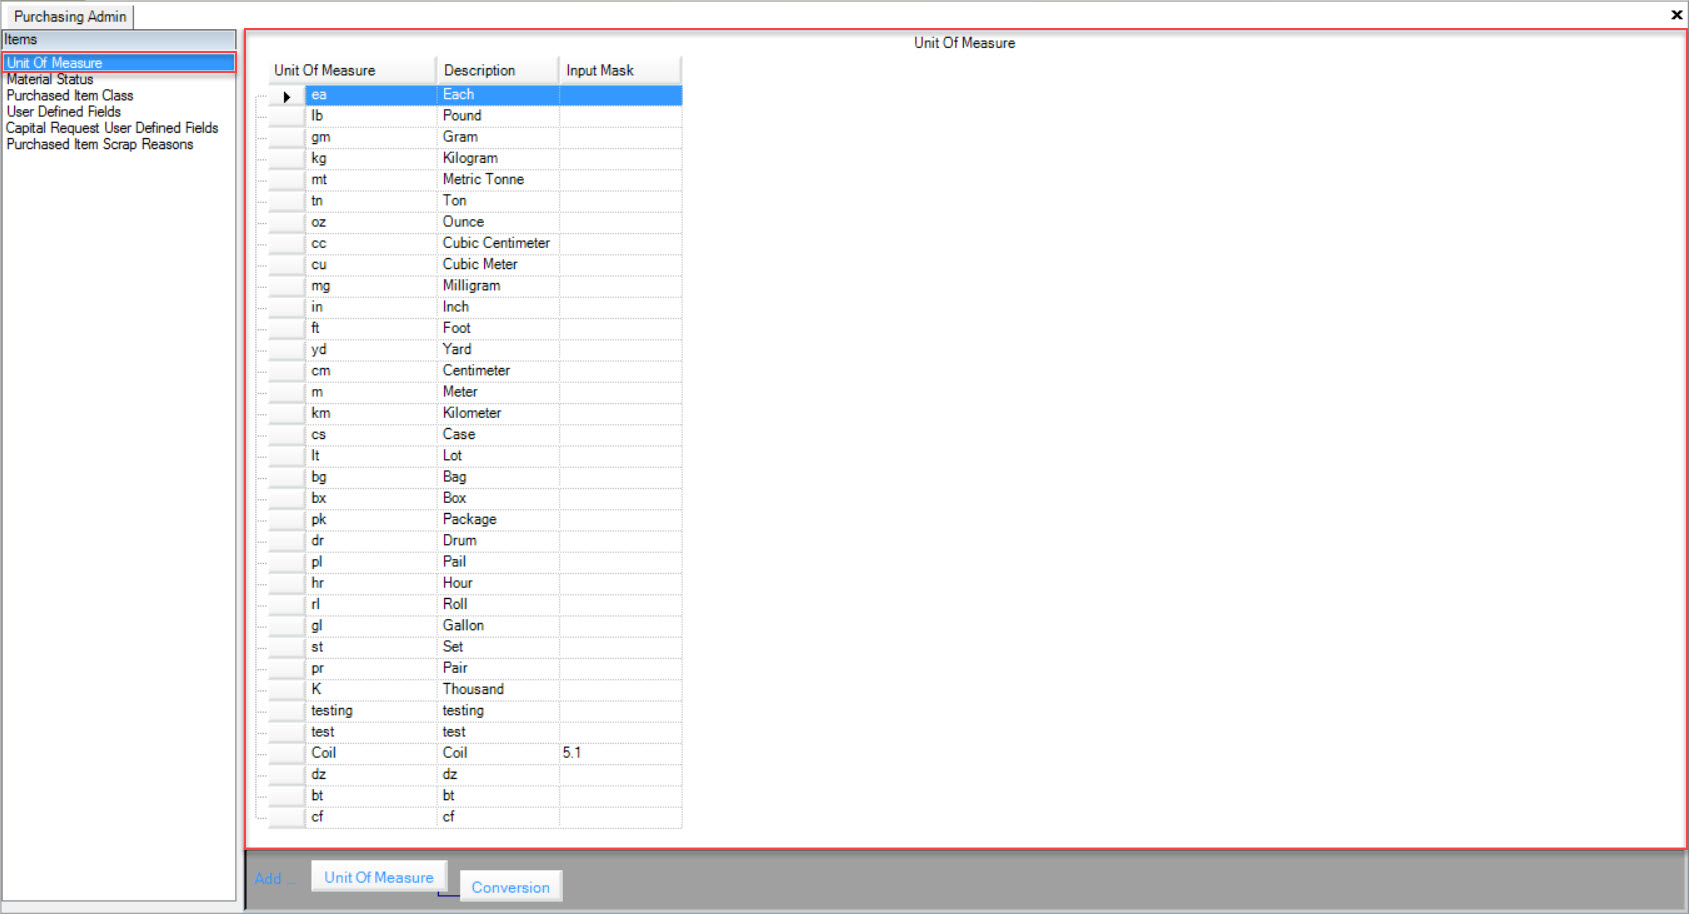
Make sure to select the Unit of Measure tab located to the left of the screen.

Click on the  button located at the bottom of the screen.
A new row will appear where users can enter in the appropriate information such as the Unit of Measure, Description, and Input Mask.
Make sure to save your changes before exiting the screen.
Editing a Unit of Measure
To edit a Unit of Measure, navigate to the  tab and click on the
 ![]() icon. The Purchasing Admin screen will appear.
icon. The Purchasing Admin screen will appear.

Make sure to select the Unit of Measure tab located to the left of the screen.

Locate the Unit of Measure you wish to edit and make the necessary changes using the available textboxes.
Once the necessary changes have been made, make sure to save before exiting the screen.
Deleting a Unit of Measure
To delete a Unit of Measure, navigate to the  tab and click on the
 ![]() icon. The Purchasing Admin screen will appear.
icon. The Purchasing Admin screen will appear.

Make sure to select the Unit of Measure tab located to the left of the screen.

Locate the Unit of Measure you wish to delete and highlight the appropriate row. Use your Delete key and when the system prompts you, select Yes.
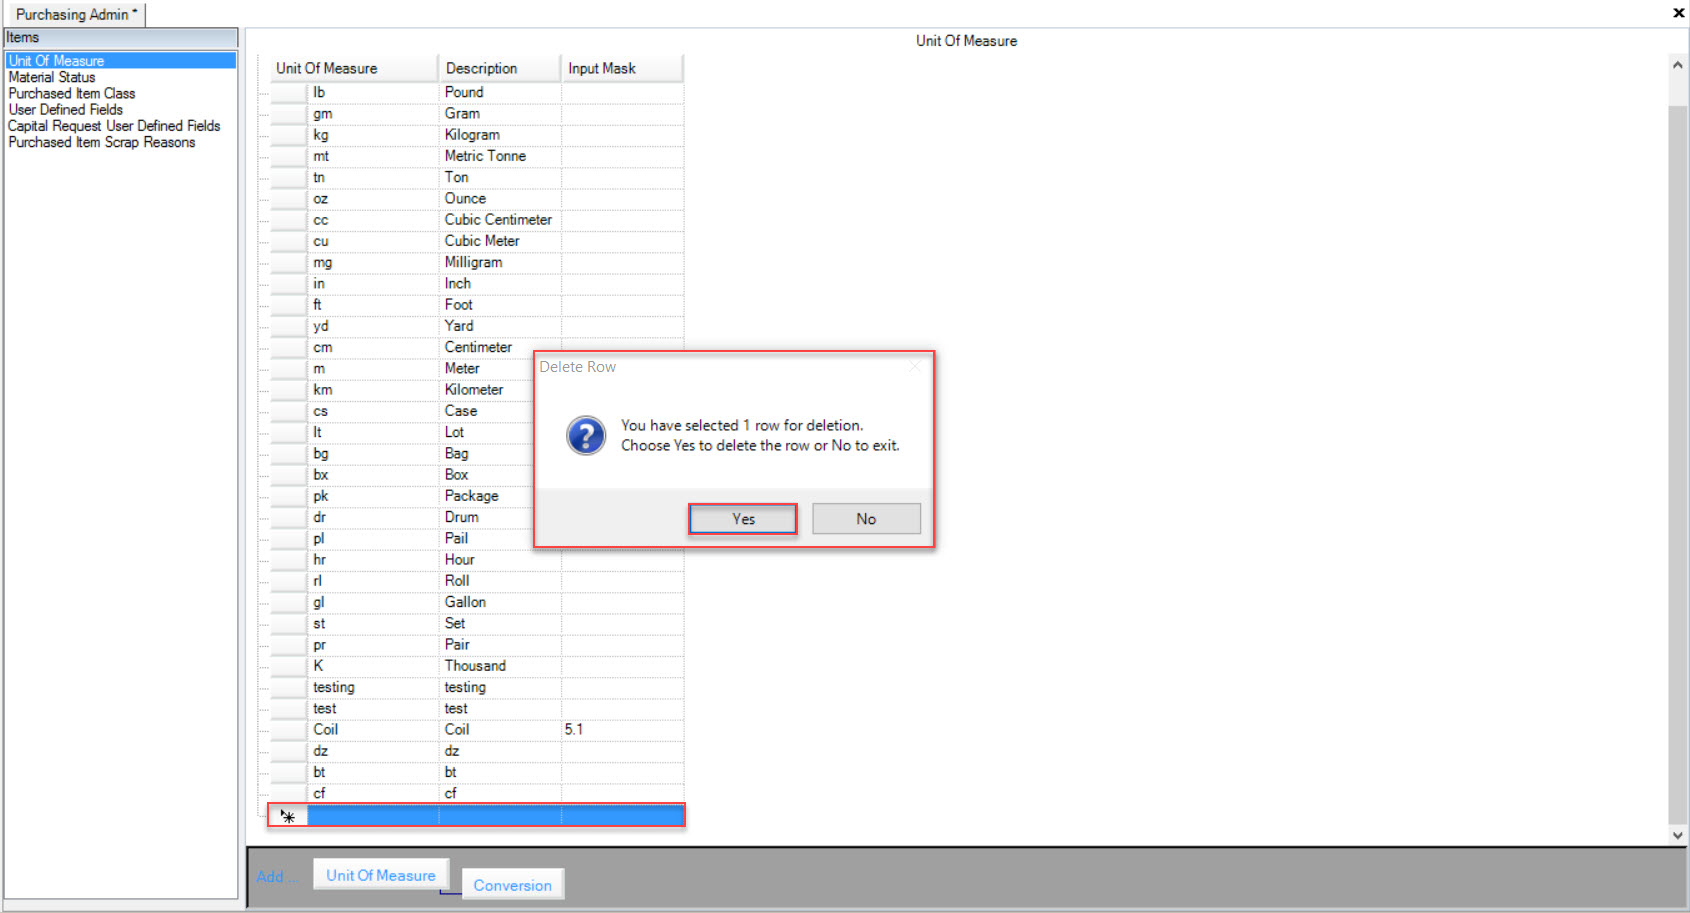
The highlighted Unit of Measure will be deleted.
Make sure to save your changes before exiting the screen.
Note
If users wish to delete a Unit of Measure with Conversions attached to it, the Conversions will also be deleted.
Adding a Conversion
Conversion Factors are used in the system if users need to have an alternate measurement representing a measurement. For example, a company may purchase Items in a Unit defined as K, which may represent 1000 pieces. Therefore the Conversion Factor entered in would be .001 and the To Unit of Measure would be K.
To add a Conversion to a Unit of Measure, navigate to the  tab and click on the
 ![]() icon. The Purchasing Admin screen will appear.
icon. The Purchasing Admin screen will appear.

Make sure to select the Unit of Measure tab located to the left of the screen.

Locate the Unit of Measure you wish to add a Conversion to and highlight the appropriate row. Then, click on the  button located at the bottom of the screen.
Note
Users cannot add a Conversion unless it is attached to a Unit of Measure. The  button will not be available unless a Unit of Measure has been selected or added.
A new row will appear where users can enter in the Conversion Factor and To Unit of Measure fields.
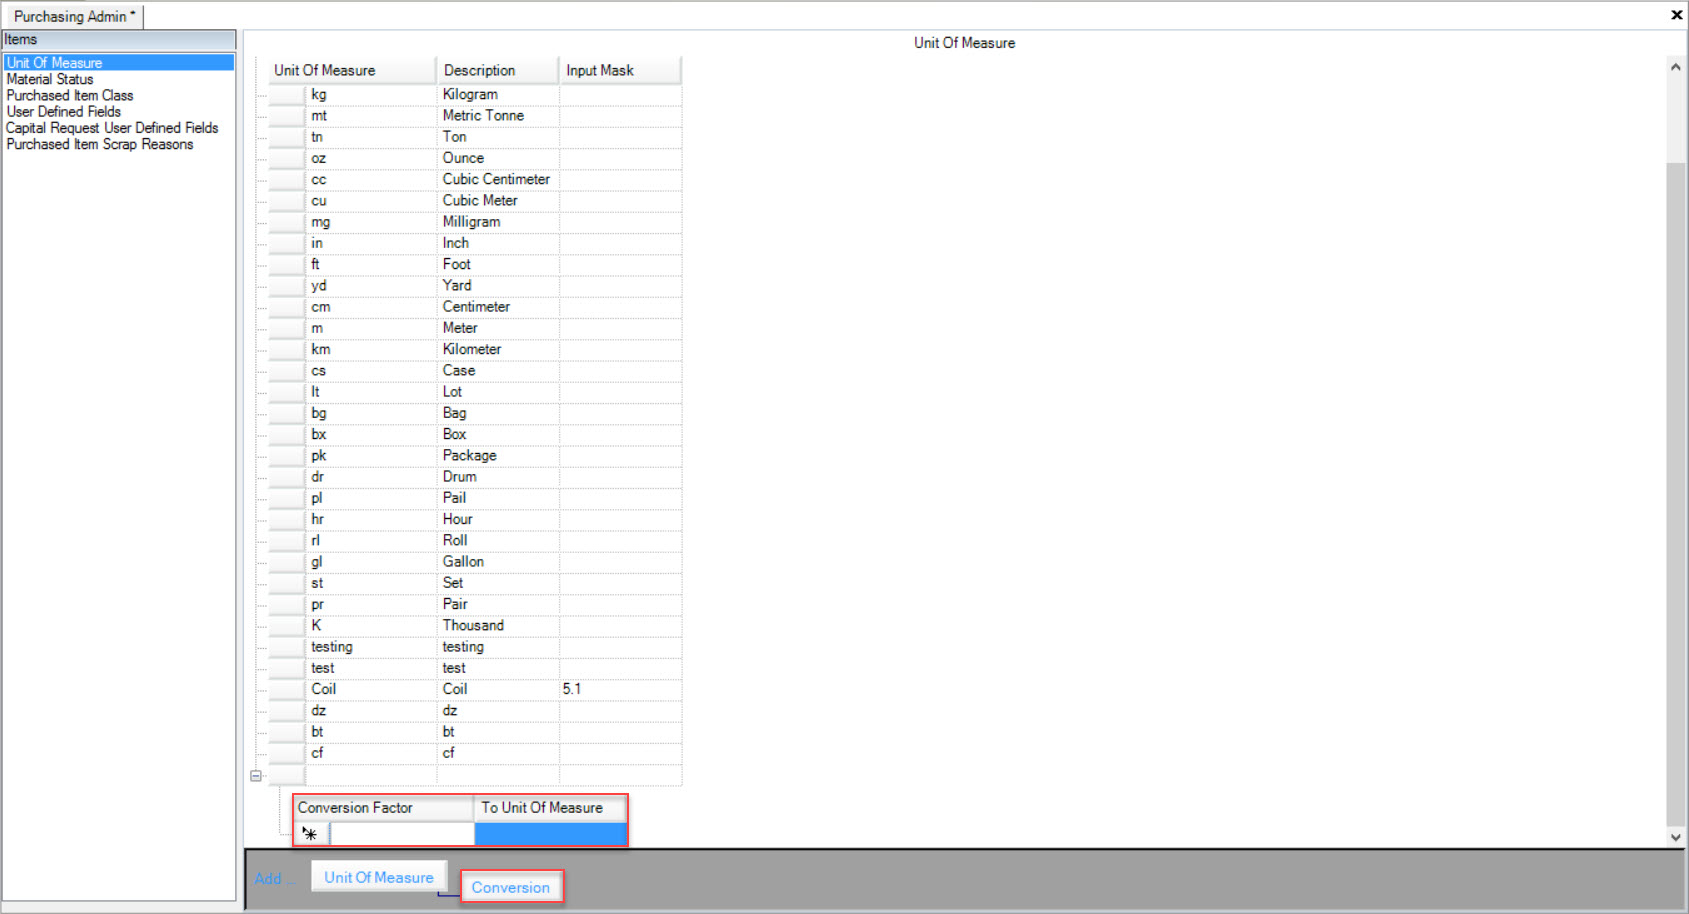
Once the necessary information has been entered in, make sure to save before exiting the screen.
Note
Users can add as many Conversions to a Unit of Measure as needed.
Editing a Conversion
To edit a Conversion, navigate to the  tab and click on the
 ![]() icon. The Purchasing Admin screen will appear.
icon. The Purchasing Admin screen will appear.

Make sure to select the Unit of Measure tab located to the left of the screen.

Locate the Unit of Measure you wish to edit a Conversion from and click on the plus sign located to the left of the row.
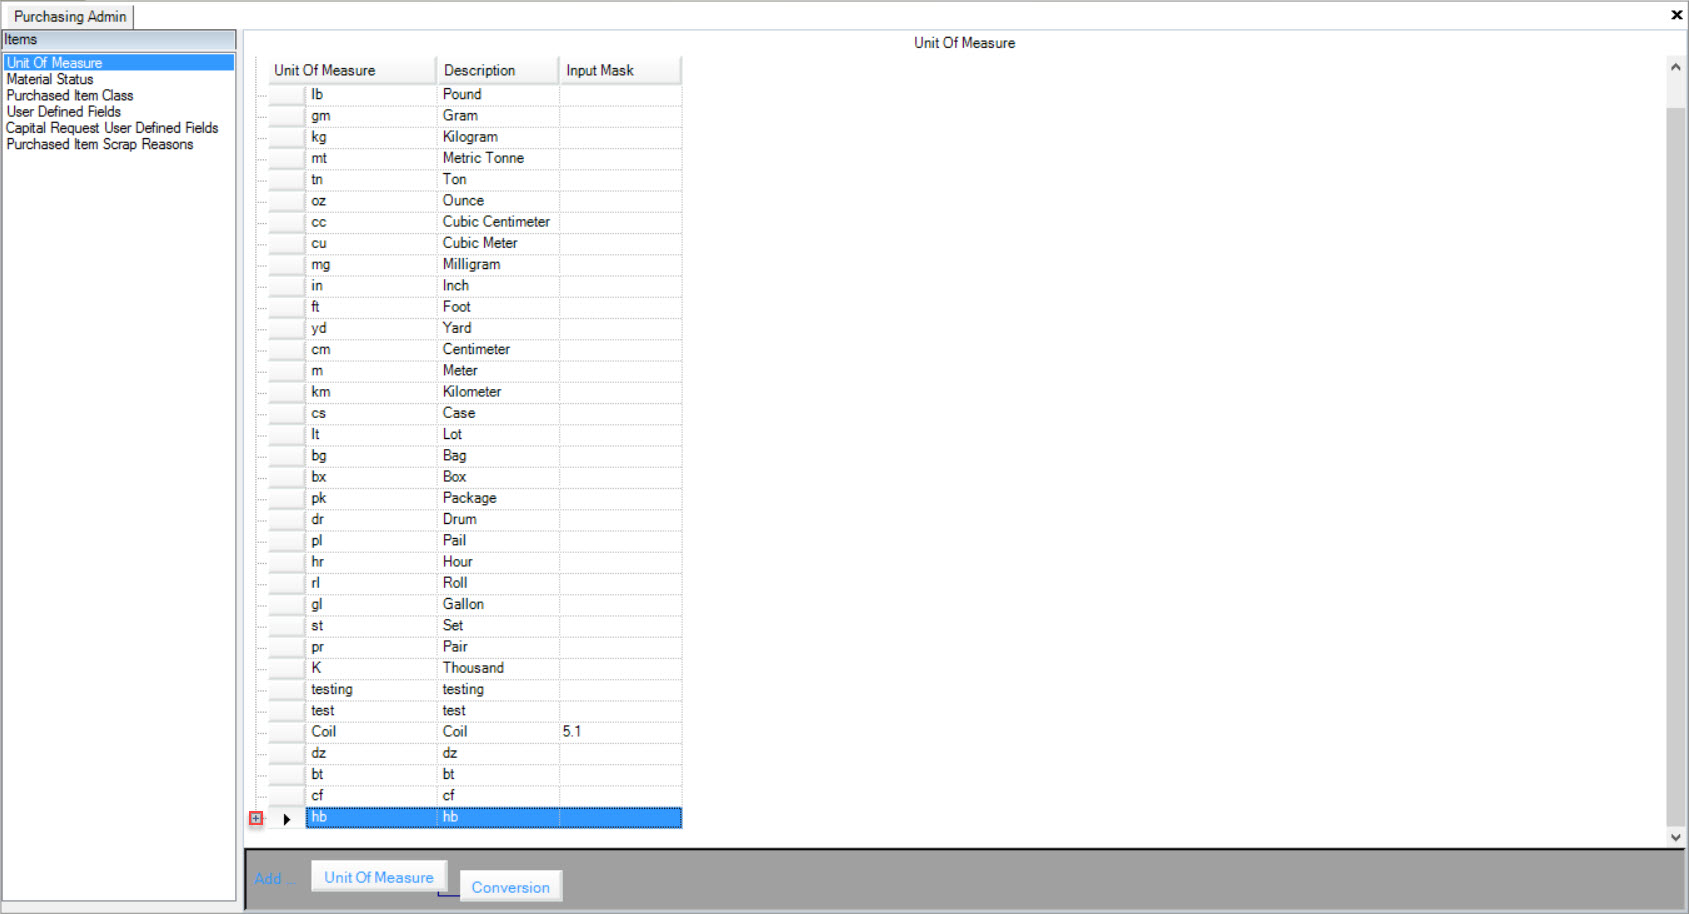
Make the necessary changes using the available textbox and drop-down menu.
Once the necessary changes have been made, make sure to save before exiting the screen.
Deleting a Conversion
To delete a Conversion, navigate to the  tab and click on the
 ![]() icon. The Purchasing Admin screen will appear.
icon. The Purchasing Admin screen will appear.

Make sure to select the Unit of Measure tab located to the left of the screen.

Locate the Unit of Measure you wish to edit a Conversion from and click on the plus sign located to the left of the row.

Select the Conversion you wish to delete by highlighting the appropriate row. Use your Delete key and when the system prompts you, select Yes.
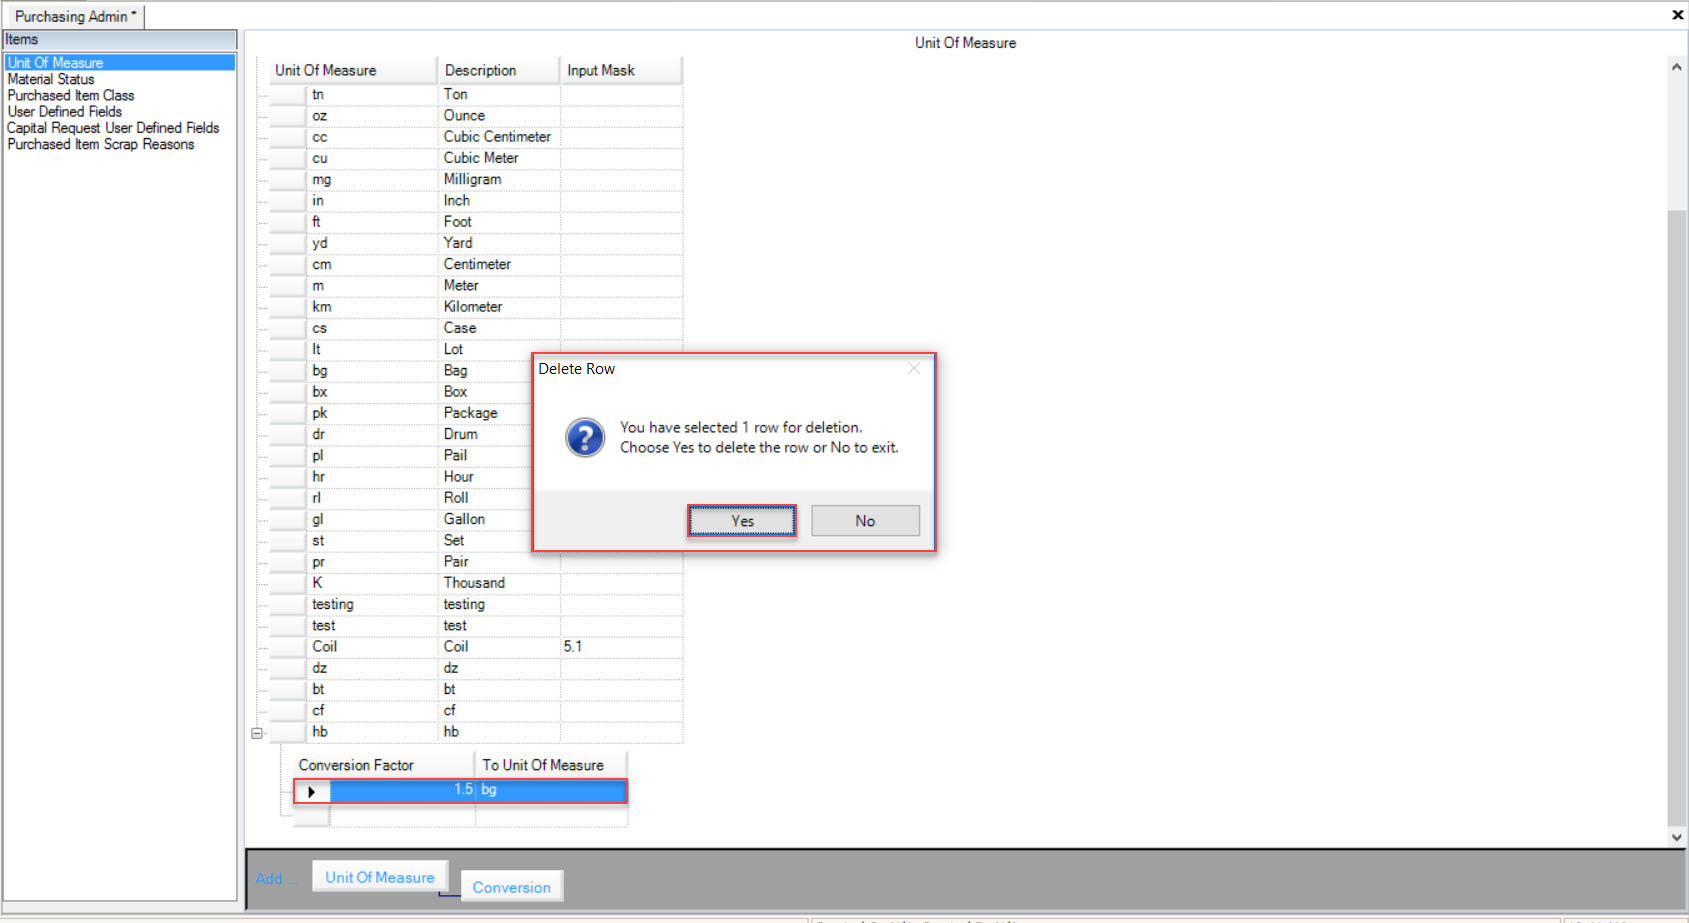
The highlighted Conversion will be deleted.
Make sure to save your changes before exiting the screen.
Material Status
To view all available Material Statuses, navigate to the  tab and click on the
 ![]() icon. The Purchasing Admin screen will appear.
icon. The Purchasing Admin screen will appear.

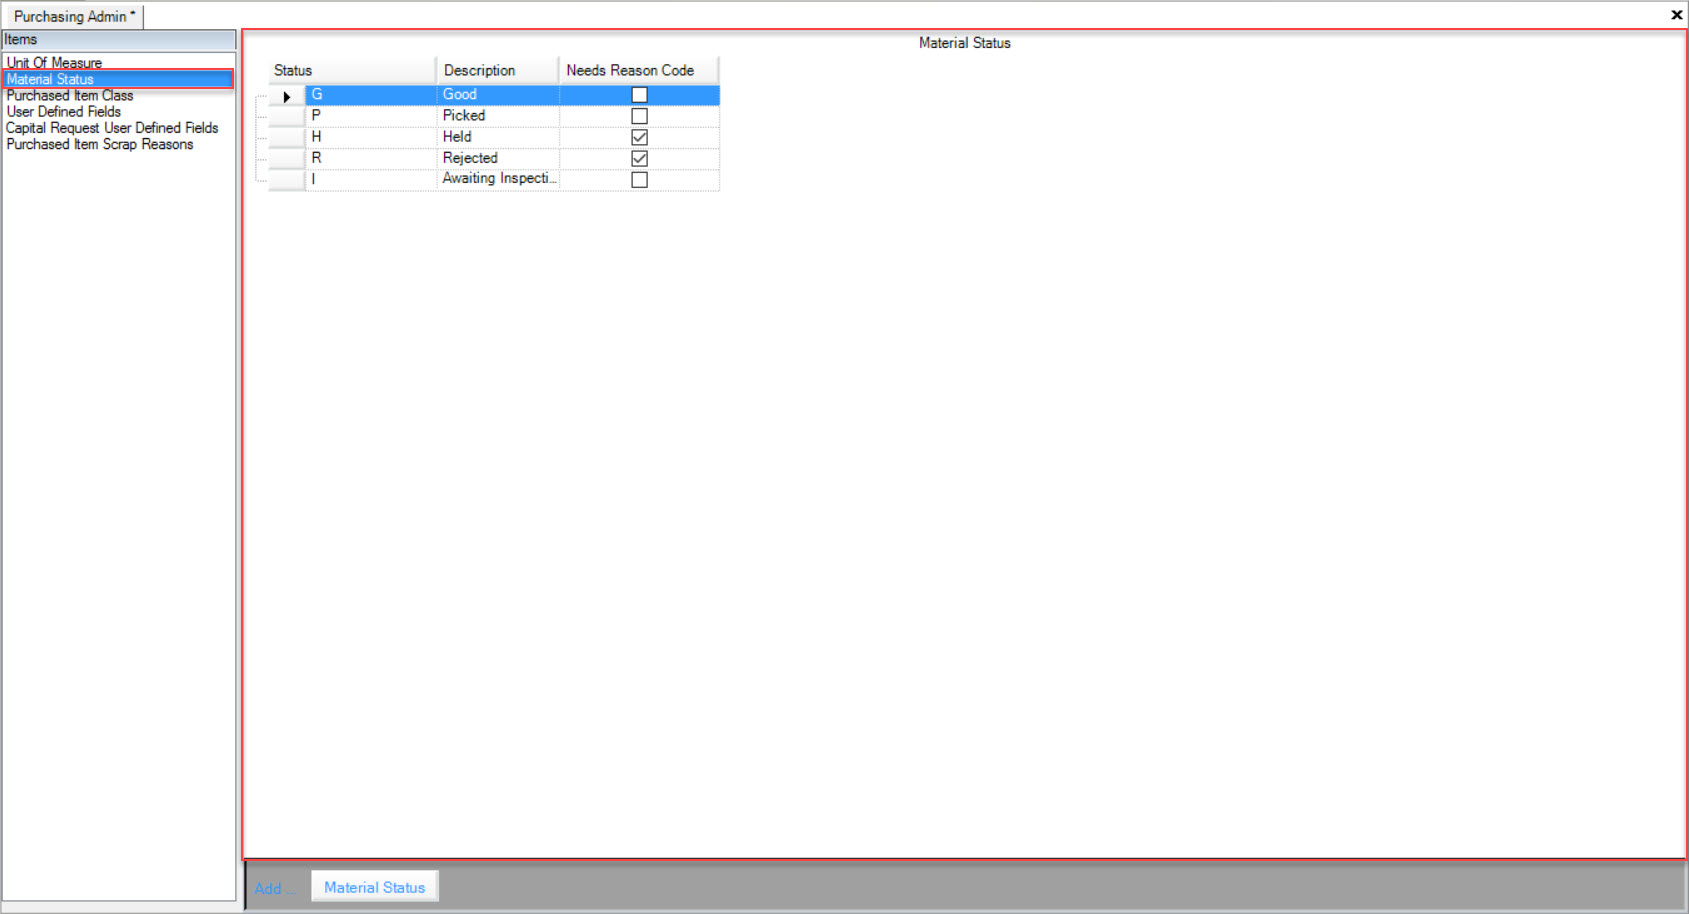
Make sure to select the Material Status tab located to the left of the screen.
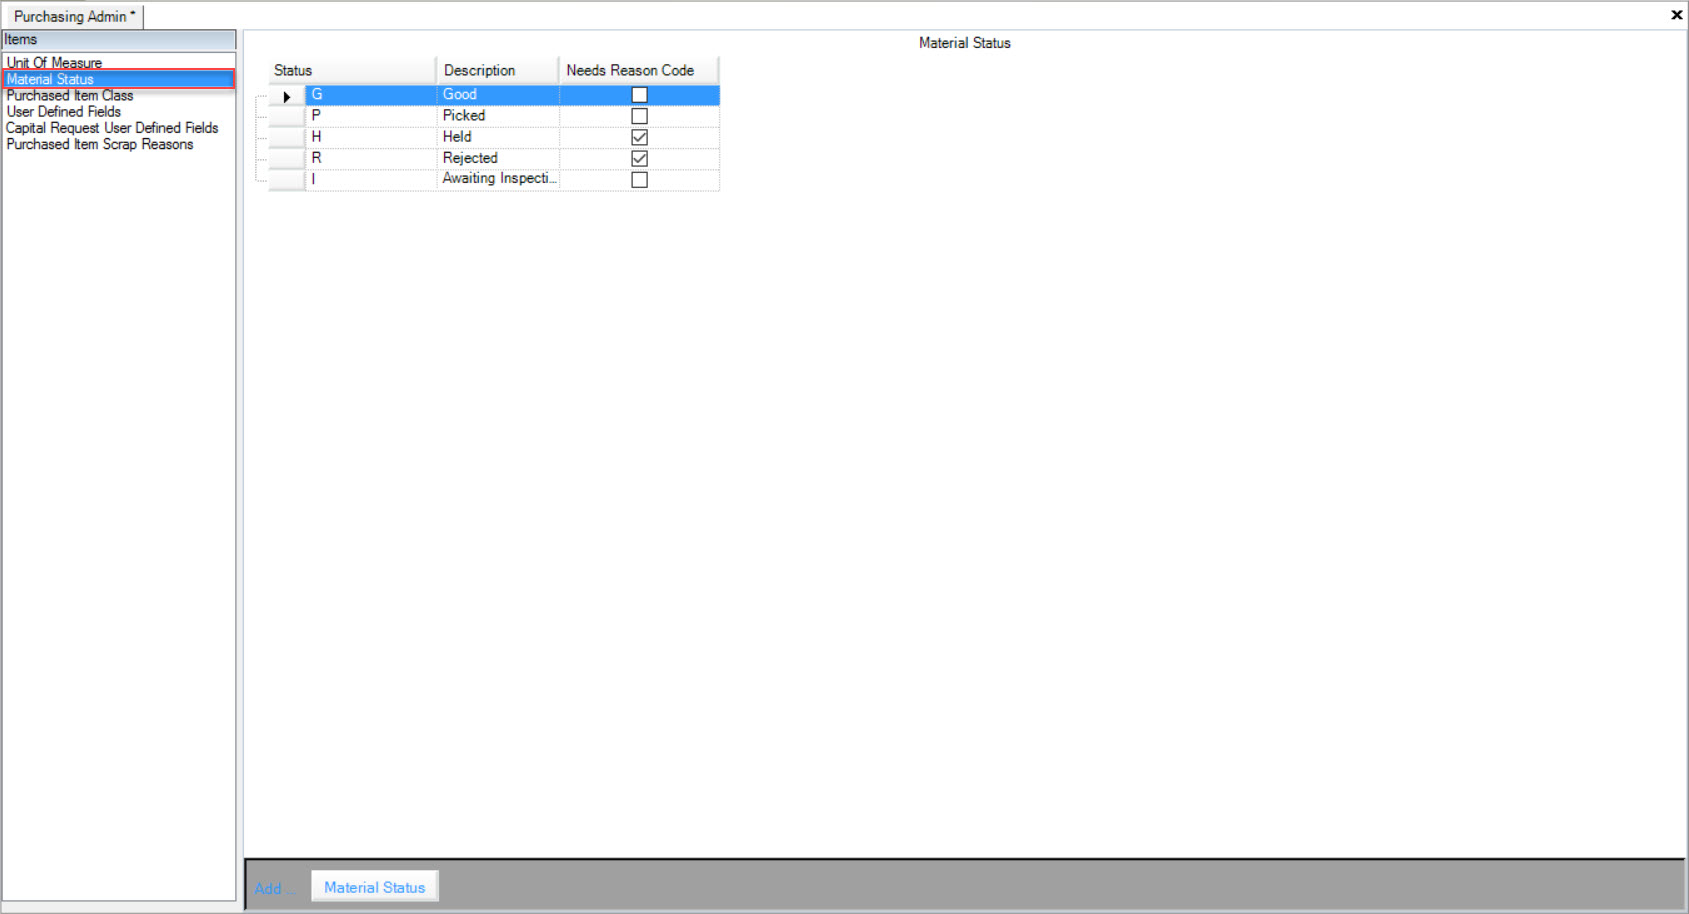
Users will be able to view all available Material Statuses in the system.
Adding a Material Status
To add a Material Status, navigate to the  tab and click on the
 ![]() icon. The Purchasing Admin screen will appear.
icon. The Purchasing Admin screen will appear.

Make sure to select the Material Status tab located to the left of the screen.

Click on the  button location at the bottom of the screen.
A new row will appear where users can enter in the Status, Description, and select whether or not it needs a Reason Code.
Make sure to save your changes before exiting the screen.
Editing a Material Status
To edit a Material Status, navigate to the  tab and click on the
 ![]() icon. The Purchasing Admin screen will appear.
icon. The Purchasing Admin screen will appear.

Make sure to select the Material Status tab located to the left of the screen.

Locate the Material Status that you wish to edit and make the necessary changes using the available textboxes and checkbox.
Once the necessary changes have been made, make sure to save before exiting the screen.
Deleting a Material Status
To delete a Material Status, navigate to the  tab and click on the
 ![]() icon. The Purchasing Admin screen will appear.
icon. The Purchasing Admin screen will appear.

Make sure to select the Material Status tab located to the left of the screen.

Locate the Material Status that you wish to delete and highlight the appropriate row. Use your Delete key and when the system prompts you, select Yes.
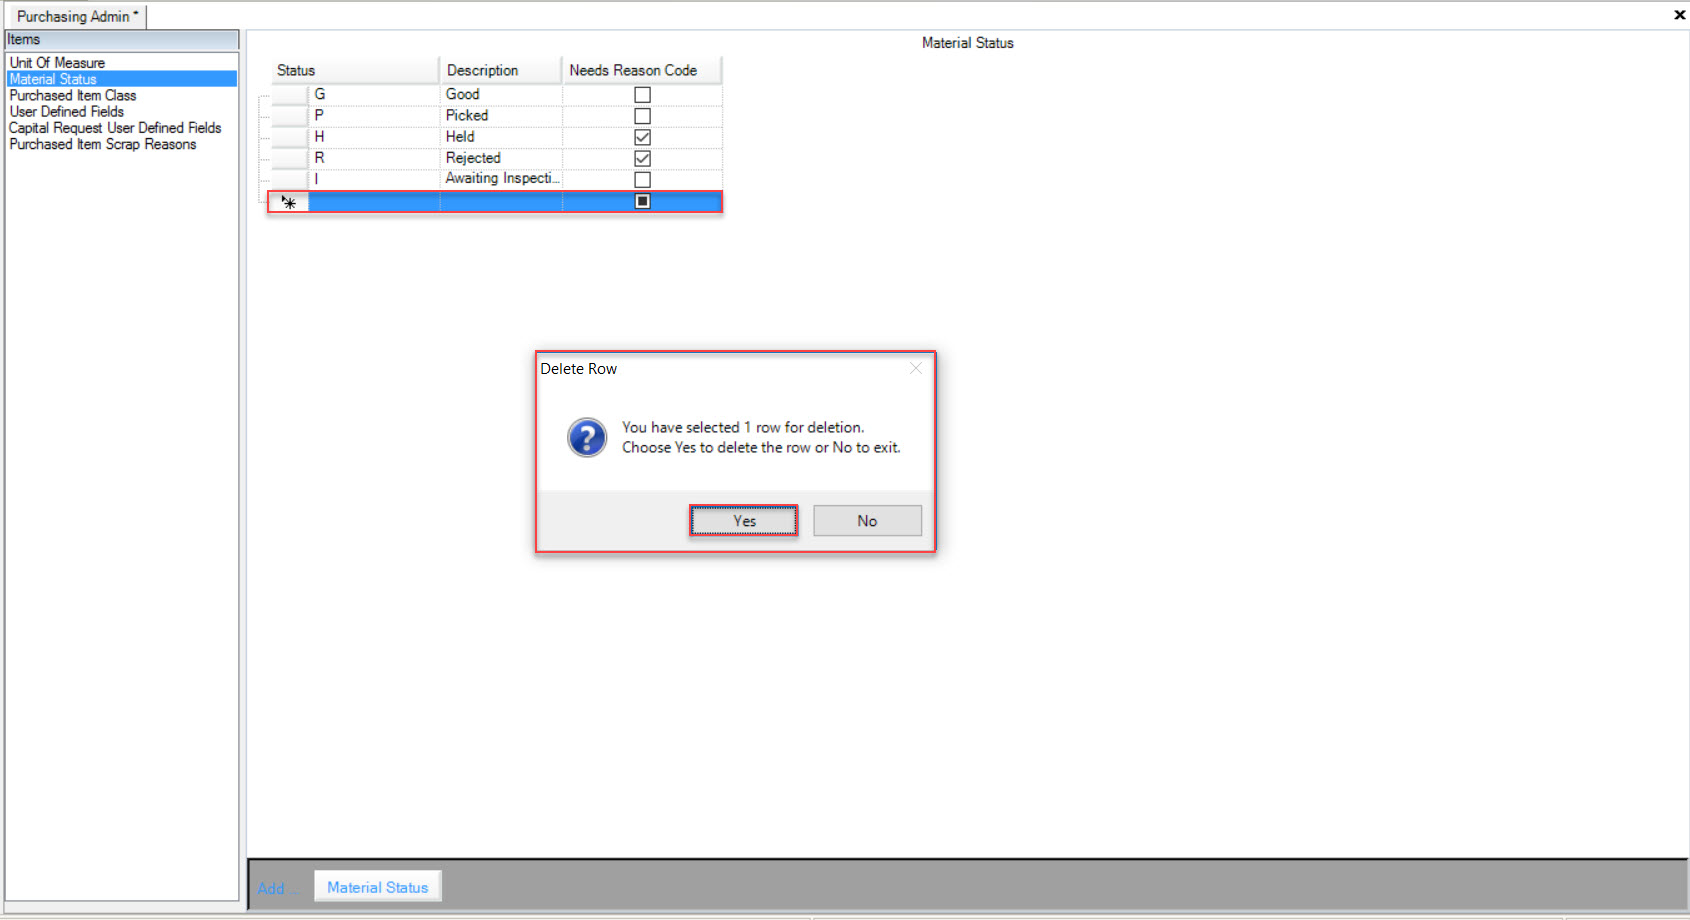
The highlighted Material Status will be deleted.
Make sure to save your changes before exiting the screen.
Purchased Item Class
To view all available Purchased Item Classes, navigate to the  tab and click on the
 ![]() icon. The Purchasing Admin screen will appear.
icon. The Purchasing Admin screen will appear.

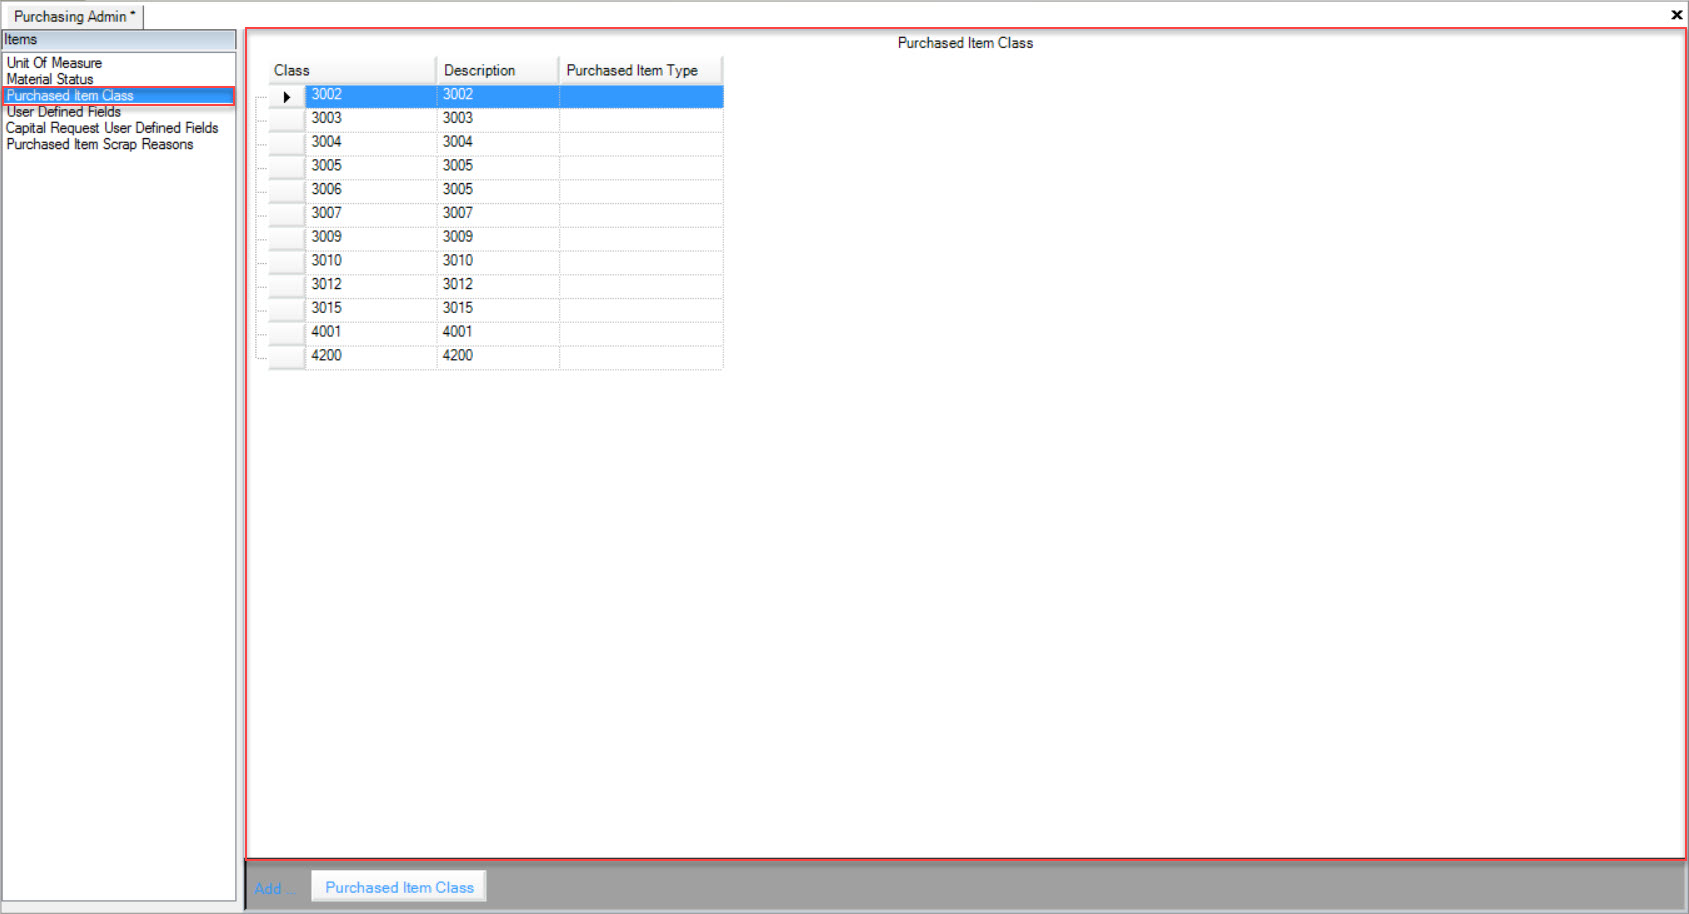
Make sure to select the Purchased Item Class tab located to the left of the screen.
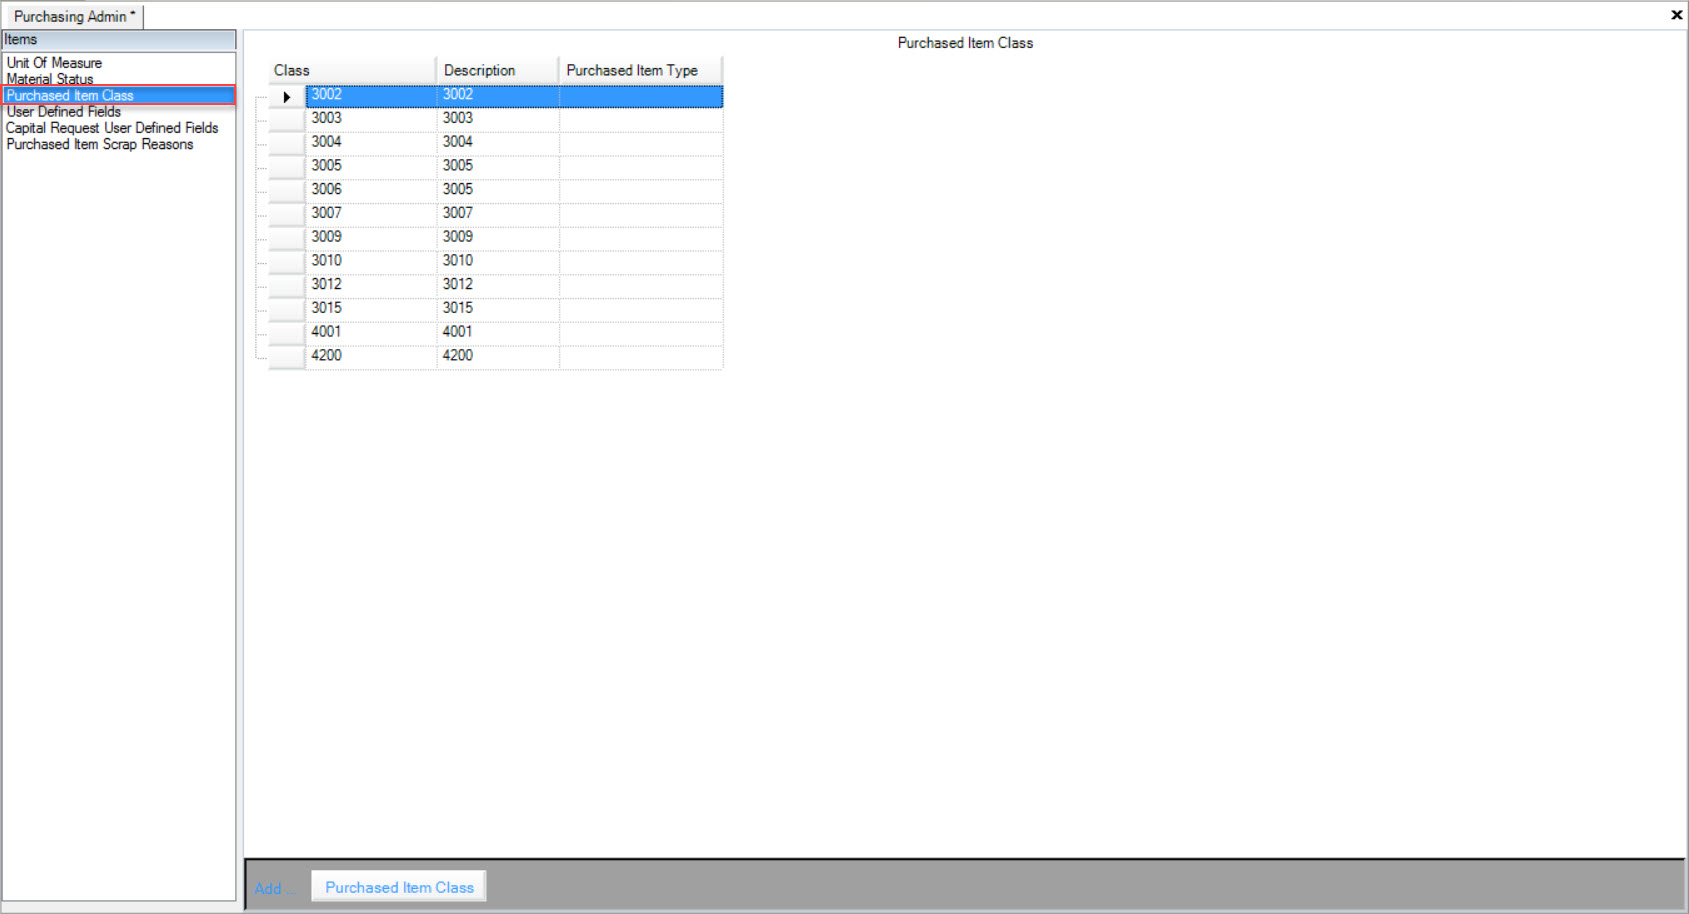
Users will be able to view all available Purchased Item Classes in the system.
Adding a Purchased Item Class
To add a Purchased Item Class, navigate to the  tab and click on the
 ![]() icon. The Purchasing Admin screen will appear.
icon. The Purchasing Admin screen will appear.

Make sure to select the Purchased Item Class tab located to the left of the screen.

Click on the  button located at the bottom of the screen.
A new row will appear where users can enter in the Class, Description, and select the Purchased Item Type.
Make sure to save your changes before exiting the screen.
Editing a Purchased Item Class
To edit a Purchased Item Class, navigate to the  tab and click on the
 ![]() icon. The Purchasing Admin screen will appear.
icon. The Purchasing Admin screen will appear.

Make sure to select the Purchased Item Class tab located to the left of the screen.

Locate the Purchased Item Class you wish to edit and make the necessary changes using the available textboxes and drop-down menu.
Once the necessary changes have been made, make sure to save before exiting the screen.
Deleting a Purchased Item Class
To delete a Purchased Item Class, navigate to the  tab and click on the
 ![]() icon. The Purchasing Admin screen will appear.
icon. The Purchasing Admin screen will appear.

Make sure to select the Purchased Item Class tab located to the left of the screen.

Locate the Purchased Item Class you wish to delete and highlight the appropriate row. Use your Delete key and when the system prompts you, select Yes.
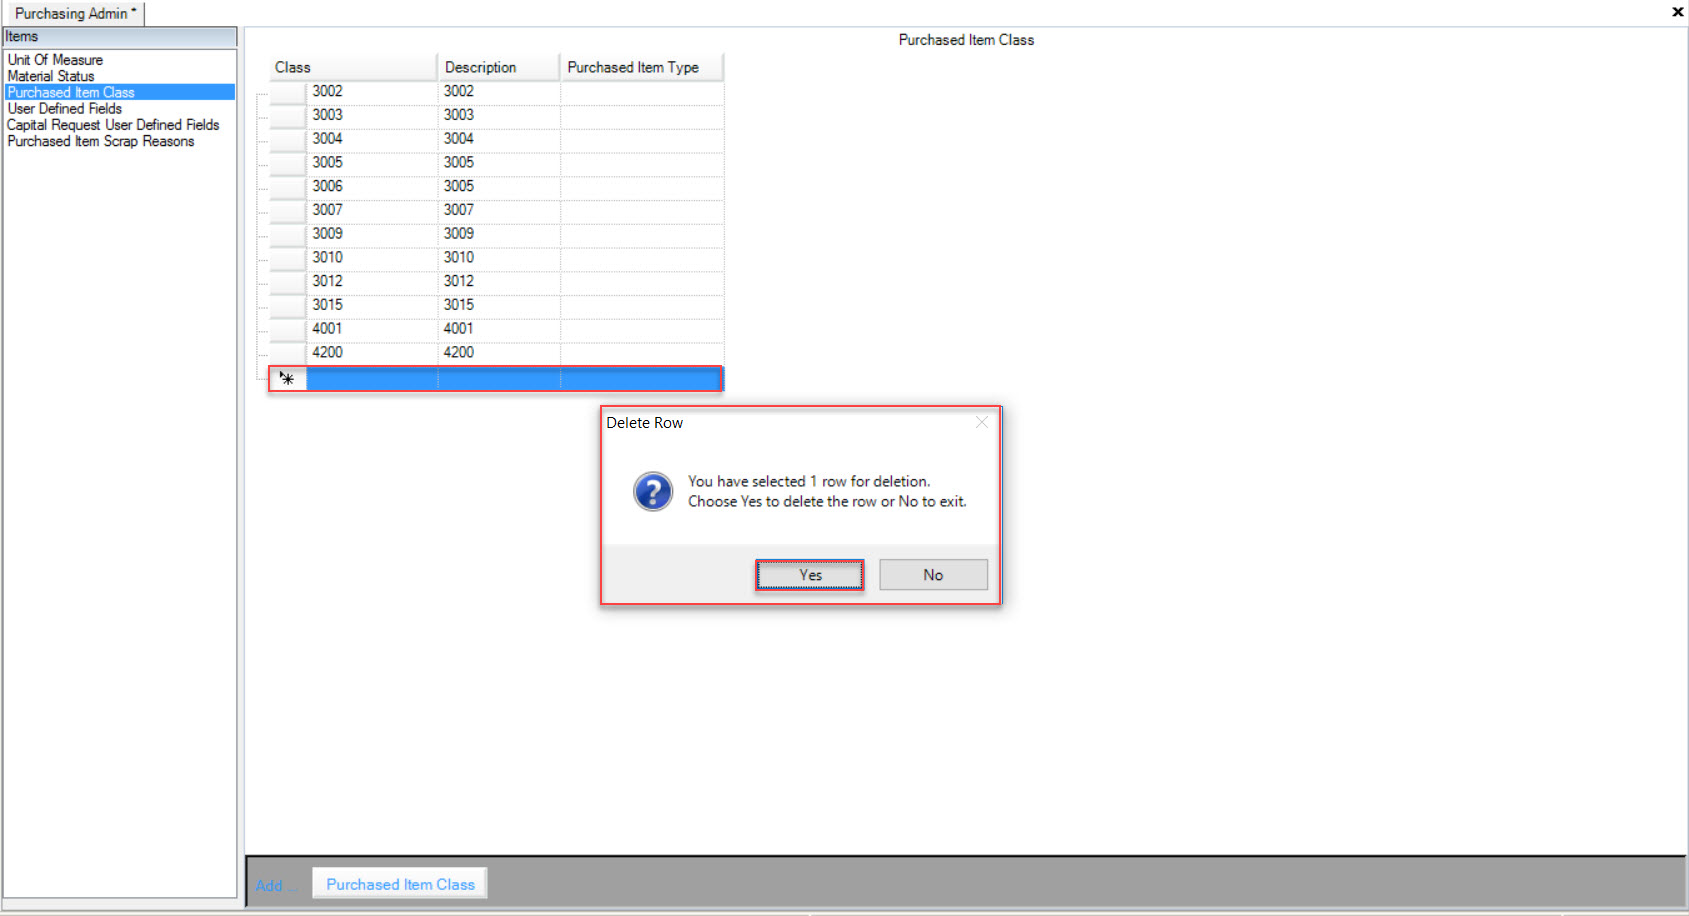
The highlighted Purchased Item Class will be deleted.
Make sure to save your changes before exiting the screen.
User Defined Fields
To view all available User Defined Fields, navigate to the  tab and click on the
 ![]() icon. The Purchasing Admin screen will appear.
icon. The Purchasing Admin screen will appear.

Make sure to select the User Defined Fields tab located to the left of the screen.
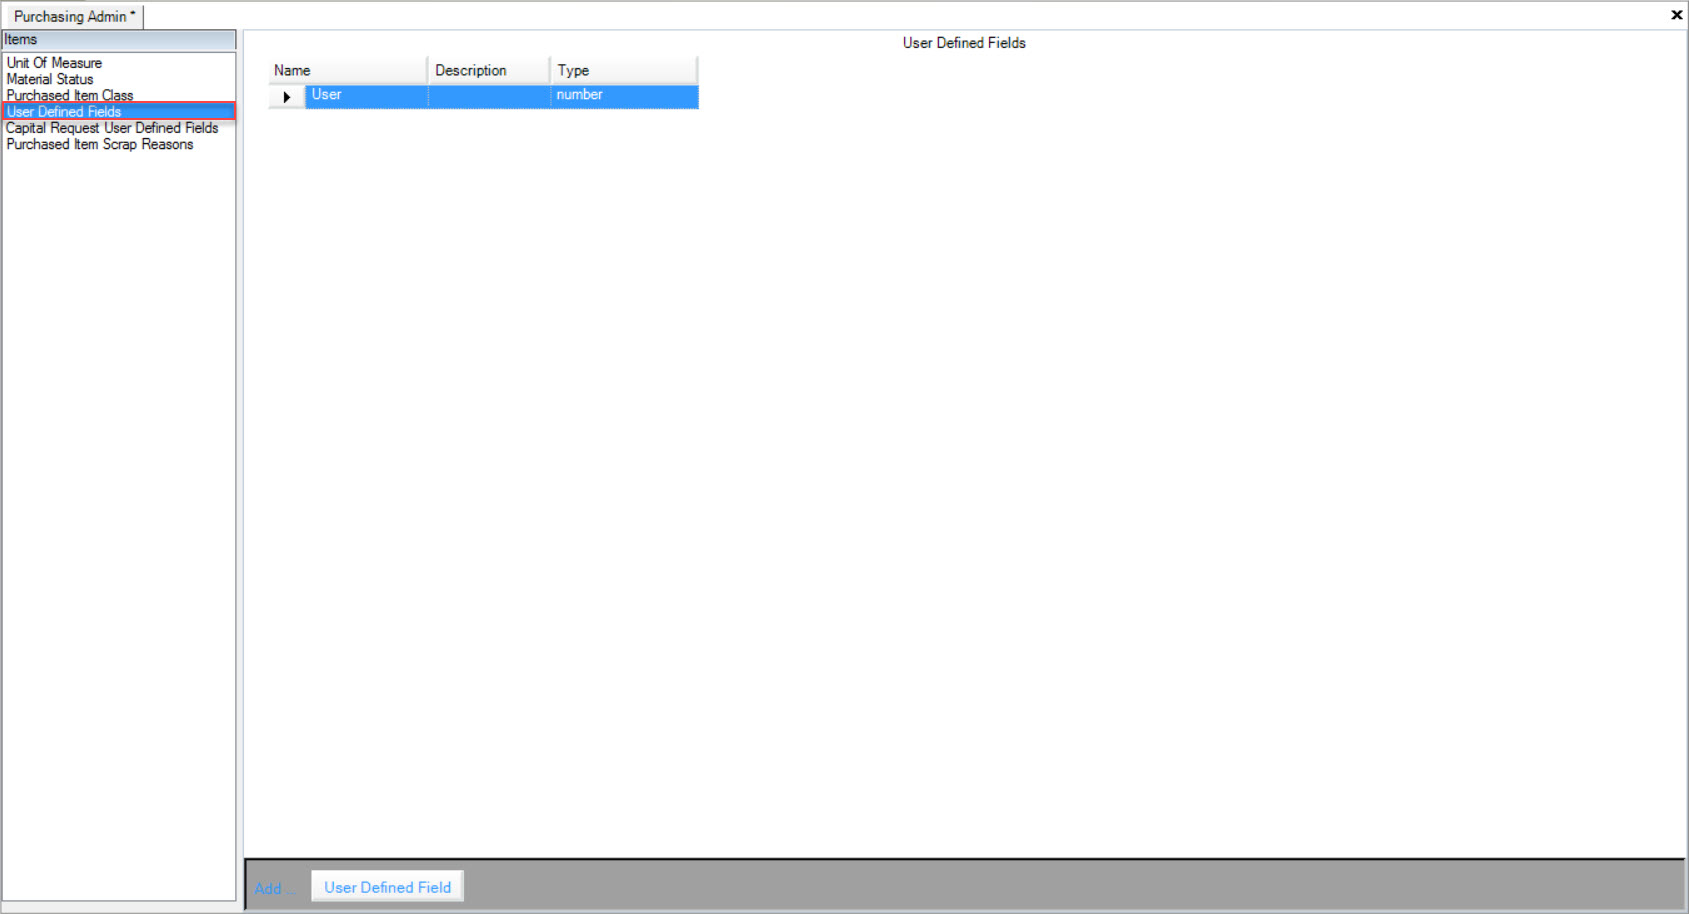
Users will be able to view all available User Defined Fields in the system.
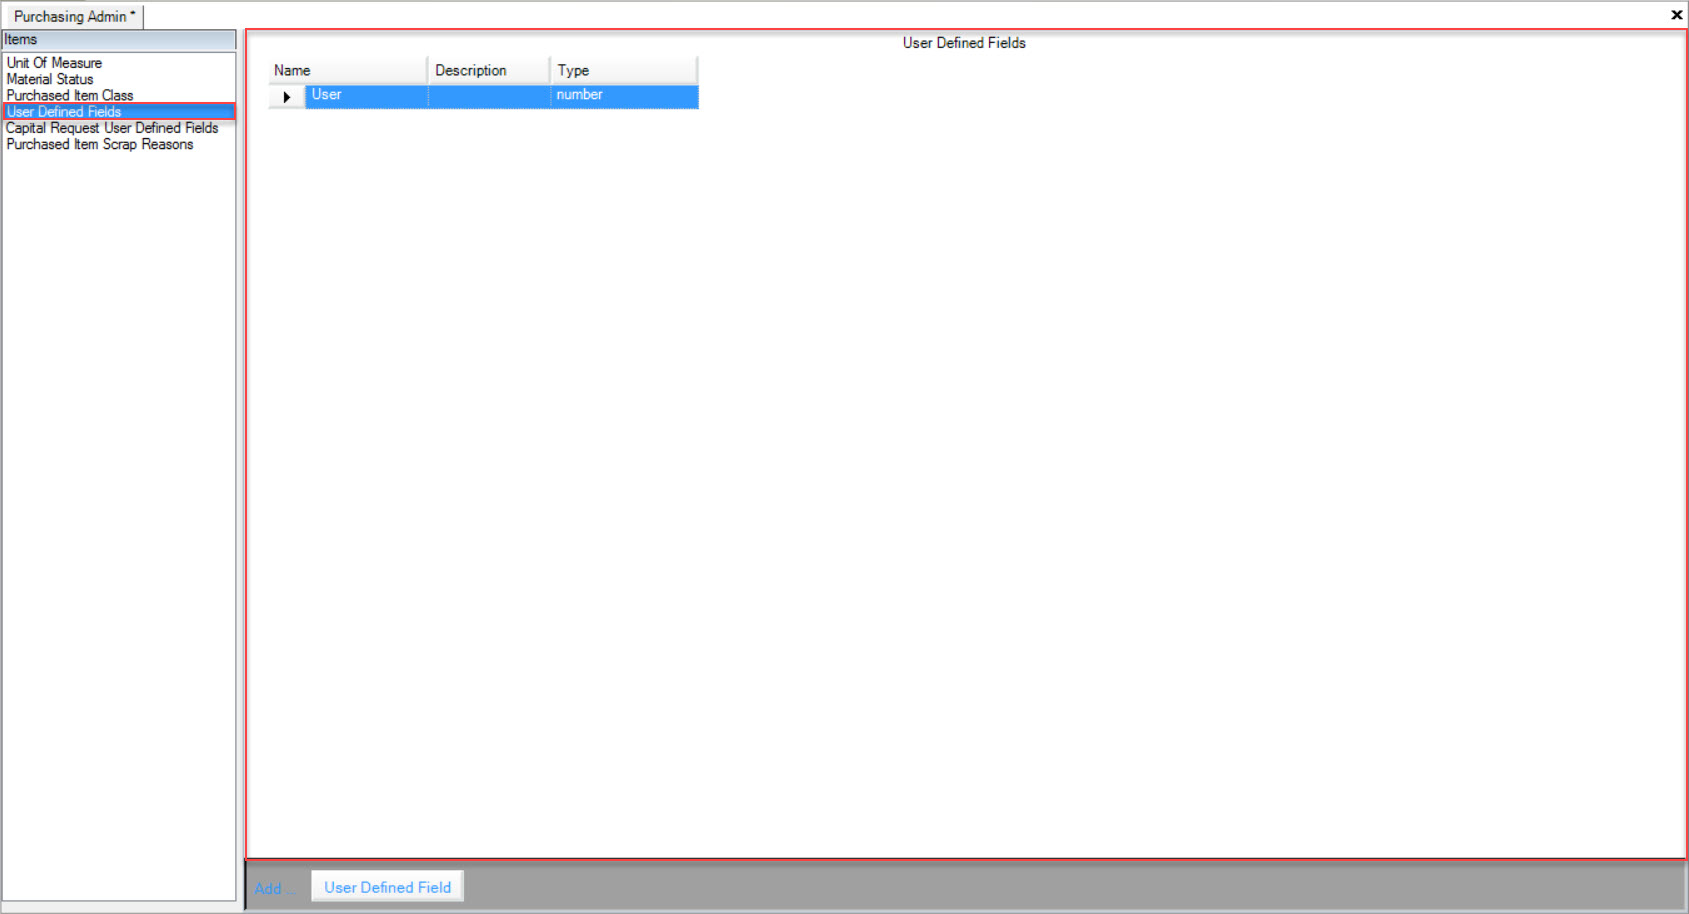
Adding User Defined Fields
To add a User Defined Field, navigate to the  tab and click on the
 ![]() icon. The Purchasing Admin screen will appear.
icon. The Purchasing Admin screen will appear.

Make sure to select the User Defined Fields tab located to the left of the screen.

Click on the  button located at the bottom of the screen.
A new row will appear where users can enter in the Name, Description, and select the Type.
Make sure to save your changes before exiting the screen.
Editing a User Defined Field
To edit a User Defined Field, navigate to the  tab and click on the
 ![]() icon. The Purchasing Admin screen will appear.
icon. The Purchasing Admin screen will appear.

Make sure to select the User Defined Fields tab located to the left of the screen.

Locate the User Defined Field that you wish to edit and make the necessary changes using the available textboxes and drop-down menu.
Once the necessary changes have been made, make sure to save before exiting the screen.
Deleting a User Defined Field
To delete a User Defined Field, navigate to the  tab and click on the
 ![]() icon. The Purchasing Admin screen will appear.
icon. The Purchasing Admin screen will appear.

Make sure to select the User Defined Fields tab located to the left of the screen.

Locate the User Defined Field that you wish to delete and highlight the appropriate row. Use your Delete key and when the system prompts you, select Yes.
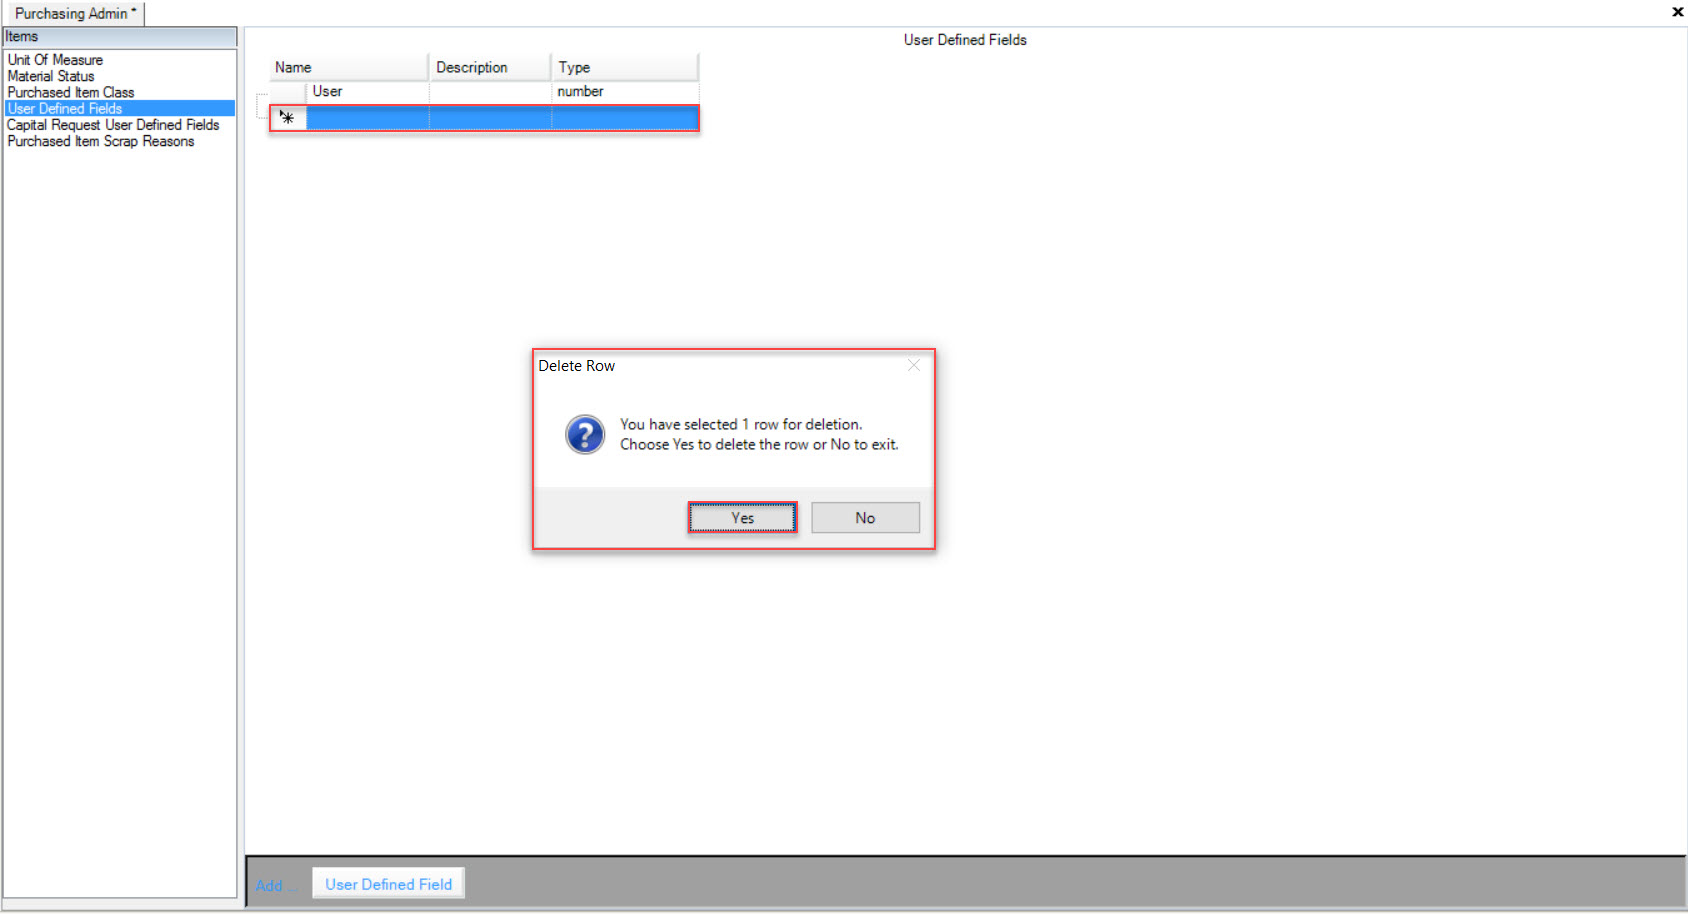
The highlighted User Defined Field will be deleted.
Make sure to save your changes before exiting the screen.
Capital Request User Defined Fields
To view all available Capital Request User Defined Fields, navigate to the  tab and click on the
 ![]() icon. The Purchasing Admin screen will appear.
icon. The Purchasing Admin screen will appear.

Make sure to select the Capital Request User Defined Fields tab located to the left of the screen.
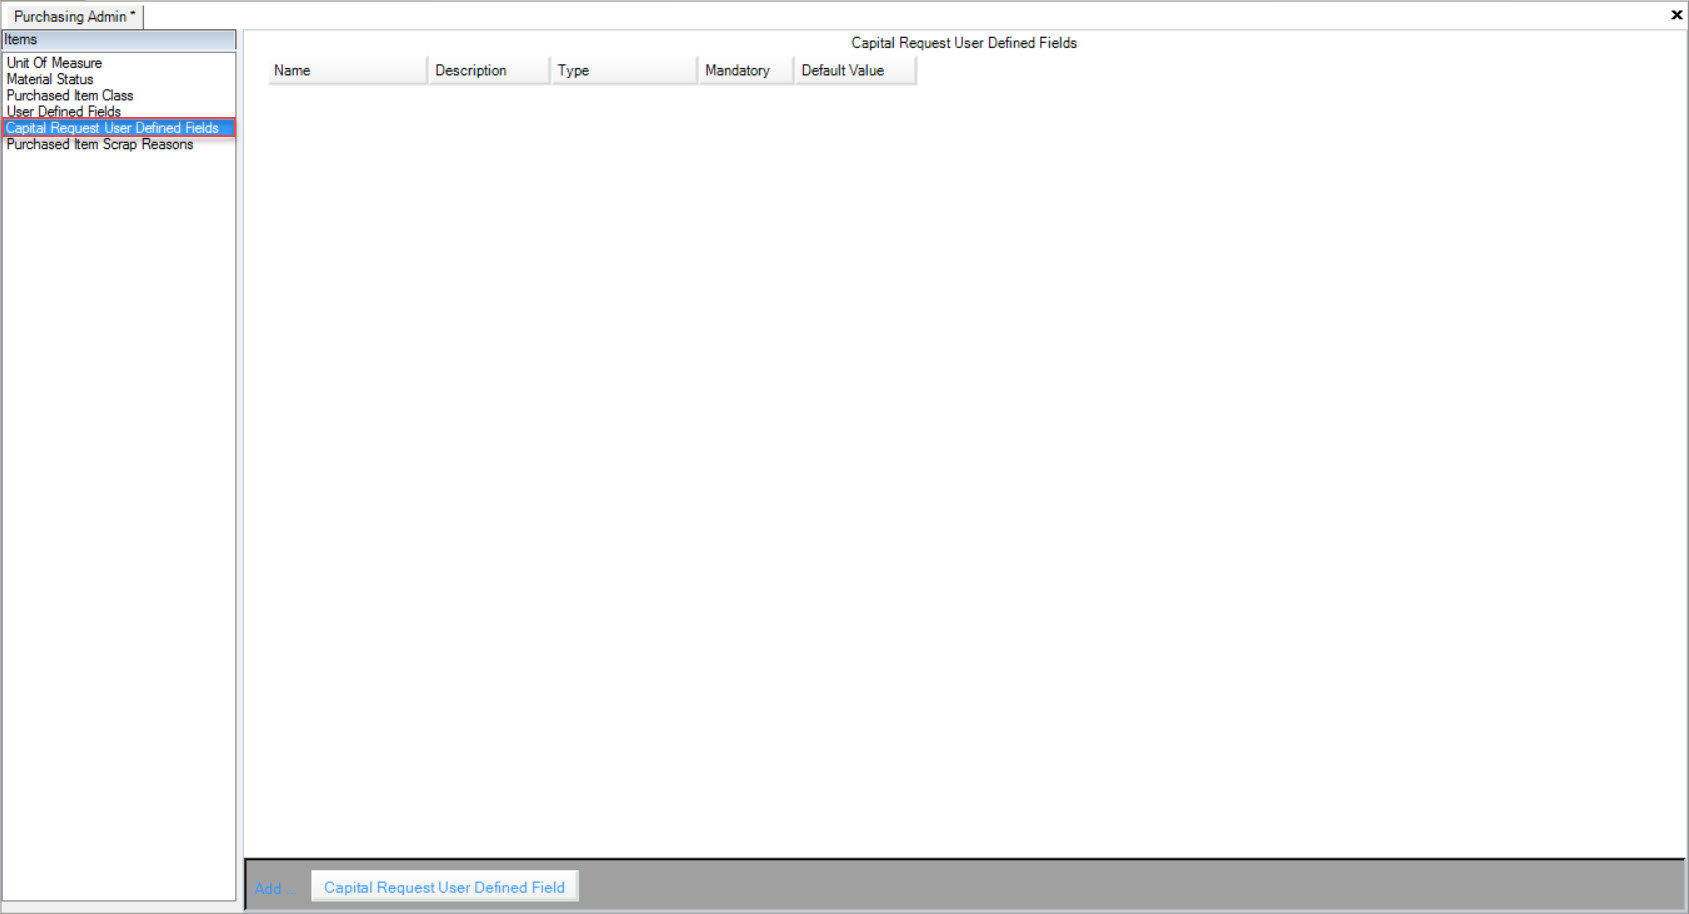
Users will be able to view all available Capital Request User Defined Fields in the system.
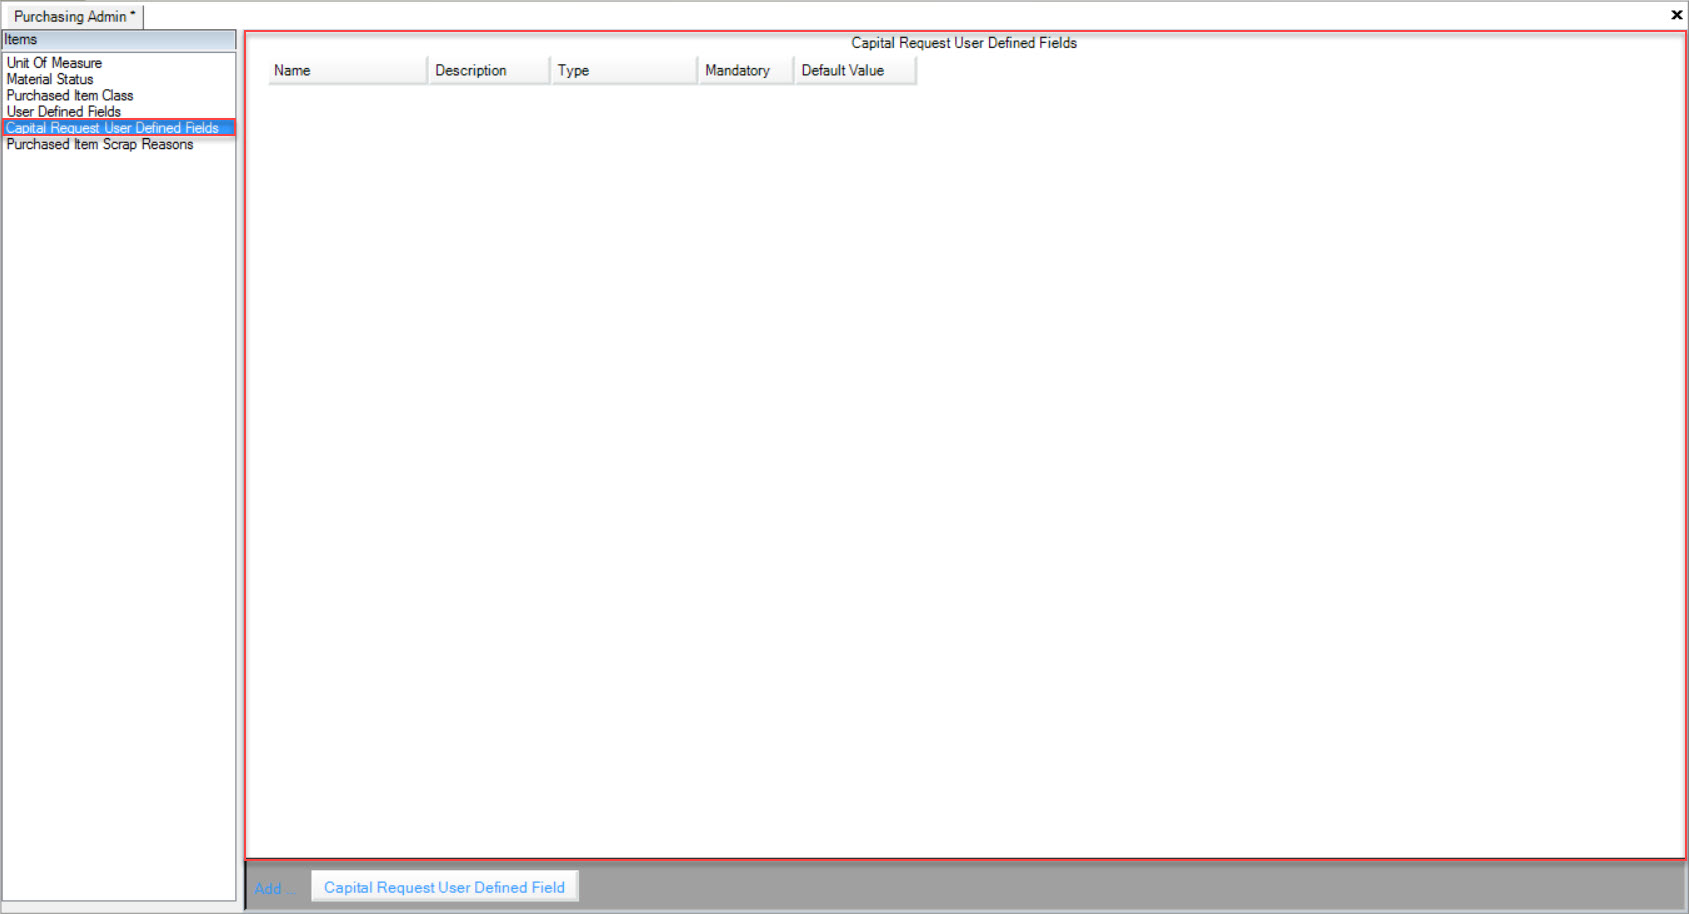
Adding a Capital Request User Defined Fields
To add a Capital Request User Defined Field, navigate to the  tab and click on the
 ![]() icon. The Purchasing Admin screen will appear.
icon. The Purchasing Admin screen will appear.

Make sure to select the Capital Request User Defined Fields tab located to the left of the screen.

Click on the  button located at the bottom of the screen.
A new row will appear where users can enter in the Name, Description, Default Value, and select the Type and whether or not it is Mandatory.
Make sure to save your changes before exiting the screen.
Editing a Capital Request User Defined Field
To edit a Capital Request User Defined Field, navigate to the  tab and click on the
 ![]() icon. The Purchasing Admin screen will appear.
icon. The Purchasing Admin screen will appear.

Make sure to select the Capital Request User Defined Fields tab located to the left of the screen.

Locate the Capital Request User Defined Field you wish to edit and make the necessary changes using the available textboxes and drop-down menus.
Once the necessary changes have been made, make sure to save before exiting the screen.
Deleting a Capital Request User Defined Field
To delete a Capital Request User Defined Field, navigate to the  tab and click on the
 ![]() icon. The Purchasing Admin screen will appear.
icon. The Purchasing Admin screen will appear.

Make sure to select the Capital Request User Defined Fields tab located to the left of the screen.

Locate the Capital Request User Defined Field you wish to delete and highlight the appropriate row. Use your Delete key and when the system prompts you, select Yes.
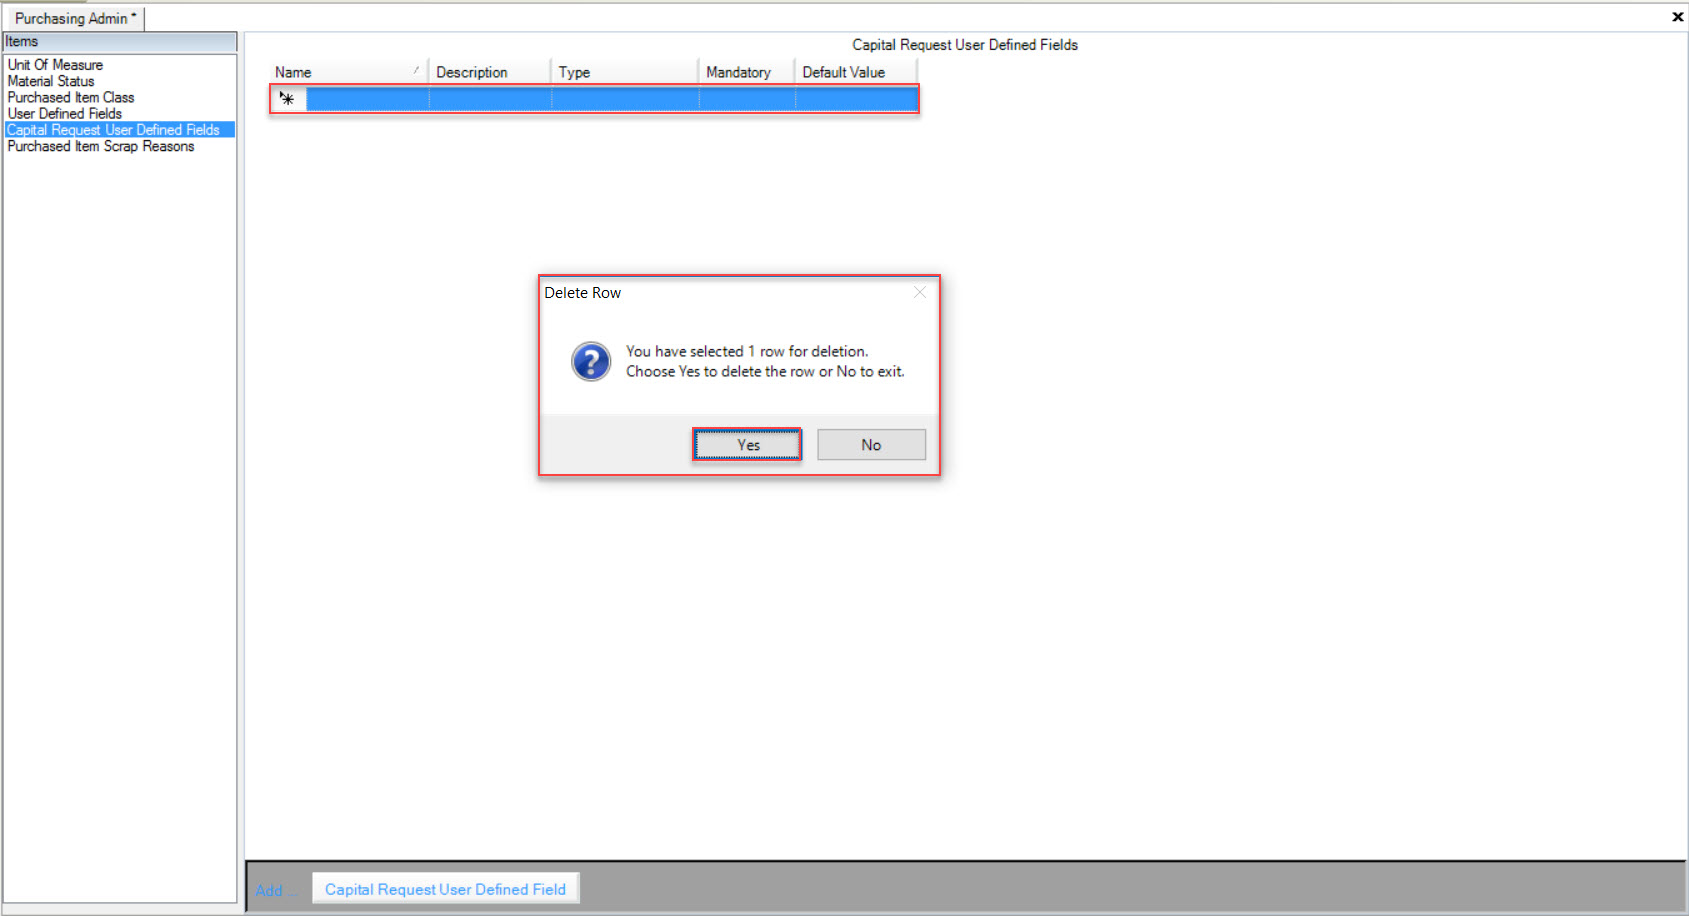
The highlighted Capital Request User Defined Field will be deleted.
Make sure to save your changes before exiting the screen.
Purchased Item Scrap Reasons
To view all available Purchased Item Scrap Reasons, navigate to the  tab and click on the
 ![]() icon. The Purchasing Admin screen will appear.
icon. The Purchasing Admin screen will appear.

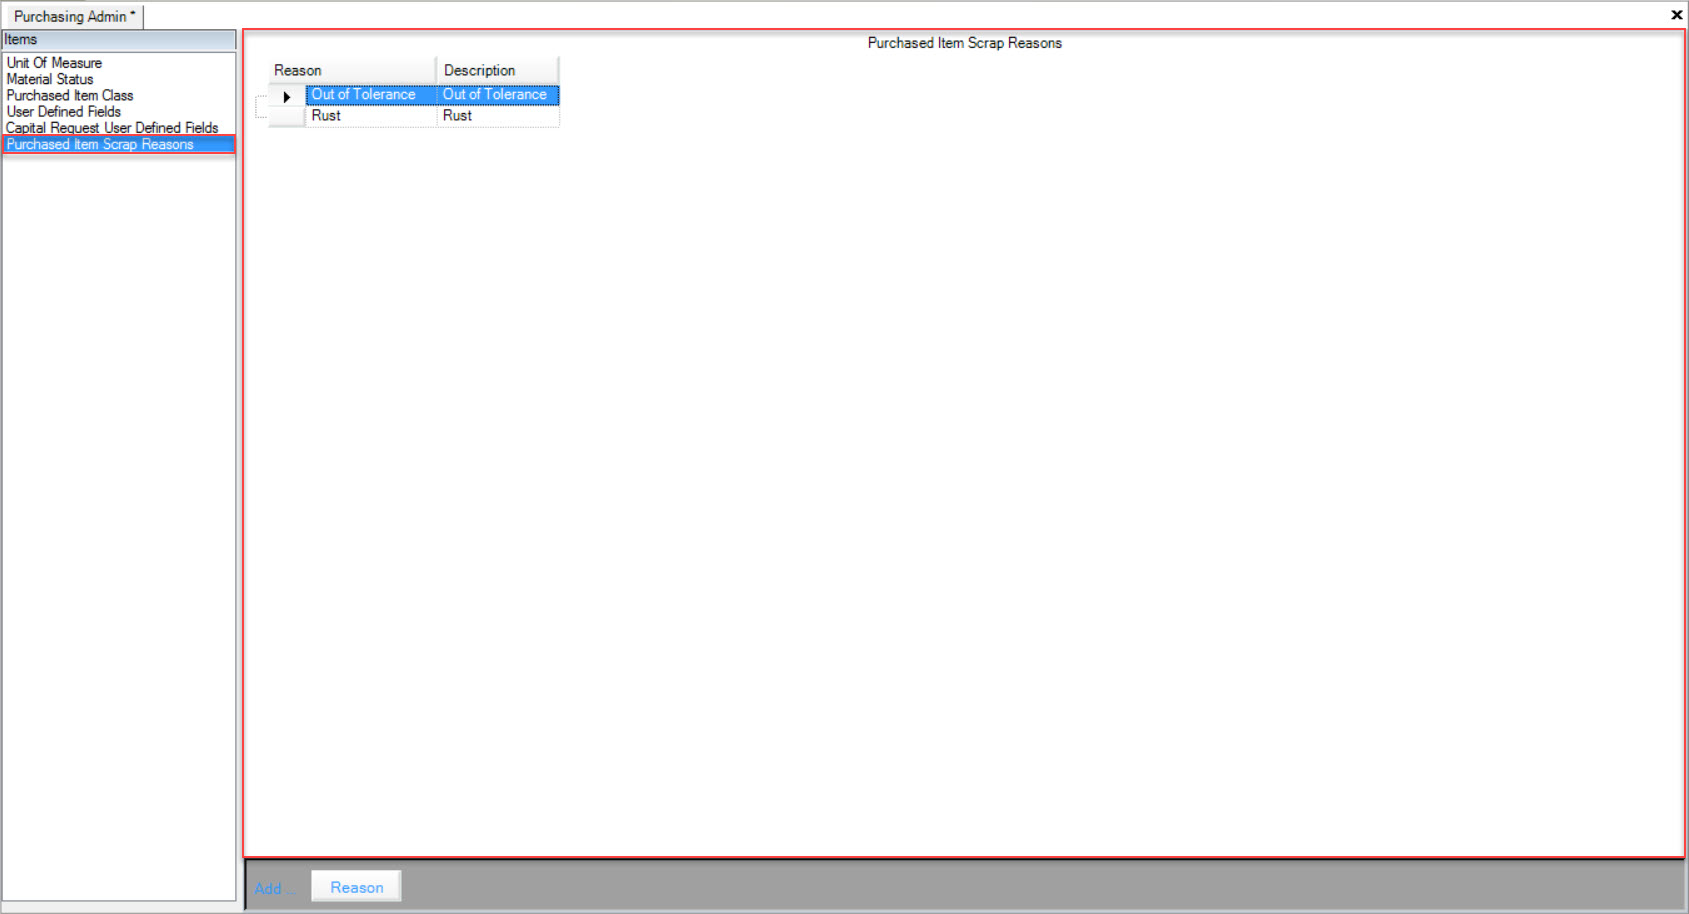
Make sure to select the Purchased Item Scrap Reasons tab located to the left of the screen.
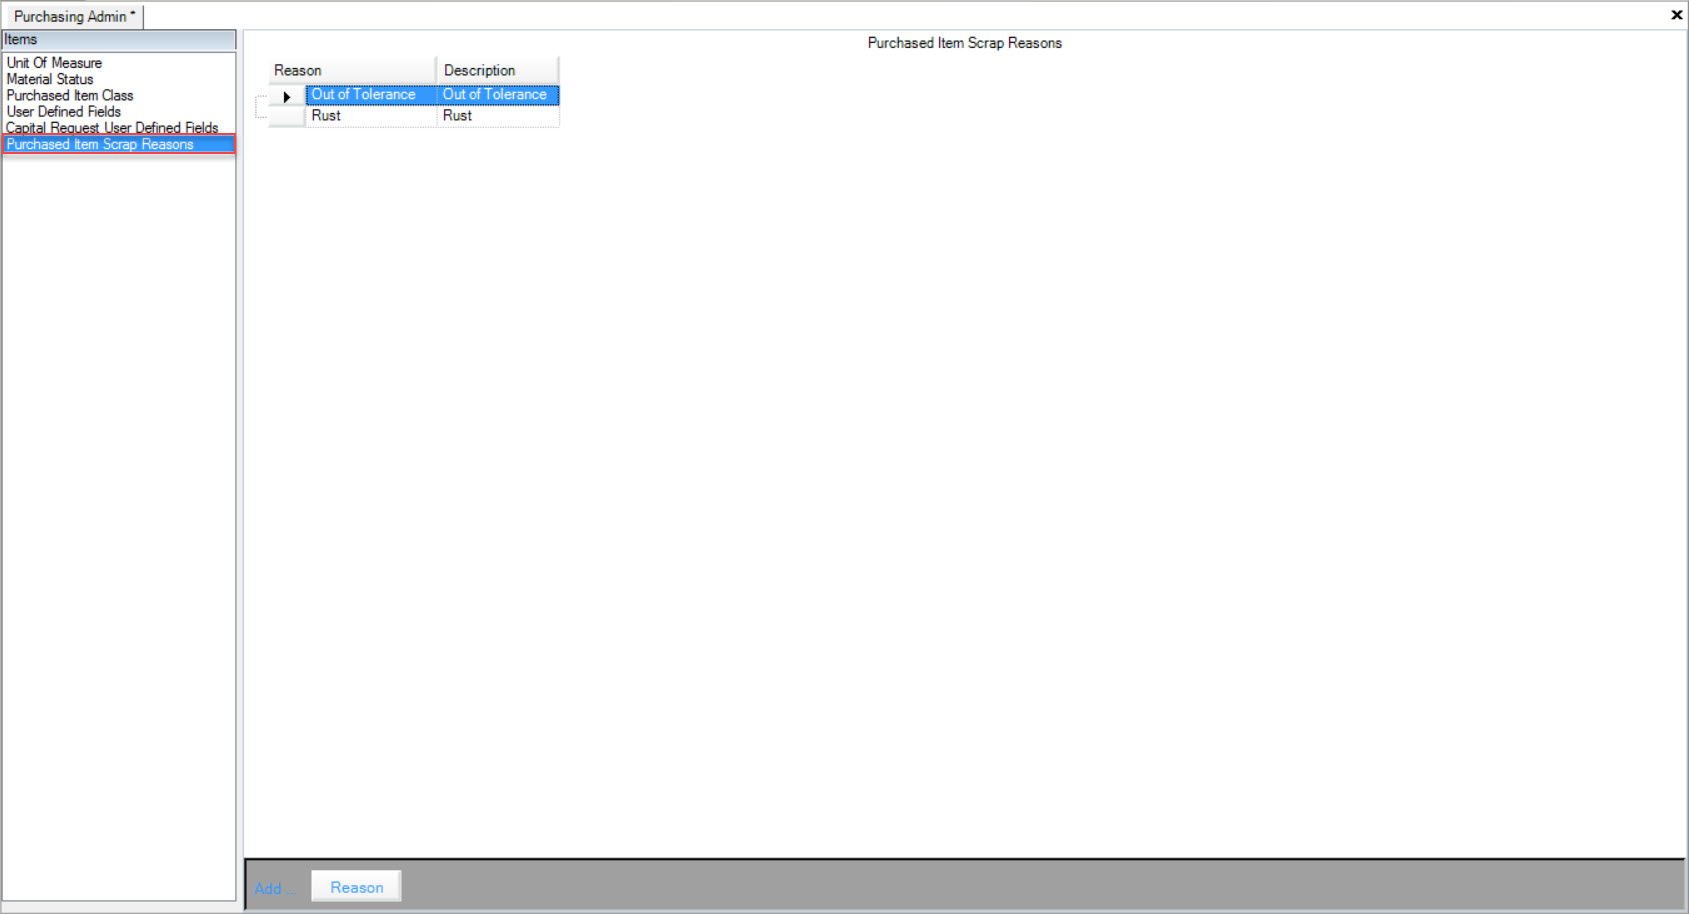
Users will be able to view all available Purchased Item Scrap Reasons in the system.
Adding a Purchased Item Scrap Reason
To add a Purchased Item Scrap Reason, navigate to the  tab and click on the
 ![]() icon. The Purchasing Admin screen will appear.
icon. The Purchasing Admin screen will appear.

Make sure to select the Purchased Item Scrap Reasons tab located to the left of the screen.

Click on the  button located at the bottom of the screen.
A new row will appear where users can enter in a Reason and Description.
Make sure to save your changes before exiting the screen.
Editing a Purchased Item Scrap Reason
To edit a Purchased Item Scrap Reason, navigate to the  tab and click on the
 ![]() icon. The Purchasing Admin screen will appear.
icon. The Purchasing Admin screen will appear.

Make sure to select the Purchased Item Scrap Reasons tab located to the left of the screen.

Locate the Purchased Item Scrap Reason you wish to edit and make the necessary changes using the available textboxes.
Once the necessary changes have been made, make sure to save before exiting the screen.
Deleting a Purchased Item Scrap Reason
To delete a Purchased Item Scrap Reason, navigate to the  tab and click on the
 ![]() icon. The Purchasing Admin screen will appear.
icon. The Purchasing Admin screen will appear.

Make sure to select the Purchased Item Scrap Reasons tab located to the left of the screen.

Locate the Purchased Item Scrap Reason you wish to delete and highlight the appropriate row. Use your Delete key and when the system prompts you, select Yes.
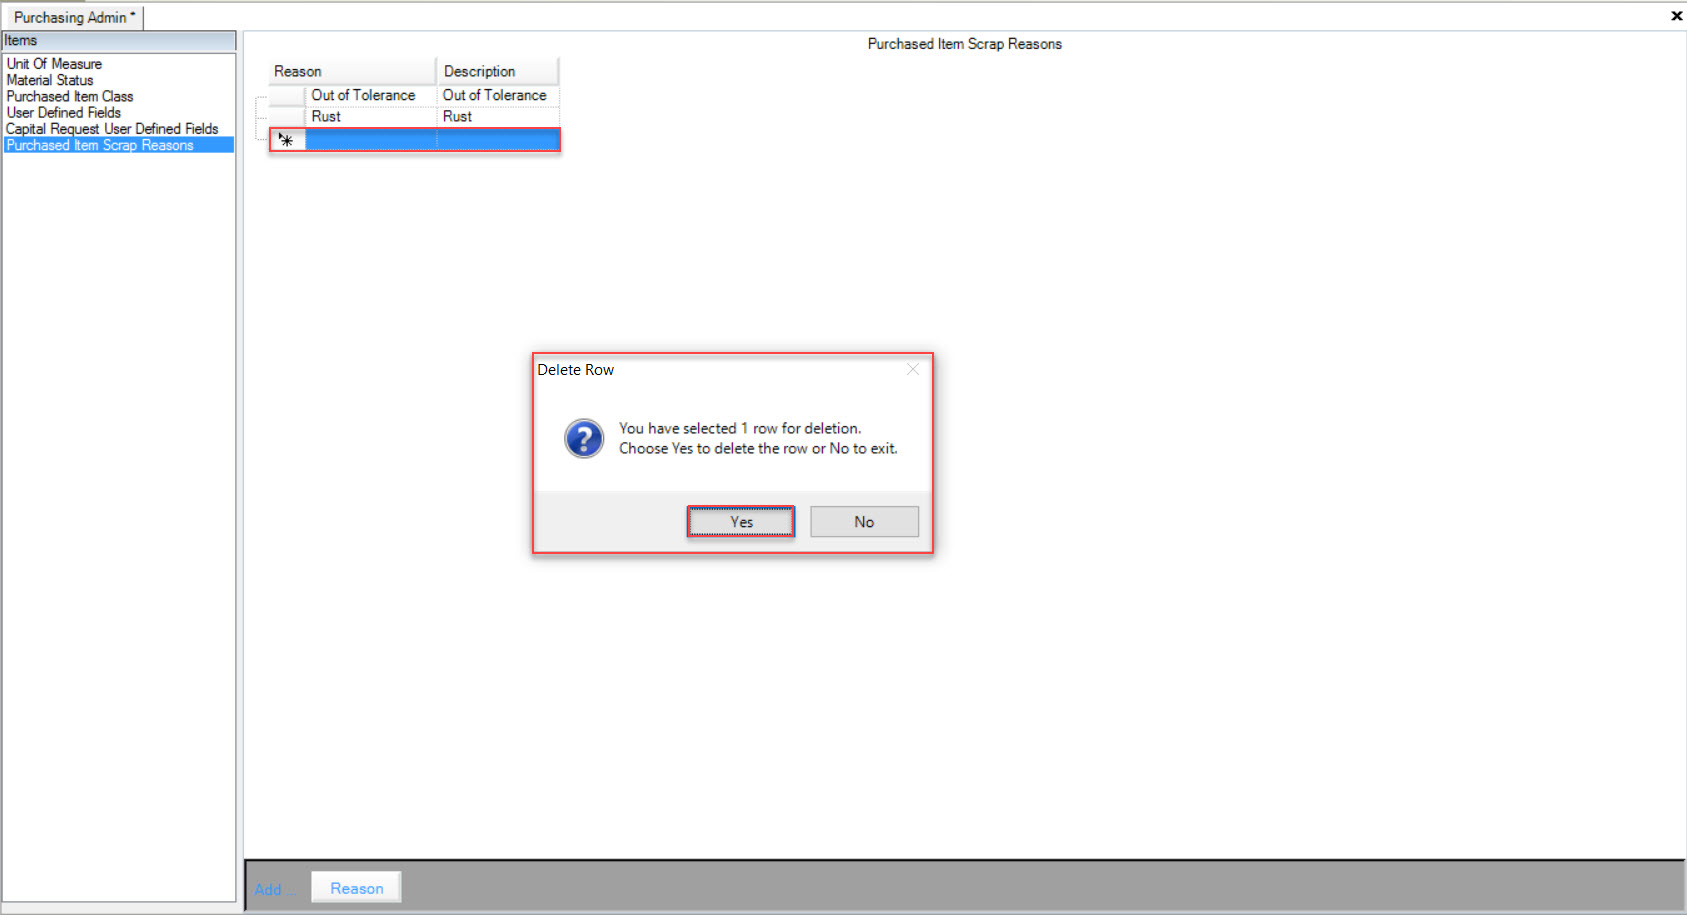
The highlighted Purchased Item Scrap Reason will be deleted.
Make sure to save your changes before exiting the screen.