Material Requirements Planning
The material requirements screen is used to plan all material purchases for purchased items on a bill of material. The screen provides an overview of all bill of material items with respect to current inventory, and gives details on the actual requirements and current orders. The screen makes it easy to find and fix material problems quickly. The material requirements are generated for frozen jobs on the Master Production Schedule, and from customer orders directly where the demand is not covered by frozen jobs on the schedule.
Material Requirements Planning can be found by navigating to the  tab,
and clicking on the
tab,
and clicking on the  icon. Clicking on the icon will bring up the Material Requirements Planning screen.
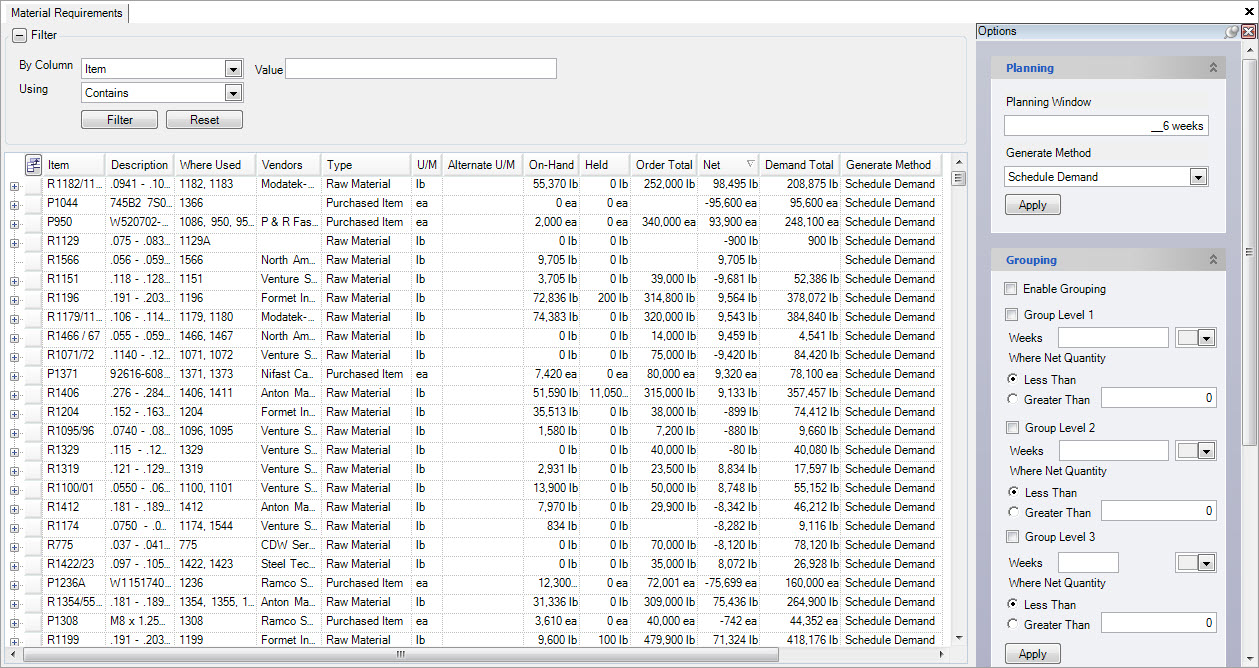
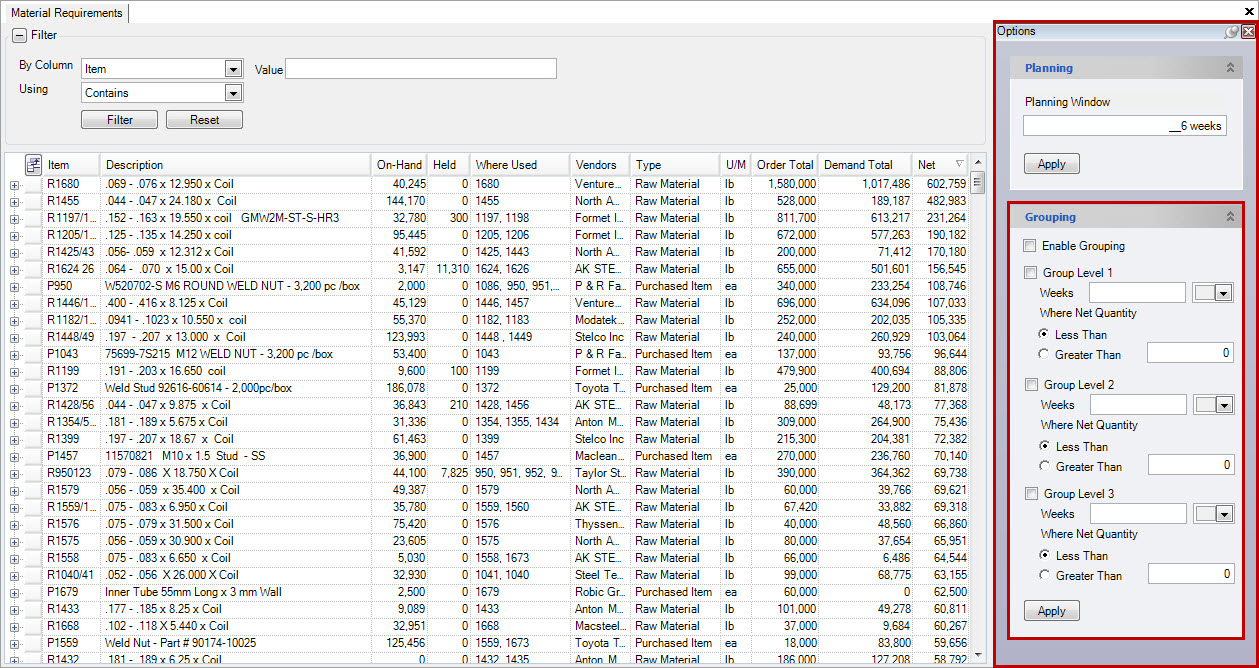
The information for each item displayed on the screen includes:
- Item and Description: all purchased items in the system-raw materials and components
- On-hand: the on-hand balance for each item
- Where Used: which f/g items the purchased item is used to produce
- Vendors: the vendor the item is purchased from
- Type: the type of item (i.e. raw material, purchased)
- U/M: the unit of measure for each item
- Order Total: the amount of inventory on order from a vendor
- Demand Total: the amount of inventory allocated to scheduled production items
- Net: the running balance of inventory-calculated using the ‘On-hand’ total, plus the ‘Order Total’ minus the ‘Demand Total’.
By expanding the item by using the + button on the left of the screen, you can see the planned production and releases for an item. By further expanding the planned production you can view order details for a particular customer.
Material Requirements Generation
The demand shown on the material requirements screen is computed live, that is, when the screen is first opened or refreshed. The system considers current on-hand inventory, frozen jobs from the Master Production Schedule and customer orders to generate the material requirements demand. It also considers any manufacturing lead time on the manufacturing routing and transit days on the customer ship to when computing material requirements due dates. For frozen jobs, the material requirements will be due when the job is scheduled to start on the Master Production Schedule, and will show with a type of Scheduled on the requirements. For customer orders not covered by frozen jobs on the Master Production Schedule, the system will generate requirements based on the due date of the customer order and will group the demand into weekly buckets and display with a type of Planned, showing due on the Monday of the week that it is due.
As an example, consider a customer with open orders for next Monday of 100 units and the following Monday for another 100 units. If the manufacture routing for the item has a single operation with no lead time, and on the bill of material consumes one unit for each unit produced, and has no on-hand inventory, then the system will show material requirements due of 100 units for this Monday and 100 units due next Monday. If you schedule a frozen job for this week of 150 units to start on Tuesday, the material requirements will show a requirement due for 150 units on Tuesday, with another 50 units to for next Monday. This is because the frozen job covers this week’s demand and part of the following Monday.
Generating Material Requirements Demand
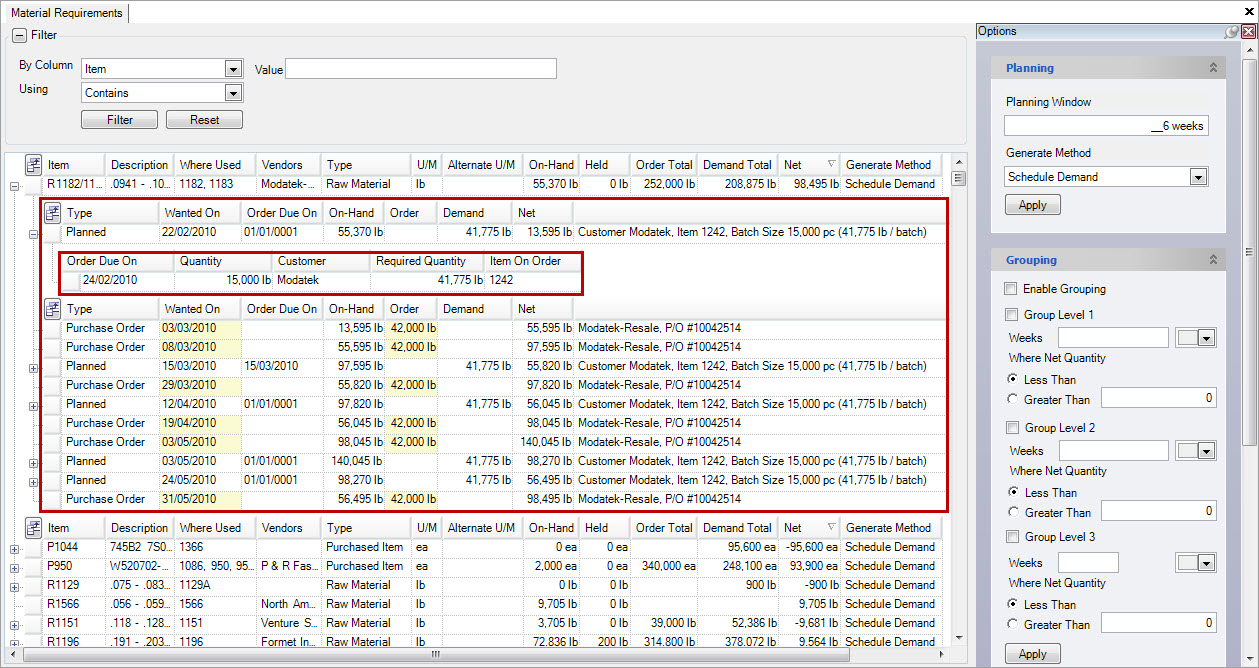
Two options are available for generating material requirements demand: order demand, or schedule demand.
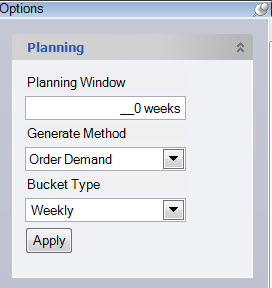
To select the method to use for generating requirements, select the option from the drop down menu on the planning pane.
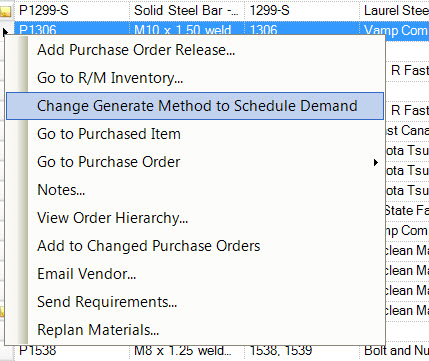
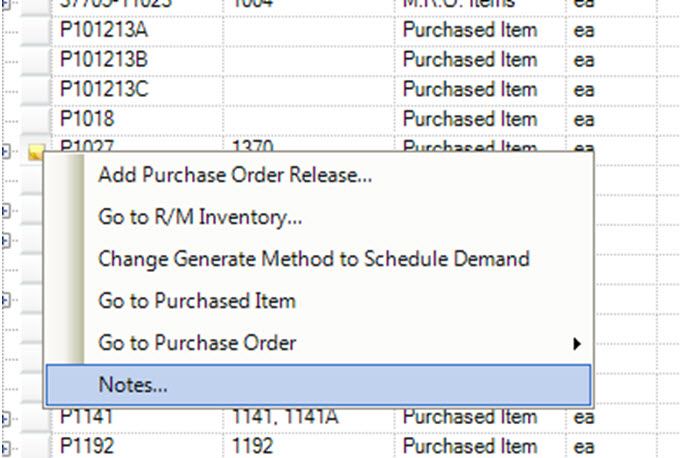
Alternately, you can override the method used on an item-by-item basis by right-clicking the item and selecting Change Generate Method to Schedule Demand on the menu:
The column called Generate Method will display the option settings for the item.
Note
If you change the option using the planning pane, all items will be set to the same setting.
The option selection on the planning pane will be restored next time you access the MRP screen.
Order Demand
The order demand method generates material demand based on customer order quantities, grouped into weekly buckets. Material due dates are calculated using shipping transit days, and manufacture routing lead times.
As an example, consider the scenario below:
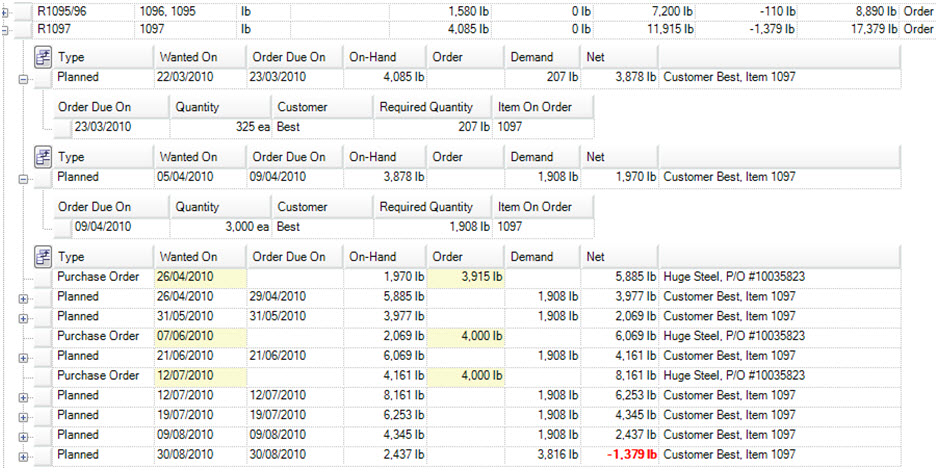
Based on the current inventory on-hand, the system has calculated that we need to build 325 units for the customer order due on 23/03/2010. Based on the bill of material, we require 207 lb of raw material, so the system has created material demand with a wanted on of 22/03/2010. The wanted on is the weekly bucket date where the order is due. If more than one order was due for the week of 22/03/2010, then the demand would show as a total for the week.
Since we have 4,085 lb of raw material on hand, to build this order will net out 3878 lb of raw material (4,085 - 207 = 3,878). The material requirements screen creates a running total of your inventory (net) based on the demand and the purchase orders you have scheduled.
The on-hand column shows the projected on-hand balance based on a running total of your current on hand, and the material demand, and purchase orders for the material. The Net column shows your inventory position after the demand or order has adjusted the inventory.
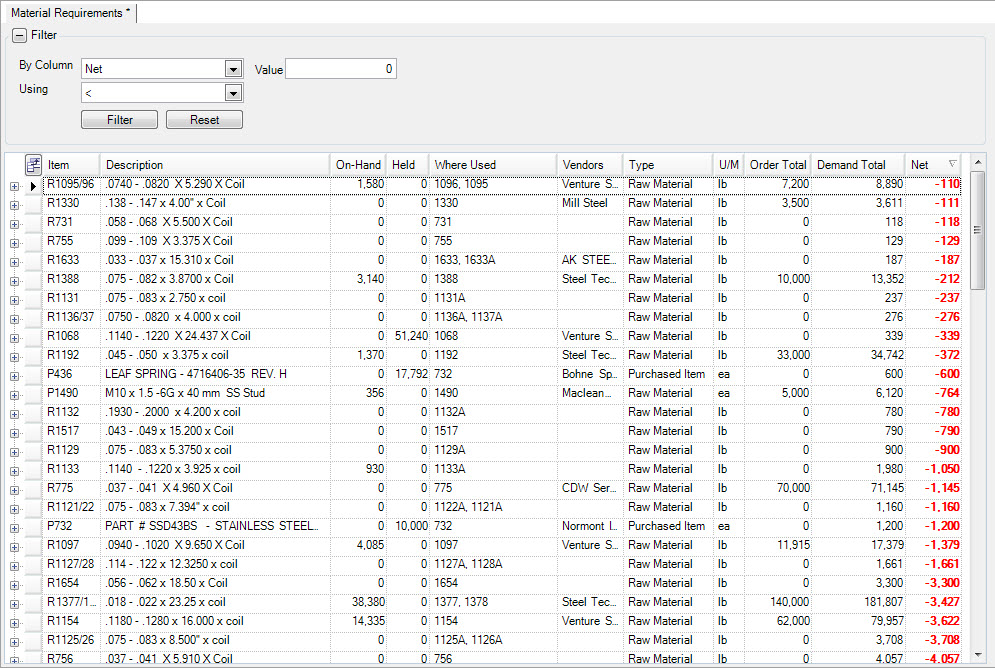
Any Net values highlighted in red indicate a material shortage.
Schedule Demand
Consider the same example above where the generate method has been switched to schedule demand.

From the previous example, we know we need to build 325 units for the customer order due on 23/03/2010. To build the 325 units, based on the bill of material requires 207 lb of raw materials. However, since we are using schedule demand now to generate requirements, the system will calculate demand based on any min inventory levels and operation batch sizes. In this case, we have a batch size of 6,000 pc, which requires 3,816 lb of raw material based on the bill of material. So, our actual material demand for the week of 22/03/2010 is increased to 3,816lb to cover the batch size, rather than just the customer order.
Because the demand is generated based on batch size, we will also see less frequent demand since our batch size may cover several customer orders in this case
Adding Notes
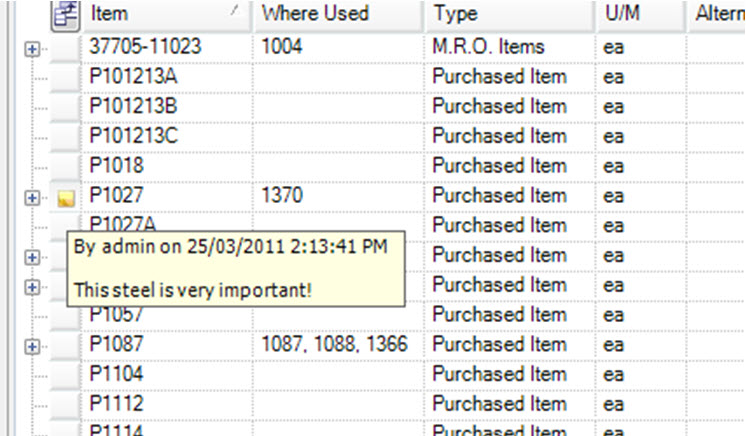
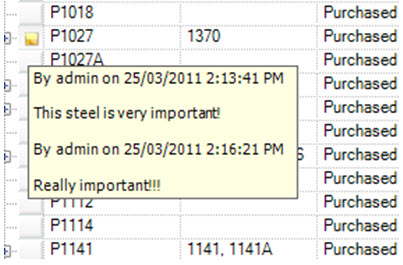
You have the ability to add notes to purchased items on the material requirements screen. An item has notes when the yellow notes icon appears beside the item. You can view the notes by hovering over the icon.
To add notes to an item, right-click the item to display the context menu. Select Notes... from the menu.
A window will appear where you can add/delete, or edit notes.
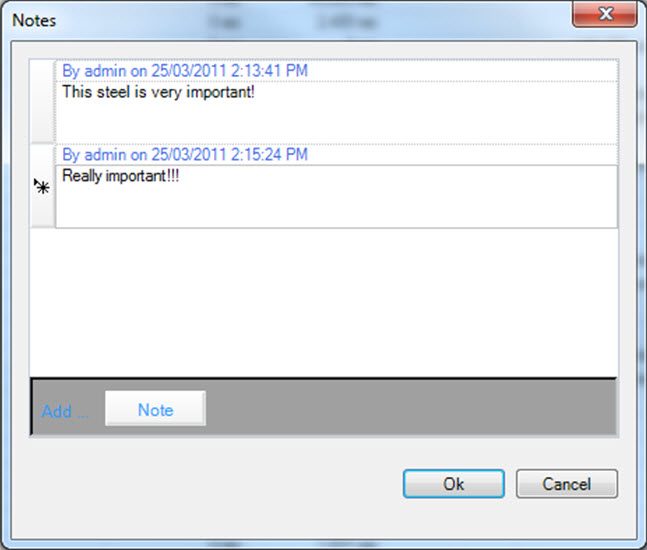
Click the  button to add a new note. You can delete a note by selecting the row, and clicking the delete key on your keyboard. When you are finished, click
  to add the note.
Alternate Unit of Measure
In ShopEdge, the option exists to order material in the default stocking unit of measure (e.g. lb), or in an alternate unit of measure (e.g. coil). This option gives you better control over purchasing quantities to vendors since it allows you to specify exact coil sizes from your vendor. You can also toggle material requirements demand to display in either the default u/m, or the alternate u/m.
The alternate unit of measure is defined on the purchased item. To start, open the ‘Purchased Item’ screen.
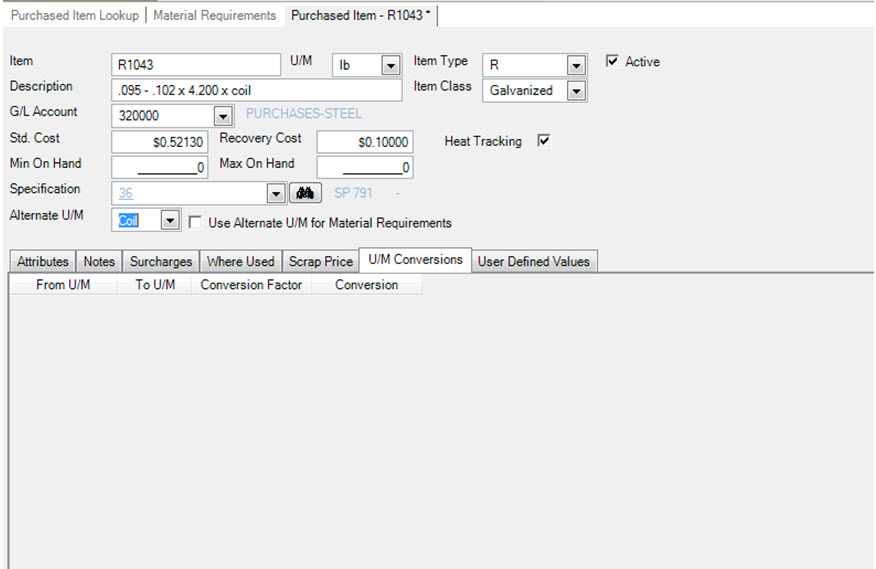
You can specify the alternate u/m by selecting a u/m from the alternate u/m field.
Note
The u/m must already be defined in the system, otherwise it must be added using the purchasing->admin function.
In this example, we have selected coil as the alternate u/m.
The next step is to define the conversion factor for the alternate u/m. The u/m conversions tab is where we defined the conversion factors for this purchased item.

To define the conversion factor, select the from u/m, in this case coil. Then select the to u/m. Then enter the conversion factor. In this example, our conversion factor is from coil to pounds, 1 coil equals 100 lb. Once the alternate u/m and conversion factor is set, we can make purchases on the material requirements screen using the alternate u/m.
Material Requirements using Alternate U/M
The material requirements screen will display the alternate u/m for purchased items that have an alternate u/m.
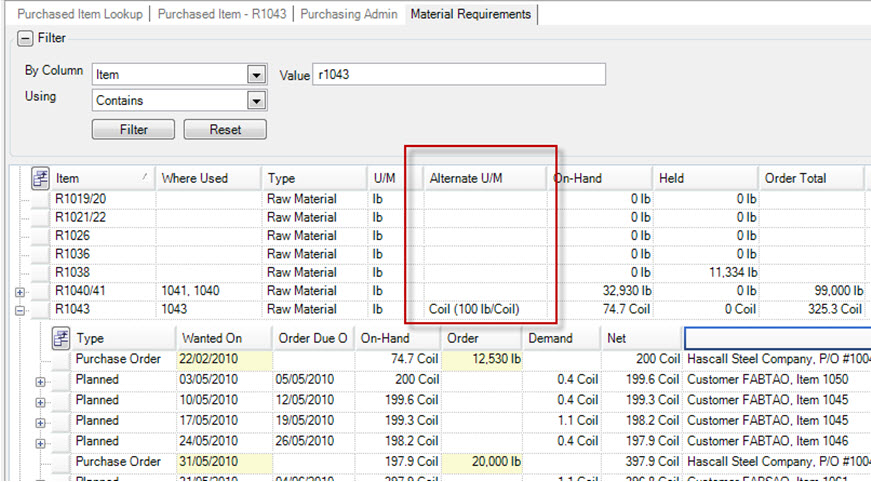
In this example, we can see that the item R1043 has an alternate u/m defined of coil, where 1 coil equals 100 lb.
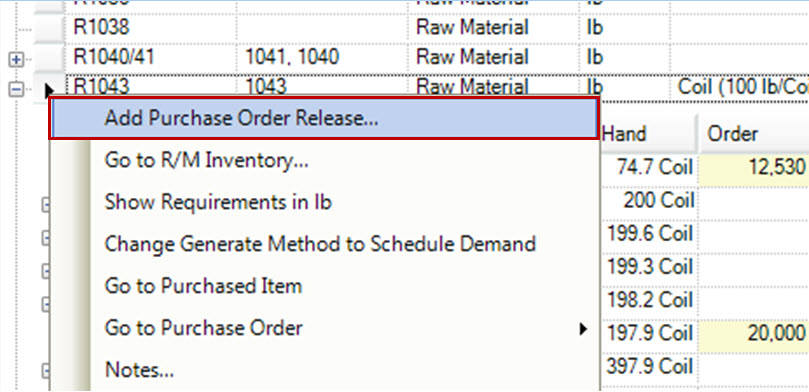
We can toggle the material requirements to be displayed using the alternate u/m by right-clicking on the purchased item and selecting Show Requirements in Coil.
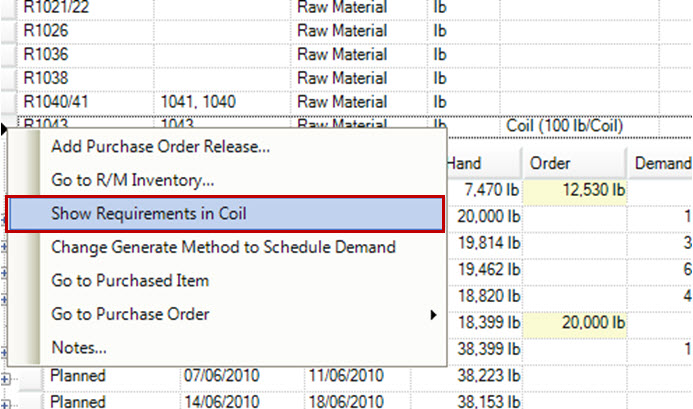
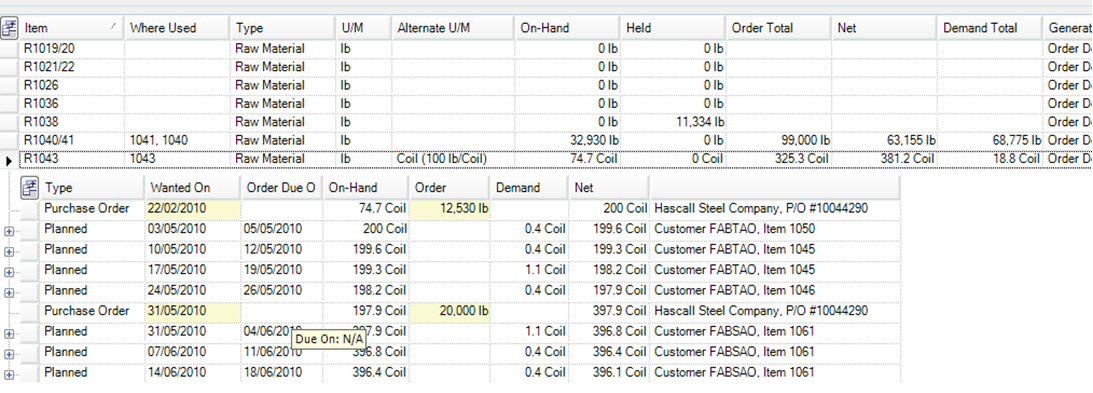
All of the quantities displayed for the purchased item will be converted to the alternate u/m.
You can control the number of decimal places used for the conversion by setting the input mask on the unit of measure using the purchasing->admin function.
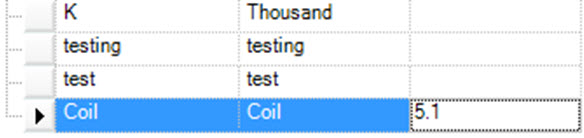
In this case, coil units will display using a 5.1 format, or 5 whole numbers and 1 decimal place.
To place an order using the alternate u/m, right-click and select add purchase order release
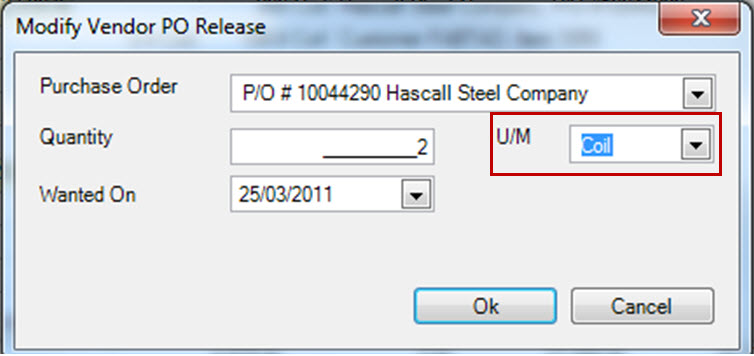
Complete the order details, and specify the alternate u/m in the u/m drop down.
Note
***Only the default and alternate u/m will show in the list.***
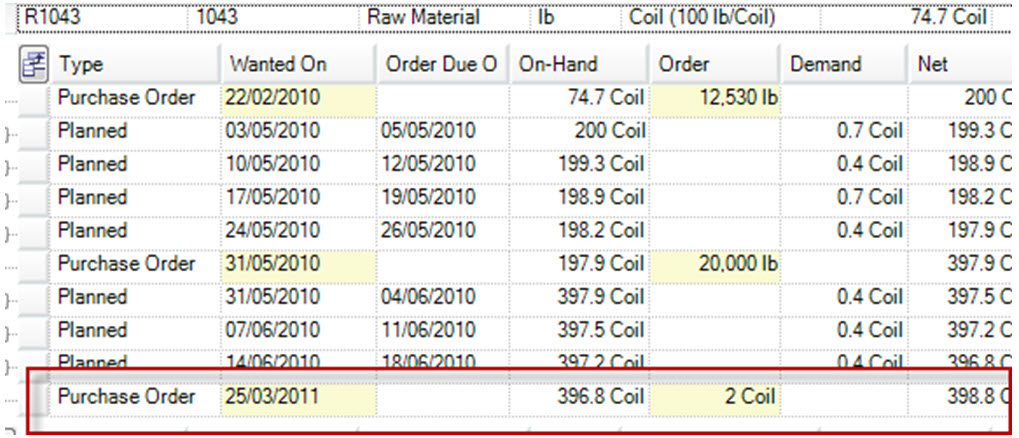
The new order will be displayed.
You can use both the default and alternate u/m for placing orders.
Searching and Filtering Material Requirements
There are a variety of ways to filter and search the material requirements screen using the ‘Filter’ function at the top of the screen.
Filtering by Column Headings
The most direct and quickest way to find an item, is to use the search ‘Filter’ at the top of the screen.
If you know the full identifier of the item you wish to find, select the column ‘Item’ beside the ‘By Column’ option, and ‘Exact Match’ beside the ‘Using’ parameter. Then, enter
in the identifier of the item you wish to find (i.e. R1680). Click on the  button to filter your search and find your item.

The filter function works similarly for all column headings. For example, you may know where a raw material item is used, (i.e. which finished good item), but not the raw material or purchased
component that is used to produce it. In this example, you would select the column ‘Where Used’ beside the ‘By Column’ option, and ‘Exact Match’ beside the ‘Using’ parameter. Then, enter
in the identifier of the finished good item you wish to find (i.e. 950). Click on the button to filter your search and find your item.

Similarly, if you know the beginning of an item or raw material item that you wish to fine, use the ‘Starts With’ or ‘Contains’ options beside the ‘Using’ parameter, and enter in the information that you
do know about the item, and click on the button.
Filtering by Vendor
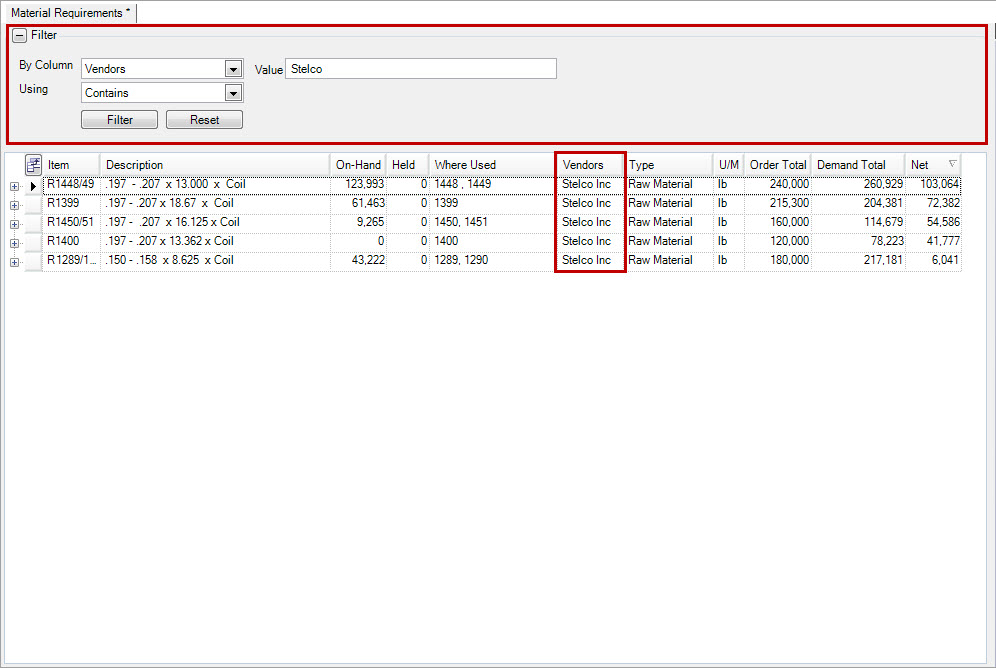
You can filter all items by vendor by selecting the column ‘Vendor’ beside the ‘By Column’ option, and the option that best suits your needs (‘Contains’, ‘Exact Match’ or ‘Starts With’) from the
‘Using’ drop down. Enter in the vendor name in the text box beside ‘Value’, and click on the button. All items purchased from
that particular vendor will be filtered and appear on the screen.
Filtering by Net Quantity
You can filter all items by Net Quantity by selecting the column ‘Net’ beside the ‘By Column’ option, and the option that best suits your needs (greater than, less than, equal to or Range) from the
‘Using’ drop down. Enter in a quantity or range (if you selected ‘Range’) in the text box beside ‘Value’, and click on the button. All items’ net
quantities that fall into the filter parameters will appear on the screen. For example, if you wish to view all materials that have a net quantity of less than 0 (i.e. deal with all potential material issues), then
select ‘Net’, and ‘less than’, and enter ‘0’ in the value text box and click on the button.
To reset the screen and/or start a new search click on the  button.
Adding a New Release
To add a release to an existing purchase order, locate the item you wish to add the new release to. You can add the release by right-clicking on the item row, or by expanding the item using the + button and right-clicking on one of the ‘Purchase Order’ rows.
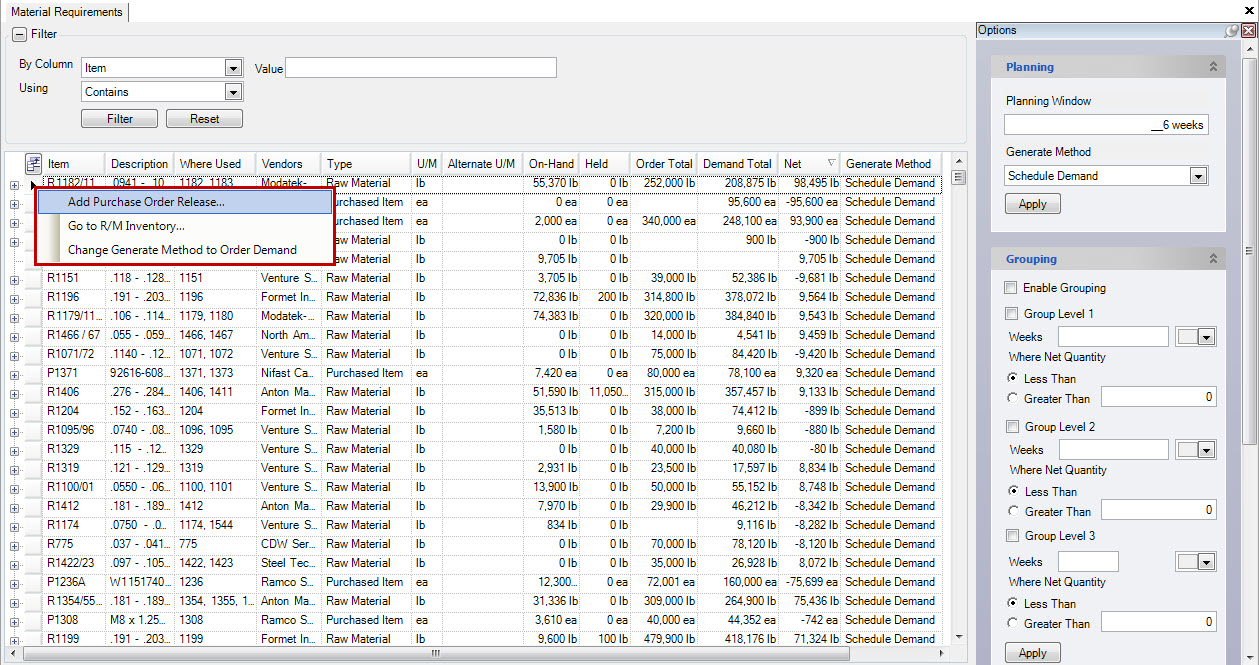

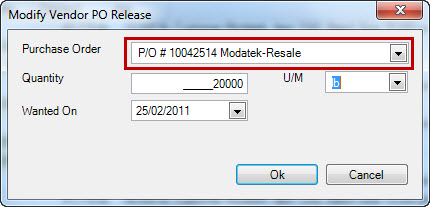
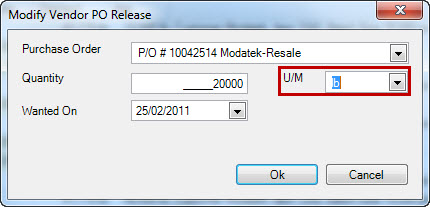
Selecting either of these options will open the ‘Modify Release Screen’. First, the user needs to select the P/O they wish to add the release to. Use the drop down menu provided to select the P/O.
The next release field that needs to be filled out is the quantity field. Enter in the number of units (i.e. pounds or each) of the item you wish to order.
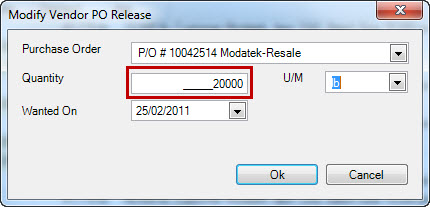
The next release field that needs to be filled out is the unit of measure field. Enter in the number of units (i.e. pounds or each) of the item you wish to order, or if there is an ‘Alternate U/M’, you can select that option.
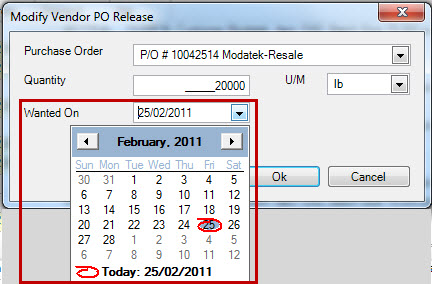
The last item that needs to be populated is the date the user wants the material to arrive on. Use the date drop down to select the date, or type it into the text box provided.
Click the button to add your release to the P/O. A new ‘Purchase Order’ line will be added to the item, with the
release information you added. Once you have saved the screen the release will be updated on the purchase order, and you can then send the updated P/O to your vendor.

Deleting a Release
To delete a release on an existing purchase order, locate the item you wish to delete the release from. Expand the item using the + button and right-click on the ‘Purchase Order’ row (the release quantity) that you wish to delete. Select the option ‘Delete Purchase Order Release...’ to delete the row, and remove the release from the purchase order. Save the screen to complete your change.
Once you have saved the screen, you can open the P/O and send the updated version to your vendor.
Opening Raw Material Inventory Screen
The option exists to open the raw material inventory screen from the material requirements screen to see how a raw material item arrived at the current inventory position. To open the screen, right-click on an item row, and select ‘Go To R/M Inventory...’.
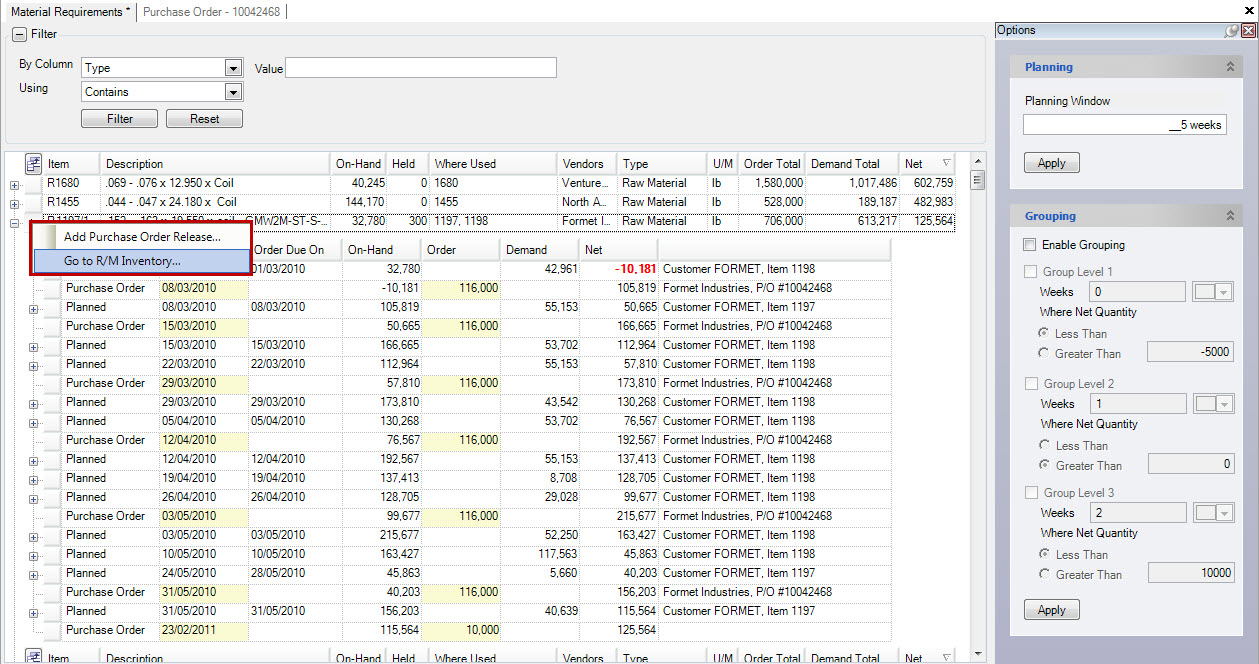
This will open the Raw Material Inventory screen for the selected item in a new tab.
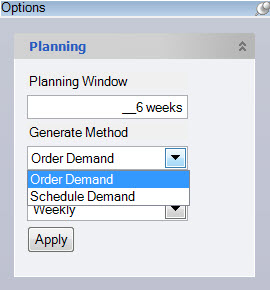
Planning Material Requirements
The system allows you to select the timeframe you wish to view material requirements for. This is defined under the ‘Options’ menu at the right side of the screen.
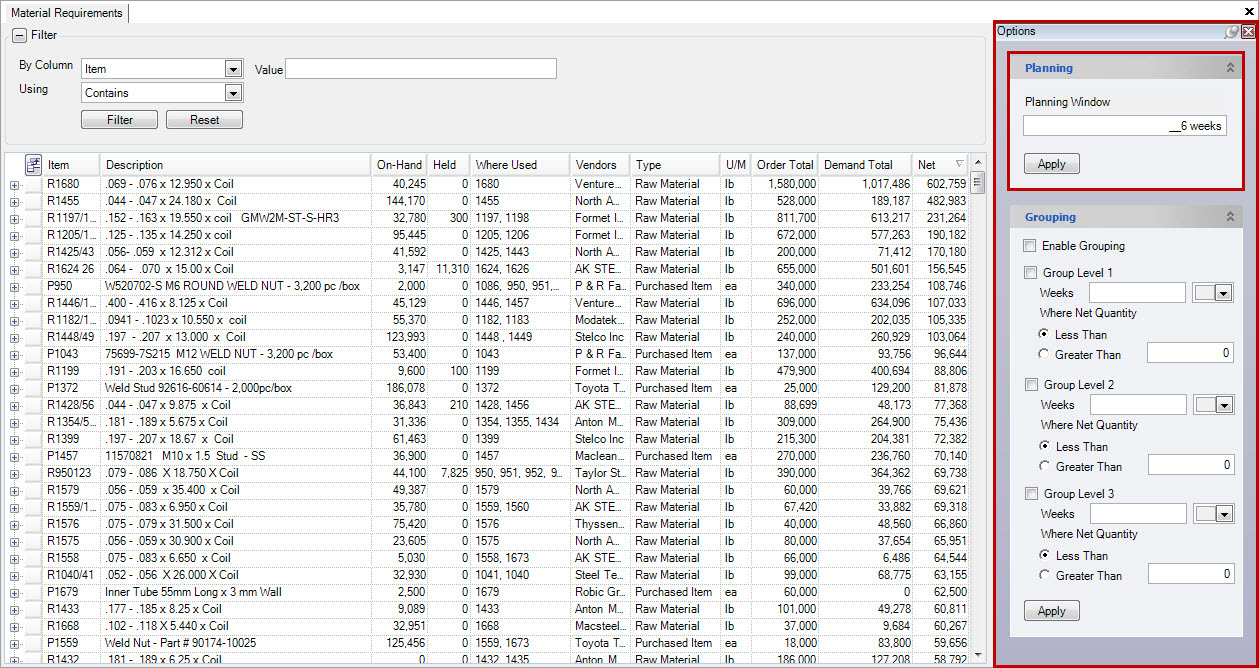
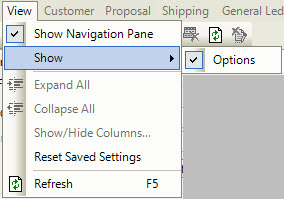
If you can’t view the options menu, navigate to the menu items at the top of the screen, and select View > Show > Options.
Enter in the number of weeks you wish to plan material requirements for (i.e. the number of weeks you wish to pull material requirements from orders and production).
Click on the  button to submit your ‘Planning Window’.
Grouping Items
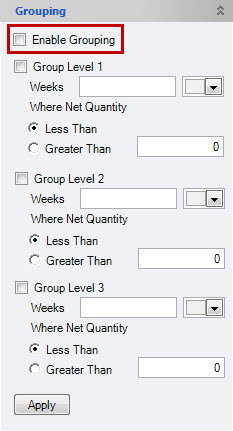
The option for grouping items on the material requirements screen allows users to view materials in groups that they define. Defining groups is located under the ‘Options’ menu at the right side of the screen.
If you can’t view the options menu, navigate to the menu items at the top of the screen, and select View > Show > Options.
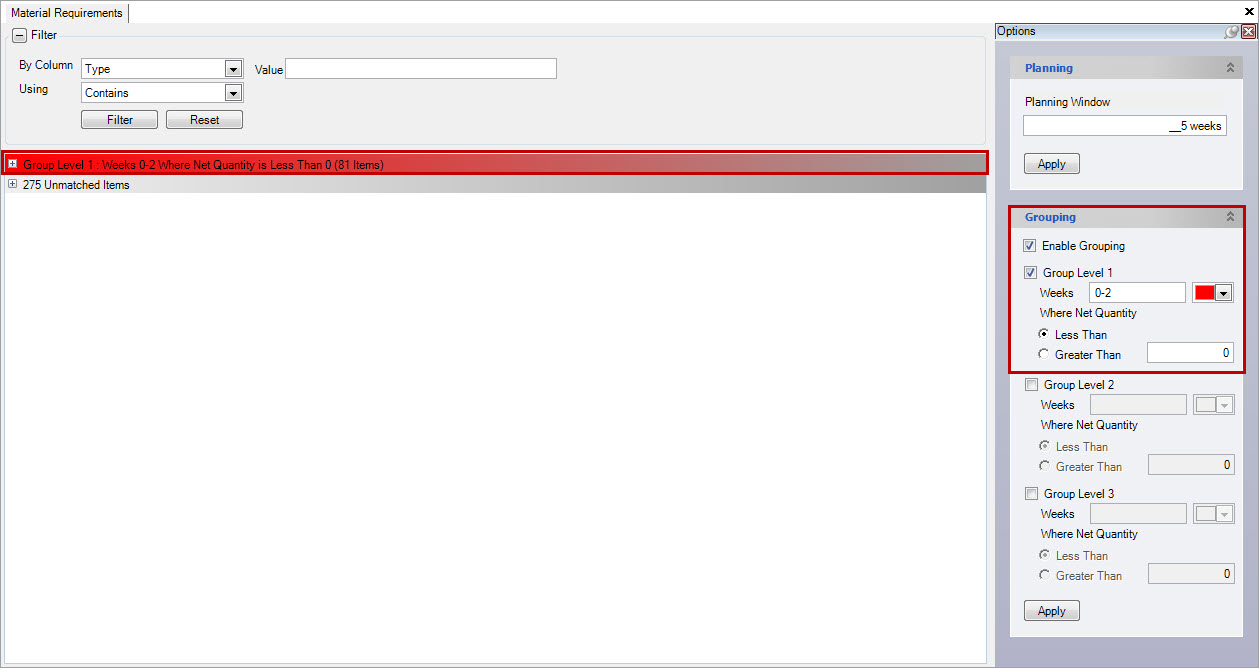
The first step to enabling and defining groups is to select the check box beside the ‘Enable Grouping’ option.
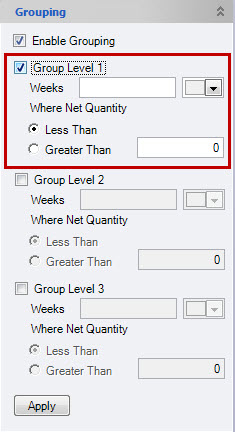
Once this box is checked, you can then define your groups, starting with Group Level 1. Check the box beside ‘Group Level 1’. The next step is to enter in the number of weeks, or range of weeks, you wish to view materials (i.e. 0-3, 7) ‘Where Net Quantity’ is ‘Less Than’ or ‘Greater Than’ (you must select your choice), and enter in a quantity in the text box provided. The last step is to select a colour for the group from the dropdown menu. This will colour-code your grouping options on the screen.
Note
The system defines the current week as ‘week 0’.
For example, if we wanted to define ‘Group Level 1’ as a group that takes weeks 0-2 into consideration (current, next and following), where the net quantity of materials is less than 0; the group is defined by the colour red. I would group
like this in order to view all material issues for the next 2 weeks where material quantities are less than 0, and I wouldn’t have enough materials to meet the production schedule requirements.
Clicking the button will create the defined groups in the main section of the material requirements screen.
You will notice that the defined group also has some information including a summary of the created group as well as the number of items that belong to the group. To expand a group (in this example we only have 1 group), click on the + button. All items that belong to the group definition will be included. The system has replaced the ‘Net Quantity’ column with the new defined ‘Group’ column that meets the defined parameters.
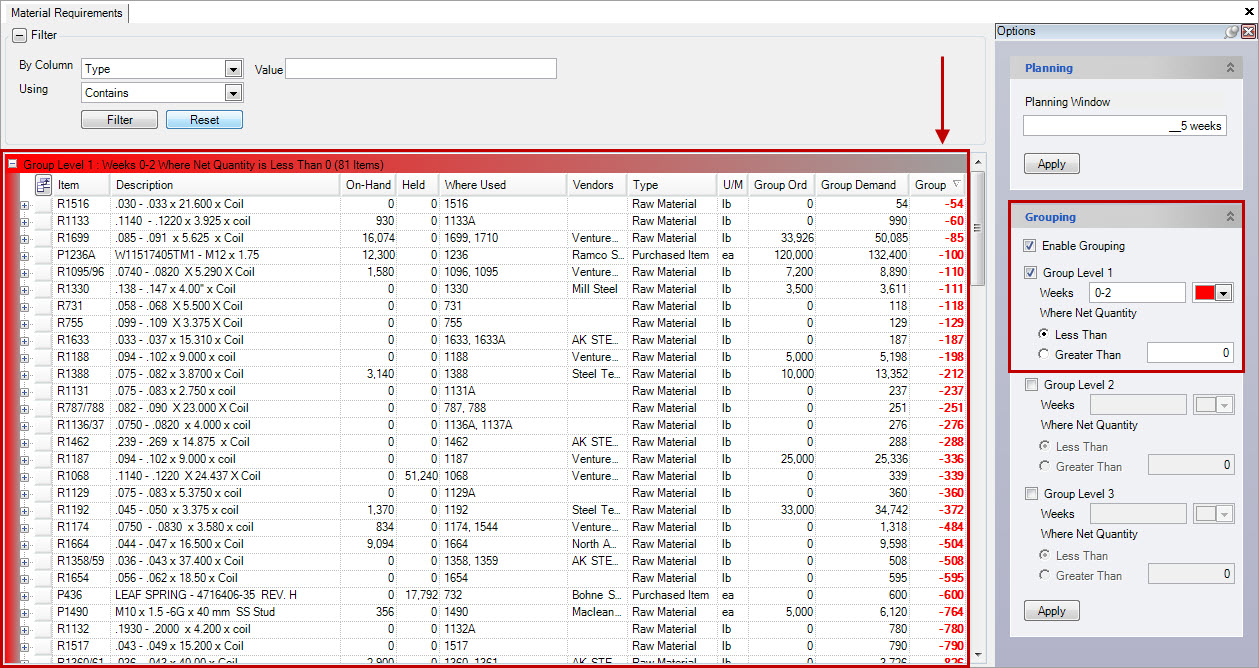
Now a material planner has the option of dealing with all pertinent material issues that take place in the next 2 weeks.
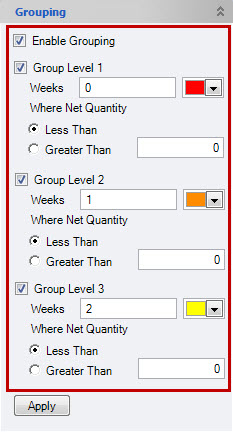
Material planners may also find it useful to use more than one grouping option. For example, by enabling all three grouping options and selecting Less Than 0, and entering in weeks 0, 1, and 2, a material planner will see all material issues (all items with negative inventory) for the current week and next 2 weeks in the future.
Alerts
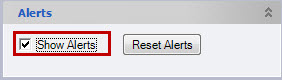
The option for Alerts on the material requirements screen allows users to view where demand has changed since an order was placed. Alerts is located under the Options menu at the right side of the screen.
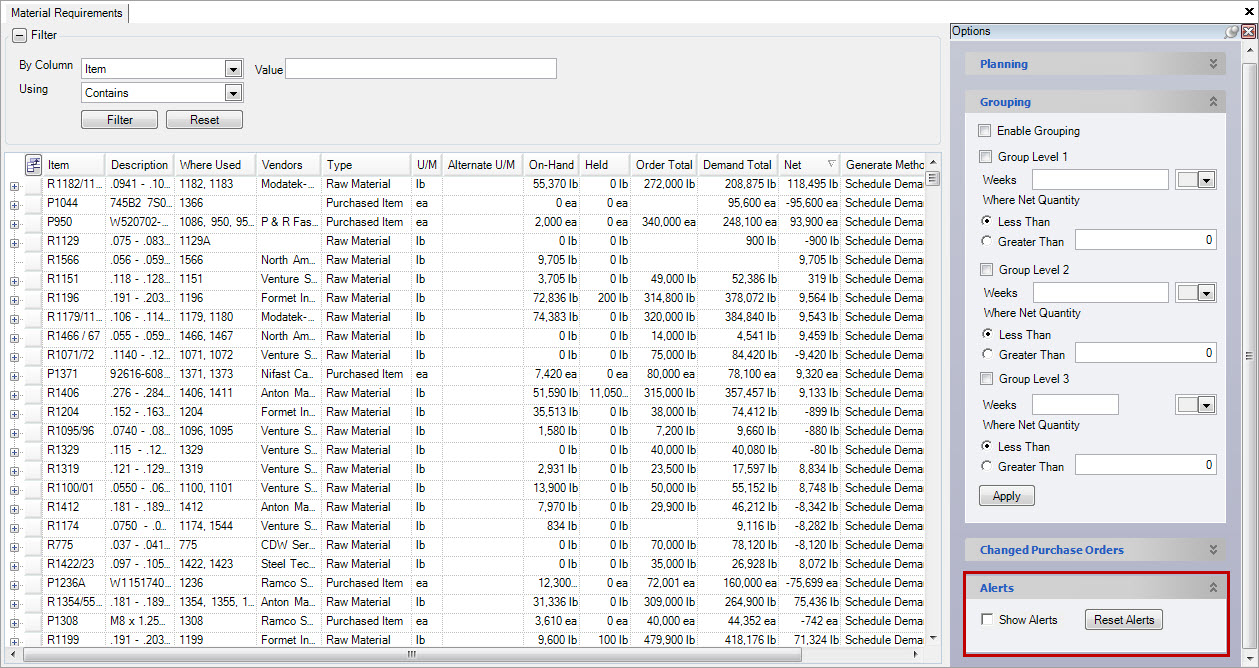
When the Show Alerts checkbox is checked, the material requirements screen will display arrows where demand has changed since the order was placed, or the alerts were last reset.
A left or right arrow on the Order Due On column indicates the demand is due earlier or later respectively, and an up or down arrow in the order column indicates the demand as increased or decreased. You can display details about the change by hovering the mouse over the arrow.
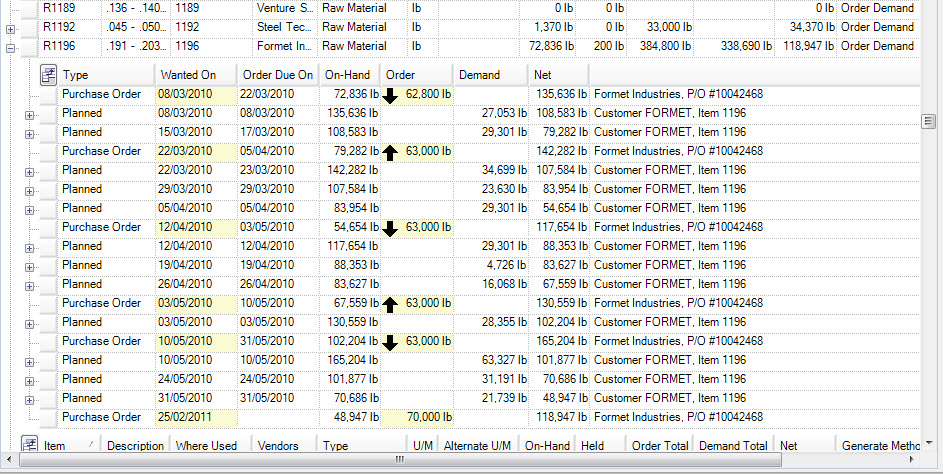
The screenshot below indicates a decrease in demand by 1218.

You can reset the alerts at any time by clicking on the  button.