Journal Entries
Journal Entries are used for manual accounting entries. Once Journal Entries have been created, they cannot be changed, only deleted.
Finding a Journal Entry
To find a Journal Entry, navigate to the  tab, and select the
 icon. This will bring up the Journal Entry lookup screen.
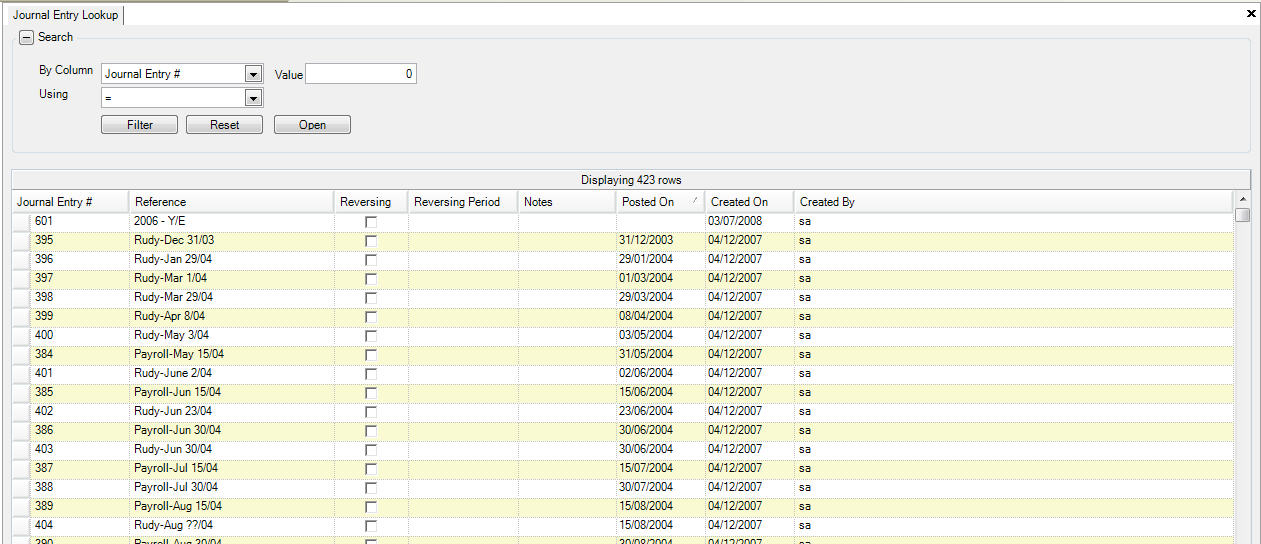
There are a variety of ways to search for an existing Journal Entry. You can search using the search option at the top of the screen.

You can also click on the column titles to sort the information in descending or ascending order.
Once you have found the Journal Entry you are looking for, double-click on the row to open the entry to view the details.
Adding a Journal Entry
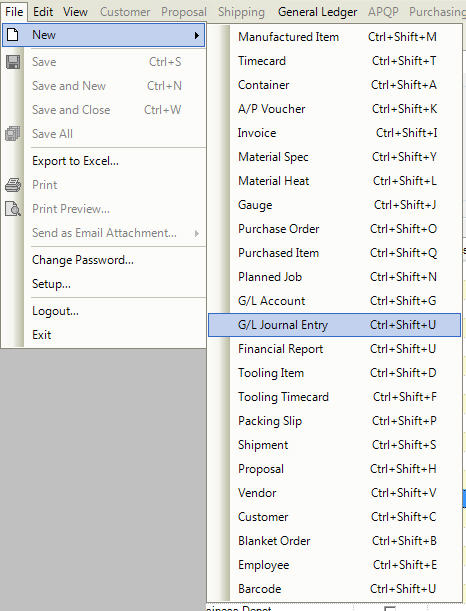
There are three different ways to add a new Journal Entry to the system. The first way is to press the Ctrl + Shift + U keys. The second way is to navigate to File > New > G/L Journal Entry.
The last way is the click on the  button, and then on the G/L Journal Entry option.
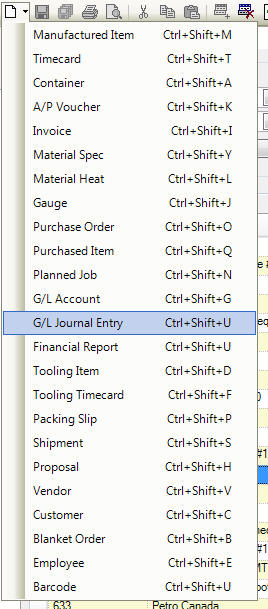
All of these three options will open a New Journal Entry screen.
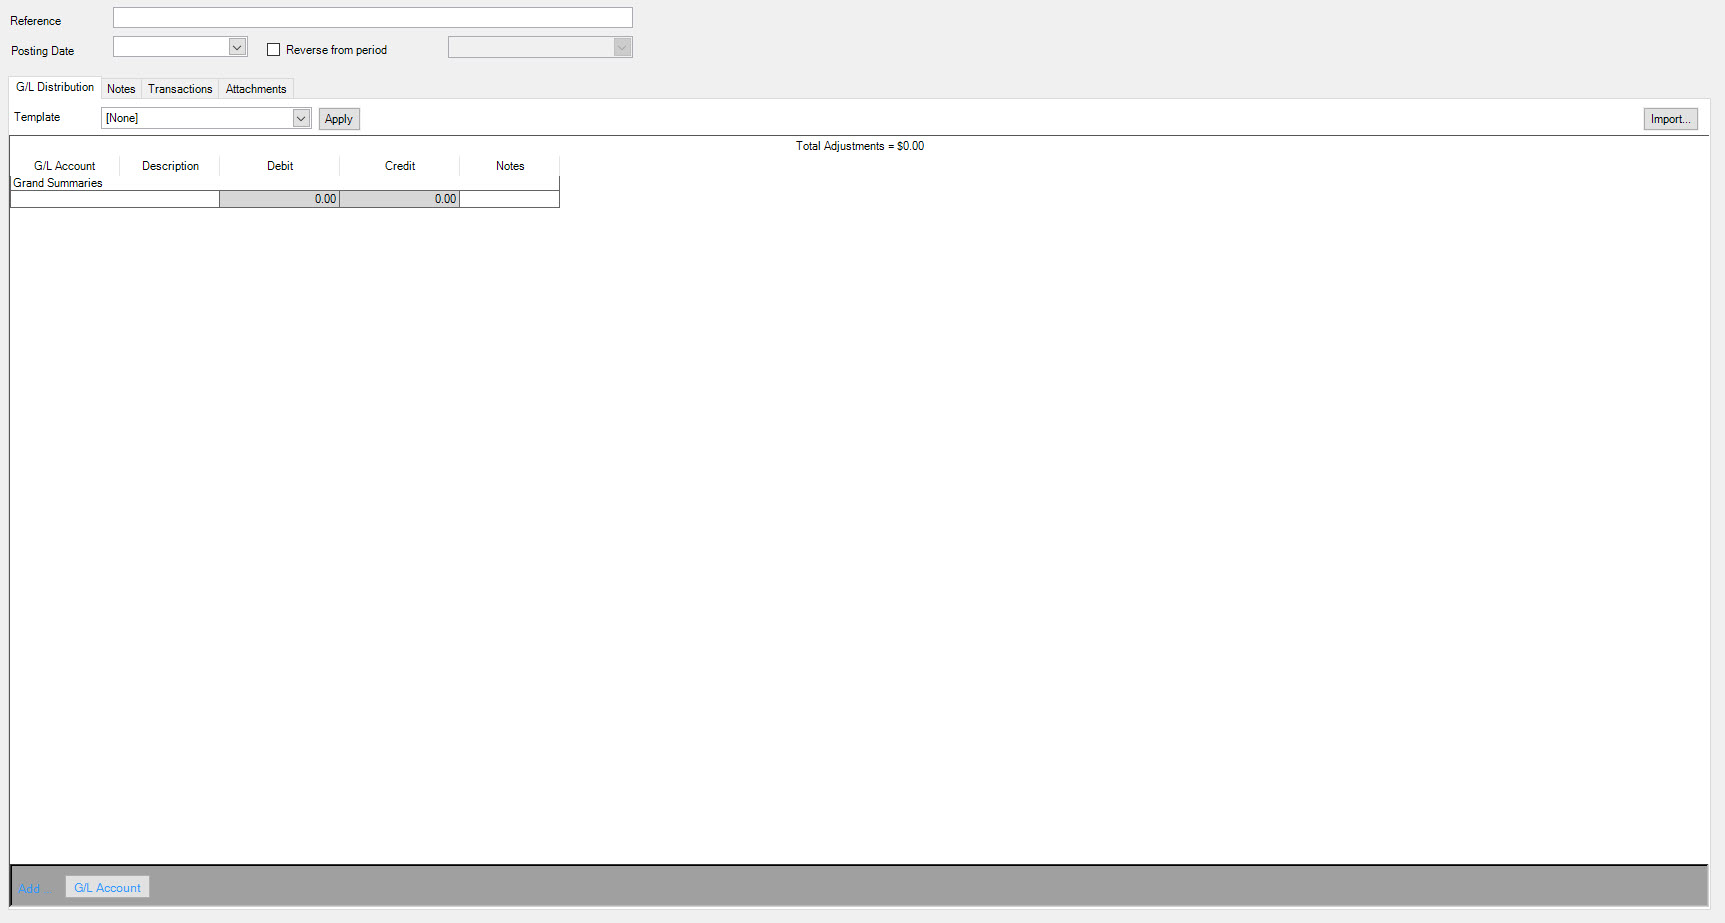
Once saved, Journal Entries will be assigned an ascending number in the system that shows on the lookup screen. Journal Entries must have a reference number, which can be a number, letter, phrase, words, or a combination.
The reference has to be unique to the system and will not be saved if it is a duplicate. Make sure to select the correct posting date.
The  box should be selected if the entry
is to be reversed automatically in the following Fiscal Period.
Creating Distributions
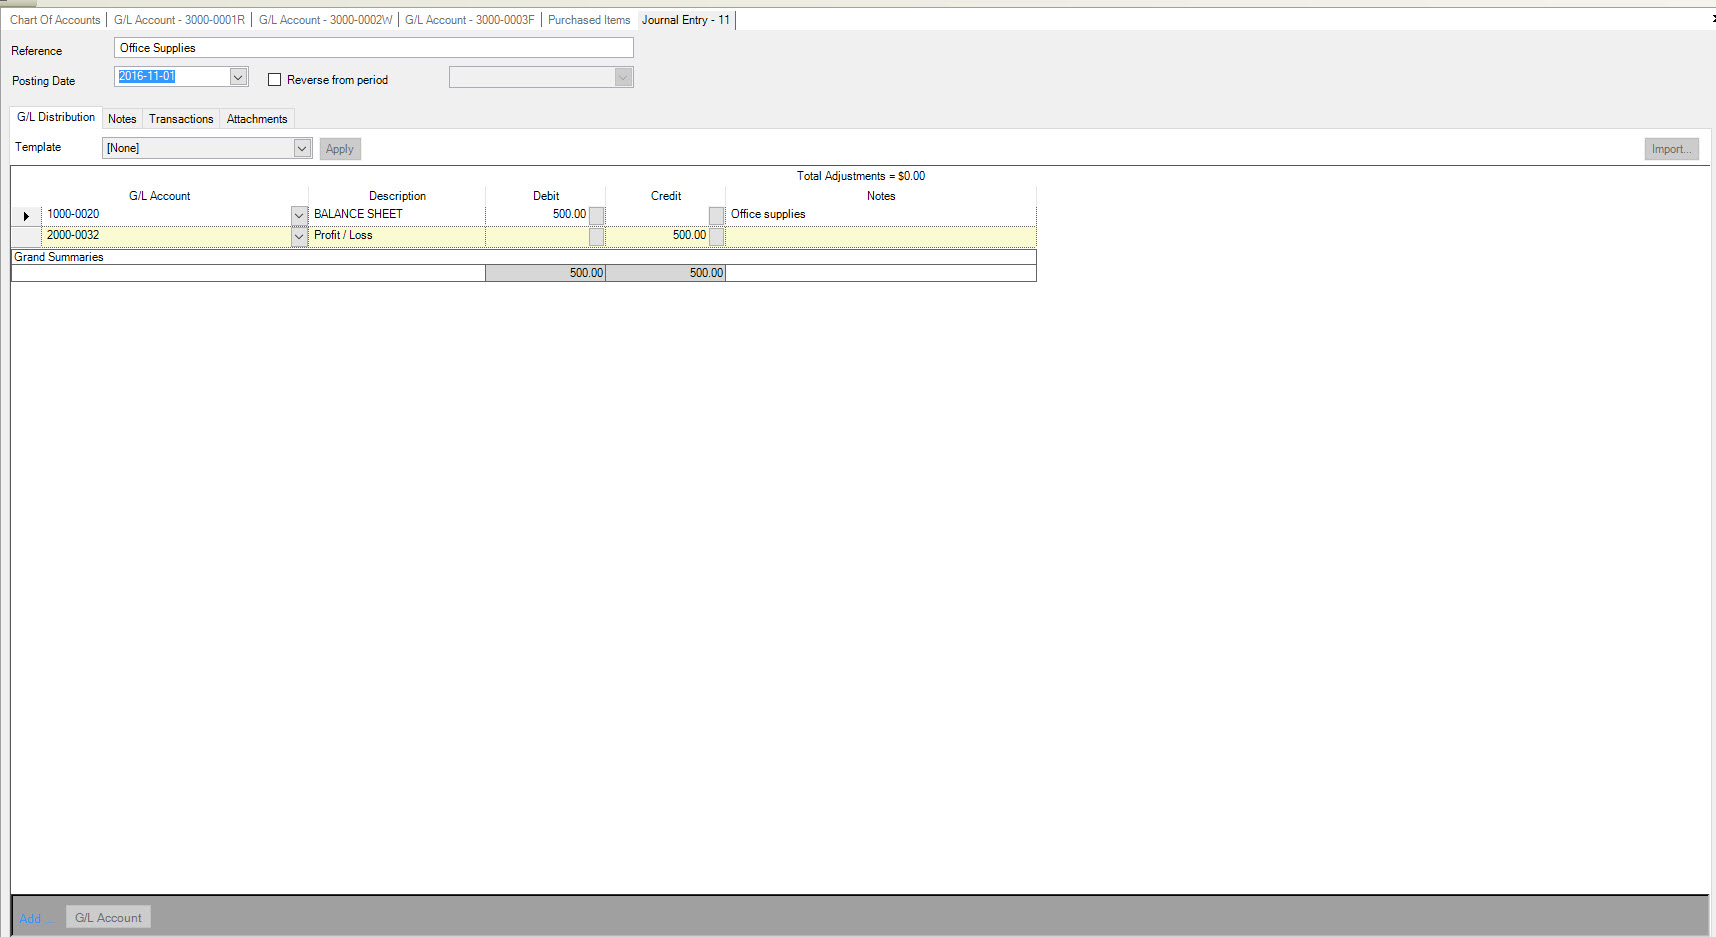
To enter the financial information in the Journal Entry, make sure the  tab is selected. Then select the
  button at the bottom of the screen. Fill out
the appropriate information starting with the G/L account, and then enter in the funds that are being accounted for. In the example below,
the Journal Entry is debiting $500.00 to the G/L account 1000-0020.

Notice that the Total Adjustments on the screen reflects the amount of the Journal Entry. Continue adding entries until all of the funds are accounted for in the appropriate G/L Account and the Total Adjustments is at $0.00. The system will not let you save until the credits and debits are balanced.
Note
Clicking on the button under the Amount column will bring up a calculator. Any calculation that you perform will be entered into the Amount box after clicking on the = sign.
Save your Journal Entry and it will be assigned a reference number on the tab at the top of the screen.
Adding Notes to a Journal Entry
Users can add Notes to a Journal Entry either as they enter a new one, or, by searching for an existing Journal Entry and adding Notes to it.
To add notes to an existing Journal Entry, navigate to the  tab, and select the
 icon. This will bring up the Journal Entry lookup screen.

Once you have found the Journal Entry you are looking for, double-click on the row to open the entry in order to view the details.
On the Journal Entry Detail screen, make sure that the Notes tab is selected.
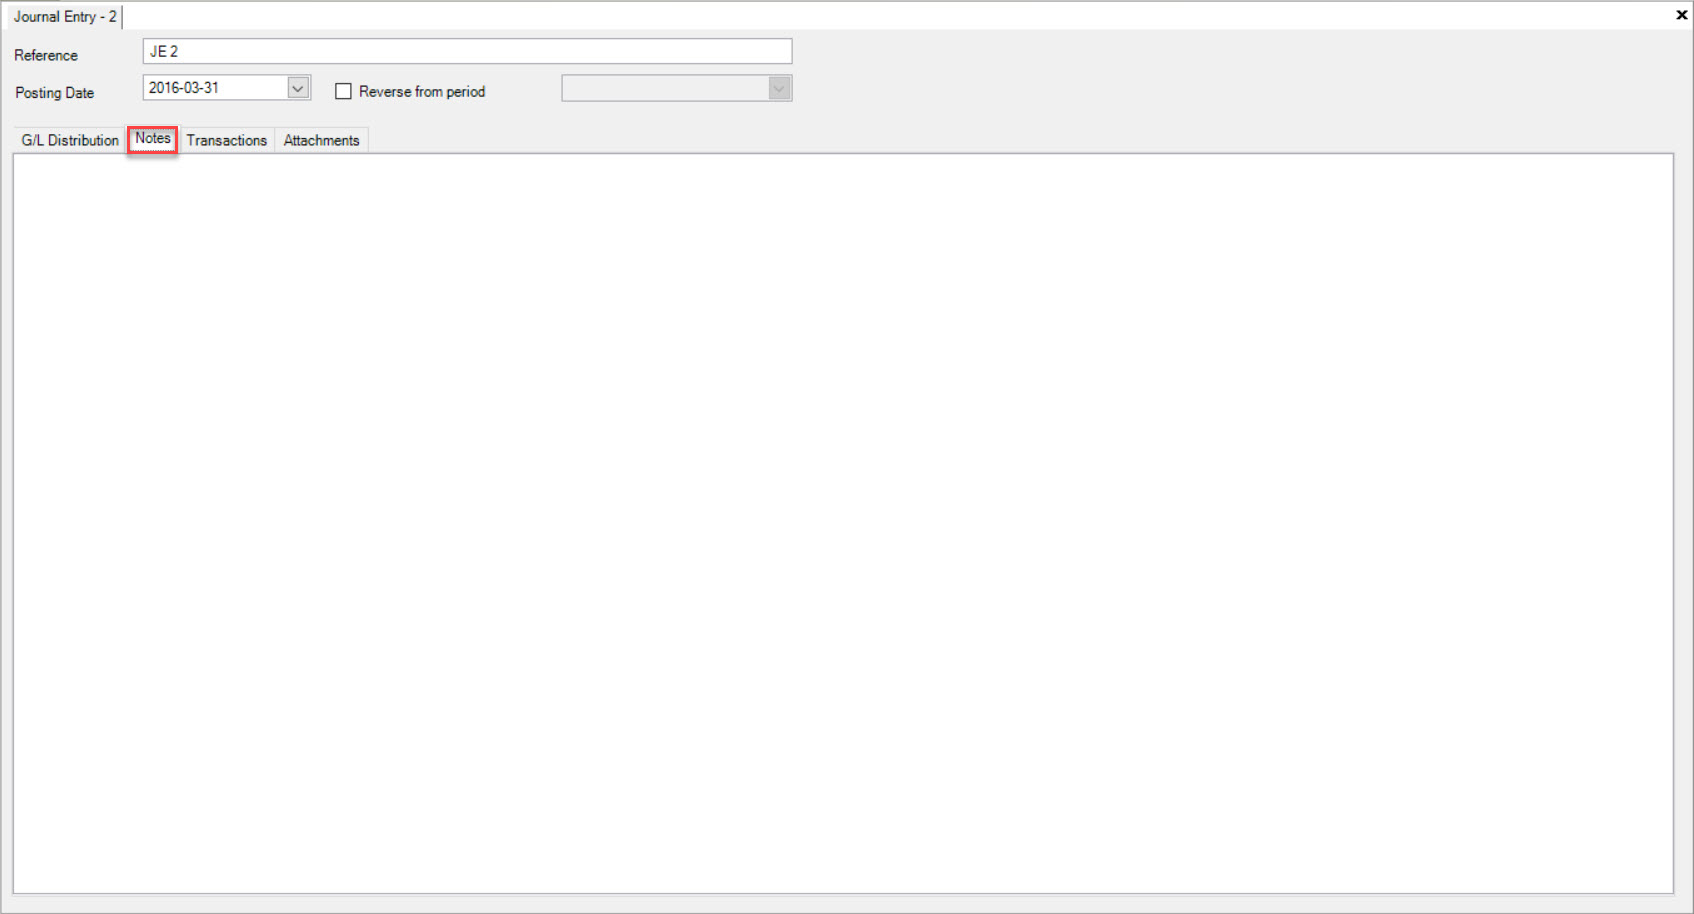
Once the Notes tab is selected, users can simply type in a note for the specific Journal Entry in the text box provided.
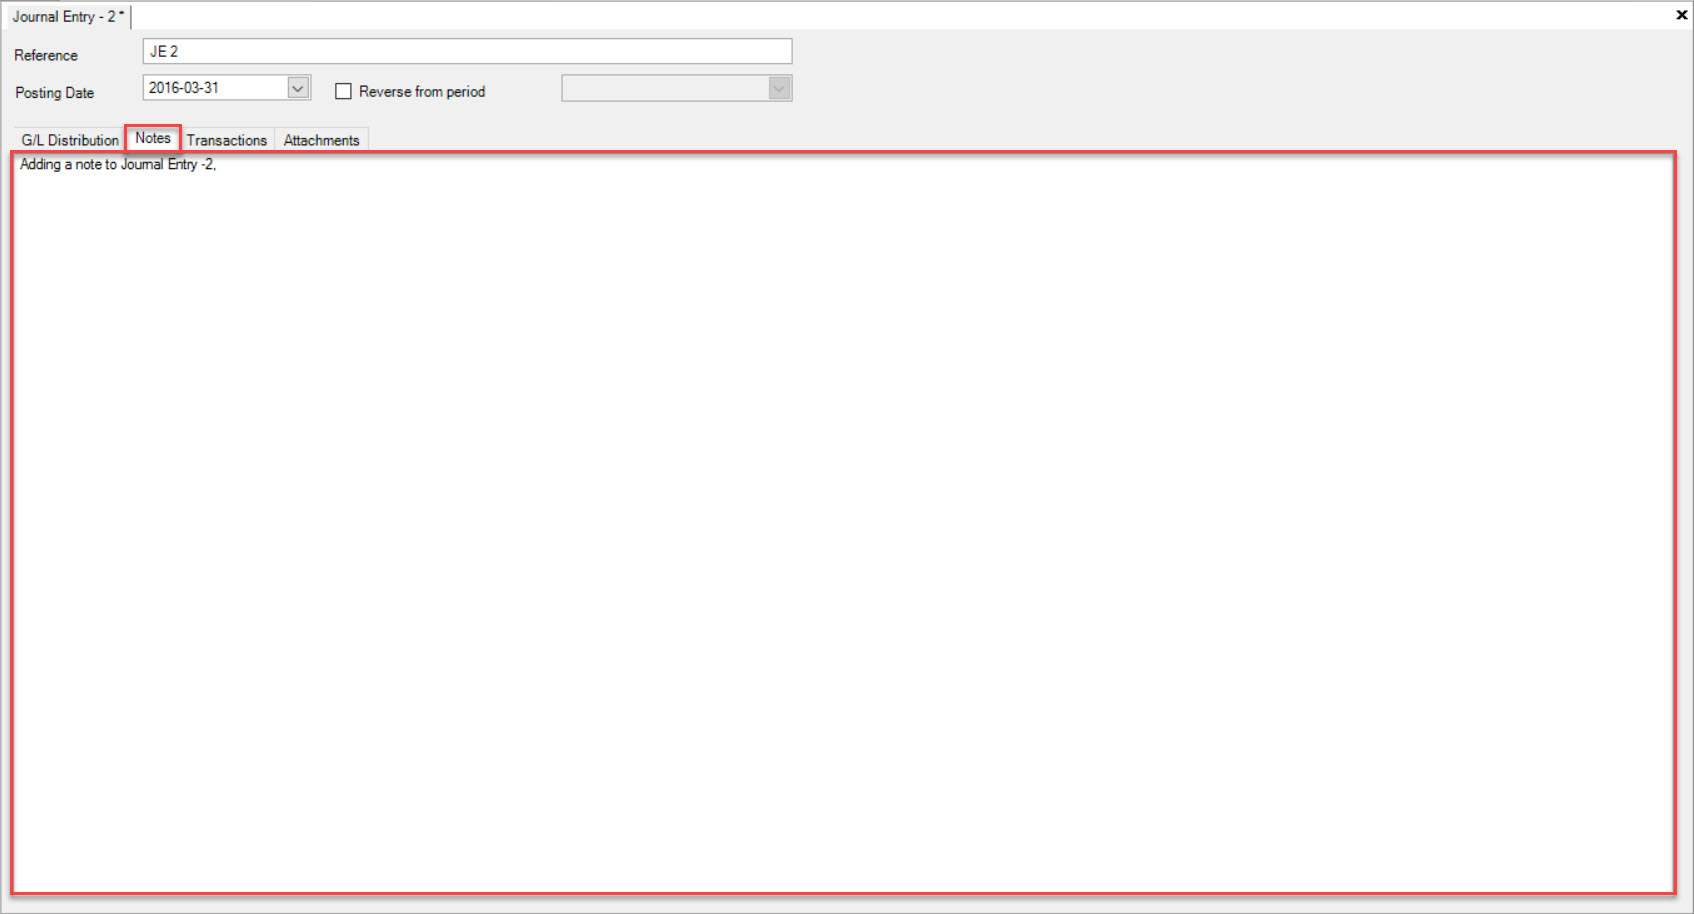
Once the note is added, make sure to save your changes before exiting the screen.
Note
To add Notes to a new Journal Entry, follow the steps to open a new one and then the above steps to add Notes.
Viewing the Transactions on a Journal Entry
To view the Transactions on a Journal Entry, navigate to the  tab, and select the
 icon. This will bring up the Journal Entry lookup screen.

Once you have found the Journal Entry you are looking for, double-click on the row to open the entry in order to view the details.
On the Journal Entry Detail screen, make sure to select the Transactions tab.
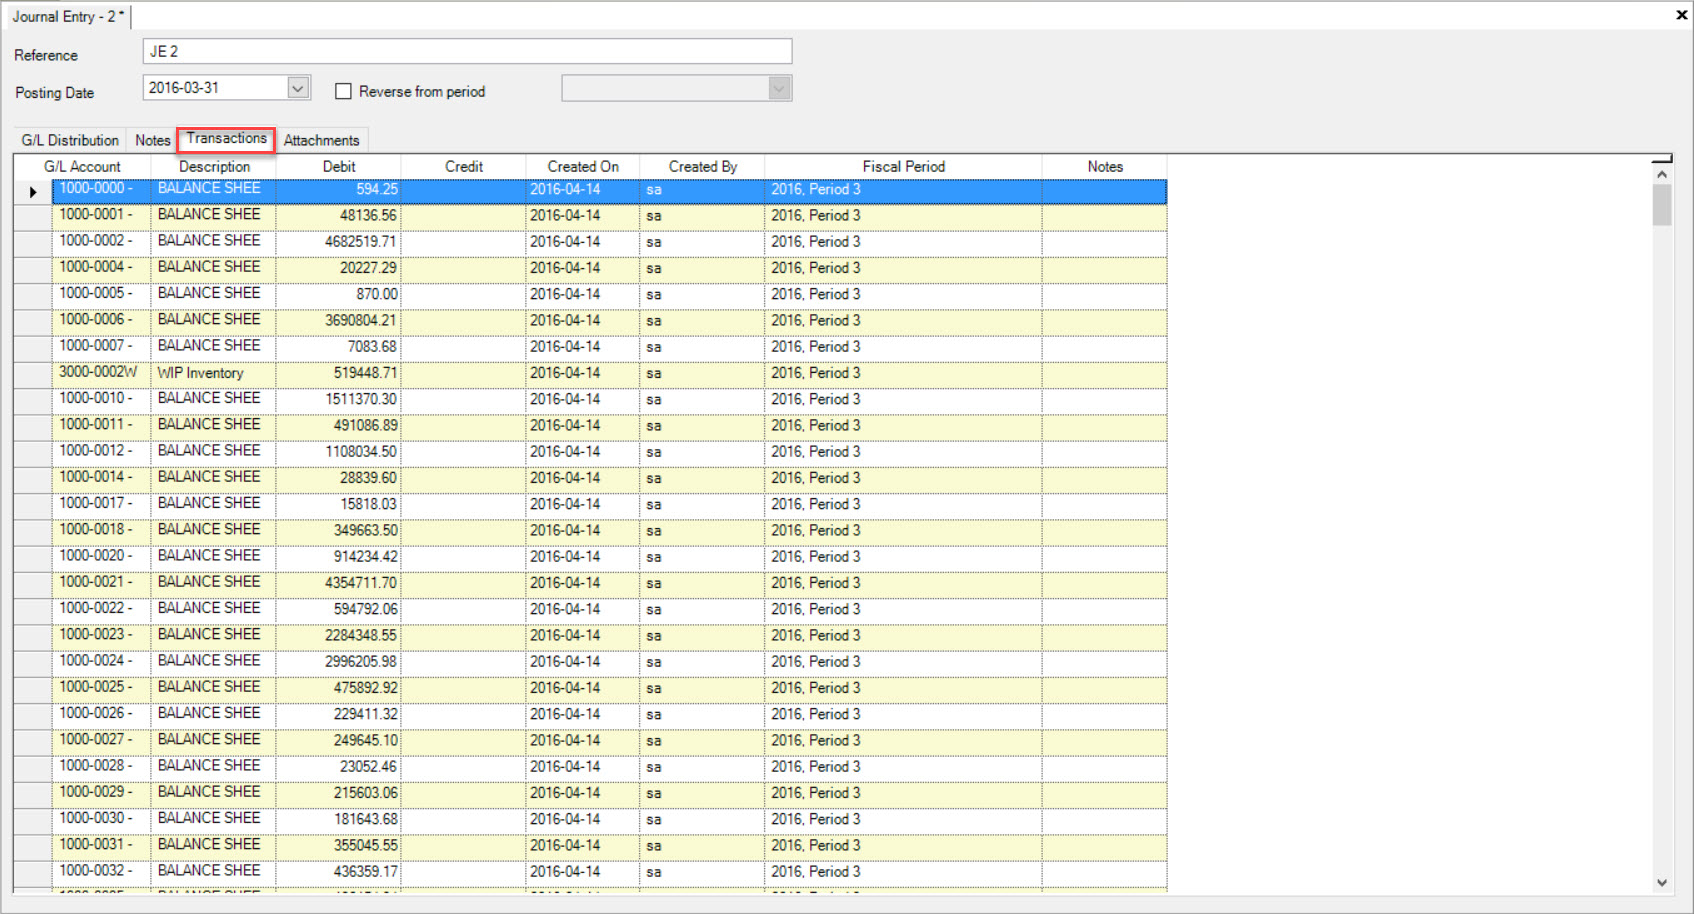
Users will be able to view all of the Transactions for the specific Journal Entry. Details include: the G/L Account, Description, Debit and Credit amounts, Created On date, Created By, the Fiscal Period, and any Notes.
You will not be able to view the Transactions until a Journal Entry has been saved.
Adding an Attachment to a Journal Entry
Users can add an Attachment to an existing or new Journal Entry in the system.
To add an Attachment to a Journal Entry, navigate to the  tab, and select the
 icon. This will bring up the Journal Entry lookup screen.

Once you have found the Journal Entry you are looking for, double-click on the row to open the entry in order to view the details.
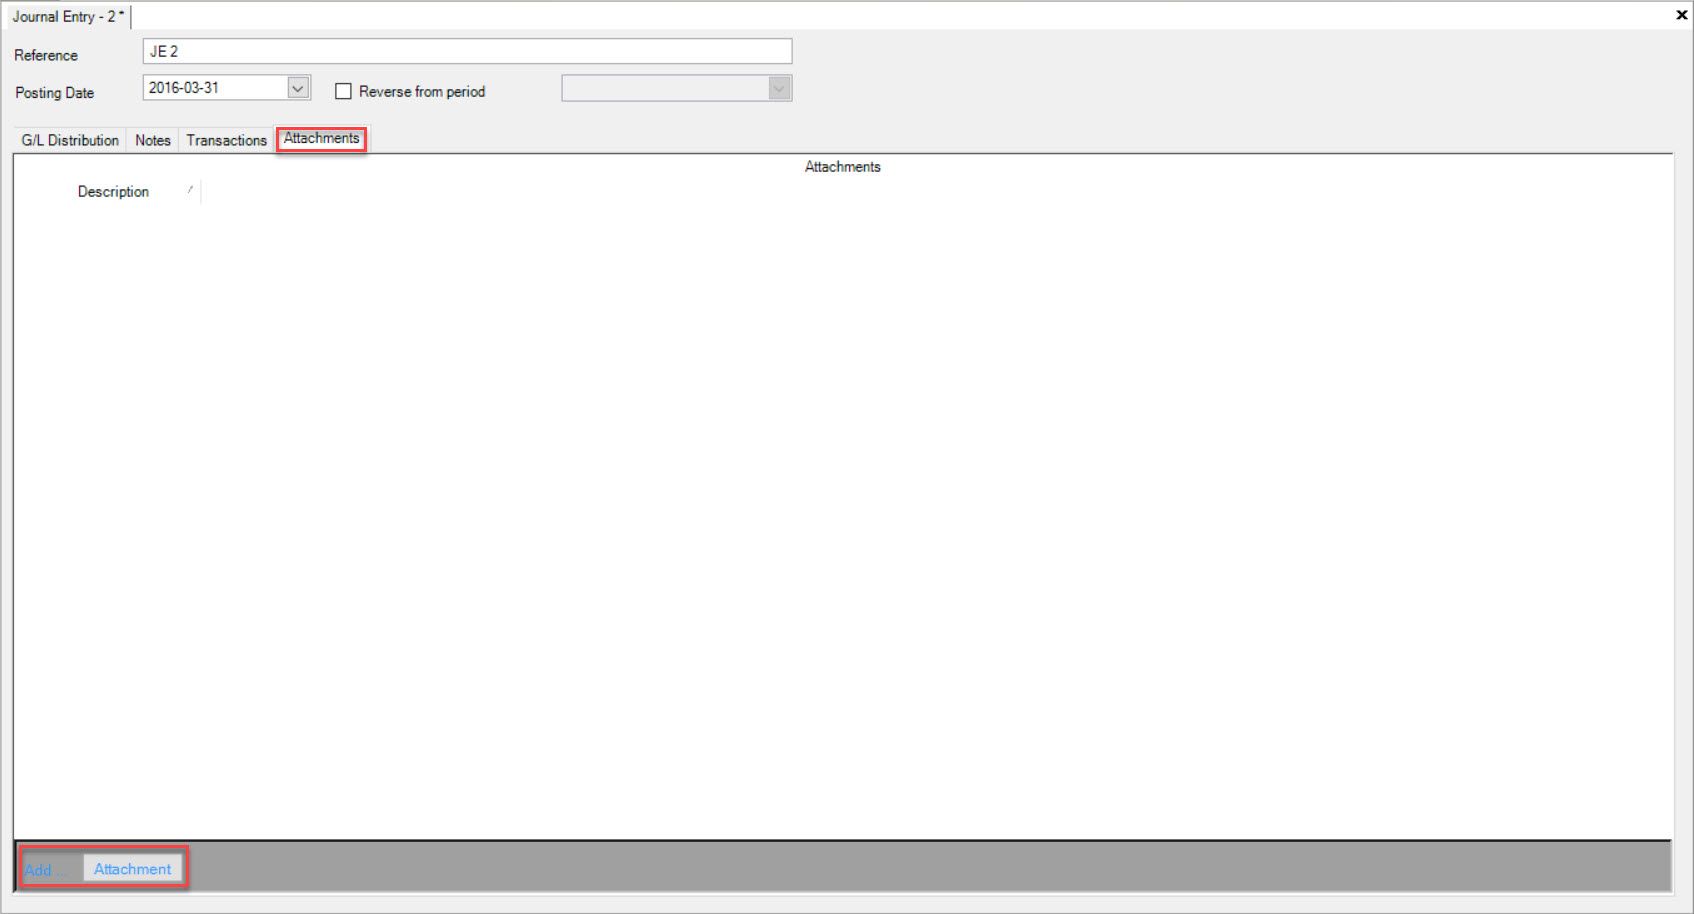
On the Journal Entry Detail screen, make sure to select the Attachments tab. Then click on the  button located at the bottom of the screen.
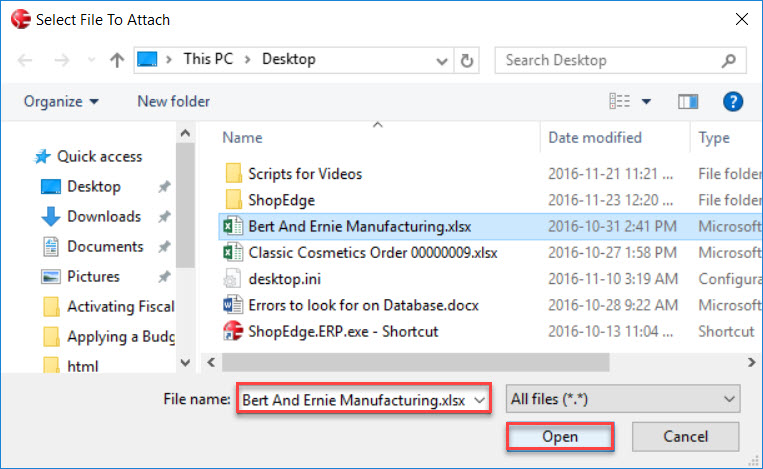
A window will pop-up where users can select an Attachment from their computer. Once you have selected the Attachment, select Open.
The Attachment will now be displayed under the Attachments tab in the Journal Entry Detail screen.
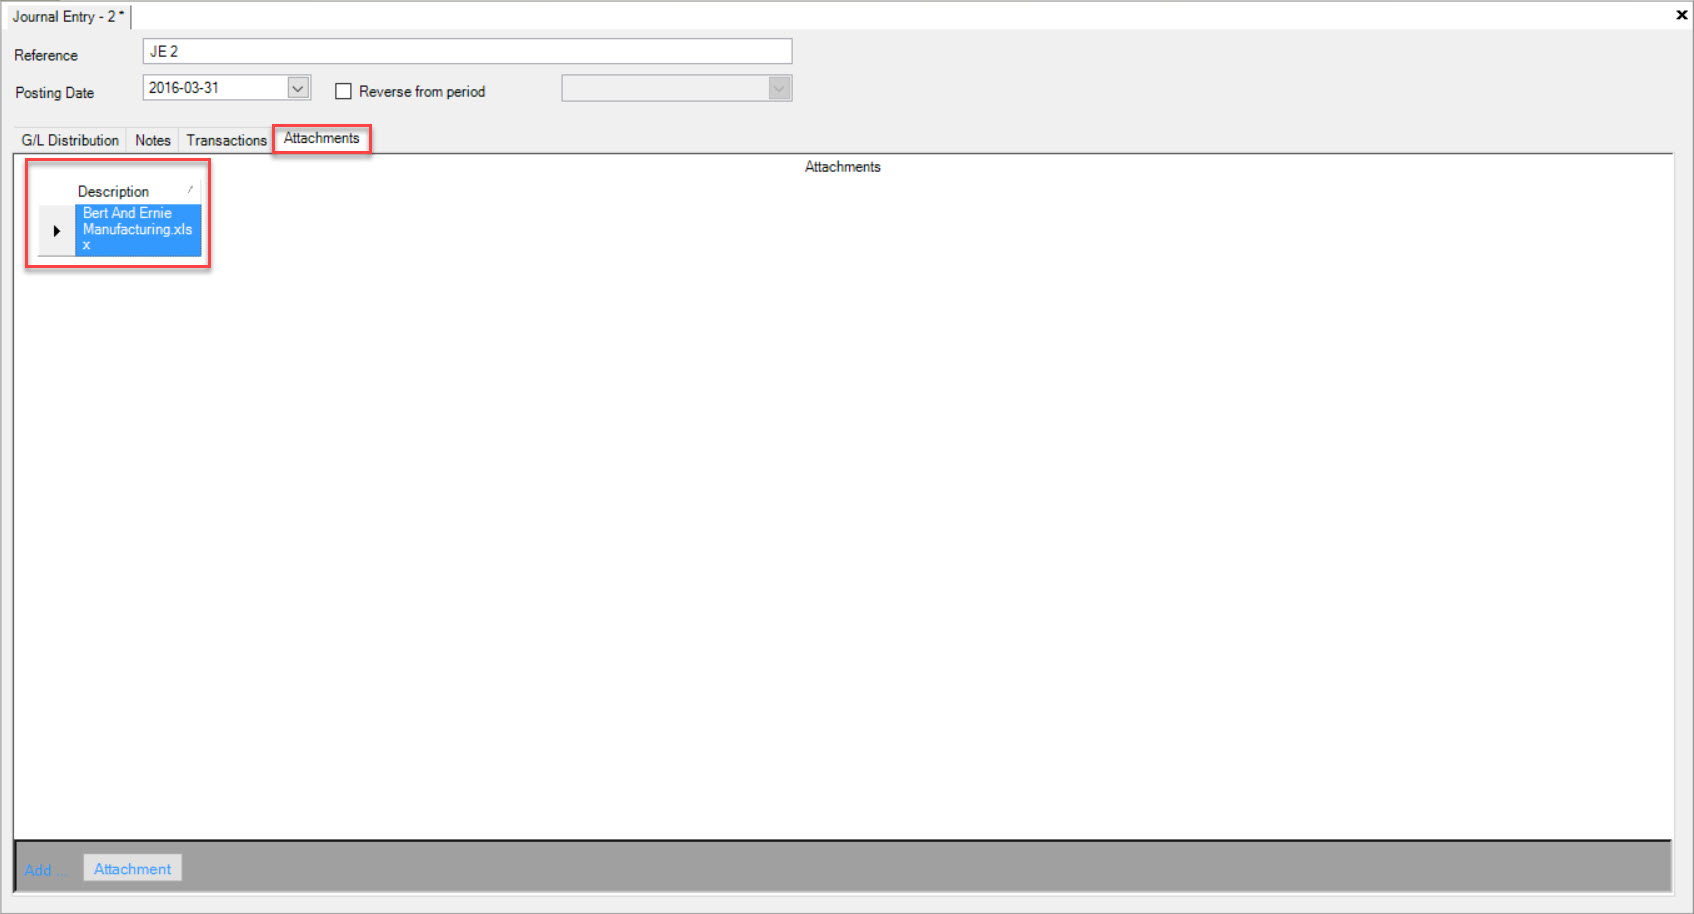
Make sure to save your changes before exiting the screen.
Note
If users wish to view the added Attachments, double-click on the appropriate one and it will open.
Note
To add an Attachment to a new Journal Entry, follow the steps above.
Creating a New Journal Entry Template
Users have the ability to add a New Journal Entry Template. This allows you to add multiple G/L Accounts under the Template so that Assets, Liabilities, Expenses, Incomes, and Owner’s Equity can easily be accounted for.
To create a new Journal Entry Template, navigate to File > New > G/L Journal Entry.

The New Journal Entry screen will be displayed.
Click on the drop-down menu below the G/L Distribution tab and click on New Journal Entry Template option.
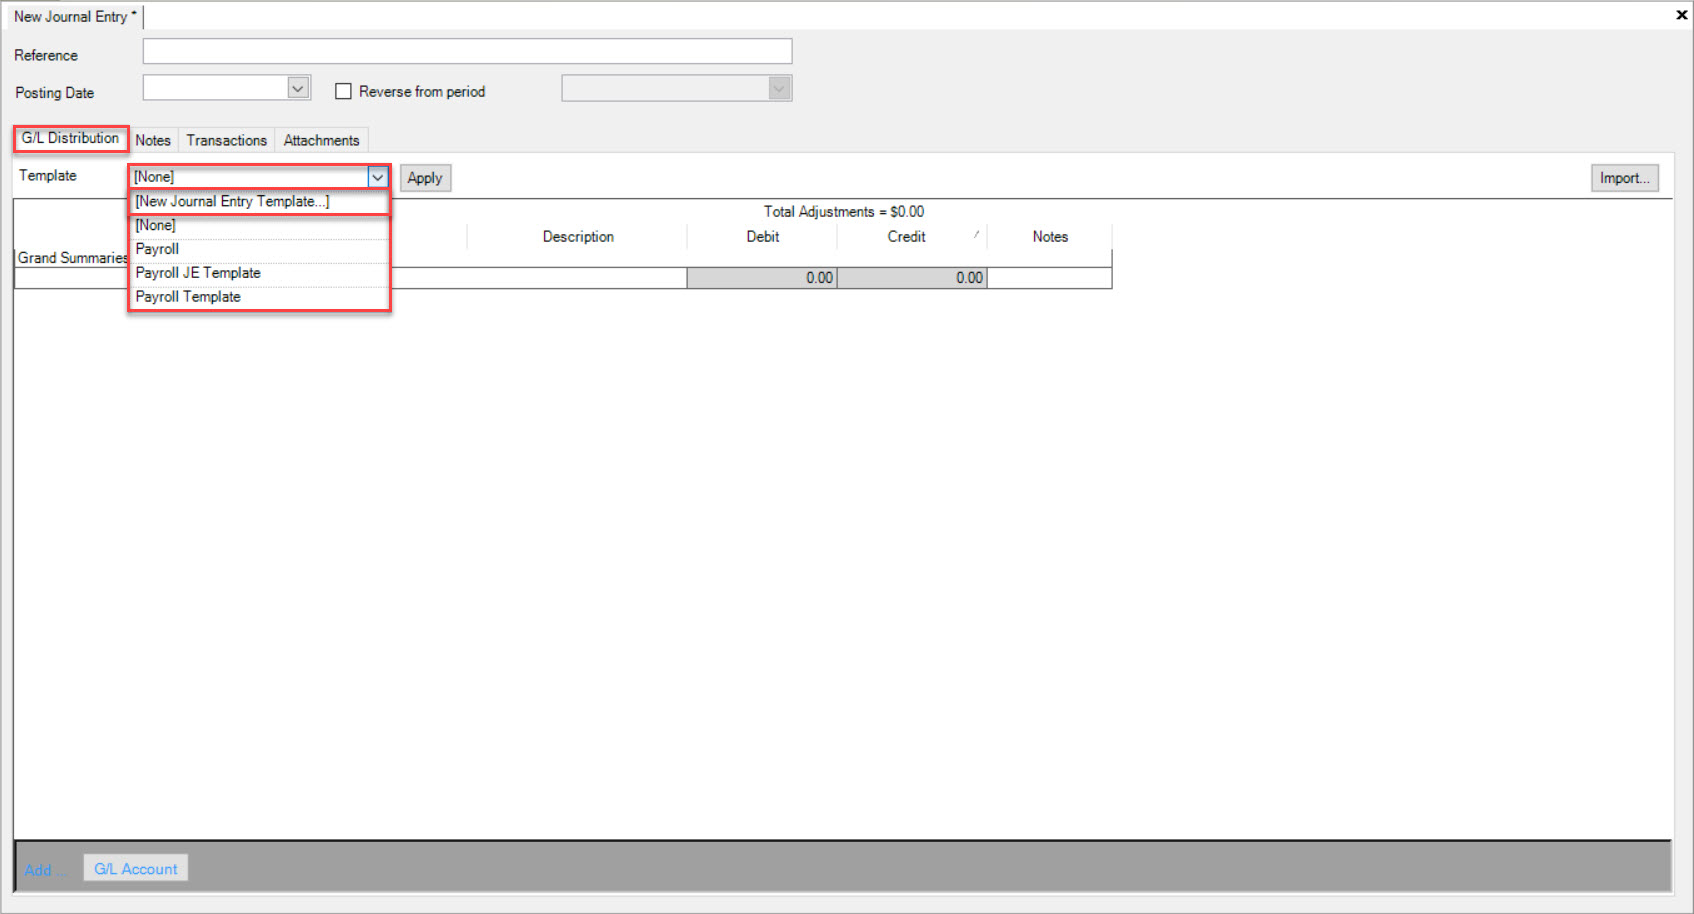
The New Journal Entry Template window will appear. Fill in the appropriate Name for the new Template and add the desired G/L Accounts by clicking on the  button.
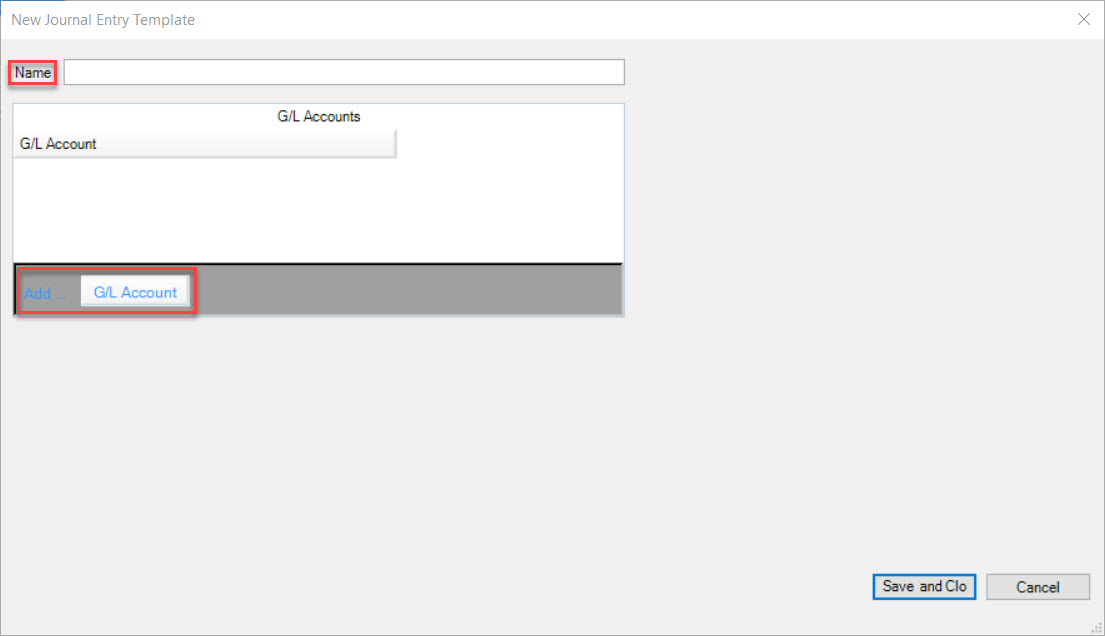
A new row will appear where you can select the G/L Account. Once you have added the desired G/L Accounts, click on the Save and Close button.
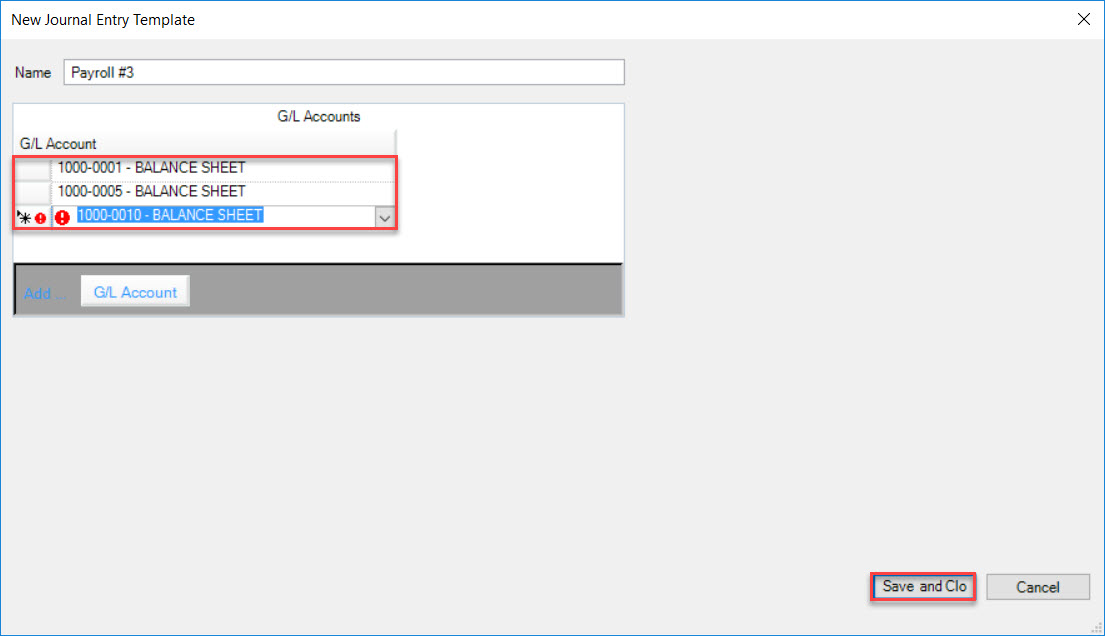
You will notice that the new Journal Entry Template is now located in the drop-down menu. Select the Journal Entry Template that was just created and click Apply.
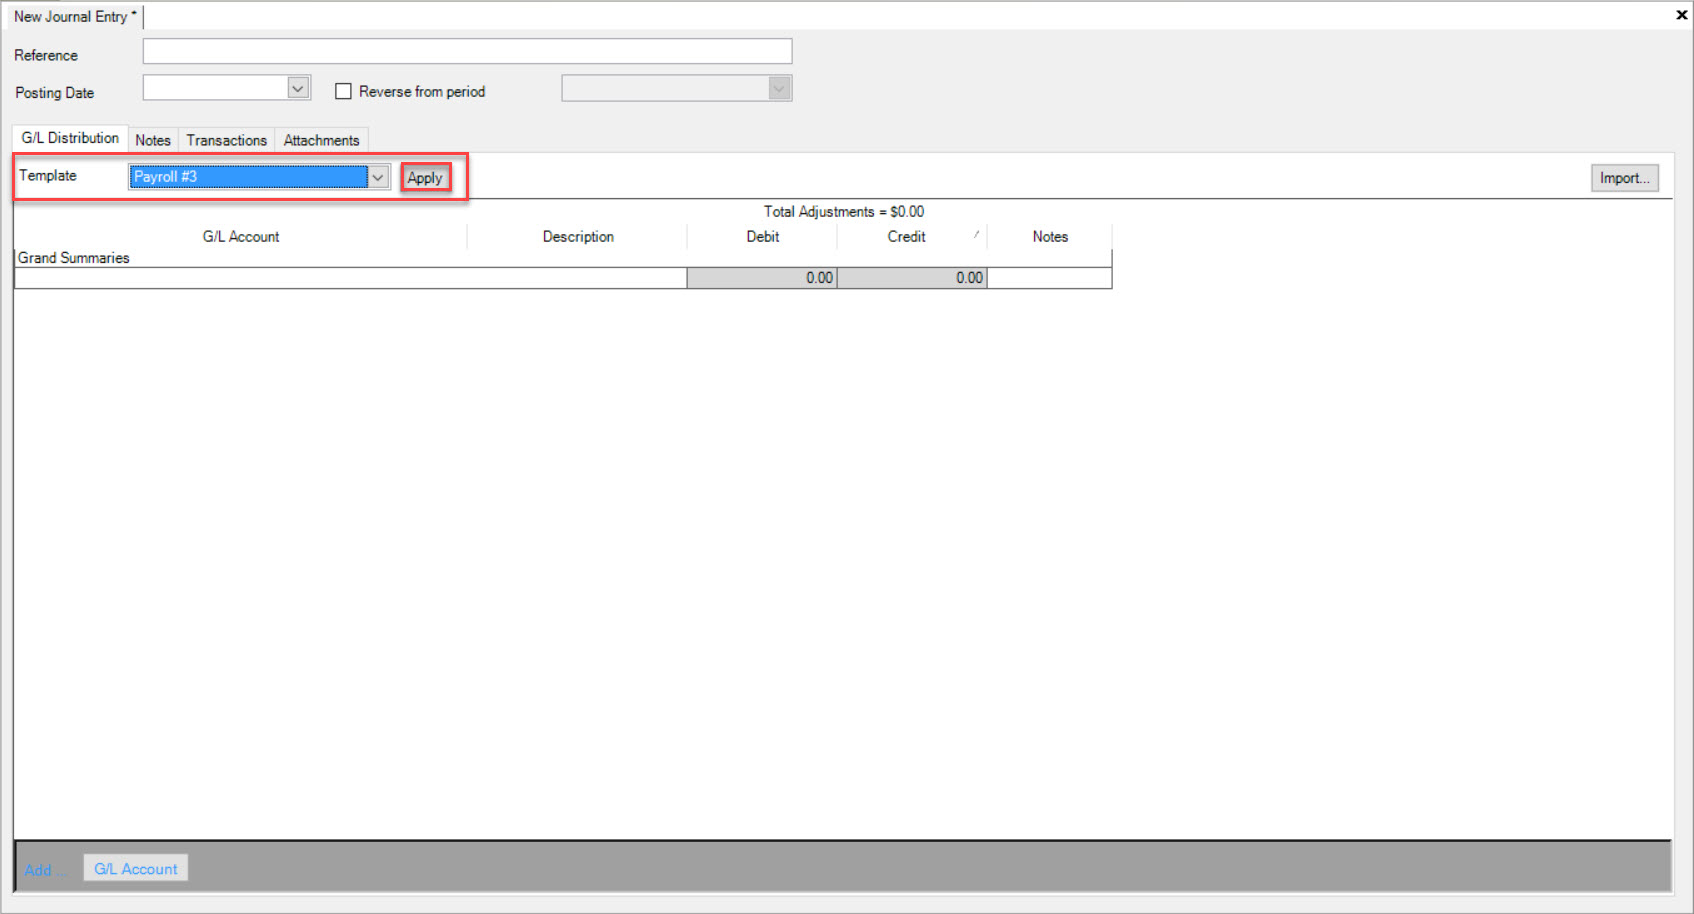
The Journal Entry Template will now appear on the screen where you can manually enter in the Debit and Credit amounts.
Note
Clicking on the button under the Debit and Credit columns will bring up a calculator. Any calculations that you perform will be entered in the columns after clicking on the = sign.
Make sure to save your changes before exiting the screen.
Note
The Total Adjustments must equal $0.00 in order for you to perform a save. To gain a Total Adjustment of $0.00, make sure that the Debit and Credit amounts balance each other out.
Creating a New Journal Entry from an Existing Template
To create a new Journal Entry from an existing Template, navigate to File > New > G/L Journal Entry.

The New Journal Entry screen will be displayed. Fill in the appropriate information and then using the drop-down menu located beside Template, click on an existing Journal Entry Template and click Apply.
The Journal Entry Template will now appear on the screen where you can manually enter in the Debit and Credit amounts.
Note
Clicking on the button under the Debit and Credit columns will bring up a calculator. Any calculations that you perform will be entered in the columns after clicking on the = sign.
Make sure to save your changes before exiting the screen.
Note
The Total Adjustments must equal $0.00 in order for you to perform a save. To gain a Total Adjustment of $0.00, make sure that the Debit and Credit amounts balance each other out.
Importing a Journal Entry from a File
To import a Journal Entry from a file, navigate to File > New > G/L Journal Entry.

The New Journal Entry screen will be displayed. Fill in the appropriate header information and then click on the  button to select a File to import as the Journal Entry.
The Data Import window will appear. Select the Open... button in order to select a File.
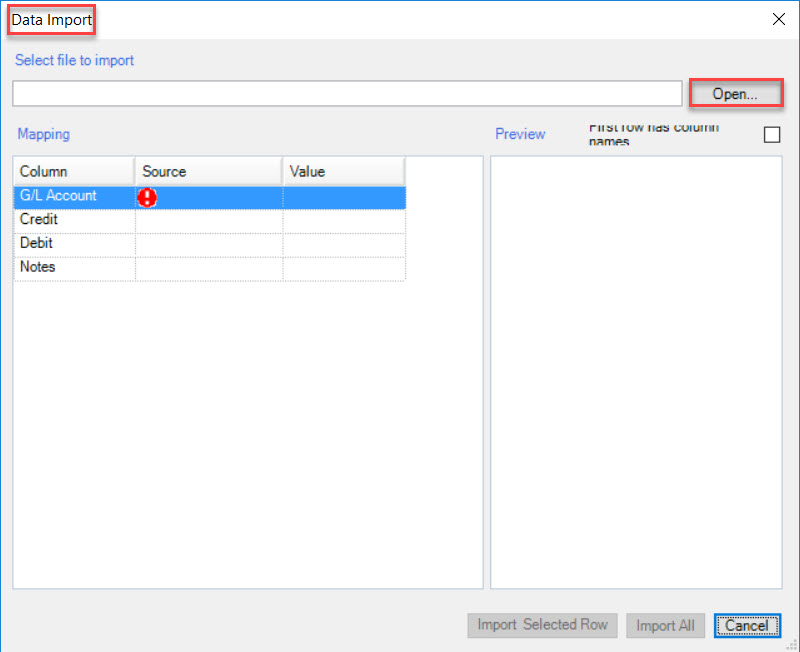
Select the File you wish to import as a Journal Entry from your computer and click Open. The data will be listed in the Preview box in the Data Import window. If the first row contains column names, check the First row has column names box. Now you must map the data on the Mapping box in the Data Import window.
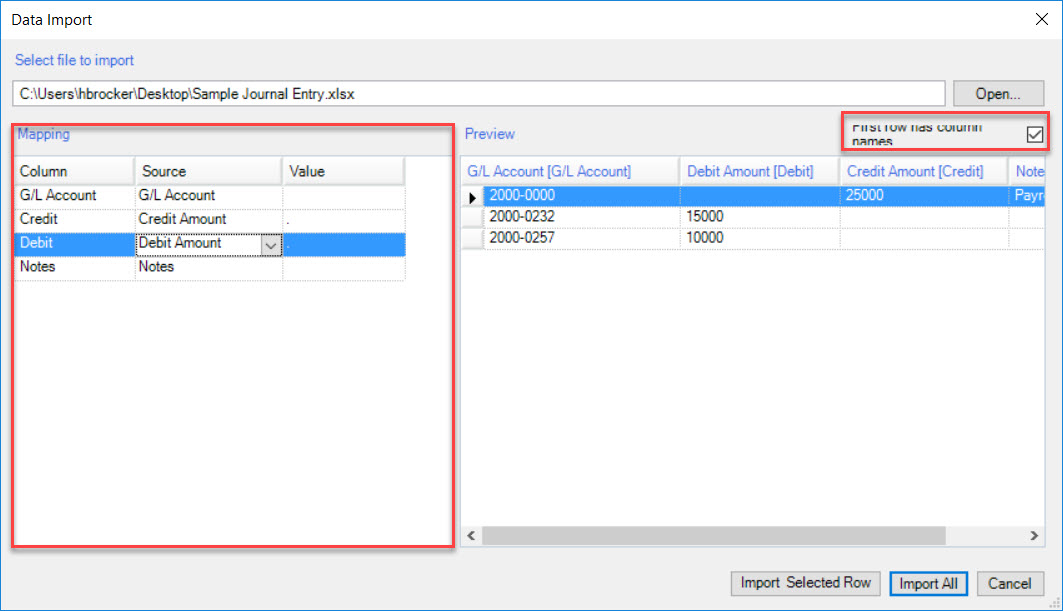
Once you have mapped the data, you have the option to Import All or Import Selected Row.
Note
When selecting Import Selected Row, you must highlight the appropriate rows in the Preview section of the Data Import window.
After you have imported the data from the File, it will now display in the new Journal Entry screen.
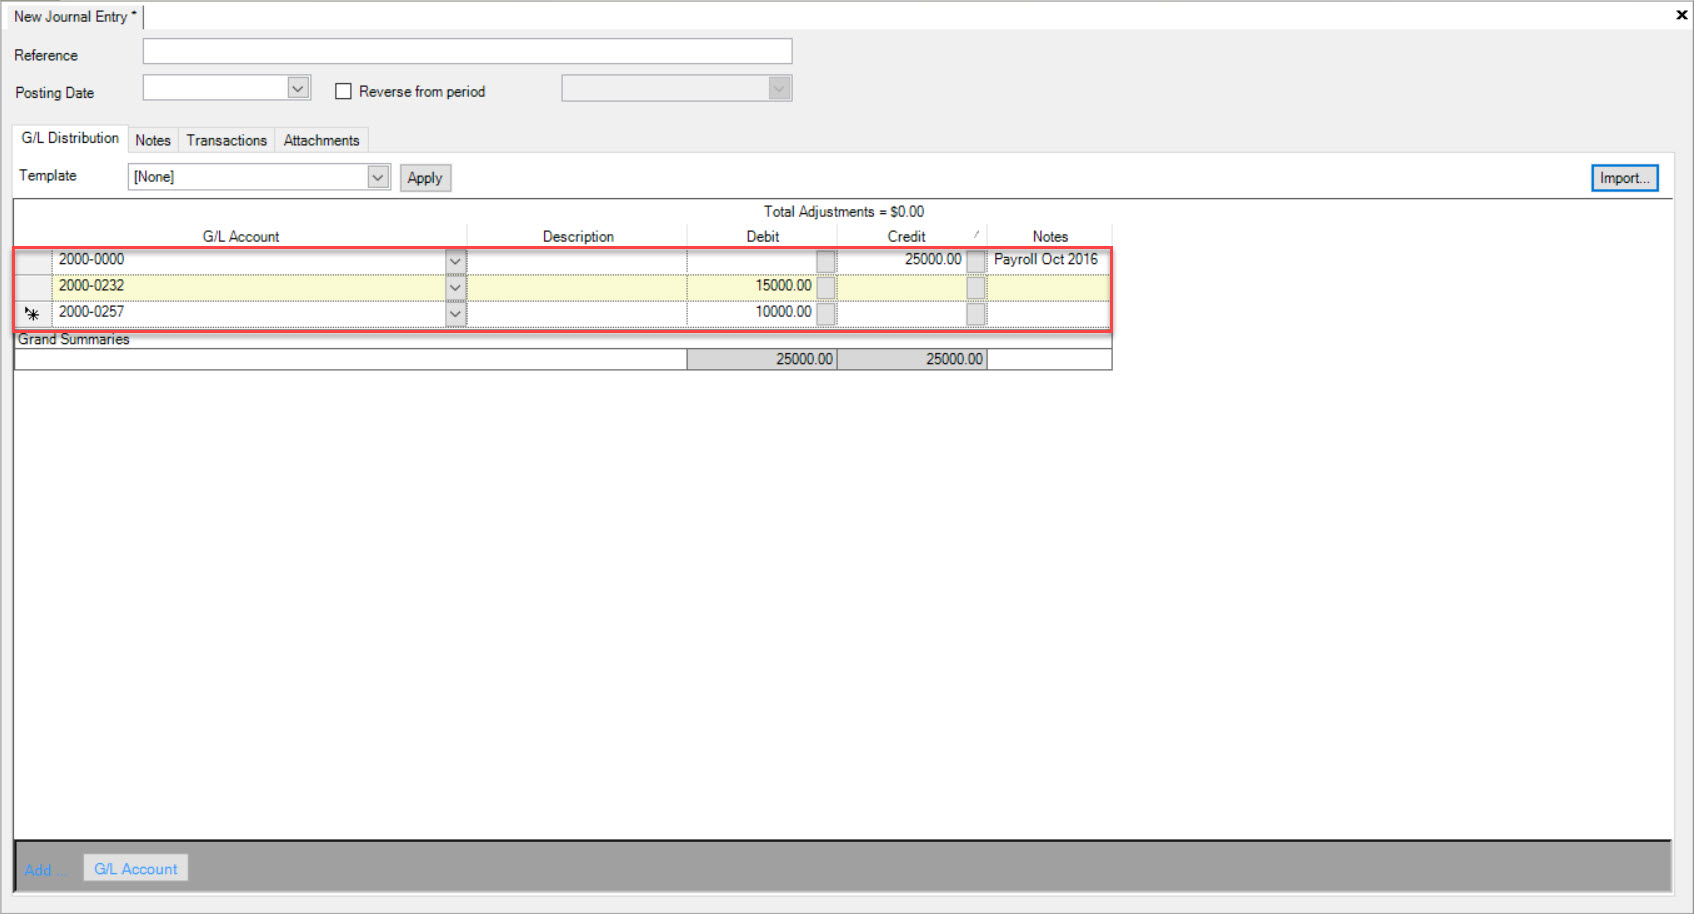
Make sure to save your changes before exiting the screen.
Note
The Total Adjustments must equal $0.00 in order for you to perform a save. To gain a Total Adjustment of $0.00, make sure that the Debit and Credit amounts balance each other out.
Deleting a Journal Entry
To delete a Journal Entry, navigate to the  tab, and select the
 icon. This will bring up the Journal Entry lookup screen.

Once you have found the Journal Entry you are looking for, highlight the appropriate row. Then navigate and click on the
 button.
Make sure to save your changes before exiting the screen.