Control Accounts
The Control Accounts section allows users to view Control G/L Accounts in Accounts Payable and Accounts Receivable. Within these, users have the ability to add G/L Accounts. The system also allows users to view Payment Accounts where G/L Accounts can also be added.
Accounts Payable
To view Accounts Payable, navigate to the  tab and click on the
 ![]() icon.
icon.
The Control Accounts screen will be displayed.
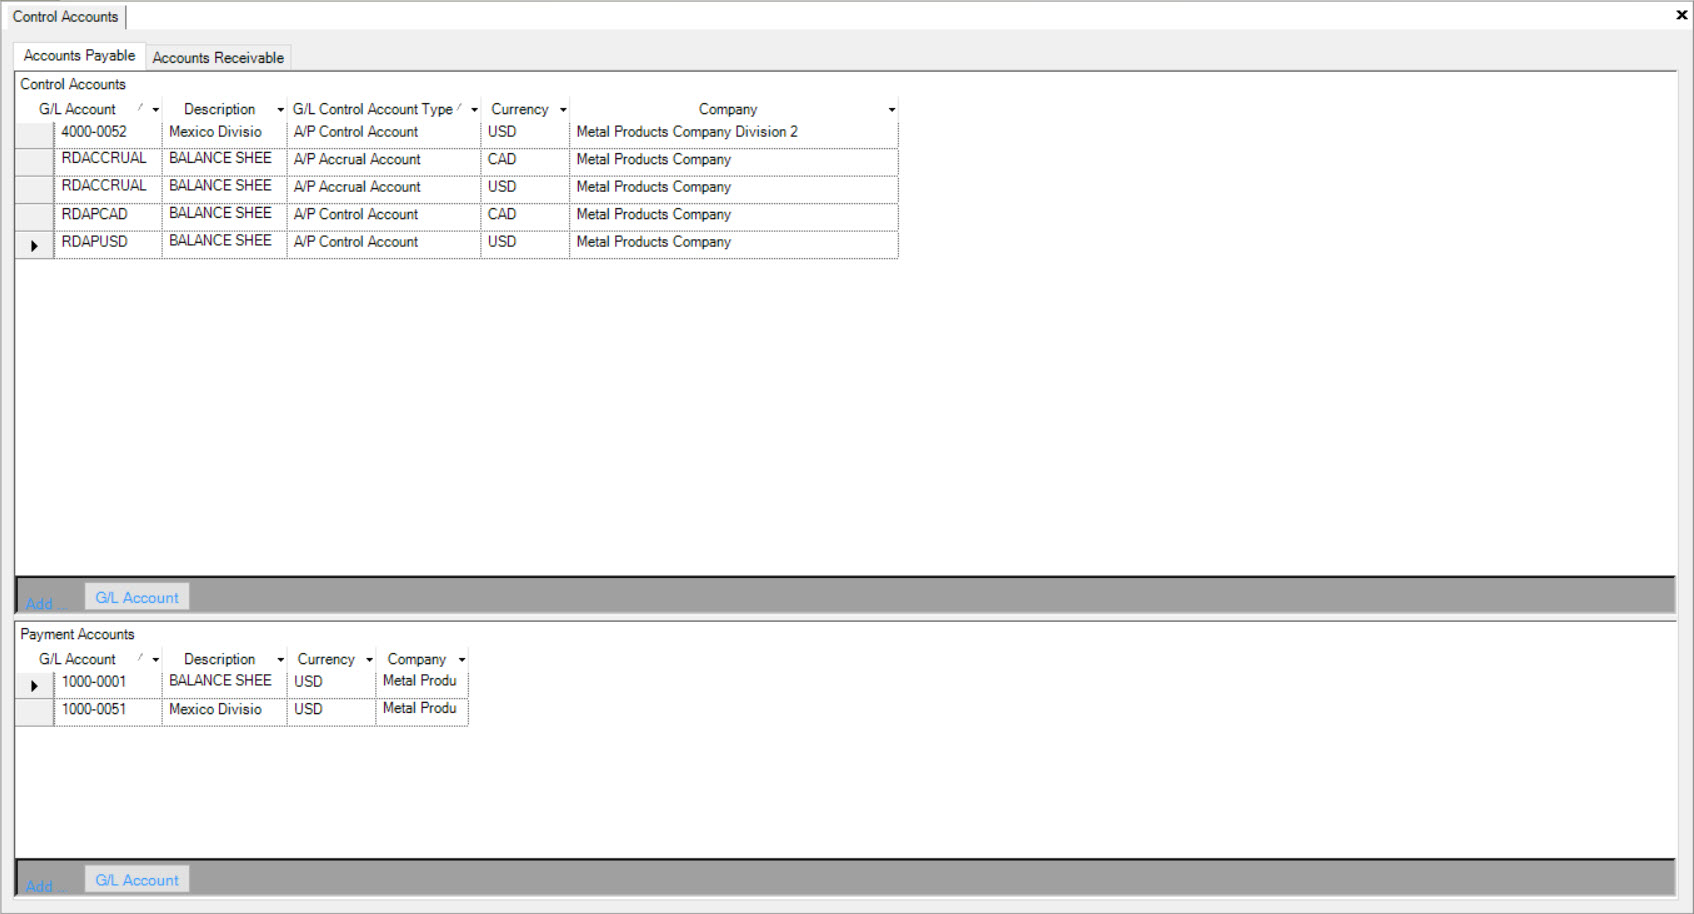
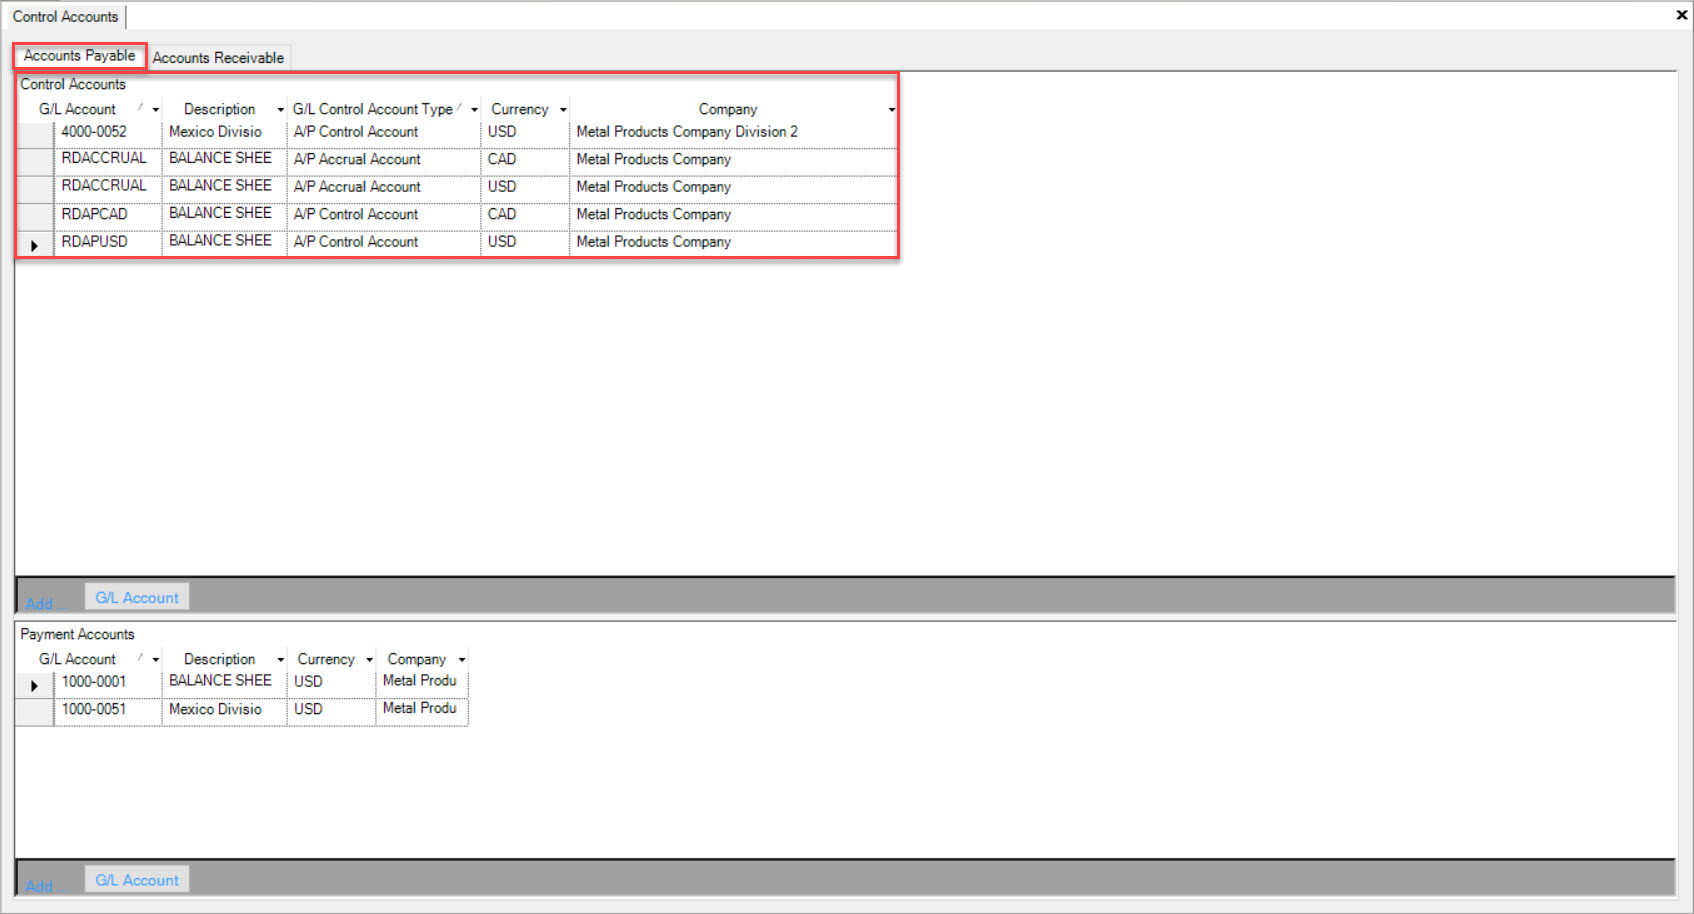
Make sure that the Accounts Payable tab is selected in order to view the Control G/L Accounts under Accounts Payable.
Adding a G/L Account to Accounts Payable
To add a G/L Account to the Accounts Payable tab, navigate to the  tab and click on the
 ![]() icon.
icon.
The Control Accounts screen will be displayed.

Make sure that the Accounts Payable tab is selected in order to view the Control G/L Accounts under Accounts Payable.

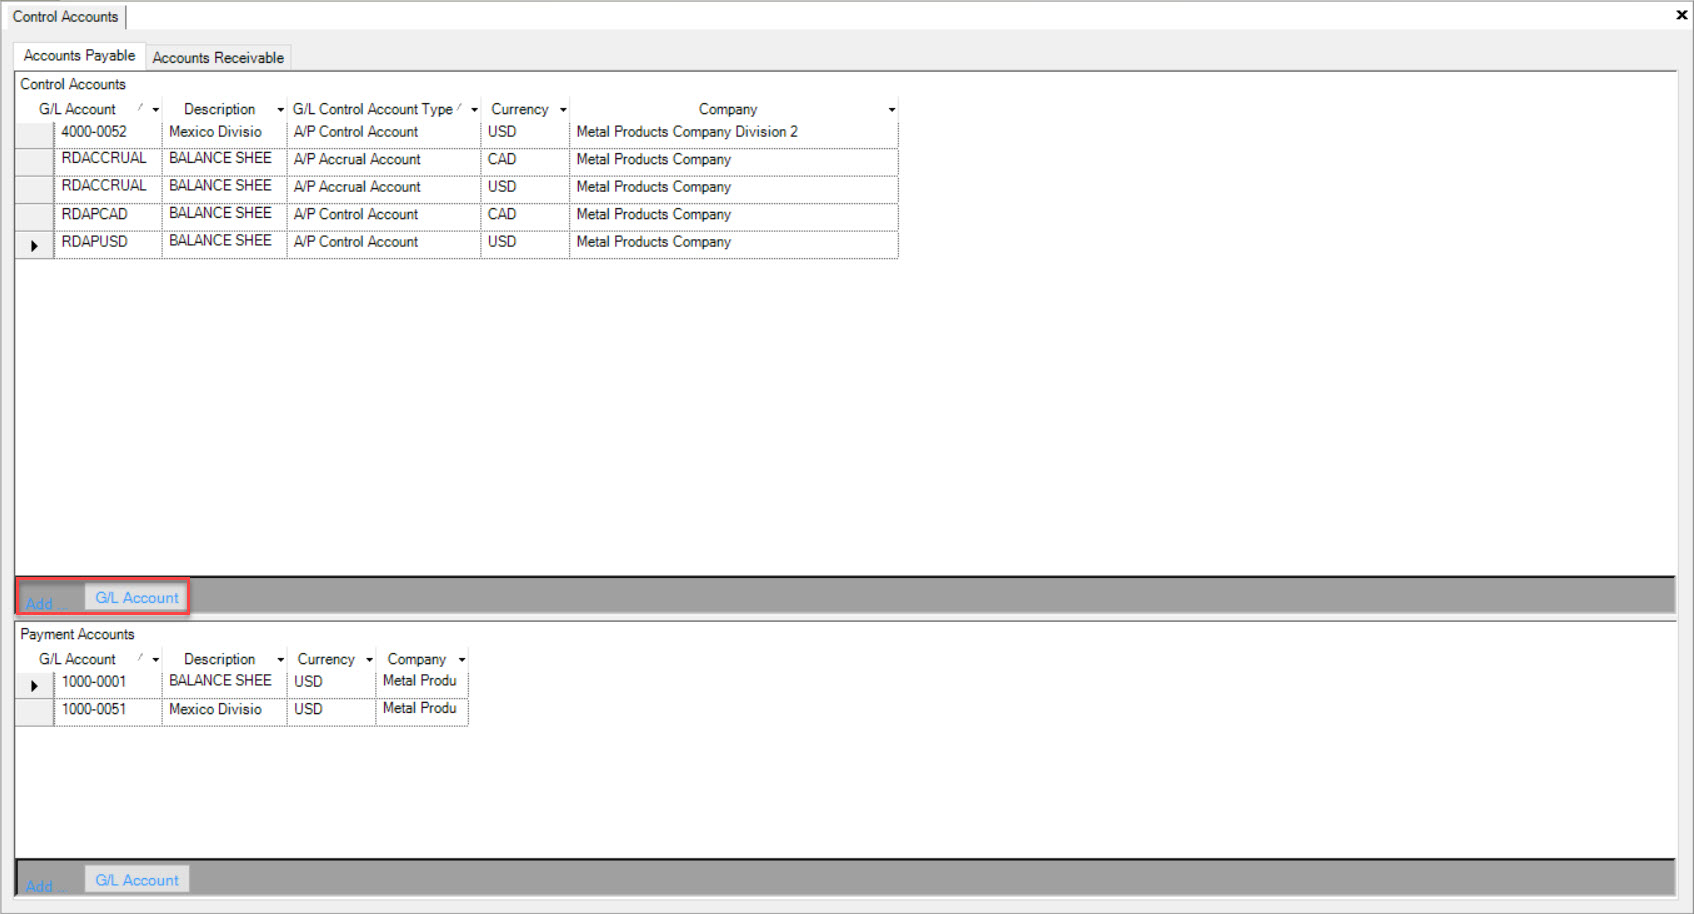
Click on the  button located in the bottom of the Accounts Payable screen.
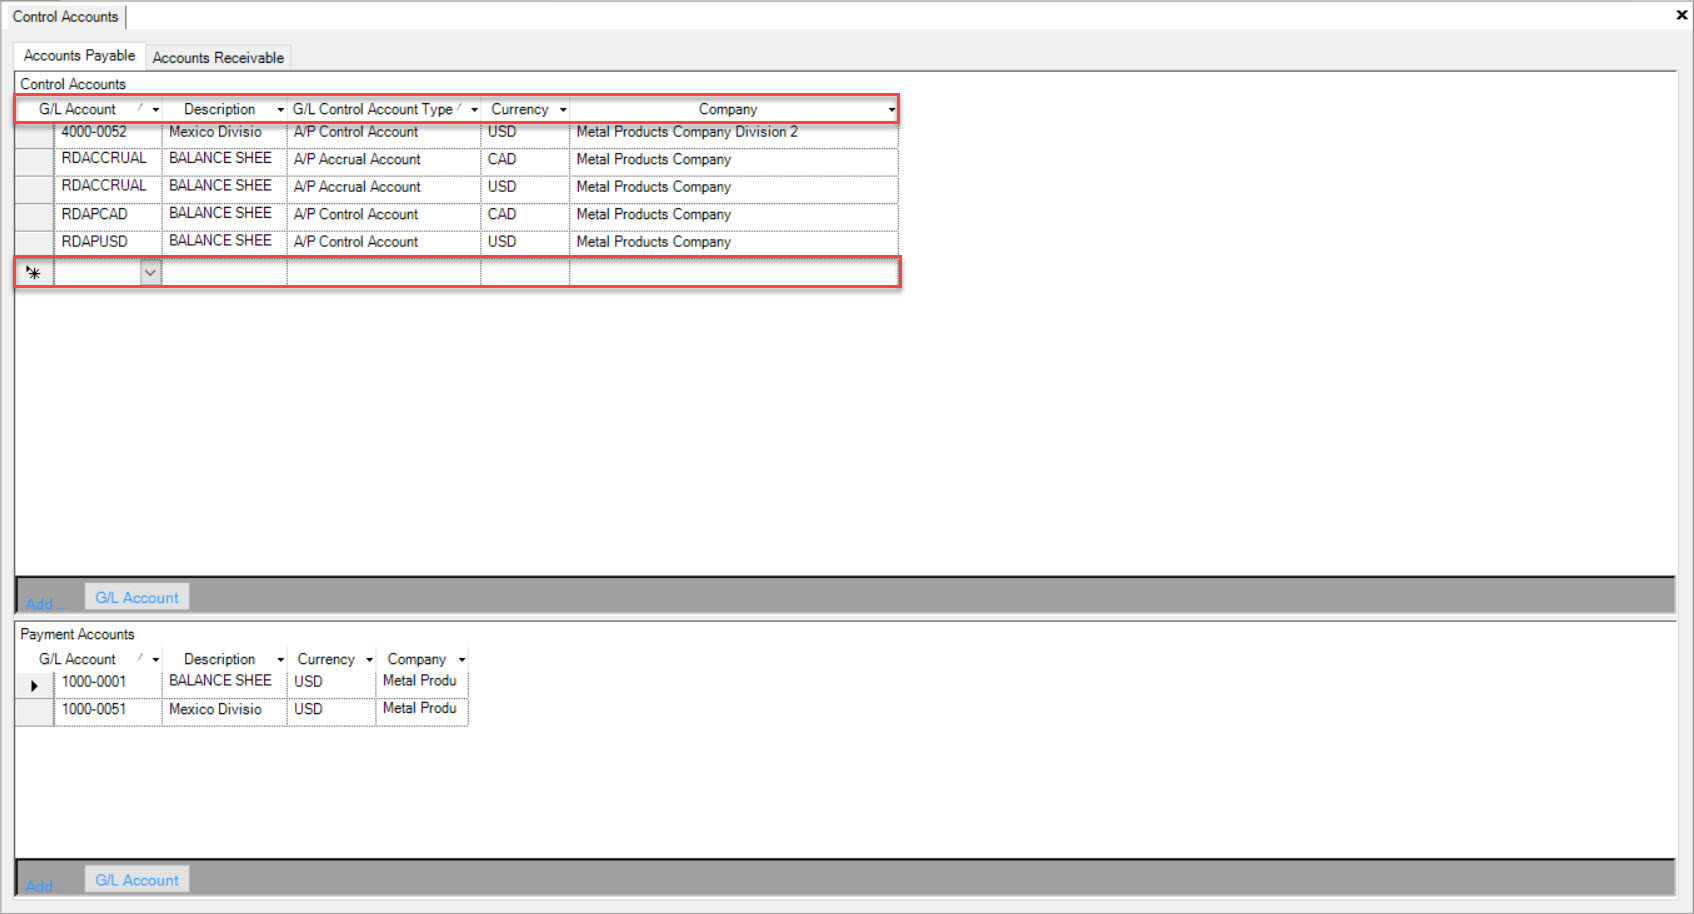
A new row will appear where you are able to fill in the necessary fields such as the G/L Account, Description, G/L Control Account Type, Currency, and Company.
Once you have filled in the necessary fields, make sure to save your changed before exiting the screen.
Deleting a G/L Account from Accounts Payable
To delete a G/L Account from the Accounts Payable tab, navigate to the  tab and click on the
 ![]() icon.
icon.
The Control Accounts screen will be displayed.

Make sure that the Accounts Payable tab is selected in order to view the Control G/L Accounts under Accounts Payable.

Find the G/L Account you wish to delete and highlight the appropriate row. Use your Delete key and when the system prompts you, select Ok.
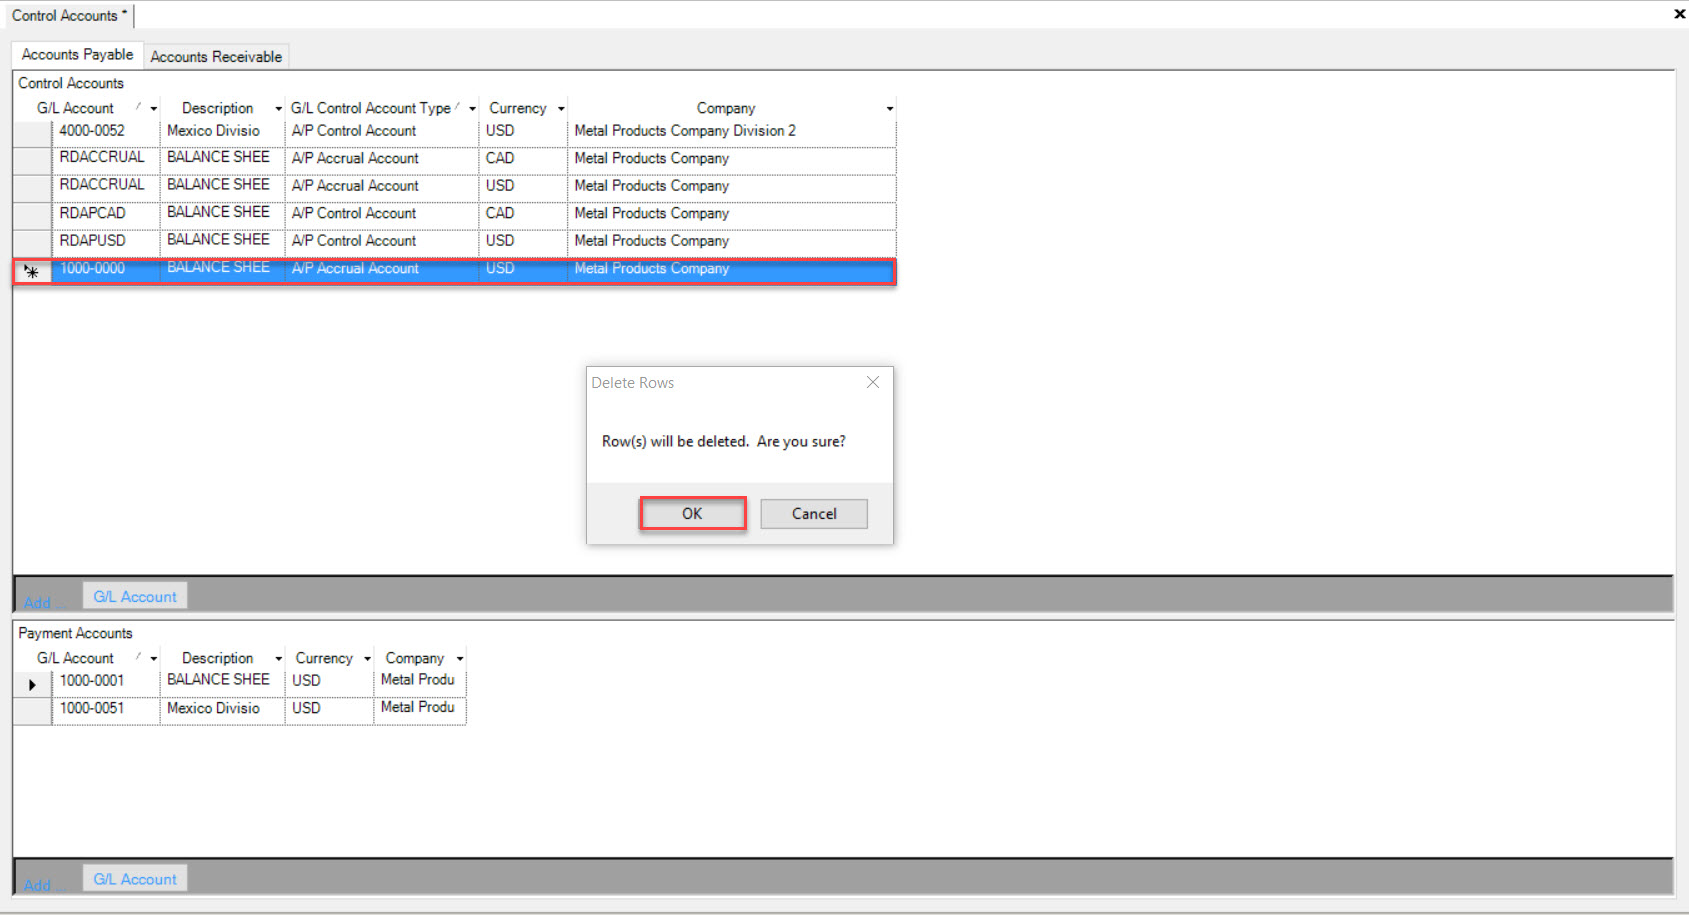
The highlighted row will be deleted immediately. Make sure to save your changes before exiting the screen.
Accounts Receivable
To view Accounts Receivable, navigate to the  tab and click on the
 ![]() icon.
icon.
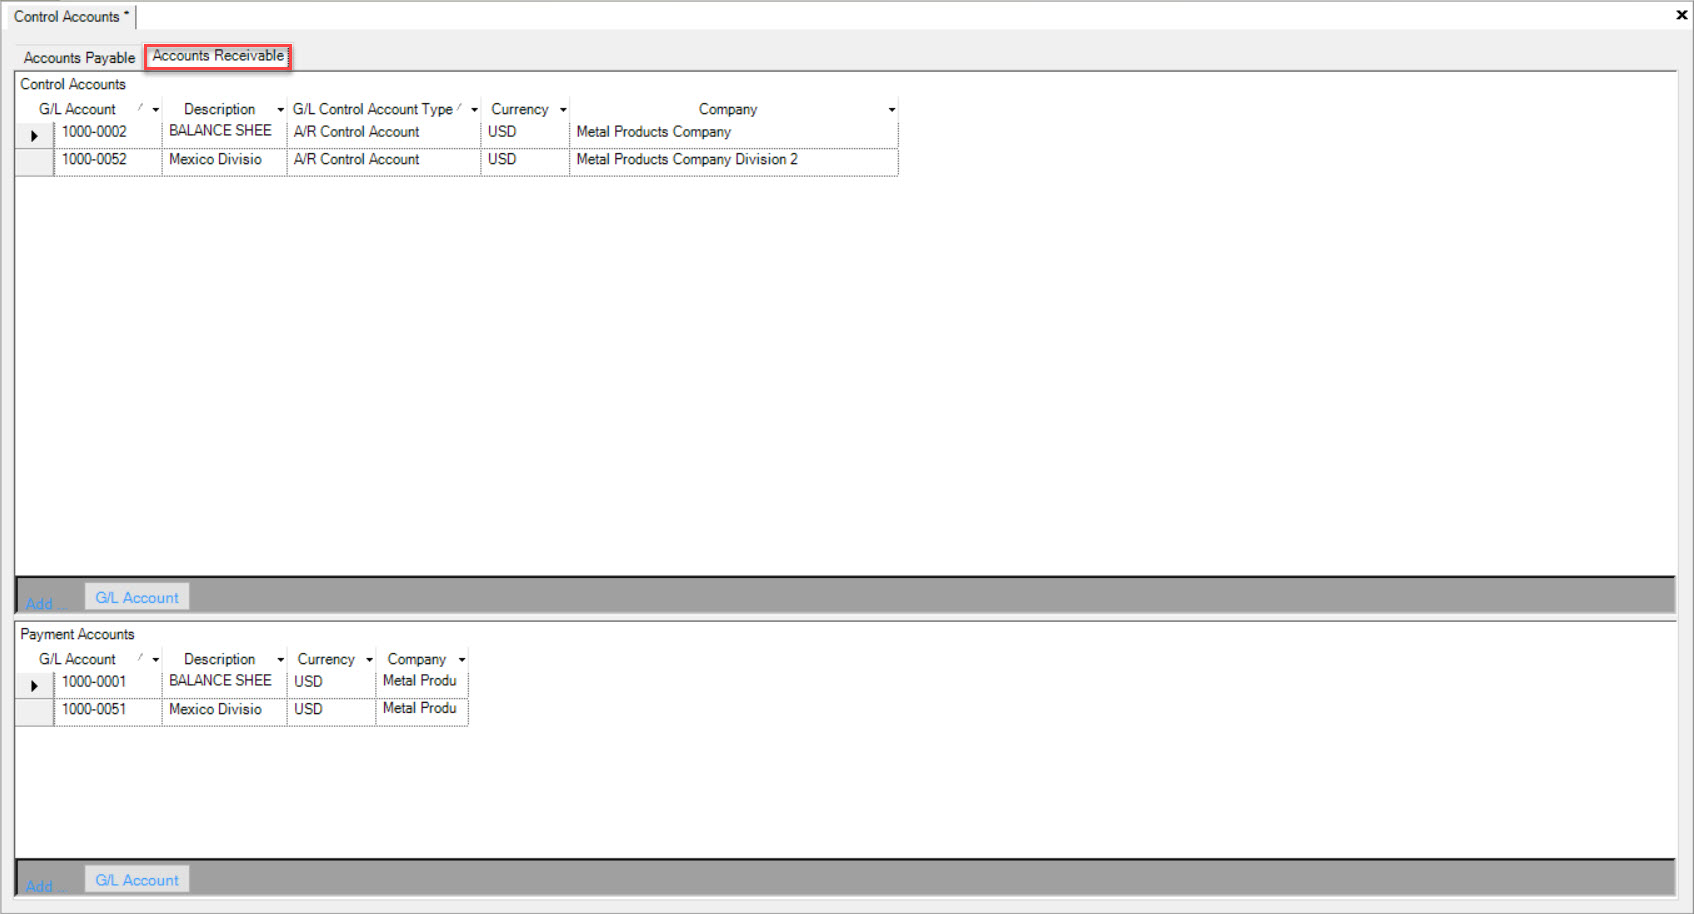
The Control Accounts screen will be displayed.

Make sure that the Accounts Receivable tab is selected in order to view the Control G/L Accounts under Accounts Receivable.
Adding a G/L Account to Accounts Receivable
To add a G/L Account to the Accounts Receivable tab, navigate to the  tab and click on the
 ![]() icon.
icon.
The Control Accounts screen will be displayed.

Make sure that the Accounts Receivable tab is selected in order to view the Control G/L Accounts under Accounts Receivable.

Click on the  button located at the bottom of the Accounts Receivable screen.
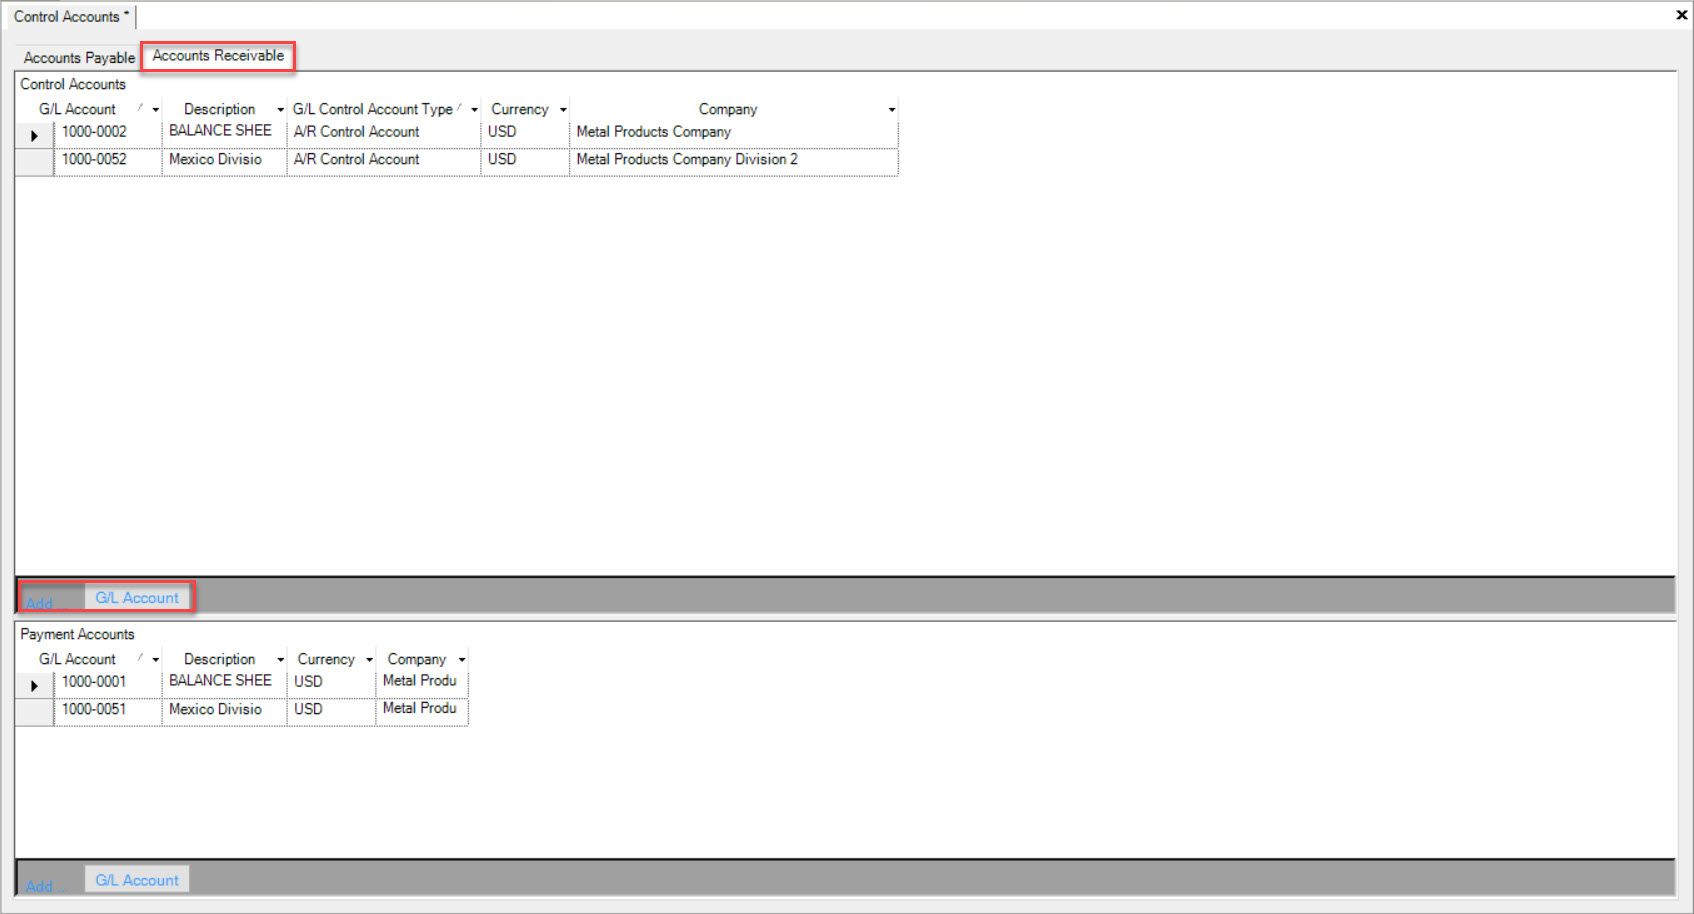
A new row will appear where you can fill in the fields such as the G/L Account, Description, G/L Control Account Type, Currency, and Company.
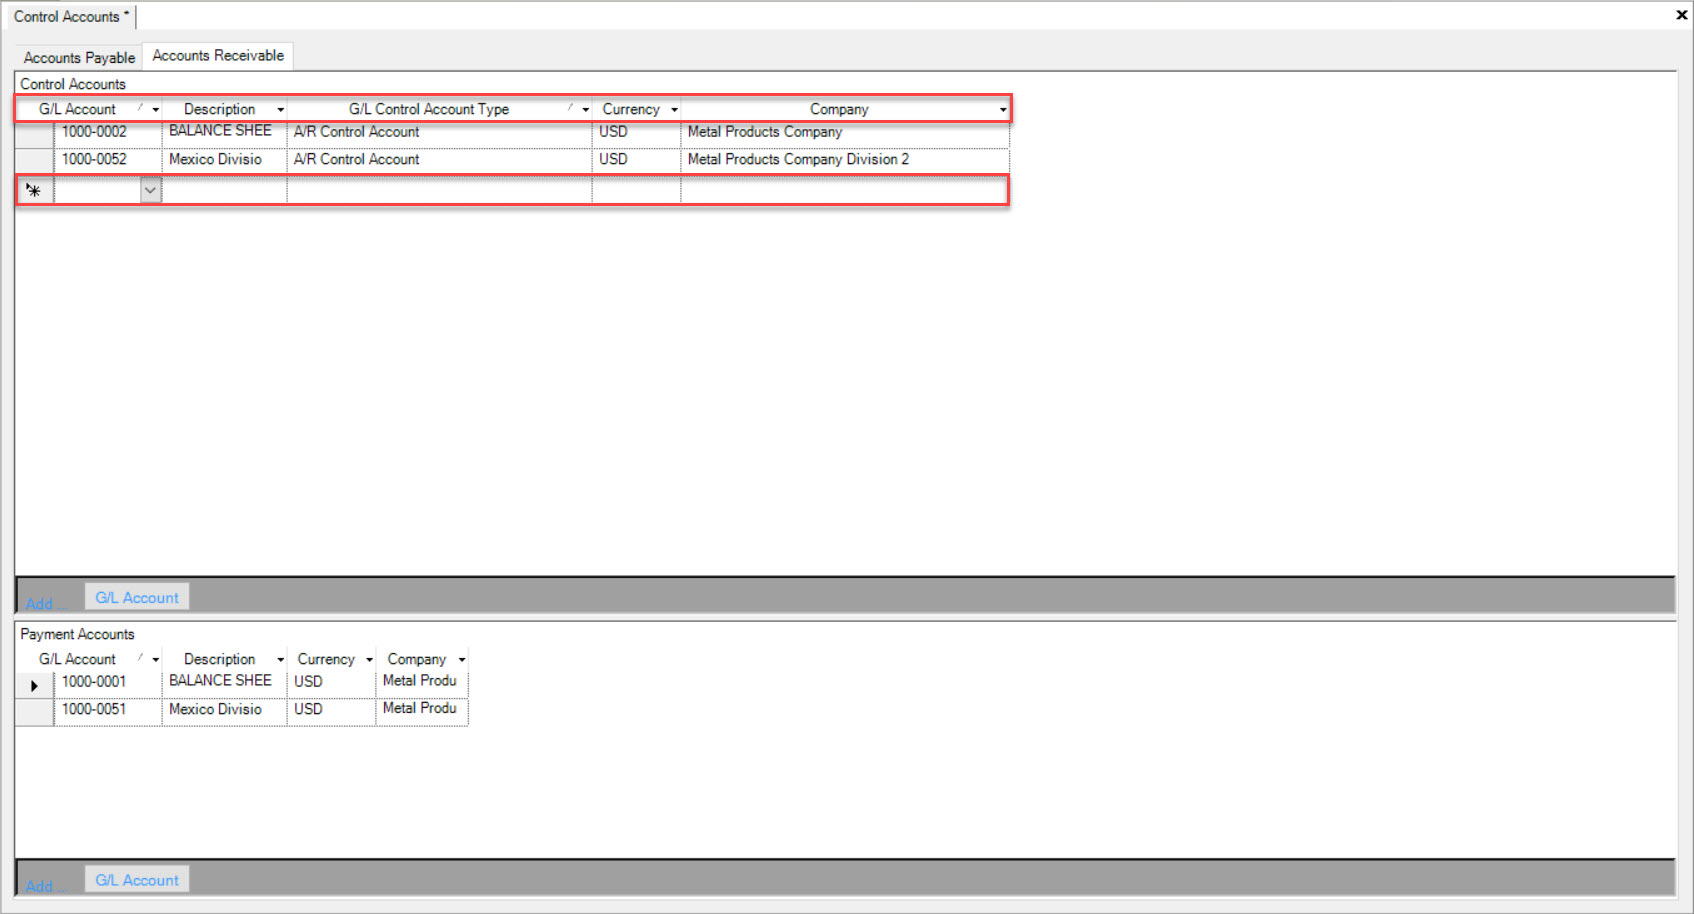
Once you have filled in the necessary fields, make sure to save your changes before exiting the screen.
Deleting a G/L Account from Accounts Receivable
To delete a G/L Account from the Accounts Receivable tab, navigate to the  tab and click on the
 ![]() icon.
icon.
The Control Accounts screen will be displayed.

Make sure that the Accounts Receivable tab is selected in order to view the Control G/L Accounts under Accounts Receivable.

Find the G/L Account you wish to delete and highlight the appropriate row. Use your Delete key and when the system prompts you, select Ok.
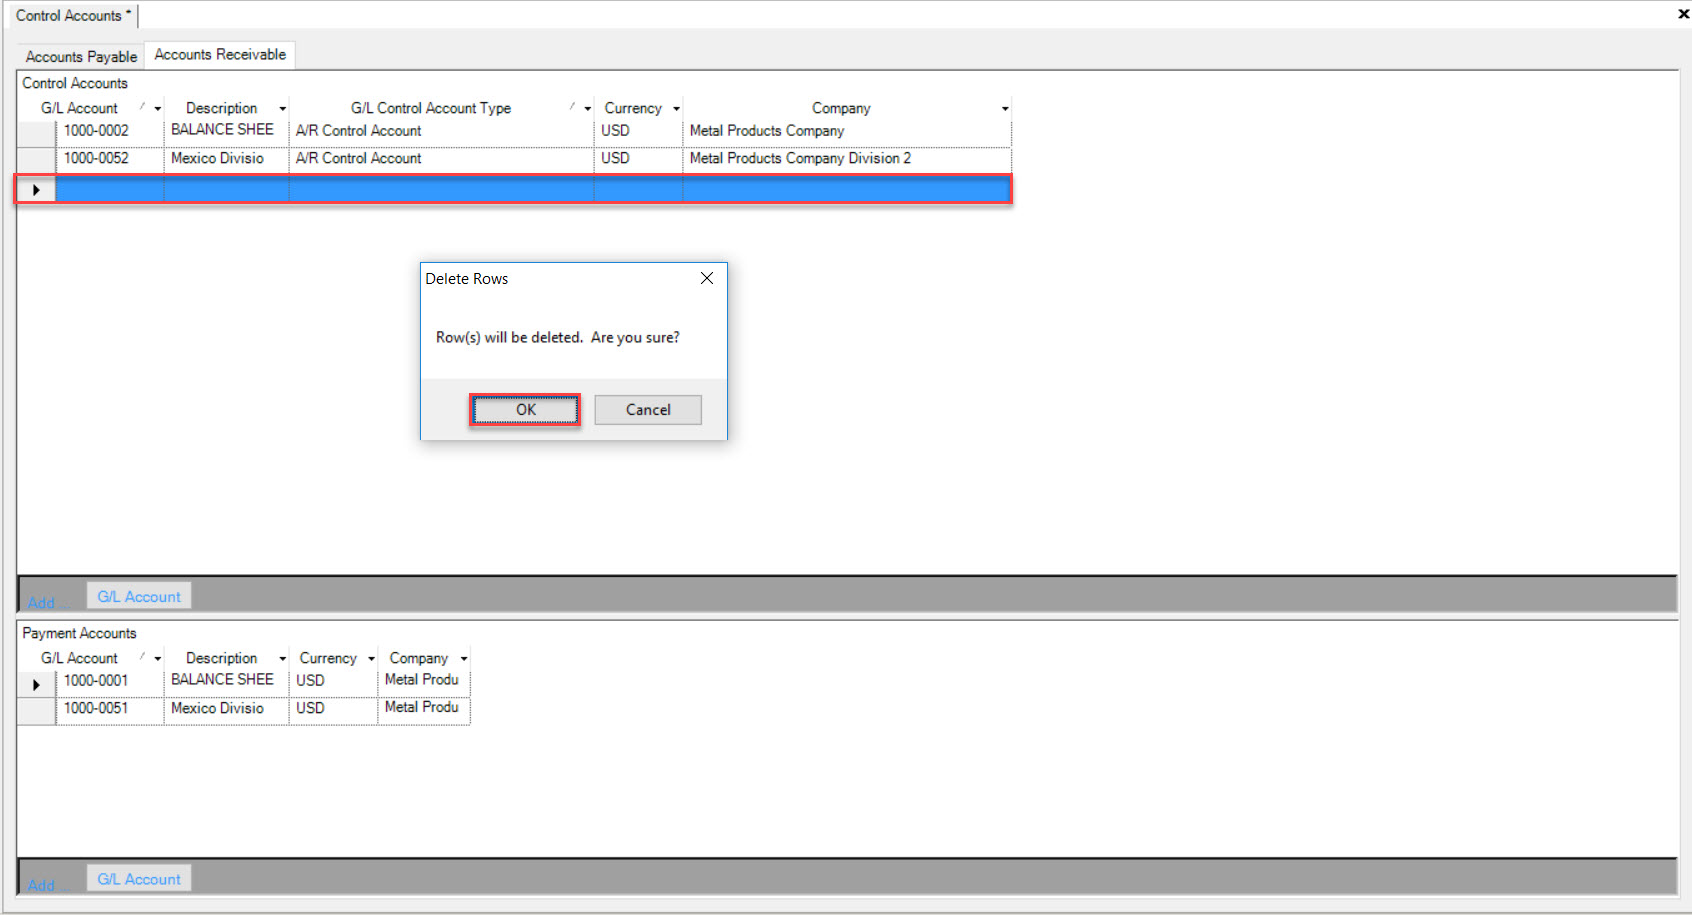
The highlighted row will be deleted immediately. Make sure to save your changes before exiting the screen.
Payment Accounts
To view Payment Accounts, navigate to the  tab and click on the
 ![]() icon.
icon.
The Control Accounts screen will be displayed.

You will find Payment Accounts located at the bottom of the Control Accounts screen.
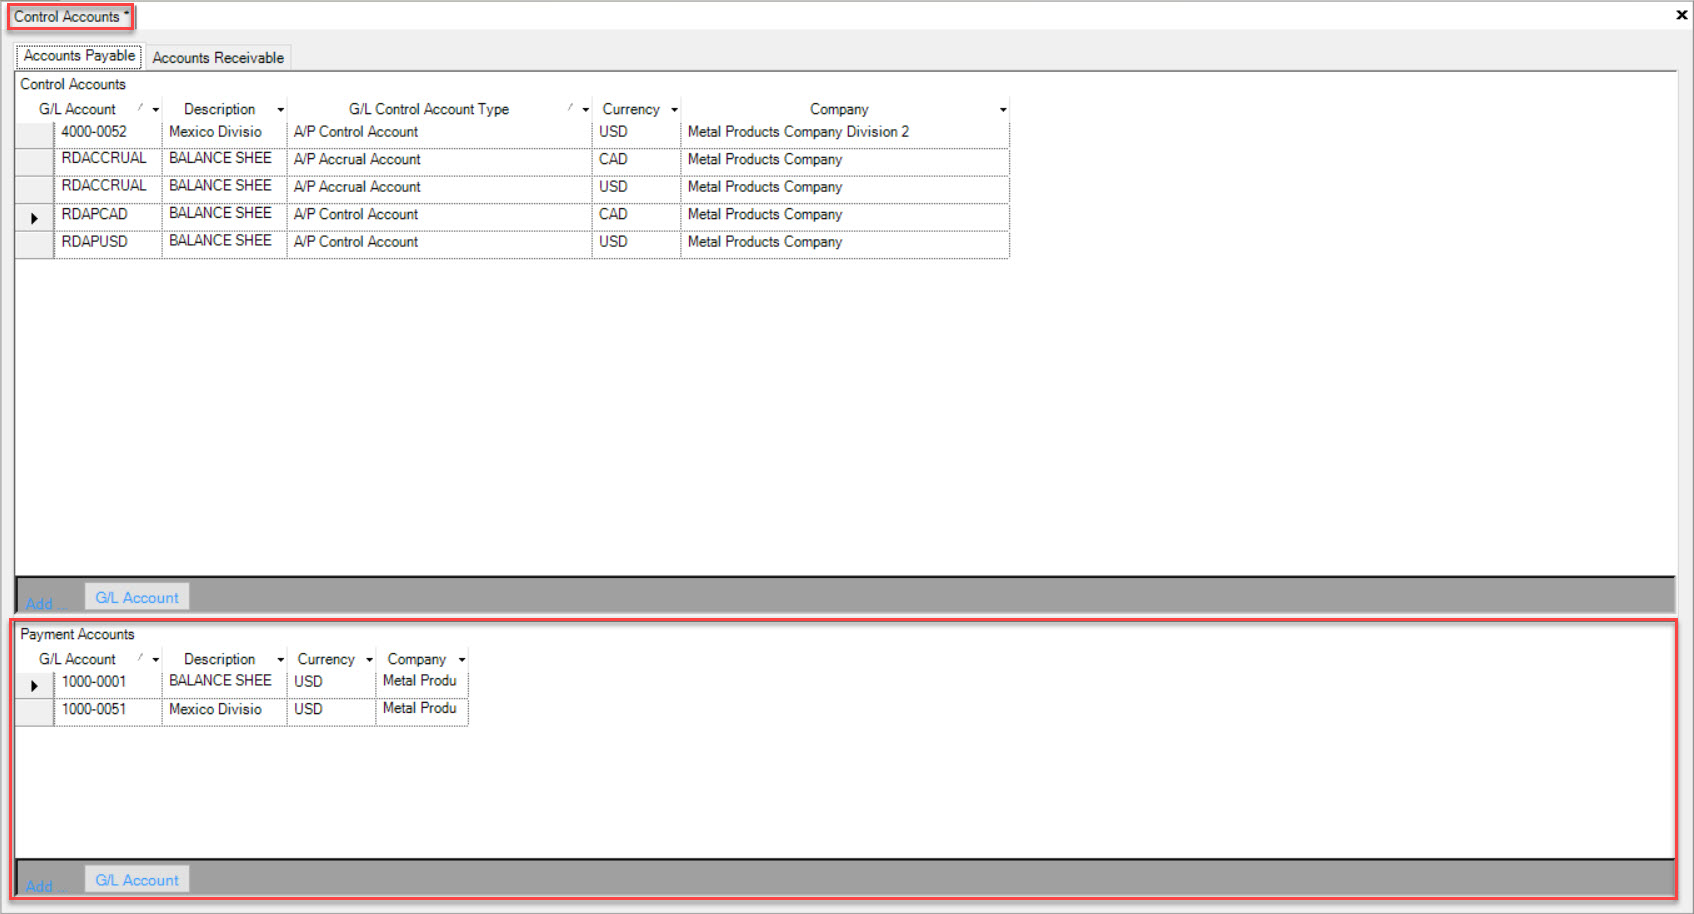
Users can view G/L Accounts, Descriptions, Currencies, and Companies.
Adding a G/L Account to Payment Accounts
To add a G/L Account to Payment Accounts, navigate to the  tab and click on the
 ![]() icon.
icon.
The Control Accounts screen will be displayed.

You will find Payment Accounts located at the bottom of the Control Accounts screen.

Click on the  button located at the bottom of the screen
A new row will appear where you can fill in the necessary fields such as the G/L Account, Description, Currency, and Company.

Once you have filled in the necessary fields, make sure to save your changes before exiting the screen.
Deleting a G/L Account from Payment Accounts
To delete a G/L Account from Payment Accounts, navigate to the  tab and click on the
 ![]() icon.
icon.
The Control Accounts screen will be displayed.

You will find Payment Accounts located at the bottom of the Control Accounts screen.

Find the G/L Account you wish to delete and highlight the appropriate row. Use your Delete key and when the system prompts you, select Ok.
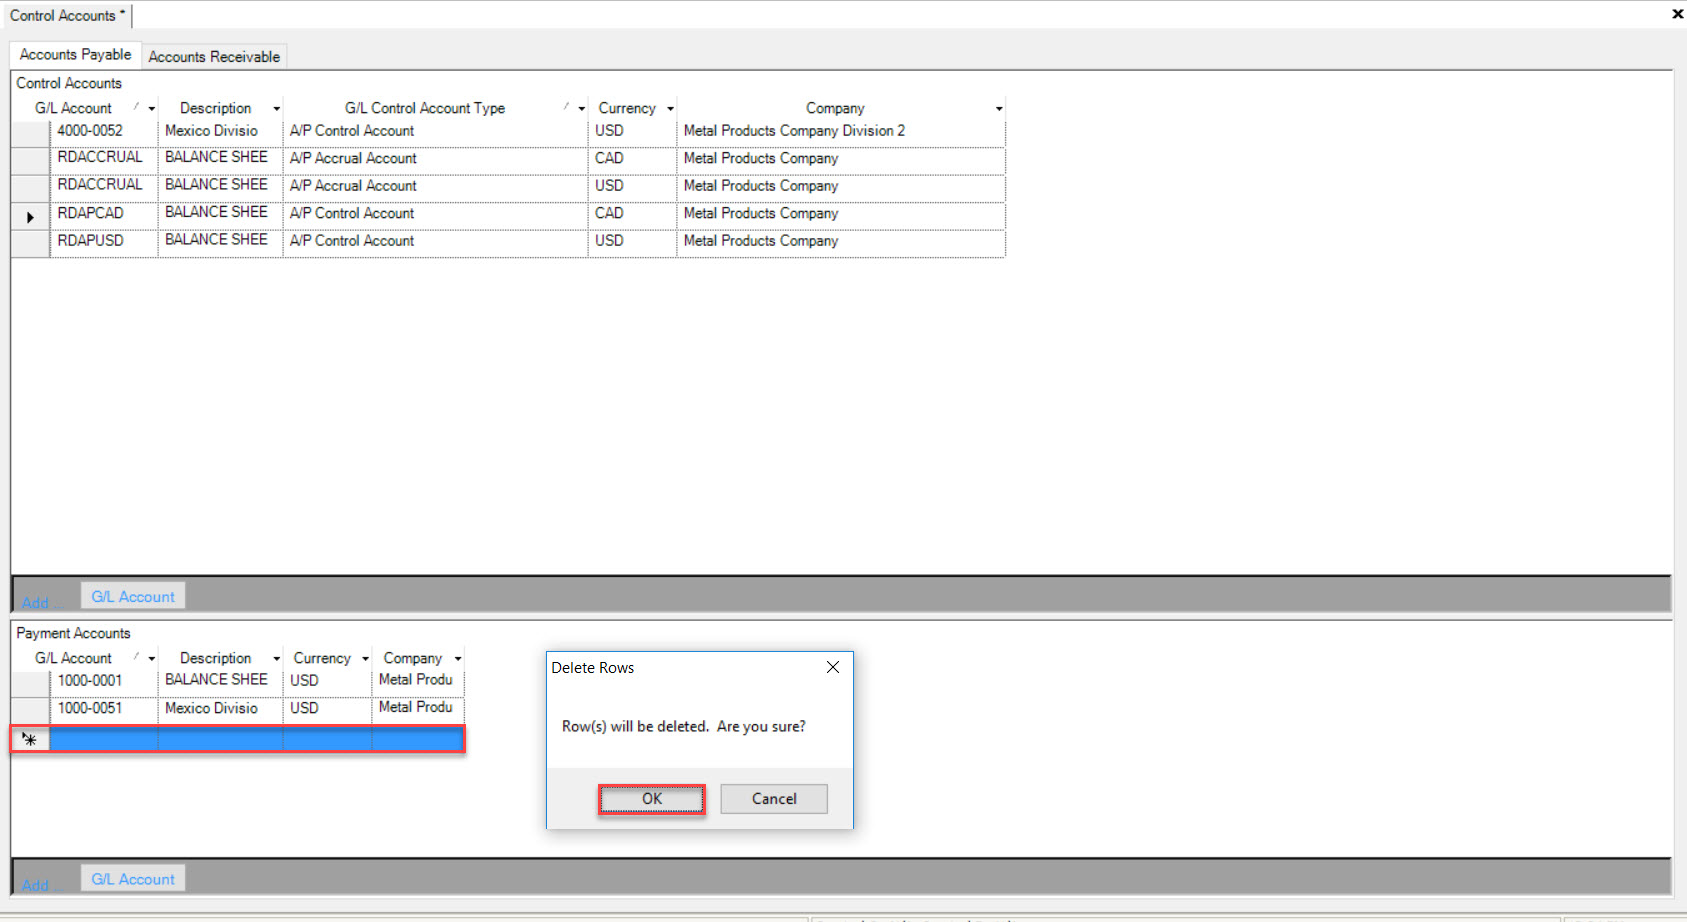
The highlighted row will be deleted immediately. Make sure to save your changes before exiting the screen.