Financial Reports
Financial Reports allows users to create, maintain, view, and print Reports that they have designed.
To view Financial Reports, navigate to the  tab and click on the
 ![]() icon.
This will open the Financial Reports Lookup screen.
icon.
This will open the Financial Reports Lookup screen.
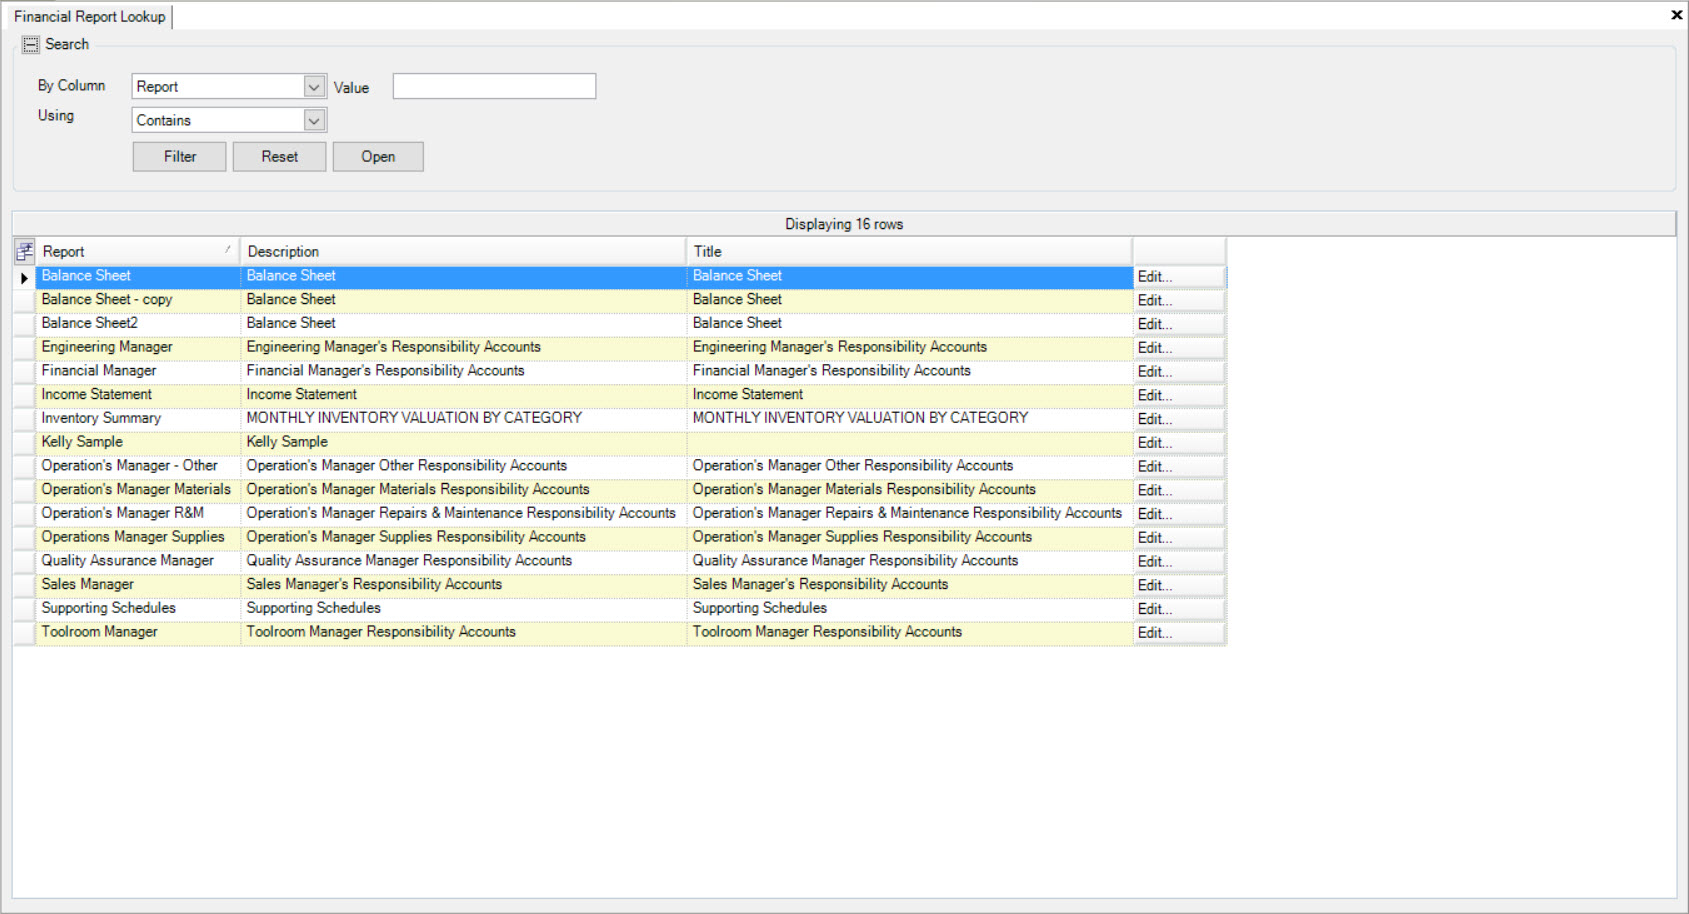
Now, users will be able to view all of the Financial Reports available in the system.
Users can either double-click on the appropriate Financial Report to view it.
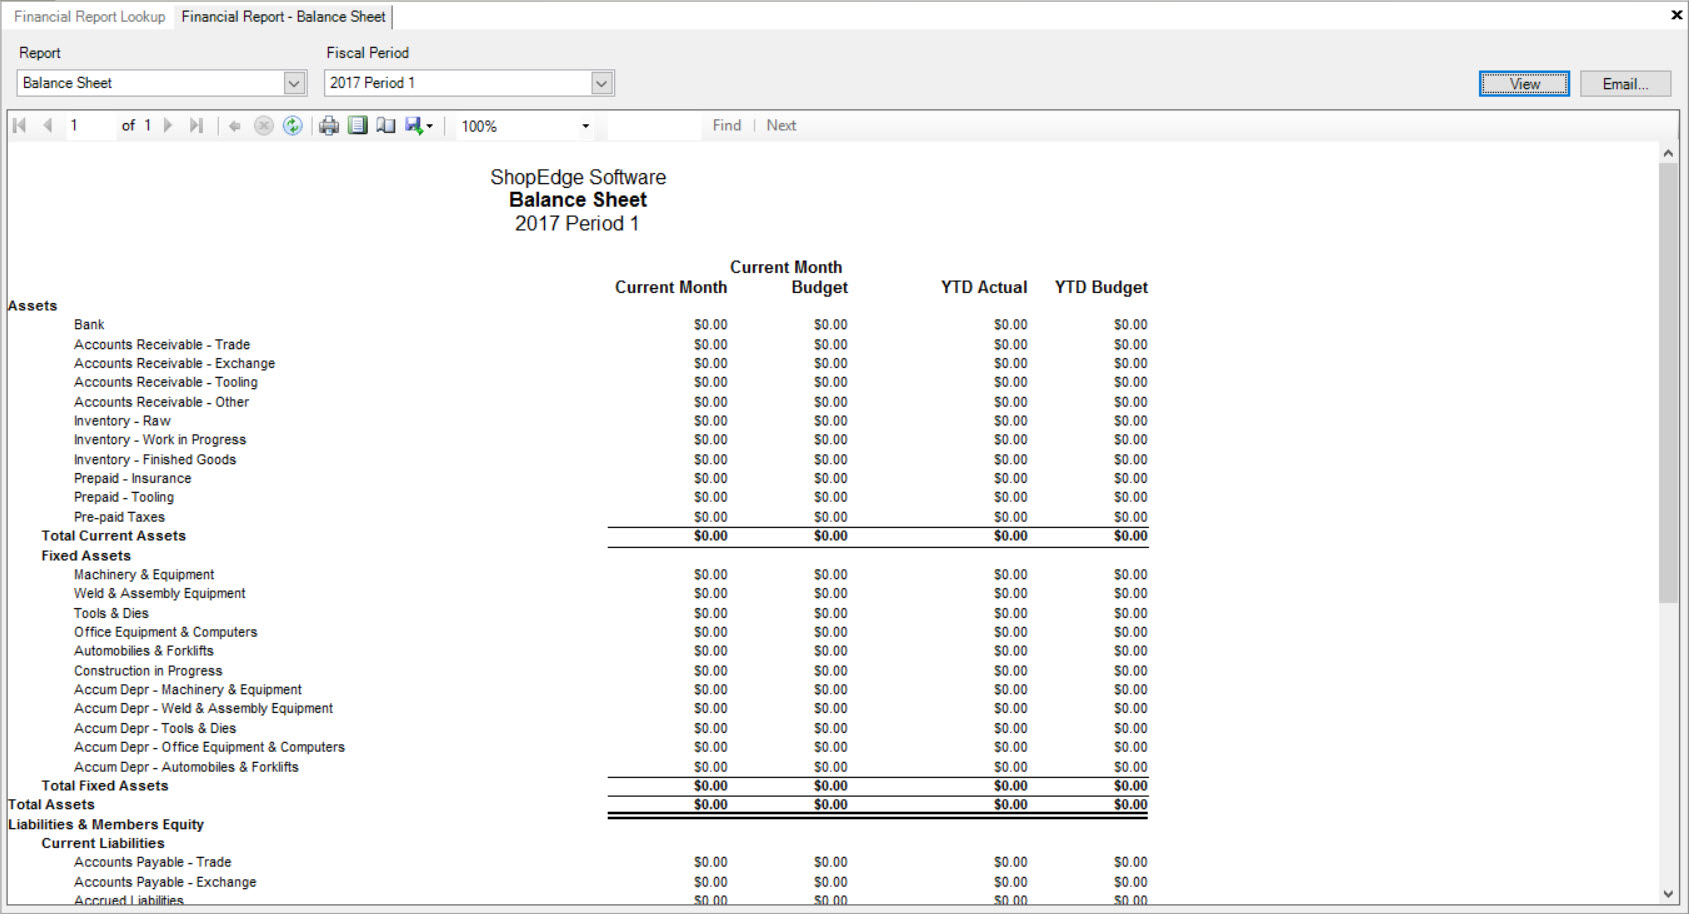
They can also edit the Report by clicking on the  button.
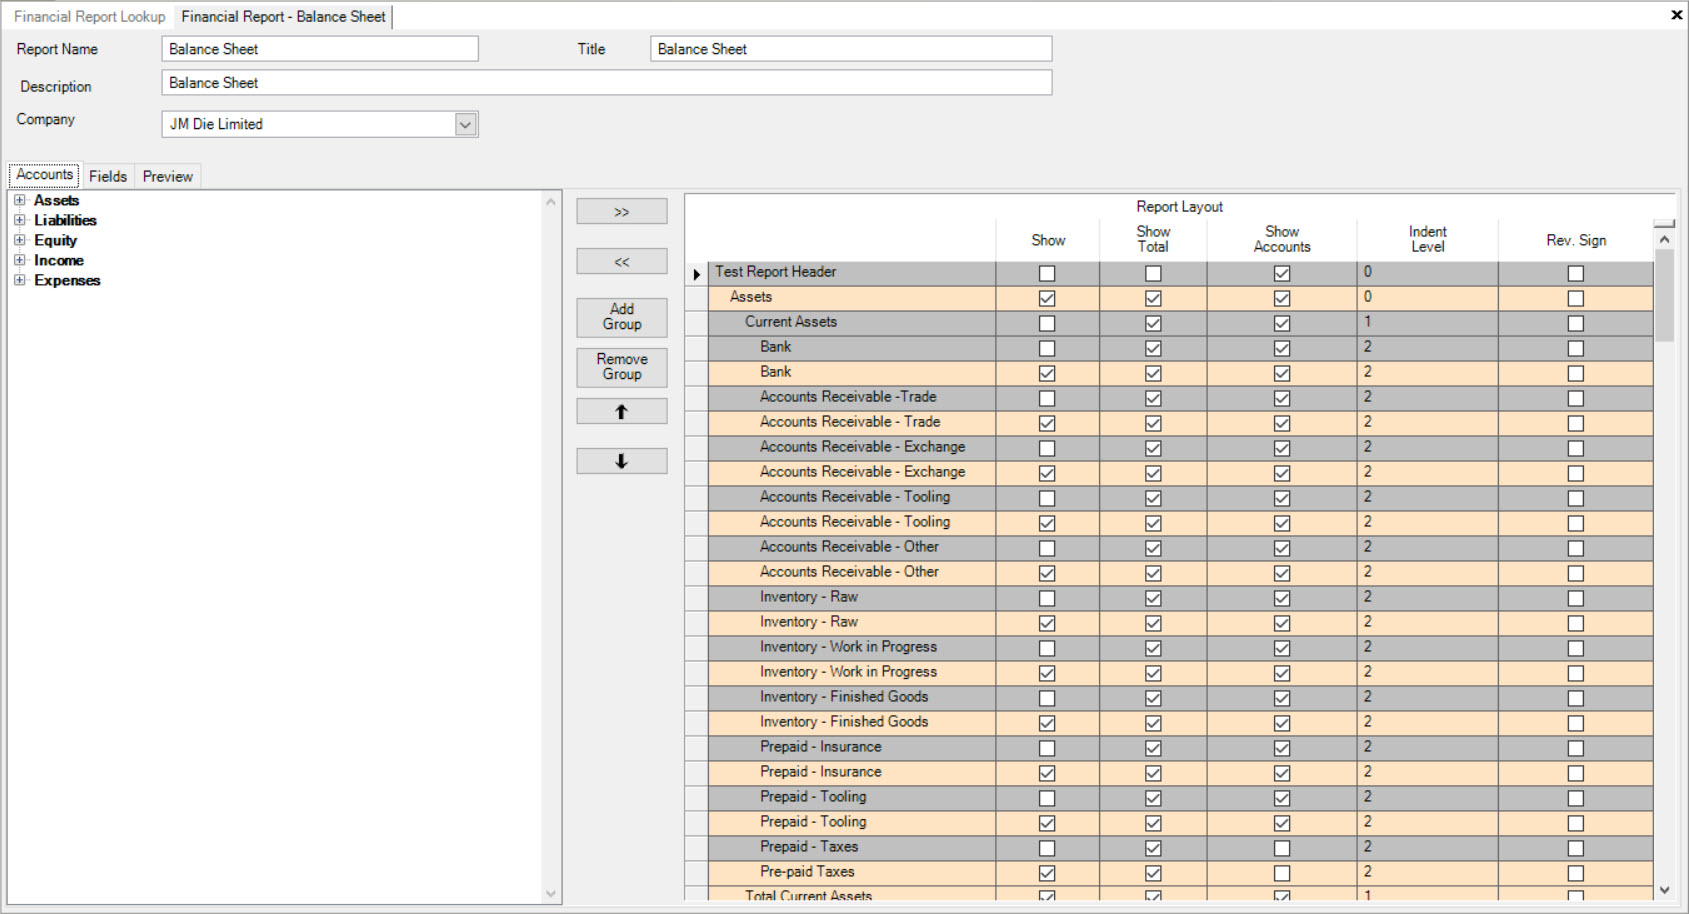
Creating a New Financial Report
There are three different ways to add a new Financial Reports to the system. The first way is to press the Ctrl + Shift + U keys. The second way is to navigate to File > New > Financial Report.
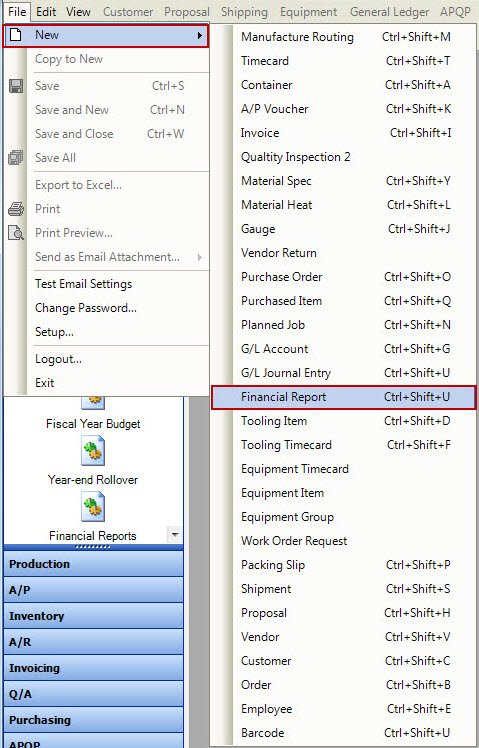
The last way is to click on the  button, and then on the Financial Report option.
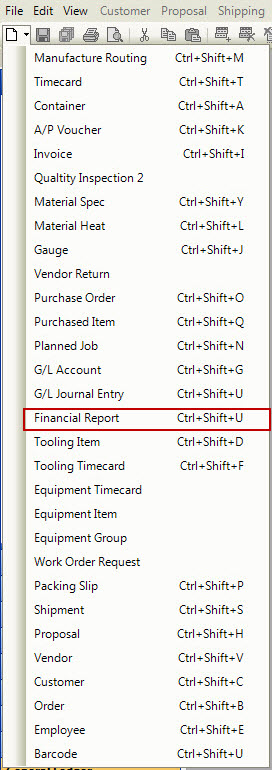
All of these options will open a new Financial Report screen.
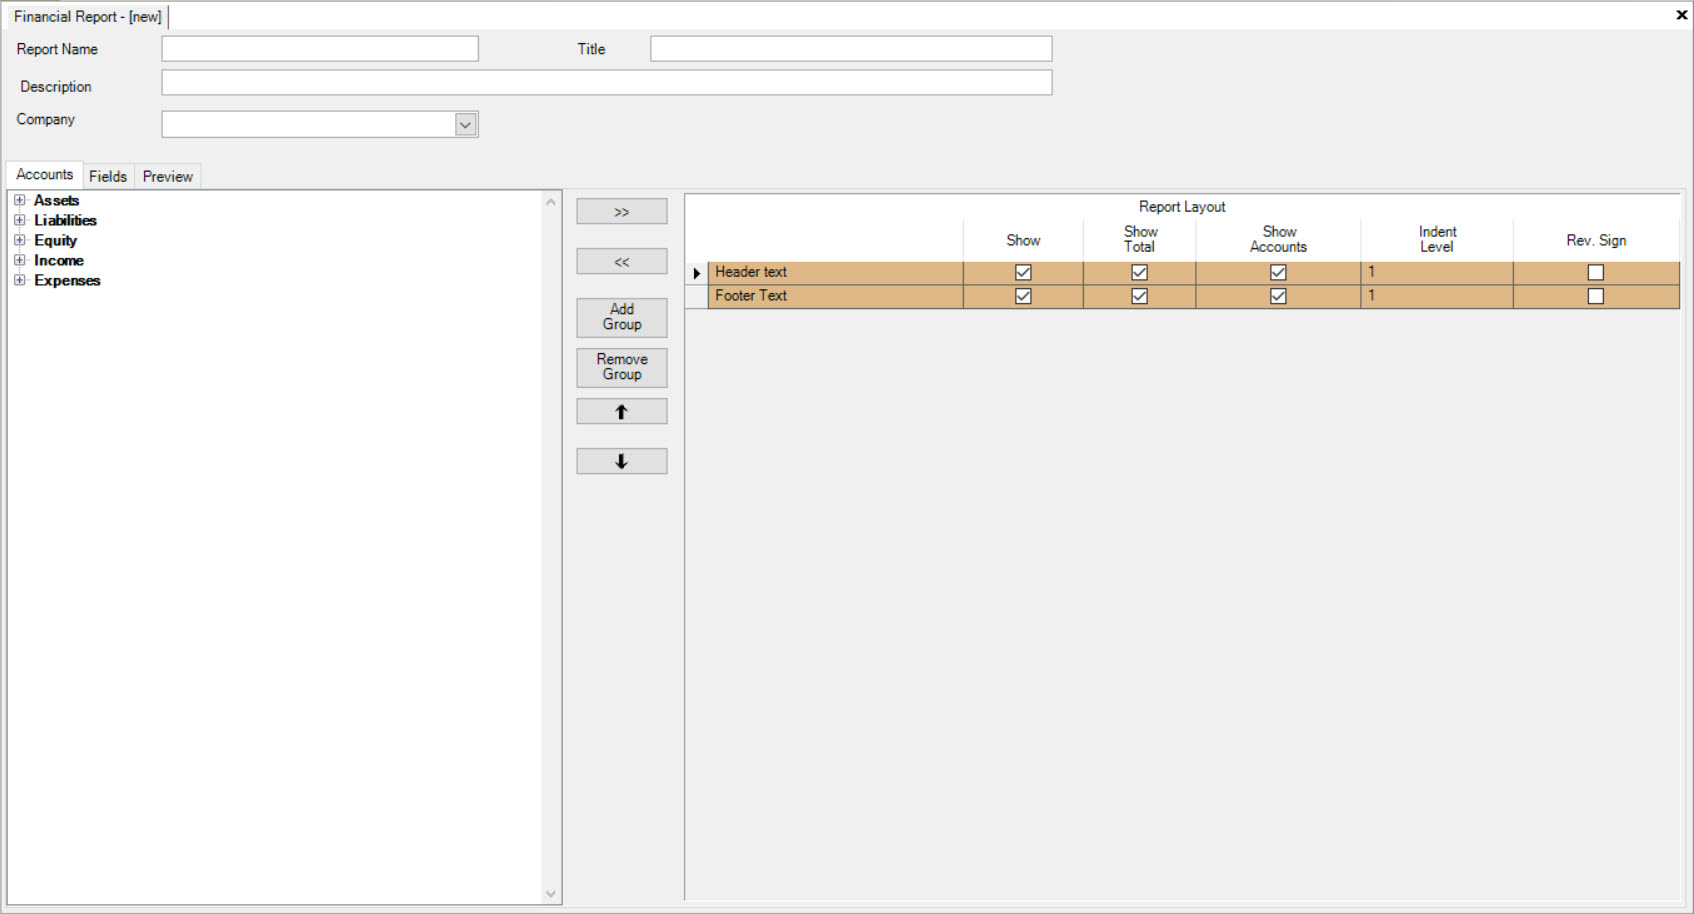
Fill in the fields such as Report Name, Title, Description, and Company.
Adding a Group to a Financial Report
To add a group to a Financial Report, make sure that the  tab is selected.
There you will find the list of your Chart of Accounts under Assets, Liabilities, Equity, Income, and Expenses. These are known as Chart of Account Types.
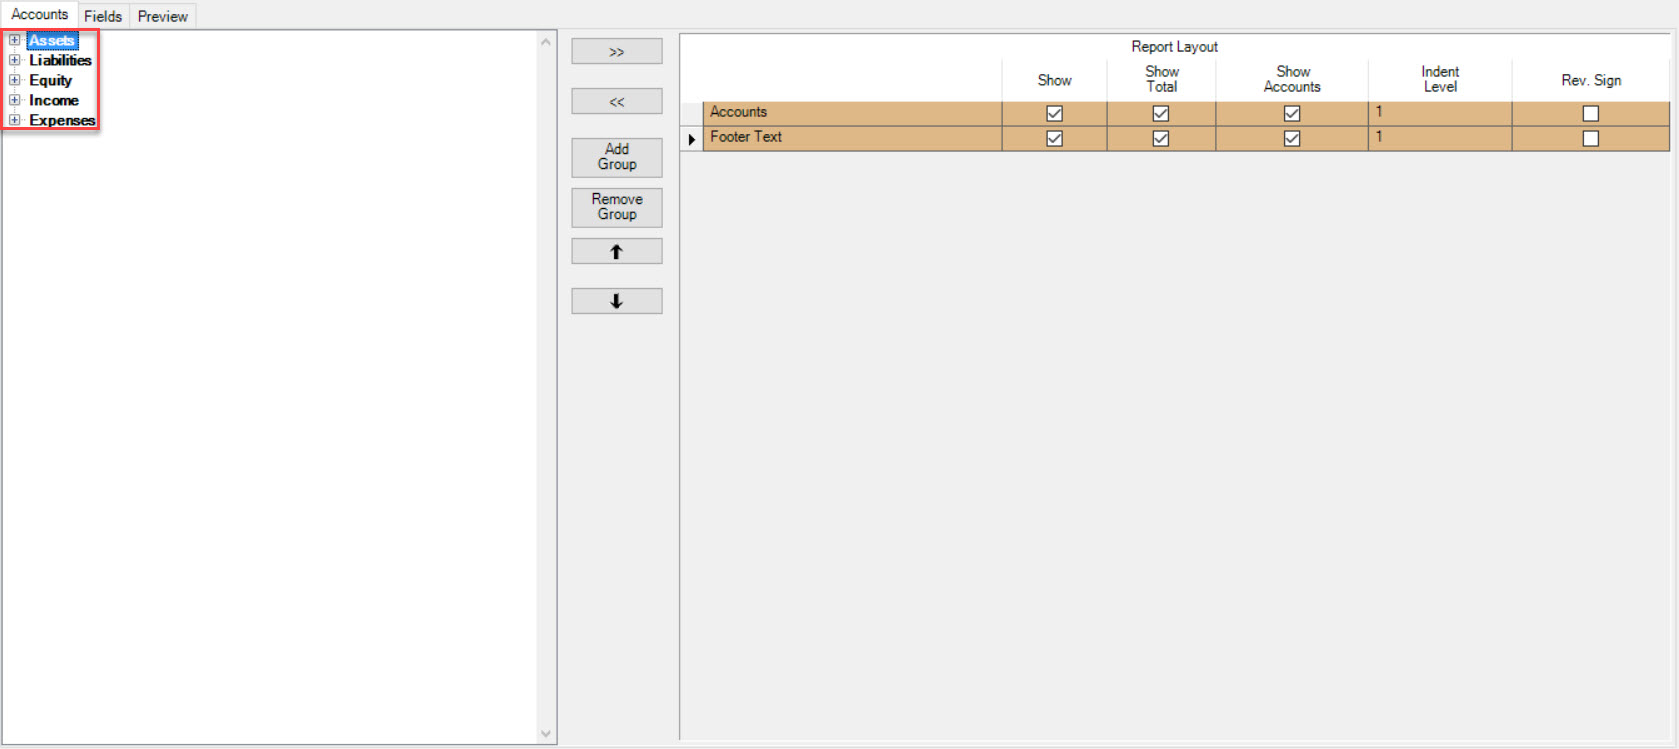
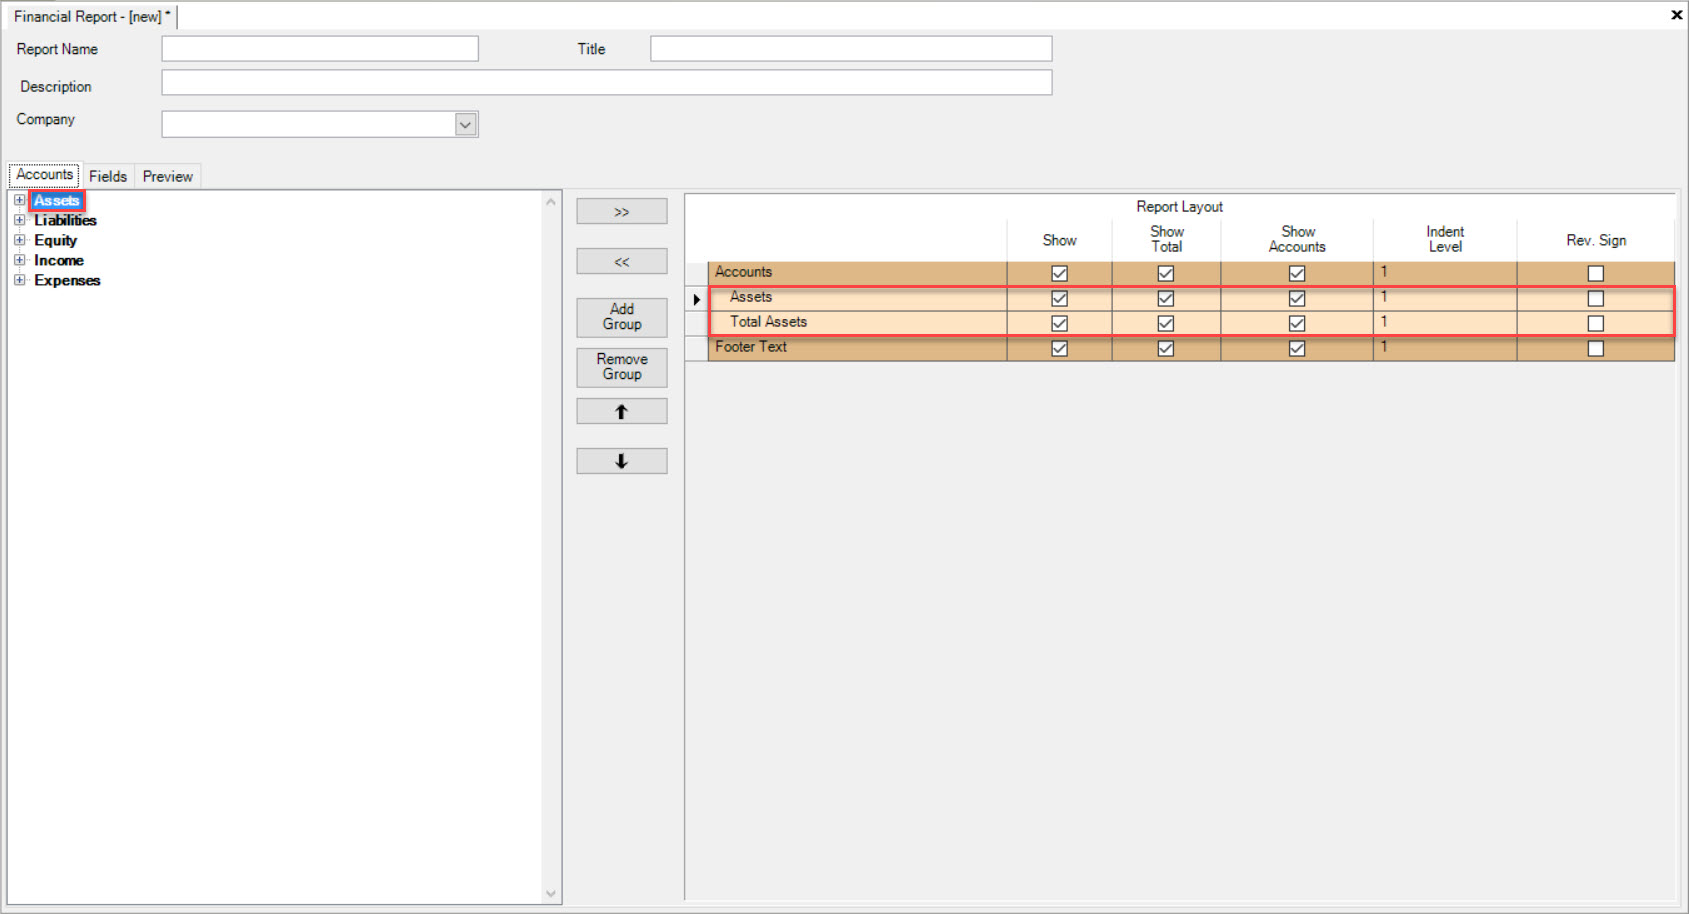
Click on the  button to add a group to the Report Layout section. If you are adding a group to an existing group, make sure
the existing group is highlighted in the Report Layout section. Then click on the
  button.
Note
You can only add one group at a time.
Group Properties
Once you have clicked on the  button, the Group Properties window will appear.
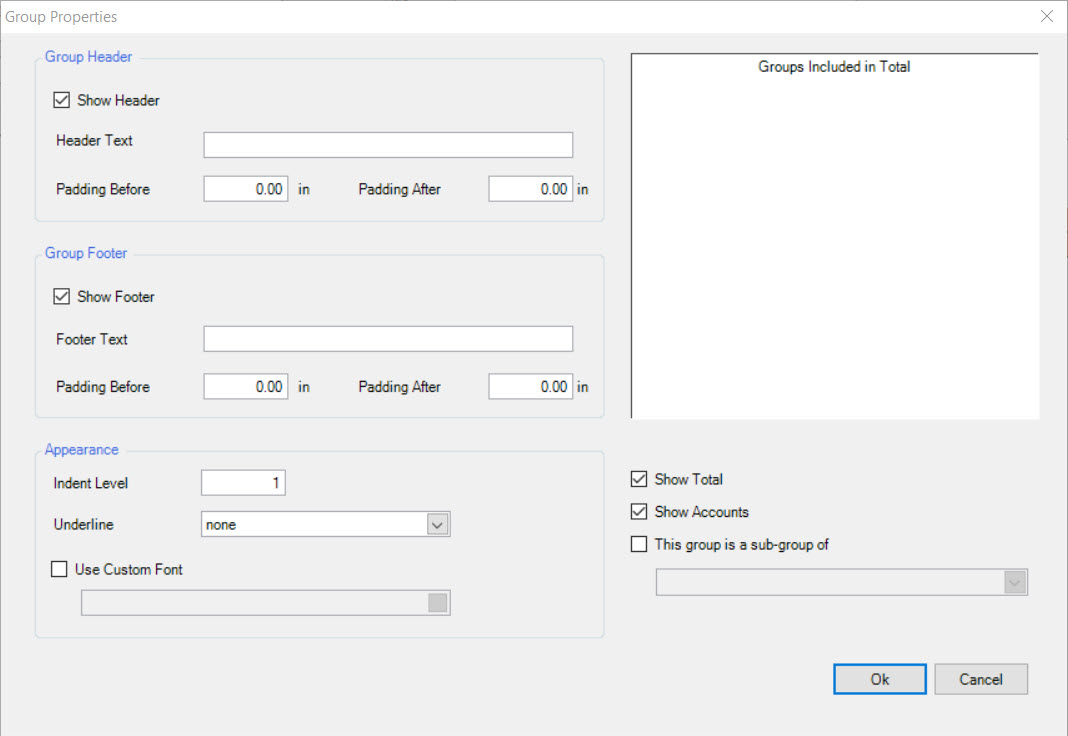
Fill in the Group Header information such as selecting the group to Show in Header, the Header Text, and the Padding Before and After.

Note
Padding Before and After refers to the spacing before the Header Text and the spacing after the Header Text.
Fill in the Group Footer information such as selecting the group to Show in Footer, the Footer Text, and the Padding Before and After.

Note
Padding Before and After refers to the spacing before the Footer Text and the spacing after the Footer Text.
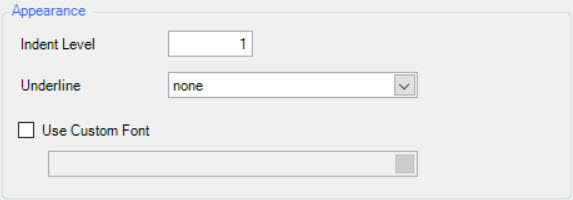
Fill in the Appearance information such as the Indent Level, Underline, and selecting a Custom Font if necessary.
Note
The Indent Level refers to the number of indents you would like the group to be when viewing it on the Financial Report.
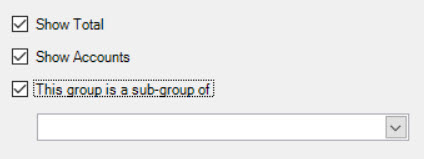
Next, you have the option to select or de-select Show Total, Show Accounts, and This group is a sub-group of.
Once the relevant information has been filled out, click on the  button to add the group to the Financial Report layout.
Note
To remove a group, simply highlight the appropriate row according to the group you would like to remove and click on the  button. The group will be removed.
Adding a Sub-Group
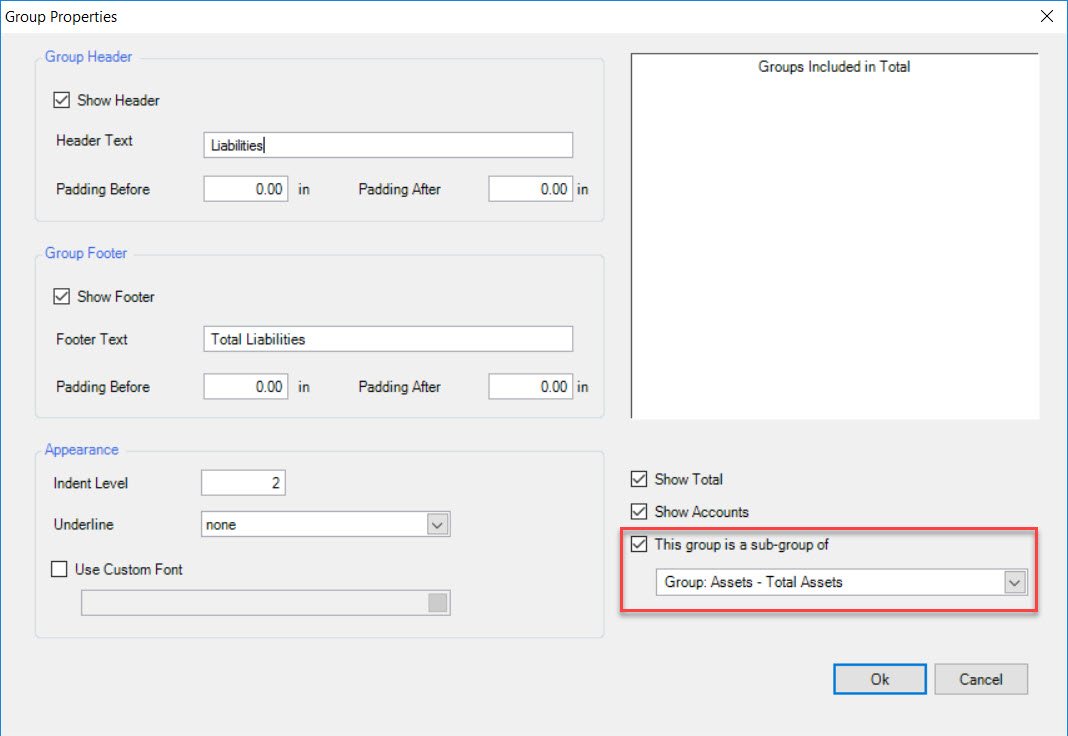
To add a sub-group to a group, make sure to highlight the head group on the Financial Report layout. Then, highlight the sub-group that you wish to add to the Financial Report
layout under the  tab. Click on the
  button. The Group Properties window will appear again.

In the Group Properties window, the sub-group that you have selected will automatically default to the group that you highlighted on the Financial Report layout.
Click on the  button when you have finished filling in the necessary fields within the Group Properties window.
Note
For more guidance on navigating the Group Properties window, please see the above section on Group Properties.
Note
To remove a sub-group, simply highlight the appropriate row according to the sub-group you wish to delete and click on the  button. The group will be removed.
Re-organizing Groups
Once all of the appropriate groups have been added to the Financial Report layout, users are then able to re-organize the order in which the groups go in (if necessary).
To do so, make sure to highlight the appropriate group and then click on the  button or the
  button
to move the group to where you would like it to be.
Adding a G/L Account to a Group
To add a G/L Account to a group, make sure that the  tab. Click on the plus sign located beside the appropriate Account Type that you
would like to add a G/L Account from. This will expand the group so users are able to view all of the G/L Accounts within that particular Account Type.
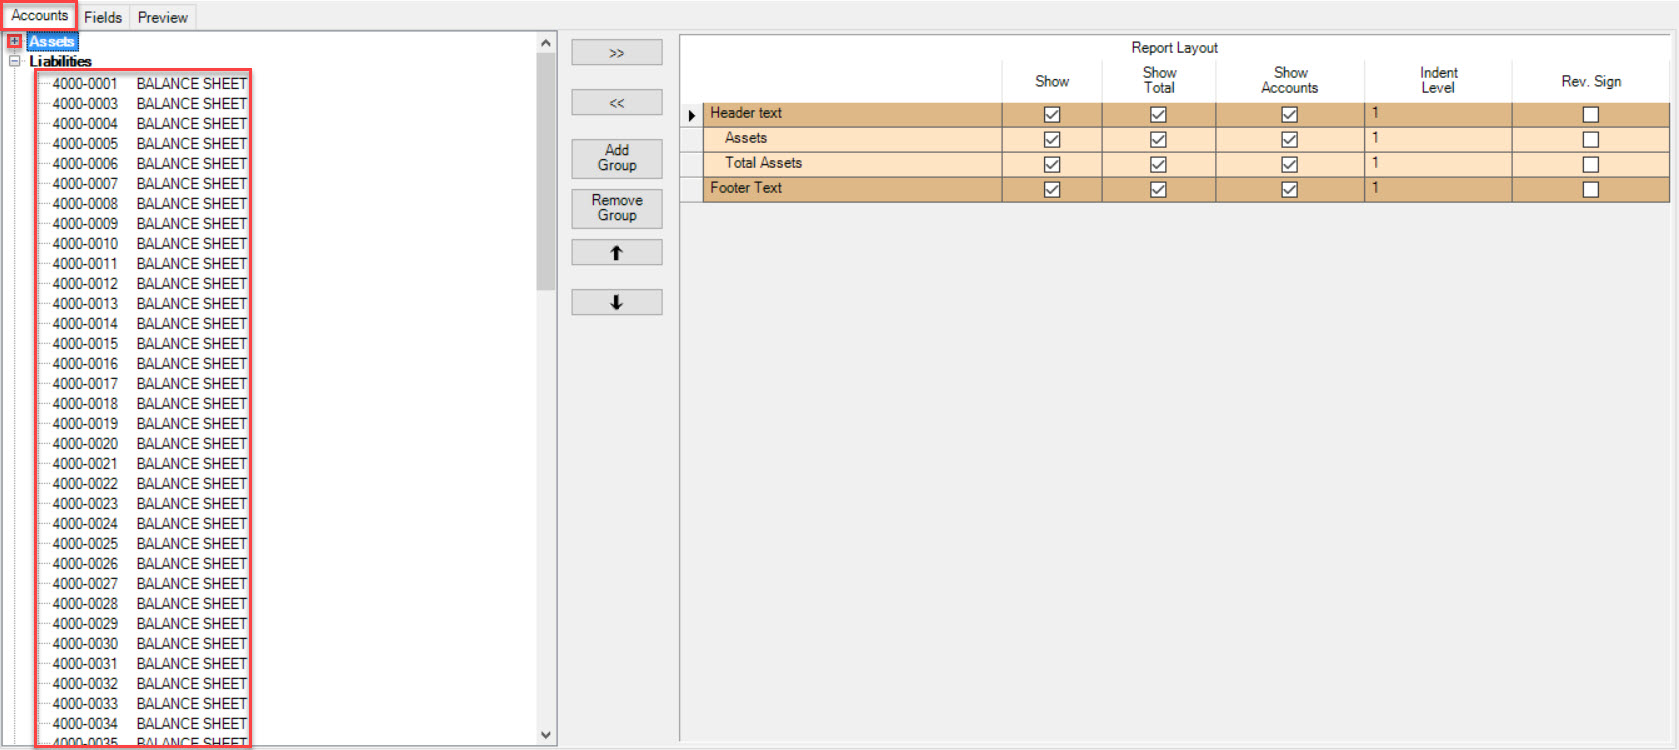
Make sure to highlight the appropriate row of the group that you would like to add the G/L Account(s) to in the Financial Report layout.
Now, select the G/L Account you wish to add.
Note
If you would like to add more than one G/L Account, hold the Ctrl key as you make your selection.
Once you have selected the appropriate G/L Accounts, click on the  button and the G/L Account(s) will now be shown on the
Financial Report layout under the group that you highlighted.
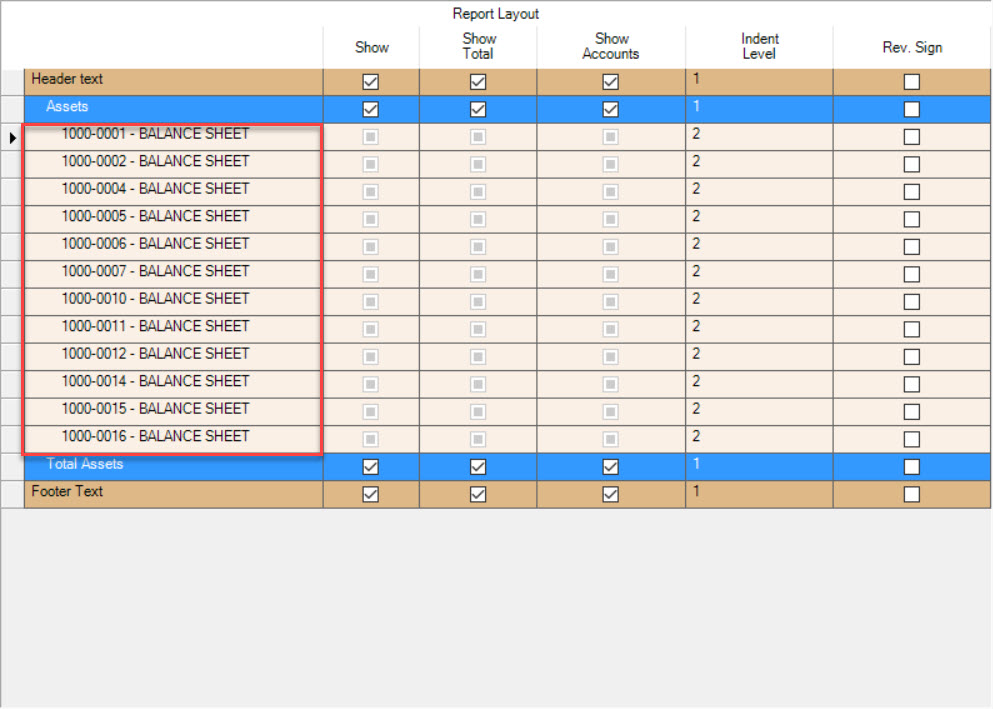
Note
If users have selected the wrong G/L Account, they can click on the  button to list it back under the
  tab.
tab.
Re-organizing G/L Accounts in a Group
Once all of the appropriate G/L Accounts have been added to the Financial Report layout, users are then able to re-organize the order in which the G/L Accounts go in (if necessary).
To do so, make sure to highlight the appropriate G/L Account and then click on the  button or the
  button
to move it to where you would like it to be.
Note
If you would like to re-organize multiple G/L Accounts, simply hold the Ctrl key while selecting the ones you wish to move.
Make sure to save all of your changes before exiting the screen.
Selecting which Fields to Show on a Financial Report
Users also have the ability to select which Fields to display on the Financial Report layout. The Fields that are available to choose from are:
- Current Month: the account total for the current month
- Current Month %: the account total as a percentage of income for the current month
- Current Month Budget: the budget amount for the account for the current month
- Current Month Budget %: the budget amount for the month divided by the period income
- YTD Actual: the year to date actual amount for the account
- YTD Actual %: the year to date actual amount as a percentage of the year to date income for the account
- YTD Budget: the year to date budget amount for the account
- YTD Budget %: the year to date budget amount divided by the year to date income amount
- Current Month Budget Variance: the difference of the current month amount minus the current month budget amount
- YTD Budget Variance: the year to date current amount minus the year to date budget amount
Note
The income amount used for the percentage calculations is a total of the G/L Accounts with an Income type.
To select which Fields to include or not include, make sure that the  tab is selected.
Users will be able to view the above listed Fields. To the left of each Field, there is a box which can be checked or unchecked depending on whether or not users would like them shown in the Financial Report layout.
Users also have the ability to change the Width of each Field as well as the Group Width and Row Height.
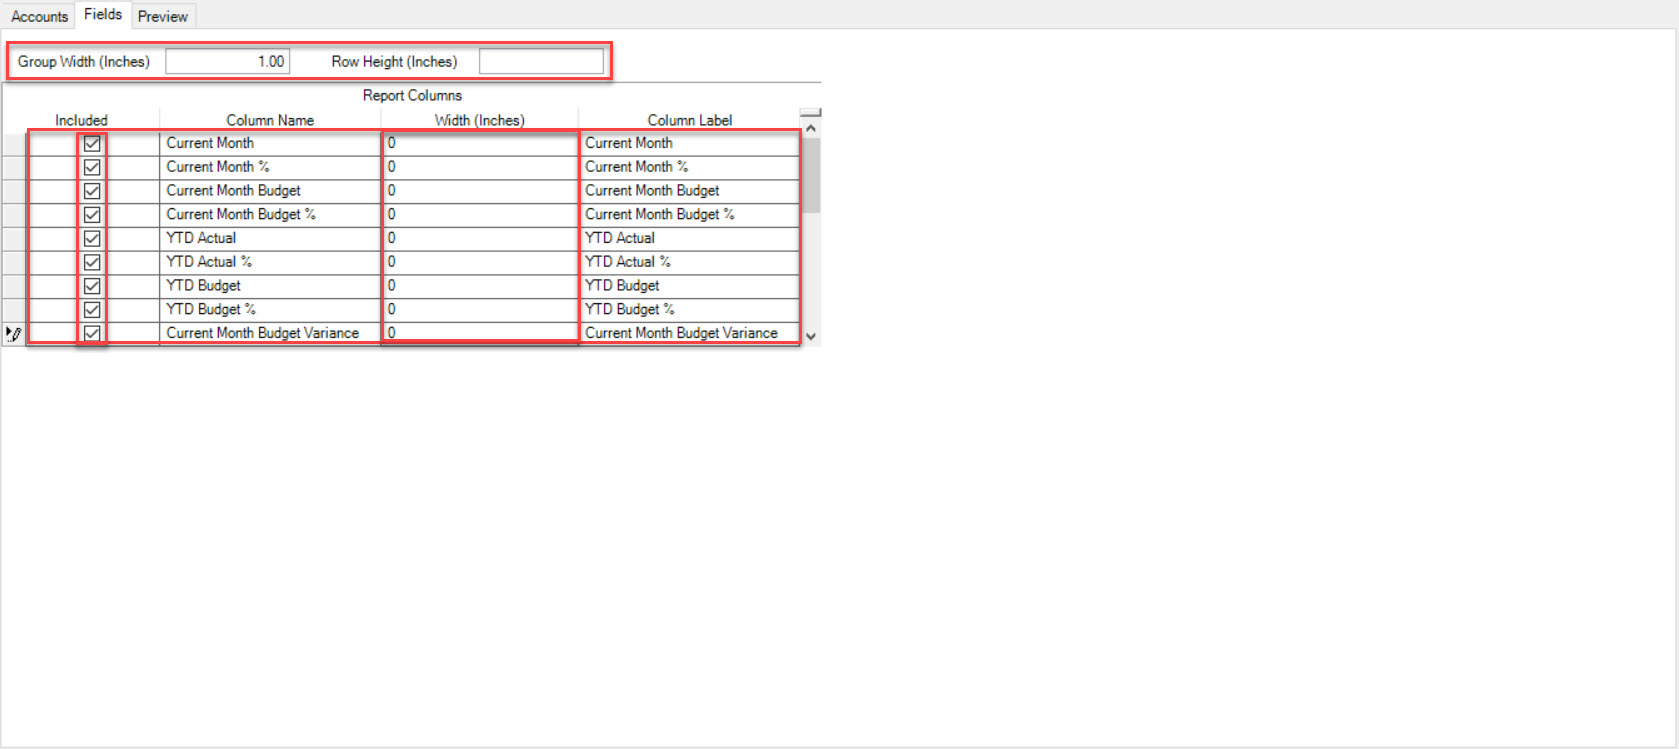
Once the appropriate Fields have been selected, make sure to save your changes before exiting the screen.
Now that the Financial Report layout settings have been saved, users can click on the  tab to view it.
Modifying a Financial Report
To modify a new or existing Financial Report, navigate to the  tab and click on the
 ![]() icon. Locate
the Financial Report you wish to edit and click on the
icon. Locate
the Financial Report you wish to edit and click on the  button.
This will open the Financial Report detail screen.
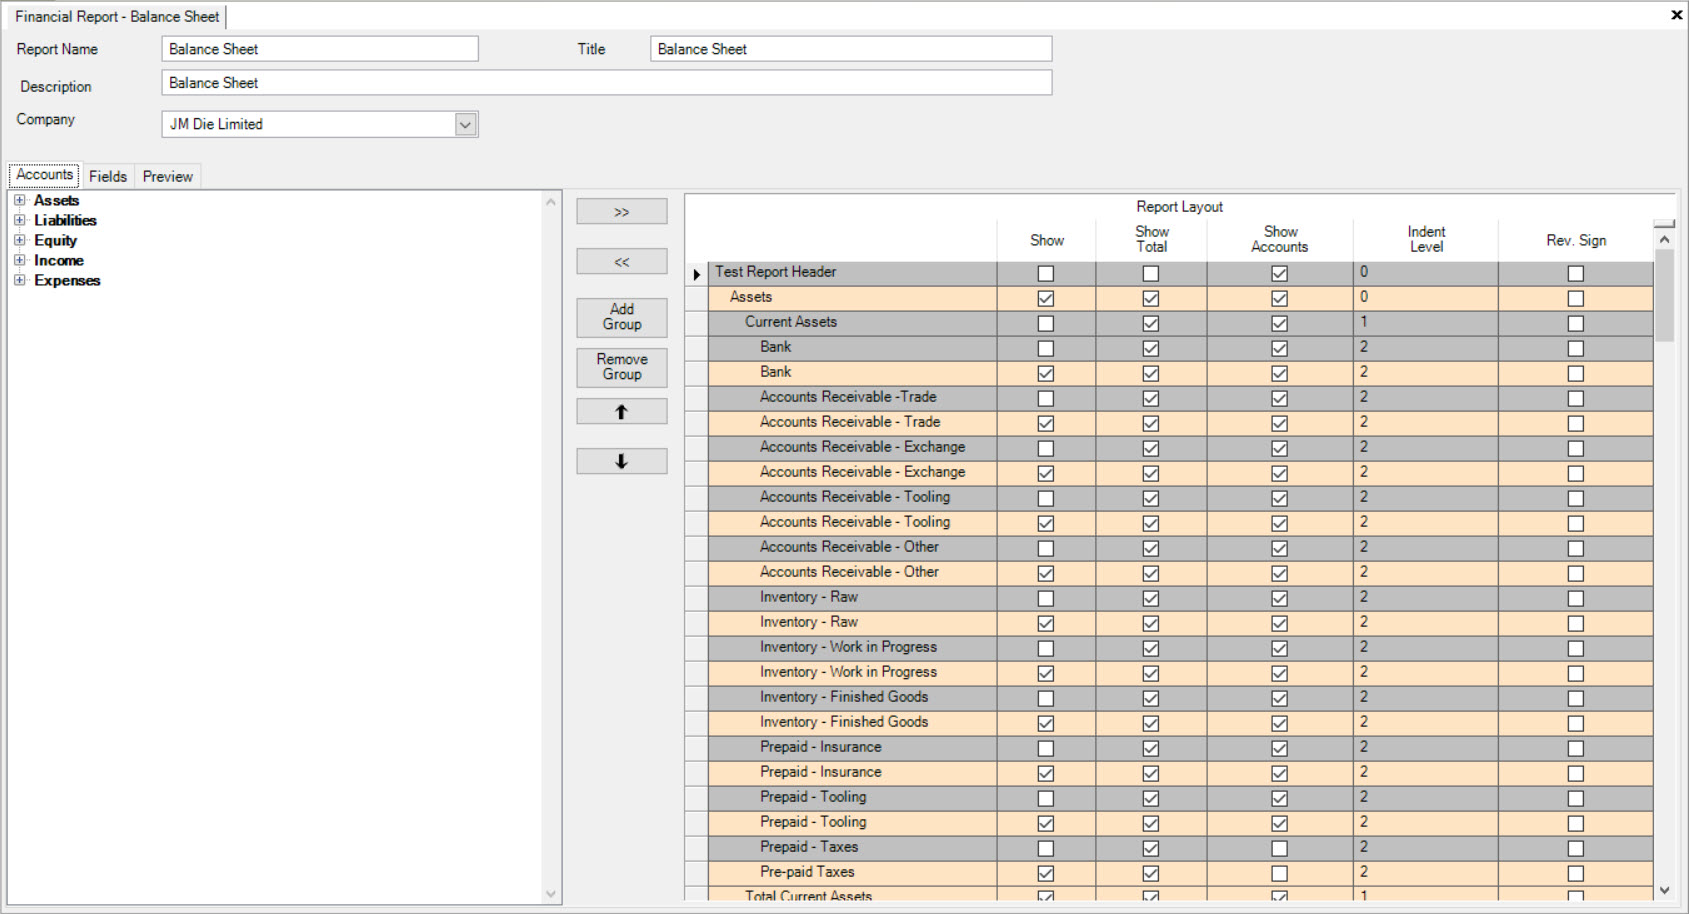
Users can modify all relevant information by following the steps above for Creating a New Financial Report.
Once all necessary changes have been made, make sure to save before exiting the screen.
Printing a Financial Report
To print a Financial Report, navigate to the  tab and click on the
 ![]() icon.
Select the Financial Report you wish to print by double-clicking on the appropriate row. This will open the Financial Report View screen.
icon.
Select the Financial Report you wish to print by double-clicking on the appropriate row. This will open the Financial Report View screen.
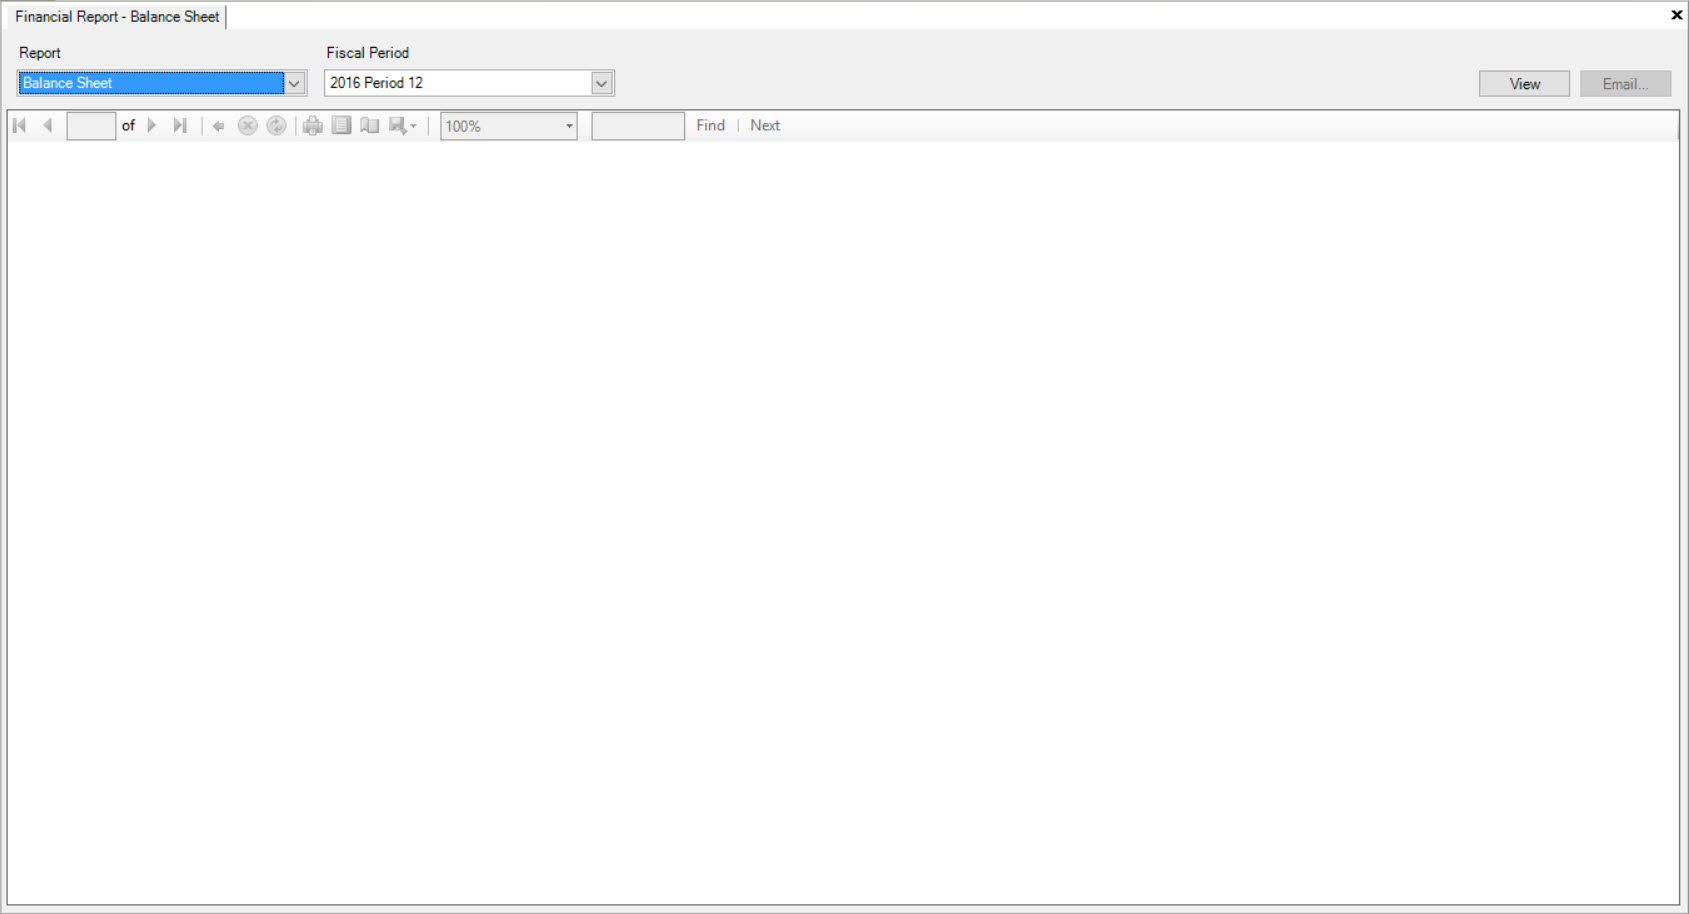
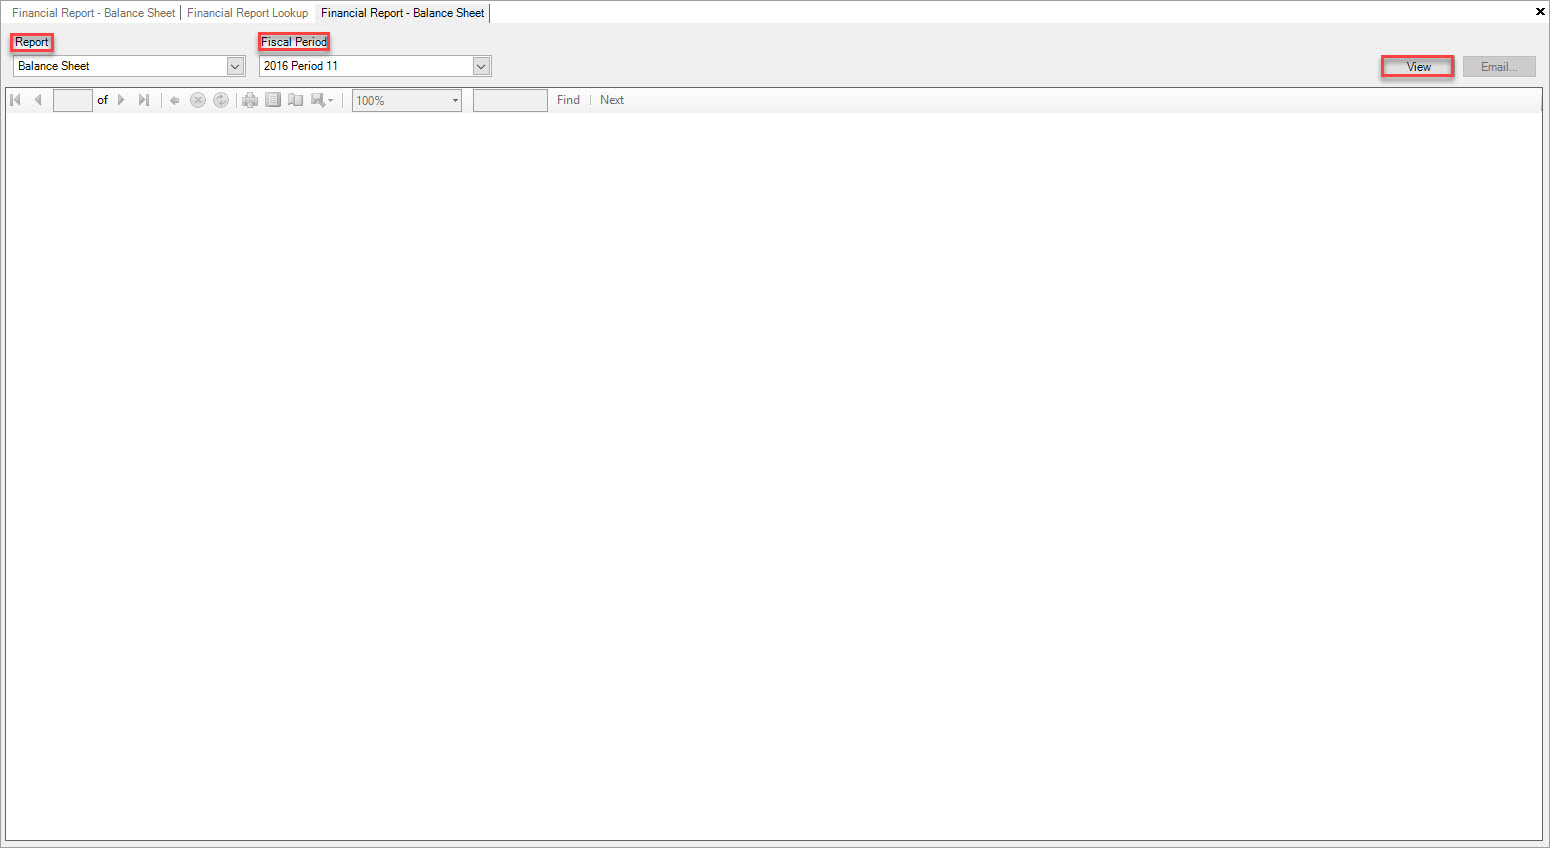
Select the Financial Report and the Fiscal Period and then click on the  button to view the Report. The system will populate the Financial Report.
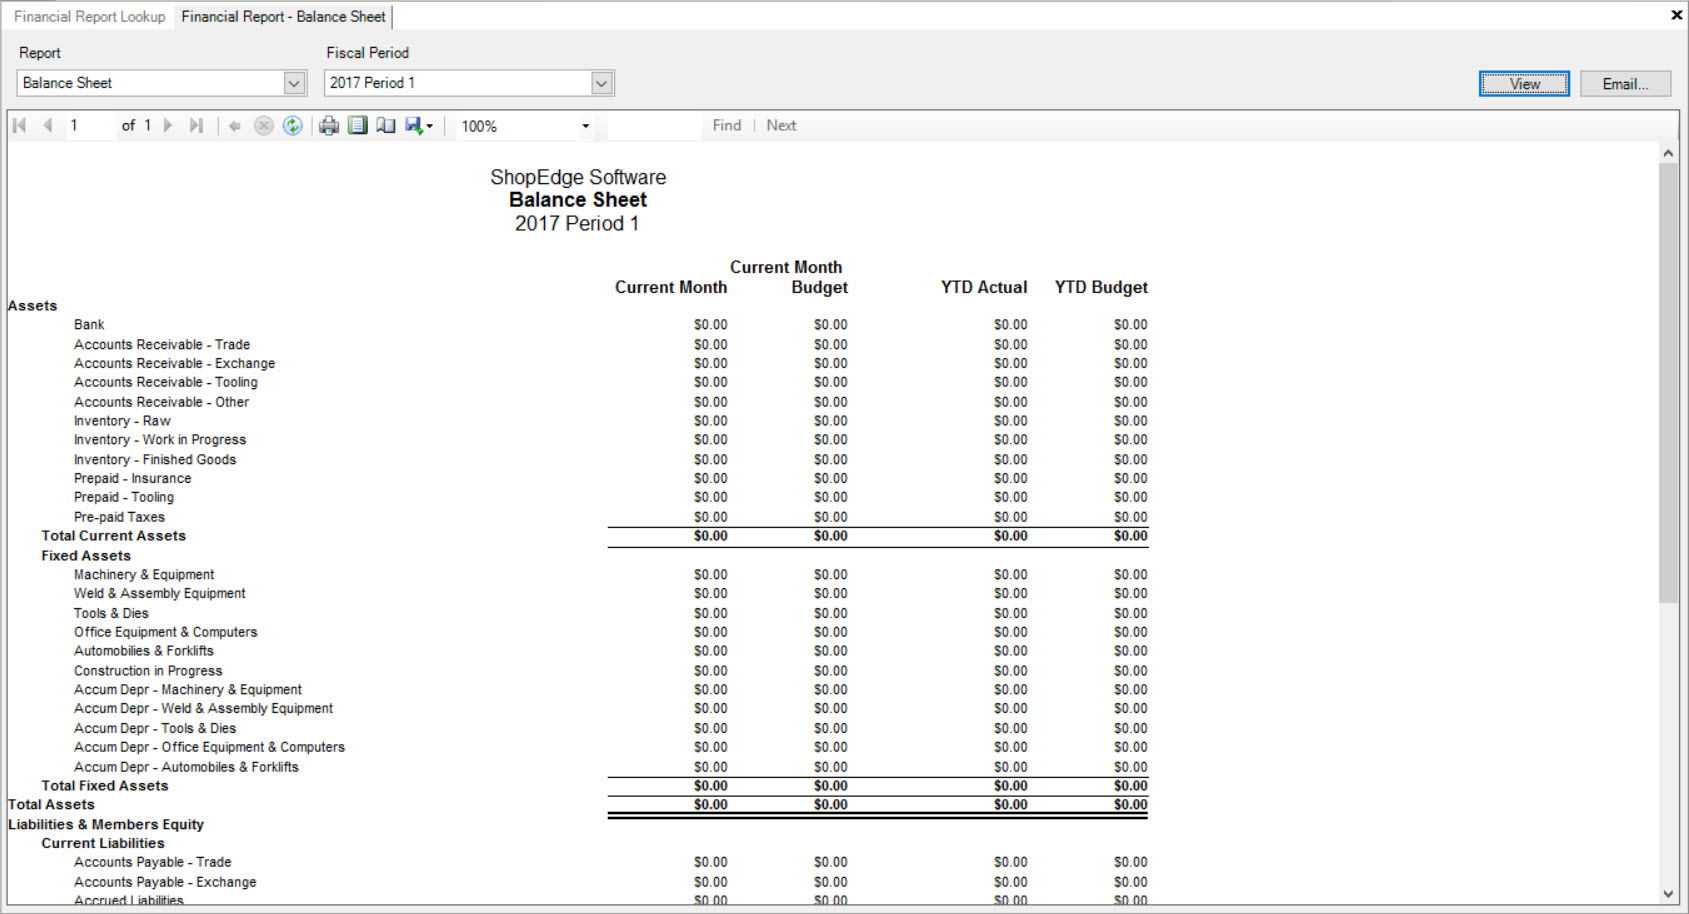
The menu bar located above the Financial Report allows users to refresh, print, print layout, page setup or export. Select the Print button in order to print the Financial Report.

The Print window will appear. Make sure to select the appropriate printer and printer setting and then click on the  button.
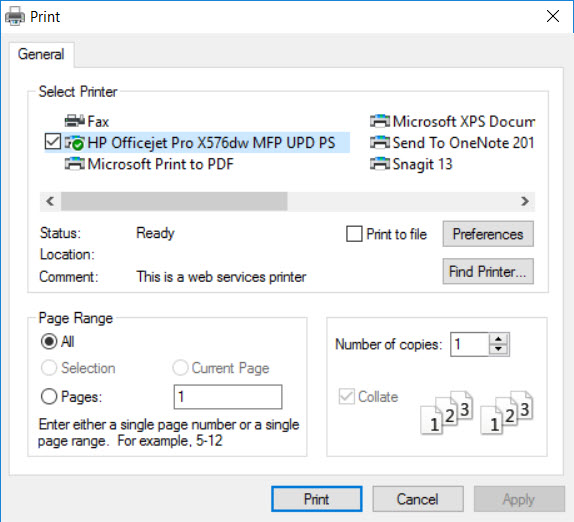
Your Financial Report will be printed.
Emailing a Financial Report
To email a Financial Report, navigate to the  tab and click on the
 ![]() icon.
Select the Financial Report you wish to Email by double-clicking on the appropriate row. This will open the Financial Report View screen.
icon.
Select the Financial Report you wish to Email by double-clicking on the appropriate row. This will open the Financial Report View screen.

Select the Financial Report and the Fiscal Period and then click on the  button to view the Report. The system will populate the Financial Report.


You will notice that the  button will now be available to click on.
Click on the  button and a new Email message window will appear with the Financial Report as an attachment.
Complete your Email and send.