Tooling Requests
Tooling Requests are viewed in the ShopEdge system by navigating to the  tab and clicking on the
 ![]() icon.
icon.
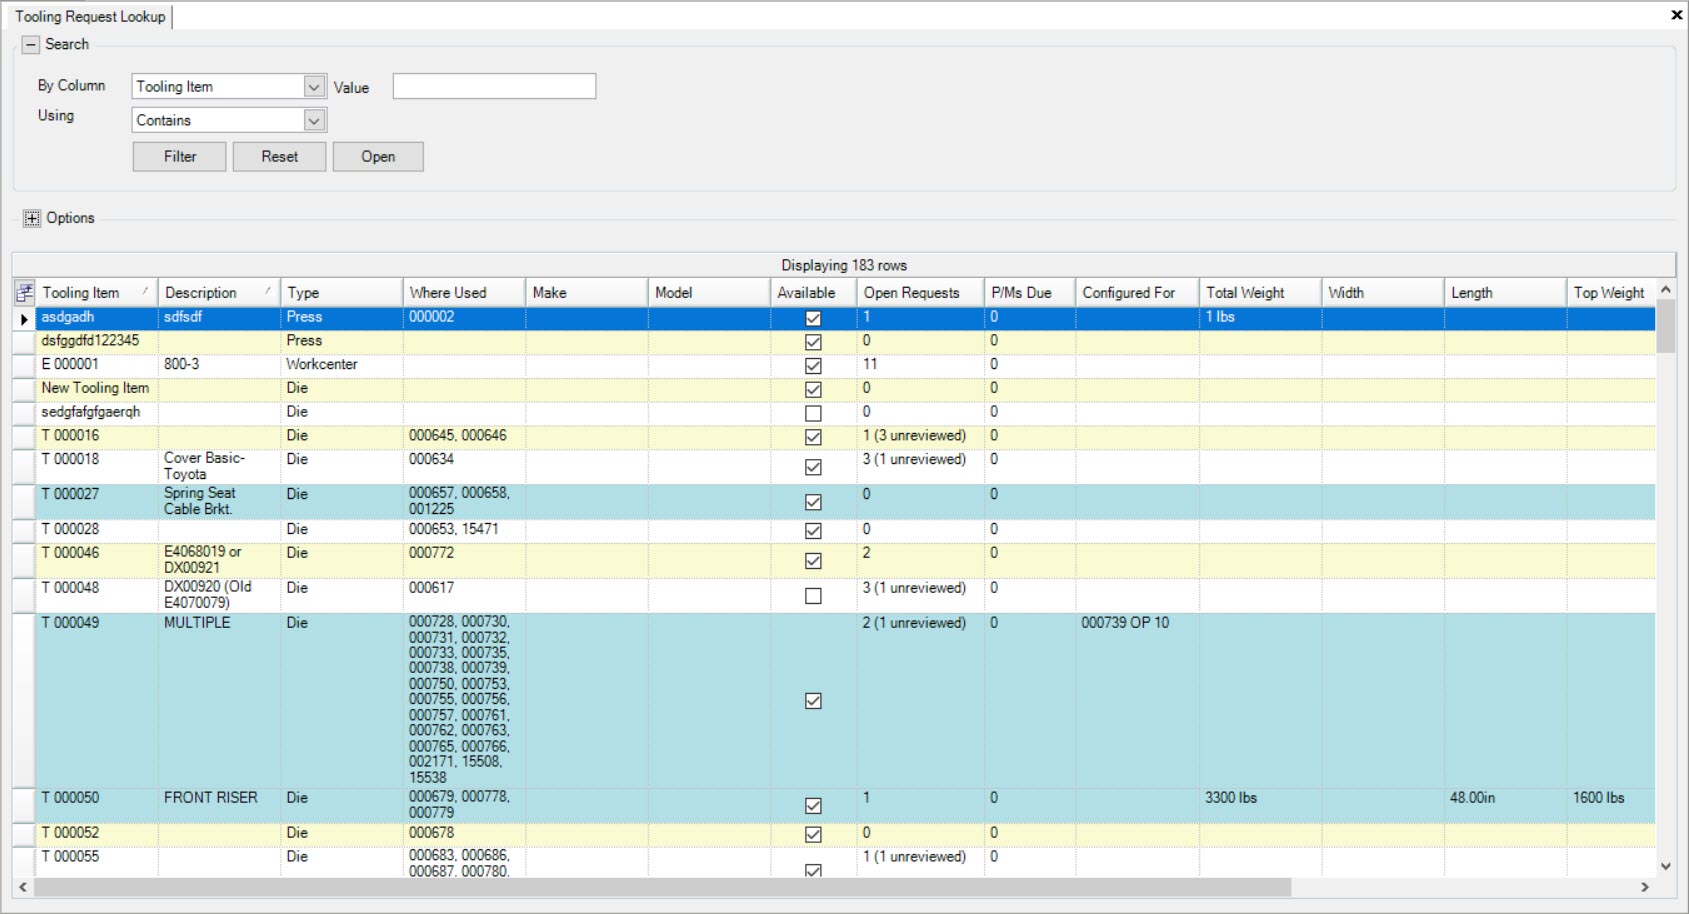
The Tooling Requests Lookup screen will be displayed.
Note
Tooling Items that are highlighted in blue on the lookup screen are currently in use.
Viewing an Existing Tooling Request
To view an existing Tooling Request, navigate to the  tab and clicking on the
 ![]() icon.
icon.
The Tooling Requests Lookup screen will be displayed.

Locate the Tooling Item you wish to open the Tooling Request for and double-click on the appropriate row.
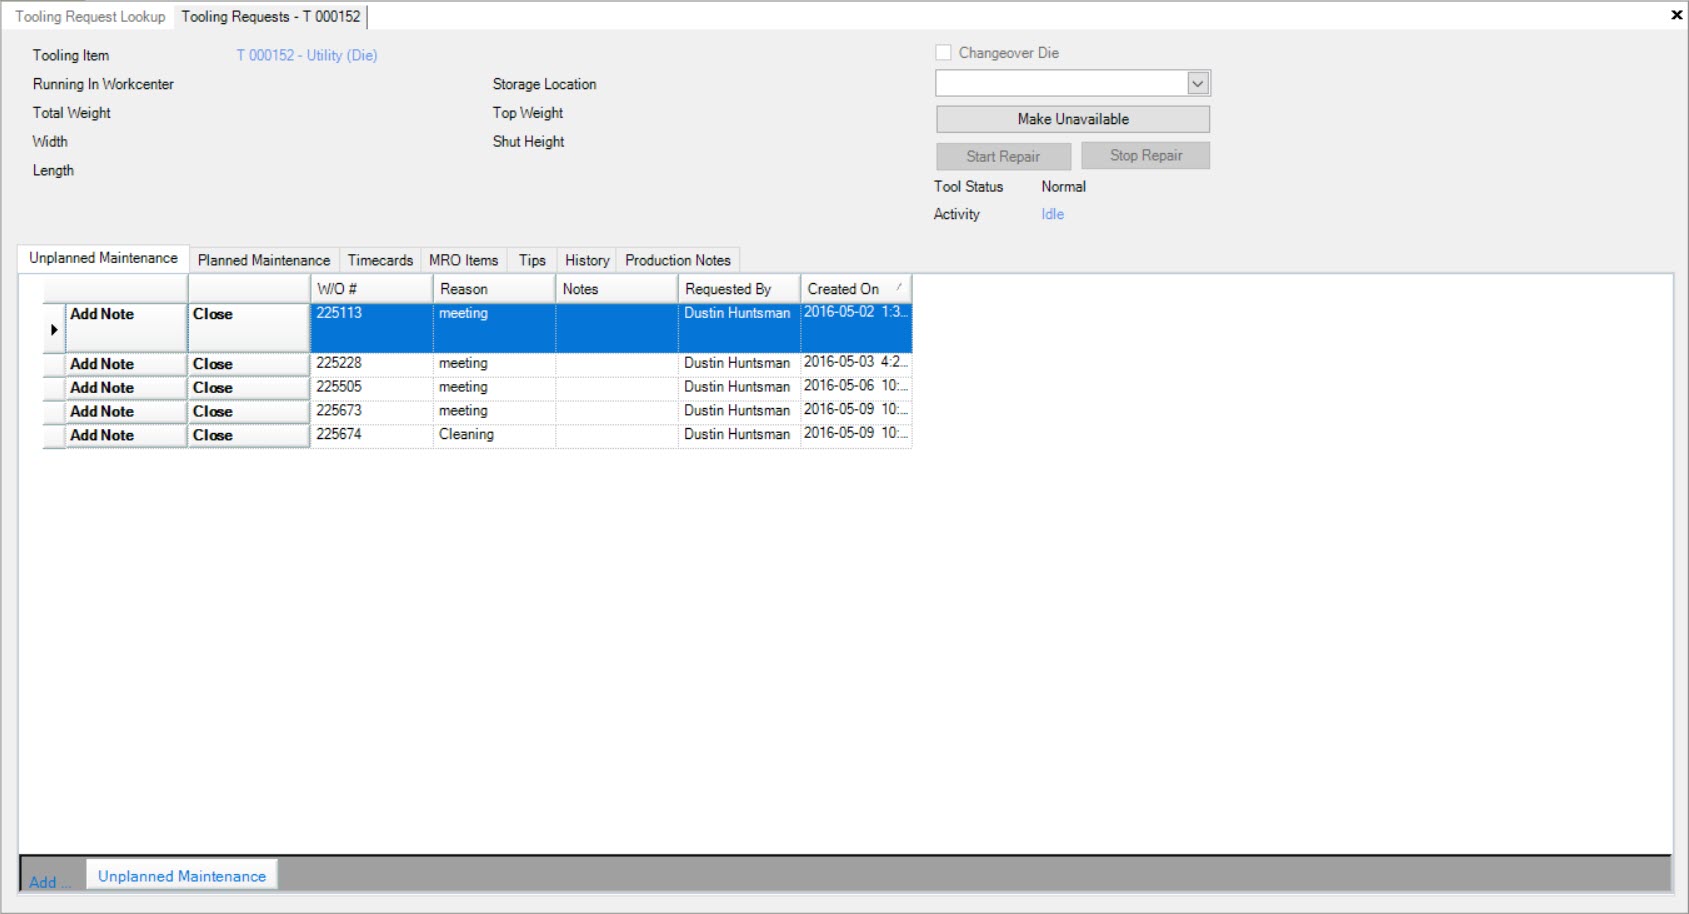
The Tooling Request detailed screen will be displayed.
Making a Tooling Request Item Available
To make a Tooling Request Item available, navigate to the  tab and clicking on the
 ![]() icon.
icon.
The Tooling Requests Lookup screen will be displayed.

Locate the Tooling Item you wish to make available and double-click on the appropriate row.
The Tooling Request detailed screen will be displayed.

Click on the  button.
Note
If a Tooling Request Item has open Work Orders
The Tooling Request Item will be changed to available.

Starting a Repair for a Tooling Request Item
To start a repair for a Tooling Request Item, navigate to the  tab and clicking on the
 ![]() icon.
icon.
The Tooling Requests Lookup screen will be displayed.

Locate the Tooling Item you wish to start a repair for and double-click on the appropriate row.
The Tooling Request detailed screen will be displayed.

Click on the  button.
The Start Repair window will appear. Users must complete the necessary fields and then click on the  button.
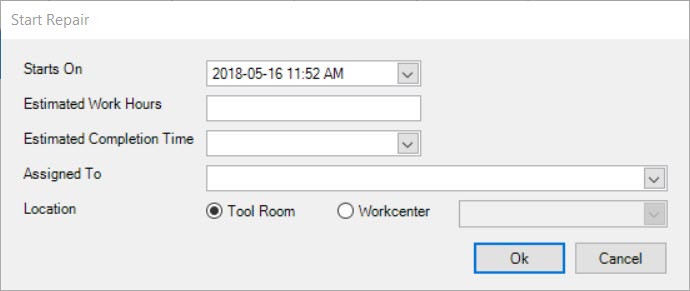
The Tooling Request Item repair will begin.
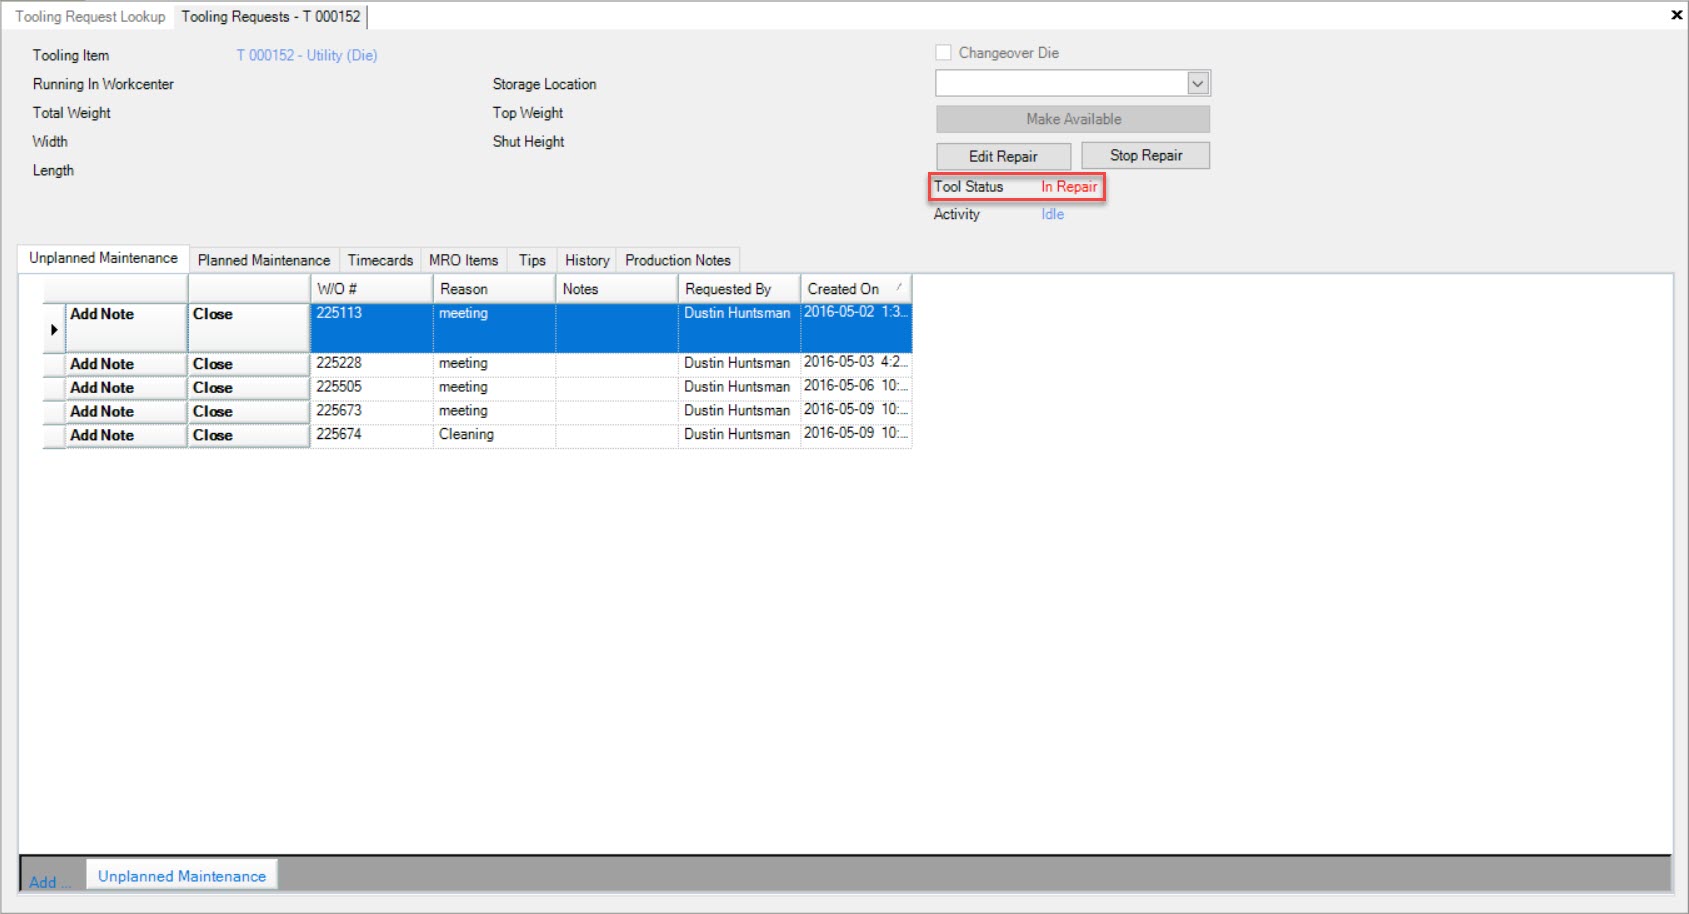
Editing a Repair for a Tooling Request Item
To edit a repair for a Tooling Request Item, navigate to the  tab and clicking on the
 ![]() icon.
icon.
The Tooling Requests Lookup screen will be displayed.

Locate the Tooling Item you wish to edit a repair for and double-click on the appropriate row.
The Tooling Request detailed screen will be displayed.

Click on the  button.
The Edit Repair window will appear where users can make the necessary changes.
Once the necessary changes have been made, click on the  button.
Stopping a Repair for a Tooling Request Item
To stop a repair for a Tooling Request Item, navigate to the  tab and clicking on the
 ![]() icon.
icon.
The Tooling Requests Lookup screen will be displayed.

Locate the Tooling Item you wish to edit a repair for and double-click on the appropriate row.
The Tooling Request detailed screen will be displayed.

Click on the  button.
The Stop Repair window will appear.
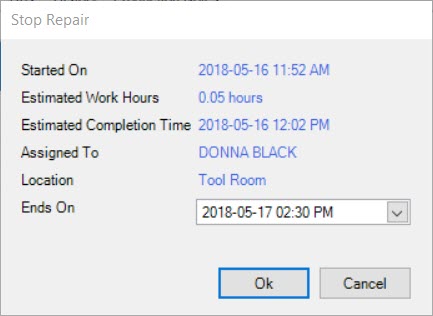
Users must select the correct Ends On date and then click on the  button.
The repair for the Tooling Request Item will be stopped.
Tooling Request Unplanned Maintenance Tab
To view Unplanned Maintenace for a Tooling Request Item, navigate to the  tab and clicking on the
 ![]() icon.
icon.
The Tooling Requests Lookup screen will be displayed.

Locate the Tooling Item you wish to view Unplanned Maintenance for and double-click on the appropriate row.
The Tooling Request detailed screen will be displayed.

Make sure to select the  tab.
tab.
Users will be able to view all Unplanned Maintenance for the selected Tooling Request Item.
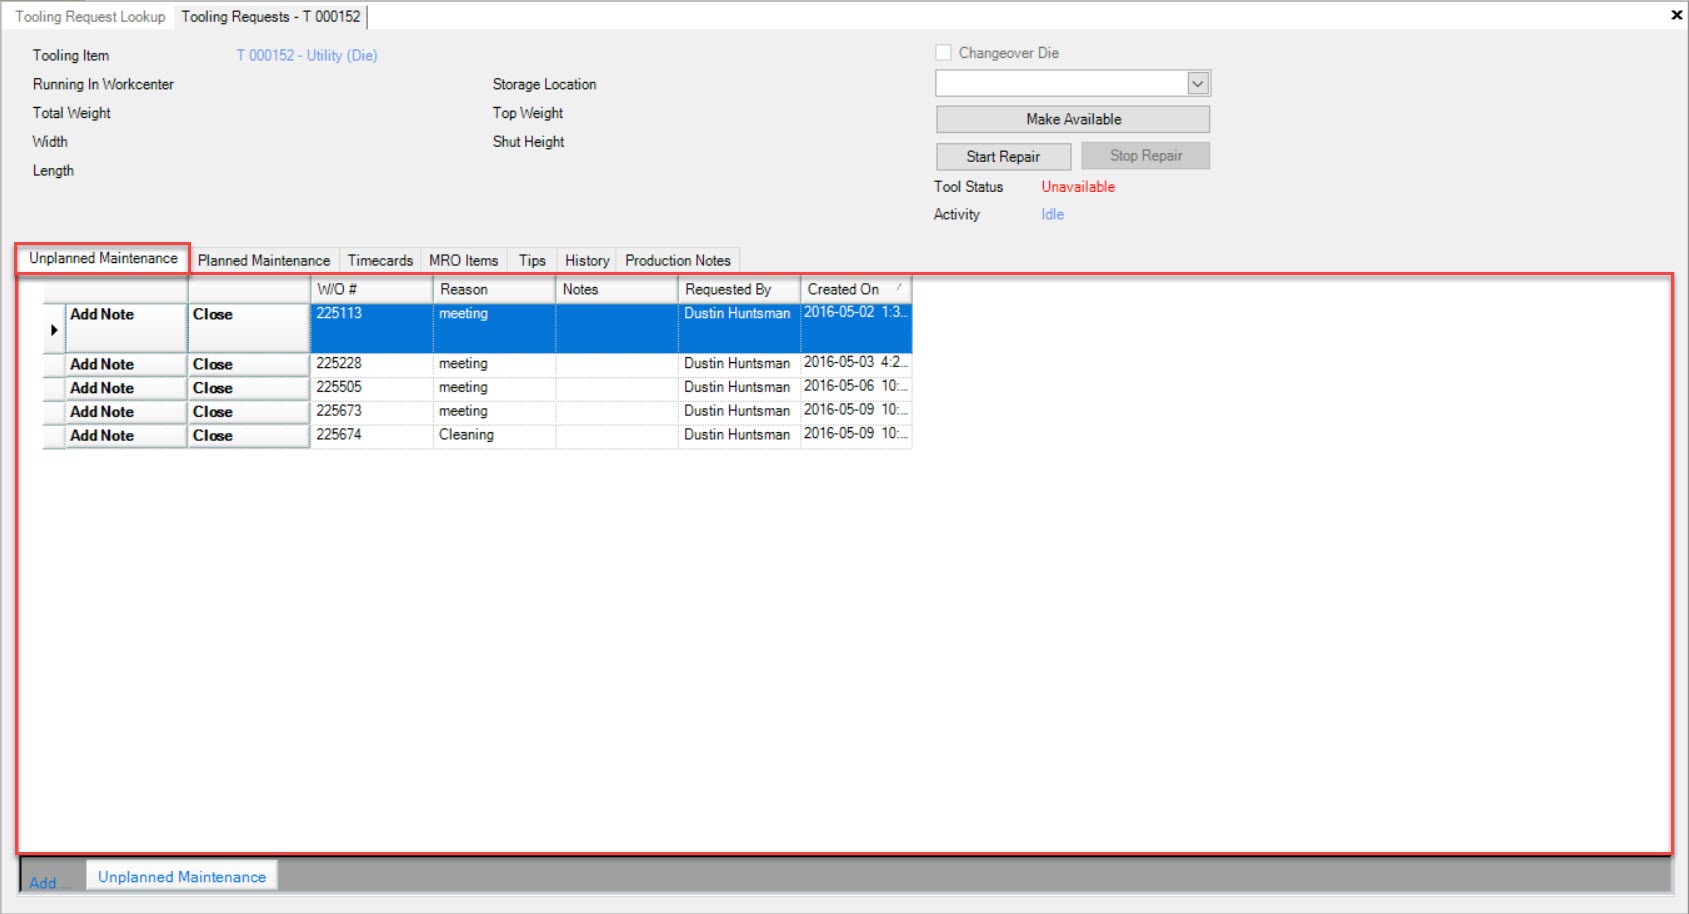
Adding Unplanned Maintenace to a Tooling Request Item
To add Unplanned Maintenance to a Tooling Request Item, navigate to the  tab and clicking on the
 ![]() icon.
icon.
The Tooling Requests Lookup screen will be displayed.

Locate the Tooling Item you wish to add Unplanned Maintenance to and double-click on the appropriate row.
The Tooling Request detailed screen will be displayed.

Make sure to select the  tab.
tab.
Next, click on the  button located at the bottom of the screen.
The New Work Order window will appear.
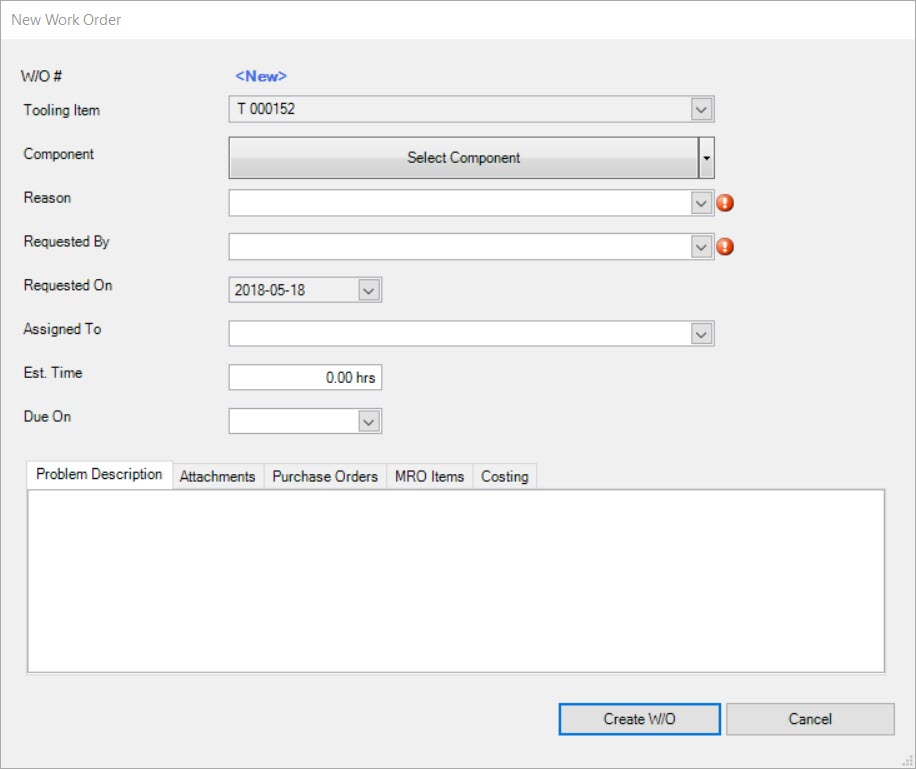
Users must complete the necessary fields and tabs, then click on the  button.
Note
For more detailed information on how to add Unplanned Maintenance, please see Tooling > Tooling Items > Unplanned Maintenance Tab > Adding Unplanned Maintenance.
The new Unplanned Maintenance Work Order for the Tooling Request Item will be created.
Adding a Note to Unplanned Maintenance on a Tooling Request Item
To add a note to Unplanned Maintenance on a Tooling Request Item, navigate to the  tab and clicking on the
 ![]() icon.
icon.
The Tooling Requests Lookup screen will be displayed.

Locate the Tooling Item you wish to add a note to and double-click on the appropriate row.
The Tooling Request detailed screen will be displayed.

Make sure to select the  tab.
tab.
Locate the Unplanned Maintenance Work Order you wish to add a note to and click on the  button.
The Add Note window will appear where users can enter in notes, and select from the available drop-down who the note was entered by.
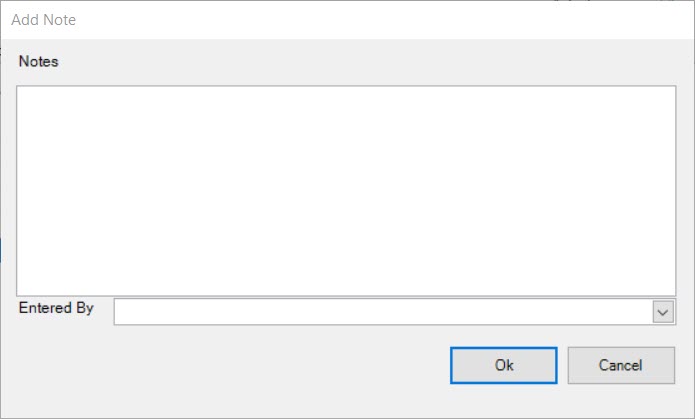
Click on the  button and the note will be added.
Note
Users can also right-click on the appropriate row and select Add Note... and the Add Note window will appear.
Printing a Work Order for a Tooling Request Item
To print a Work Order for Unplanned Maintenance on a Tooling Request, navigate to the  tab and clicking on the
 ![]() icon.
icon.
The Tooling Requests Lookup screen will be displayed.

Locate the Tooling Item you wish to add a note to and double-click on the appropriate row.
The Tooling Request detailed screen will be displayed.

Make sure to select the  tab.
tab.
Locate the Unplanned Maintenance Work Order you wish to print and right-click on the appropriate row. Select the Print W/O option from the menu.
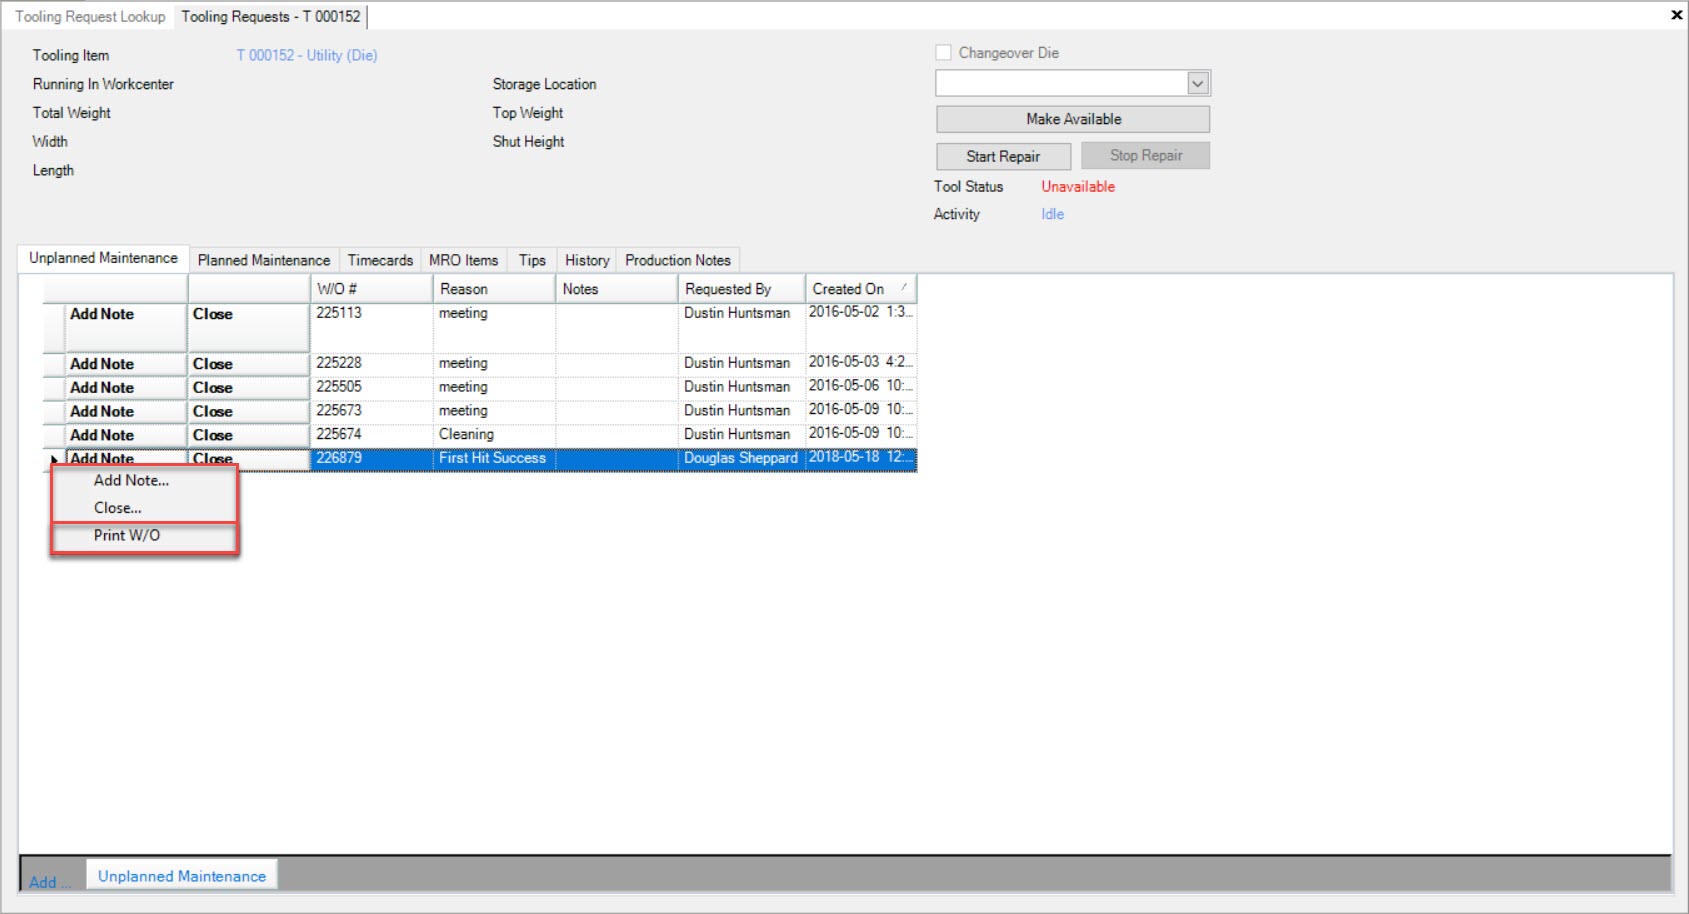
The Print window will appear. Users must select the appropriate Printer and print settings, then click on the  button.
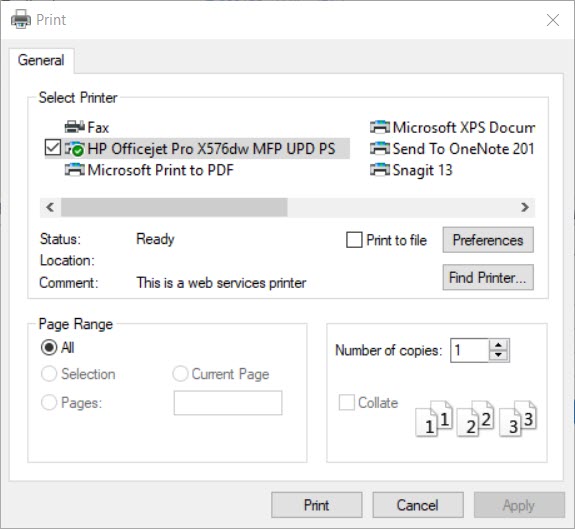
The selected Unplanned Maintenance Work Order will be printed.
Closing Unplanned Maintenance Work Orders for a Tooling Request Item
To close Unplanned Maintenance Work Orders, navigate to the  tab and clicking on the
 ![]() icon.
icon.
The Tooling Requests Lookup screen will be displayed.

Locate the Tooling Item you wish to close and double-click on the appropriate row.
The Tooling Request detailed screen will be displayed.

Make sure to select the  tab.
tab.
Locate the Unplanned Maintenance Work Order you wish to close and click on the  button.
The Close Work Order window will appear.
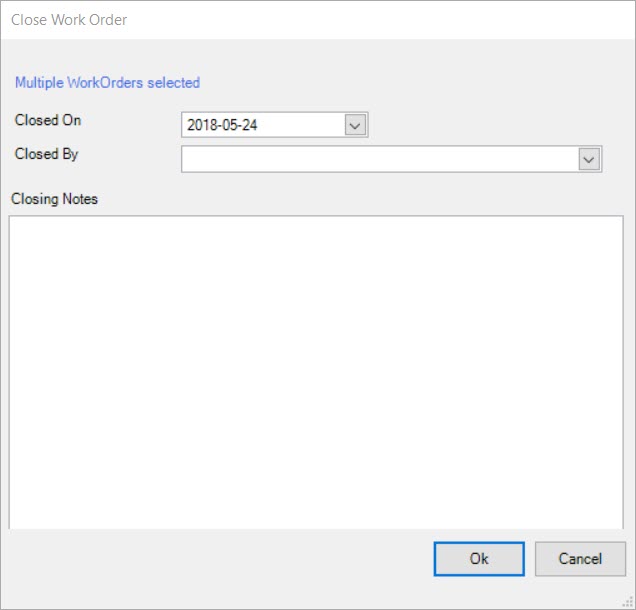
Users must select a Closed On date and Closed By, and enter in Closing Notes if necessary. Then click on the  button.
The selected Unplanned Maintenance Work Order will be removed and closed.
Make sure to save your changes before exiting the screen.
Tooling Request Planned Maintenance Tab
To view Planned Maintenace for a Tooling Request Item, navigate to the  tab and clicking on the
 ![]() icon.
icon.
The Tooling Requests Lookup screen will be displayed.

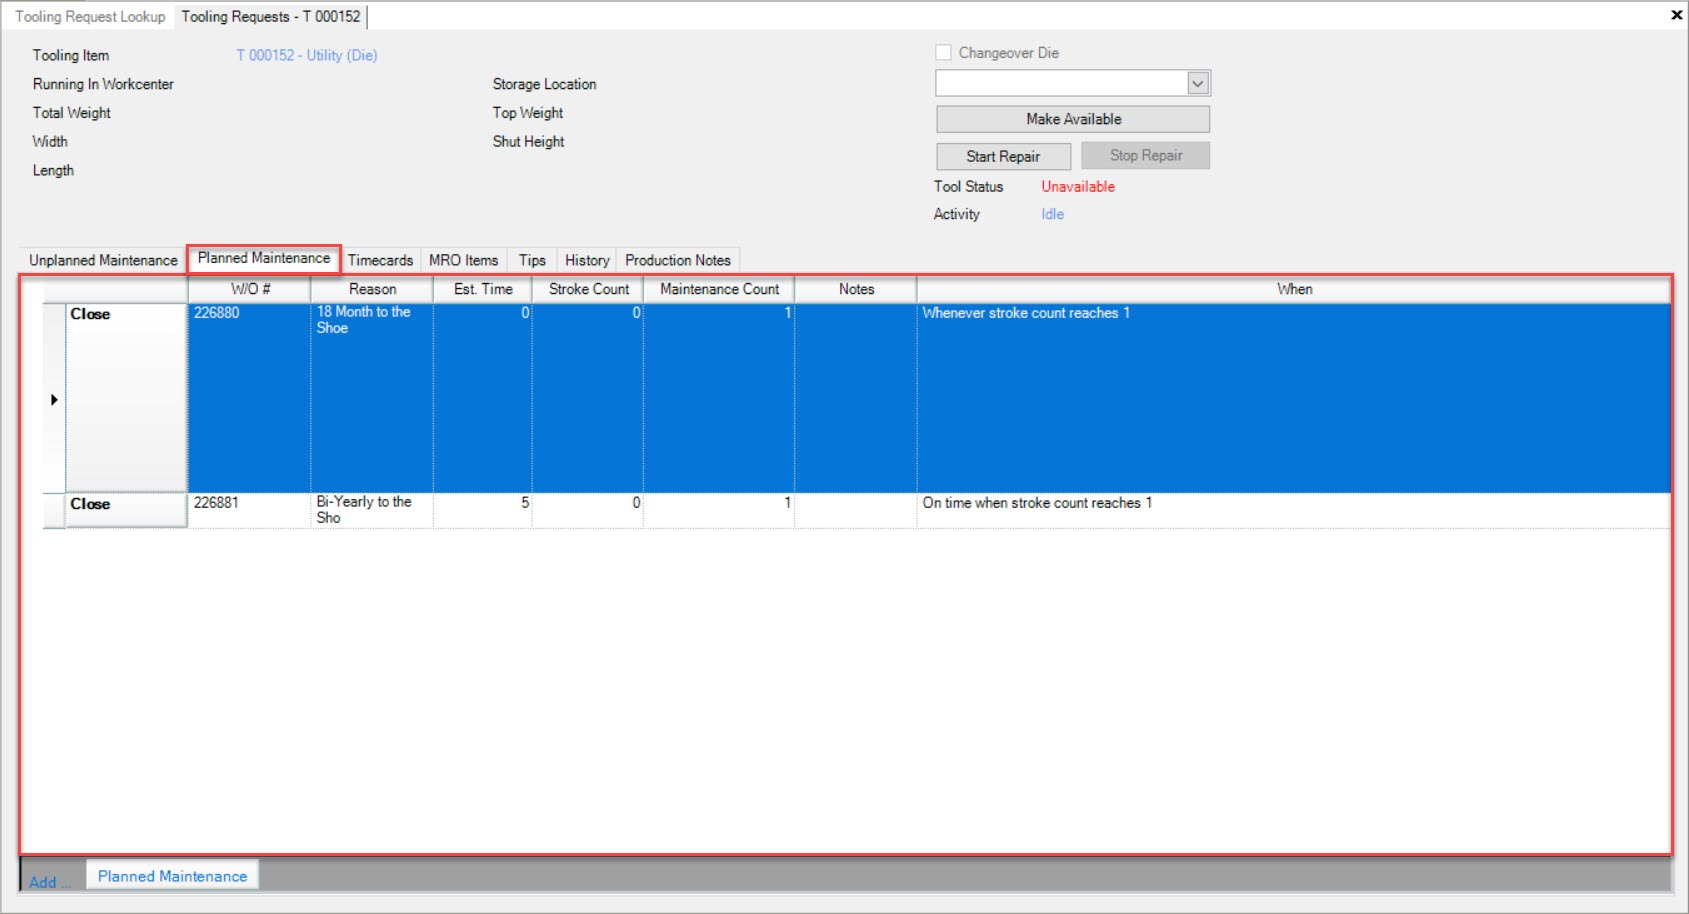
Locate the Tooling Item you wish to view Planned Maintenance for and double-click on the appropriate row.
The Tooling Request detailed screen will be displayed.

Make sure to select the  tab.
tab.
Users will be able to view all Planned Maintenance for the selected Tooling Request Item.
Adding Planned Maintenance to a Tooling Request Item
To add Planned Maintenance to a Tooling Request Item, navigate to the  tab and click on the
 ![]() icon.
icon.
The Tooling Requests Lookup screen will be displayed.

Locate the Tooling Item you wish to add Planned Maintenance to and double-click on the appropriate row.
The Tooling Request detailed screen will be displayed.

Make sure to select the  tab.
tab.
Then, click on the  button located at the bottom of the screen.
The Planned Maintenance window will appear.

Planned Maintenance Scheduling Tab
When creating Planned Maintenance, users can use the  tab to select maintenance as one-time due, meaning the Planned Maintenance
only occurs once and there will be one Work Order created in the system; or maintenance as recurring due, meaning the Planned Maintenance can occur more than once
and once a Work Order is complete, another one will be created in the system based on the schedule.
Planned Maintenance Work Instructions Tab
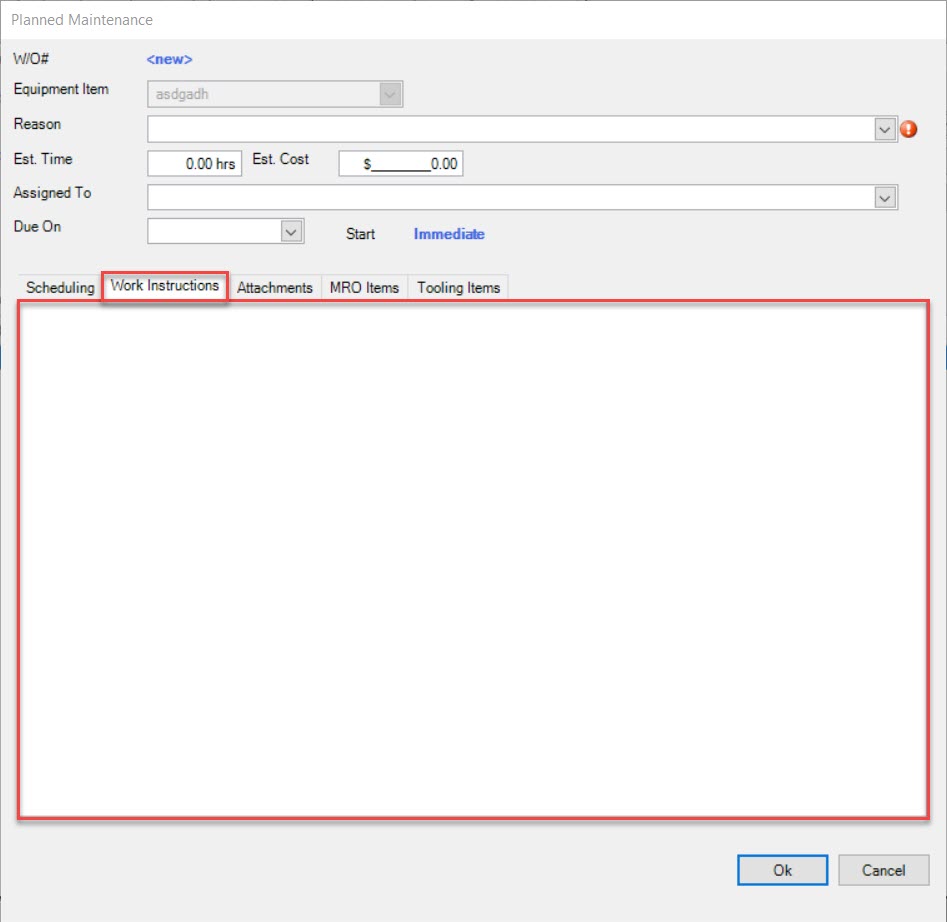
Users can enter any notes regarding Work Instructions by selecting the  tab on the Planned Maintenance window.
Planned Maintenance Attachments Tab
Users can add Attachments to a Planned Maintenance by clicking on the  tab on the Planned Maintenance window. Attachments
will be part of the Work Order created so users viewing and/or completing the Work Order can view them.
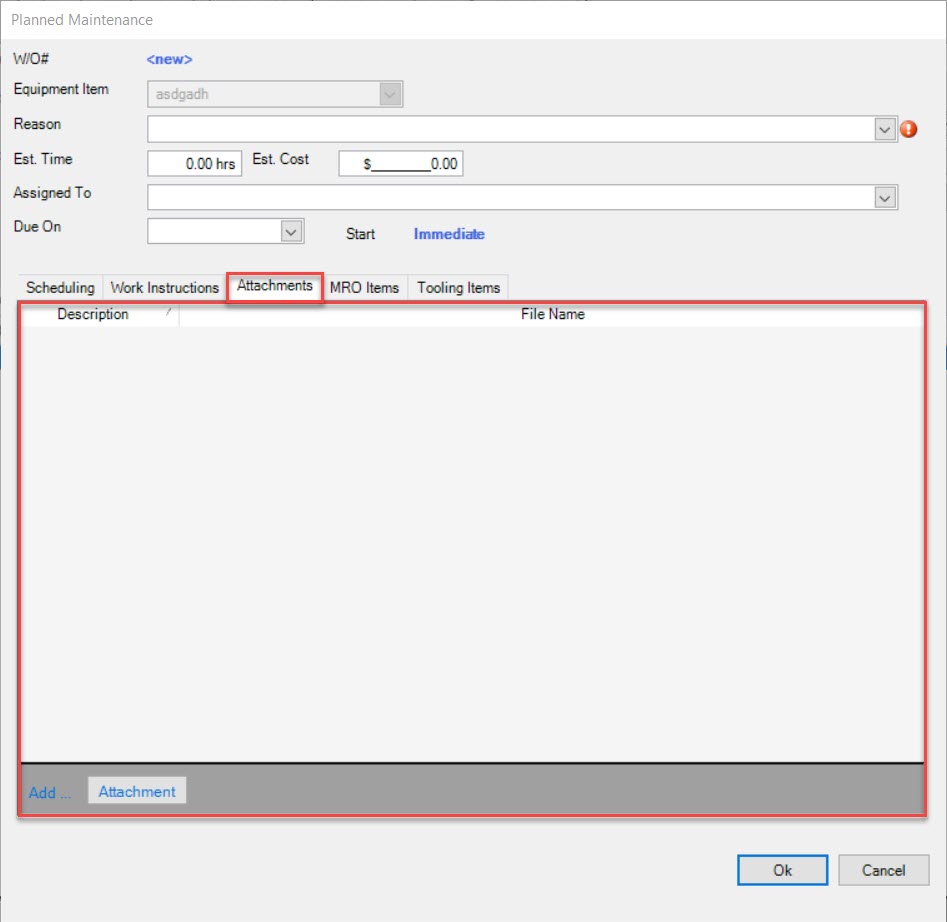
Then, click on the  button located at the bottom of the window.
Users will then be able to select an Attachment from their computer. Once an Attachment has been selected, click on the  button.
The selected Attachment will be added to the Planned Maintenance.
To delete an Attachment from a Planned Maintenance, simply highlight the appropriate row and use your Delete key.
The selected Attachment will be deleted.
Planned Maintenance MRO Items Tab
Users also have the ability to add MRO Items to Planned Maintenance. To do so, select the  tab on the Planned Maintenance window.
MRO Items added to Planned Maintenance will show on the Work Order and also on a Tooling Timecard when users are completing a Tooling Timecard against the Planned
Maintenance Work Order. Users will be able to enter in a consumed Quantity to record it against the Work Order, and also create an Inventory Transaction for the MRO Item.
Then, click on the  button located at the bottom of the window.
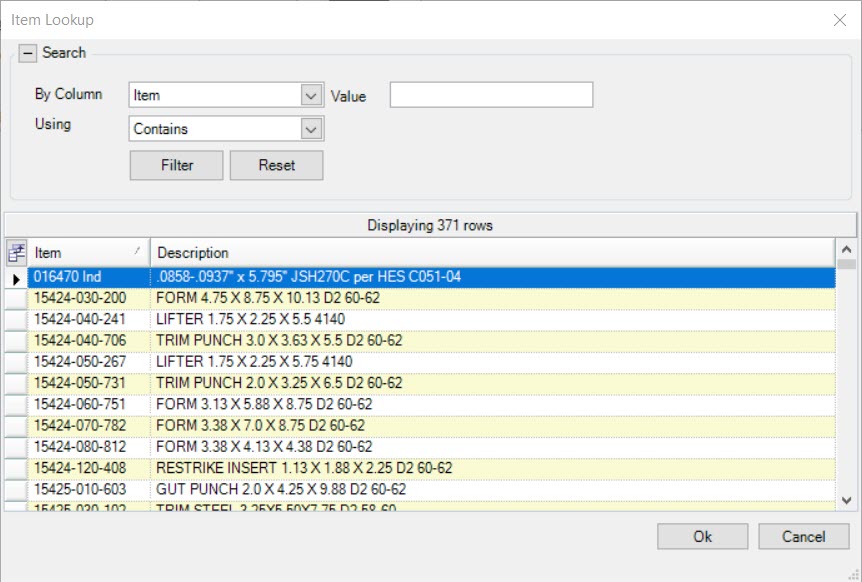
The Item Lookup window will appear where users can select an MRO Item and then click on the  button. Only Items flagged as MRO
Items on the Purchased Item screen will appear in the Item Lookup window. Once selected, users can enter in a Quantity that should be consumed as part of the
Planned Maintenance Work Order.
The selected MRO Item will be added to the Planned Maintenance.
To delete an MRO Item from a Planned Maintenance, simply highlight the appropriate row and use your Delete key.
The selected MRO Item will be deleted.
Once all the necessary header information and tabs have been completed, click on the  button.
The Planned Maintenance will be added to the Tooling Item and a Work Order will be created.
Make sure to save before exiting the screen.
Planned Maintenance Tooling Items Tab
Users have the ability to add or remove multiple Tooling Items to Planned Maintenance.
To do so, select the  tab from the Planned Maintenance window.
Then, select the Tooling Items you wish to add to the Planned Maintenance by highlighting the appropriate row(s) under the Available Tooling Items table. Then, click on
the  arrow to move the Tooling Items to the Selected Tooling Items table. Users can select more than one Tooling Item at a time
by holding down the Ctrl key and highlighting the appropriate Items they wish to add. Then, click on the
  arrow. Users can
also double-click on a Tooling Item to add it to the Selected Tooling Items table.
The selected Tooling Items will appear on the right-side of the window.
To remove Tooling Items from Planned Maintenance, simply select the Tooling Items from the right-side of the window and click on the  arrow.
The selected Tooling Items will be removed from the Planned Maintenance.
Users can also add all Tooling Items by clicking on the  button, and can remove all Tooling Items by clicking on the
  button.
Once all the necessary header information and tabs have been completed, click on the  button.
The Planned Maintenance will be added to the Tooling Item and a Work Order will be created.
Make sure to save before exiting the screen.
Editing Planned Maintenance Tooling Request Work Orders
To edit Planned Maintenance, navigate to the  tab and click on the
 ![]() icon.
icon.
The Tooling Requests Lookup screen will be displayed.

Locate the Tooling Request you wish to edit Planned Maintenance for and double-click on the appropriate row.
The Tooling Request detailed screen will be displayed.

Make sure to select the  tab.
tab.
Locate and double-click on the Planned Maintenance you wish to edit. The Planned Maintenance window will appear. Make the necessary changes and click on the  button.
Make sure to save before exiting the screen.
Closing Planned Maintenance
Closing Planned Maintenance will close the Work Order without recording a Tooling Timecard against it.
To close Planned Maintenance, make sure to select the  tab.
tab.
Locate the Planned Maintenance you wish to close and select the |images/toolingrequests/closebutton-25.jpg| button.
The Close Work Order window will appear.
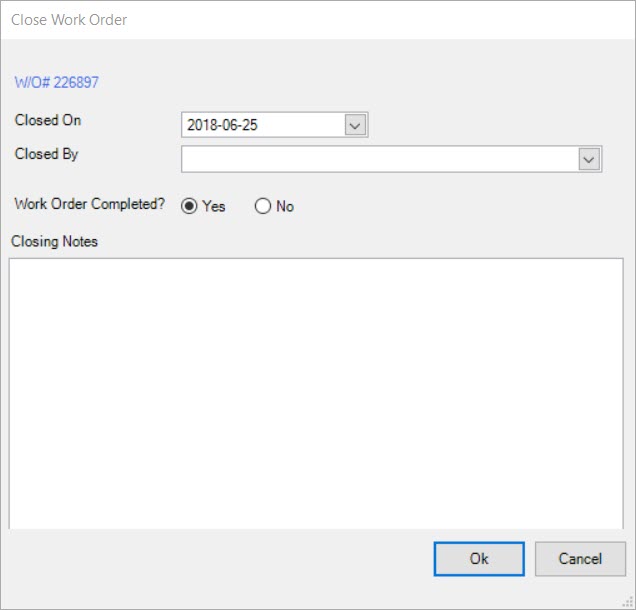
Users must select a Closed On, Closed By, select whether or not the Work Order is complete, and enter in Closing Notes. Then, click on the  button.
The selected Planned Maintenance will be removed from the Planned Maintenance tab on the Tooling Request.
Make sure to save your changes before exiting the screen.
Deleting Planned Maintenance
To delete Planned Maintenance from a Tooling Request, make sure to select the  tab.
tab.
Locate the Planned Maintenance you wish to delete and highlight the appropriate row. Use your Delete key and when the system prompts you, select Yes.

The selected Planned Maintenance will be deleted and all Work Orders and Timecards associated with it will be deleted as well.
Make sure to save your changes before exiting the screen.
Tooling Request Timecards Tab
To view Timecards associated with a Tooling Request, navigate to the  tab and click on the
 ![]() icon.
icon.
The Tooling Requests Lookup screen will be displayed.

Locate the Tooling Request you wish to view Timecards for and double-click on the appropriate row.
The Tooling Request detailed screen will be displayed.

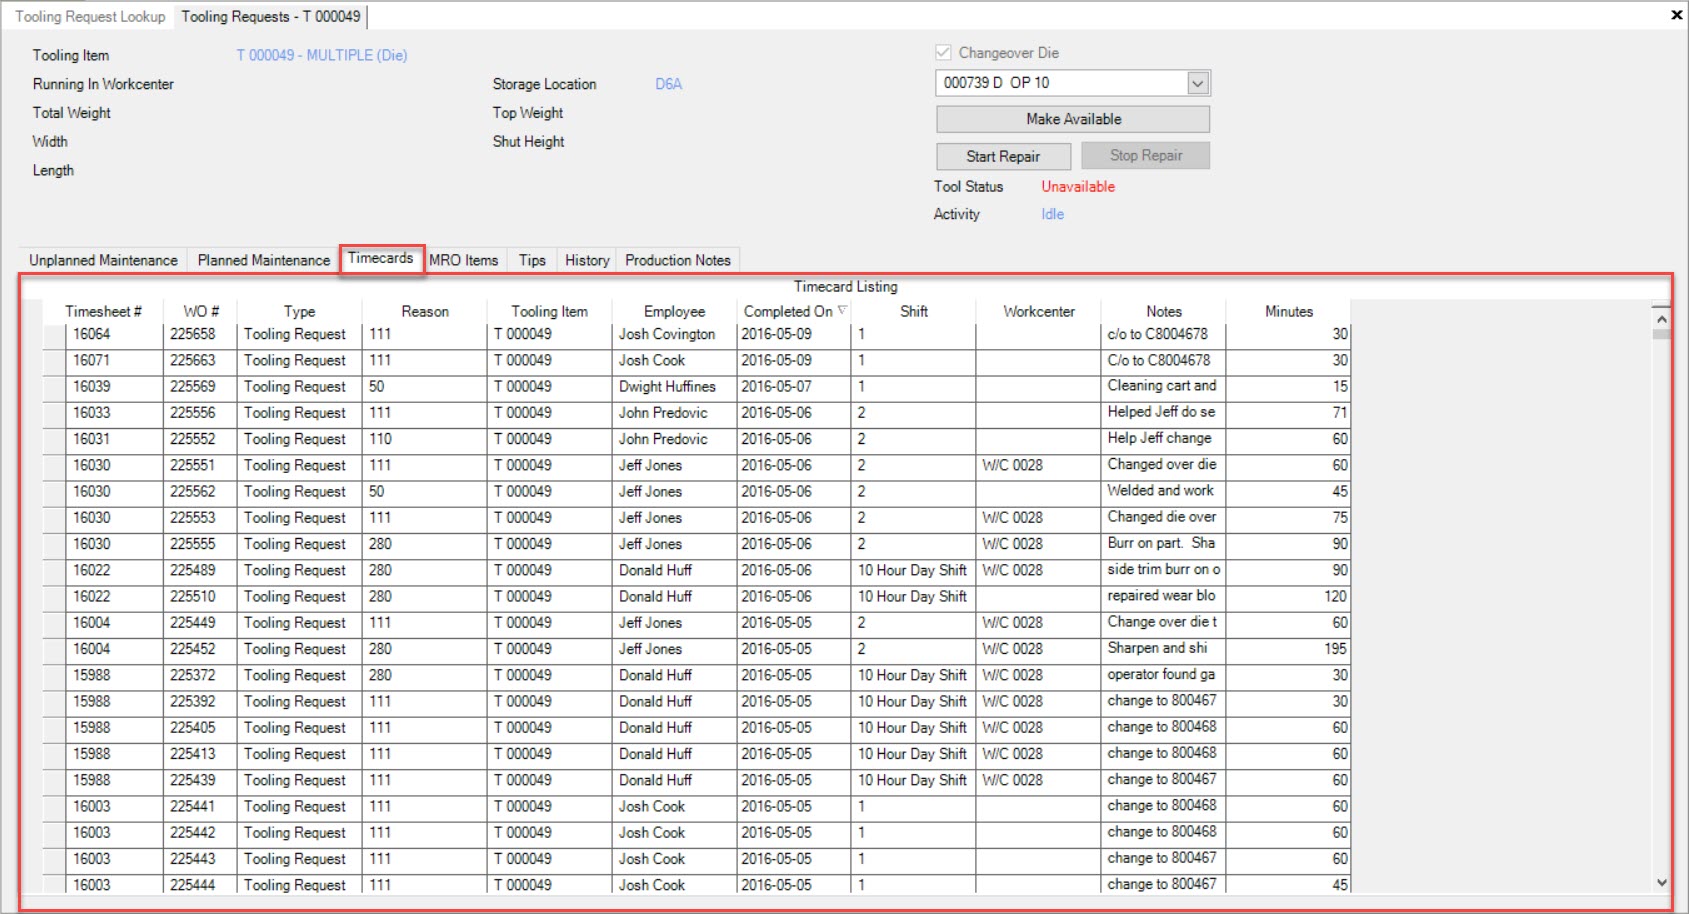
Make sure to select the  tab.
tab.
All of the Timecards associated with the selected Tooling Request will be displayed.
Tooling Request MRO Items Tab
To view MRO Items associated with a Tooling Request, navigate to the  tab and click on the
 ![]() icon.
icon.
The Tooling Requests Lookup screen will be displayed.

Locate the Tooling Request you wish to view MRO Items for and double-click on the appropriate row.
The Tooling Request detailed screen will be displayed.

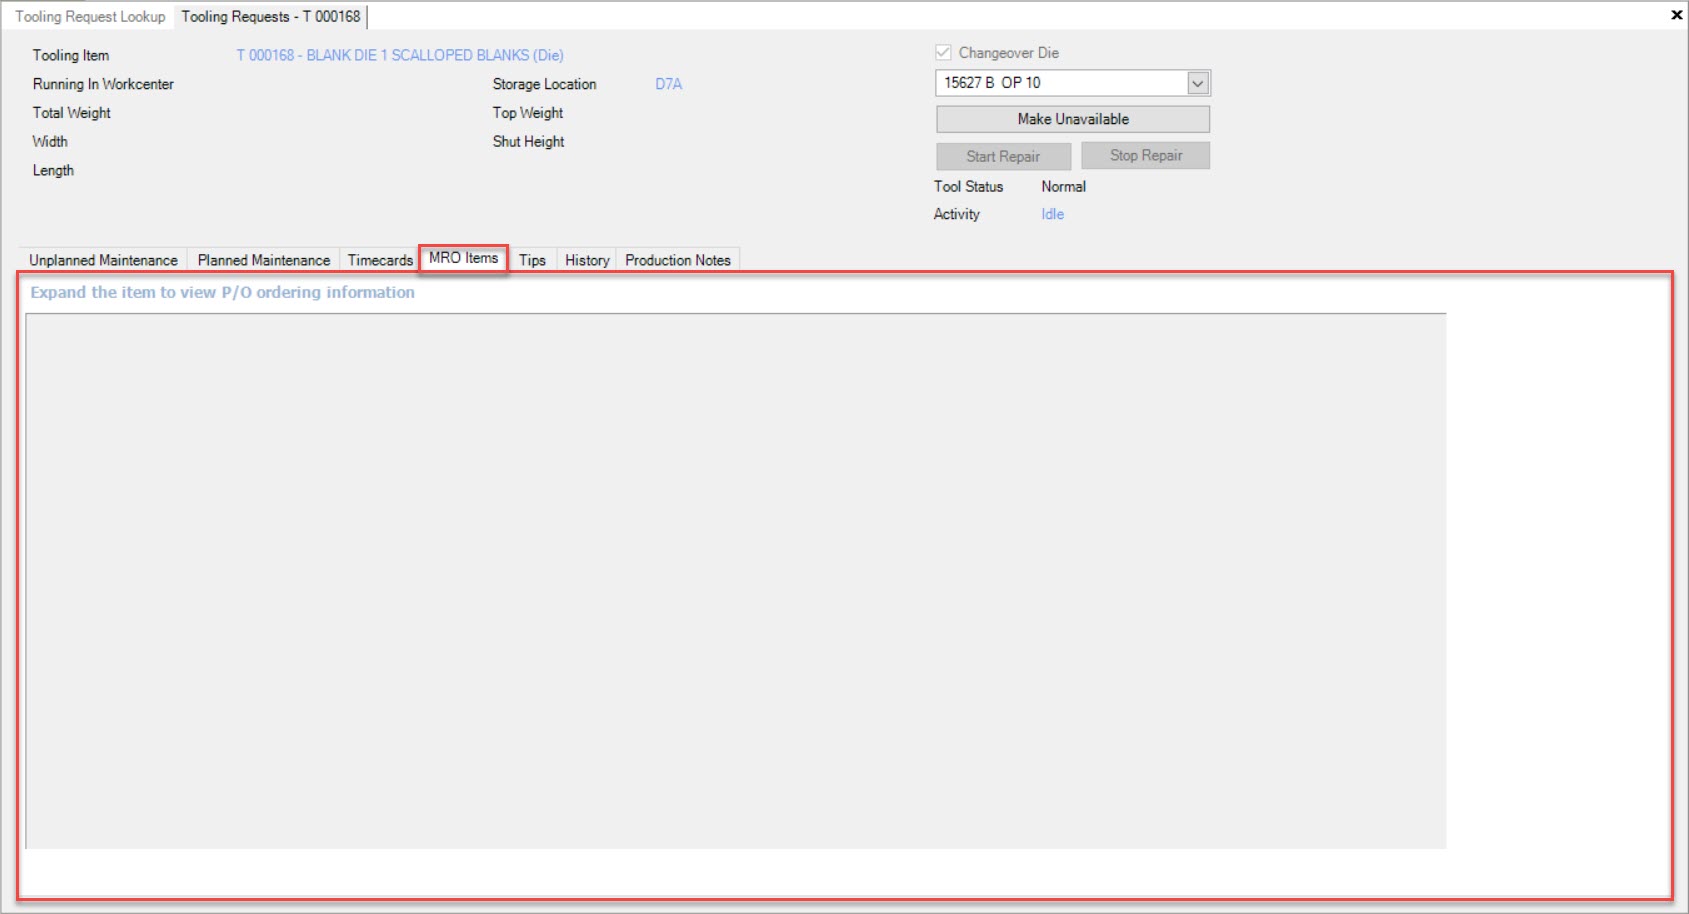
Make sure to select the  tab.
tab.
All of the MRO Items associated with the selected Tooling Request will be displayed.
Tooling Request Tips Tab
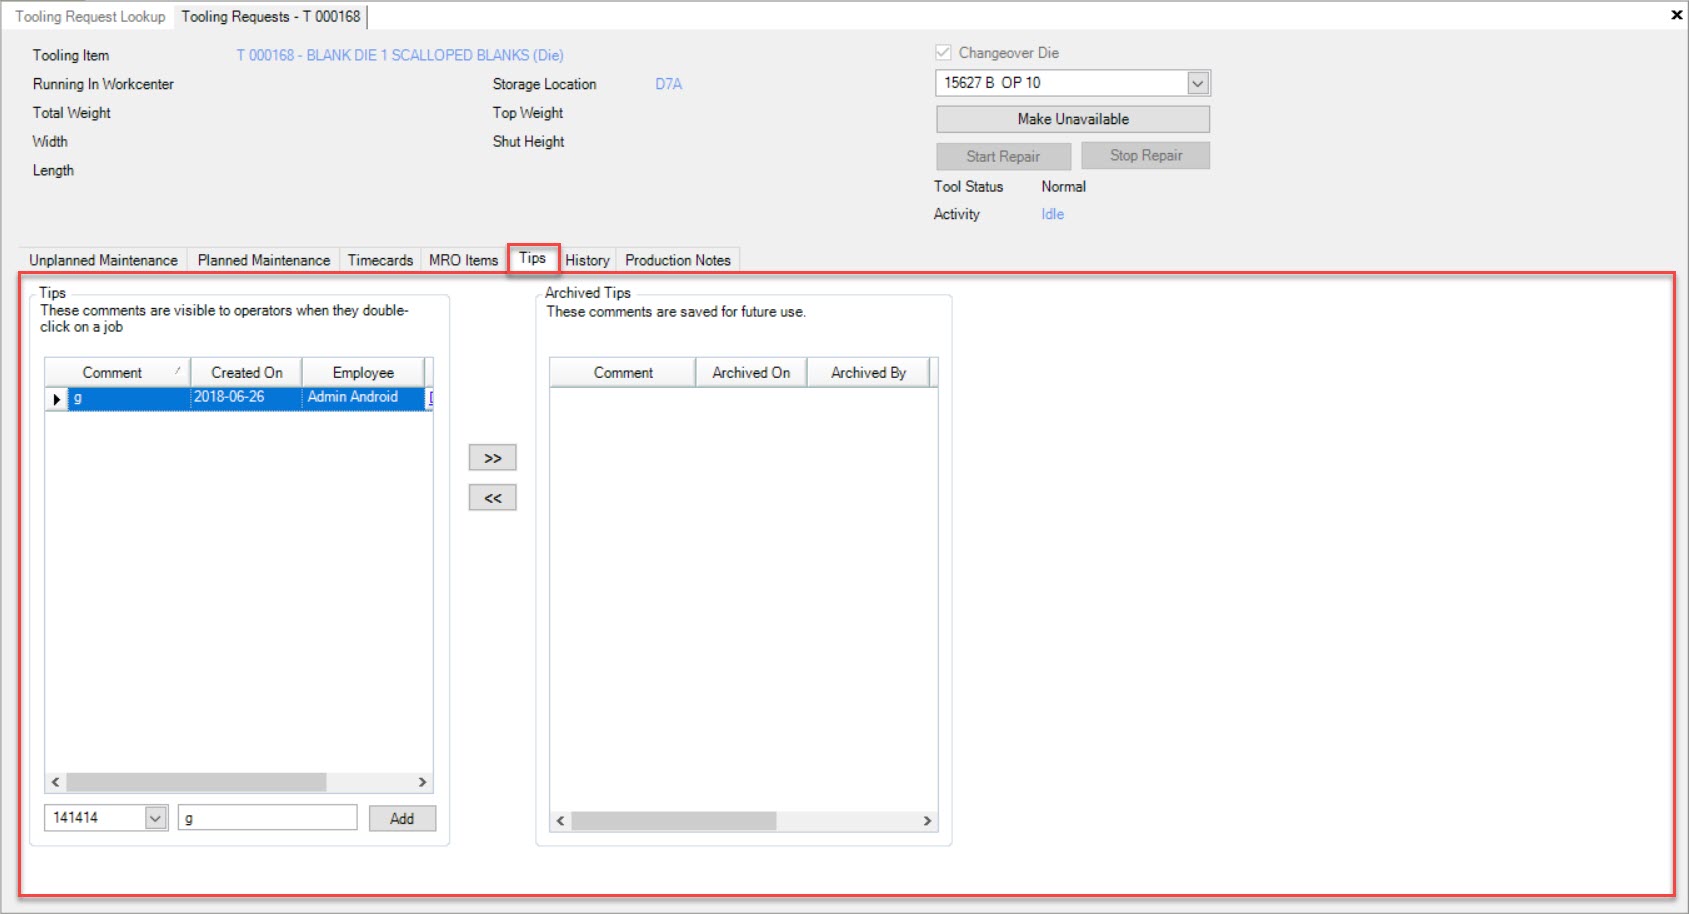
Users can add, edit, or delete Tips which are visible to Operators when double-clicking on a job. Tips can also be saved for future use.
To view Tooling Request Tips, navigate to the  tab and click on the
 ![]() icon.
icon.
The Tooling Requests Lookup screen will be displayed.

Locate the Tooling Request you wish to view Tips for and double-click on the appropriate row.
The Tooling Request detailed screen will be displayed.

Make sure to select the  tab.
tab.
All of the available Tooling Request Tips will be displayed for the selected Tooling Request.
Adding a Tooling Request Tip
To add a Tooling Request Tip, navigate to the  tab and click on the
 ![]() icon.
icon.
The Tooling Requests Lookup screen will be displayed.

Locate the Tooling Request you wish to add a Tip to and double-click on the appropriate row.
The Tooling Request detailed screen will be displayed.

Make sure to select the  tab.
tab.
Next, select an Employee using the available drop-down located below the Tips box.

In the available textbox located next to the Employee drop-down, enter in any Tips (comments).
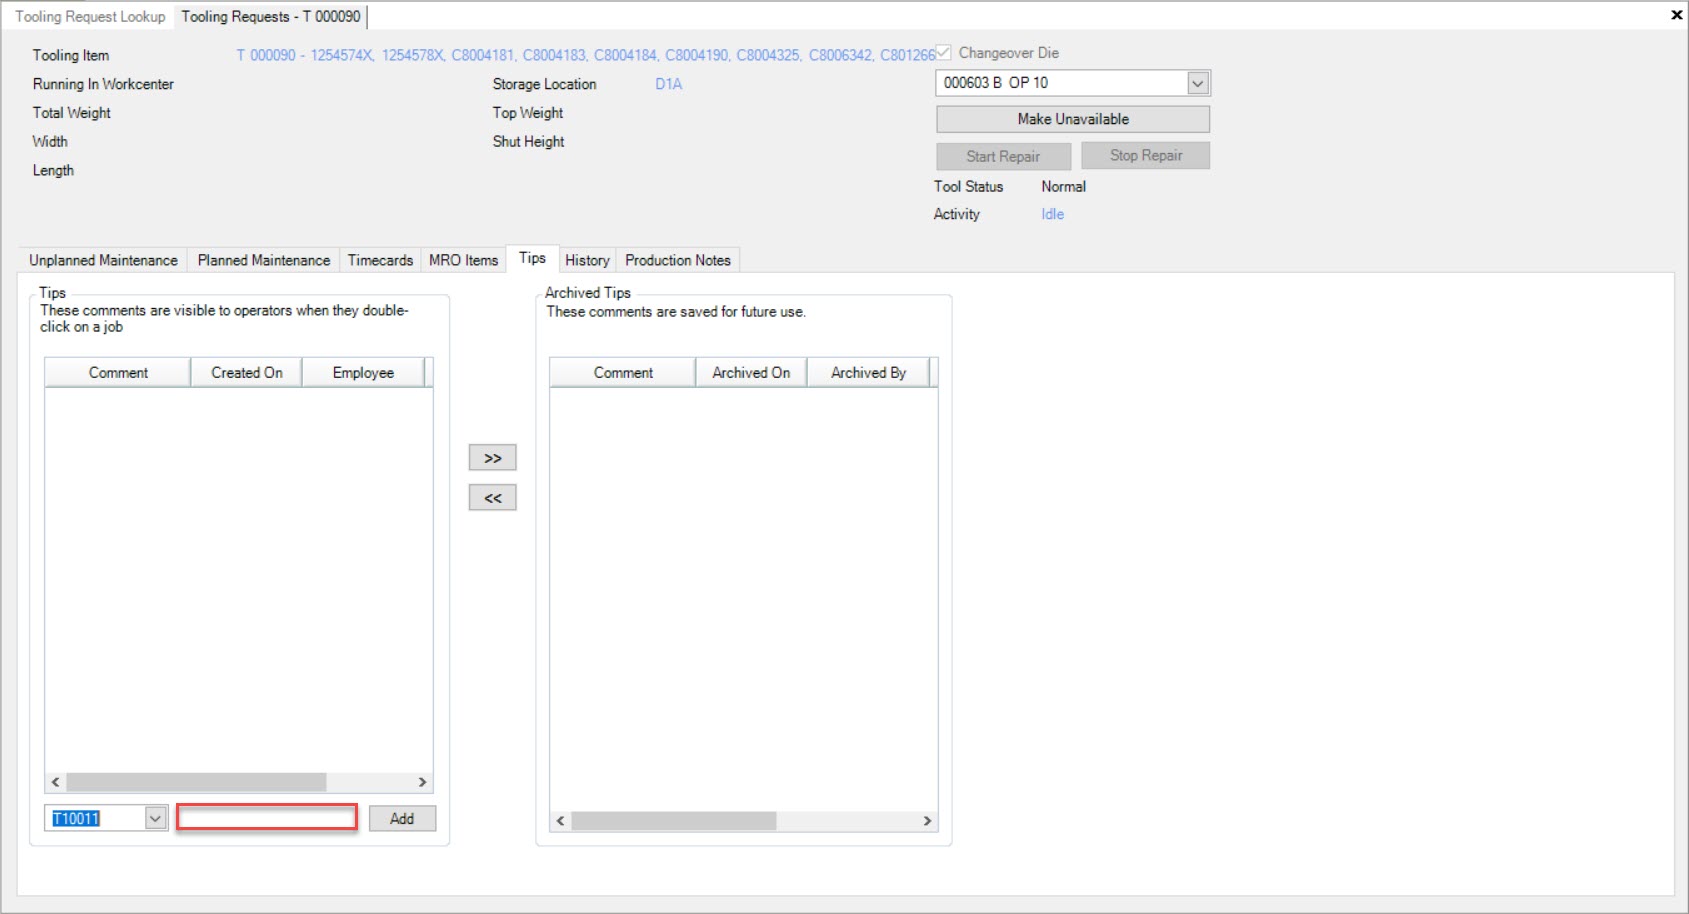
Once an Employee is selected and a Tip is entered, click on the  button.
The Tip will be added.
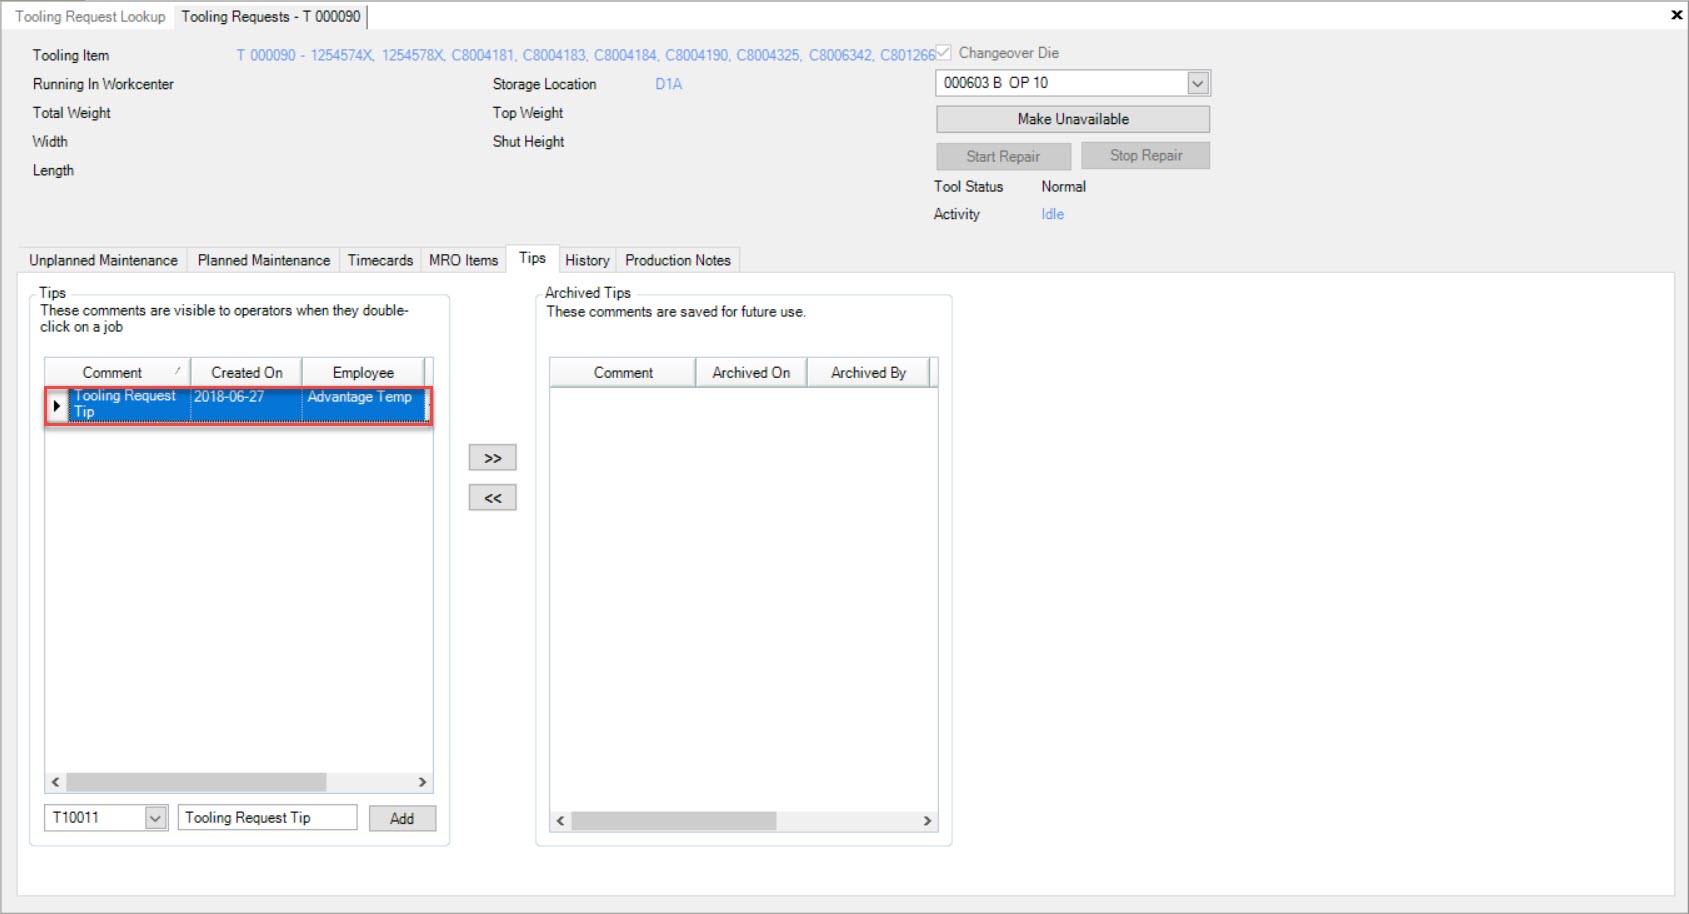
If users wish to archive Tips, simply highlight the Tip and click on the |images/toolingrequests/tiprightarrow-58.jpg| button. The selected
Tooling Request History Tab
Tooling Request Production Notes Tab
Production Notes can be recorded against a Tooling Item and will show on the various Production screens including the Master Production Schedule, the Workcenter Schedule, and the Operator Schedule.
To view, add, edit, or delete Production Notes on a Tooling Item, navigate to the |images/toolingitems/toolingtab-1.jpg| tab and click on the |images/toolingitems/toolingitemsicon-2.jpg| icon. The Tooling Items lookup screen will be displayed.
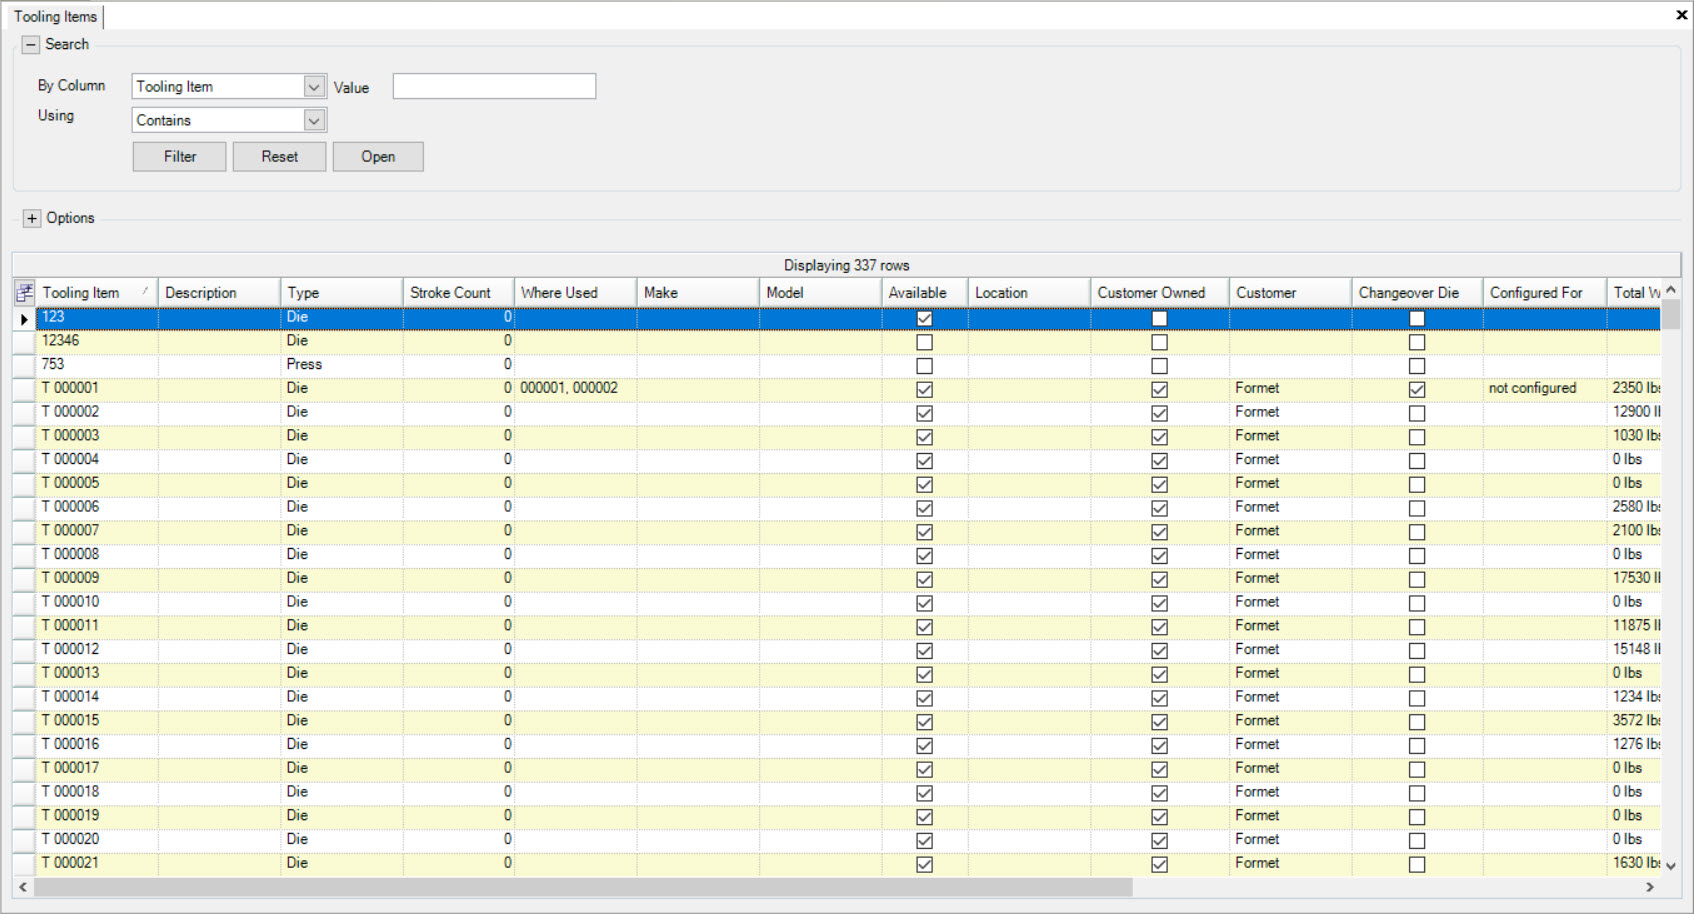
Locate and double-click on the appropriate row to open a Tooling Item. The Tooling Item detail screen will be displayed.
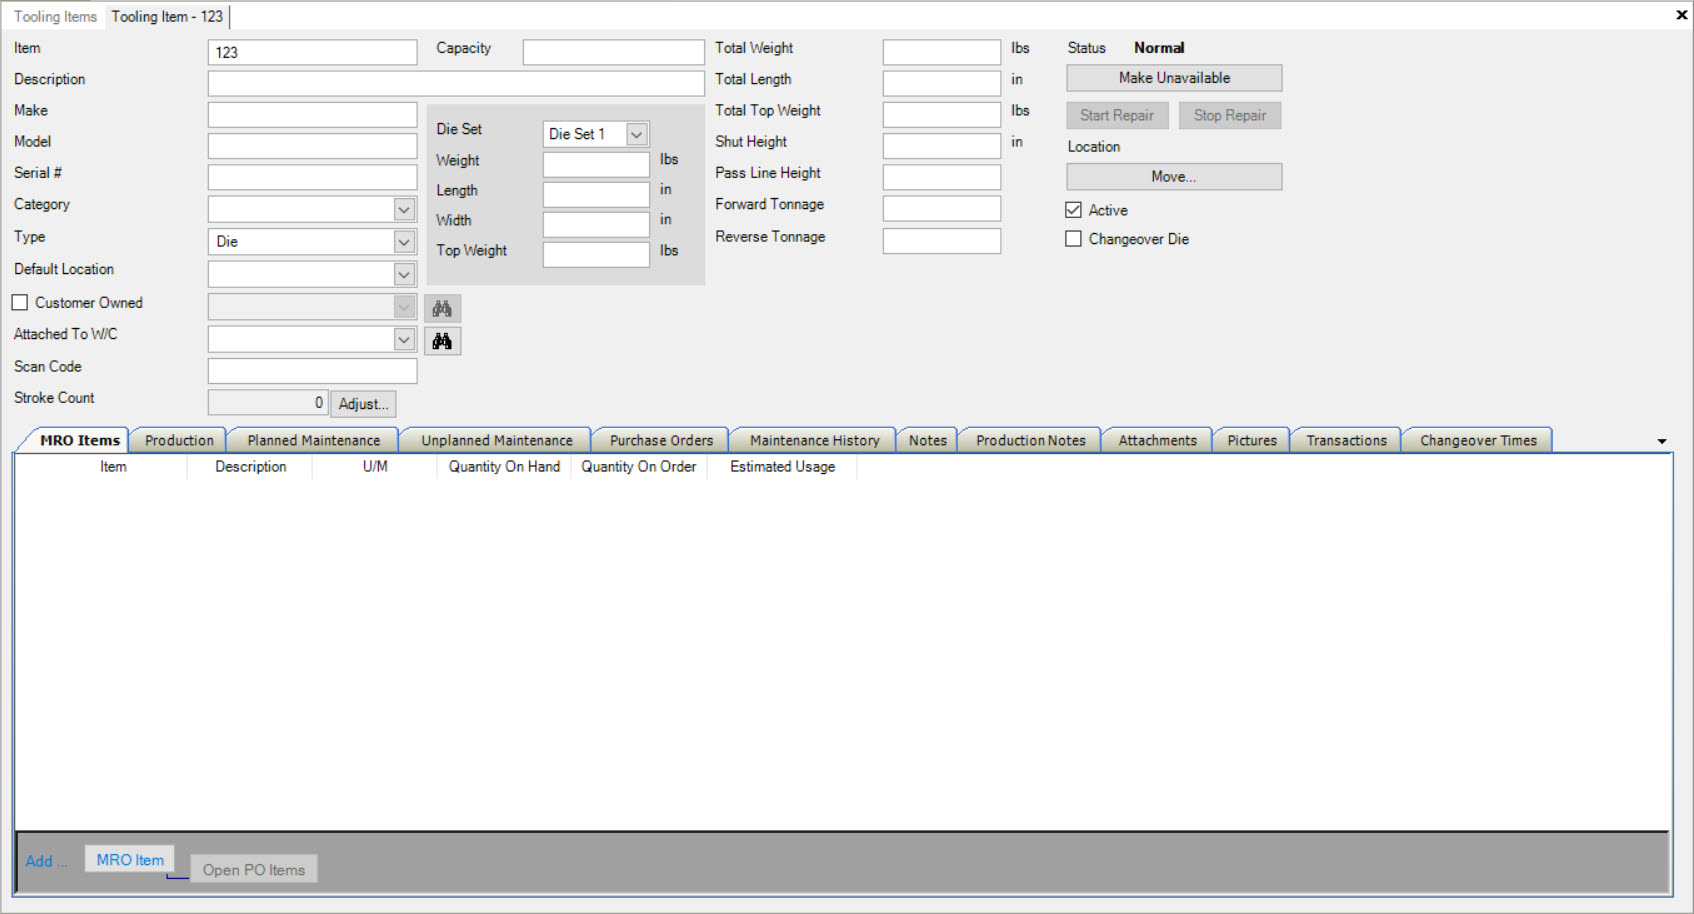
Make sure to select the  tab.
tab.
Using the available textbox, users can add, edit, or delete Production Notes.
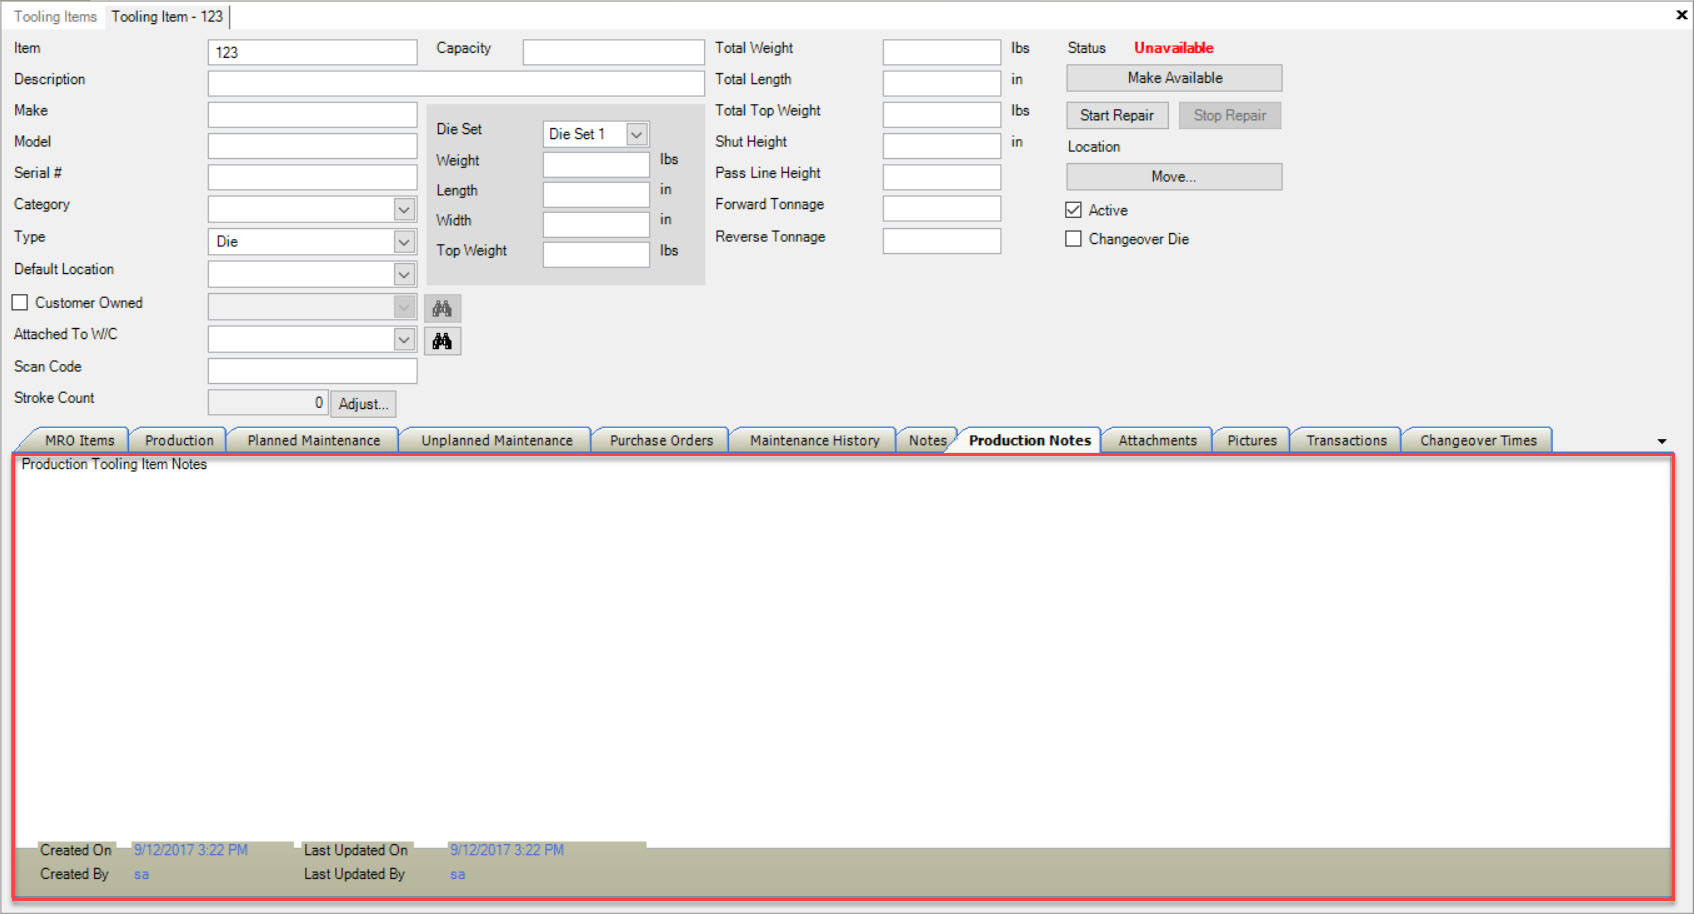
Make sure to save your changes before exiting the screen.
To add a note to an tooling request click on the  button. This will open the “Add Tooling Request Note” screen.
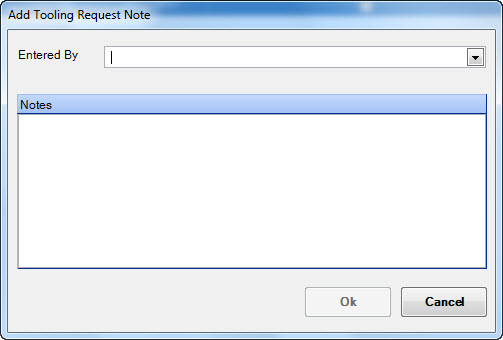
Select your name (or the employee”s name) from the drop down menu and fill out the note in the text box provided. Click on the  button to save your note.
To close a tooling request click on the  button in the row of the request you wish to close. This will open the “Close Tooling Request” screen.
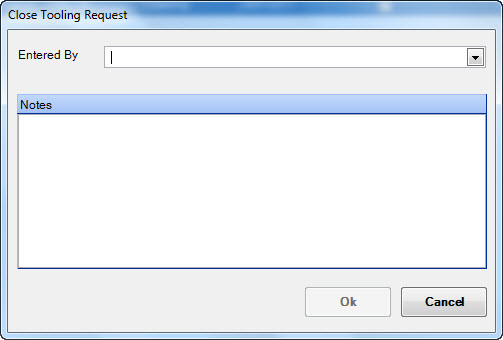
Select your name (or the employee”s name) from the drop down menu and fill out the note in the text box provided. Click on the  button to save your closing note.
Once saved the tool room request will be removed from the tooling request screen.
To add a new tooling request click on the  button under the
  tab. This will
open the “Tooling Request Screen”.
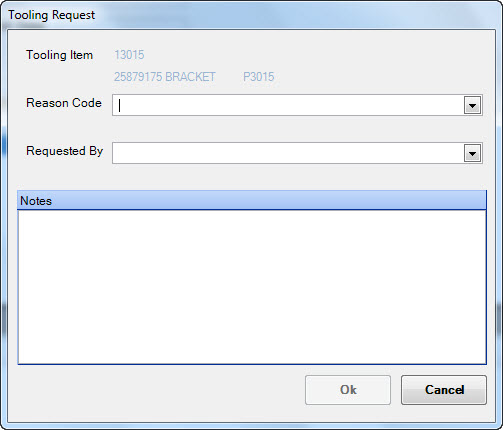
Fill out the required entries and select the  button to finalize. Perform a ‘save’ and it will be added to the list of open Tooling Requests.
To add scheduled maintenance click on the  button under the
  tab. This will
open the “Planned Maintenance” window.
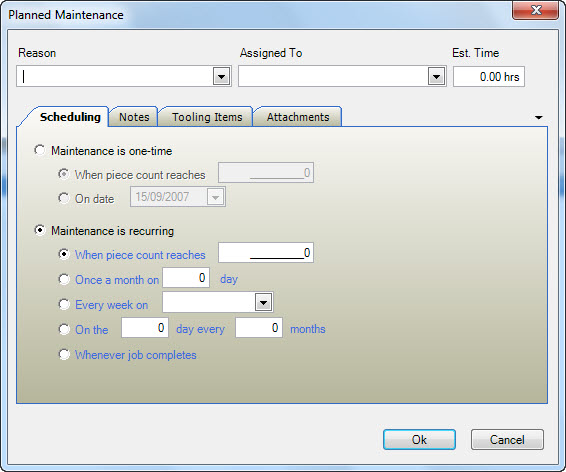
Fill out the required entries and select the  button to finalize. Perform a ‘save’ and it will be added to the list of open Scheduled Maintenance items.
To view a timecard for a tooling item, navigate to the  tab.
tab.
Opening a Timecard
To open an existing timecard, navigate to the  tab and double click on the timecard you wish to open.
To view any job closing notes (that an operator entered at the time a job was finished in production), navigate to the  tab.
tab.
To view any checklist notes, navigate to the  tab.
tab.
To view MRO Items for a tooling item, navigate to the  tab.
tab.
Note
***This feature is currently not available.***
To view tooling tips for a tooling item, navigate to the  tab. This will open the “Tooling Tips Screen”.
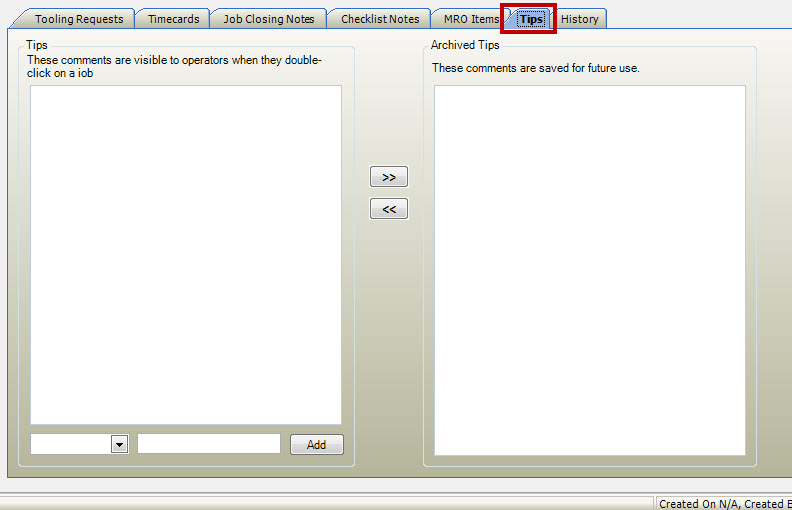
If you wish to move a tip from either current “Tips” or “Archived Tips”, highlight the tip to be moved and choose the applicable arrow set. To delete a tip highlight the row to delete and press the delete key.
To view tooling request history, navigate to the  tab. This tab will display a history of tooling requests for
a particular item.
Any individual row may be opened by clicking on the + sign (left side of the row) to review when the job was closed and applicable notes.
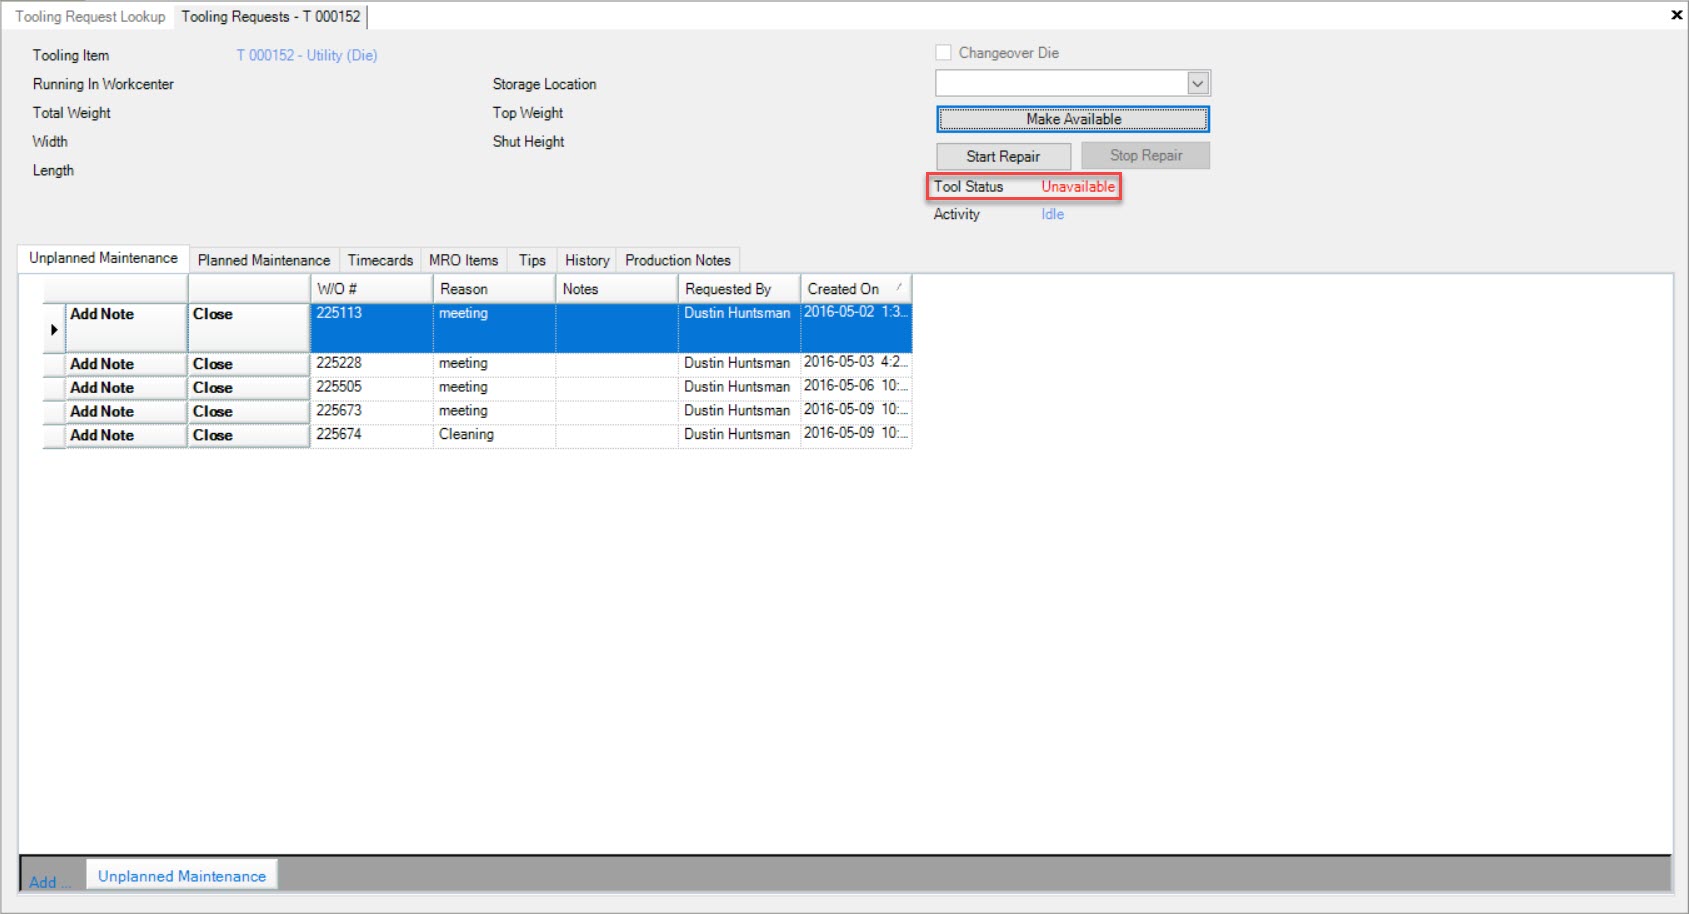
In the top right-hand corner of the Tooling Request screen is the capability to change the current status of a tool. Click on the  button
to change the status of a tool to “Unavailable”. Similarly, click on the
  button to change a tool”s status to available. This will display the status
in the workcenter planning and workcenter operator screens.
Managing Tooling Requests
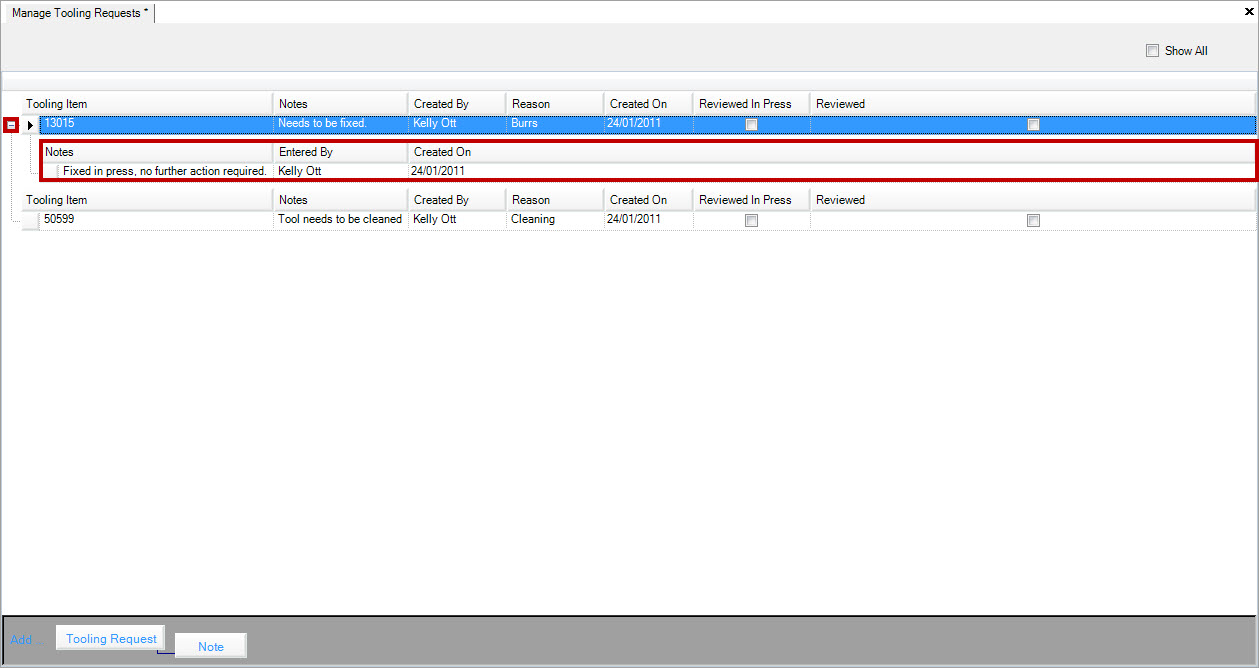
Tooling Requests are managed in the ShopEdge system by navigating to the |images/tooling.jpg| button, and then select the |images/managetoolingrequests.jpg| option. This will open the “Manage Tooling Requests Screen”.
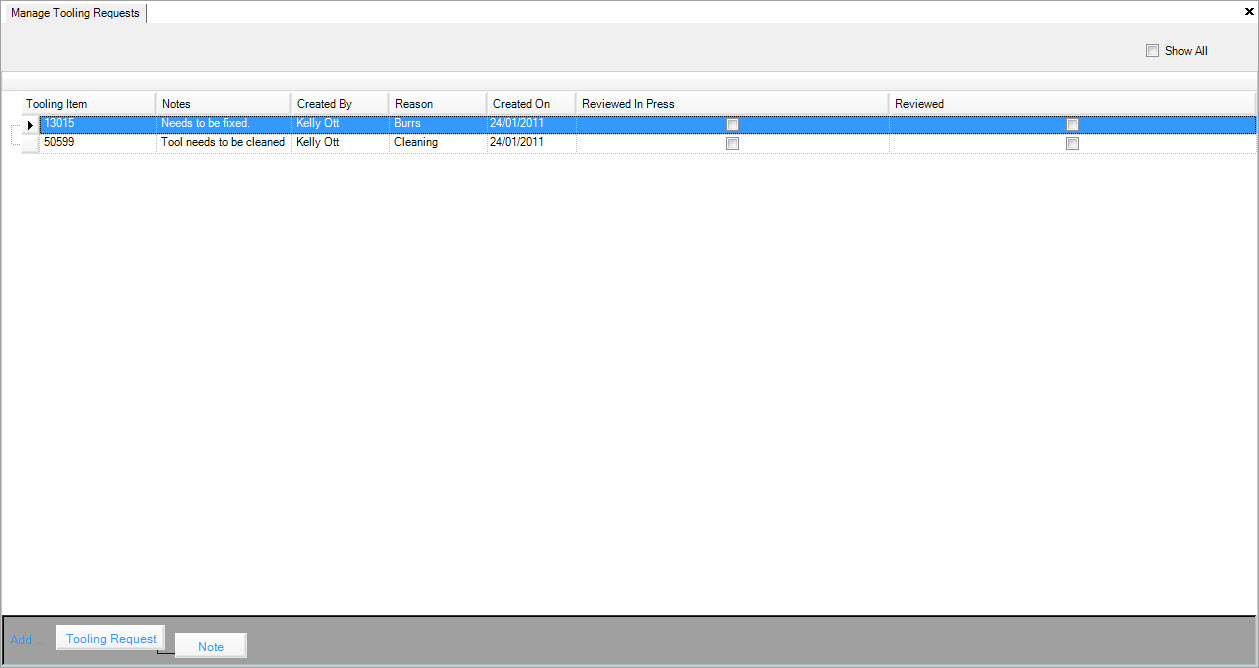
Here the incoming ‘Tooling Requests’ from the production floor can be reviewed and where the reviewer (Tool Room Manager) determines if the tooling item needs repairs and is moved to the ‘Tooling Requests’ screen (for repairs) or remains on ‘available’ status.
The ‘reviewer’ must check-off the review’ box (either “Reviewed In Press” or “Reviewed”) for the request show up in the ‘Tooling Requests’ to have repairs recorded against it.

The reviewer may also double click on a row to have the ‘Tooling Requests’ window open; the user is now able to see all of the open requests for that tooling item.
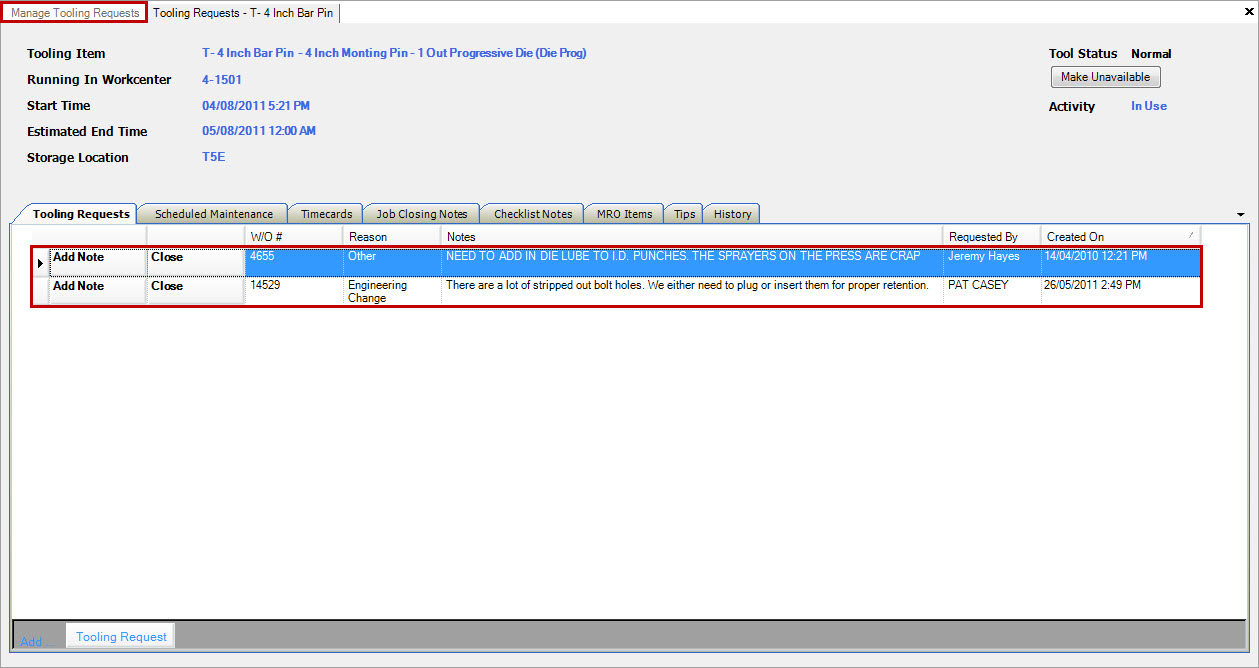
Only after you save your changes are the requests actually moved for this screen into the ‘Tooling Requests’ screen.
Closing a Tooling Request
You have the option of closing a tool room request directly on the “Manage Tooling Requests” screen. Right click on the appropriate row and select “Close Request” from the options.

This will open the “Close Tooling Request” screen.

Select your name (or the employee”s name) from the drop down menu and fill out the note in the text box provided. Click on the  button to save your closing note.
The “Reviewed” check box will automatically be selected. Save your changes before exiting the screen.
Adding a Tool Room Note to a Request
To add a note to an tooling request right click on the appropriate row and select “Add Tool Room Note” from the options.

This will open the “Add Tooling Request Note” screen.

Select your name (or the employee”s name) from the drop down menu and fill out the note in the text box provided. Click on the  button to save your note. You can view it and existing notes by expanding the
request row using the + button on the left side of the screen.
Note
***It is also possible to add 1 or more notes by selecting the ‘Tool Room Notes’ button at the bottom of the screen.***
Adding a Tooling Request
It is also possible for someone in the tool room to enter a ‘tooling request’ by selecting the  button at the bottom of the screen. The “Tooling Request” window will appear.
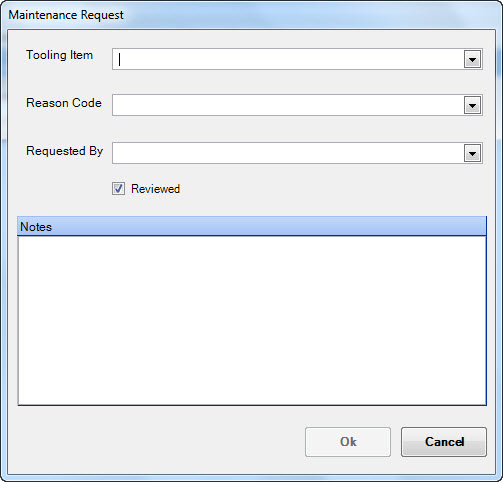
Use the drop down boxes to assist with the selections for each of the entry fields and click the  button when completed. When this is completed, the request will be added as a row to the ‘Manage Tooling request’ window.
 button.