Manage Work Order Requests
When a Work Order Request has been created in the system, users can then view, edit, or close them from the Manage Work Order Requests lookup screen.
Viewing a Work Order Request
Once a Work Order Request has been created, users can then view them on the Manage Work Order Requests screen.
To view Work Order Requests, navigate to the  tab and click on the
 ![]() icon.
icon.
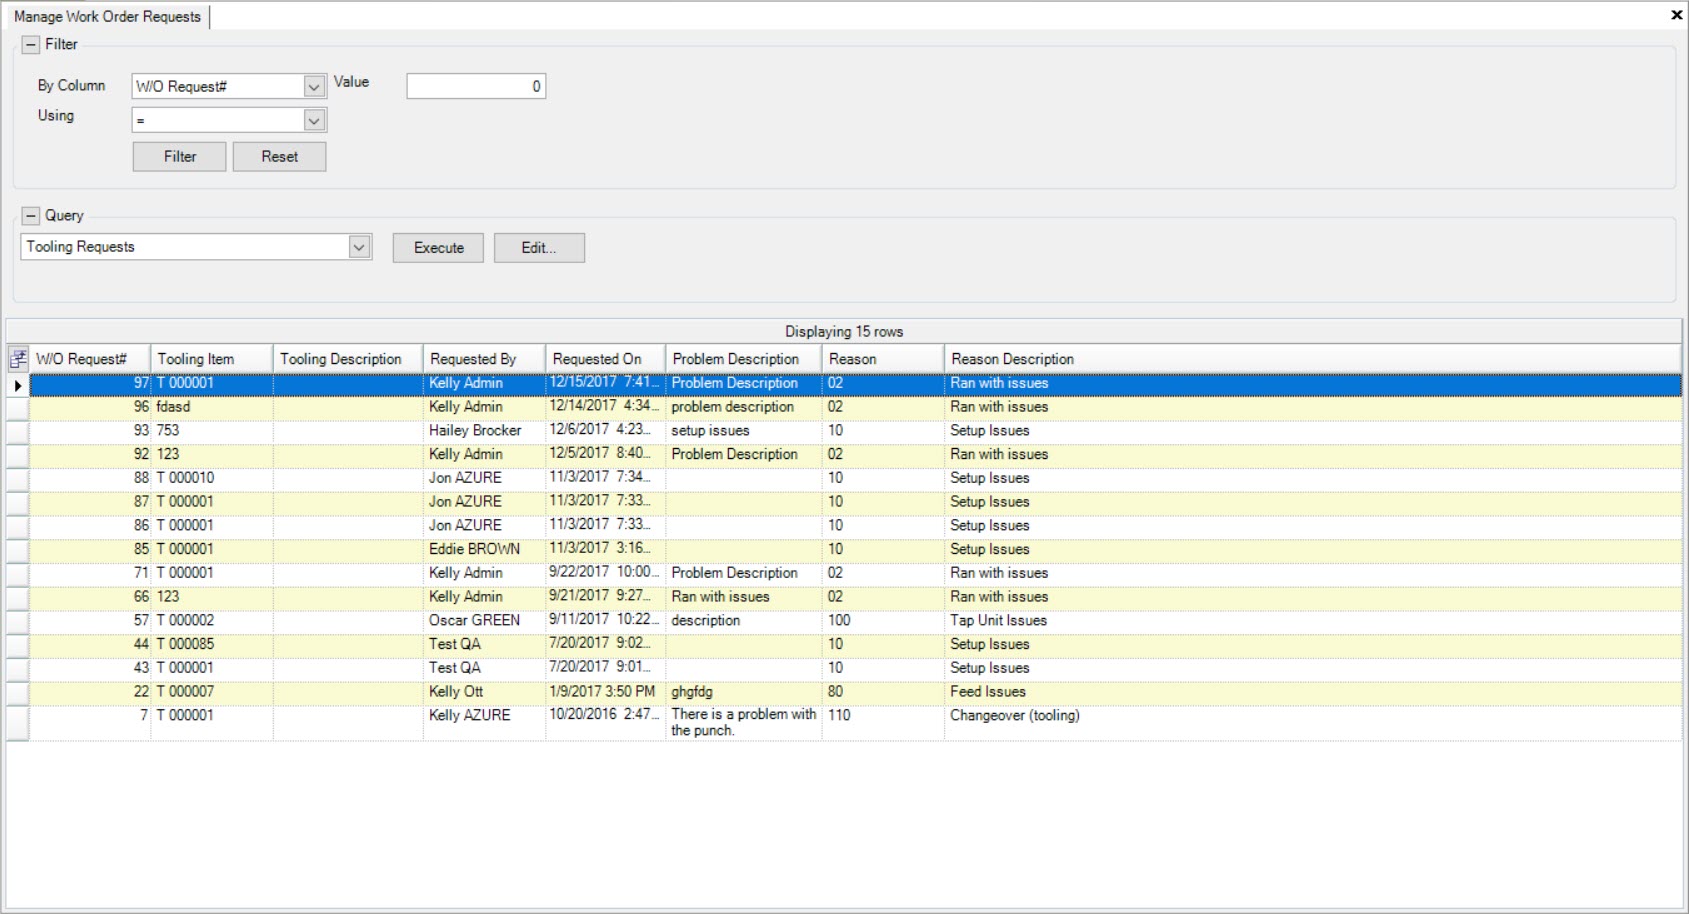
The Manage Work Order Requests lookup screen will appear, displaying all Work Order Requests.
Opening a Work Order Request
To open a Work Order Request, navigate to the  tab and click on the
 ![]() icon.
icon.
The Manage Work Order Requests lookup screen will appear, displaying all Work Order Requests.

Locate and double-click on the row of the Work Order Request you wish to open.
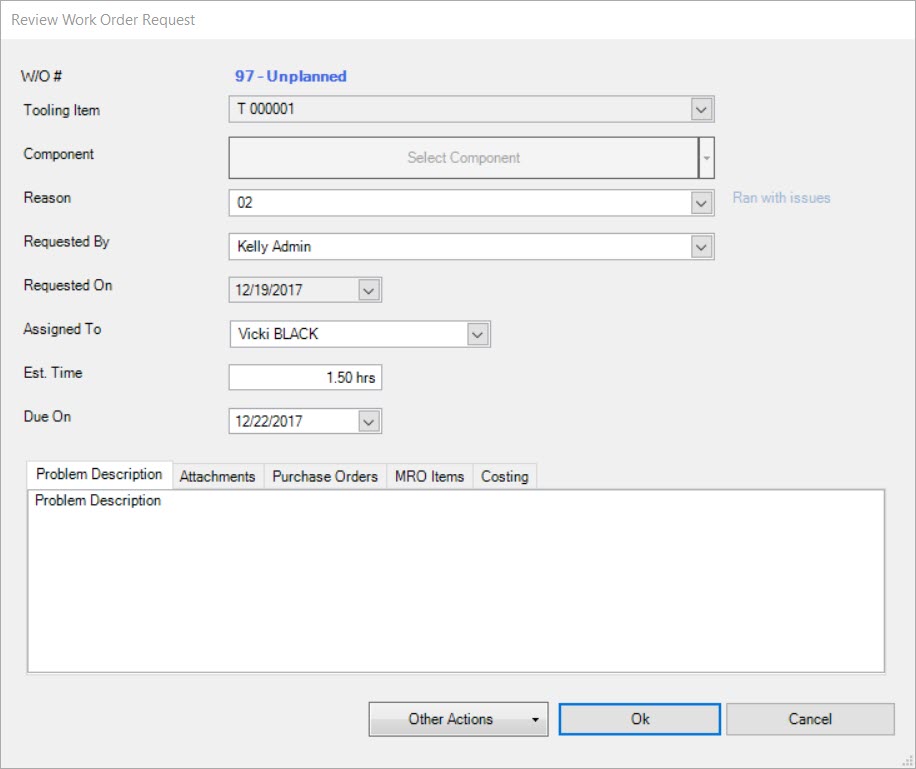
The Review Work Order Request window will appear.
Problem Description Tab
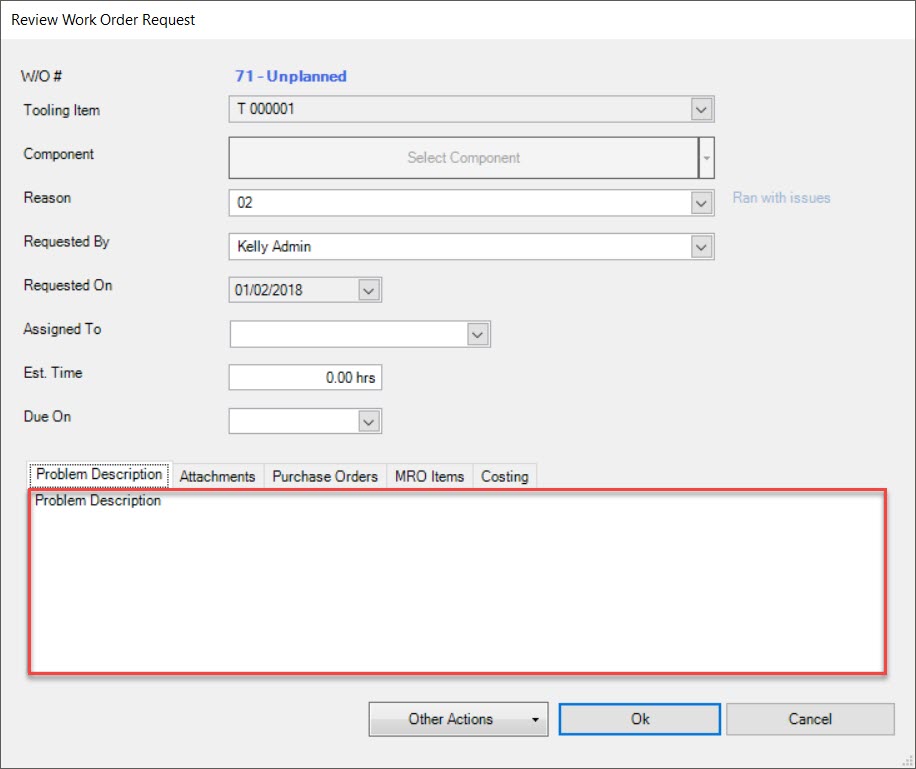
The Problem Description tab should be completed when the Work Order Request was first created but users who manage Work Order Requests have the ability to add and/or edit the Problem Description.
To do so, make sure to select the  tab located on the Review Work Order Request window.
Users can then add and/or edit to the existing Problem Description by using the available textbox. To save any changes, click on the  button.
Attachments Tab
Users who manage Work Order Requests have the ability to add or remove attachments.
To do so, make sure to select the  tab located on the Review Work Order Request window.
To add an attachment, click on the  button.
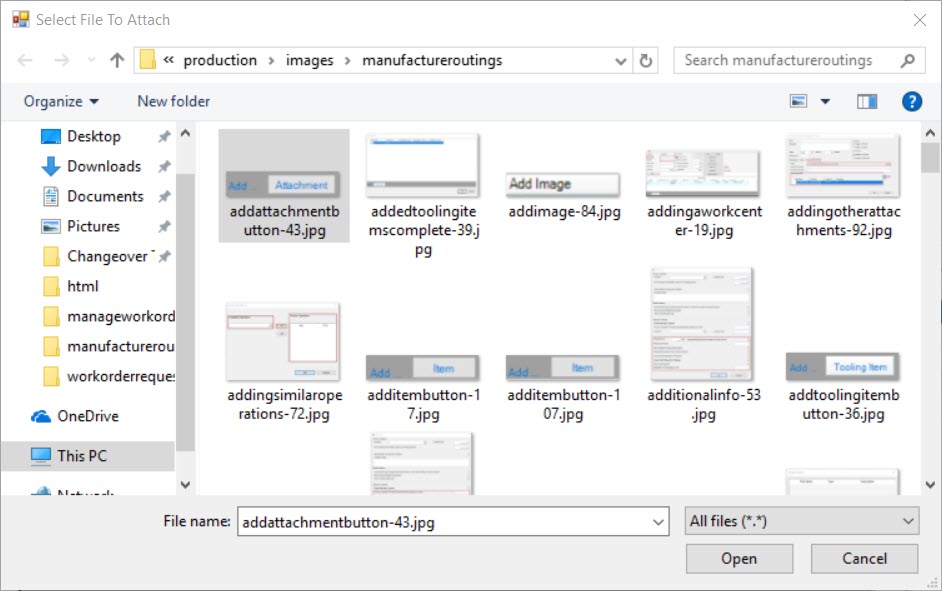
The Select File To Attach window will appear where users can select an attachment from their computer. Once an attachment has been selected, click on the
 button.
The selected attachment will be added to the Work Order Request.
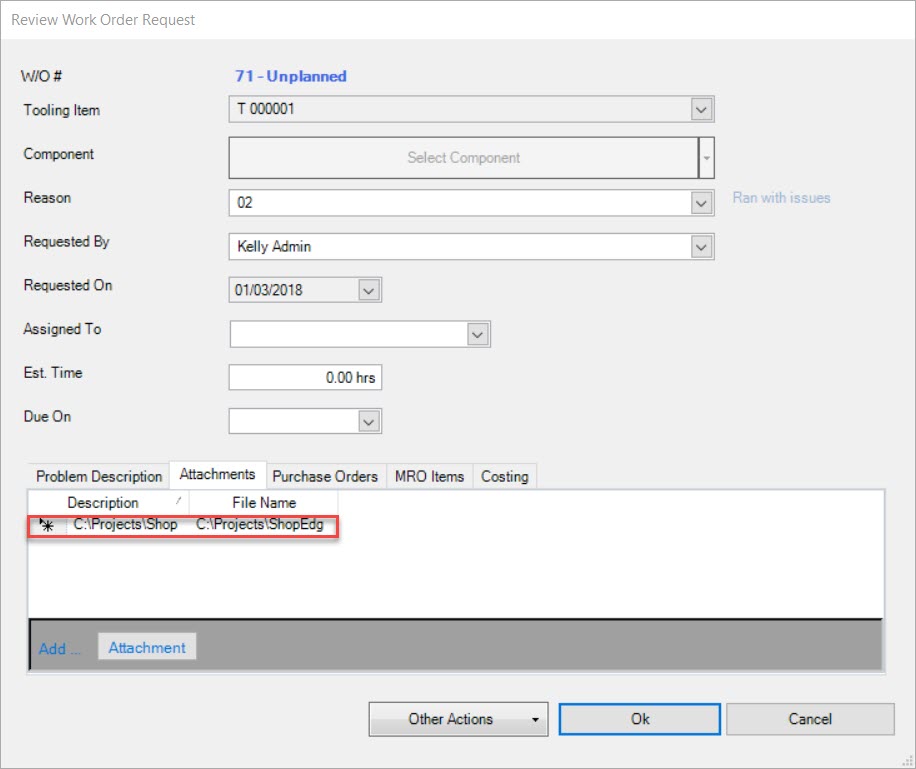
To remove attachments from a Work Order Request, simply highlight the appropriate row of the attachment you wish to delete. Use your Delete key and the selected attachment will be removed.
Once the appropriate attachments have been added and/or removed, click on the  button to save your changes.
Purchase Orders Tab
Users who manage Work Order Requests have the ability to add or remove Purchase Orders.
To do so, make sure to select the  tab on the Review Work Order Request
window.
To add a Purchase Order to a Work Order Request, click on the  button.
The Purchase Order Lookup window will appear where users can select Purchase Order(s) to add. Once the appropriate Purchase Order(s) have been selected, click on the
 button.
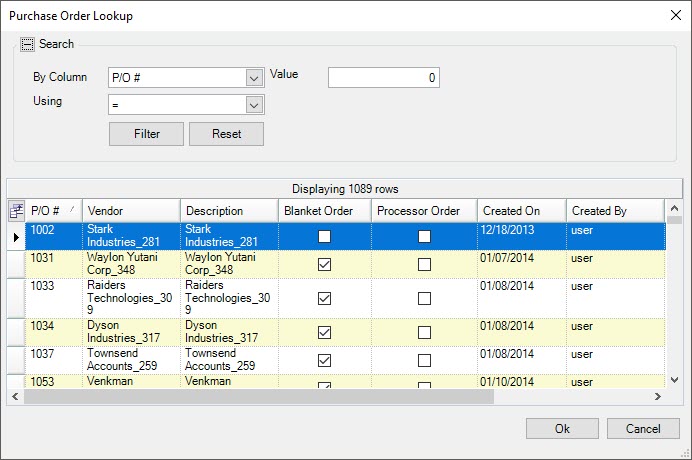
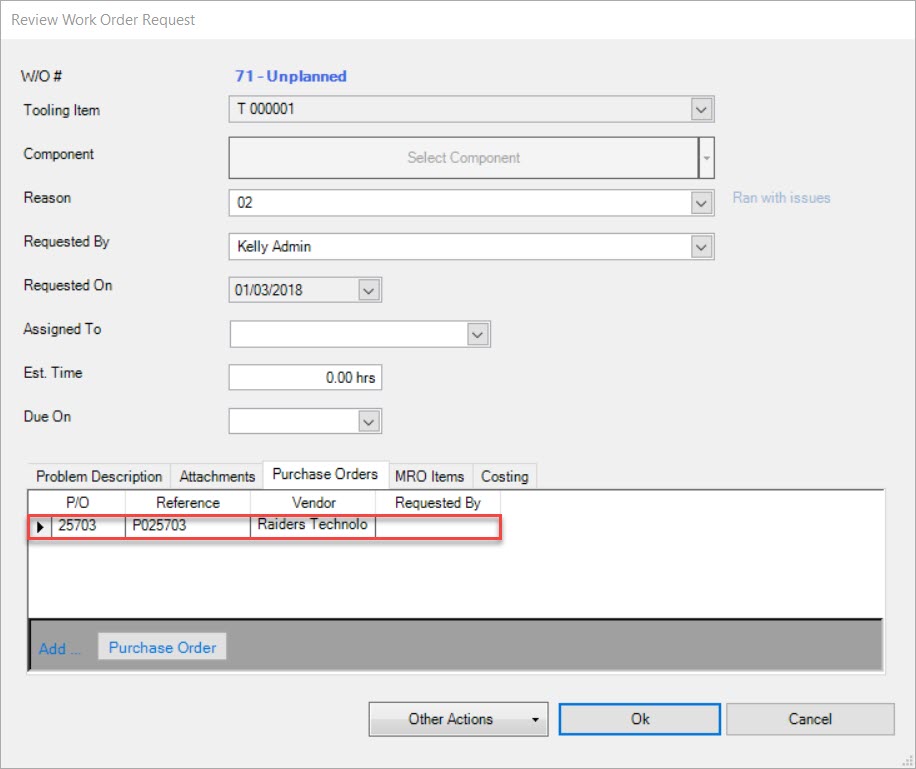
The selected Purchase Order(s) will be added to the Work Order Request.
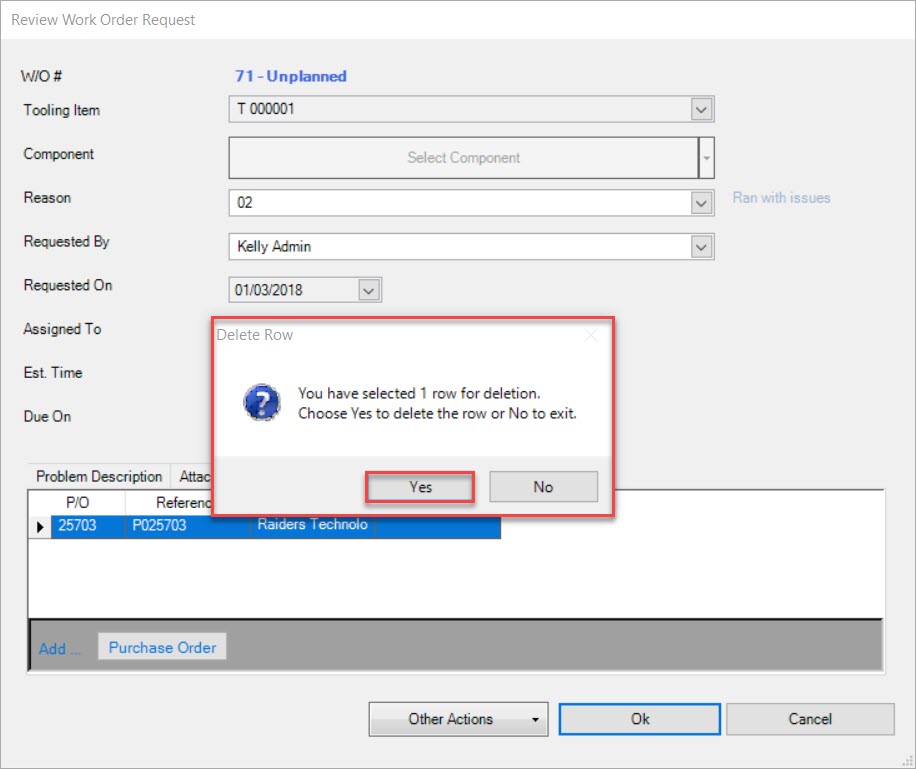
To remove a Purchase Order from a Work Order Request, simply highlight the appropriate row of the Purchase Order you wish to delete. Use your Delete key and when the system prompts you, select Yes.
The selected Purchase Order will be deleted. Click on the  button to save your changes.
MRO Items Tab
Users who manage Work Order Requests have the ability to add or remove MRO Item.
To do so, make sure to select the  tab on the Review Work Order Request window.
To add an MRO Item to a Work Order Request, click on the  button.
The Item Lookup window will appear where users can select the appropriate MRO Items. Once the appropriate MRO Item(s) have be selected, click on the
 button.
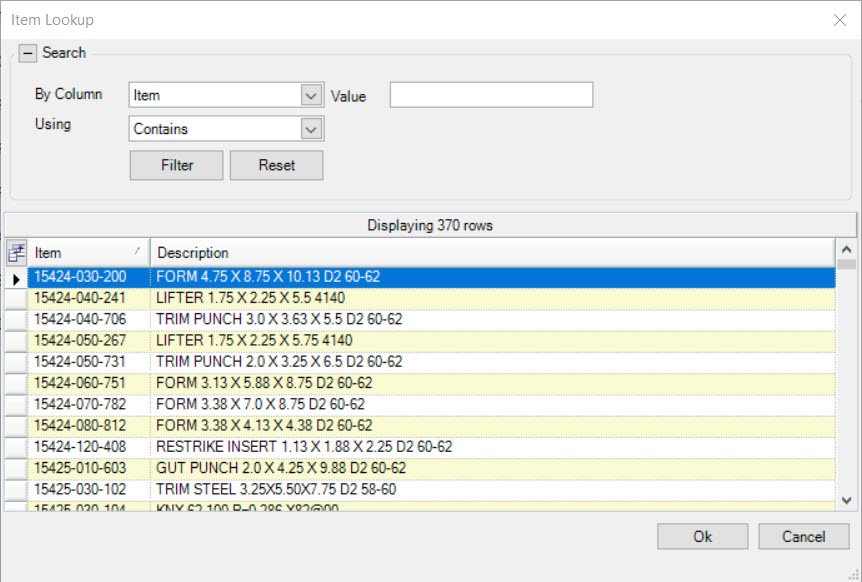
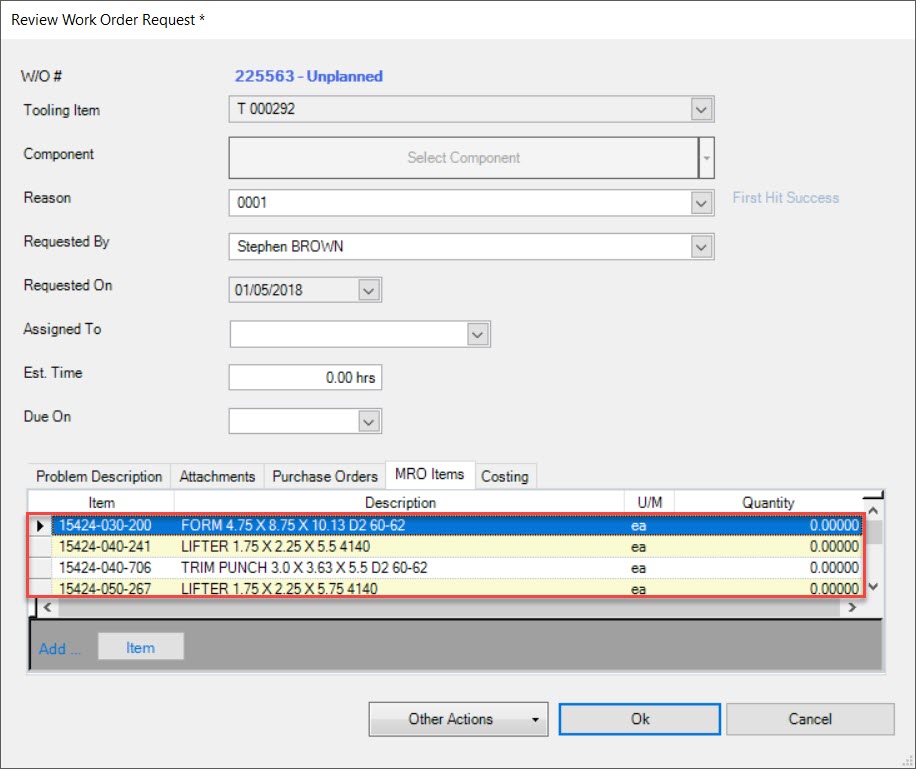
The selected MRO Item(s) will be added to the Work Order Request.
Note
Once an MRO Item has been added to a Work Order Request, users can add or edit the quantity by entering in a value in the textbox under the Quantity column.
To remove an MRO Item from a Work Order Request, simply highlight the row of the MRO Item you wish to delete. Use your Delete key and when the system prompts you, select Yes.
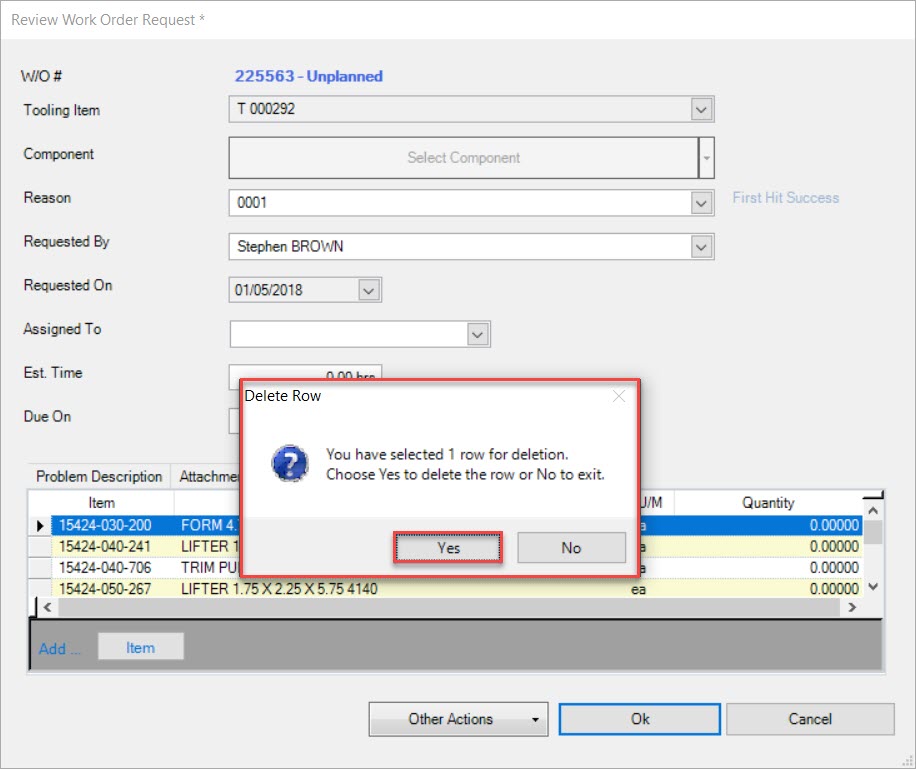
The selected MRO Item will be deleted.
To save your changes, click on the  button.
Adding Costing to a Work Order Request
Users who manage Work Order Requests have the ability to add costing.
To do so, make sure to select the  tab on the Review Work Order Request window.
Select an Item using the available drop-down menu and enter in a Production Job #.
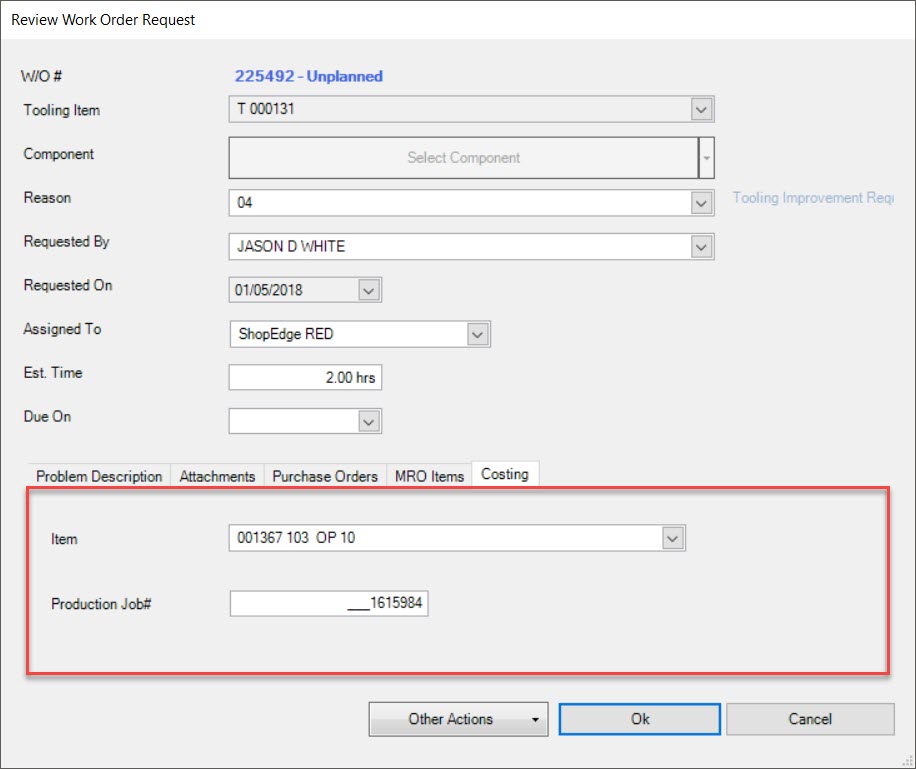
Once the appropriate information has been selected and entered, click on the  button to save.
Closing a Work Order Request
To close a Work Order Request, navigate to the  tab and click on the
 ![]() icon.
icon.
The Manage Work Order Requests lookup screen will appear, displaying all Work Order Requests.

Locate and double-click on the row of the Work Order Request you wish to close.
The Review Work Order Request window will appear.

Click on the  button and select the Close option.
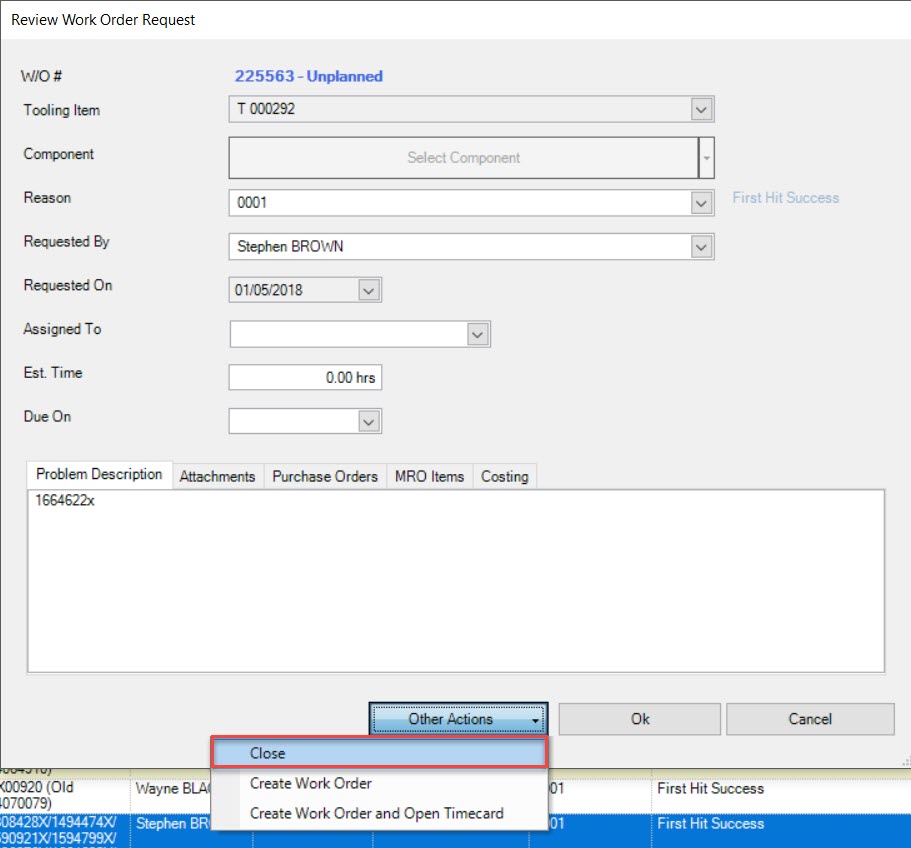
The Close Work Order window will appear.
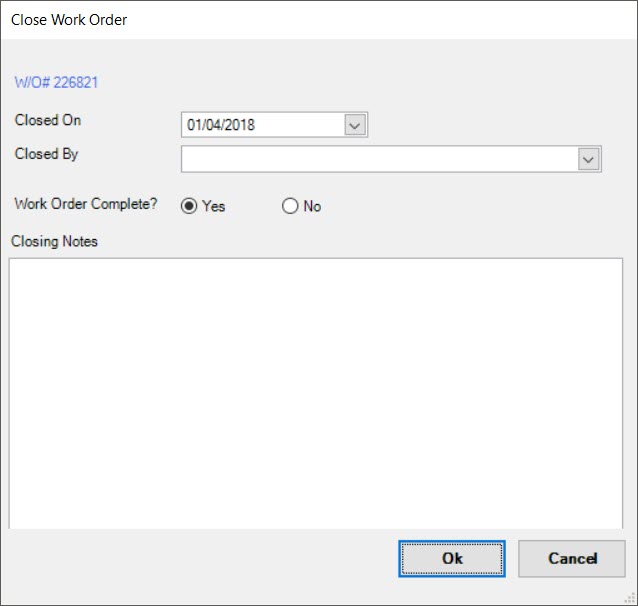
Users must select the Closed On date and Closed By using the available drop-down menus. Users must also indicate if the Work Order is complete and enter in Closing Notes.
Once the appropriate information has been completed, click on the  button.
The Close Work Order window will close and a confirmation window will appear to verify that the Work Order Request has been closed.
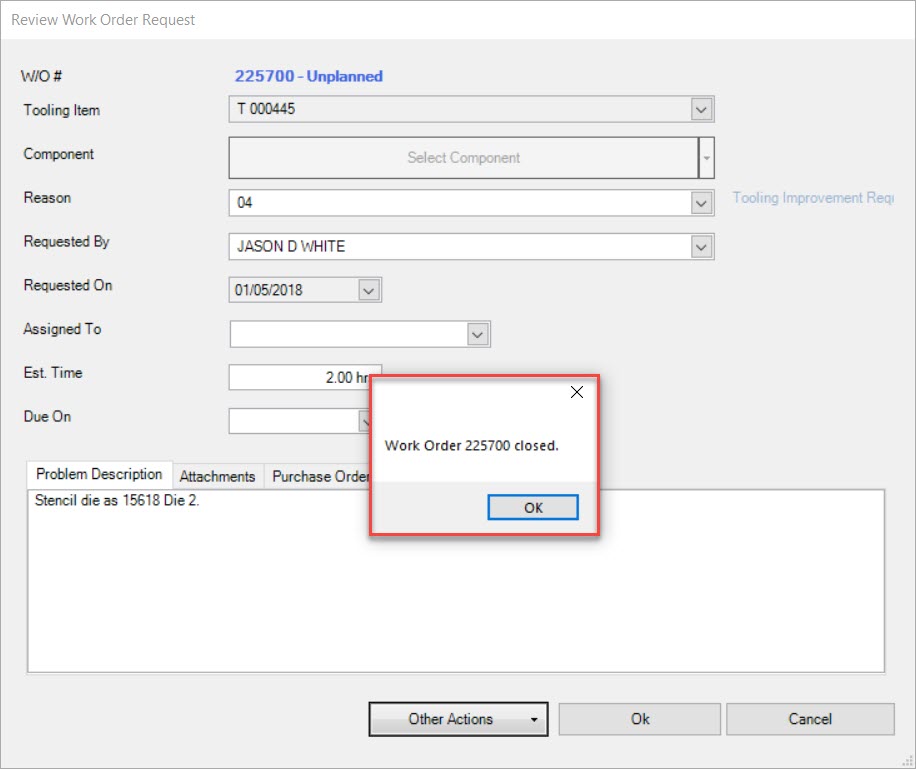
Click on the  button. The Review Work Order Request window will close and the Work Order Request will be removed from the
Manage Work Order Requests lookup screen.
Creating a Work Order for a Work Order Request
To create a Work Order for a Work Order Request, navigate to the  tab and click on the
 ![]() icon.
icon.
The Manage Work Order Requests lookup screen will appear, displaying all Work Order Requests.

Locate and double-click on the row of the Work Order Request you wish to create a Work Order for.
The Review Work Order Request window will appear.

Click on the  and select the Create Work Order option.
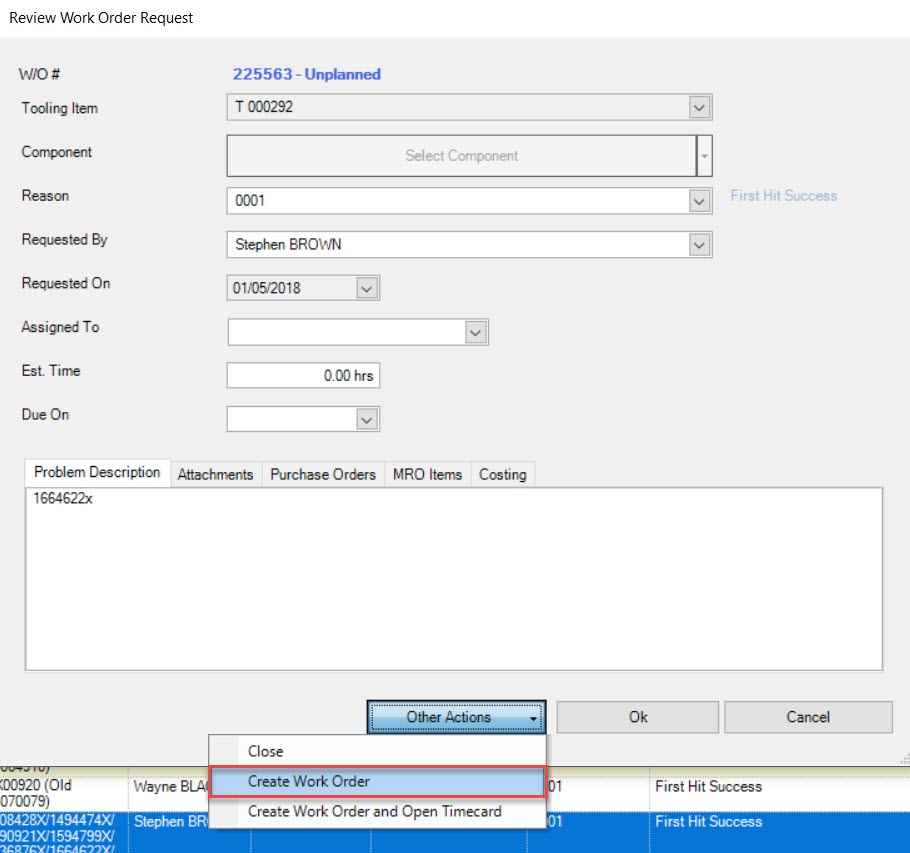
A confirmation window will appear to verify that a Work Order has been created for the selected Work Order Request.
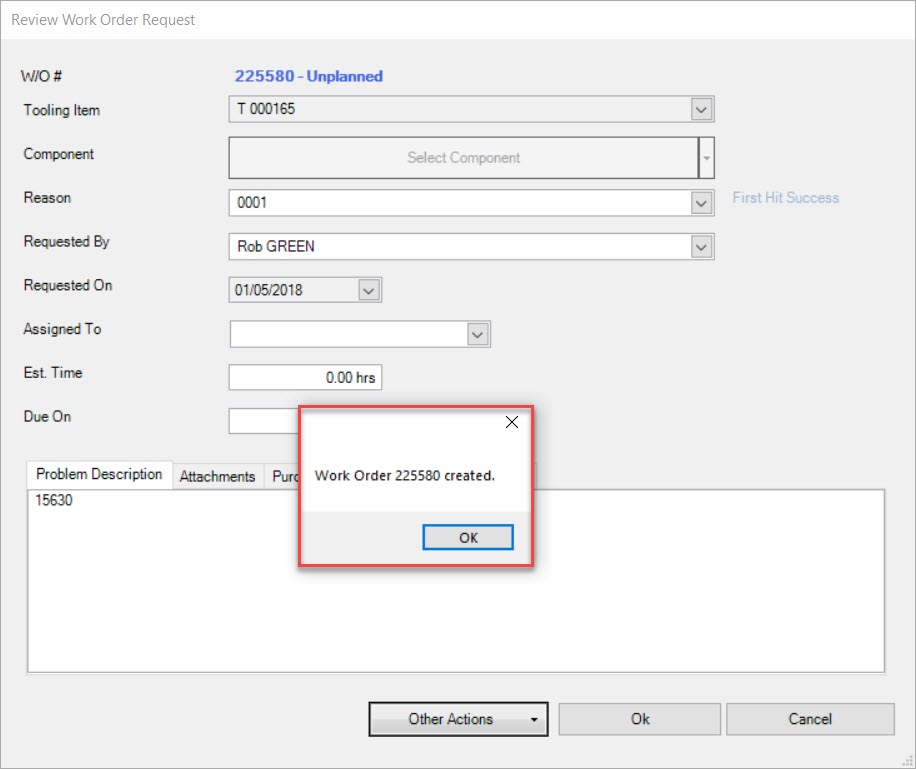
Click on the  button. The Review Work Order Request window will close and the Work Order Request will be removed from the
Manage Work Order Requests lookup screen.
Users will be able to find the created Work Order by navigating to the  tab and clicking on the
 icon.
icon.
Creating a Work Order and an Open Timecard for a Work Order Request
TO create a Work Order and an open Timecard for a Work Order Request, navigate to the  tab and click on the
![]() icon.
icon.
The Manage Work Order Requests lookup screen will appear, displaying all Work Order Requests.

Locate and double-click on the row of the Work Order Request you wish to create a Work Order and an open Timecard for.
The Review Work Order Request window will appear.

Click on the  and select the Create Work Order and Open Timecard option.
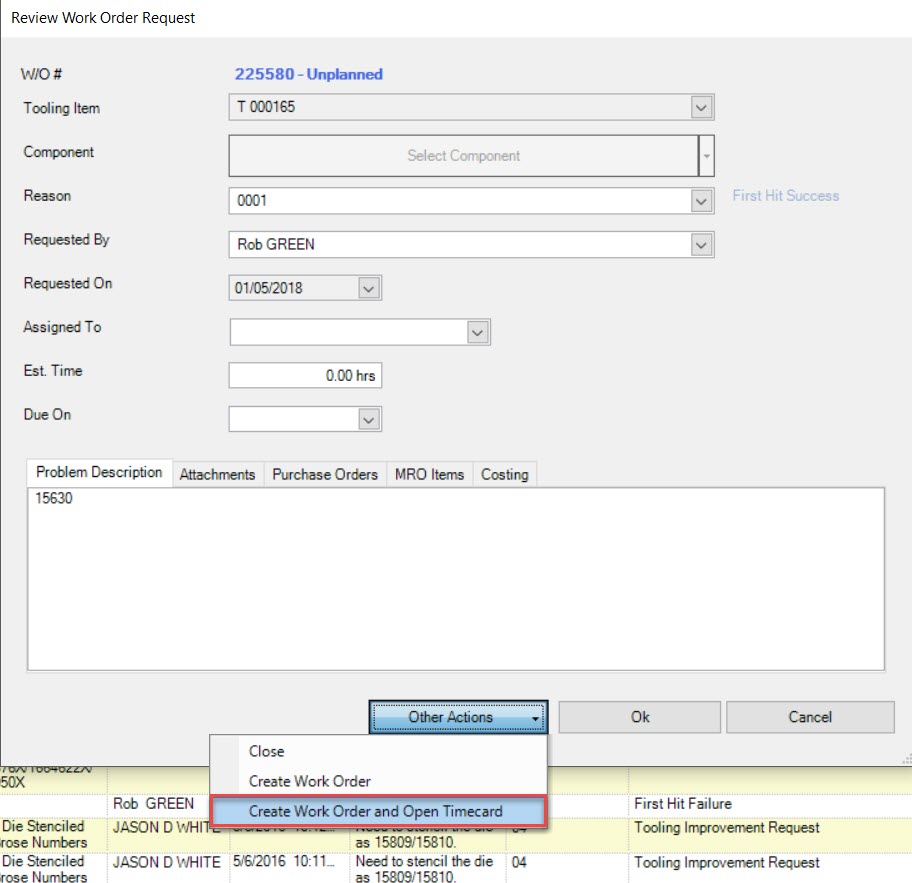
A confirmation window will appear to verify that a Work Order has been created for the selected Work Order Request.

Click on the  button. The Review Work Order Request window will close and the Work Order Request will be removed from the
Manage Work Order Requests lookup screen.
A new Tooling Time Reporting screen will open with the Work Order attached to it. Users must complete the appropriate fields and save.
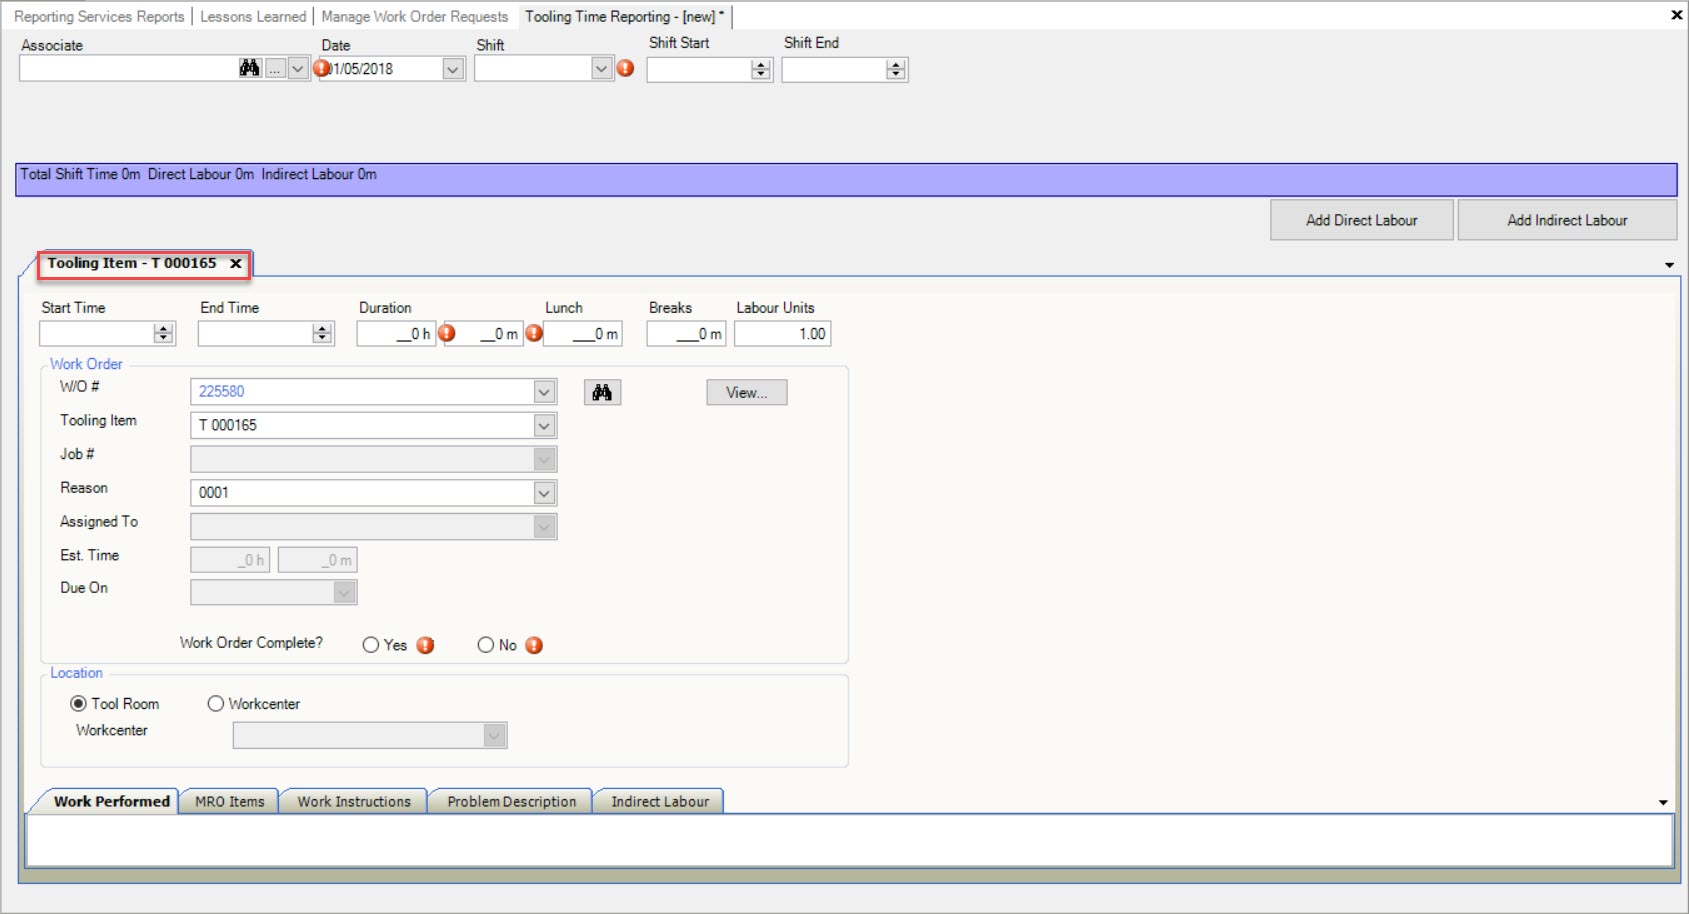
For more detailed information on how to complete a Tooling Timecard, please navigate to Tooling > Timecard Entry.