Payments
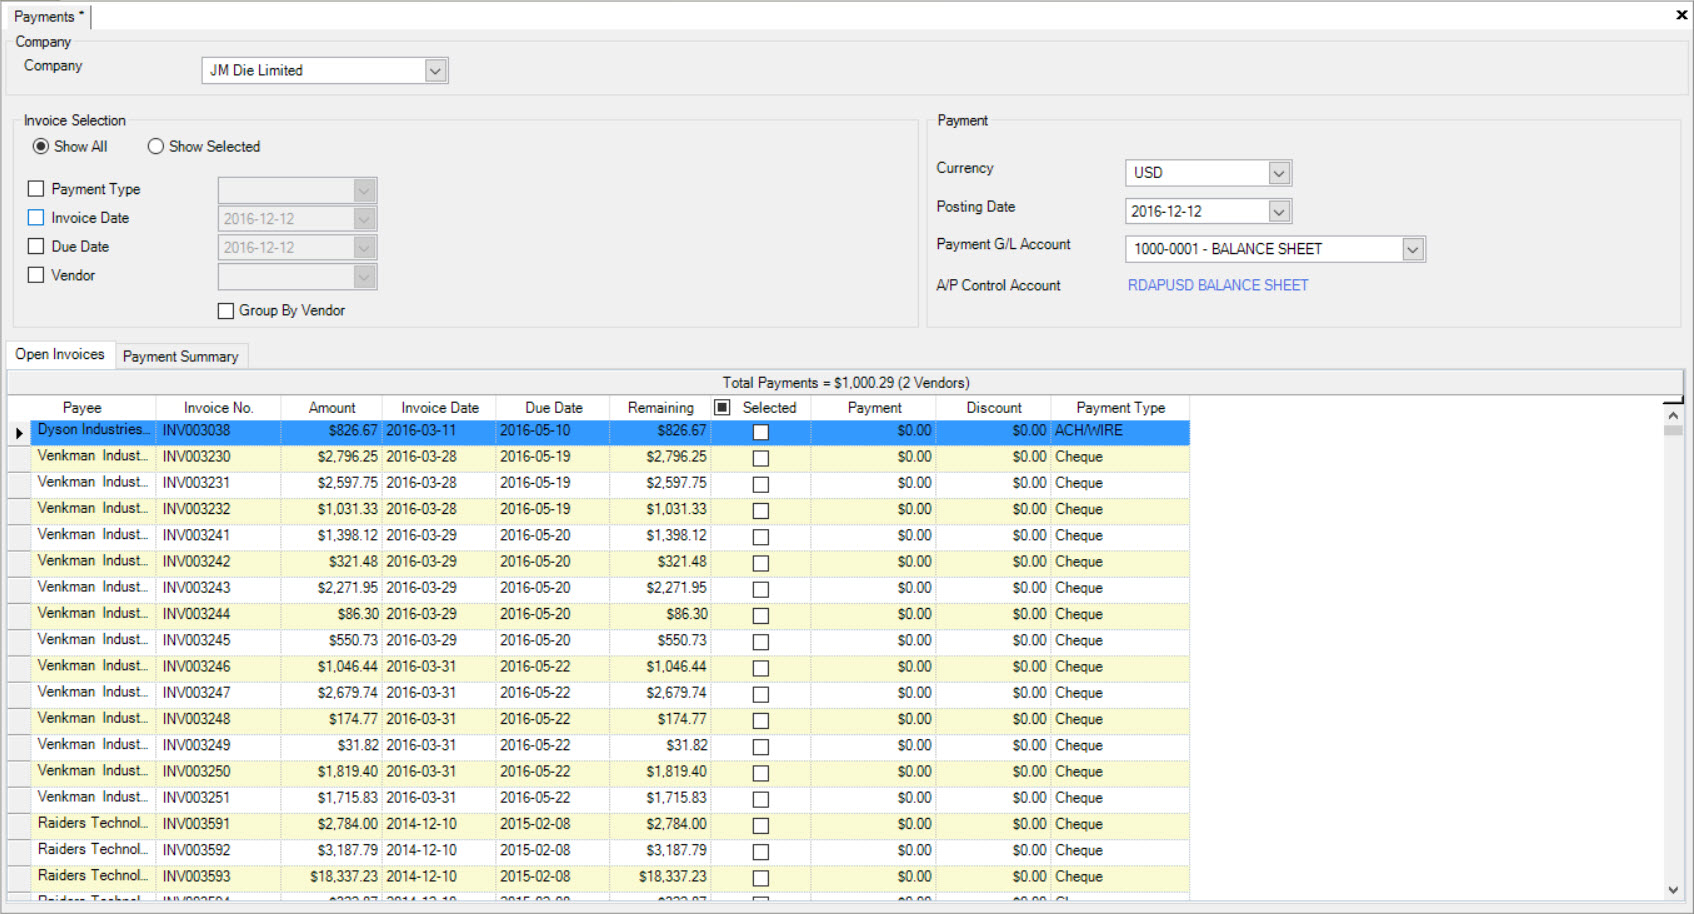
The Payments screen allows you to select Vendor Invoices for payment. Open Payments can be filtered, sorted, and grouped to make it easier to select Invoices for payment. Payments can be made using several different payment types, such as Cheques, and Electronic Payments. A payment summary is displayed that groups the payments by type, along with the payment total, and the number of payments that will be made.
To open the Payments screen, navigate to the  tab and click on the
 ![]() icon. The Payments screen will be displayed.
icon. The Payments screen will be displayed.
Note
Payment Types are created and maintained under Vendors > Admin. Once a Payment Type* has been created,users can then add it to a Vendor on the Vendor detail screen.
Selecting Payments
To select an Invoice for payment in the Payments screen, navigate to the  tab and click on the
 ![]() icon. The
Payments screen will be displayed.
icon. The
Payments screen will be displayed.

Click on the checkbox in the Selected column to select the appropriate Invoice(s) for payment.
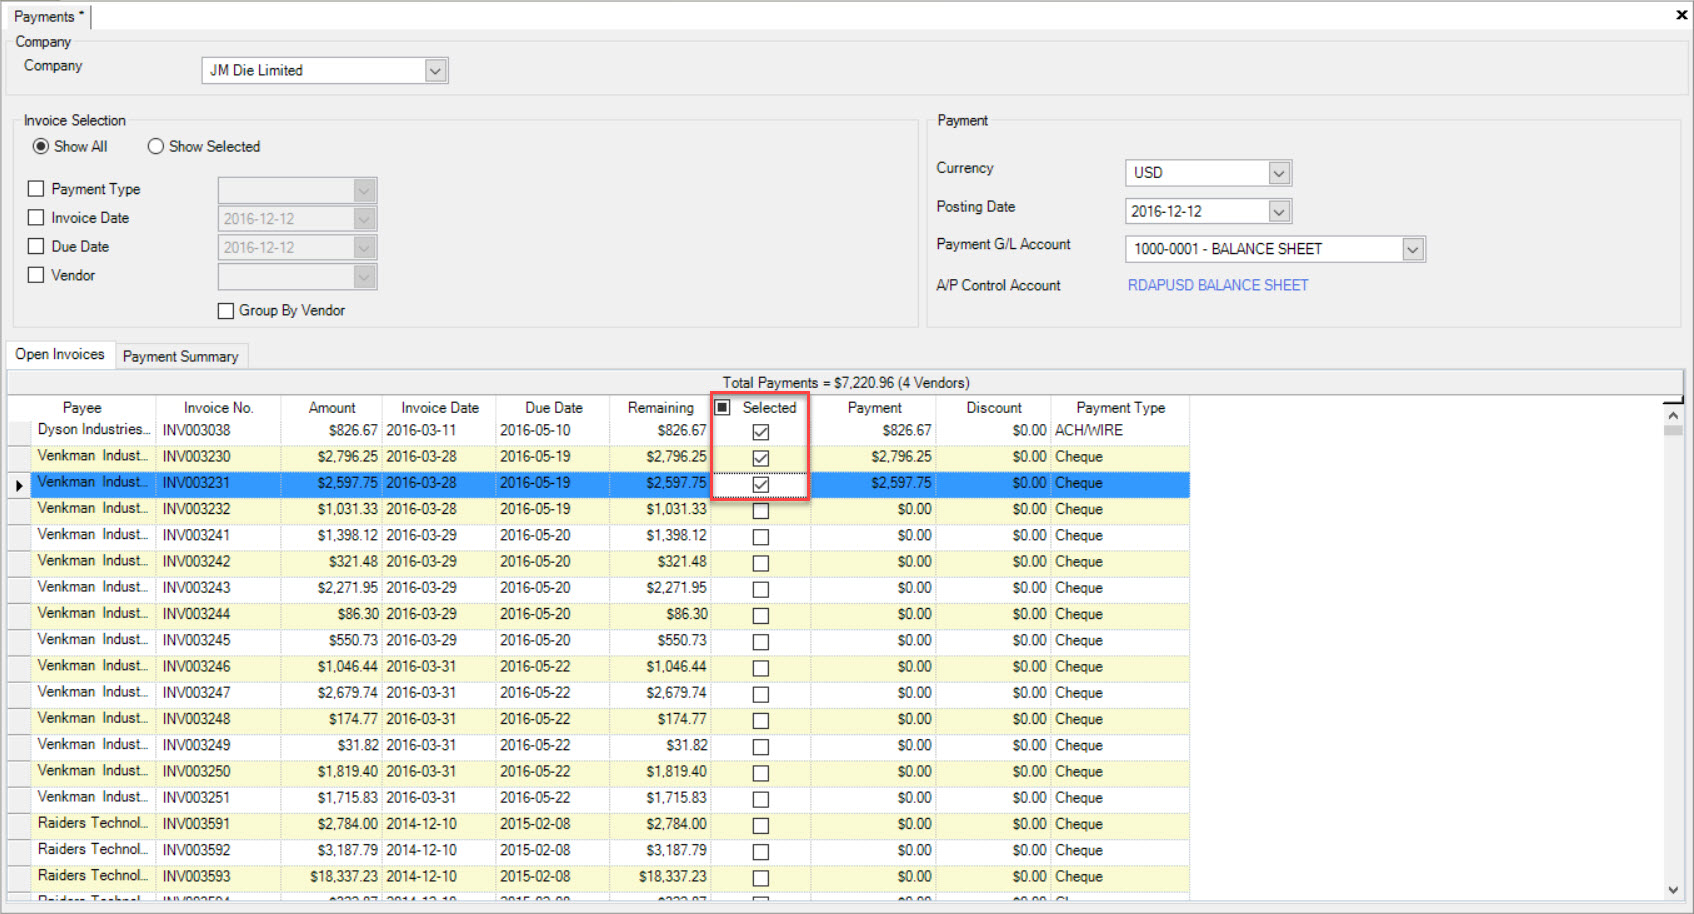
The Payment amount column will default to the Remaining amount for the Invoice.
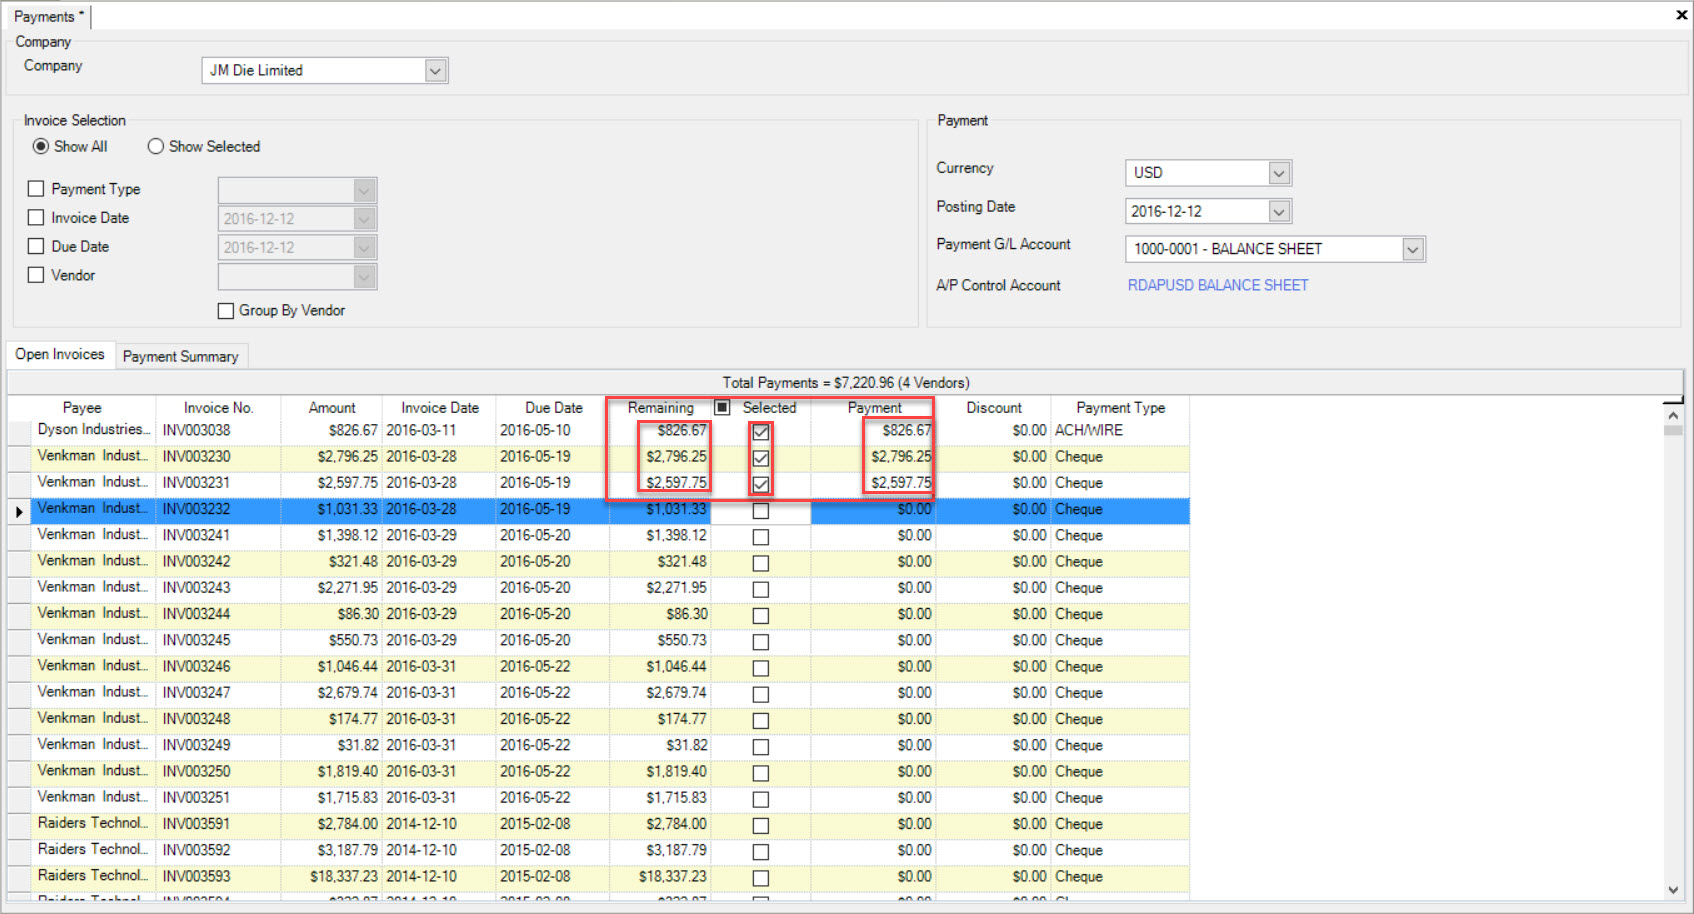
If you want to make a partial payment against the Invoice, and leave it open, simply change the value in the Payment column to another amount.
You can also enter a discount amount in the Discount column to apply a discount to the Invoice. Discounts can also be automatically calculated if users have set up a Discount % and Discount Days on the Vendor Terms table, and have selected the Apply Discount? checkbox on the Vendor detail screen.
Note
The Payment amount cannot exceed the Remaining amount on the Invoice.
Note
You cannot enter a value in the Payment or Discount column until the Invoice has been selected for payment. Users can select multiple Invoices for payment at a time.
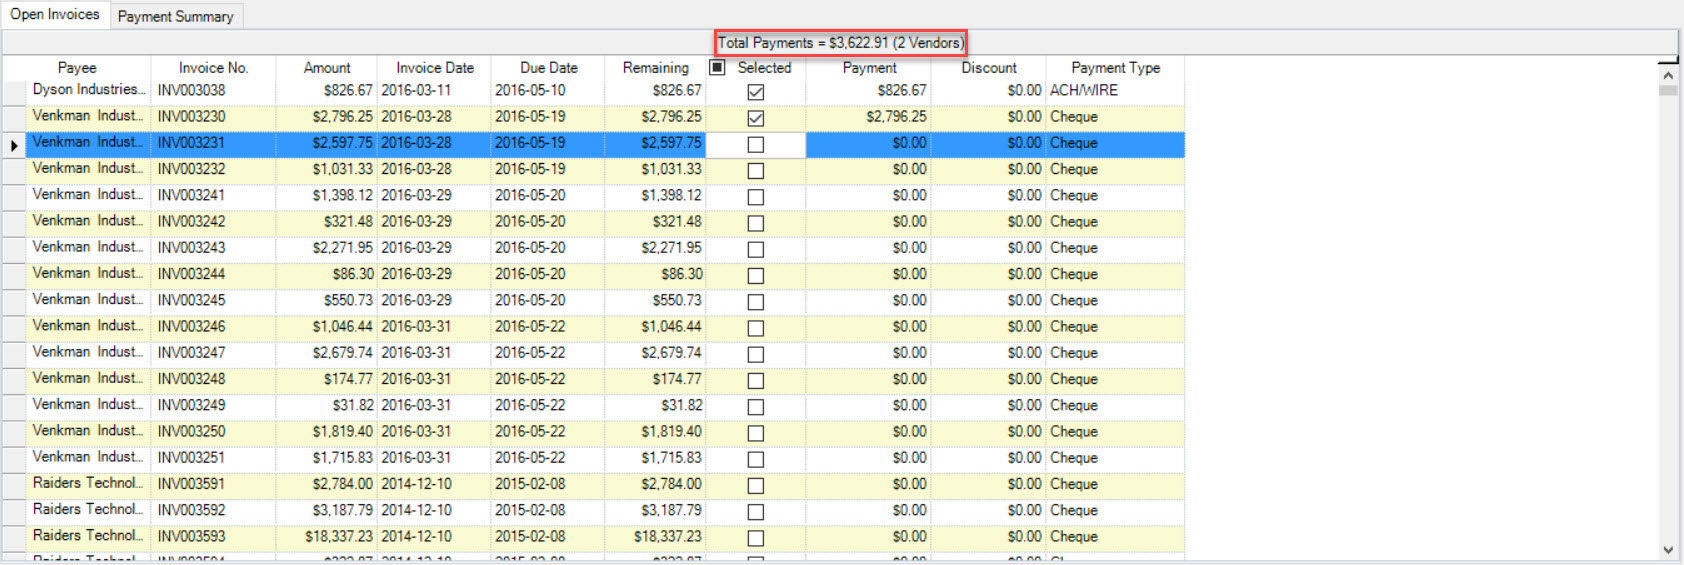
As Open Invoices are selected for payment, a summary of the total payments will display in the grid header. The summary shows the total amount of the payments selected, along with how many Vendors have been selected for payment.
Sorting, Filtering and Grouping Payments
You can sort the Open Invoices by clicking on any of the column headings in the Payments screen. You can sort by multiple columns by holding the Shift key while clicking on the column headings that you wish to sort on. To toggle between ascending or descending sort order, click on the column heading again.
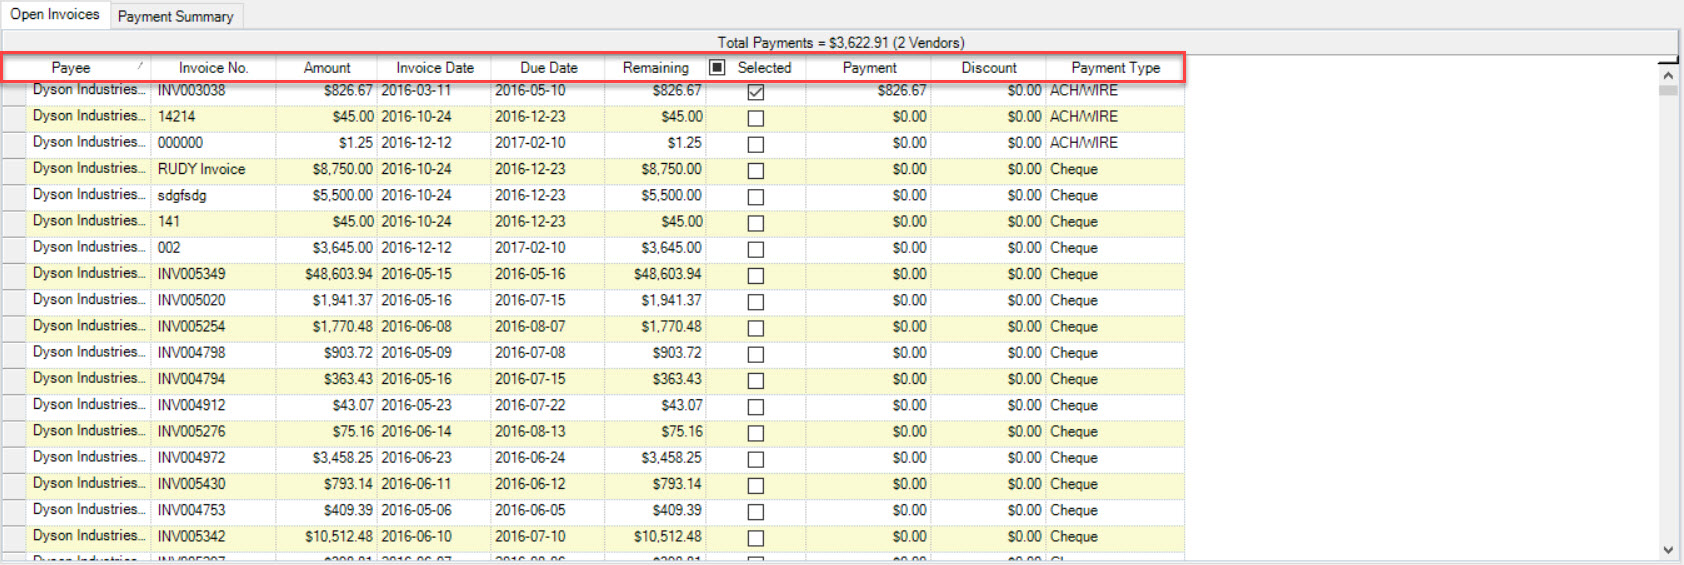
Several options exist to filter Open Invoices for selection. The available filter options are displayed under the Invoice Selection section.
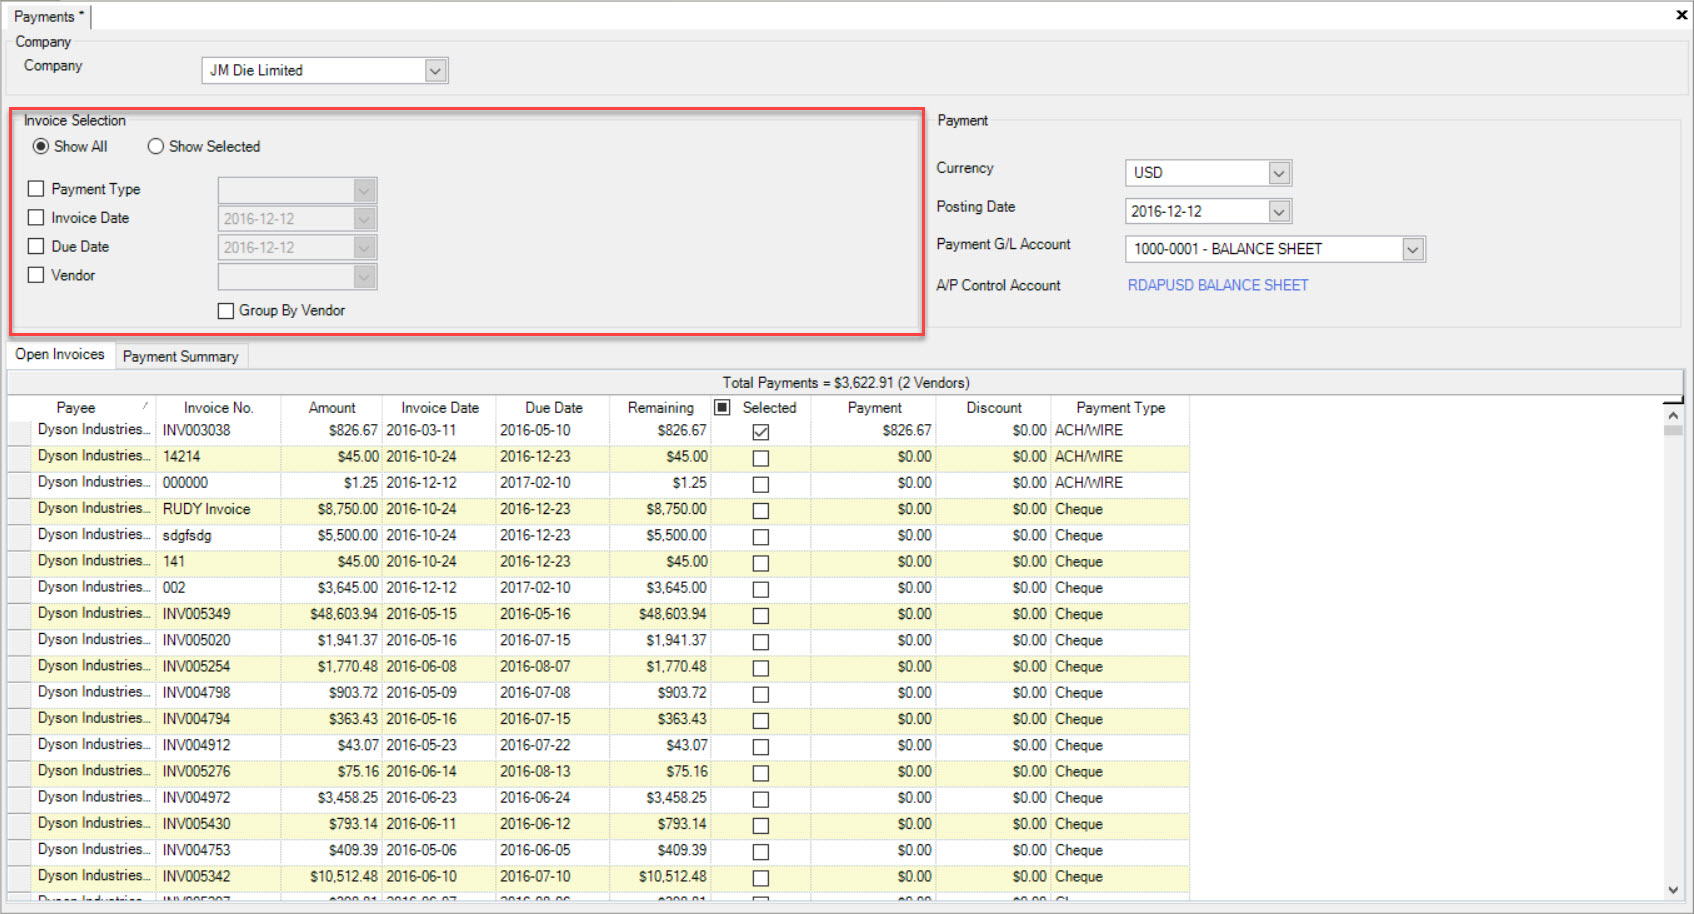
Selecting Show All will show all Invoices in the grid below, both selected and unselected.
Selecting Show Selected will show only the Invoices that have been selected for payment. Unselected invoices will not show.
You can filter by Payment Type, Invoice Date, Due Date, and/or Vendor by clicking the checkbox beside each option. You then have to select a value or date using the drop-down menu beside the option.
For instance, to show all Open Invoices due up until 2016-12-12, select the checkbox beside the Due Date filter option, and then select the date using the drop-down option beside the Due Date label.

Note
The list of Open Invoices will filter as soon as you select the date from the drop-down and will include all Invoices with a due date up to and including the date selected.
Note
To clear the filter, un-check all the filter options.
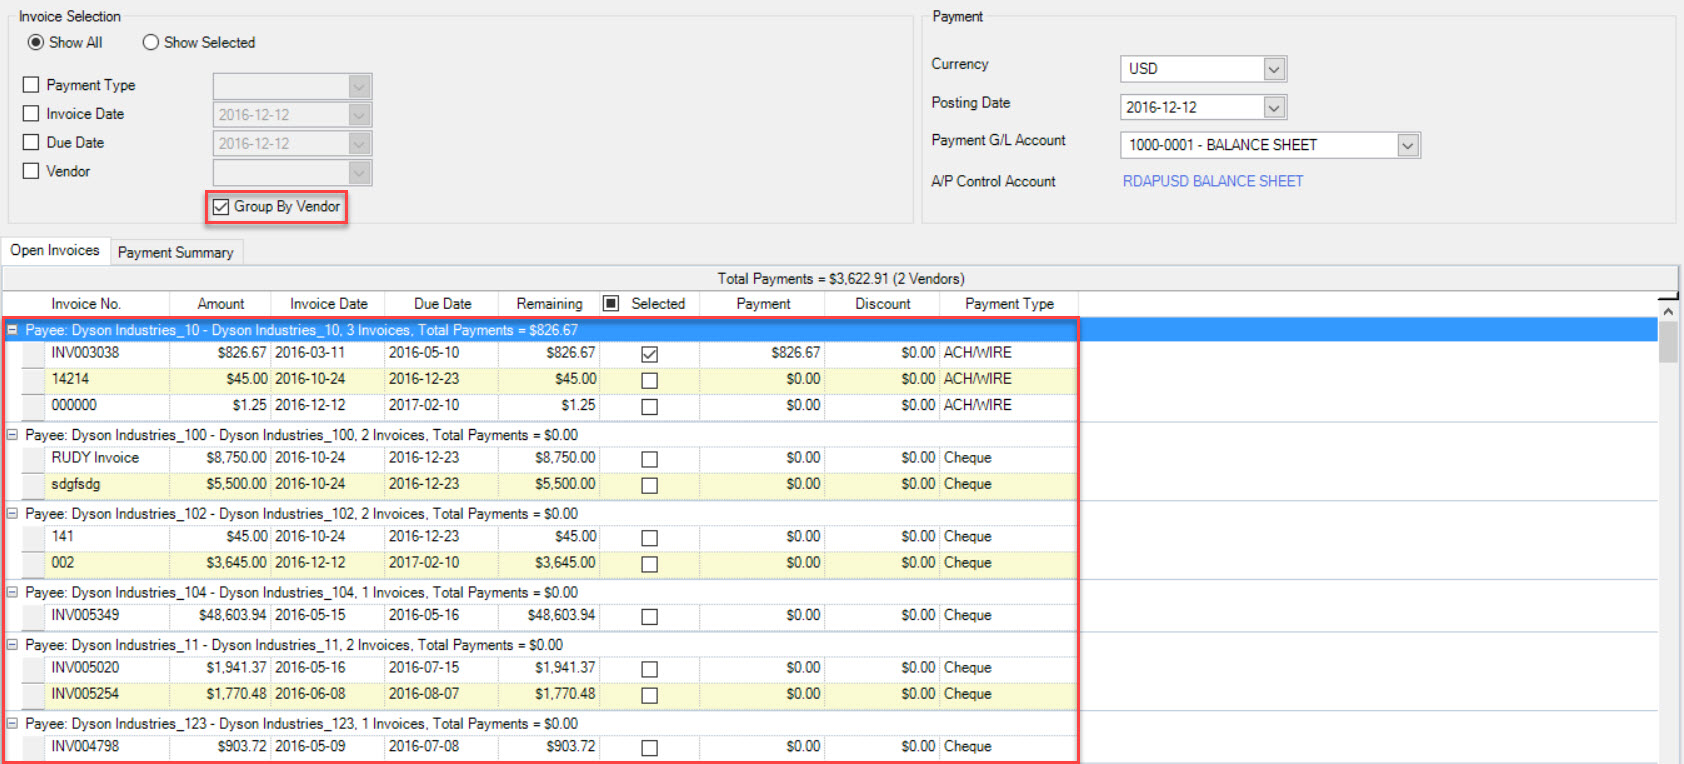
You can group Open Invoices by Vendor by selecting the Group By Vendor checkbox. By doing so, the Open invoices will display a summary (by clicking on the plus sign) showing the total Invoices for each Vendor, along with a total of the payments selected.
Selecting Payment Types
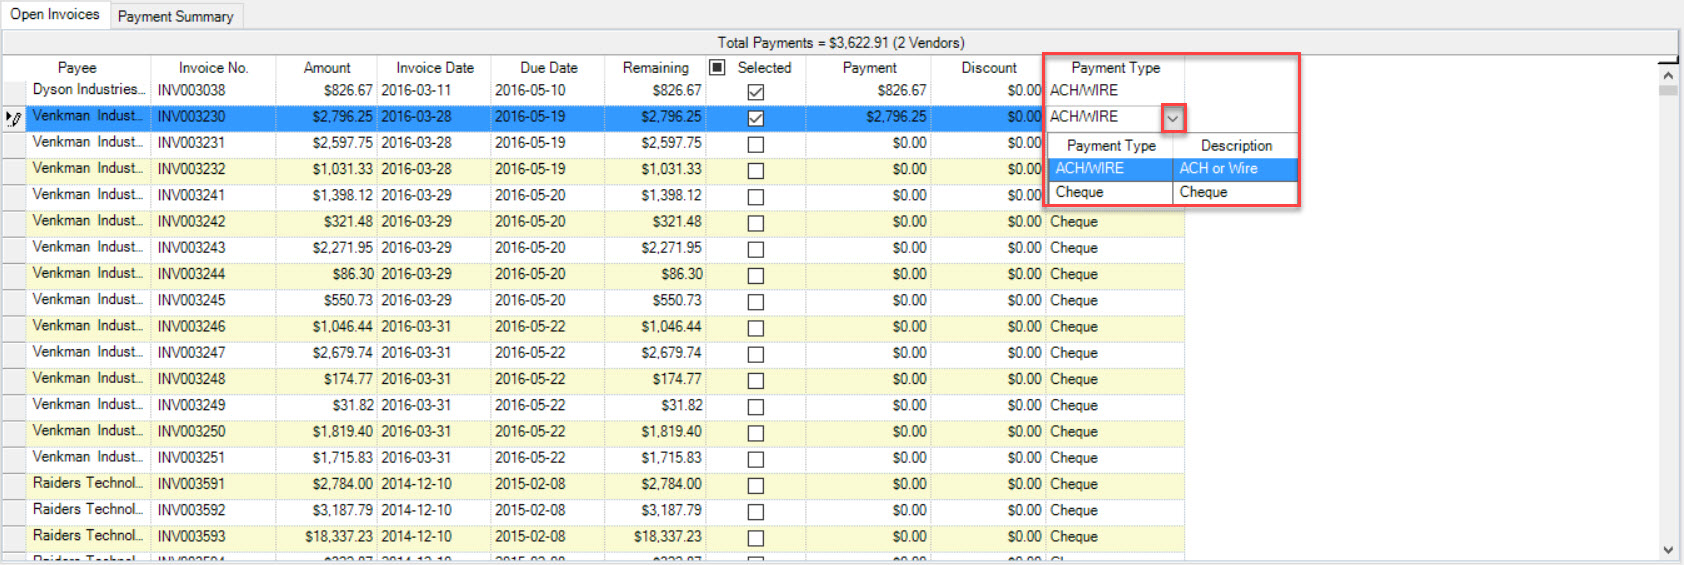
The Payment Type value will default to the Vendor’s default payment type (if one is set on the Vendor), or it will default to Cheque if the Vendor does not have a default Payment Type specified.
To change the Payment Type, select one from the available options in the Payment Type drop-down list.
Note
Payment Types are created and maintained under Vendors > Admin.
Note
To add a Custom Payment Type, please navigate to the  tab and click on
 ![]() icon. Select the Payment Types tab located to the left of the Vendor Admin screen. Click on the
icon. Select the Payment Types tab located to the left of the Vendor Admin screen. Click on the  button located at the bottom of the screen to add a Custom Payment Type. Enter in the Payment Type, Description, check whether or not a Bank Account is Required, and the Payment Processor. When selecting the Payment Processor, you have the option to select Default which means that the particular Payment Type will become the Default Payment Type for the Vendor. Make sure to save your changes. The Custom Payment Type will now be available for selection.
Saving Payments
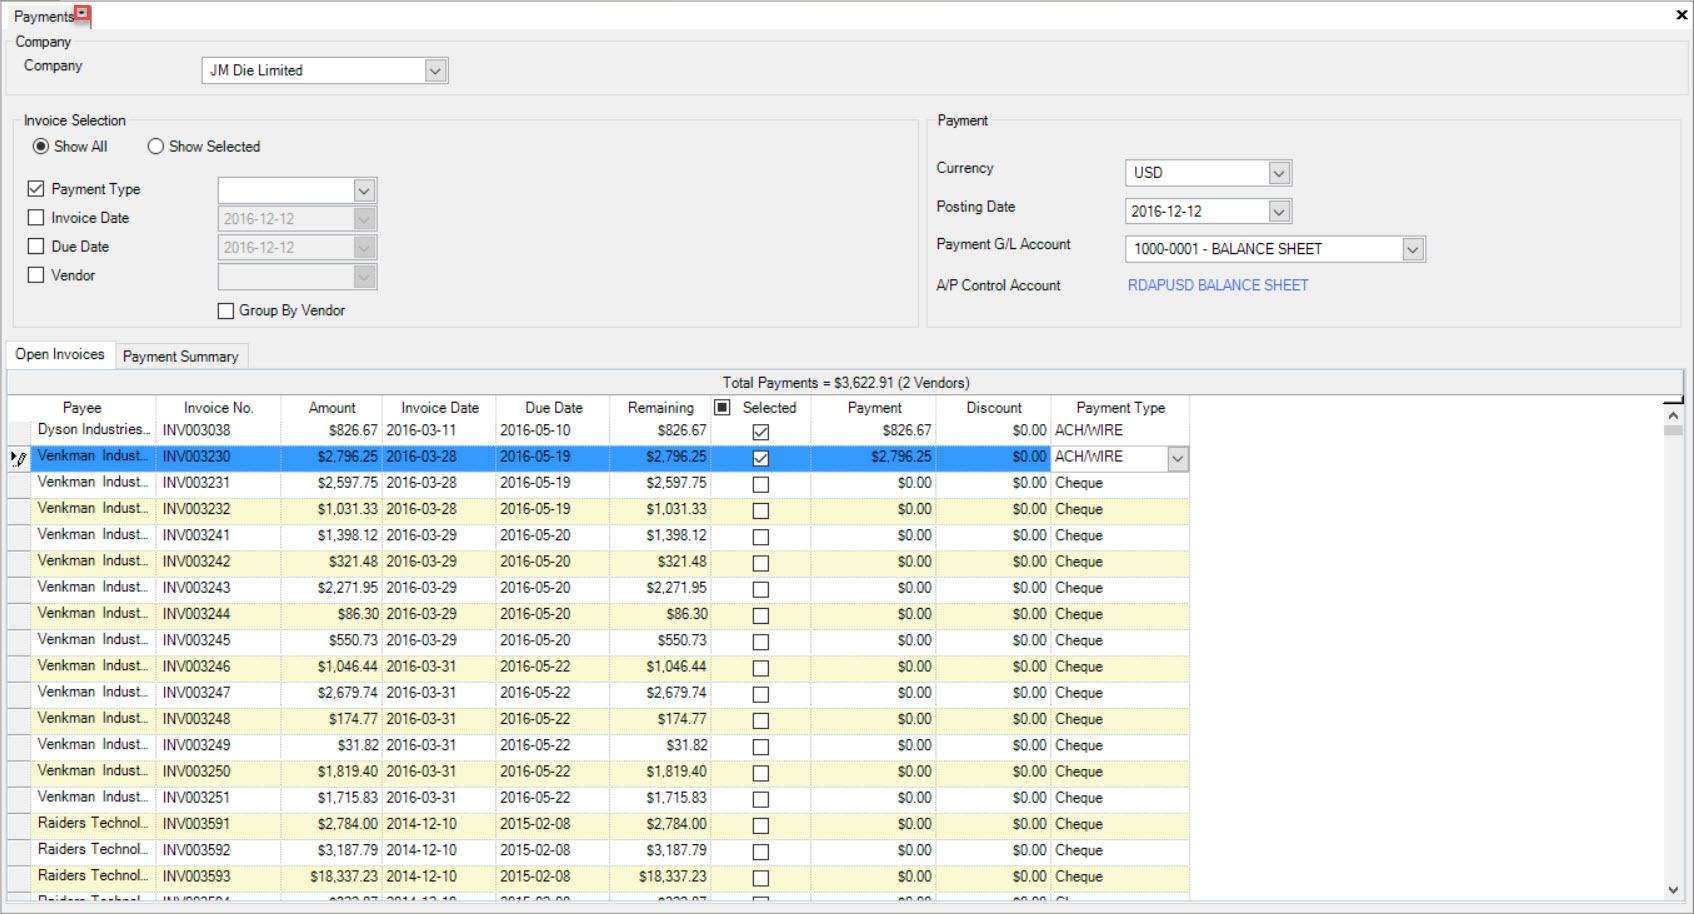
At any time, you can save Payments that you have selected. To save your payments, click on the ![]() at the top of the screen. You can only save the Payments if your
screen has un-saved changes. This is indicated by the asterisk that displays on the Payments tab. The save option will only be available if the asterisk is showing.
at the top of the screen. You can only save the Payments if your
screen has un-saved changes. This is indicated by the asterisk that displays on the Payments tab. The save option will only be available if the asterisk is showing.
Note
You can only have one set of saved Payments at any time. Any user with permissions to access the Payments screen can view the saved Payments. Payments remain saved until the Payments are processed, or are de-selected for payment and then saved again.
Printing Payments
You can print Payments that have been saved. A report will print that summarizes the selected Payments.
To print Payments, select the Print Payments... option from the A/P menu located at the top of the screen.
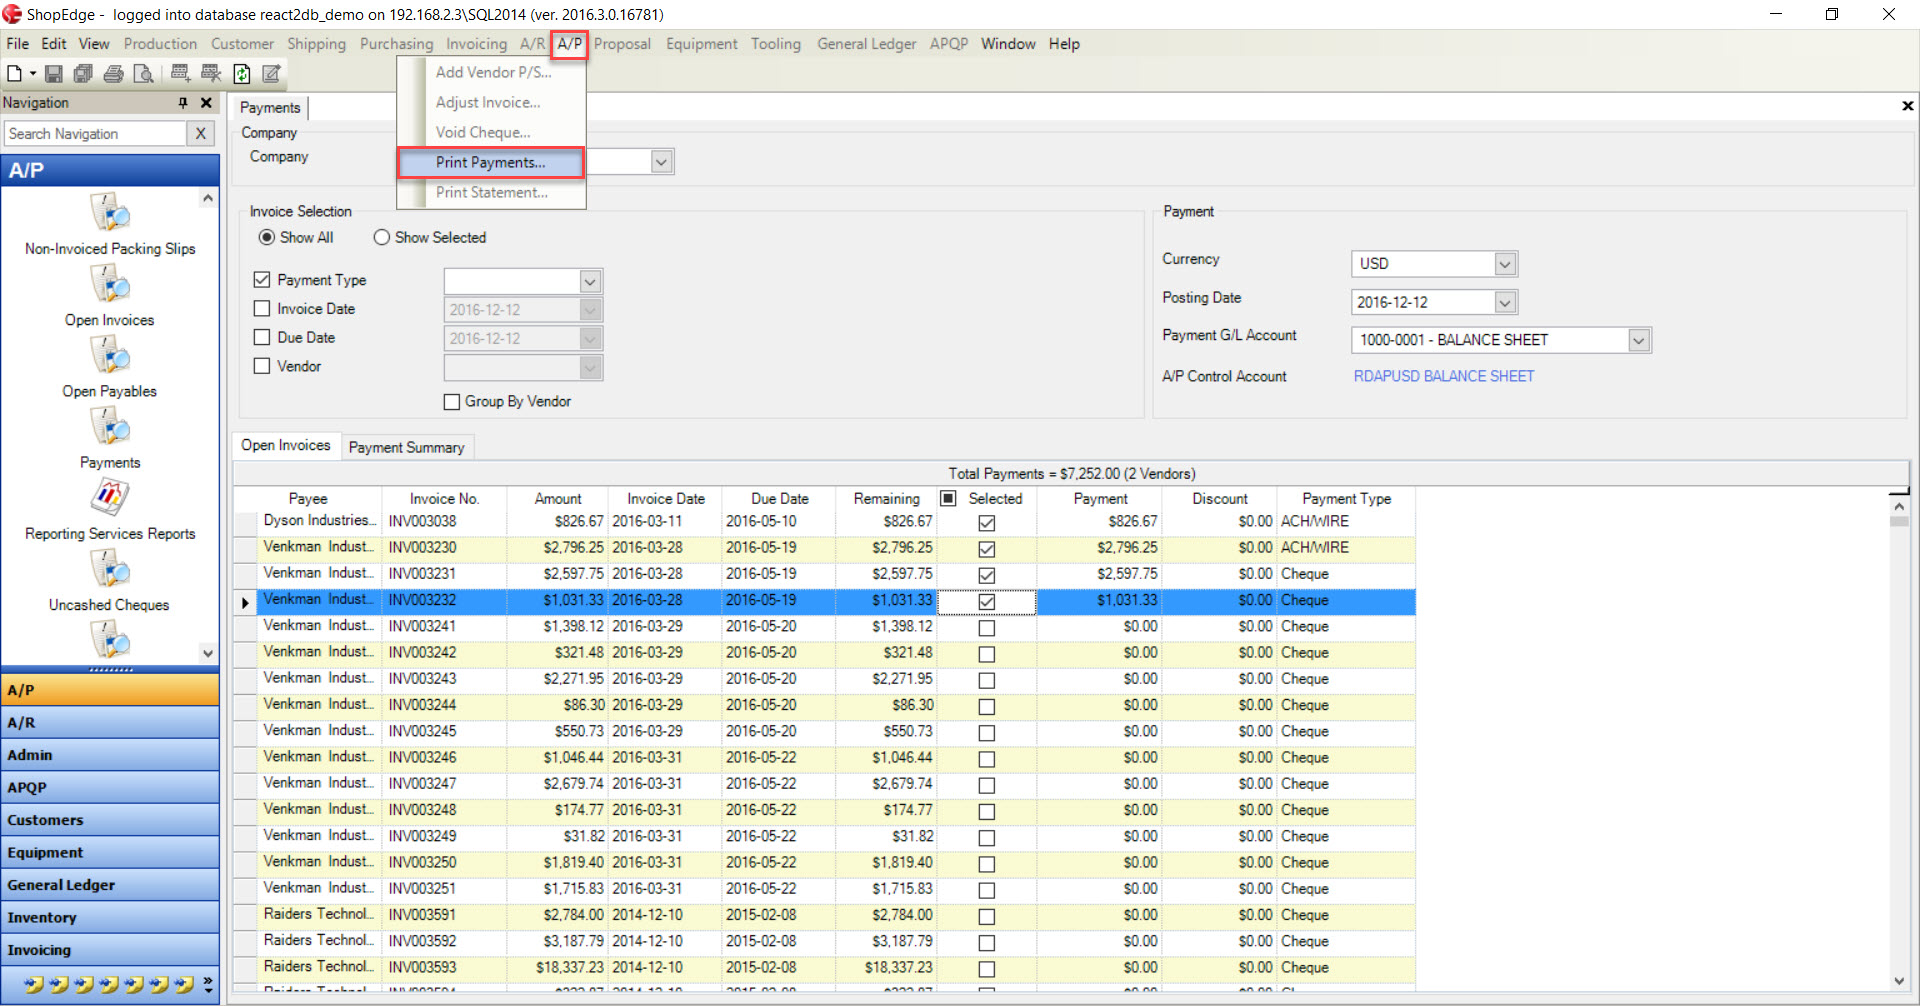
Once you have selected the Print Payments... option, the Print window will be displayed.
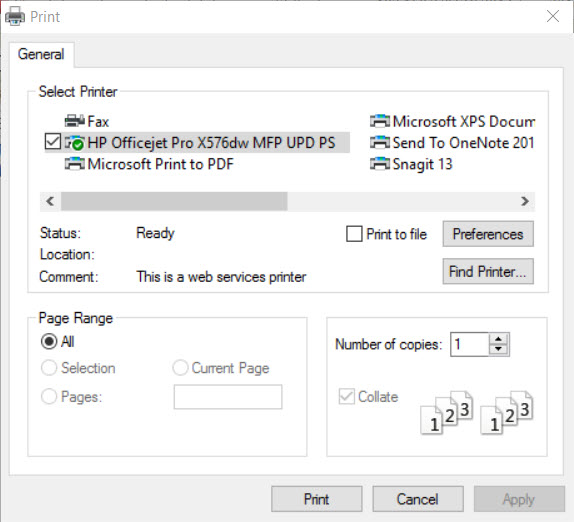
Select the printer, make sure the preferences are correct, and click Print.
A summary report listing all of the Payments selected will print.
Processing Payments
Once you have finished selecting Open Invoices for payment, you are able to process the payments. To process payments, click on the Payment Summary tab.
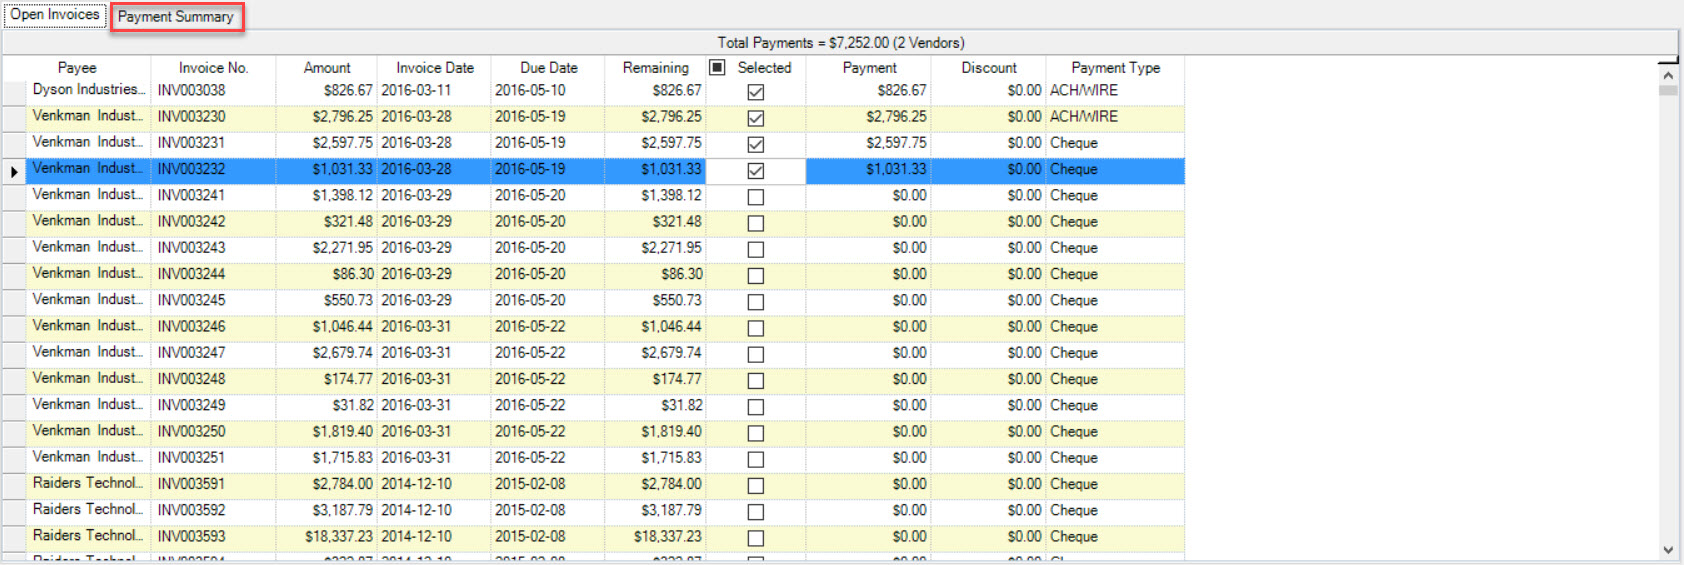
The Payment Summary screen will be displayed.
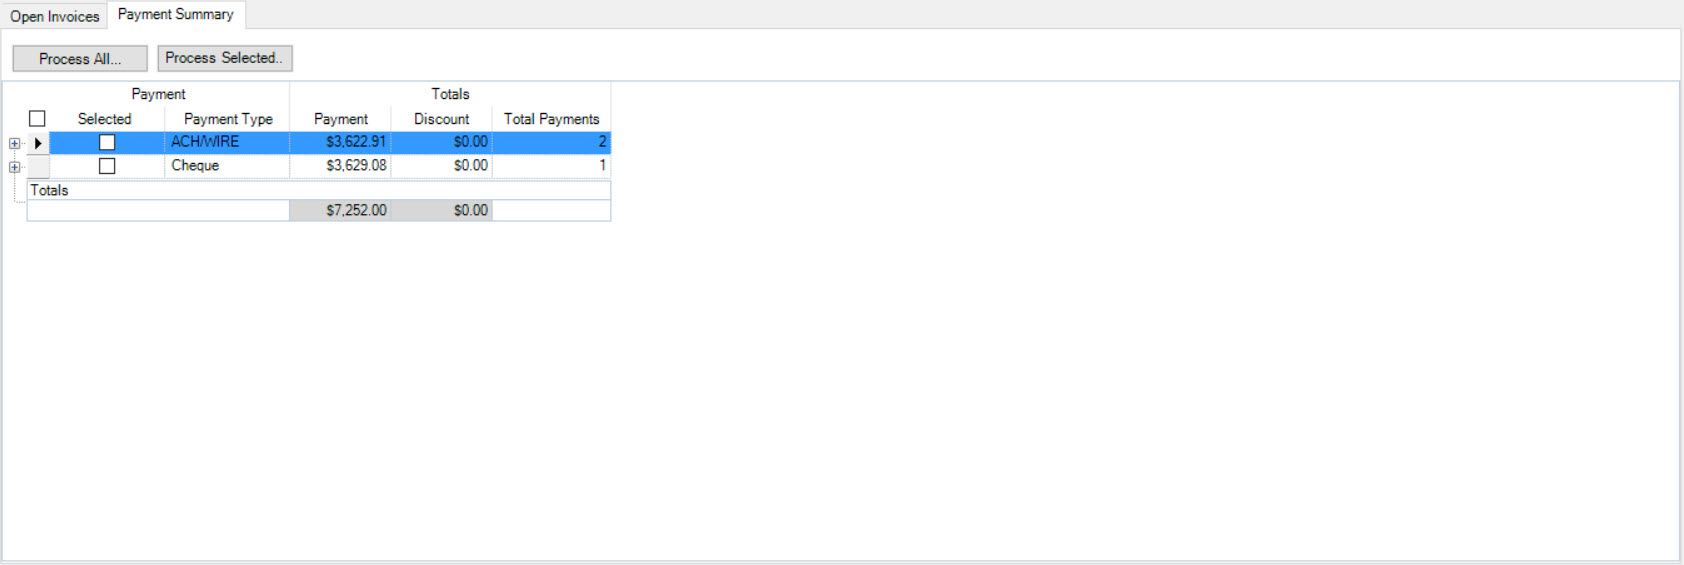
The Payment Summary screen lists the payments summarized by Payment Type, along with the Total Payment amount, the Total Discount amount, and the Total Payments.
In the screenshot above, we have 2 payments to be made by ACH/WIRE for a total of $3,622.91, and 1 payment to be made by Cheque for a total of $3,629.08.
You can expand each Payment Type to view the Payee (or Vendor) that will be paid. A summary is shown for each Payee.
You can then expand each Payee to view the actual Invoices selected for payment.
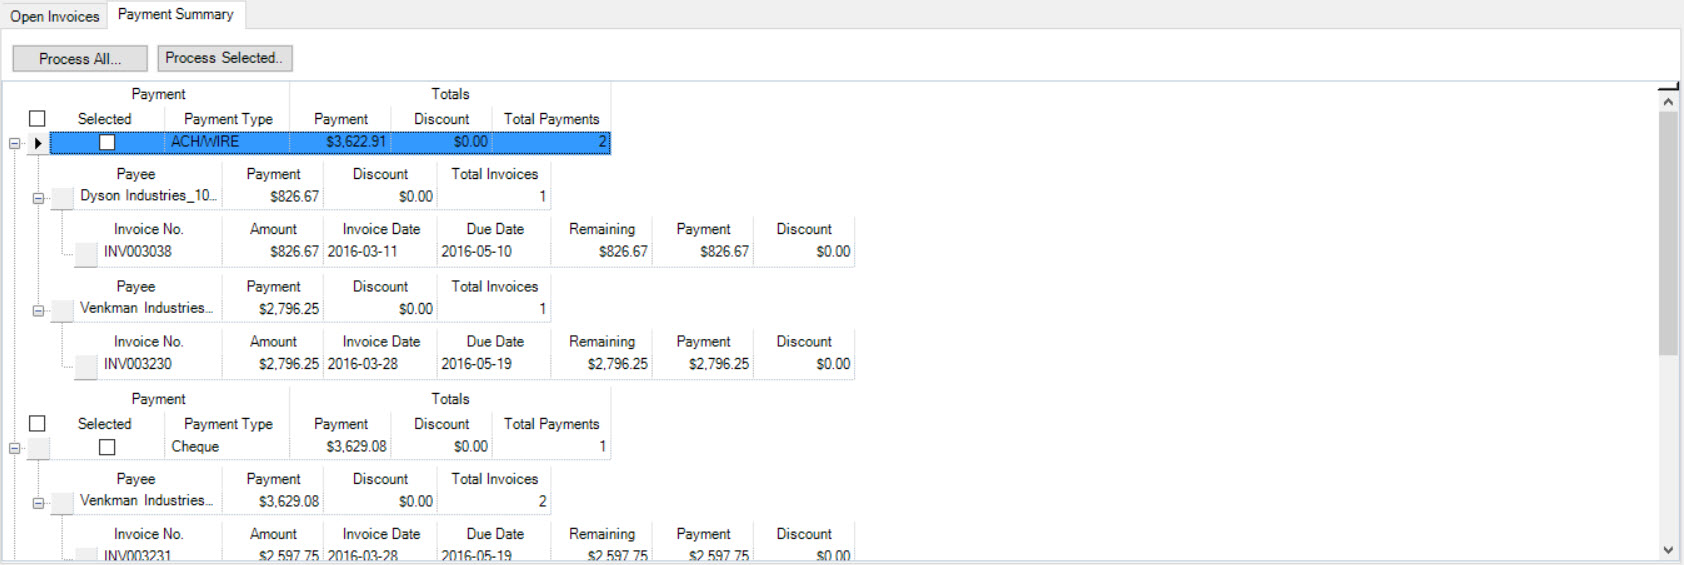
To process the Payments, you can either click the Process All... button to process all Payments at once, or you can select the Payment Type to process by checking the box in the Selected column to select the Payment Type(s) for processing. Then, click on Process Selected... button to start the processing.
Before processing any Payments, make sure the information is correct in the Payment group box at the top right of the screen. In particular, make sure the Posting Date and the Payment G/L Account selected is correct.

Note
If the Posting Date is incorrect, you may get a warning message when you select Process All... or Process Selected....
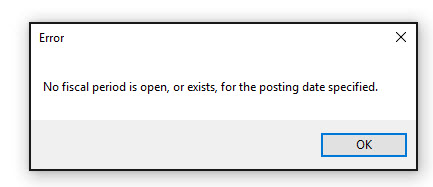
Users must fix the errors before trying again.
Once everything has been verified, click either Process All... or Process Selected... to start the process.
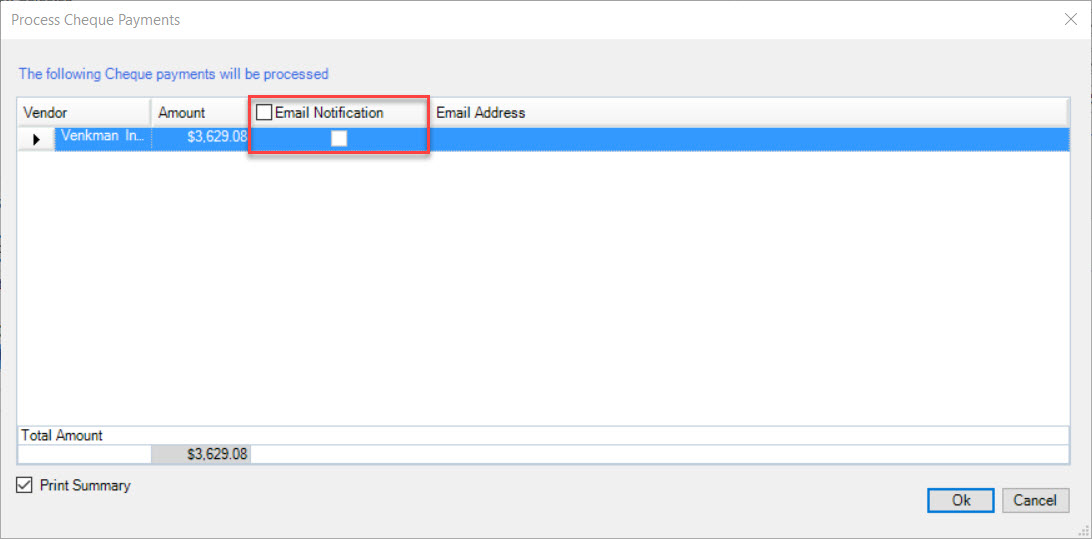
In this example, we have selected Process Selected... to process cheque payments only. A confirmation window will display with details about the payments that will be processed.
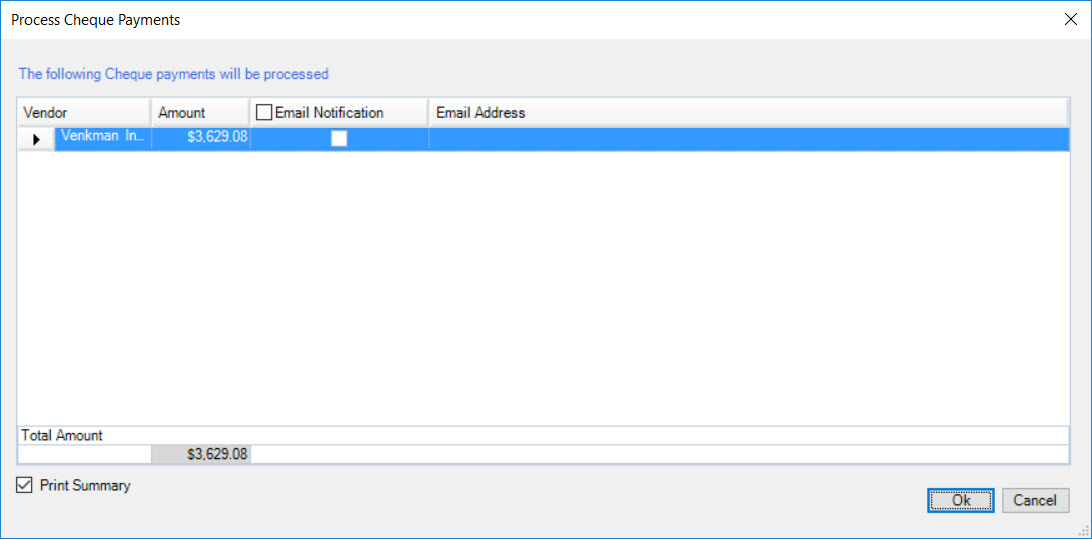
If the Vendor has been configured to receive payment notifications by Email, the Email Address(es) will show beside the Vendor. You can choose to send the Email notification or not by clicking on the Email Notification checkbox in the appropriate row.
Note
The Email Notification checkbox will only be enabled if the Vendor has been configured to receive Email notifications for payments by default. To receive Email notifications by default, navigate to the  tab and click on the
 ![]() icon. Double-click on the Vendor you wish to open on the Vendors screen. Click on the
icon. Double-click on the Vendor you wish to open on the Vendors screen. Click on the  tab and check the
  checkbox. Make sure to save your changes before exiting the screen. Now, the particular Vendor will receive Email notifications by default.
You have the option to print a summary of the payments by checking the Print Summary checkbox at the bottom of the Process Cheque Payments window.
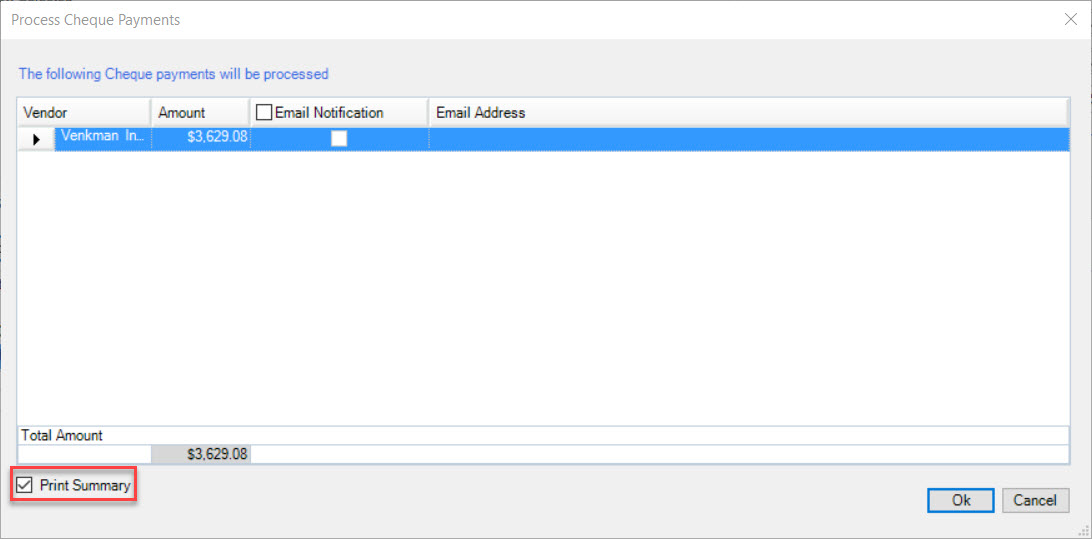
To cancel payment processing, click Cancel. The confirmation window will close.
To continue processing payments, click Ok.
For Cheque payments, a Print Cheques window will display:
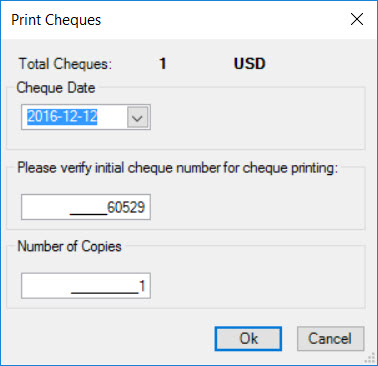
Confirm the Cheque Date, the initial cheque number for printing, and the number of copies you wish to print. Click Ok to continue.
Note
The initial cheque number will default to the last cheque number used from any previous cheque printing.
The Print window will be displayed. Select the printer and preferences and click the Print button to continue. The Cheques will print to the printer you selected.
When the Cheques are finished printing, a window will display asking if the Cheques printed correctly.
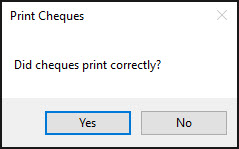
If the Cheques printed correctly, select Yes. Payment processing will complete and the payments will be removed from the Payment Summary screen, and the Open Invoices screen will refresh to clear the payments.
If the Cheques did not print properly, select No. A window will display allowing you to select the Cheques to reprint. You can also void the cheques here by selecting the appropriate Cheque, and then clicking Void Selected.
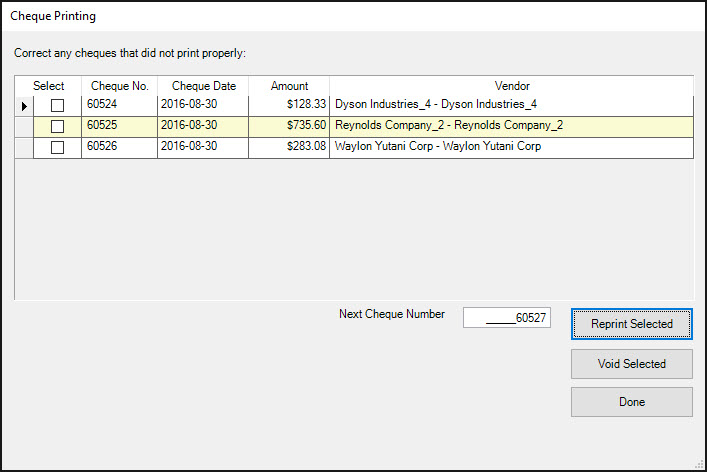
To re-print a Cheque, select the Cheque then click Re-print Selected.
To void any Cheques, select the Cheque(s) then click Void Selected.
Click Done if you do not wish to re-print or void any Cheques.
You can continue the process until all Cheques have been printed successfully.
Once they have been printed successfully, if Print Summary was selected on the Payment Confirmation window, a Print window will display for selecting the printer for the Cheque Summary Report. Select the printer and preferences, and click Print.
Payment processing will complete and the Payments will be removed from the Payment Summary screen, and the Open Invoices screen will refresh to clear the Payments. If more than one Payment Type was selected for processing, then payment processing will continue to the next Payment Type until all selected Payment Types have been processed.