Cheque Batch Lookup
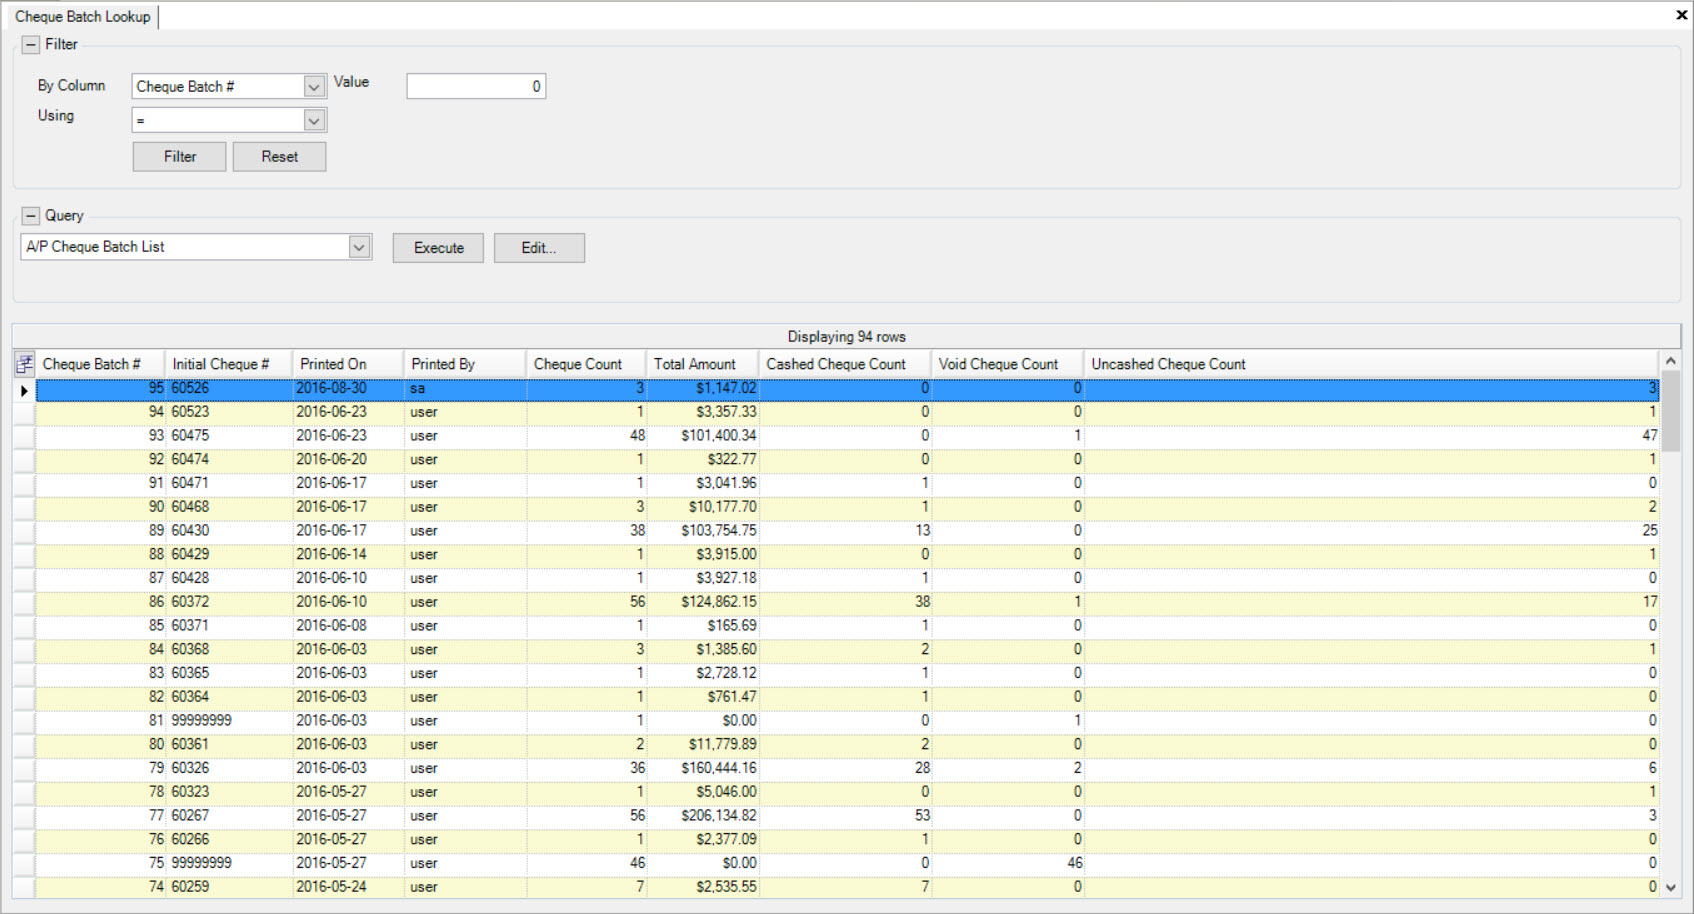
The Cheque Batch Lookup tool is available so that users can locate Cheques in the system to view Print Cheque Summary, to Re-Print Selected Cheques, to Void Selected Cheques, and to Edit Cheque Numbers.
Users also have the ability to view the Cheque Batch #, Initial Cheque #, the date it was Printed On, whom it was Printed By, the Cheque Count, Total Amount, Cashed Cheque Count, Void Cheque Count, and Uncashed Cheque Count when in the Cheque Batch Lookup screen.
To view the Cheque Batch Lookup screen, navigate to the  tab and click on the
 ![]() icon. This
will open the Cheque Batch Lookup screen.
icon. This
will open the Cheque Batch Lookup screen.
Viewing a Cheque Batch Number
To view a Cheque Batch #, navigate to the  tab and click on the
 ![]() icon. This
will open the Cheque Batch Lookup screen.
icon. This
will open the Cheque Batch Lookup screen.

Locate the Cheque Batch # you wish to view and double-click on the appropriate row. The Cheque Batch detail screen will be displayed.
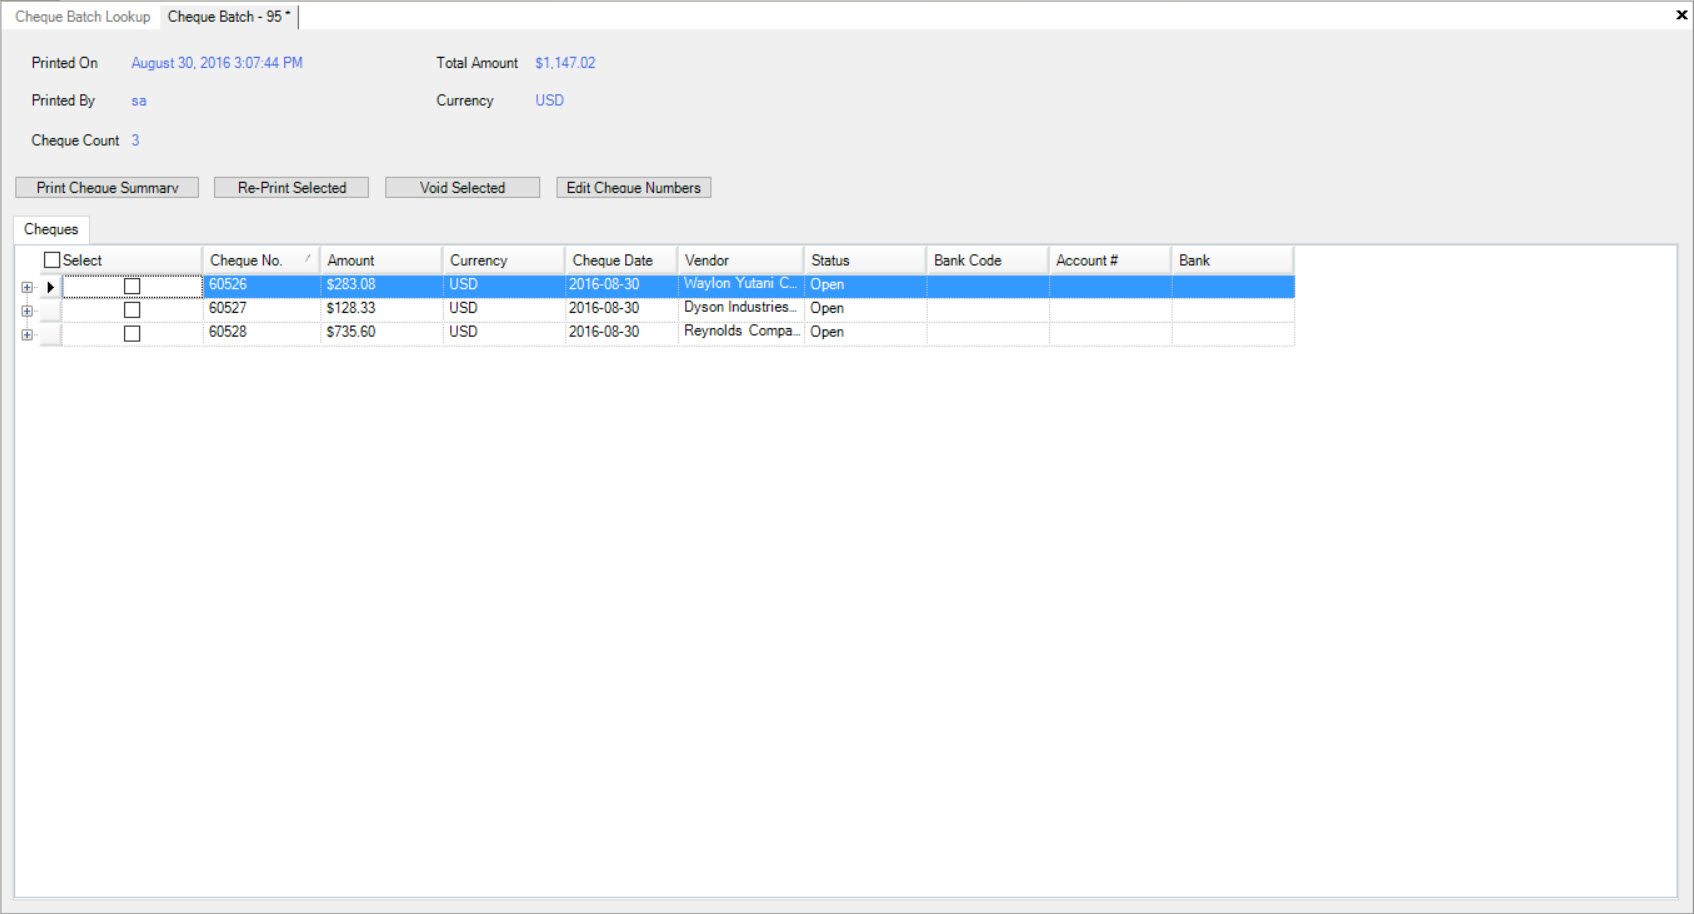
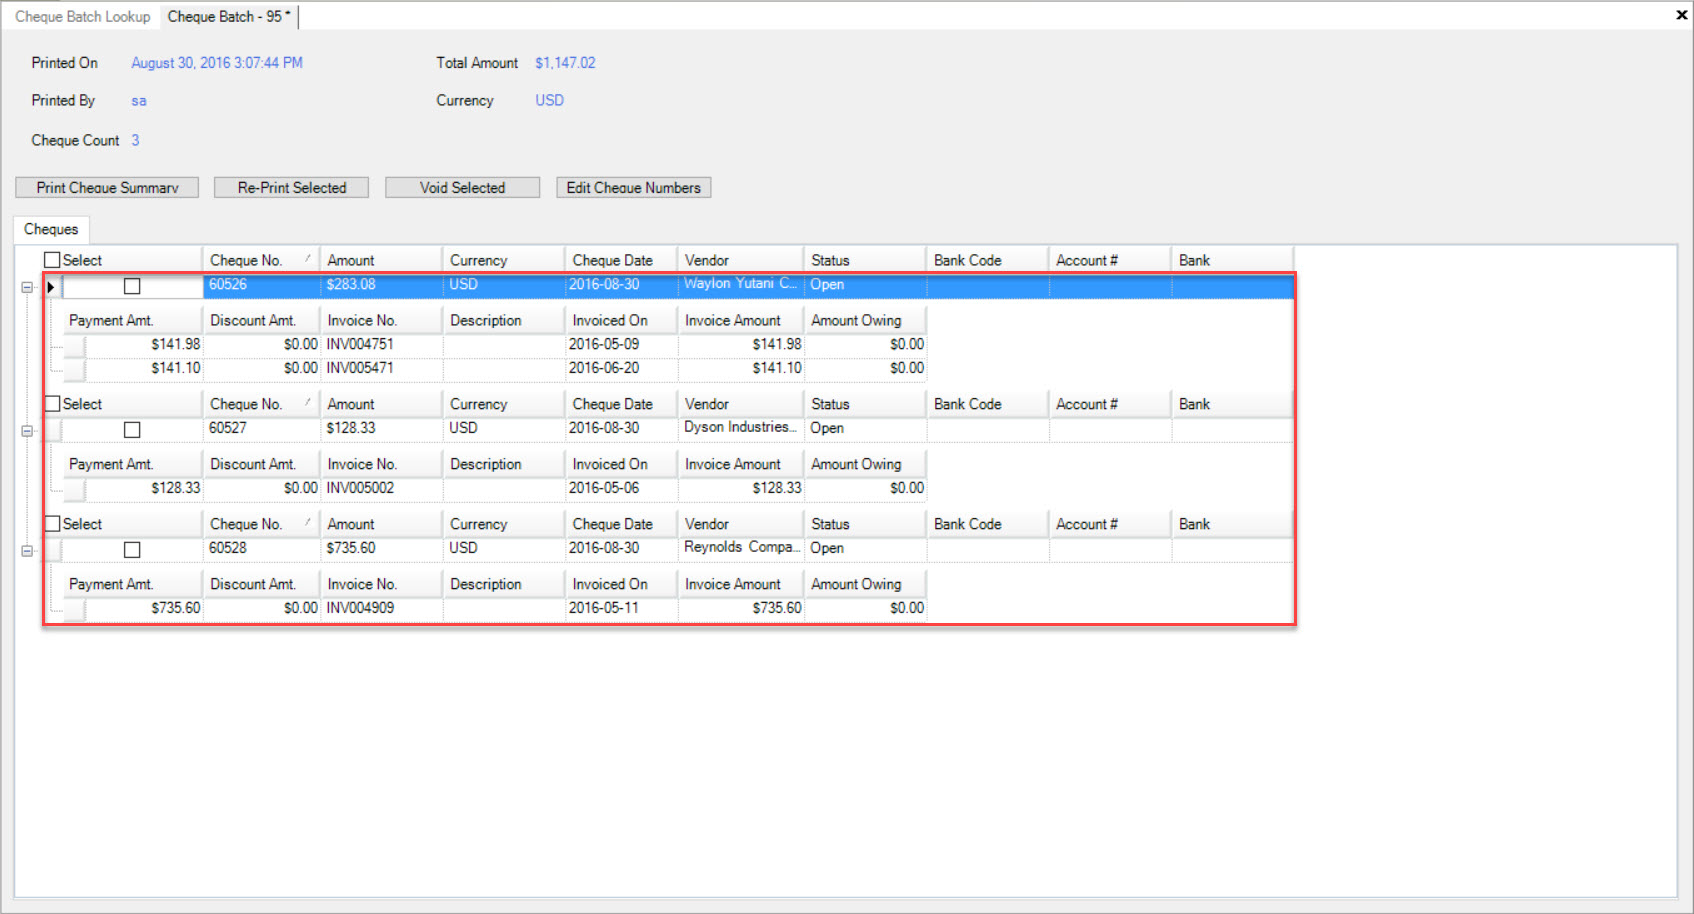
Users can now view all of the Cheques and the Payment details (by clicking the plus sign) for the particular Cheque Batch that they opened.
Printing a Cheque Summary
To print a Cheque Summary, navigate to the  tab and click on the
 ![]() icon. This
will open the Cheque Batch Lookup screen.
icon. This
will open the Cheque Batch Lookup screen.

Locate the Cheque Batch # you wish to view and double-click on the appropriate row. The Cheque Batch detail screen will be displayed.

Select the appropriate Cheques you wish to print a summary for by checking the box under the Select column.
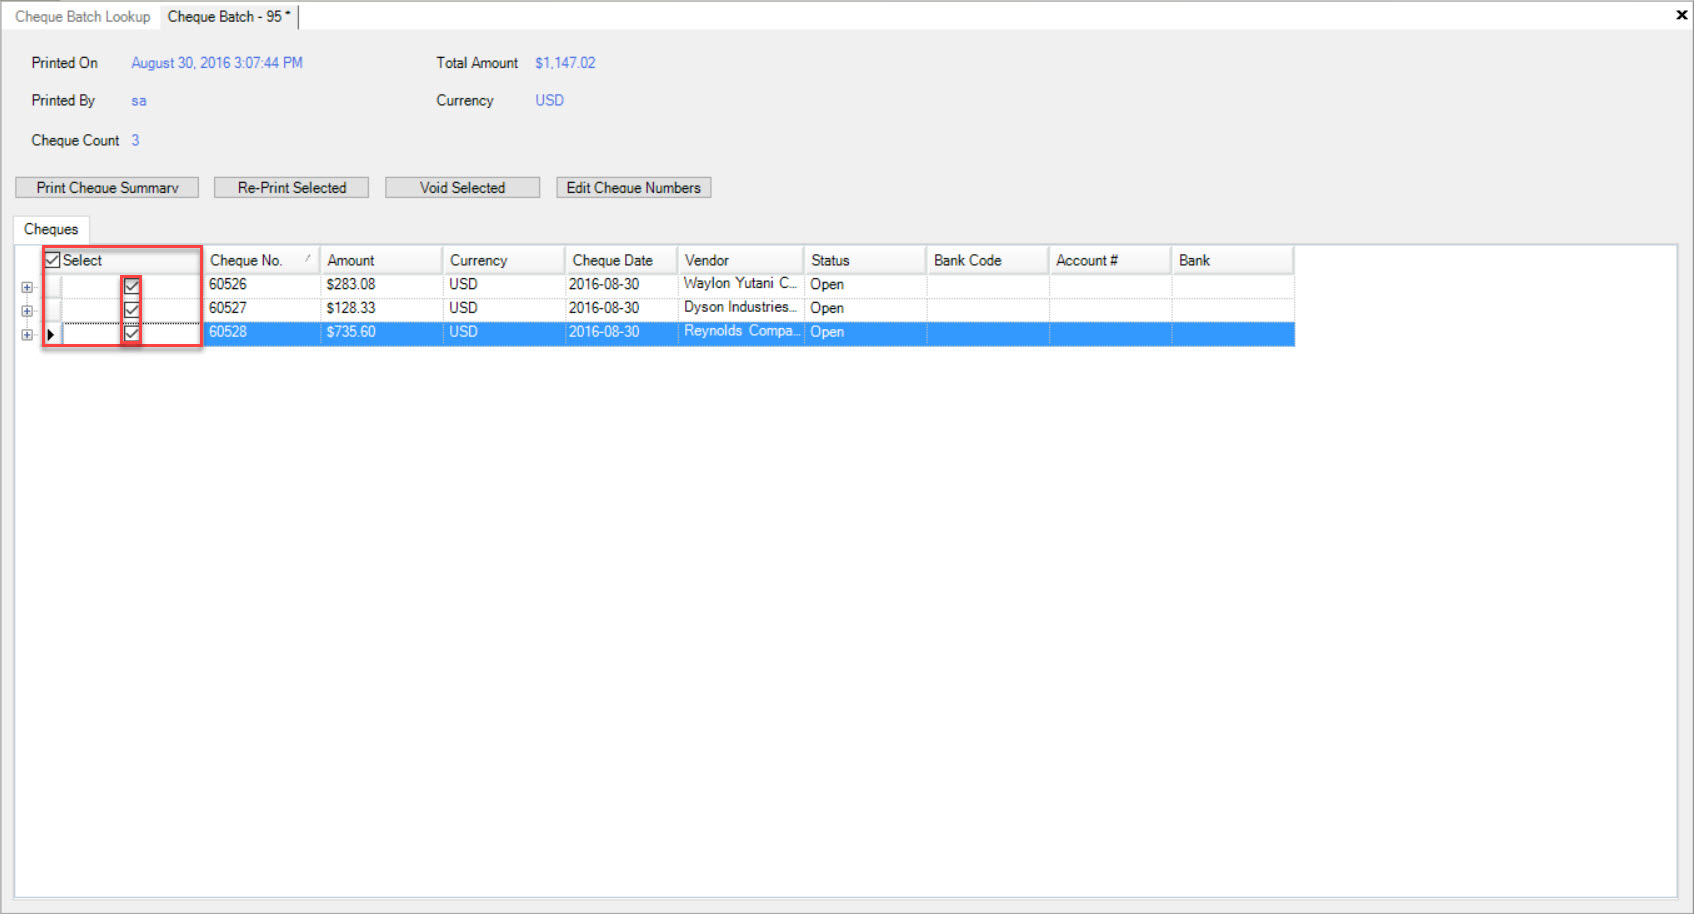
Once you have selected the appropriate Cheques, click on the  button. This will open the Print window.
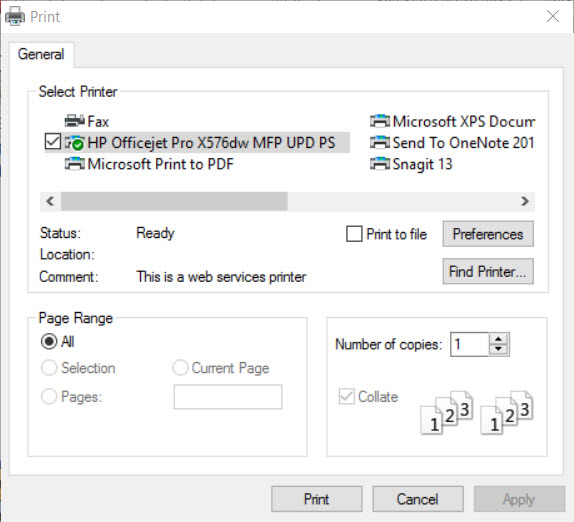
Make sure that the correct printer is selected and check that the preferences are set appropriately. Click on the  button.
The Cheque Summary will print.
Re-Print Selected
To re-print the selected Cheques, navigate to the  tab and click on the
 ![]() icon. This
will open the Cheque Batch Lookup screen.
icon. This
will open the Cheque Batch Lookup screen.

Locate the Cheque Batch # you wish to view and double-click on the appropriate row. The Cheque Batch detail screen will be displayed.

Select the appropriate Cheques you wish to re-print by checking the box under the Select column.

Once you have selected the appropriate Cheques, click on the  button. The Print Cheques window will appear.
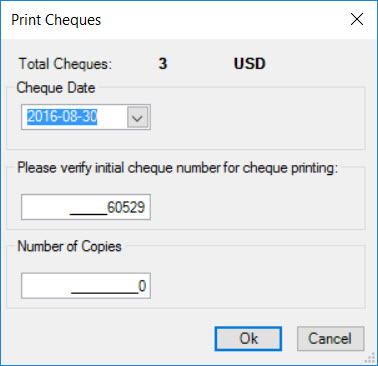
Make sure that the Cheque Date matches the Cheque Batch screen, verify the initial Cheque Number, and enter in the Number of Copies you wish to print.
Click on the  button.
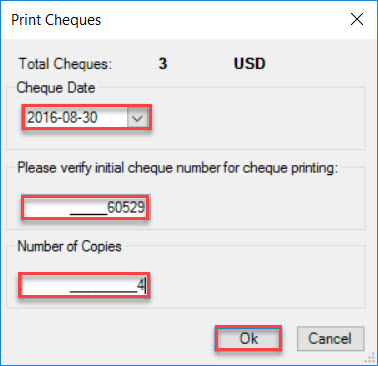
This will open the Print window.

Make sure that the correct printer is selected and check that the preferences are set appropriately. Click on the  button.
The Cheques will be re-printed.
Void Selected
To void the selected Cheques, navigate to the  tab and click on the
 ![]() icon. This
will open the Cheque Batch Lookup screen.
icon. This
will open the Cheque Batch Lookup screen.

Locate the Cheque Batch # you wish to view and double-click on the appropriate row. The Cheque Batch detail screen will be displayed.

Select the appropriate Cheques you wish to void by checking the box under the Select column.

Once you have selected the appropriate Cheques, click on the  button. The Posting Date window will appear.
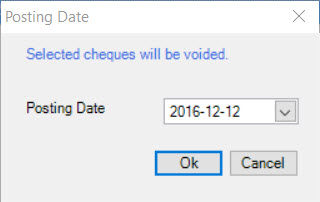
Make sure that the correct Posting Date is selected and click on the  button.
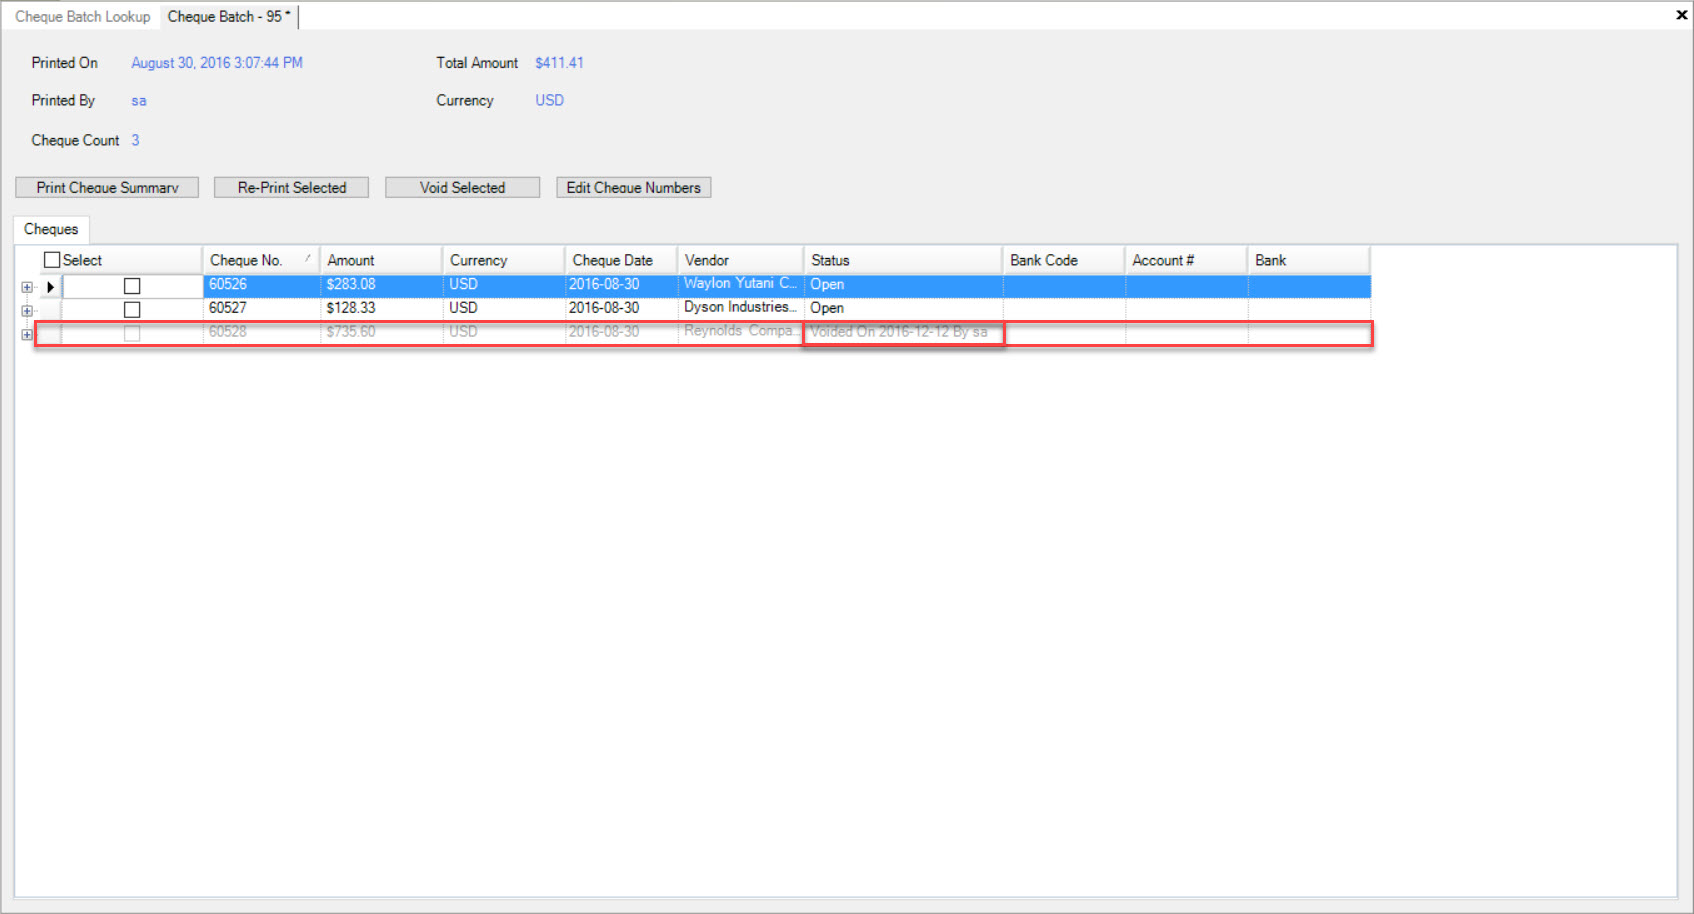
You will notice that the row of the selected Cheques will now be greyed out and that the Status will change to Voided On (the date that you selected).
Editing Cheque Numbers
To edit the numbers of Cheques, navigate to the  tab and click on the
 ![]() icon. This
will open the Cheque Batch Lookup screen.
icon. This
will open the Cheque Batch Lookup screen.

Locate the Cheque Batch # you wish to view and double-click on the appropriate row. The Cheque Batch detail screen will be displayed.

Select the appropriate Cheque you wish to edit the number for by checking the box under the Select column.

Once you have selected the appropriate Cheque, click on the  button.
The Select column will disappear and users will now be able to click on the appropriate row of the Cheque(s) they would like to edit the number for. Make the necessary changes.
Make sure to save before exiting the screen.