Item Pricing
Item Pricing can be found by navigating to the  tab,
and clicking on the
 ![]() icon. The Item Pricing screen will be displayed.
icon. The Item Pricing screen will be displayed.
The Item Pricing table is updated when new Orders are entered into the system. Users can create new Orders by adding Items to the Item Pricing table. Users can also use this screen to manage pricing or adding Price Revisions for existing Items.
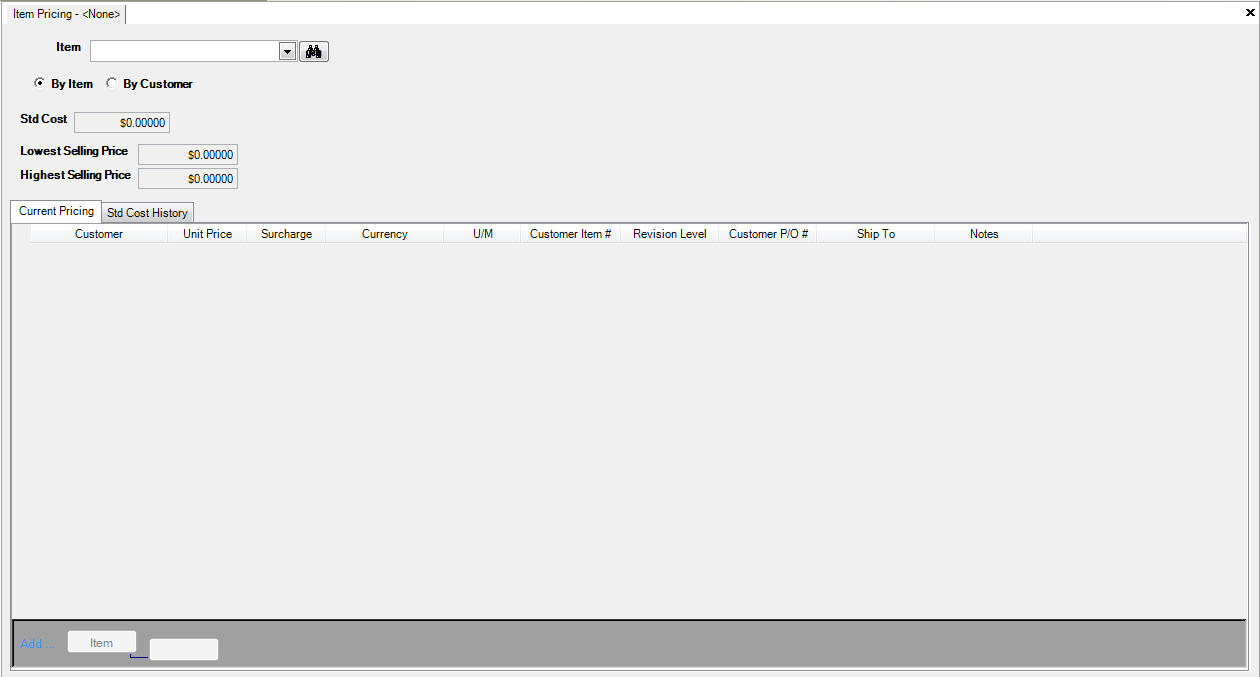
Users can then search for Items either by Item or by Customer. Then, select the Item or Customer by using the available drop-down menu or lookup window. The system will populate the appropriate information.
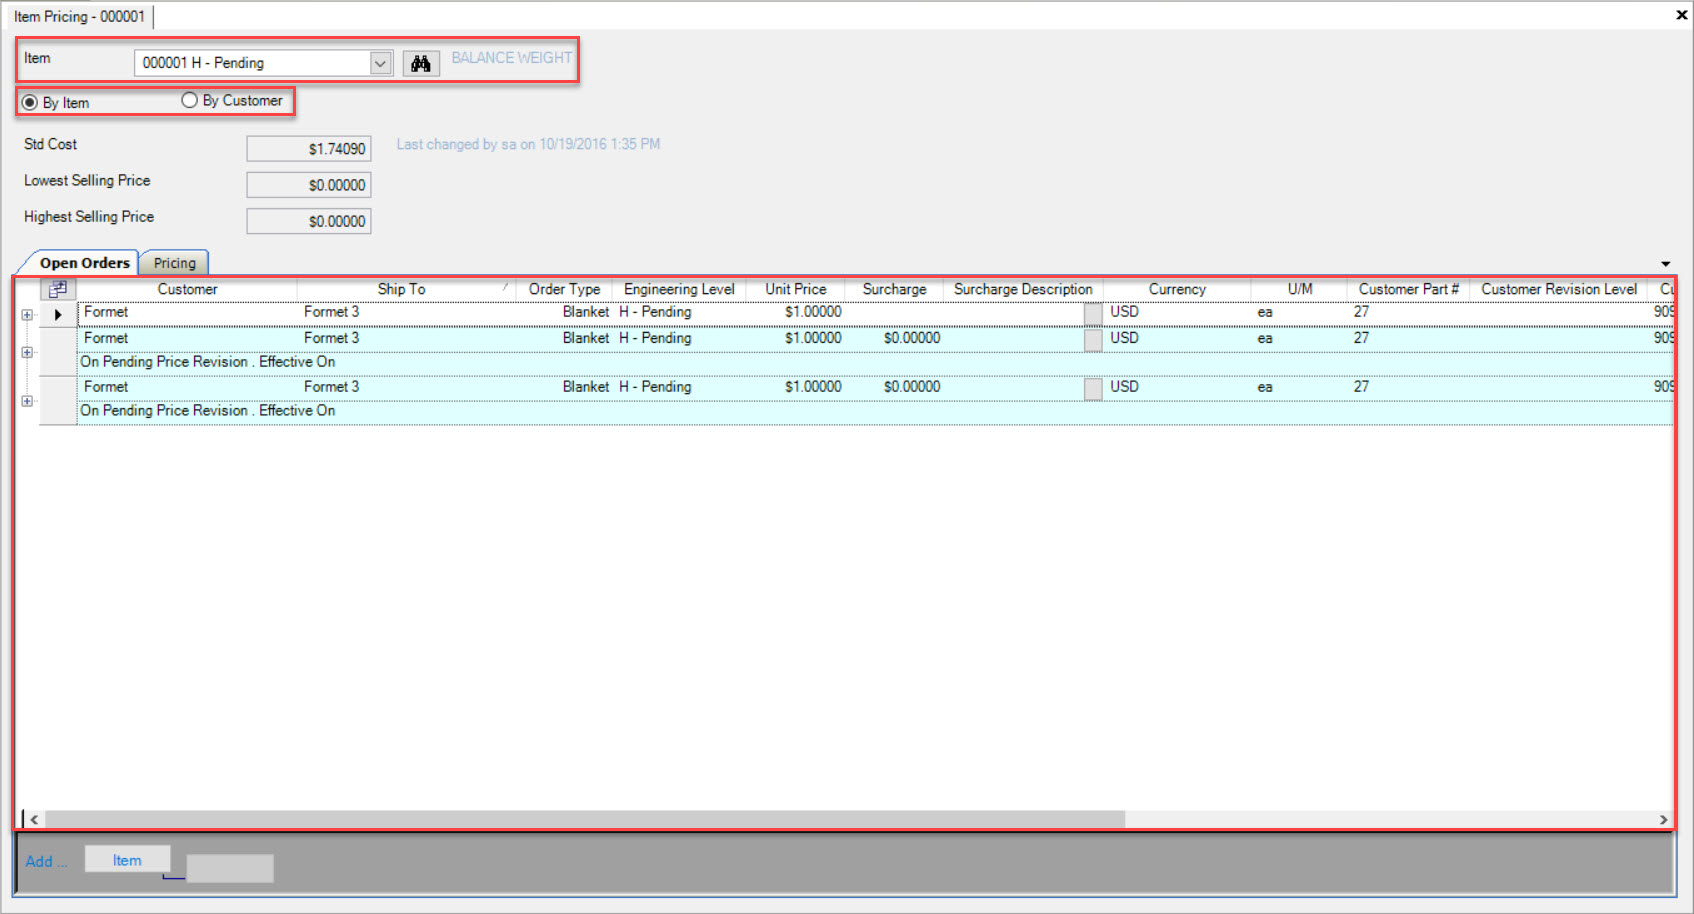
Adding an Item to the Open Orders Tab
Users have the ability to add Items to an Item Pricing on the Open Orders tab.
To do so, users must select Items either by Item or by Customer by using the available drop-down menu or lookup window.
Then, click on the  button located at the bottom of the screen.
A new row will appear where users can enter or select information based on the Item that is being added using the available drop-down menus and textboxes.

Make sure to save your changes before exiting the screen.
Deleting an Item
To delete an Item from an Item Pricing, simply search by the Item or Customer that you wish to delete the Item from and highlight the Item under the Open Orders tab.
Use your Delete key and when they system prompts you, select Yes.
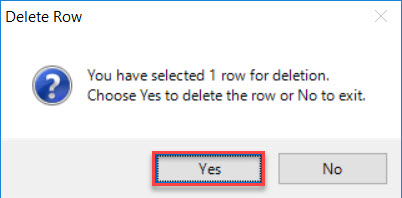
The selected Item will be deleted.
Make sure to save your changes before exiting the screen.
Adding a Revision to an Item
Users have the ability to add a Price Revision to an Item from the Item Pricing screen.
Simply search by the Item or Customer of the Item you wish to add a Price Revision to.
Locate the Item you wish to add a Price Revision to under the Open Orders tab.
Then, click on the  button.
The Add to Price Revision window will appear.
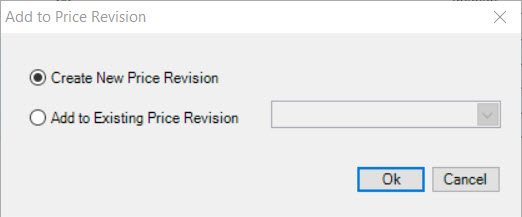
Users have the option of select Create New Price Revision OR Add to Existing Price Revision.
To create a new Price Revision, select the Create New Price Revision option and then click on the  button.
The Bulk Edit window will appear.
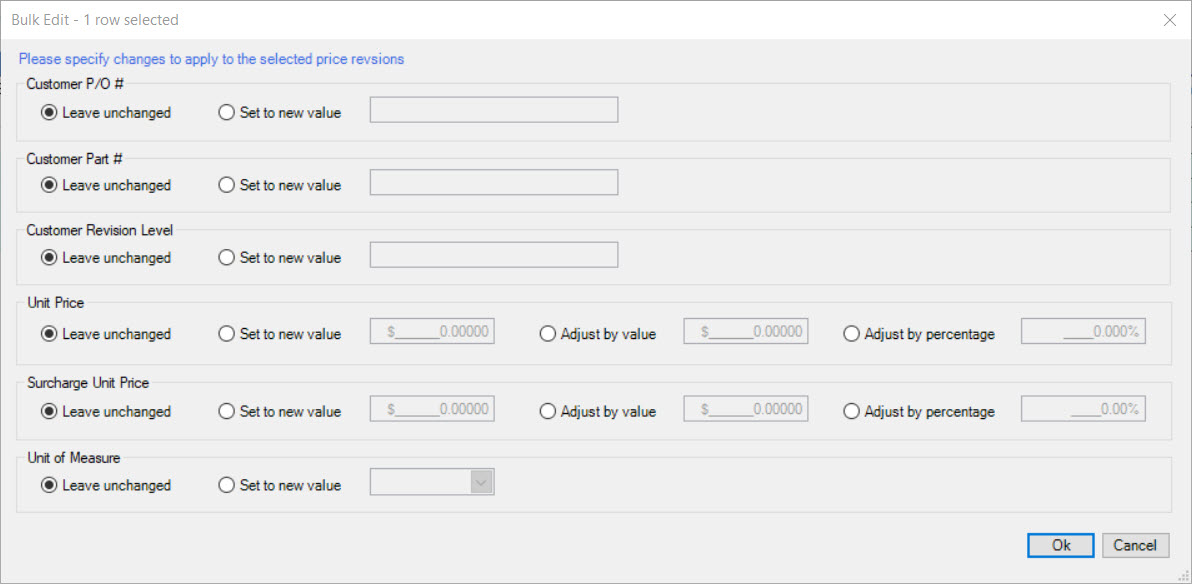
On the Bulk Edit window, users have the option to make changes to the Customer Price Revision by Customer P/O #, Customer Part #, Customer Revision Level, Unit, Price, Surcharge Unit Price, and Unit of Measure.
- Customer P/O #: users have the option of leaving the Customer P/O # unchanged OR entering in a new value.
- Customer Part #: users have the option of leaving the Customer Part # unchanged OR entering in a new value.
- Customer Revision Level: users have the option of leaving the Customer Revision Level unchanged OR entering in a new value.
- Unit Price: users have the option of leaving the Unit Price unchanged OR entering in a new value, adjusting by value, or adjusting by percentage.
- Surcharge Unit Price: users have the option of leaving the Surcharge Unit Price unchanged OR entering in a new value, adjusting by value, or adjusting by percentage.
- Unit of Measure: users have the option of leaving the Unit of Measure unchanged OR selecting a new value.
Users can select as many options as needed. Then, click on the  button.
The system will automatically open a new Customer Price Revision screen with the appropriate Item(s) added.
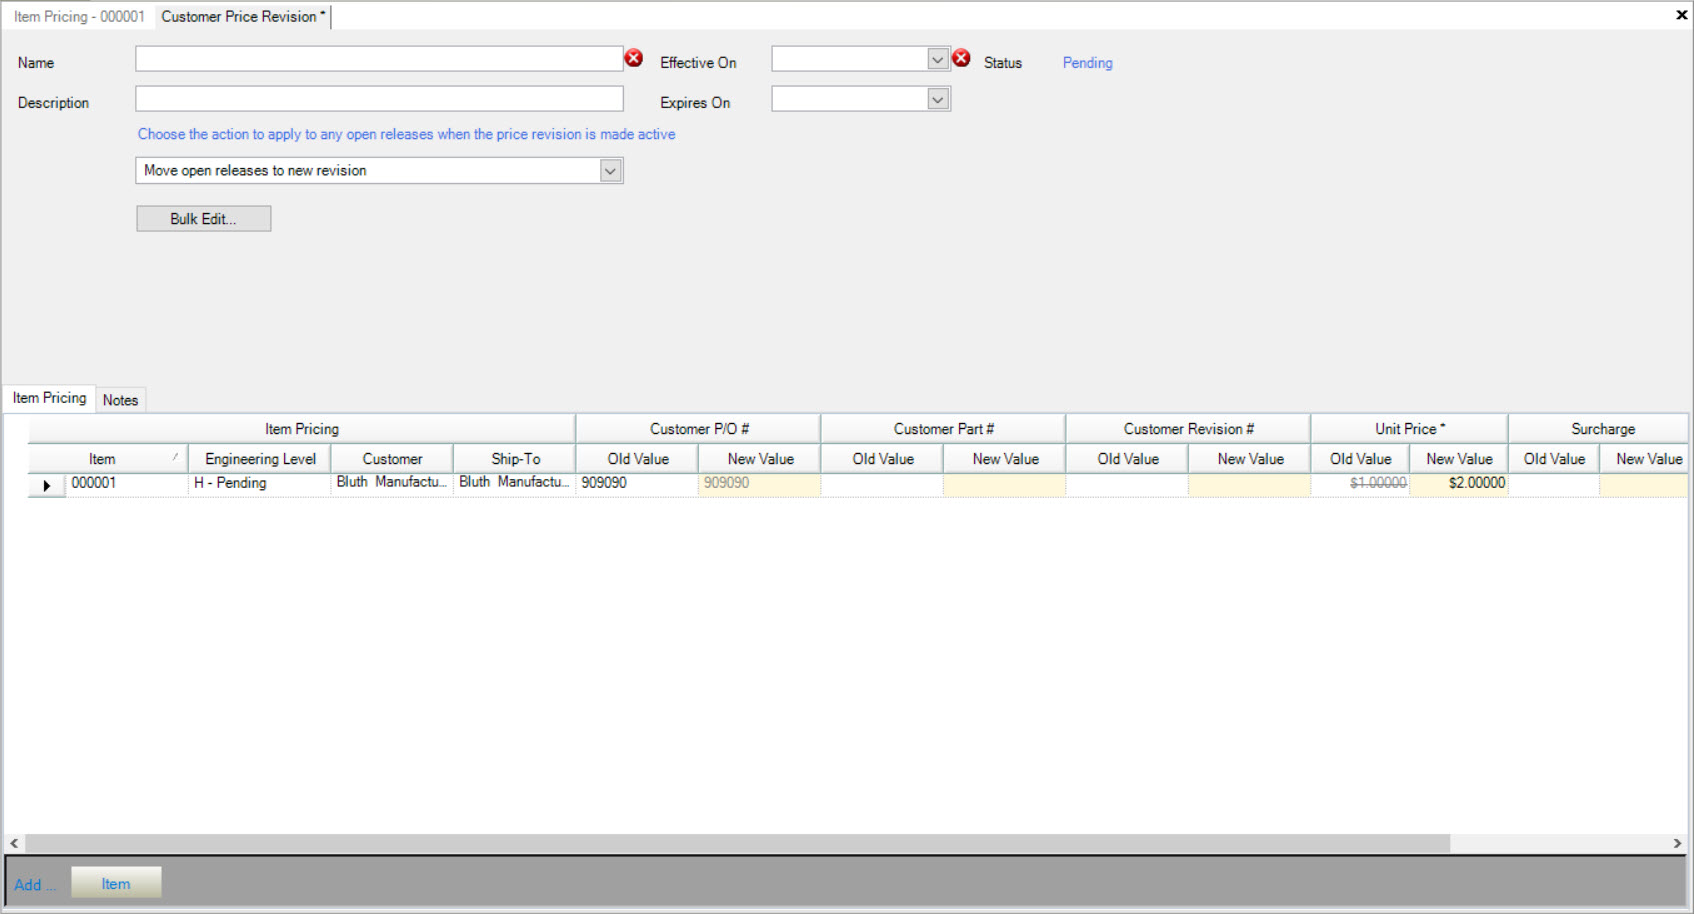
The column in which users made changes to will now appear with an asterick(*) to indicate which part of the Items have been revised. The asterick will remain visible even after the Customer Price Revision has been saved for user reference.
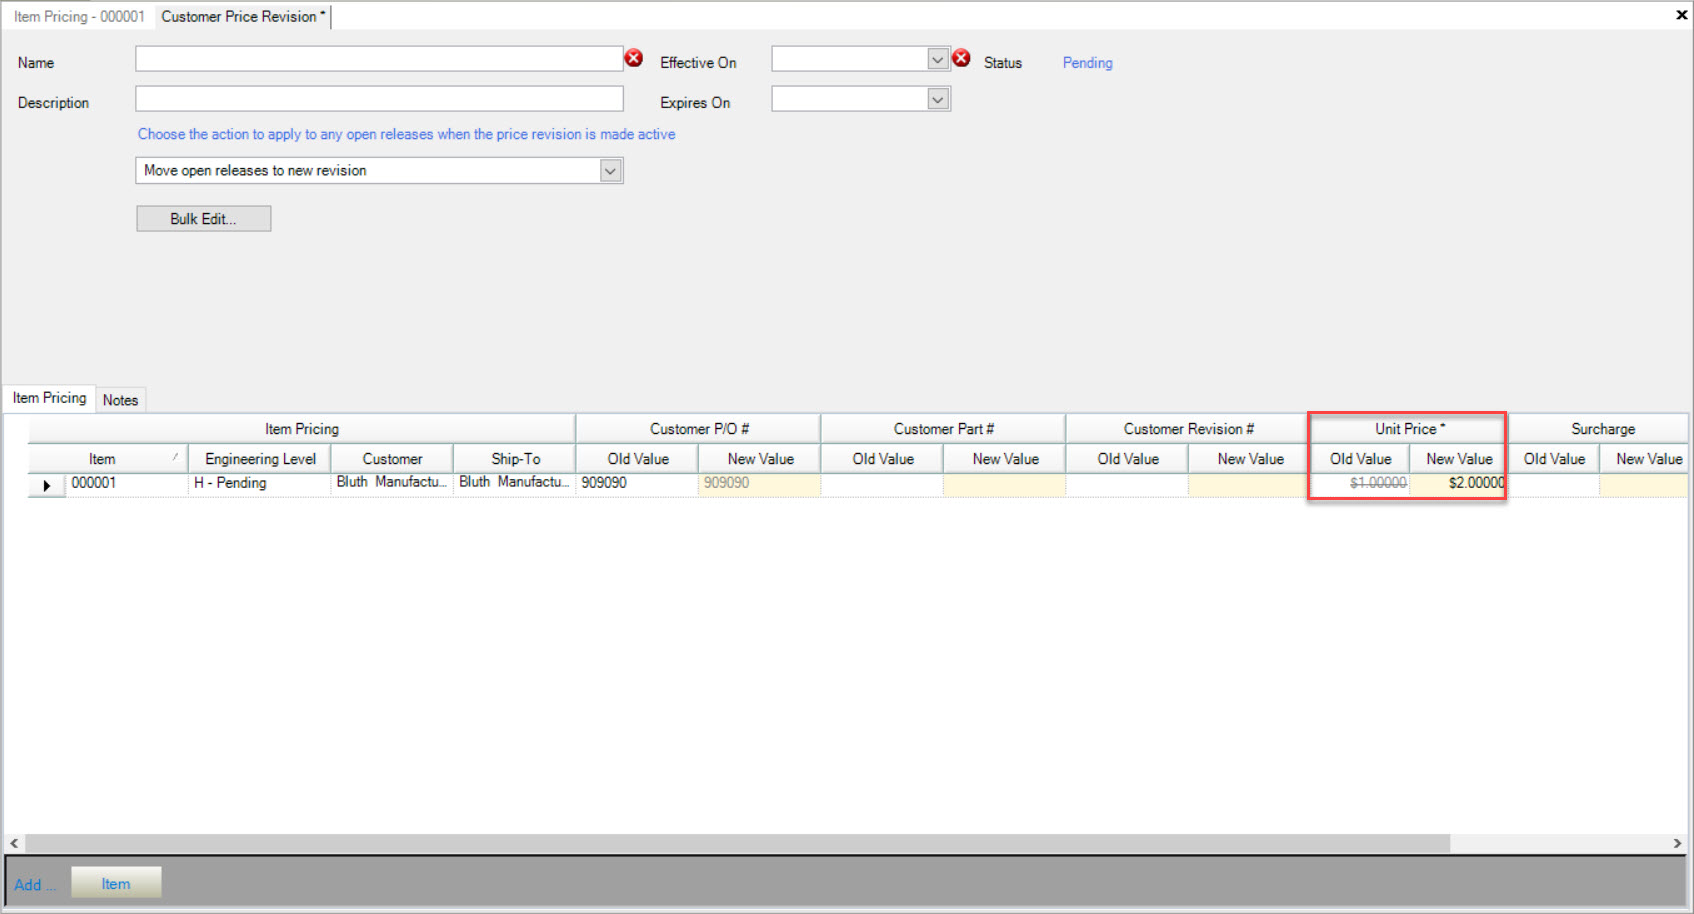
Users must enter in the Name and select an Effective On date.
Make sure to save before exiting the screen.
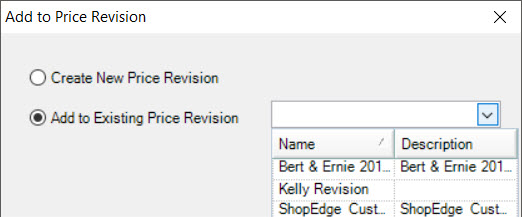
To add the Item to an existing Price Revision, click on the Add to Existing Price Revion option and select the appropriate one using the available drop-down menu. Then, click
on the  button.
The Bulk Edit window will appear.

On the Bulk Edit window, users have the option to make changes to the Customer Price Revision by Customer P/O #, Customer Part #, Customer Revision Level, Unit, Price, Surcharge Unit Price, and Unit of Measure.
- Customer P/O #: users have the option of leaving the Customer P/O # unchanged OR entering in a new value.
- Customer Part #: users have the option of leaving the Customer Part # unchanged OR entering in a new value.
- Customer Revision Level: users have the option of leaving the Customer Revision Level unchanged OR entering in a new value.
- Unit Price: users have the option of leaving the Unit Price unchanged OR entering in a new value, adjusting by value, or adjusting by percentage.
- Surcharge Unit Price: users have the option of leaving the Surcharge Unit Price unchanged OR entering in a new value, adjusting by value, or adjusting by percentage.
- Unit of Measure: users have the option of leaving the Unit of Measure unchanged OR selecting a new value.
Users can select as many options as needed. Then, click on the  button.
The system will automatically open the existing Price Revision that was selected with the appropriate changes mades from the Bulk Edit window.
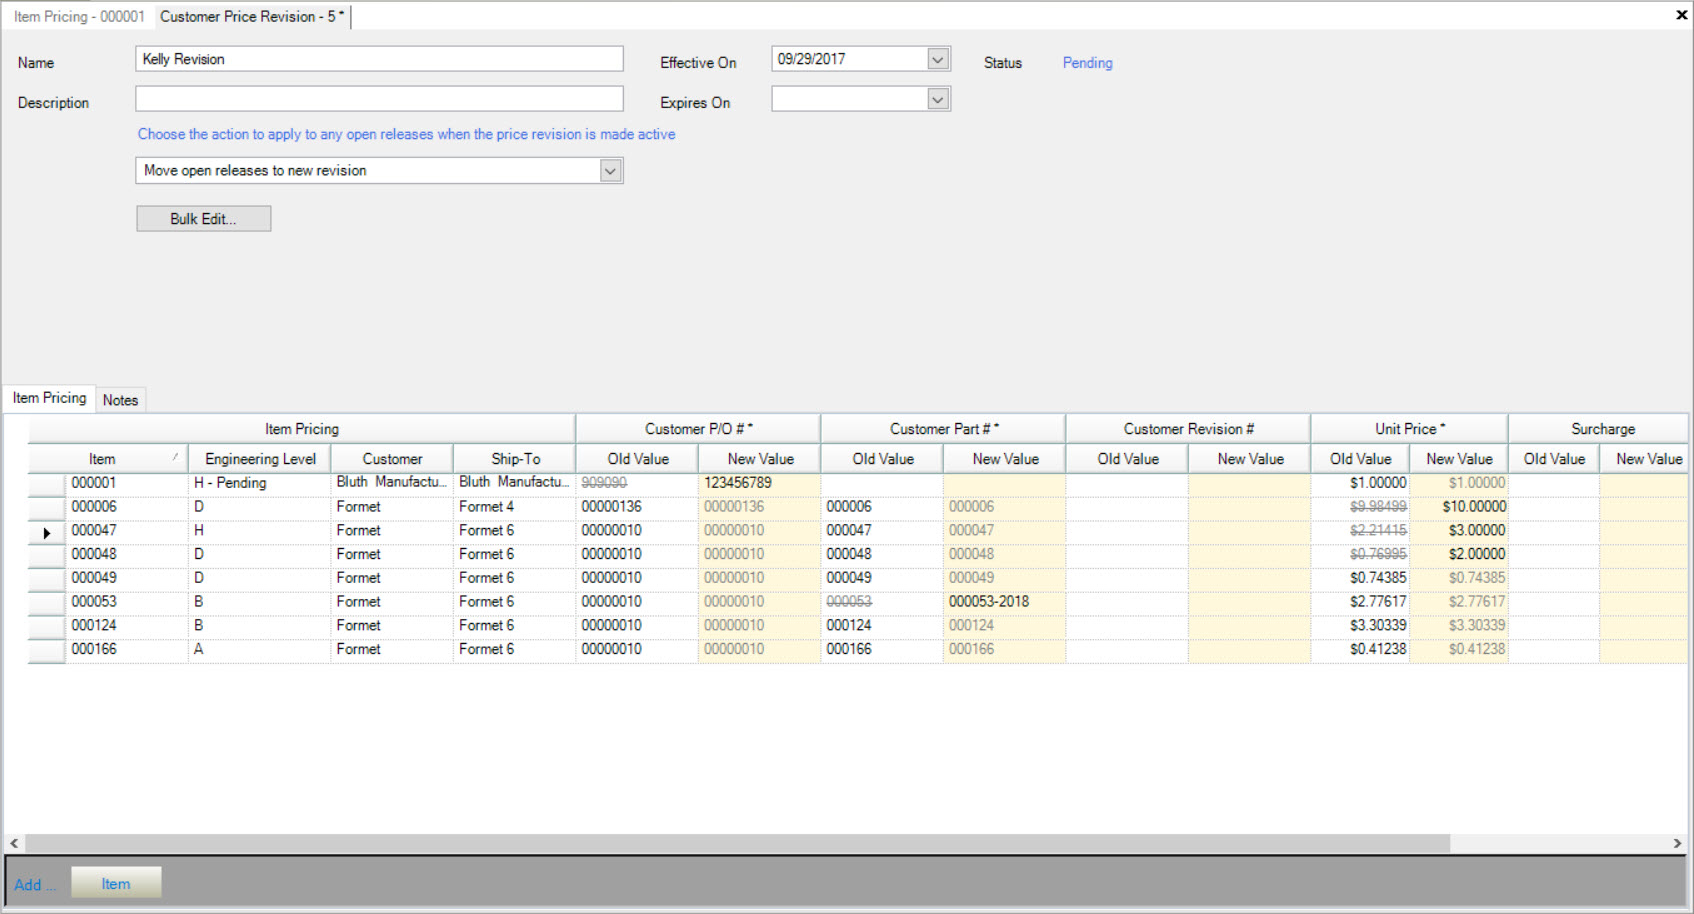
The column in which users made changes to will now appear with an asterick(*) to indicate which part of the Items have been revised. The asterick will remain visible even after the Customer Price Revision has been saved for user reference.
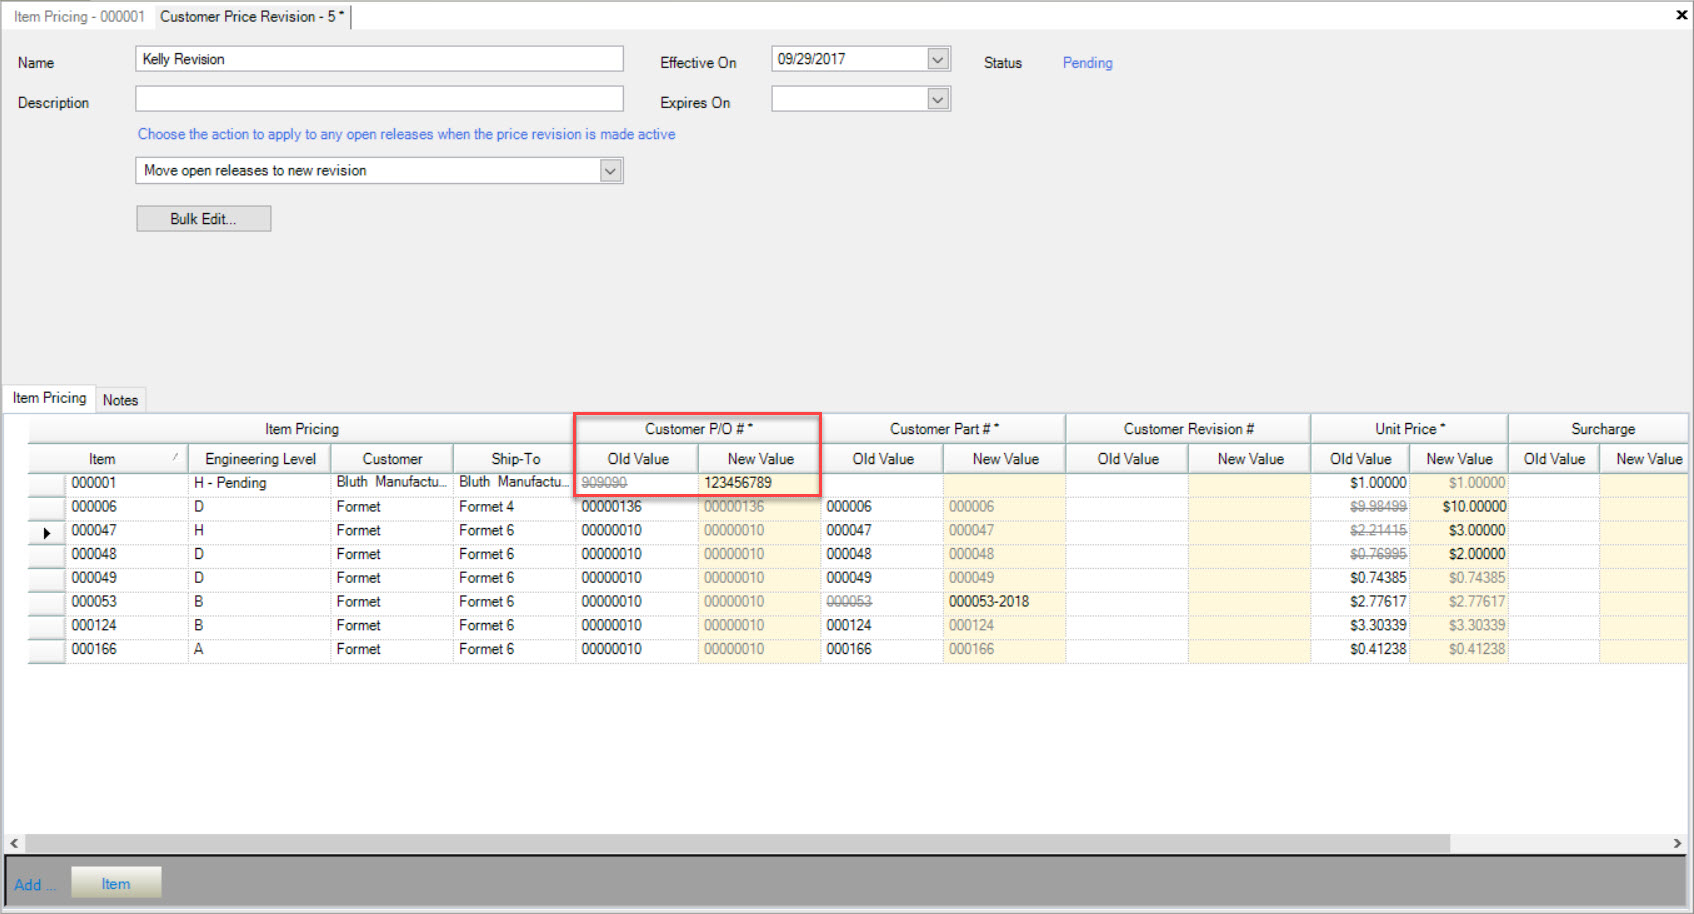
Make sure to save before exiting the screen.
Opening a Revision from an Item
Price Revisions that have a status of Pending will appear in blue and the  button will be visible.
Clicking on the  button will open the Customer Price Revision screen.
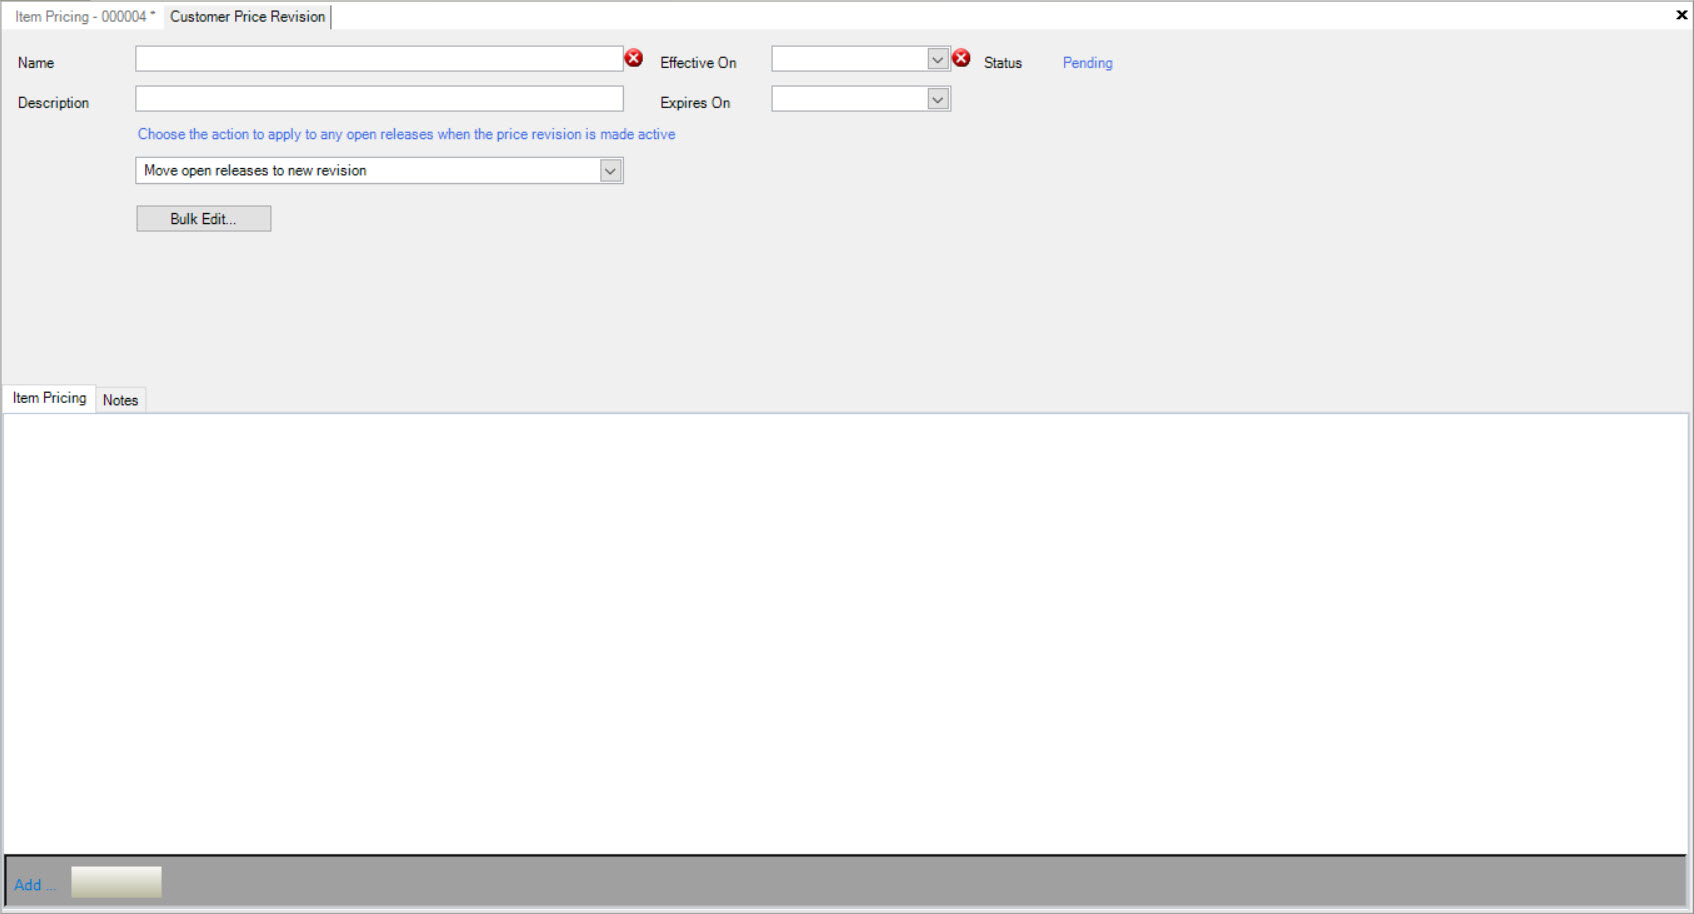
Users must take the steps to create a new Price Revision for the selected Item.
For more information on how to create a new Price Revision, please navigate to Customers > Customer Price Revisions > Creating a New Customer Price Revision.
Note
For more information on Customer Price Revisions, please navigate to Customers > Customer Price Revisions.
Adding Discounts to an Item
Users have the ability to add Discounts to an Item from the Item Pricing screen.
To add a Discount to an Item, navigate to the  tab, and clicking on the
 ![]() icon. The
Item Pricing screen will be displayed.
icon. The
Item Pricing screen will be displayed.

Users can then search for Items either by Item or by Customer. Then, select the Item or Customer by using the available drop-down menu or lookup window. The system will populate the appropriate information.

Locate the appropriate Item under the Open Orders tab and click on the  button.
The Discounts window will appear.
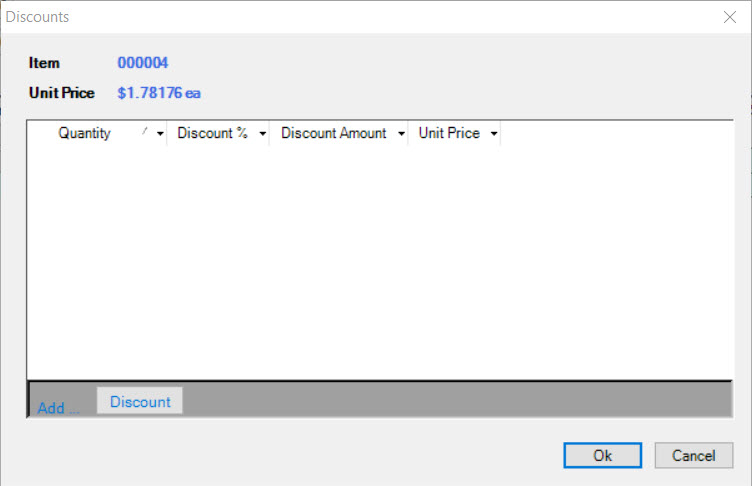
Click on the  button.
A new row will appear where users must enter in the Quantity, and Discount % OR Discount Amount OR Unit Price.
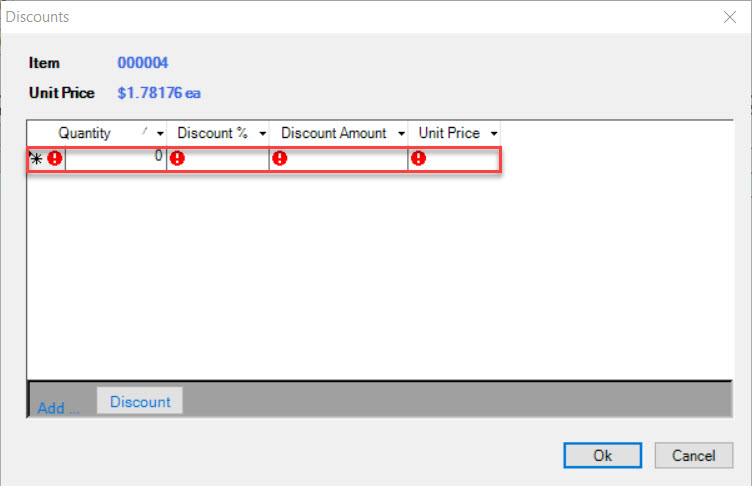
Once the appropriate fields have been entered, click on the  button.
The Discount will be added to the selected Item and the  button will appear blue to indicate to users that there is a
Discount associated with the Item.
Make sure to save your changes before exiting the screen.
Editing a Discount
To edit a Discount, navigate to the  tab, and clicking on the
 ![]() icon. The
Item Pricing screen will be displayed.
icon. The
Item Pricing screen will be displayed.

Users can then search for Items either by Item or by Customer. Then, select the Item or Customer by using the available drop-down menu or lookup window. The system will populate the appropriate information.

Locate the appropriate Item under the Open Orders tab and click on the  button. The Discounts window will appear.

Locate the Discount you wish to edit and make the necessary changes.
Make sure to save before exiting the screen.
Deleting a Discount
To delete a Discount, navigate to the  tab, and clicking on the
 ![]() icon. The
Item Pricing screen will be displayed.
icon. The
Item Pricing screen will be displayed.

Users can then search for Items either by Item or by Customer. Then, select the Item or Customer by using the available drop-down menu or lookup window. The system will populate the appropriate information.

Locate the appropriate Item under the Open Orders tab and click on the  button. The Discounts window will appear.

Locate the Discount you wish to delete and highlight the appropriate row. Use your Delete key and when the system prompts you, select Yes.
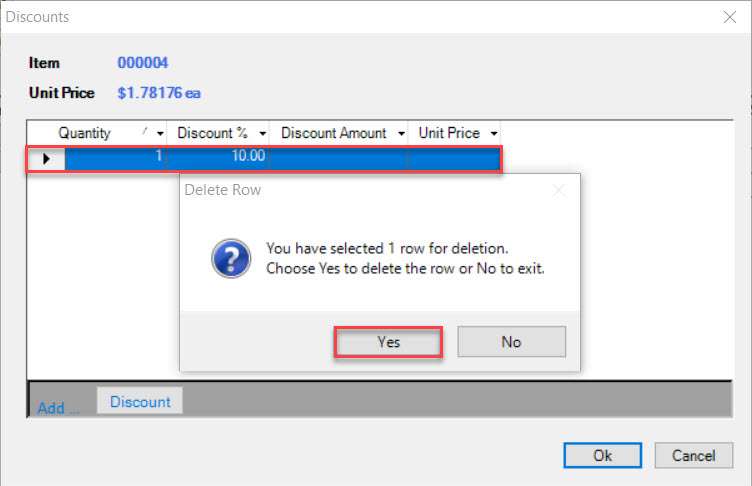
The selected Discount will be deleted and users can then exit out of the Discounts window.
Make sure to save your changes before exiting the screen.