Receiving
The Receiving module can be used to perform normal, blanket, and/or processor purhcase order receipts. Users can also view open purchase orders, existing receipts, and receipt history.
Open Receipts
Users have the ability to view, edit, and/or delete Open Receipts in the system.
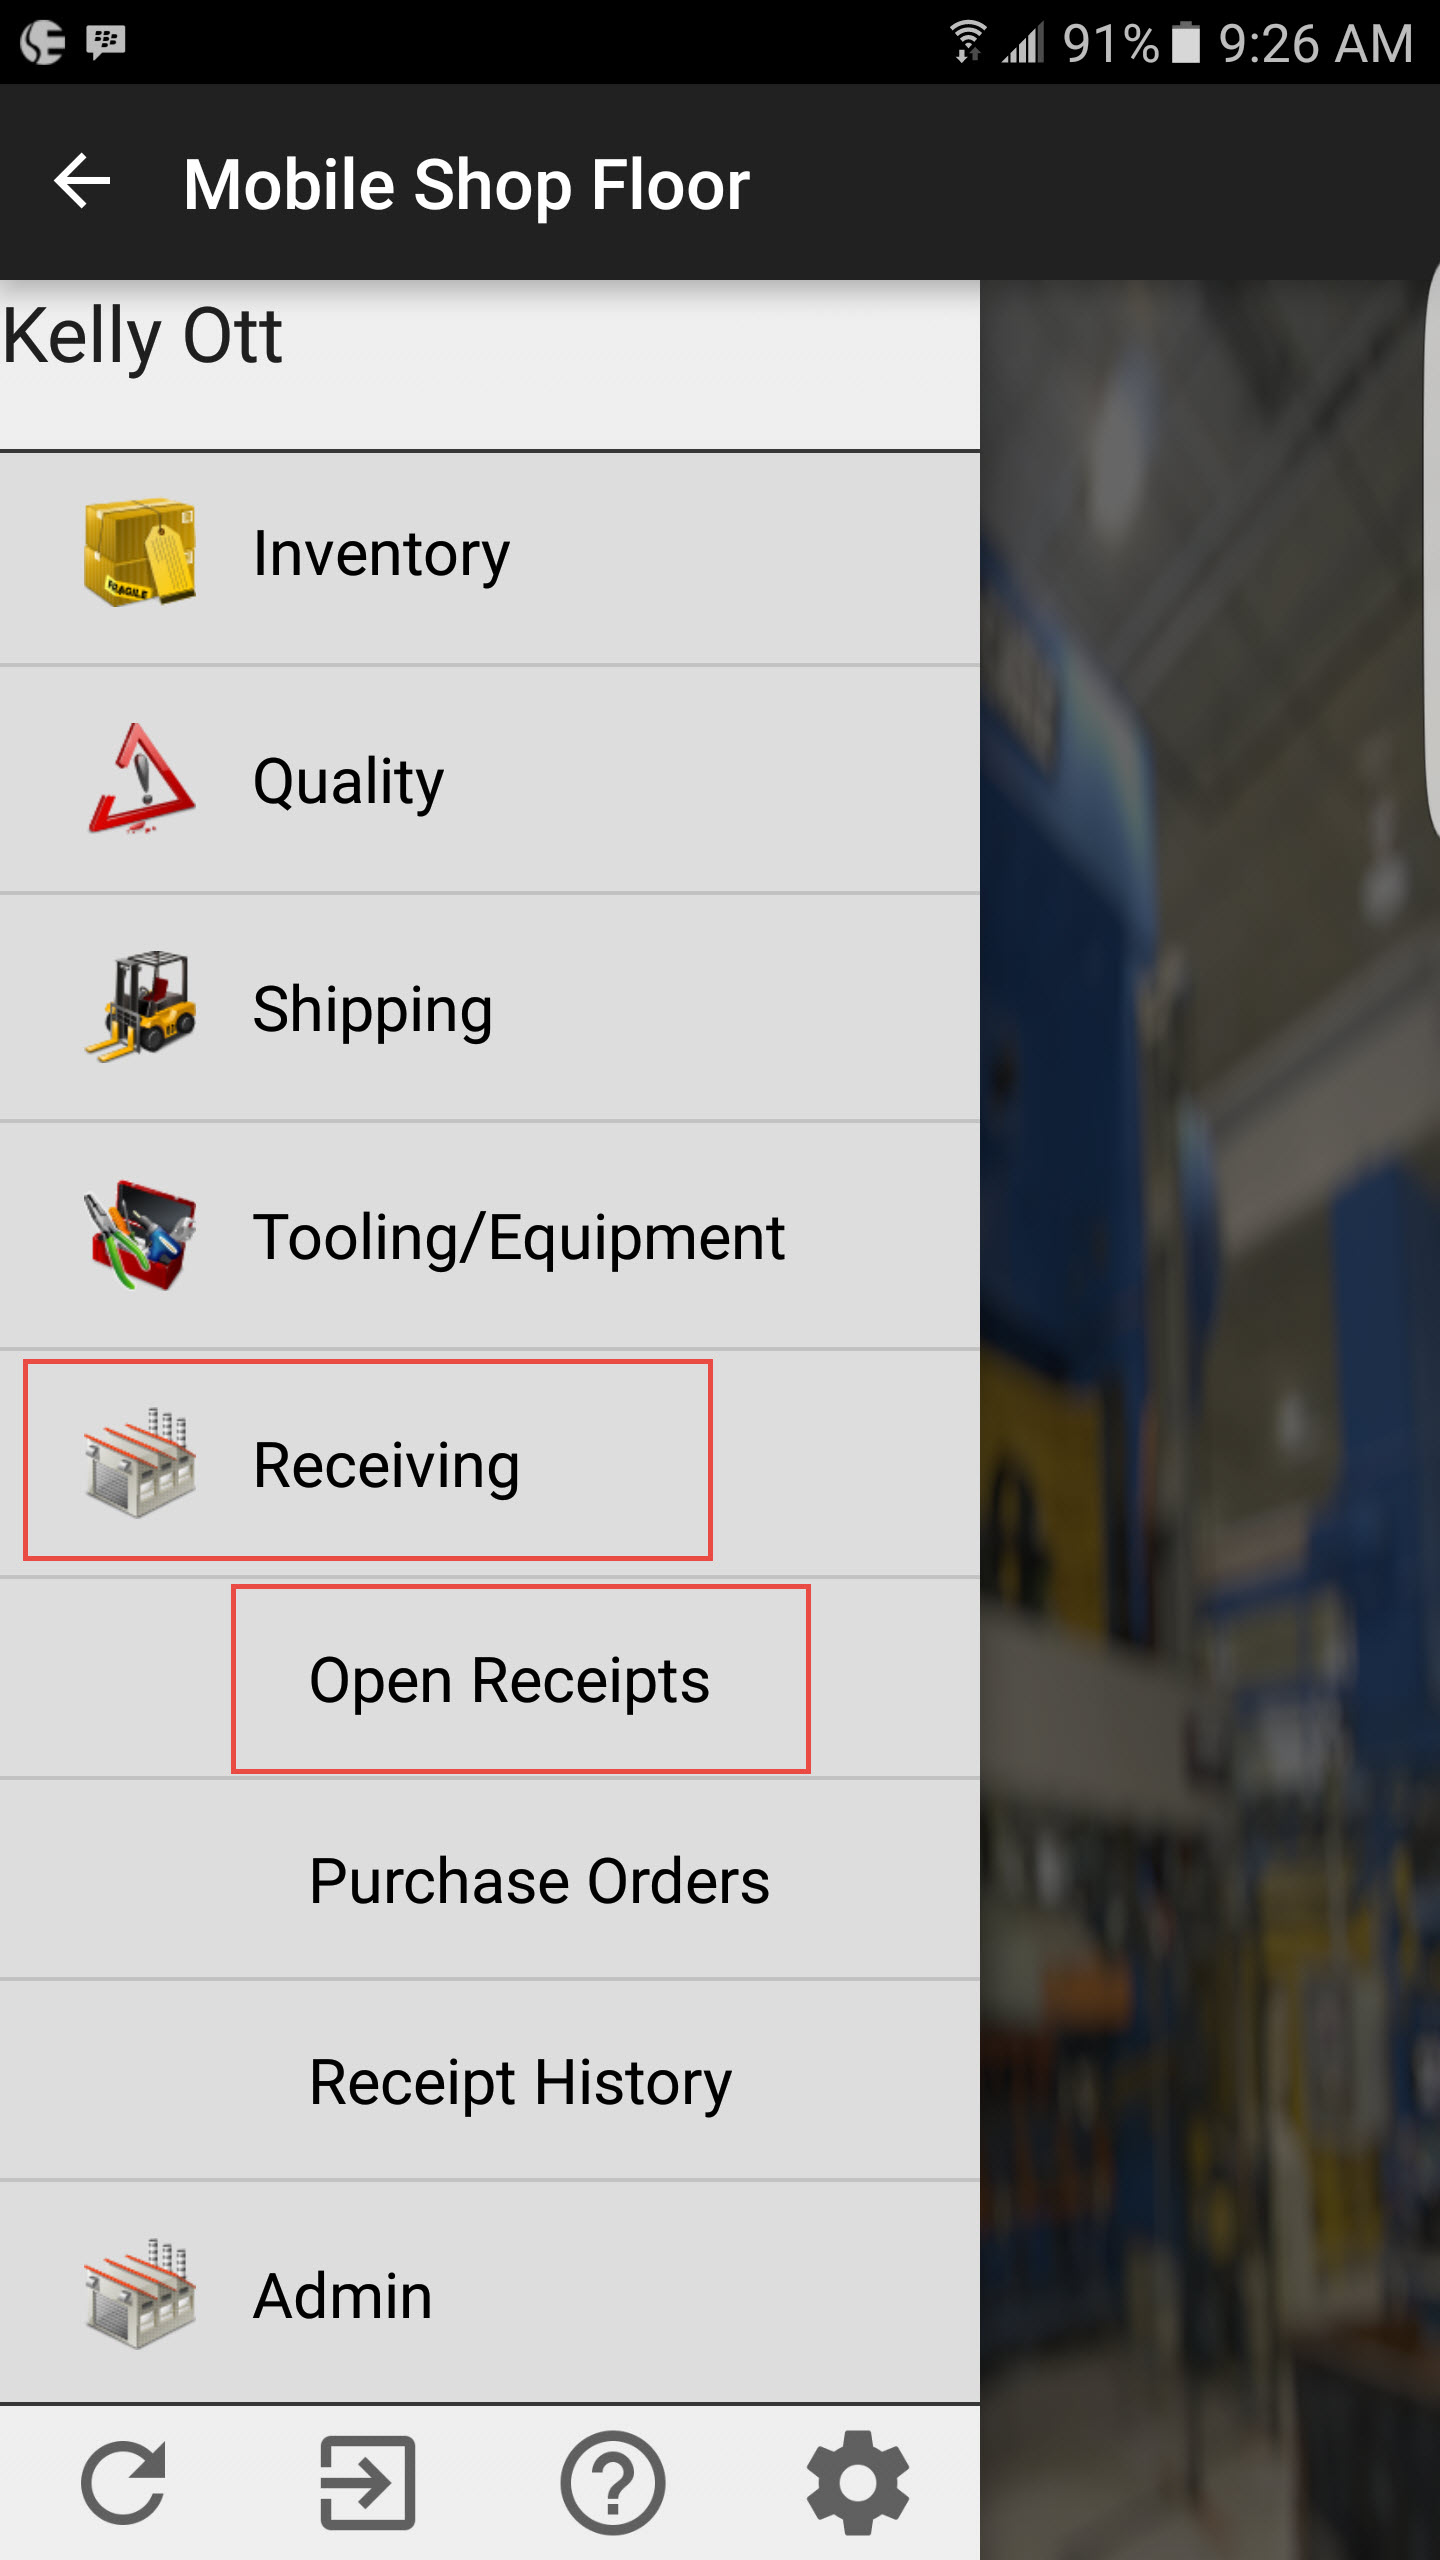
To view Open Receipts, from the navigation drawer select Open Receipts under the Receiving module.
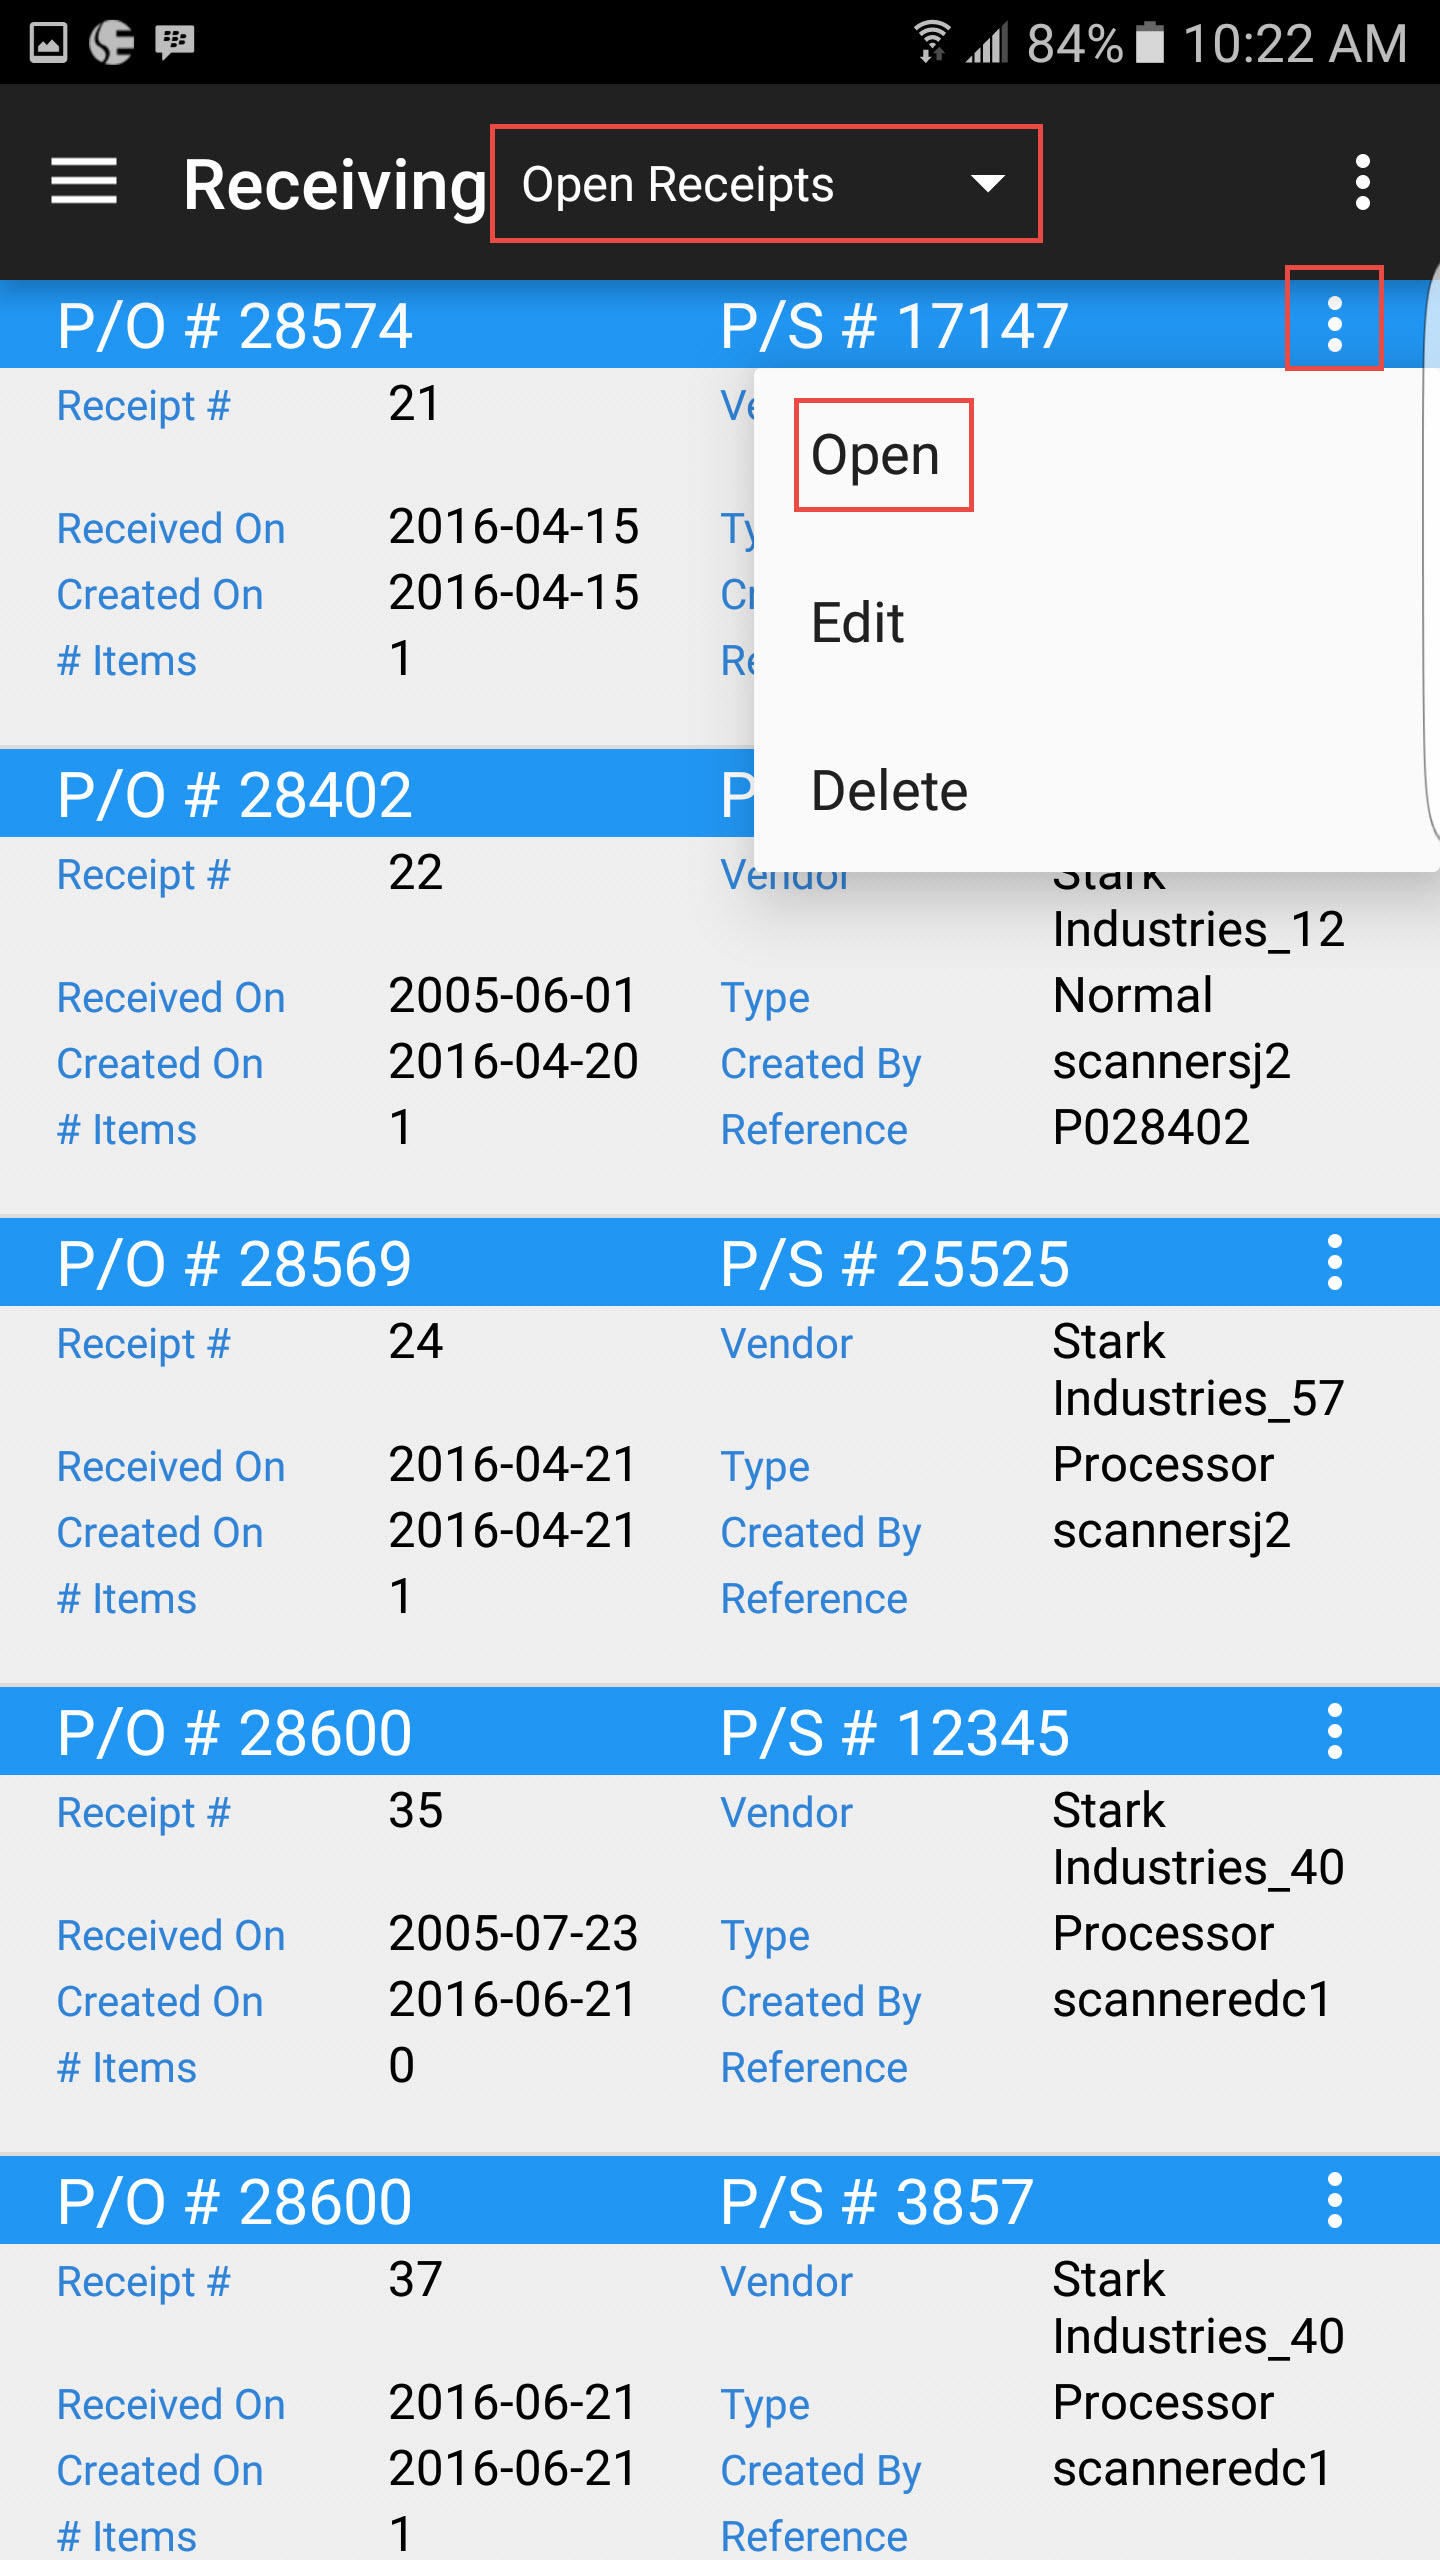
The Open Receipts screen will appear displaying all existing Open Receipts in the system.
To view an Open Receipt, select Open from the action menu or simply touch the row of the Open Receipt.
The selected Open Receipt will be displayed.
Creating a New Receipt
To create a new receipt, select New Receipt from the action menu located at the top of the screen.
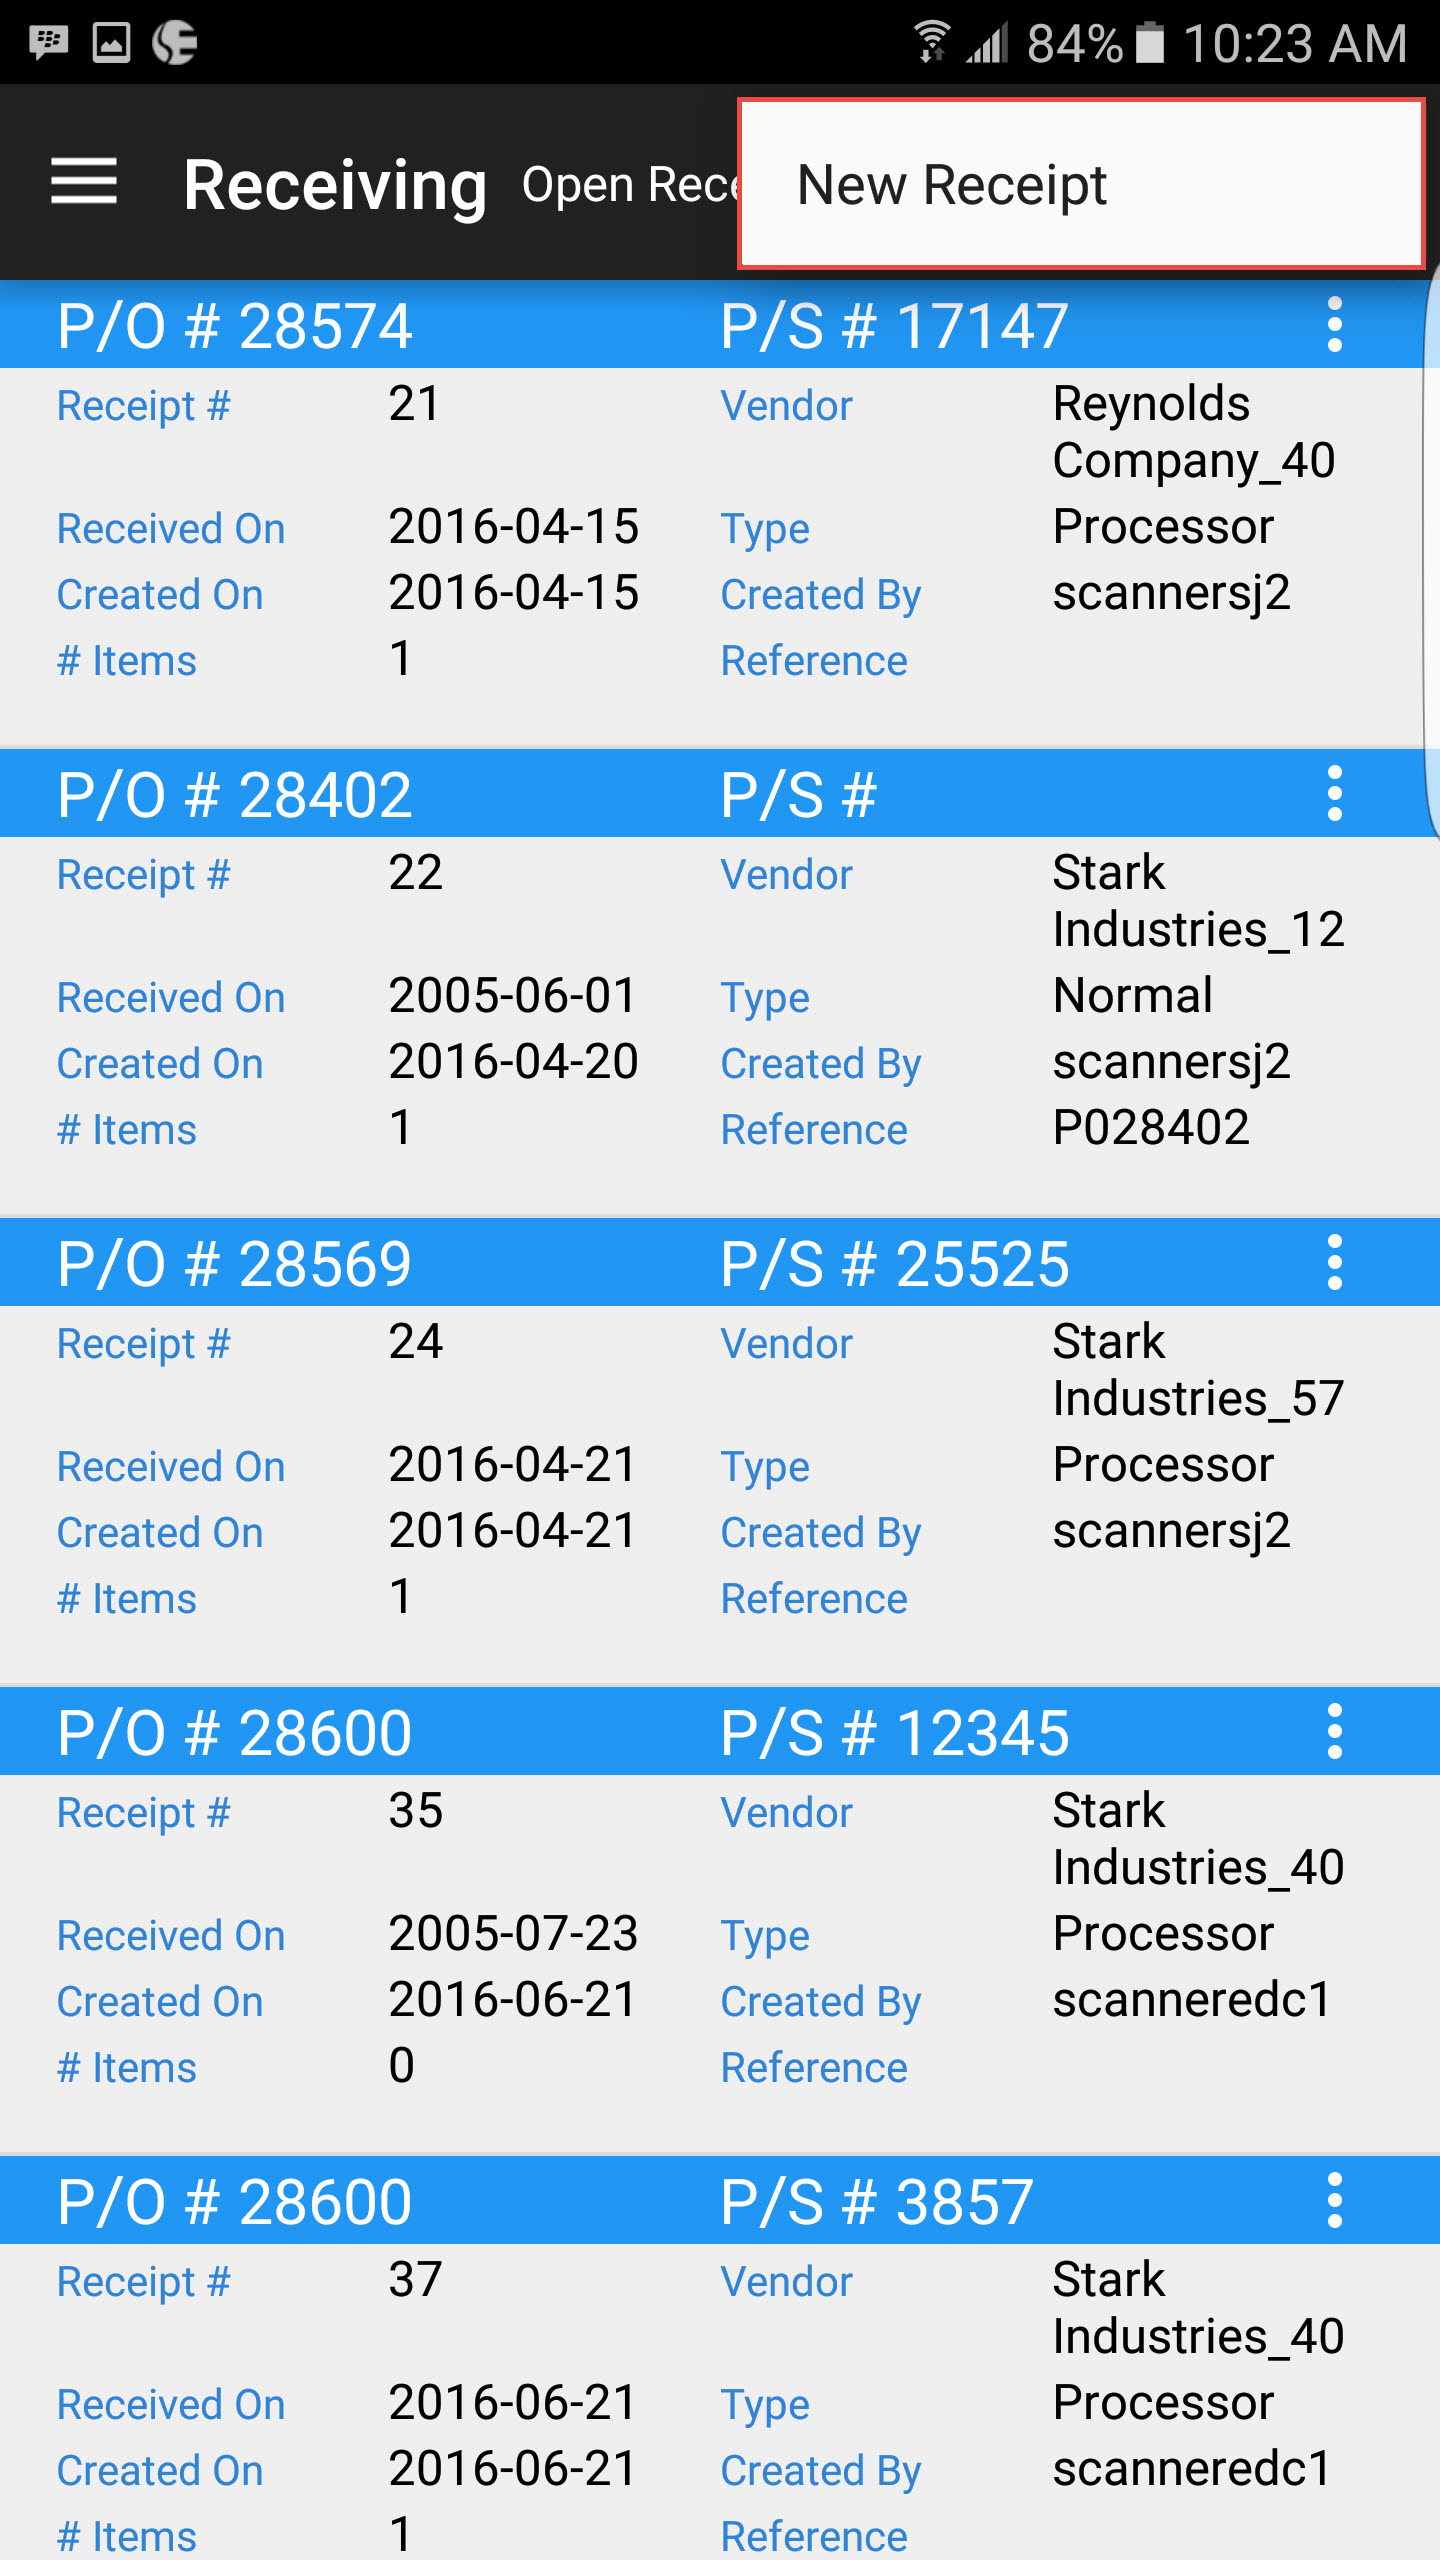
The New Receipt window will open where users can create a Vendor receipt, or an Inventory Transfer receipt.
When creating a Vendor receipt, users can select the Vendor, P/O #, Received On date, and enter a P/S # using the available drop-down menus.
When creating an Inventory Transfer users can select a Ship From and a P/S # using the available drop-down menus.
Creating Vendor or Inventory Transfer receipts after selecting OK, will open the receipt details.
Opening an Existing Receipt
Receiving Serial Numbers from a Receipt
Once you have created barcode labels to receive, or, if the incoming materials have tags already on them, you can start receiving them into the system.
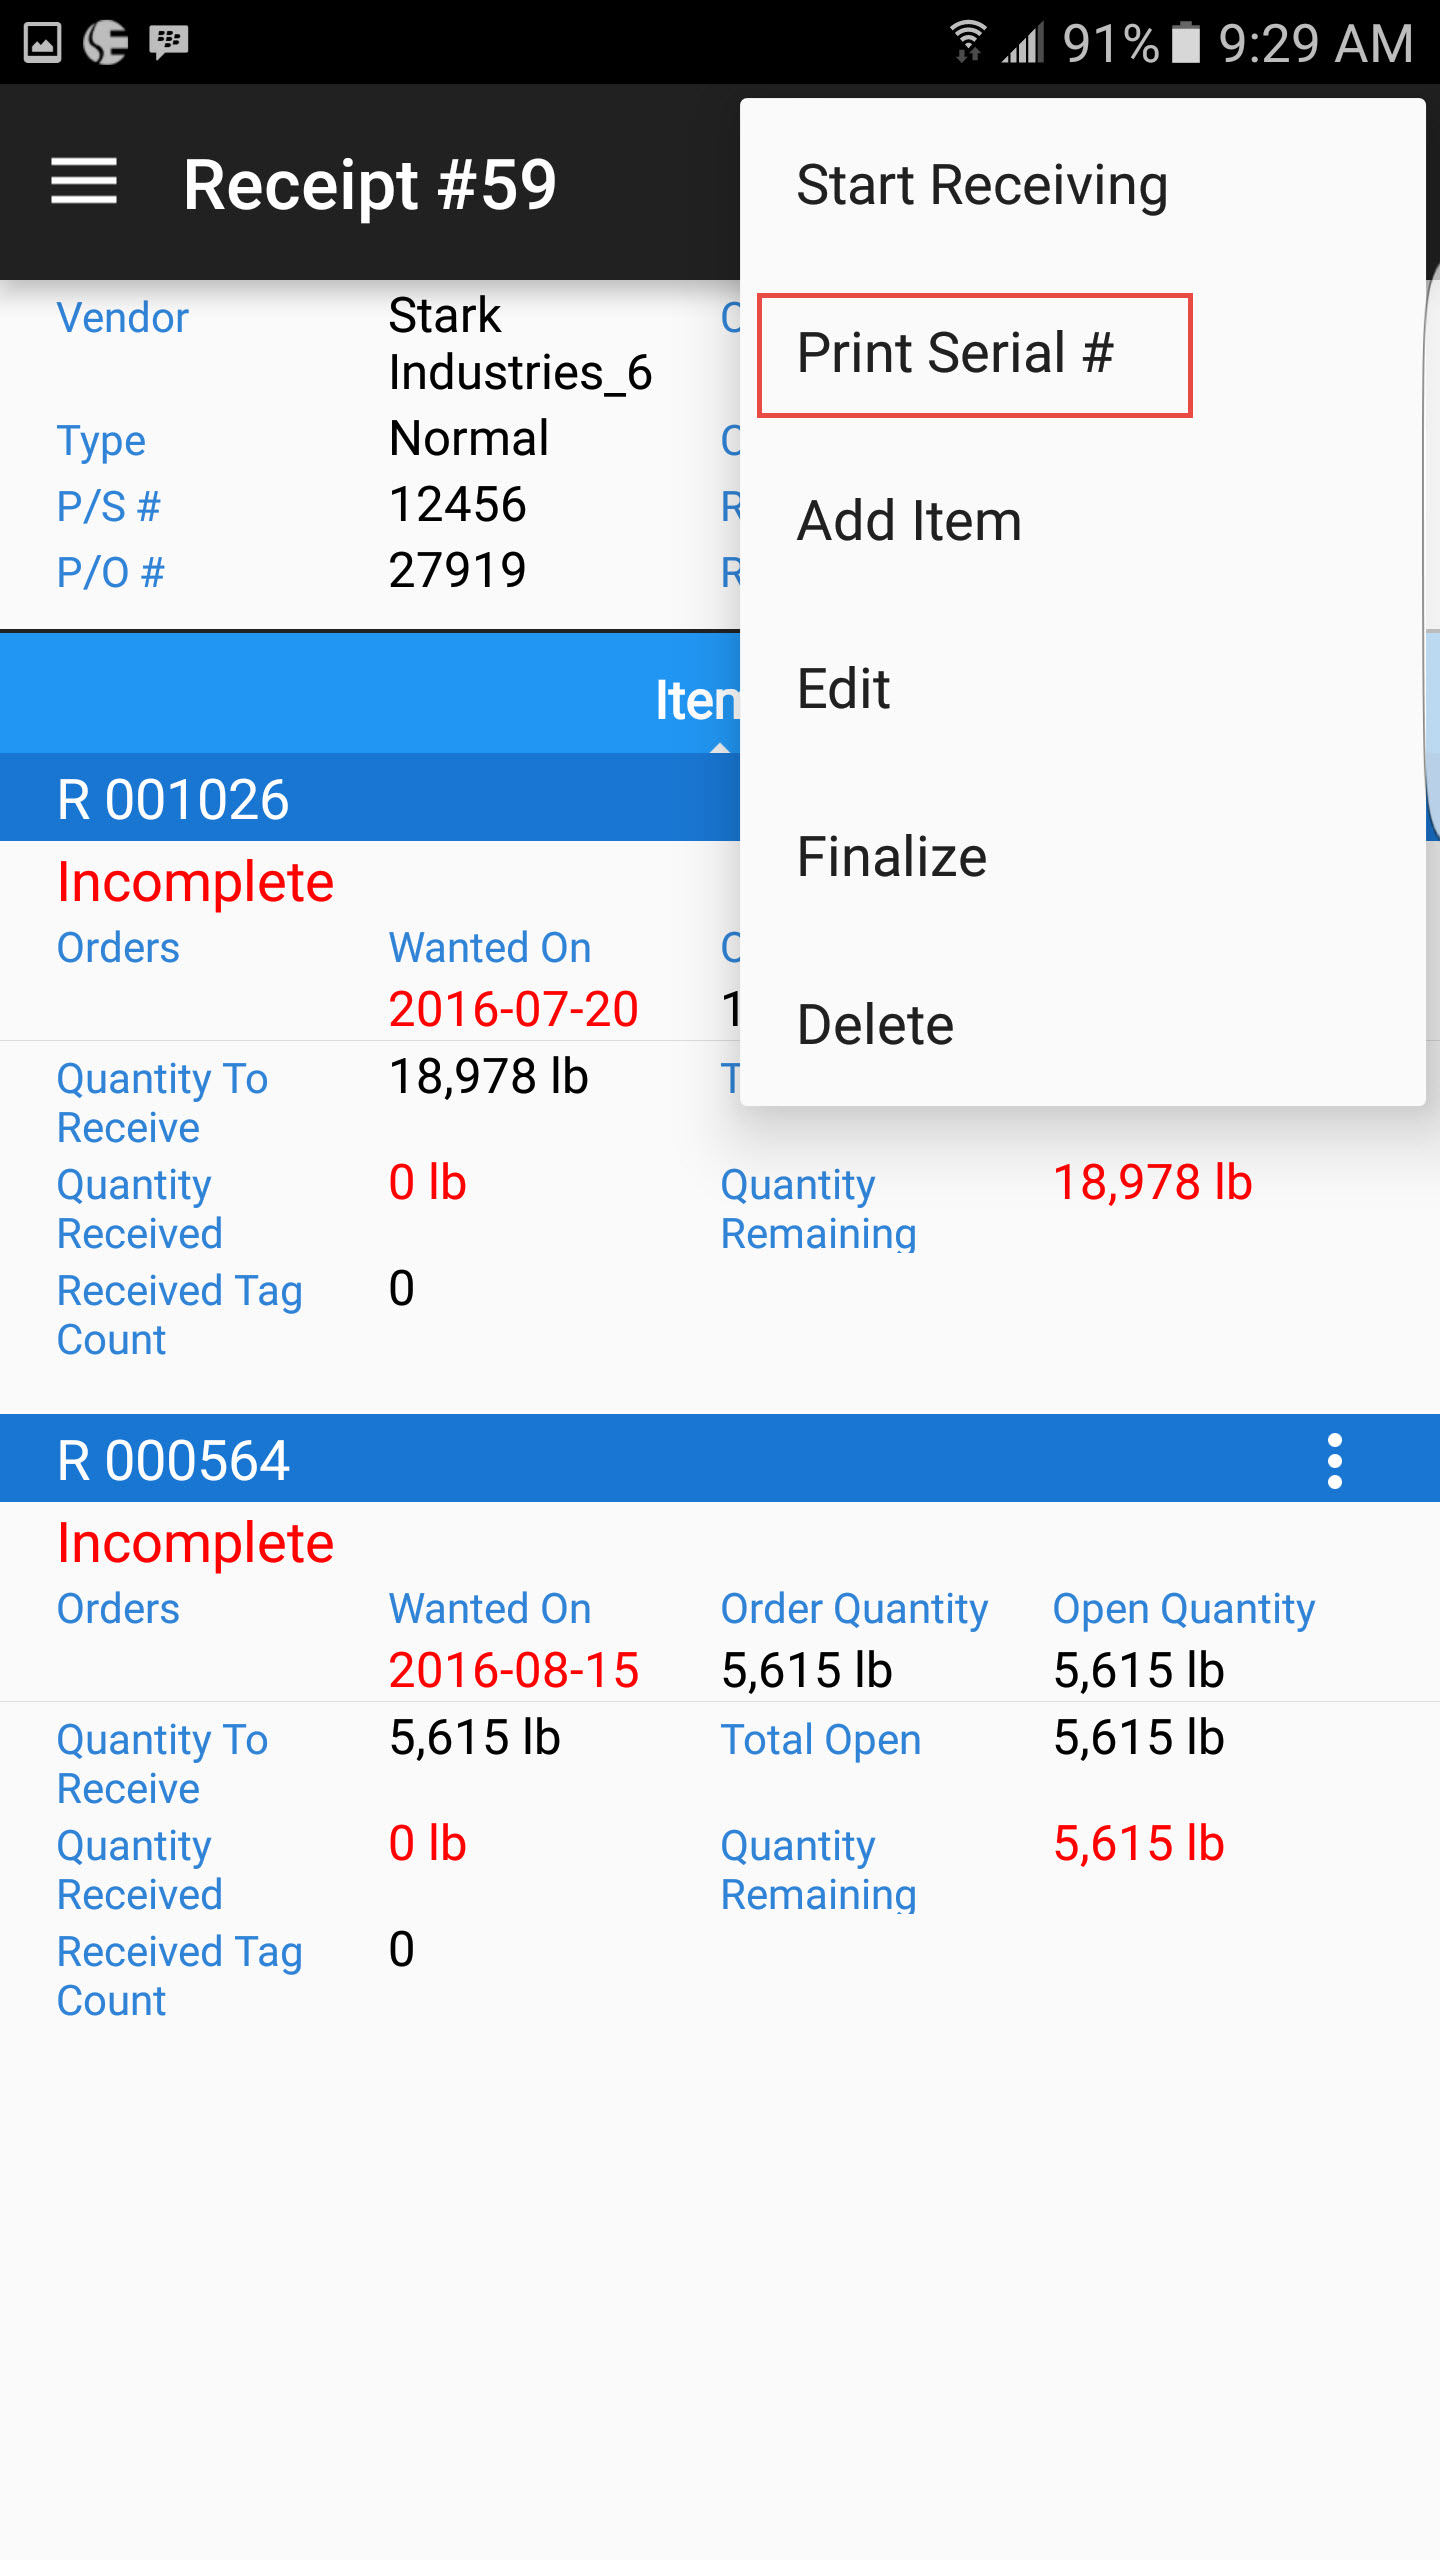
To start receiving, navigate to the action menu at the top right of the screen and select Print Serial #.
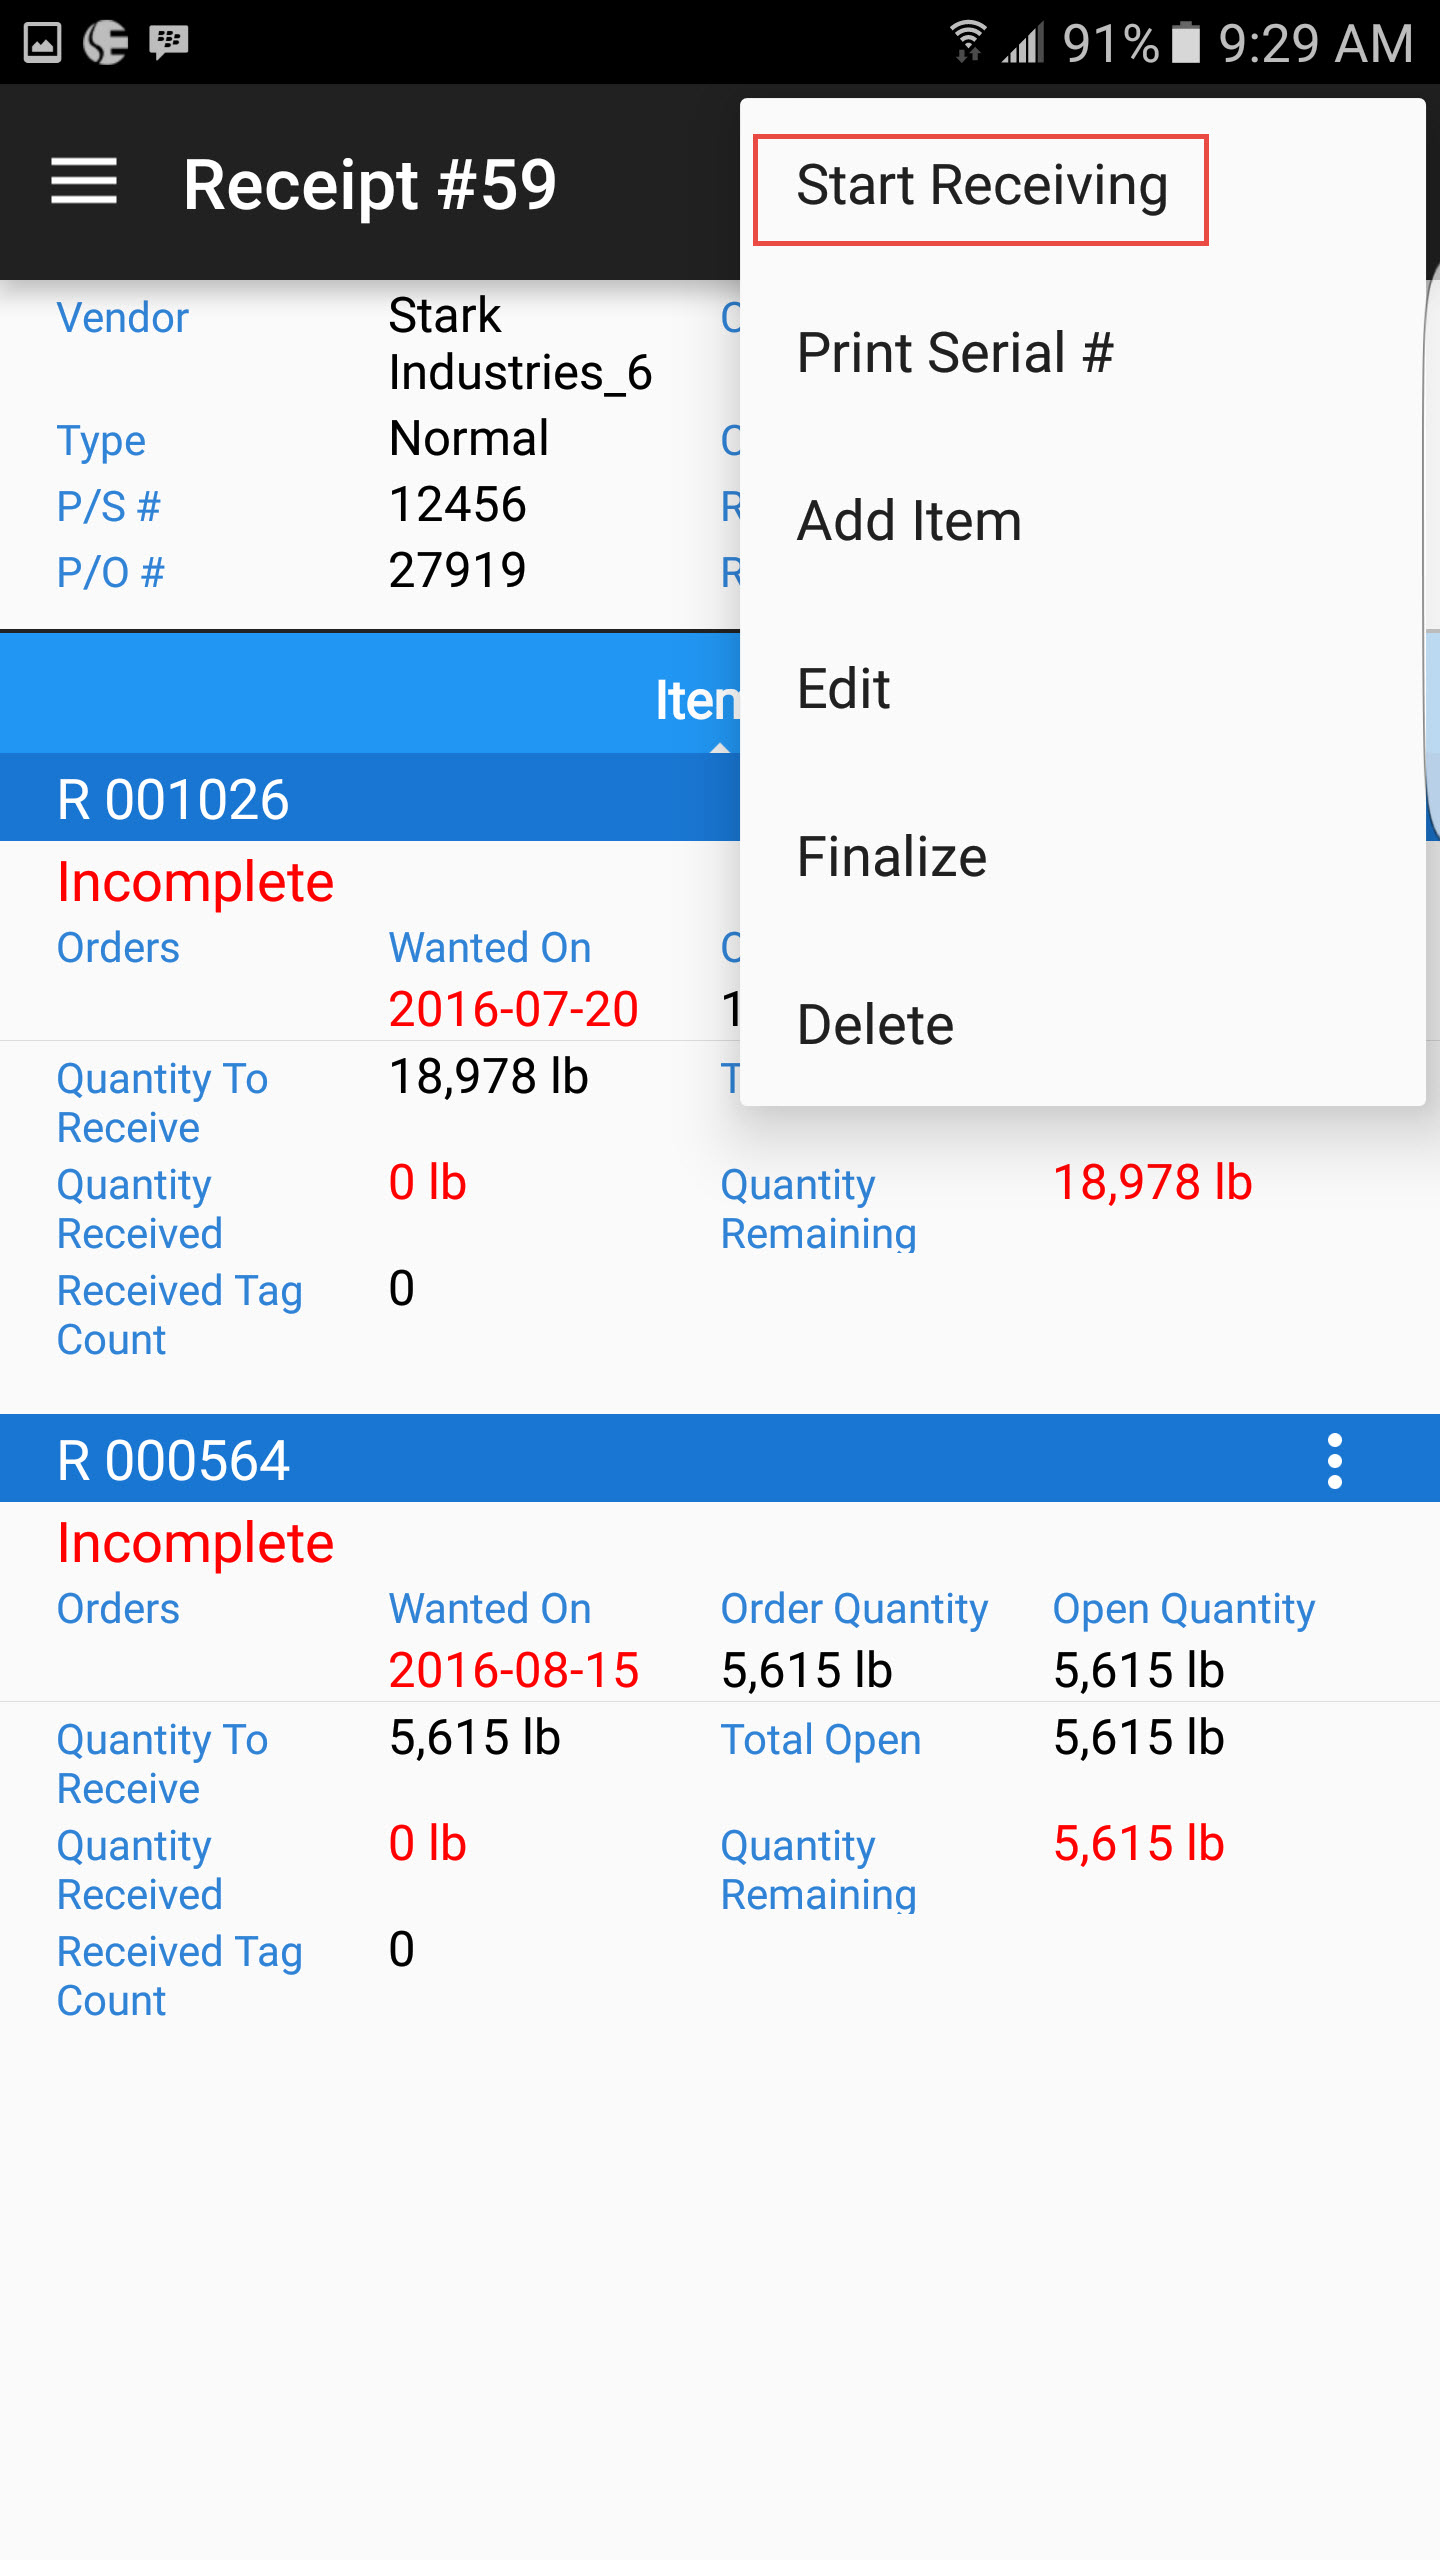
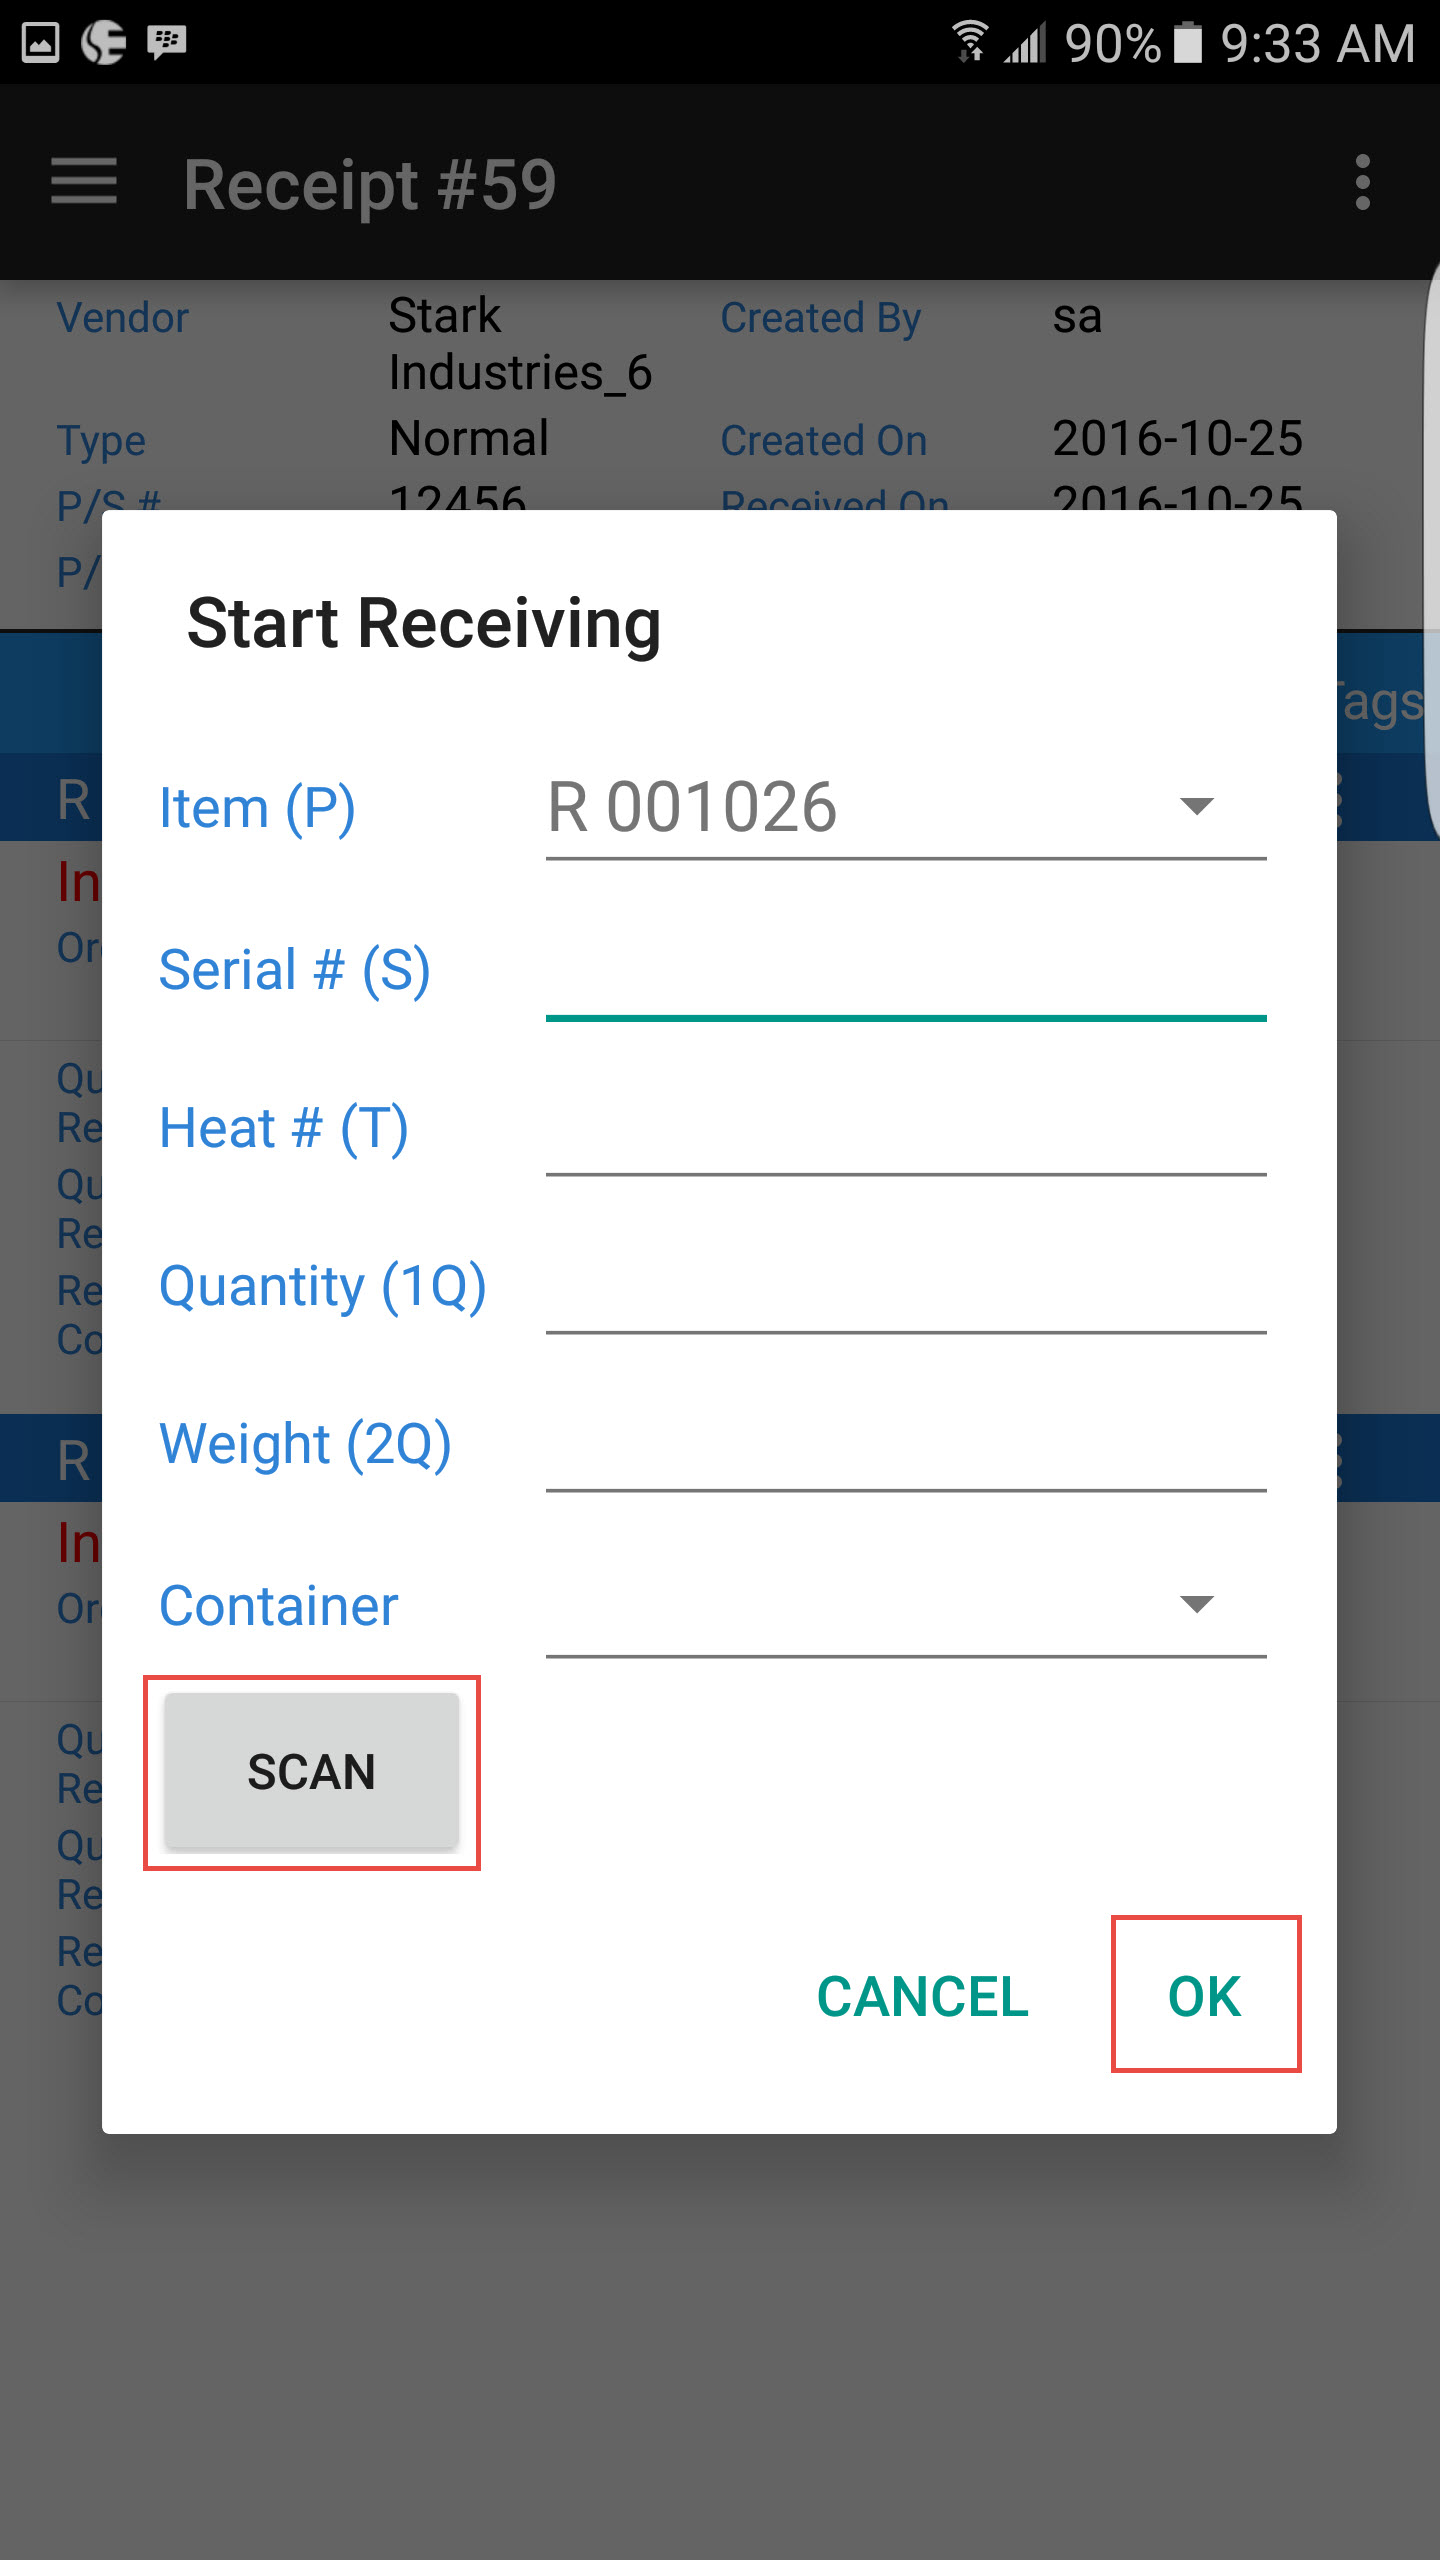
This will open the Start Receiving screen. If you printed a serial number barcode you can scan the serial number by clicking the SCAN button, and scanning the serial number barcode.
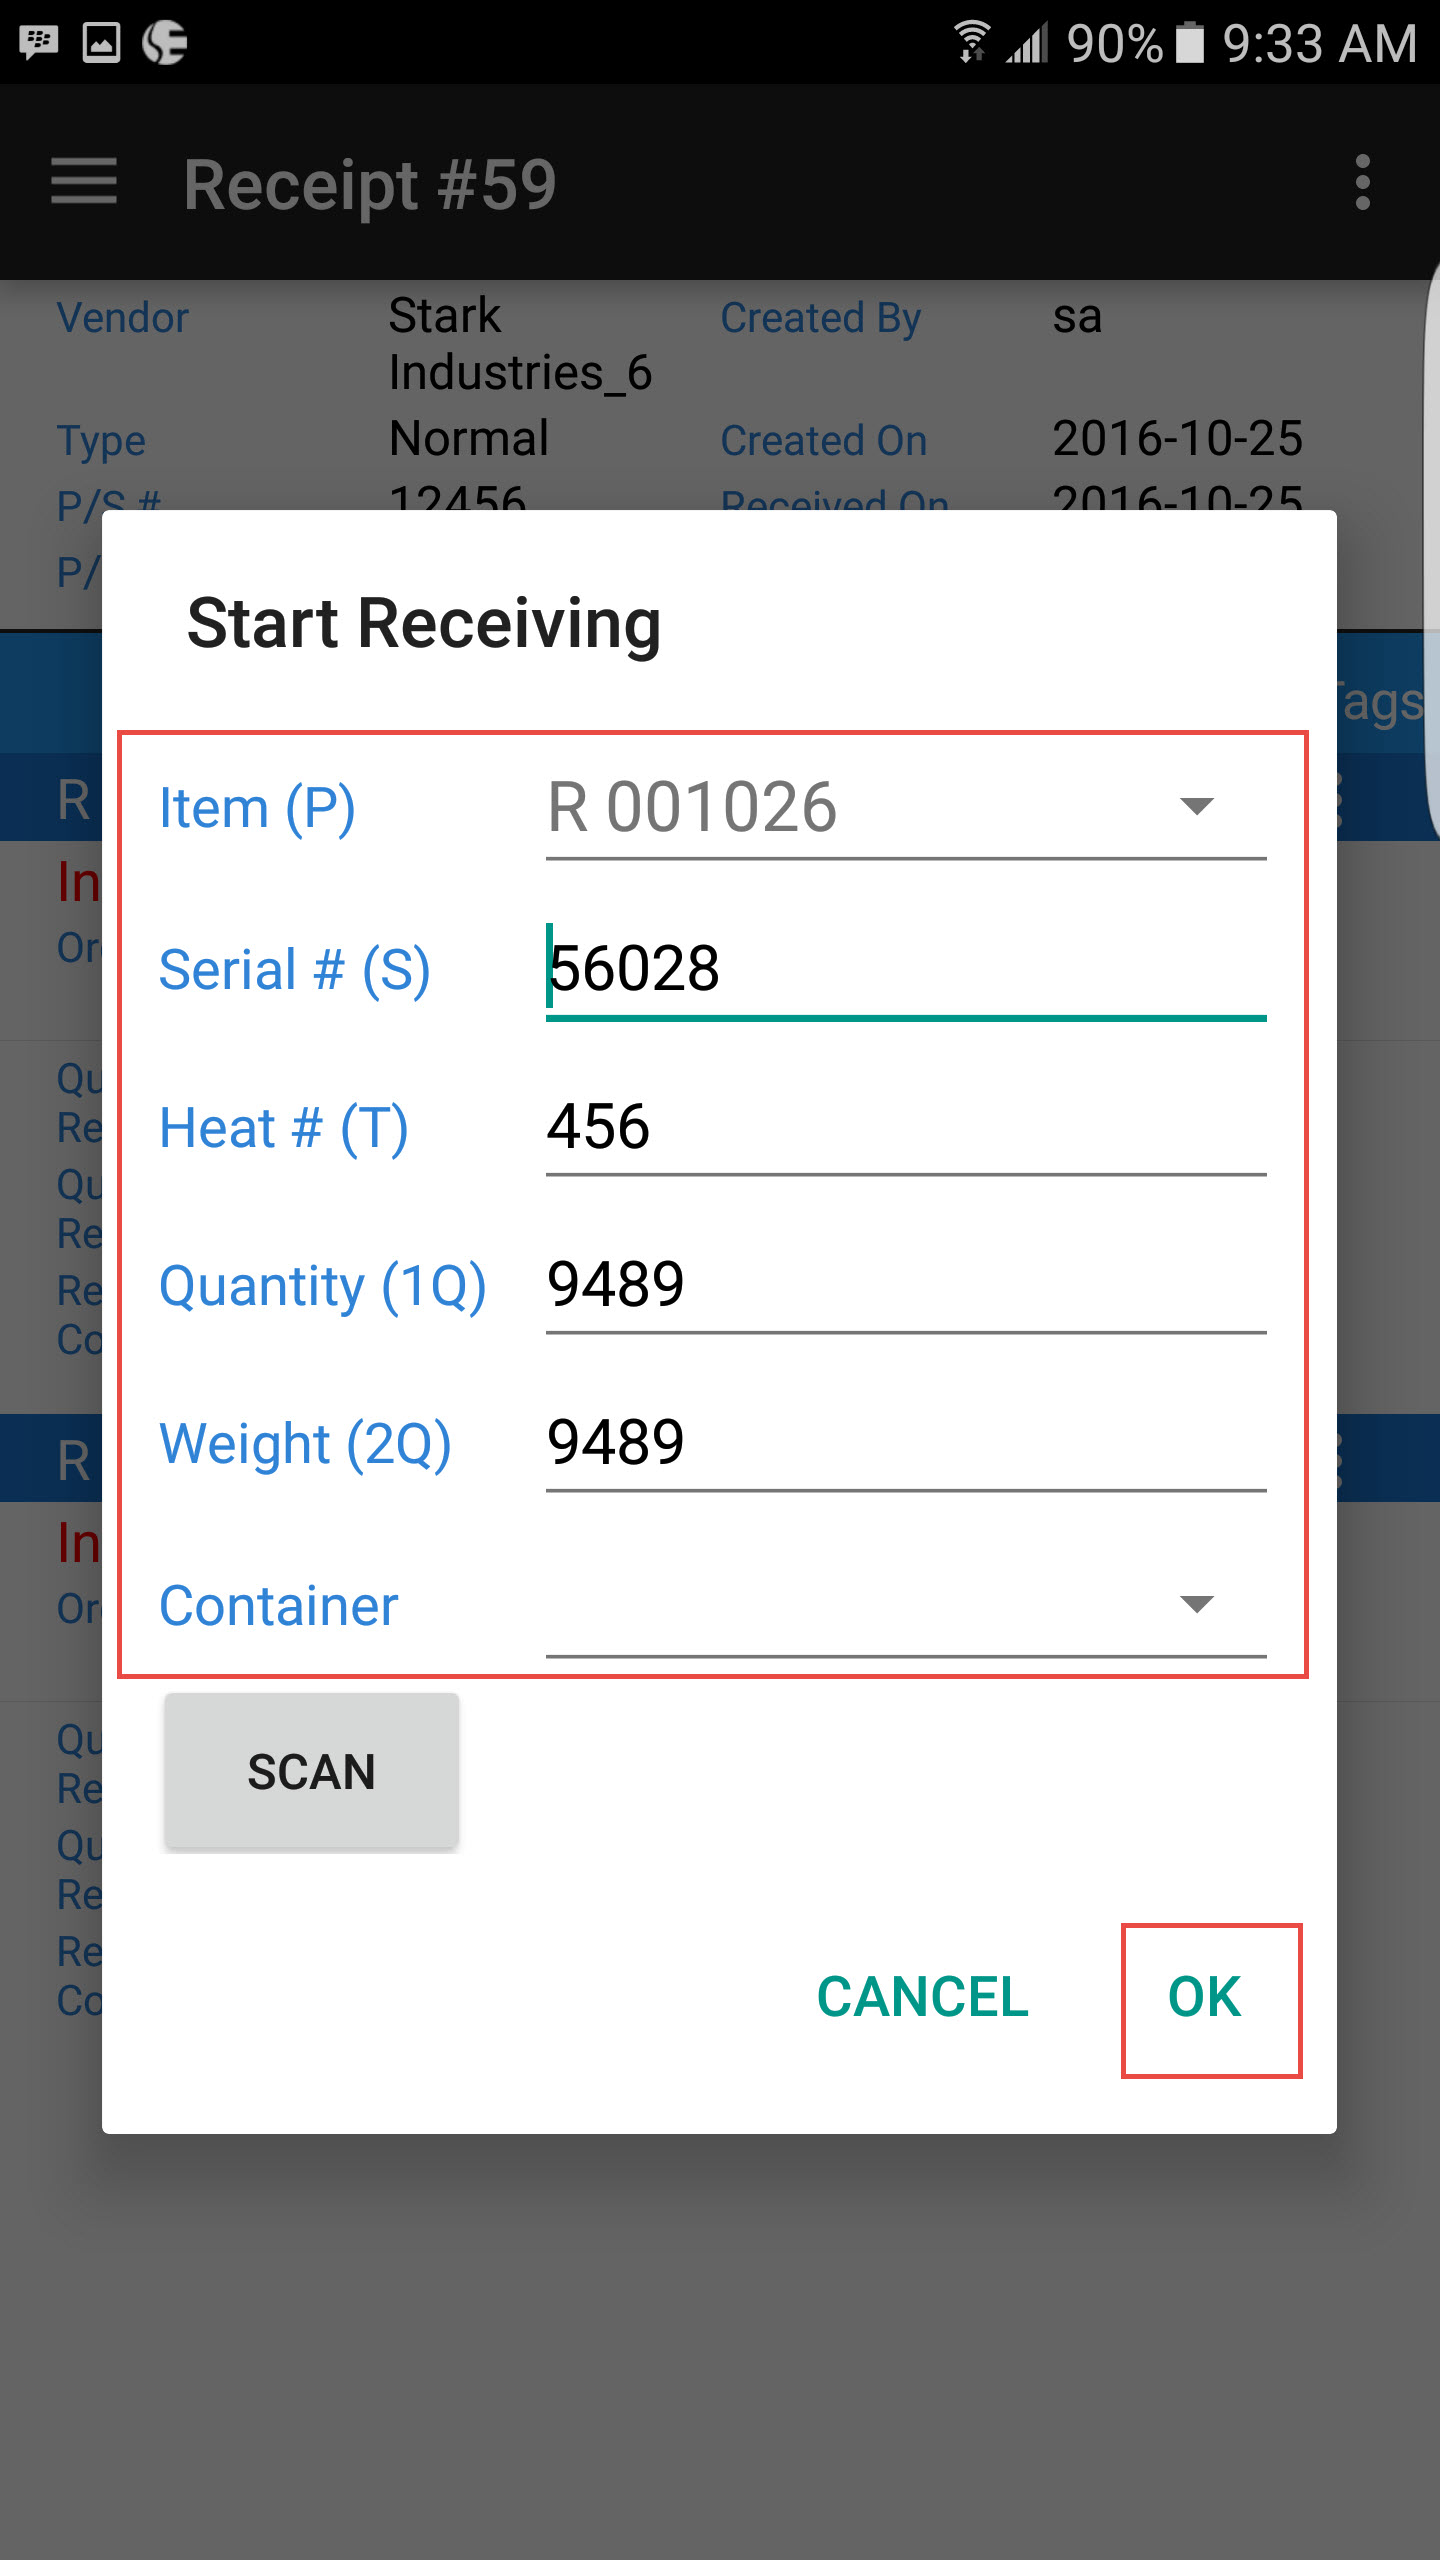
The other will get populated from scanning the serial number. If you did not create a barcode label and are scanning an existing tag on incoming material, you can just scan the fields on the existing barcode label to complete the information required. Once you are done, touch OK.
You will receive a message when the serial number has been received into the system, and the information for the item will be updated to show the Quantity Received, Quantity Remaining, and Received Tag Count. The item will show as Incomplete until the full quantity has been received.
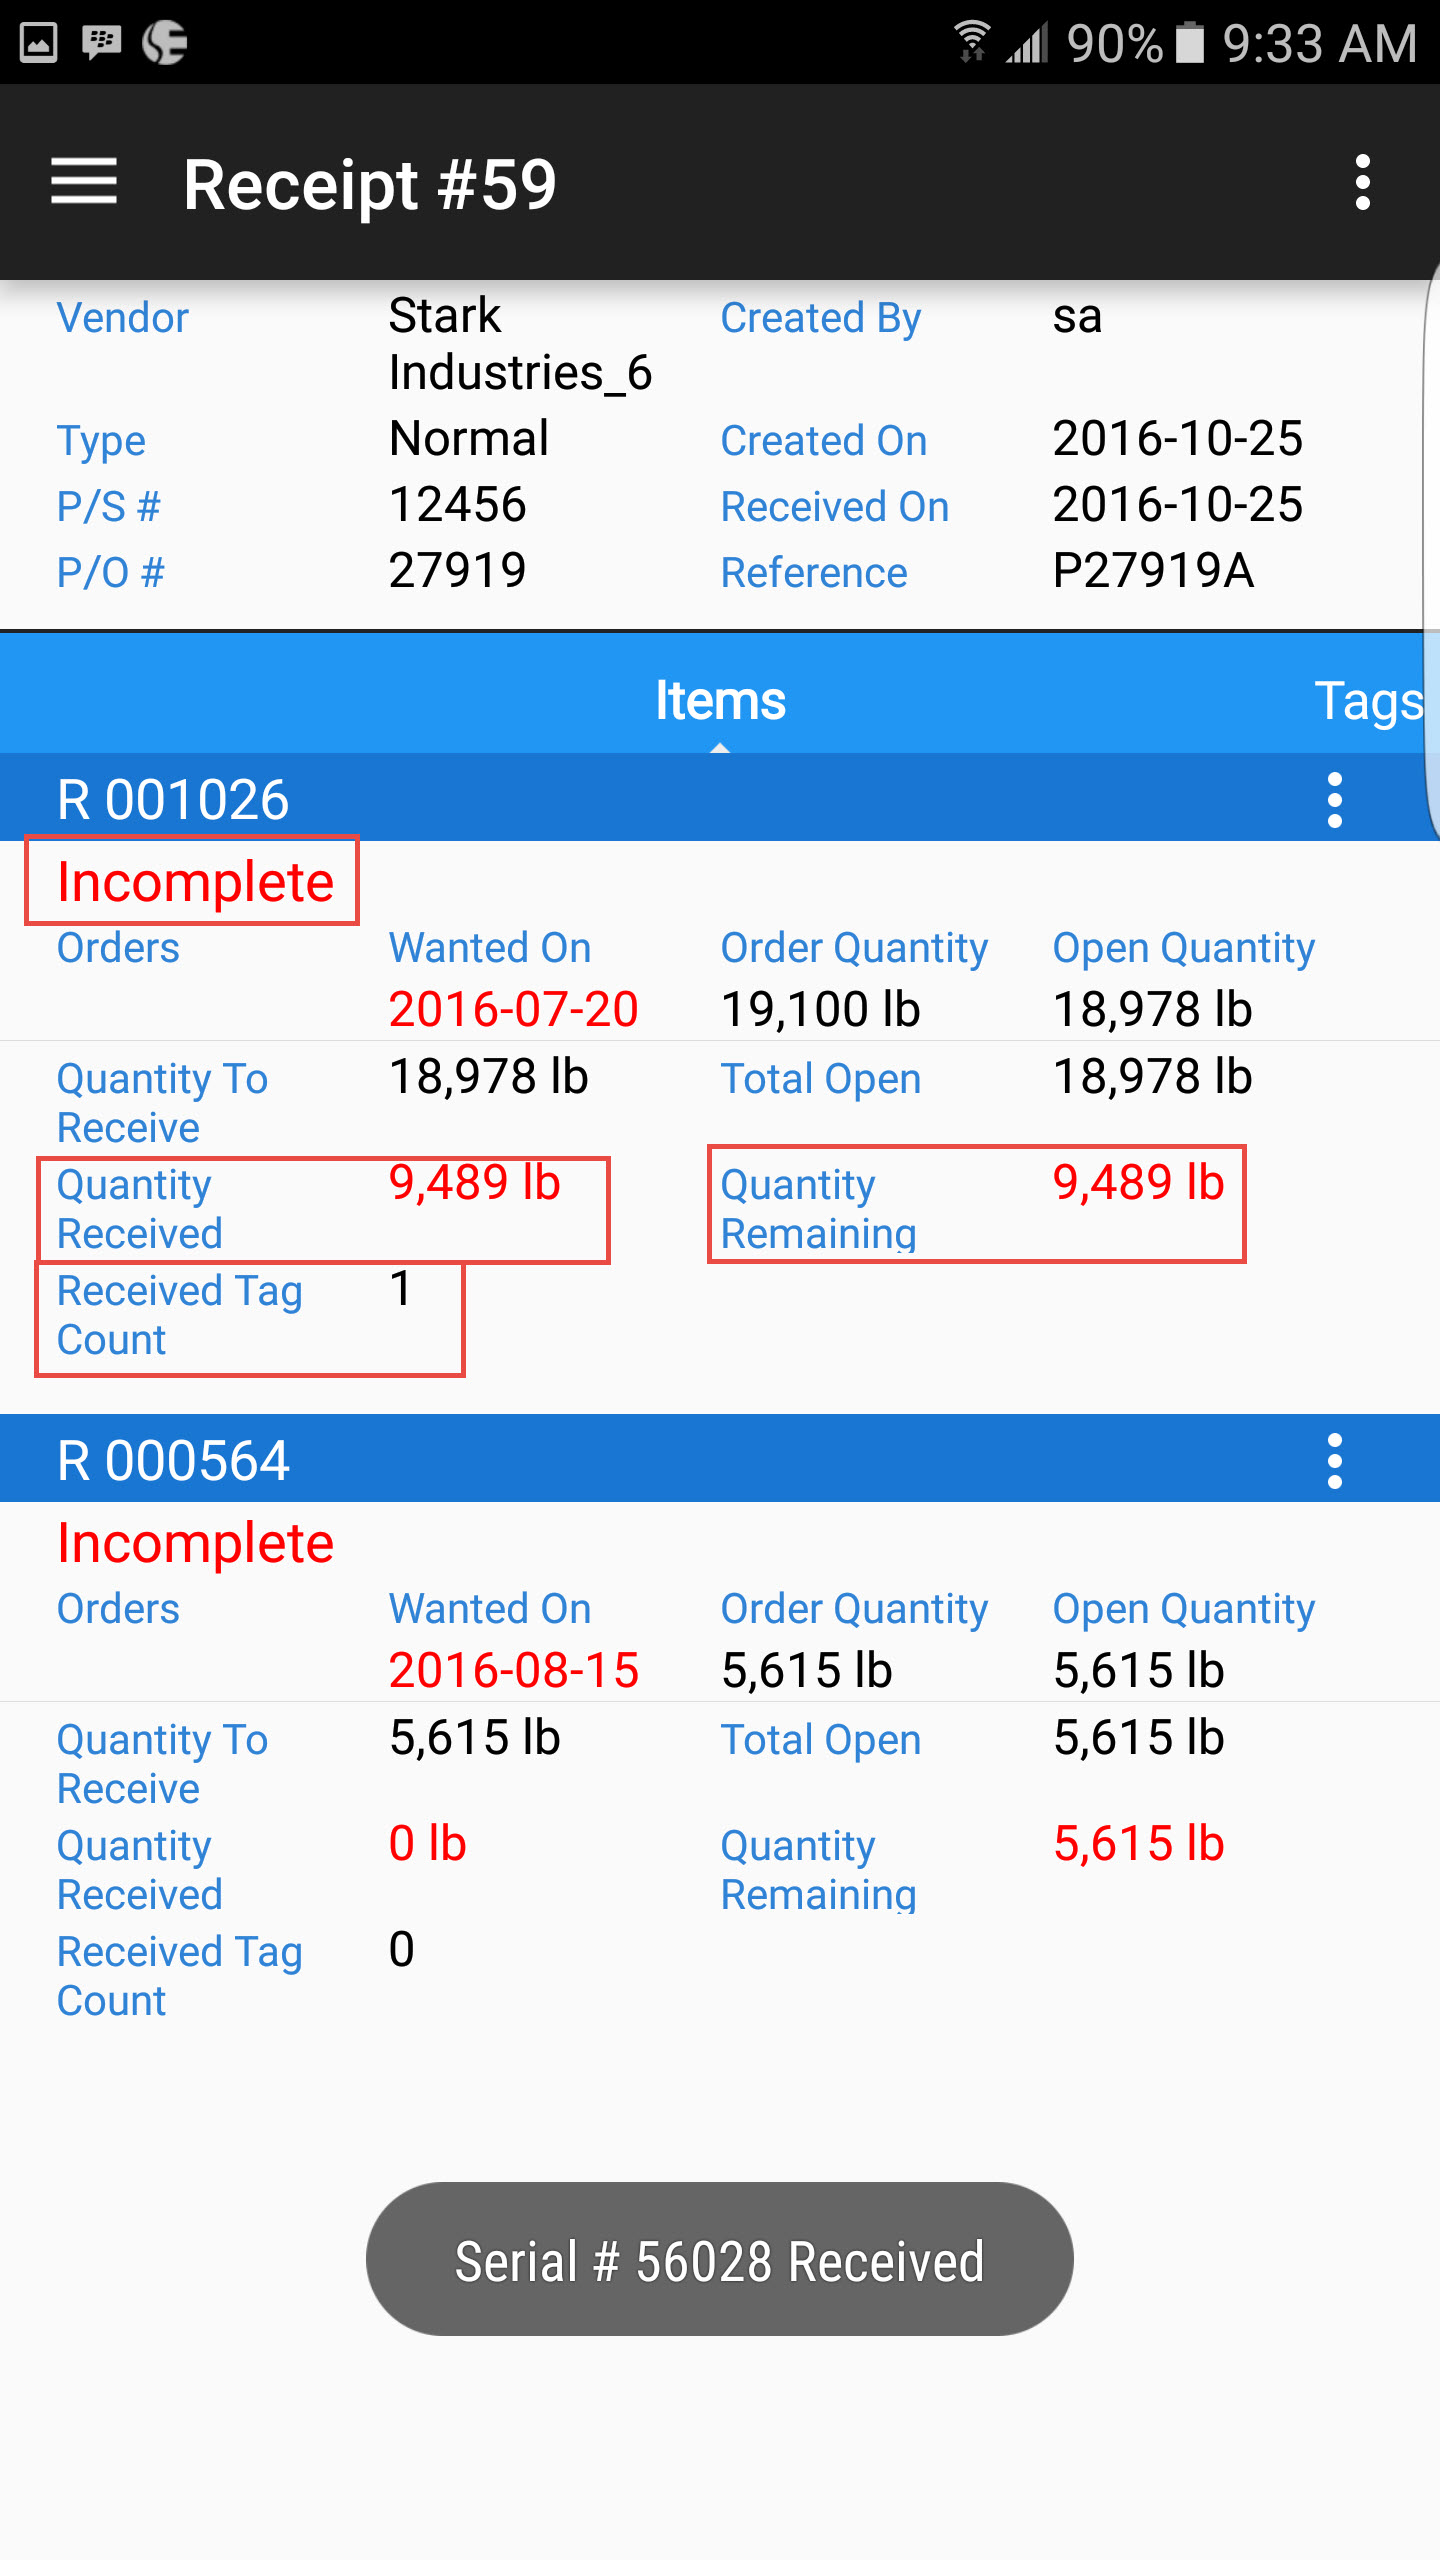
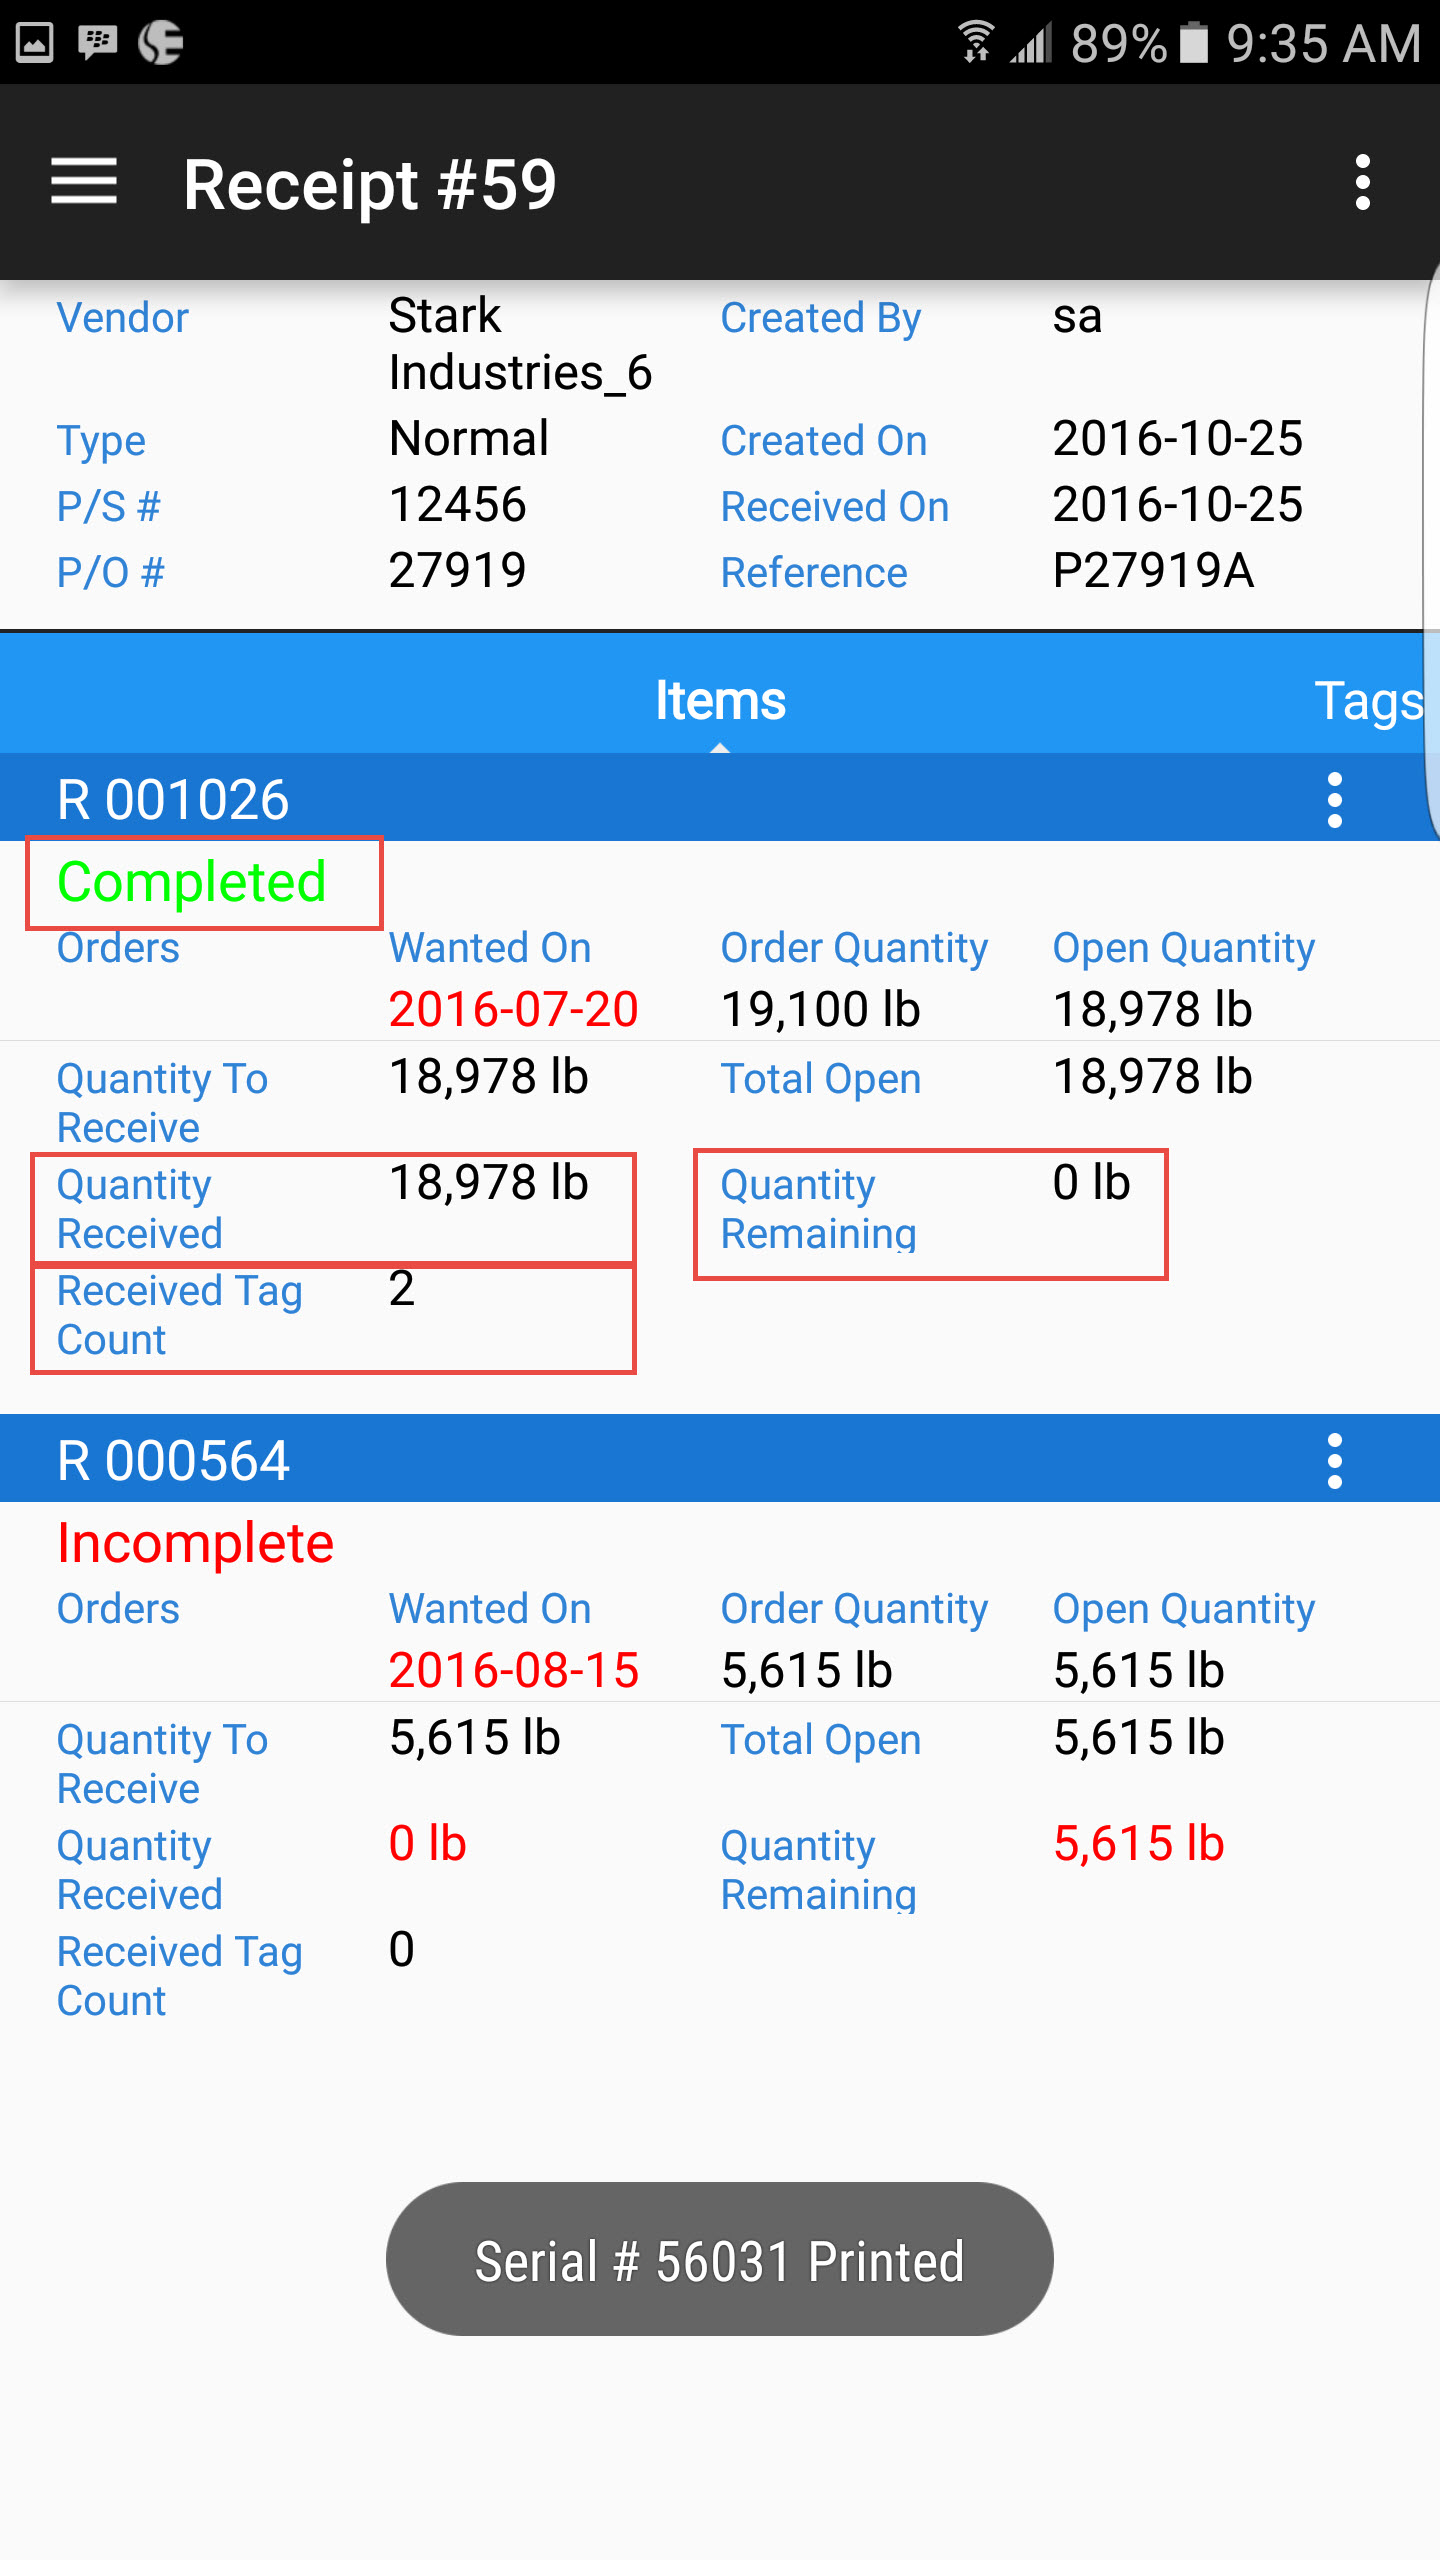
Repeat the process for all items until each item shows as Completed in green. Then, you can Finalize your receipt.
Printing Serial Numbers from a Receipt
Some vendors may supply materials that have a tag with barcode information that can be received directly into the ShopEdge system. If you are receiving materials that do not have a tag with all of the necessary barcode fields, or, if you want to create a new tag, this section will explain how to print serial numbers from the receiving screen.
Note
If you are doing an outside processor receipt, you MUST print new serial numbers to receive, as you cannot re-use serial numbers in the ShopEdge system, and the new serial numbers will be created for the next operation or finished goods.
To print serial numbers, navigate to the action menu at the top right of the screen and select Print Serial #.
This will open up the Print Serial # screen. Complete the available fields, or, if there is an existing tag with barcode information, you can also touch the SCAN button to scan the available barcode fields such as Item (P), Heat # (T), Quantity (1Q), and Weight (2Q). If you want the system to assign the next available serial number, leave the field to <Auto>. If you want to use the serial number from your vendor, you can enter that information in the field. Enter in the # of S/N. The system will default to 1, but if you have multiple items with the same quantity, heat, etc., you may want to enter more than 1 in this field. .
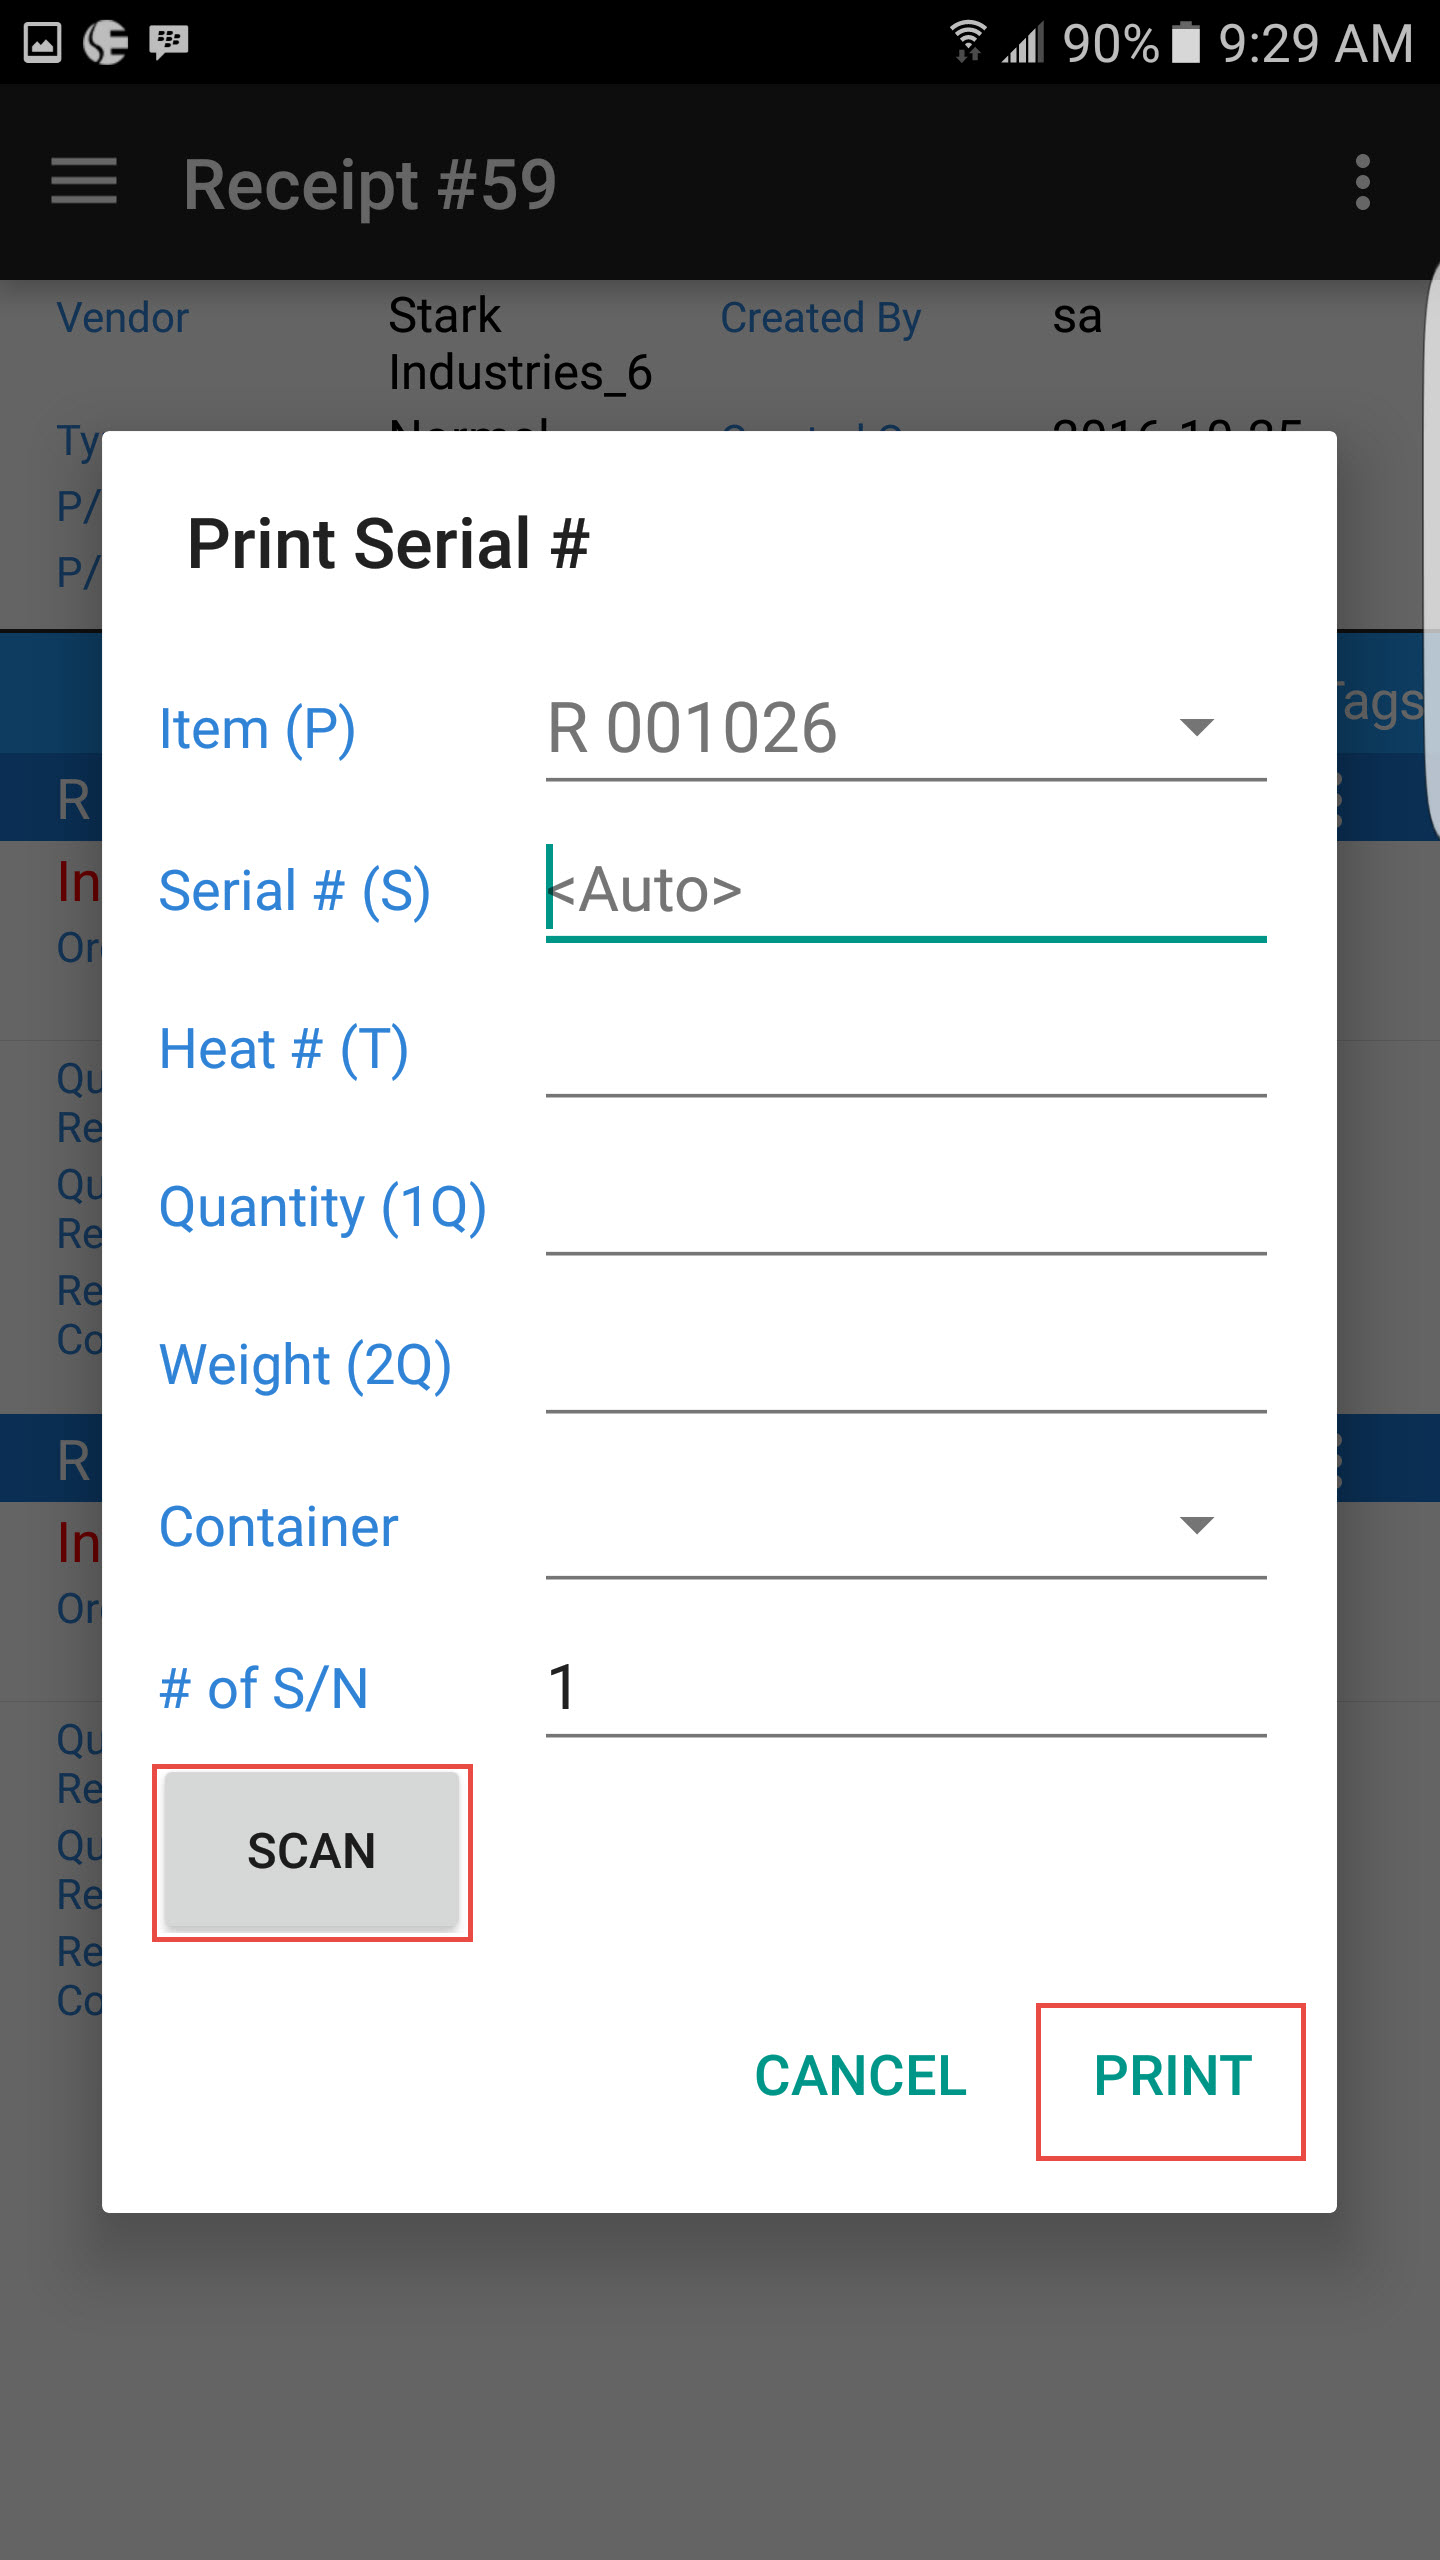
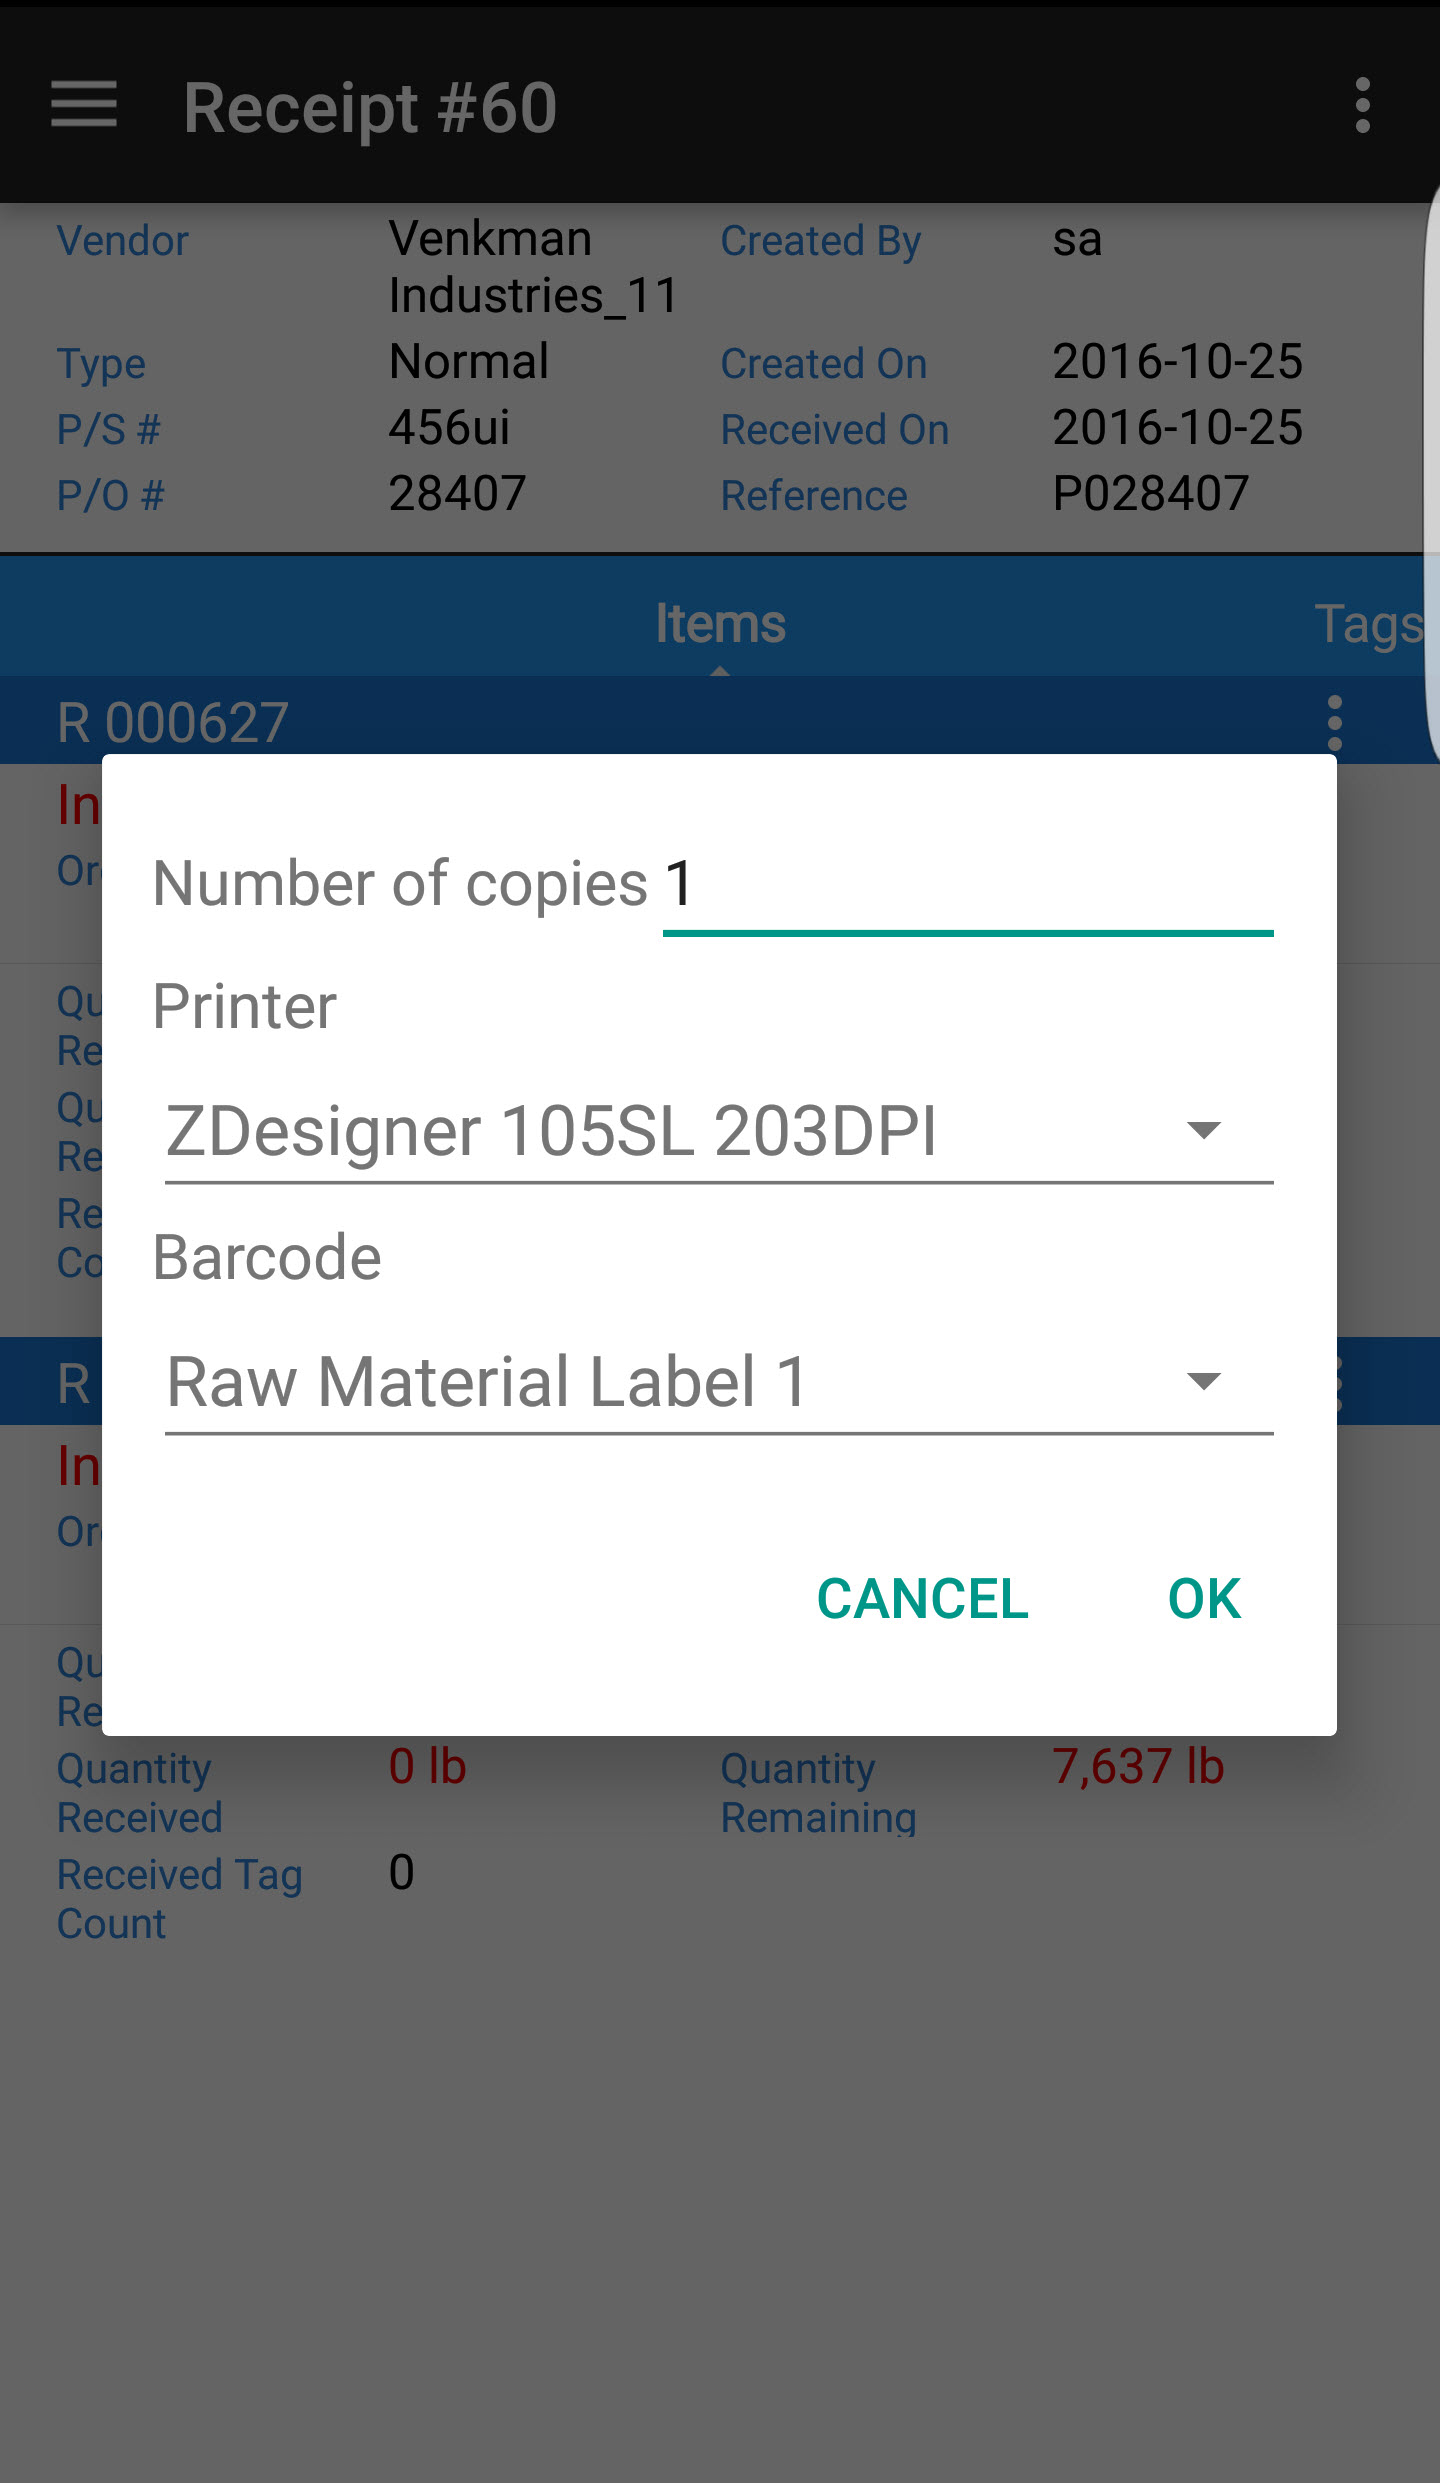
When you are done, touch PRINT to go to the print screen. Touch OK to print the serial number.
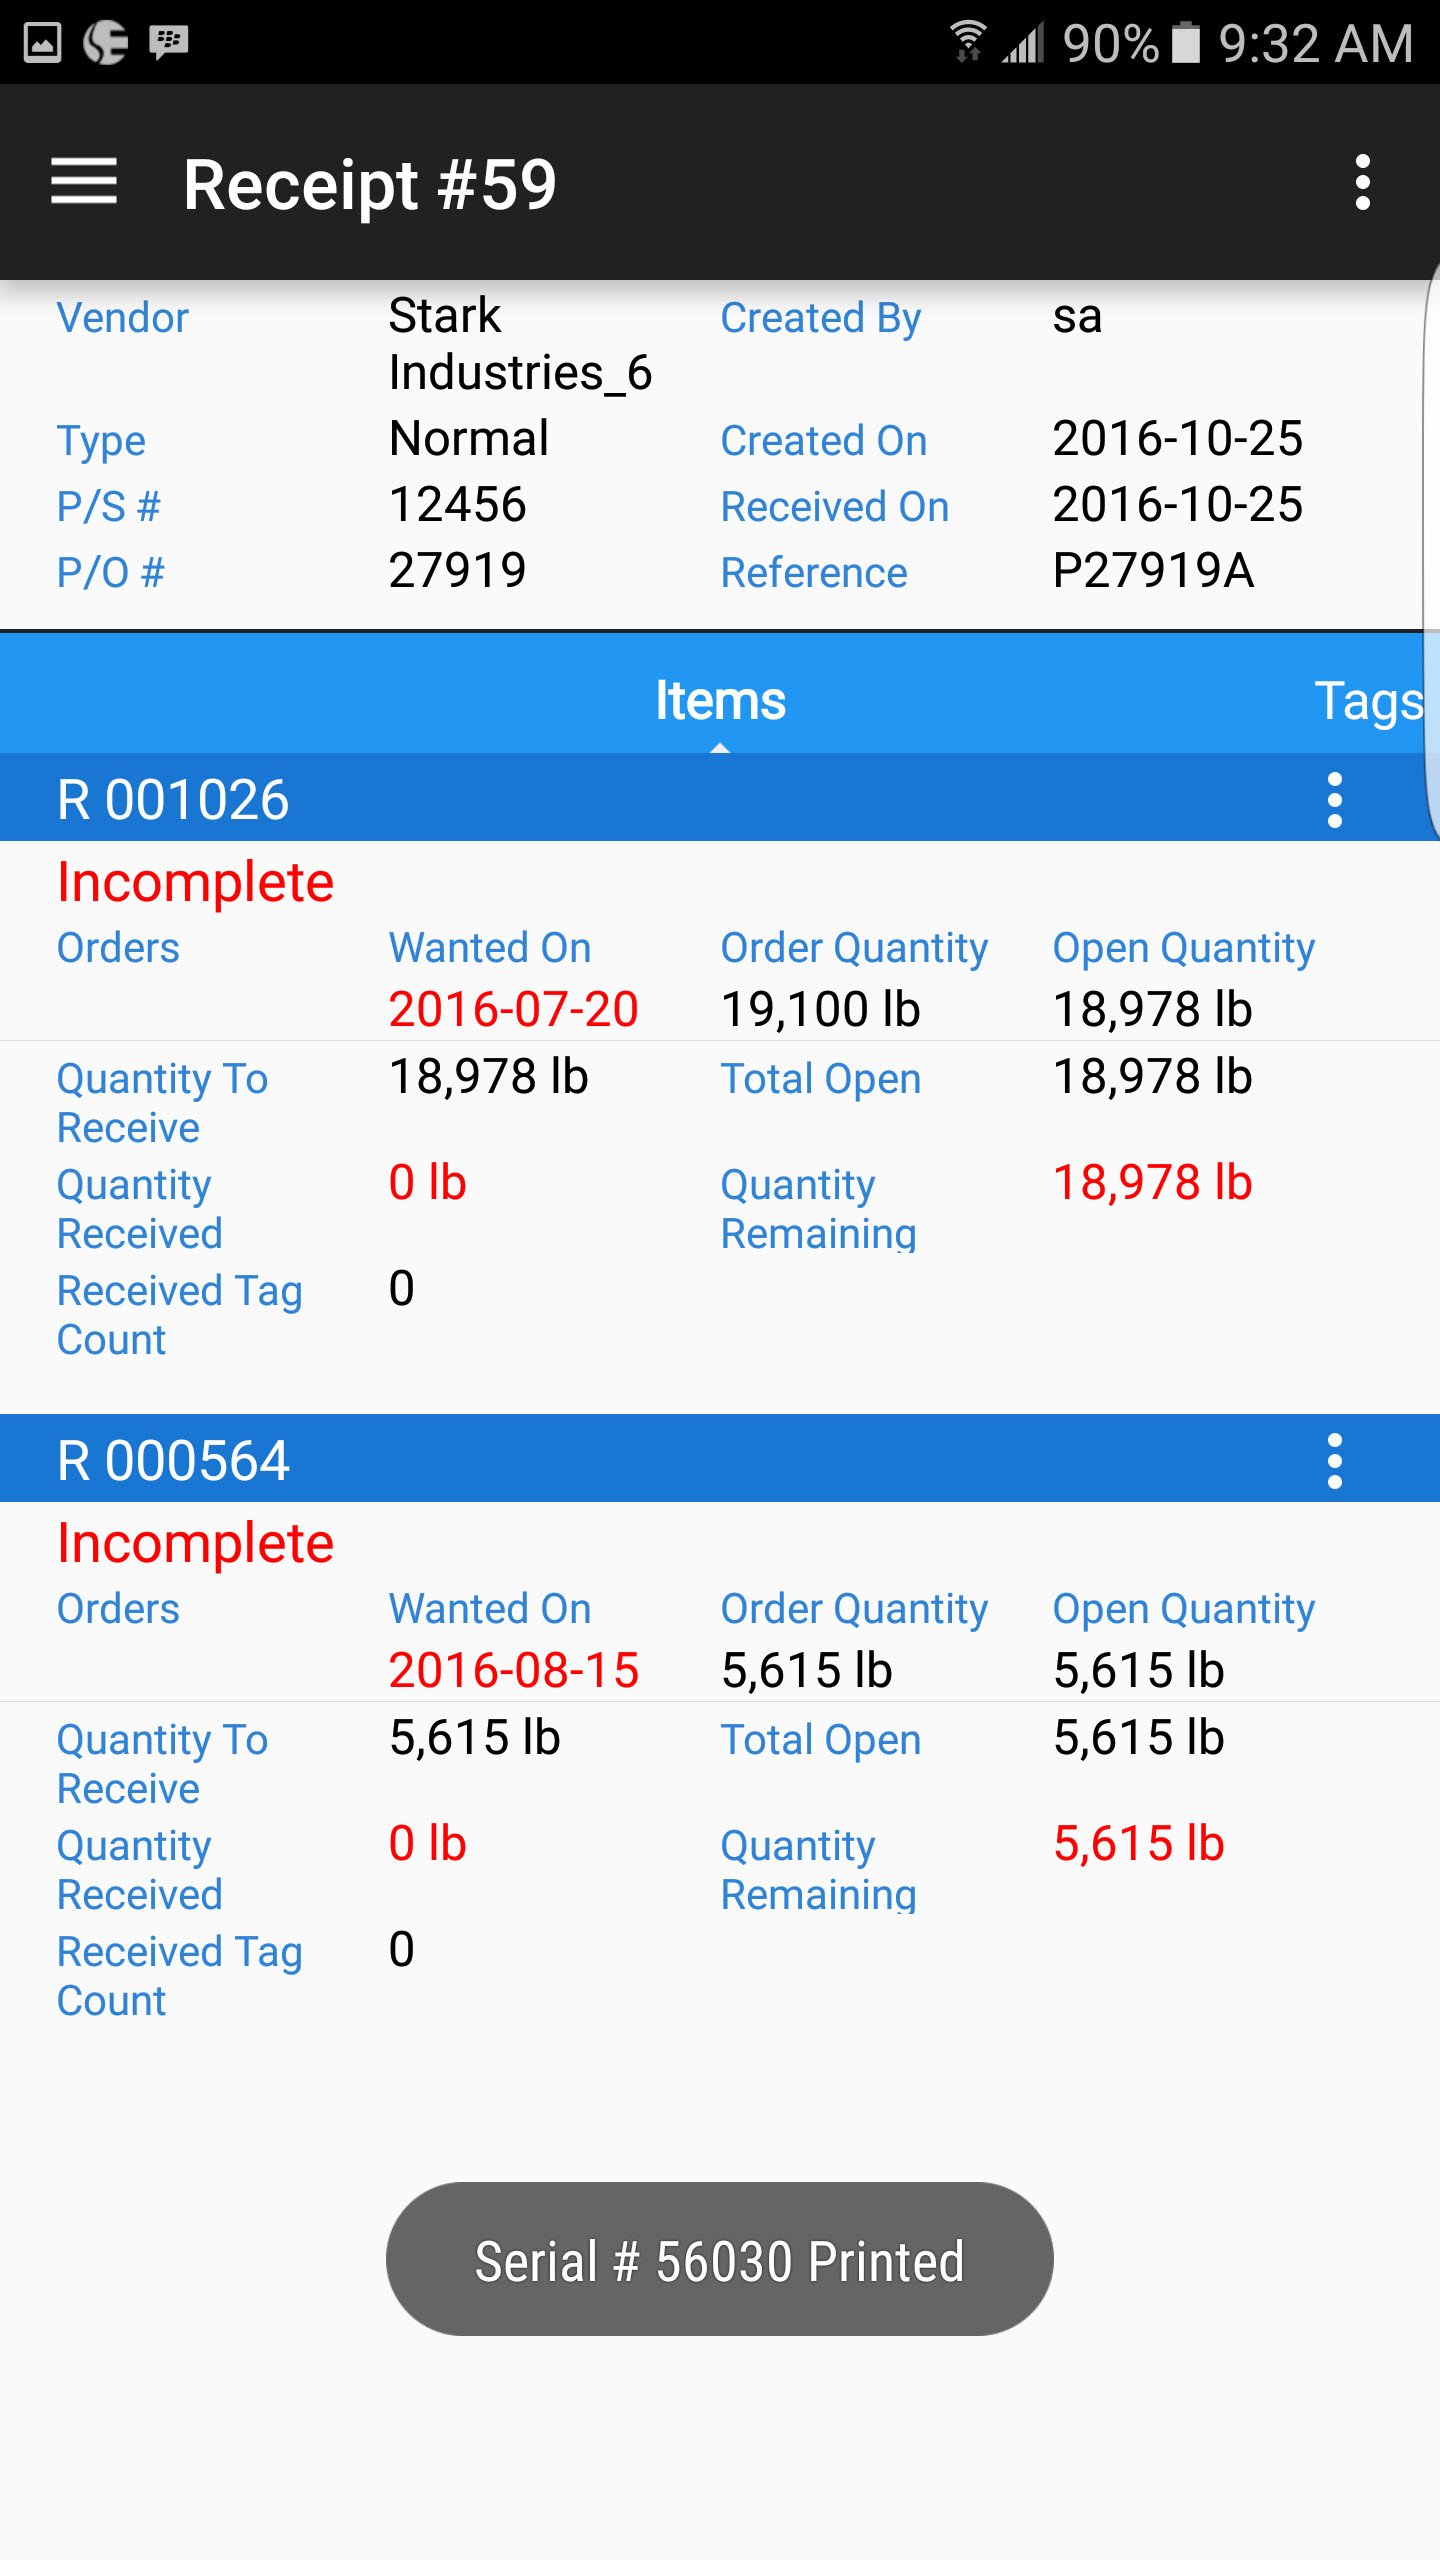
You will receive a message at the bottom of the screen that the serial number you created has printed.
If you have more items and serial numbers to print, repeat the above process until you have tags printed for each item you are going to receive.
Adding Items to a Receipt
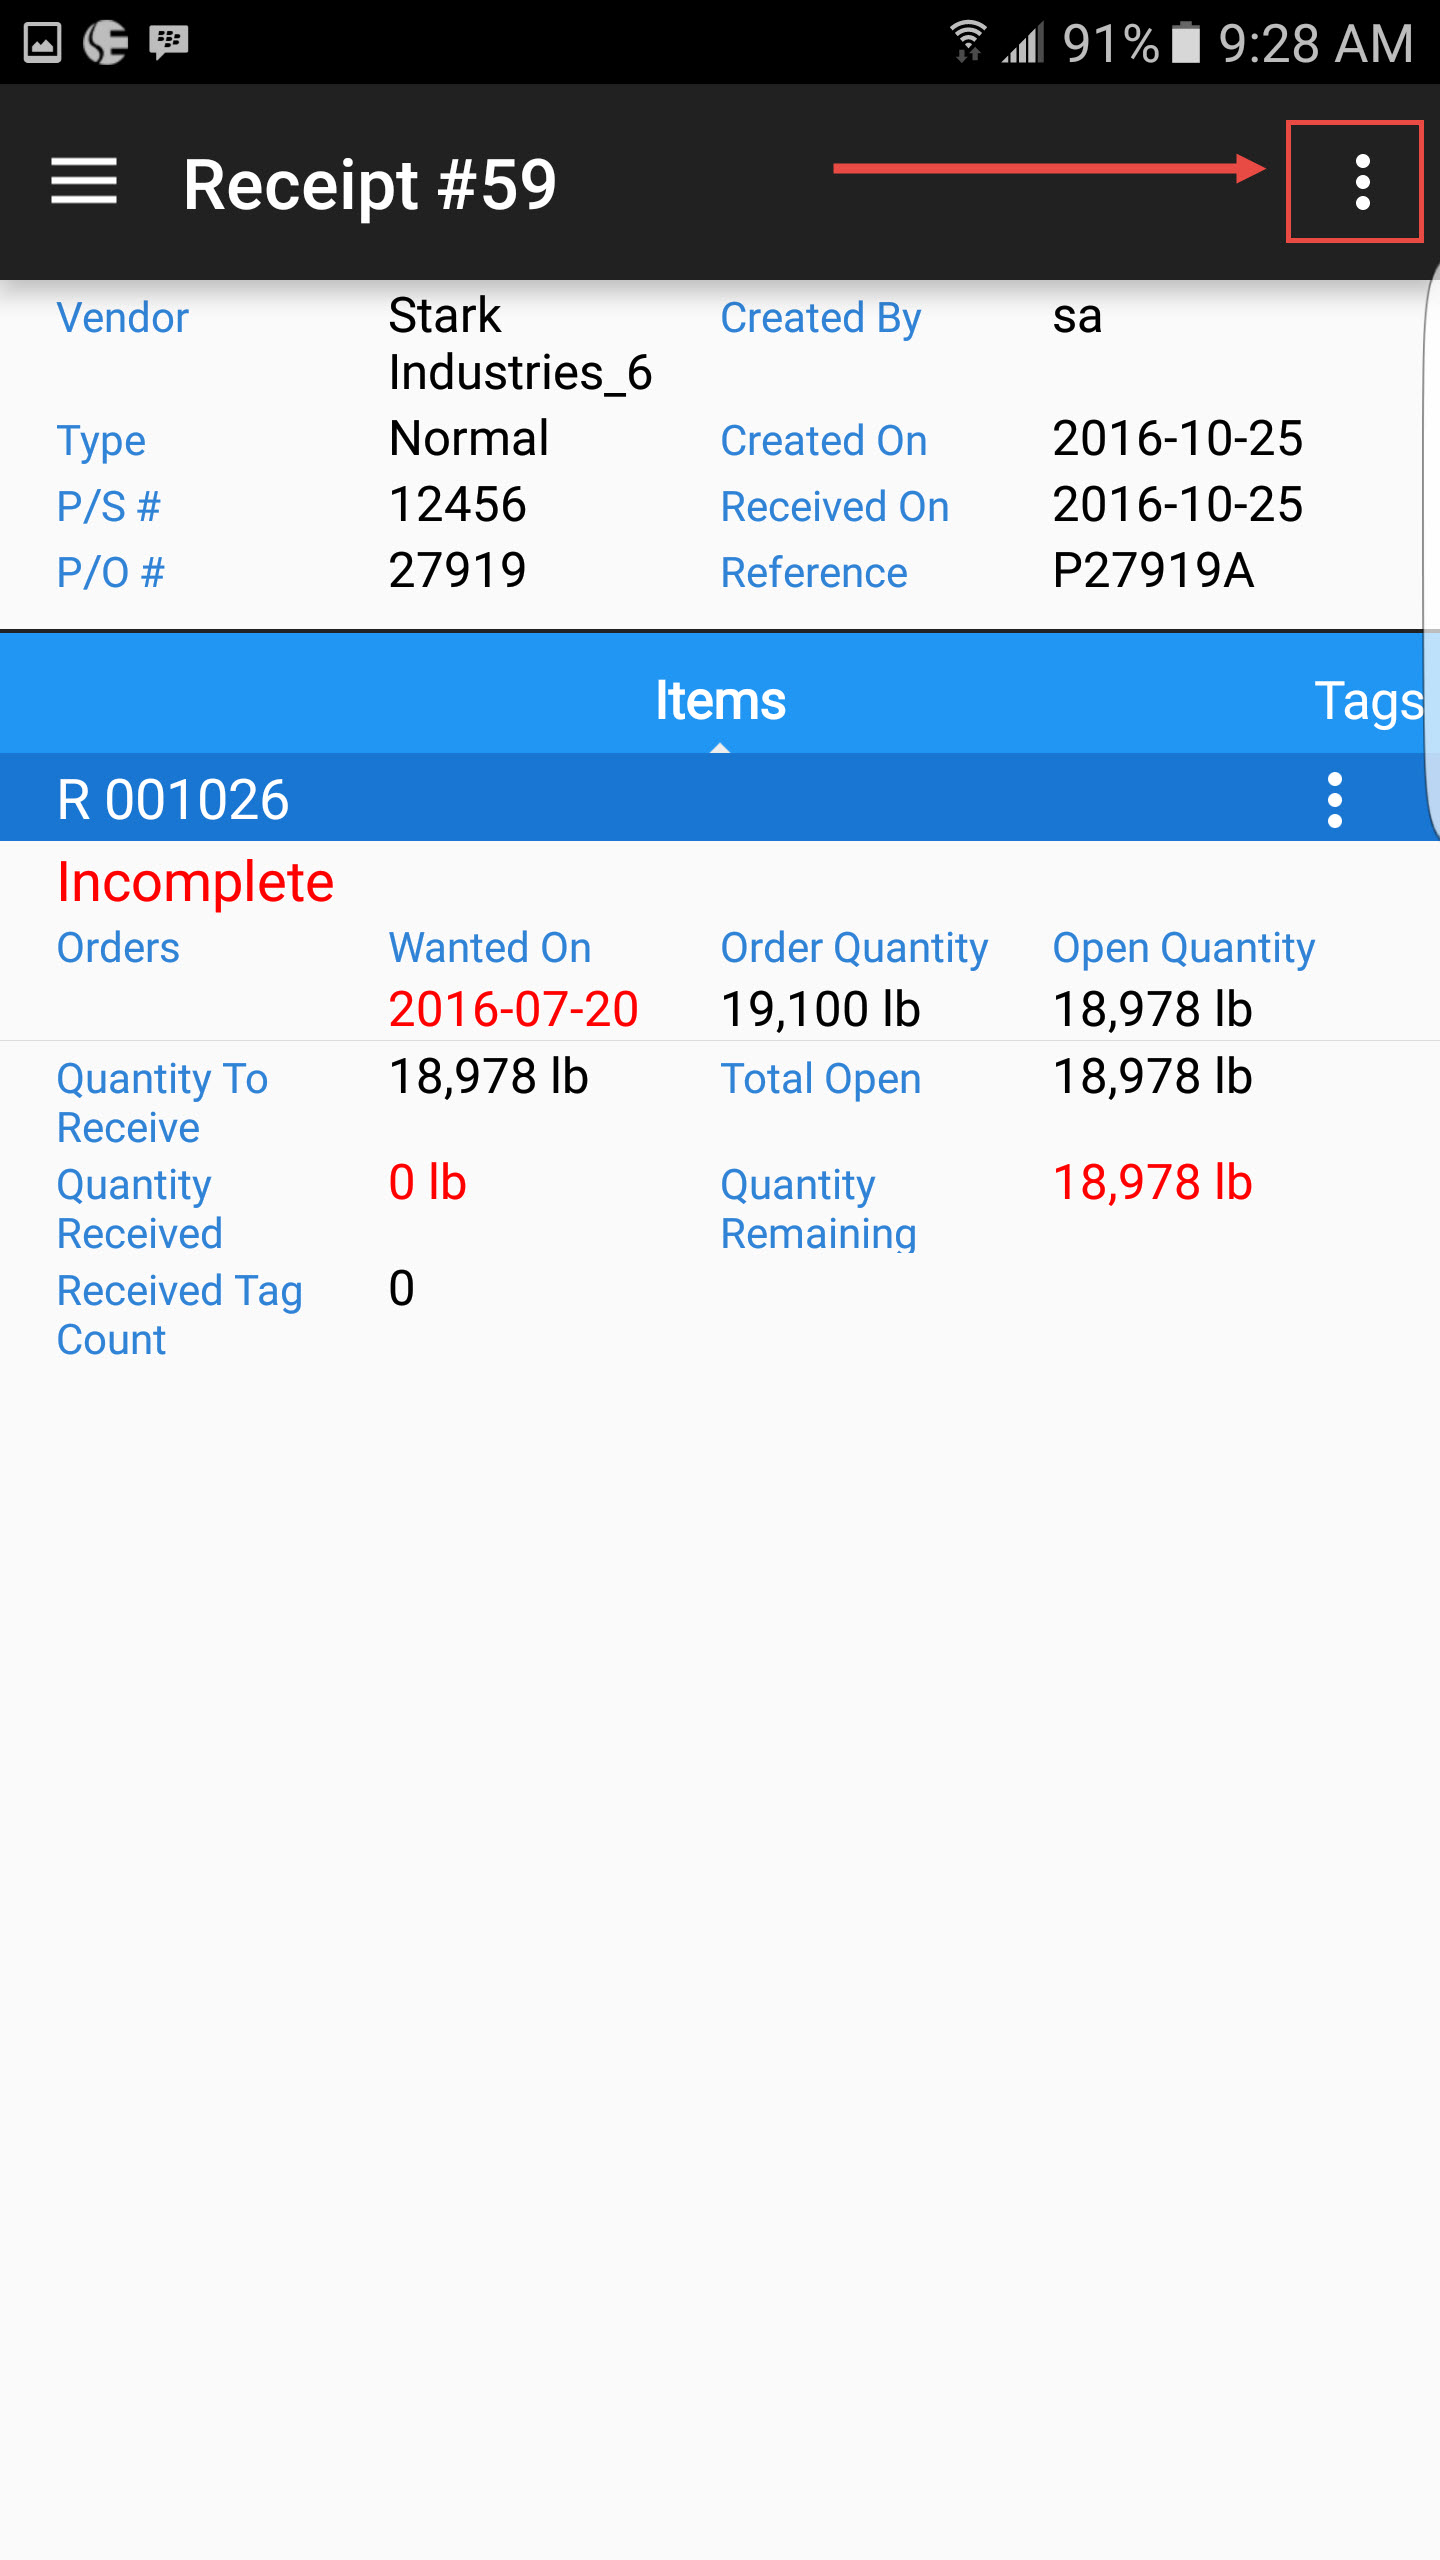
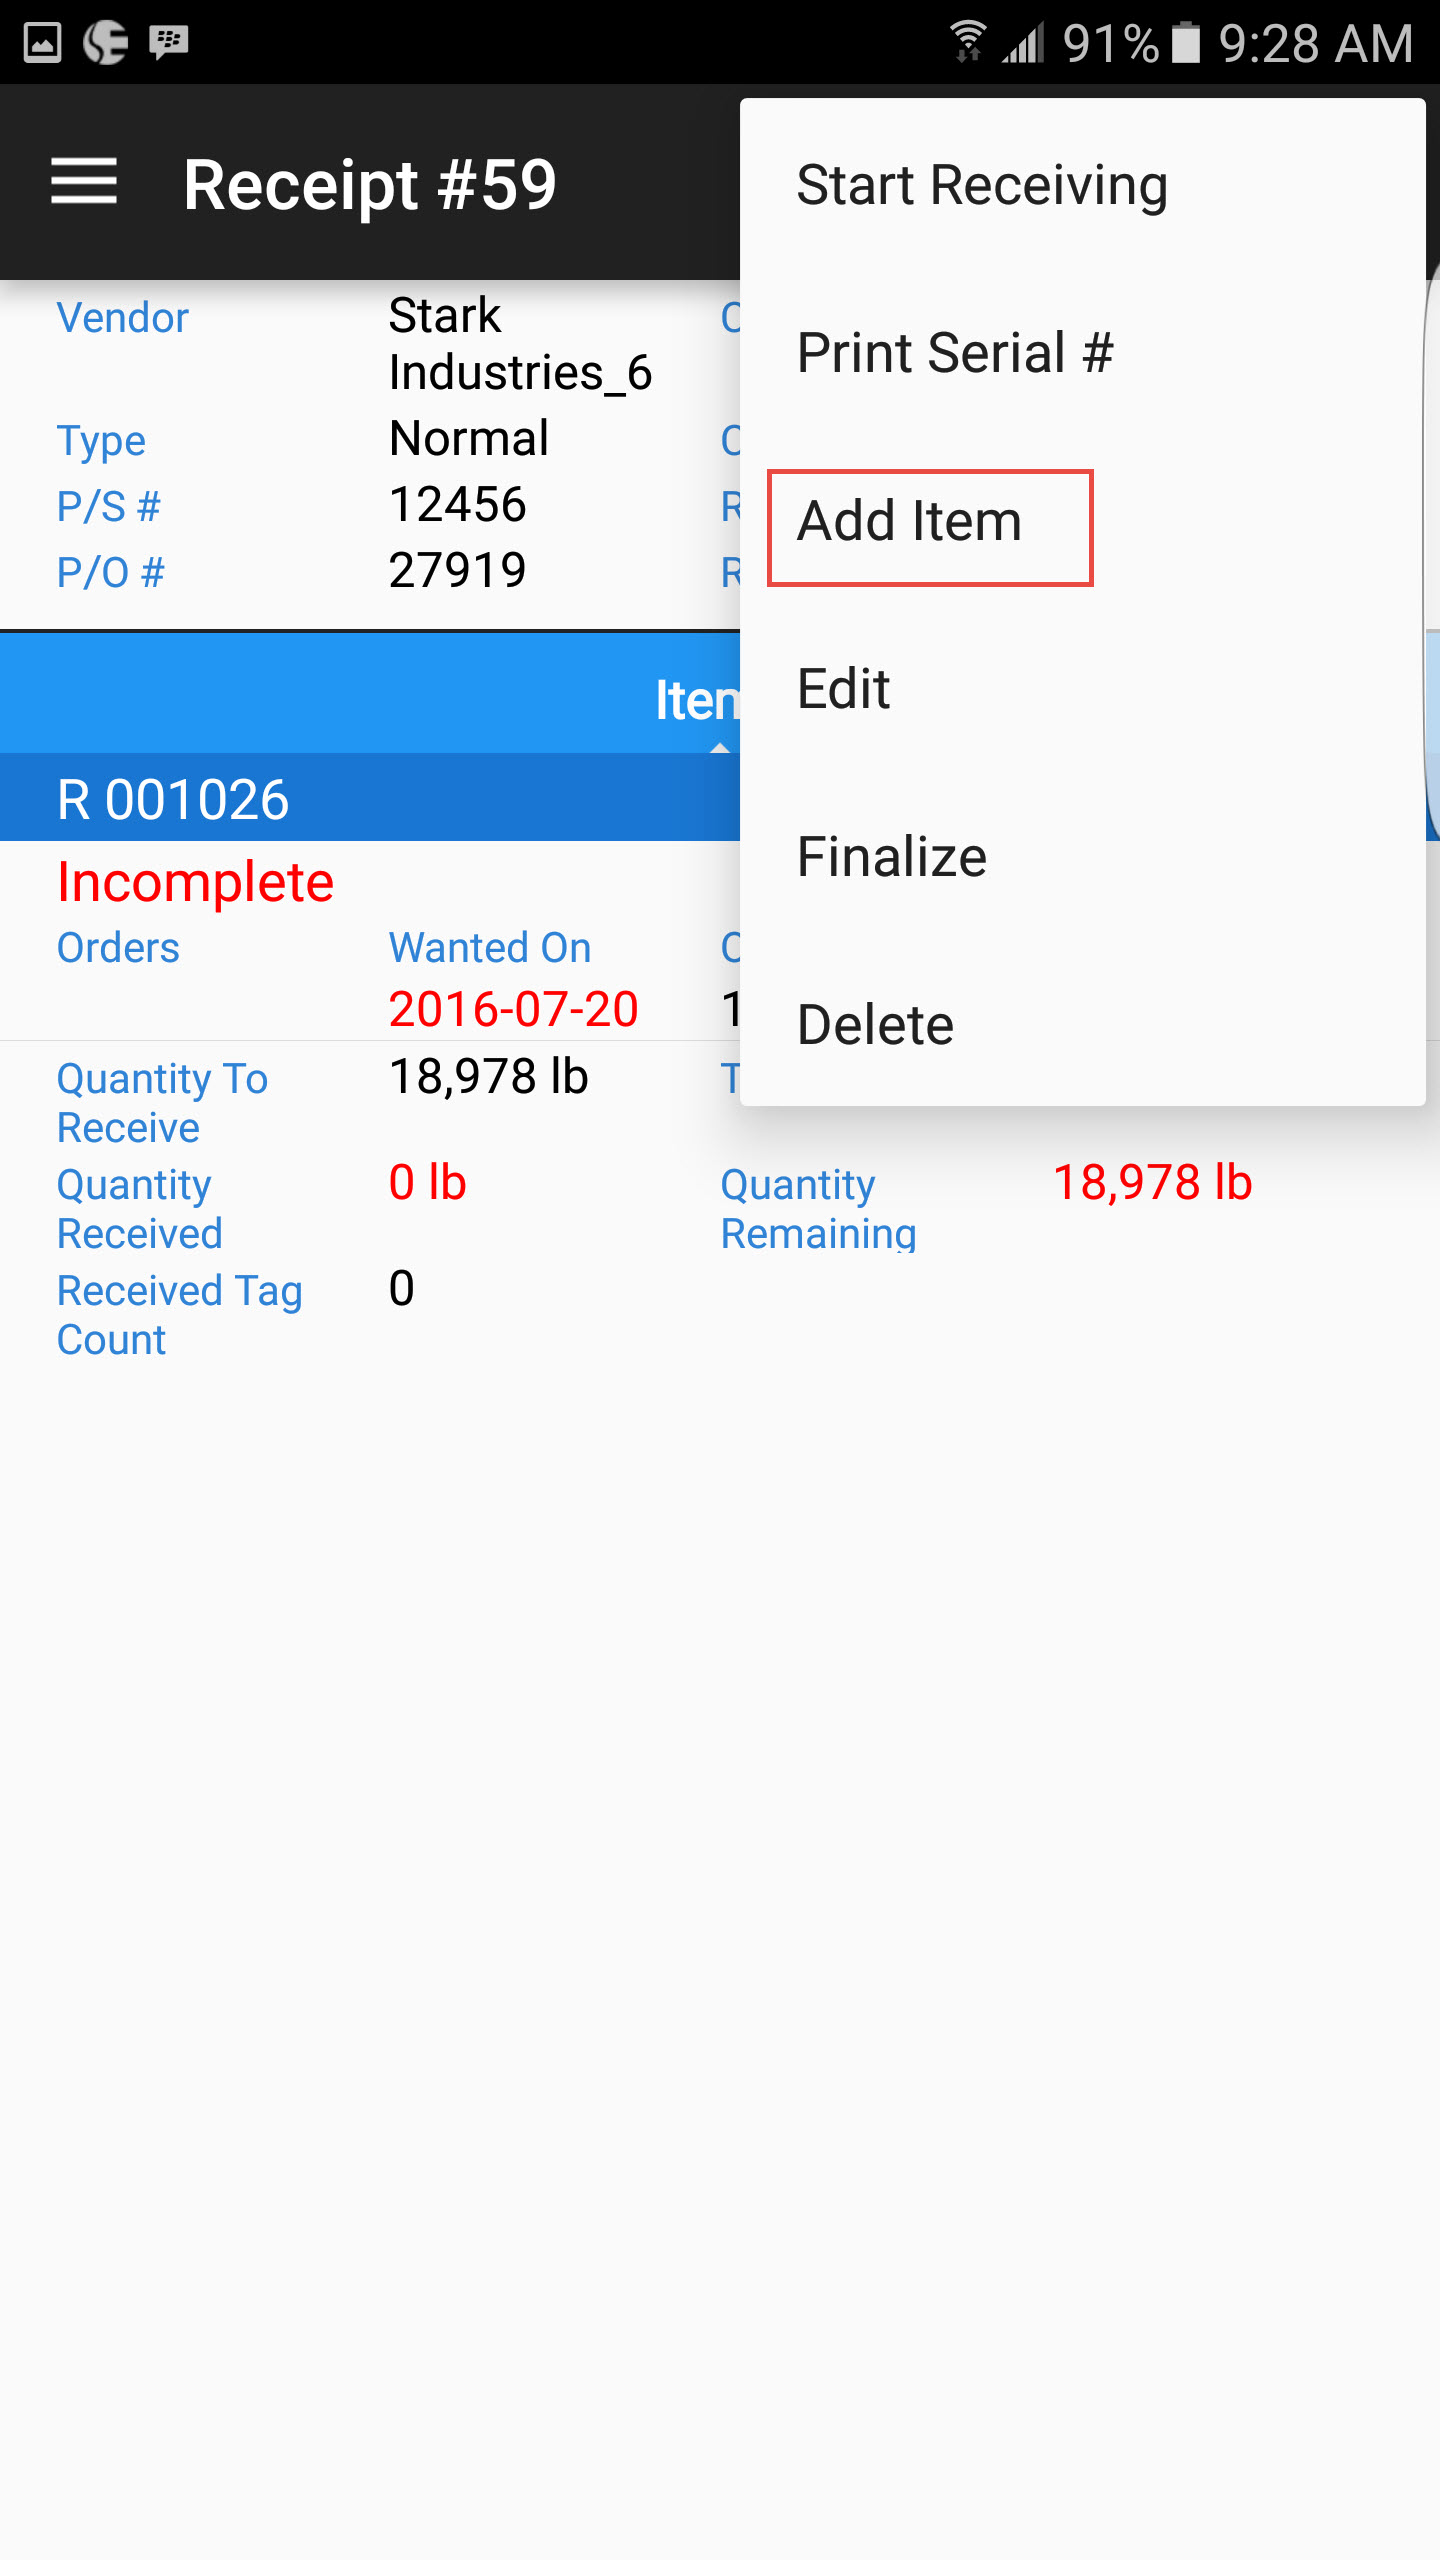
If you didn’t add the items to the receipt from the Open Purchase Orders screen, you can add the items to a receipt manually. Open the receipt you wish to add items to, and touch the action menu at the top right of the screen. Select Add Item.
The application will show the items that are available to add to the receipt. Select the items and touch the check mark at the top right of the screen to add the item to the receipt.
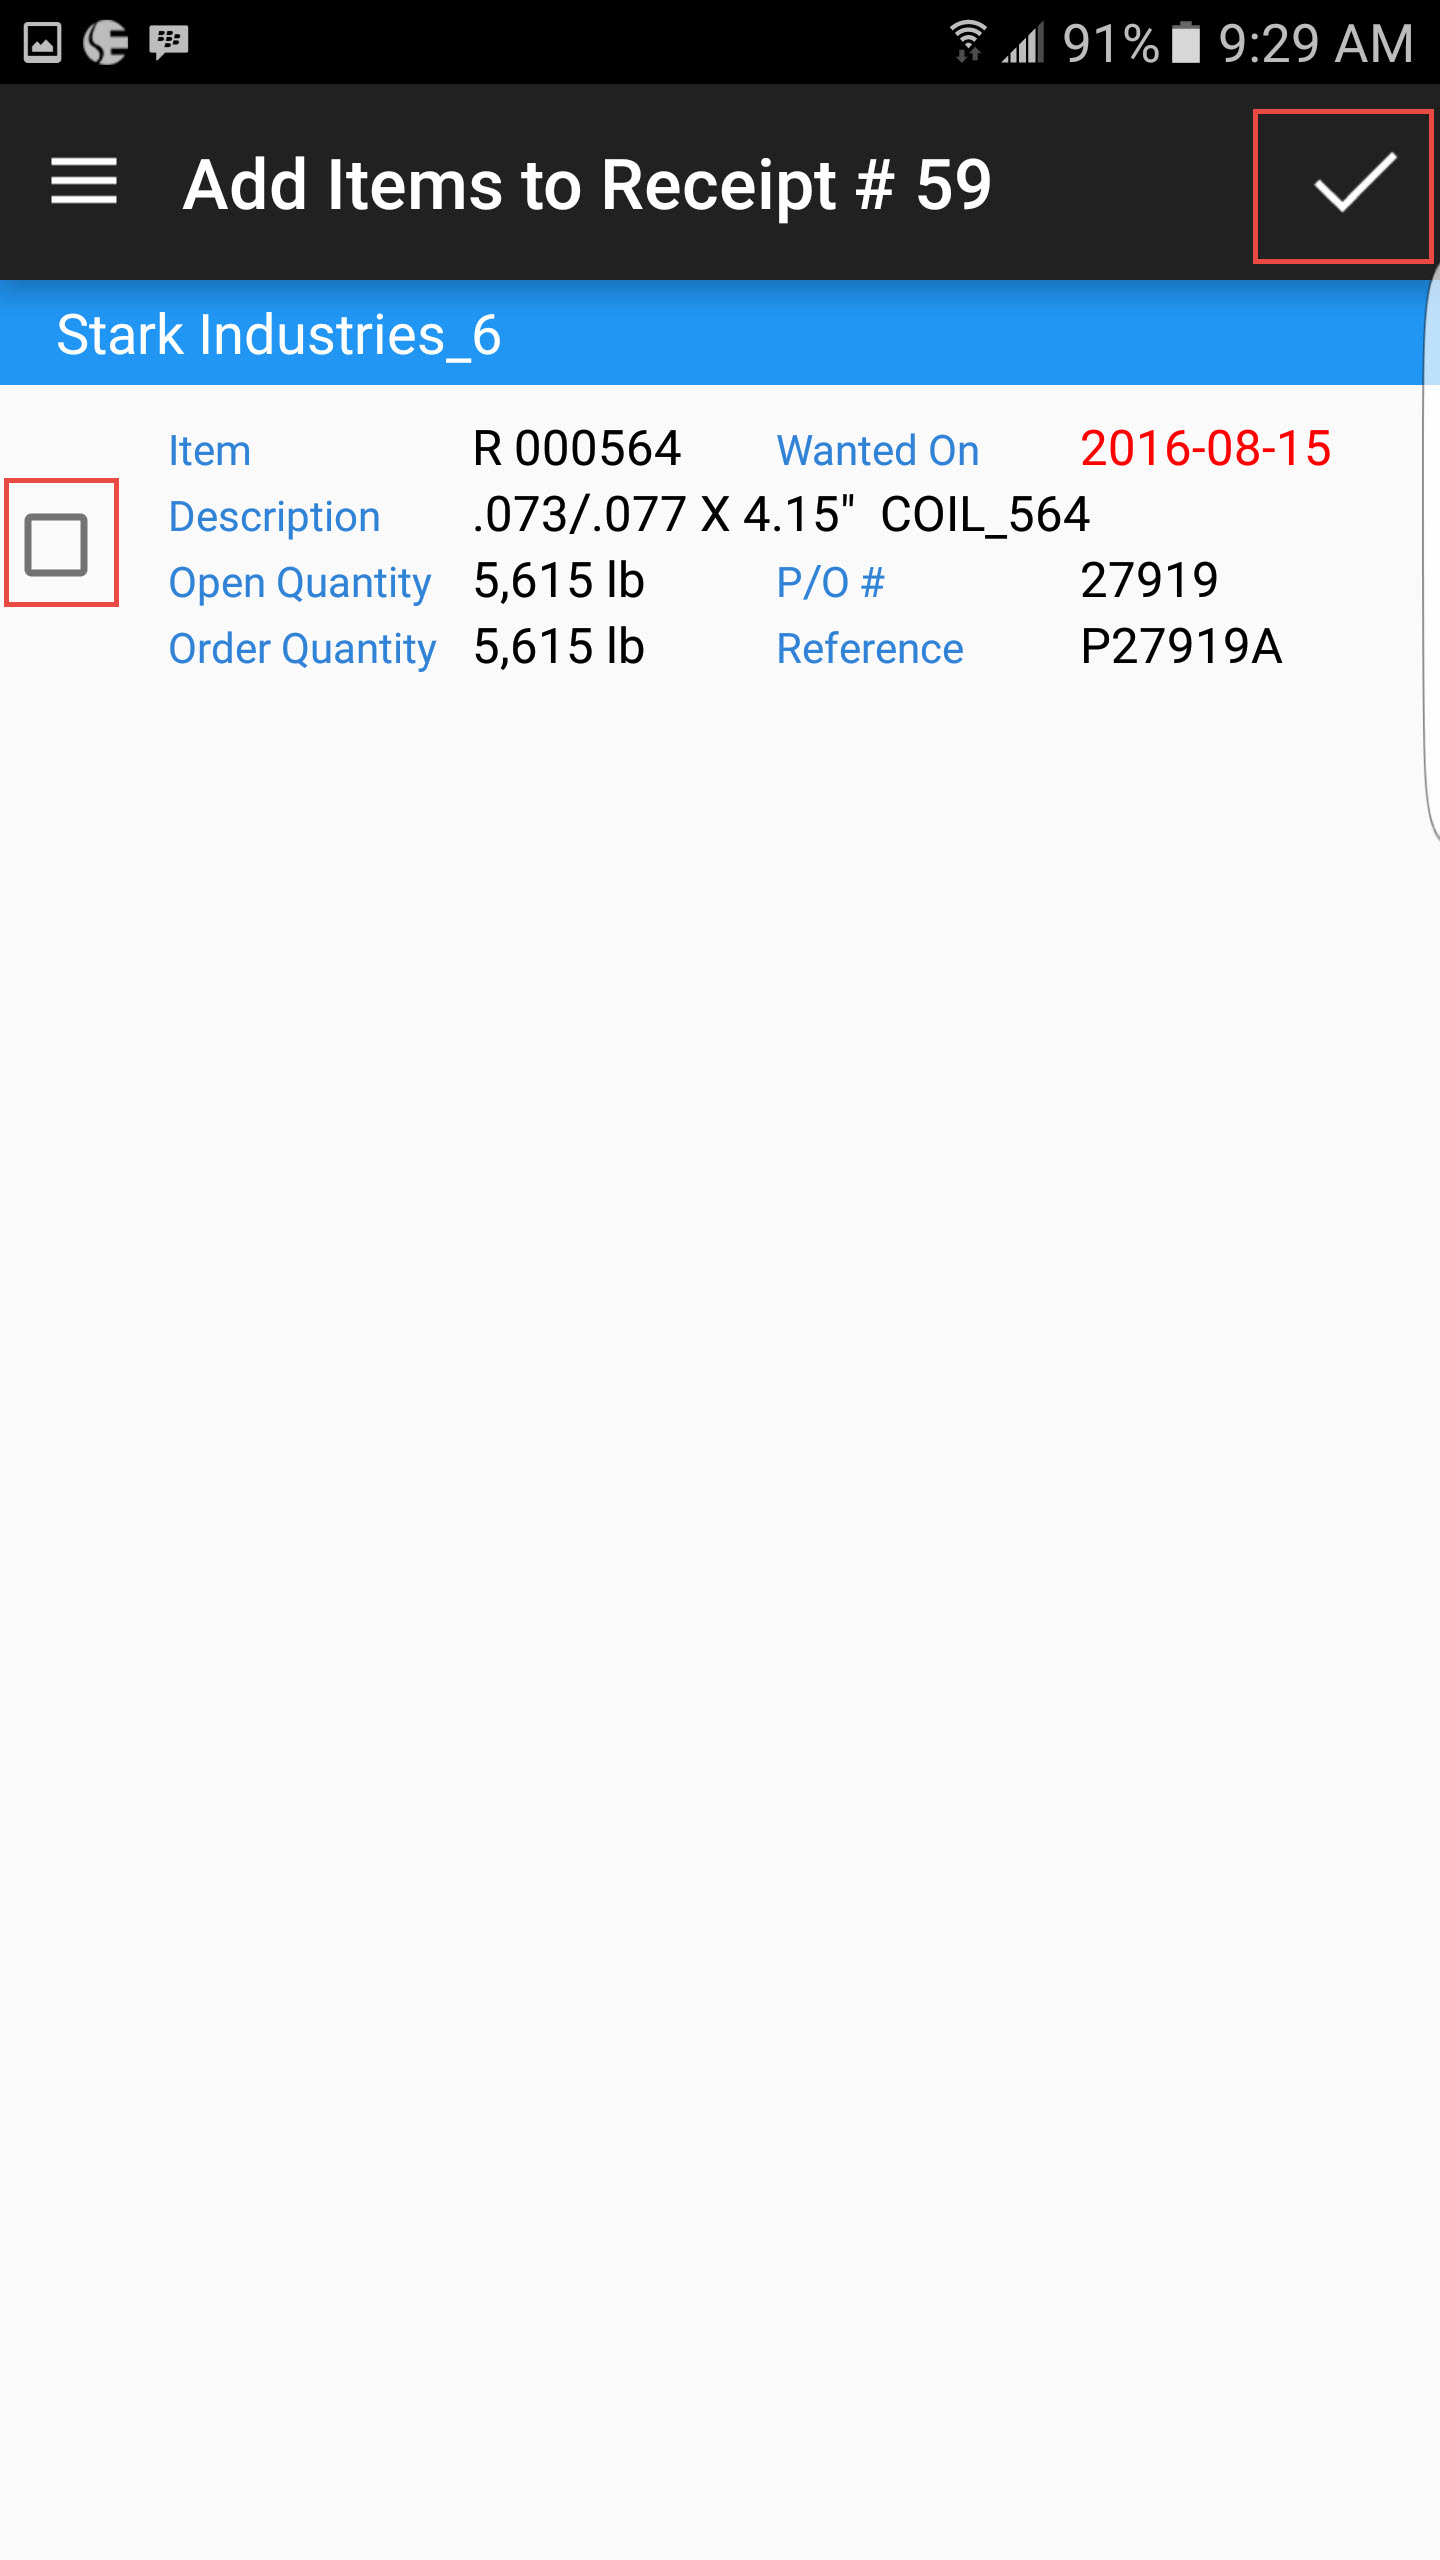
You will need to indicate the quantity of the item you are receiving. The system will default to the open quantity, but the field can be modified. Touch the OK button to continue, or CANCEL to go back.

Editing Items on a Receipt
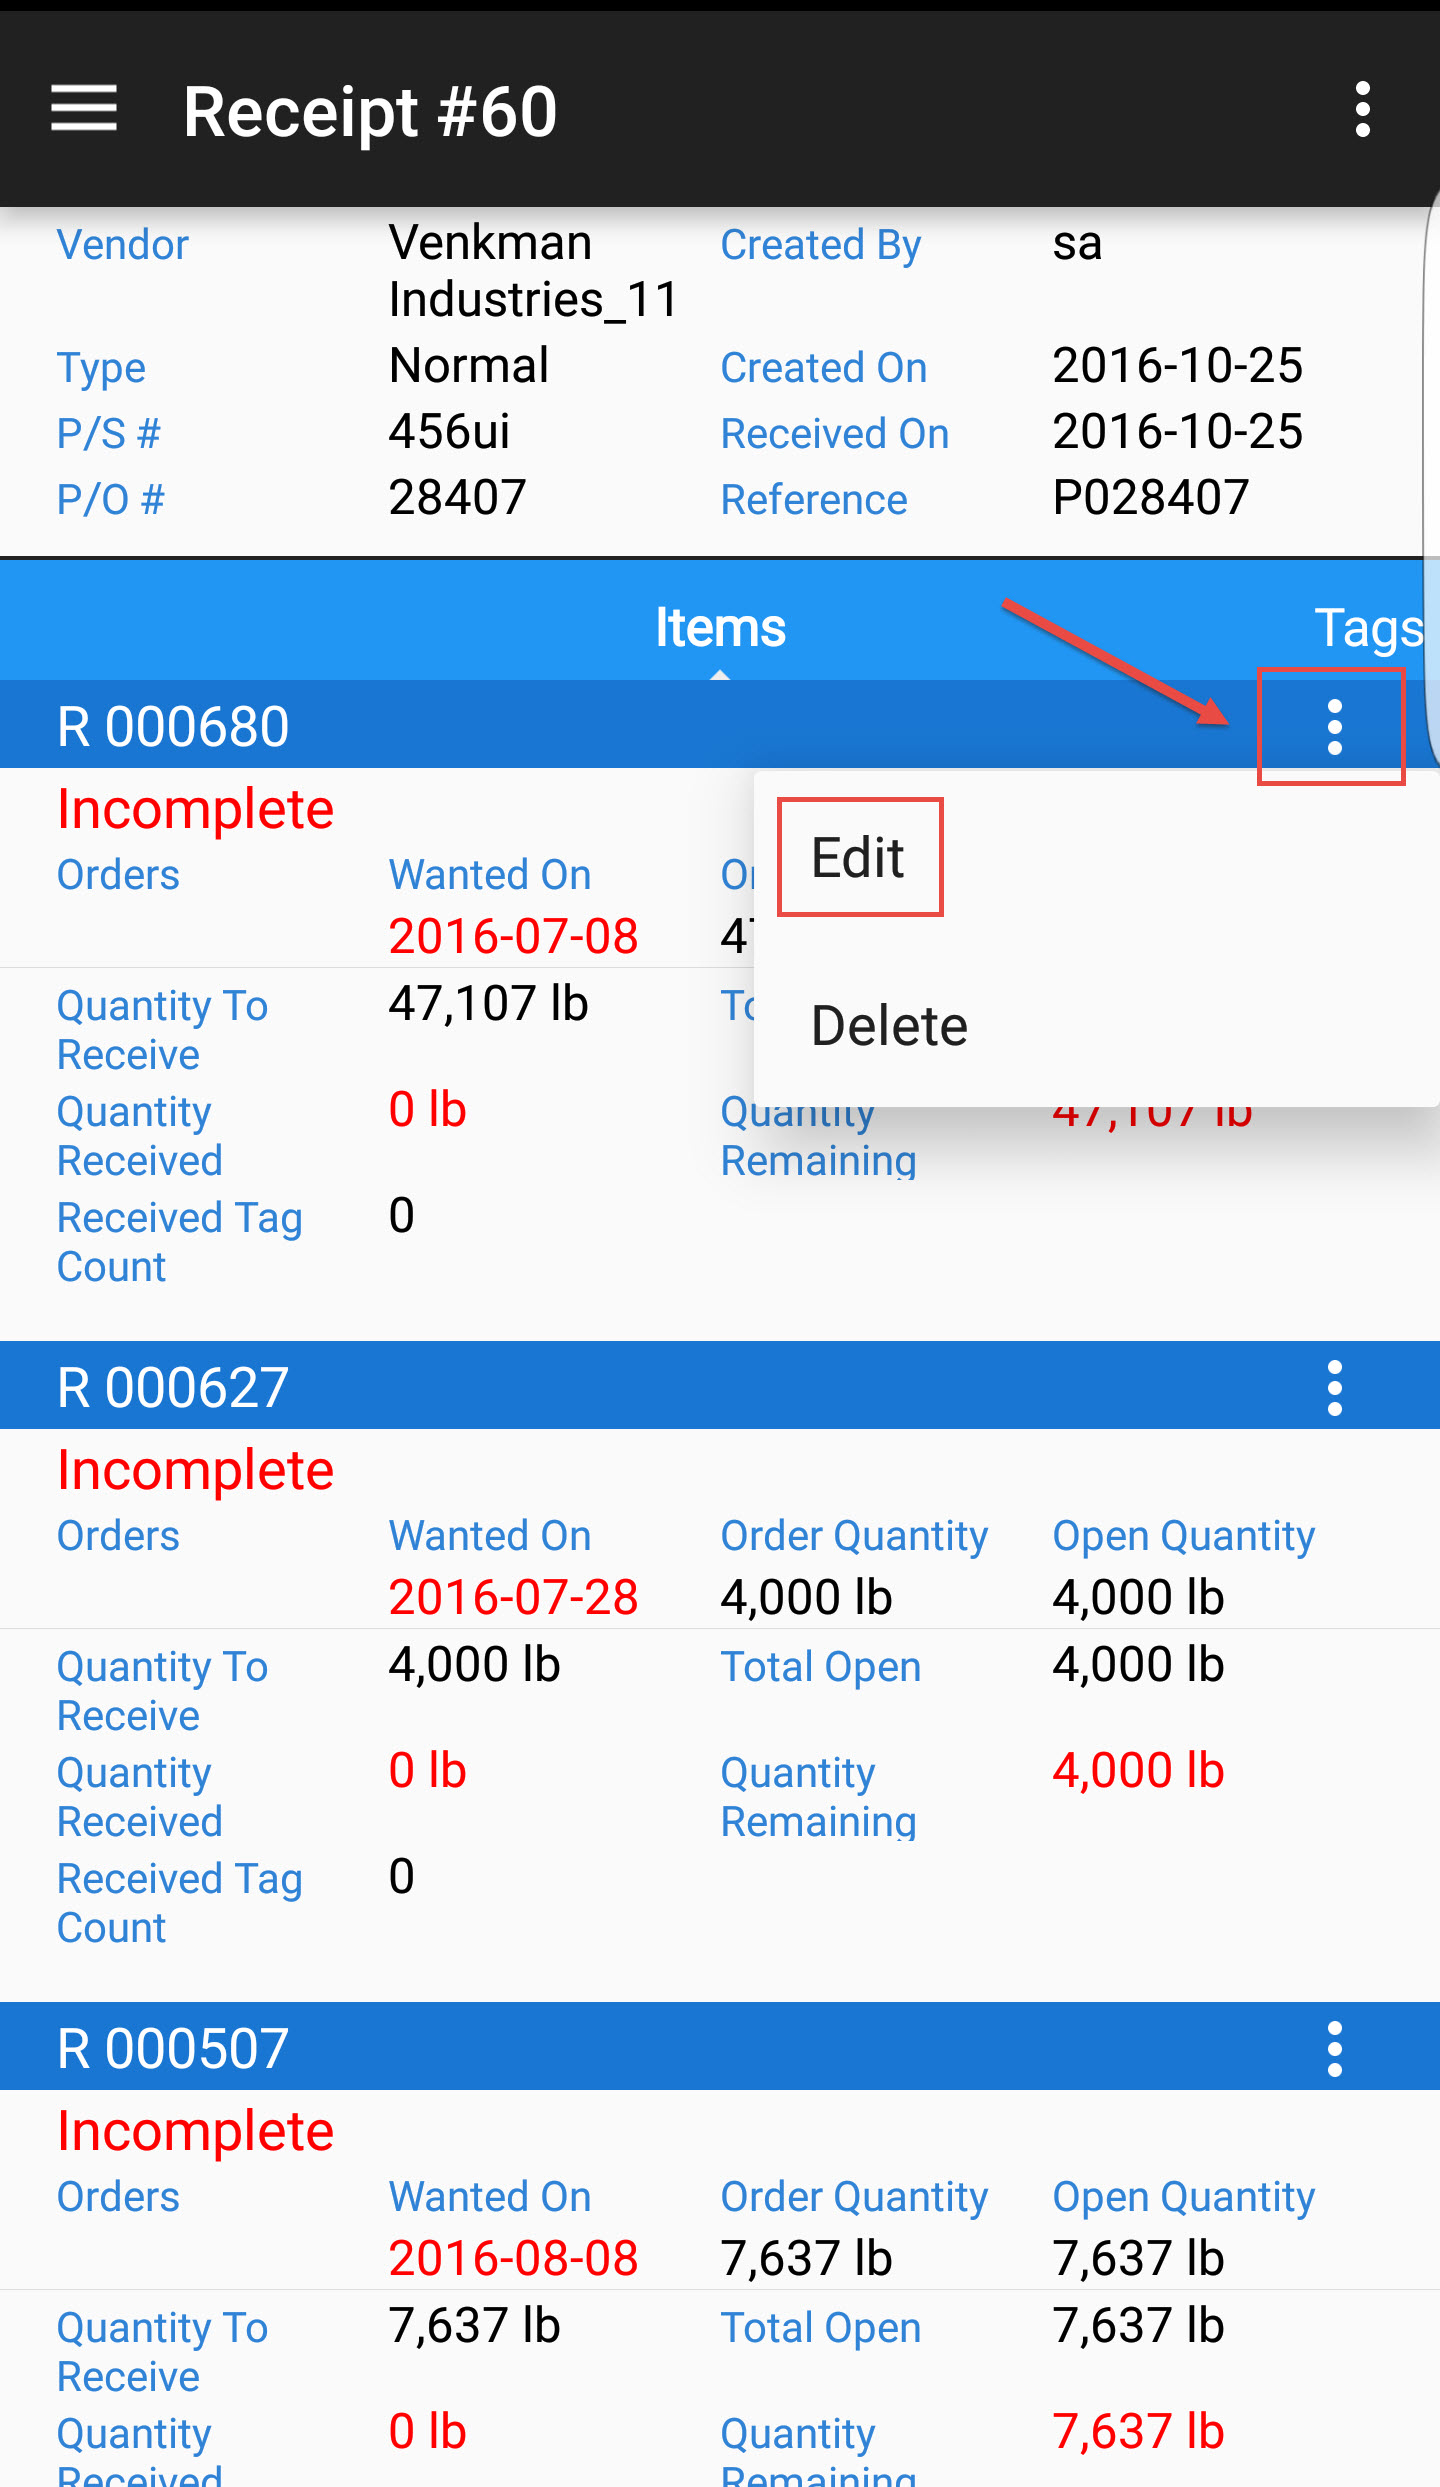
To edit an item quantity that is already on a receipt, open the receipt for which you wish the edit the item, and click on the action menu beside the item you wish to delete. Select the Edit option.
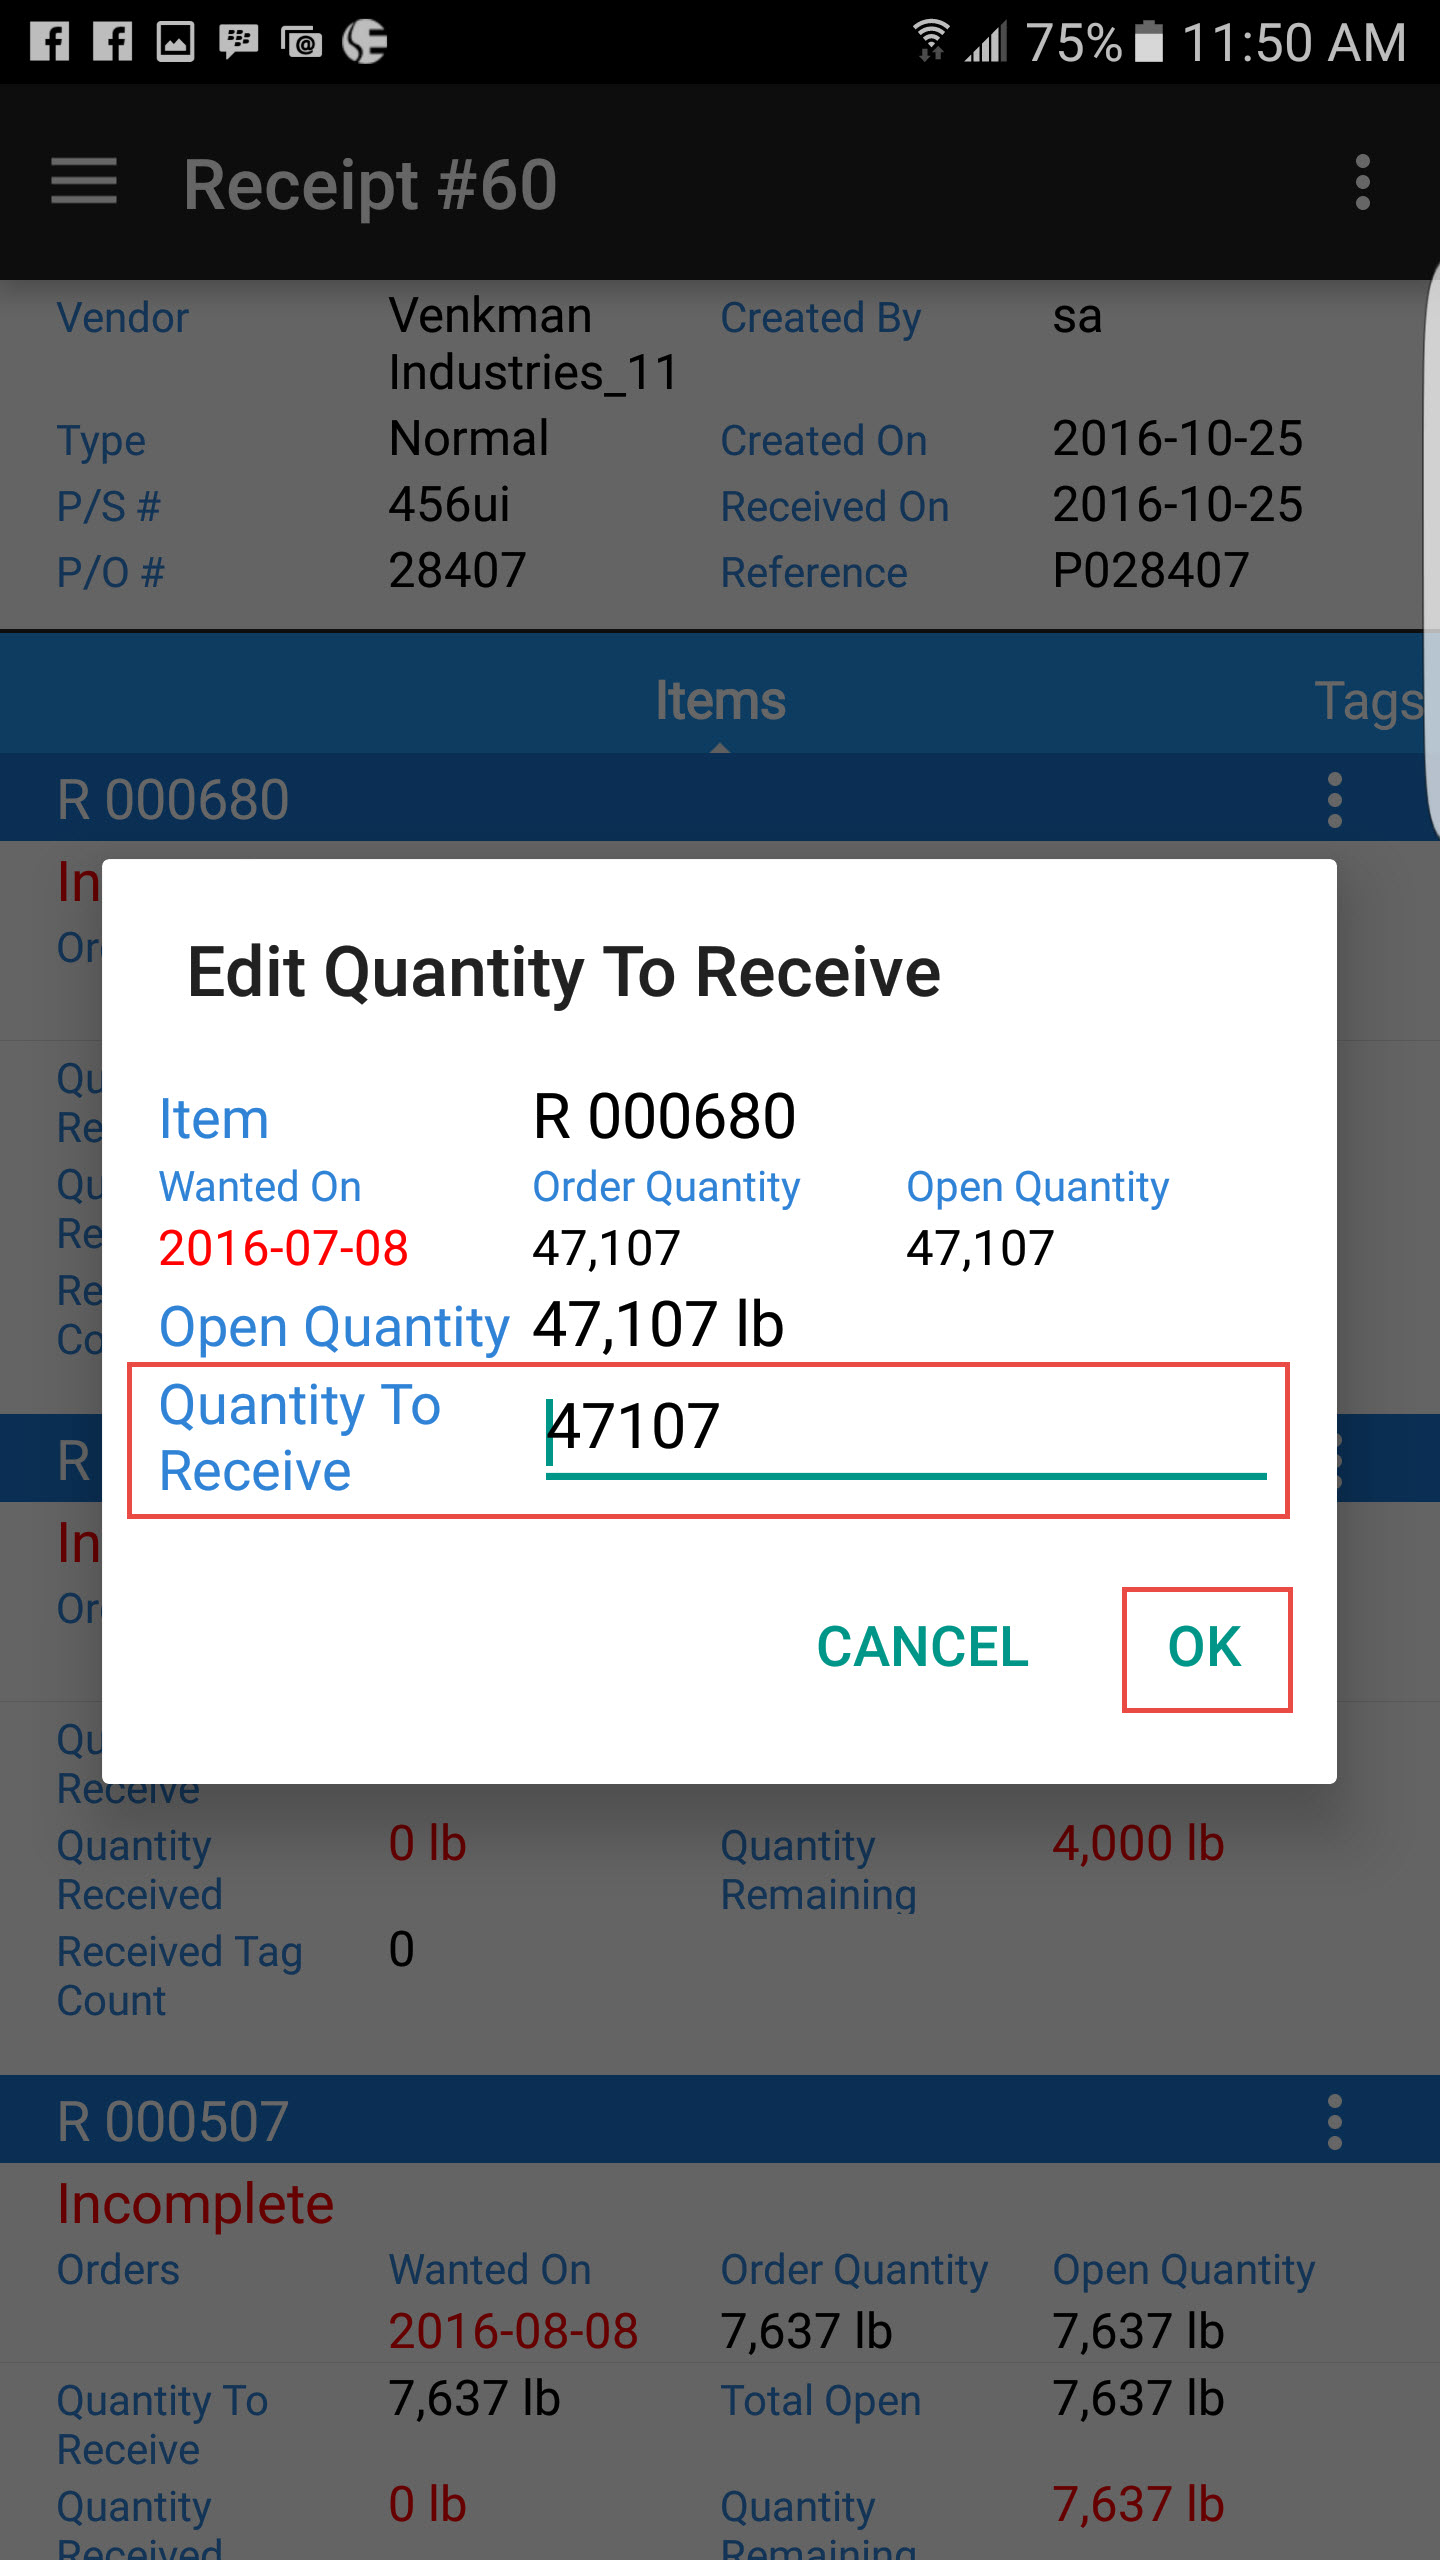
Enter in the new quantity that you are receiving for the item, and select OK. Select CANCEL to return to the receipt.
Deleting Items on a Receipt
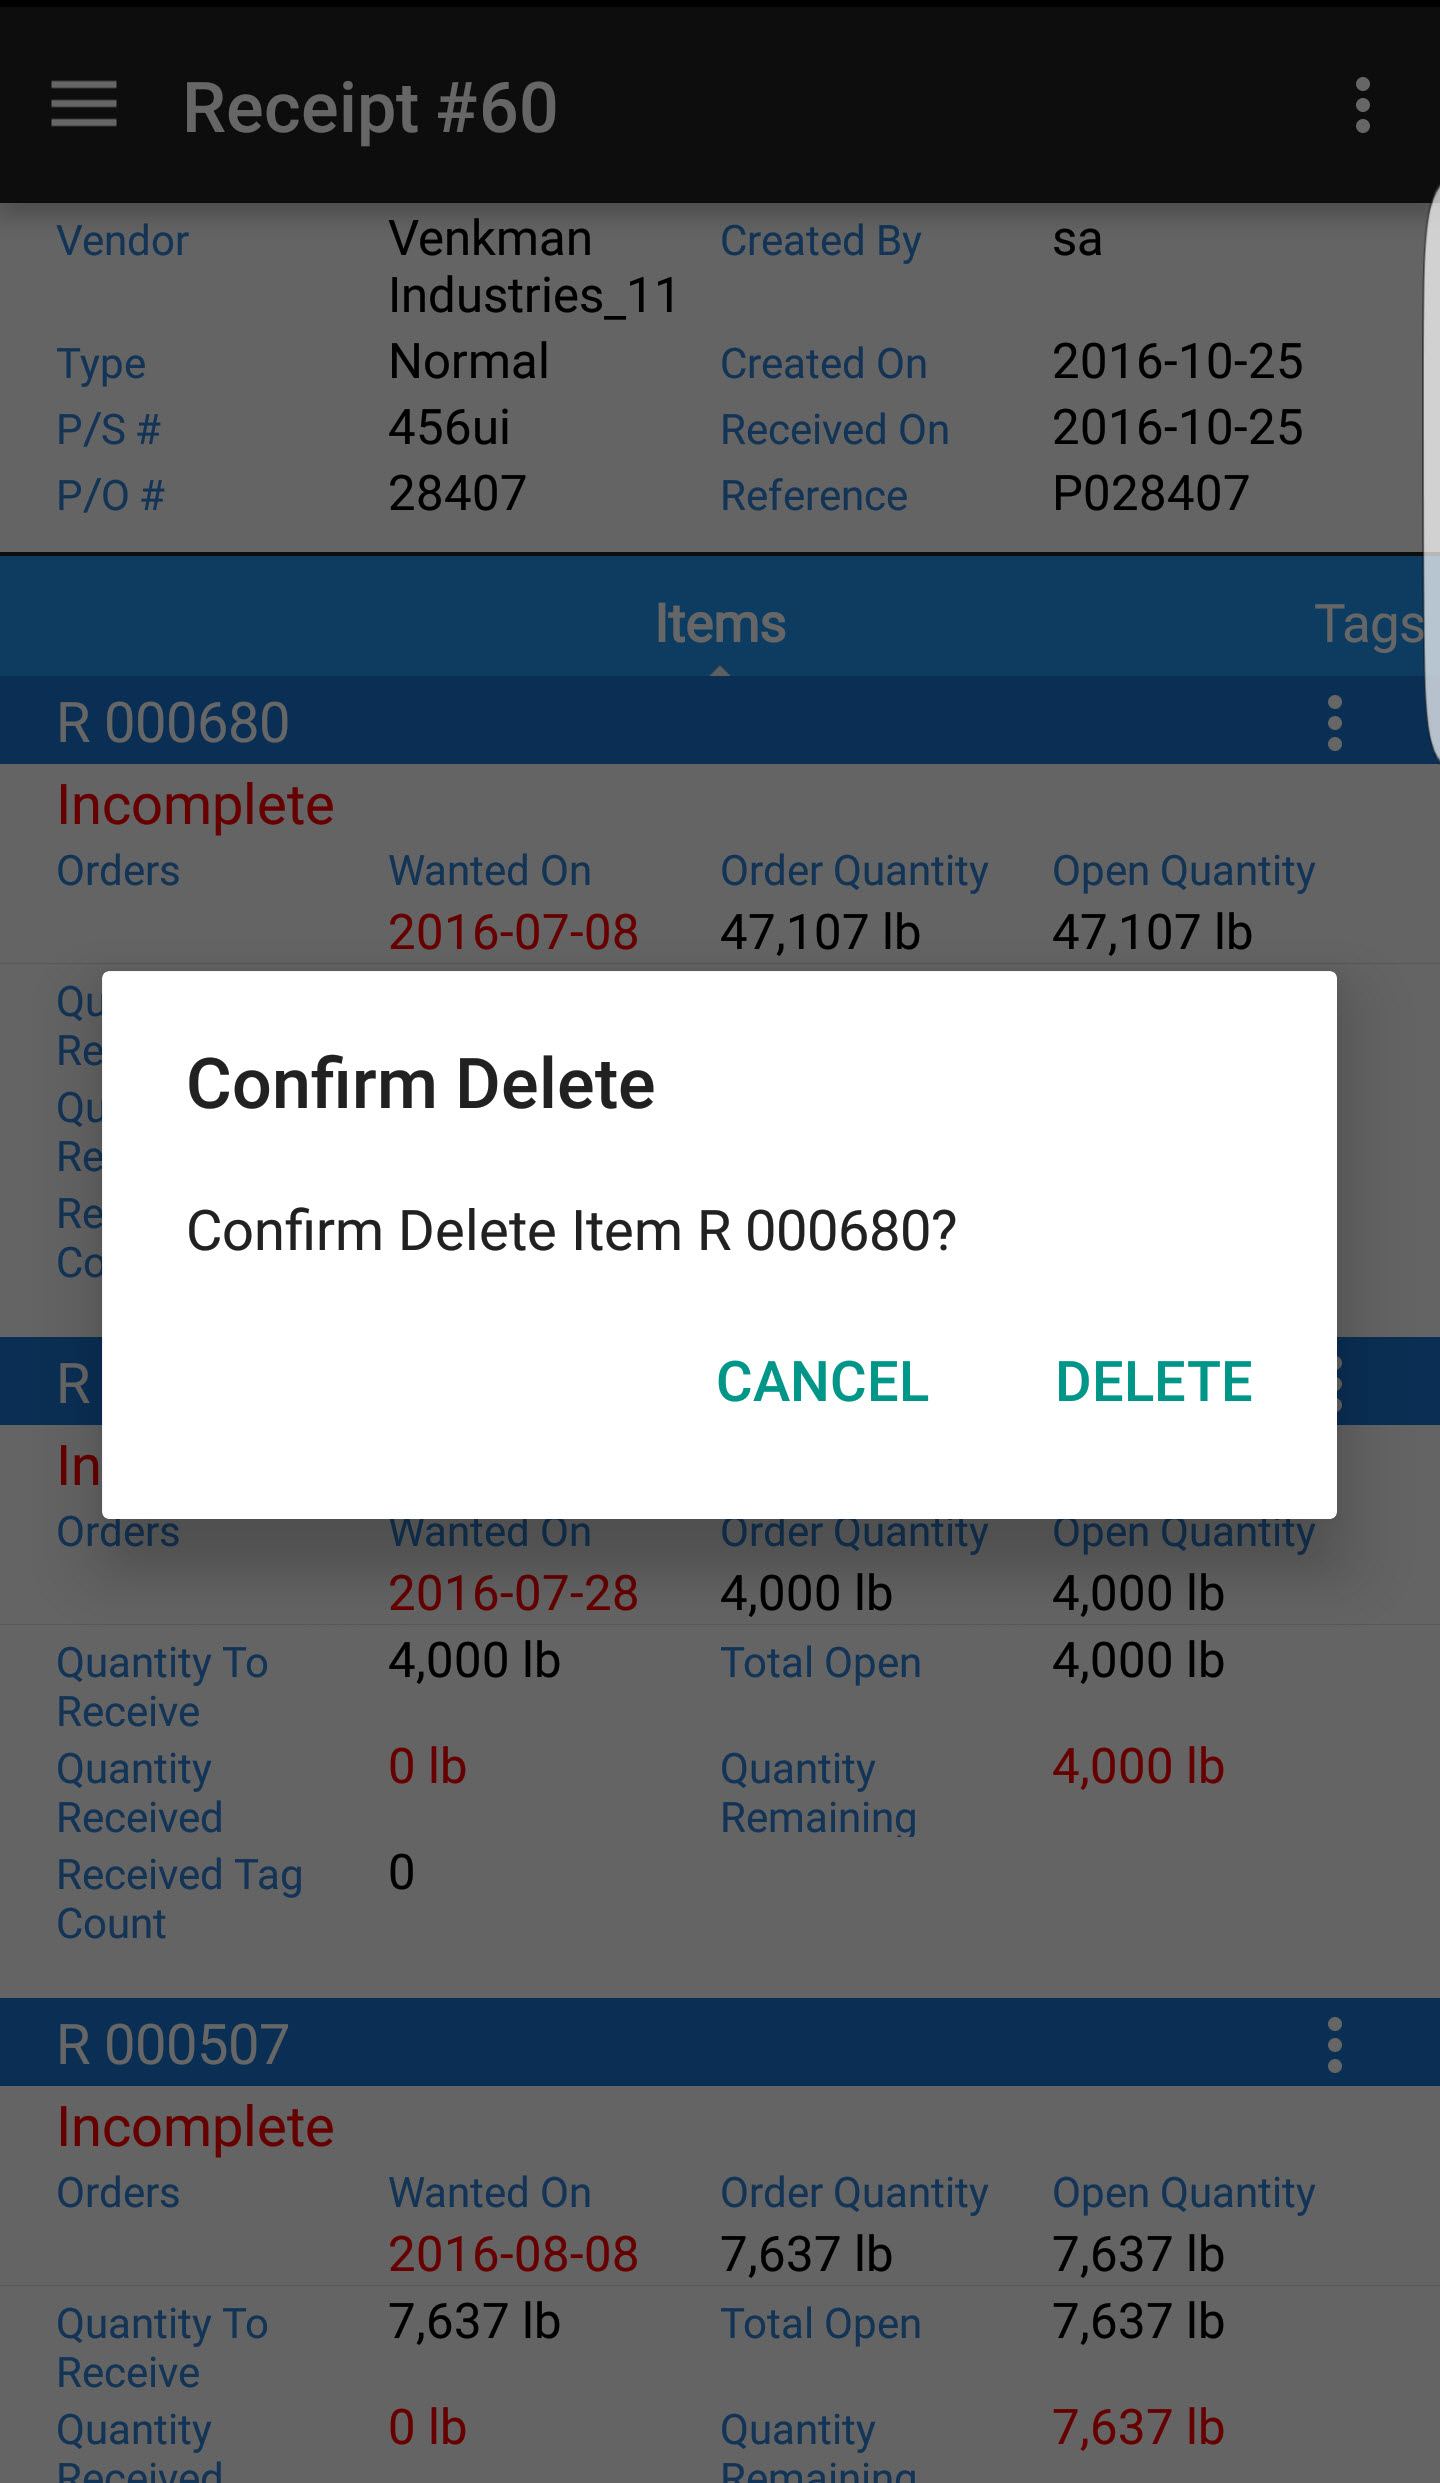
To delete items that should not be part of a receipt, open the receipt you wish to delete the items from, and click on the action menu beside the item you wish to delete. Select the Delete option.
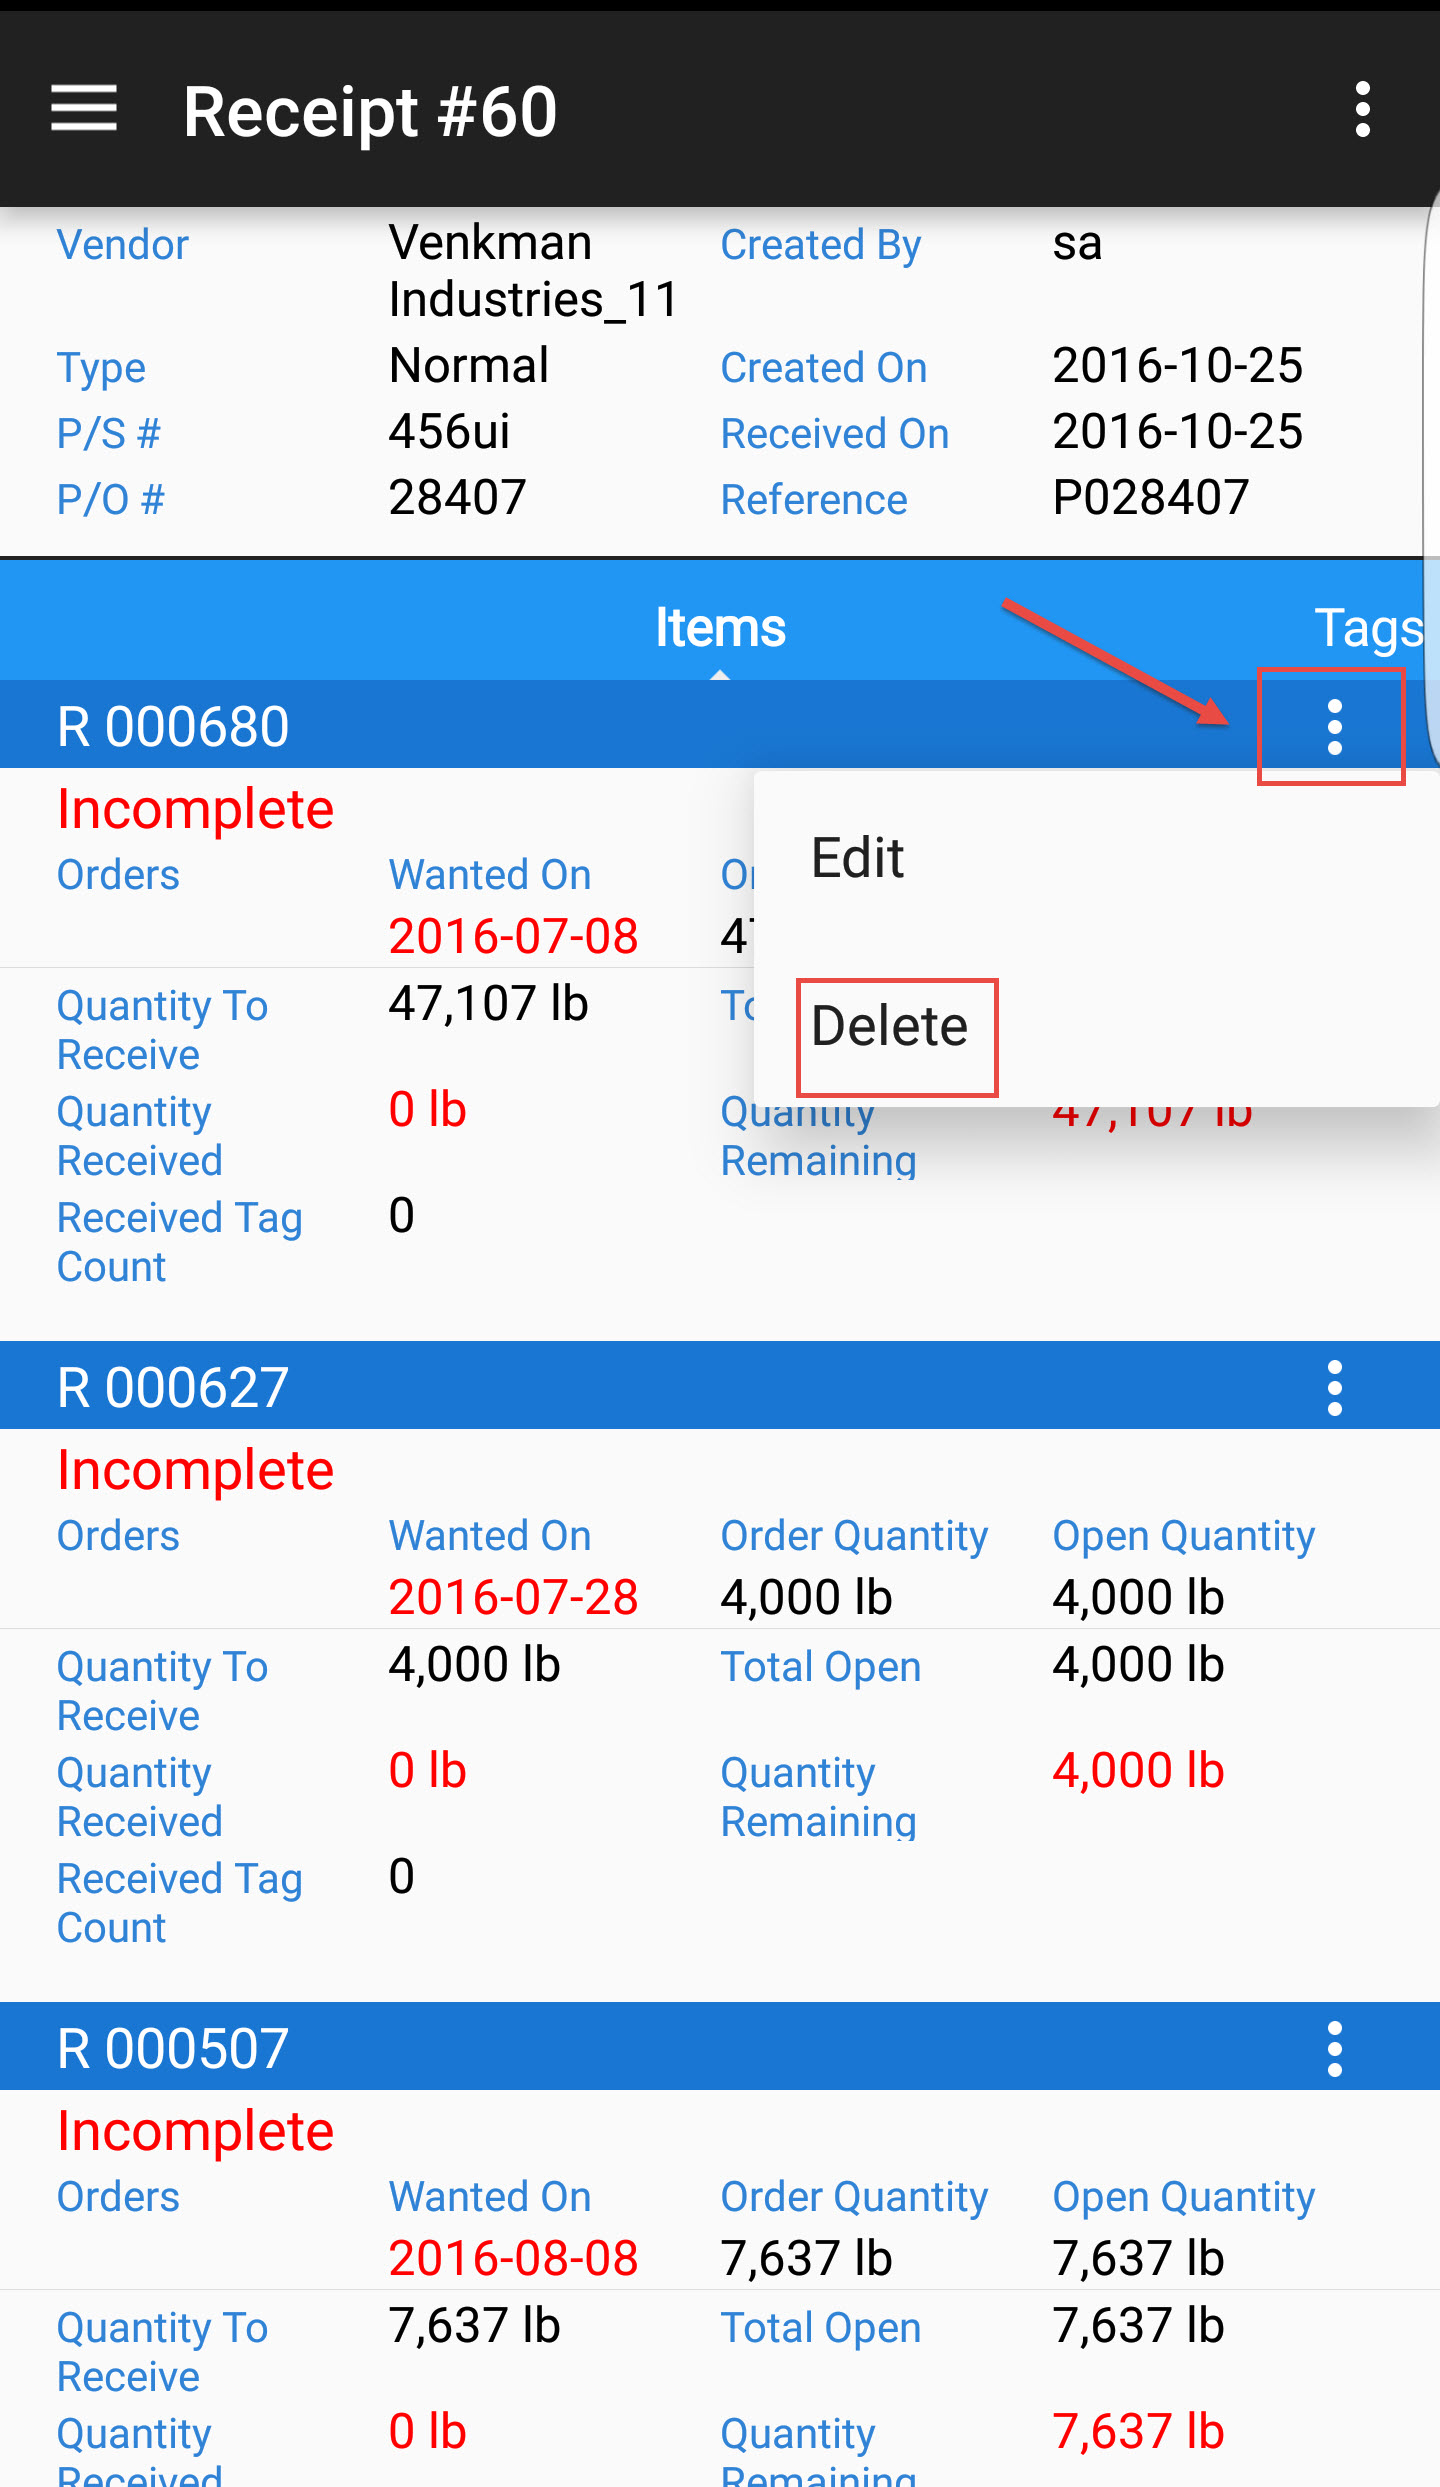
The application will prompt you to confirm the deletion of the item from the receipt. Touch CANCEL to return to the receipt, or DELETE to delete the item.
Editing a Receipt
Finalizing a Receipt
Once you have completed receiving all items, you must Finalize a receipt in the application.
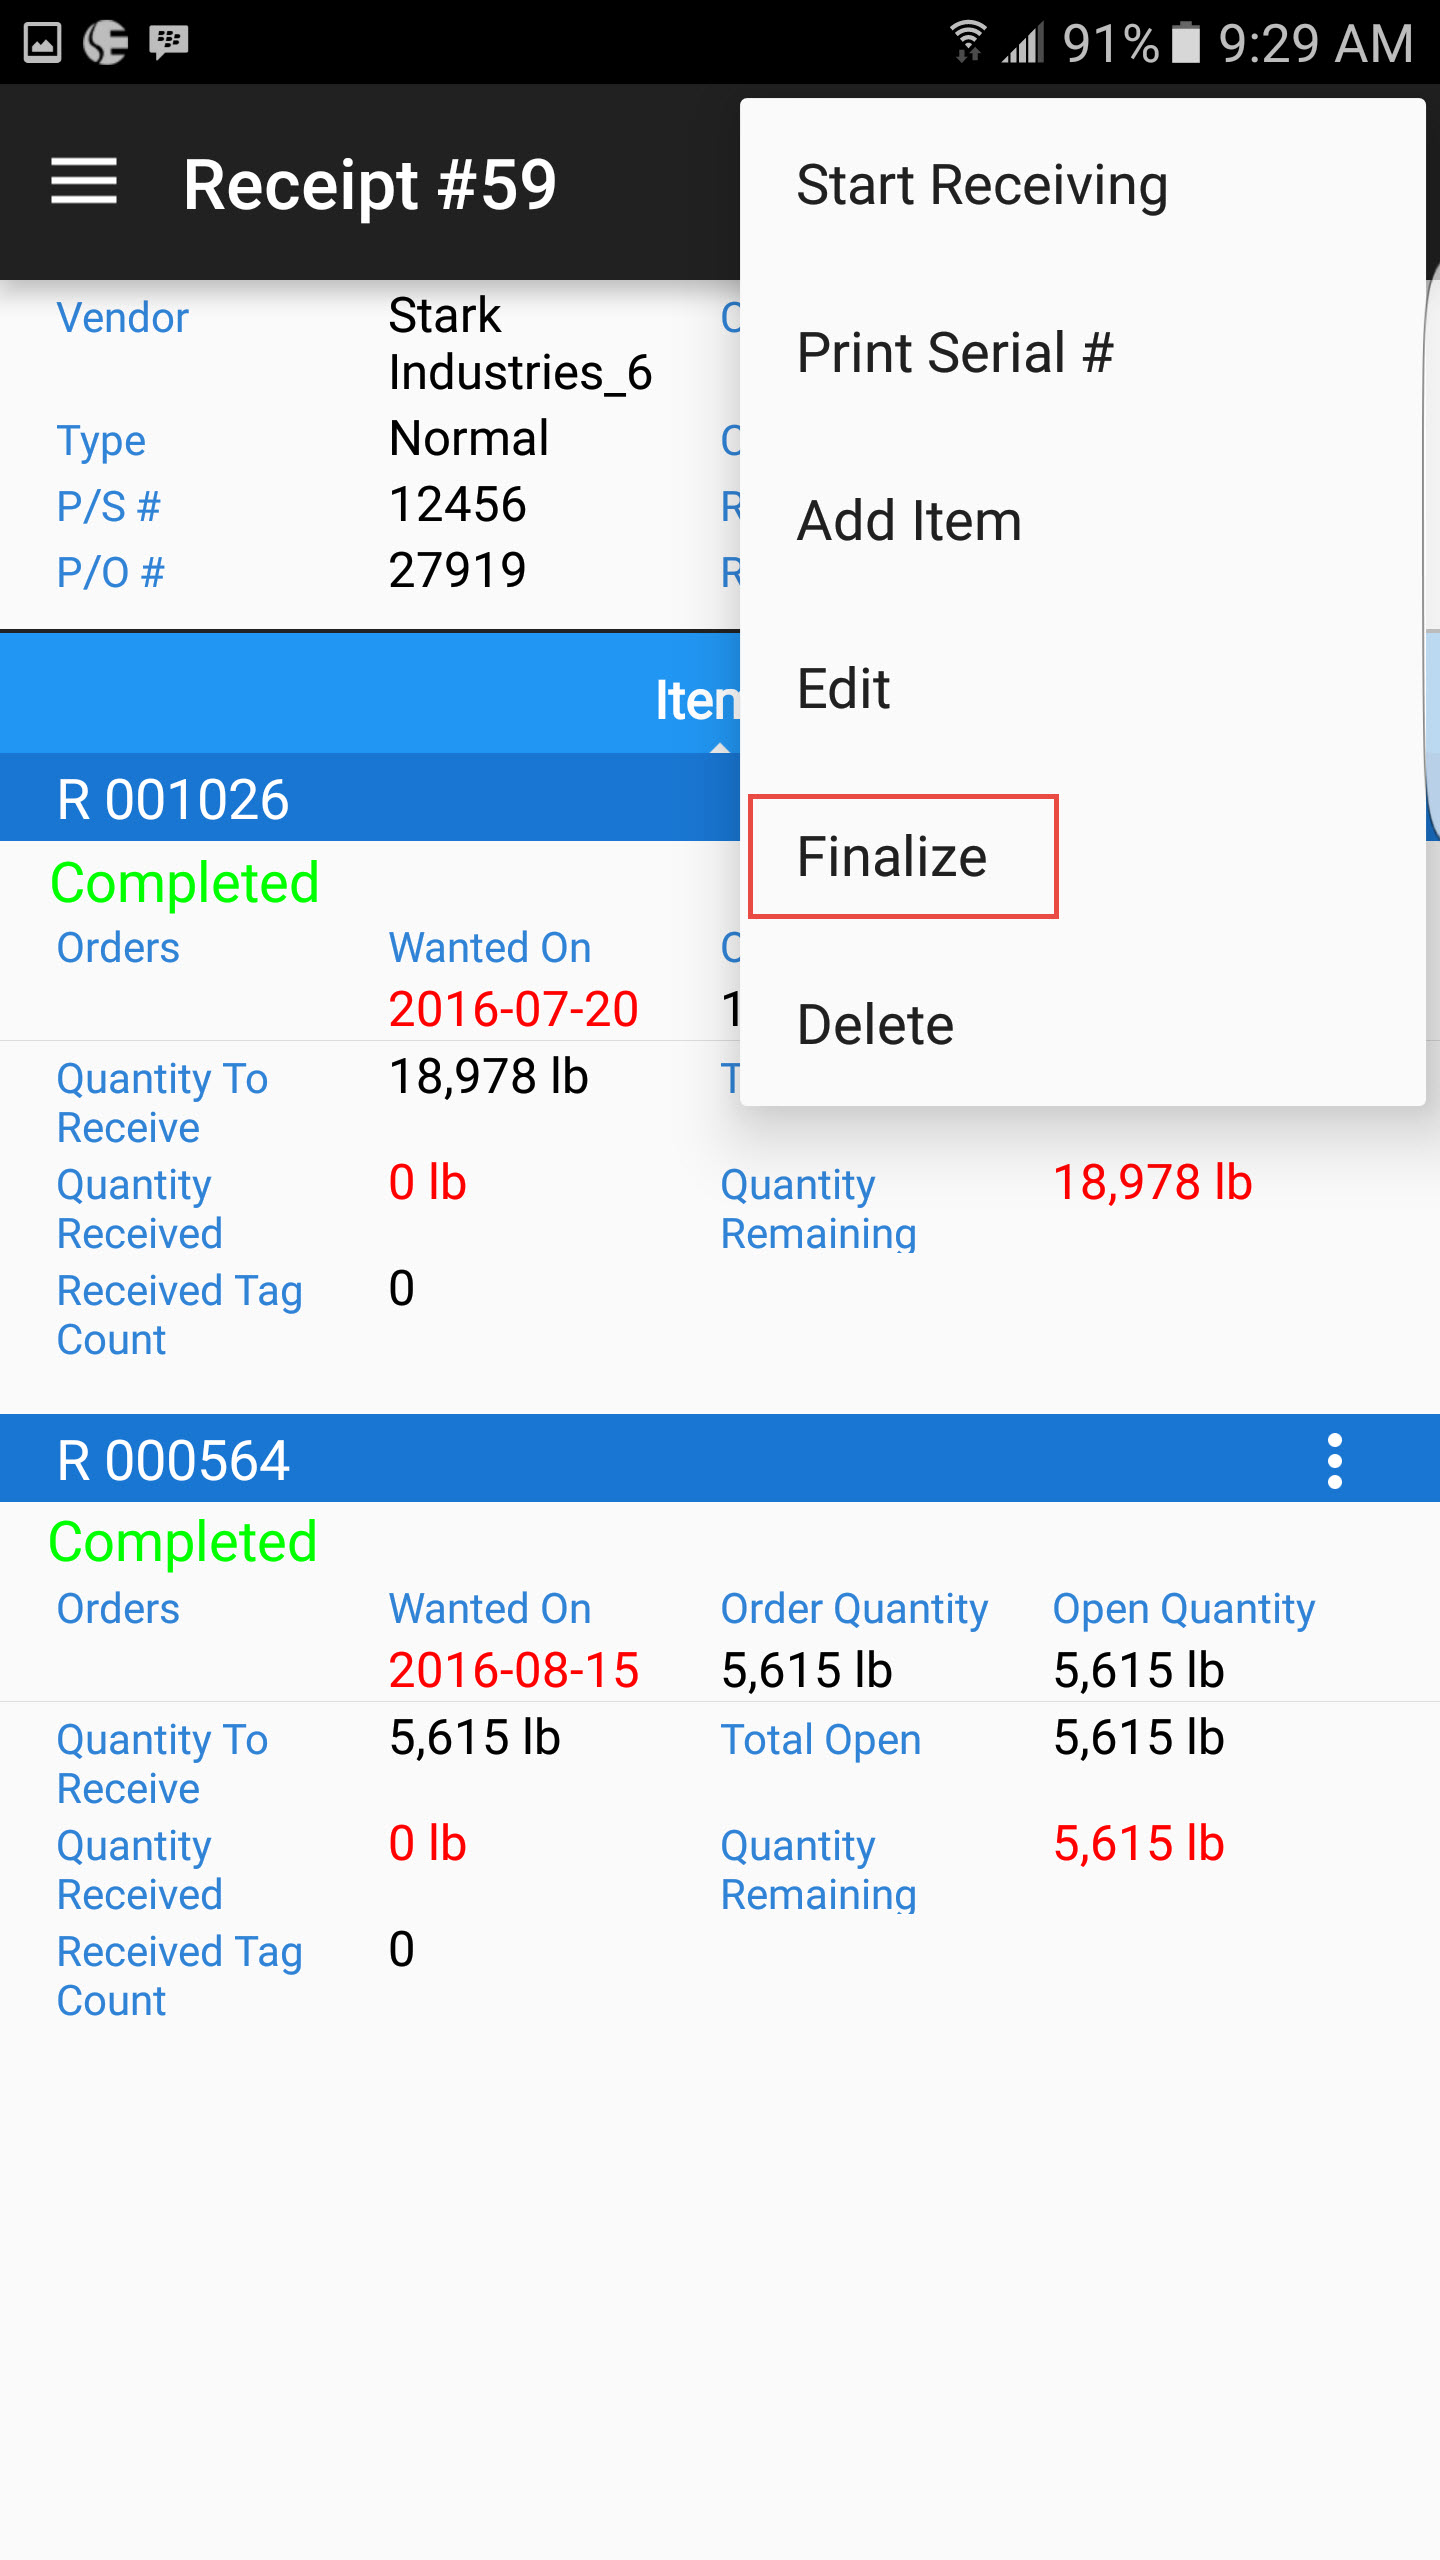
To Finalize, navigate to the action menu at the top right of the screen and select Finalize.
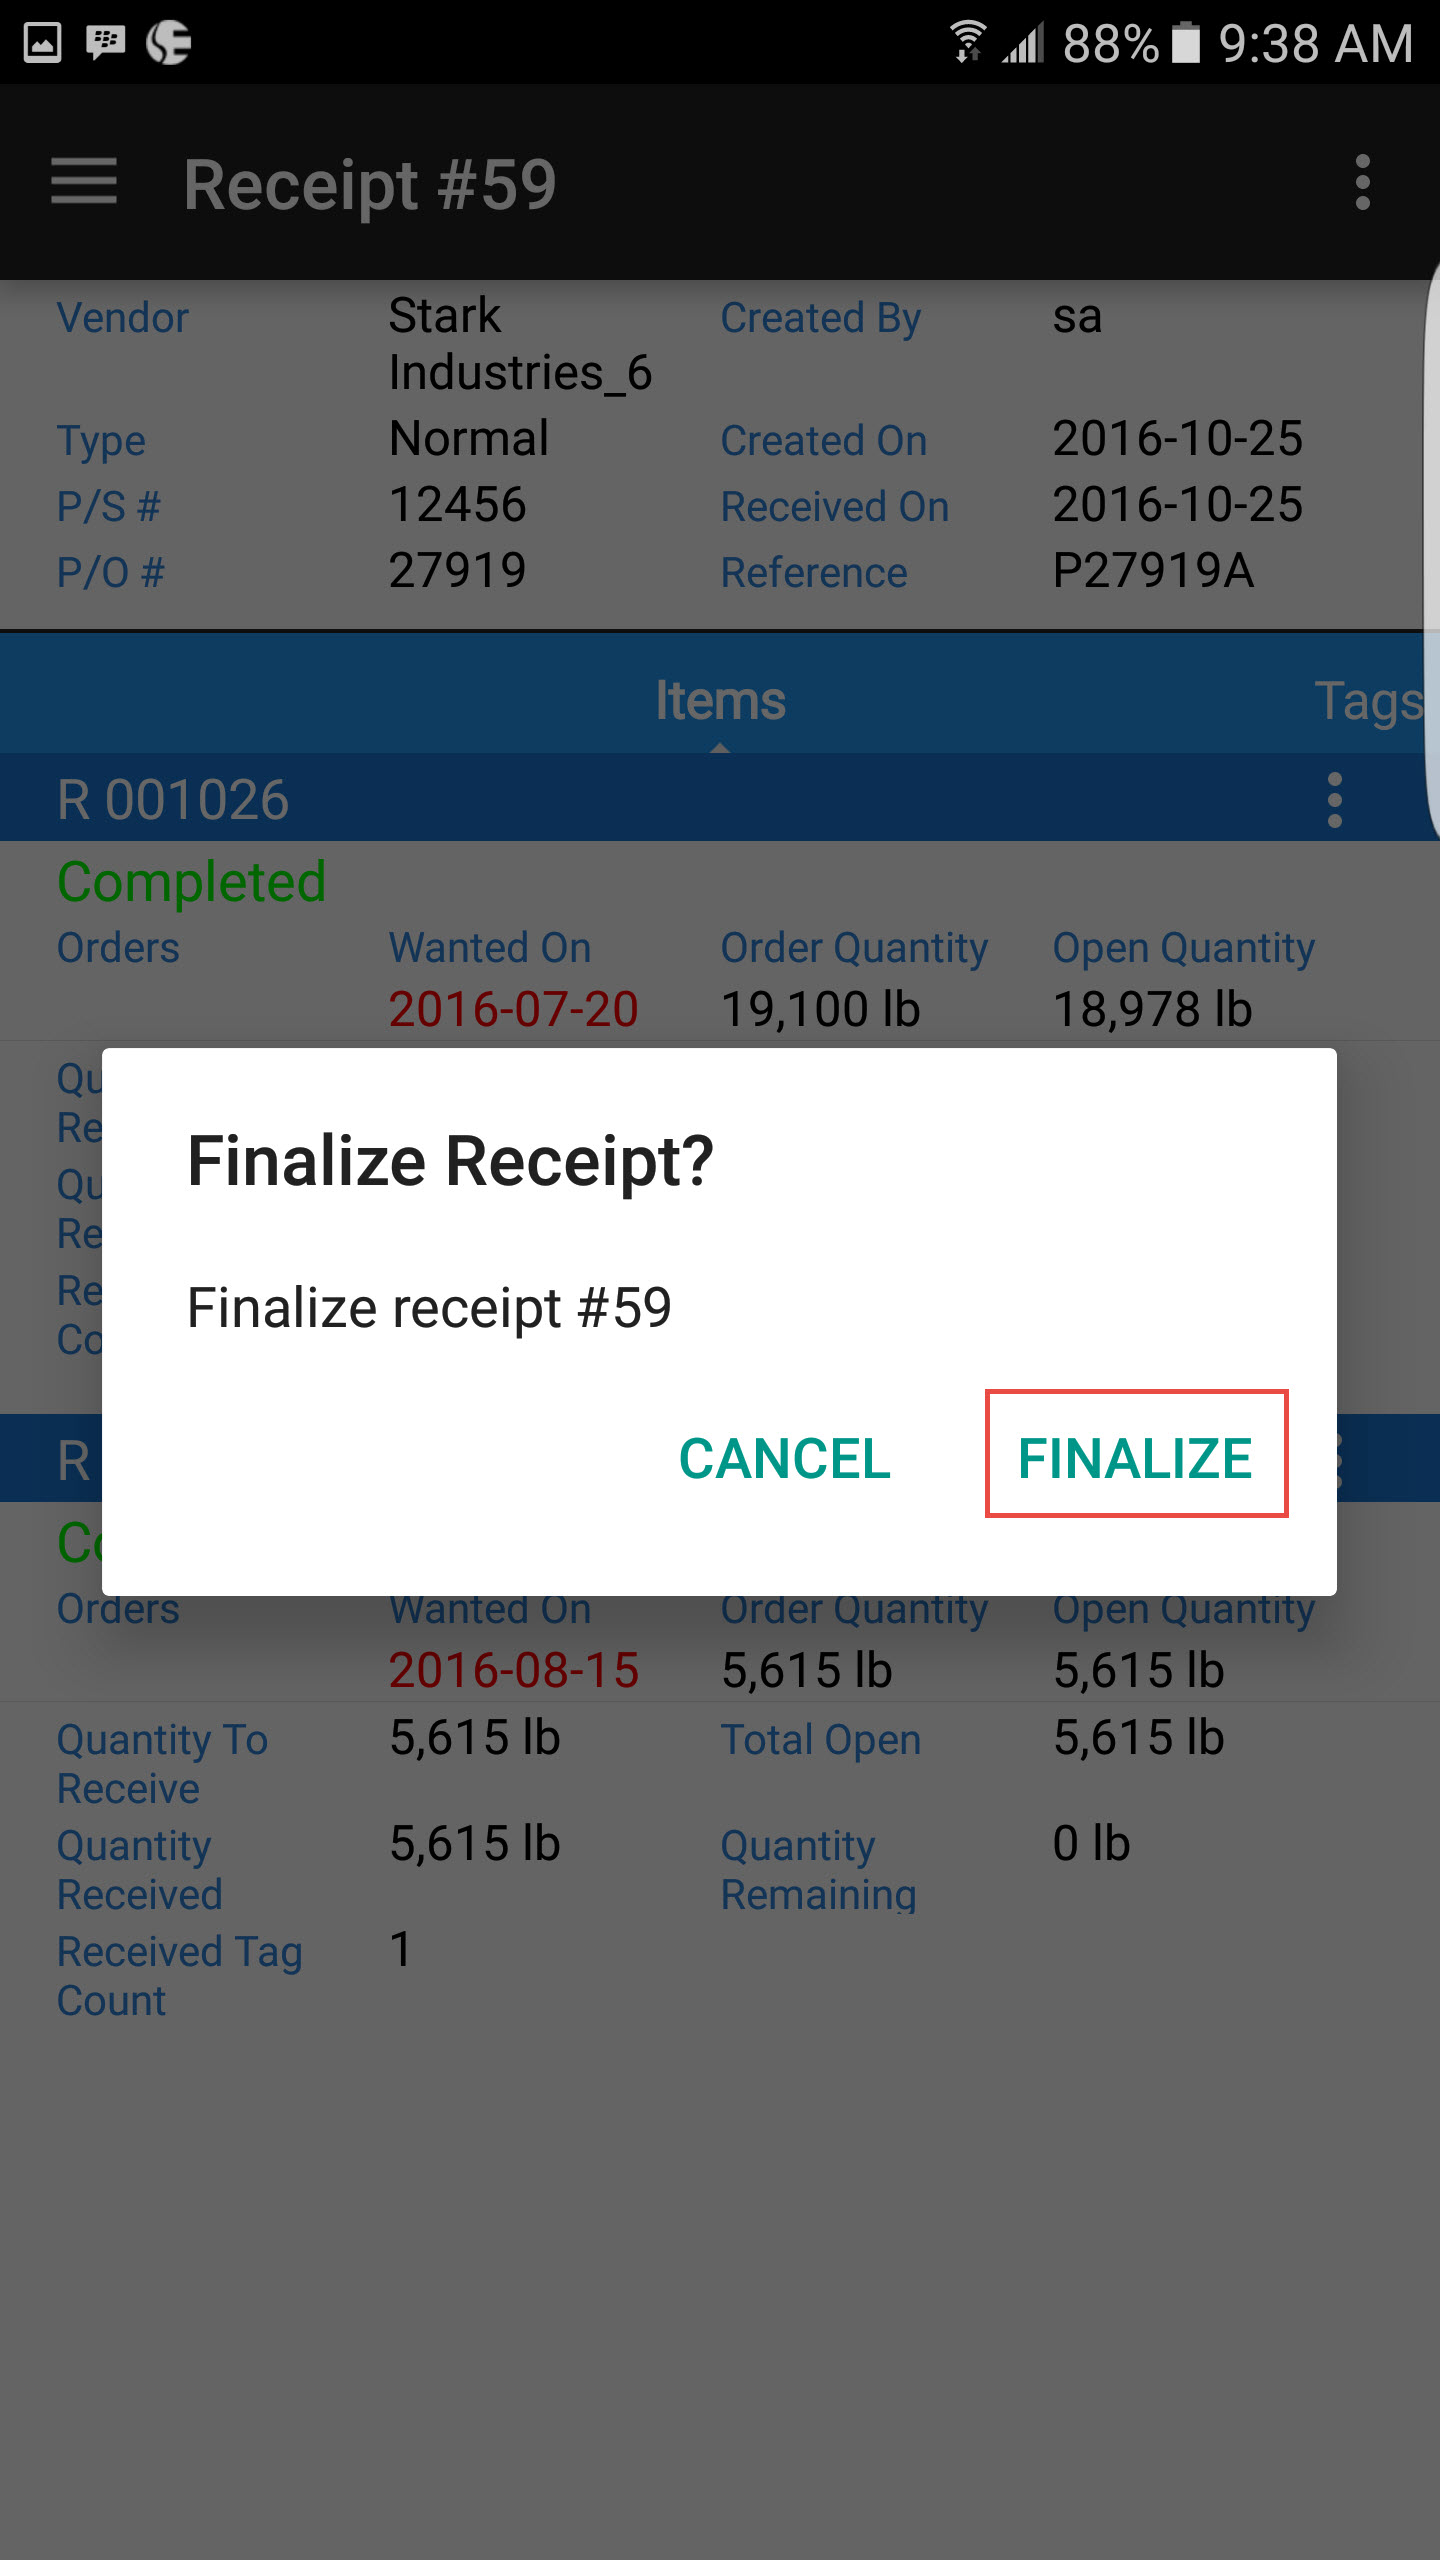
The system will prompt you to make sure you wish to Finalize the receipt.
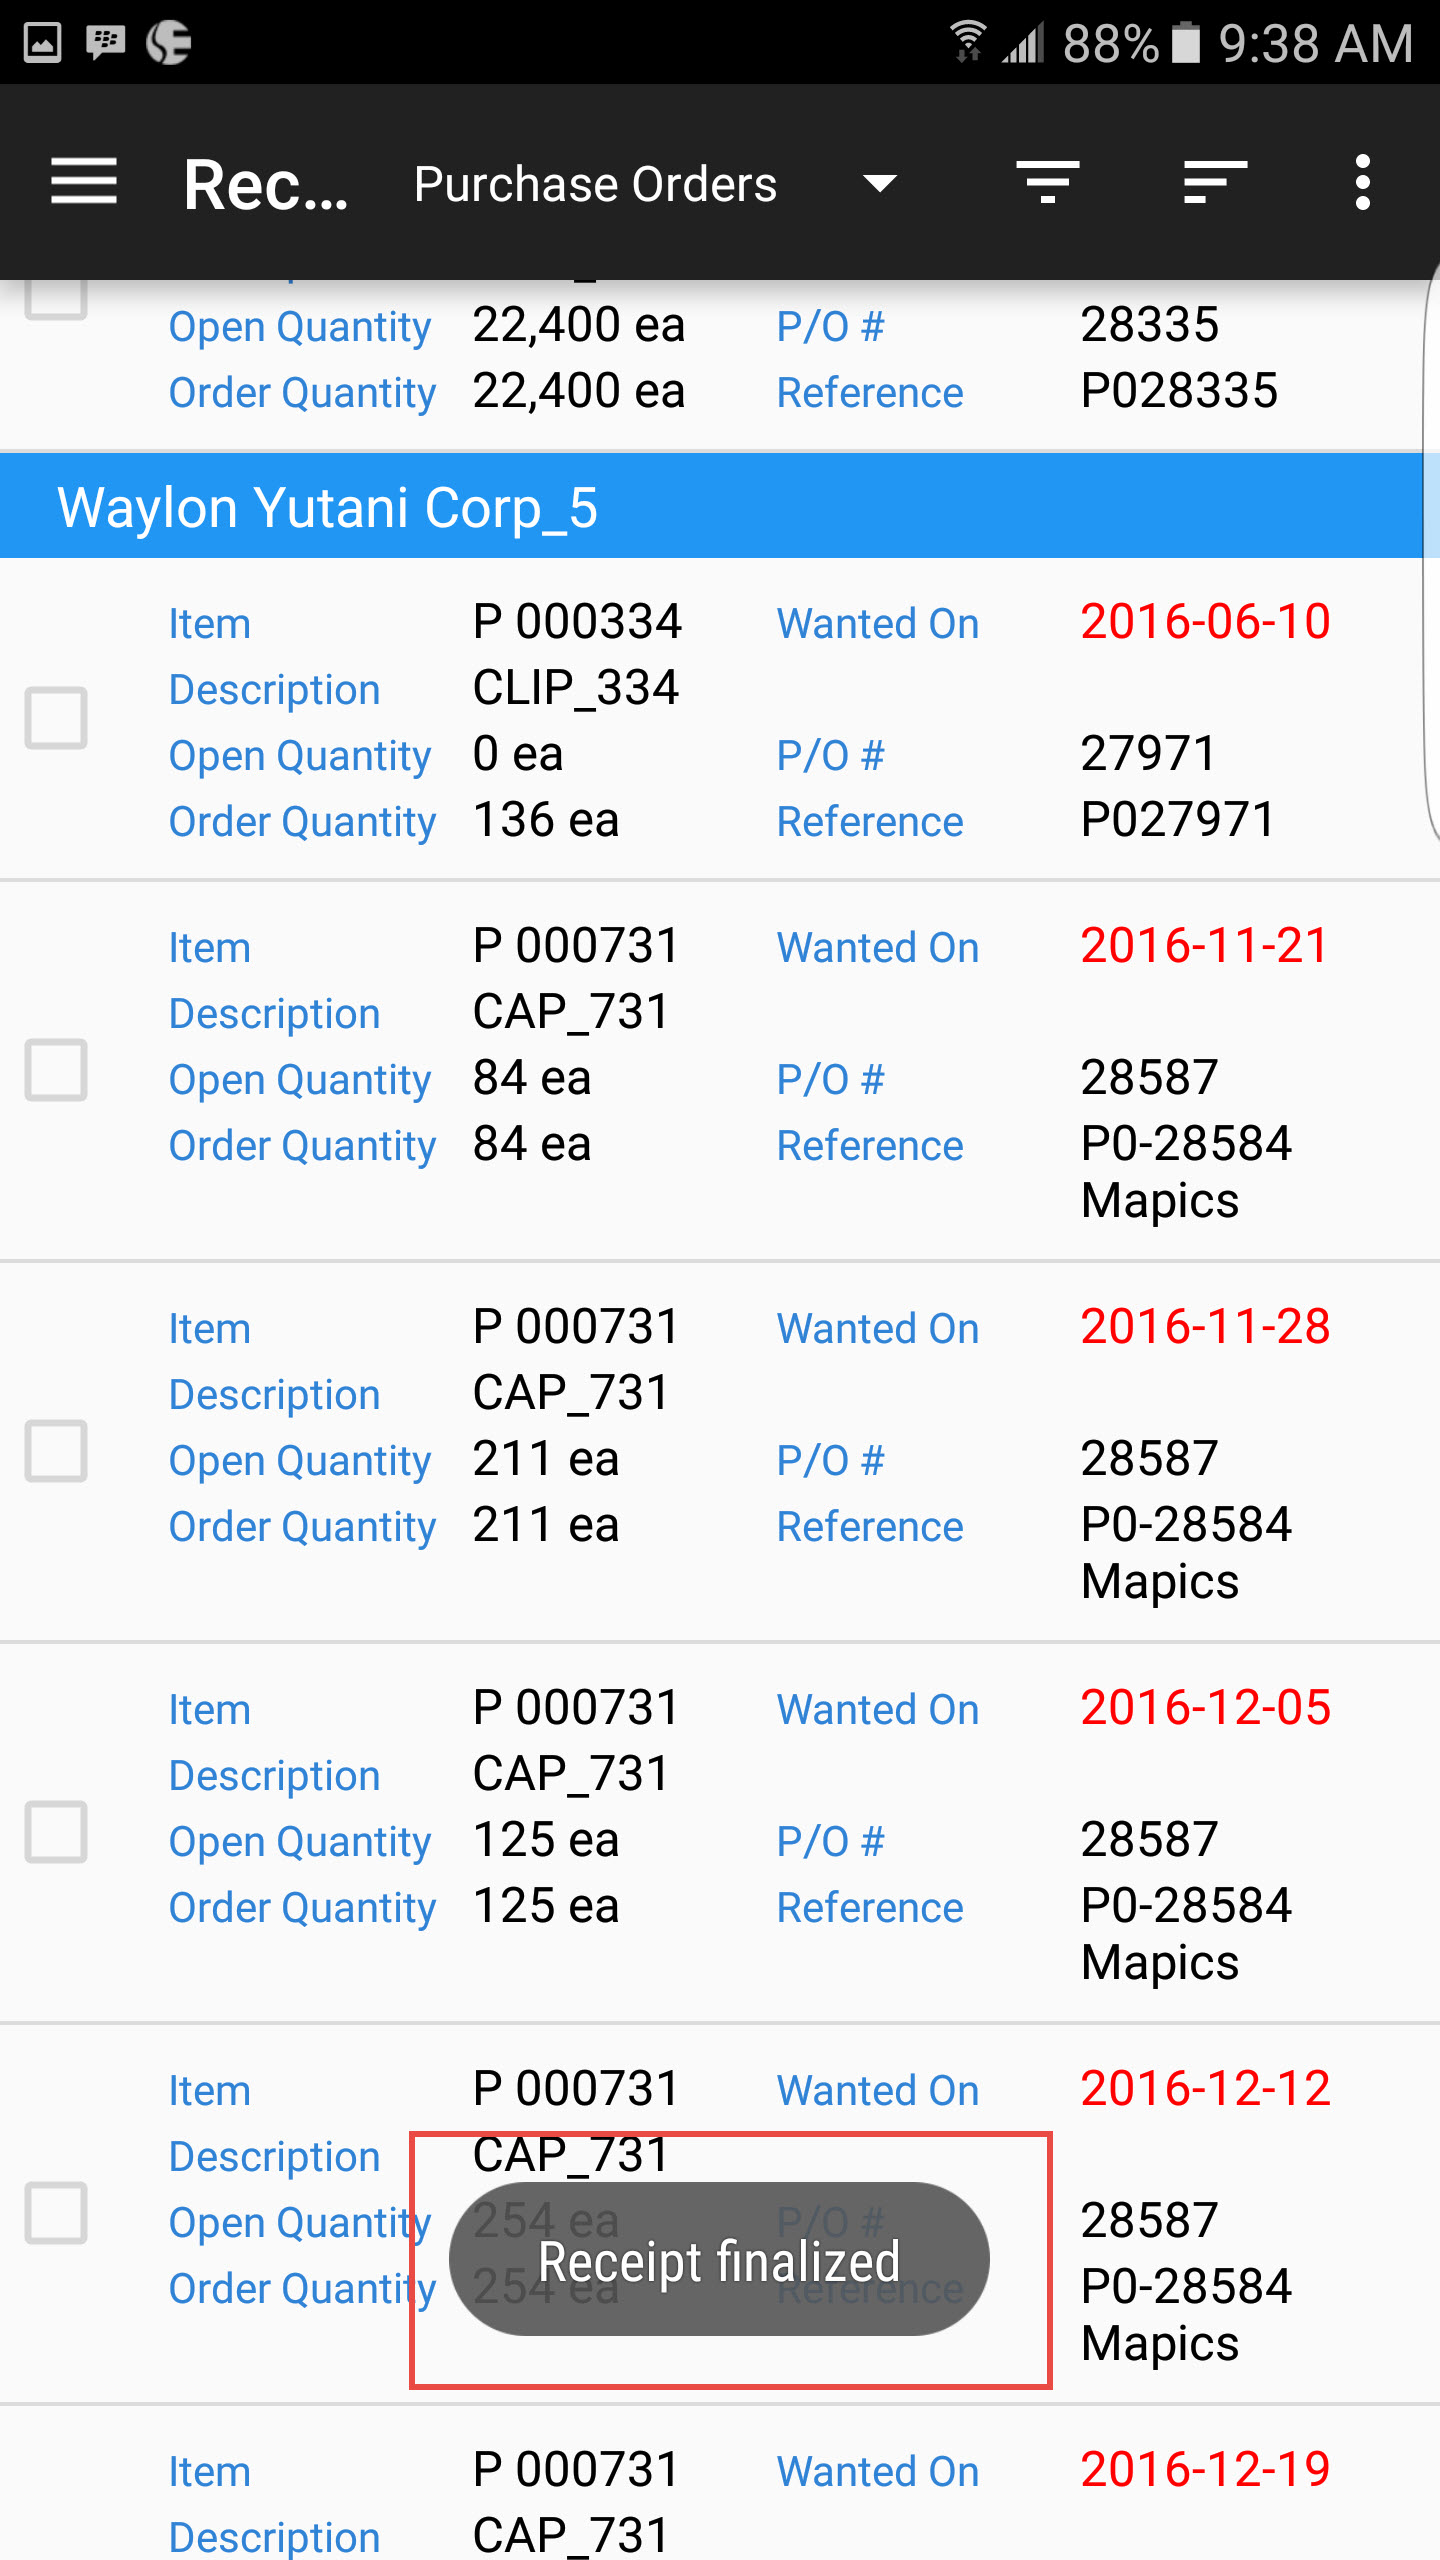
You will receive a message that the receipt has been finalized, and the application will take you to the Open Purchase Orders screen.
Deleting a Receipt
Purchase Orders
Users can view open purchase orders in the system, and simplify the receiving process by adding items from a purchase order and creating a new receipt simutaneously.
Navigate to the Purchase Orders section by touching it under Receiving on the main navigation window.

Adding Items to a New Receipt
Adding an Item to an existing Receipt
Once you have found the purchase order you wish to receive against, you have the option to select the items from the list to add them to your receipt.

Note
You can only select items that are on the same purchase order for the same vendor.
To create a new receipt with the selected items, touch the action menu at the top right of the screen and select New Receipt.


This will open the Create Receipt screen, with the P/O # and Vendor information pre-populated. The Received On date will populate from the current date, and you will need to enter in a unique vendor P/S #. Touch OK when you are done.

Note
The vendor packing slip number must be a unique number. The system will not let you enter and save a number that has been used before.
You will then be prompted to enter the quantities of the items you are receiving. The application will default to the open quantities on the purchase order, but users have an option to override this field for each item.
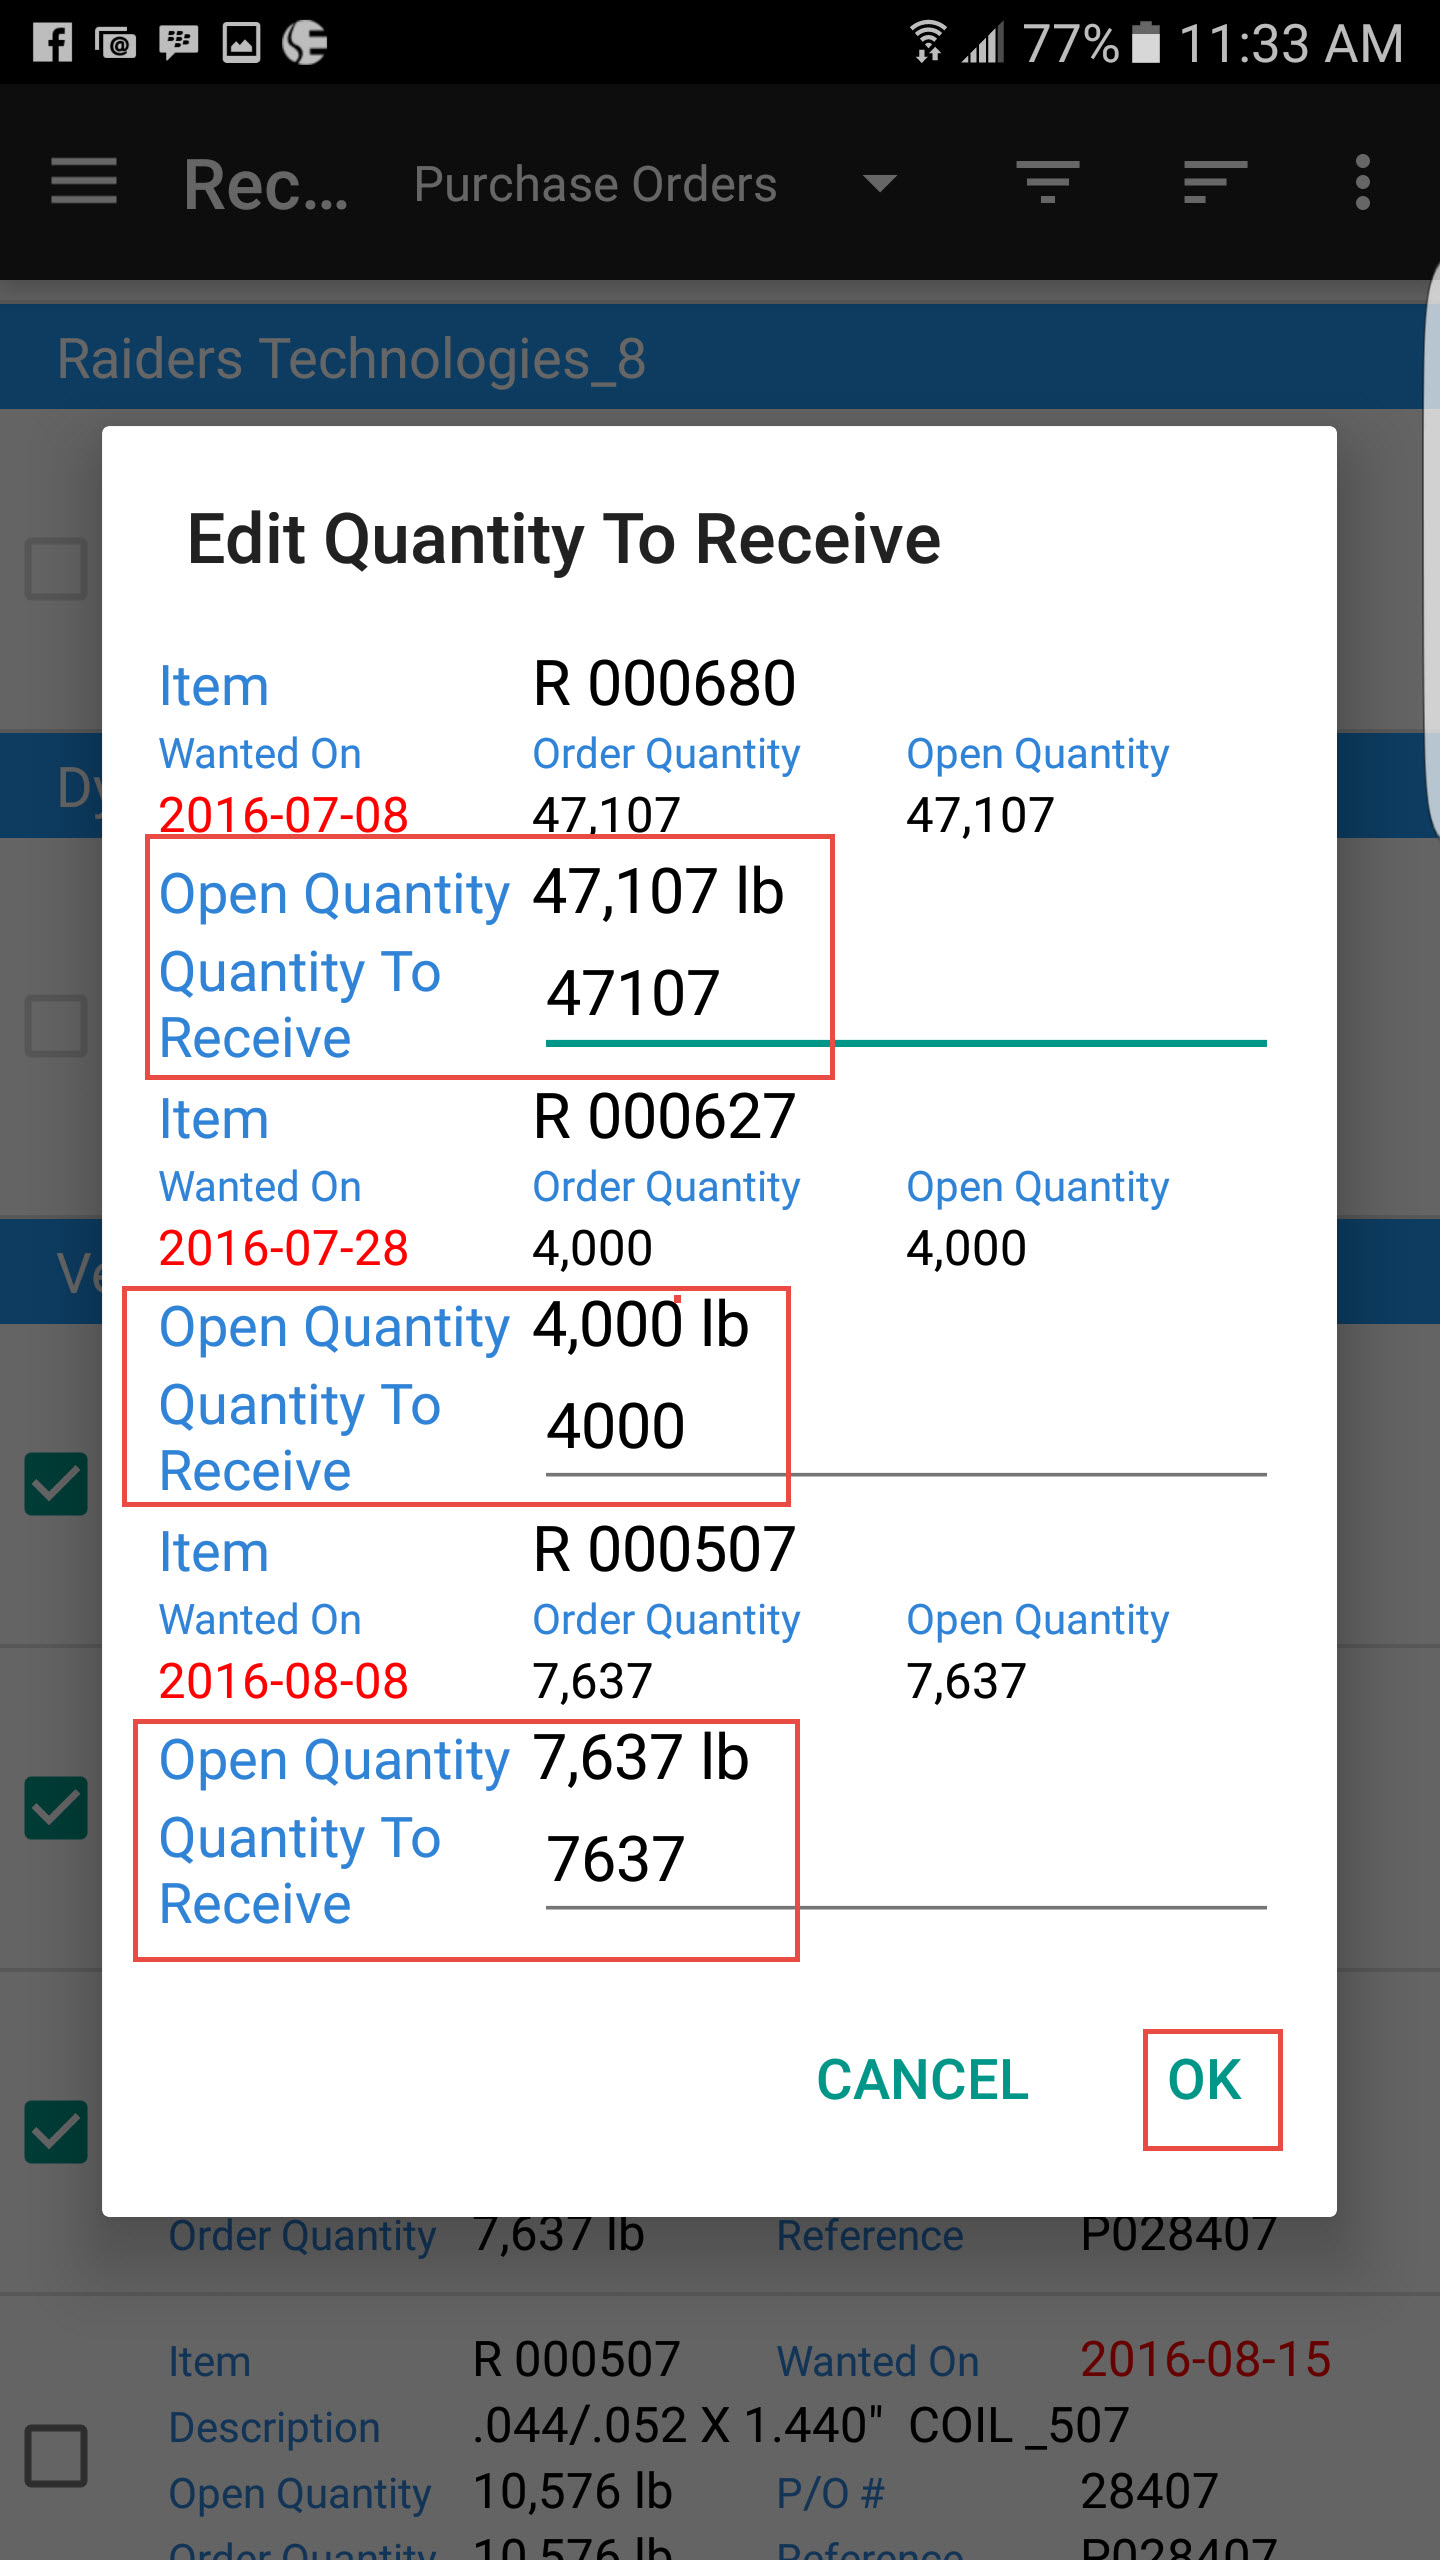
The application will then add the receipt to the system, assign the receipt a number, and add the items and open quantities.

Opening a Receipt
To open a receipt, navigate to Open Receipts under the Receiving module.

The application will take you to the Open Receipts screen. To open a receipt, touch the action menu beside the receipt you wish to open and select Open.

This will open the existing receipt screen where you can add additional items, scan incoming barcode tags, and finalize the receipt.
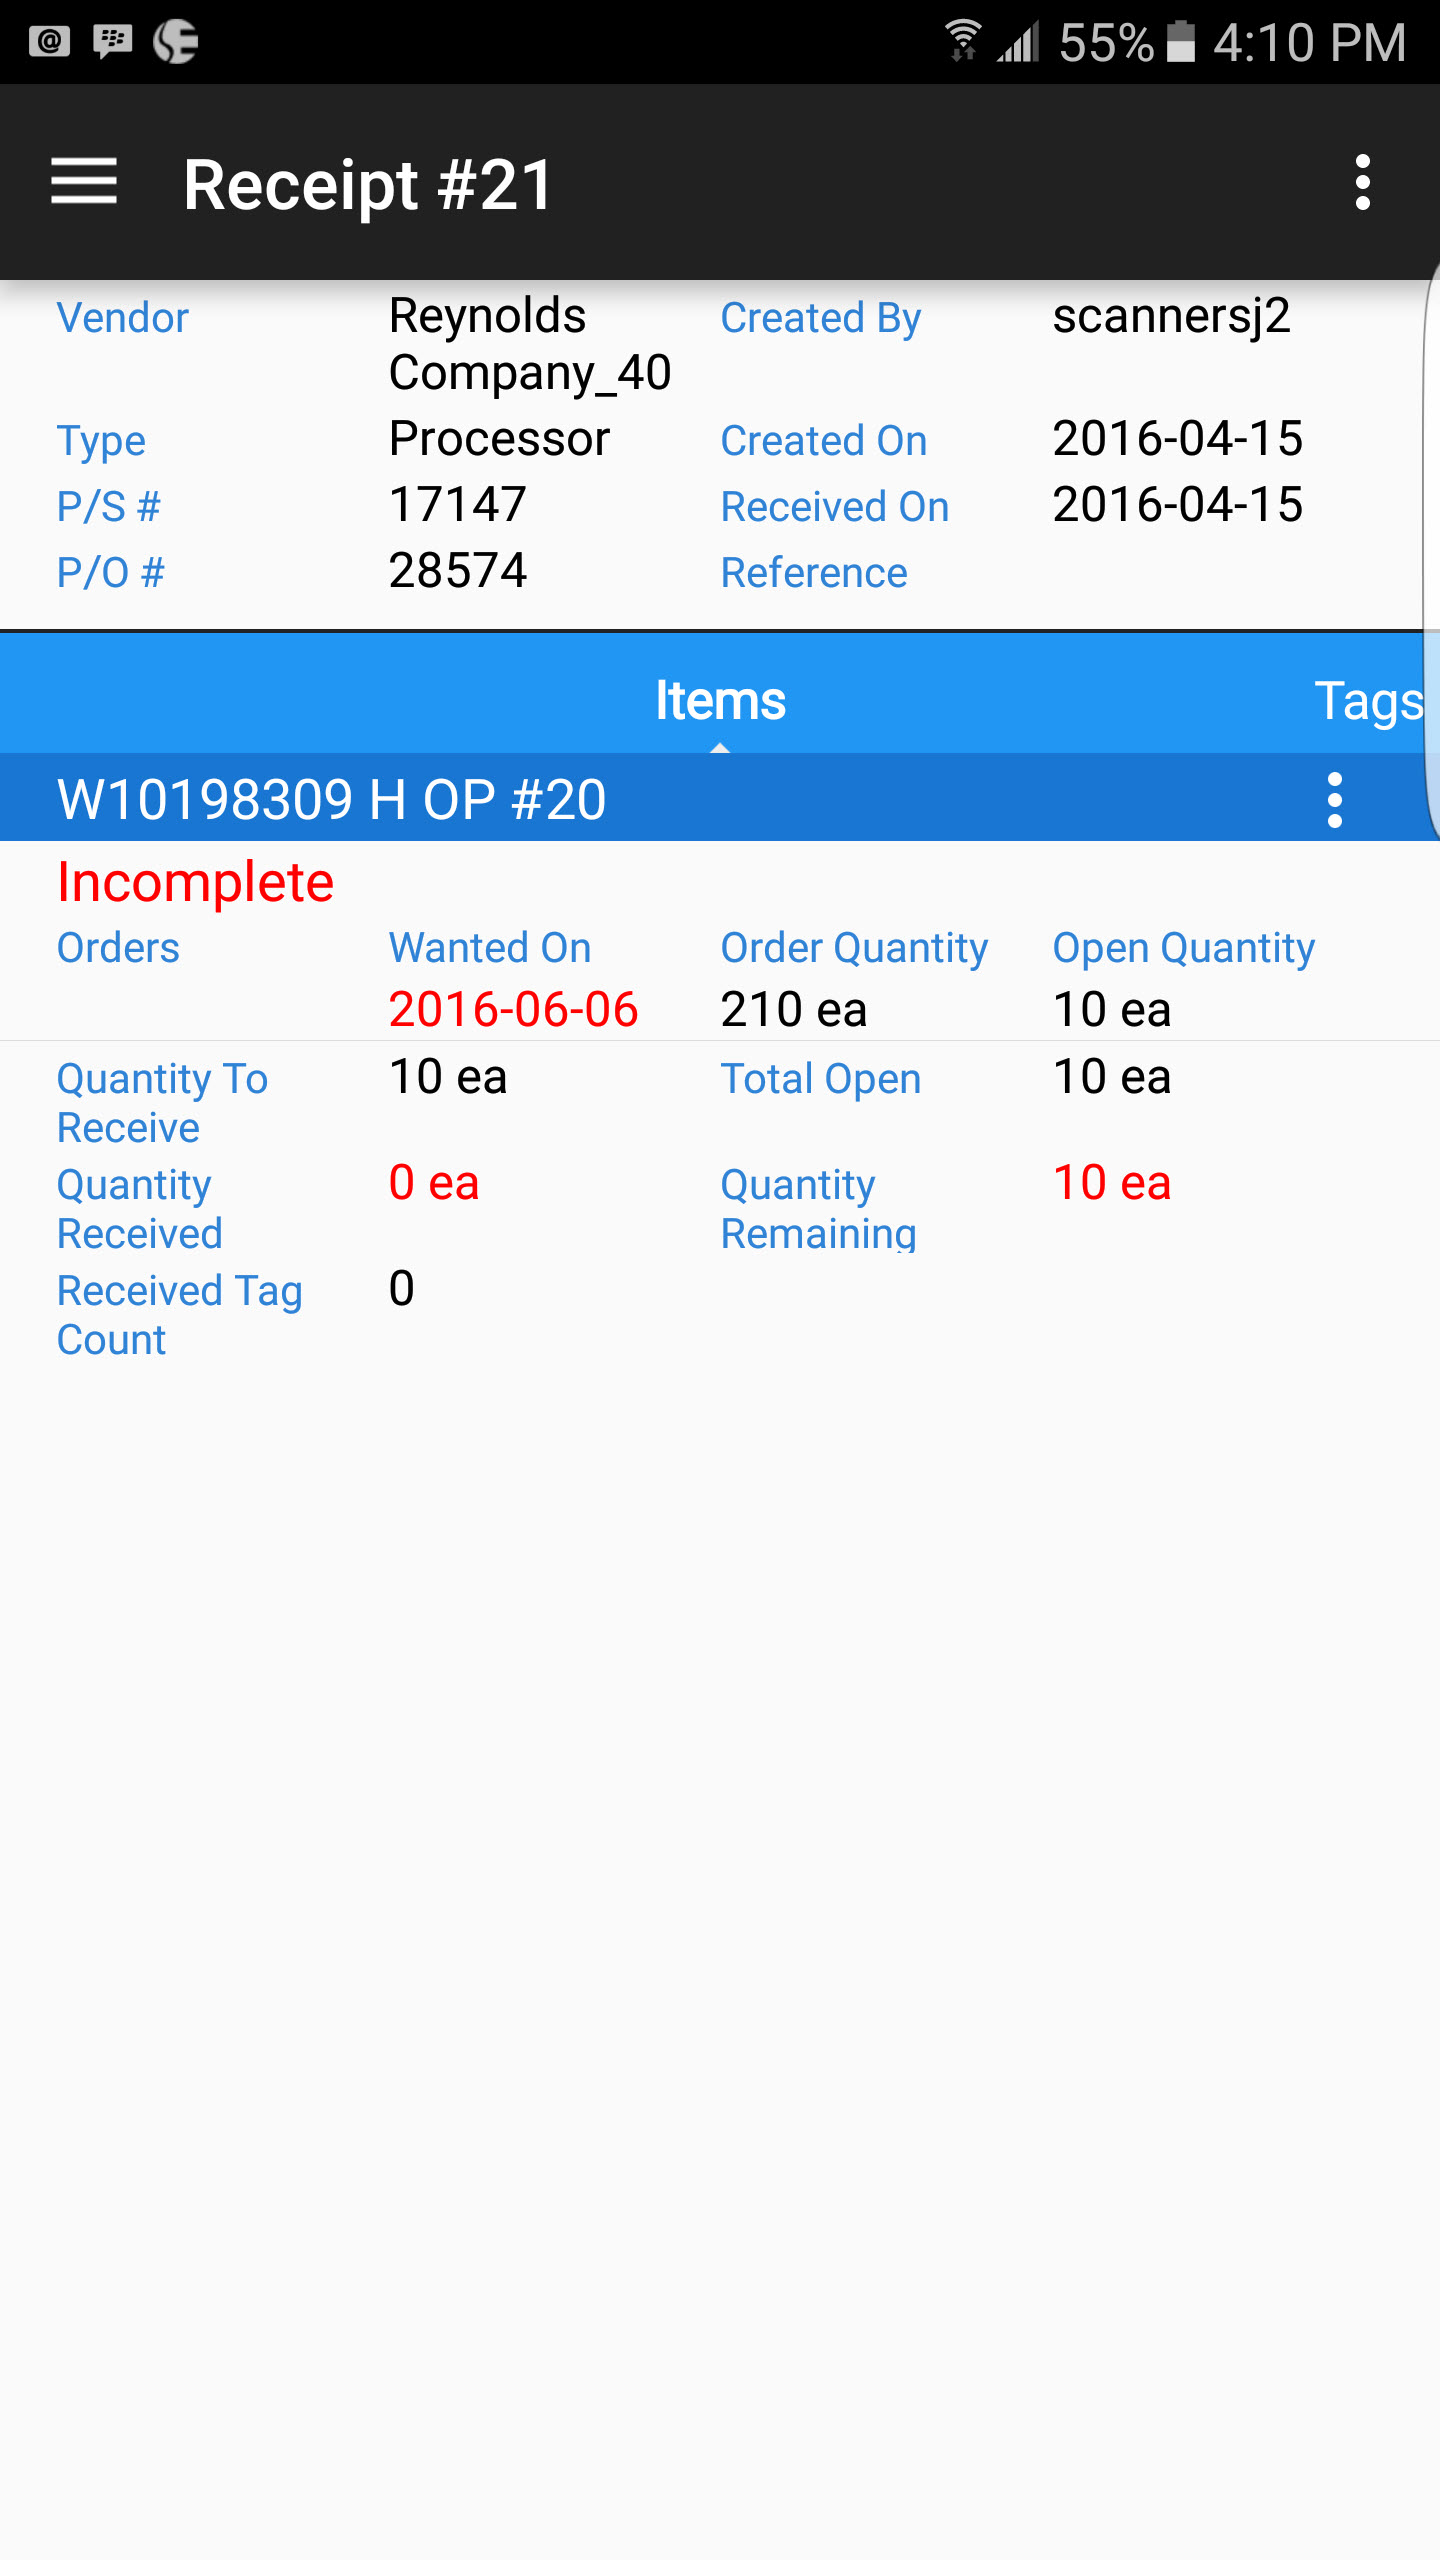
Removing an Item from a Receipt
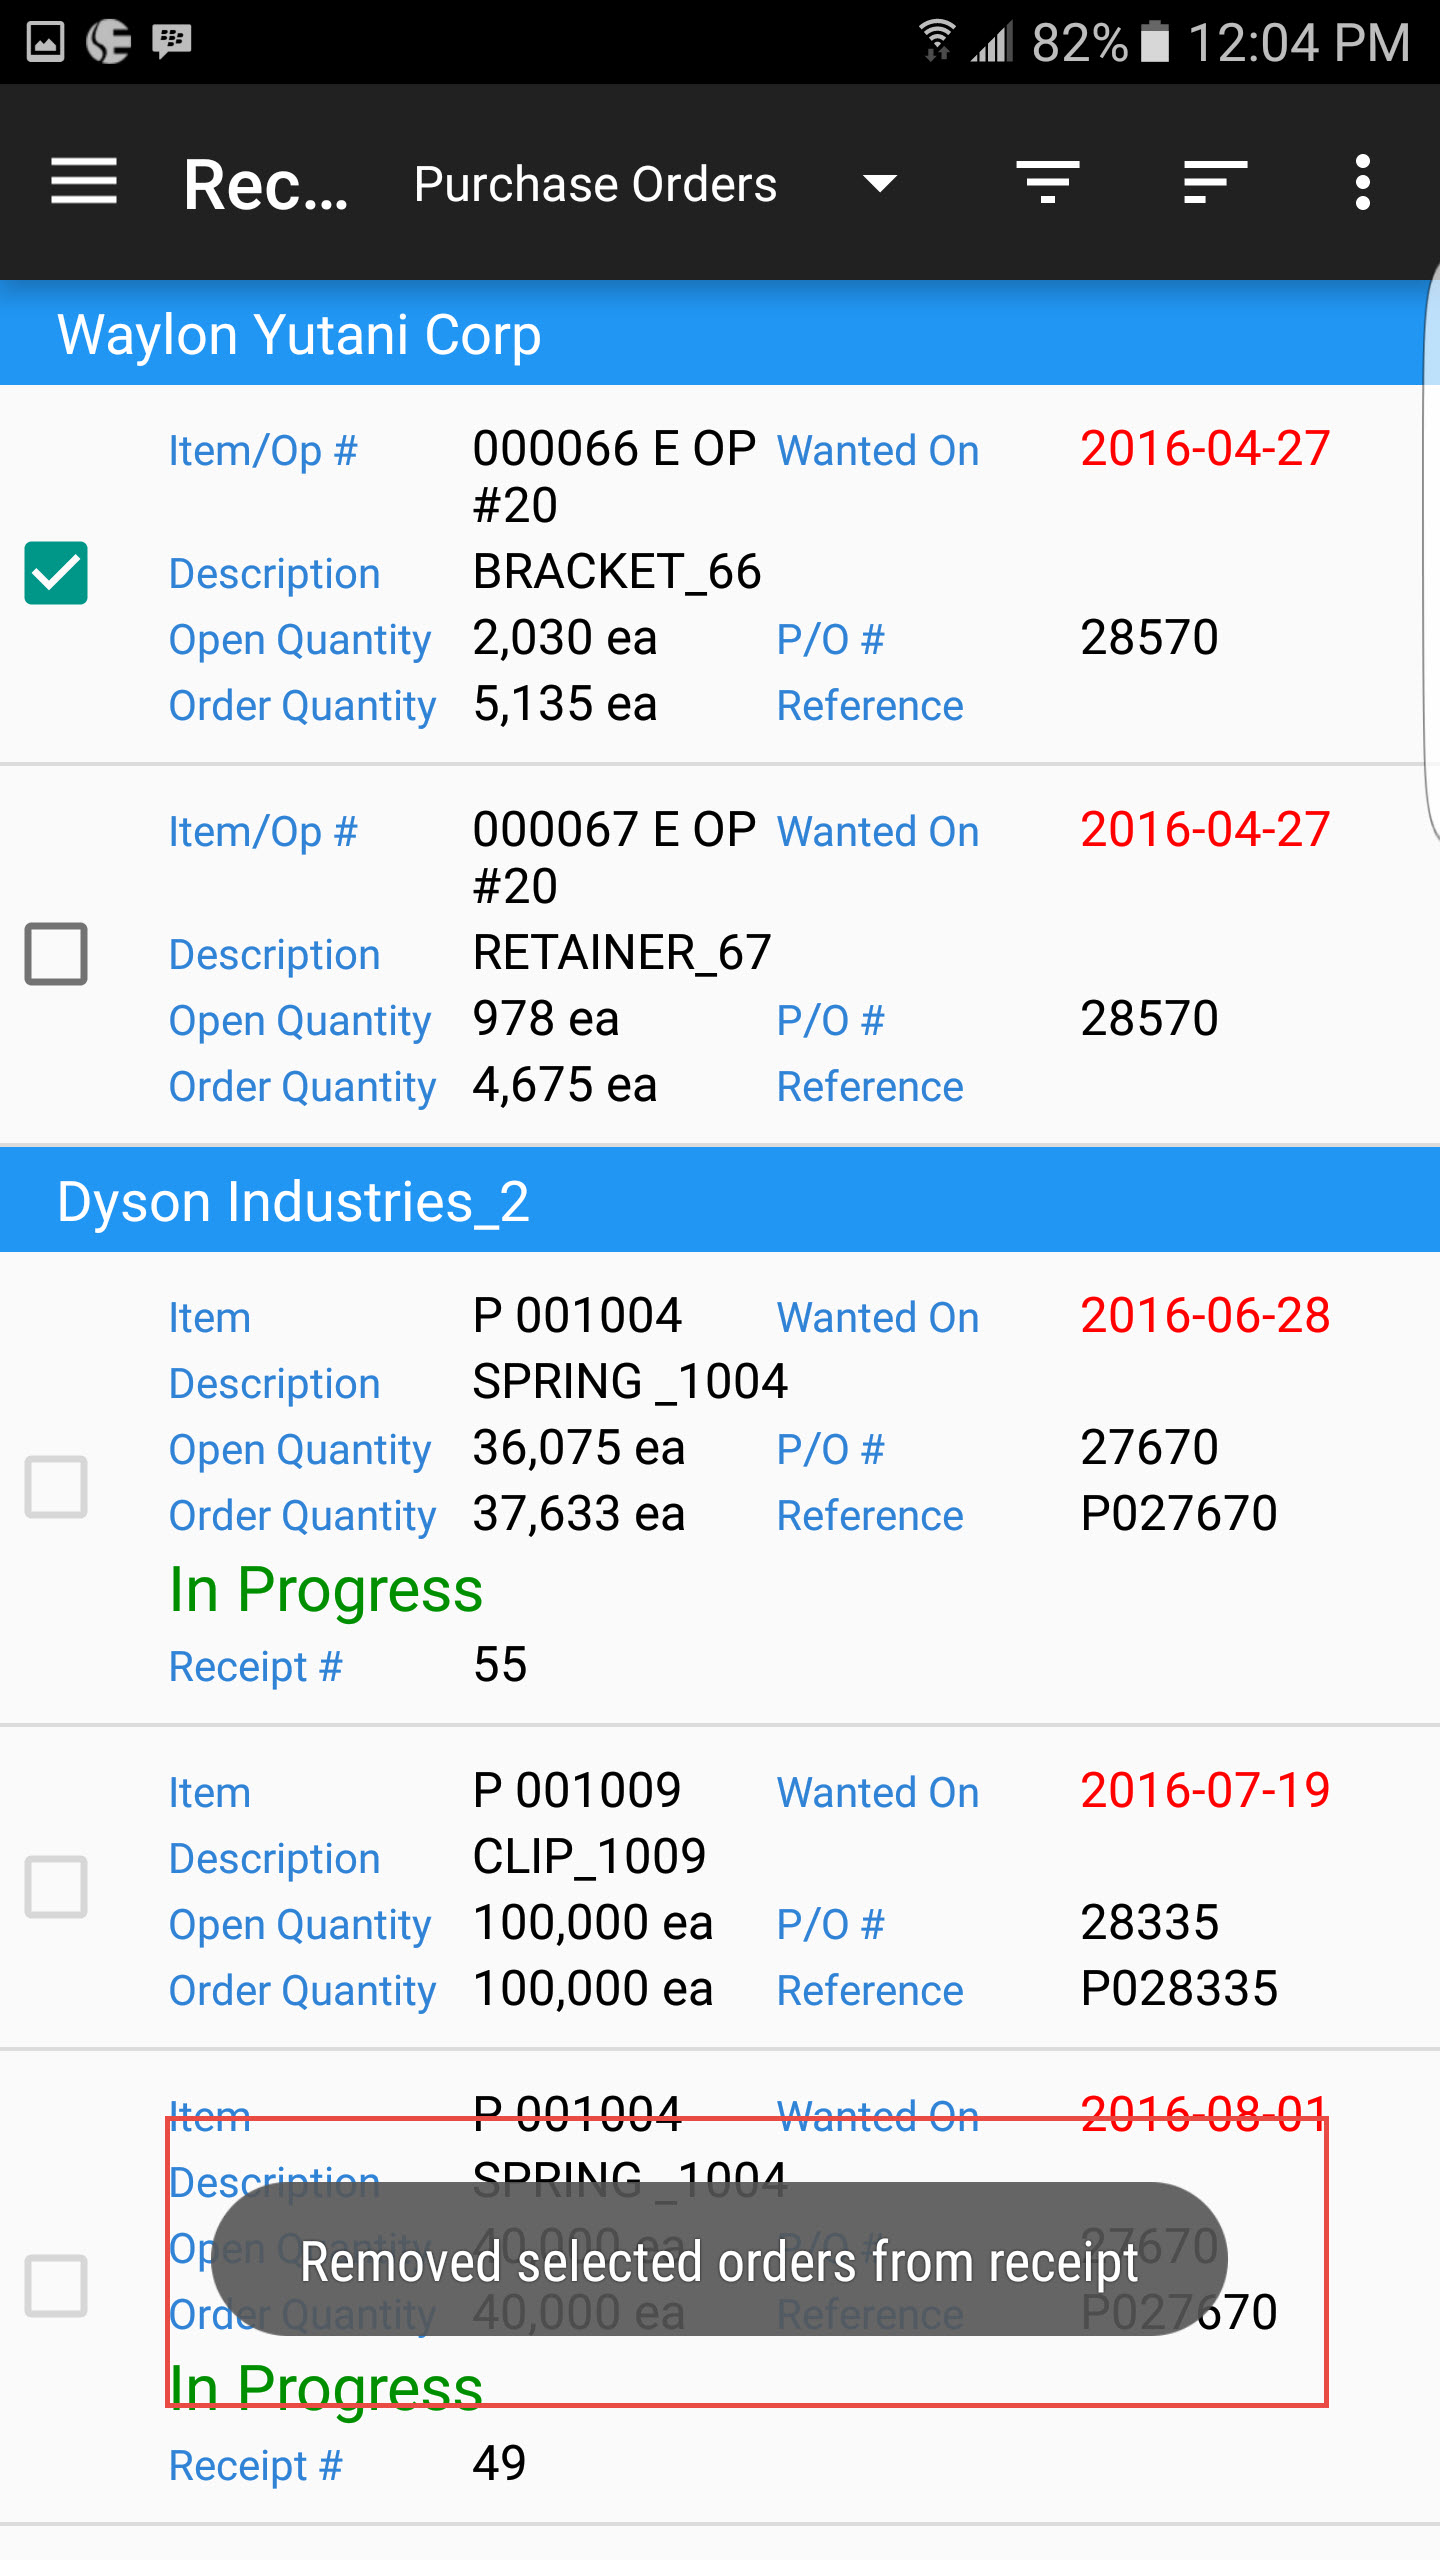
To remove an item that was mistakenly added to a receipt from the Purchase Orders screen, select the item by touching the box to the left, and touch the action menu at the top right of the screen.
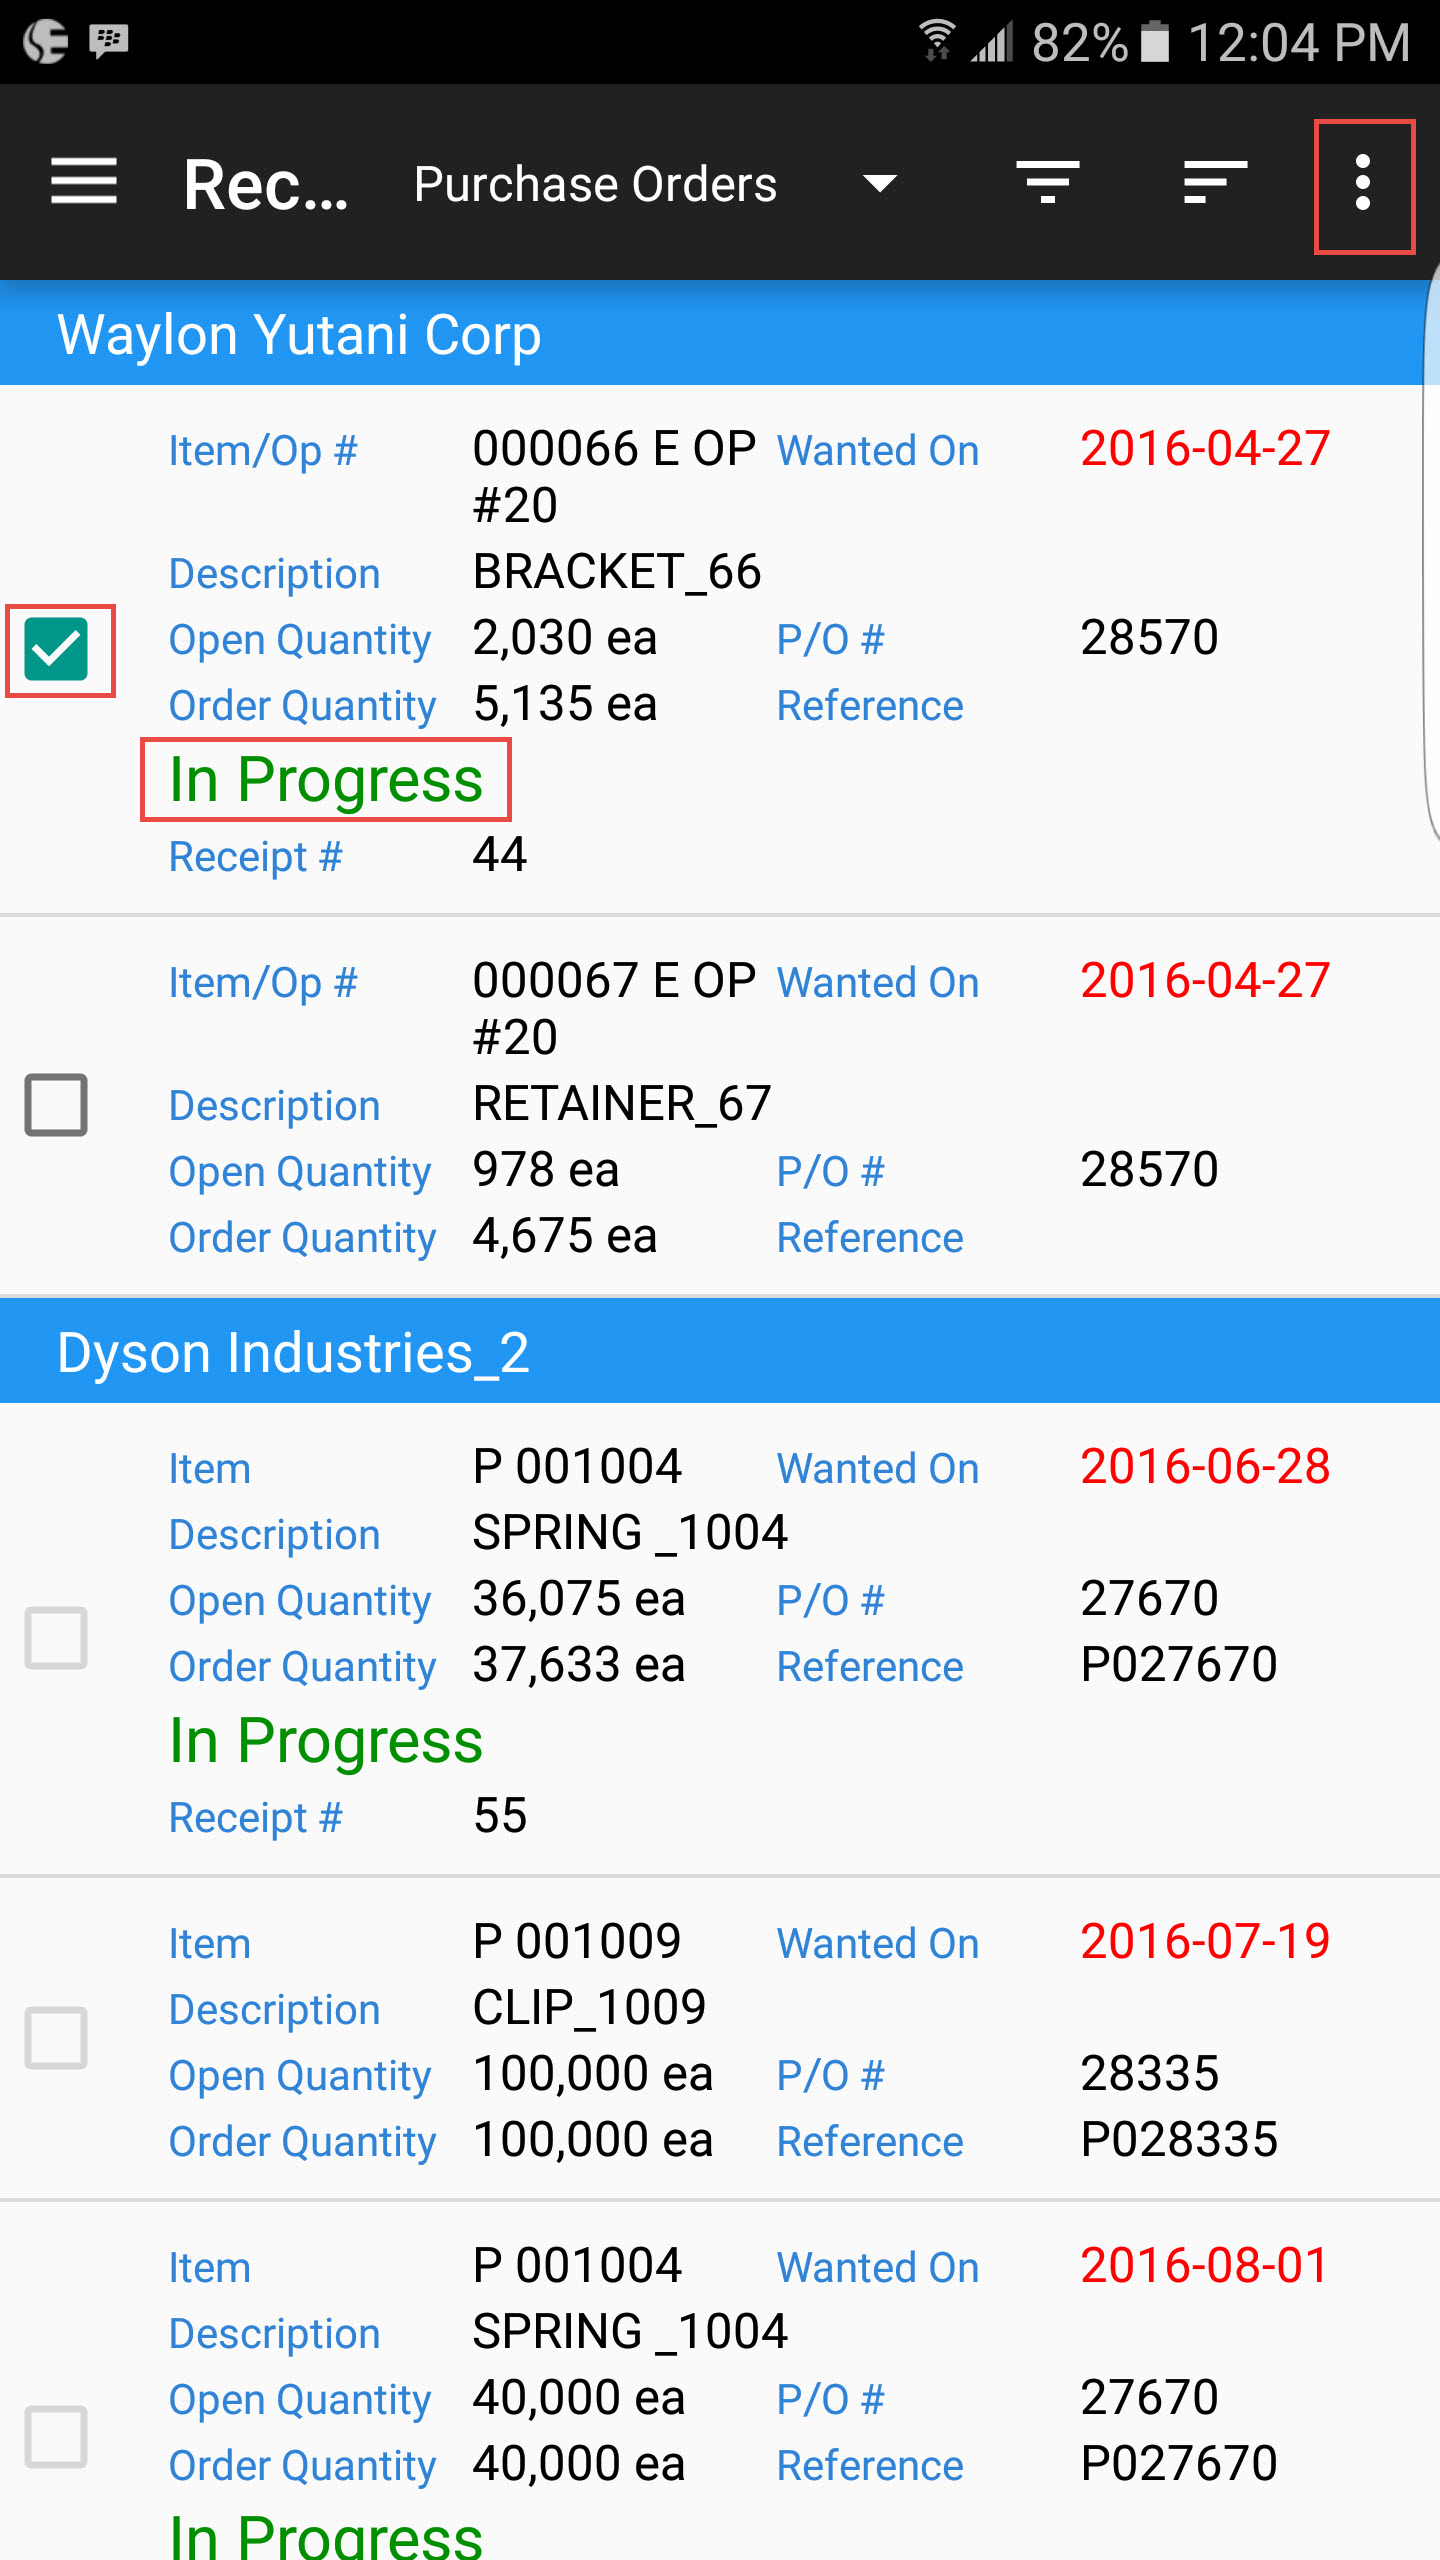
Select Remove from Receipt from the action menu.
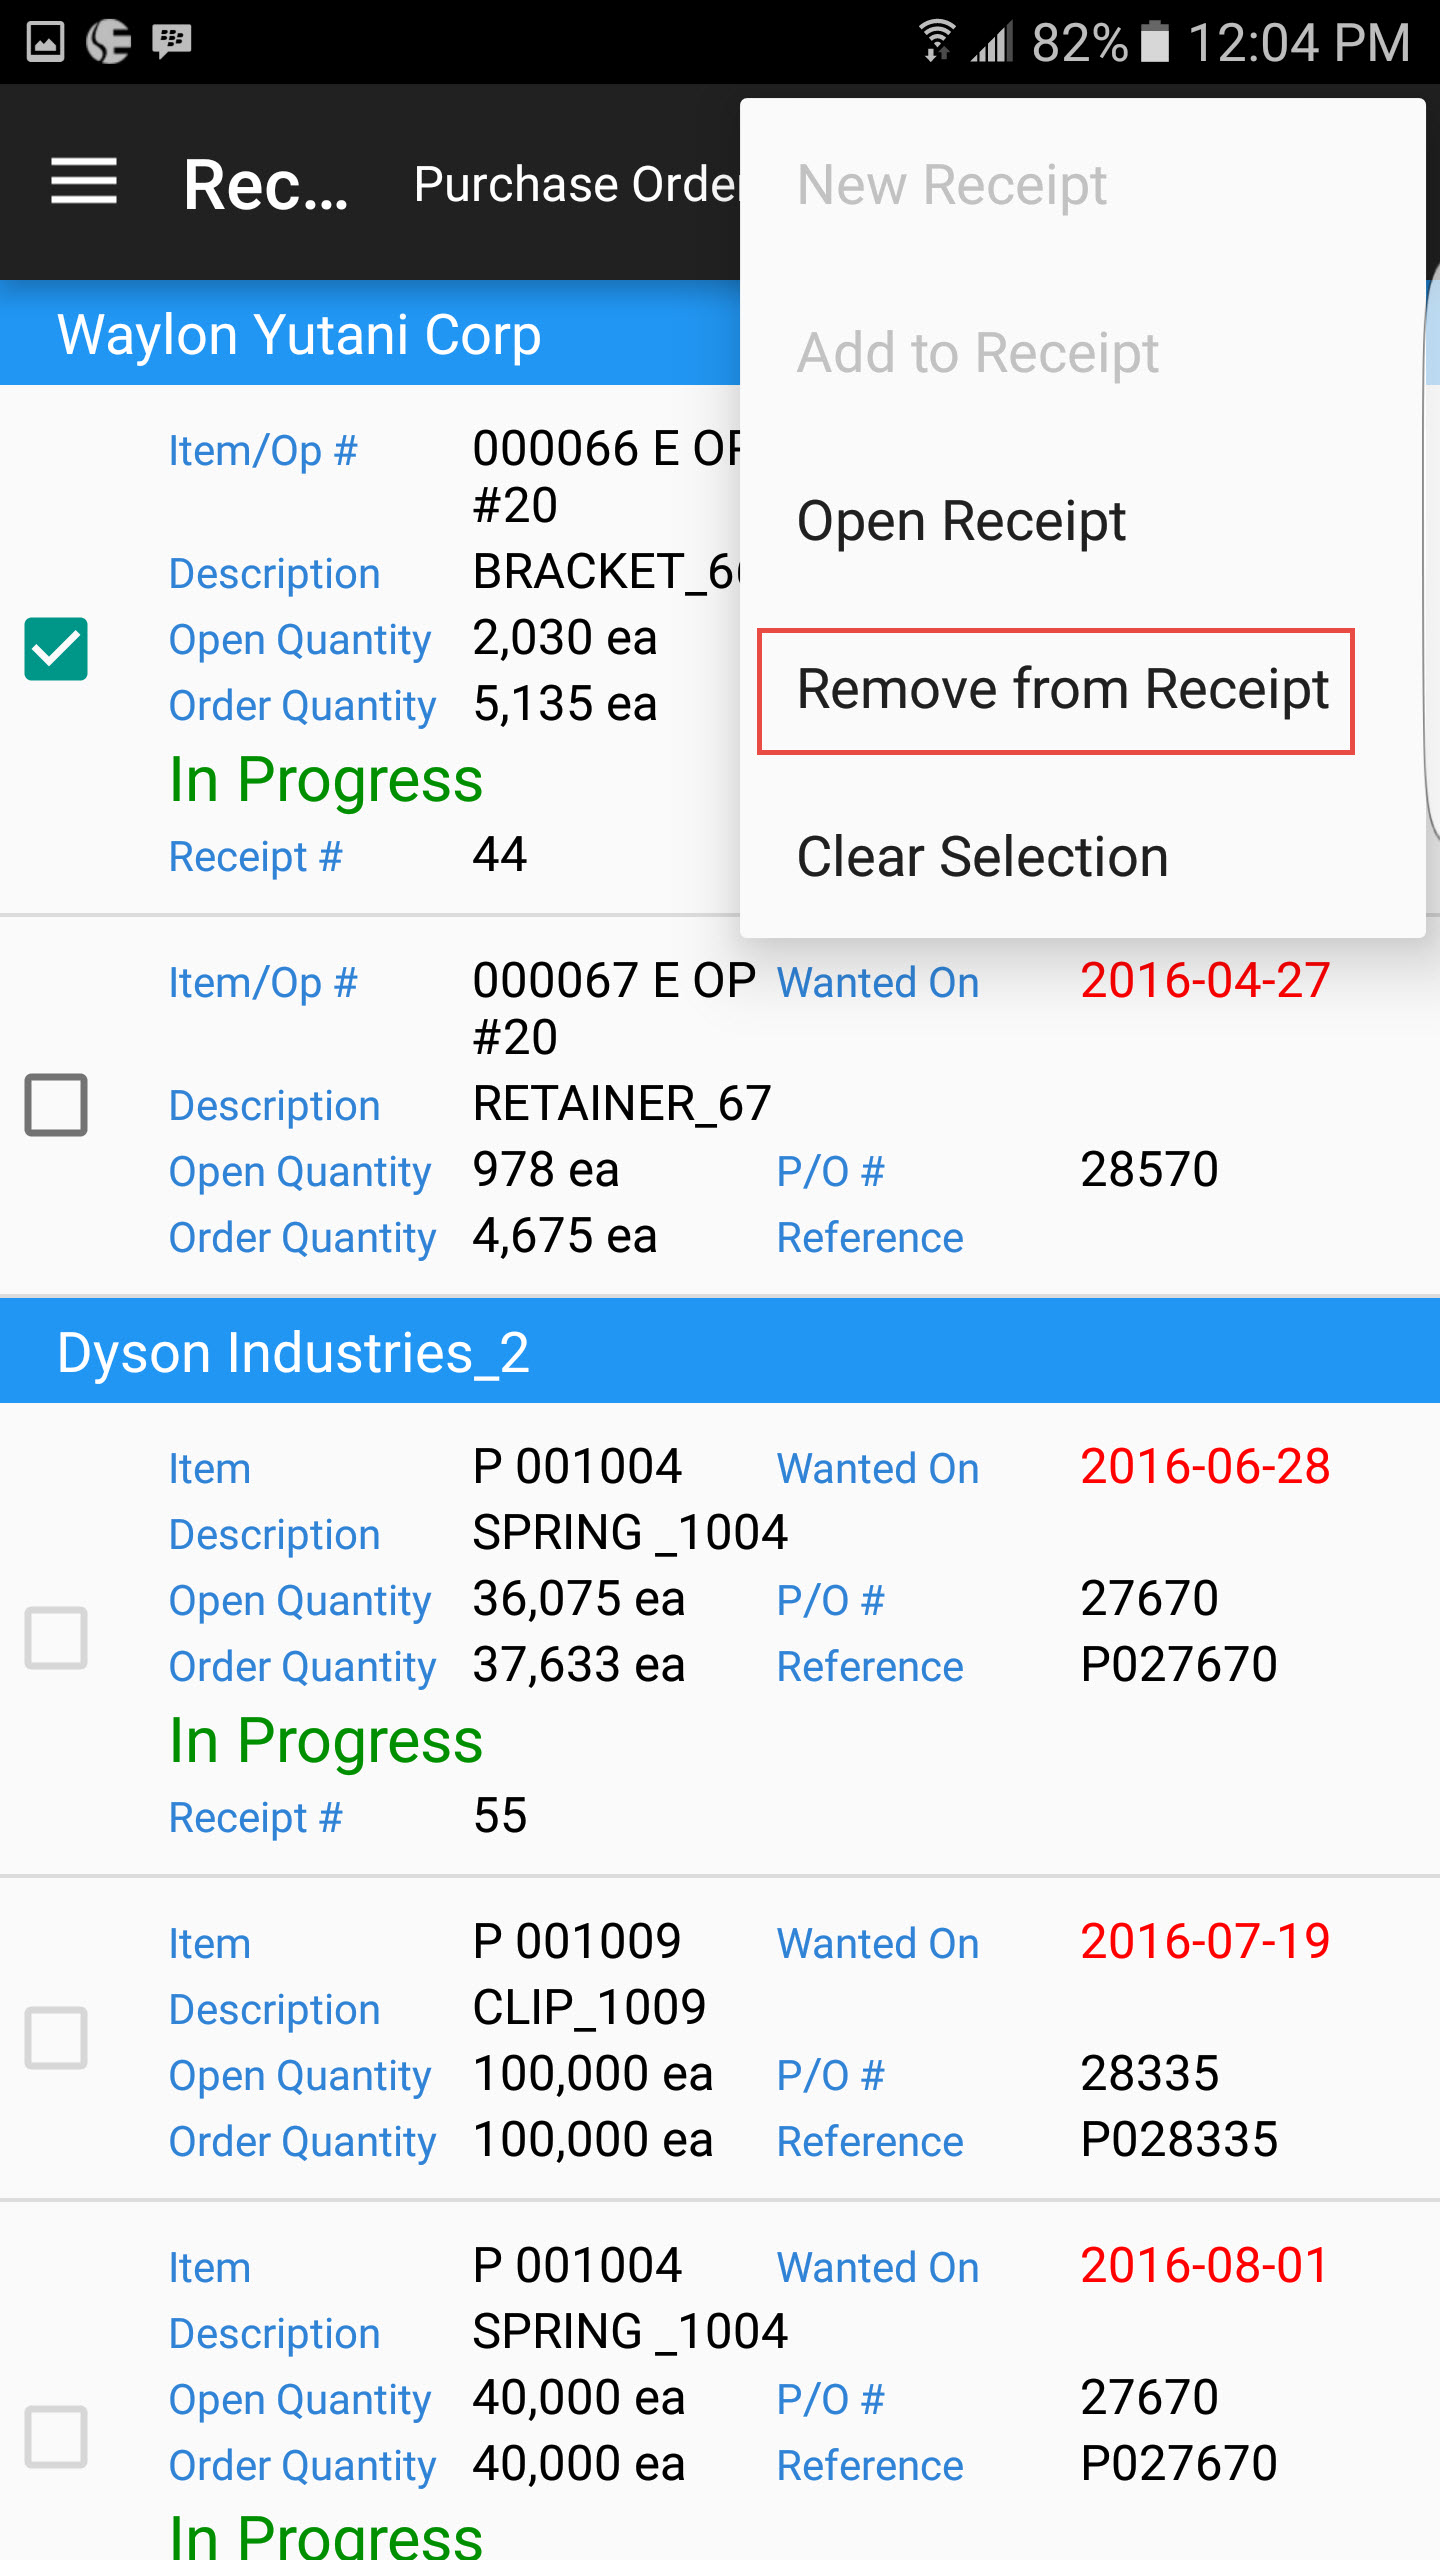
The application will give you a message at the bottom of the screen when the item(s) have been removed from the receipt.
Receipt History
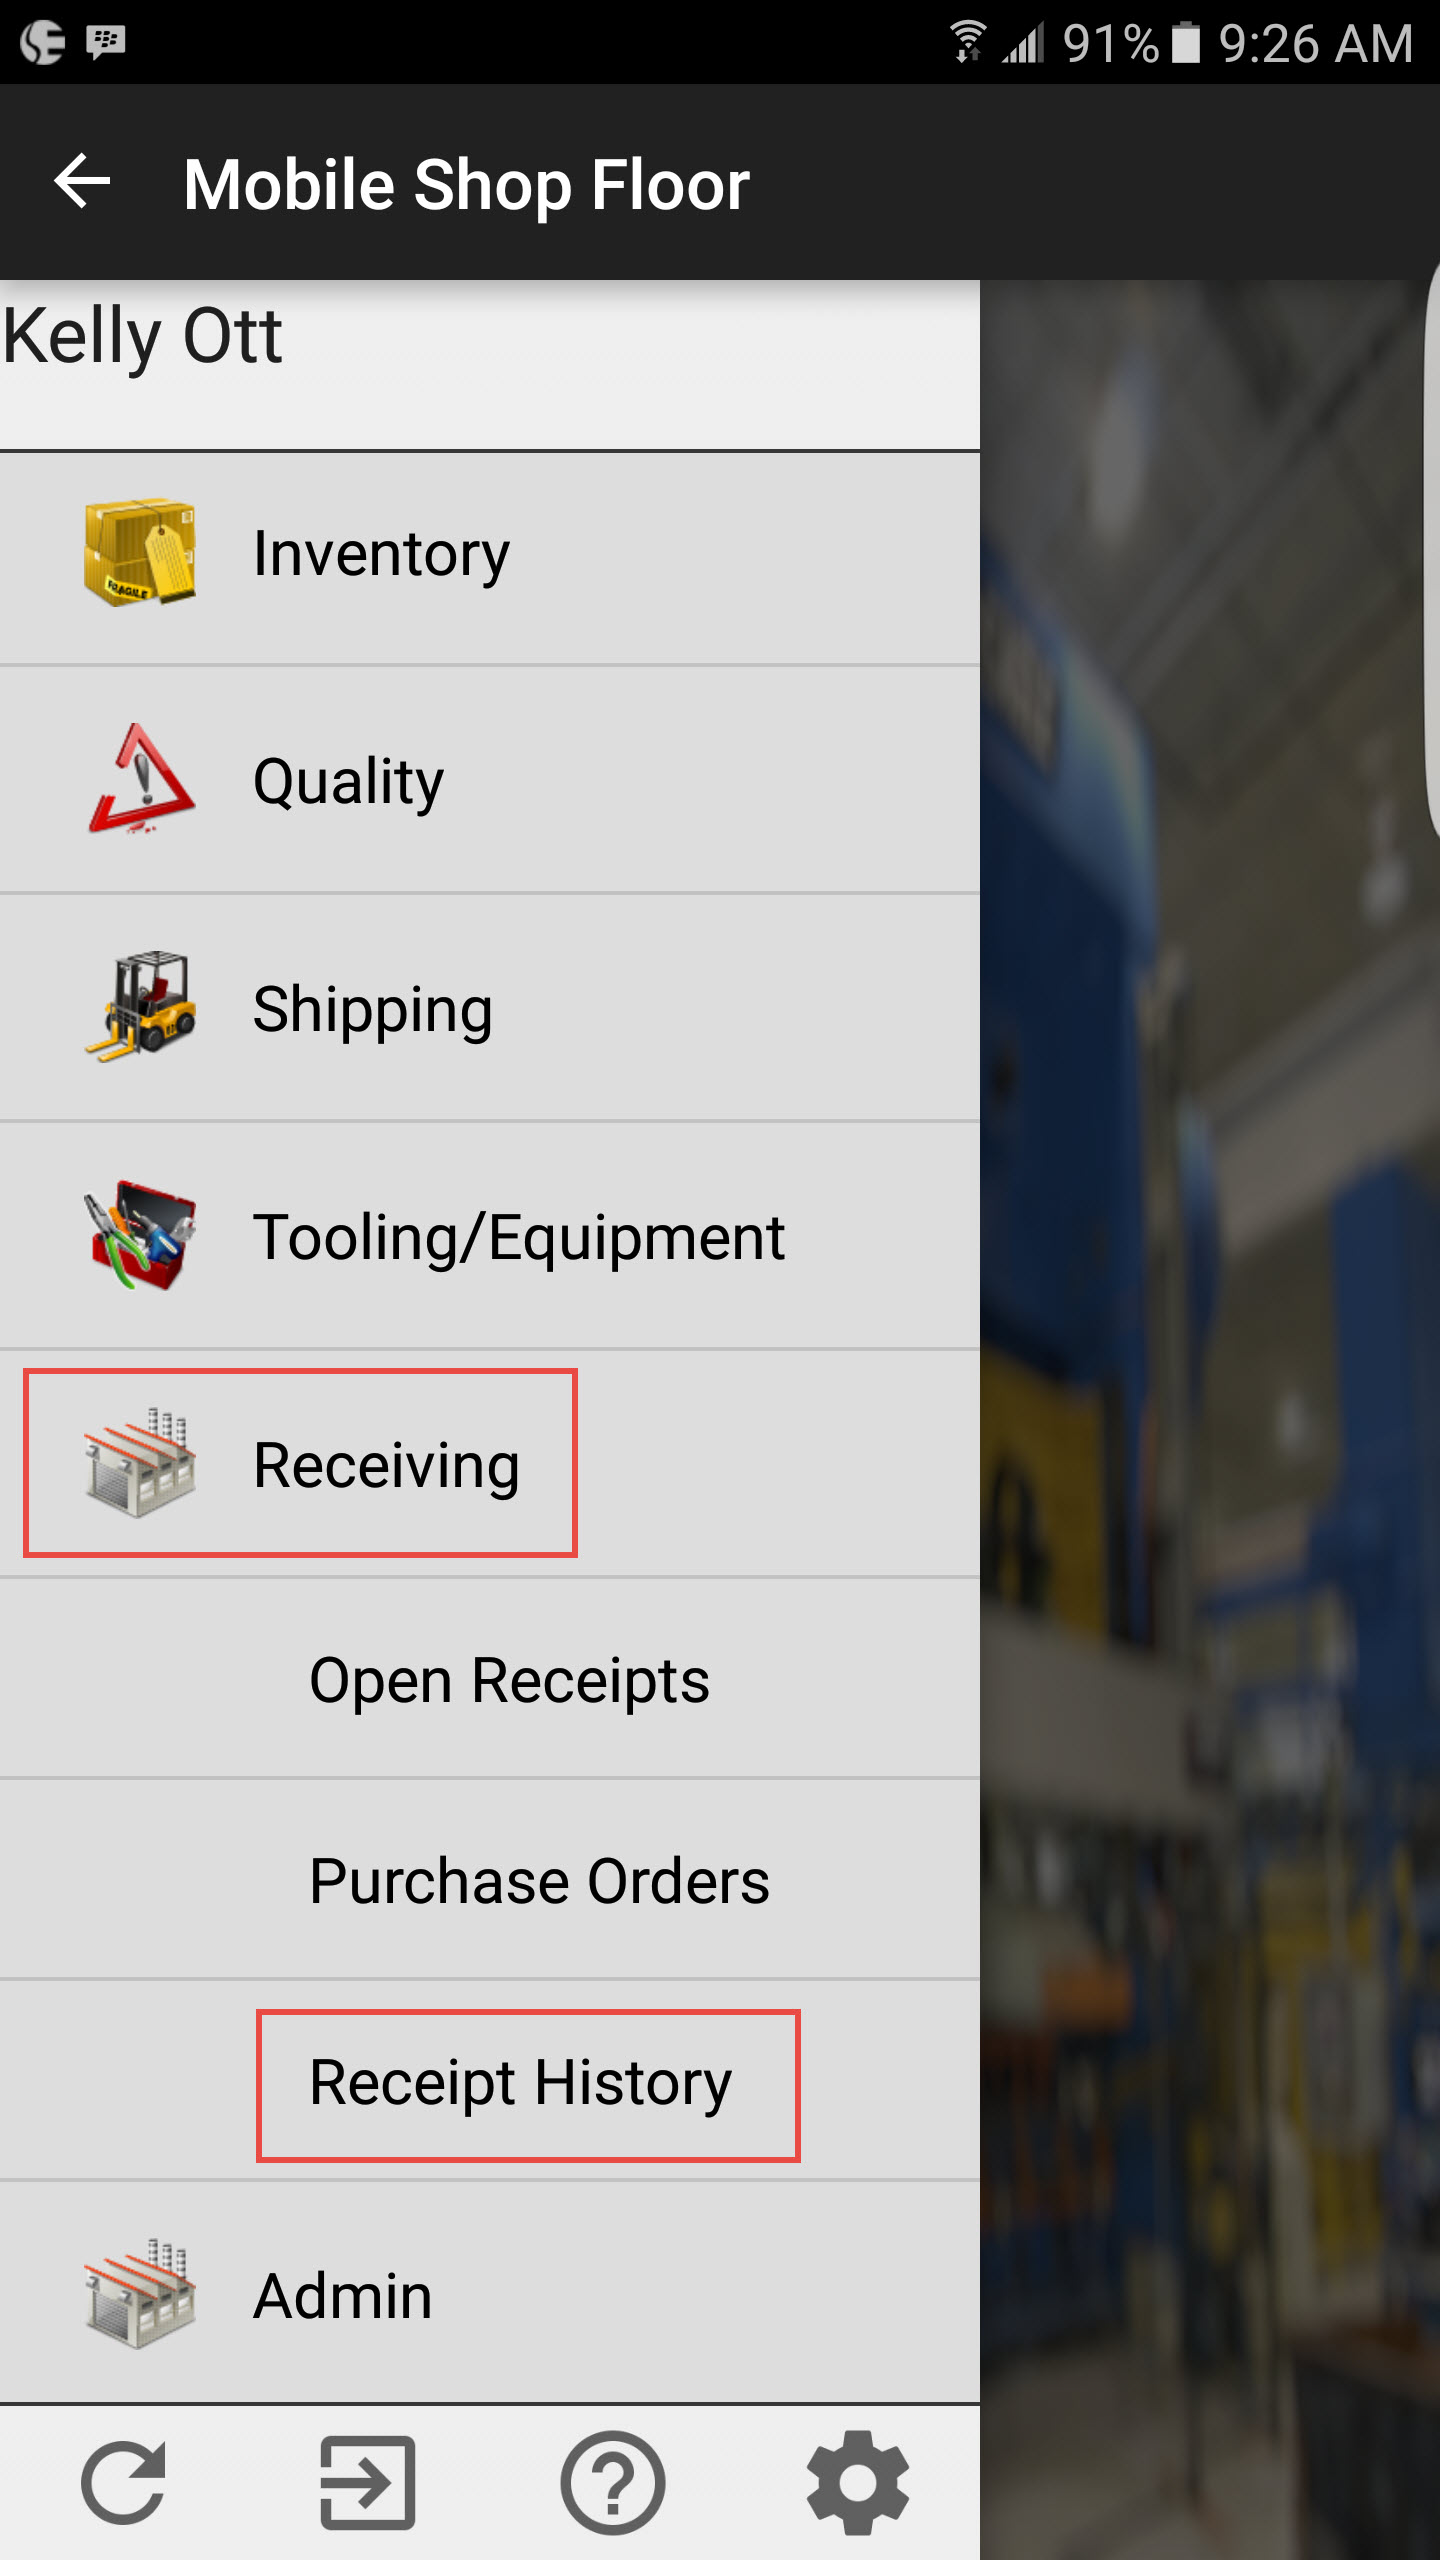
Users can view receipt history in the application by navigating to Receipt History under the Receiving module.
This will open the Receipt History screen, and allow you to view the history of receipts done in the system. You can see the receipt number, vendor, P/S and P/O #, and a variety of other information.
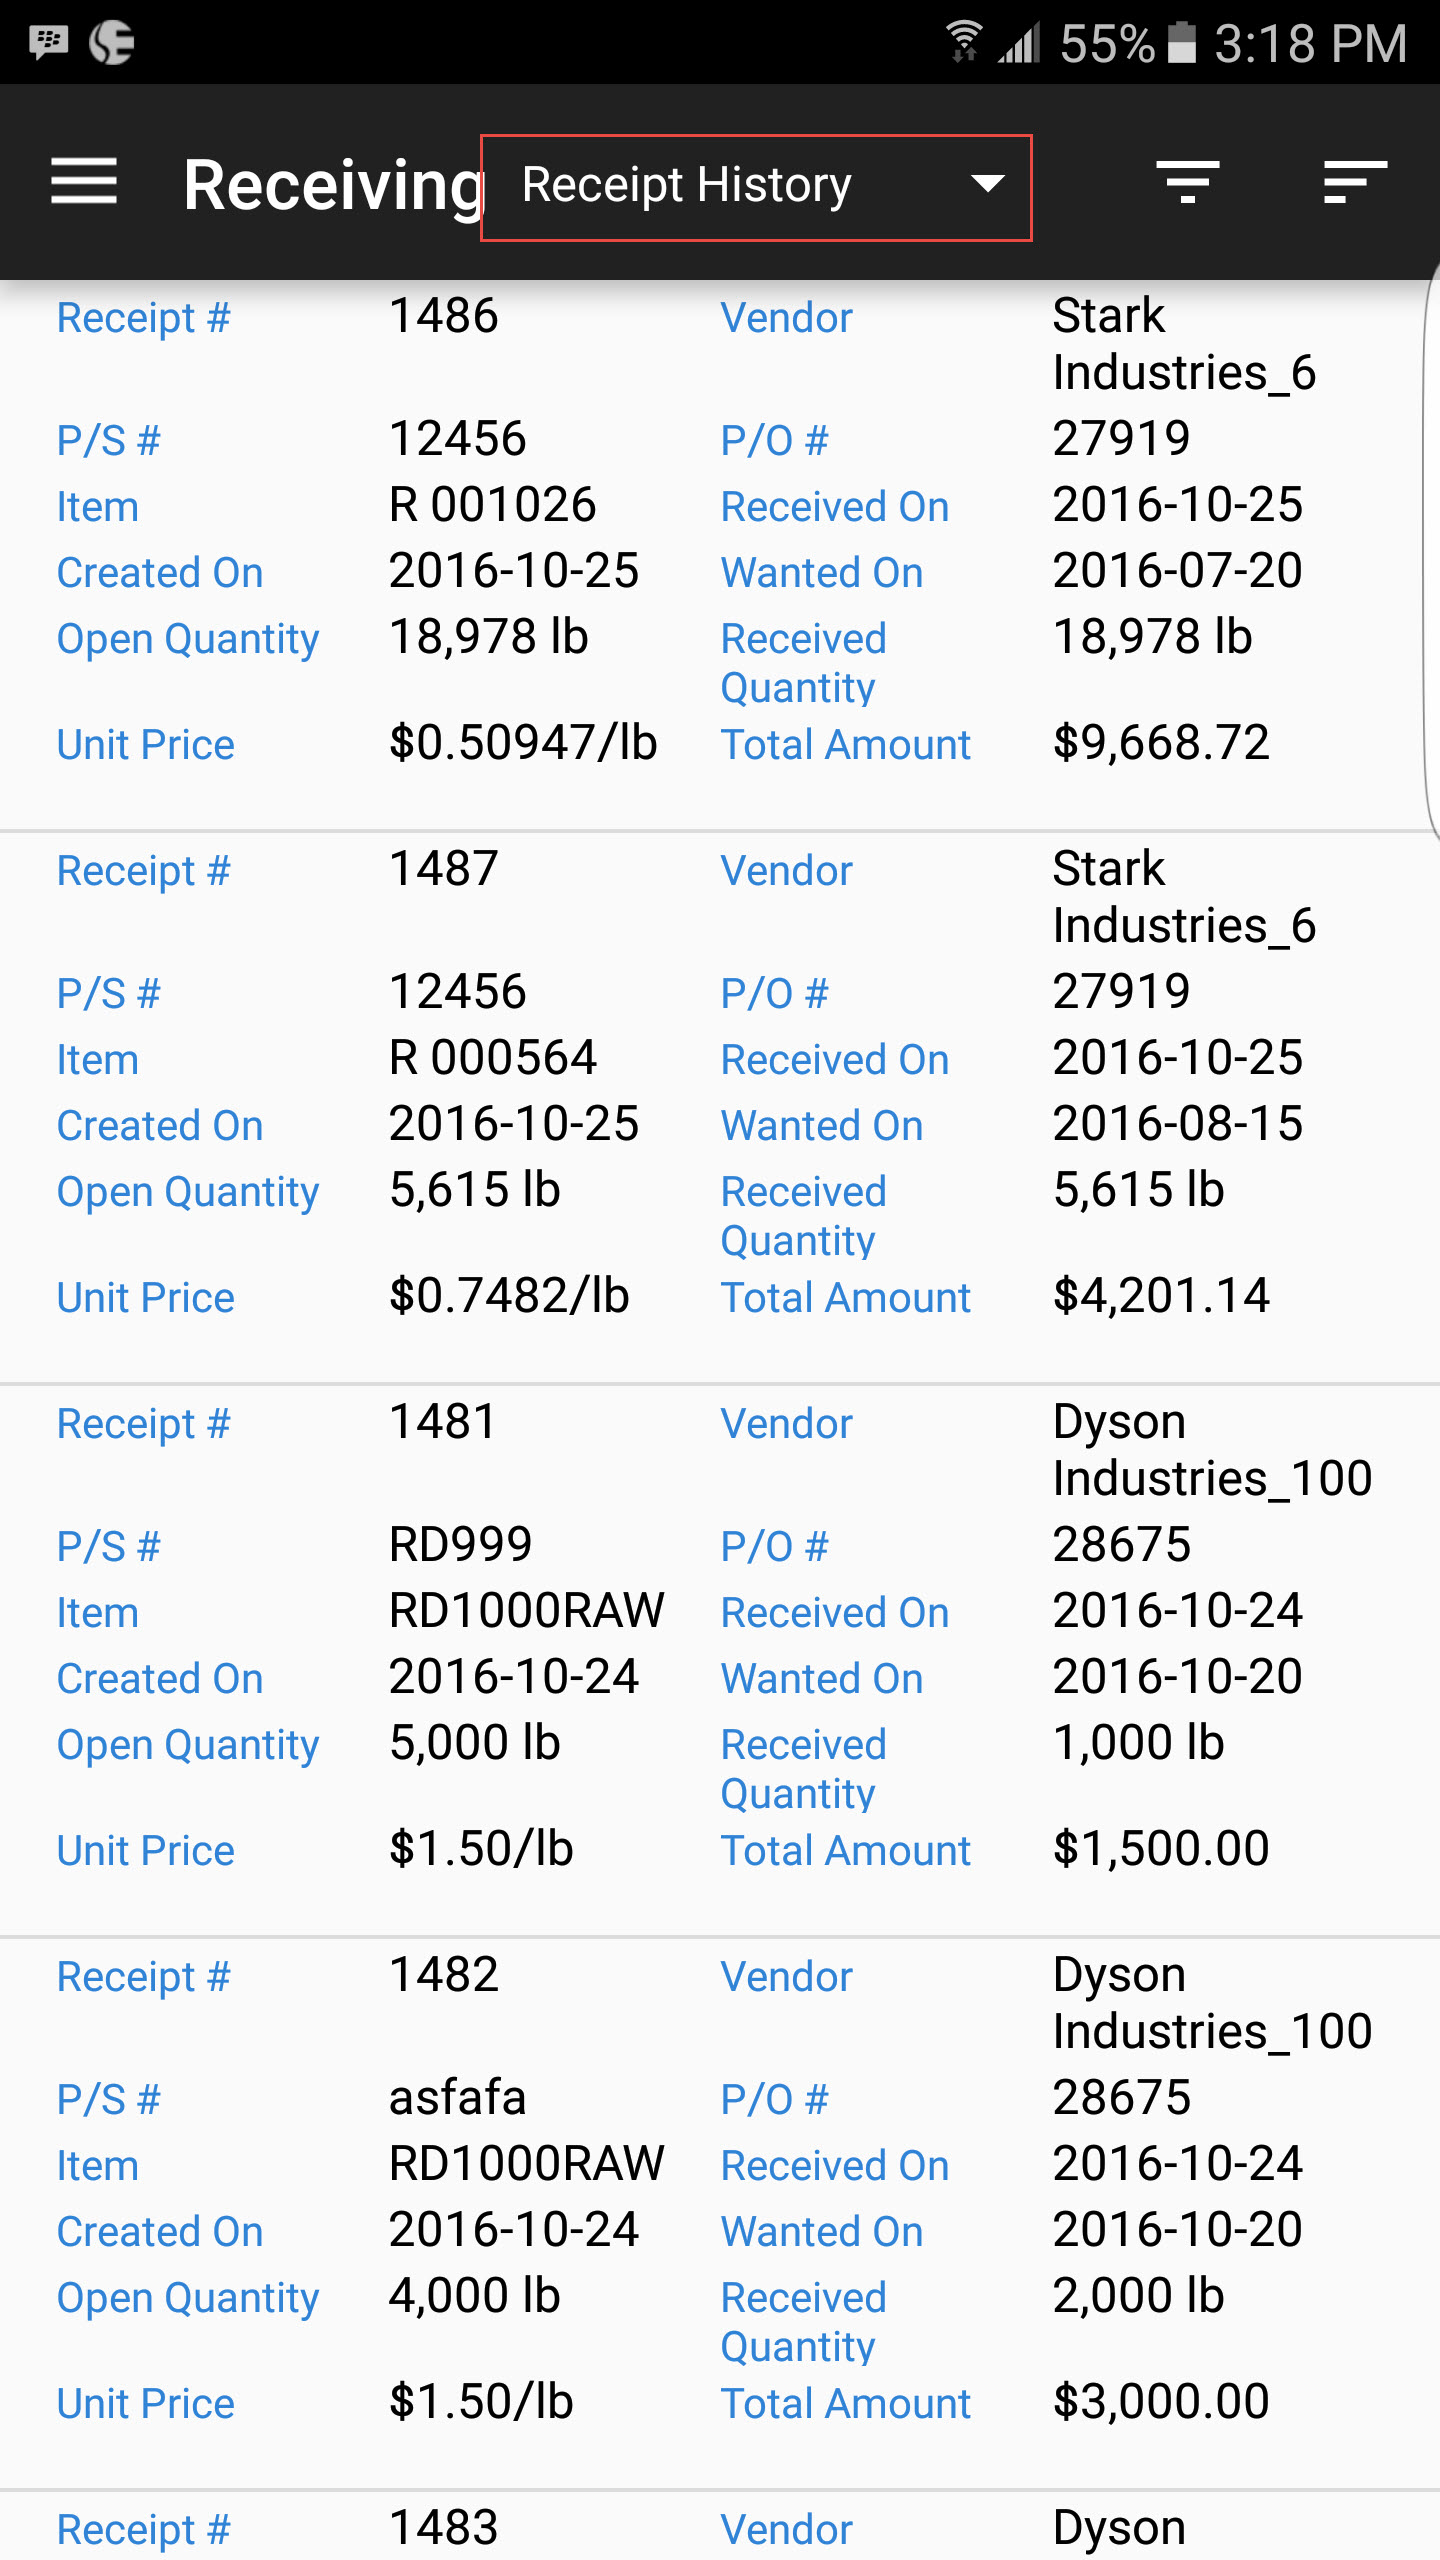
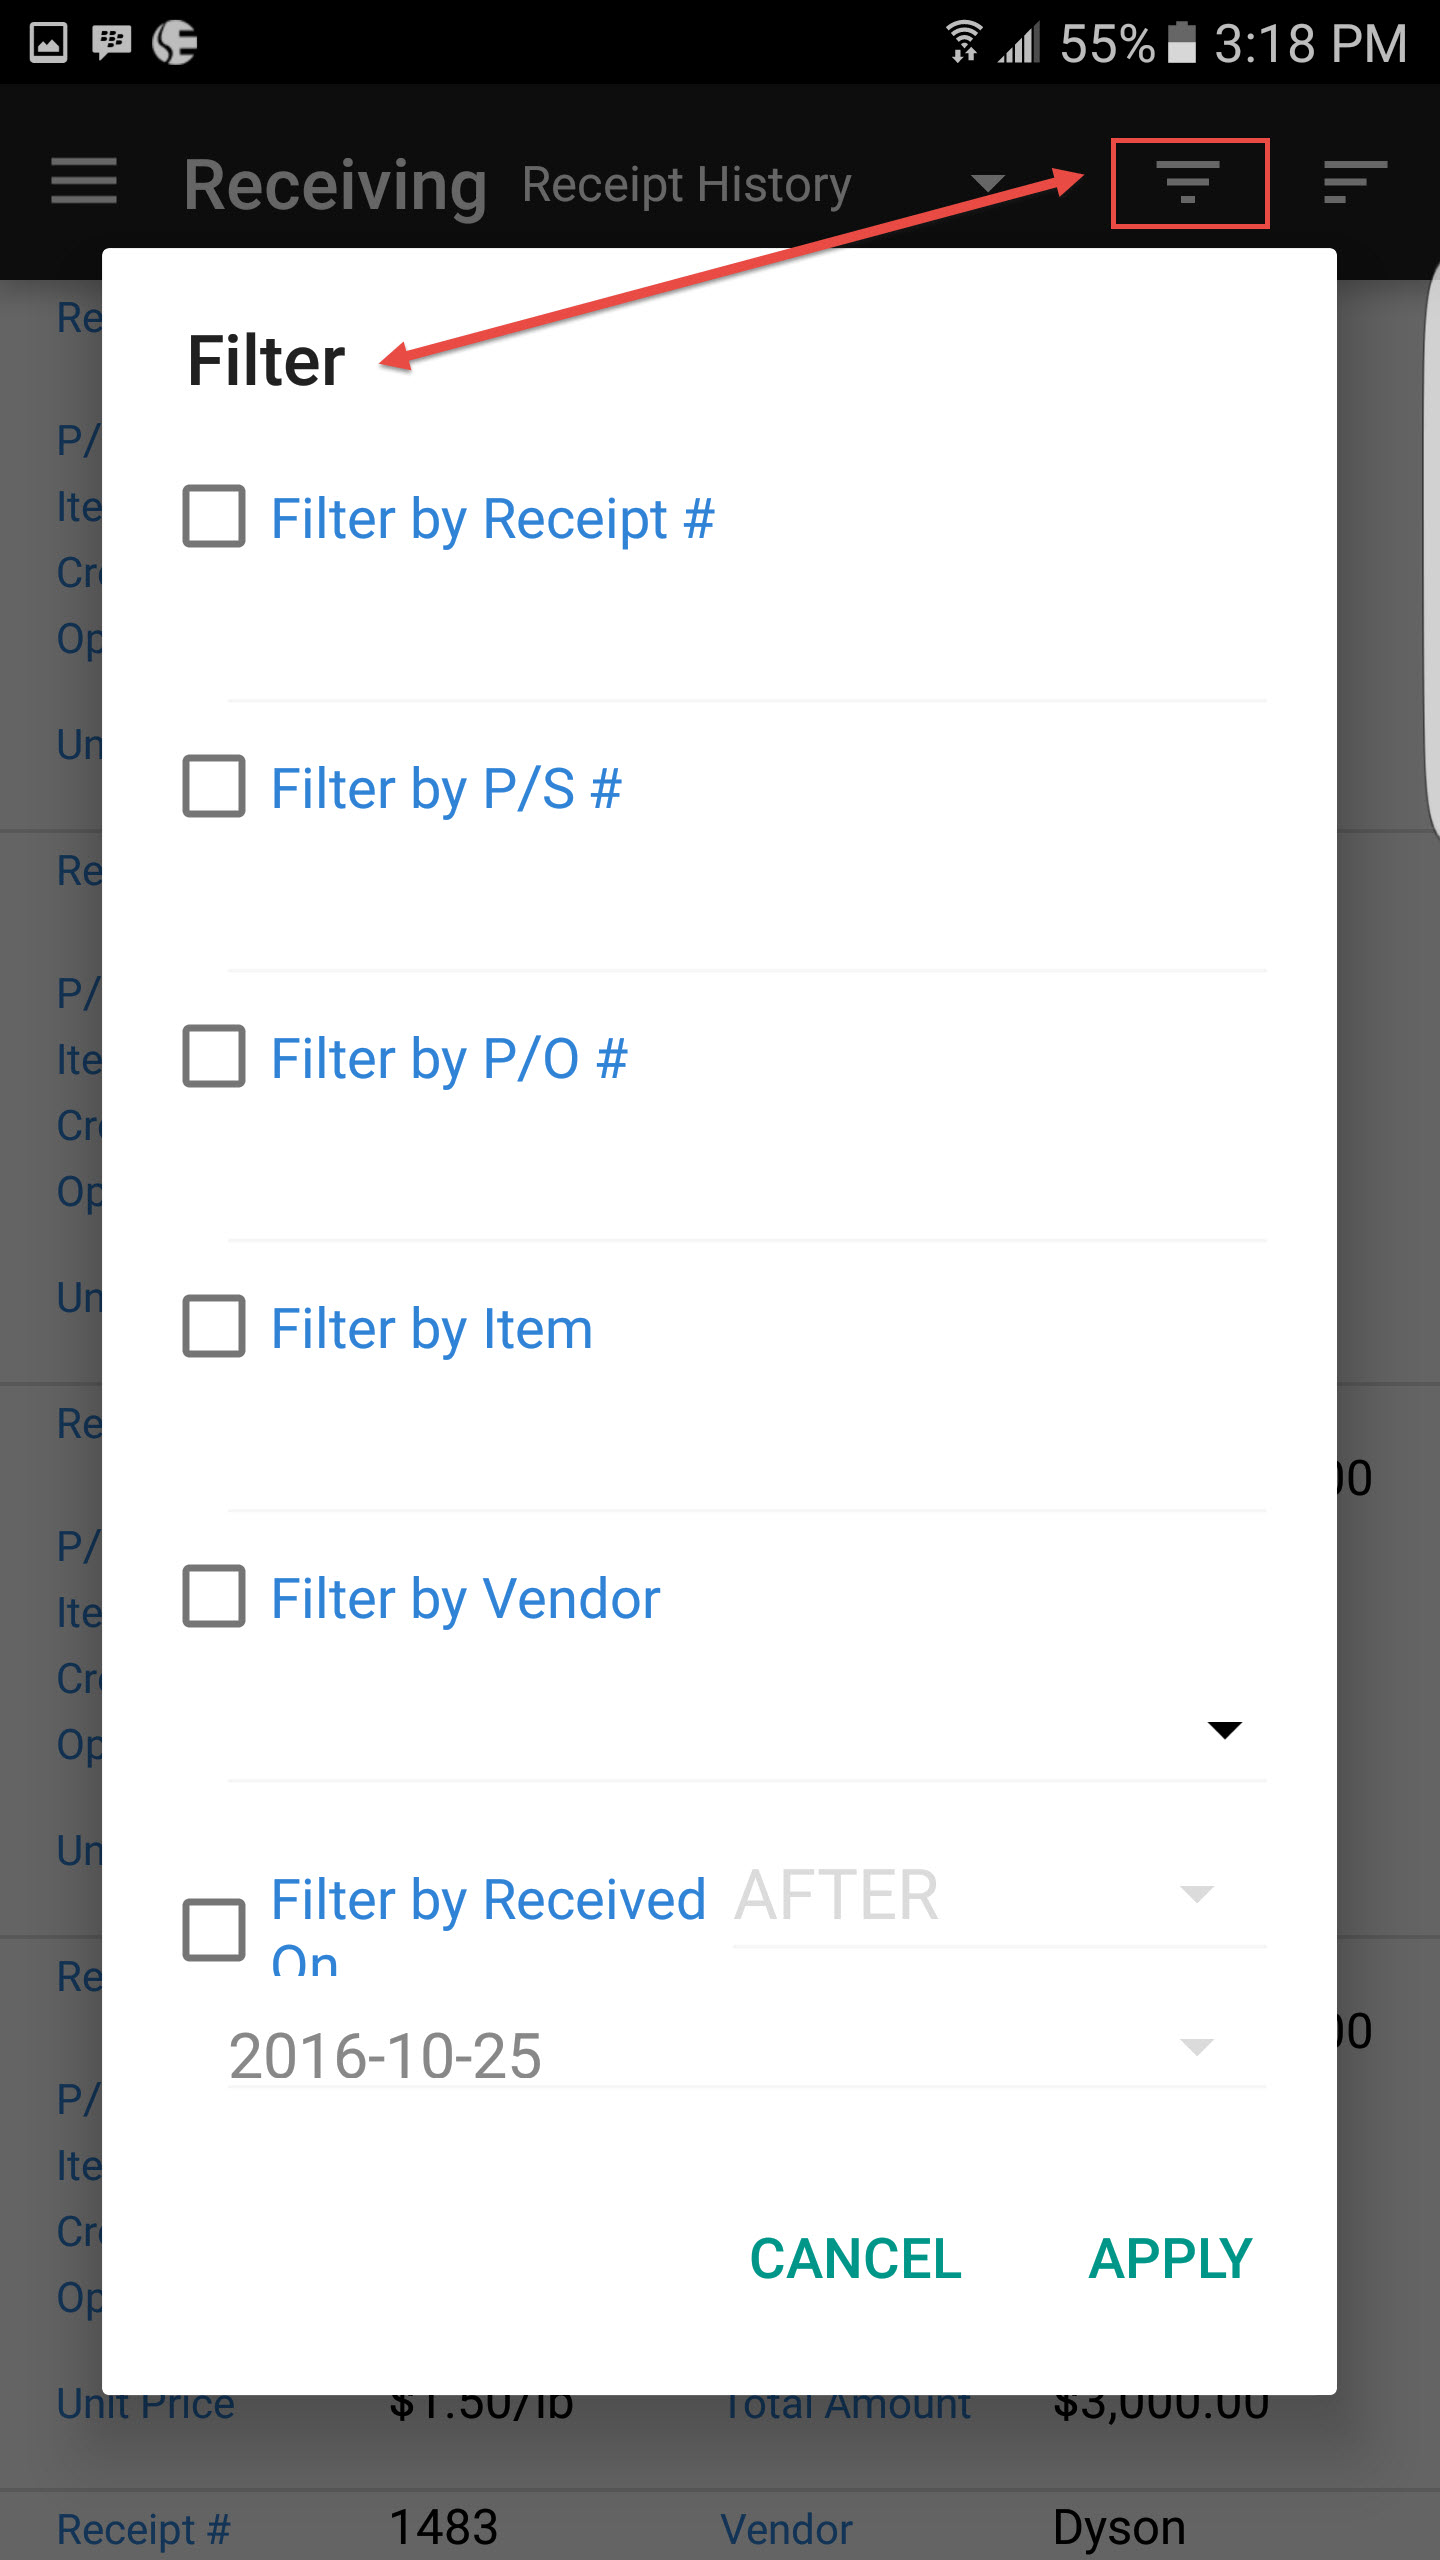
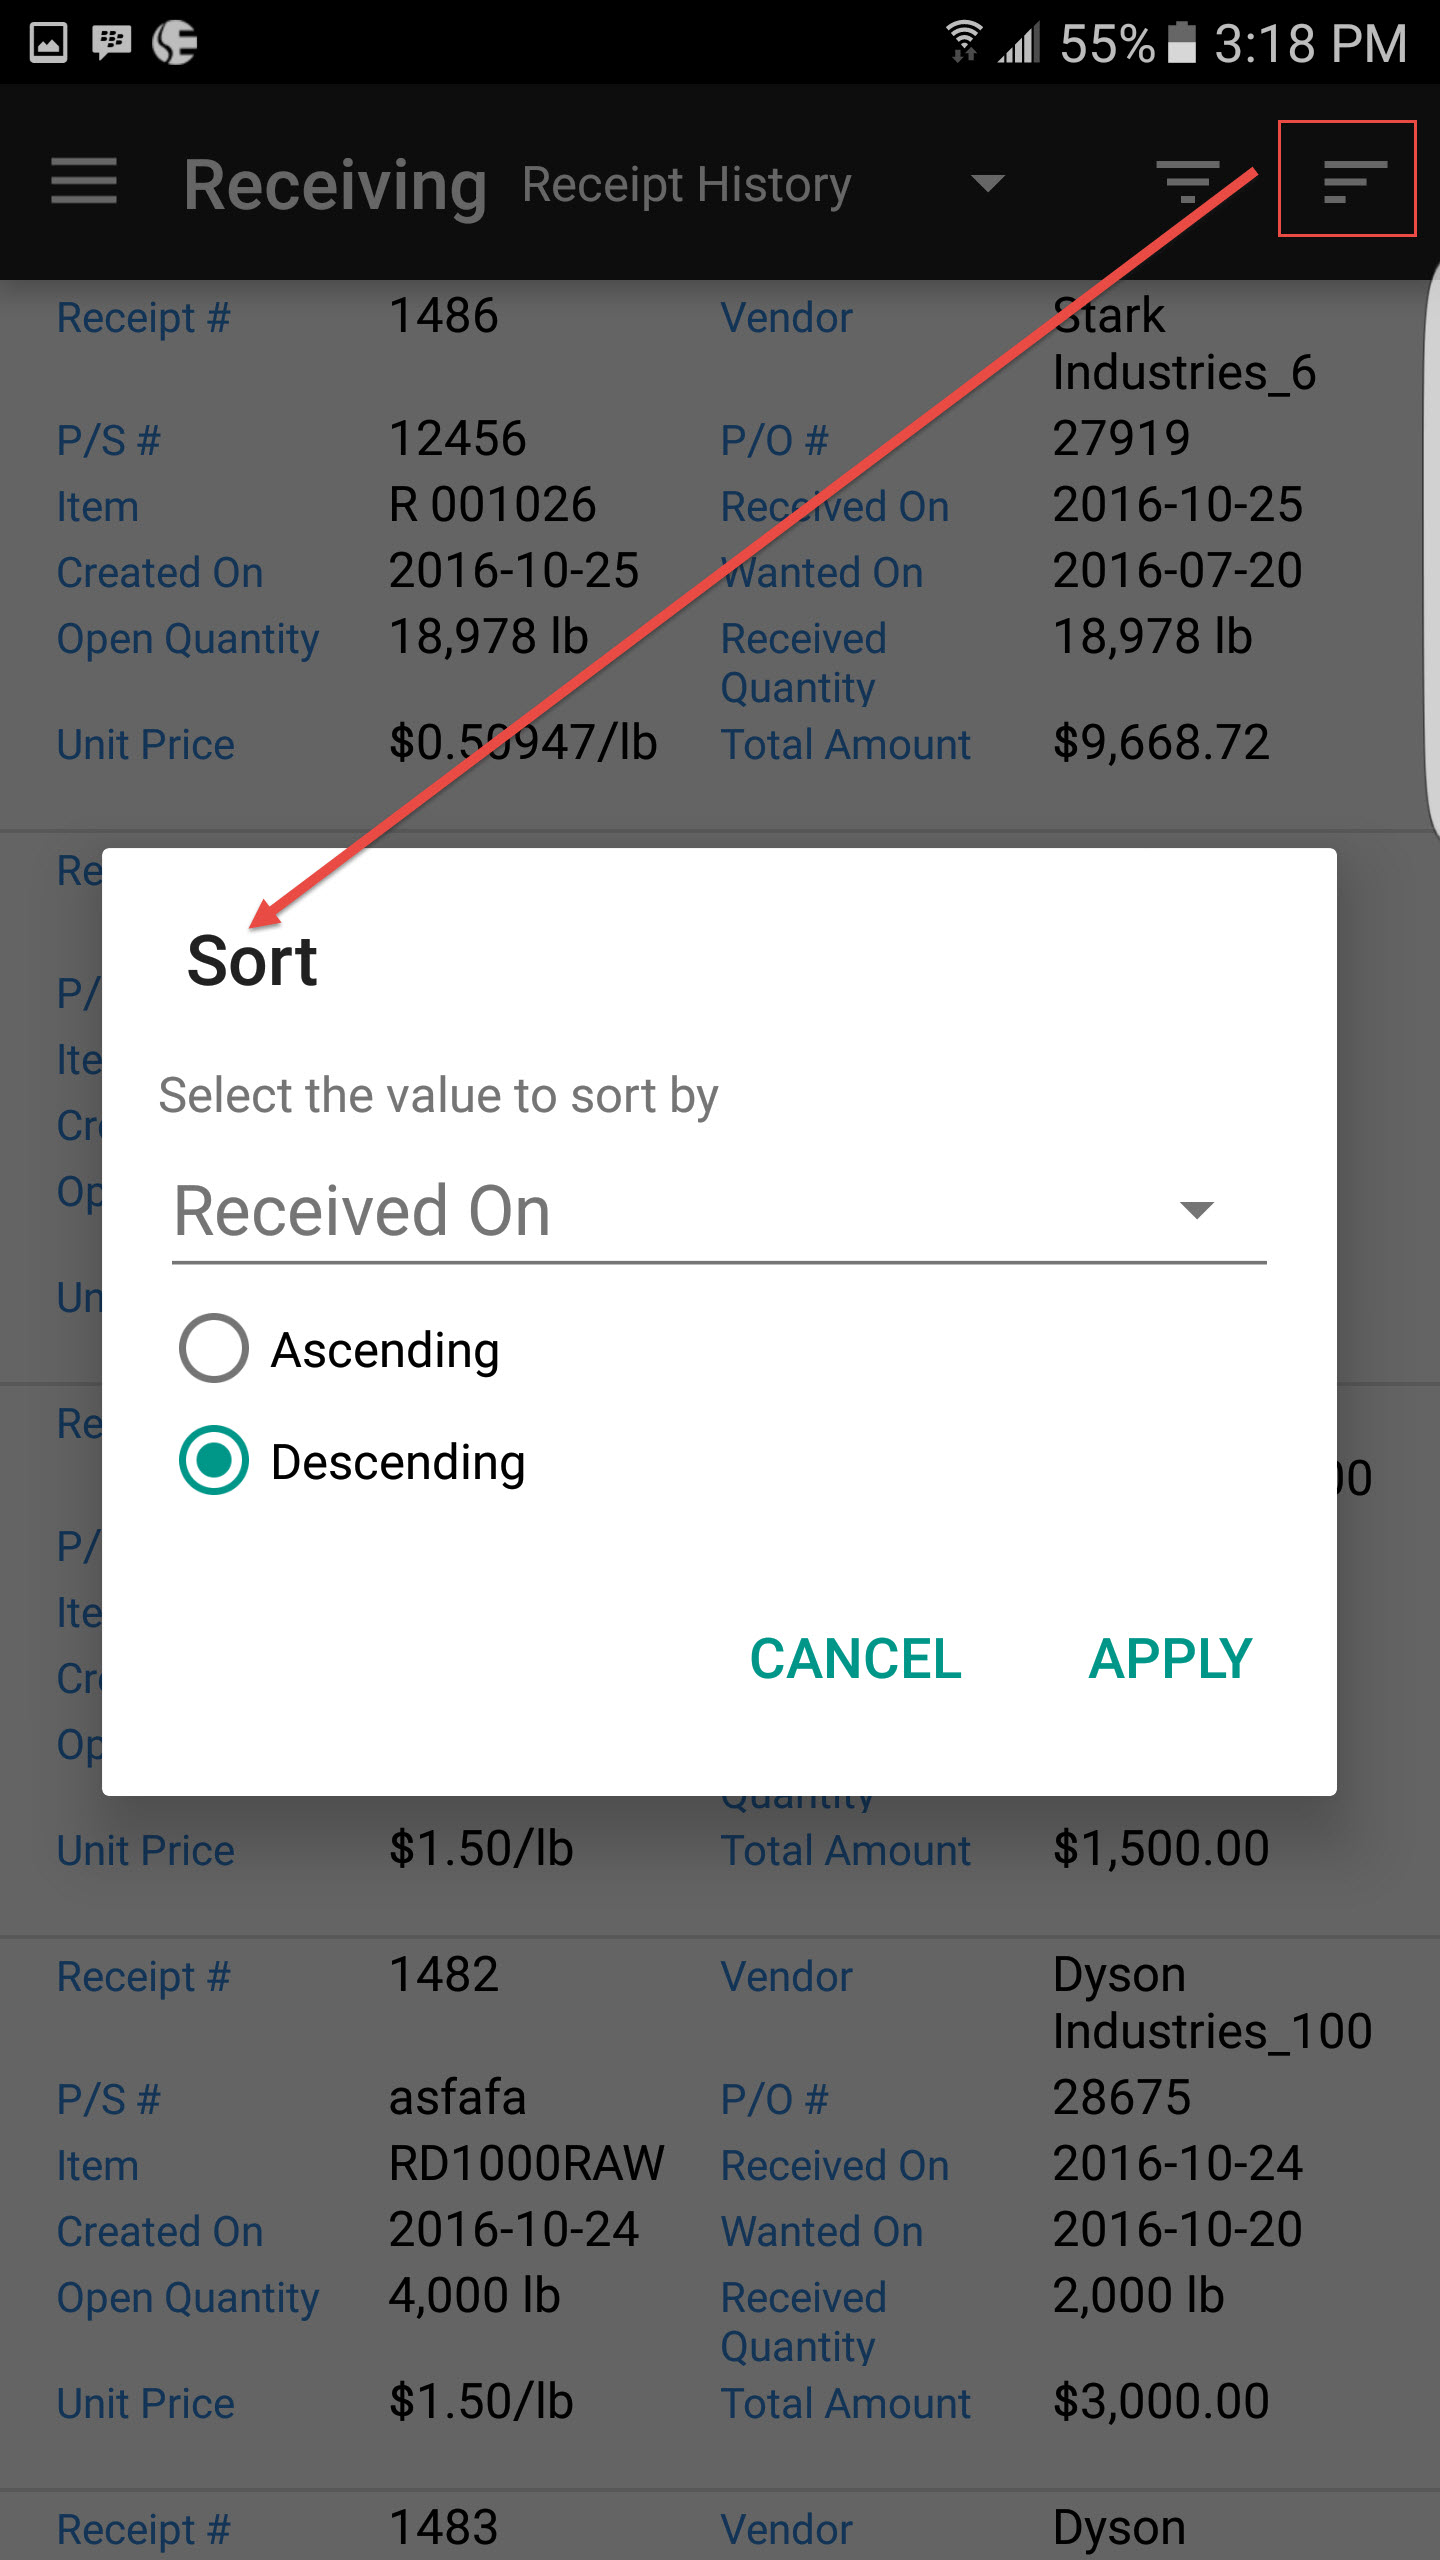
You can filter or sort the receipts to help find the one you are looking for by using the filter and sort options at the top right of the screen.
