Production
Workcenters
Navigating to Production, then Workcenters will show a list of all workcenters, including the workcenter status (one of running, idle, or down). You can touch a particular workcenter to view details about that workcenter. The workcenter screen is also where job actions are performed like starting and stopping jobs, signing in and out of jobs, and reporting downtime and scrap.
Opening a Workcenter
Starting a Job
Navigate to the workcenter screen. The scheduled jobs will display on the SCHEDULE tab. Find the job you want to start and touch the action menu:
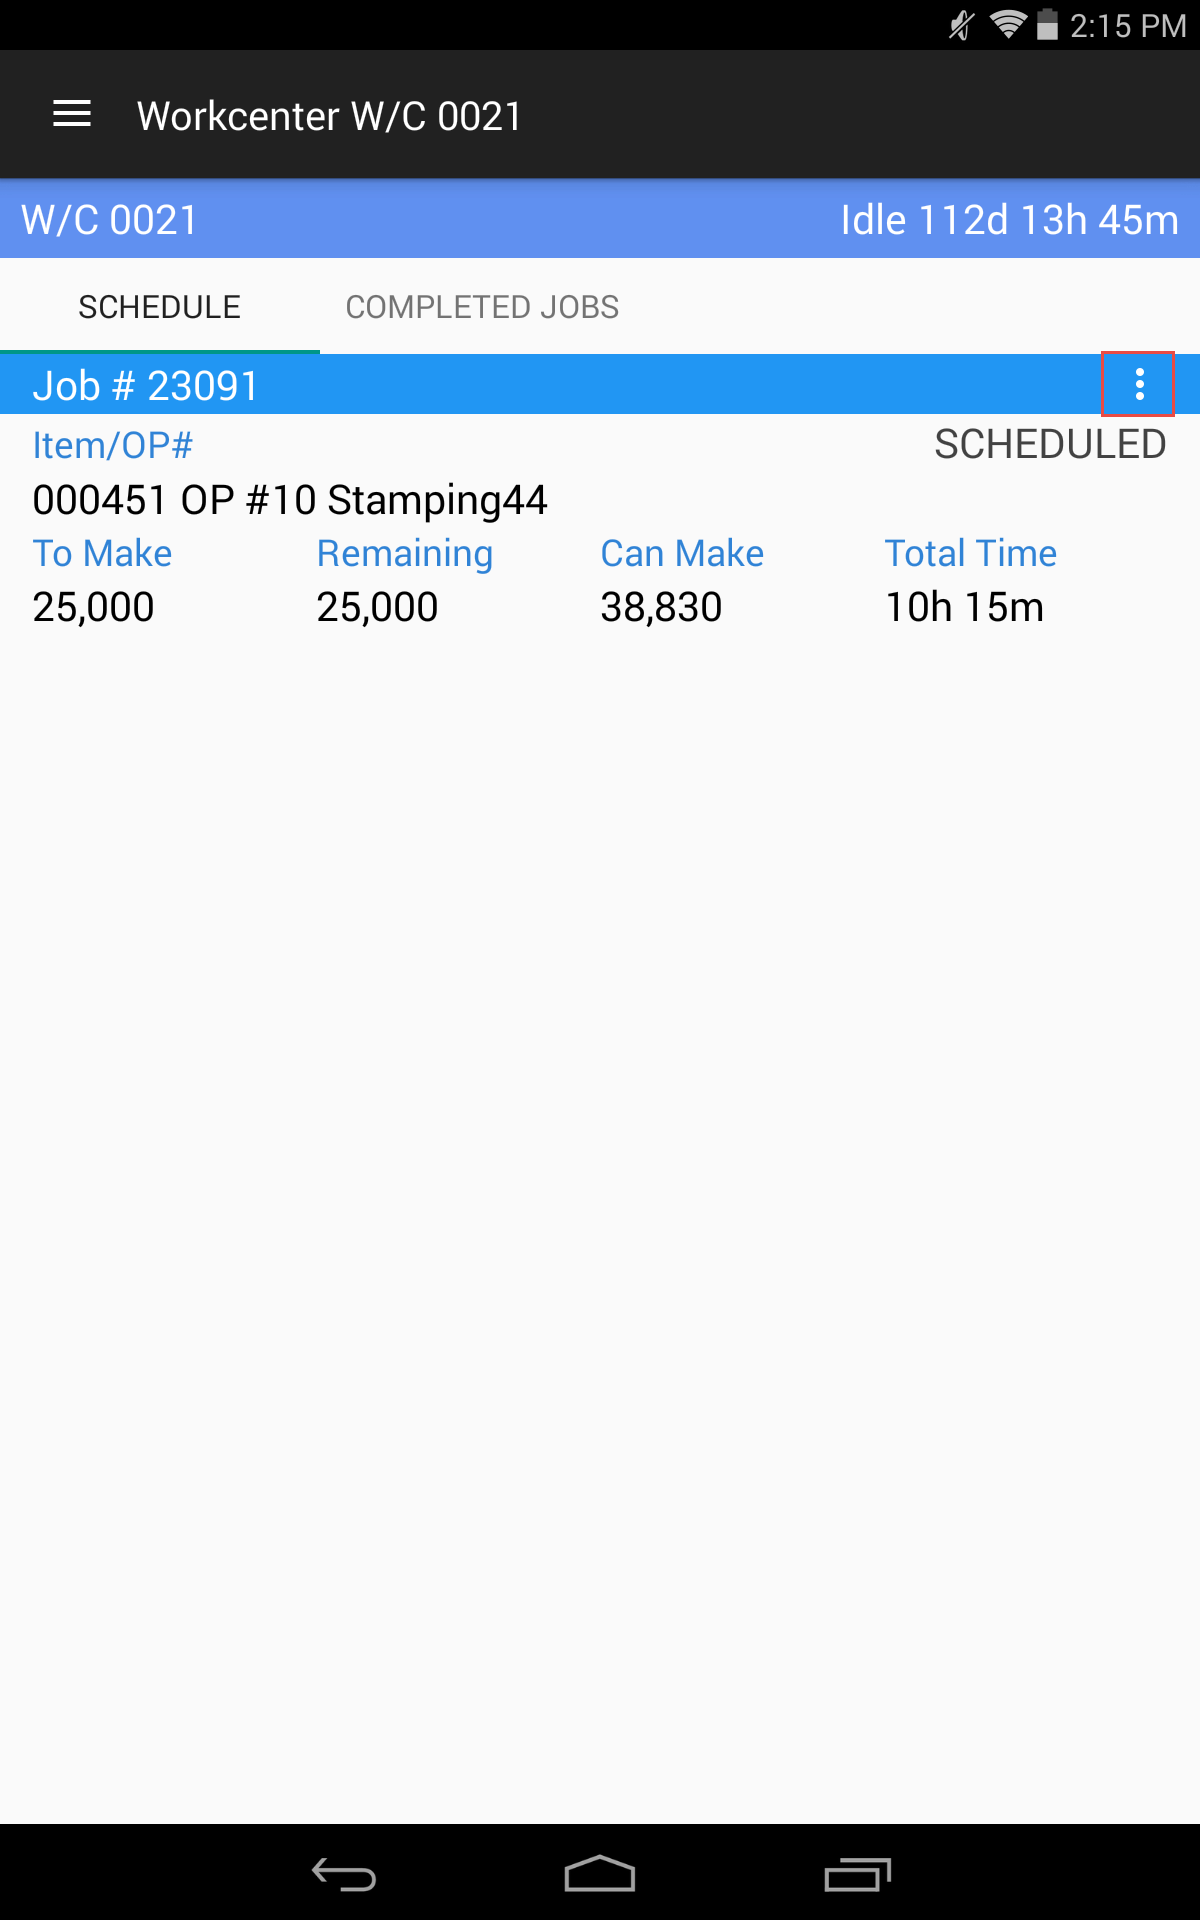
The action menu will display:
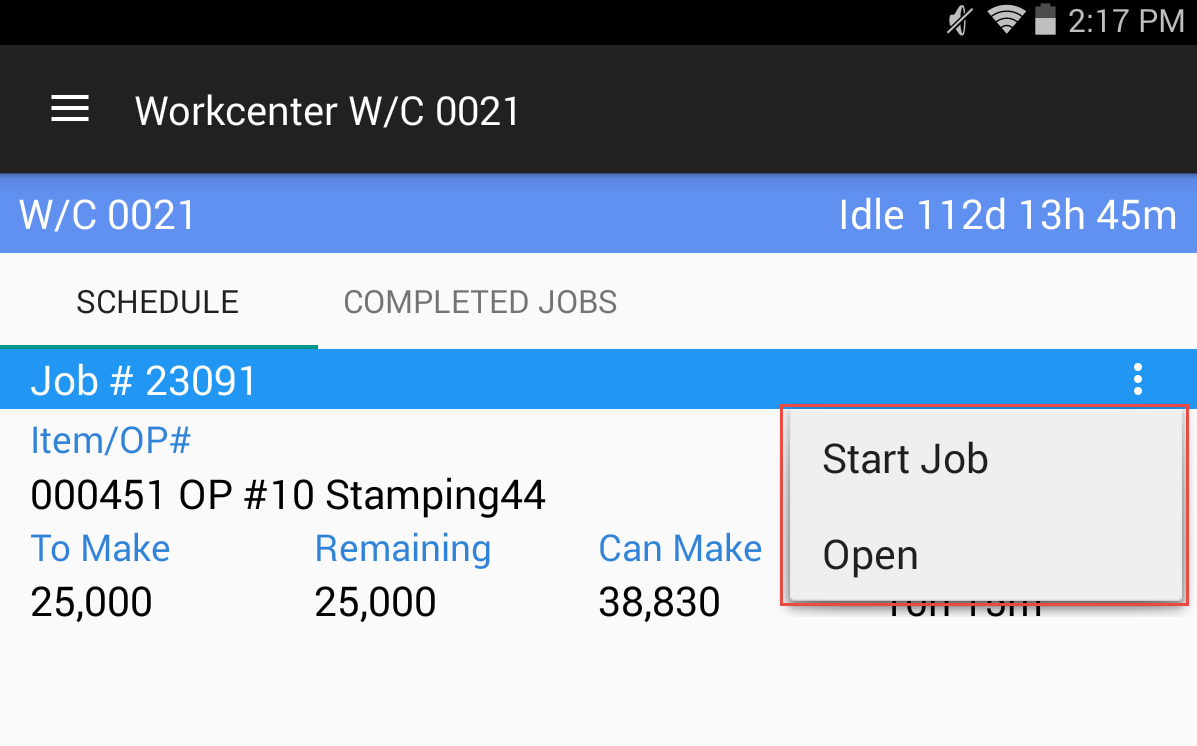
Touch Start Job to launch the Start Job screen:
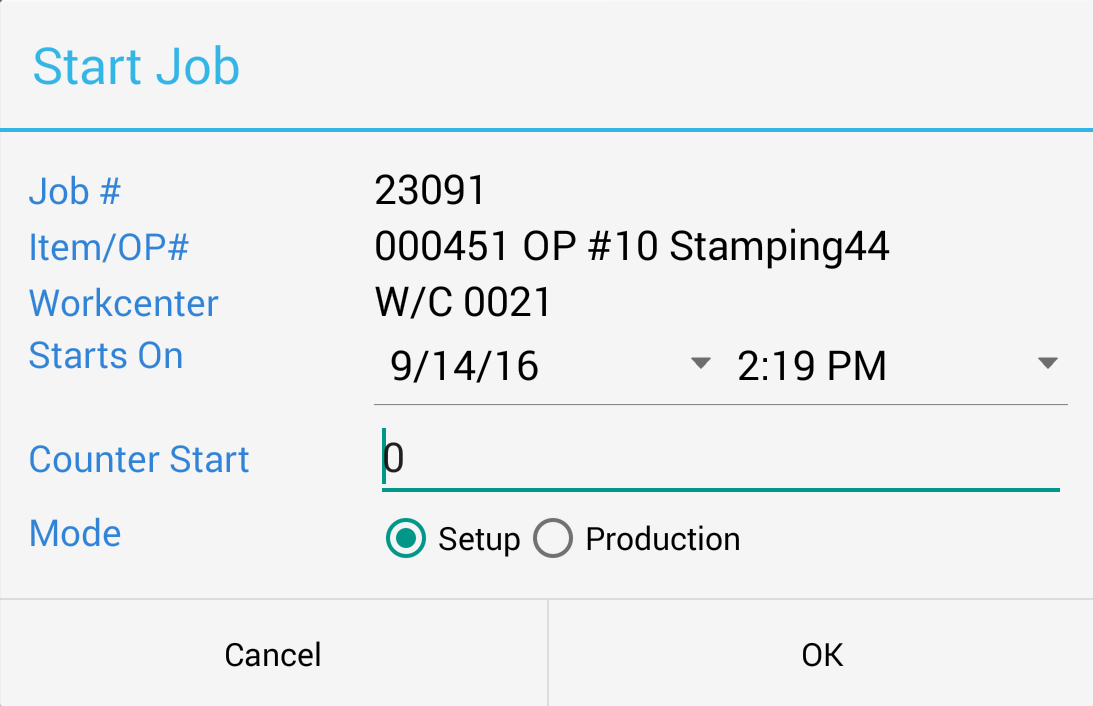
Details about the job will be displayed. Confirm that the correct job was selected. Complete the following details:
- Starts On - The date and time the job actually started. It will default to the current date and time. This should be set to the actual start time of the job.
- Counter Start - The starting counter value for the job. It will default to zero. If the machine is connected to ShopEdge via the PLC Integration module, the actual machine counter value will default.
- Mode - One of Setup or Production. It will default to Setup when starting a new job. If you don’t want to track setup, then select Production.
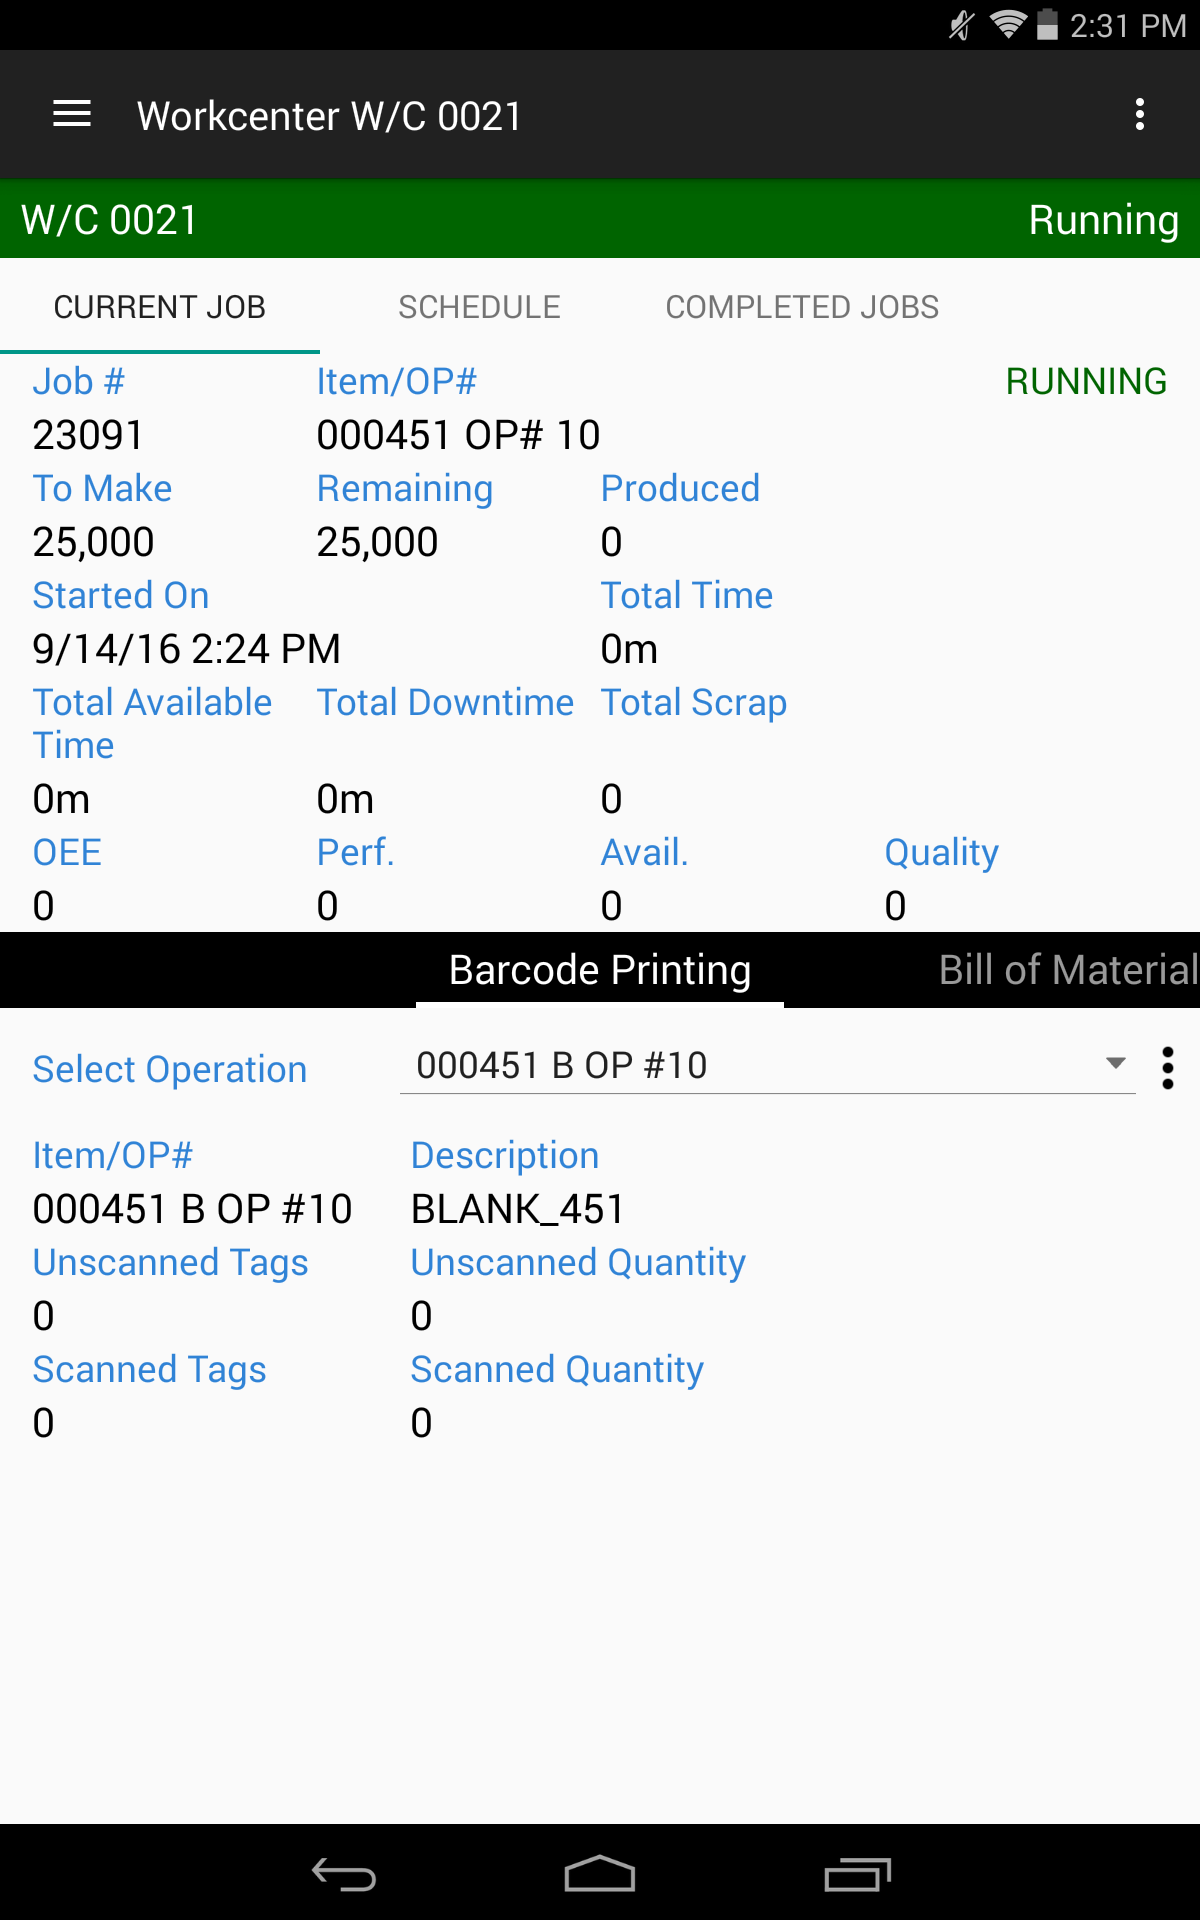
When you are finished, touch OK to start the job. A confirmation message will display that the job was started successfully and the workcenter screen will show the running job:
Note
Depending on your security permissions, you may need to start a timecard when you start the job.
Signing onto a Job
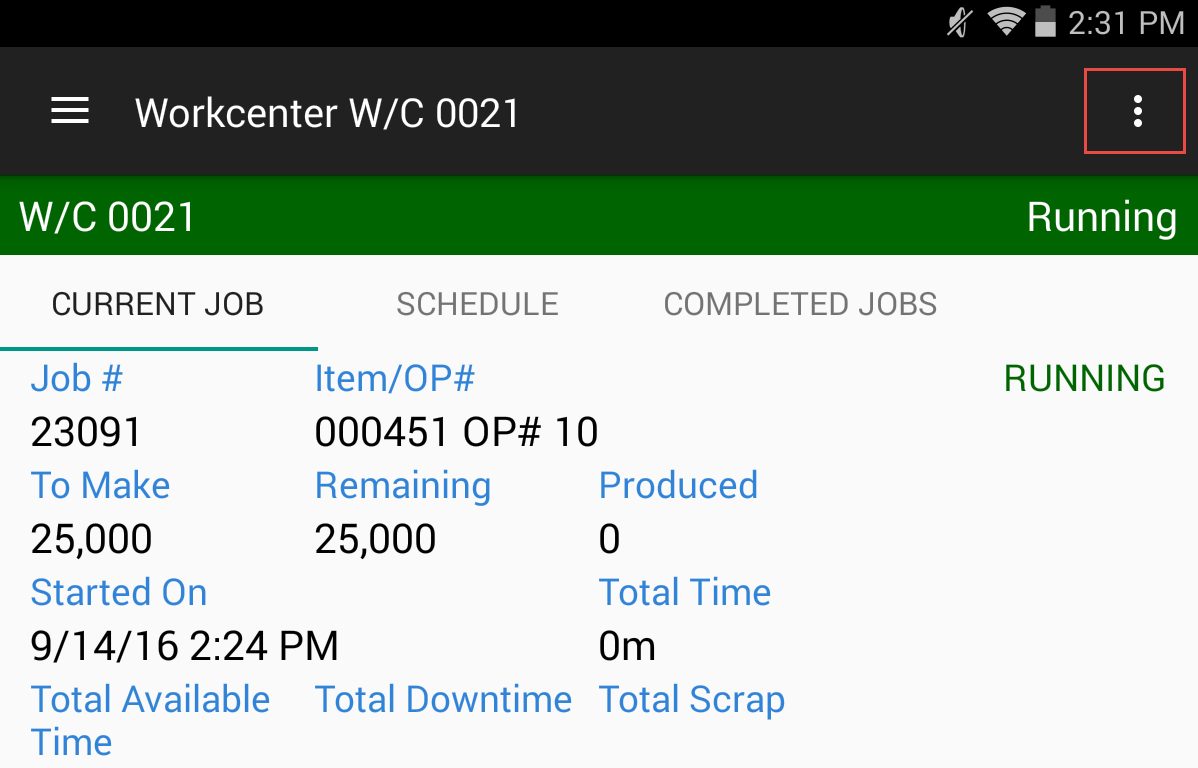
To sign into a running job, touch the action menu on the workcenter screen:
The action menu will display:
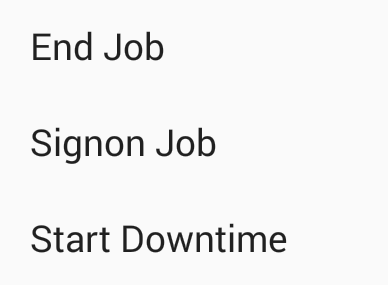
Touch the Signon Job option to launch the Signon Job screen:
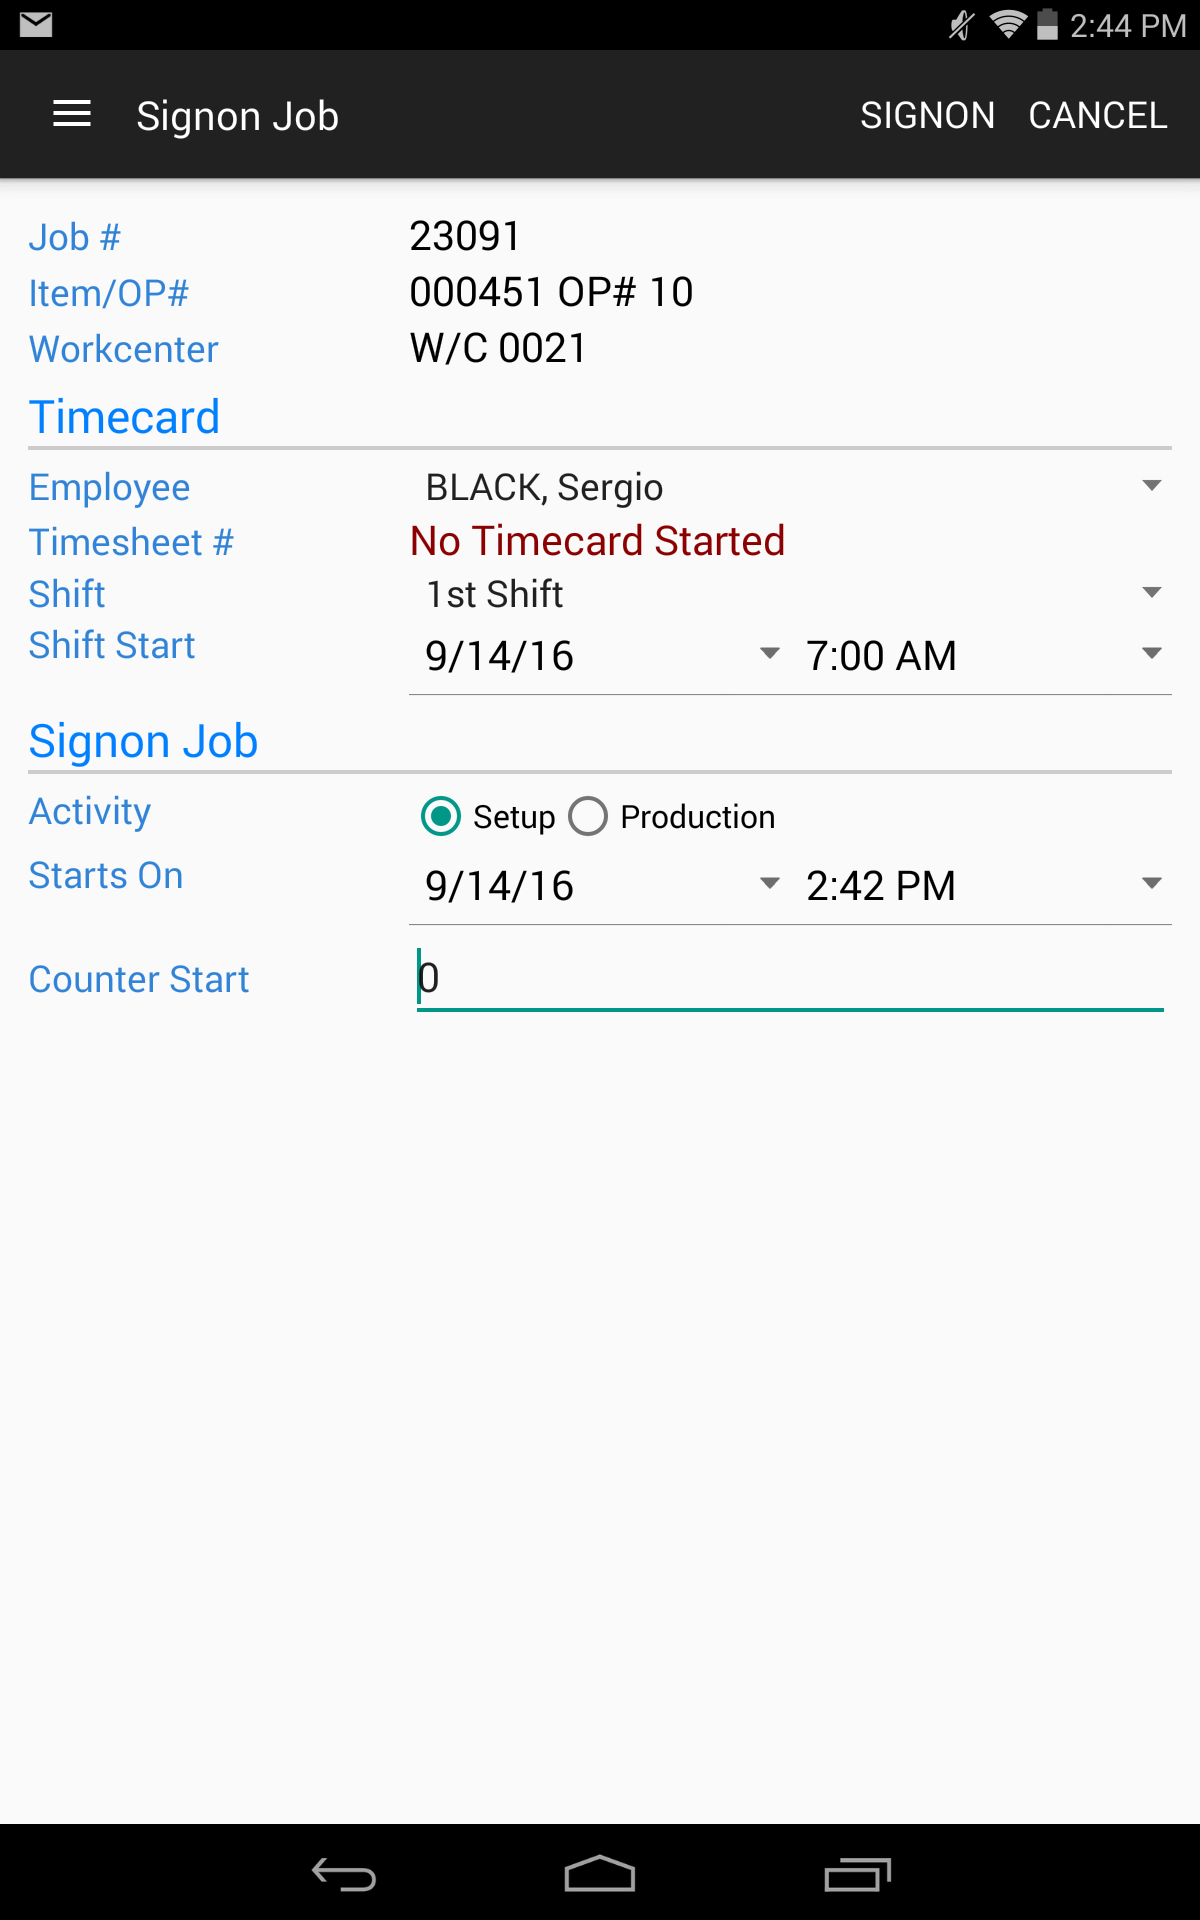
Details about the job will be shown. Confirm the correct job is selected. Complete the following details:
Timecard
- Employee - Select the employee that you want to sign-in. This will be a read-only field and will default to you unless you have permissions to sign-in any user.
- Timesheet # - This is a read-only field that will display the timecard for the user selected, if the user has a current timecard started.
- Shift - The shift that the employee is working on.
- Shift Start - The shift start time for the employee, if a current timecard is started. This field will be read-only if a current timecard is started, otherwise you should confirm the start time since a new timecard will be started.
Signon Job
- Activity - A read-only field that shows one of Setup or Production depending on the mode of the running job.
- Starts On - Confirm the start date and time for when you started working on the job. It will default to the current date and time.
- Counter Start - Confirm the starting counter for the shift. It will default to zero unless the workcenter is connected via the PLC Integration Module in which case the current PLC count will show.
Complete the details and touch OK to sign into the job. The Signon Job screen will close and the Workcenter screen will show with the running job details.
- Production Reporting or Labour Only
Starting Downtime
Stopping Downtime
Starting Indirect Labour
Stopping Indirect Labour
Barcode Printing Tab
Starting a Master
Printing and Consuming Partial Tags
Printing Serial Numbers
Bill of Material Tab
Consuming Material
Scrapping Material
There are different ways to record scrap in the ShopEdge system. Setup scrap is recording when you are in Setup mode, or logged in as Setup as your Labour Type. Production scrap is created in Production mode, or logged in as Primary Operator as your Labour Type. There is also a way to record WIP or Finished Good scrap for items you are producing, and a different way to record scrap for items that are part of the Bill of Material.
Recording Scrap in Setup Mode
Scrap can be recorded against Setup or Production in the ShopEdge system. Below explains how to record scrap in Setup mode.
Recording WIP and Finished Good Scrap
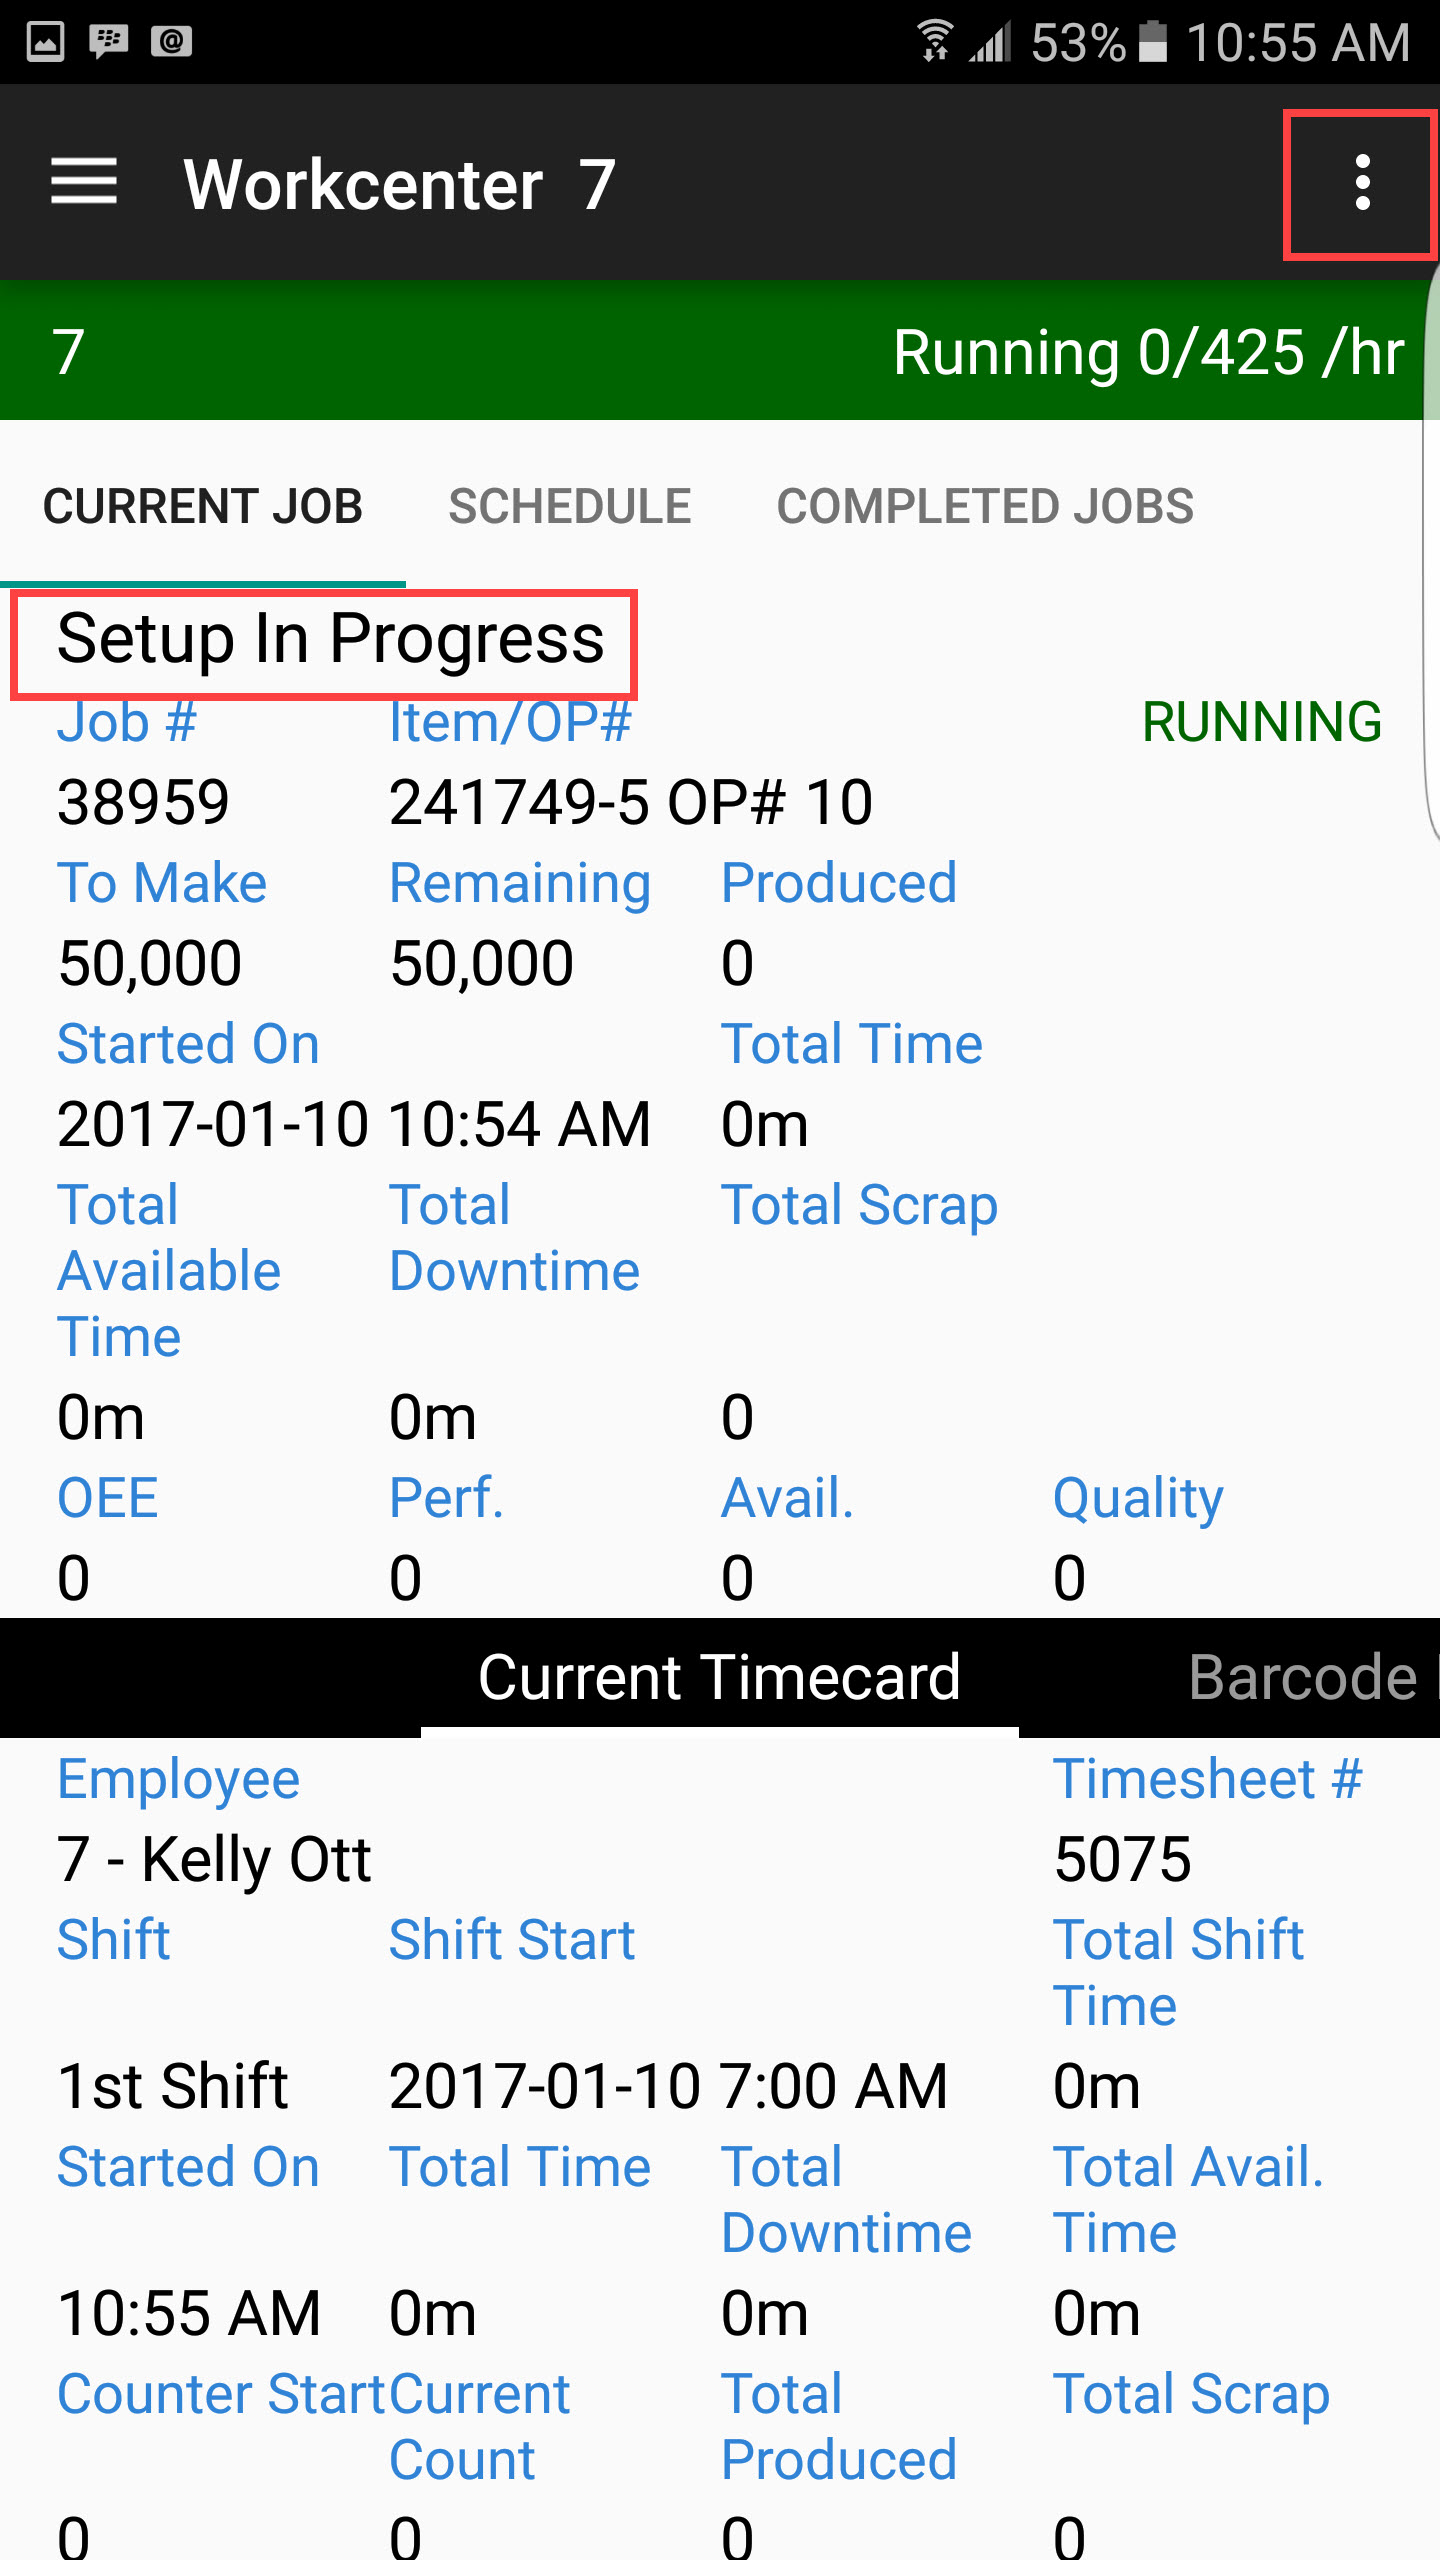
To record scrap in Setup mode, make sure you are logged into a Workcenter as Setup. Touch the Action menu at the top right of the screen.
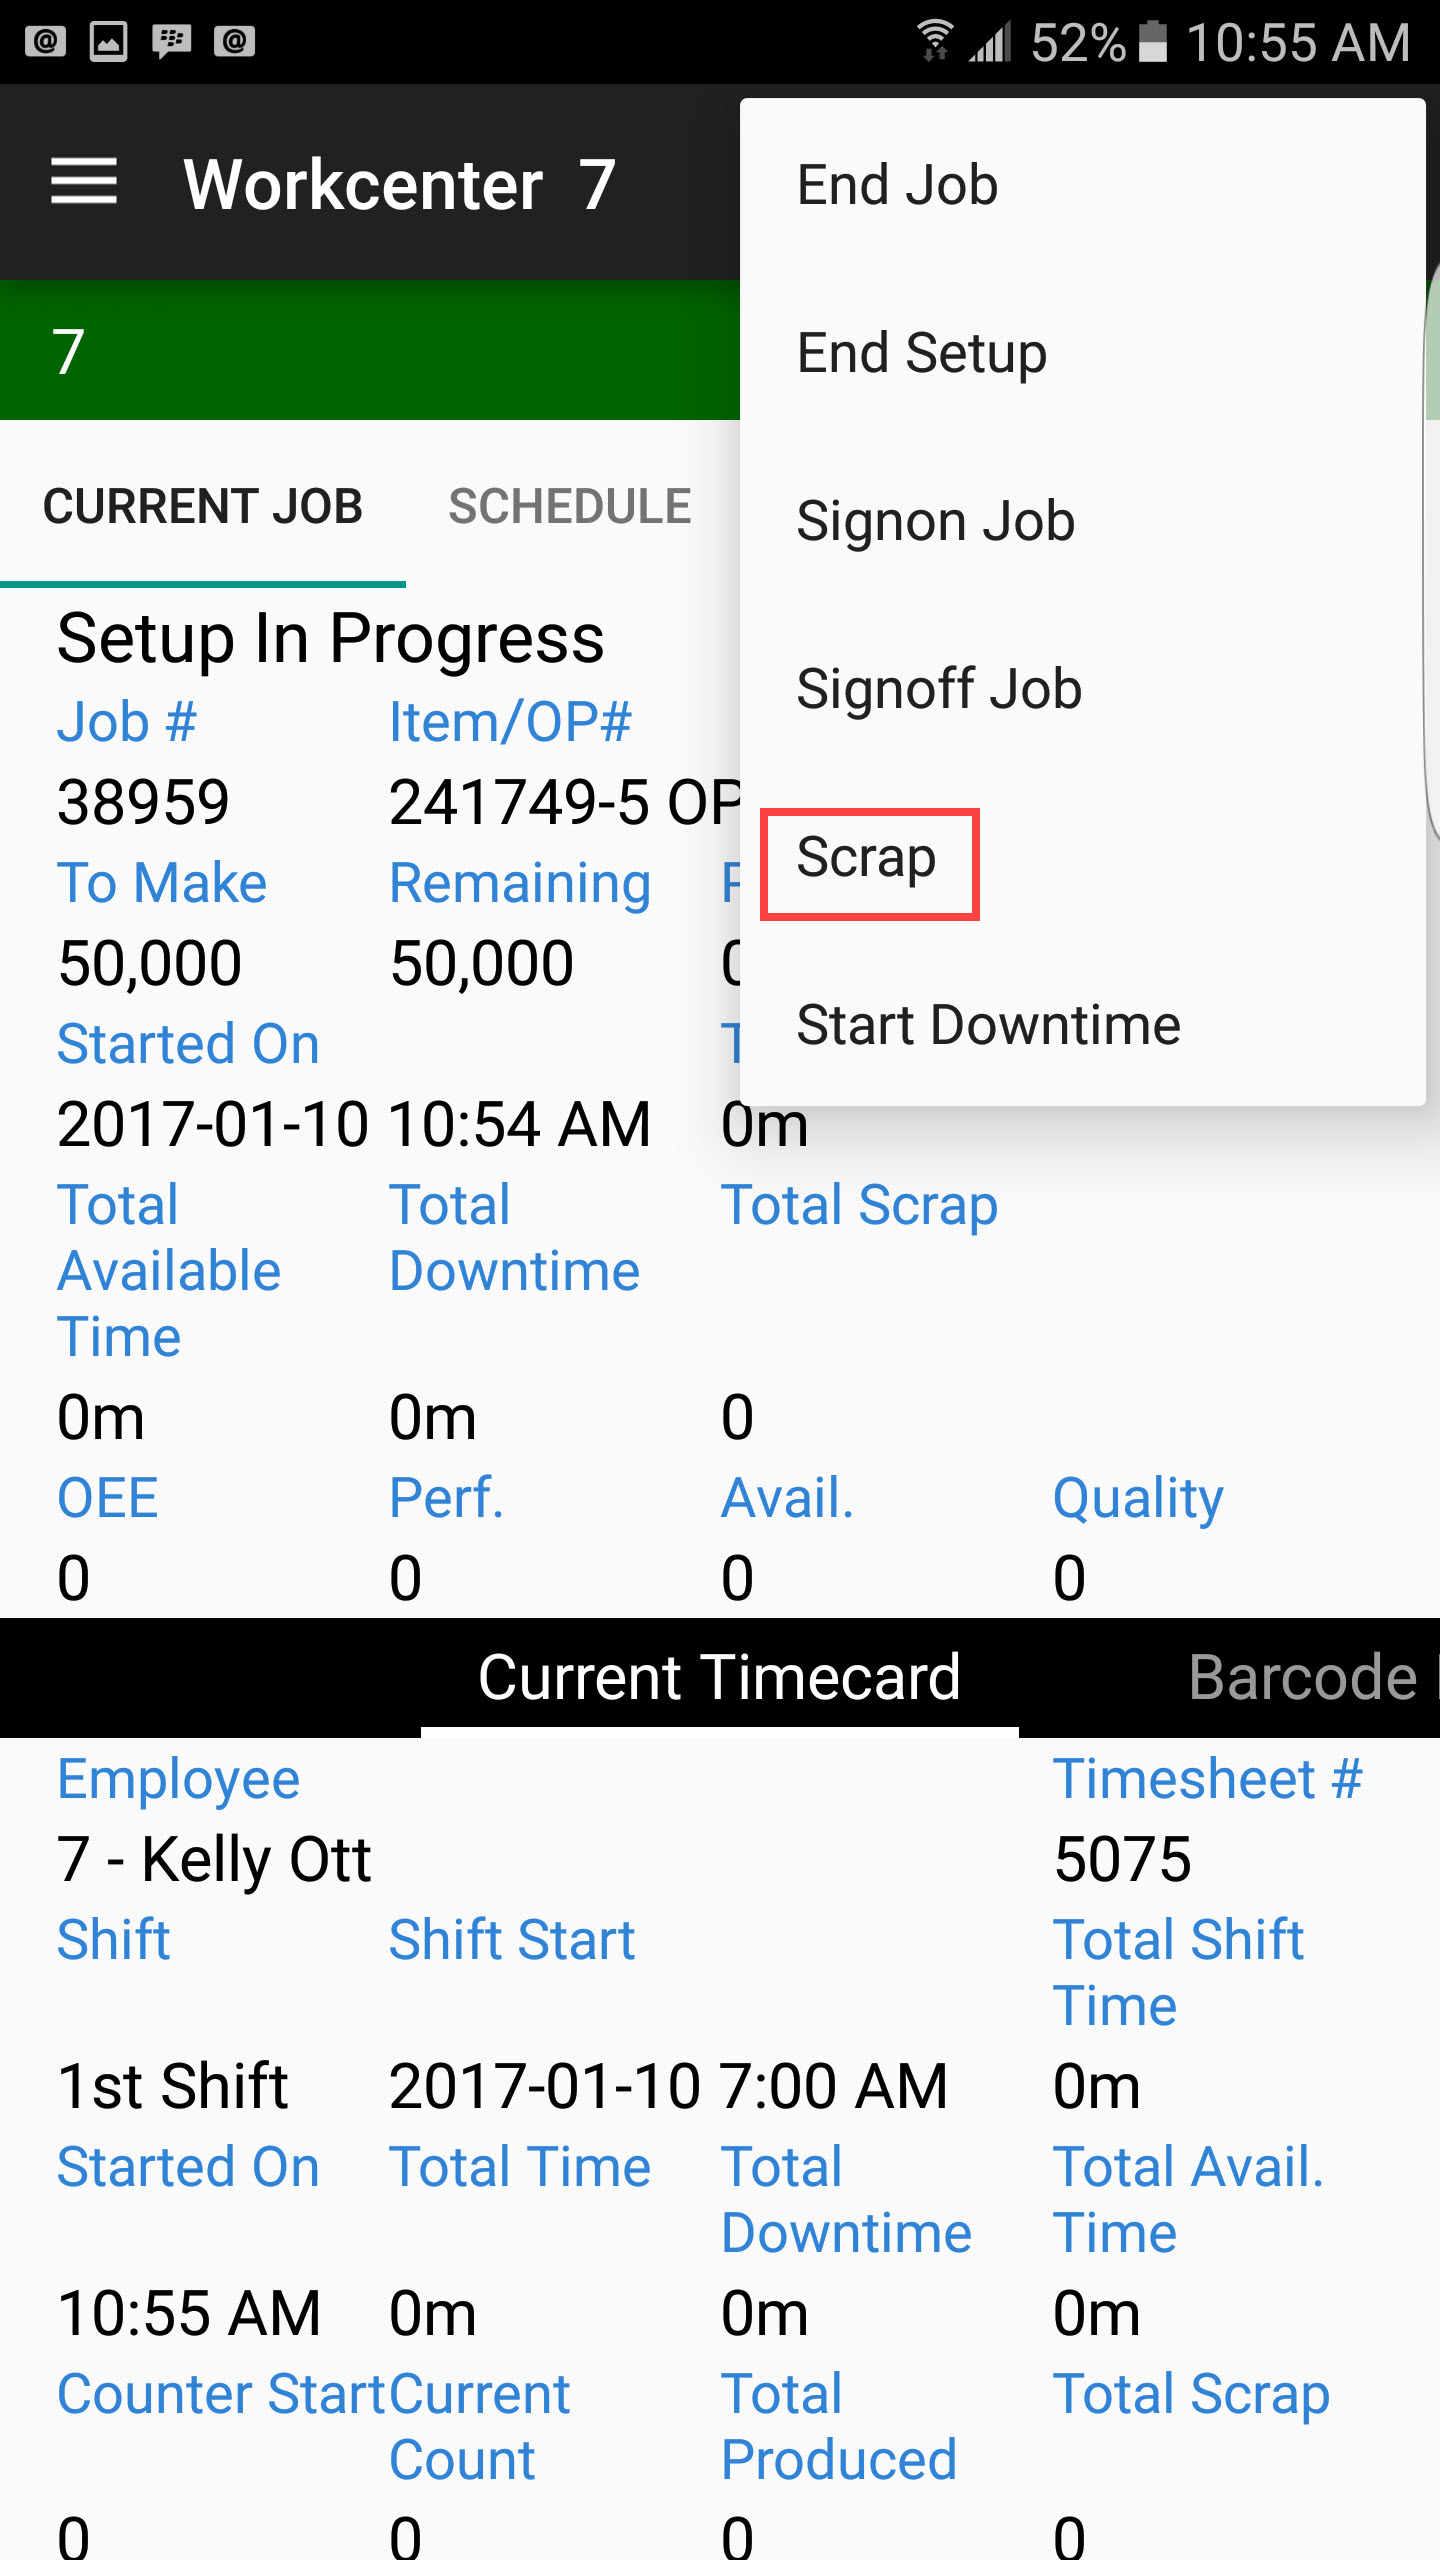
Select the Scrap option from the Action menu.
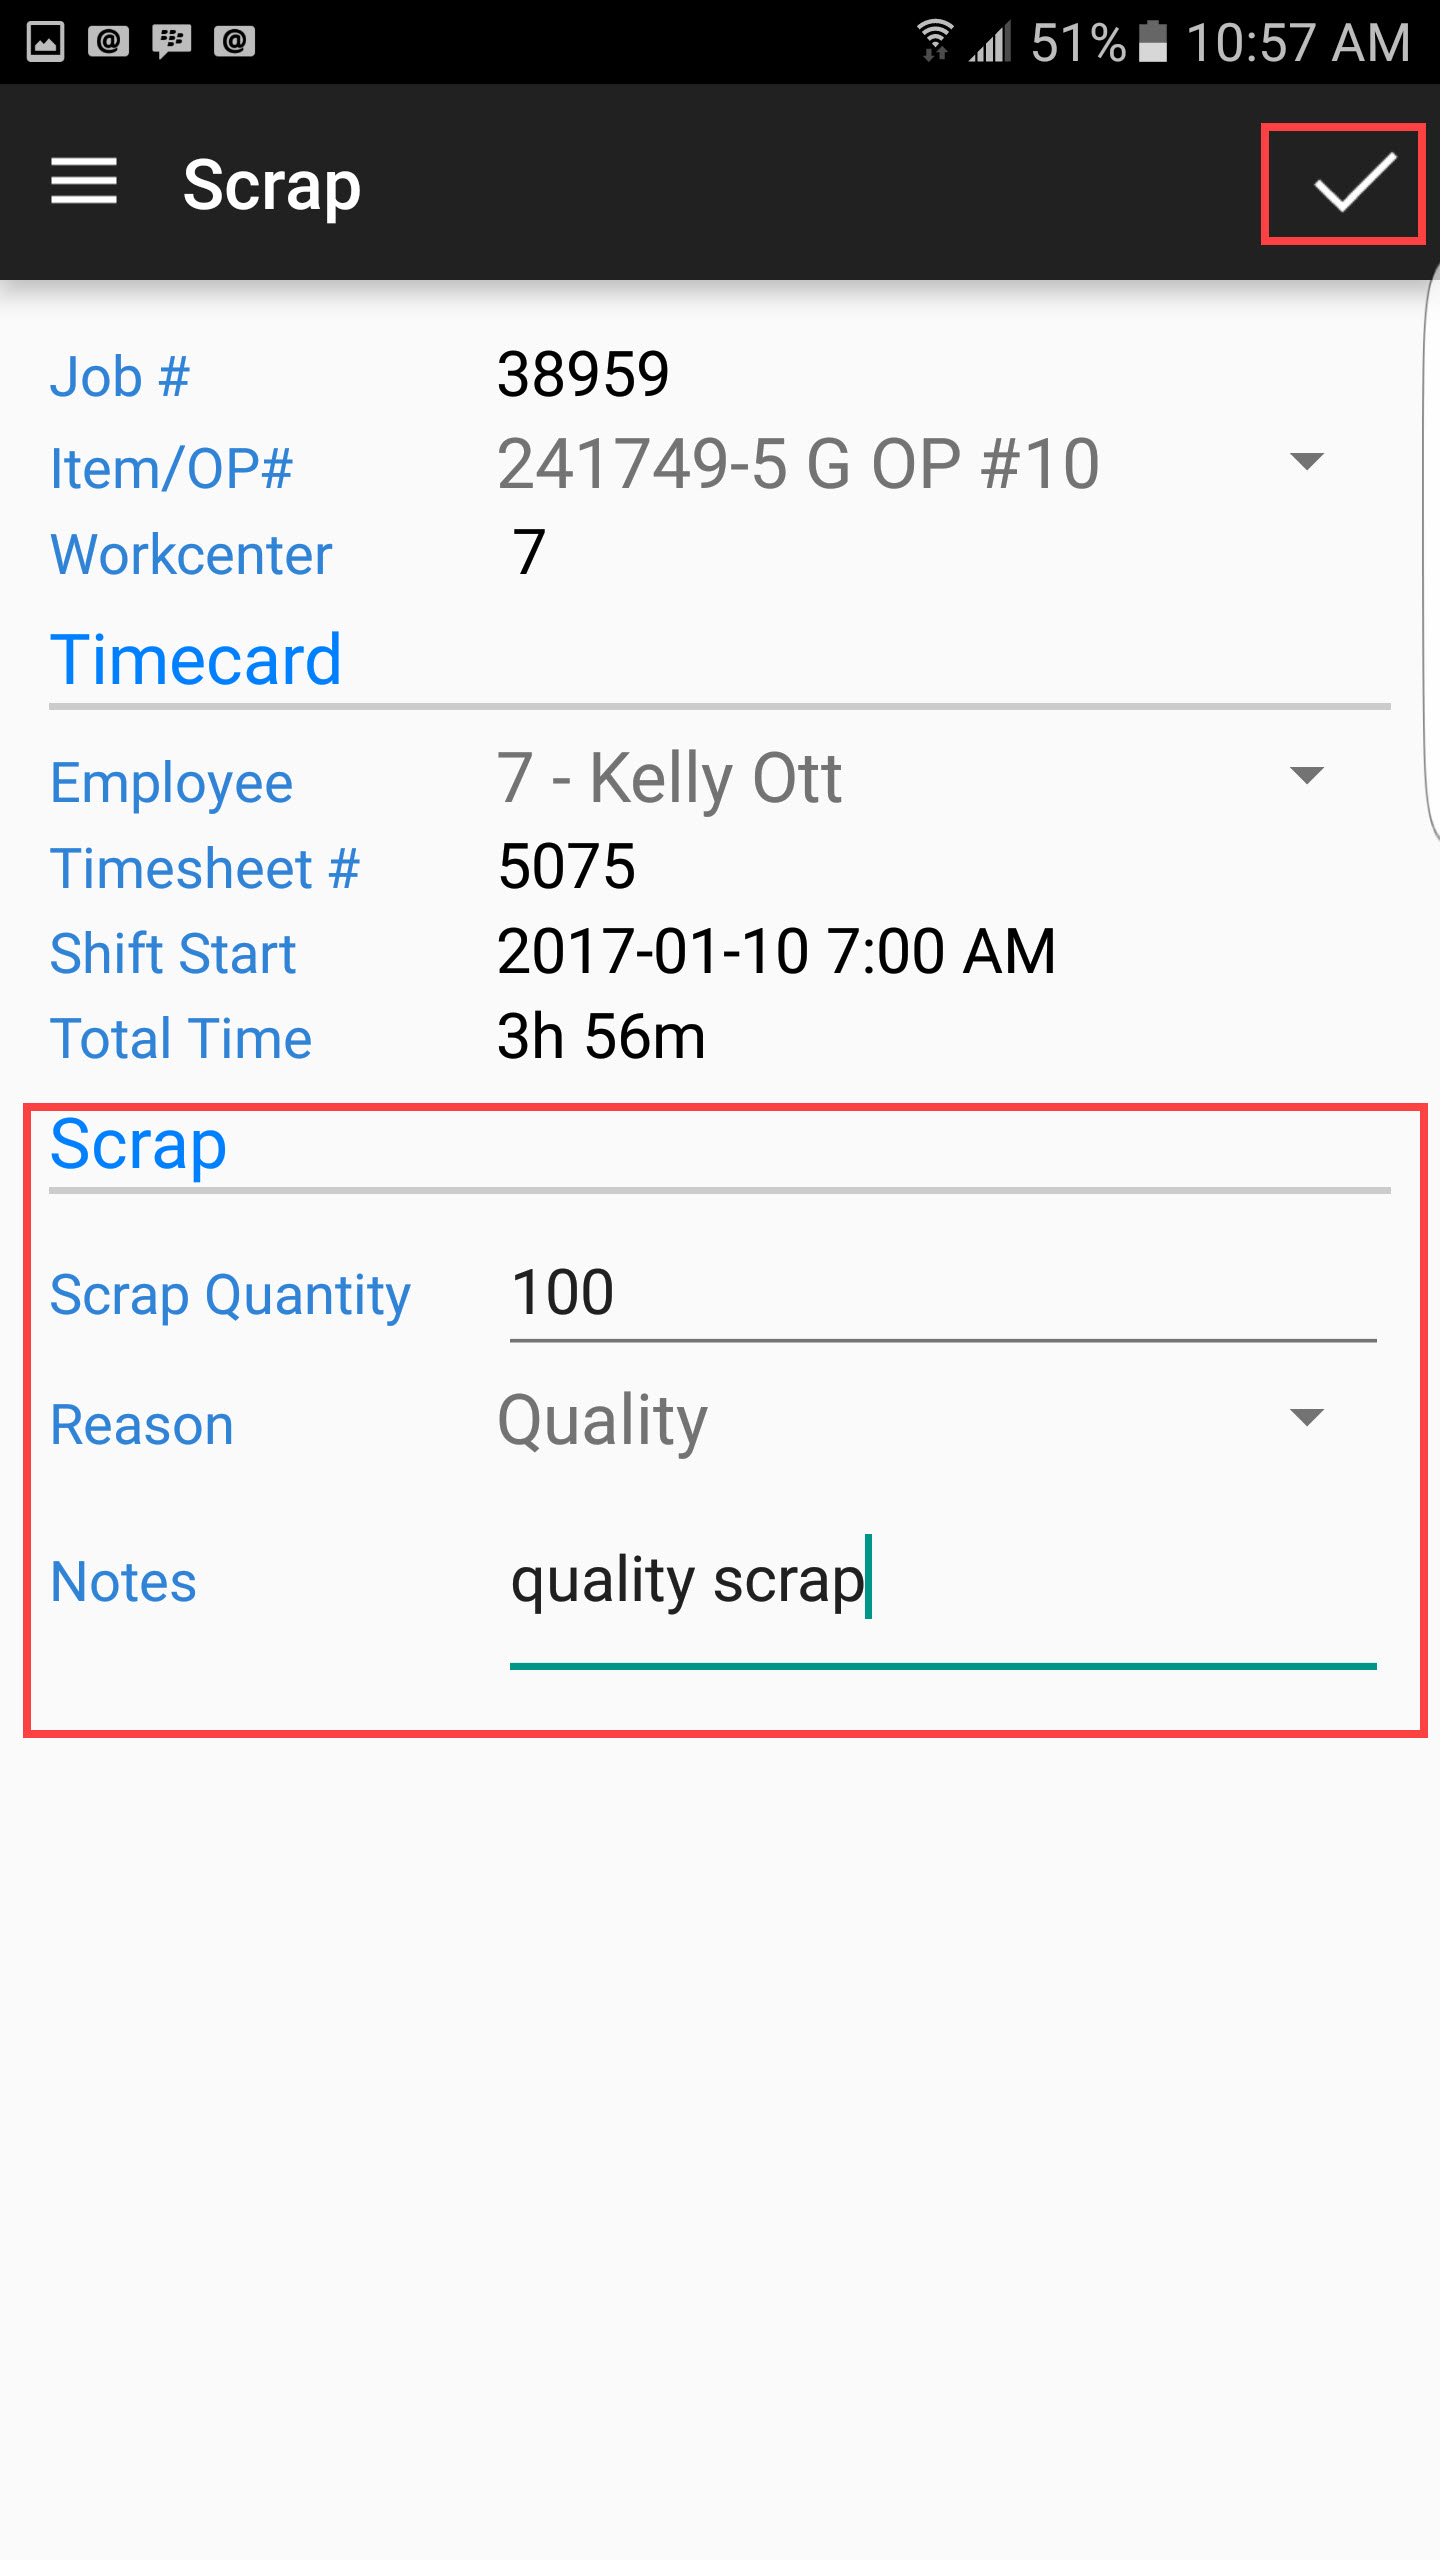
Fill out the scrap information including the Scrap Quantity, select a Reason, and enter in any Notes that you like:
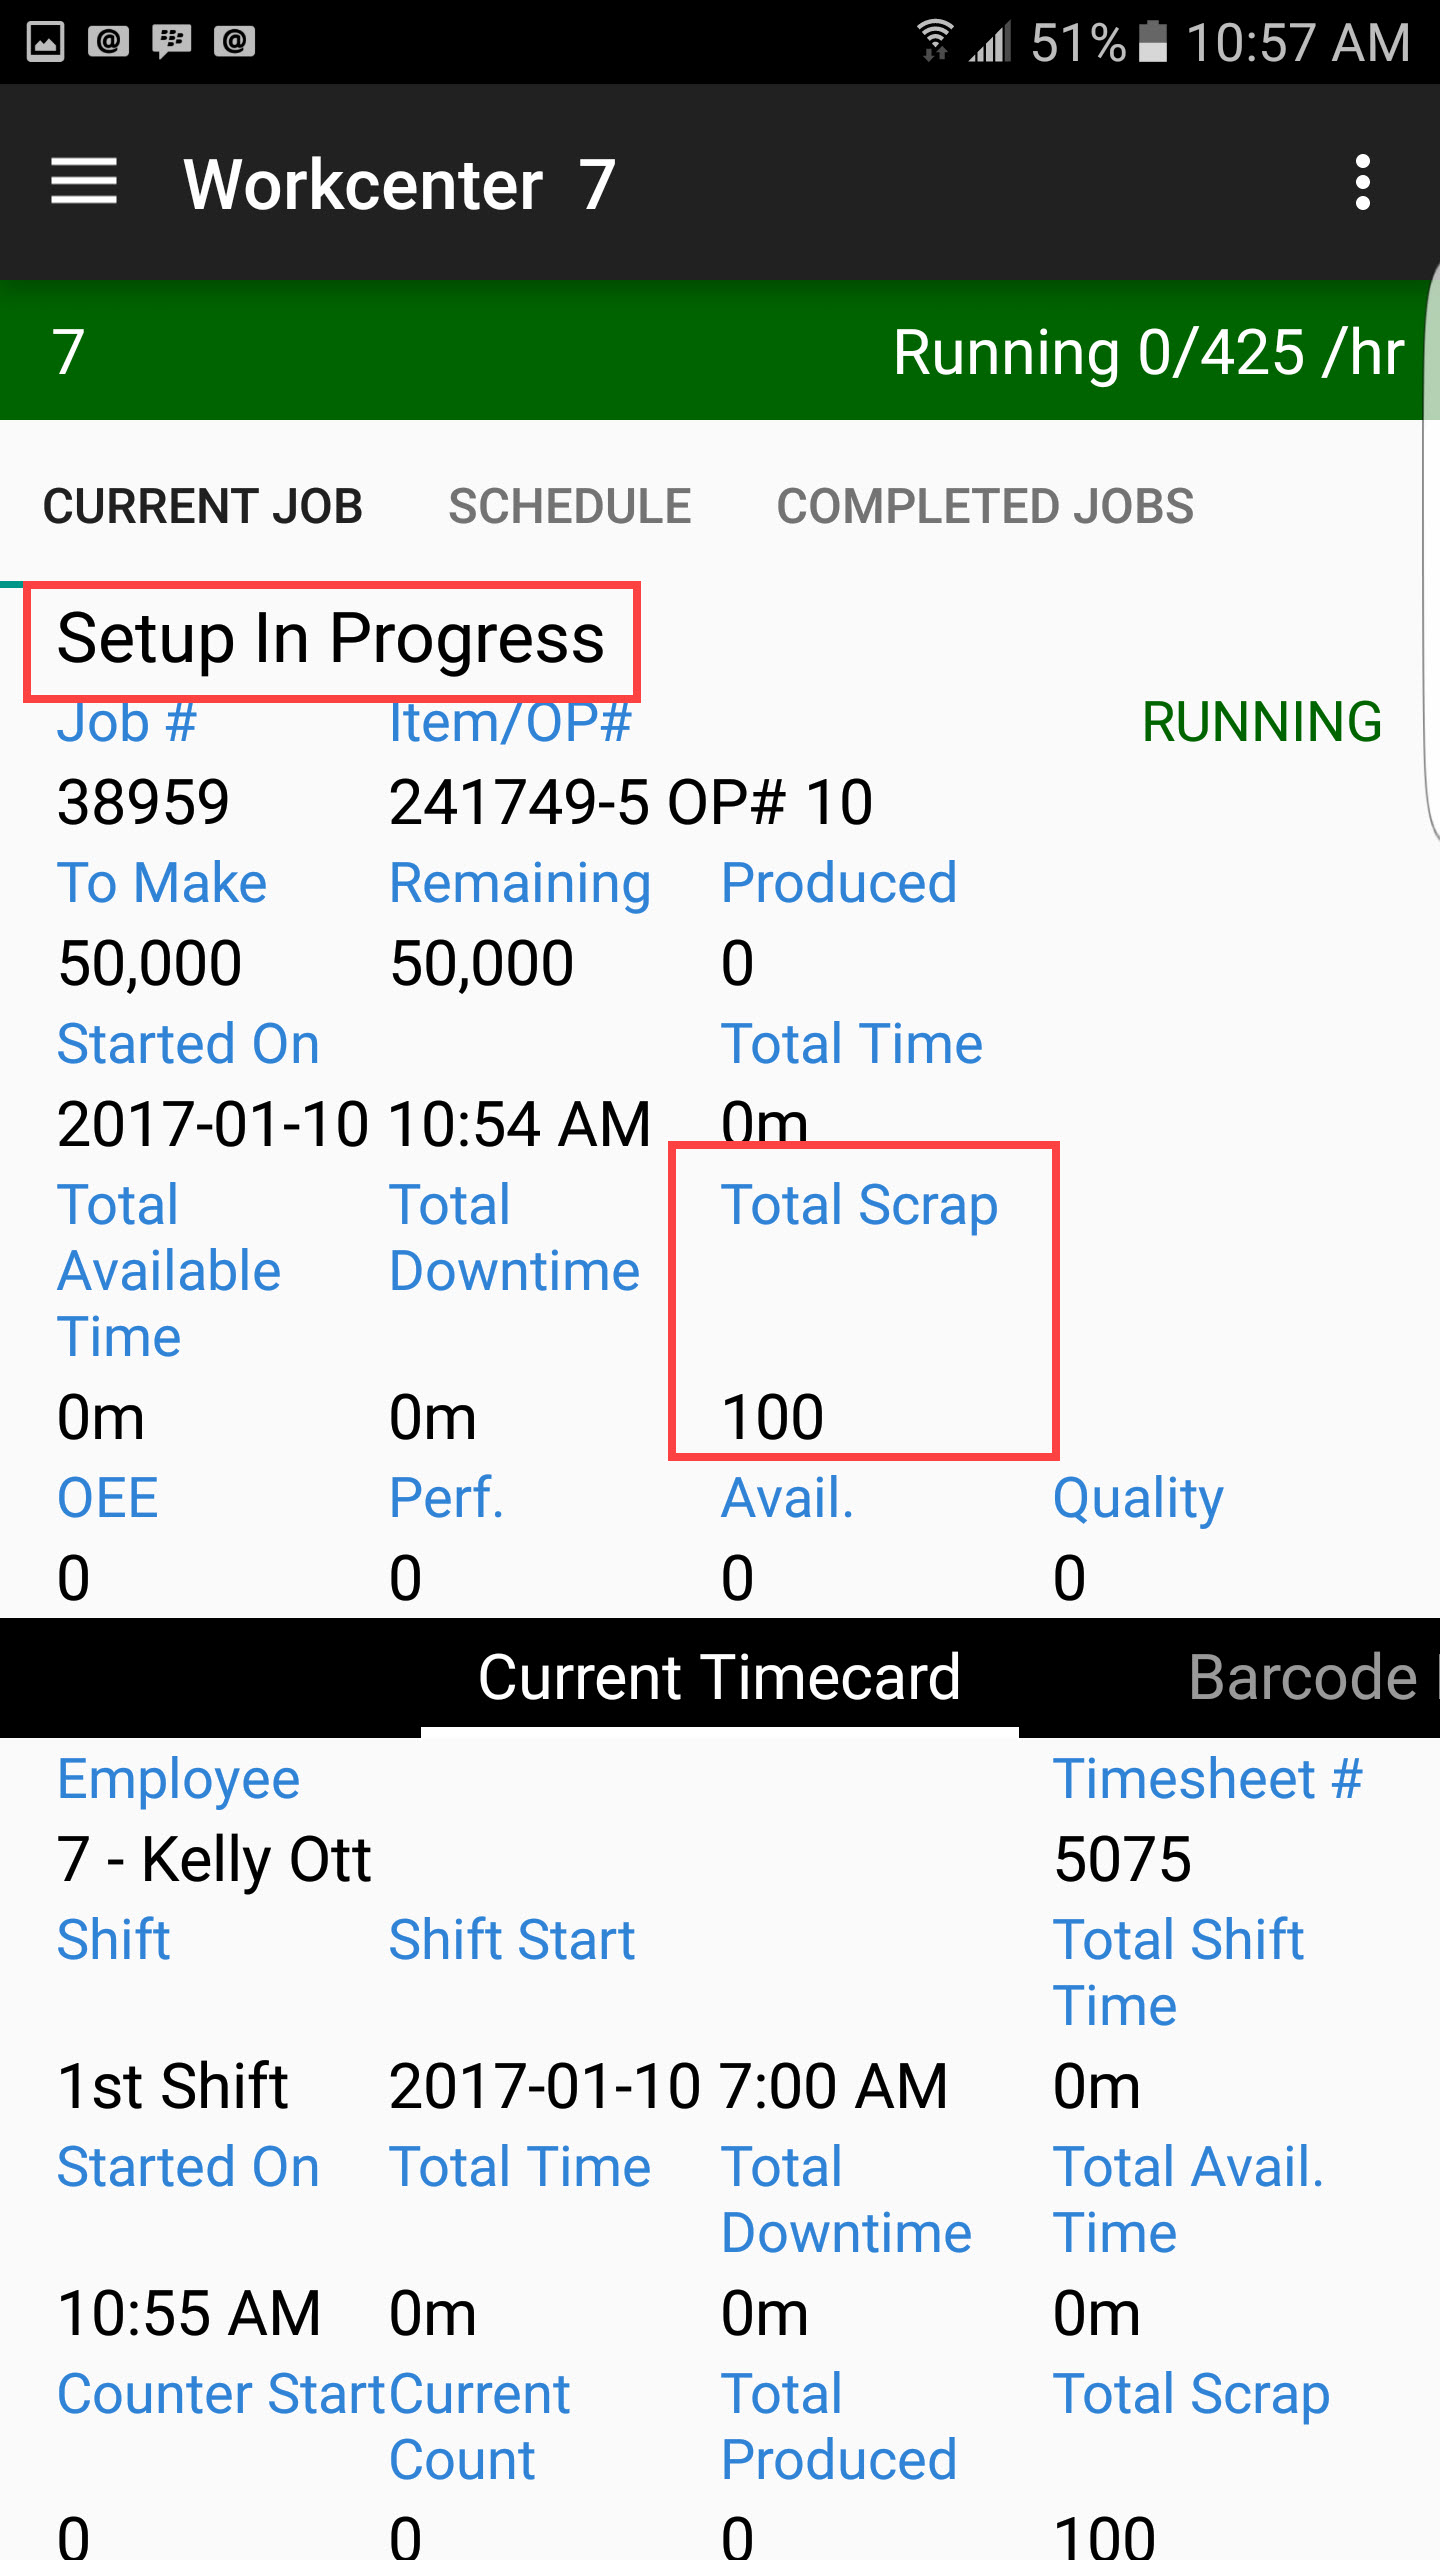
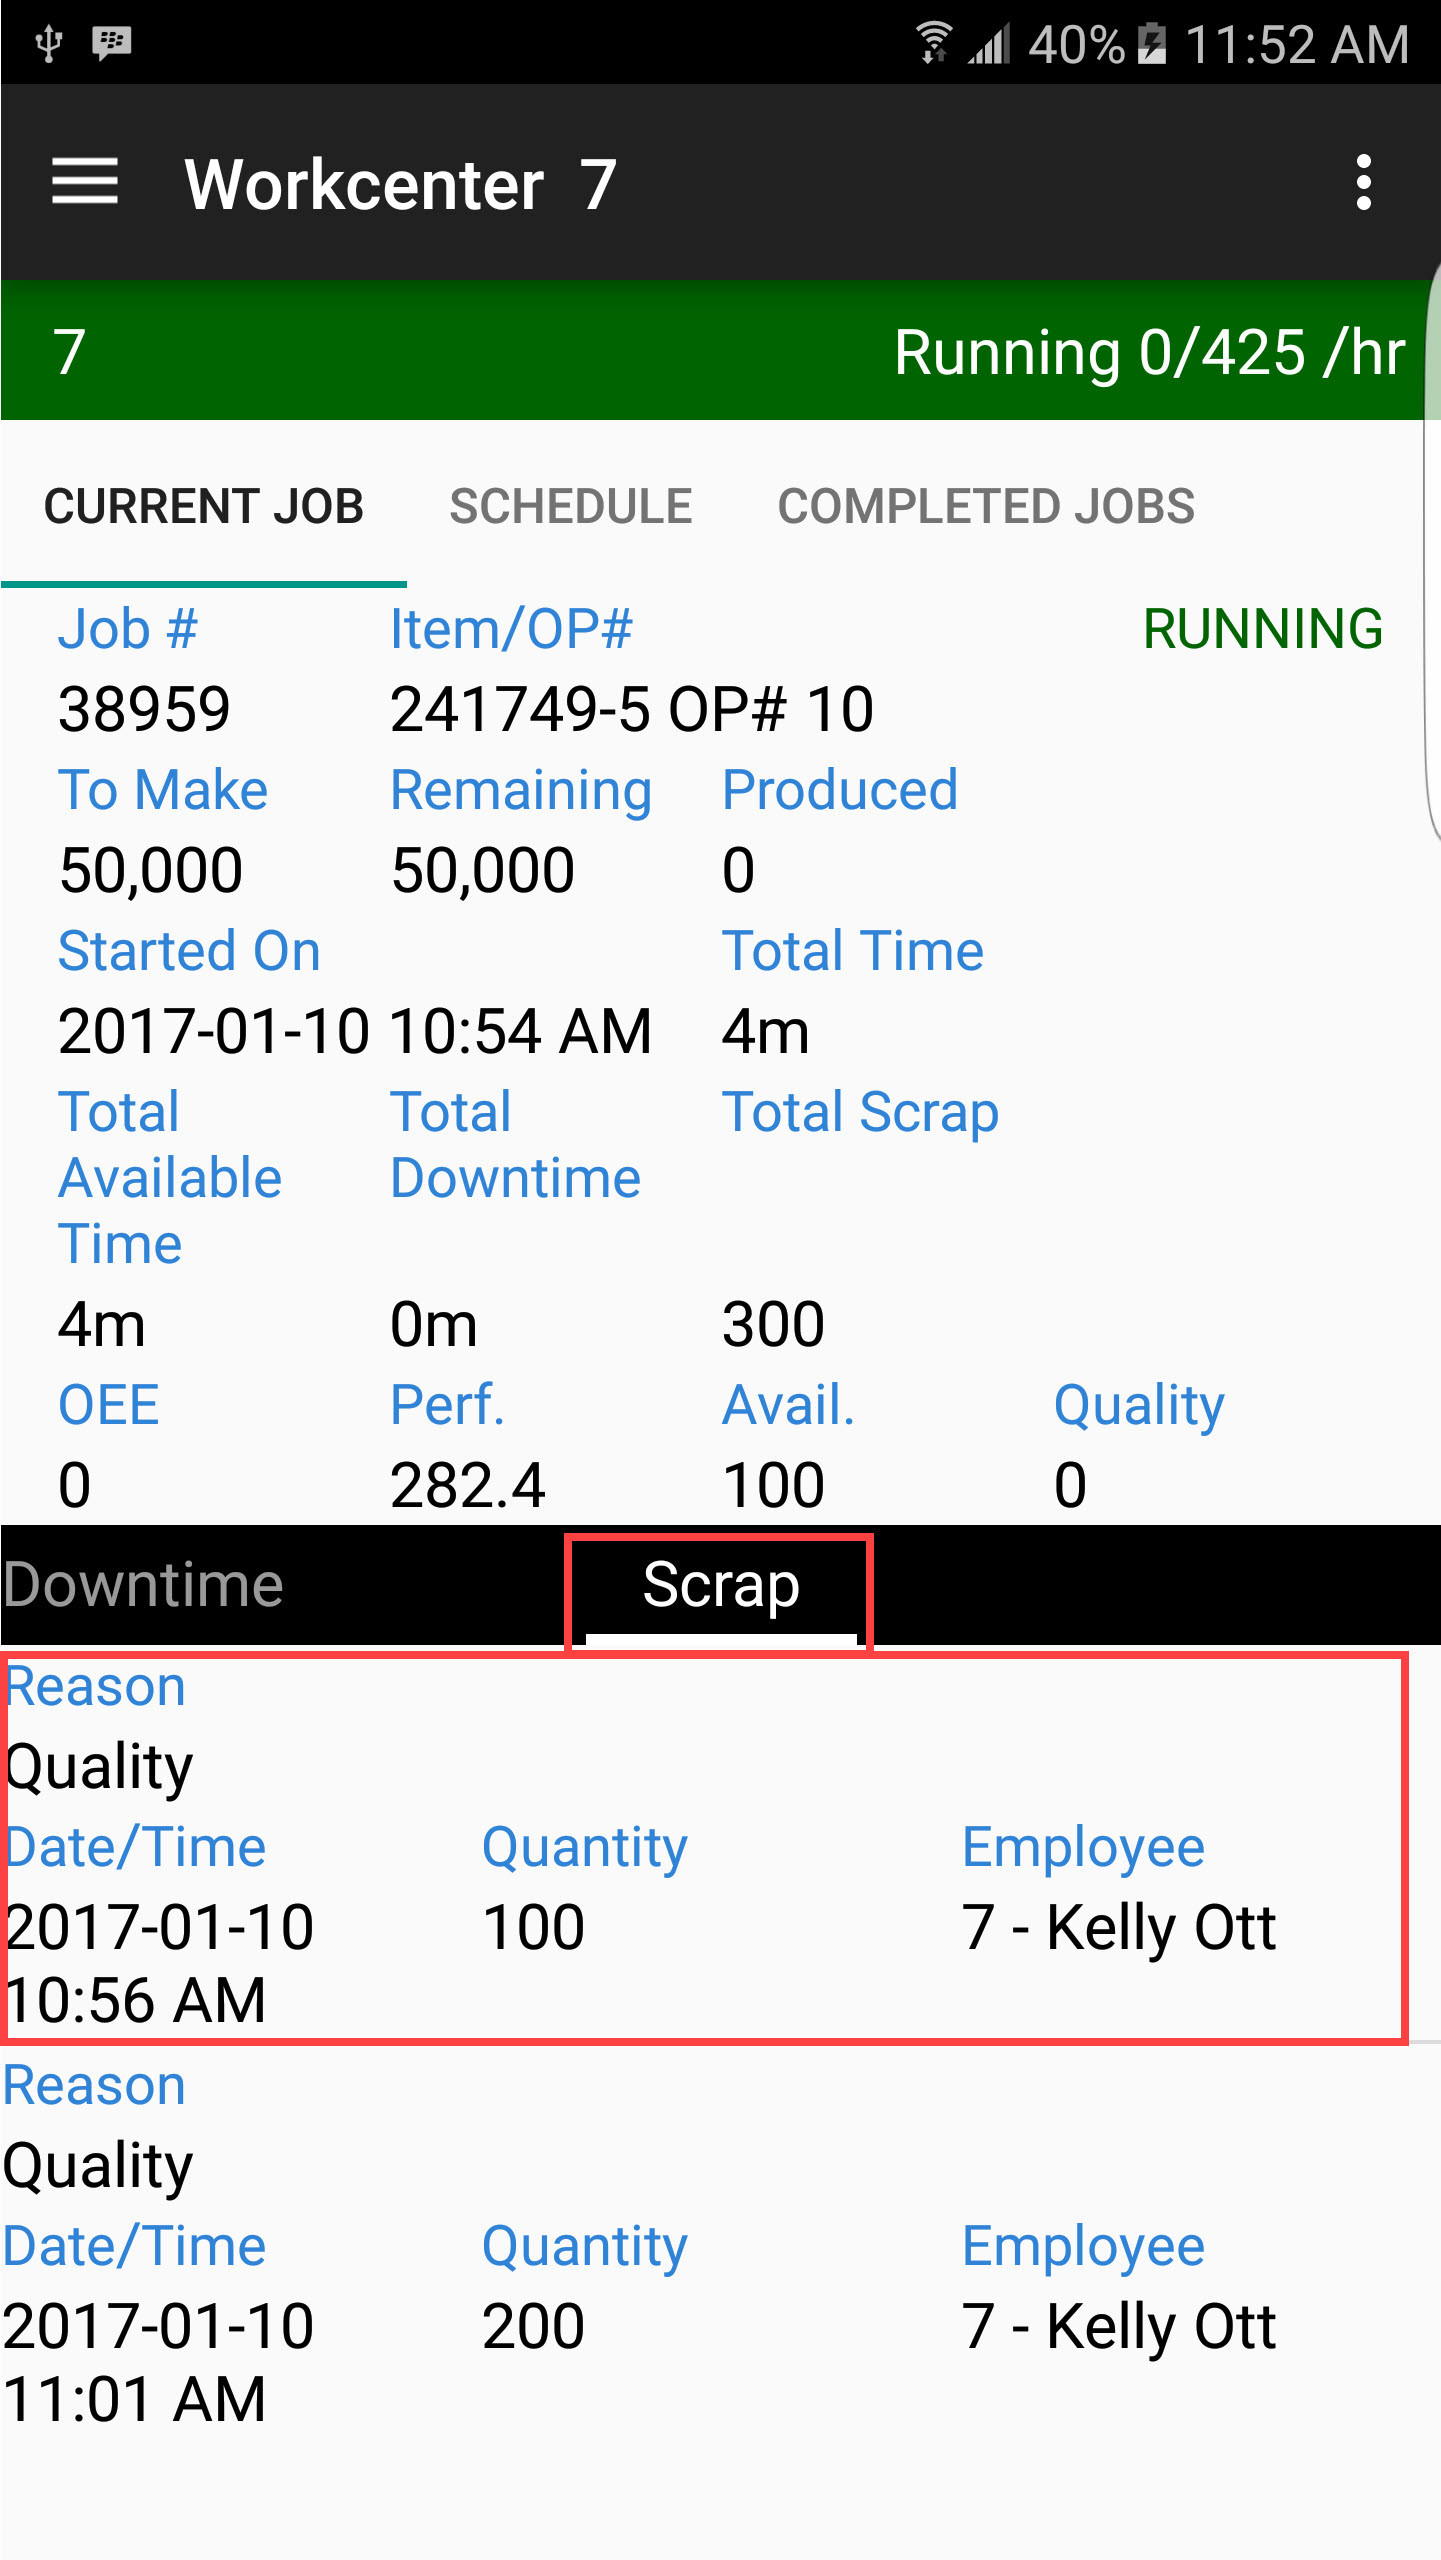
You can now view the recorded scrap on the Workcenter screen under Total Scrap or, by navigating to the Scrap section at the bottom of the Workcenter screen.
Recording Raw Material Scrap
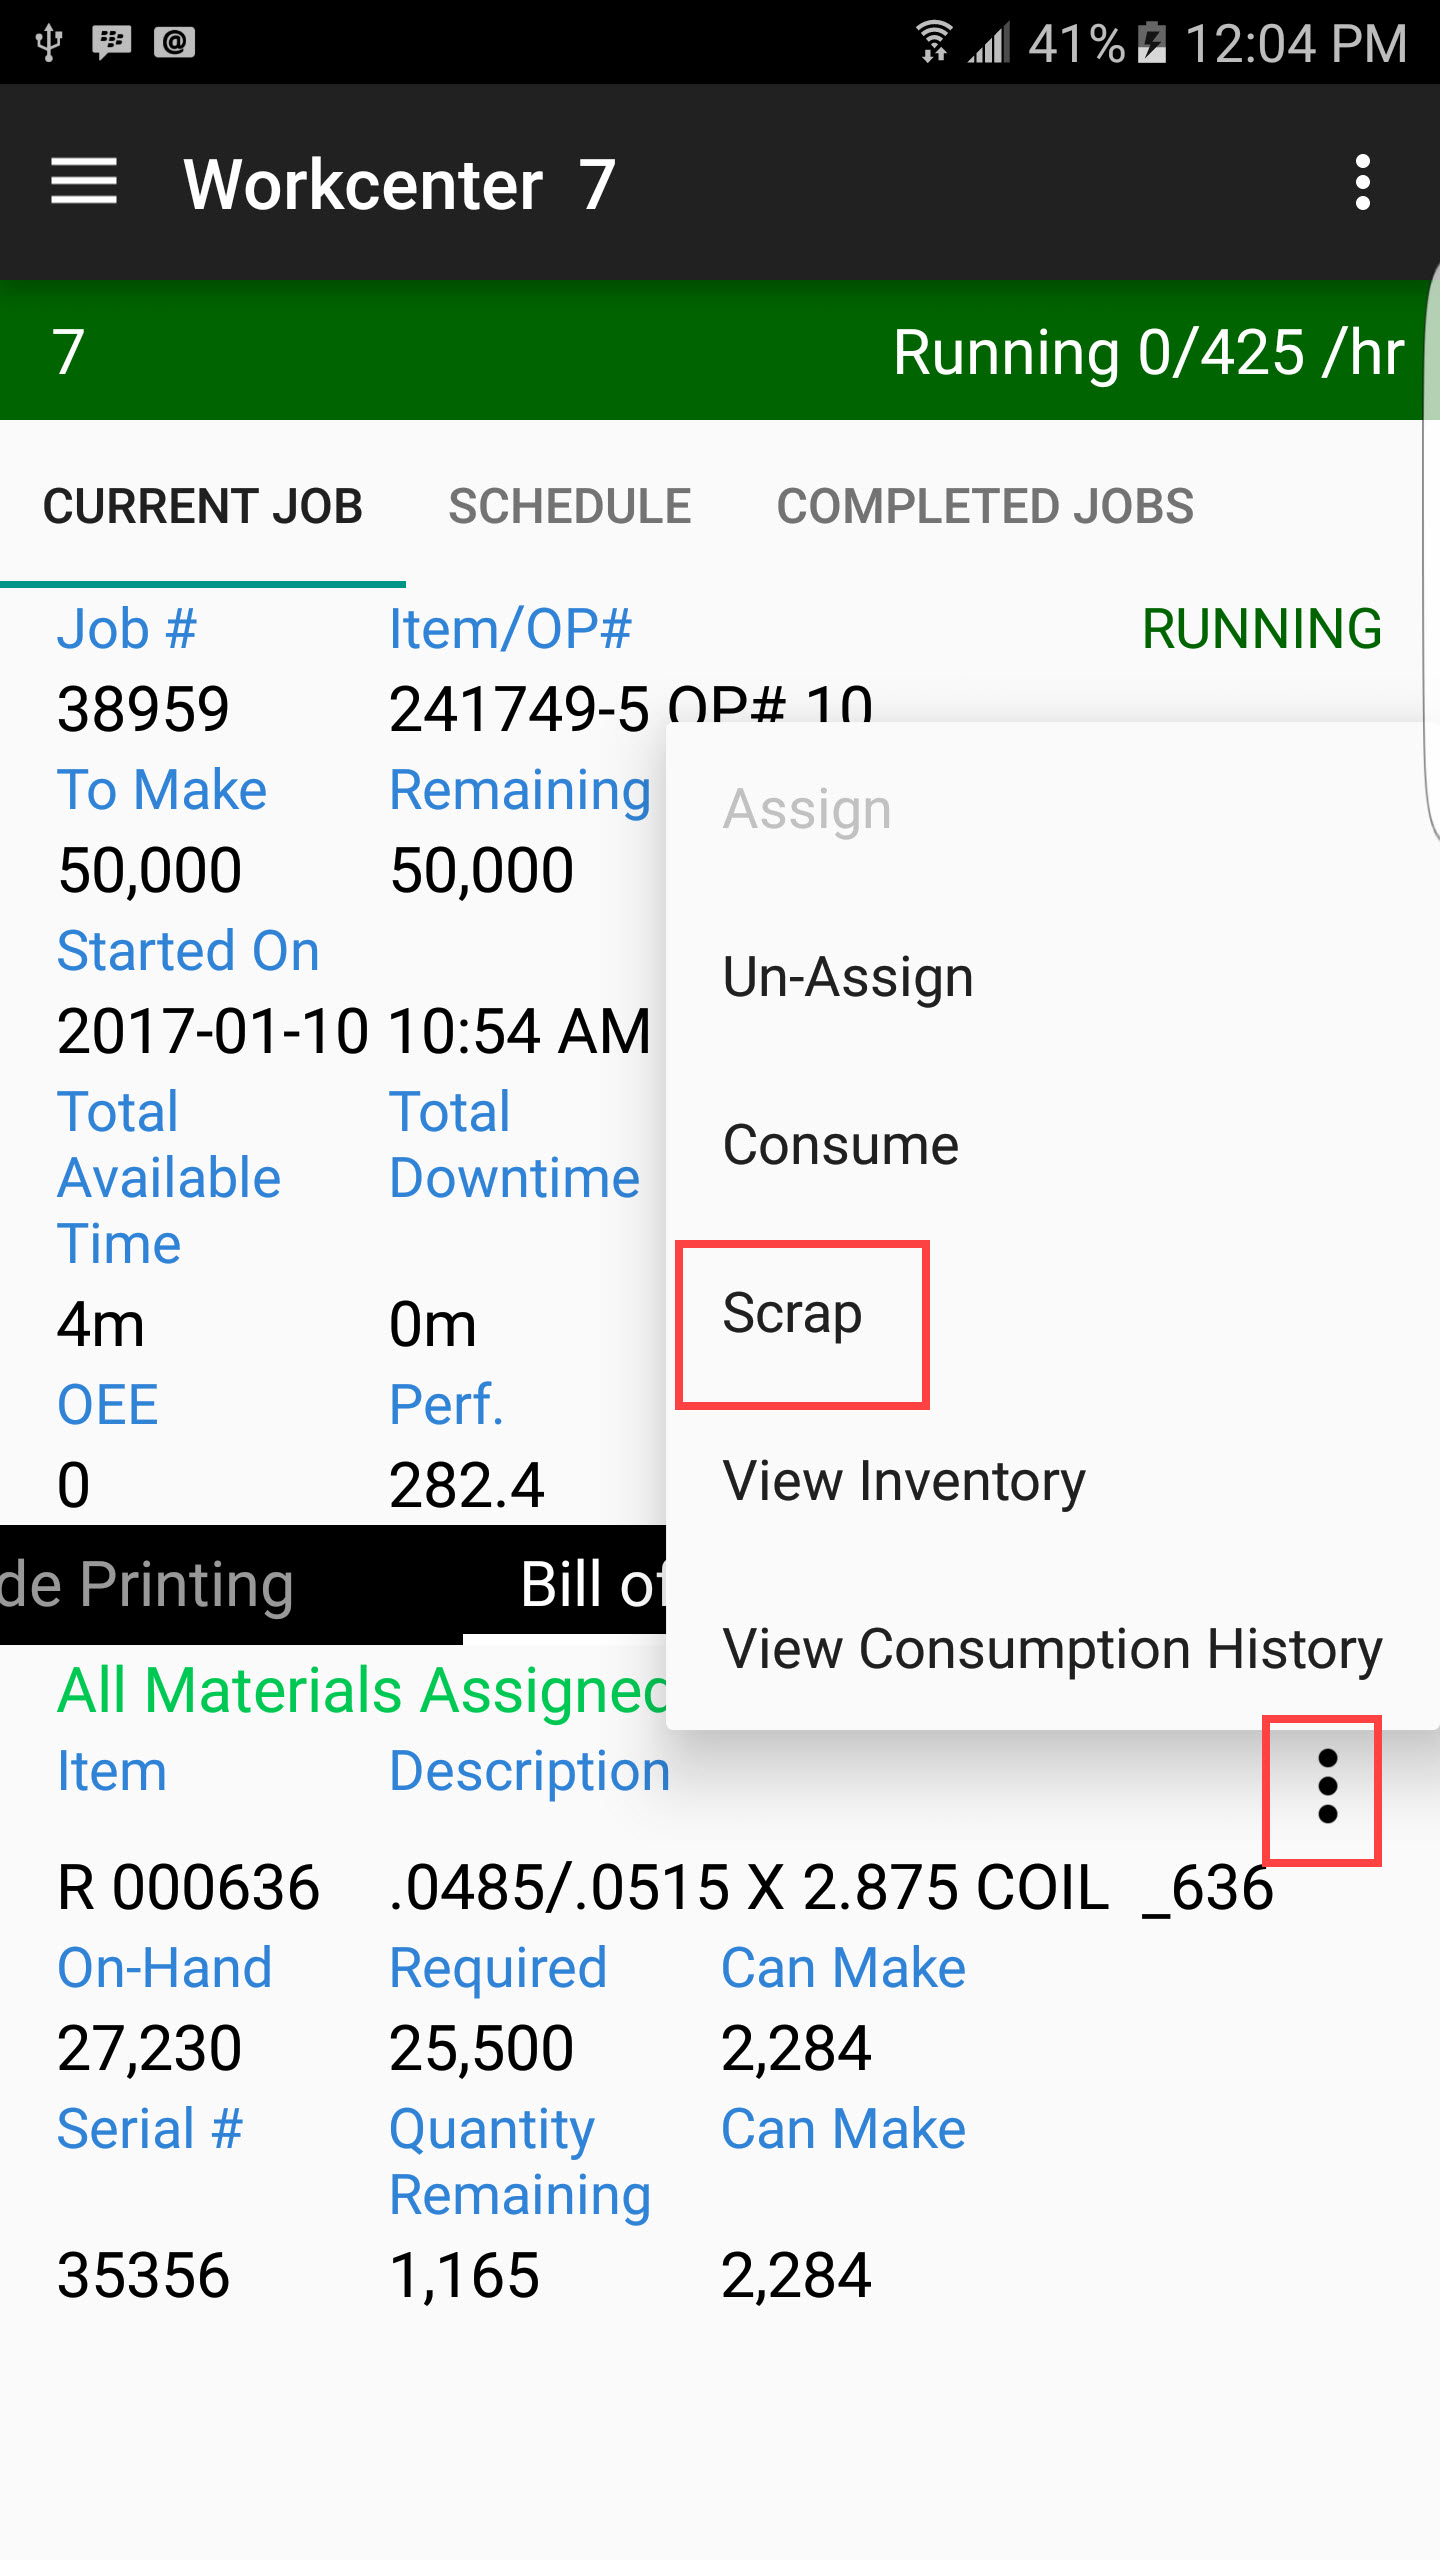
To record Raw Material scrap in Setup mode, swipe across the bottom of you screen until you find the Bill of Material section. Touch the Action menu for the Bill of Material item you wish to record scrap for, and select the Scrap option:
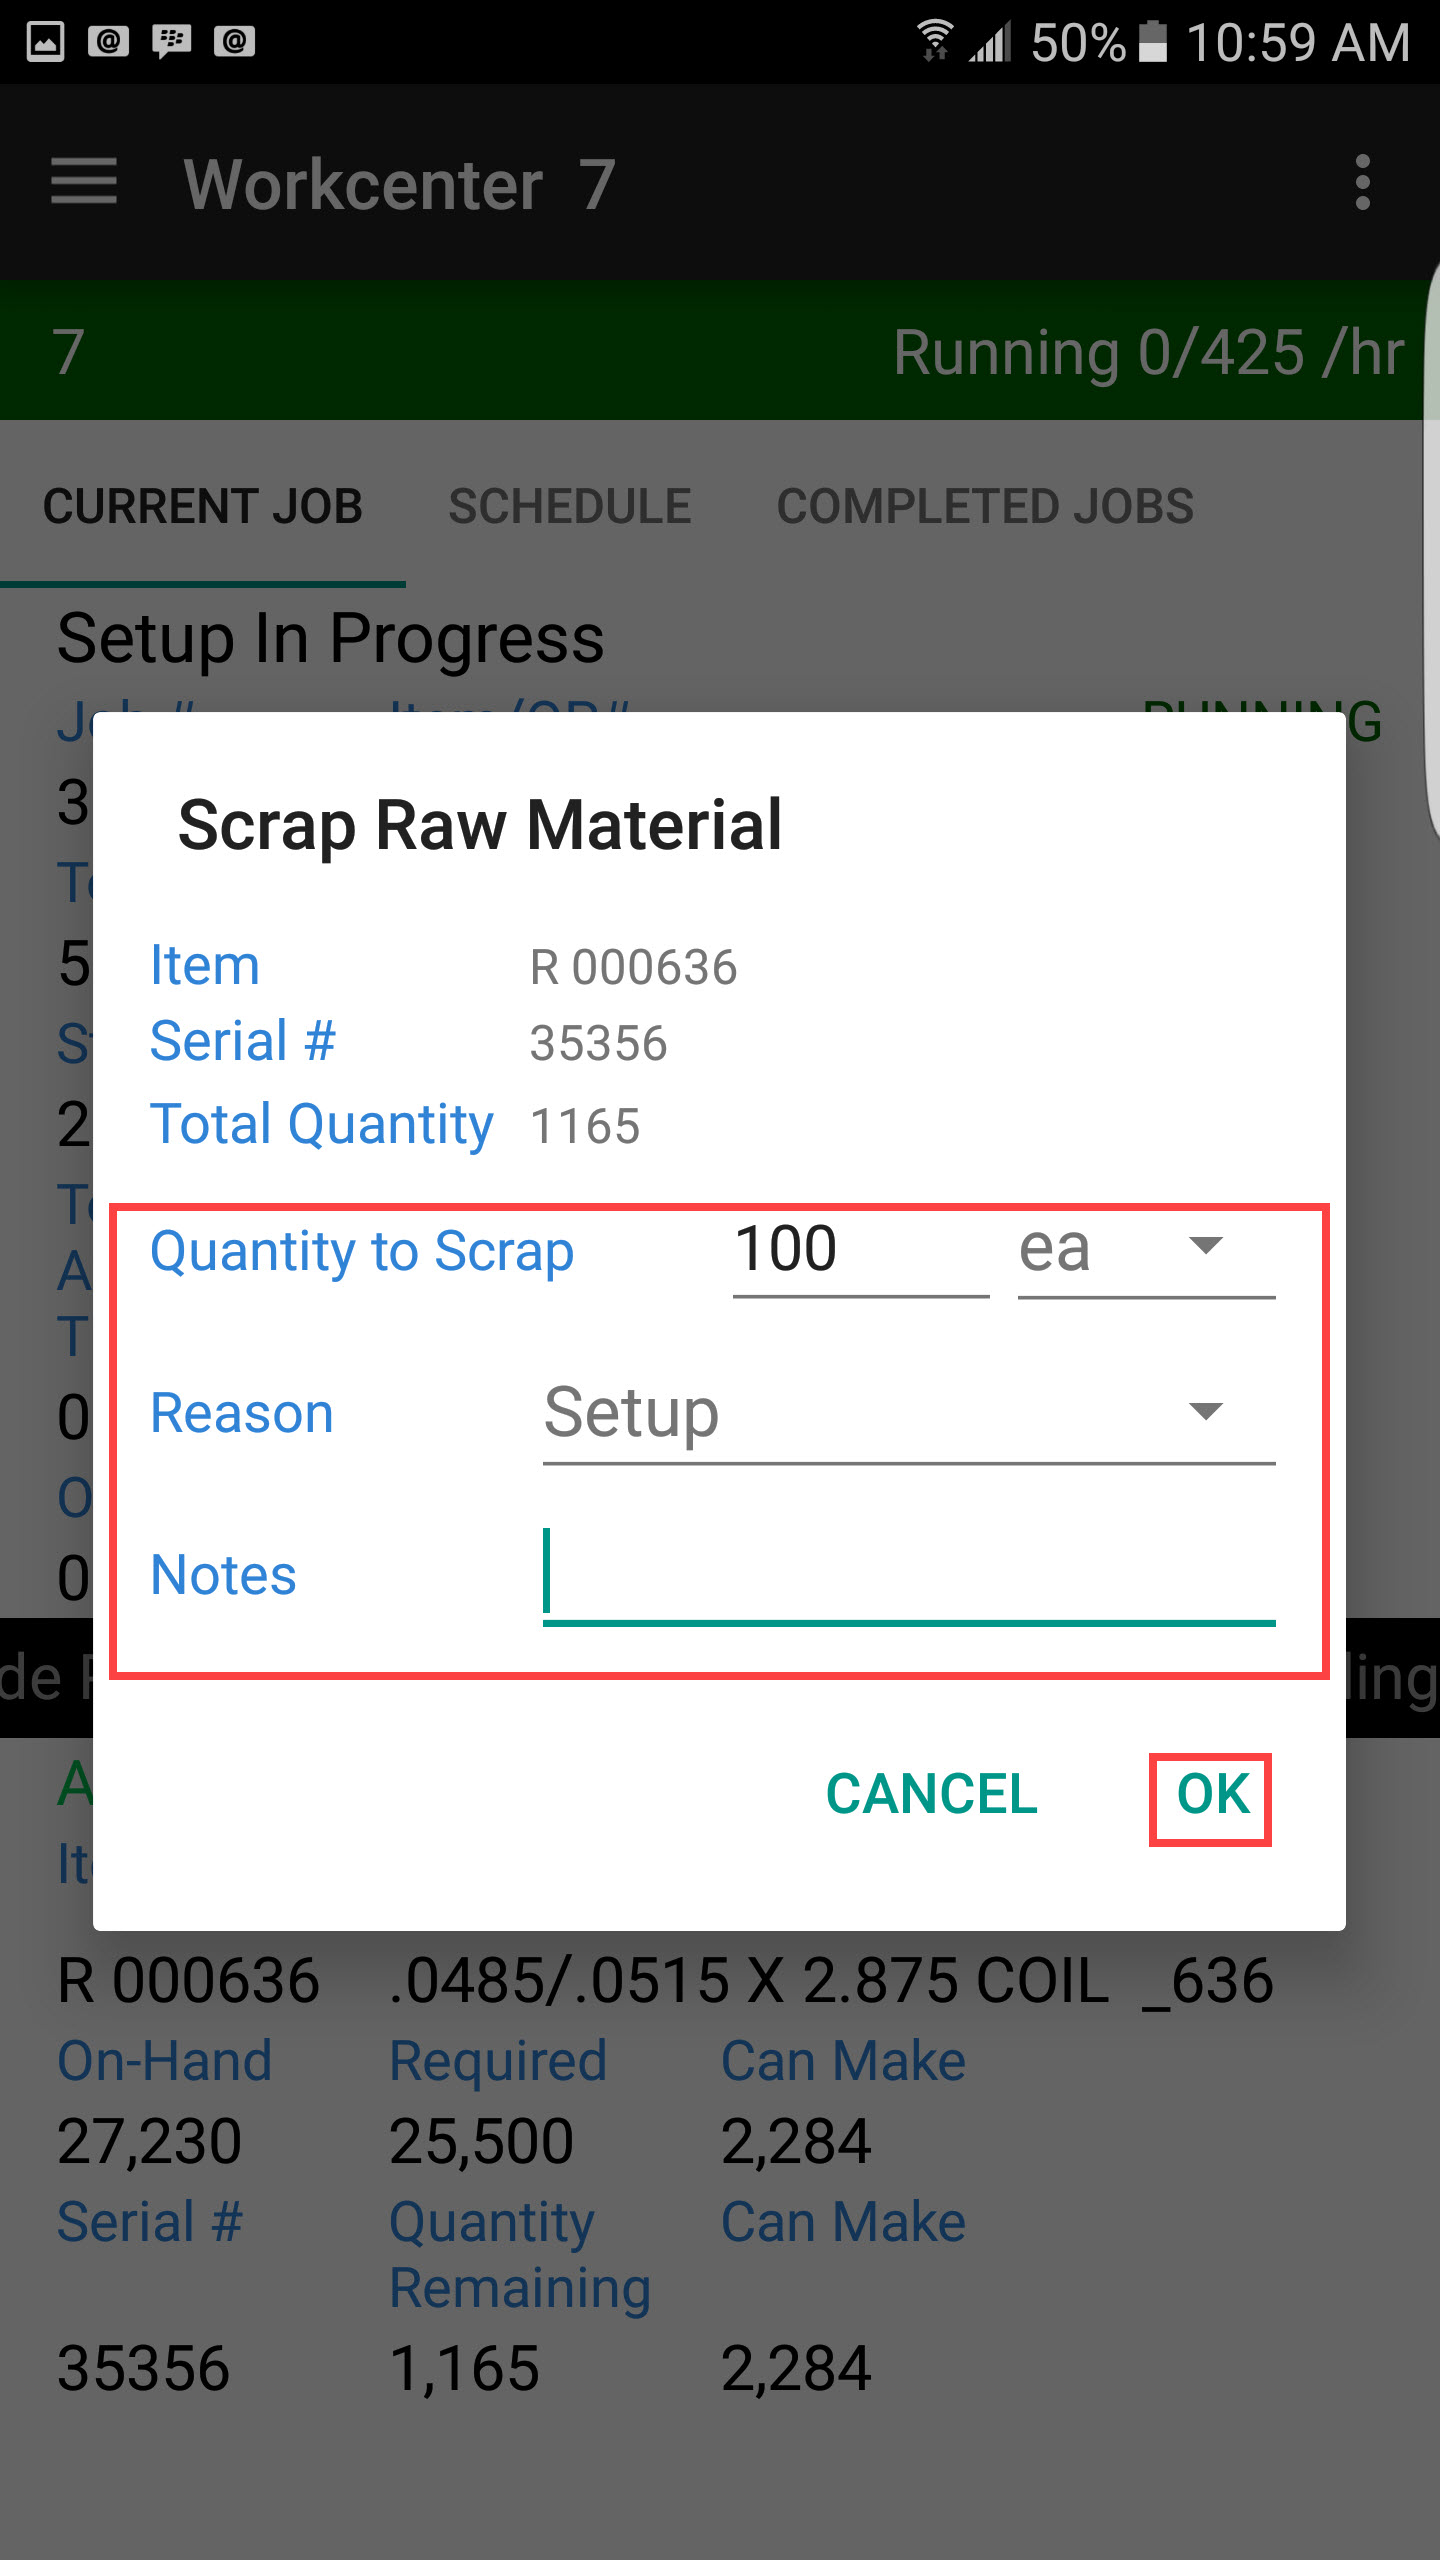
Fill out the scrap information including the Scrap Quantity, select a Reason, and enter in any Notes that you like:
Recording Scrap in Production Mode
Scrap can be recorded against Setup or Production in the ShopEdge system. Below explains how to record scrap in Production mode.
Recording WIP and Finished Good Scrap
To record scrap in Production mode, make sure you are logged in to a Workcenter as Production. Touch the Action menu at the top right of the screen.
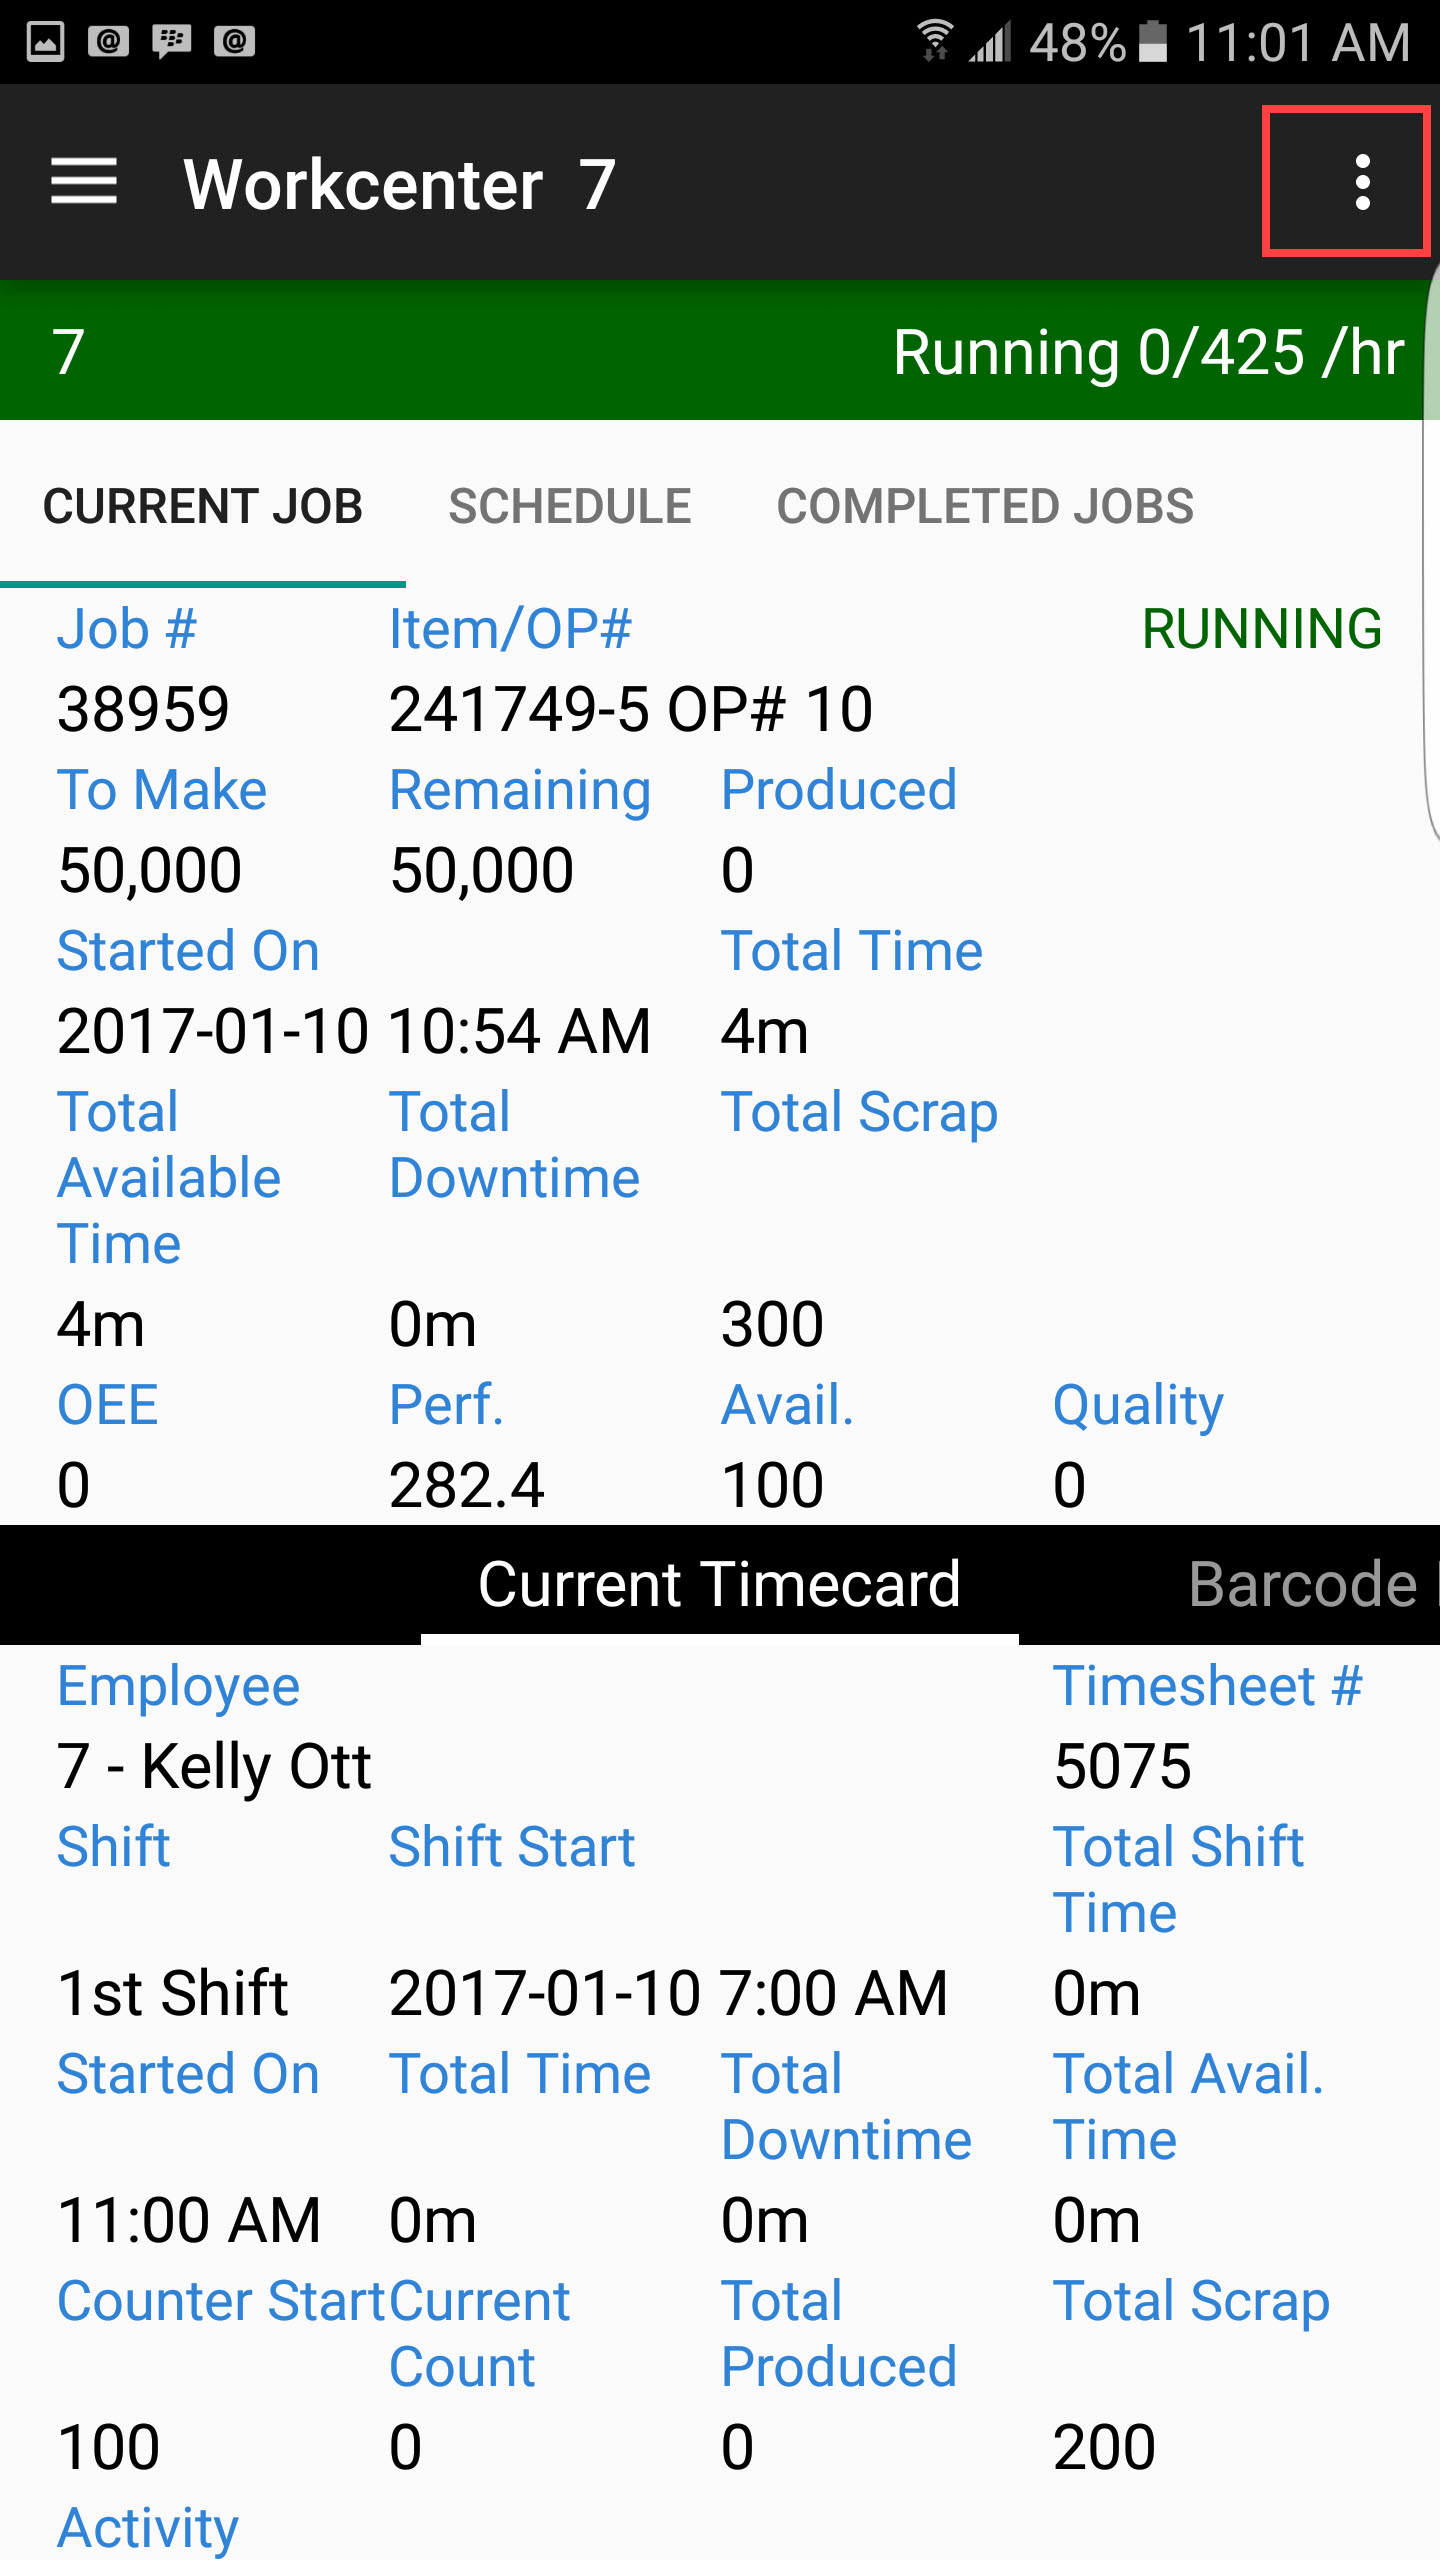
Select the Scrap option from the Action menu.

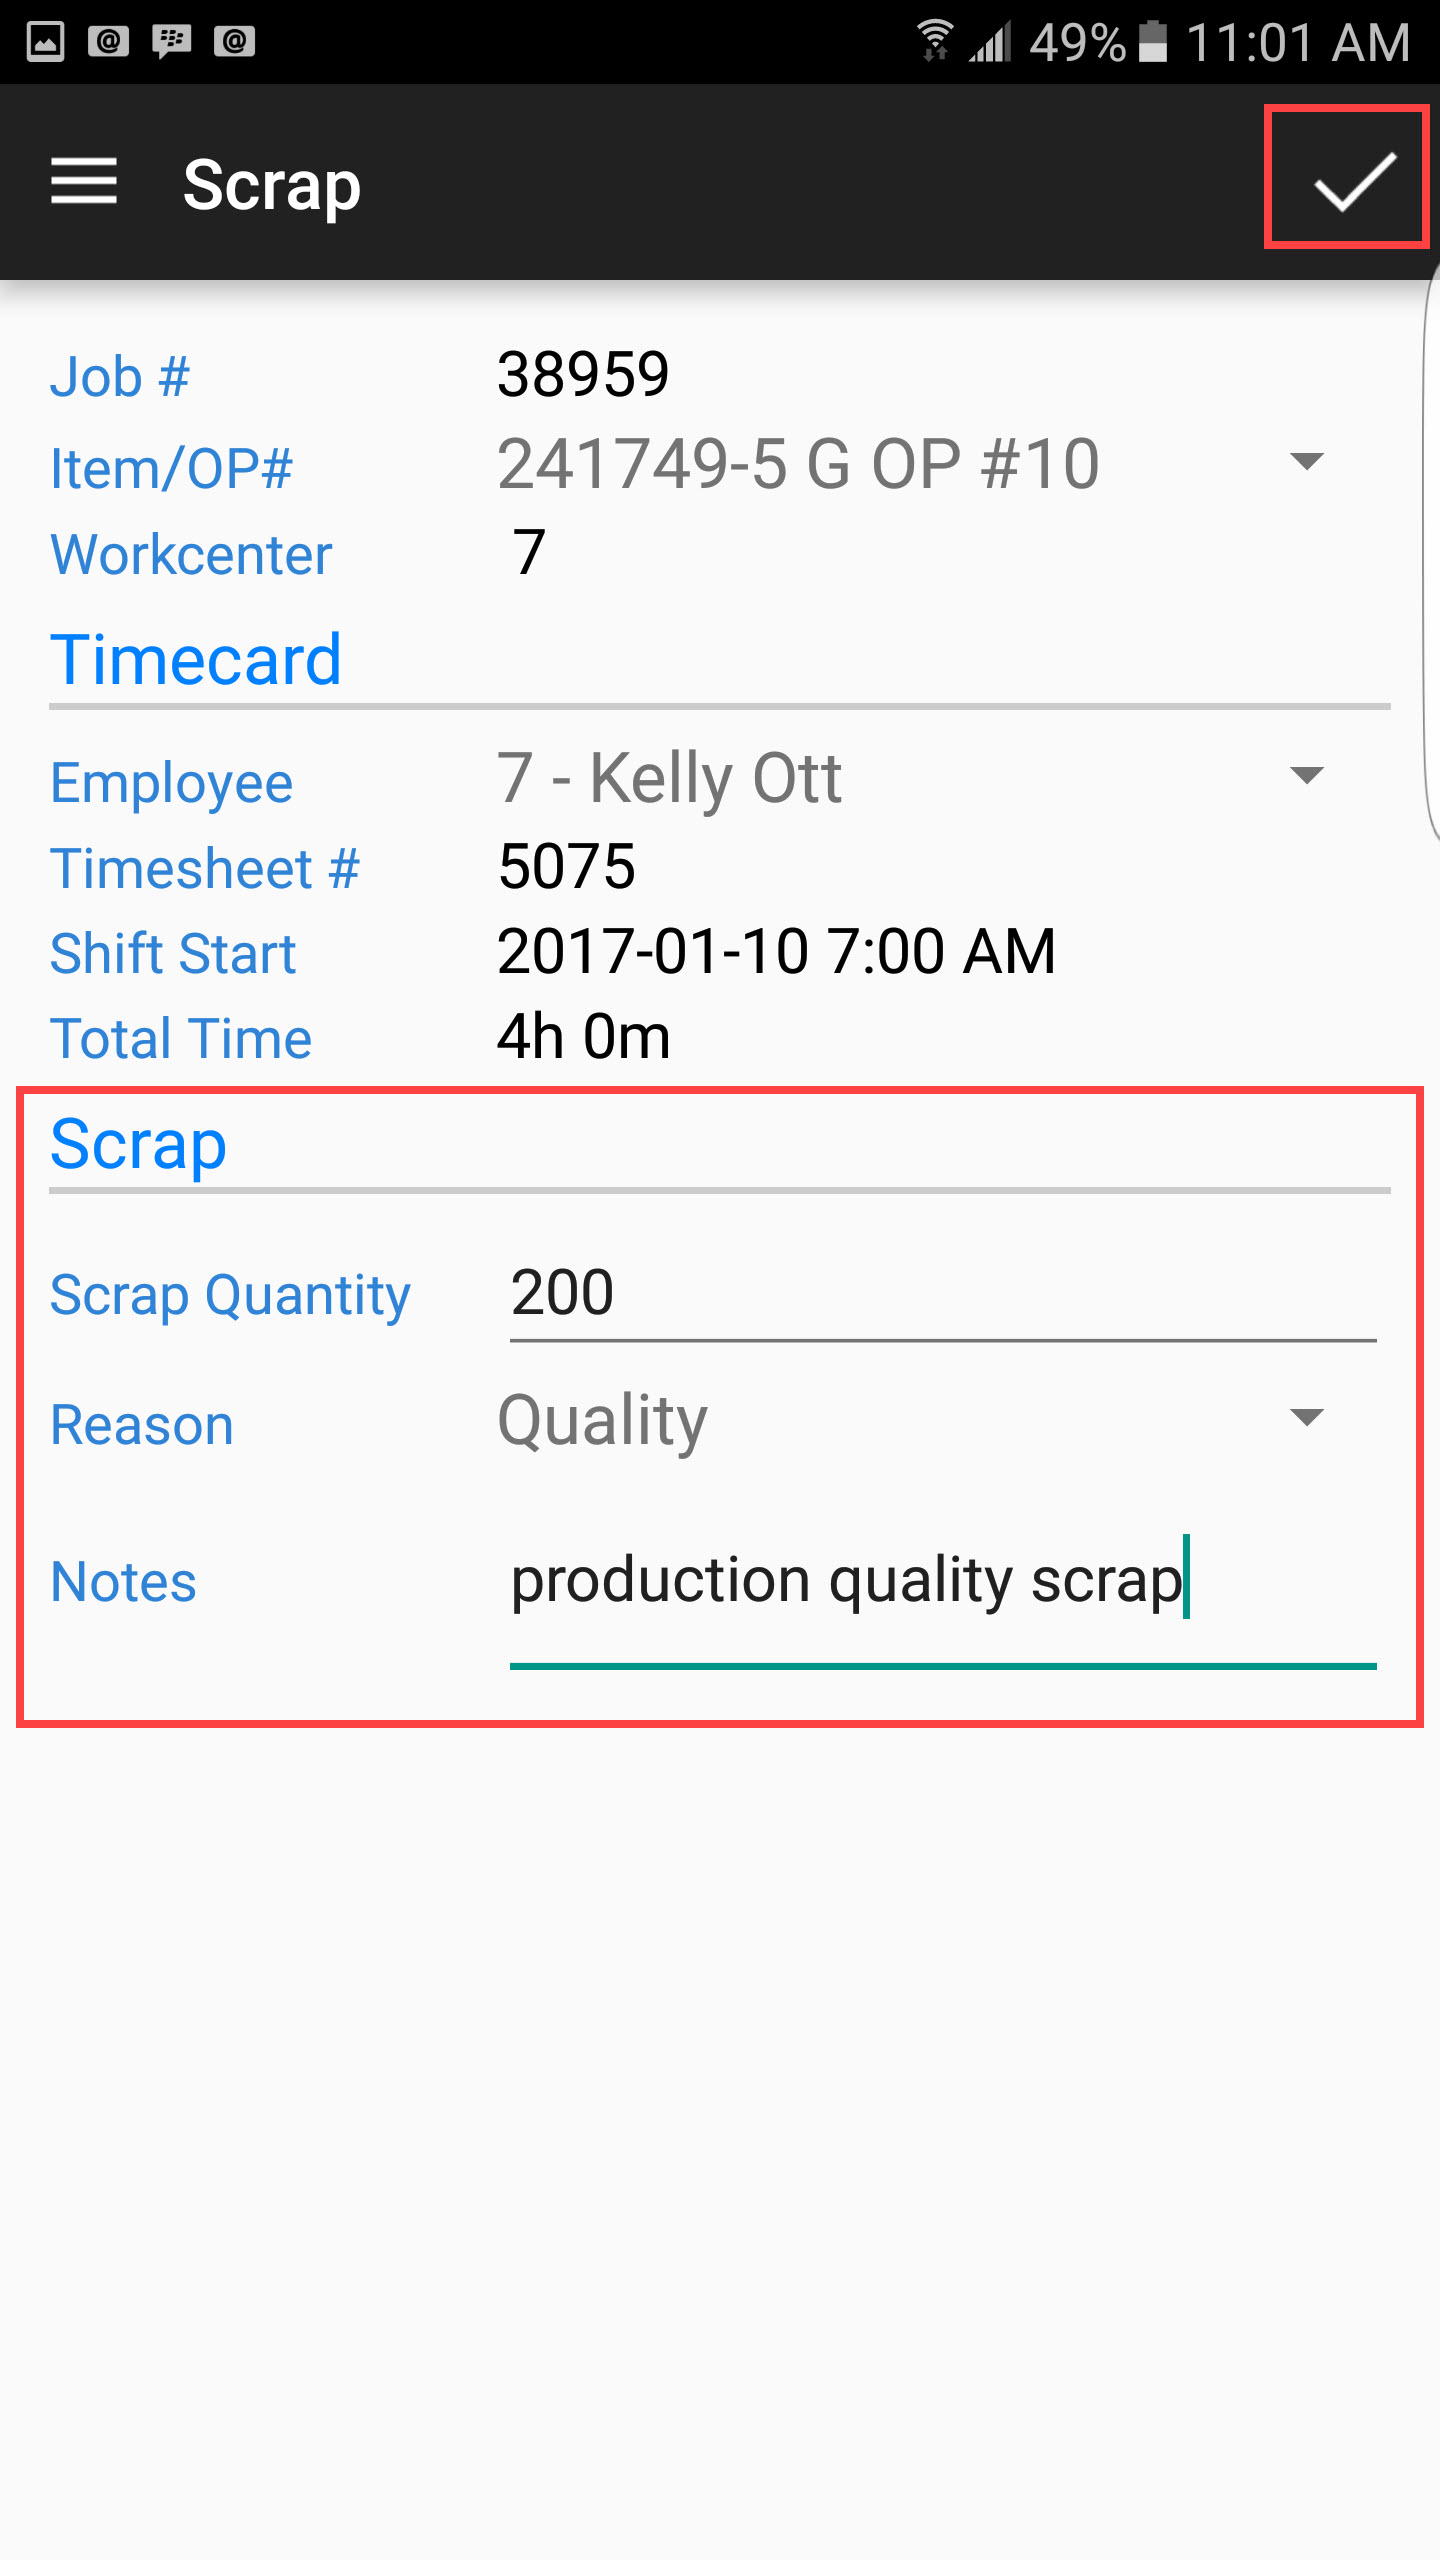
Fill out the scrap information including the Scrap Quantity, select a Reason, and enter in any Notes that you like:
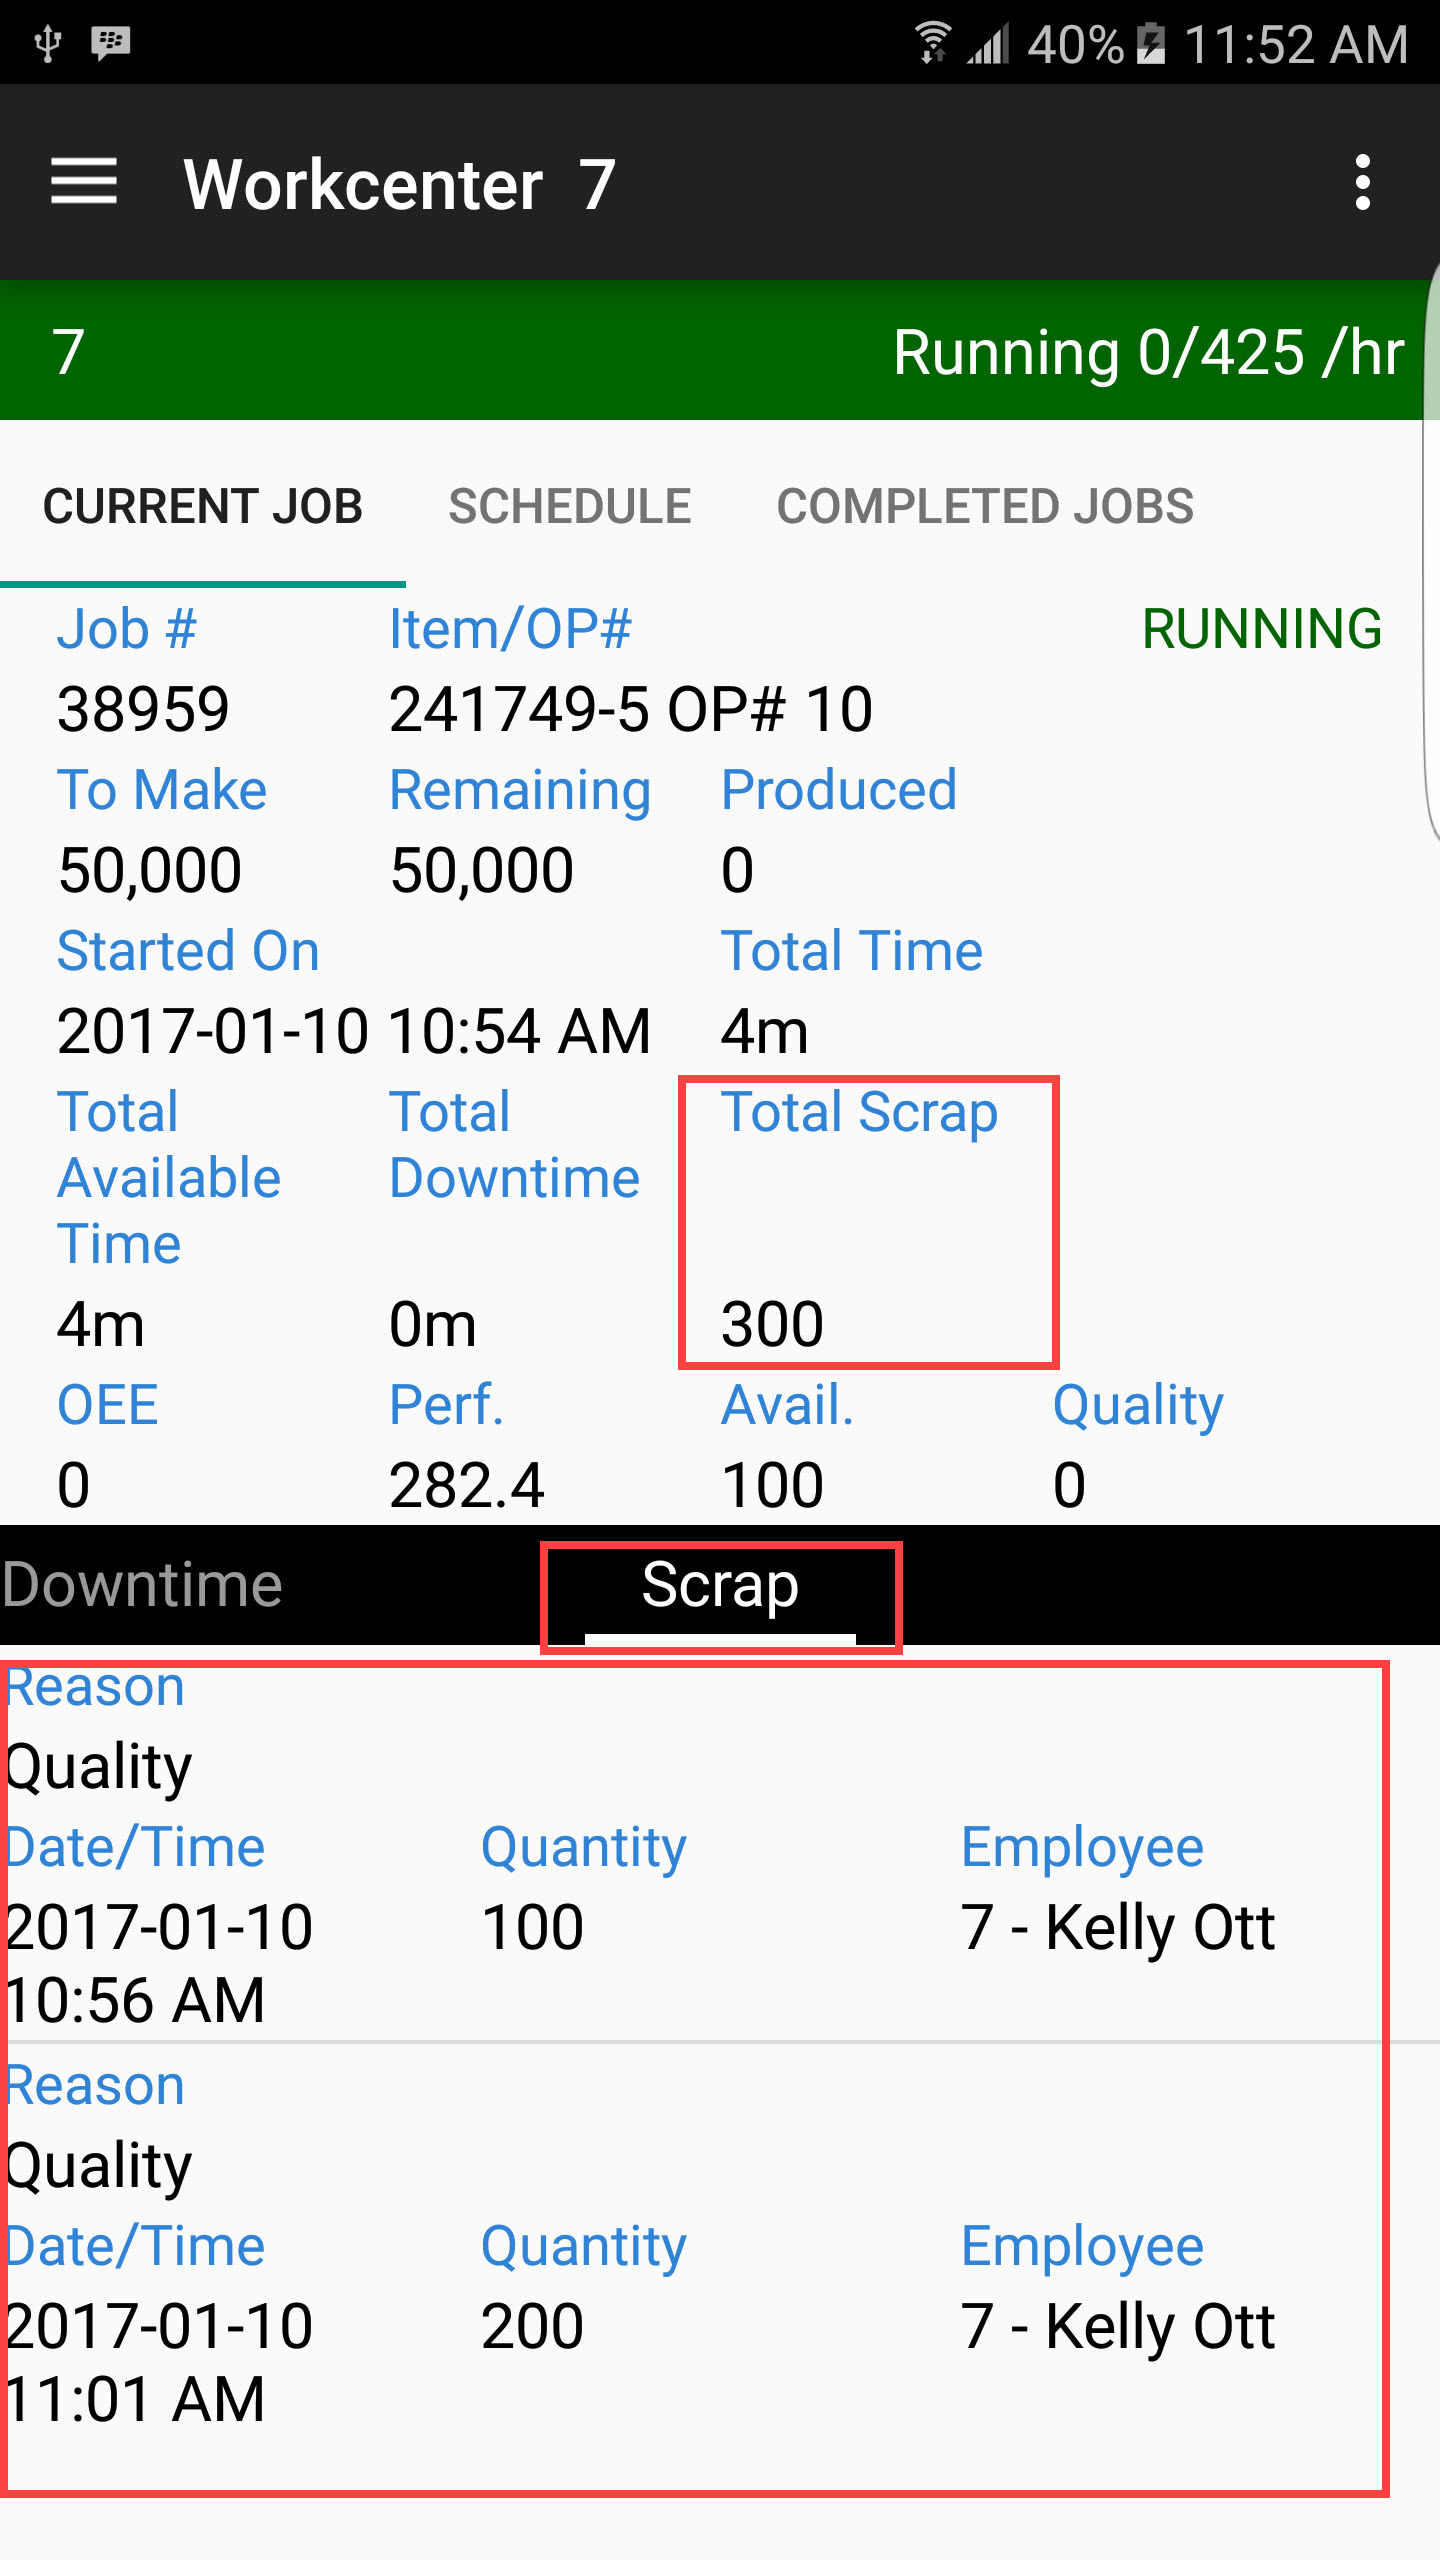
You can now view recorded scrap on the Workcenter screen under Total Scrap or, by navigating to the Scrap section at the bottom of the Workcenter screen:
Recording Raw Material Scrap
To record Raw Material scrap in Production mode, swipe across the bottom of you screen until you find the Bill of Material section. Touch the Action menu for the Bill of Material item you wish to record scrap for, and select the Scrap option:

Fill out the scrap information including the Scrap Quantity, select a Reason, and enter in any Notes that you like:

Viewing Material in Inventory
Viewing Material Consumption History
Attachments Tab
Tooling Tab
Timecards Tab
Downtime Tab
Scrap Tab
Pictures Tab
Notes Tab
Container Tab
Signing off a Job
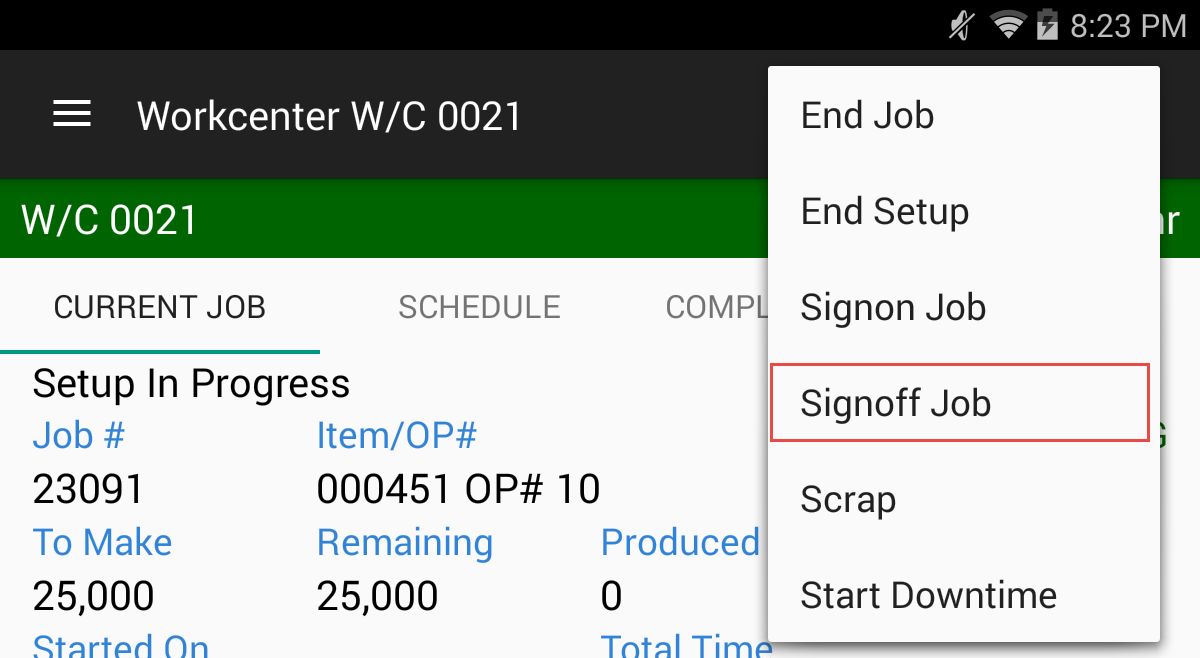
To sign off the job, open the action menu for the running job, and touch Signoff Job from the action menu:
The Signoff Job screen will display:
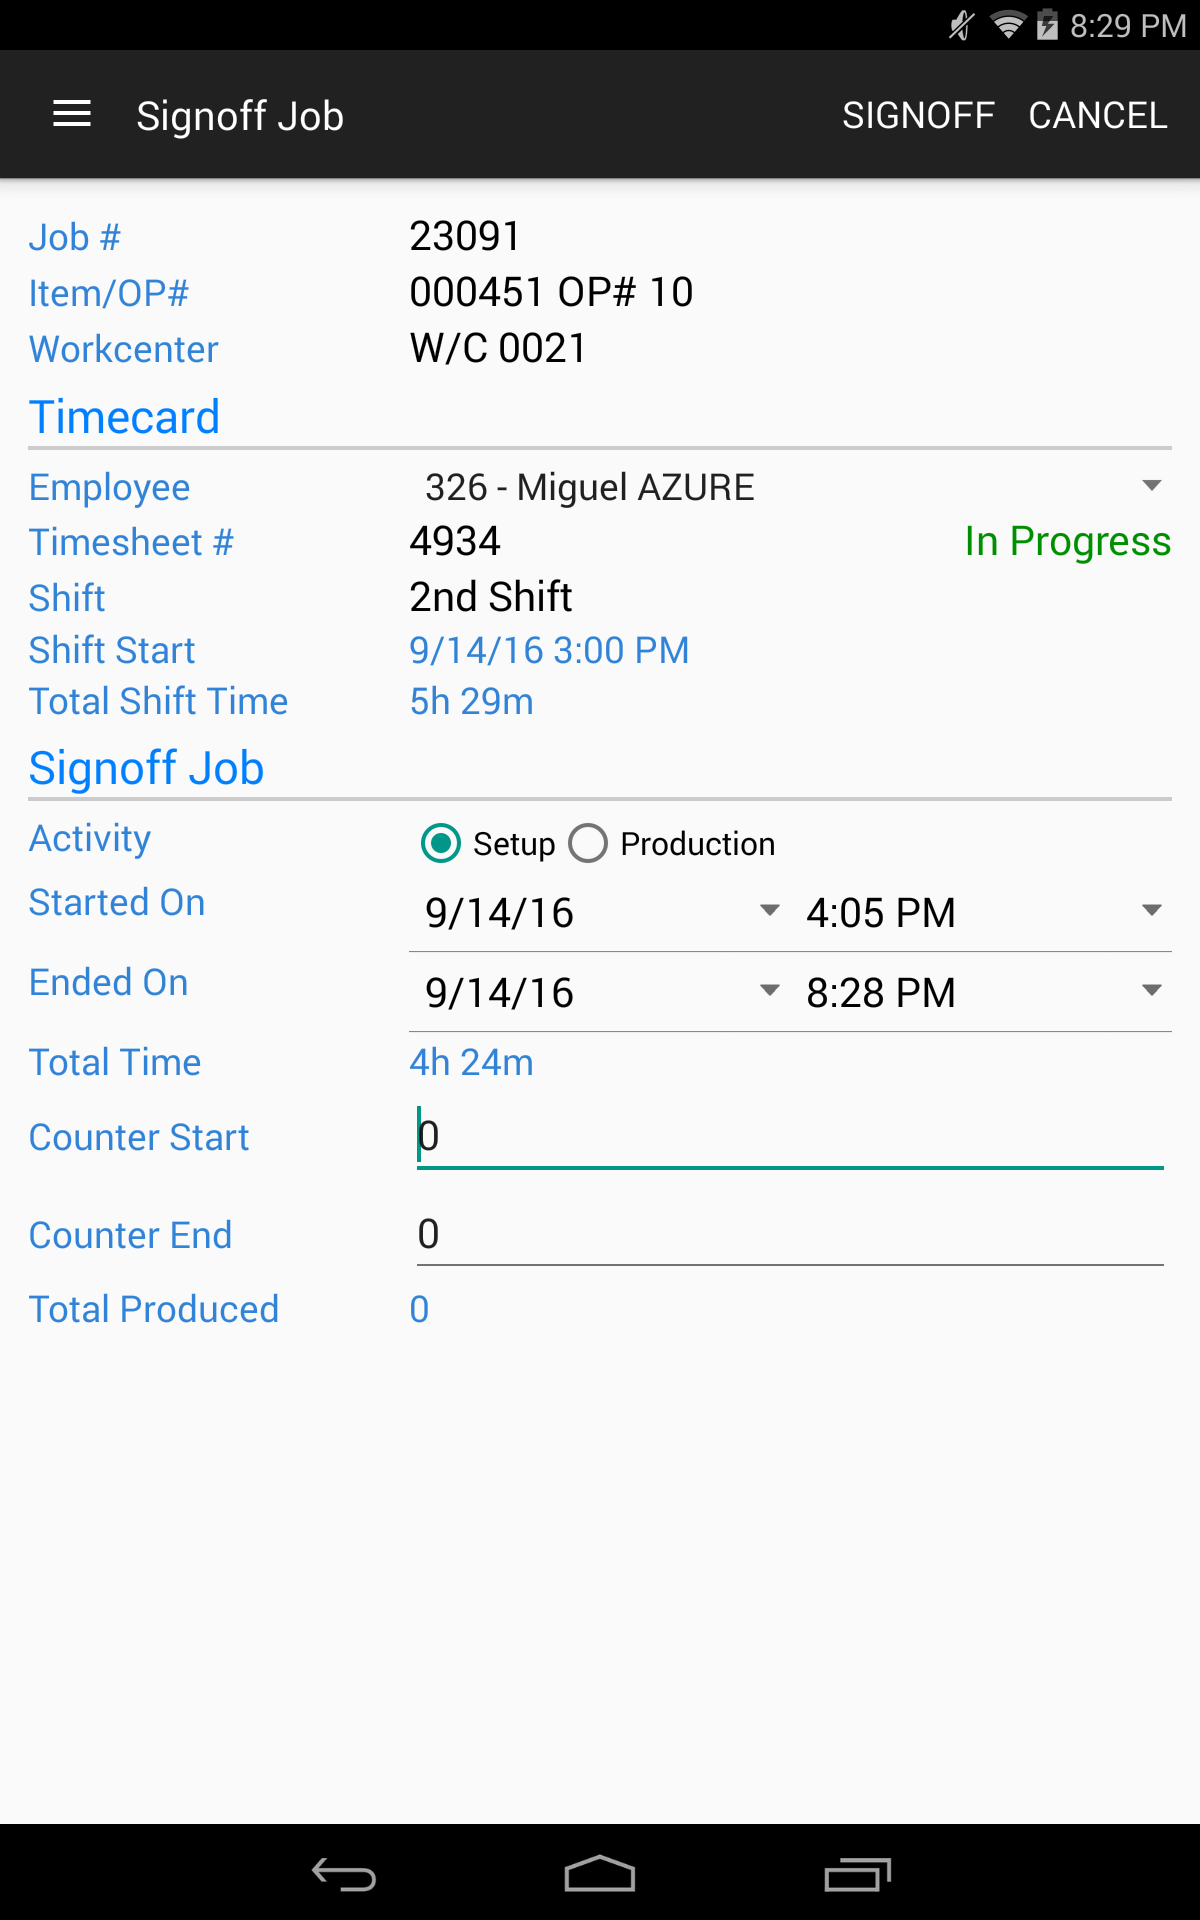
Confirm that the correct job is selected, and then complete the Signoff Job information:
- Activity - A read-only value that shows the activity for the timecard. One of Setup or Production, depending on the mode of the job when the timecard was started.
- Started On - The date and time of when the employee was signed into the job. If it is incorrect, it can be fixed here since the value is editable.
- Ended On - The date and time of when the employee signed out of the job. It defaults to the current date and time, but can be changed to any value.
- Total Time - A read-only value that is calculated based on the Ended On minus the Started On.
- Counter Start - The starting counter value for the timecard. It is editable.
- Counter End - The ending counter value for the timecard. It is an editable value. For workcenters connected via the PLC Integration module, it is a read-only value that comes directly from the workcenter’s PLC.
- Total Produced - A computed display-only value that is calculated based on the Counter End minus the Counter Start value.
Once the Signoff Job information is completed, touch OK to sign off the job.
End Setup
To end setup on a job that is in setup mode, open the action menu for the running job. Touch End Setup from the action menu:
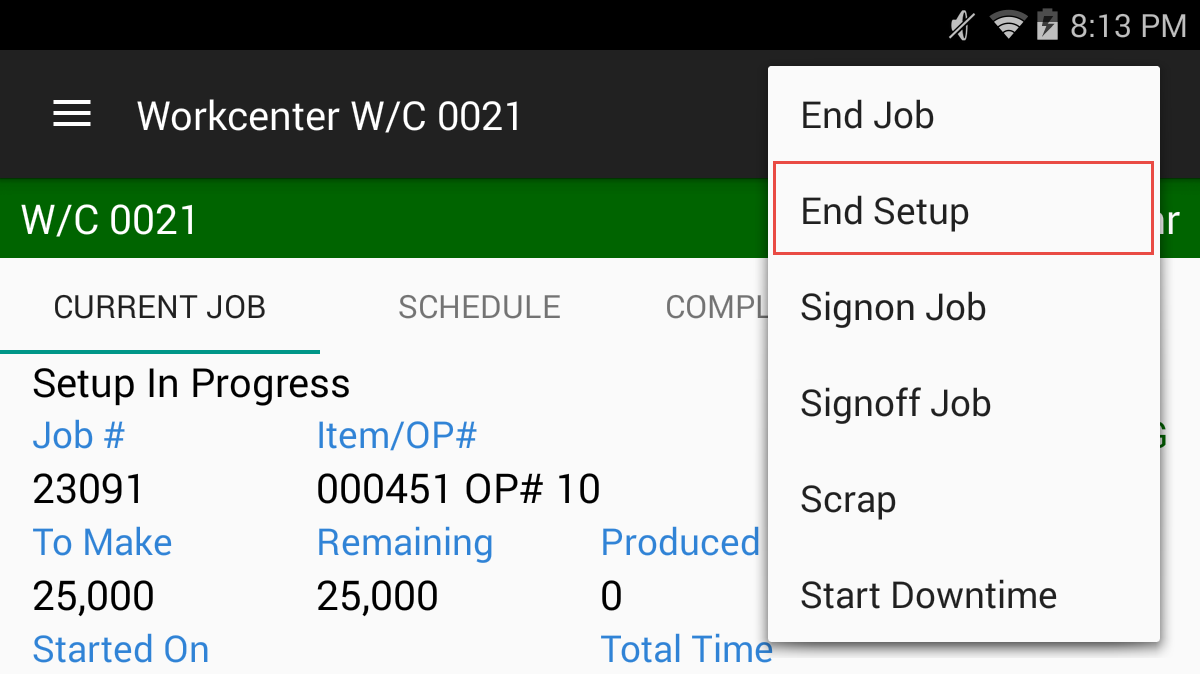
The End Setup screen will display:
Note
You cannot end setup if you, or another user, are currently signed into the job. You will get a warning message:
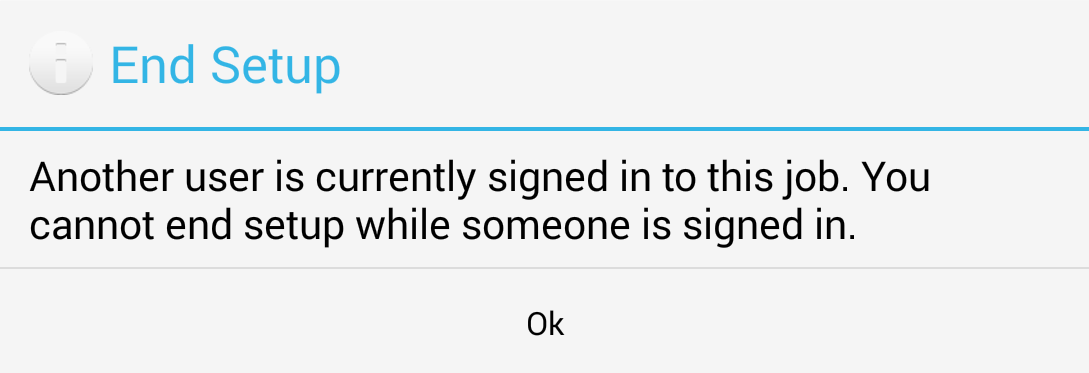
You must first sign-out of the job before you can end setup.
Ending a Job
Current Job
Workcenter Events
Starting a Timecard
To start a time card in ShopEdge, go to Timecard, under Production. This will open the new Timecard screen:
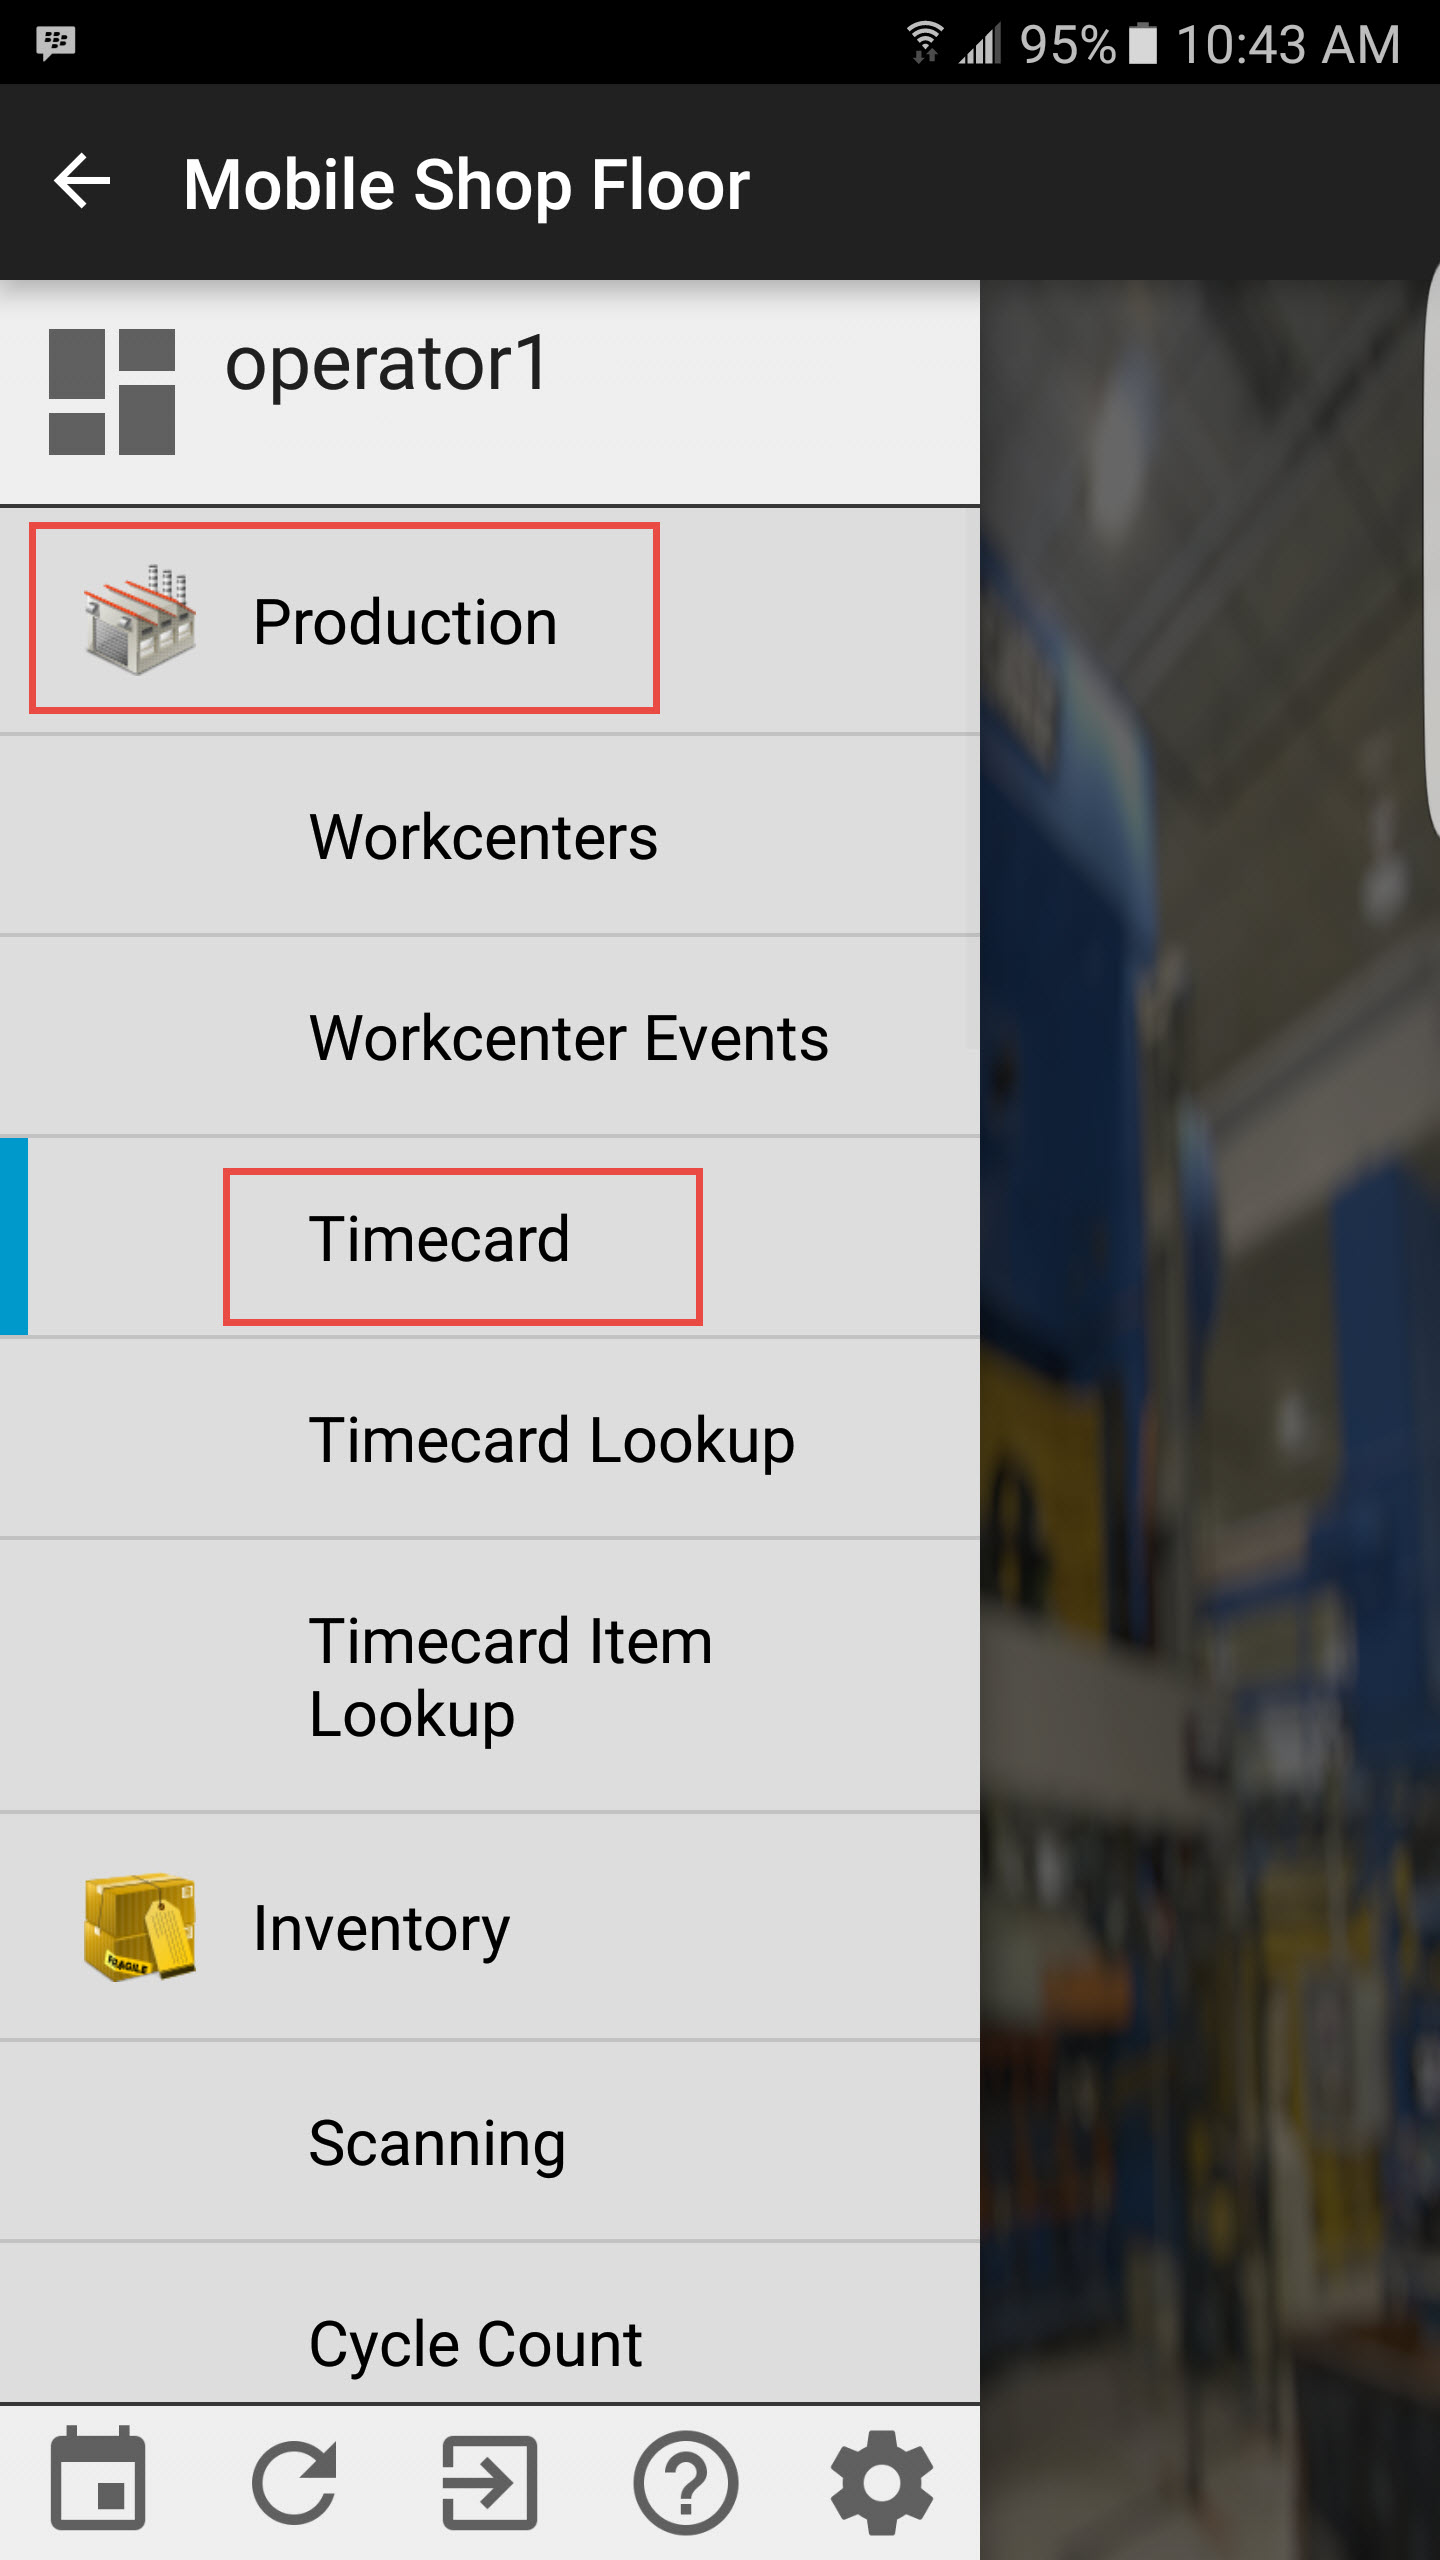
If you do not have a timecard started, the system will let you know. To start a new timecard, click on the action menu at the top right side of the screen, and select “Start Shift”:
Verify the employee and shift information is correct, and touch OK:
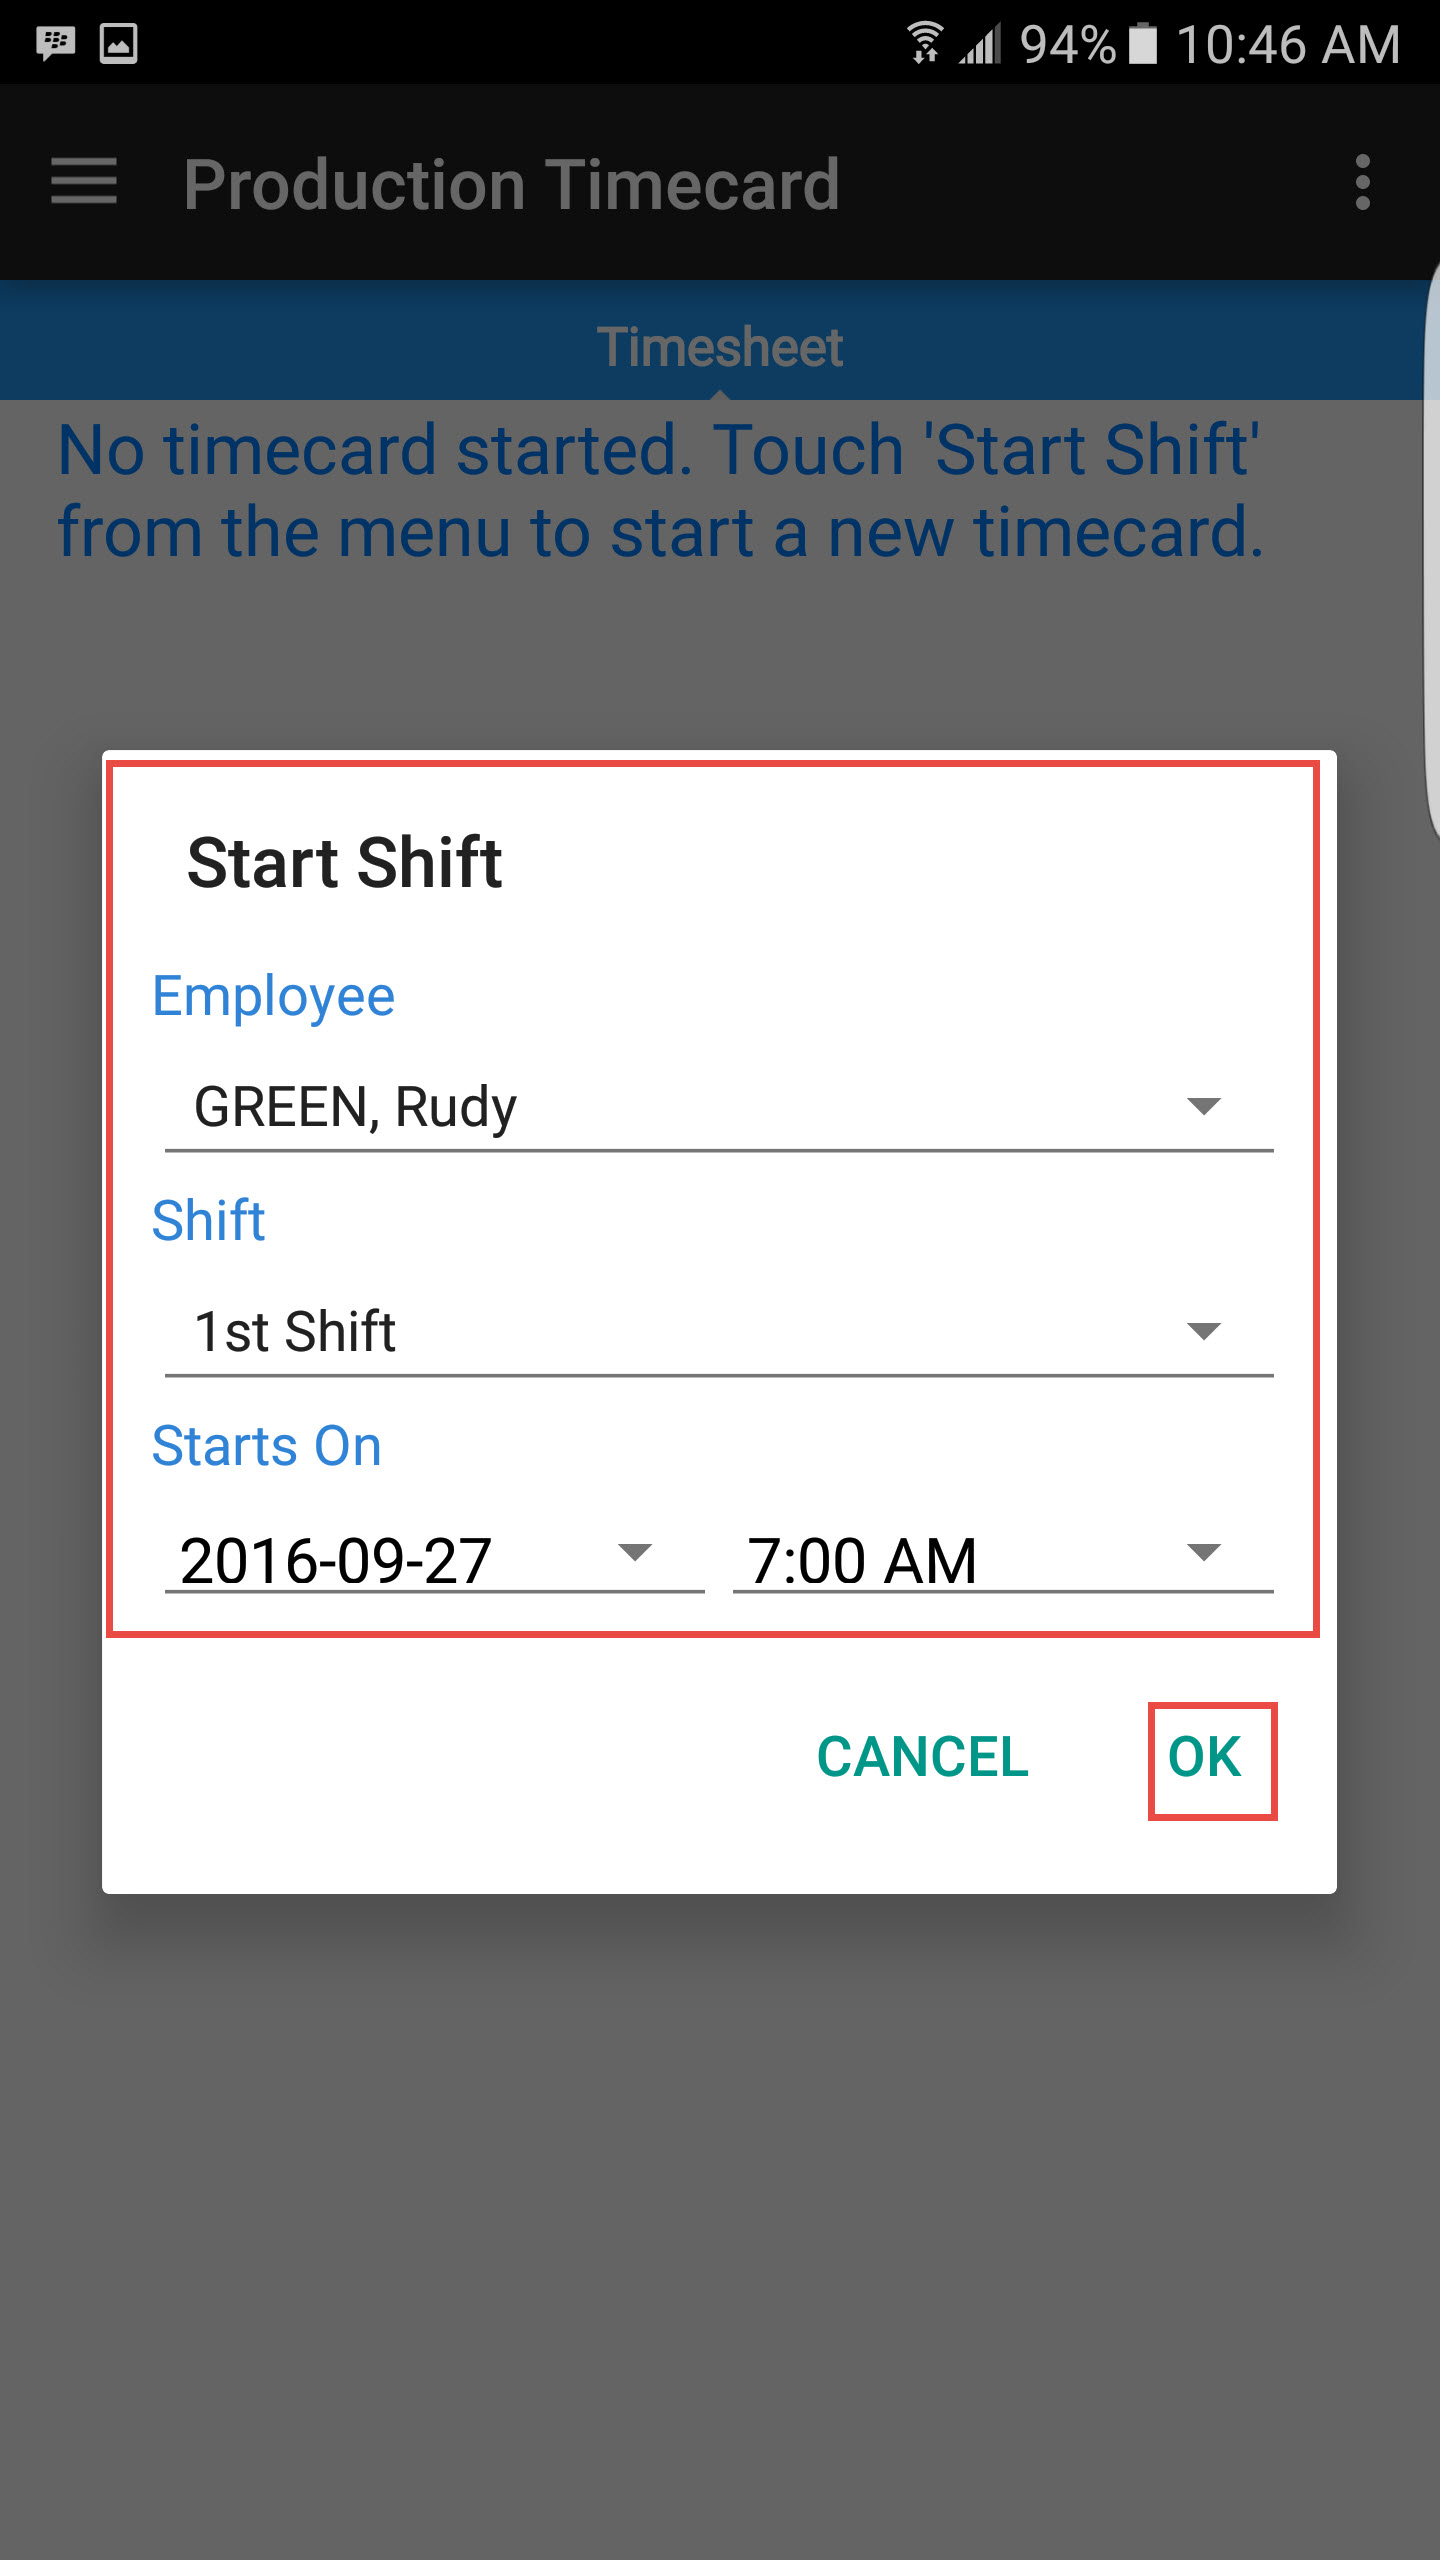
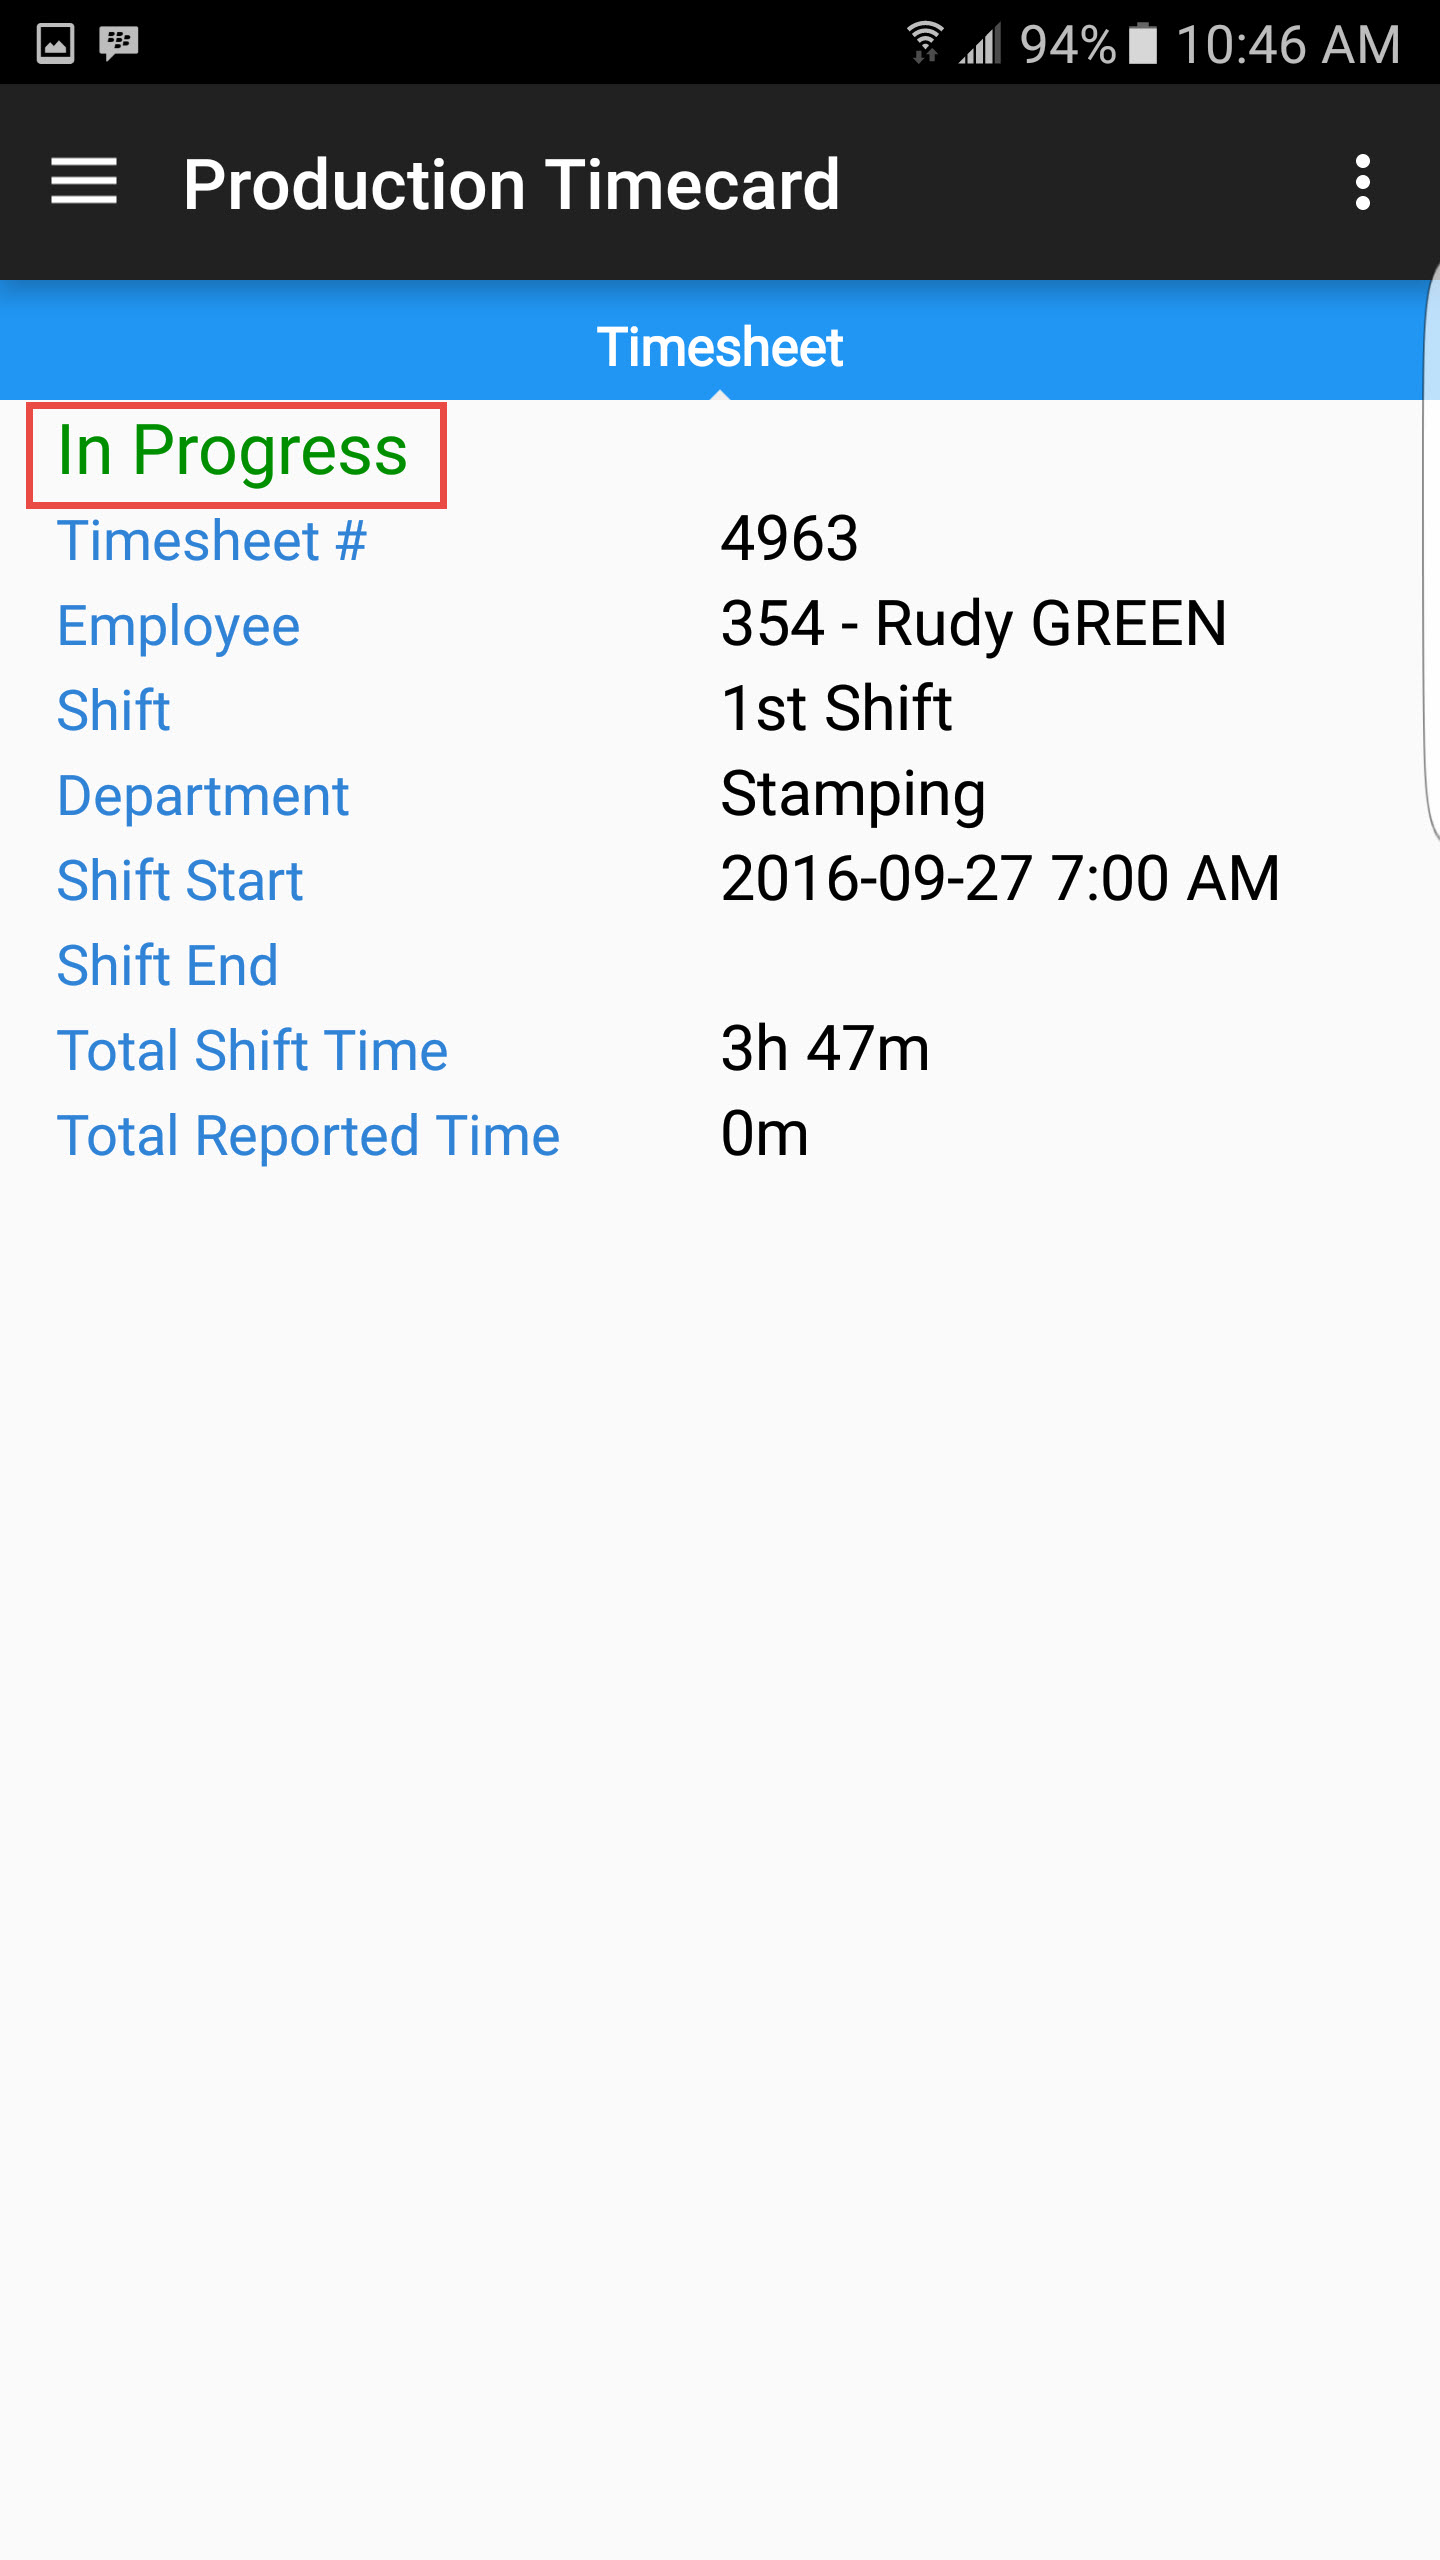
The system will then show that your timecard is in progress:
