Quality
The Quality module is used to create and scan barcodes, to perform operations on held serial numbers, to manage quality rejects, view held inventory, and to manage quality timecards.
Scanning
Scanning is used to scan barcode labels for quality inventory purposes, and to create and perform operations on serial numbers such as scrapping, reworking, and sorting.
Creating a New Held Serial Number
To create a new held serial number, select Scanning under the Quality module from the navigation drawer.
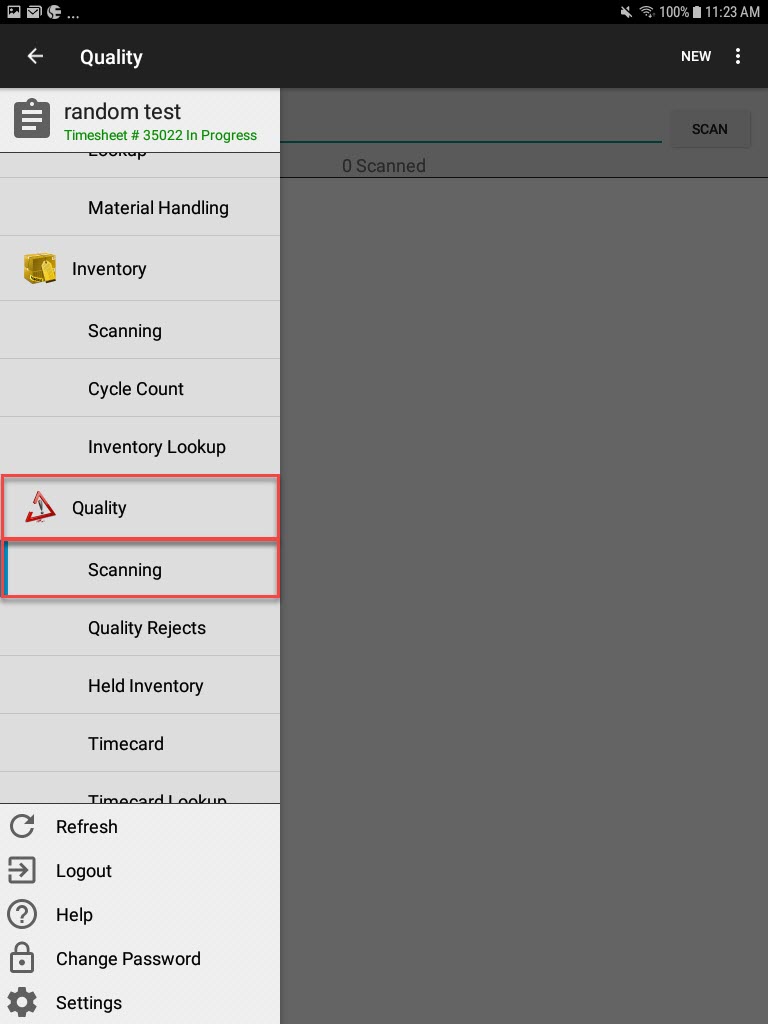
The Quality Scanning screen will appear.
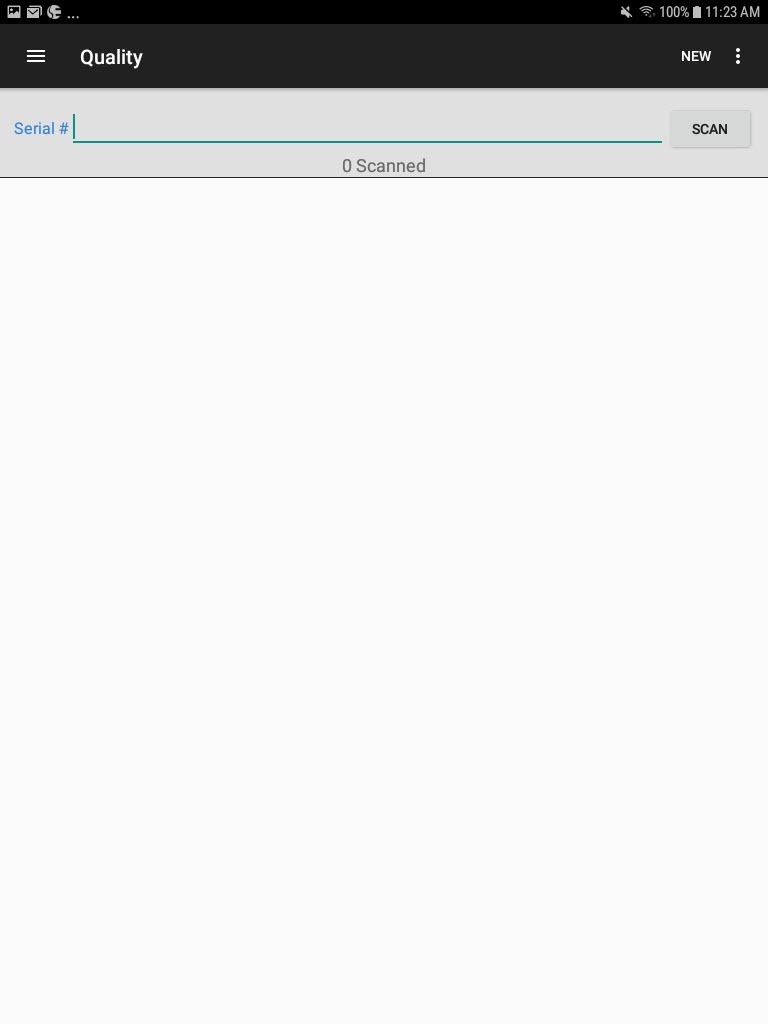
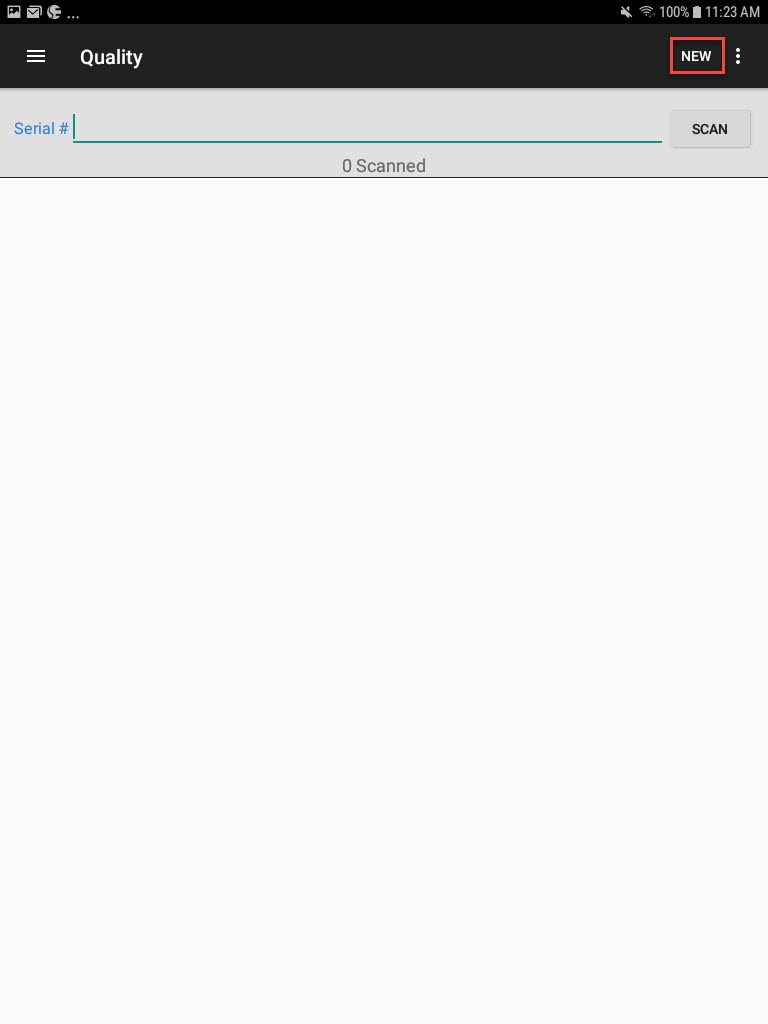
Select New located next to the action menu at the top-right corner of the screen.
The New Held Serial # window will appear where users can create Finished Good/WIP, or Purchased serial numbers.
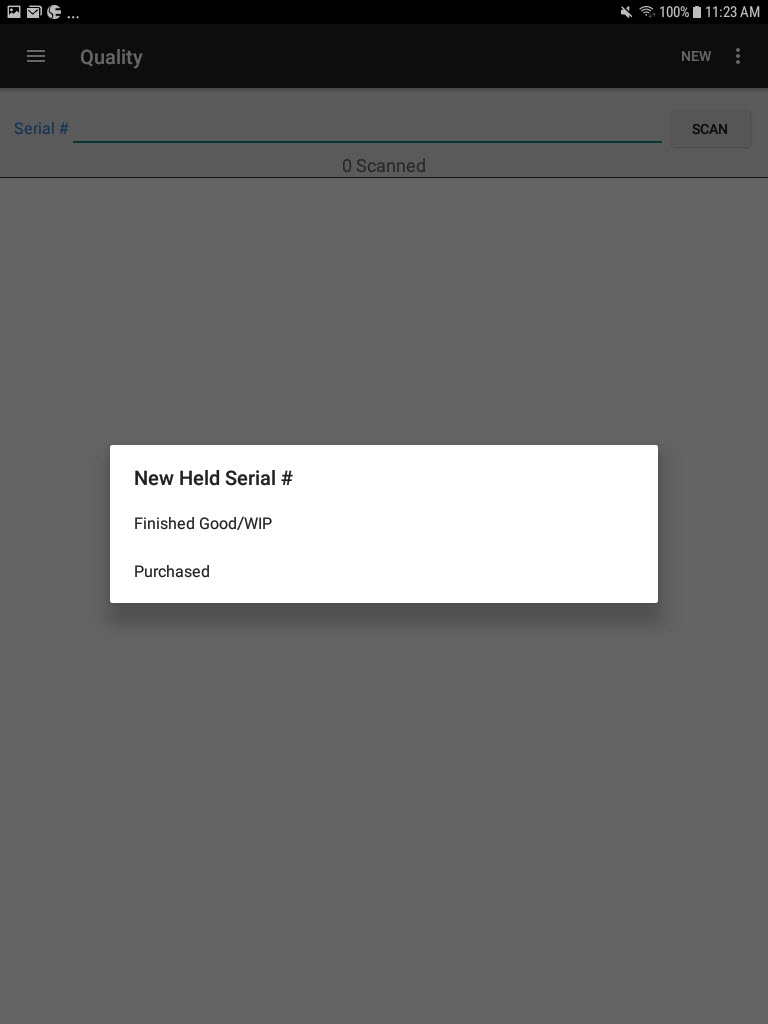
Creating a Finished Good/WIP Serial Number
To create a Finished Good/WIP serial number, select the Finished Good/WIP option on the New Held Serial # window.

The New Held Serial screen will appear where users can enter in the appropriate fields such as the Item, OP #, and the Quantity.
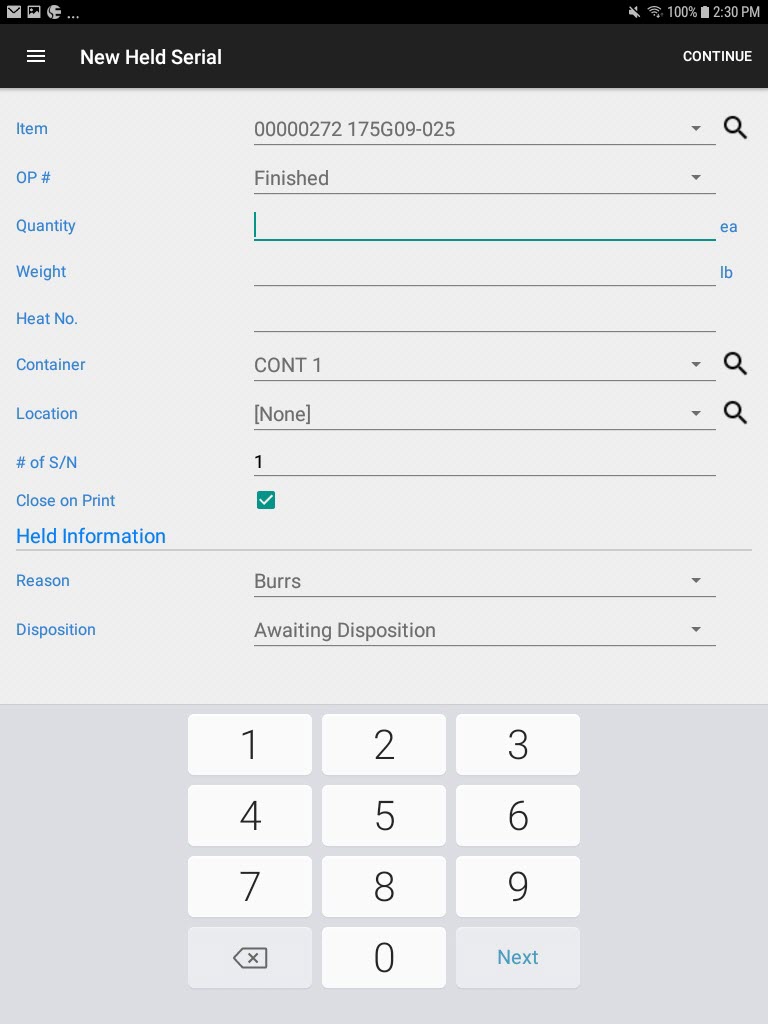
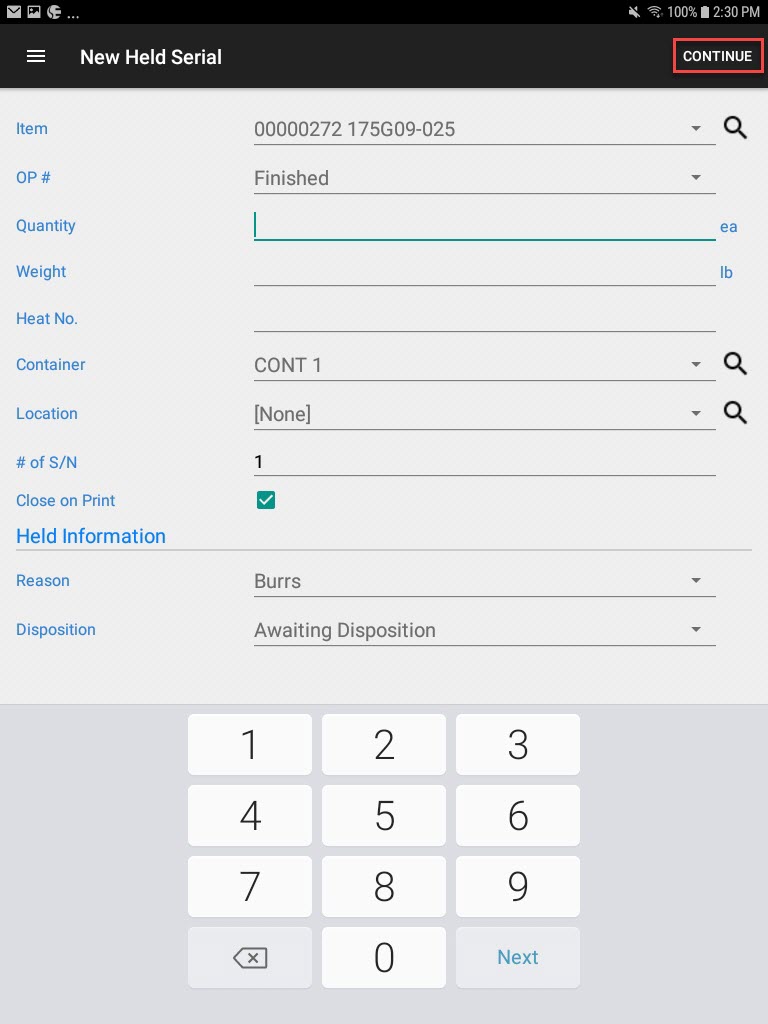
Once the appropriate fields are filled in, select Continue.
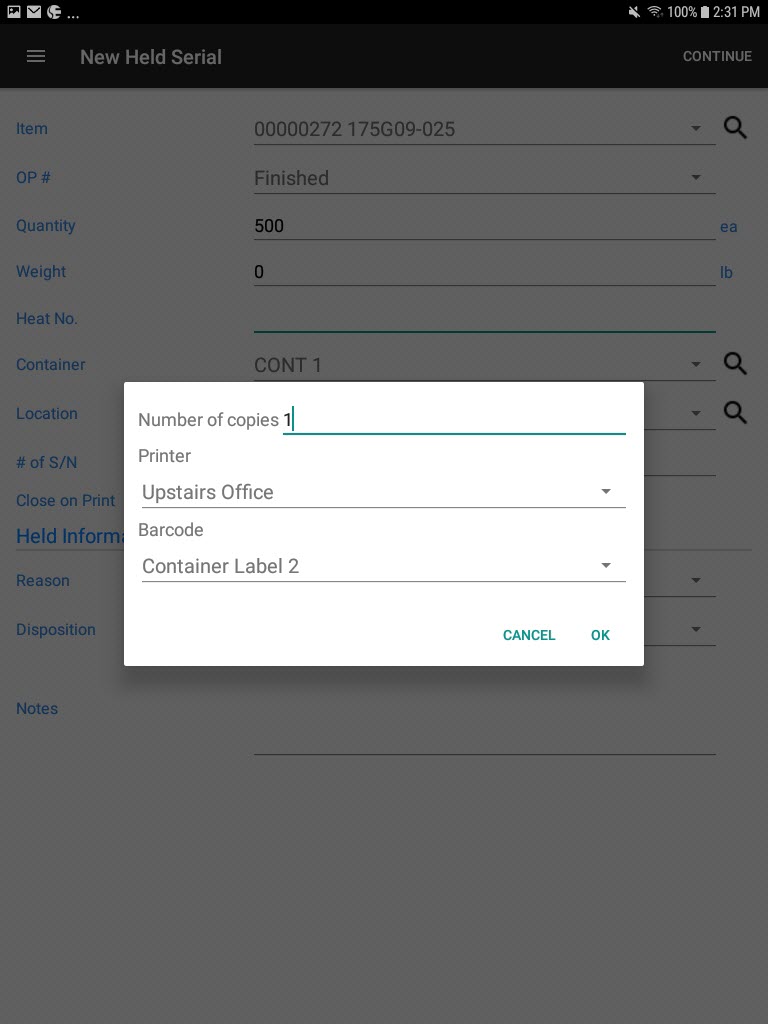
A window will appear where users can enter the number of copies to print, and select the printer and barcode. Select OK.
The Finished Good/WIP will be created and printed.
Creating a Purchased Held Serial Number
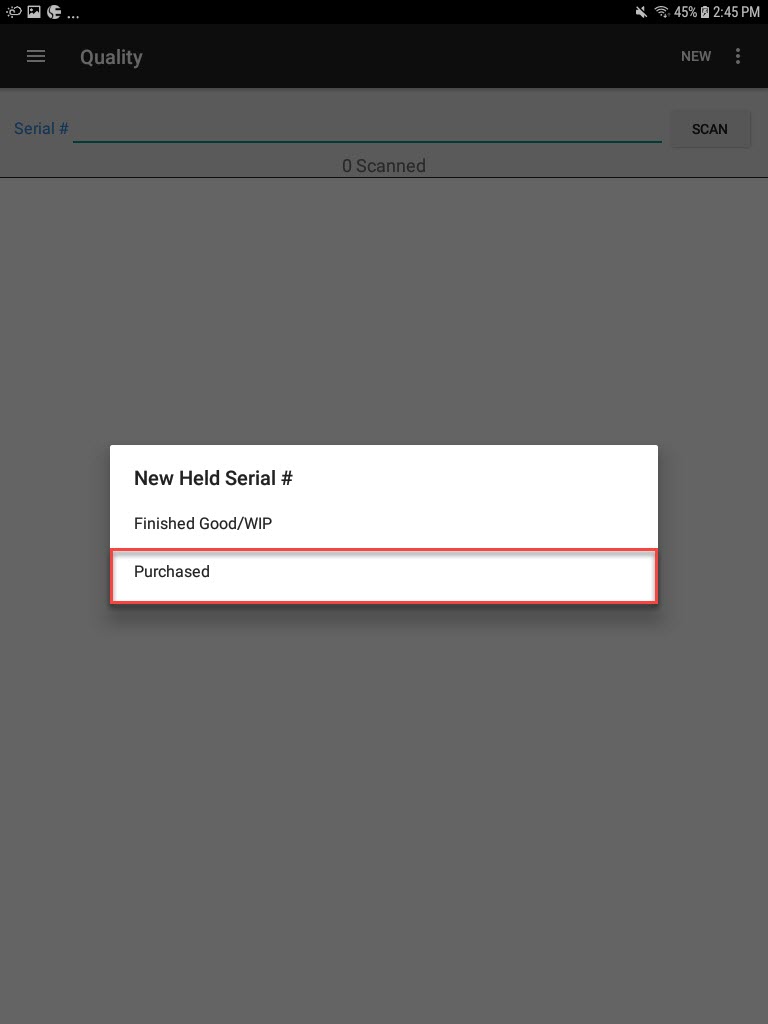
To create a Purchased held serial number, select the Purchased option on the New Held Serial # window.
The New Held Serial screen will appear where users can enter in the appropriate fields such as the Item, OP #, and the Quantity.

Once the appropriate fields are filled in, select Continue.

A window will appear where users can enter the number of copies to print, and select the printer and barcode. Select OK.

The Purchased held serial number will be created and printed.
Scanning Serial Numbers on the Quality Scanning Screen
Users may want to scan a serial number in the Quality module to move a serial number to held status, add it to a Quality Reject, or scrap, sort, or change the status.
To scan a serial number in the Quality module, select Scanning under the Quality module from the navigation drawer.

The Quality Scanning screen will appear.

Users can select the Scan button to launch the device camera for scanning or, if you’re using a Bluetooth or USB scanner simply scan the barcode label serial number or, manually enter in a serial number.
Queue Enabled
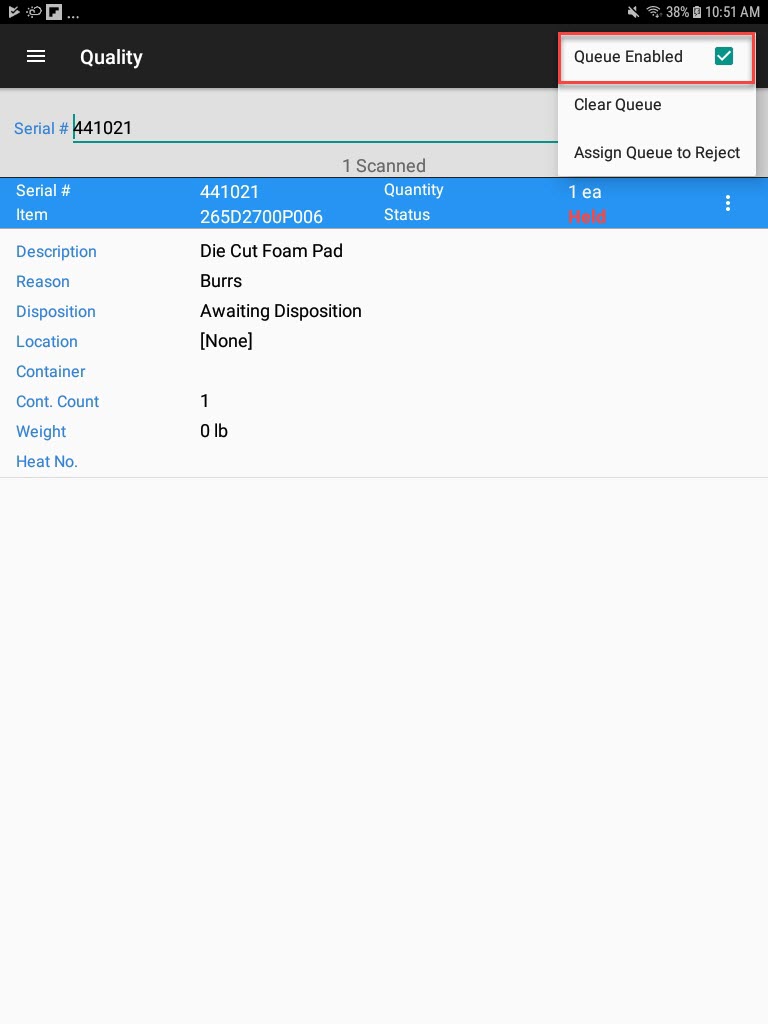
Users may wish to scan more than one serial number at a time, and perform an action to all serial numbers in the queue.
To do this, users must select the Queue Enabled option from the action menu located in the top-right corner of the screen.
Clear Queue
To clear the queue of the serial numbers scanned, from the action menu select Clear Queue.
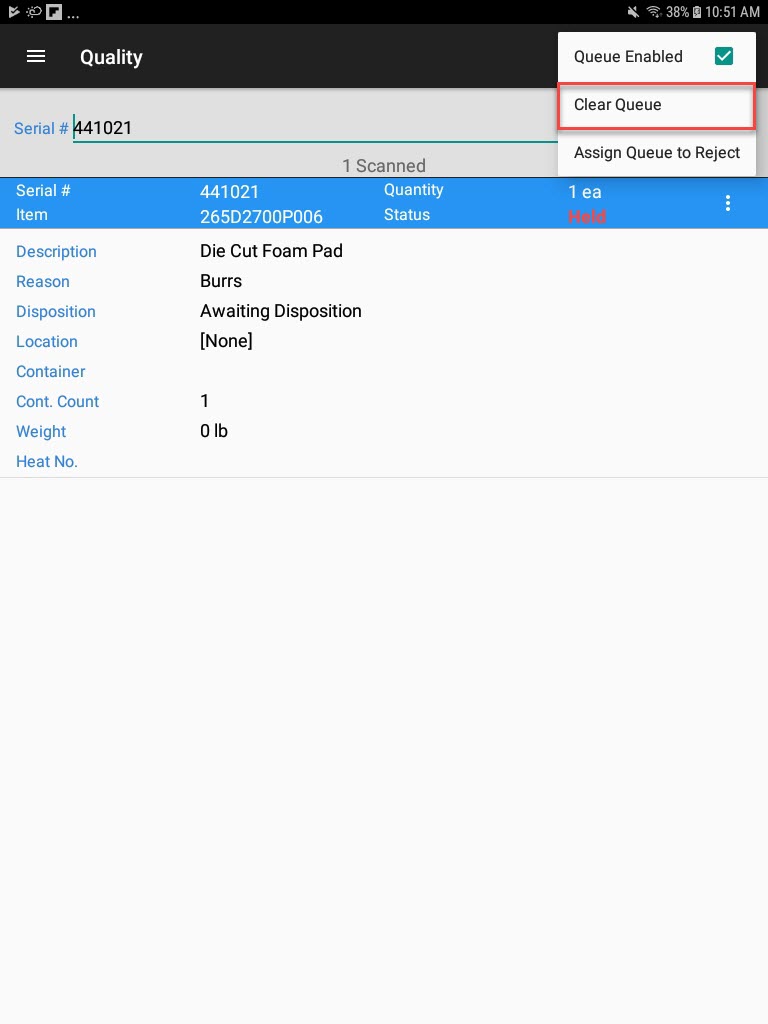
The serial numbers will be removed from the queue.
Assigning Multiple Serial Numbers to an Existing Quality Reject
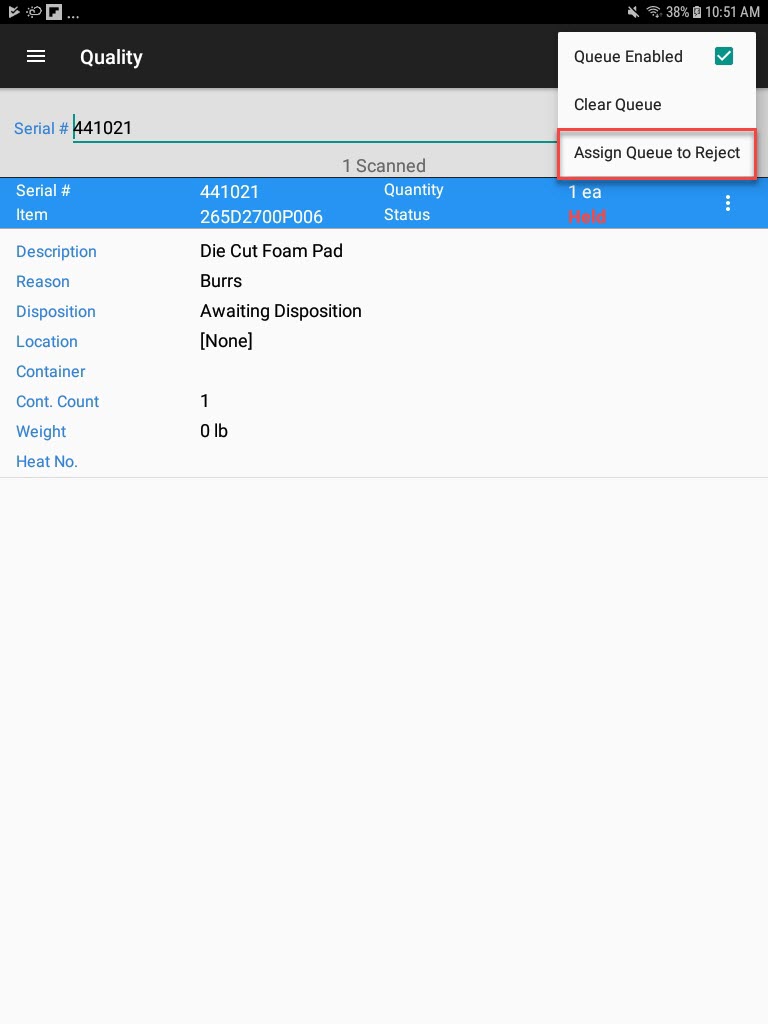
To assign multiple serial numbers to an existing Quality Reject, from the action menu select Assign Queue to Reject.
The Assign to Reject window will appear where users can select the reject they wish to assign the serial number(s) to or, users can use the lookup button.
Once a Quality Reject is selected, select OK.
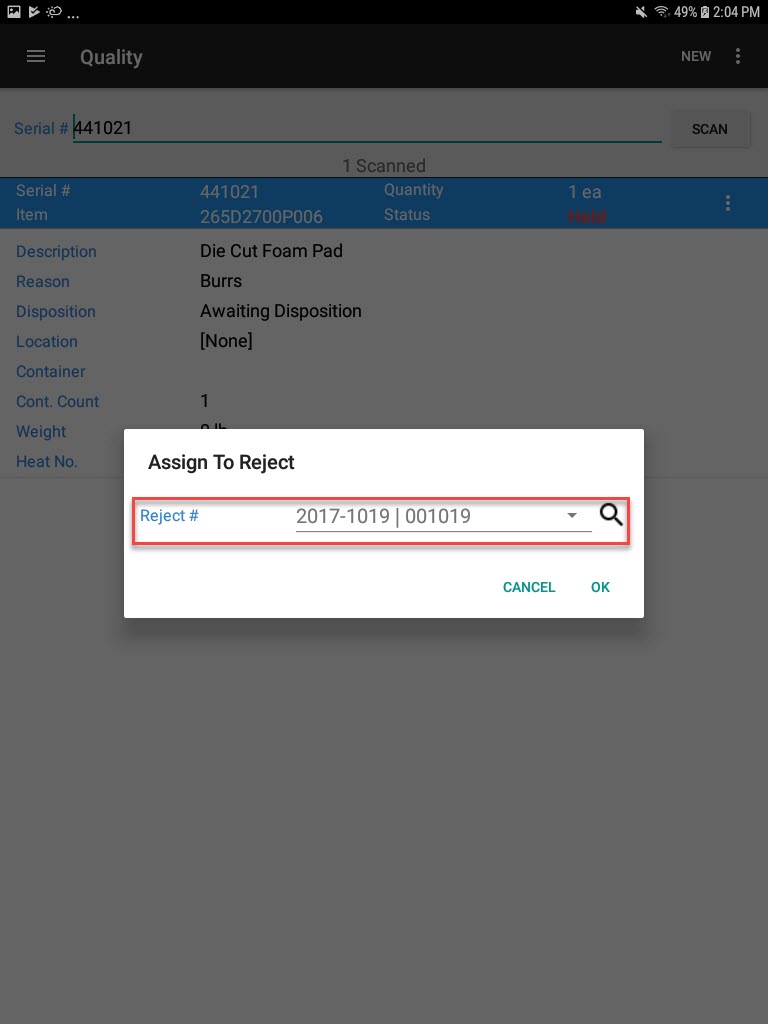
The selected serial number will be assigned to the selected Quality Reject.
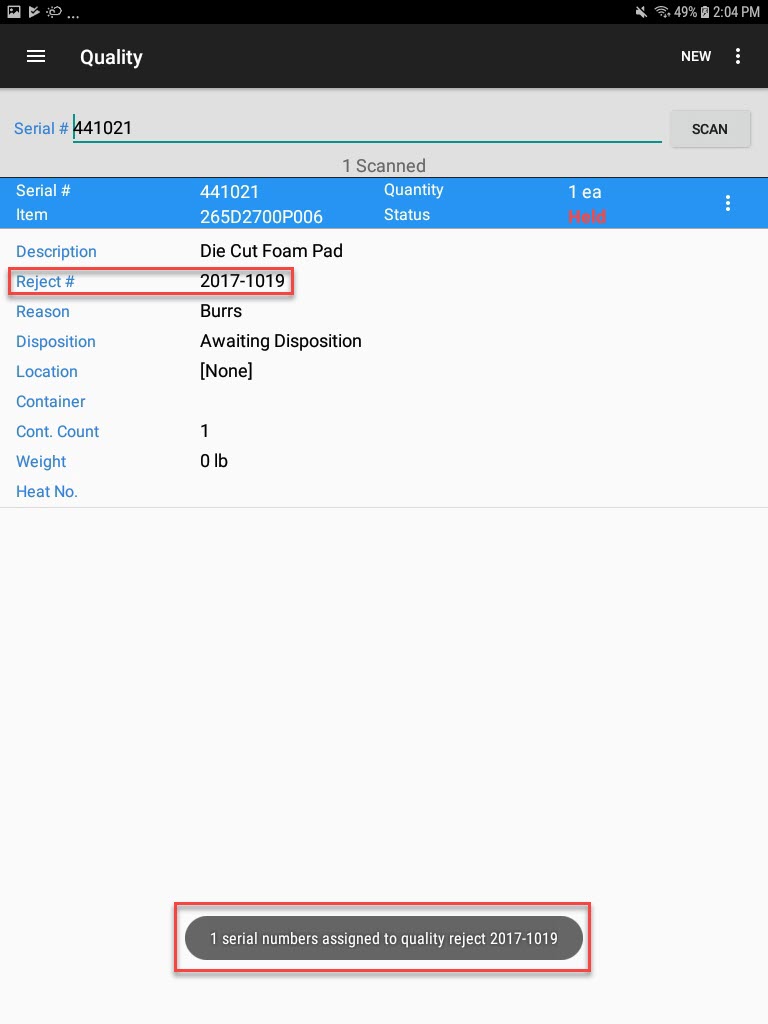
Collapsing Held Serial Numbers
When a serial number is first scanned, it will be expanded so that users can view detailed information.
If users wish to collapse the detailed information, simply select Collapse from the serial number action menu.
The serial number detailed information will be collapsed.
Expanding Held Serial Numbers
To expand a serial number, simply select Expand from the serial number action menu.
The serial number will be expanded.
Scrapping Held Serial Numbers
To scrap a serial number, select the Scrap option from the serial number action menu.
The Scrap screen will appear where users can select a Timecard, enter in the Scrap Quantity, Scrap Reason, and Scrap Notes.
Select OK located at the top of the screen.
The Scrap Quantity will be scrapped for the selected serial number.
Reworking Held Serial Numbers
To rework a serial number, select the Rework option from the serial number action menu.
The Rework screen will appear where users must select a Timecard, enter in a Rework Quantity, select Same S/N, New S/N, or Existing S/N and enter in a serial number if necessary.
Users can also select a Rework Reason and enter in Rework Notes as well.
Once the necessary fields are completed, select OK located at the top of the screen.
The selected serial number will be reworked.
Sorting Held Serial Numbers
To sort a serial number, select the Sort option from the serial number action menu.
The Sort screen will appear.
Users must select a Timecard, enter in a Sort Quantity, select Same S/N, New S/N, or Existing S/N and enter in a serial number if necessary.
Users can also select a Sort Reason and enter in Sort Notes.
Once the necessary fields are completed, select OK located at the top of the screen.
The serial number will be sorted.
Editing Held Serial Numbers
To edit a serial number, select Edit from the serial number action menu.
The Edit Serial window will appear where users can make the necessary changes.
Once the necessary changes are made, select OK.
The serial number will be edited.
Assigning Held Serial Numbers to Rejects
To assign a serial number to a Quality Reject, select Assign to Reject from the serial number action menu.
The Assign To Reject window will appear where users can either select a Quality Reject using the drop-down or, search for one using the search button.
Once a Quality Reject is selected, select OK.
The serial number will be assigned to the selected Quality Reject.
Opening a Quality Reject from a Serial Number
To open a Quality Reject from a serial number, select Open Reject from the serial number action menu.
The Quality Reject detail screen will appear.
Removing a Serial Number from a Quality Reject
To remove a serial number from a Quality Reject, select Remove from Reject from the serial number action menu.
The Are You Sure? window will appear where users must confirm removing the serial number from the Quality Reject.
Once confirmed, the serial number will be removed from the Quality Reject.
Releasing Serial Numbers from Held
To release a serial number from held, select the Release from Held option from the serial number action menu.
The Release from Held window will appear where users can verify information and enter in any necessary notes.
Then, select OK. The select serial number will now have a status of normal.
Note
To move a serial number back to held, simply select the Move to Held option from the serial number action menu. Select a Reason, Disposition, enter notes, and select whether or not to print the held serial number. Select OK to complete the move.
Adjusting Held Serial Numbers
To adjust a serial number, select the Adjust option from the serial number action menu.
The Adjust window will appear where users can enter in a Quantity, Reference, select a Reason, and enter in any necessary Notes. Select Ok to complete the adjustment.
Deleting Held Serial Numbers
To delete a serial number, select the Delete option from the serial number action menu.
The Delete window will appear where users can enter in a Reference, select a Reason, and enter in any necessary Notes. Select OK to confirm the deletion.
Printing Held Serial Numbers
To print a serial number, select the Print option from the serial number action menu.
A window will appear where users can enter in the Number of Copies, and select the Printer and Barcode. Select OK to confirm the print.
Viewing the History of Held Serial Numbers
To view the history of a serial number, select the History option from the serial number action menu.
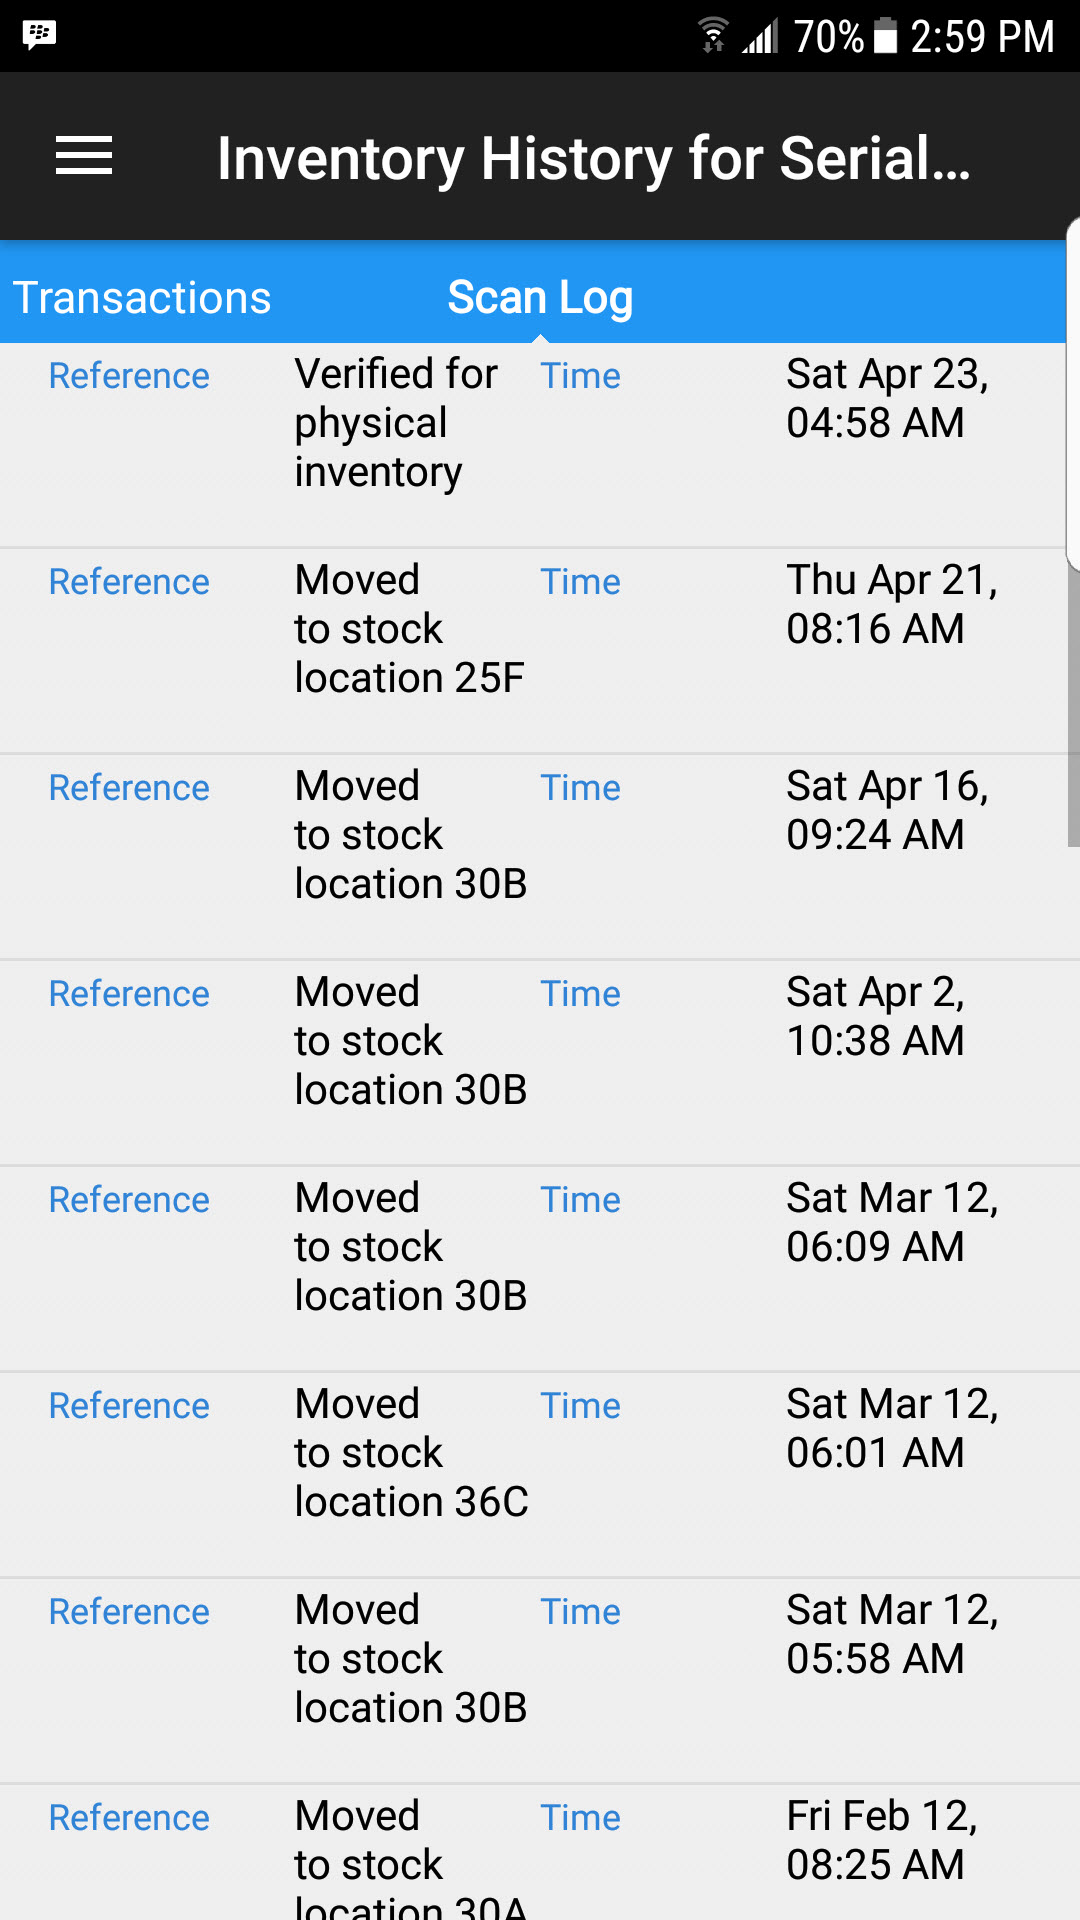
The Inventory History for Serial # ______ screen will appear. Users can view the Transactions, Scan Log, and Dock Audit History for the selected serial number.
Quality Rejects
Quality Rejects are used to provide better reporting by linking Quality Transactions to Quality Rejects for scrap, rework, and labour hours.
Viewing Open Quality Rejects
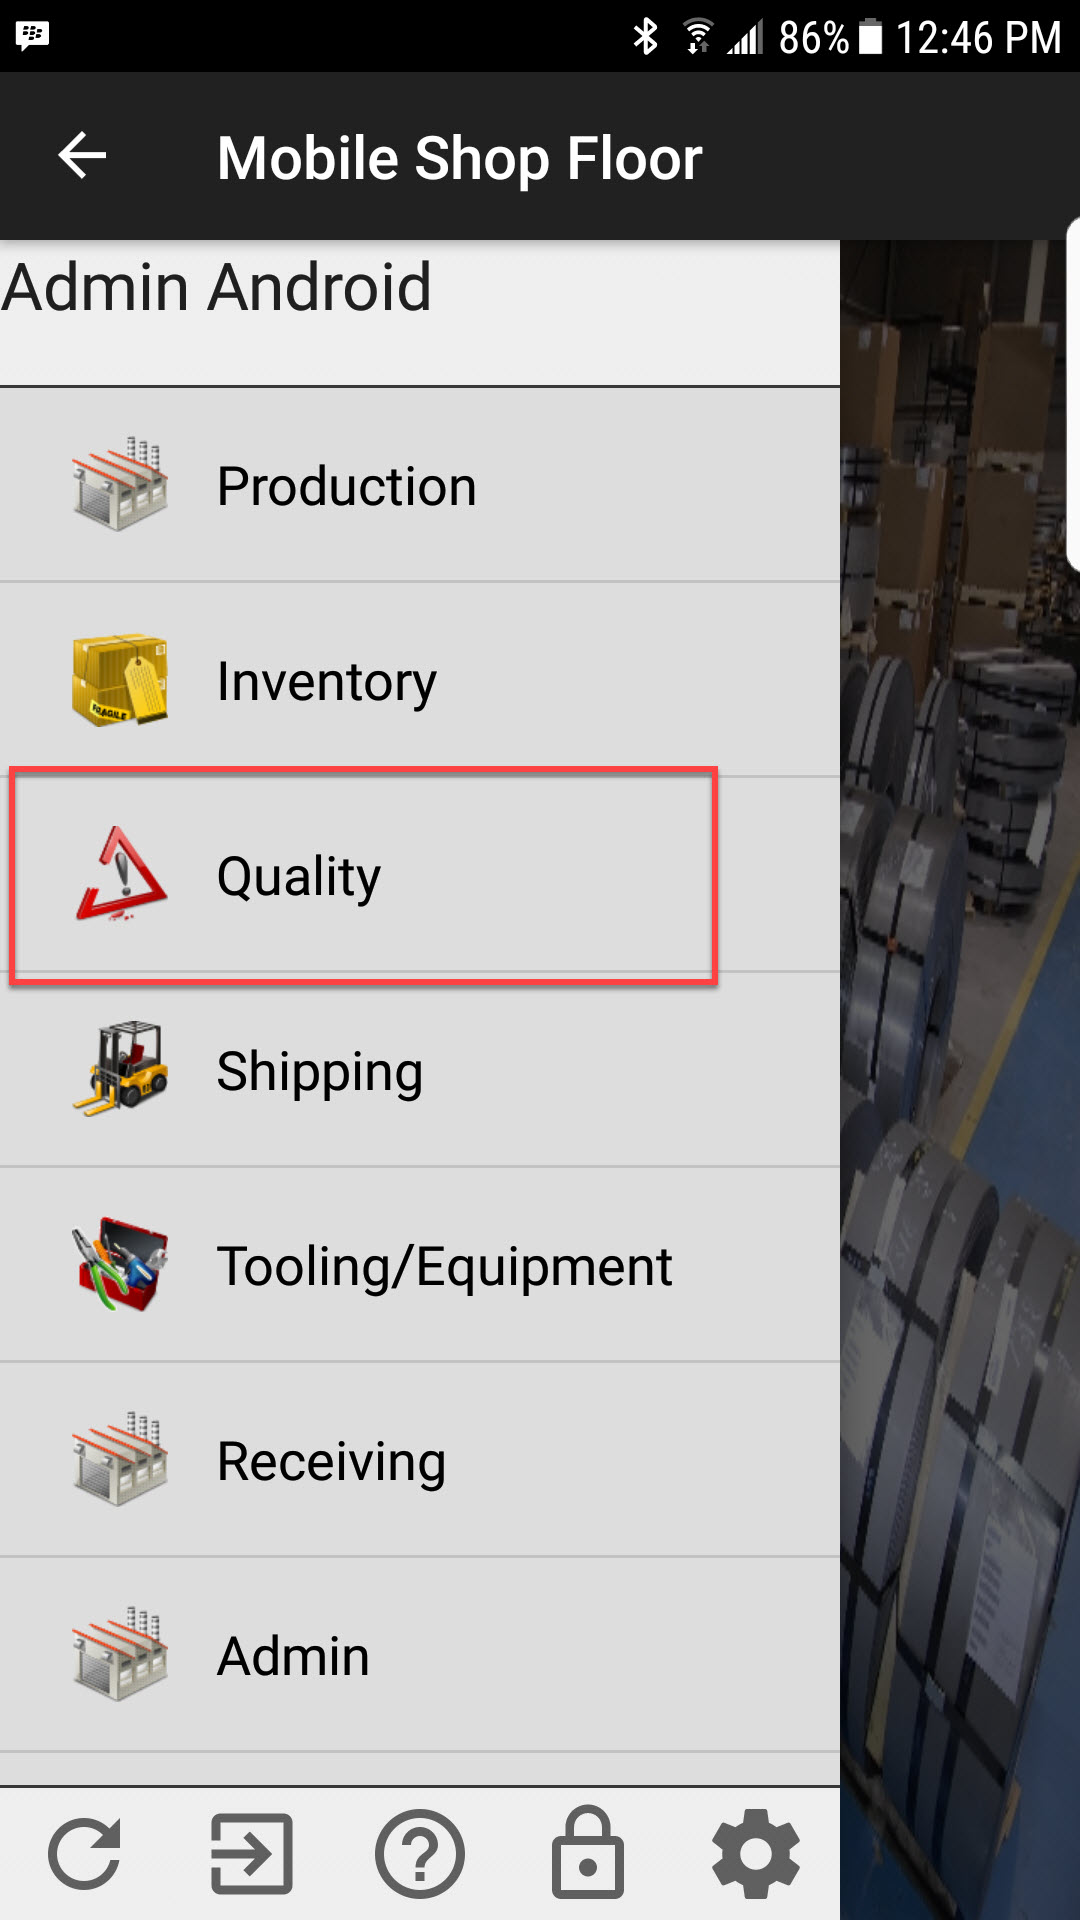
To view open Quality Rejects, select Quality Rejects located under the Quality module from the navigation drawer.
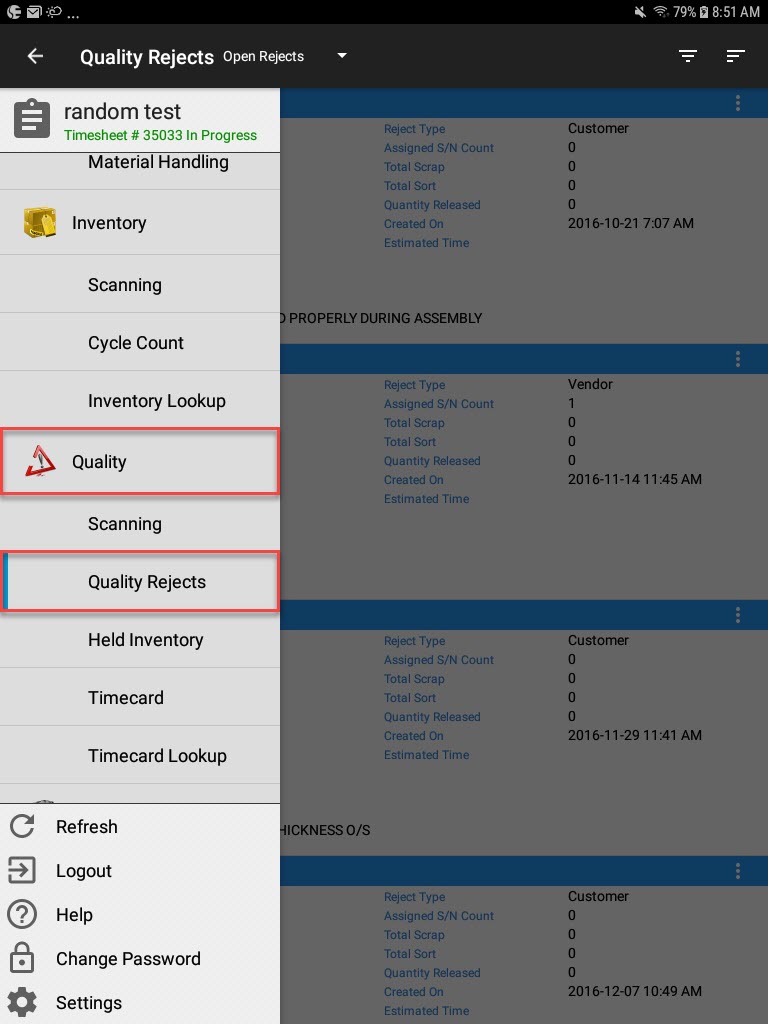
The Quality Rejects screen will appear.
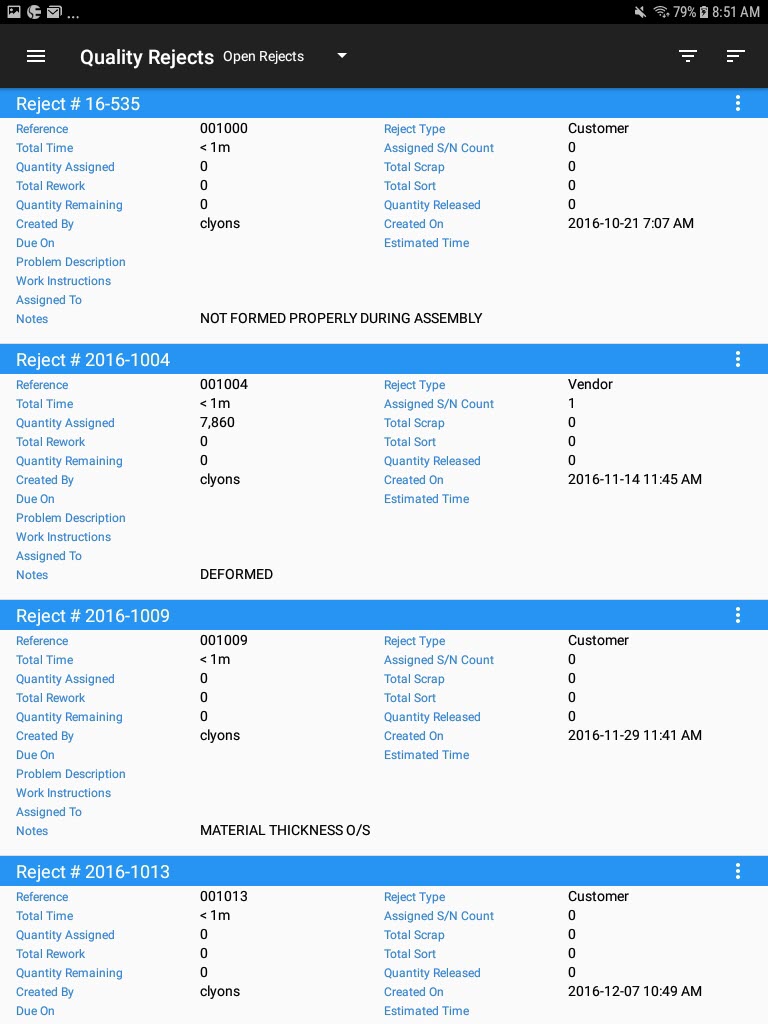
Make sure to select Open Rejects from the drop-down menu.
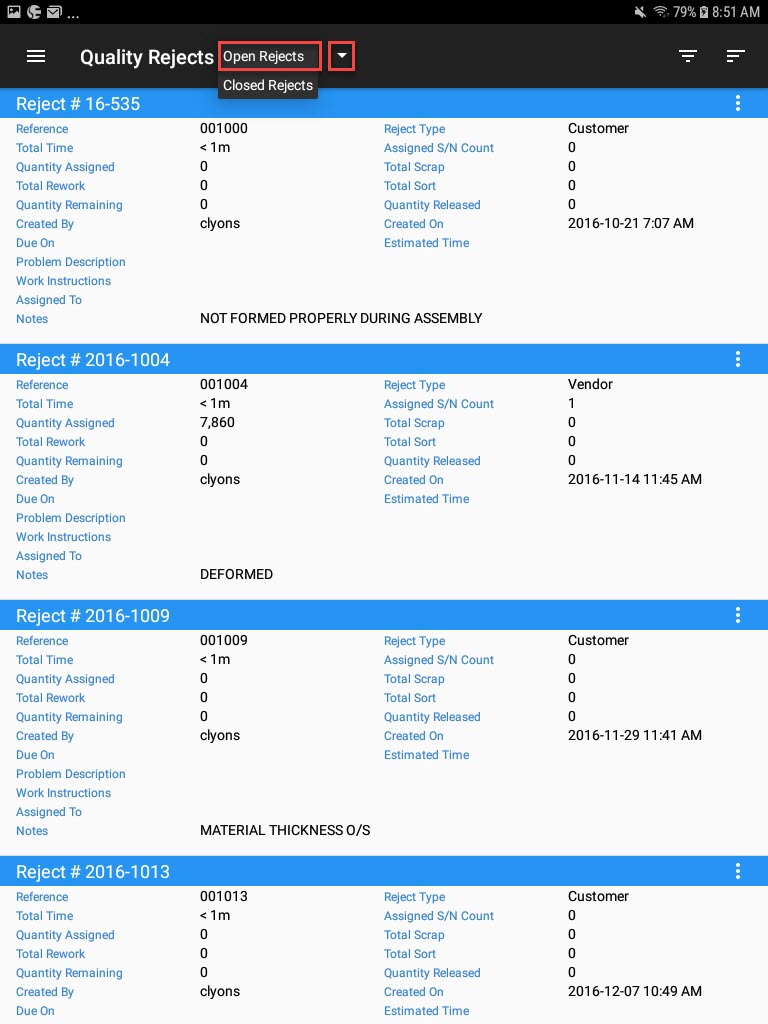
All open Quality Rejects in the system will appear.
Note
Users can use the Filter and Sort options located in the top-right corner of the screen to find Quality Rejects more efficiently.
Viewing Closed Quality Rejects
To view closed Quality Rejects, select Quality Rejects located under the Quality module from the navigation drawer.

The Quality Rejects screen will appear.

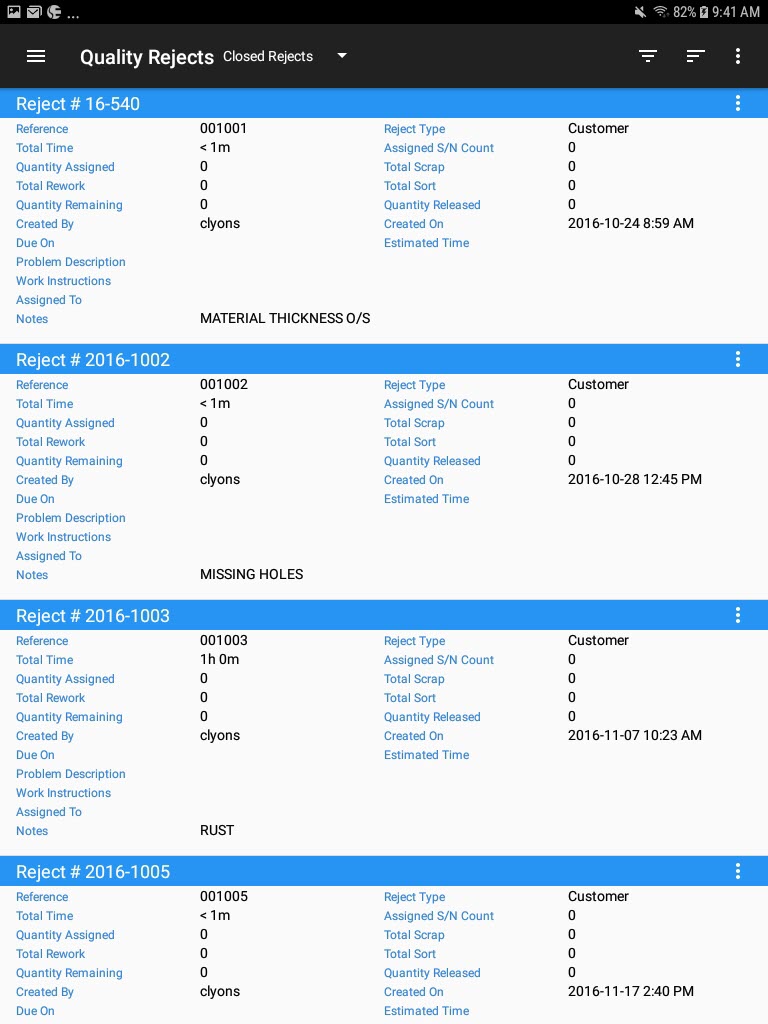
Make sure to select Closed Rejects from the drop-down menu.
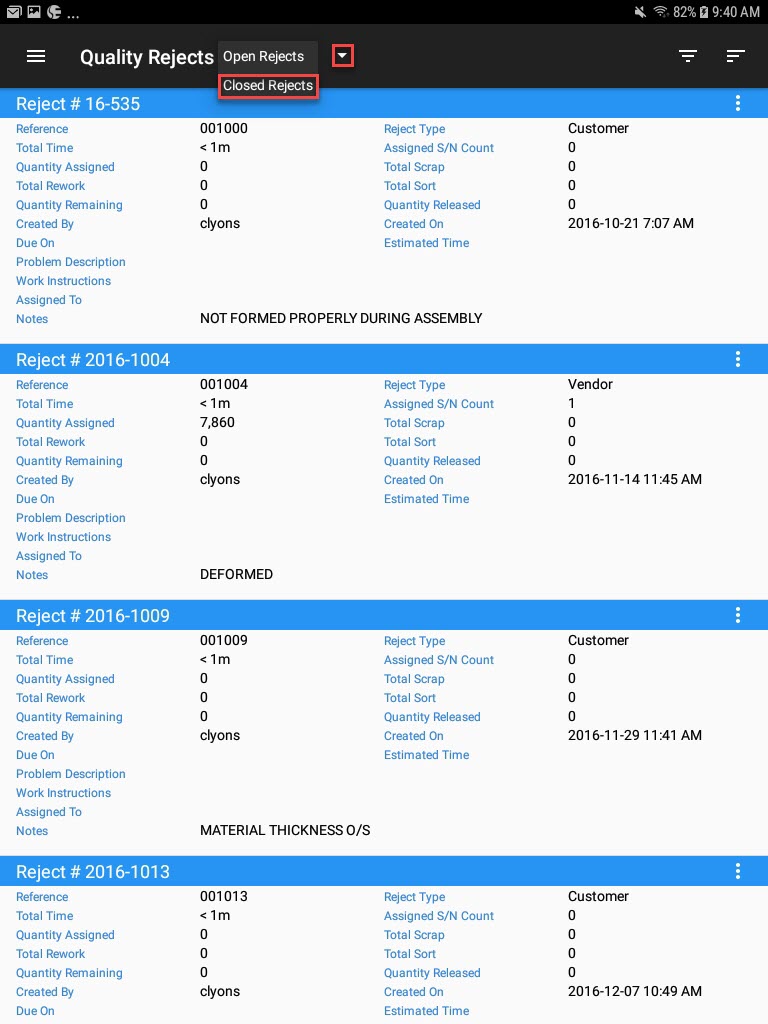
All closed Quality Rejects in the system will appear.
Note
Users can use the Filter and Sort options located in the top-right corner of the screen to find Quality Rejects more efficiently.
Creating a New Quality Reject
To create a new Quality Reject, select Quality Rejects located under the Quality module from the navigation drawer.

The Quality Rejects screen will appear.

From the action menu located in the top-right corner of the screen, select New Quality Reject.

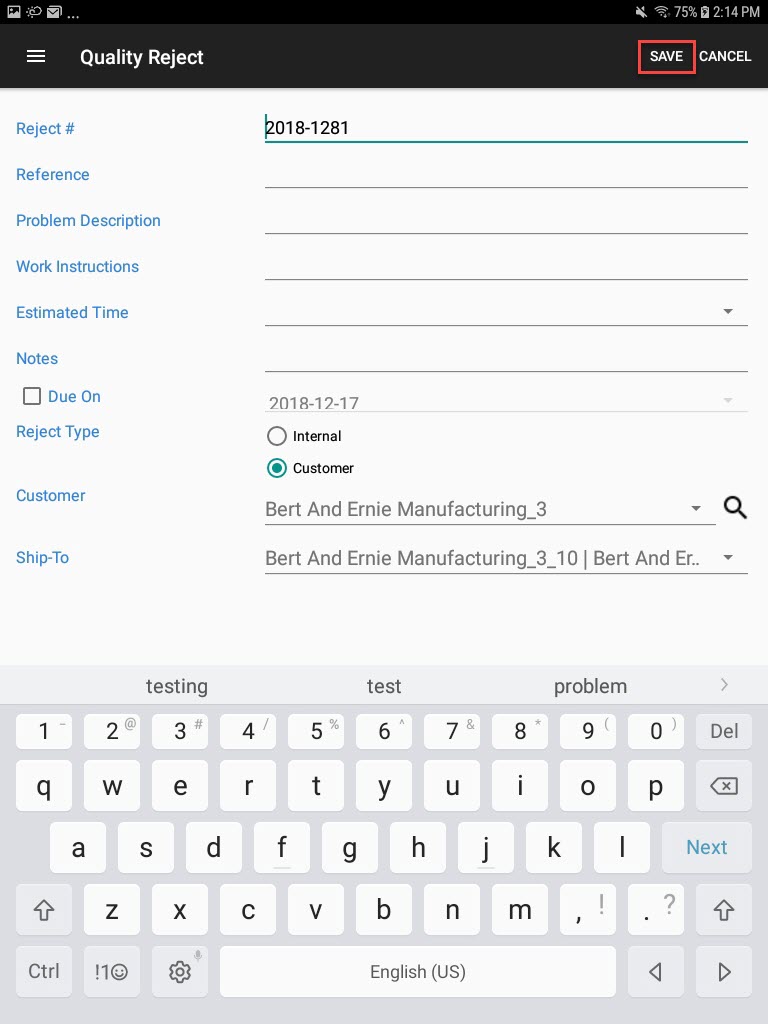
The Quality Reject screen will appear where users can complete information including the Reject #, Reference, Problem Description, Work Instructions, Estimated Time, Notes, and Due On date.
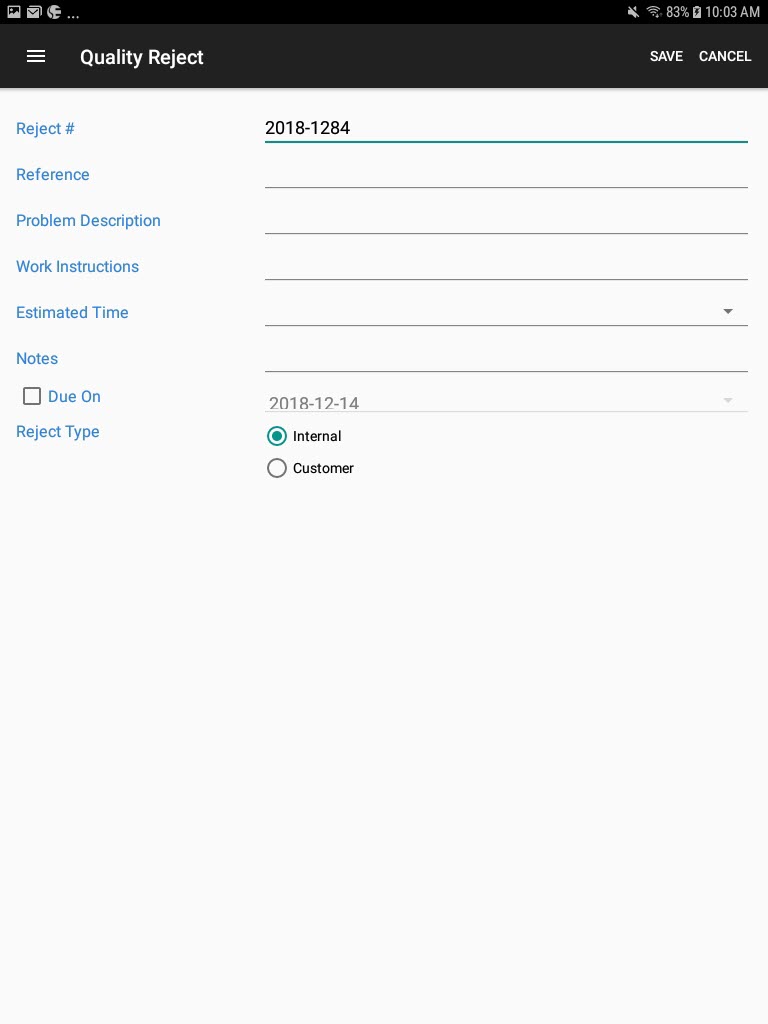
Next, users must select whether the Quality Reject is Internal or for a Customer.
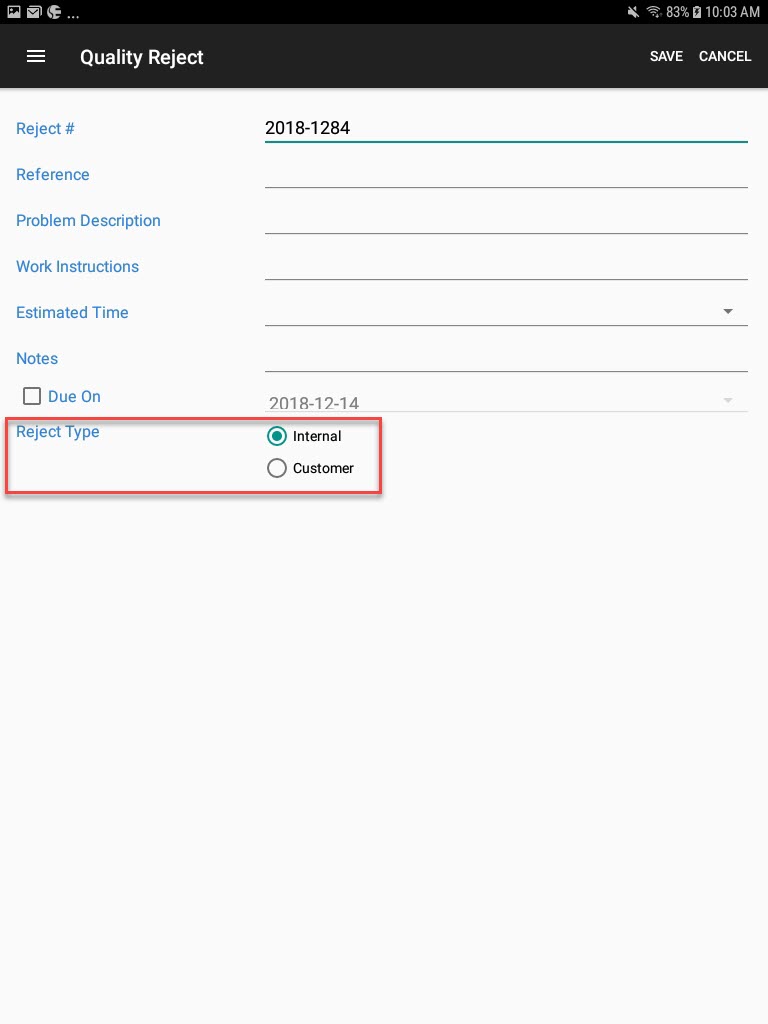
If the users select Customer, they will have to select a Customer and Ship-To using the available drop-down menus.
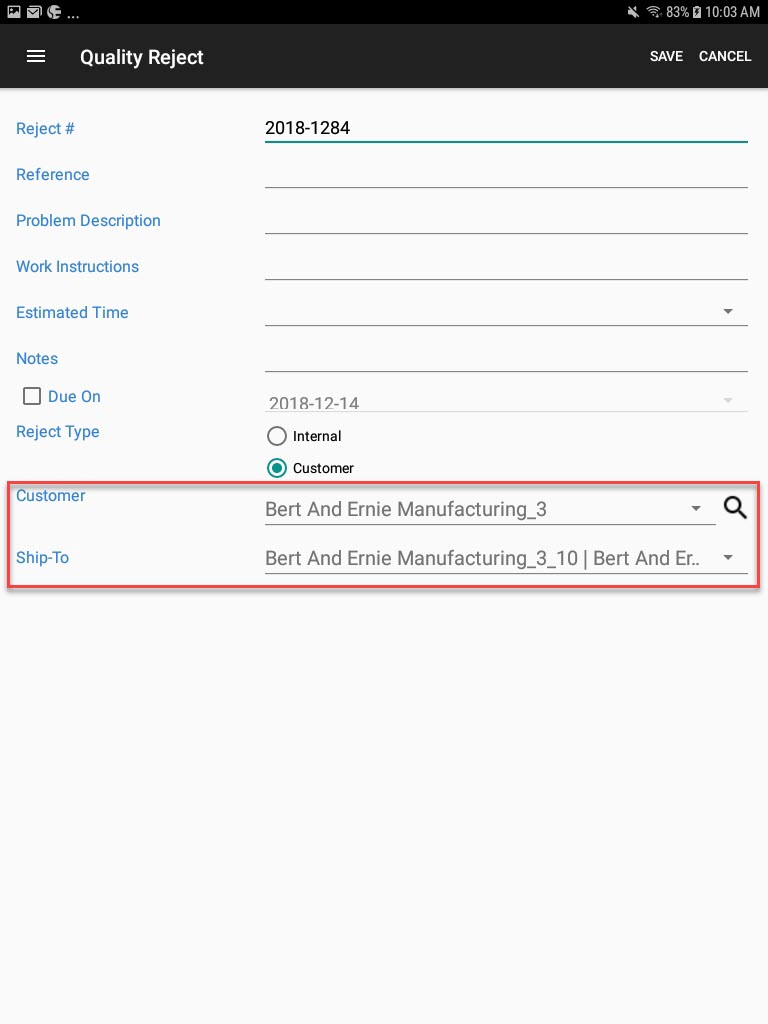
Once all the necessary information is completed, select Save located in the top-right corner of the screen.
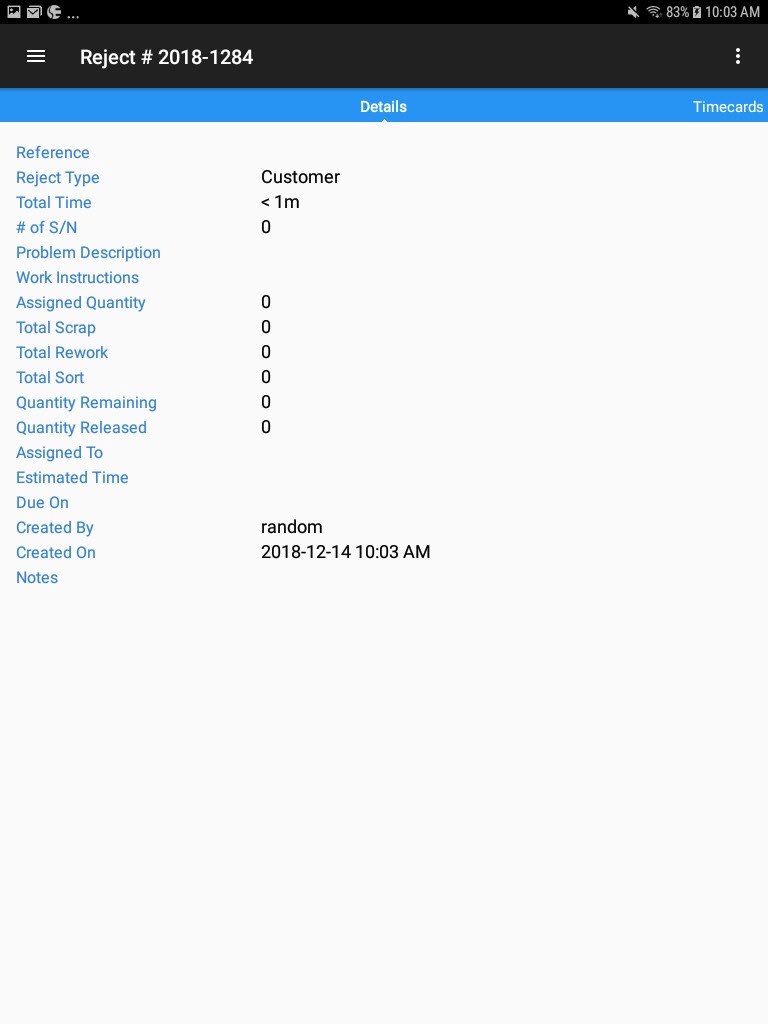
The Quality Reject will be saved and the detailed screen will appear.
Starting a Reject
There are two ways to start a Quality Reject.
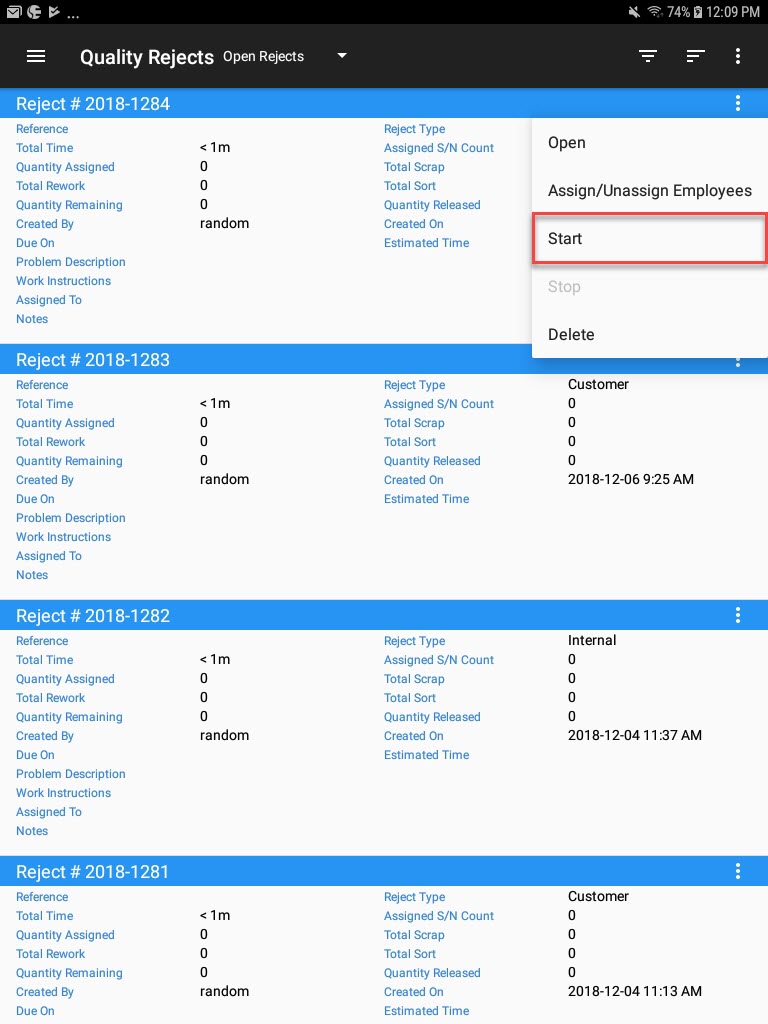
The first way is to locate the Quality Reject you wish to start on the Quality Rejects screen.
Using the action menu, select the Start option.
The second way is to locate the Quality Reject you wish to start on the Quality Rejects screen and from the action menu, select Open.
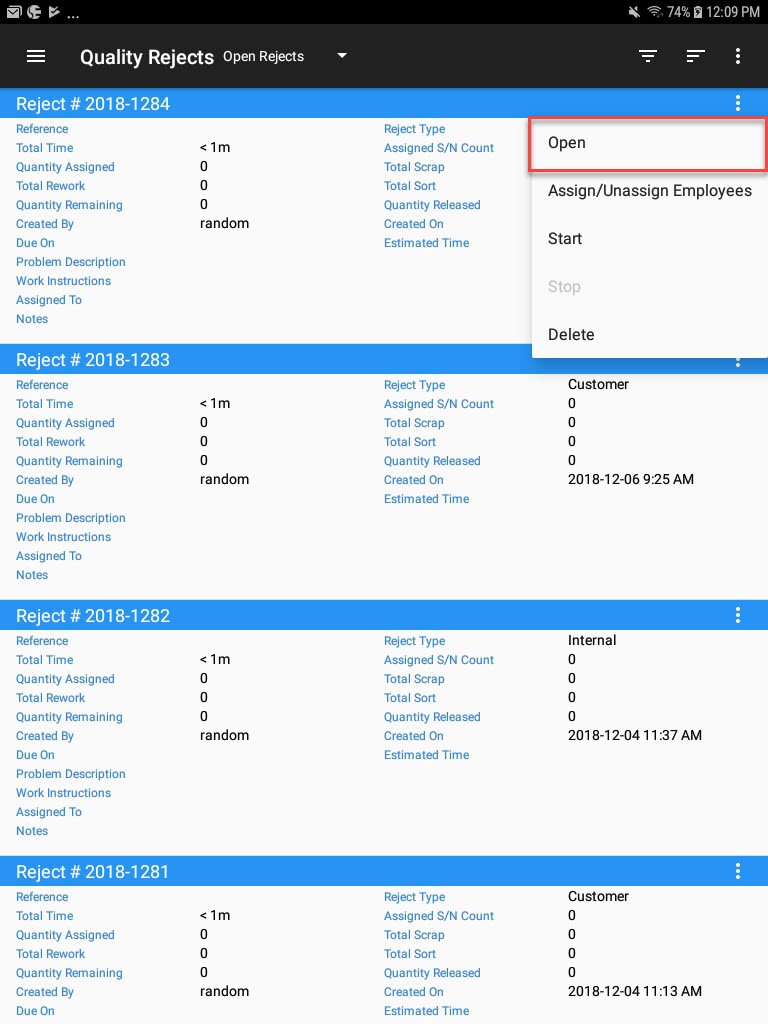
On the Quality Reject detail screen select the Start option from the action menu located in the top-right corner of the screen.
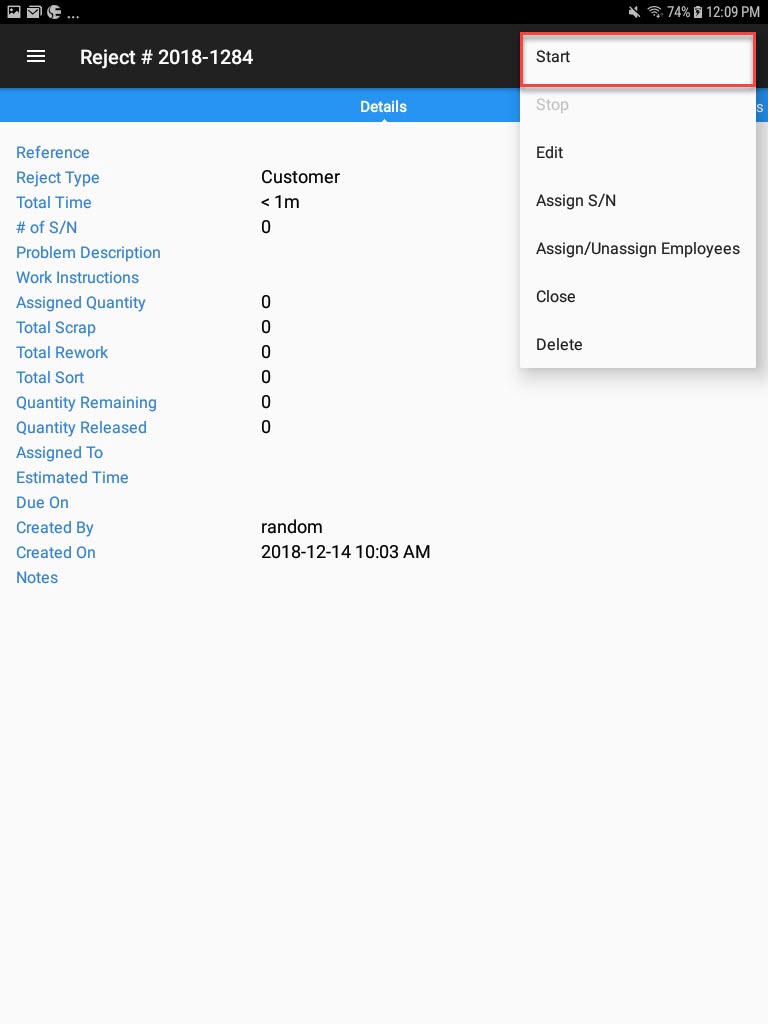
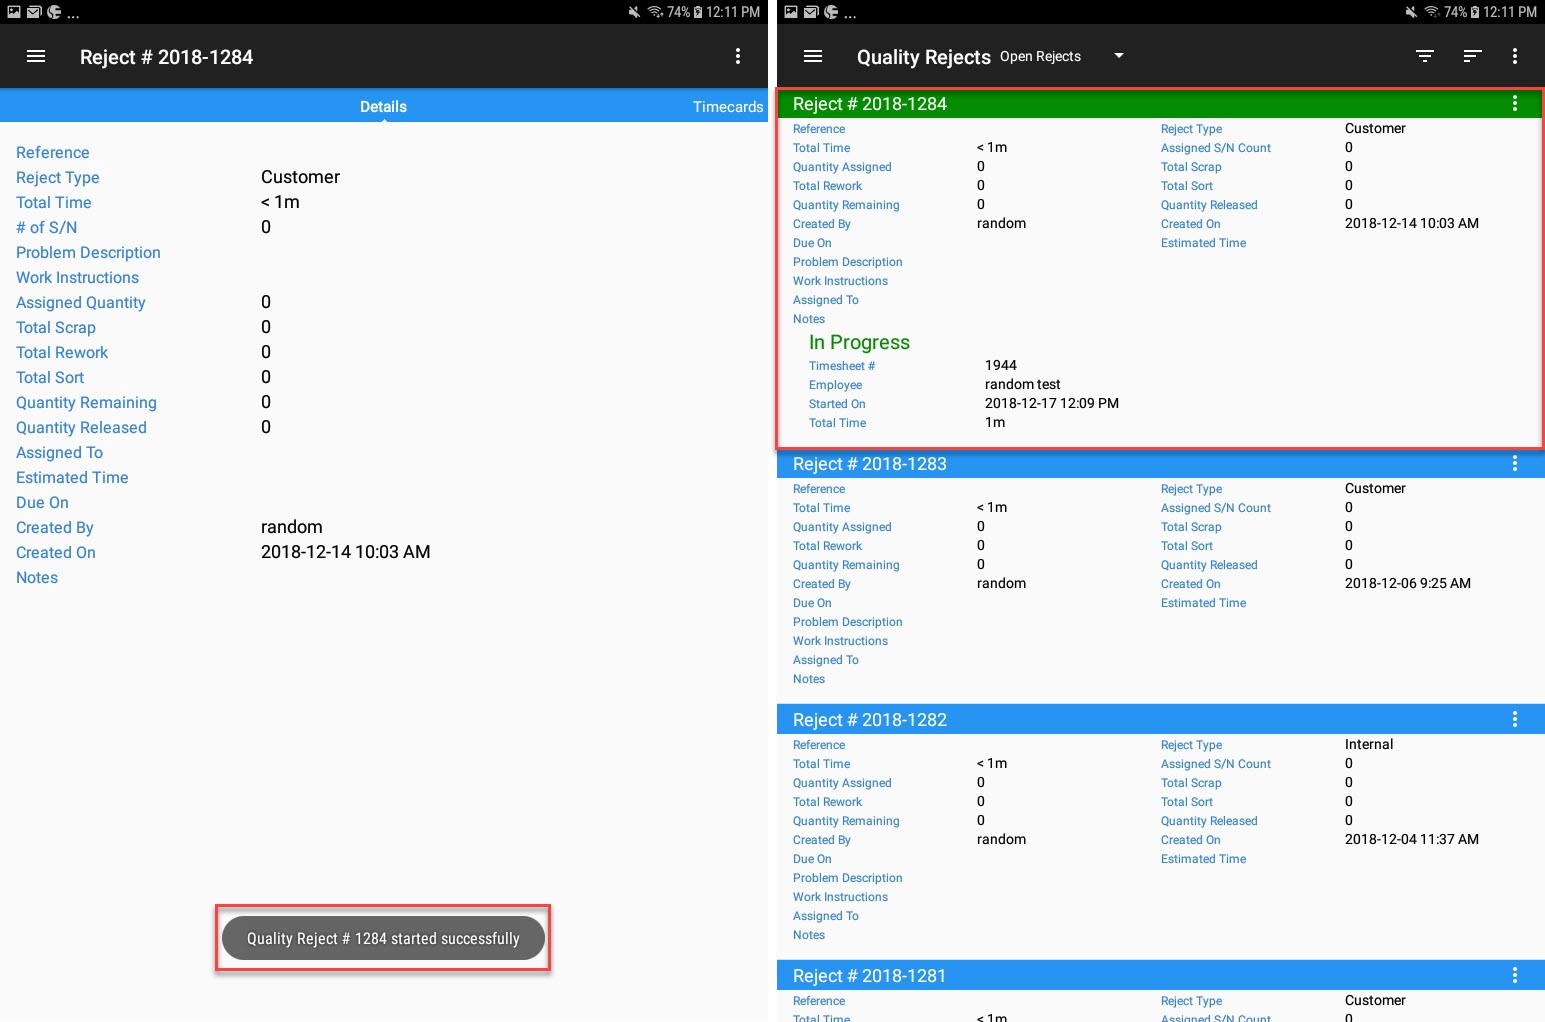
Both of these options will open the Start Quality Reject screen.
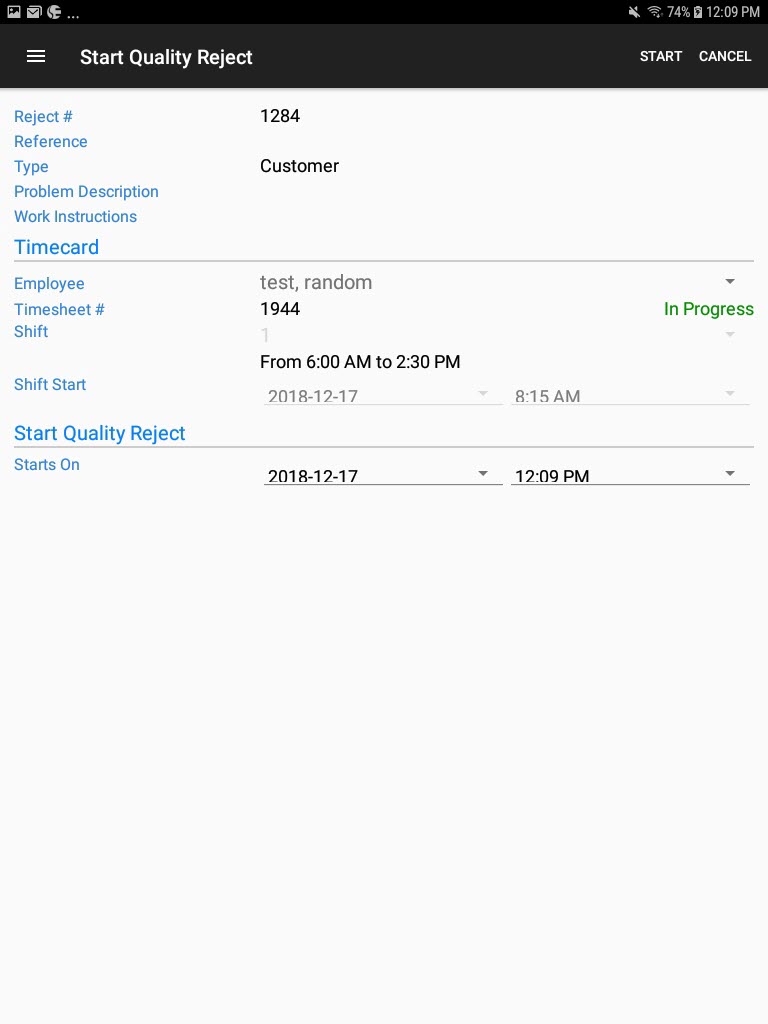
Here, the selected Quality Reject will be added to an existing Quality Timecard OR, to a new Quality Timecard that will be created when the Quality Reject is started.
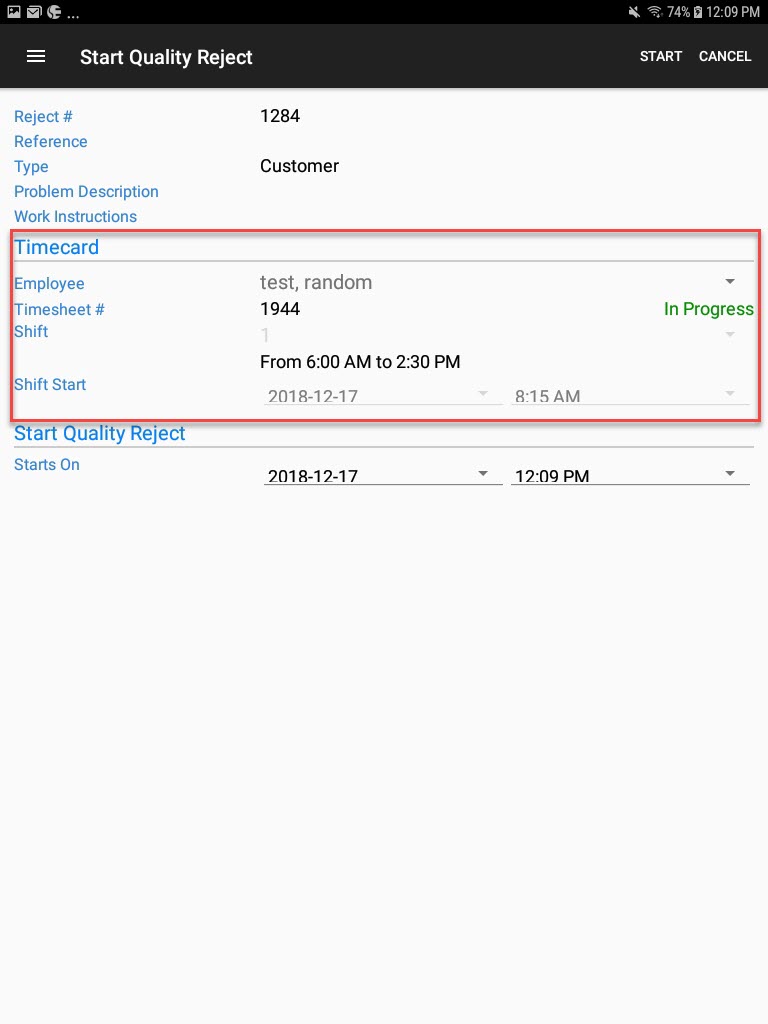
Users can then select the Shift Start date and time (so long as it is a new Quality Timecard being created), as well at the Quality Reject Starts On date and time.
Once the necessary fields are completed, select Start located in the top-right corner of the screen.
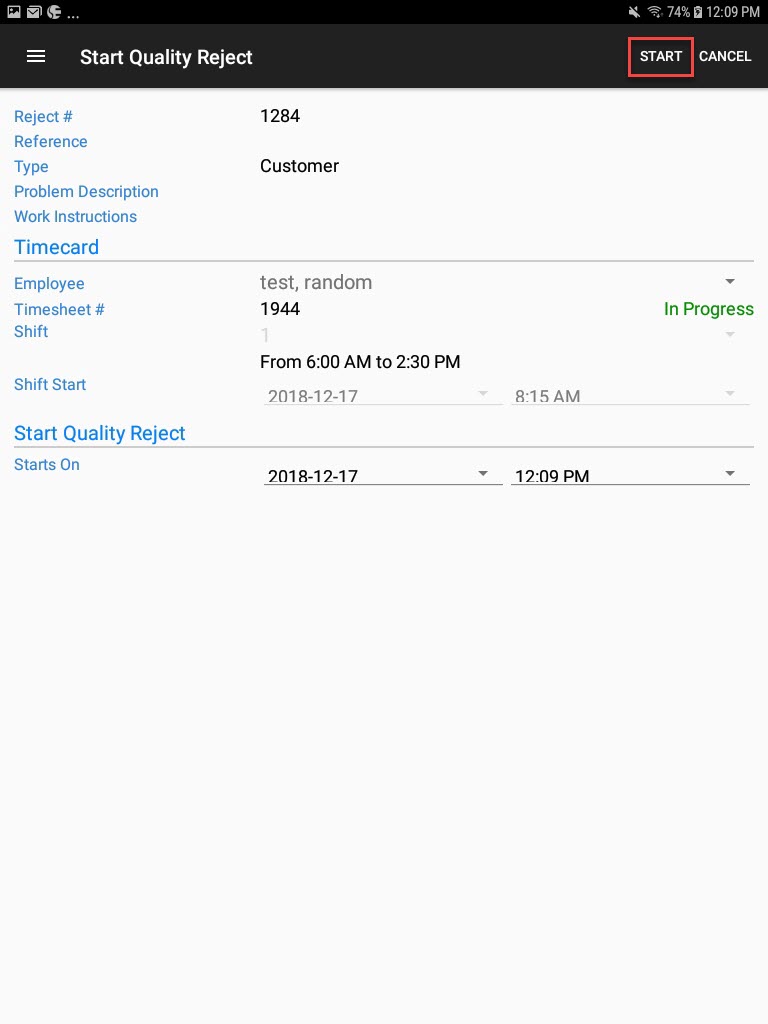
The Quality Reject will be started.
Stopping a Reject
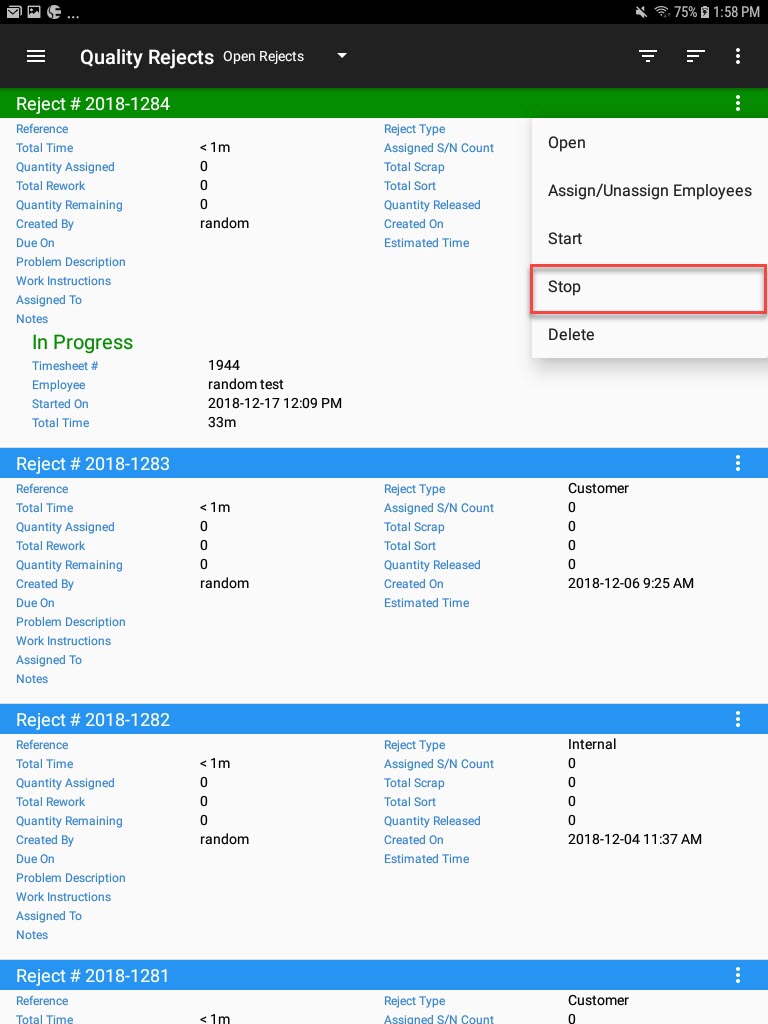
There are two ways to stop a Quality Reject. The first way is to locate the Quality Reject you wish to stop on the Quality Rejects screen.
Using the action menu, select the Stop option.
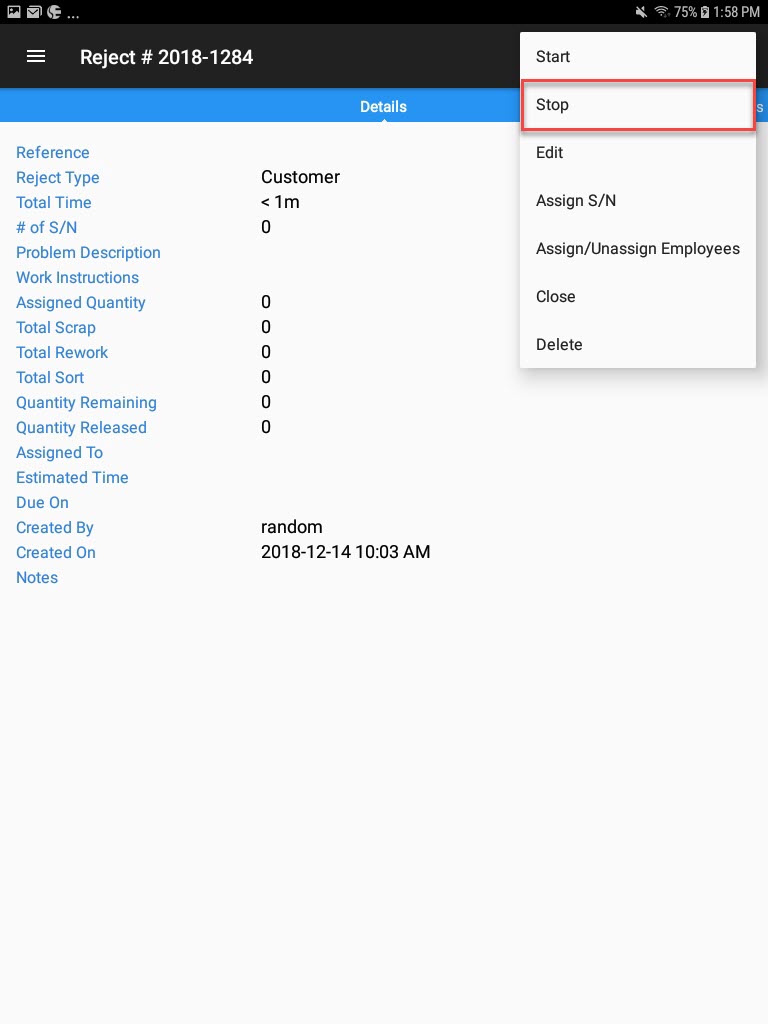
The second way is to locate the Quality Reject you wish to stop on the Quality Rejects screen and from the action menu, select Open.

On the Quality Reject detail screen select the Stop option from the action menu located in the top-right corner of the screen.
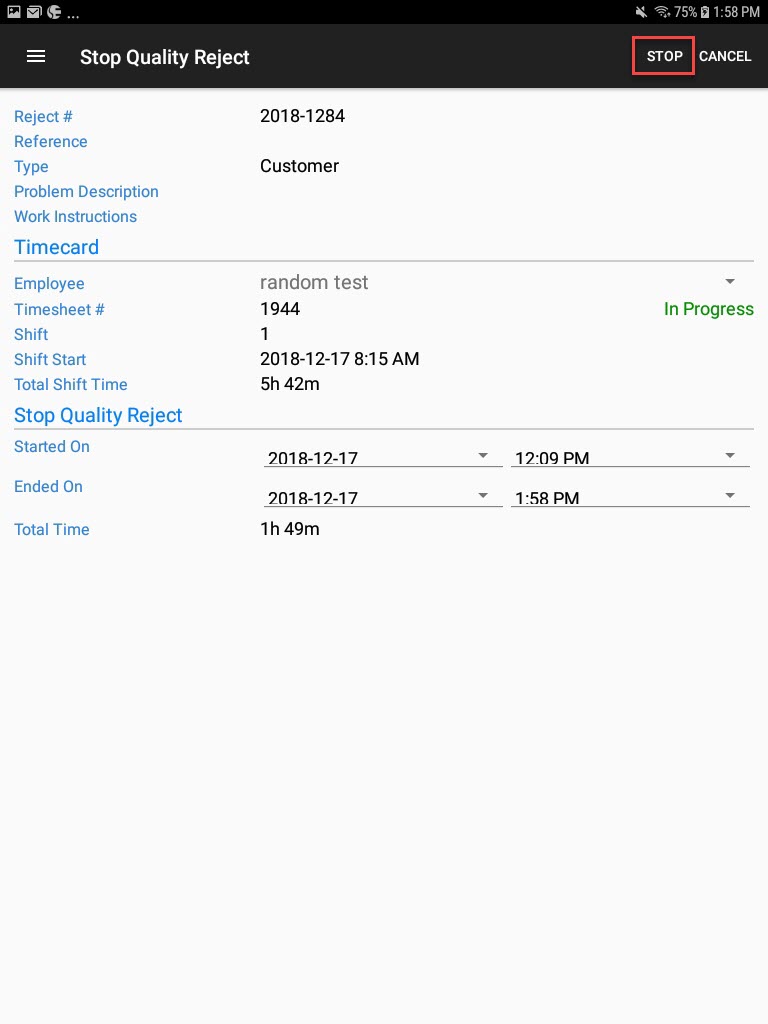
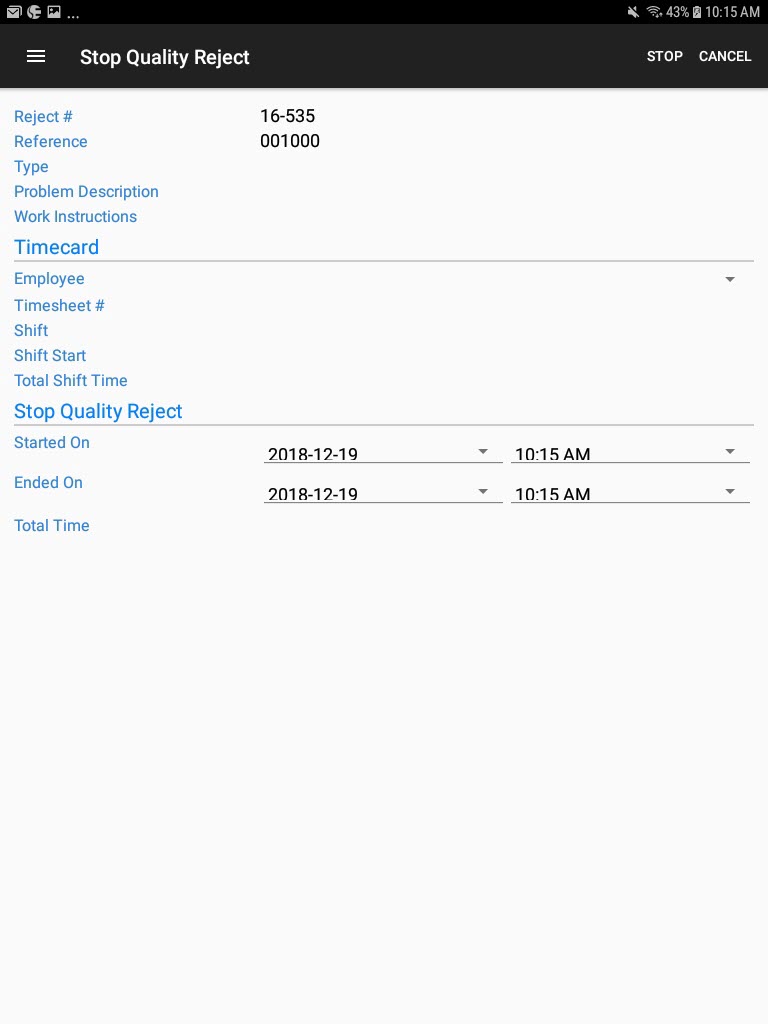
Both of these options will open the Stop Quality Reject screen.
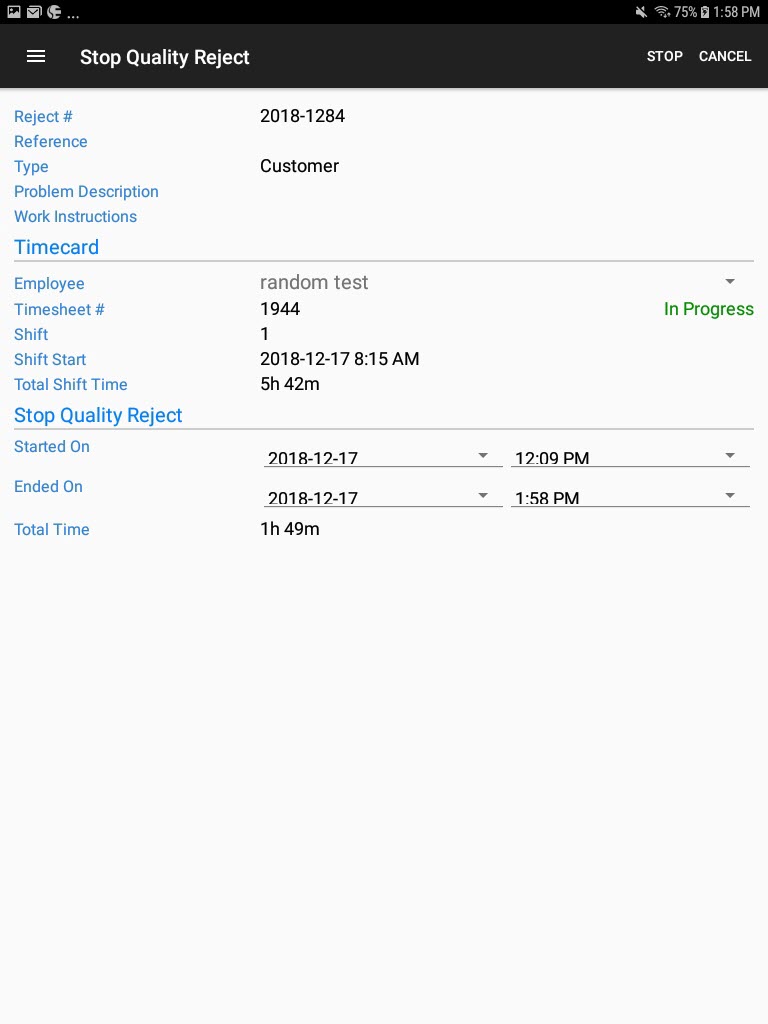
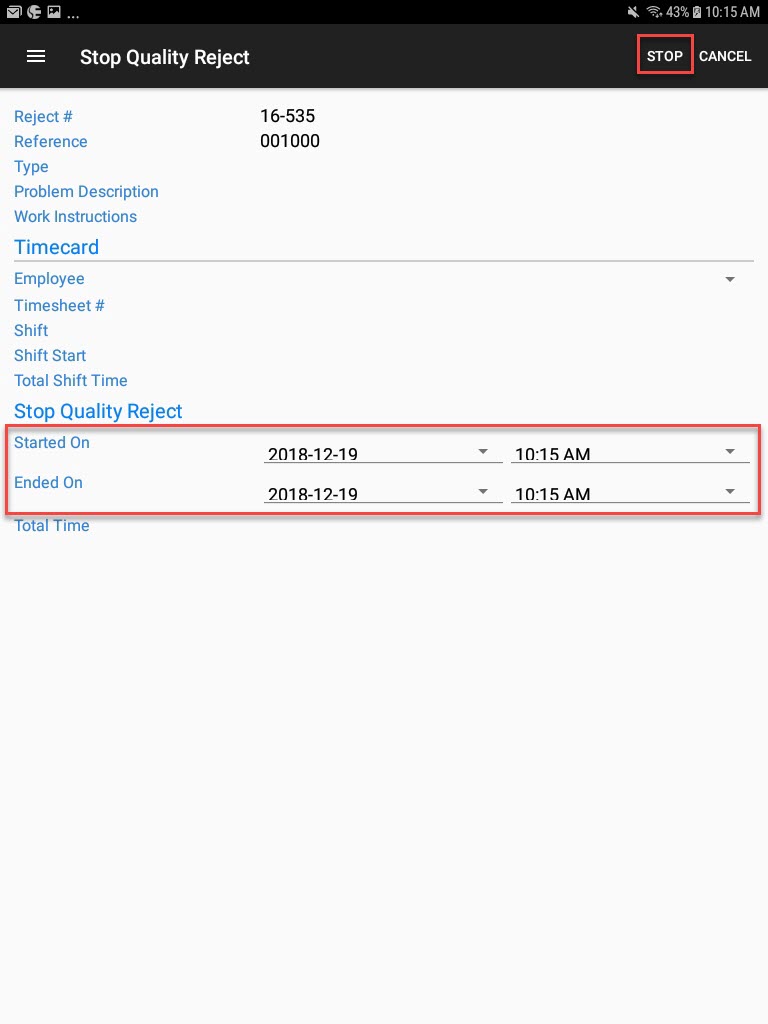
Users must select an Ended On time, then select Stop located in the top-right corner of the screen.
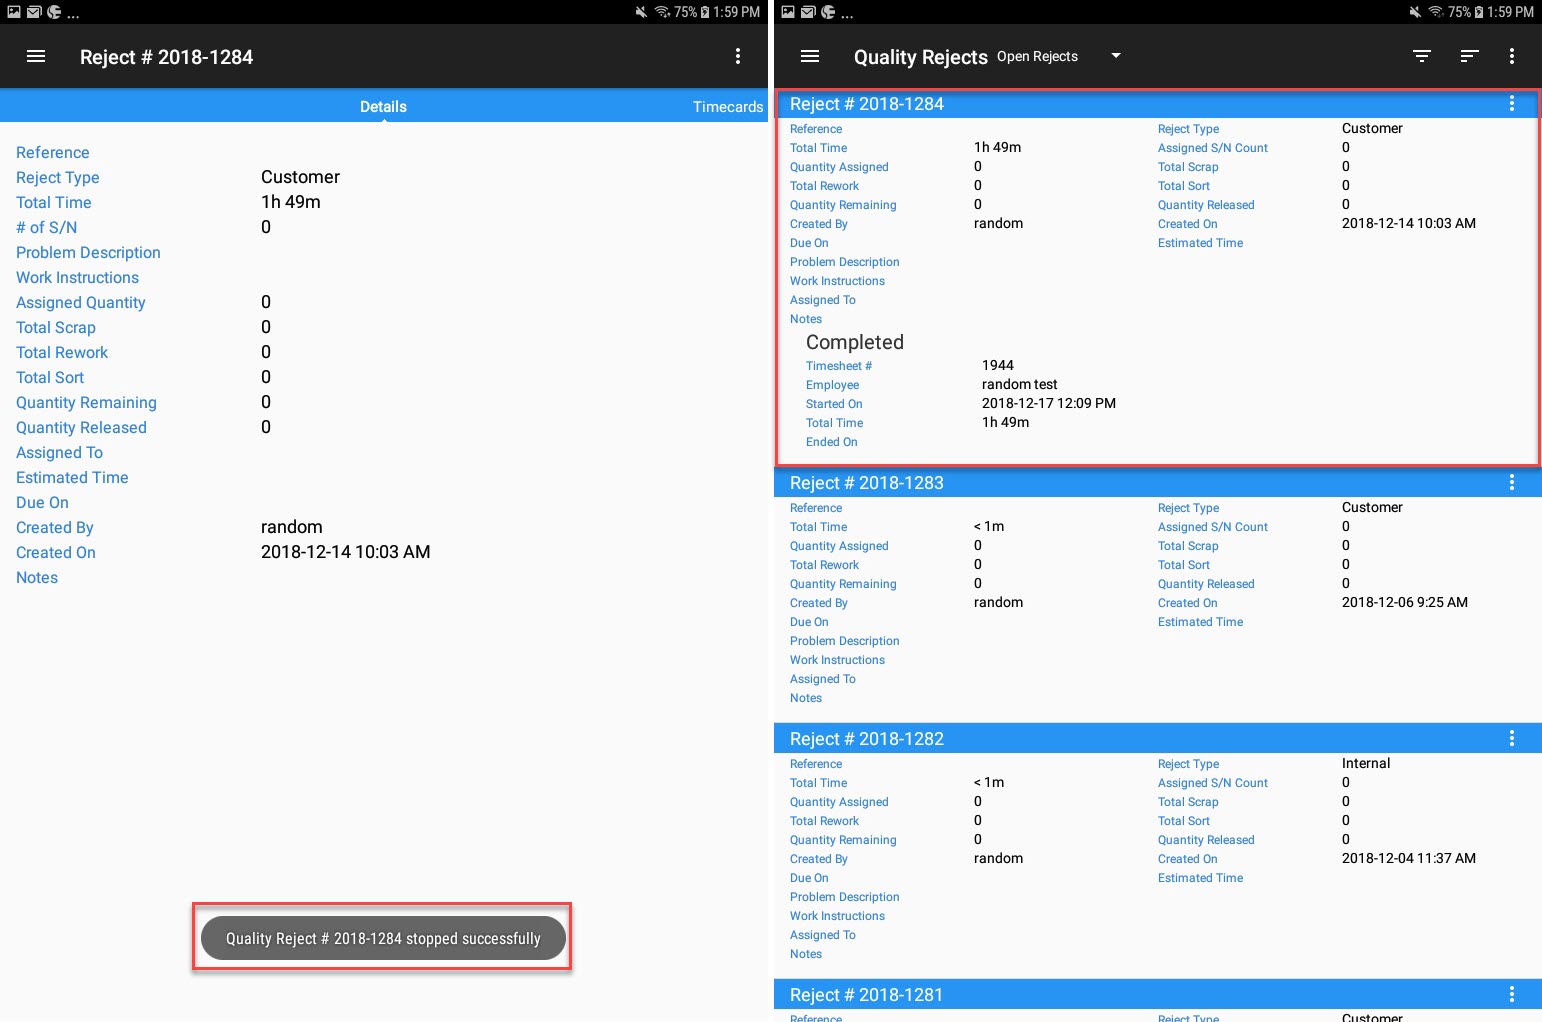
The Quality Reject will be stopped and will appear as Completed.
Editing a Reject
To edit a Quality Reject, locate the Quality Reject you wish to edit on the Quality Rejects screen and from the action menu, select Open.

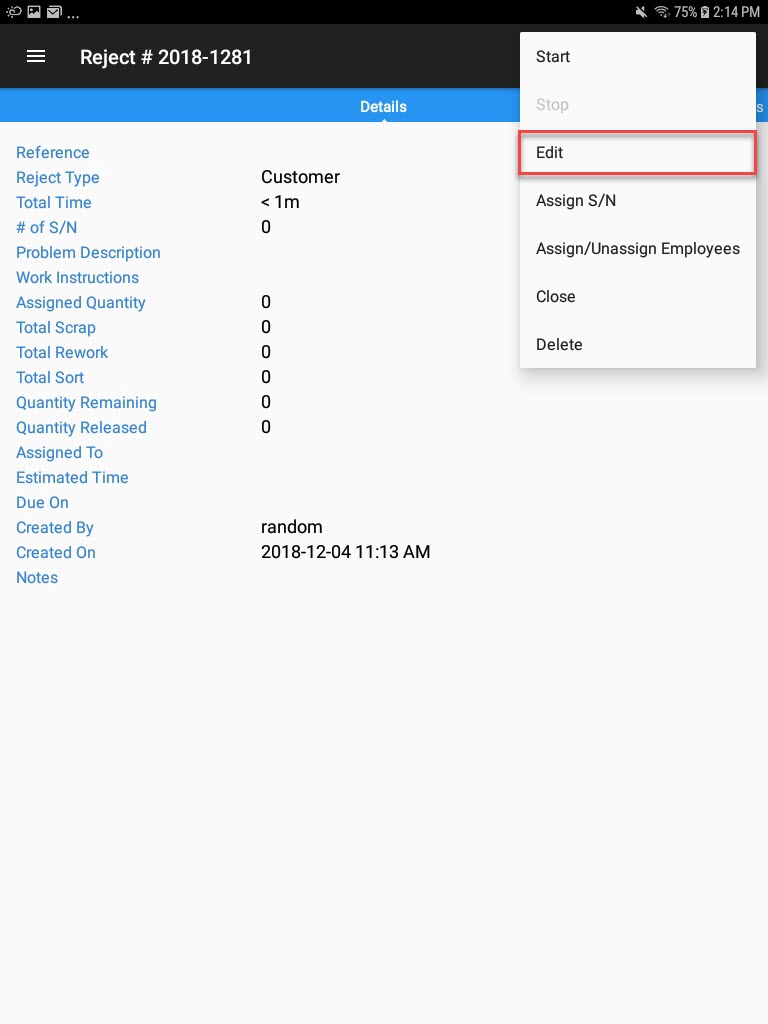
On the Quality Reject detail screen select the Edit option from the action menu located in the top-right corner of the screen.
The Edit Quality Reject screen will appear where users can make the necessary changes.
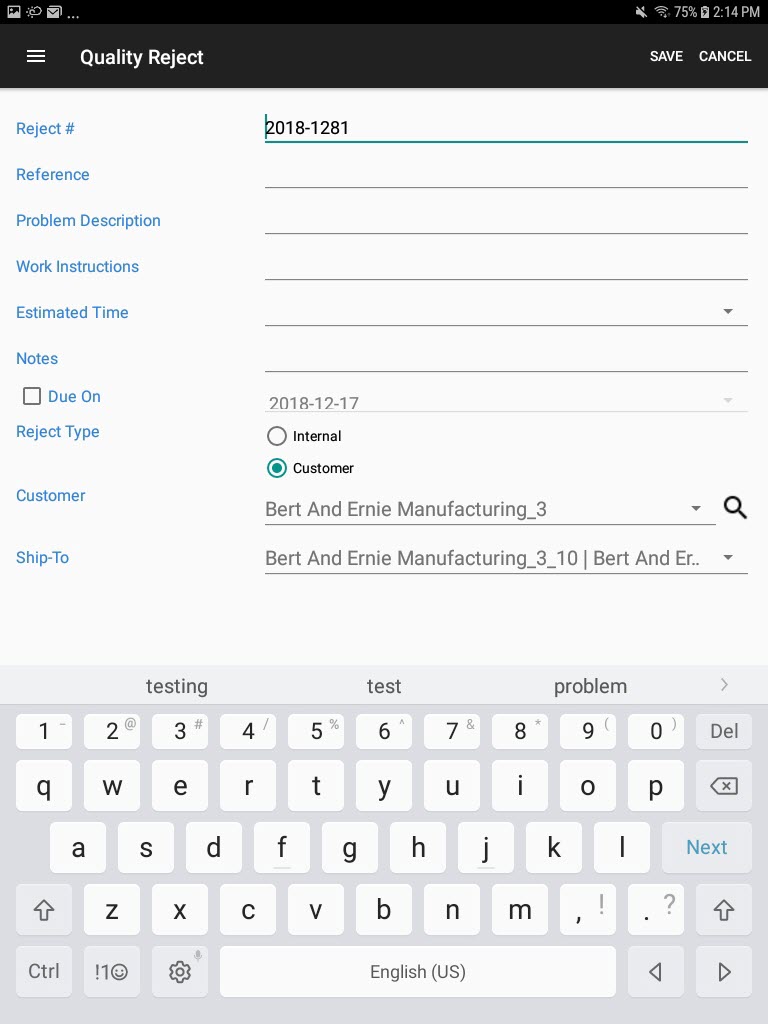
Once the necessary changes have been made, select Save located in the top-right corner of the screen.
The changes will be saved.
Assigning Serial Numbers to a Reject
To assign a serial number to a Quality Reject, on the Quality Rejects screen locate the Quality Reject you wish to assign a serial number to and from the action menu, select Open.

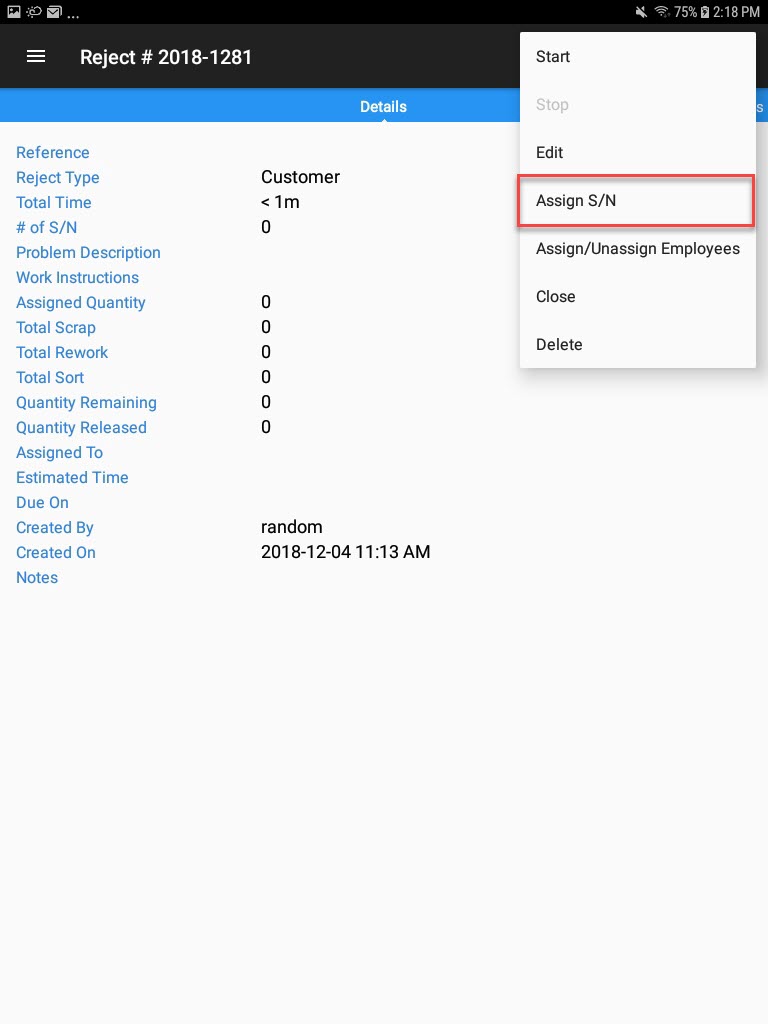
On the Quality Rejects detail screen select the Assign S/N option from the action menu located in the top-right corner of the screen.
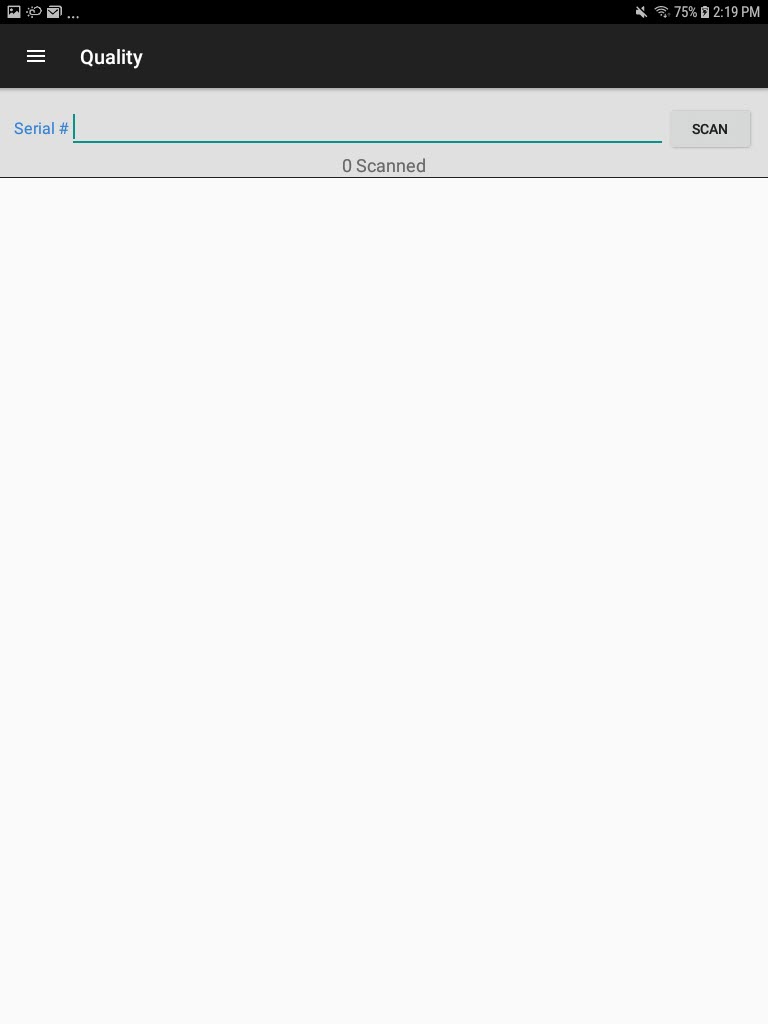
The Quality Scanning screen will appear where users can enter in a serial number or, scan one.
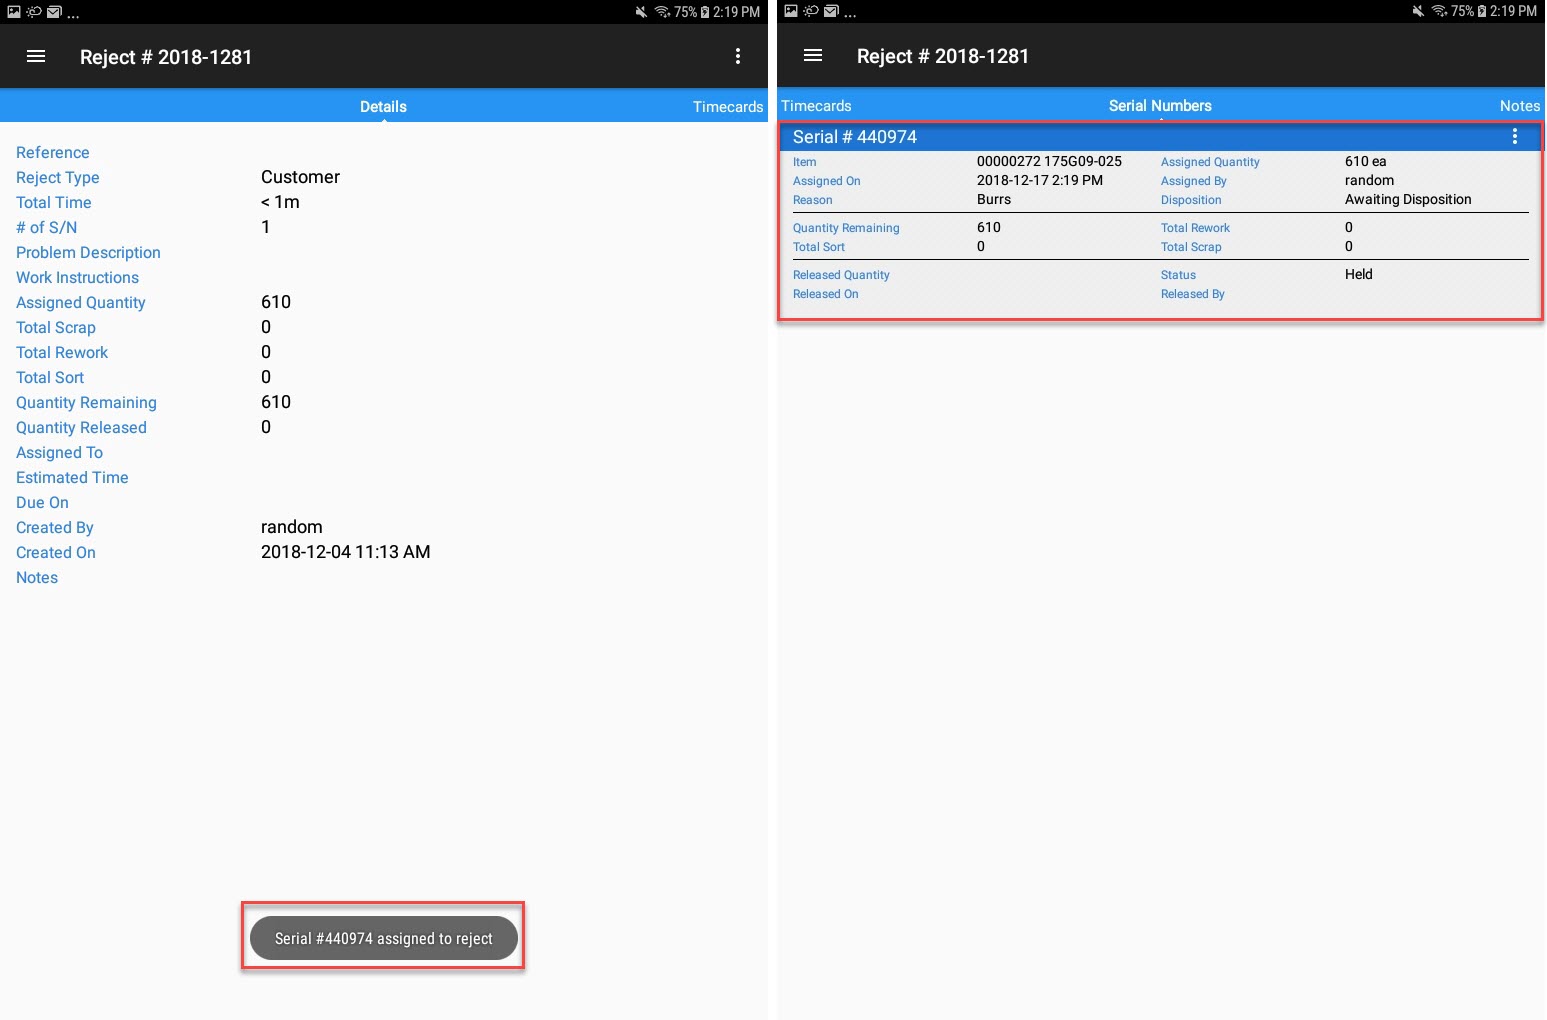
Once the serial number has been entered or scanned, it will be assigned to the selected Quality Reject.
Removing a Serial Number on a Quality Reject
To remove a serial number from a Quality Reject, simply locate the serial and from the action menu, select Remove.
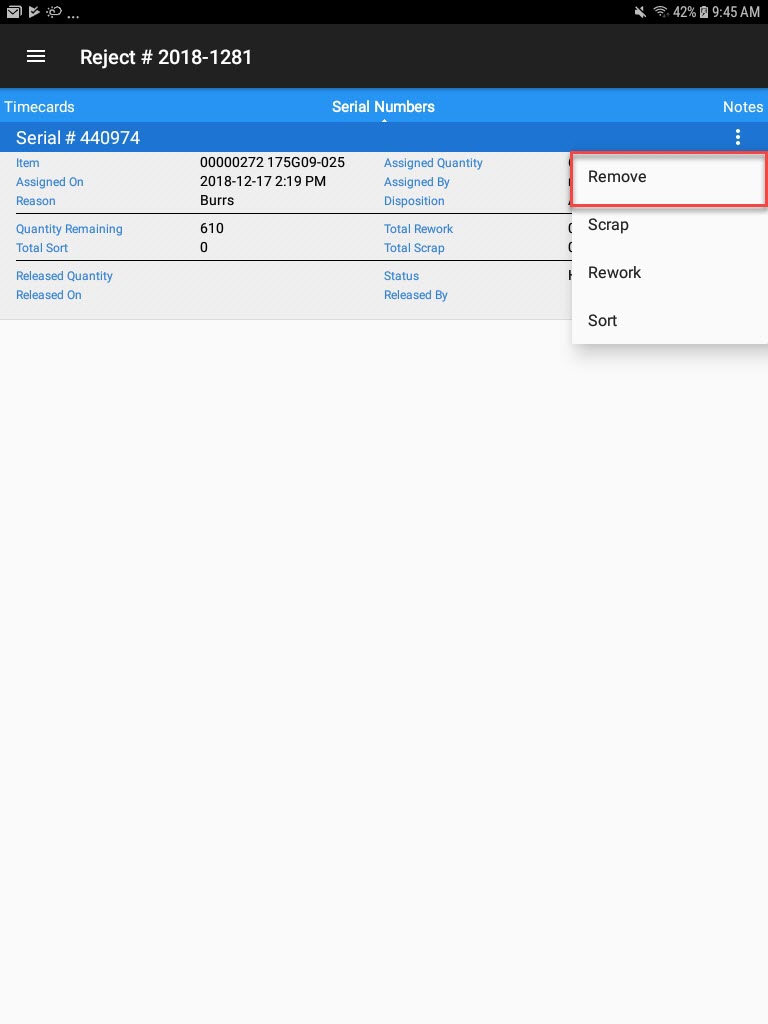
The selected serial number will be removed from the Quality Reject.
Scrapping a Serial Number on a Quality Reject
To scrap a serial number that is on a Quality Reject, locate the Quality Reject and from the action menu, select Open.

On the Quality Rejects detail screen, swipe over to the Serial Numbers tab and locate the serial number you wish to scrap.
From the action menu, select Scrap.
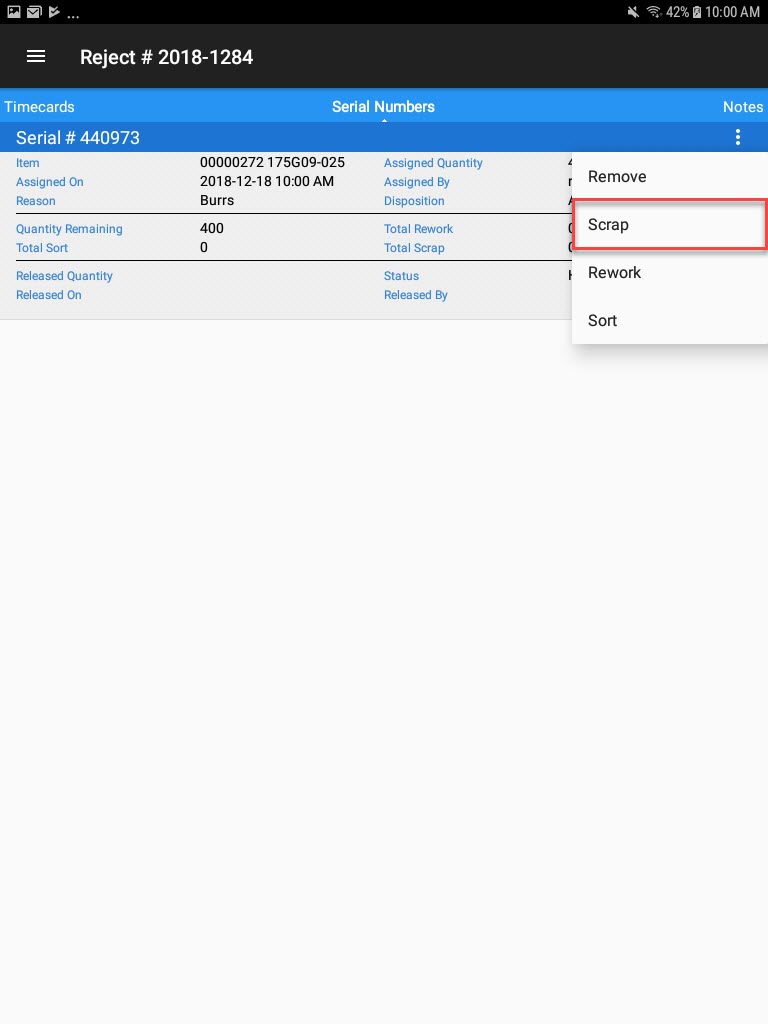
The Scrap screen will appear.
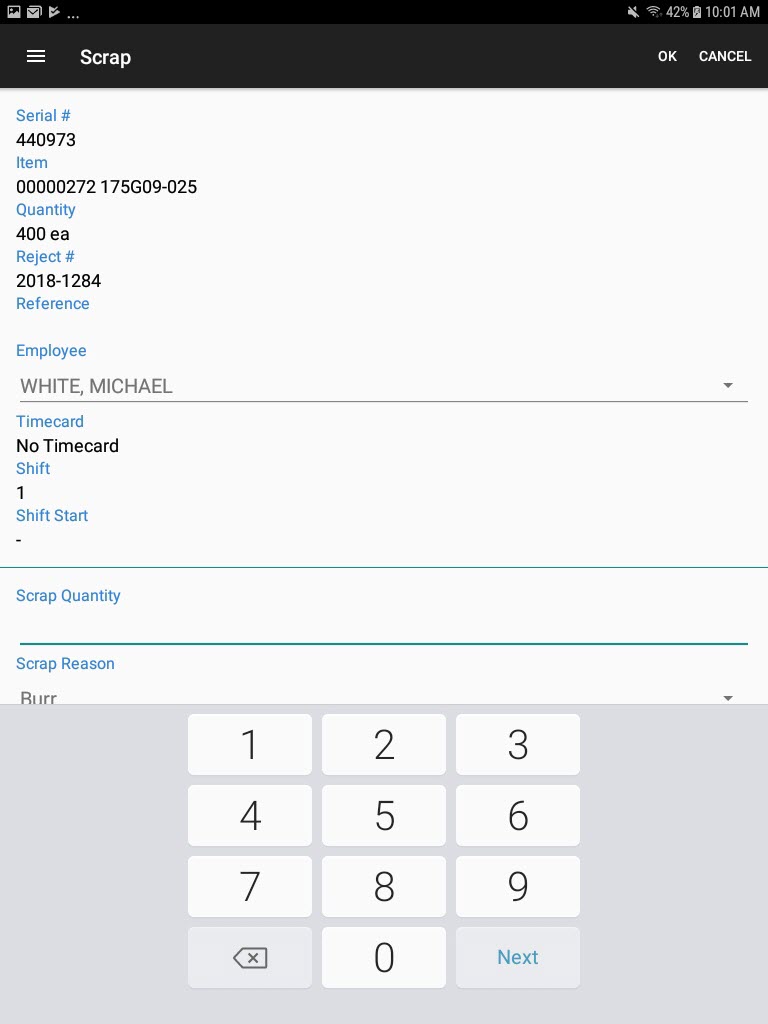
Users must select a Timecard, enter the Scrap Quantity, Scrap Reason, and Scrap Notes if necessary.
Note
Users can also select a different Employee if one has not already been selected. The scrap will be recorded against the selected Employee’s timecard.
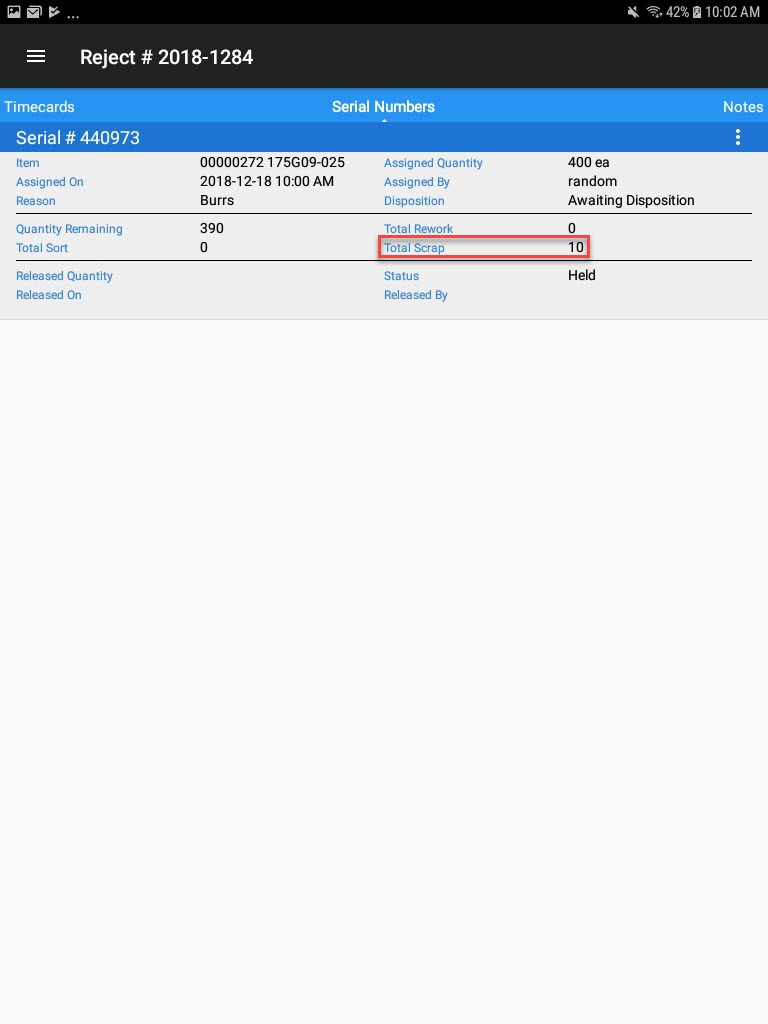
Once the necessary information is completed, select OK located at the top of the screen.
The scrapped quantity for the selected serial number will be scrapped.
Reworking a Serial Number on a Quality Reject
To rework a serial number that is on a Quality Reject, locate the Quality Reject and from the action menu, select Open.

On the Quality Rejects detail screen, swipe over to the Serial Numbers tab and locate the serial number you wish to rework.
From the action menu, select Rework.
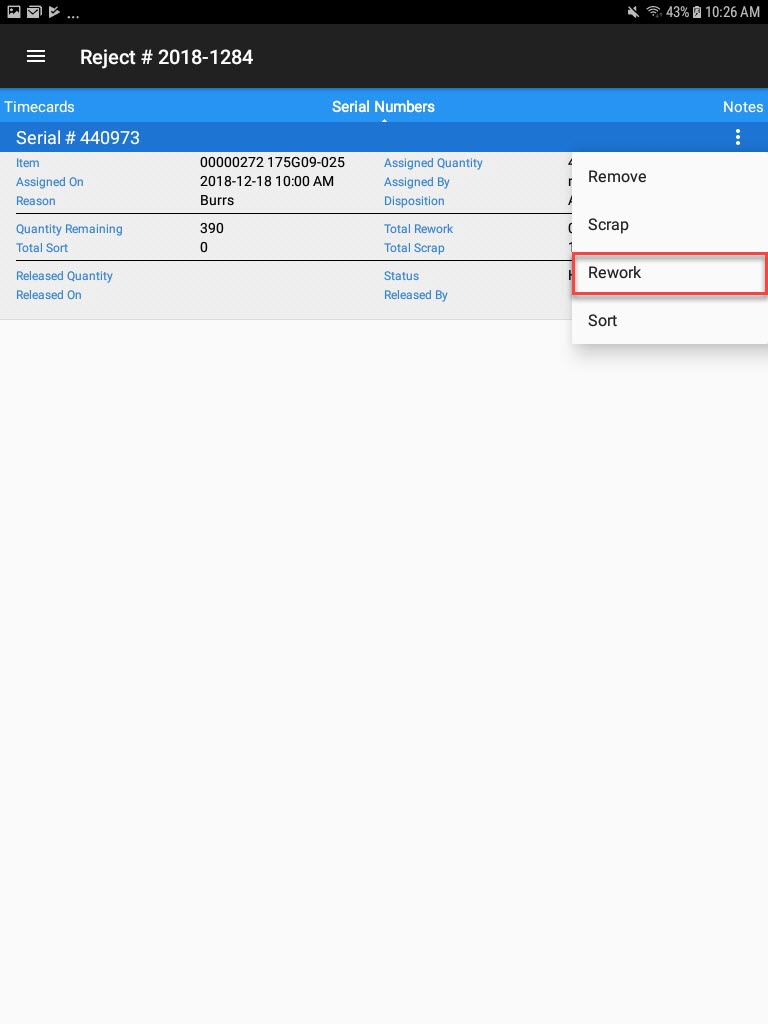
The Rework screen will appear.
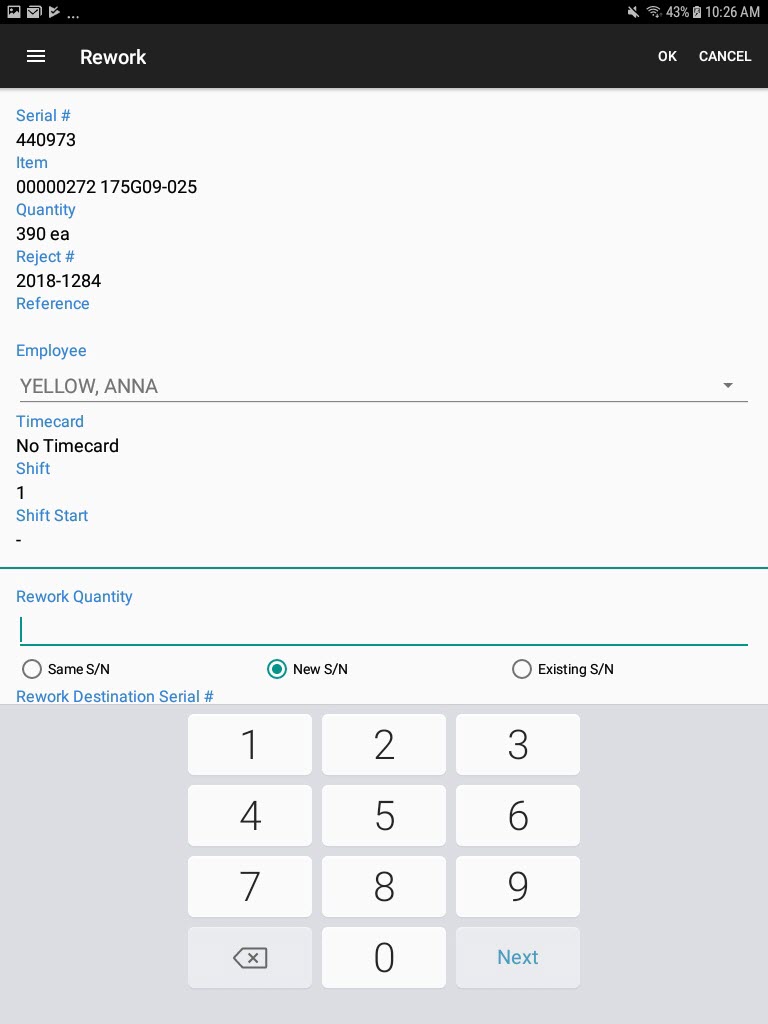
Users must select a Timecard, enter in a Rework Quantity, select Same S/N, New S/N, or Existing S/N and enter in a serial number if necessary.
Users can also select a Rework Reason and enter in Rework Notes as well.
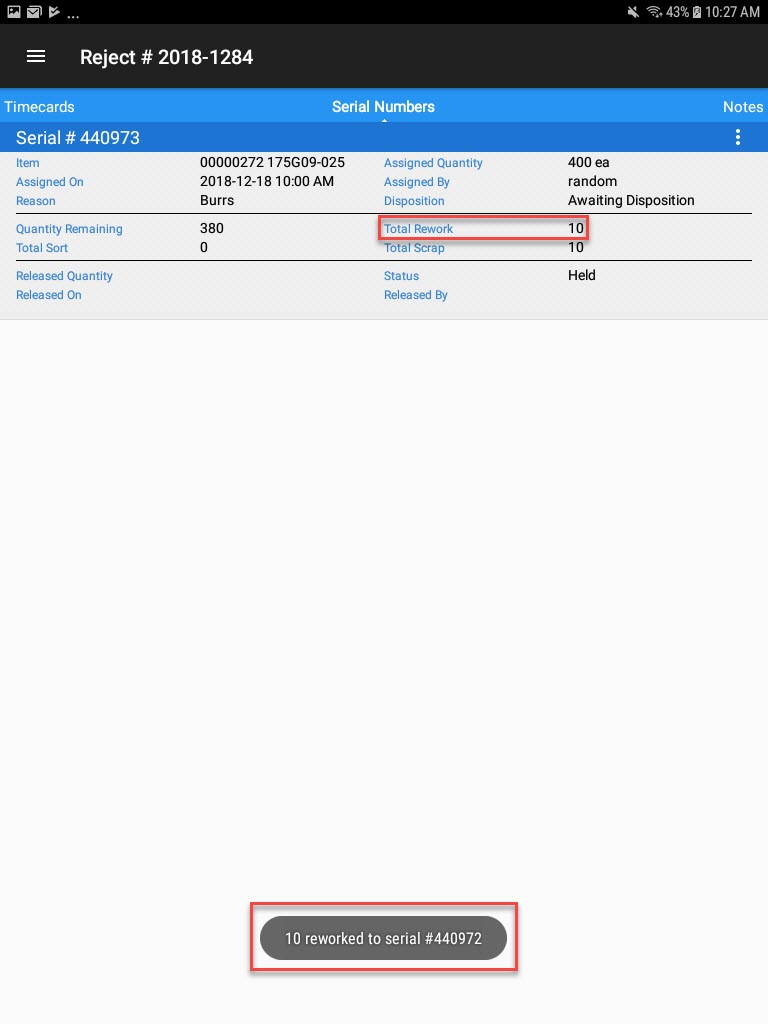
Once the necessary fields are completed, select OK located at the top of the screen.
The serial number Quantity Remaining and Total Rework fields will be updated.
Sorting a Serial Number on a Quality Reject
To sort a serial number that is on a Quality Reject, locate the Quality Reject and from the action menu, select Open.

On the Quality Rejects detail screen, swipe over to the Serial Numbers tab and locate the serial number you wish to sort.
From the action menu, select Sort.
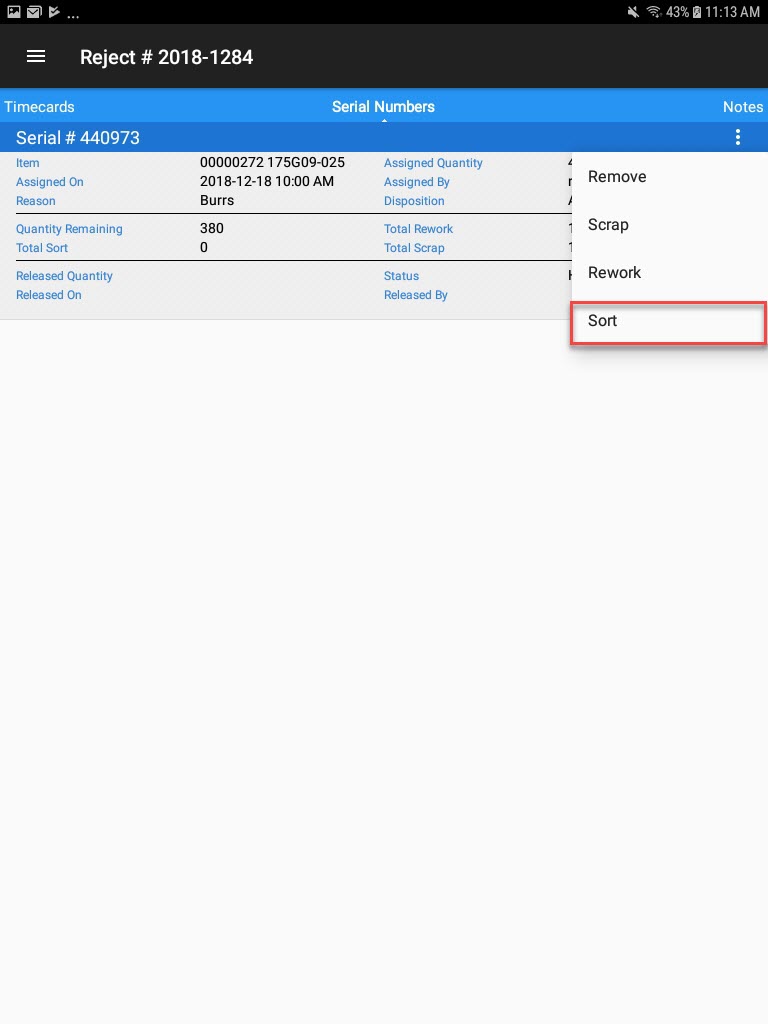
The Sort screen will appear.
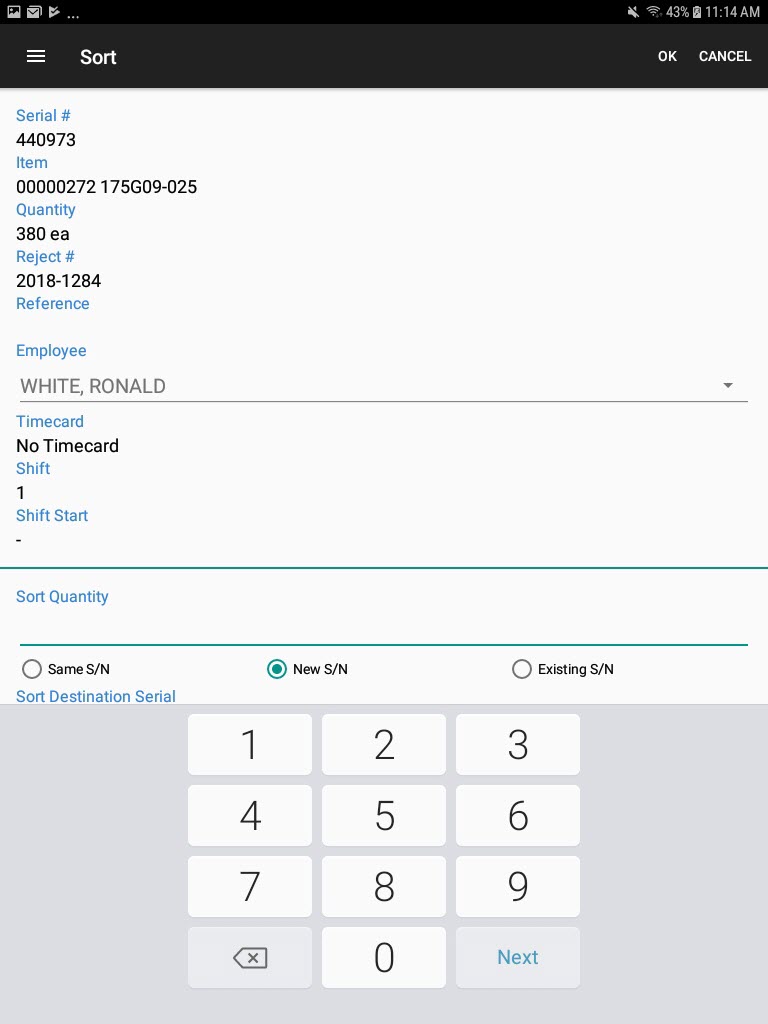
Users must select a Timecard, enter in a Sort Quantity, select Same S/N, New S/N, or Existing S/N and enter in a serial number if necessary.
Users can also select a Sort Reason and enter in Sort Notes.
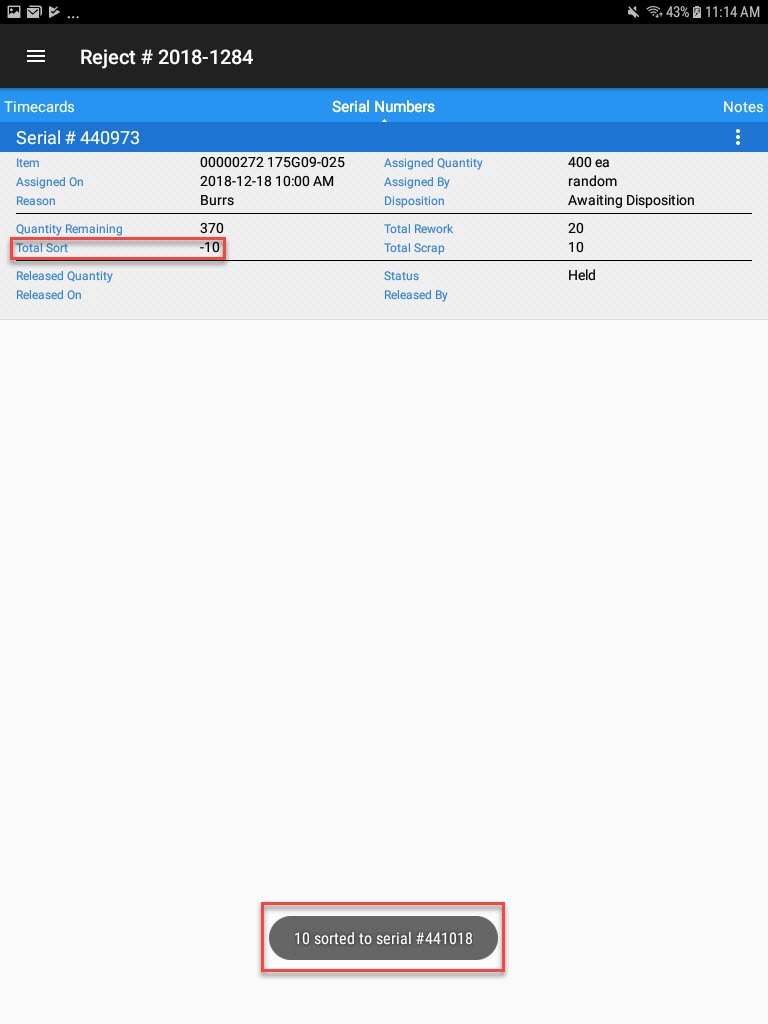
Once the necessary fields are completed, select OK located at the top of the screen.
The serial number Quantity Remaining and Total Sort fields will be updated.
Assigning and Unassigning Rejects to Employees
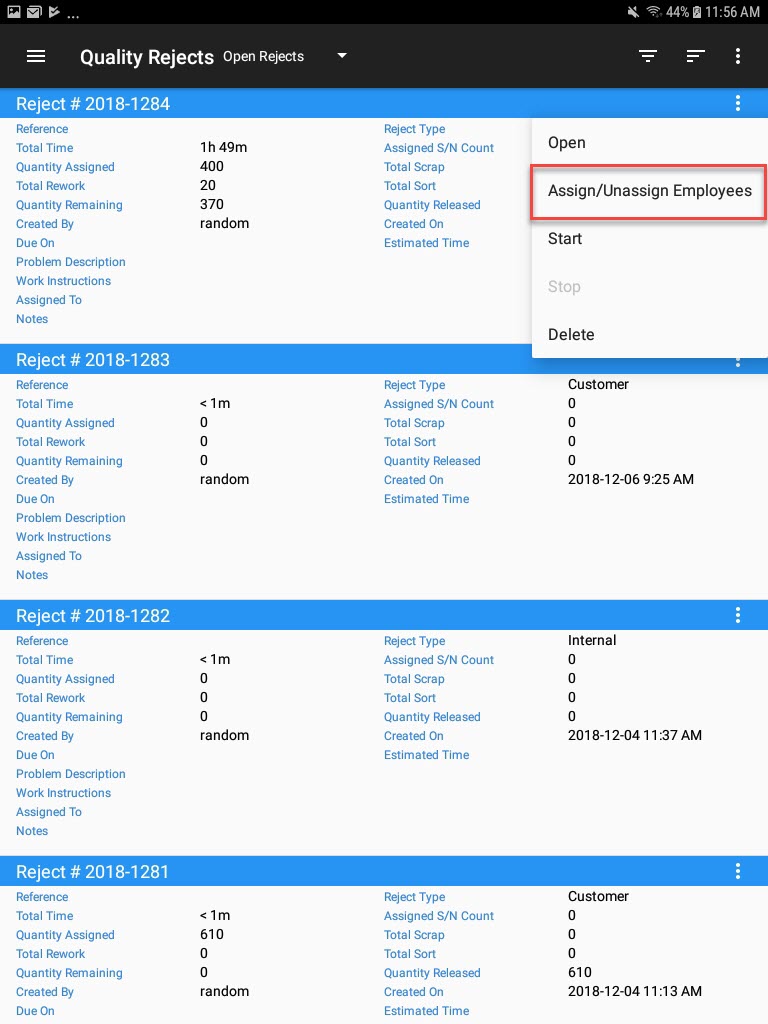
There are two ways to assign a Quality Reject to an Employee. The first way is to locate the Quality Reject you wish to assign to an Employee.

Using the action menu, select the Assign/Unassign Employees option.
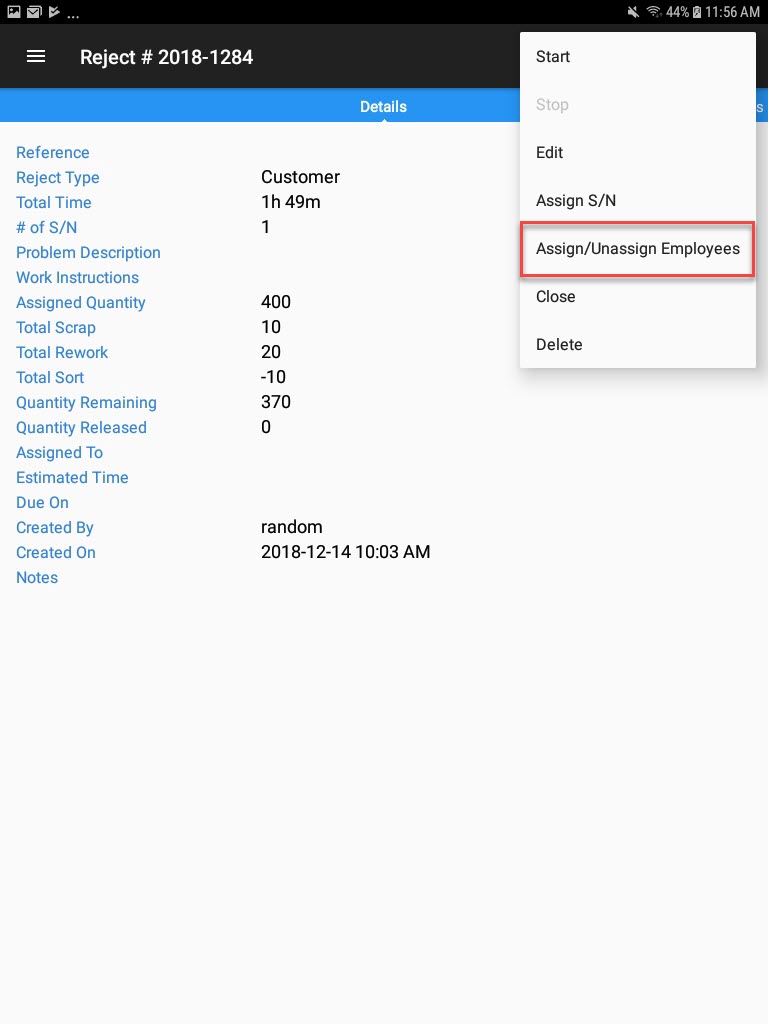
The second way is to locate the Quality Reject you wish to assign an Employee too and from the action menu, select Open.

On the Quality Rejects detail screen select the Assign/Unassign Employees option from the action menu located in the top-right corner of the screen.
Both of these options will open the Assigned Employees window.
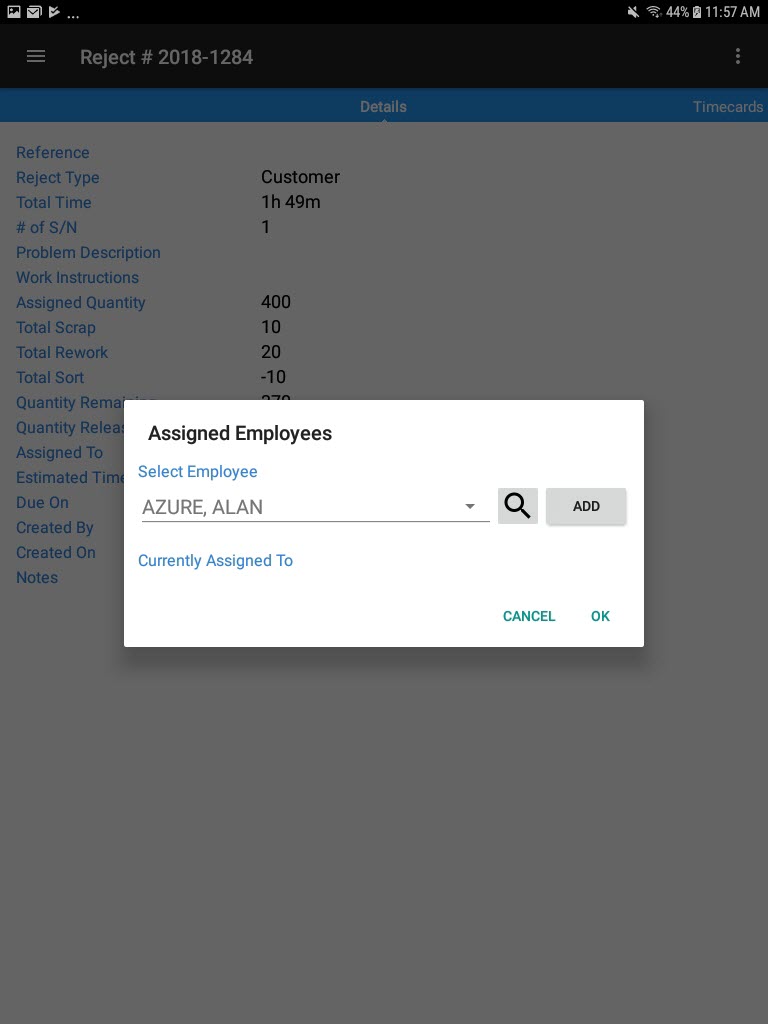
Users can select an Employee using the drop-down or search for an Employee using the search button.
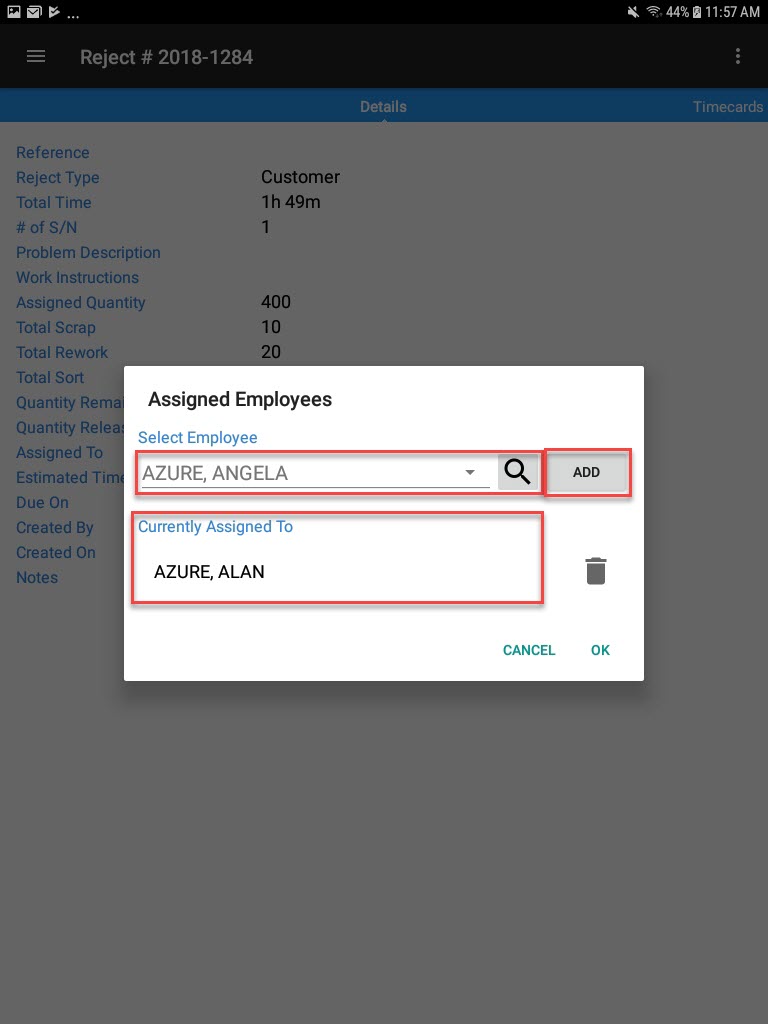
Once the appropriate Employee is selected, select the Add button. The selected Employee will be added to the Currently Assigned To section of the window.
Note
Users can assign multiple Employees to a Quality Reject if necessary.
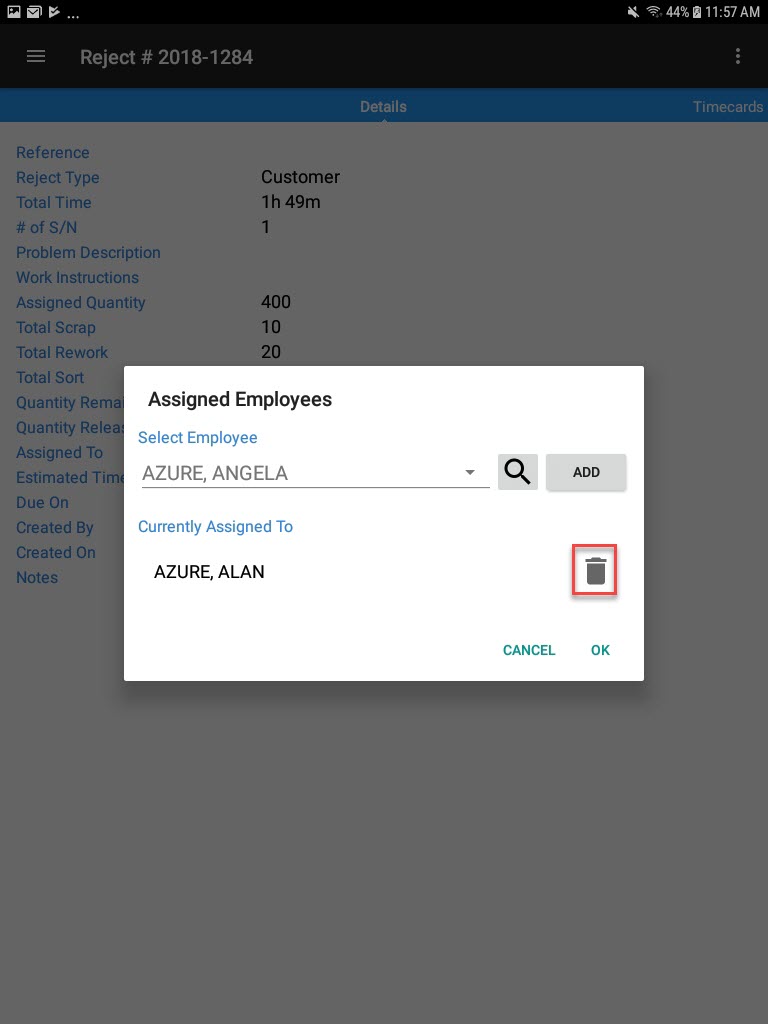
To unassign Employees from a Quality Reject, simply select the trash can icon and the Employee will become unassigned.
Quality Reject Timecard
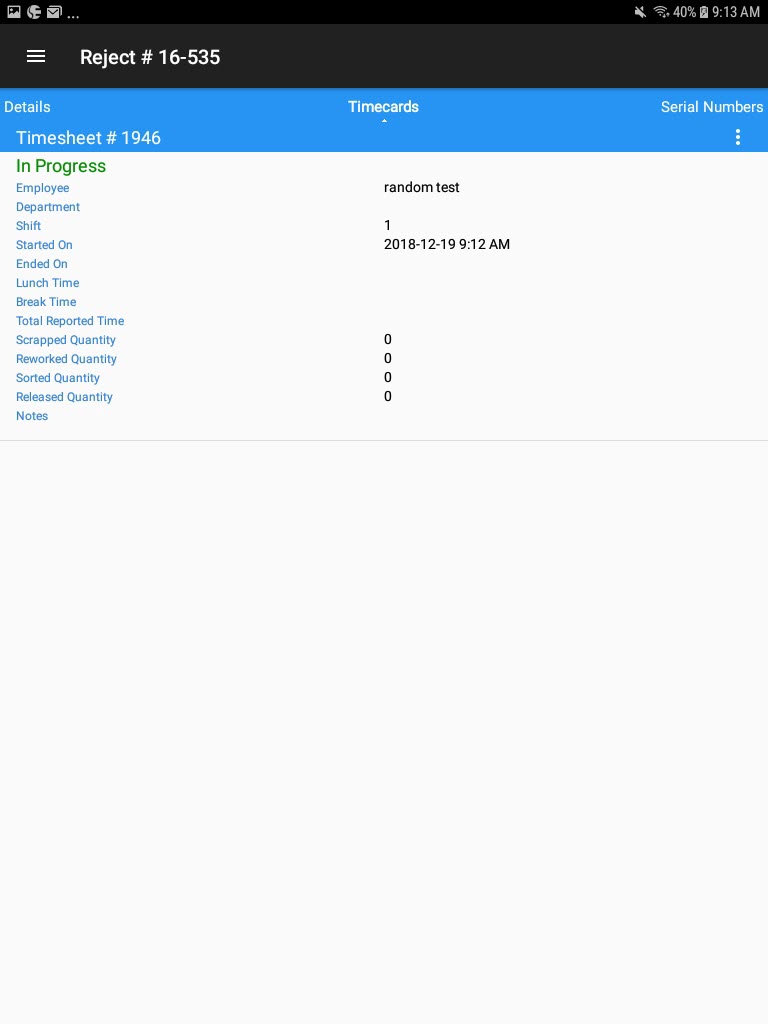
To view a Quality Reject timecard, locate the Quality Reject you wish to view a timecard for and from the action menu, select Open.

On the Quality Reject detail screen, scroll to the Timecards tab.
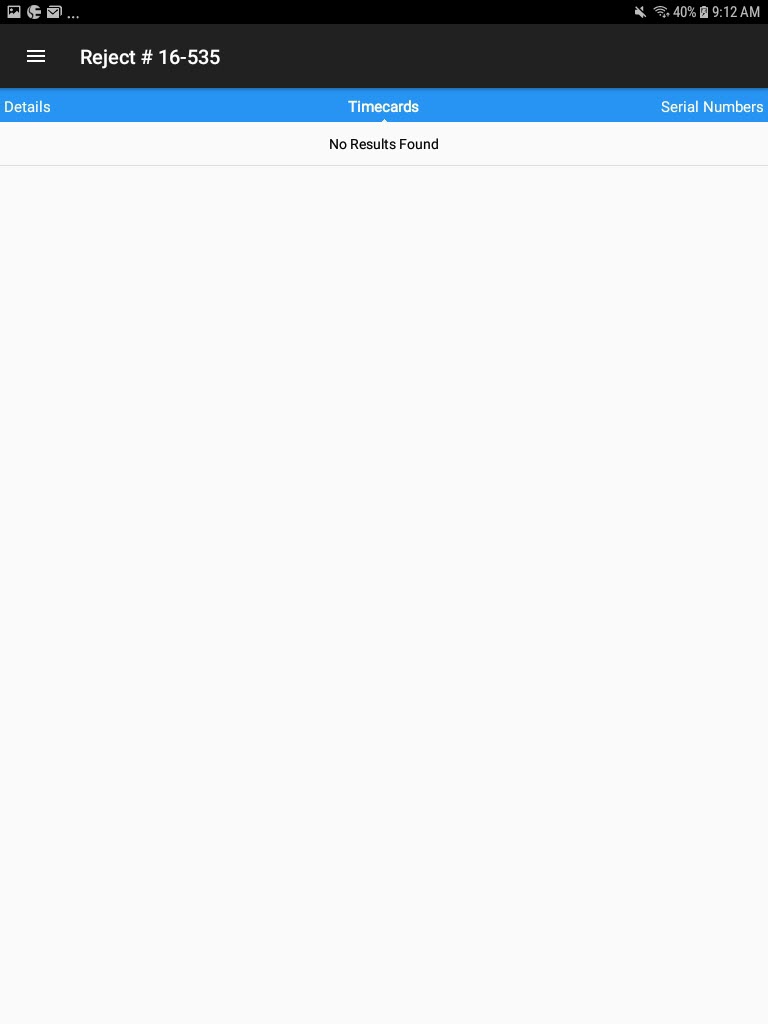
If a Quality Reject has been started, a timecard will be displayed.
Stopping a Quality Reject Timecard
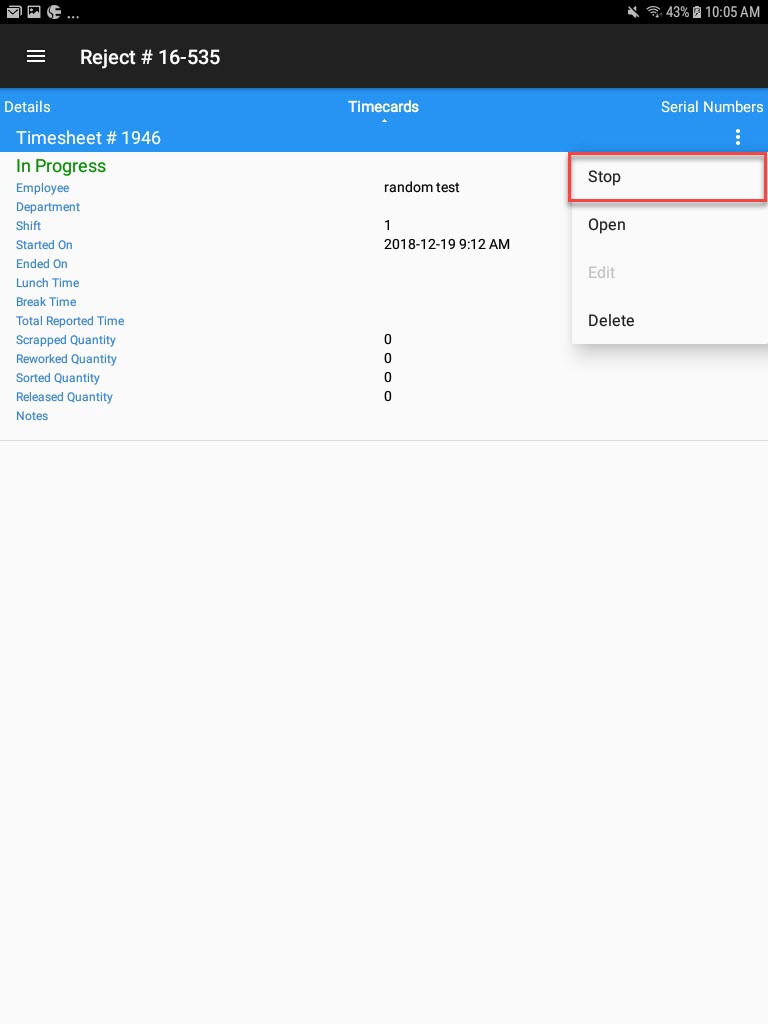
If a Quality Reject has been started, a timecard will be displayed under the Timecards tab where users have the ability to stop the timecard if necessary.
To do so, from the action menu, select Stop.
The Stop Quality Reject screen will appear.
Users can change the Started On and Ended On times if necessary. Select Stop located at the top of the screen.
The Quality Reject timecard will be stopped.
Opening a Quality Reject Timecard
To open a Quality Reject timecard, locate the Quality Reject you wish to view a timecard for and from the action menu select Open.

On the Quality Reject detail screen, scroll to the Timecards tab.

From the action menu, select Open.
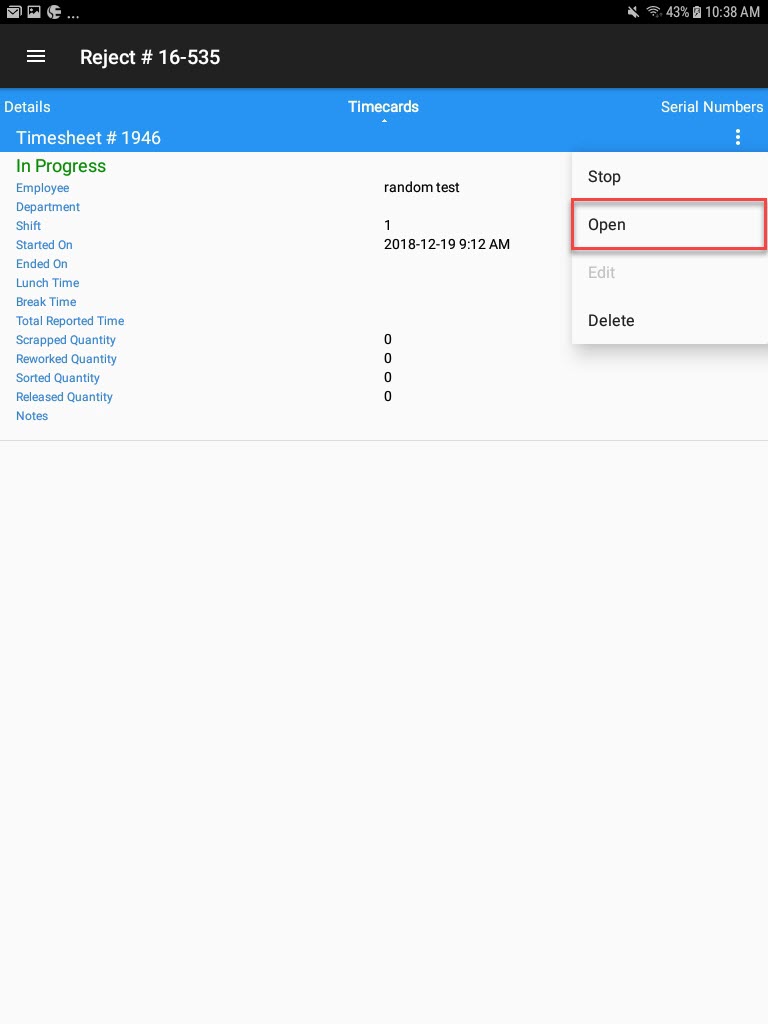
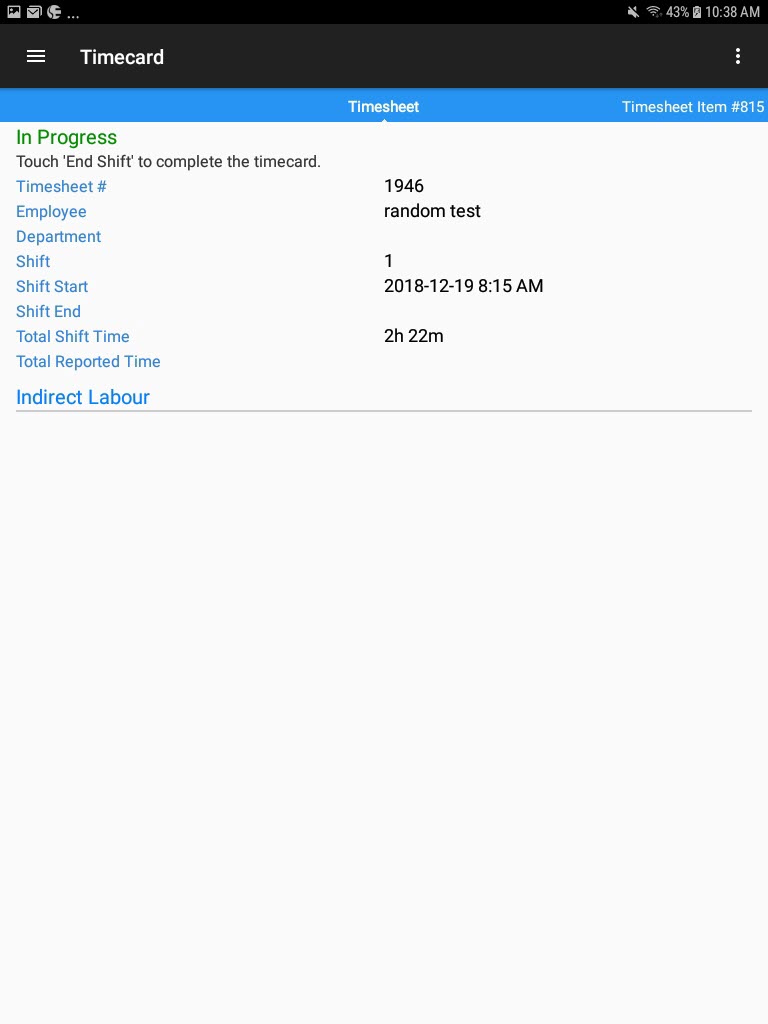
The Timecard detail screen will be displayed.
Editing a Quality Reject Timecard
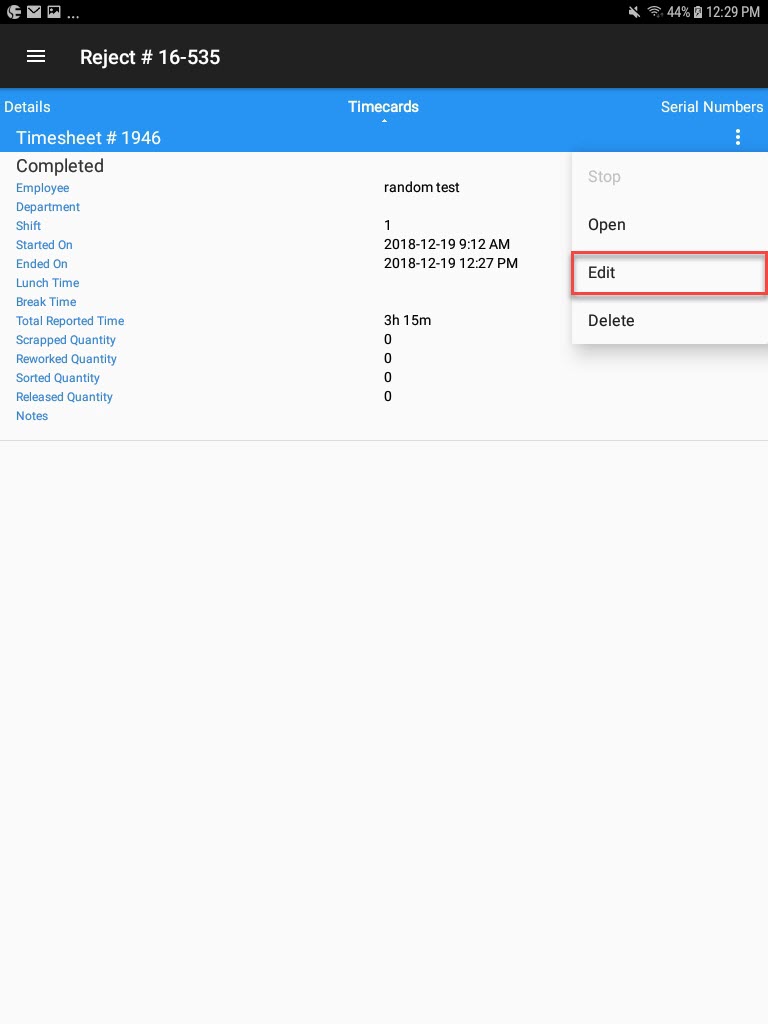
To edit a Quality Reject timecard, locate the Quality Reject you wish to edit a timecard for and from the action menu select Open.

On the Quality Reject detail screen, scroll to the Timecards tab.

From the action menu, select Edit.
The Timecard screen will be appear where users can make the necessary changes. Then, select Save located at the top of the screen.
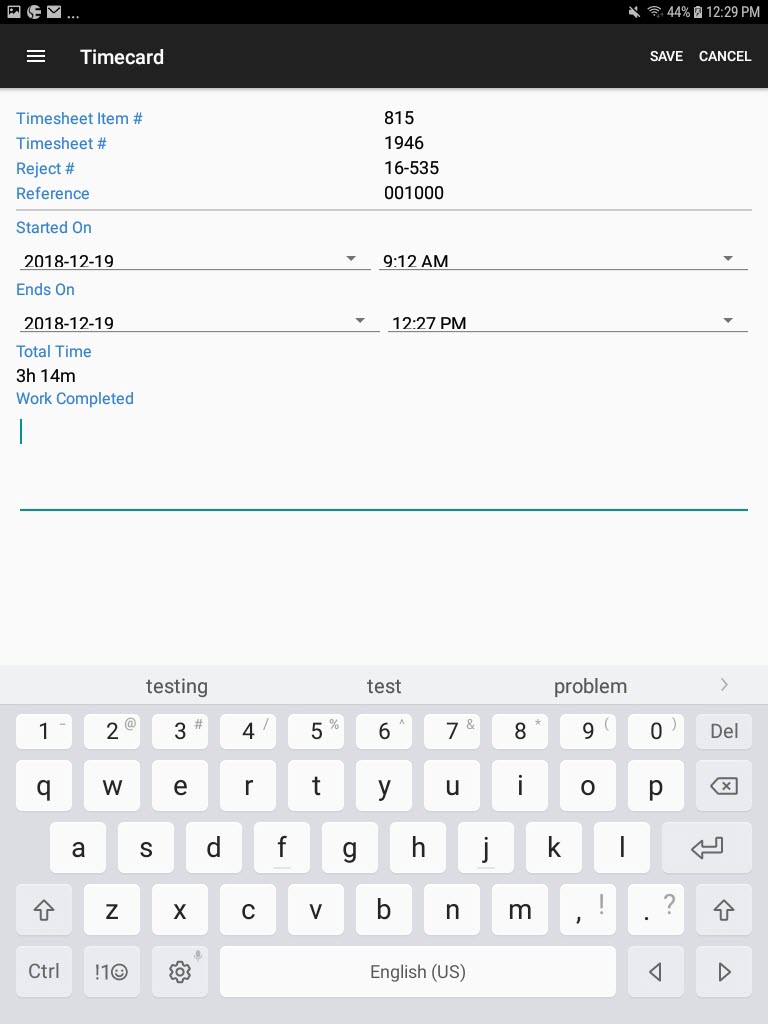
The Quality Reject timecard will be updated.
Deleting a Quality Reject Timecard
To delete a Quality Reject timecard, locate the Quality Reject you wish to delete a timecard for.

On the Quality Reject detail screen, scroll to the Timecards tab.

From the action menu, select Delete option.
The Delete Timesheet Item window will appear for users to confirm the deletion of the timecard.
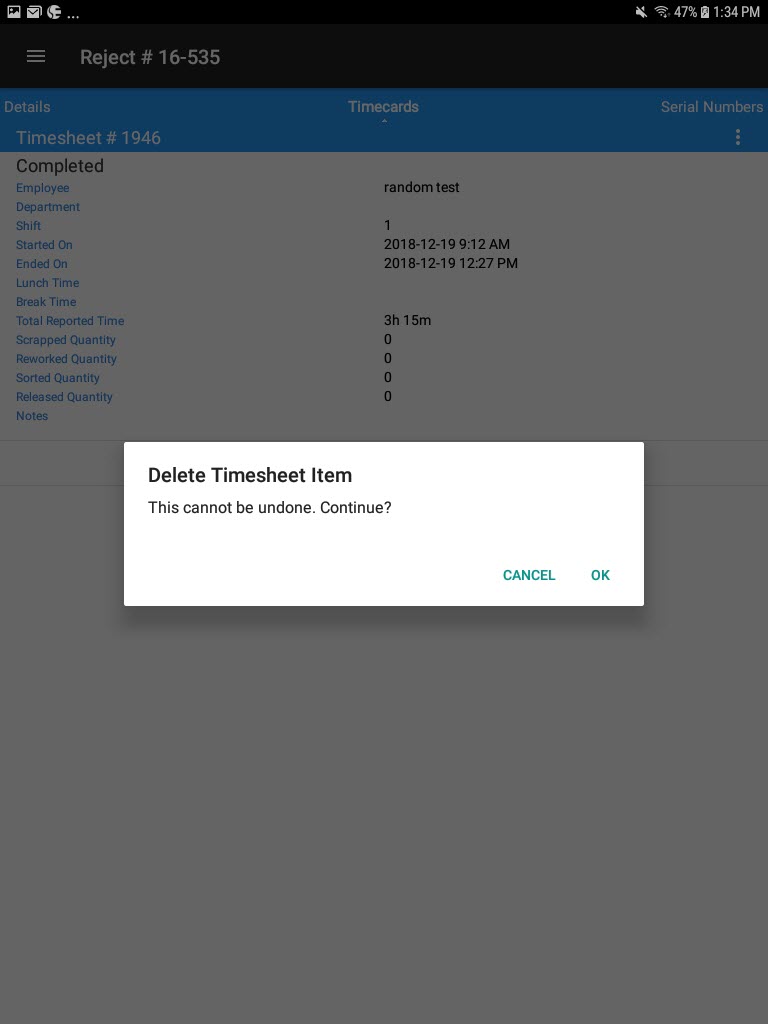
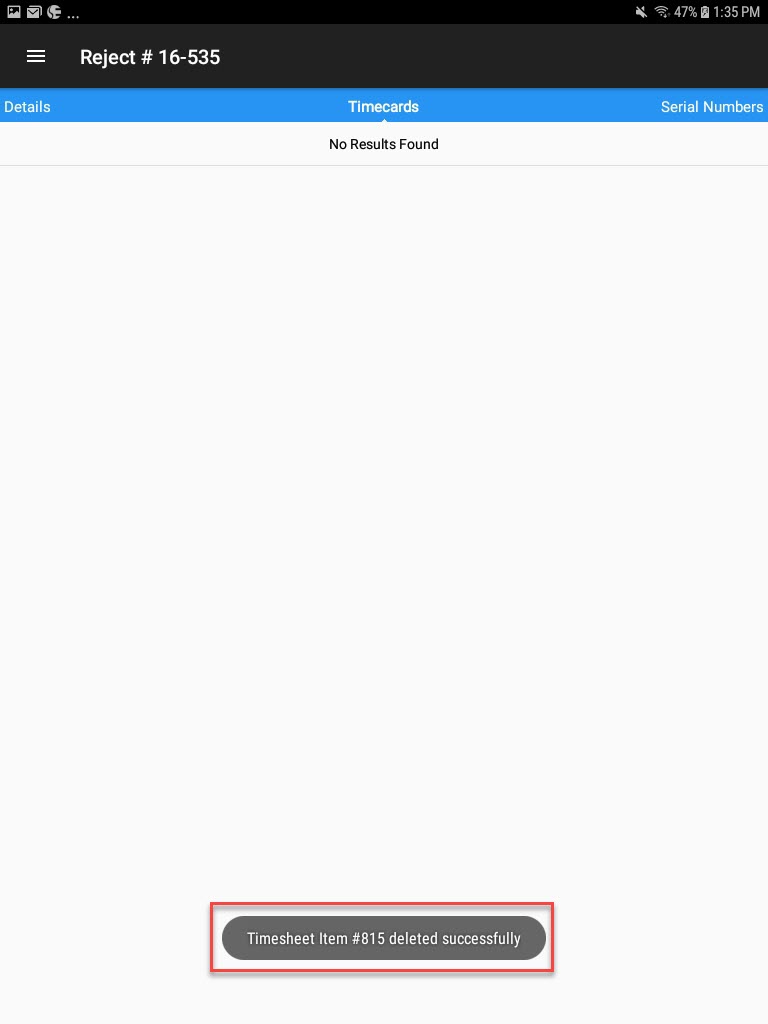
Once confirmed, the Quality Reject timecard will be deleted.
Adding and Deleting Notes on a Quality Reject
To add notes to a Quality Reject, locate the Quality Reject and from the action menu, select Open.

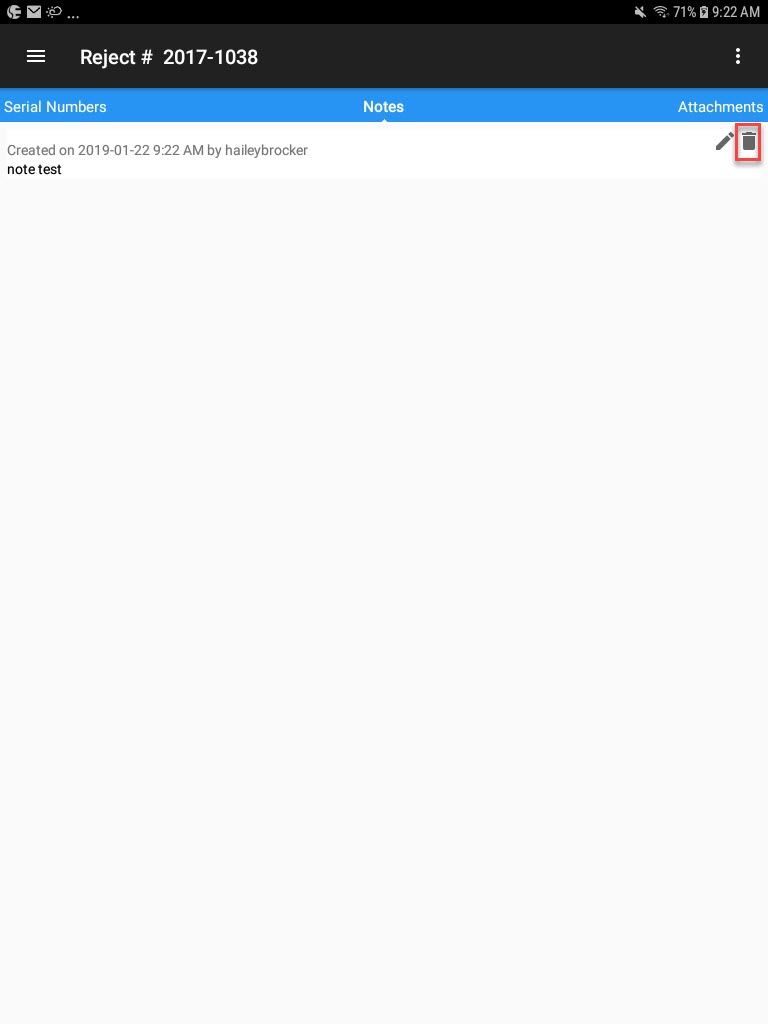
On the Quality Rejects detail screen, swipe over to the Notes tab and from the action menu, select Add Note.
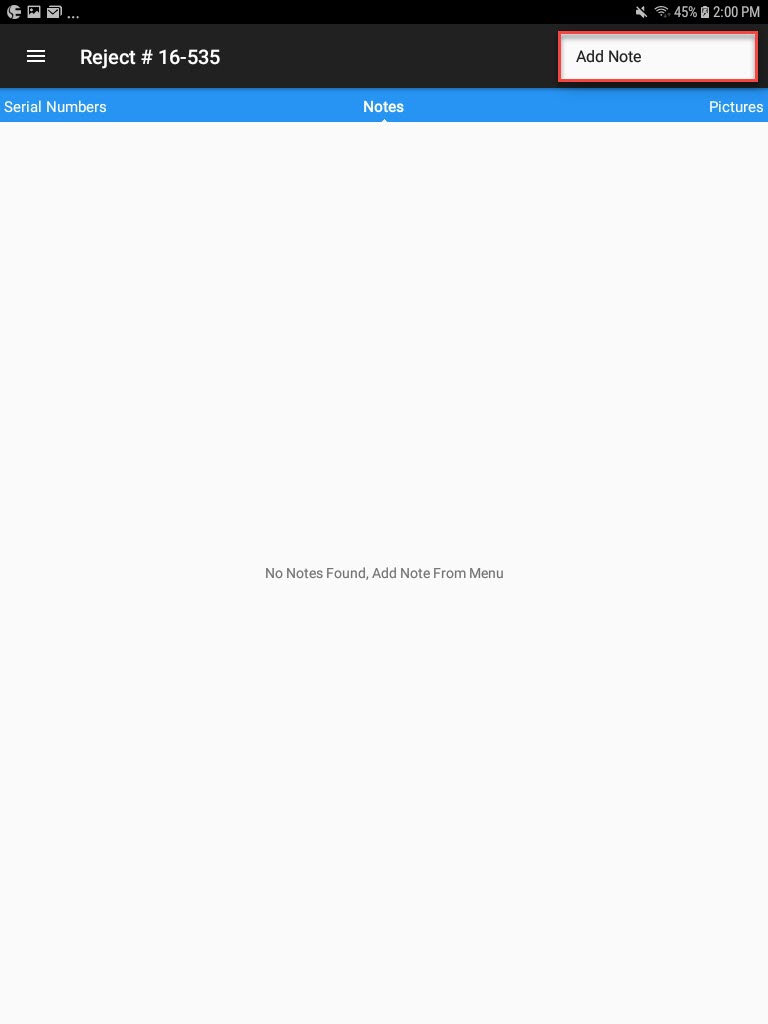
The Add Note window will appear where users can enter in any necessary notes for the selected Quality Reject.
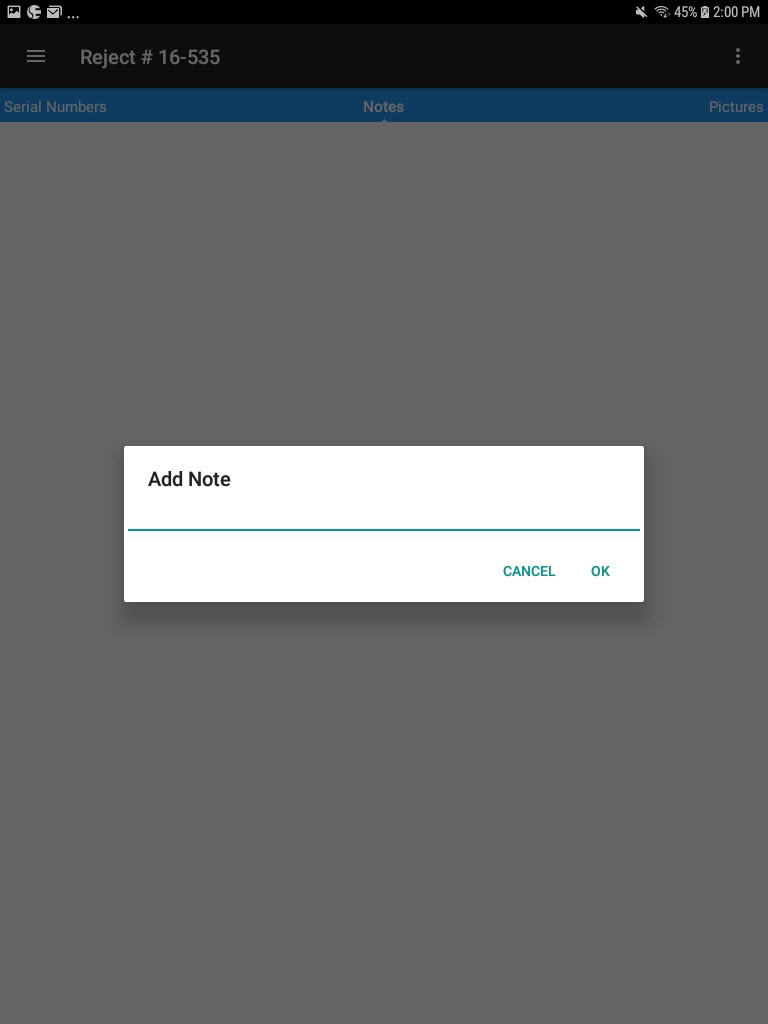
Once the necessary notes have be entered, select OK.
The notes will be added to the Quality Reject.
Note
Users can edit notes on a Quality Reject by selecting the Edit button. The Edit Note window will appear where users can make the necessary changes and then, select OK to save.
To delete a note from a Quality Reject, locate the note you wish to delete and select the trash can button.
Adding and Deleting Pictures on a Quality Reject
To add a picture to a Quality Reject, locate the Quality Reject and from the action menu, select Open.

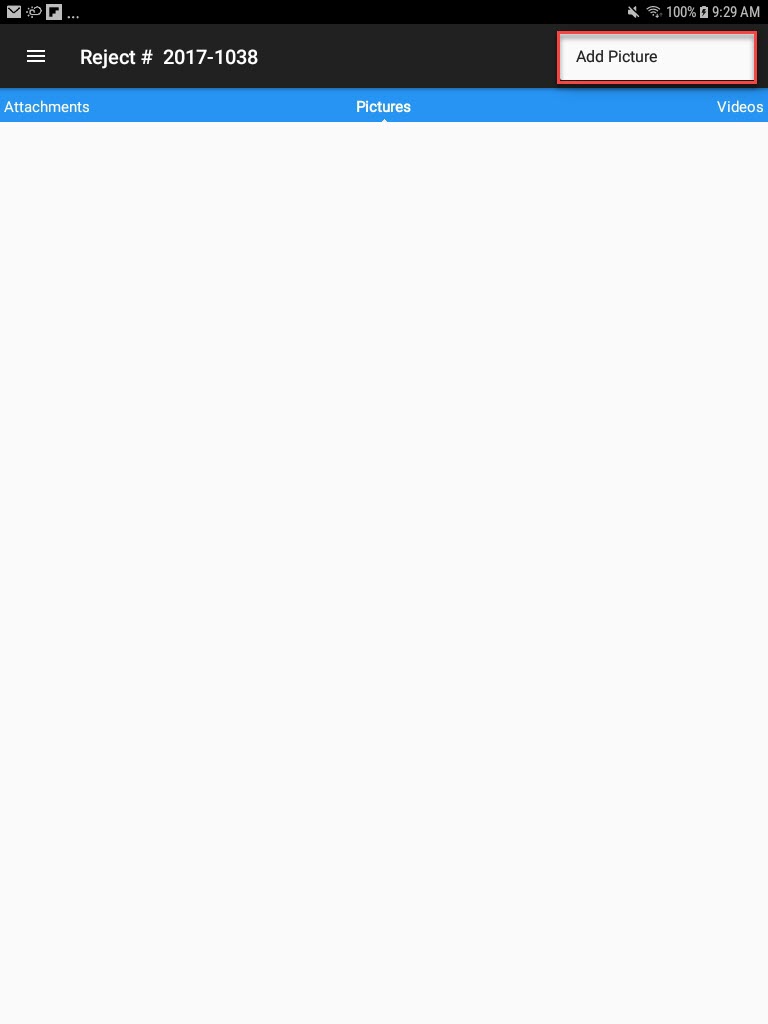
On the Quality Rejects detail screen, swipe over to the Pictures tab and from the action menu, select Add Picture.
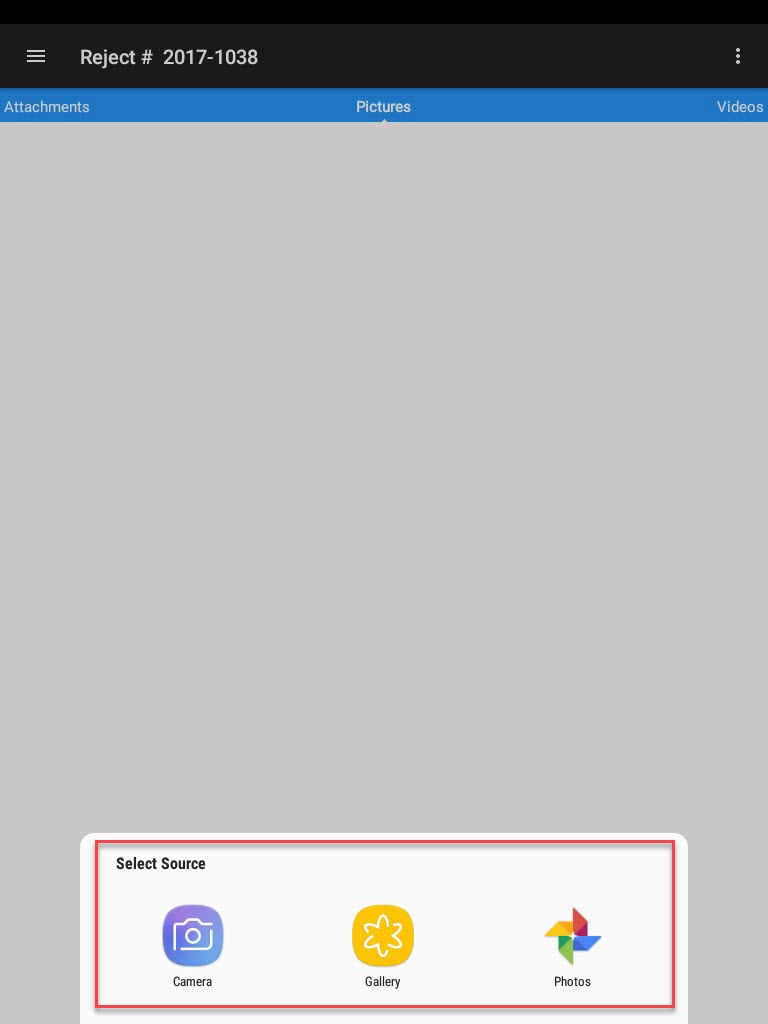
Users can add a picture using the camera, gallery, or photos option.
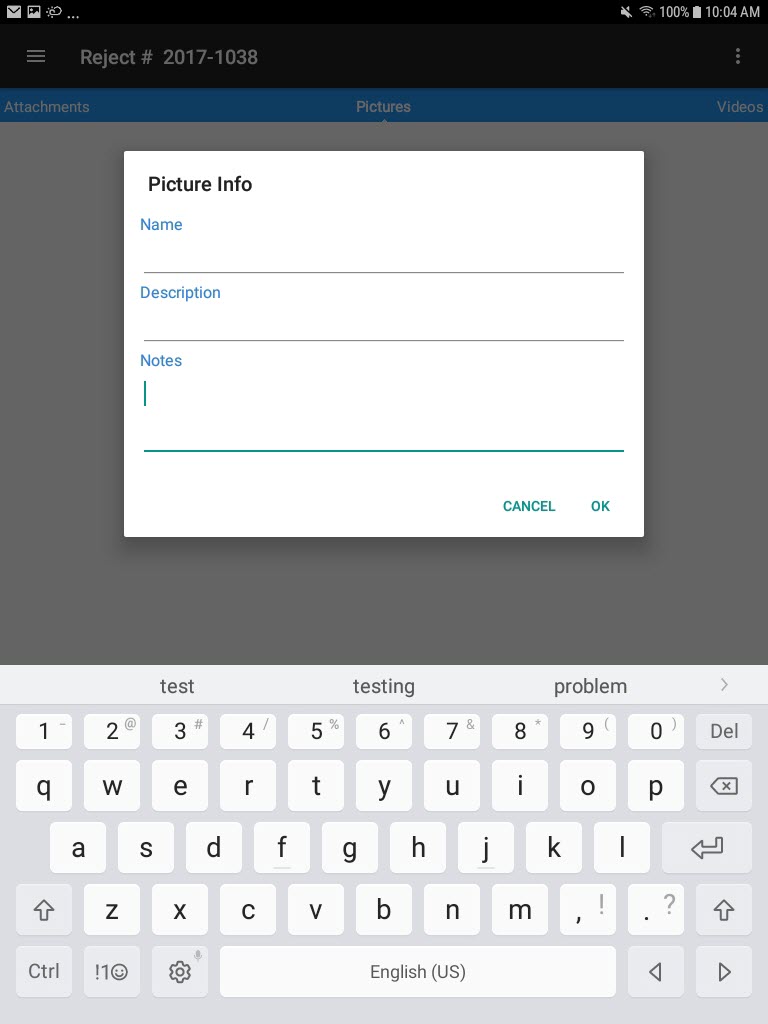
Once a picture has been selected, the Picture Info window will appear where users can fill in detailed information. After selecting OK, the selected picture will be added to the Quality Reject.
To delete a picture from a Quality Reject, locate the picture you wish to delete and select the trash can icon.
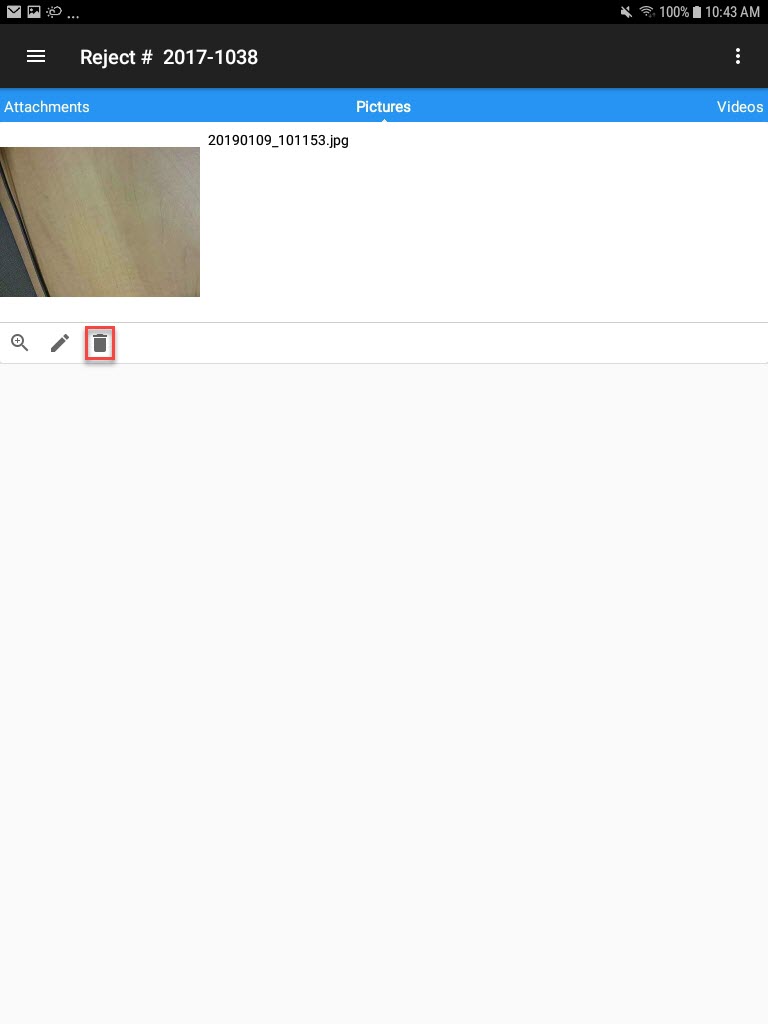
A Confirm Delete window will appear where users must confirm the deletion of the picture.
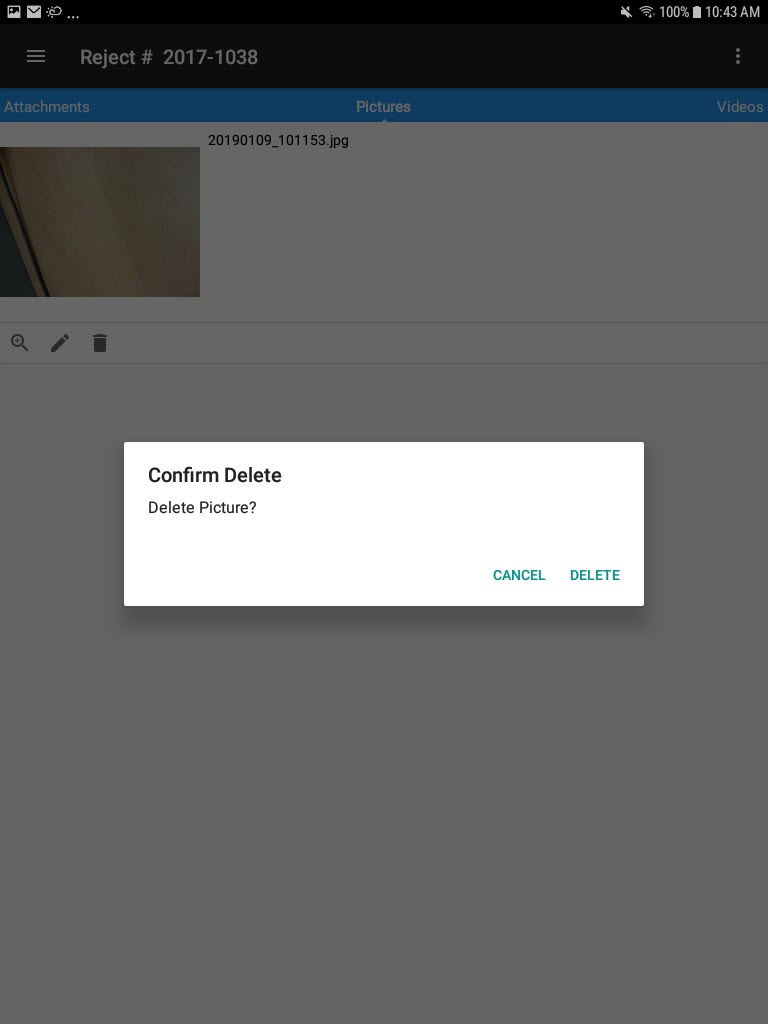
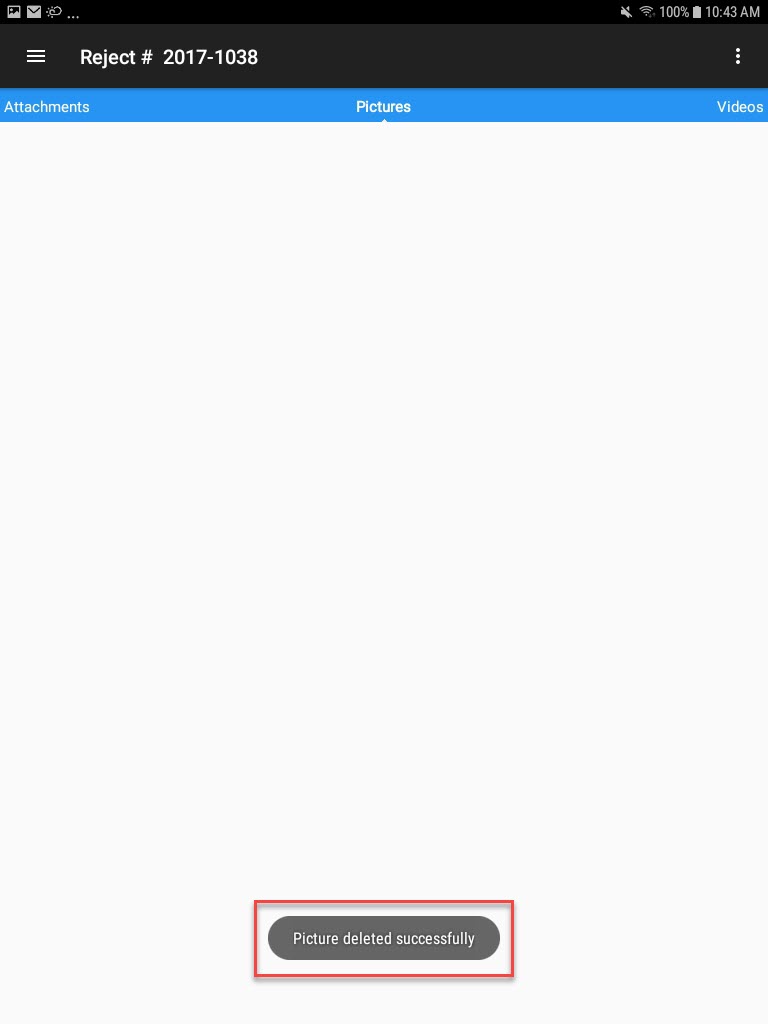
Once confirmed, the picture will be deleted from the Quality Reject.
Adding and Deleting Videos on a Quality Reject
To add a video to a Quality Reject, locate the Quality Reject and from the action menu, select Open.

On the Quality Rejects detail screen, swipe over to the Videos tab and from the action menu, select Add Video.

Users can add a video using the camcorder, photos, or gallary options. Once a video has been selected, the Video Info window will appear where users can enter in detailed information about the video.

After selecting OK, the selected video will be added to the Quality Reject.

Note
To edit the Title and/or Notes of a video, select the pencil icon and make the necessary changes.
To delete a video from a Quality Reject, locate the video you wish to delete and select the trash can icon.

A Confirm Delete window will appear where users must confirm the deletion of the video.

Once confirmed, the video will be deleted from the Quality Reject.

Closing a Quality Reject
To close a Quality Reject, locate the Quality Reject you wish to close on the Quality Reject lookup screen and from the action menu select Open.

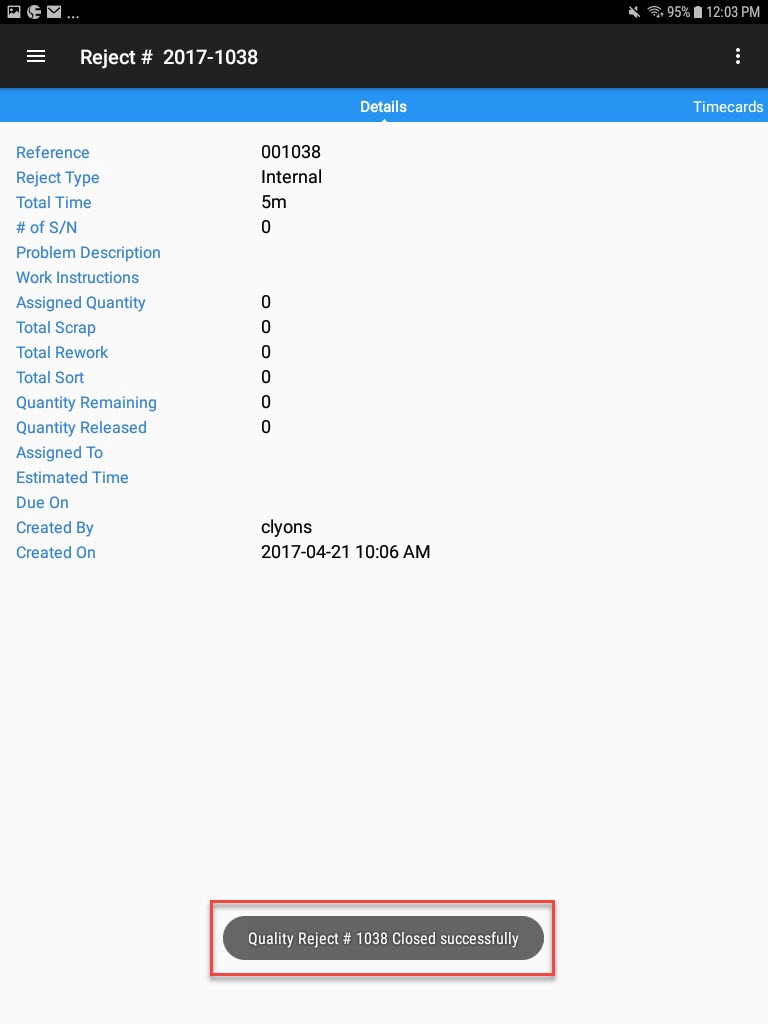
On the Quality Reject detail screen, select the Close option from the action menu.
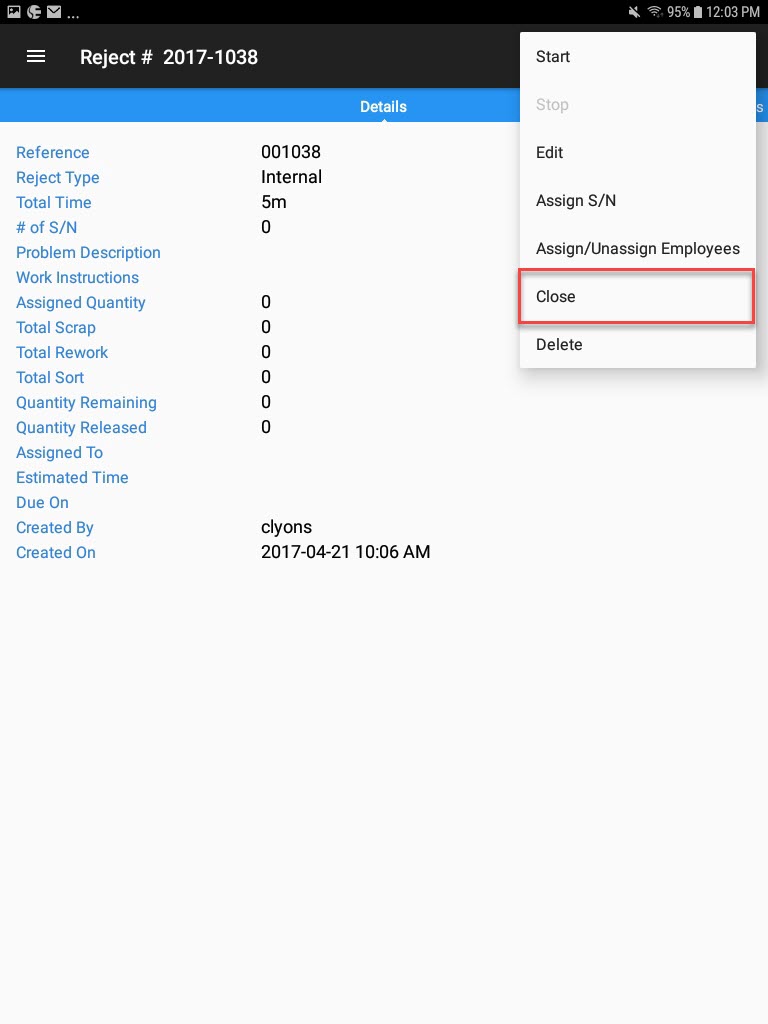
The selected Quality Reject will be closed.
Note
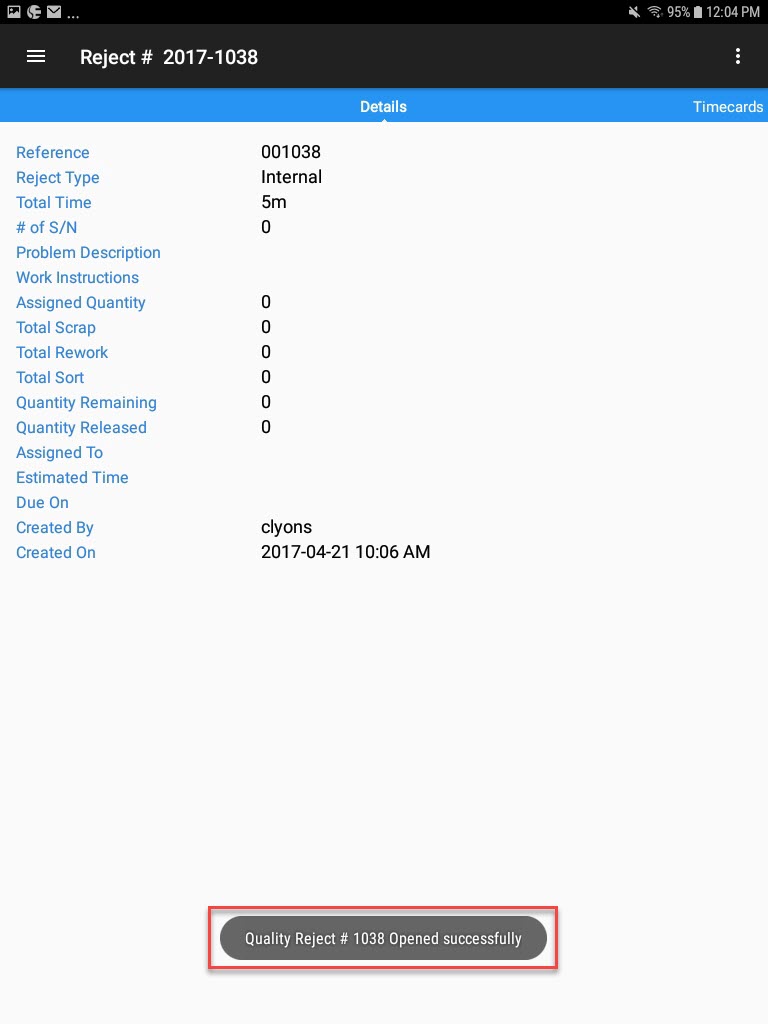
To re-open a closed Quality Reject, simply select Open from the Quality Reject detail screen action menu. The Quality Reject will be re-oped.
Deleting a Quality Reject
There are two ways to delete a Quality Reject.
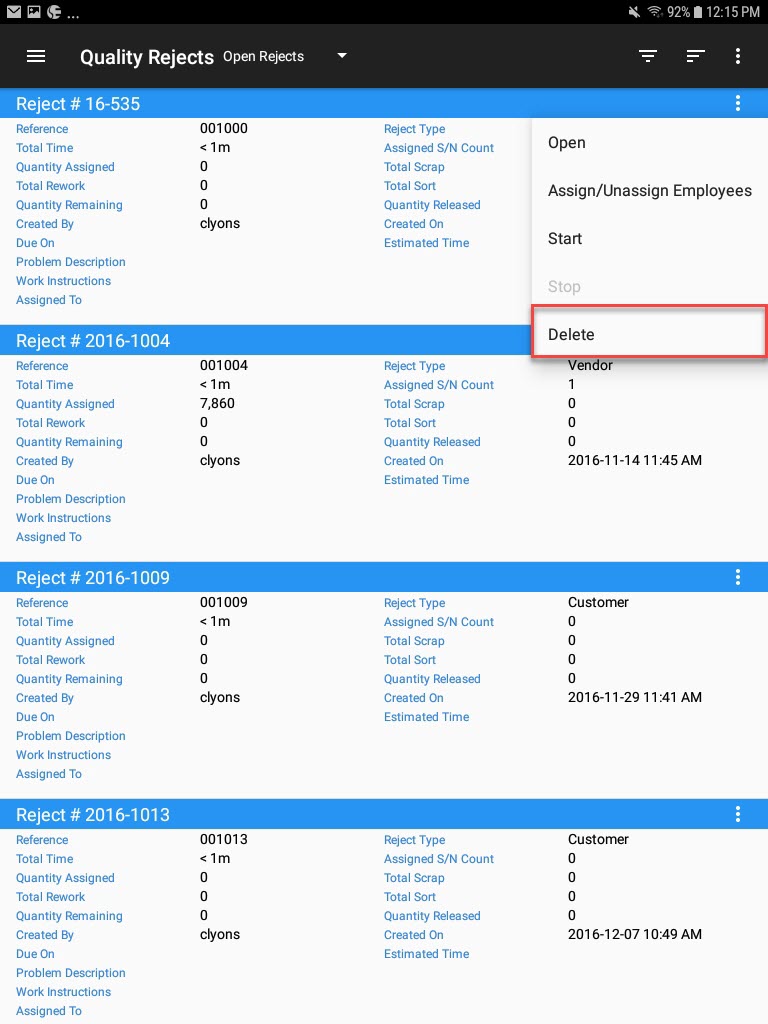
The first way is to locate the Quality Reject you wish to delete on the Quality Reject lookup screen and from the action menu select Delete.
The second way is to locate the Quality Reject you wish to delete on the Quality Reject lookup screen and from the action menu select Open.

On the Quality Reject detail screen, select the Delete option from the action menu.
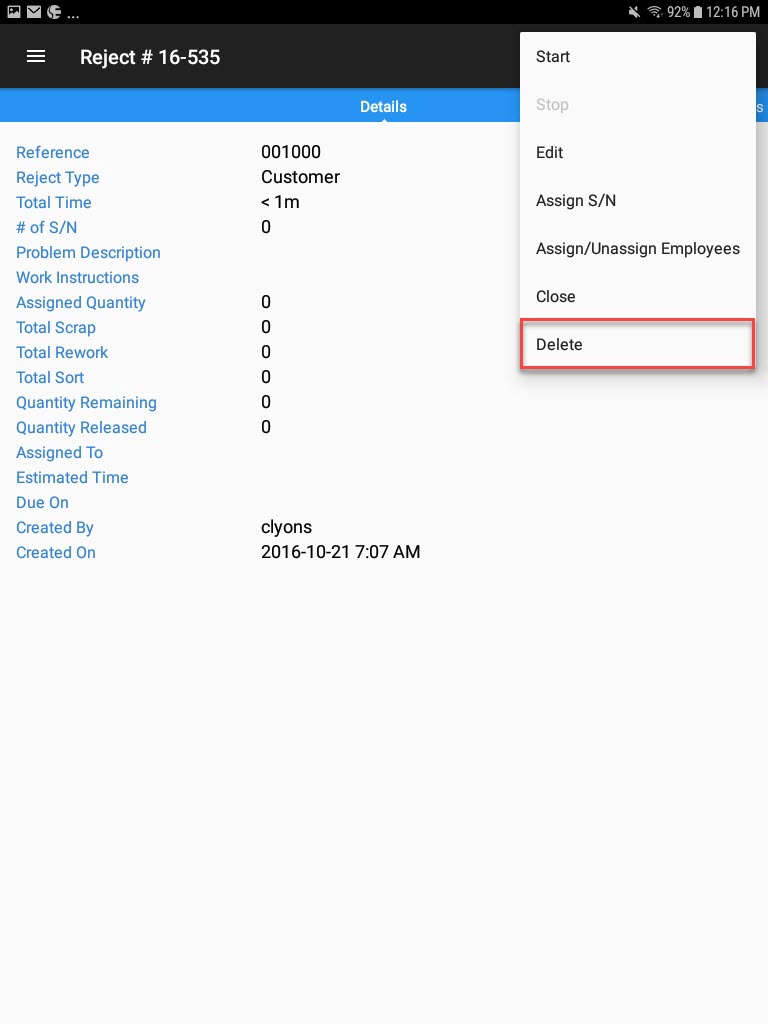
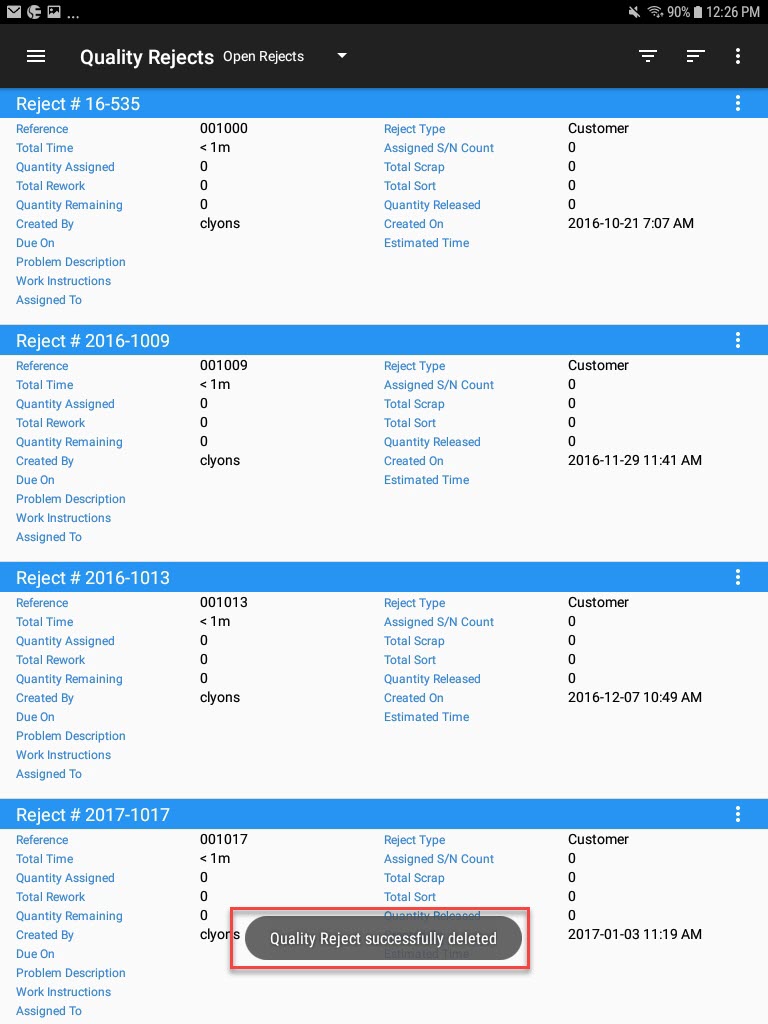
The selected Quality Reject will be deleted.
Held Inventory
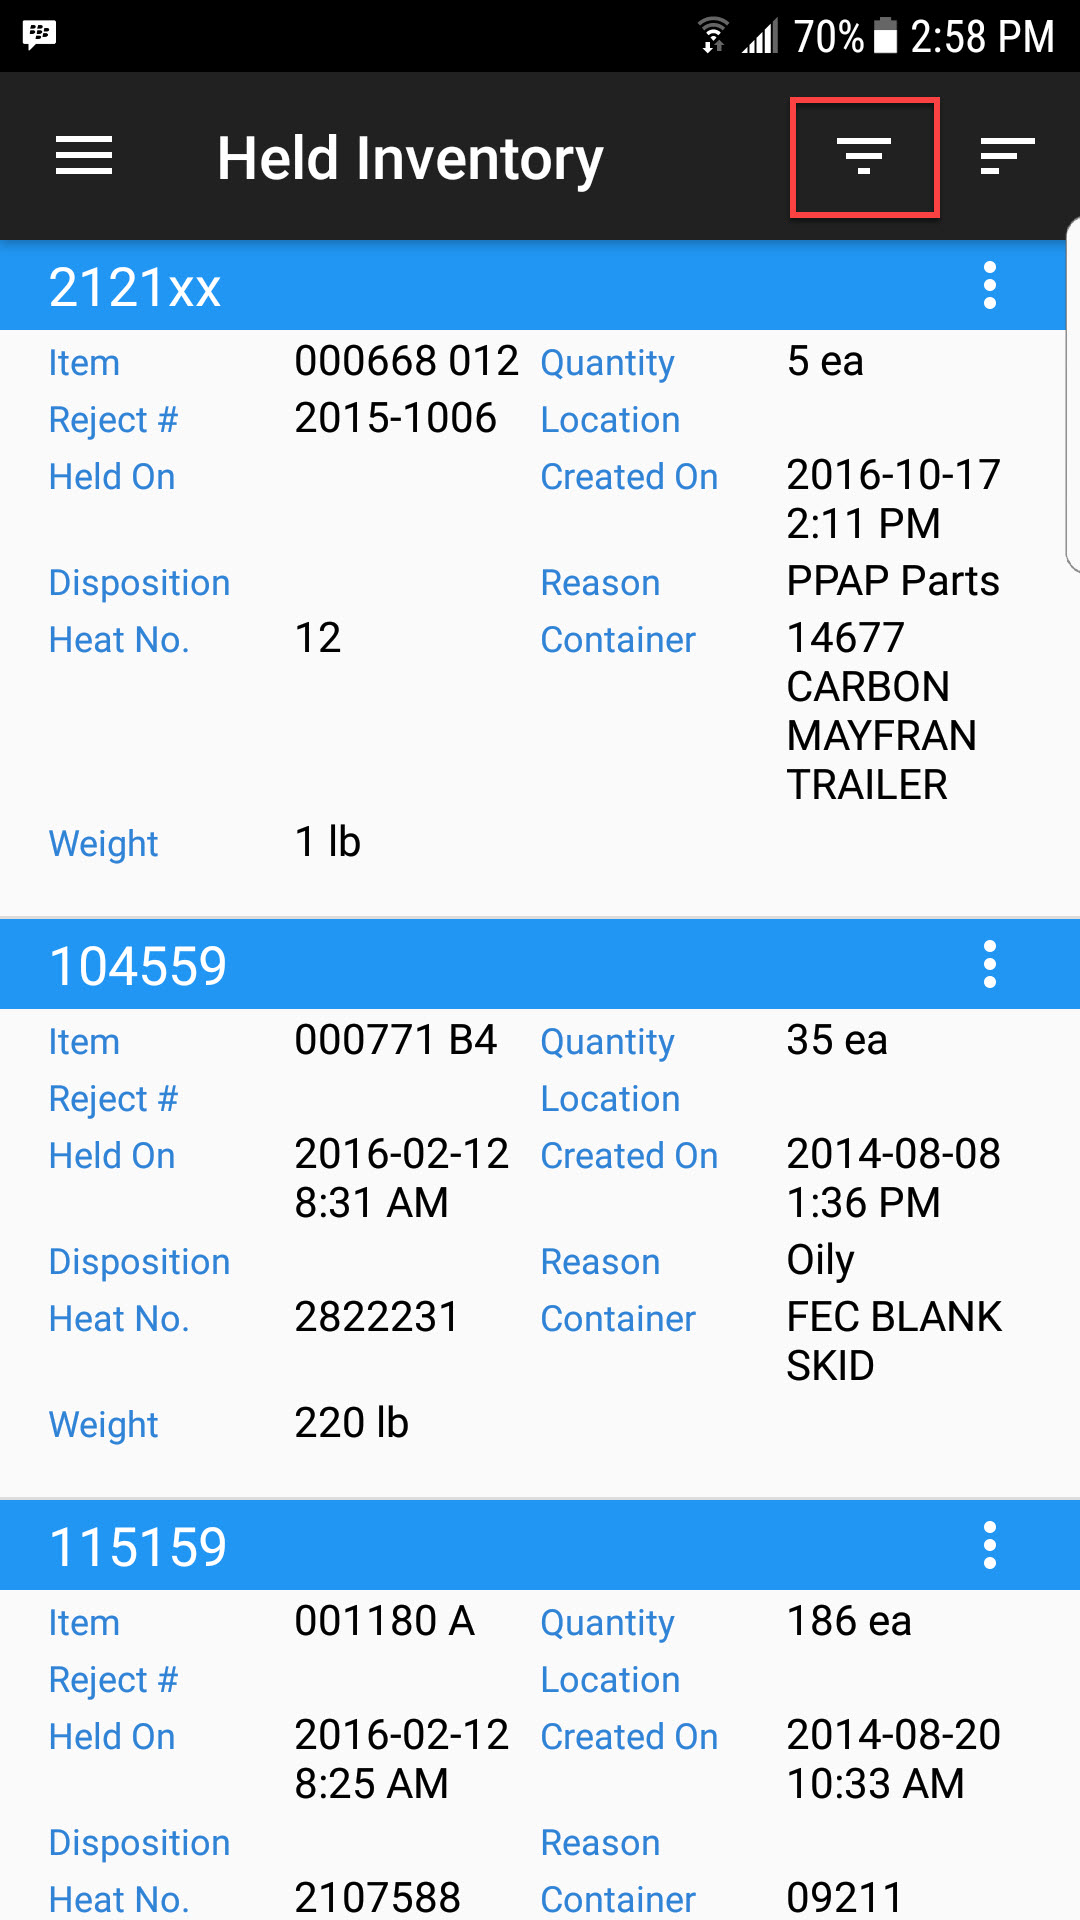
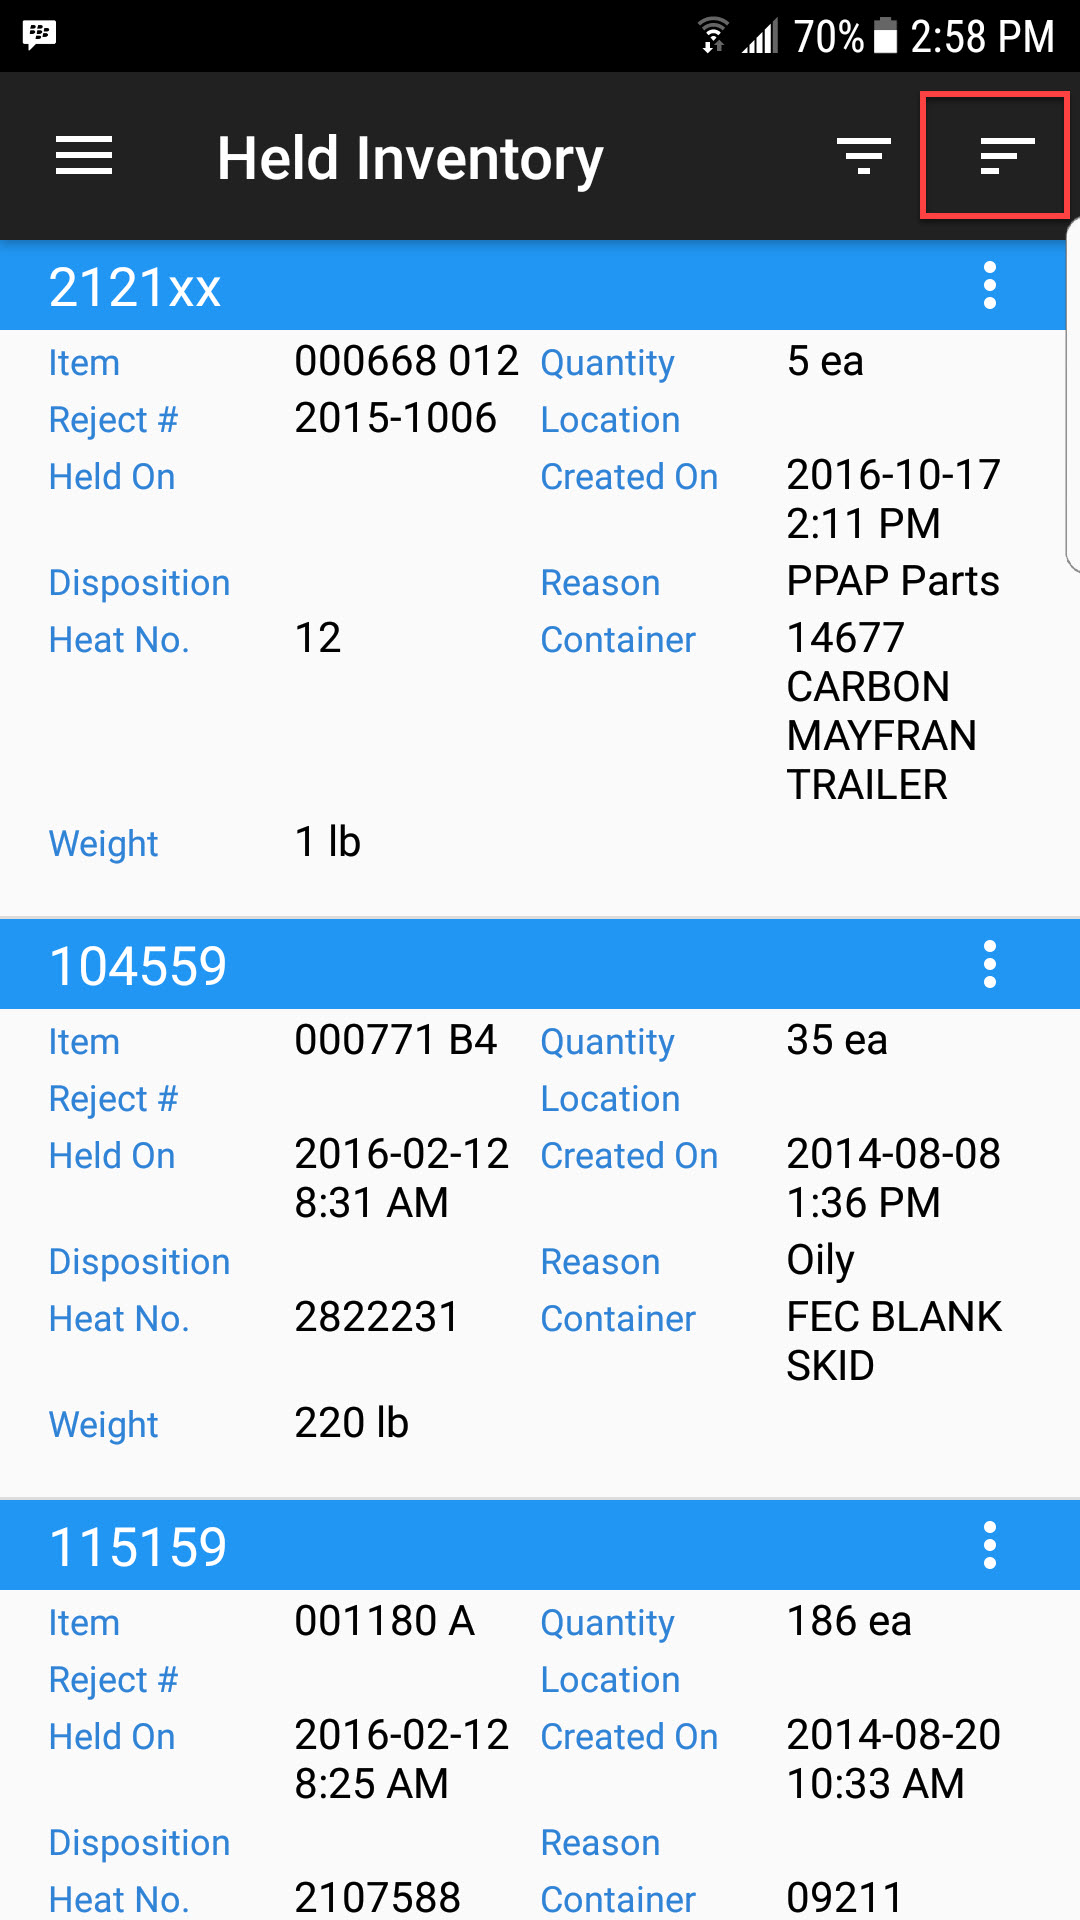
Held Inventory displays a list of all held serial numbers in the system.
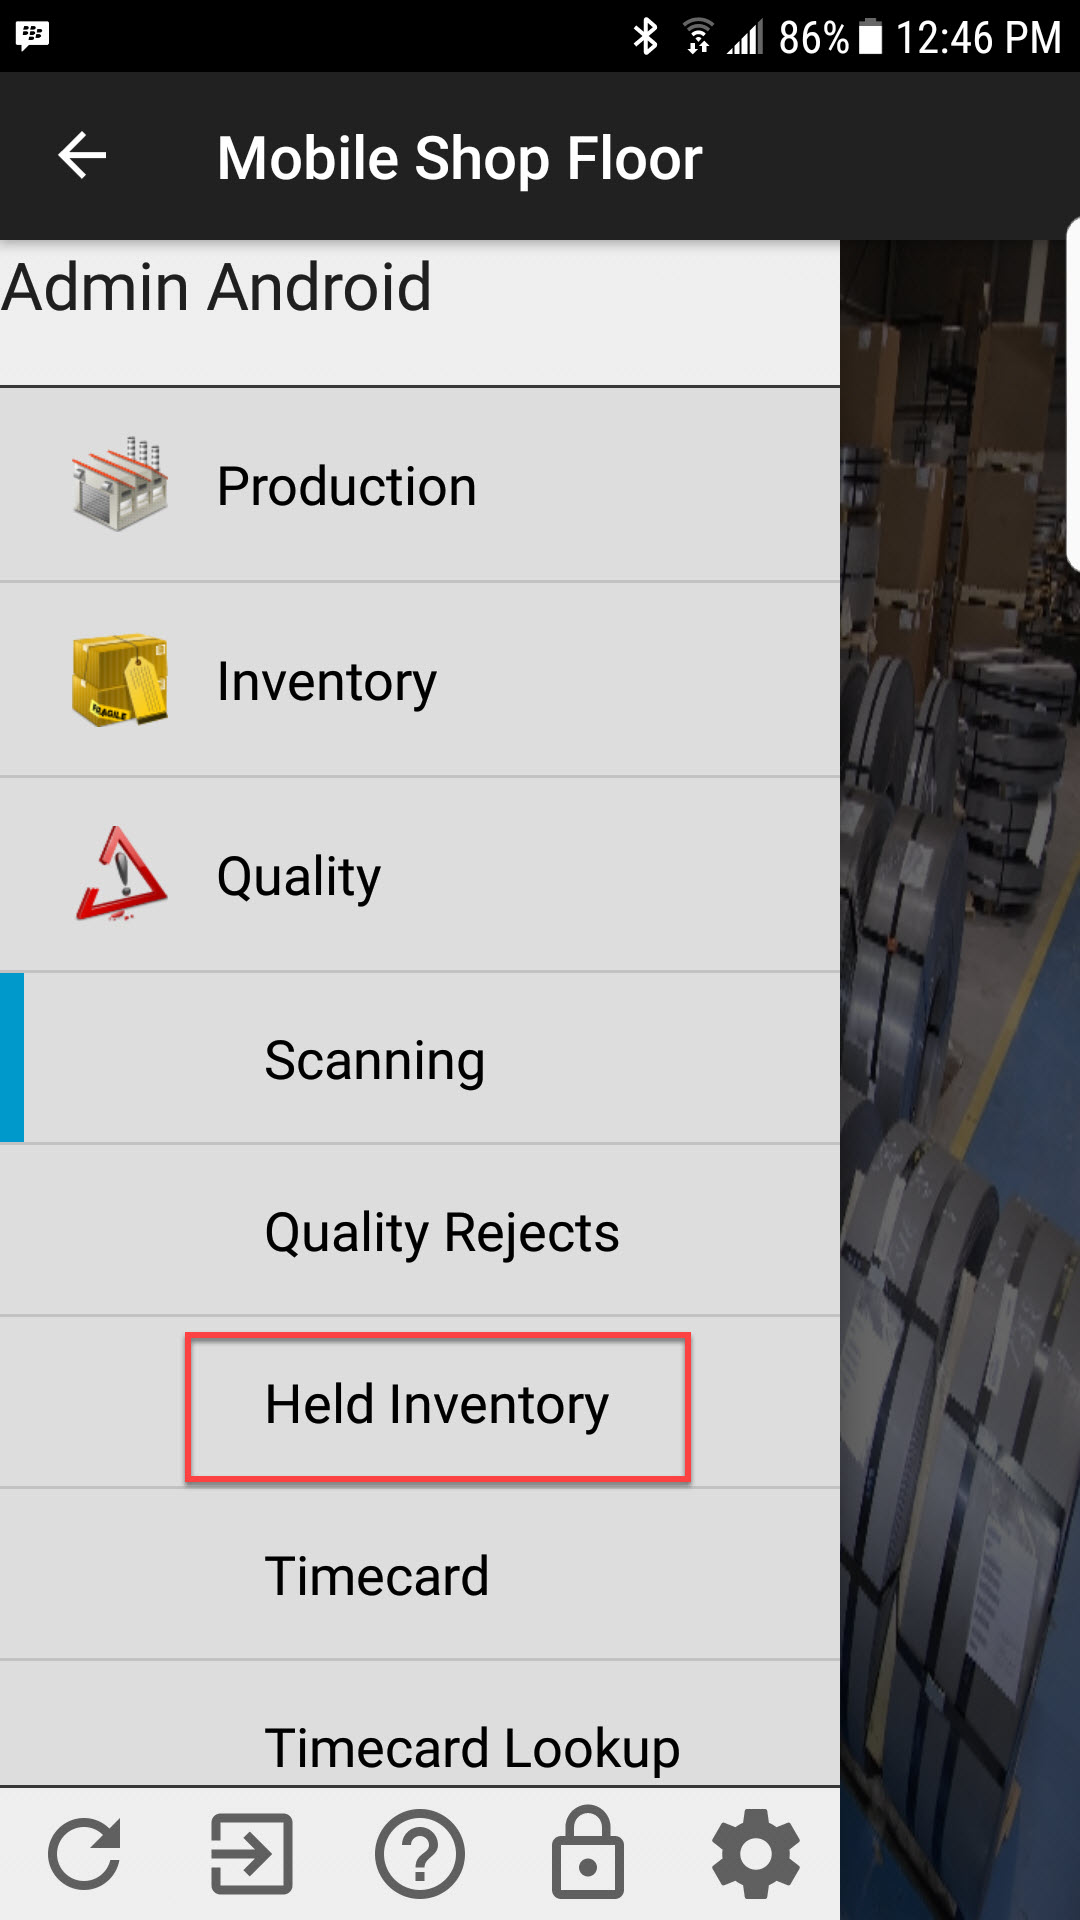
To view a list of held serial numbers, select Held Inventory located under the Quality module from the navigation drawer.
Users can filter or sort the list to find a specific serial number, or group of serial numbers. The Filter and Sort options are located at the top right of the screen.
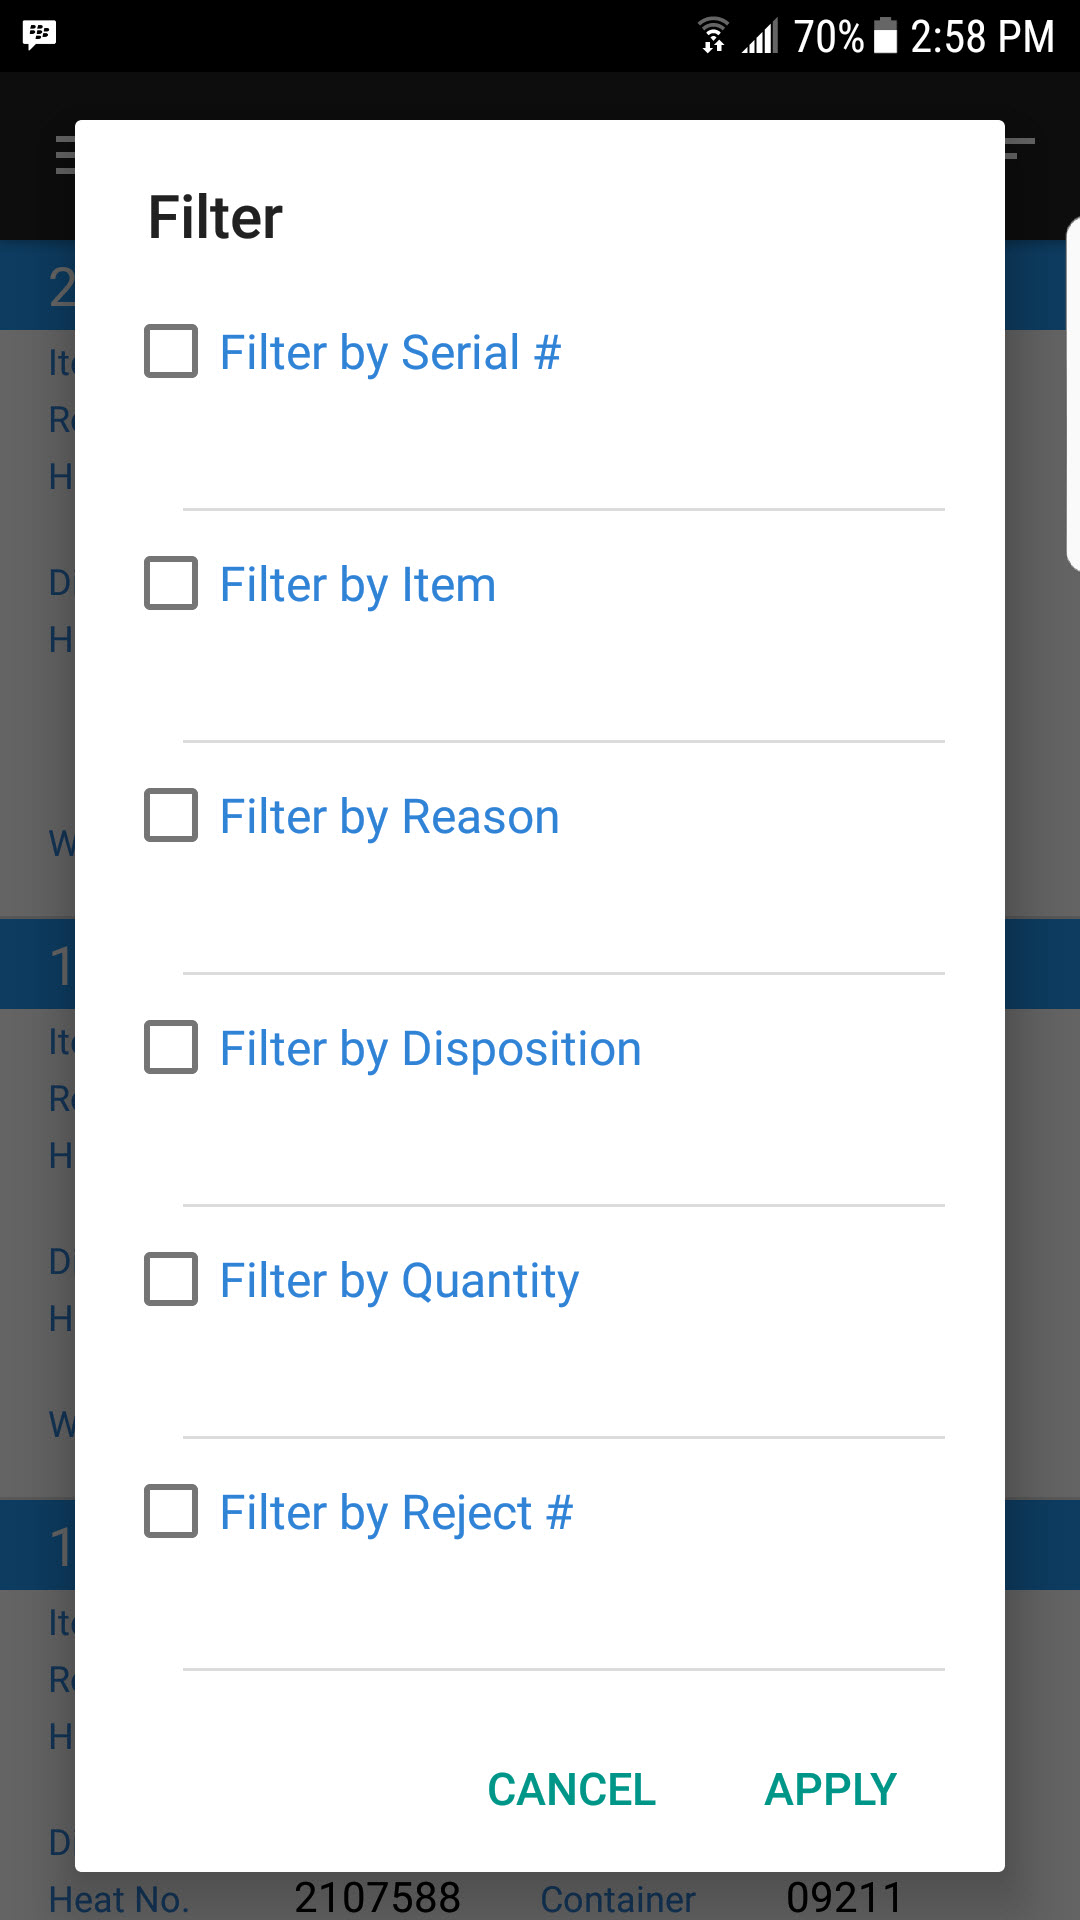
When selecting the Filter option, users can select from a variety of options including by Serial #, Item, Reason, Disposition, Quantity, Reject # and Held On date/time. Once an option is selected, users can enter in the filter information for the selected option. Select Apply to filter or Cancel to cancel.
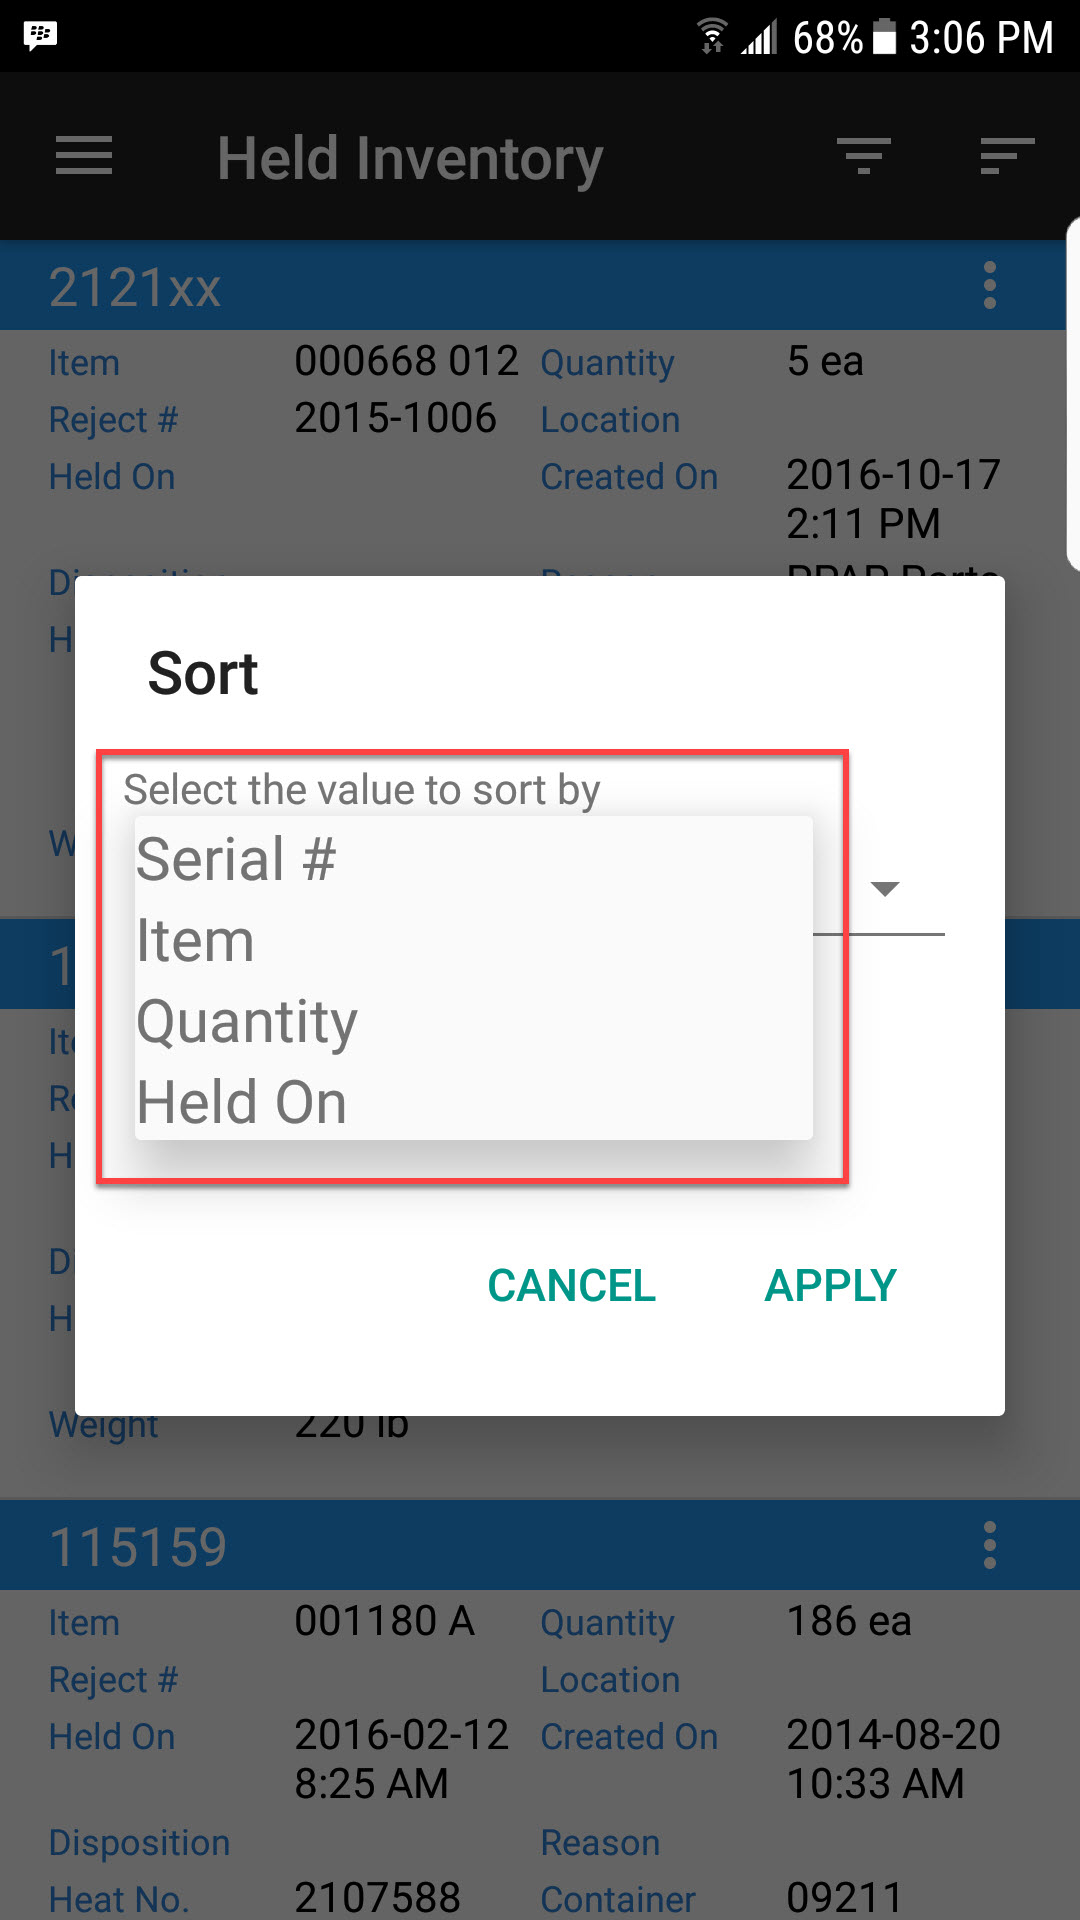
When selecting the Sort option, users can select from a variety of sort options from the drop-down menu, including Serial #, Item, Quantity and Held On.
Then users can select either Ascending or Descending from the options provided. The sort results will be displayed according to the option selected.
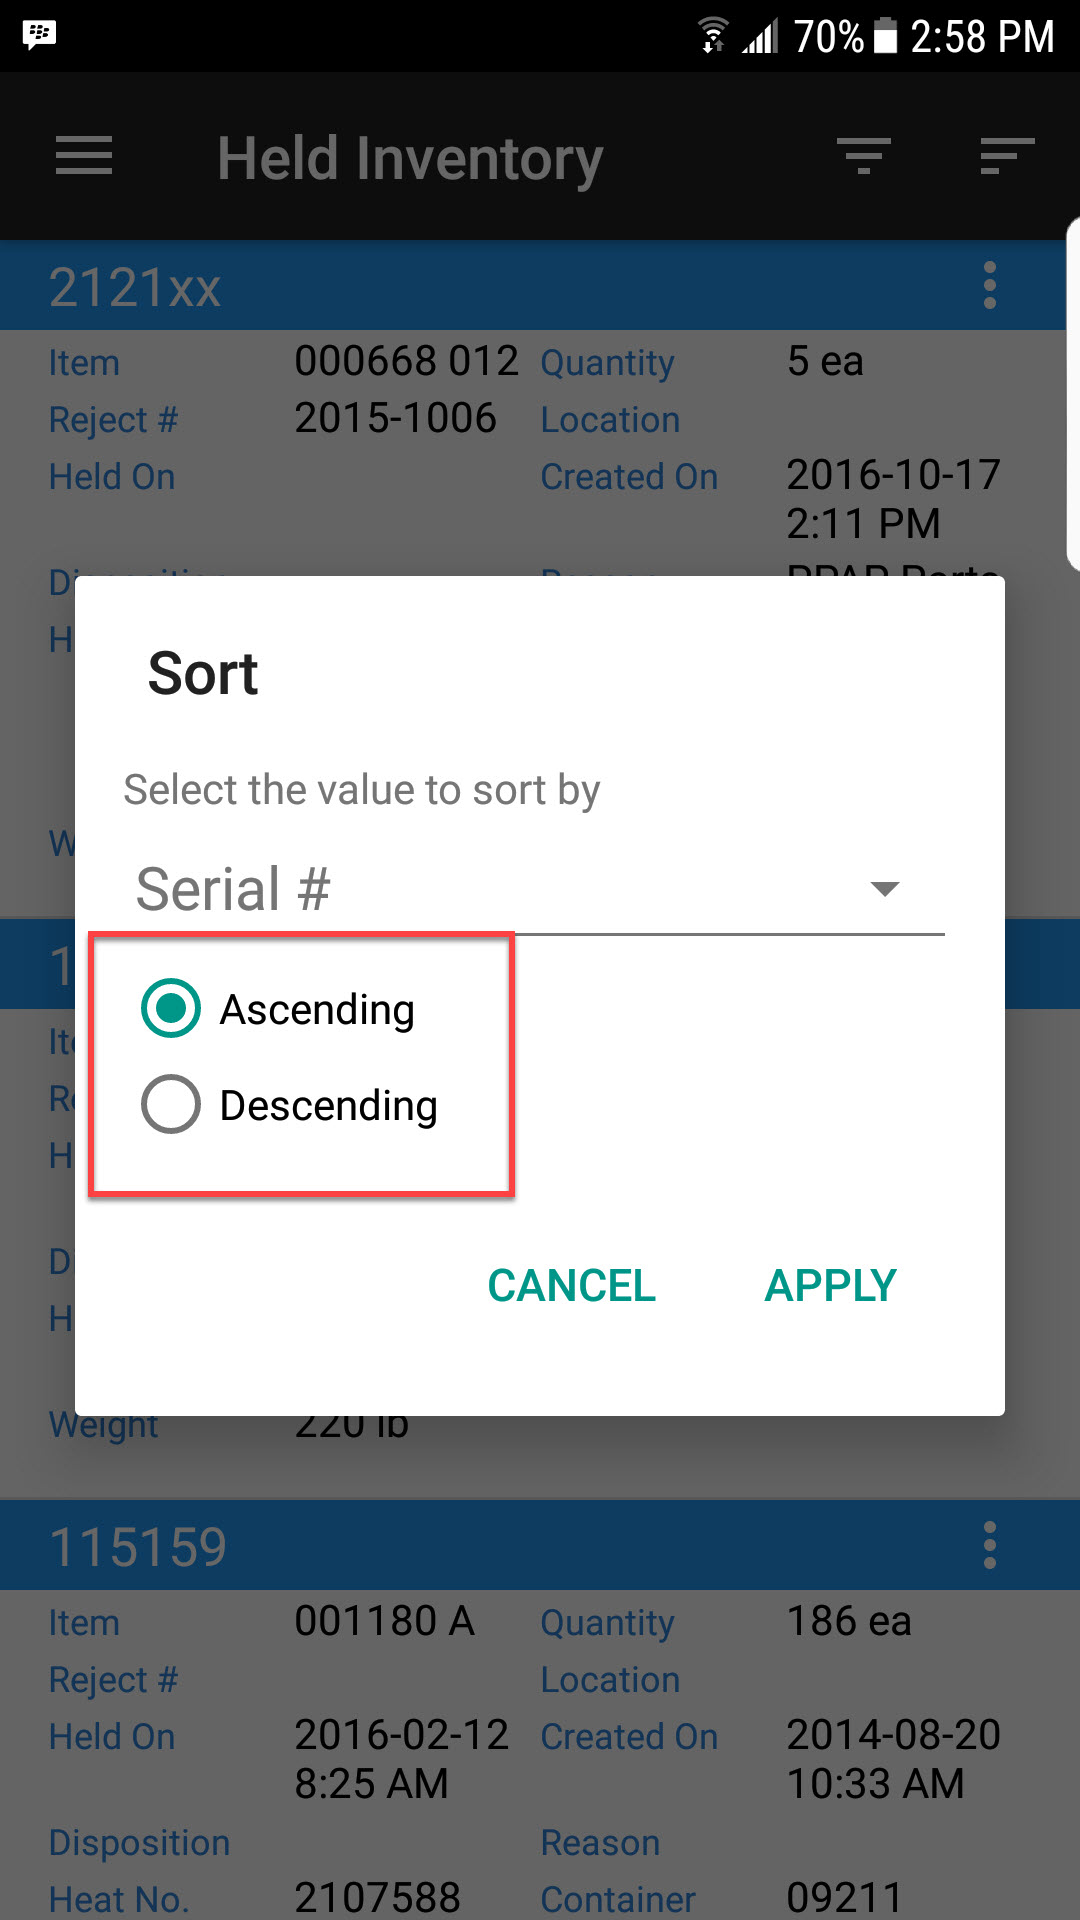
Select Apply to filter or Cancel to cancel.
Assigning a Held Serial Number to a Quality Reject
To assign a held serial number to an existing Quality Reject, from the action menu select the Assign to Reject option.
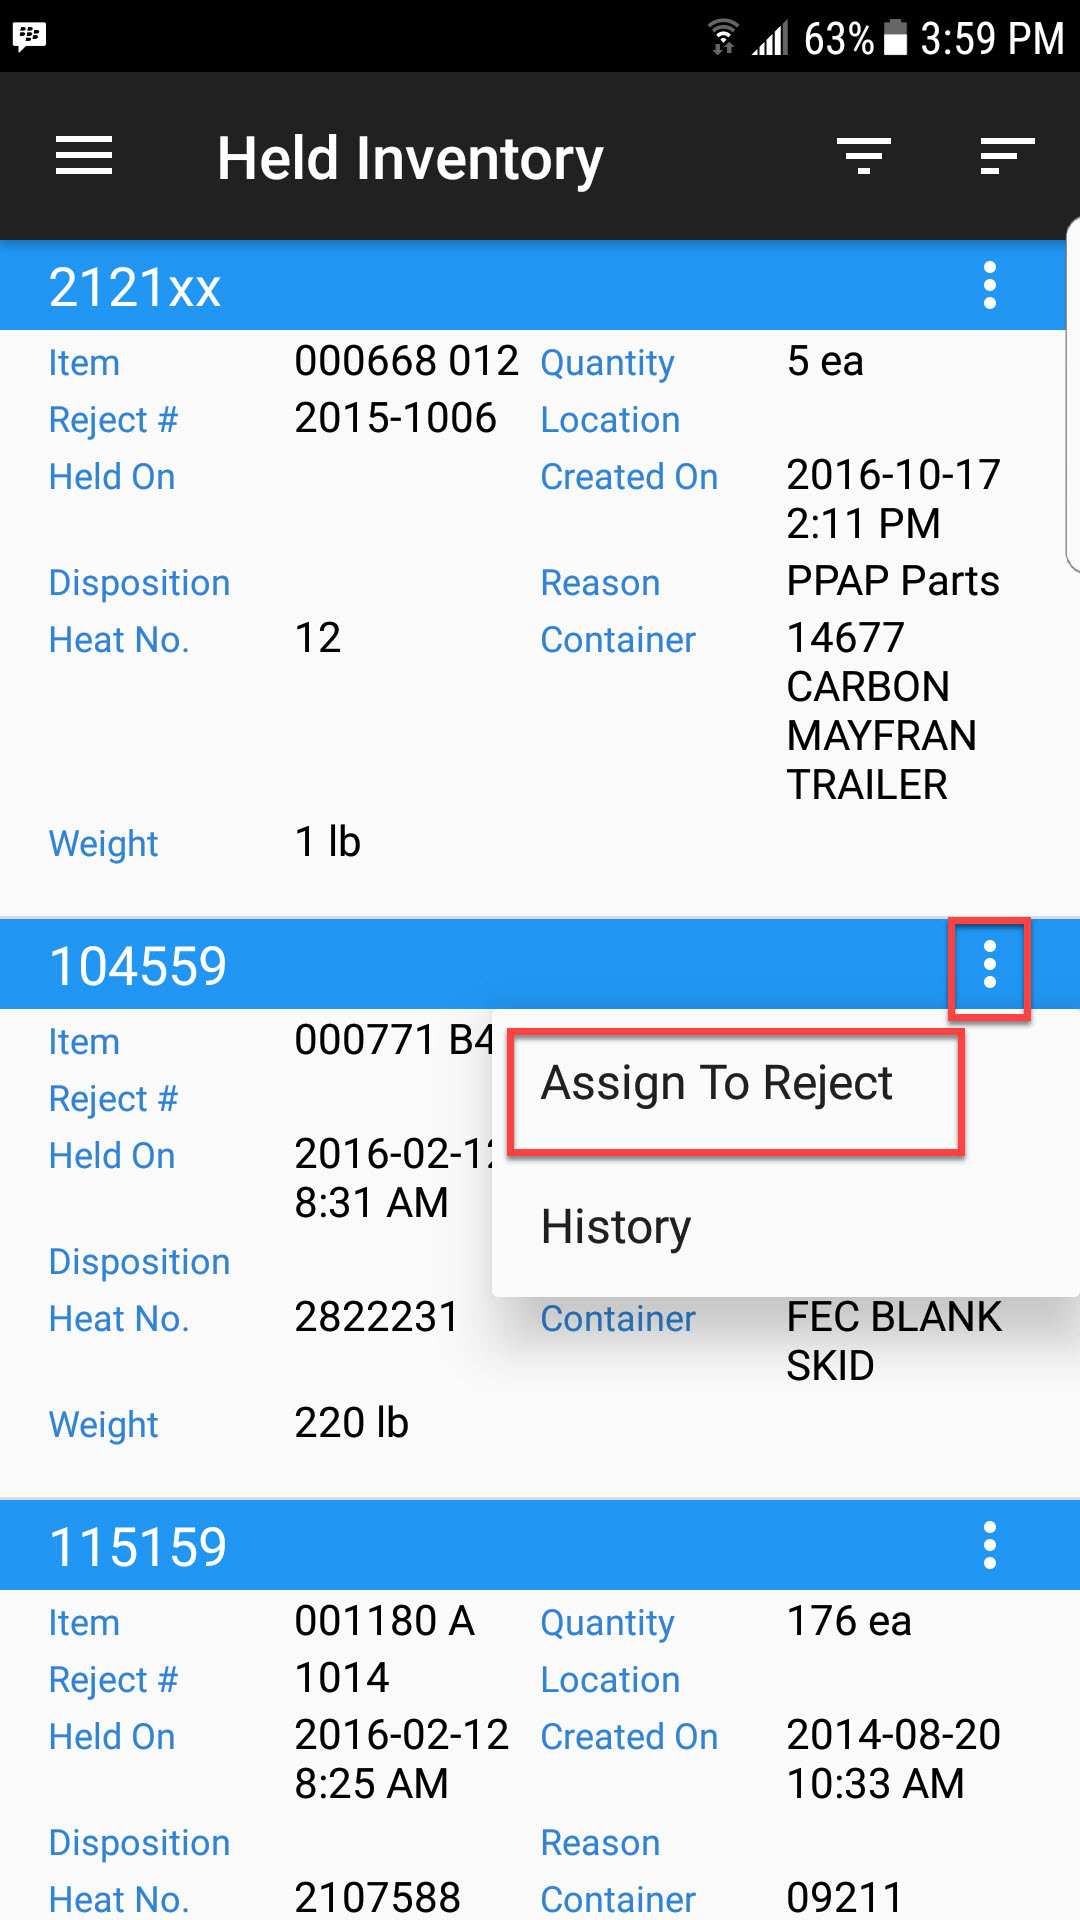
The Assign to Reject window will open. Users can select the Reject # they wish to assign the serial number to. They can use the drop-down menu, or the search function to find the reject they are looking for.
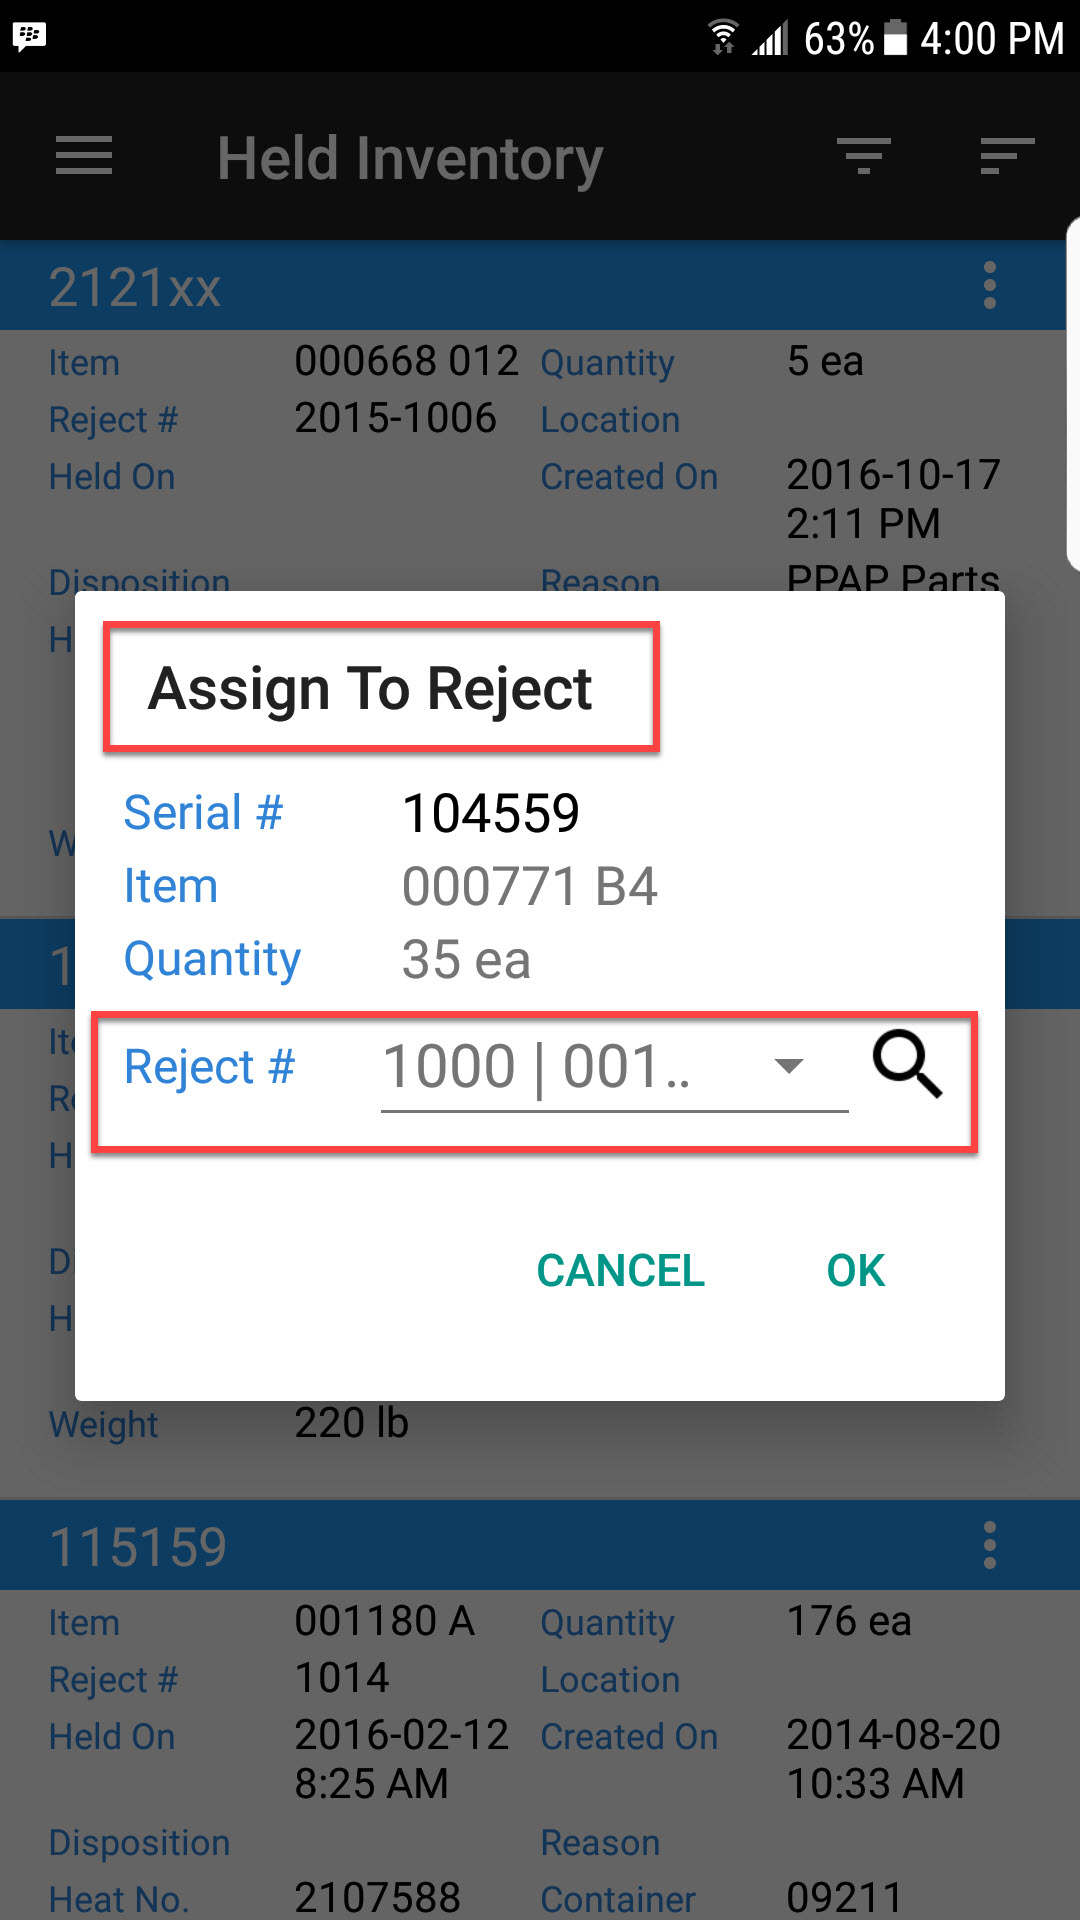
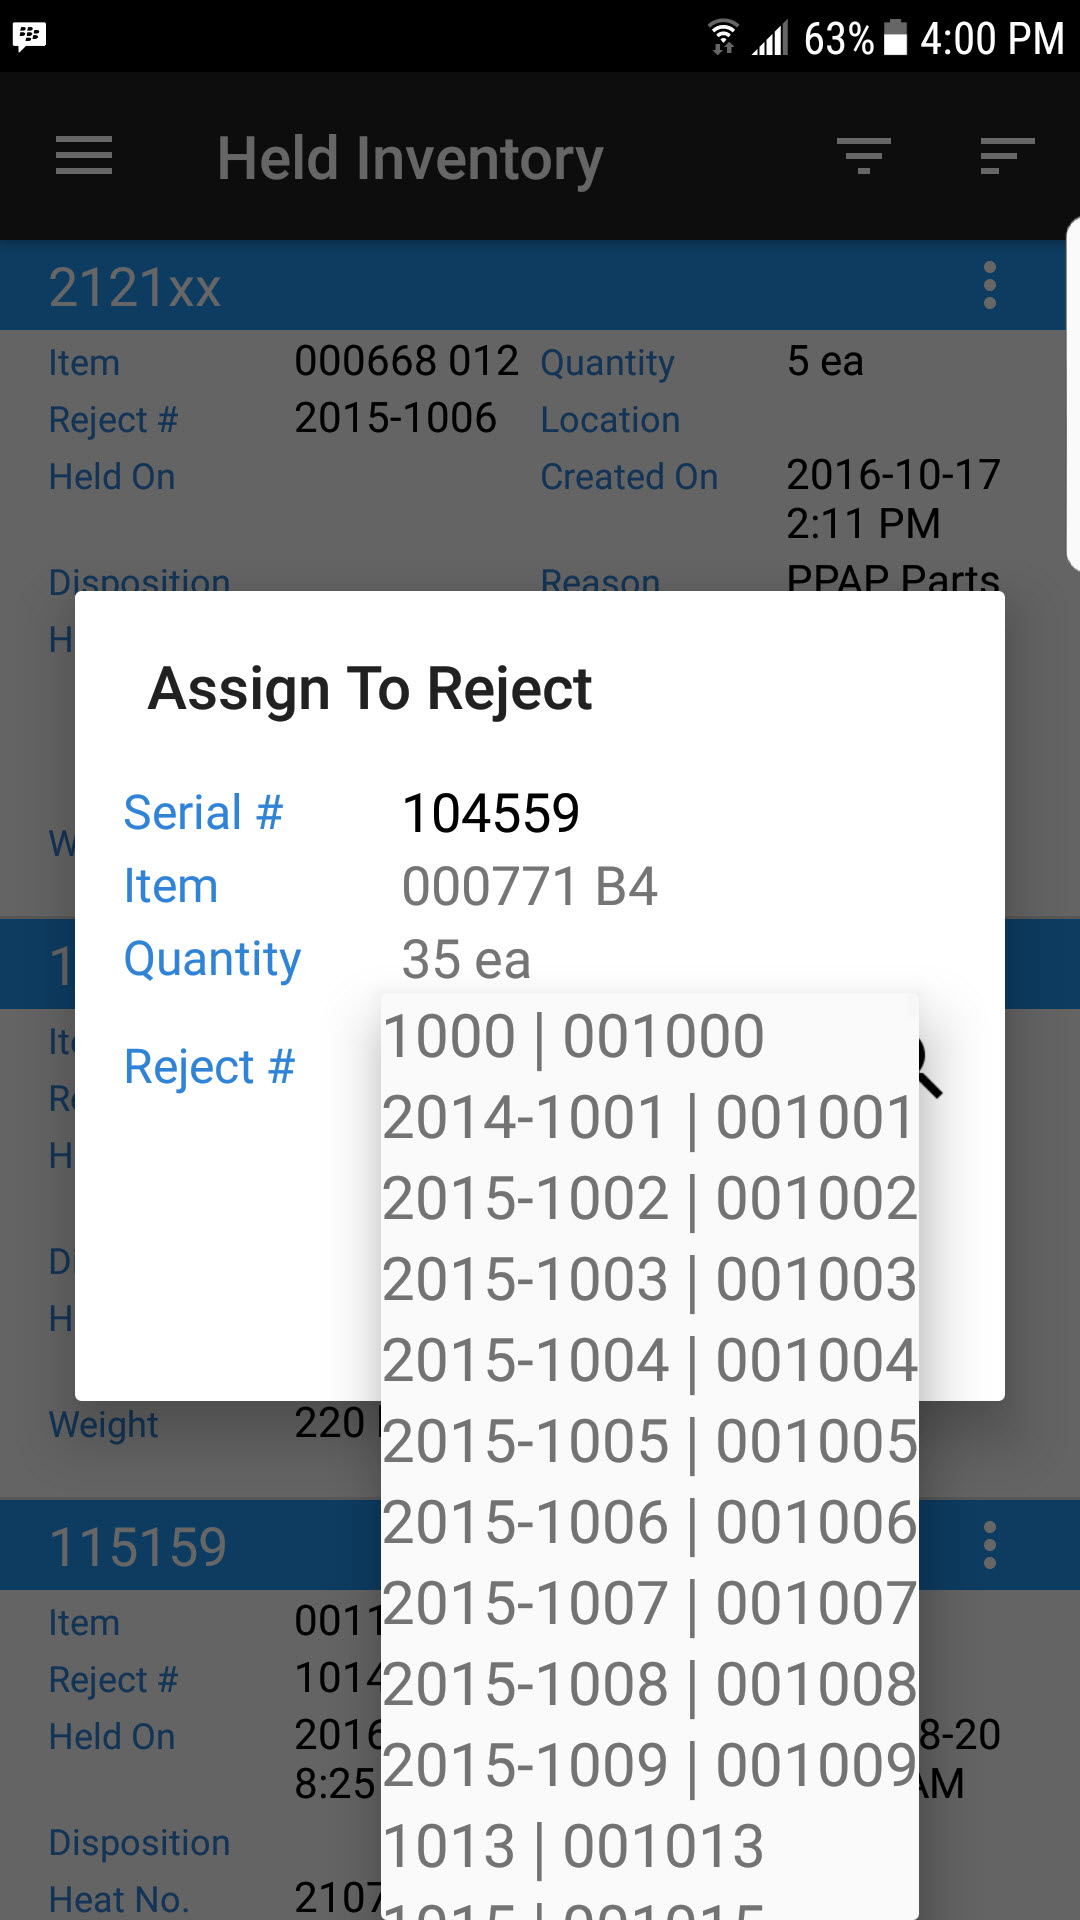
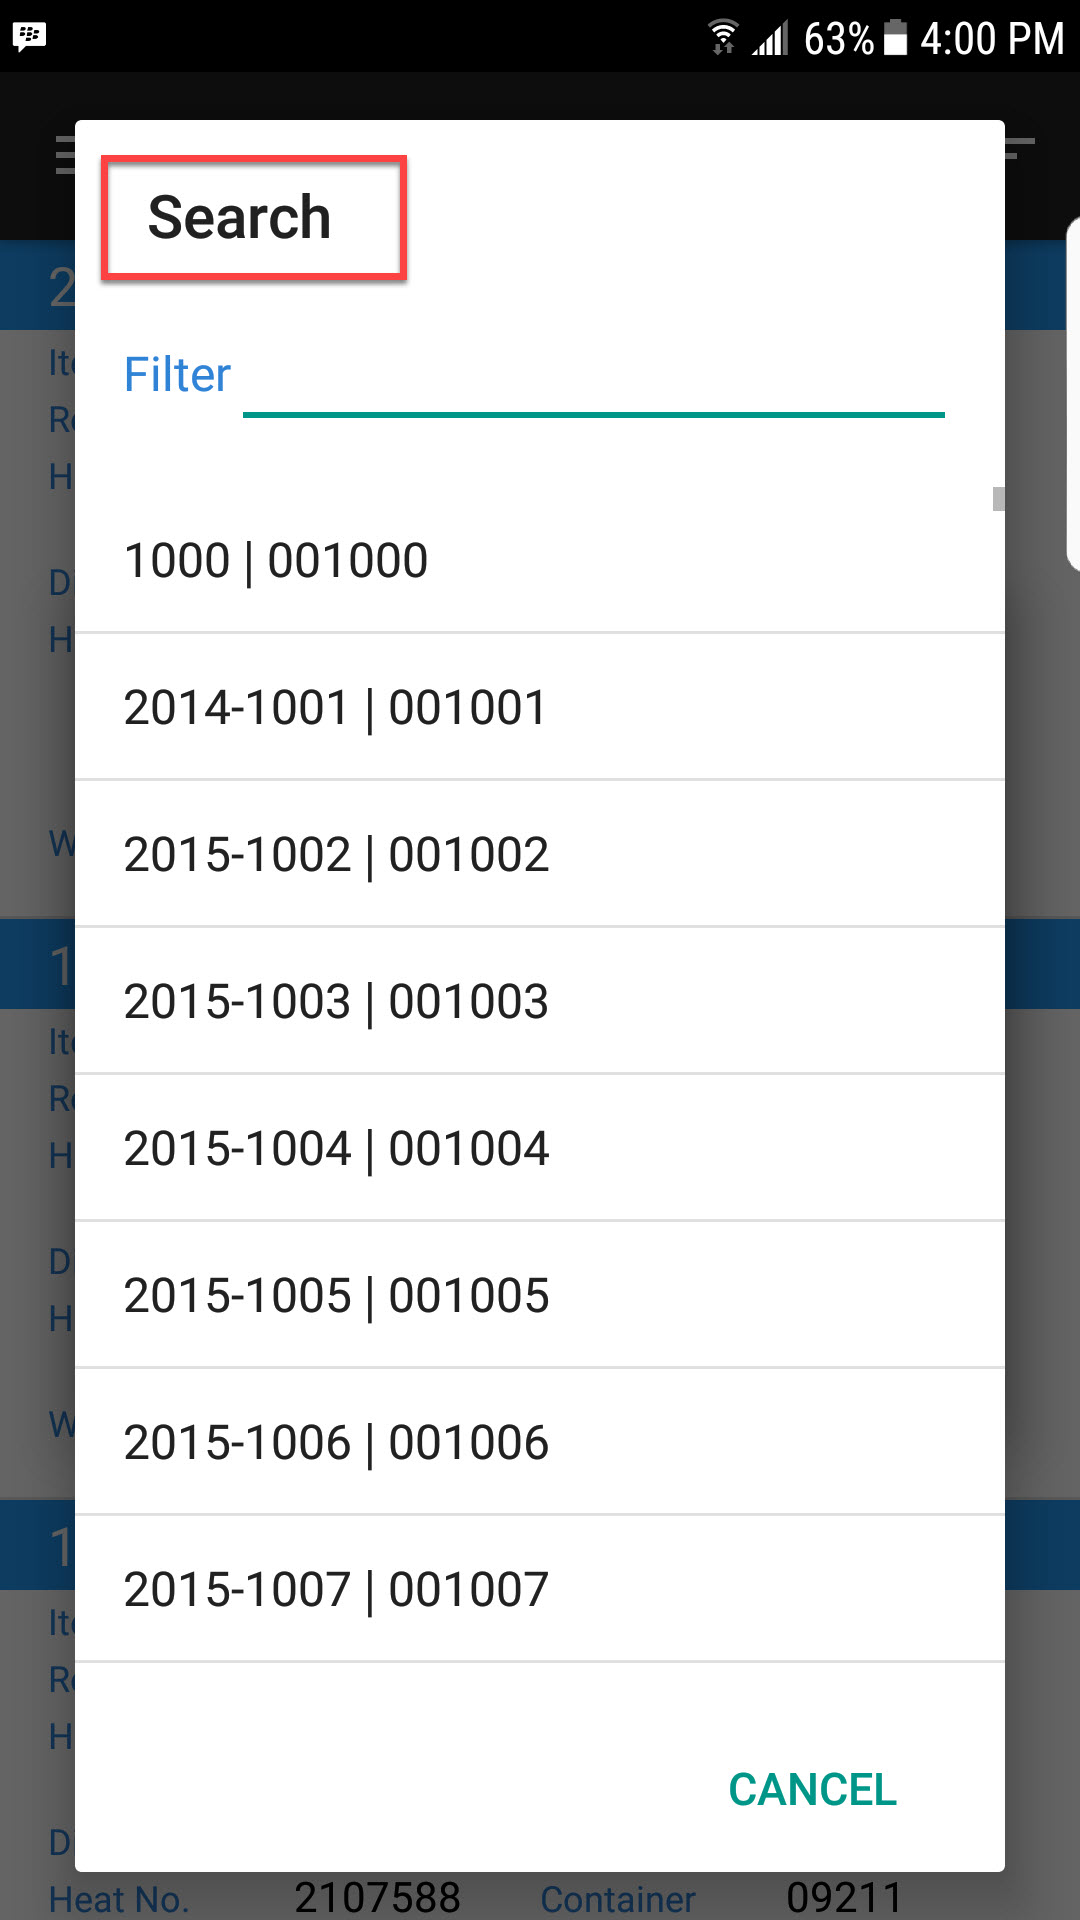
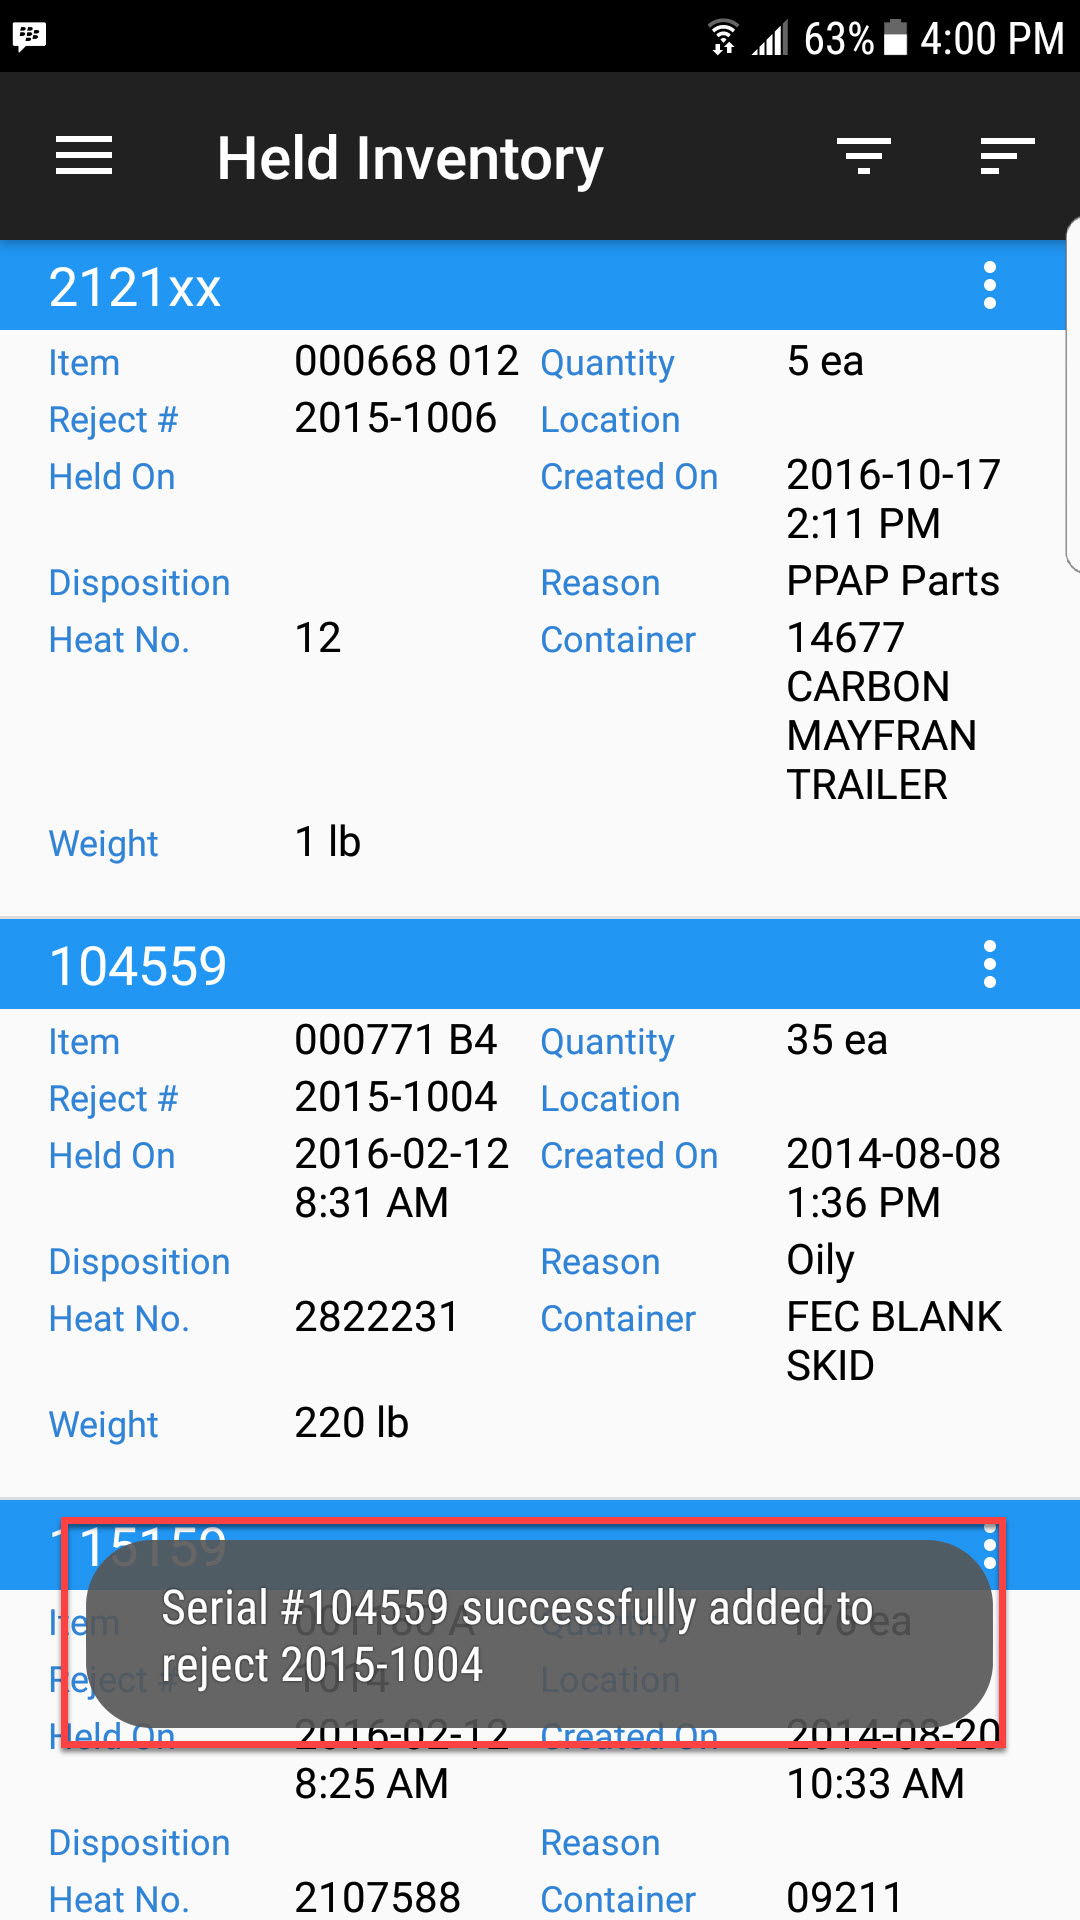
Once the Quality Reject has been selected to add the serial number to, select OK. The application will show a message to confirm the serial number has been added.
Removing a Held Serial Number from a Quality Reject
To remove a held serial number from a Quality Reject, from the action menu for the serial number you wish to remove select the Remove from Reject option.
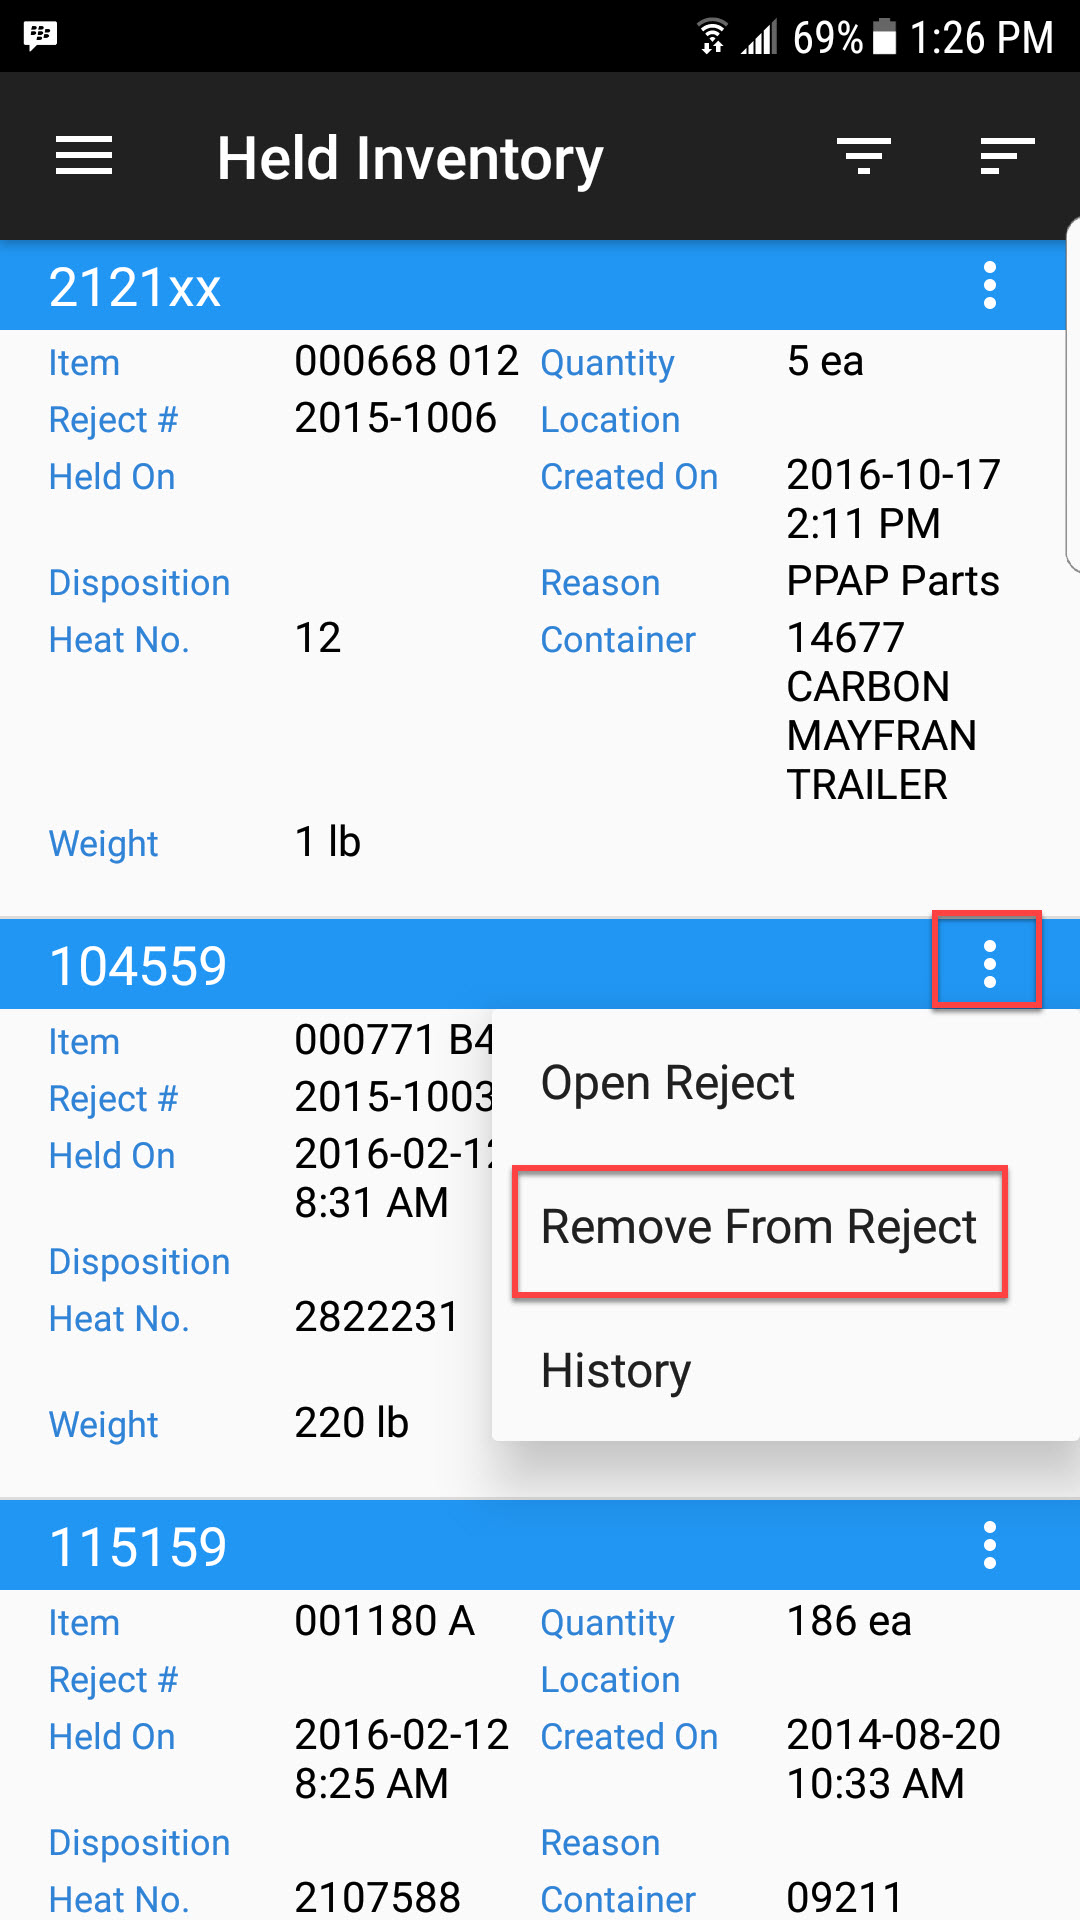
The serial number will be removed from the select Quality Reject.
Viewing History for a Held Serial Number
Users can view the history for a particular serial number from the Held Inventory screen. From the action menu select the History option.
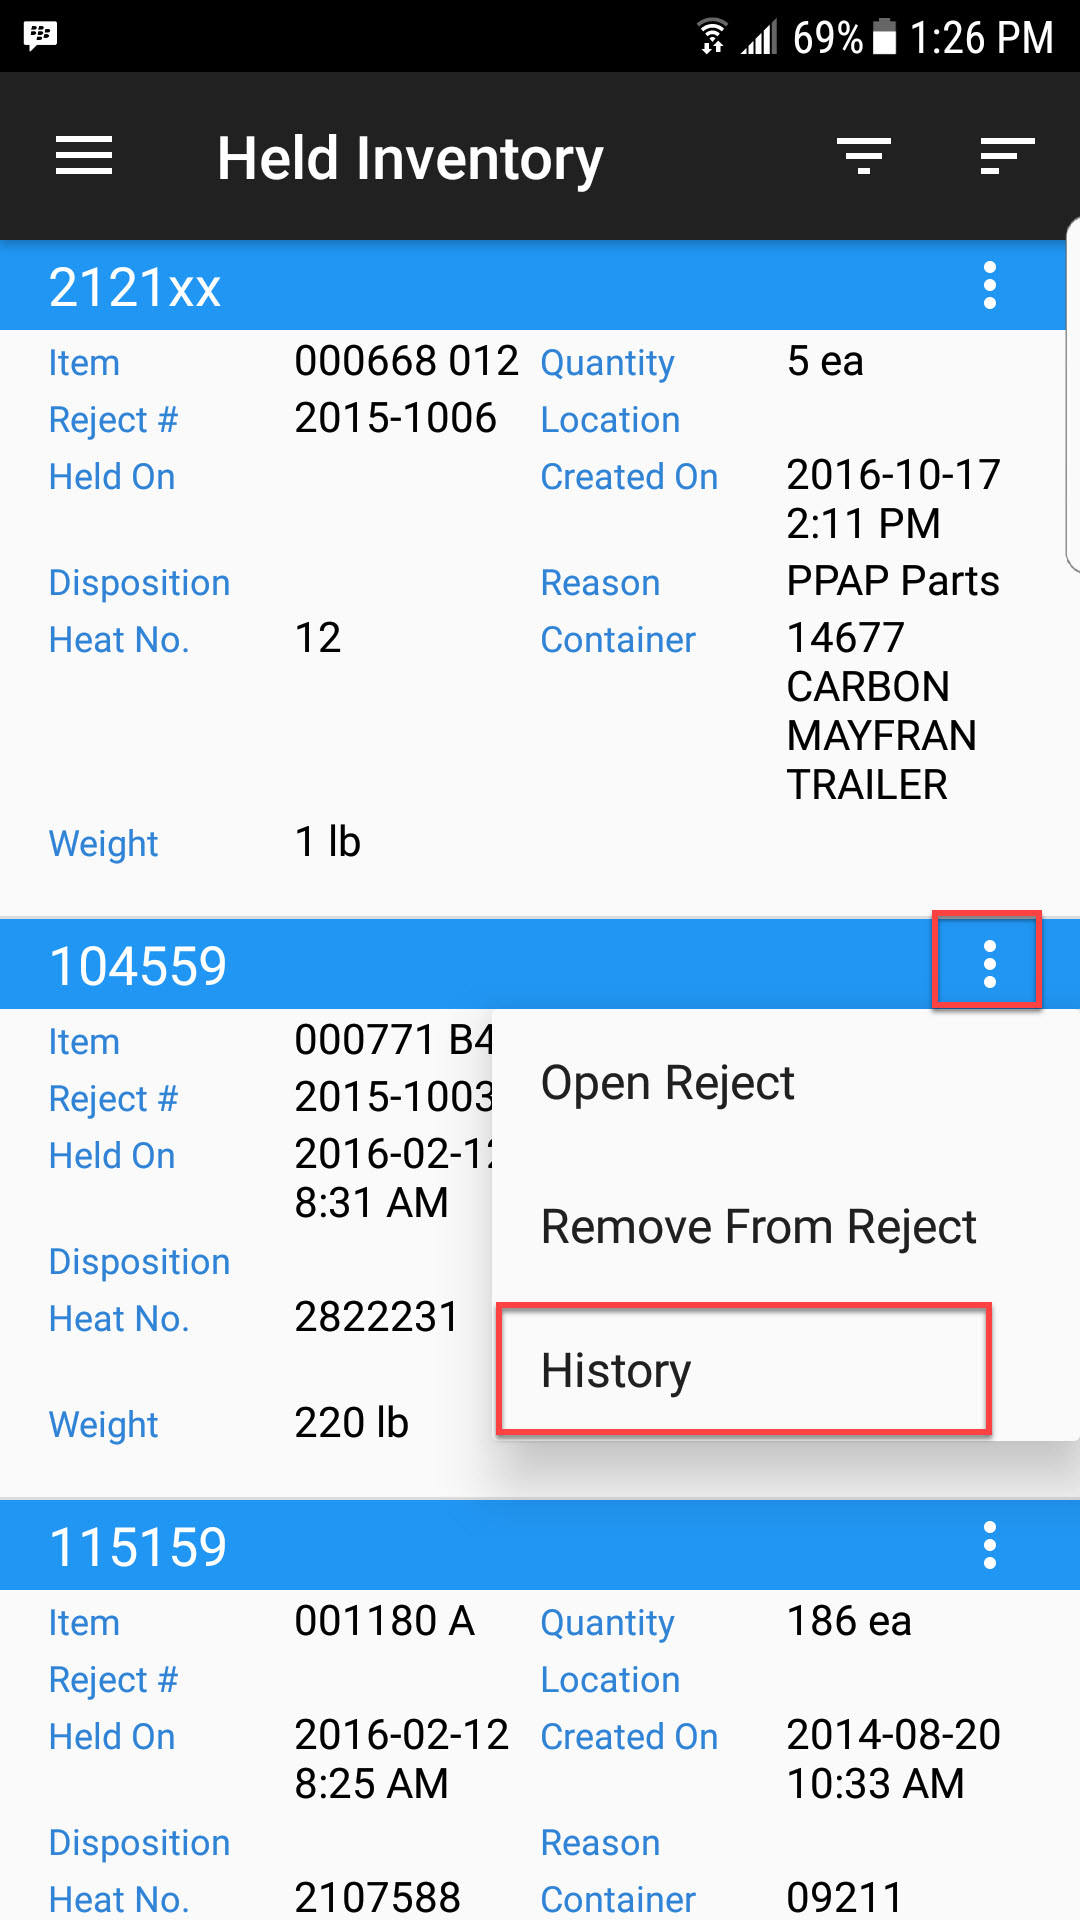
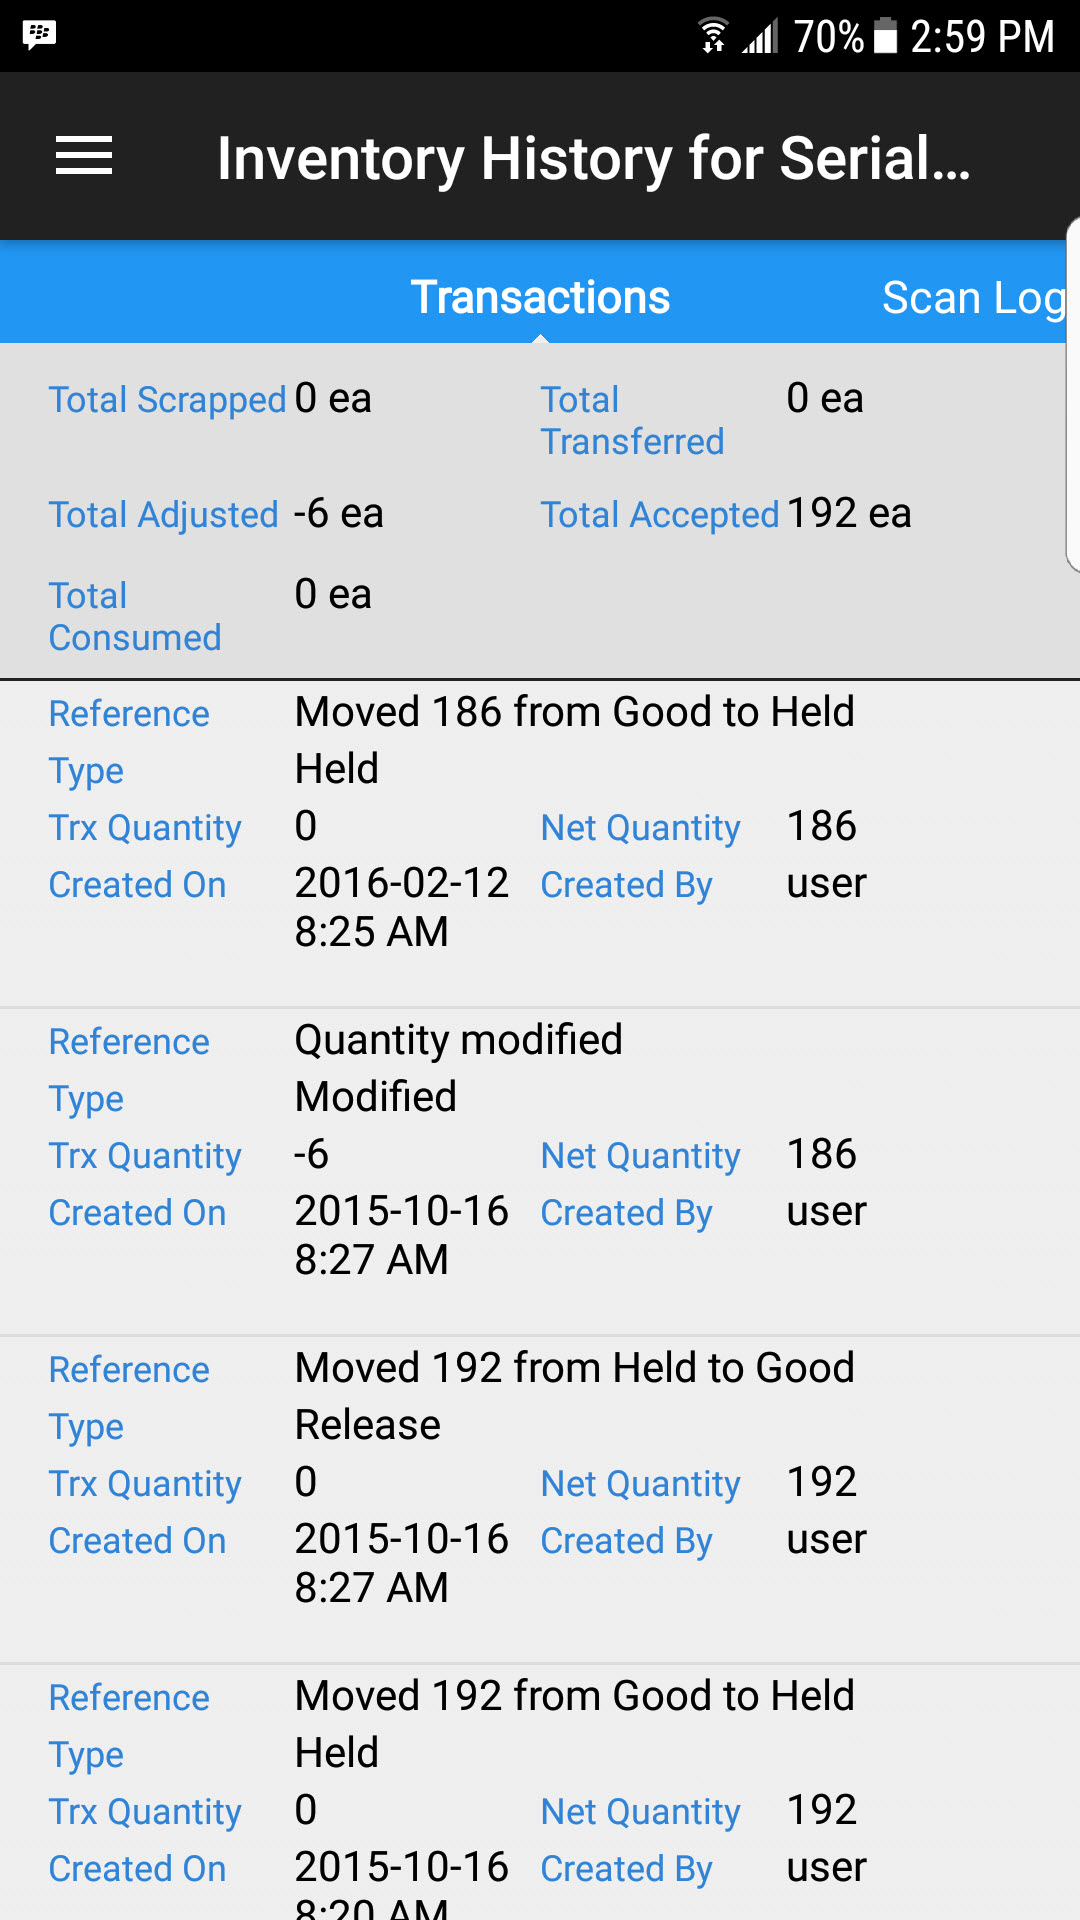
This will take you to the Inventory History screen for the selected serial number where users can view Transactions, Scan Log, and Dock Audit History for the serial number.
Timecard
Starting a Quality Timecard
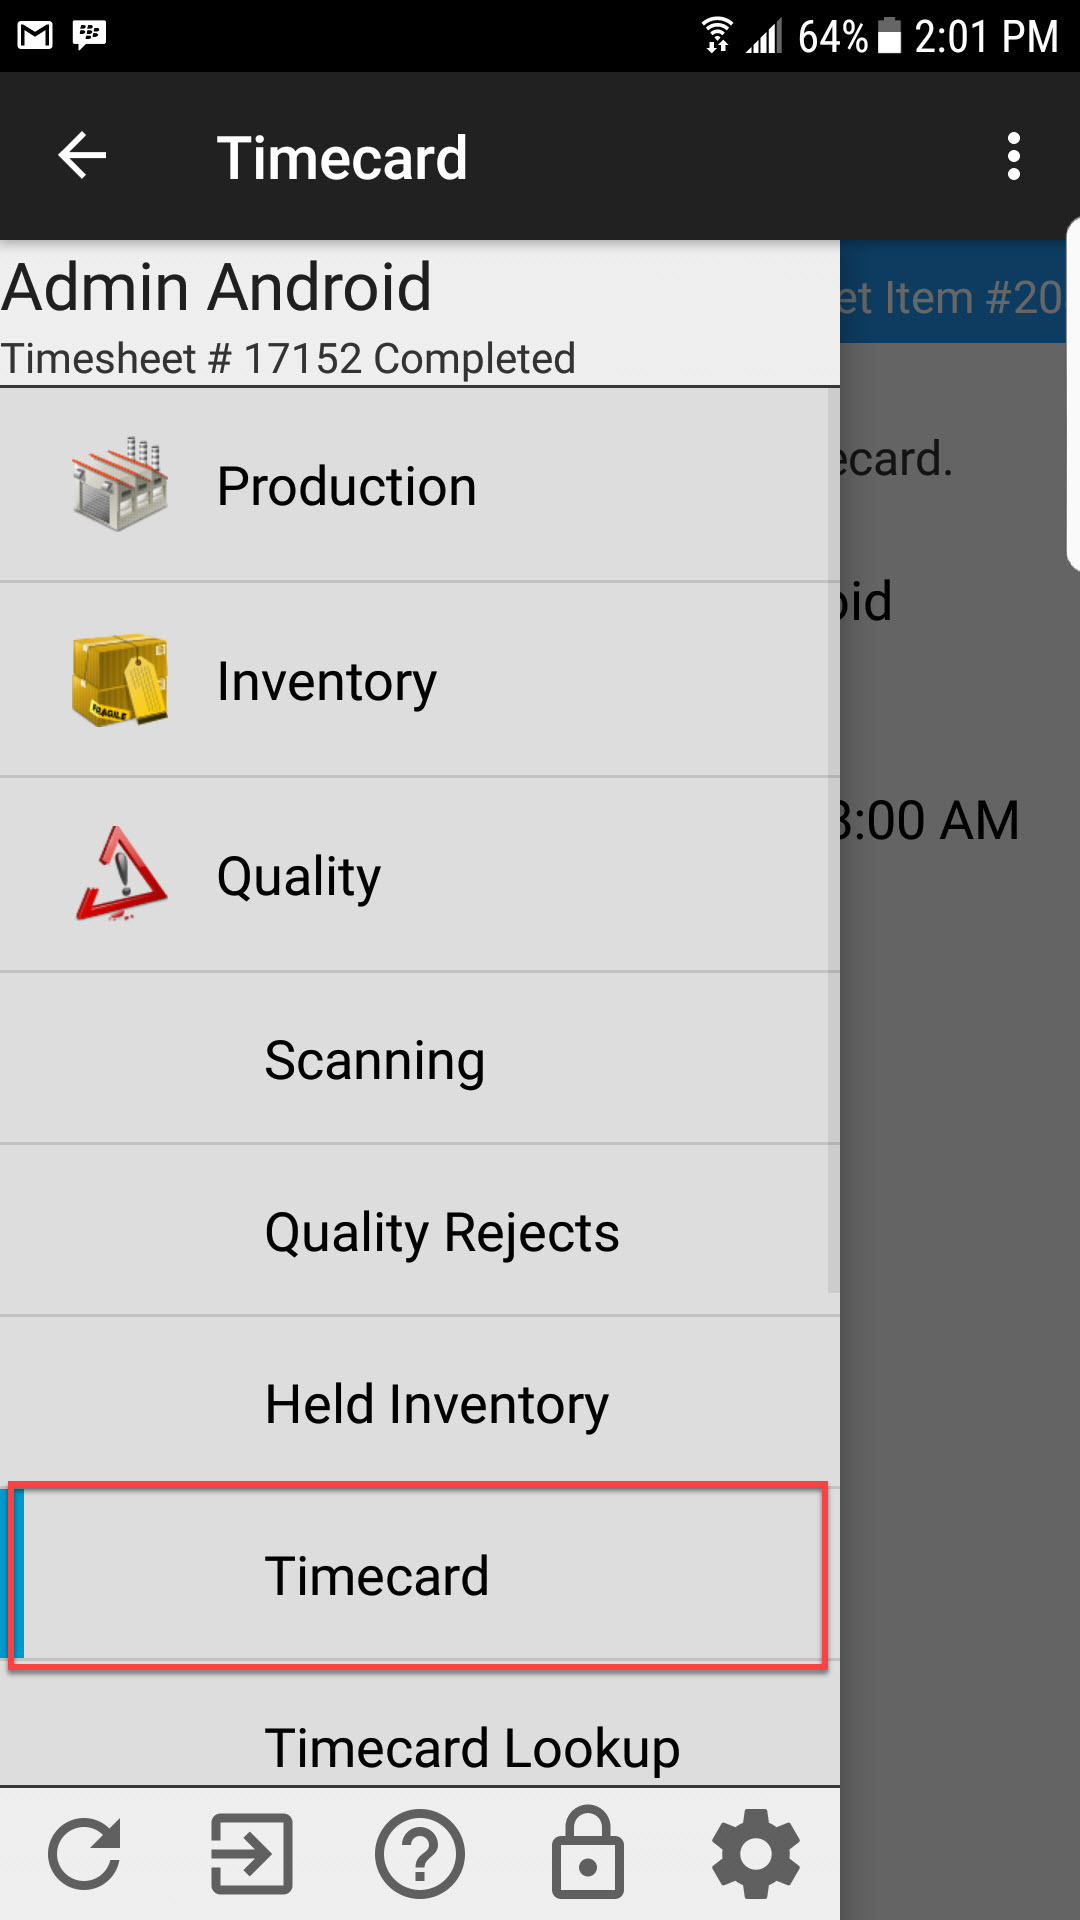
Users can start a quality timecard by navigating to the Quality module and selecting the Timecard option.
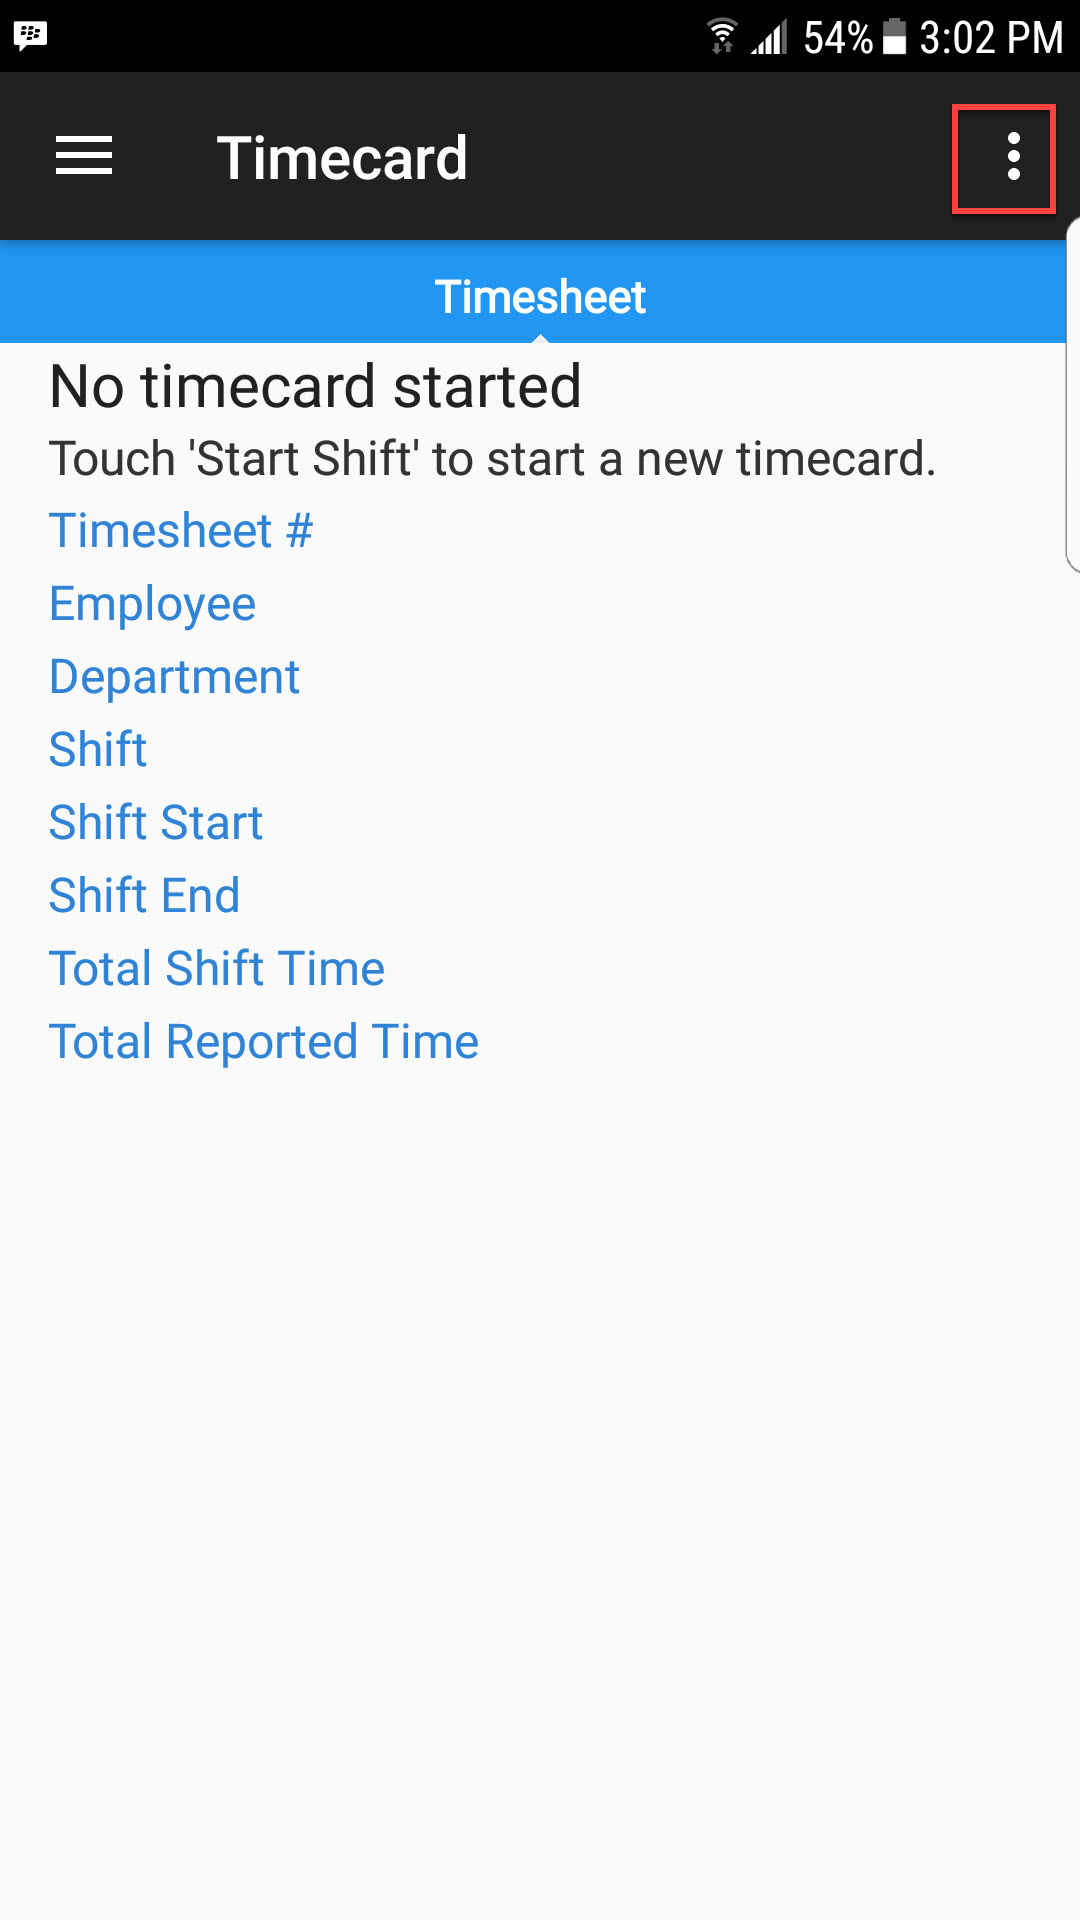
Users then will select the action menu on the top right of the screen and select the Start Shift option.
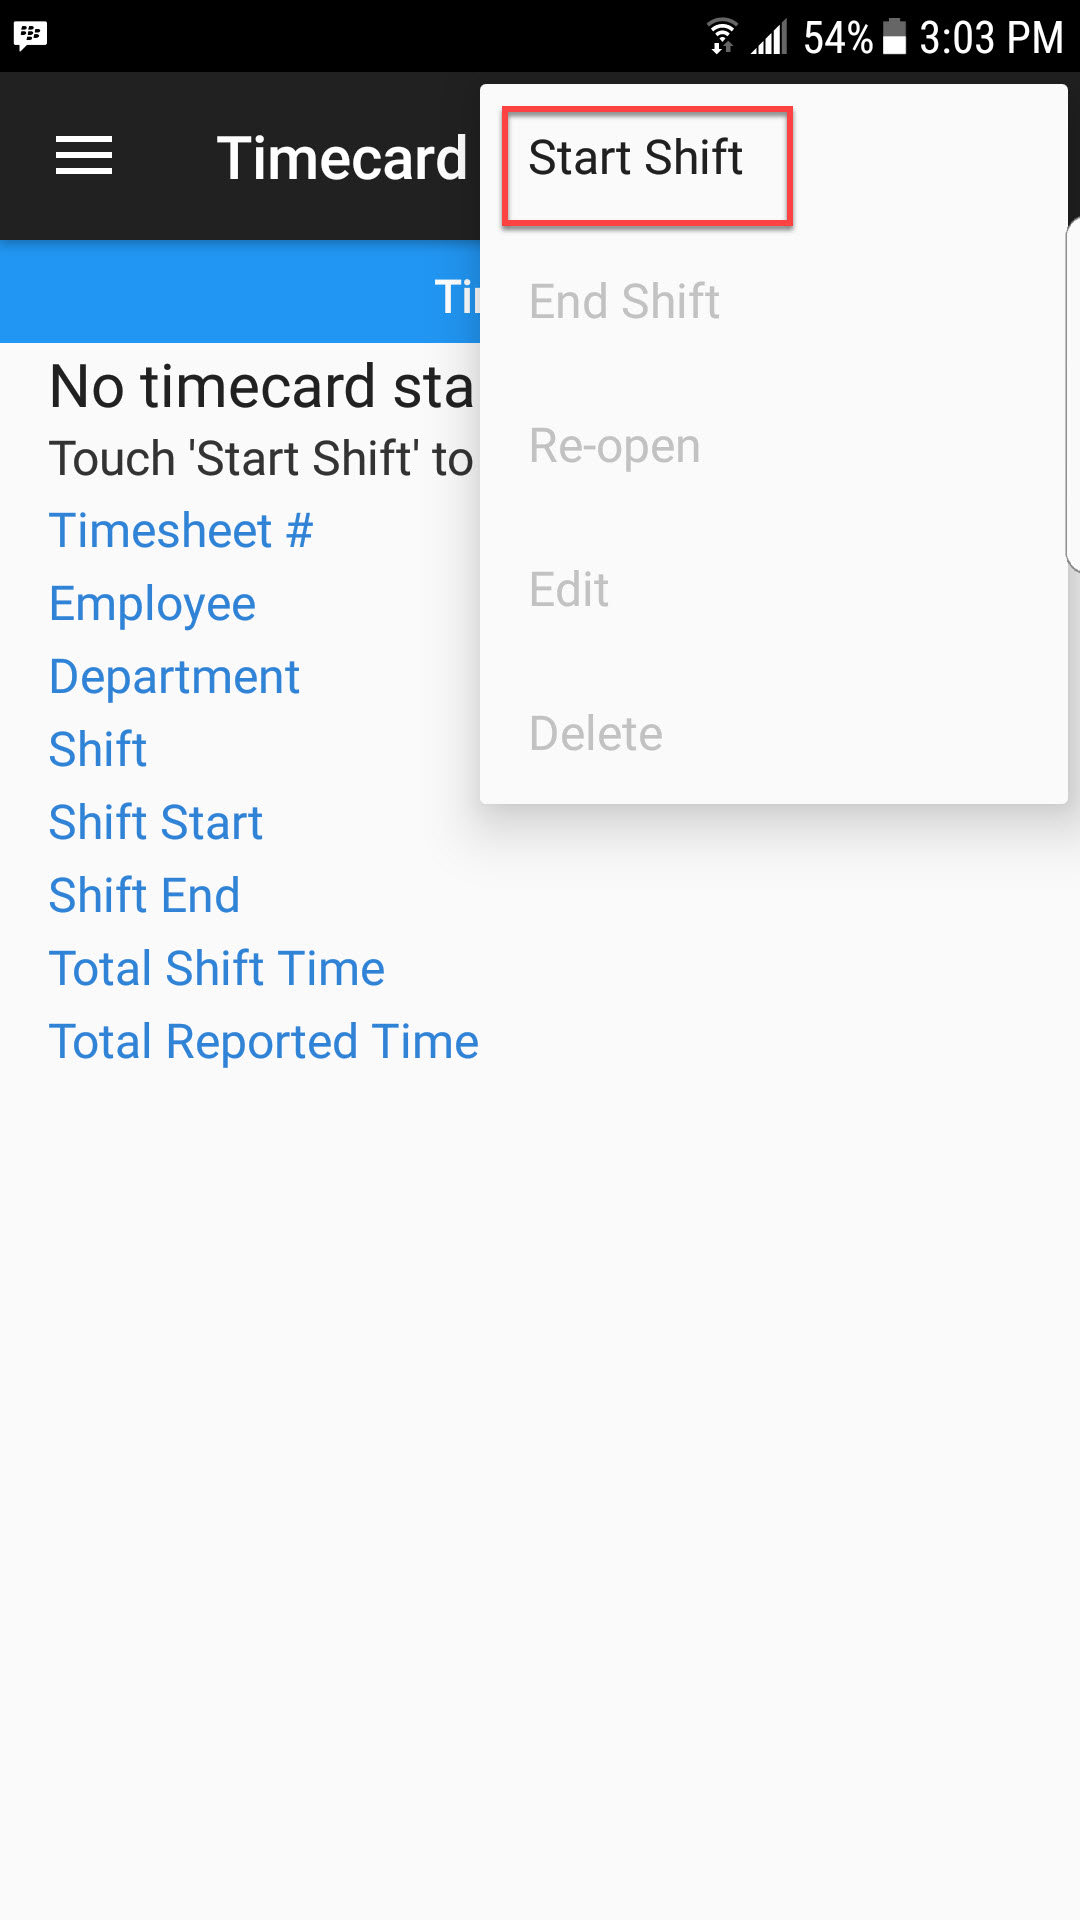
The Start Shift window will open where users can select the Employee, Shift, and Starts On date and time, if permissions allow.
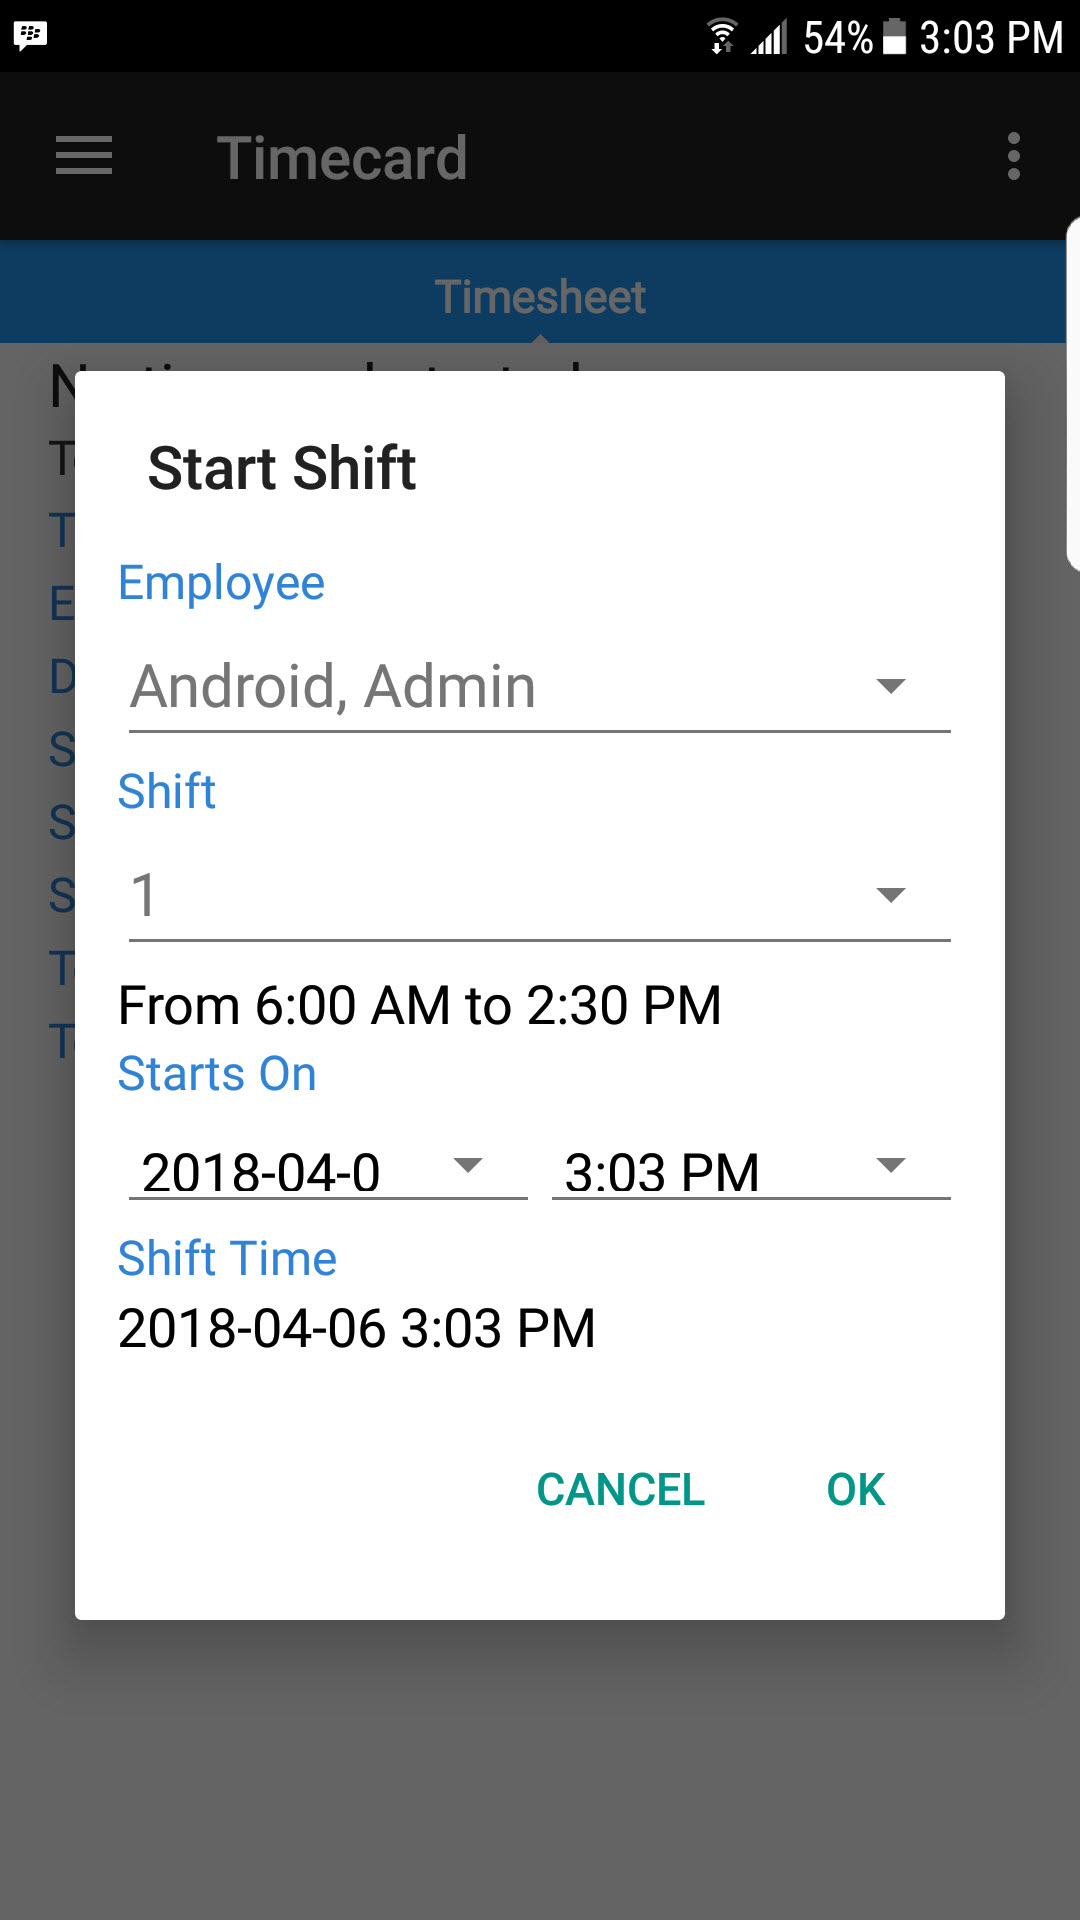
Once they have entered in the required information, they can select OK to start the timecard.
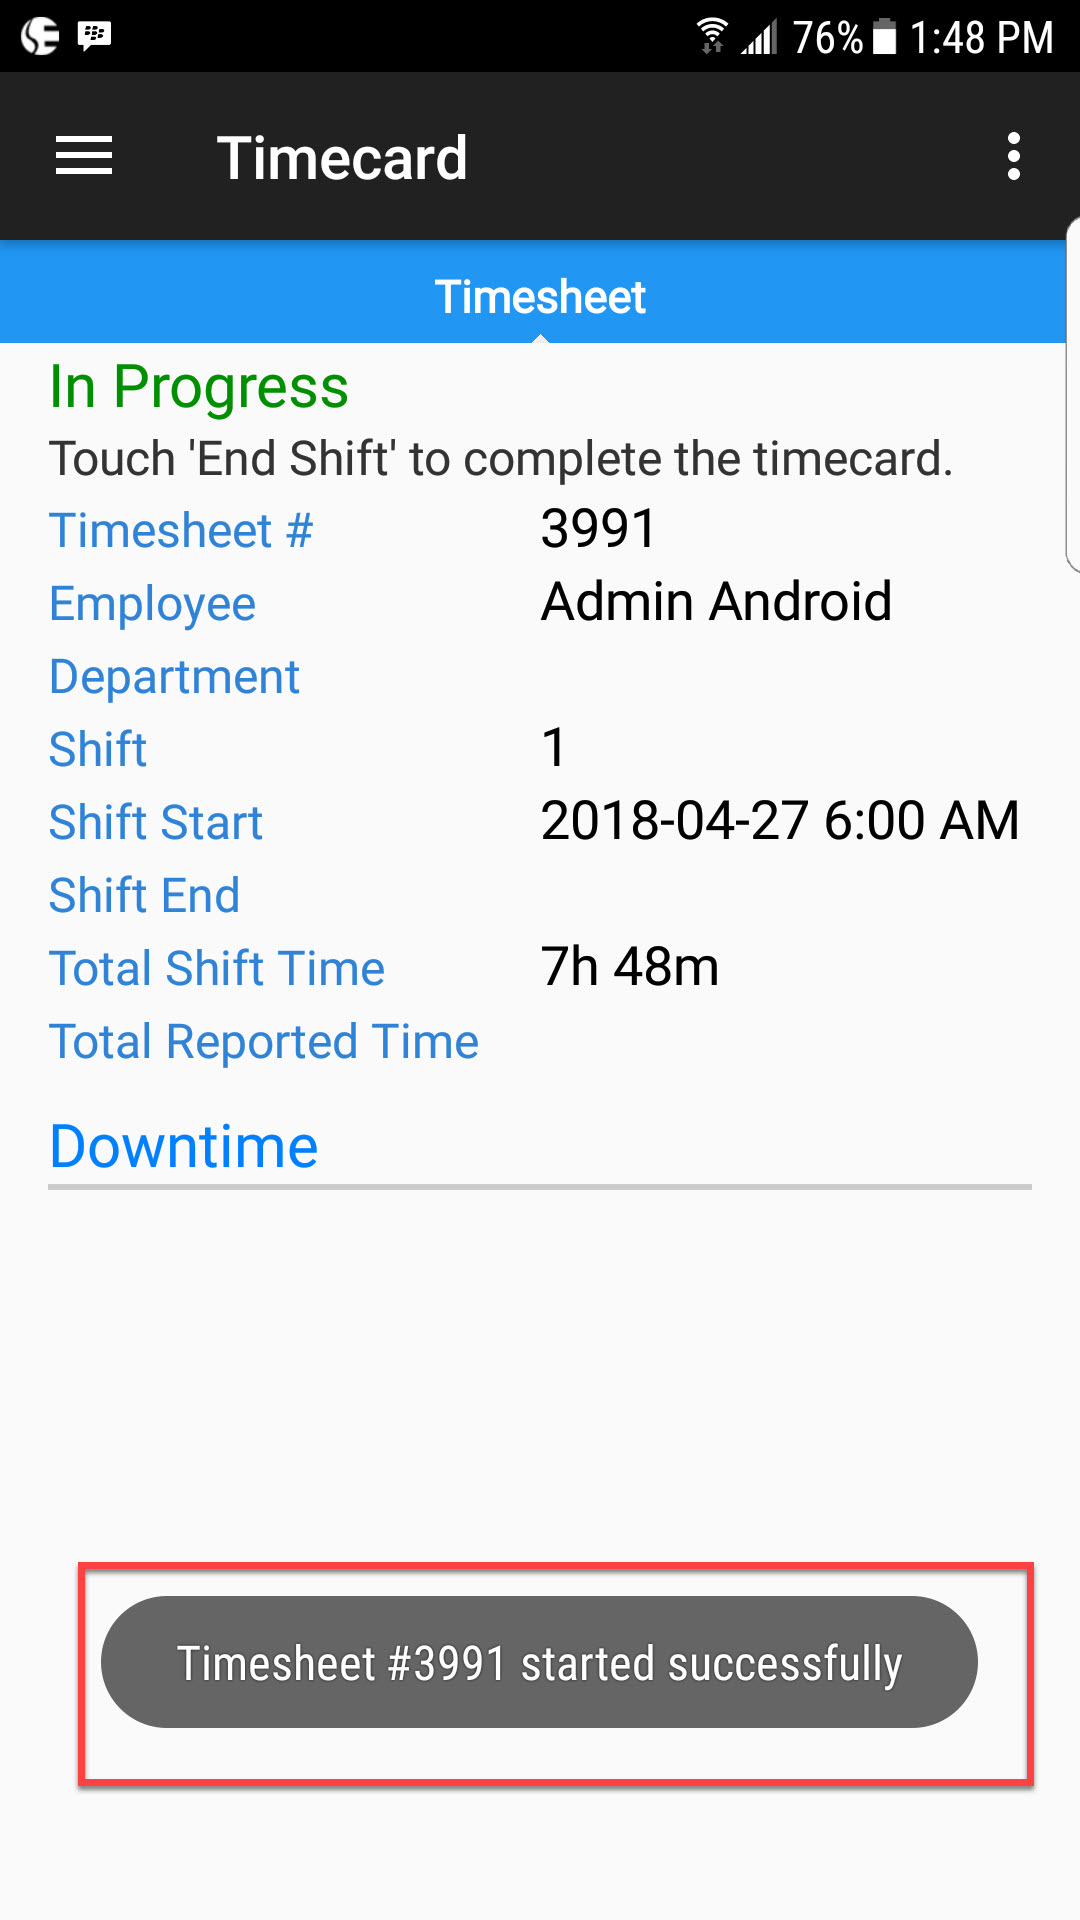
Ending a Quality Timecard
Users can end a quality timecard by navigating to the Quality module and selecting the Timecard option.

Users then will select the action menu on the top right of the screen and select the End Shift option.

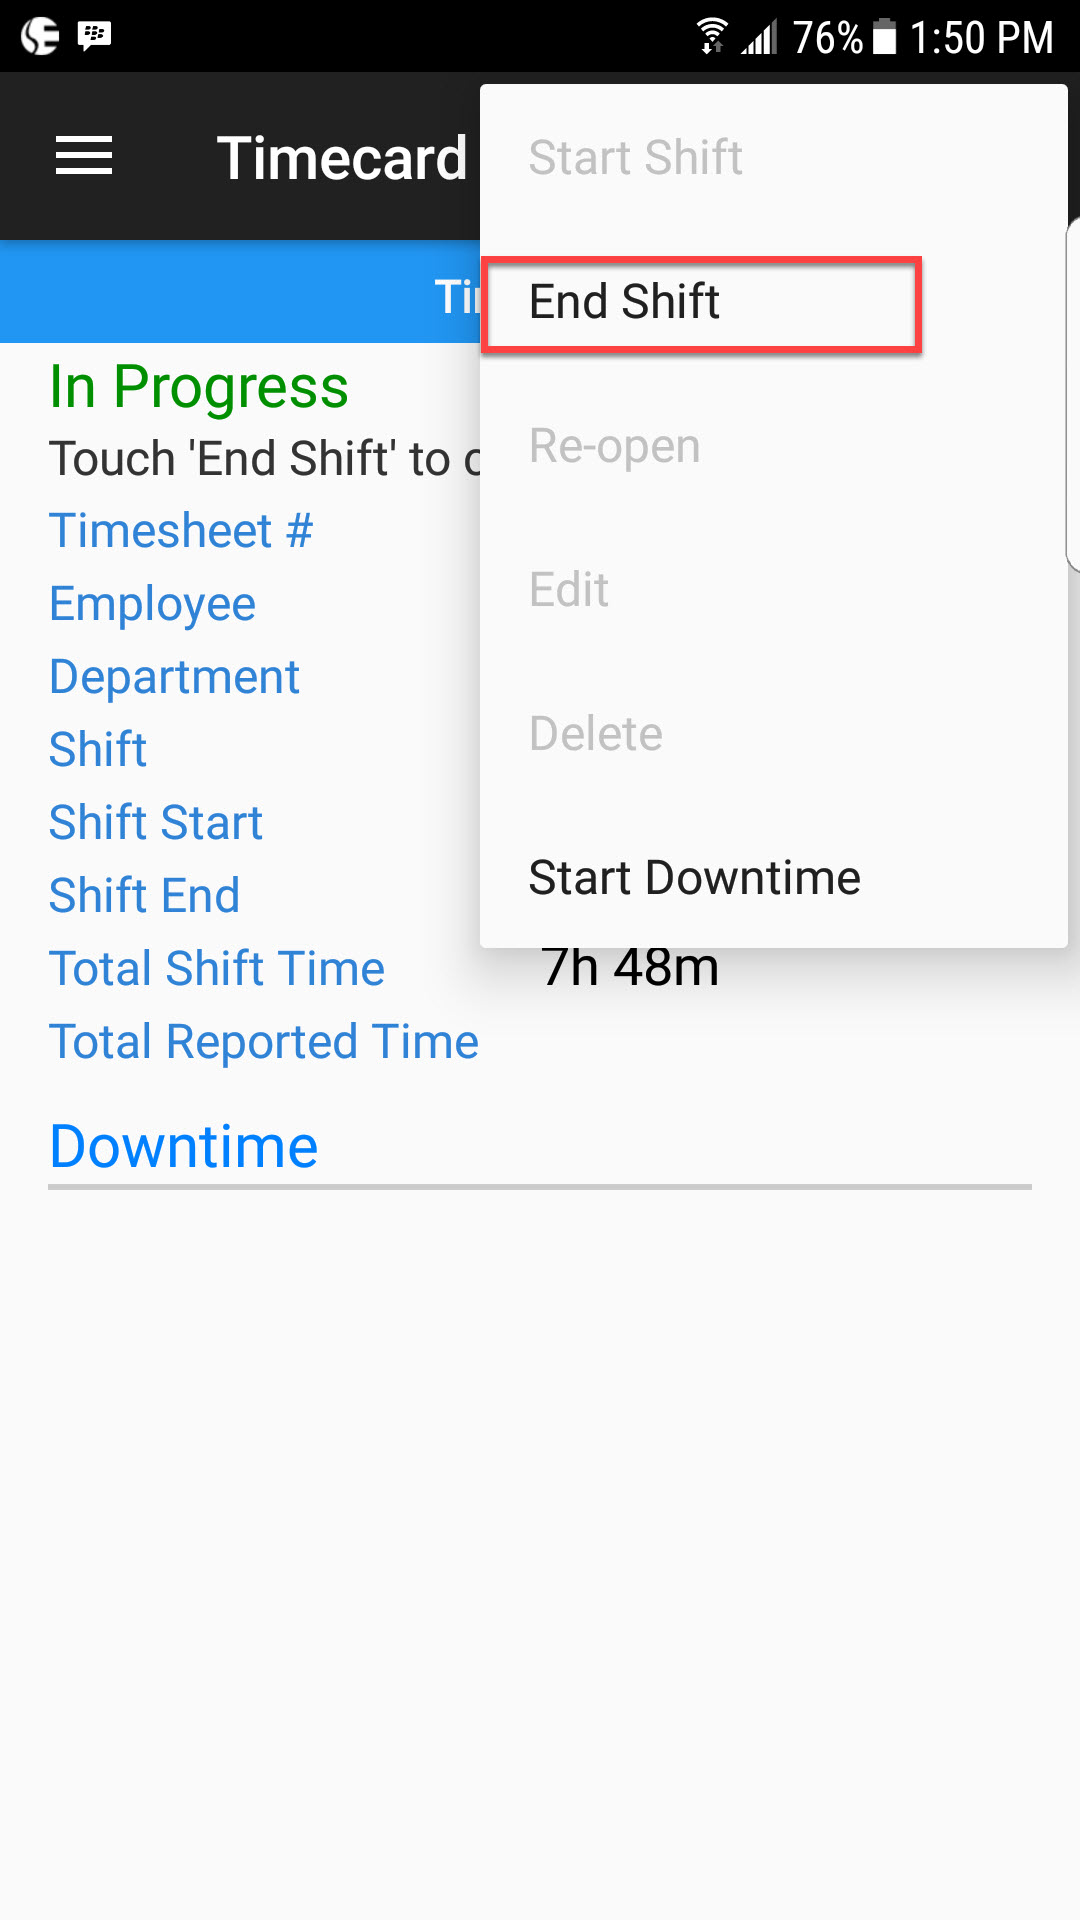
The End Shift window will open where users can change the Shift, and Ended On date and time, if permissions allow.
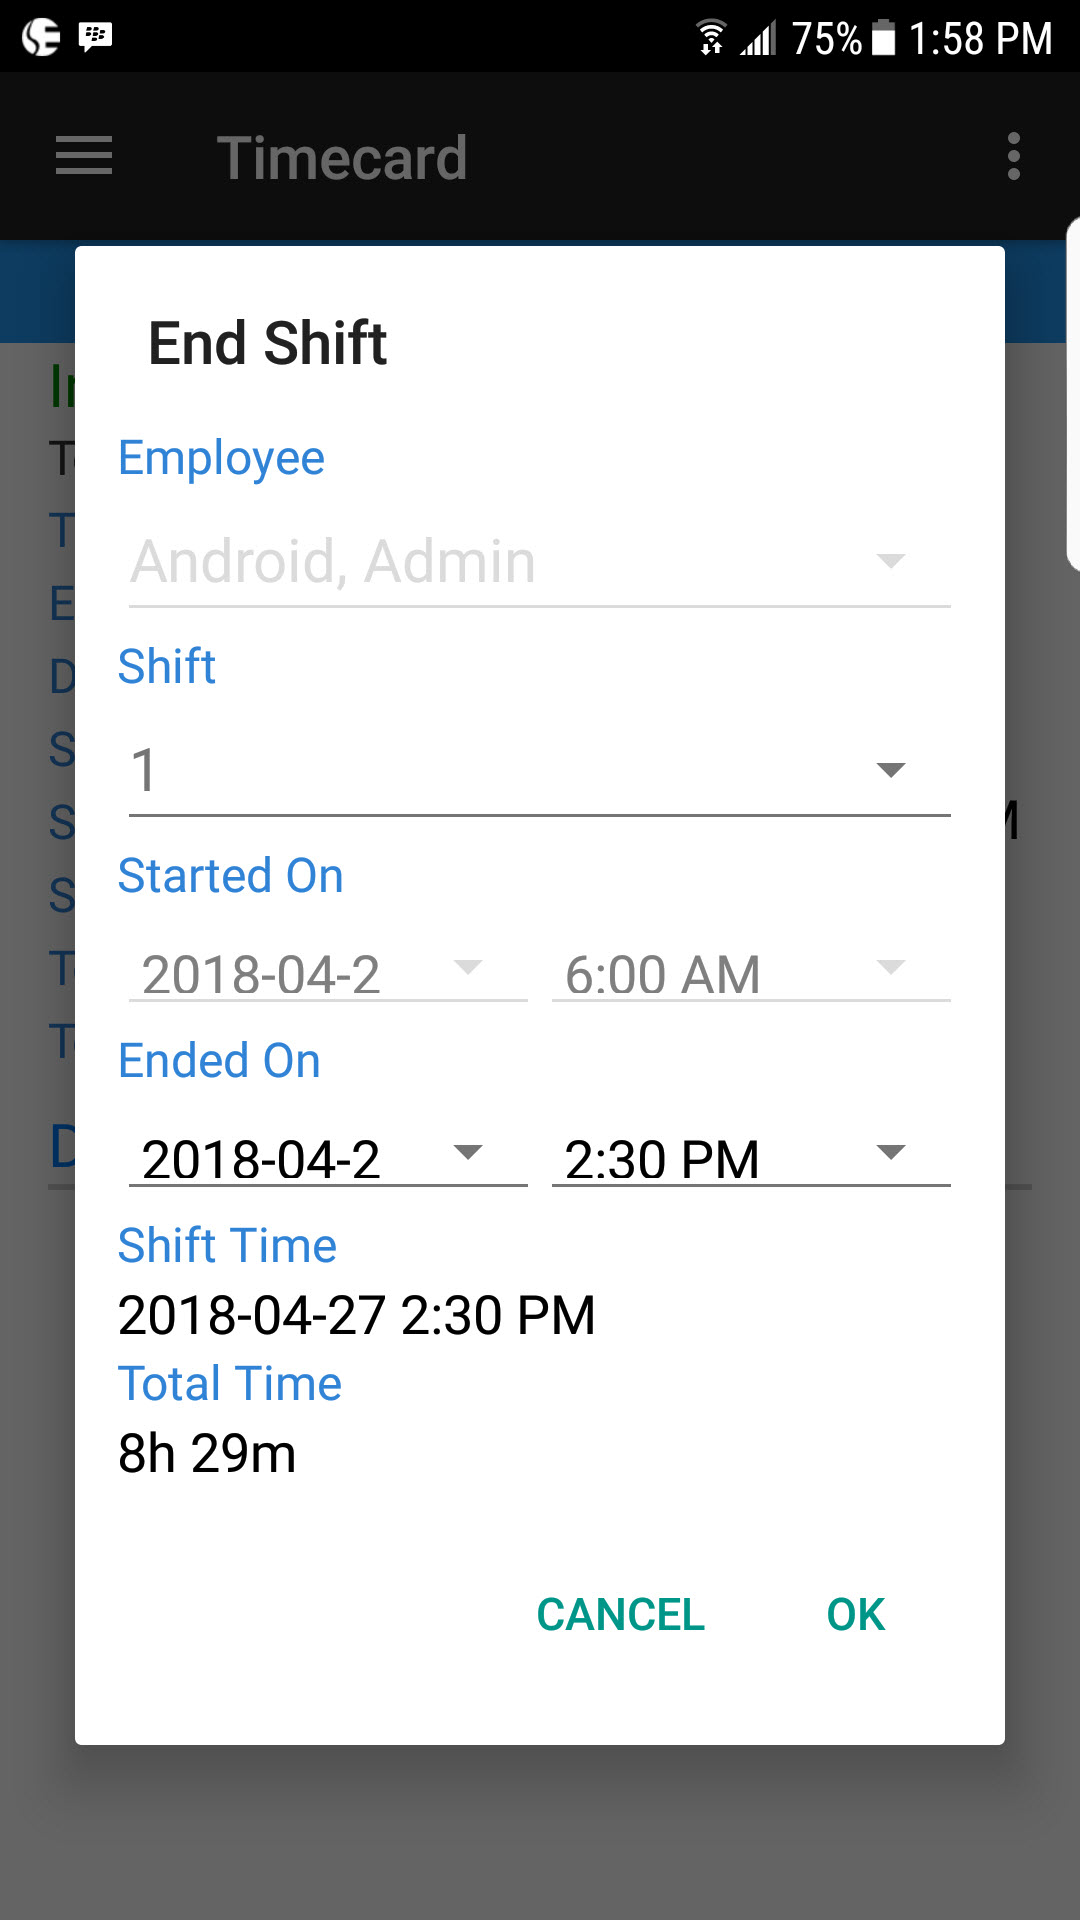
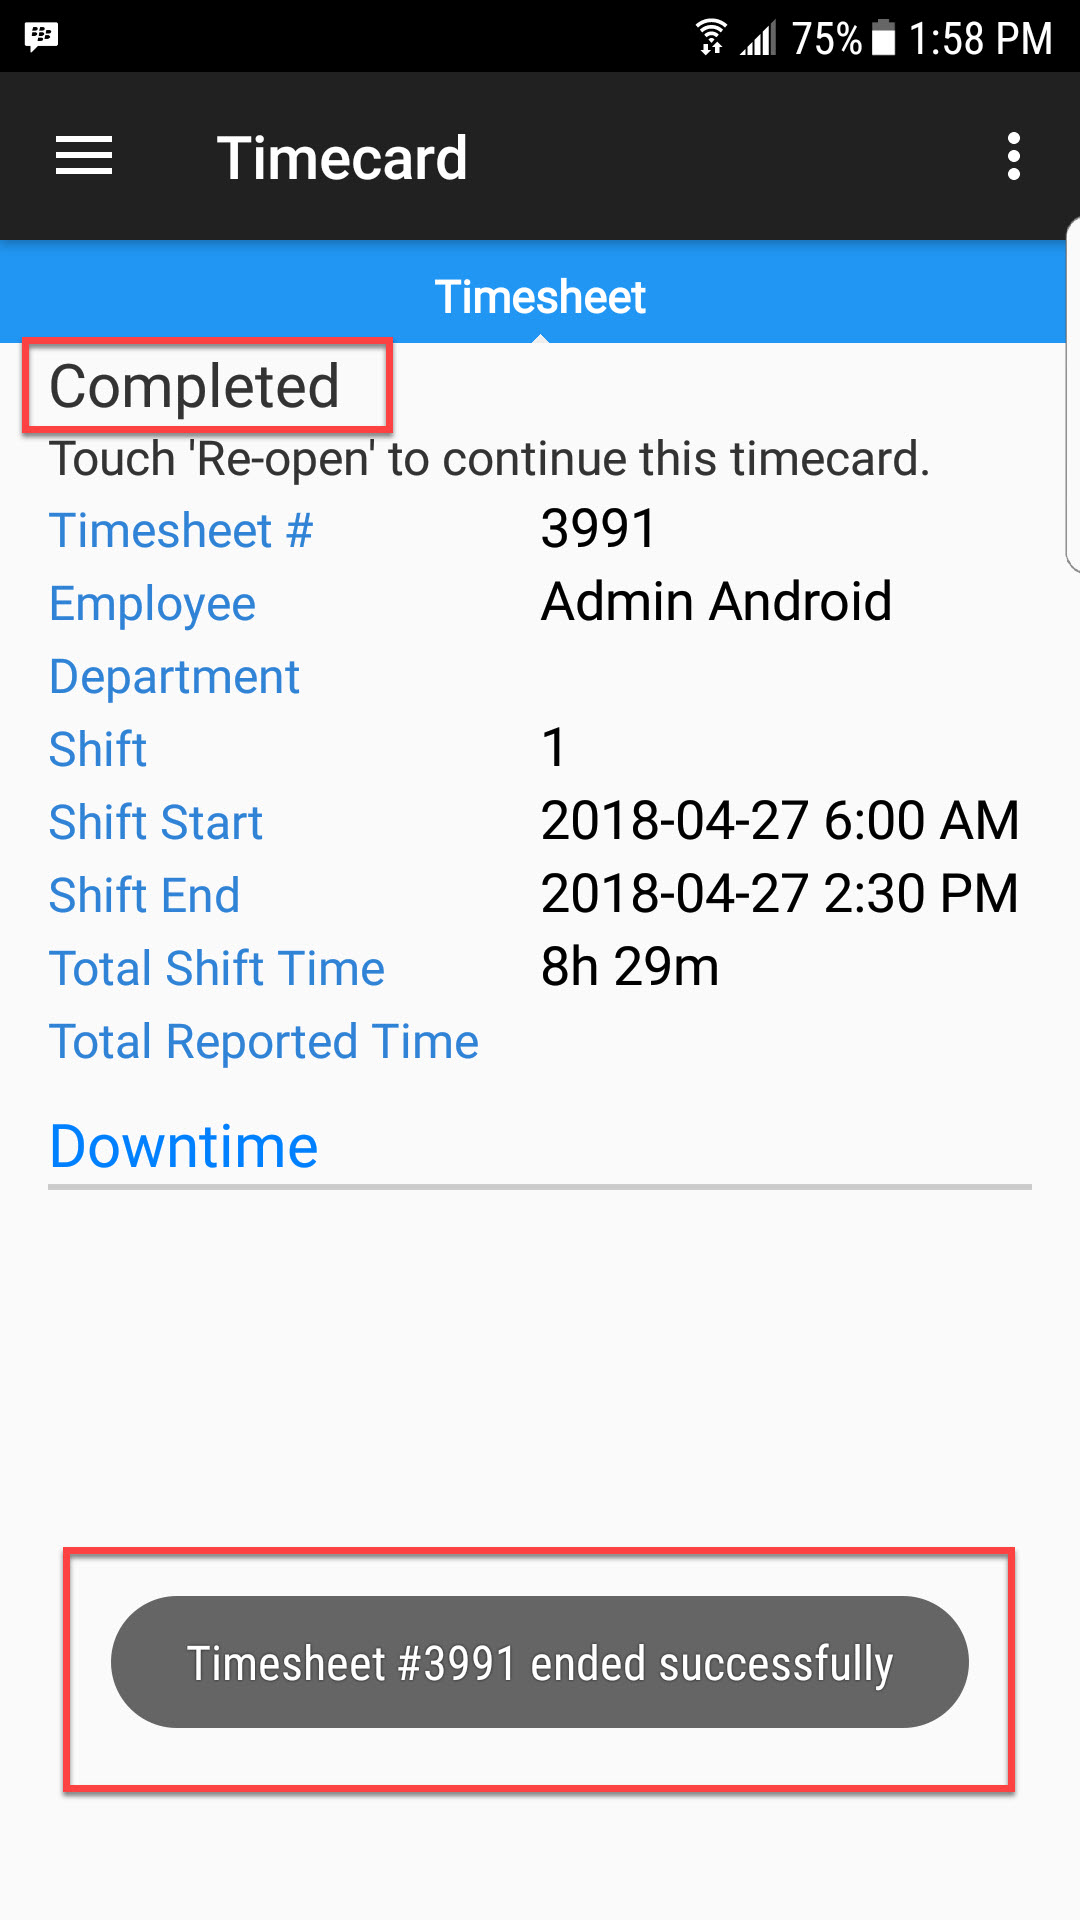
Once they have entered in the required information, they can select OK to end the timecard or CANCEL. The application will display a message letting the user know that the timecard has been completed, and the Timecard will show as Completed on the top left of the screen.
Editing a Quality Timecard
Users cannot edit a timecard that is in progress, a timecard must be completed before editing.
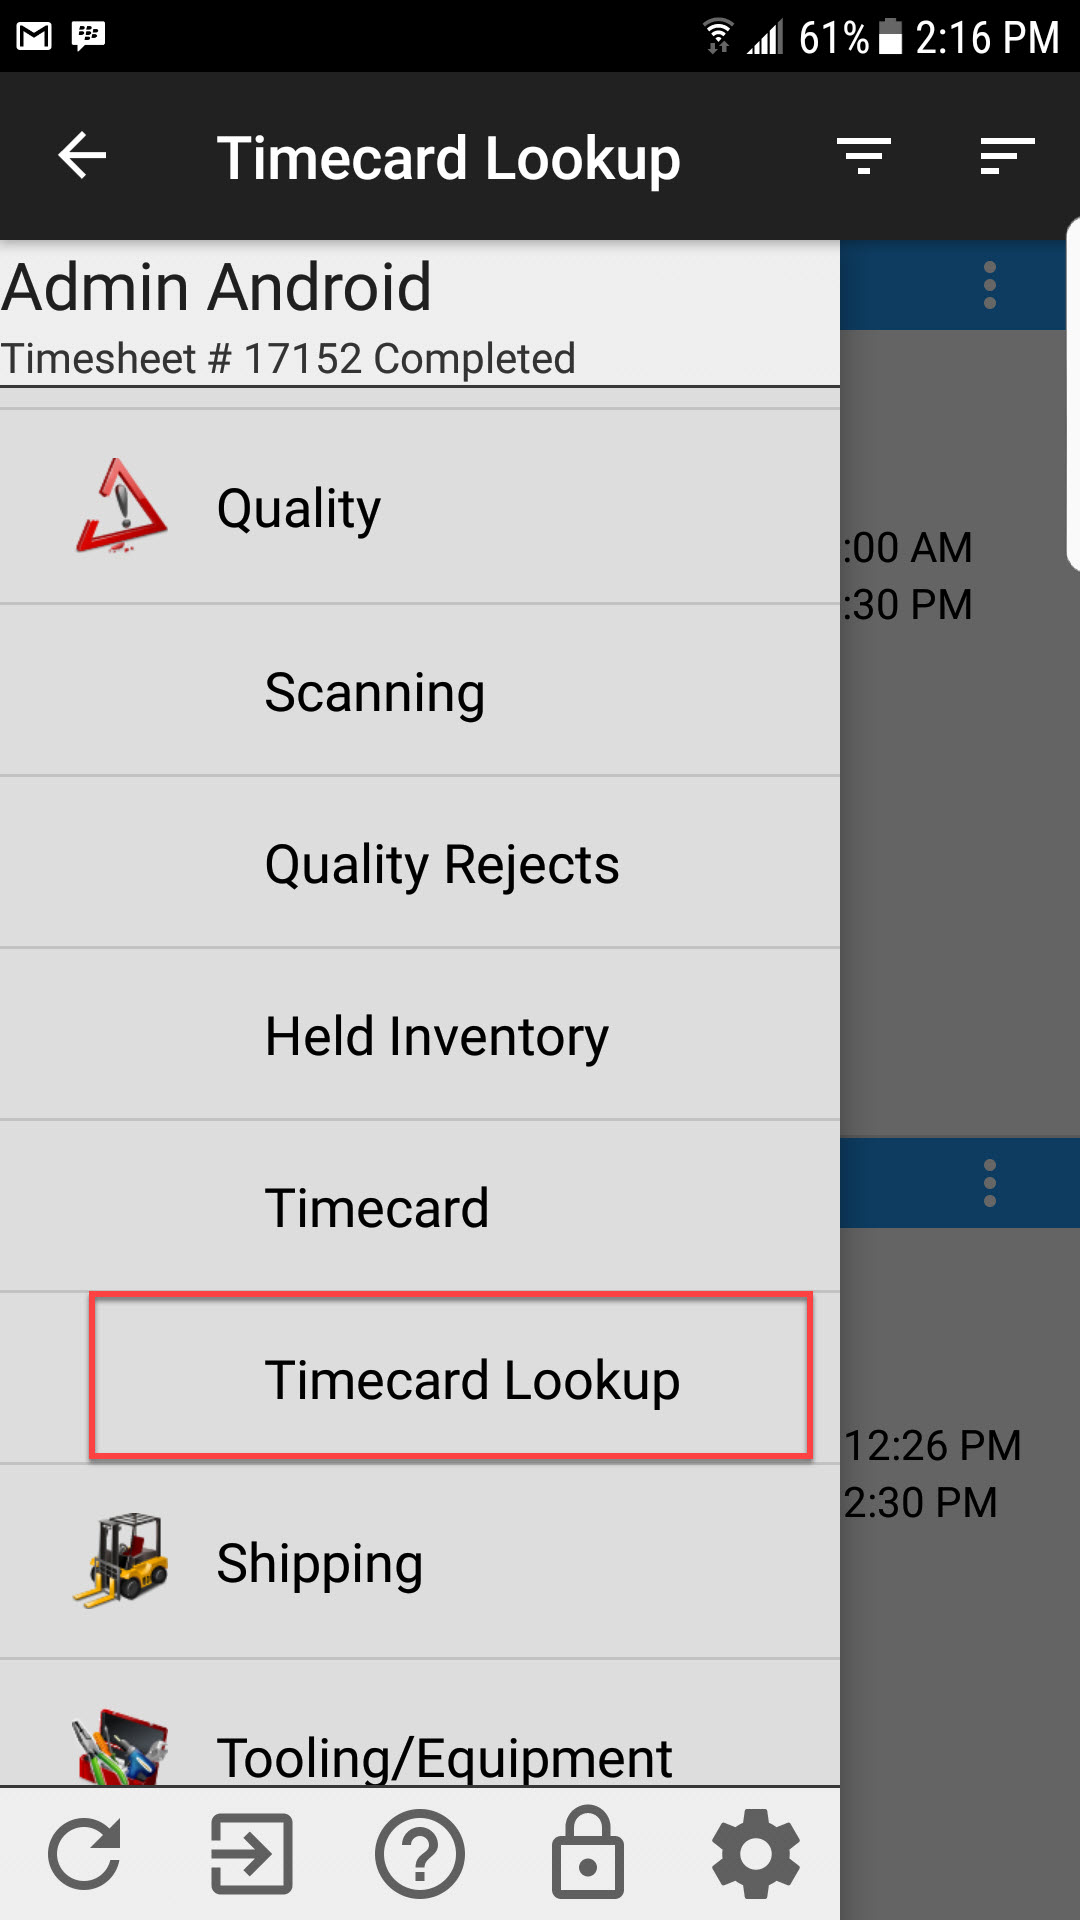
To edit a quality timecard, users first need to open the timecard they wish to edit. Users can do this by navigating to the Quality module, and the Timecard Lookup option.
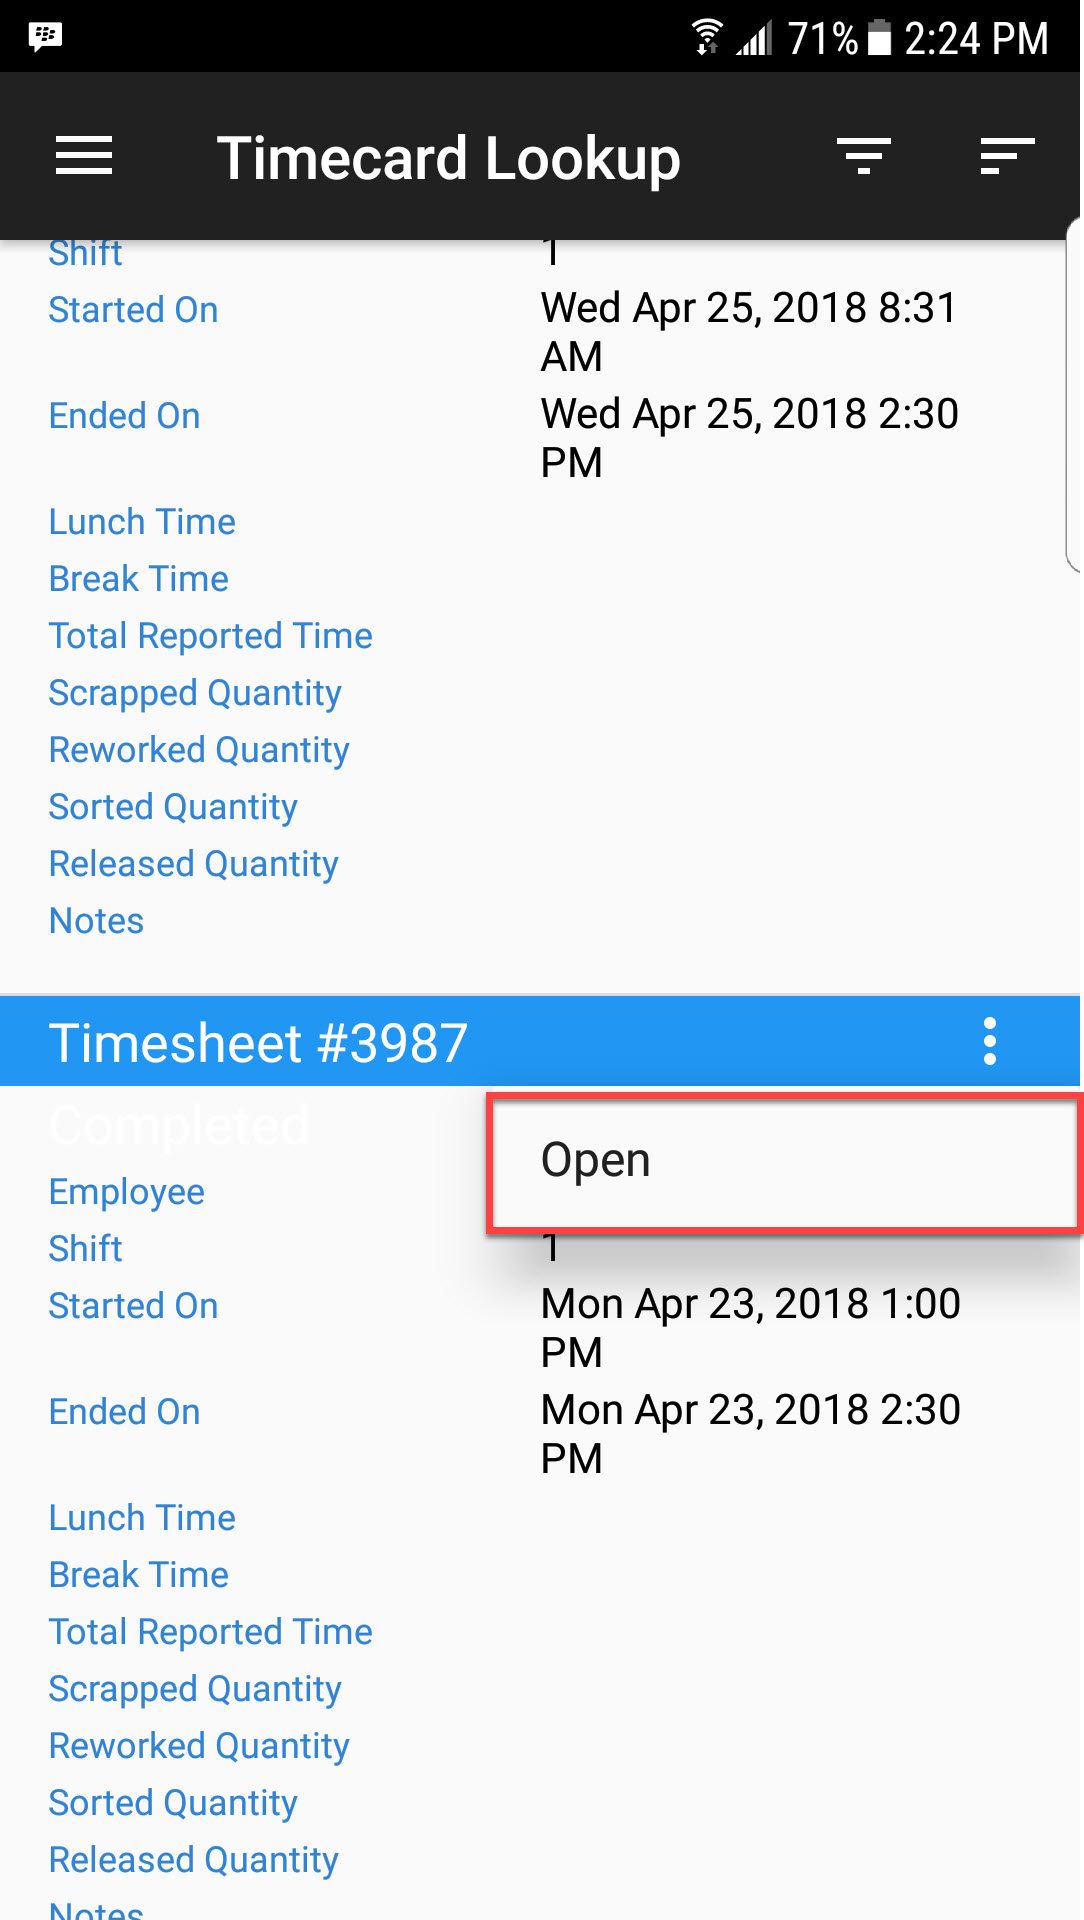
Click on the action menu of the timecard you wish to edit, and select Open.
Users then will select the action menu on the top right of the screen and select the End Shift option.
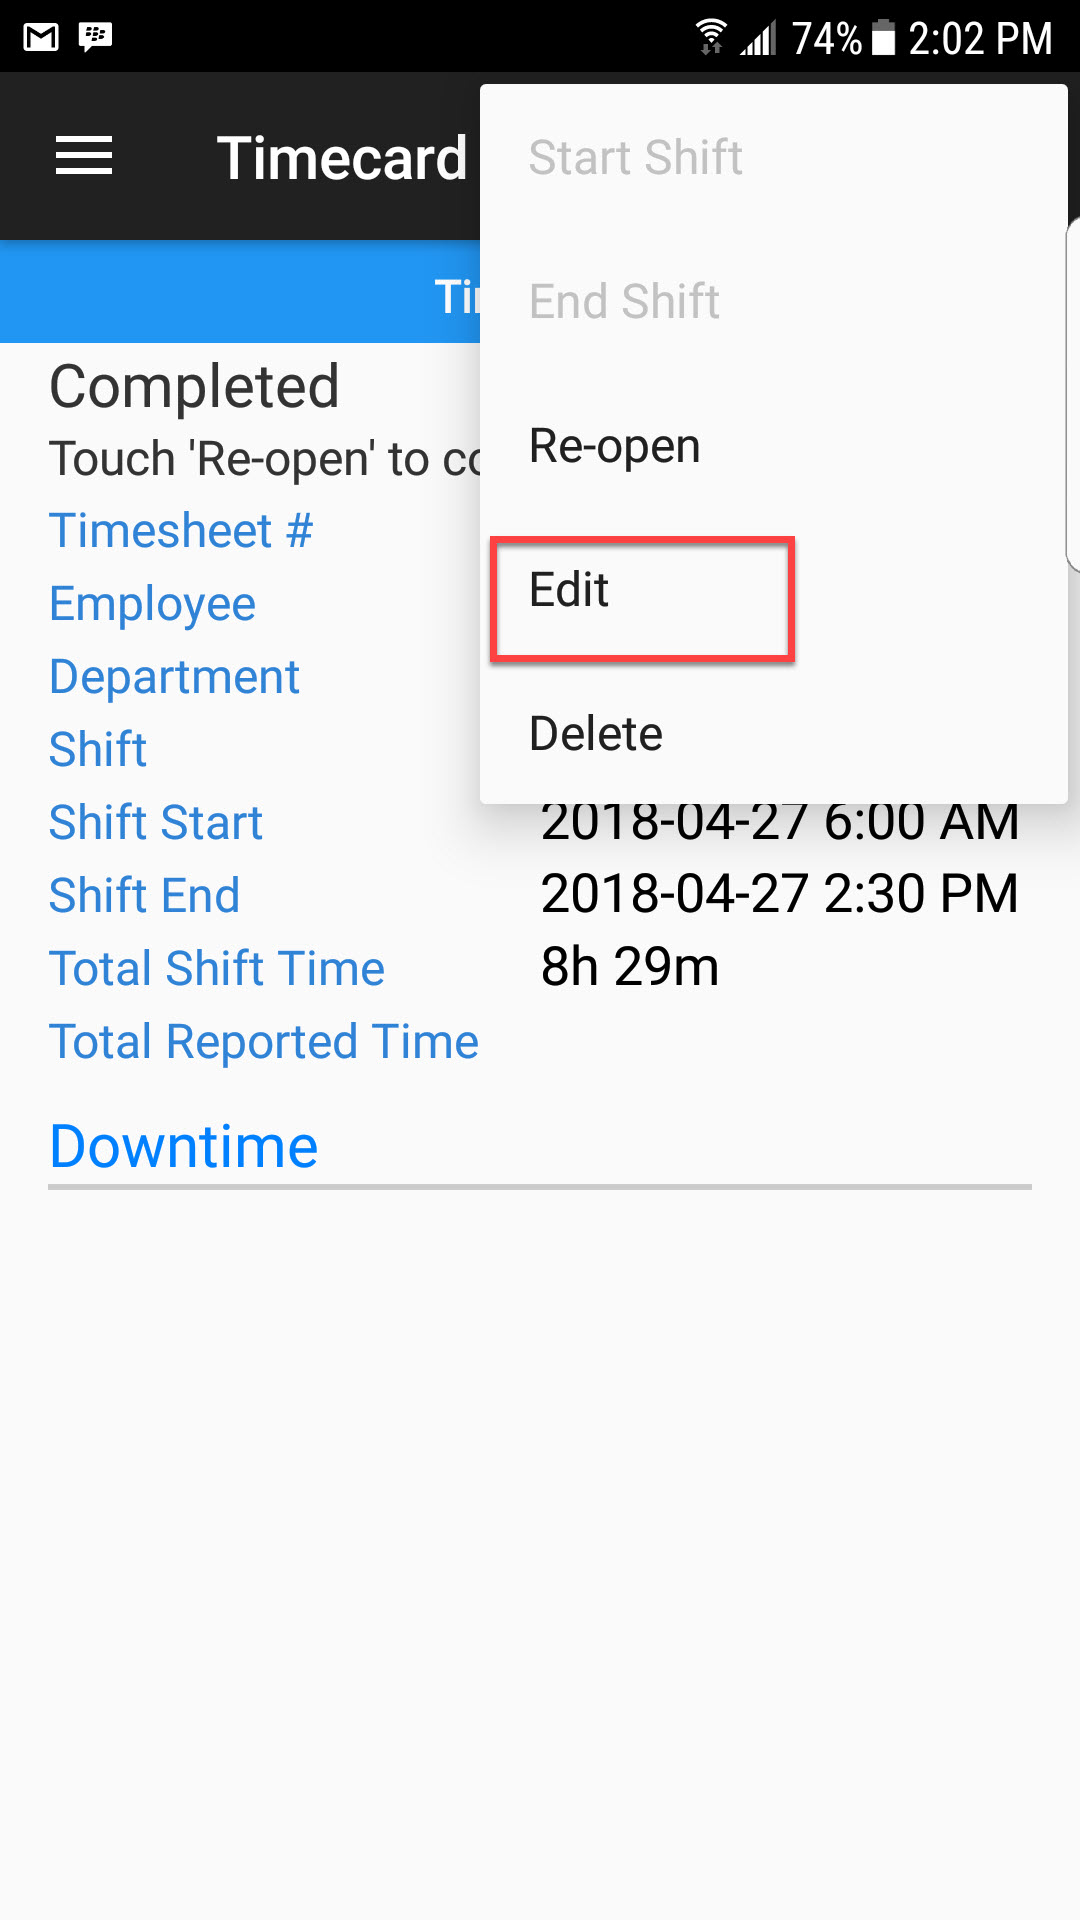
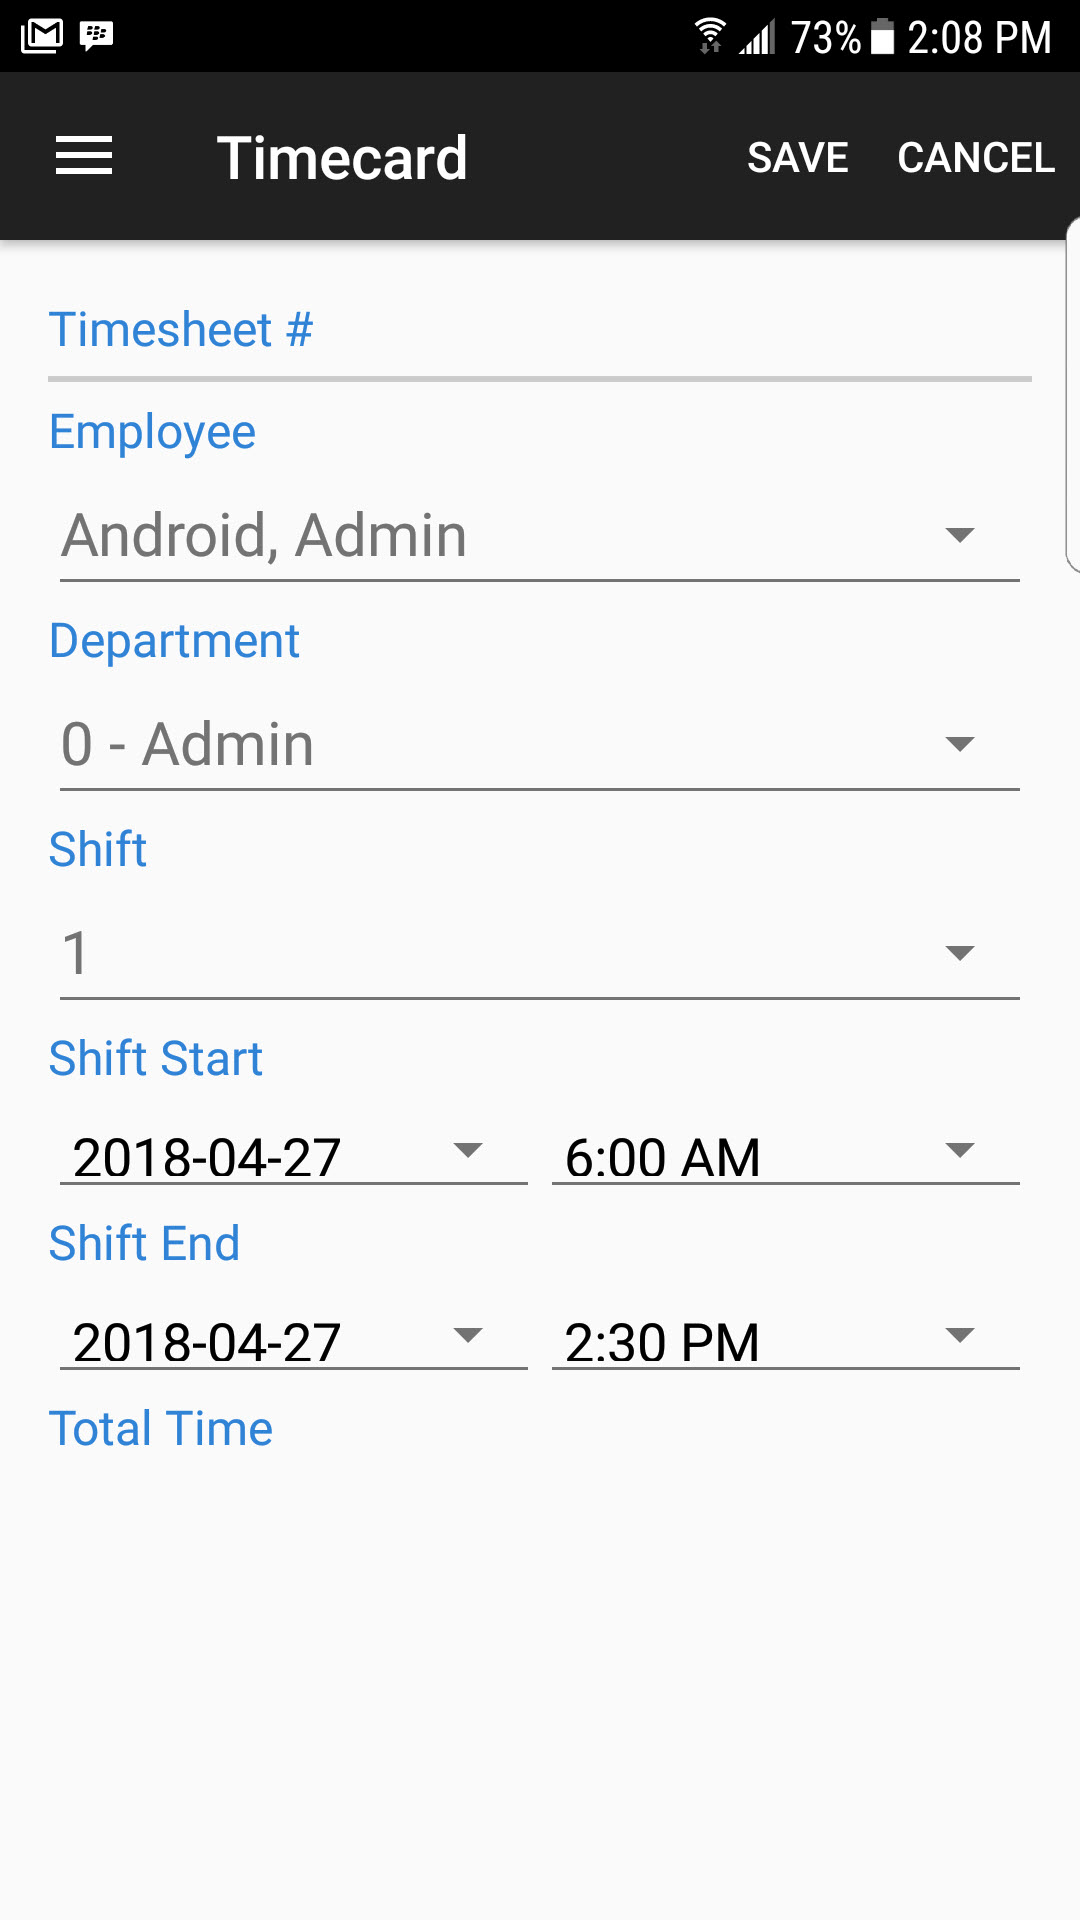
Users can then edit the information in the fields such as Employee, Department, Shift, Shift Start and End date and time.
Deleting Timesheet Items from a Quality Timecard
Timesheet items on a quality timecard are the rejects that employees have worked on throughout their shift. If a timesheet item was added in error to a quality timecard, it can be deleted. Users can delete a timesheet item that is on an in progress quality timecard, an incomplete quality timecard, or a completed quality timecard.
To delete a timesheet time, find the quality timecard you wish to delete the timesheet item from. The easiest way to find a timecard is by navigating to the Quality module and selecting Timecard Lookup which will display a list of all quality timecards.

Click on the action menu of the timecard you wish to open, and select Open.

Once the timecard is open, swipe across to find the timesheet item you wish to delete. Once you find the item, touch the action menu at the top right of the screen and select the Delete option:
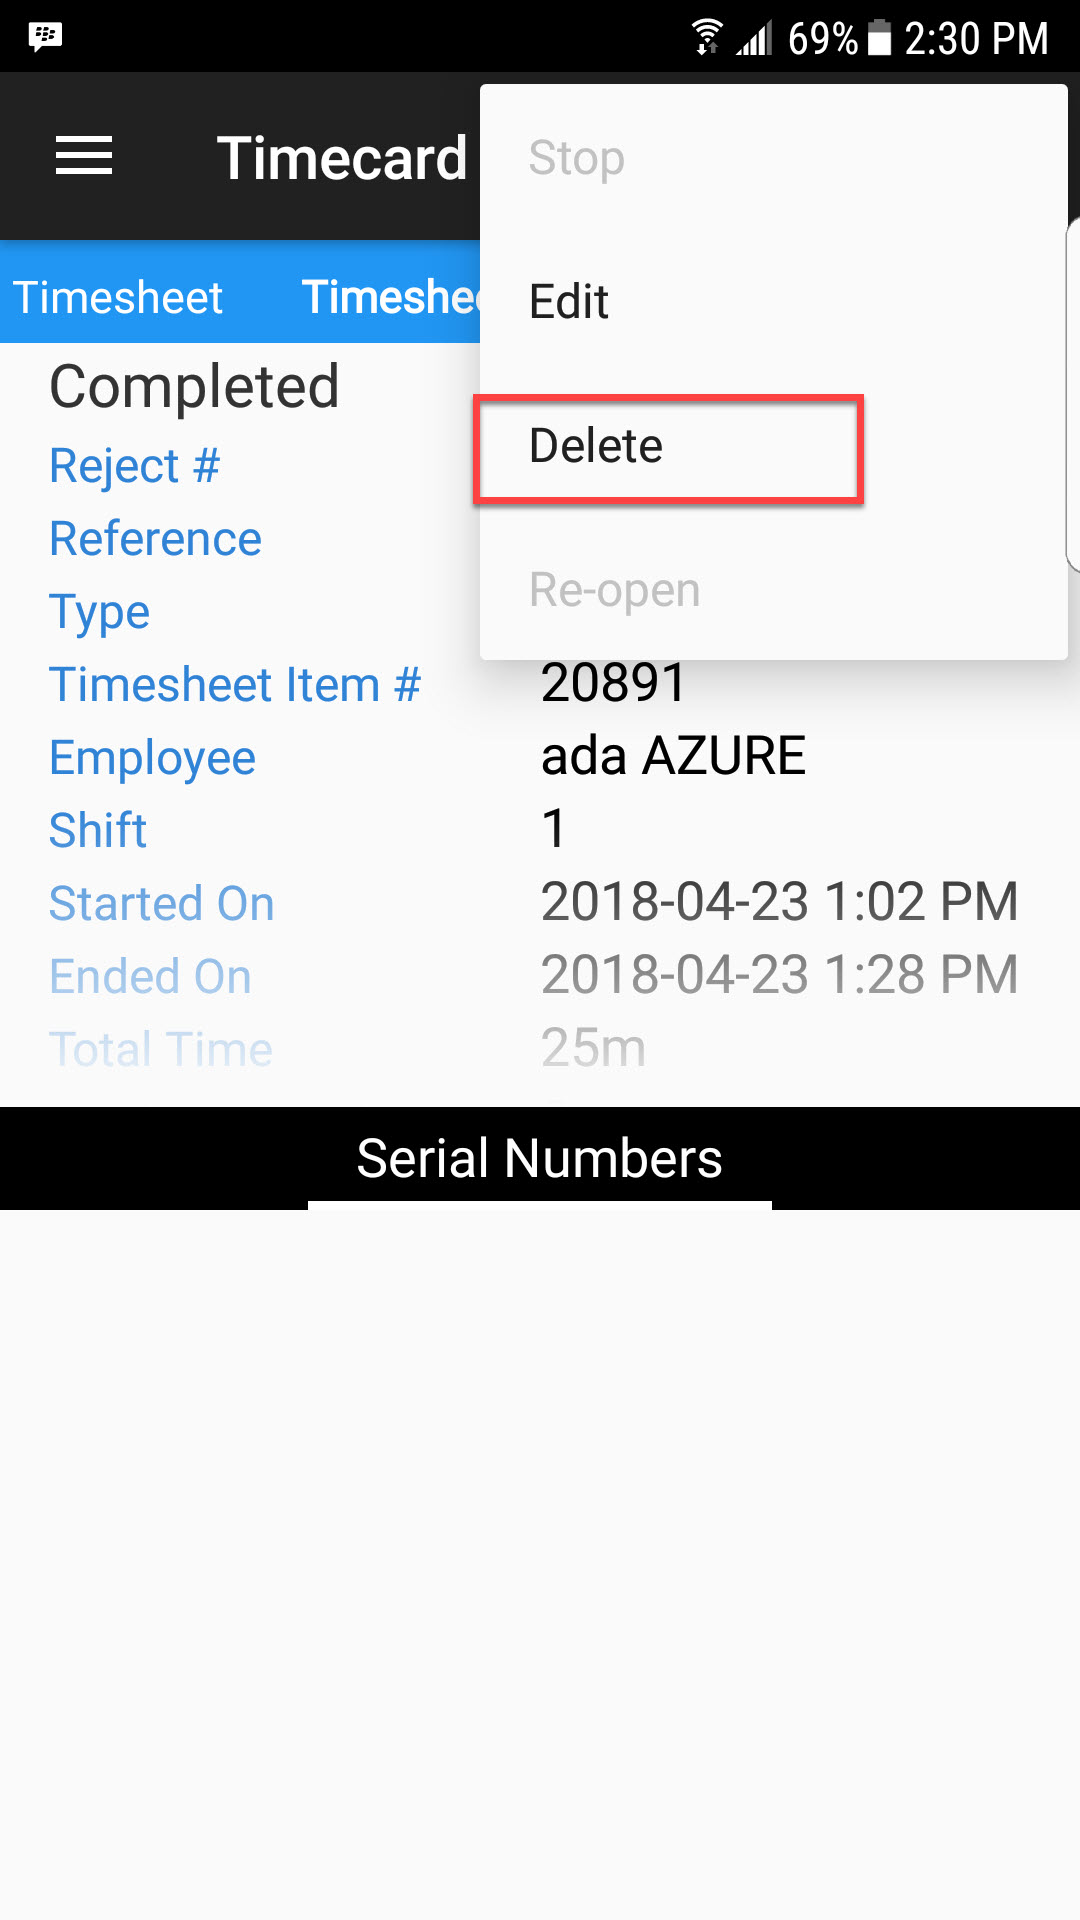
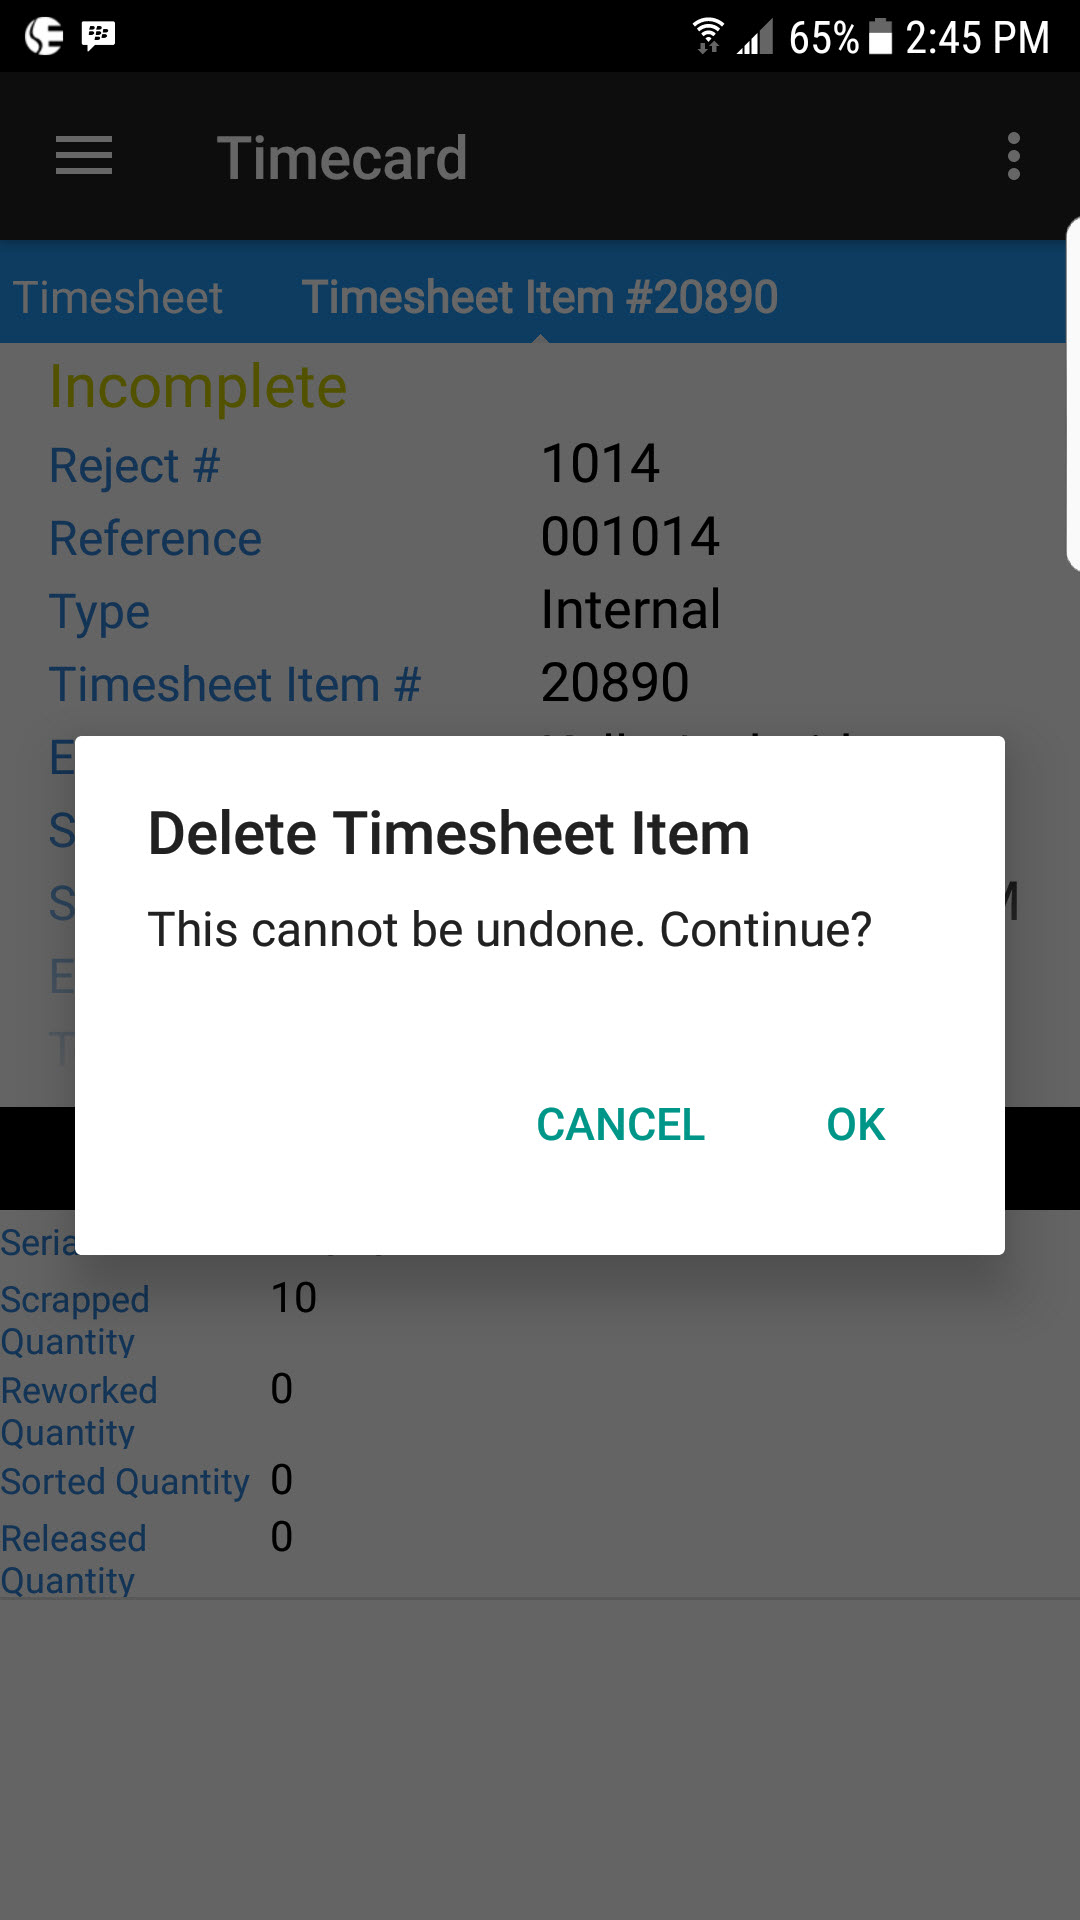
The application will prompt you to make sure you wish to delete the timesheet item. Select Ok to delete.
Editing Timesheet Items on a Quality Timecard
Users cannot edit a timesheet item on a quality timecard that is in progress. The timesheet item must be complete before editing.
To edit a timesheet item, first find the quality timecard you wish to delete the timesheet item from. The easiest way to find a timecard is by navigating to the Quality module and selecting Timecard Lookup which will display a list of all quality timecards.

Click on the action menu of the timecard you wish to open, and select Open.

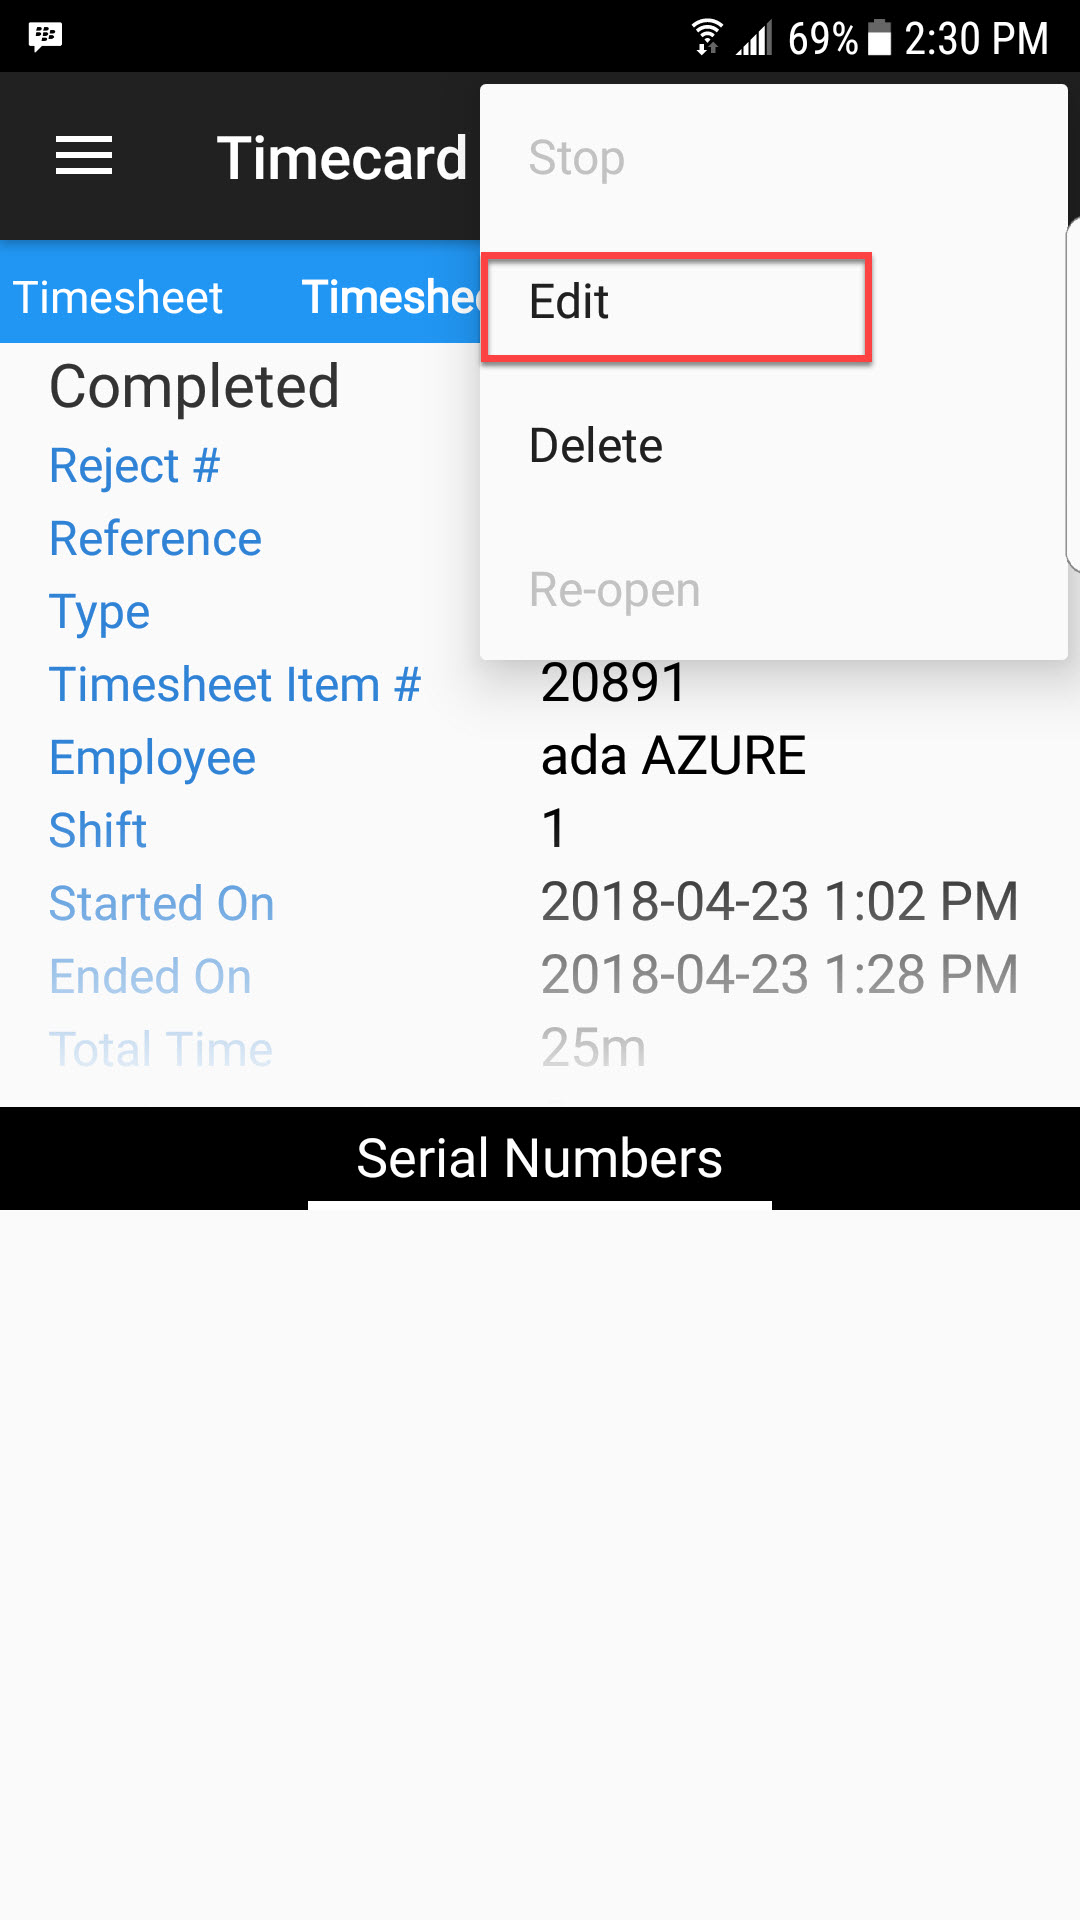
Once the timecard is open, swipe across to find the timesheet item you wish to edit. Once you find the item, touch the action menu at the top right of the screen and select the Edit option.
Deleting a Quality Timecard
Users cannot delete a timecard that is in progress, a timecard must be completed before deleting.
To delete a quality timecard, users first must open the timecard they wish to delete. Users can do this by navigating to the Quality module, and the Timecard Lookup option.

Once you have found the timecard you wish to delete, touch the action menu and select Open.
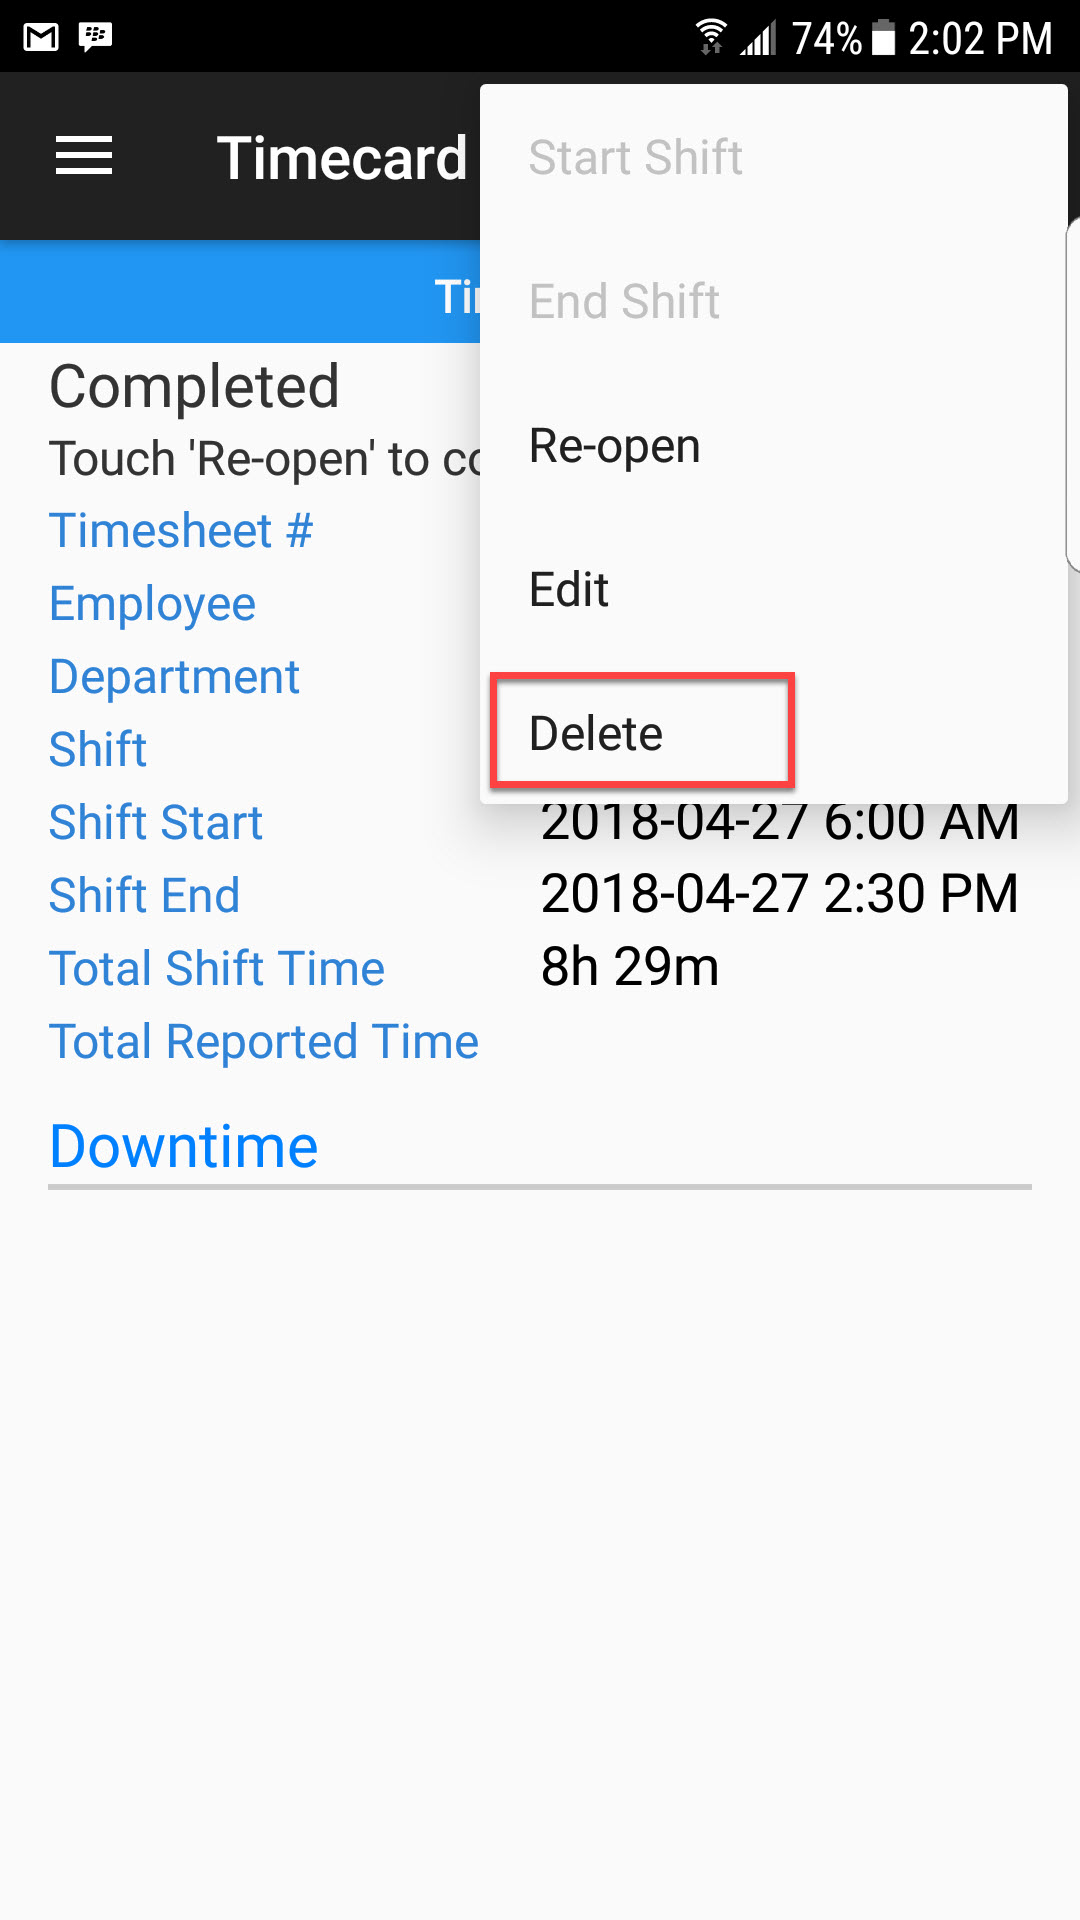
Users then will select the action menu on the top right of the screen and select the Delete option.
Re-opening a Quality Timecard
Users can re-open a quality timecard by navigating to the Quality module and selecting the Timecard option to view their previously ended timecard for that day.

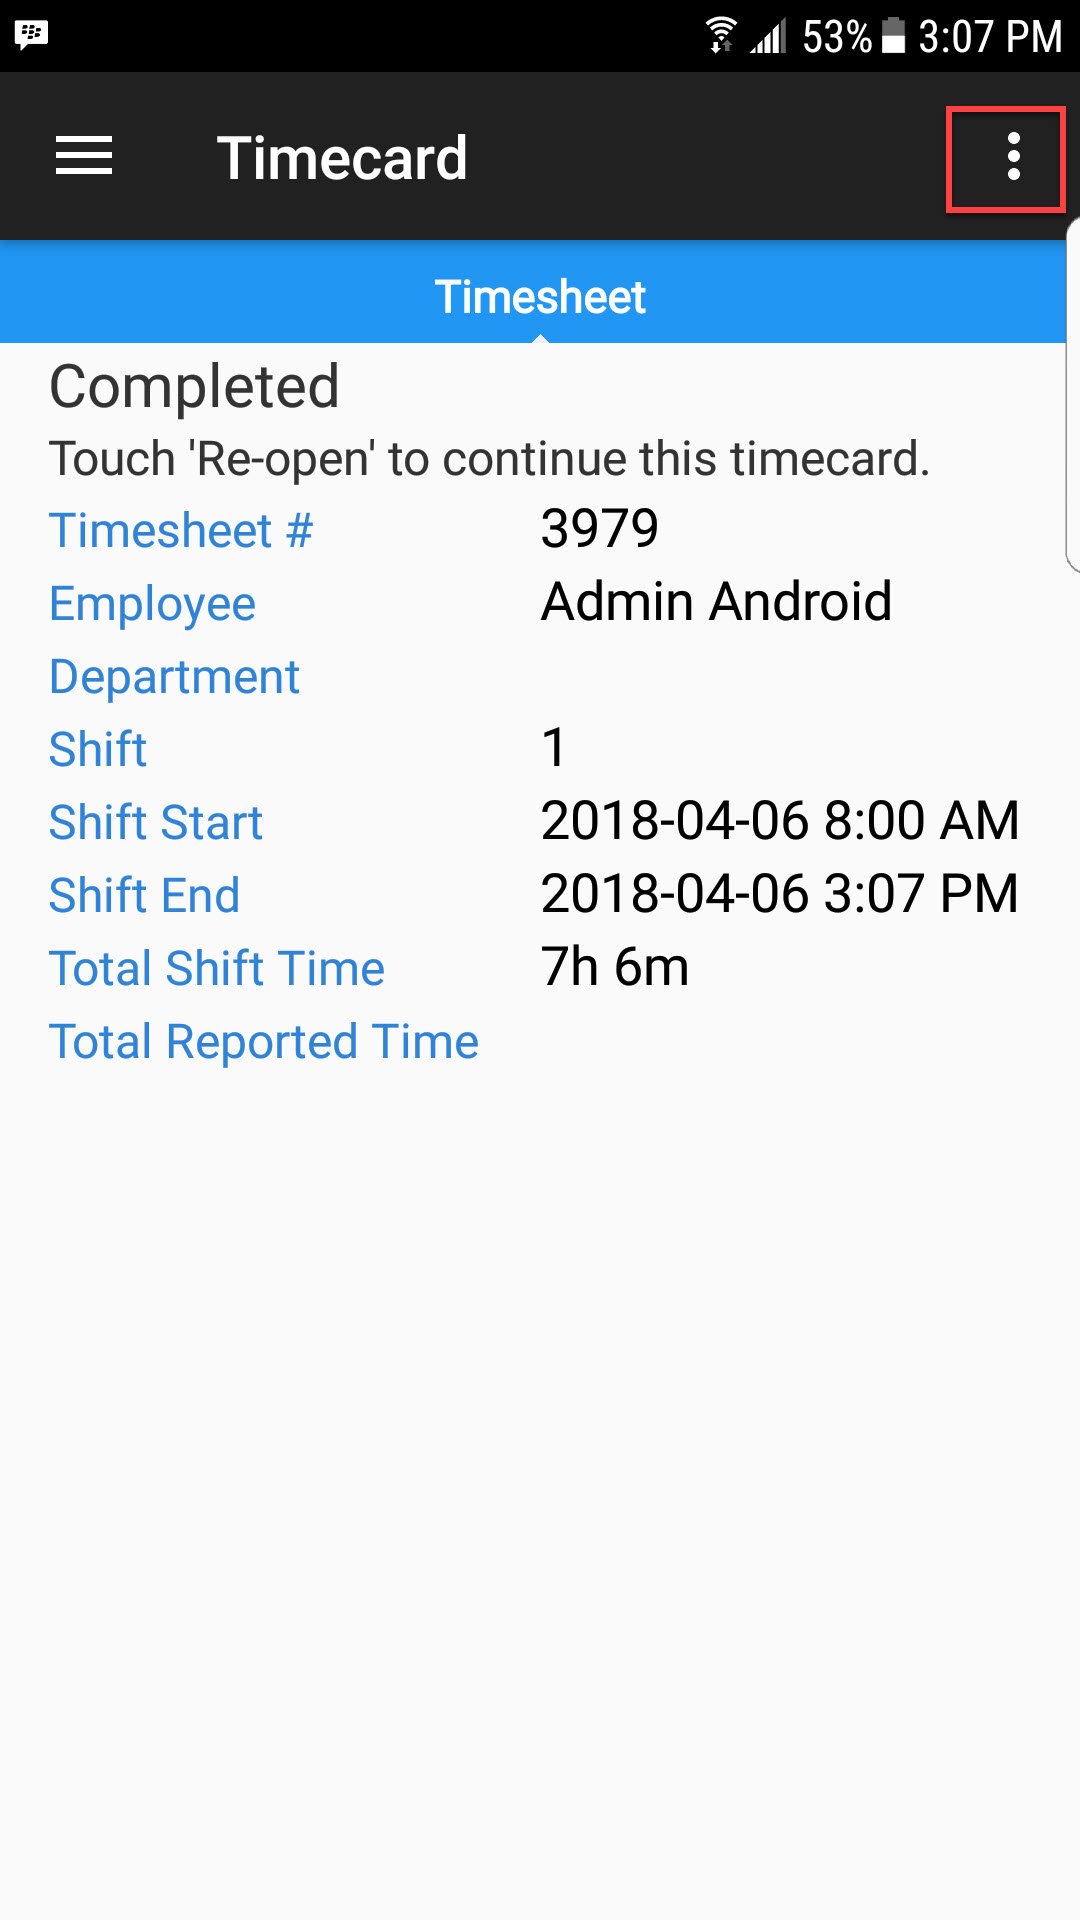
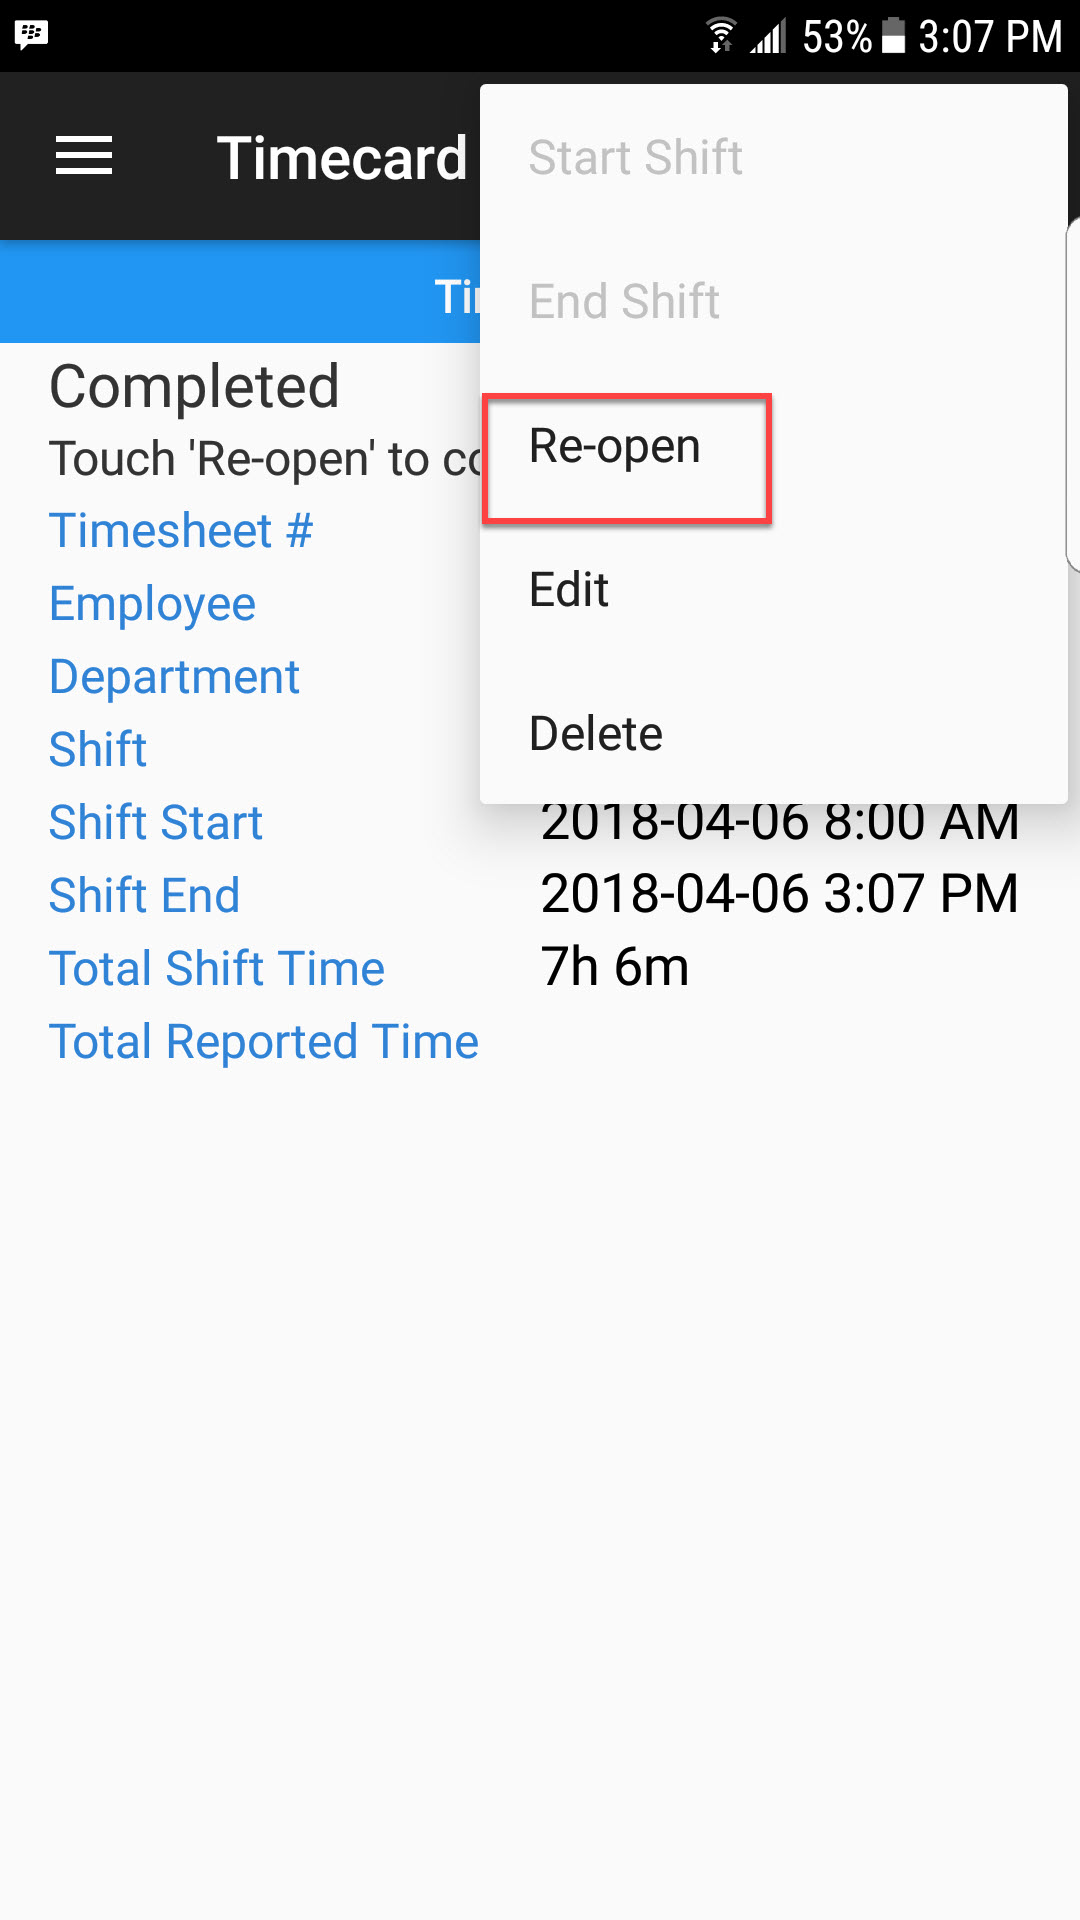
The timecard screen will open and show the previously completed timecard for the user. Users should select the action menu on the top right of the screen and select the Re-open option.
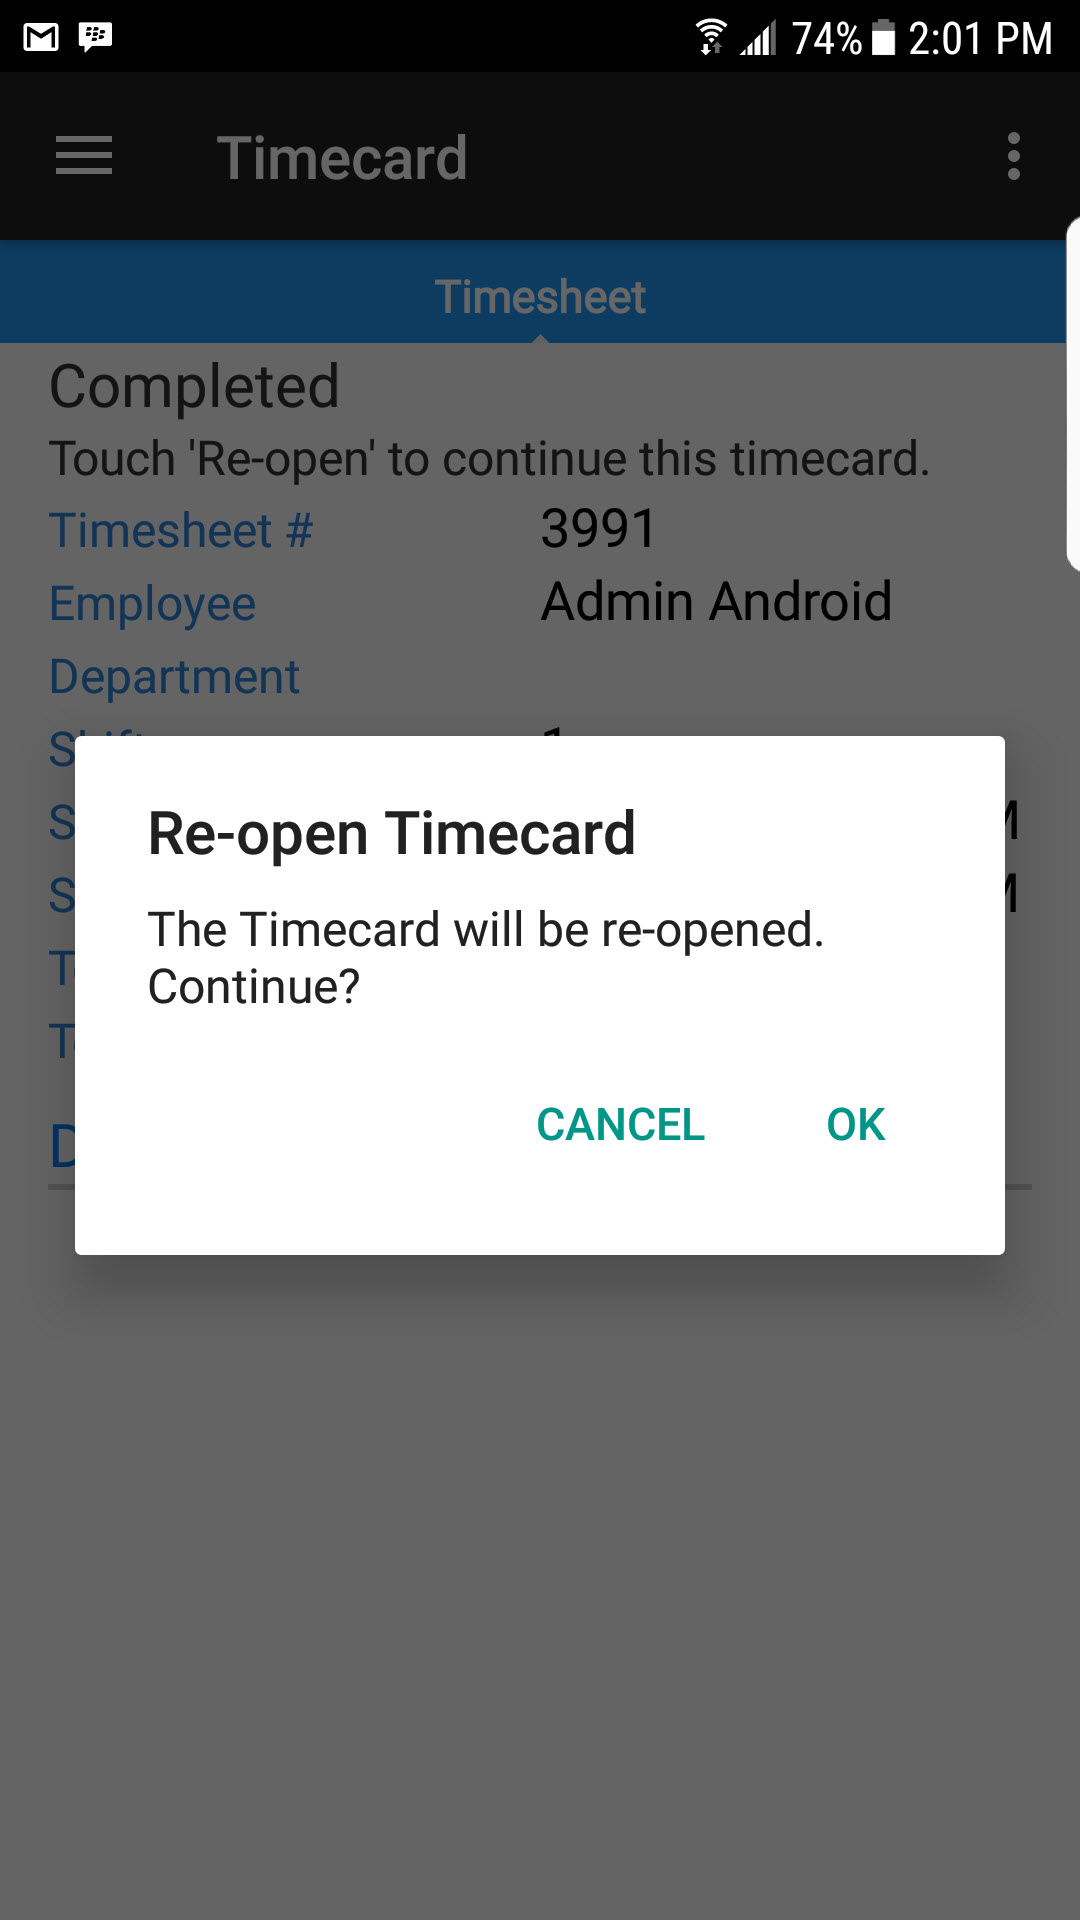
The application will ask the user if they are sure they want to re-open the timecard. Select OK to re-open and CANCEL to exit.
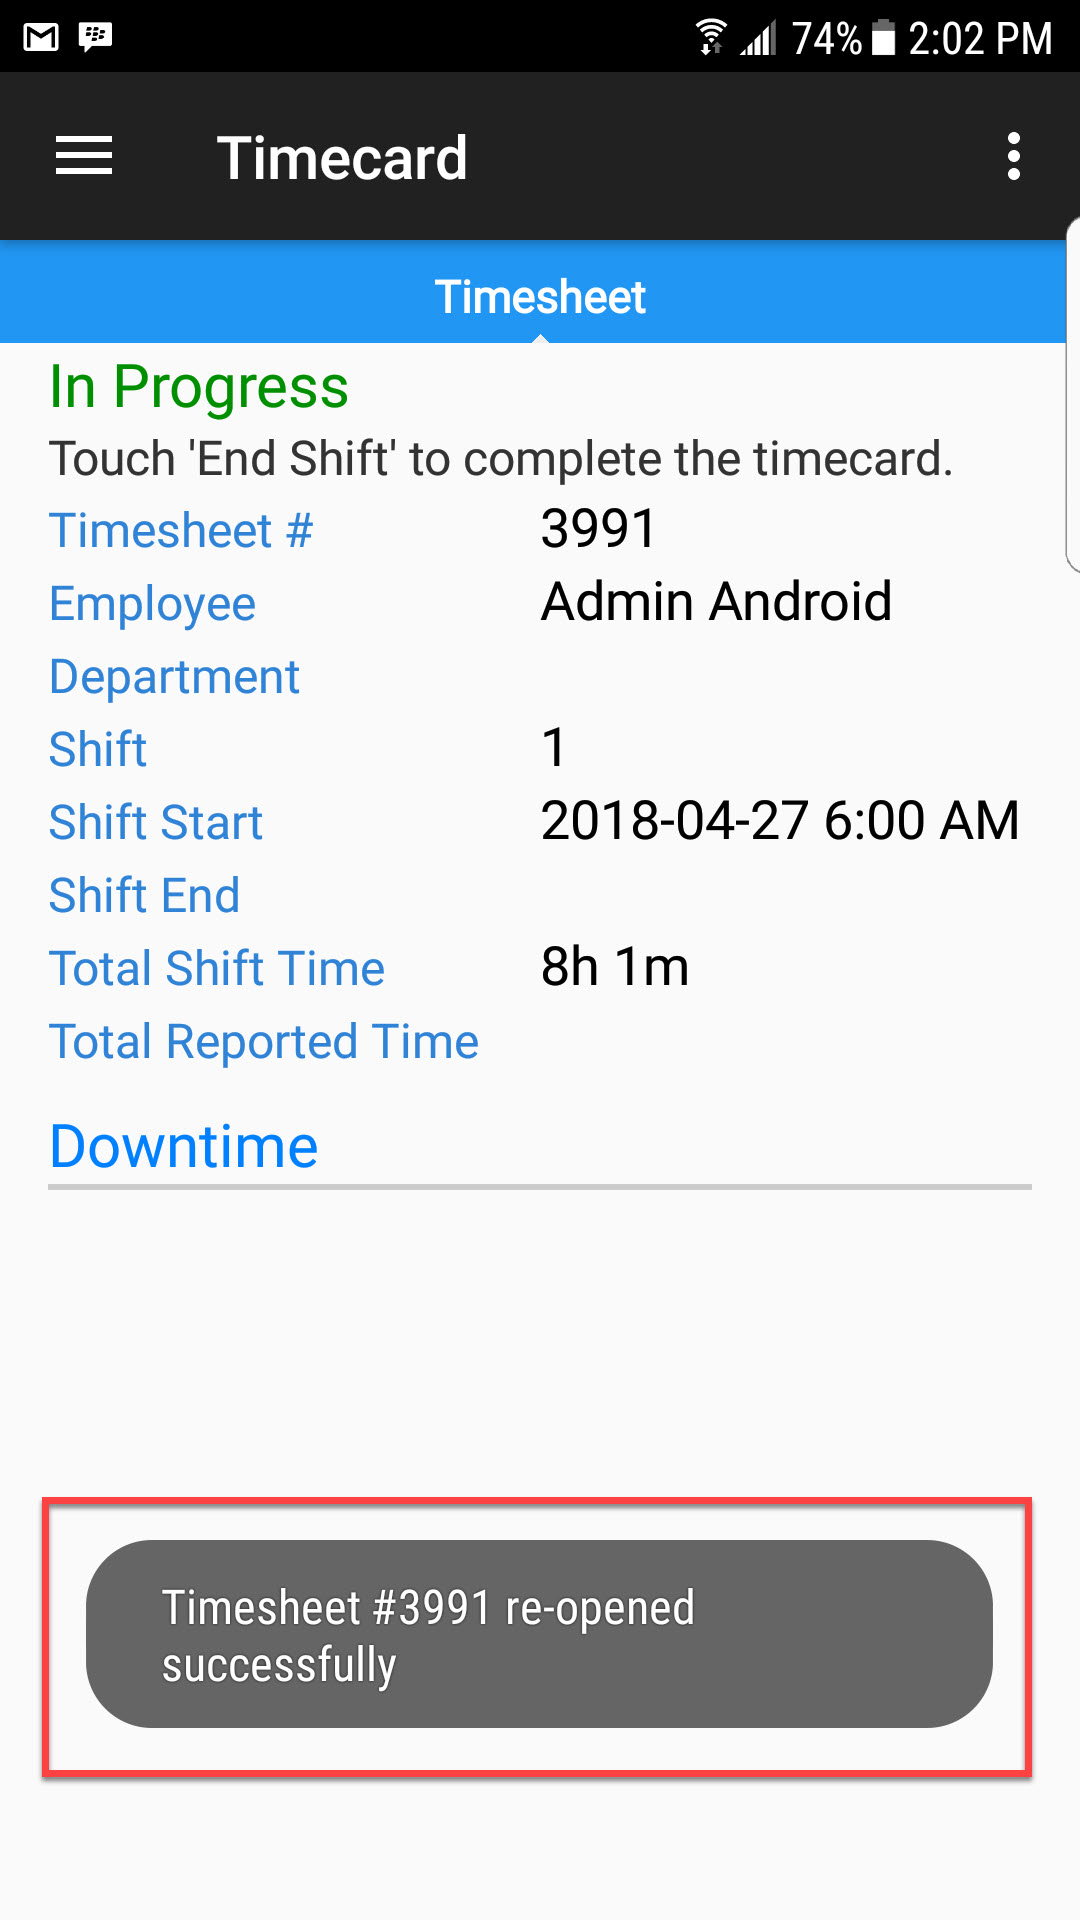
Once the timecard has been re-opened, a message will appear at the bottom of the screen.
Timecard Lookup
The Timecard Lookup screen will show users all of the quality timecards in the system. To view a list of all of the quality timecards, navigate to the Quality module and the Timecard Lookup option.

Users can use the filter or sort options at the top right of the screen to find a timecard or timecards they are looking for.
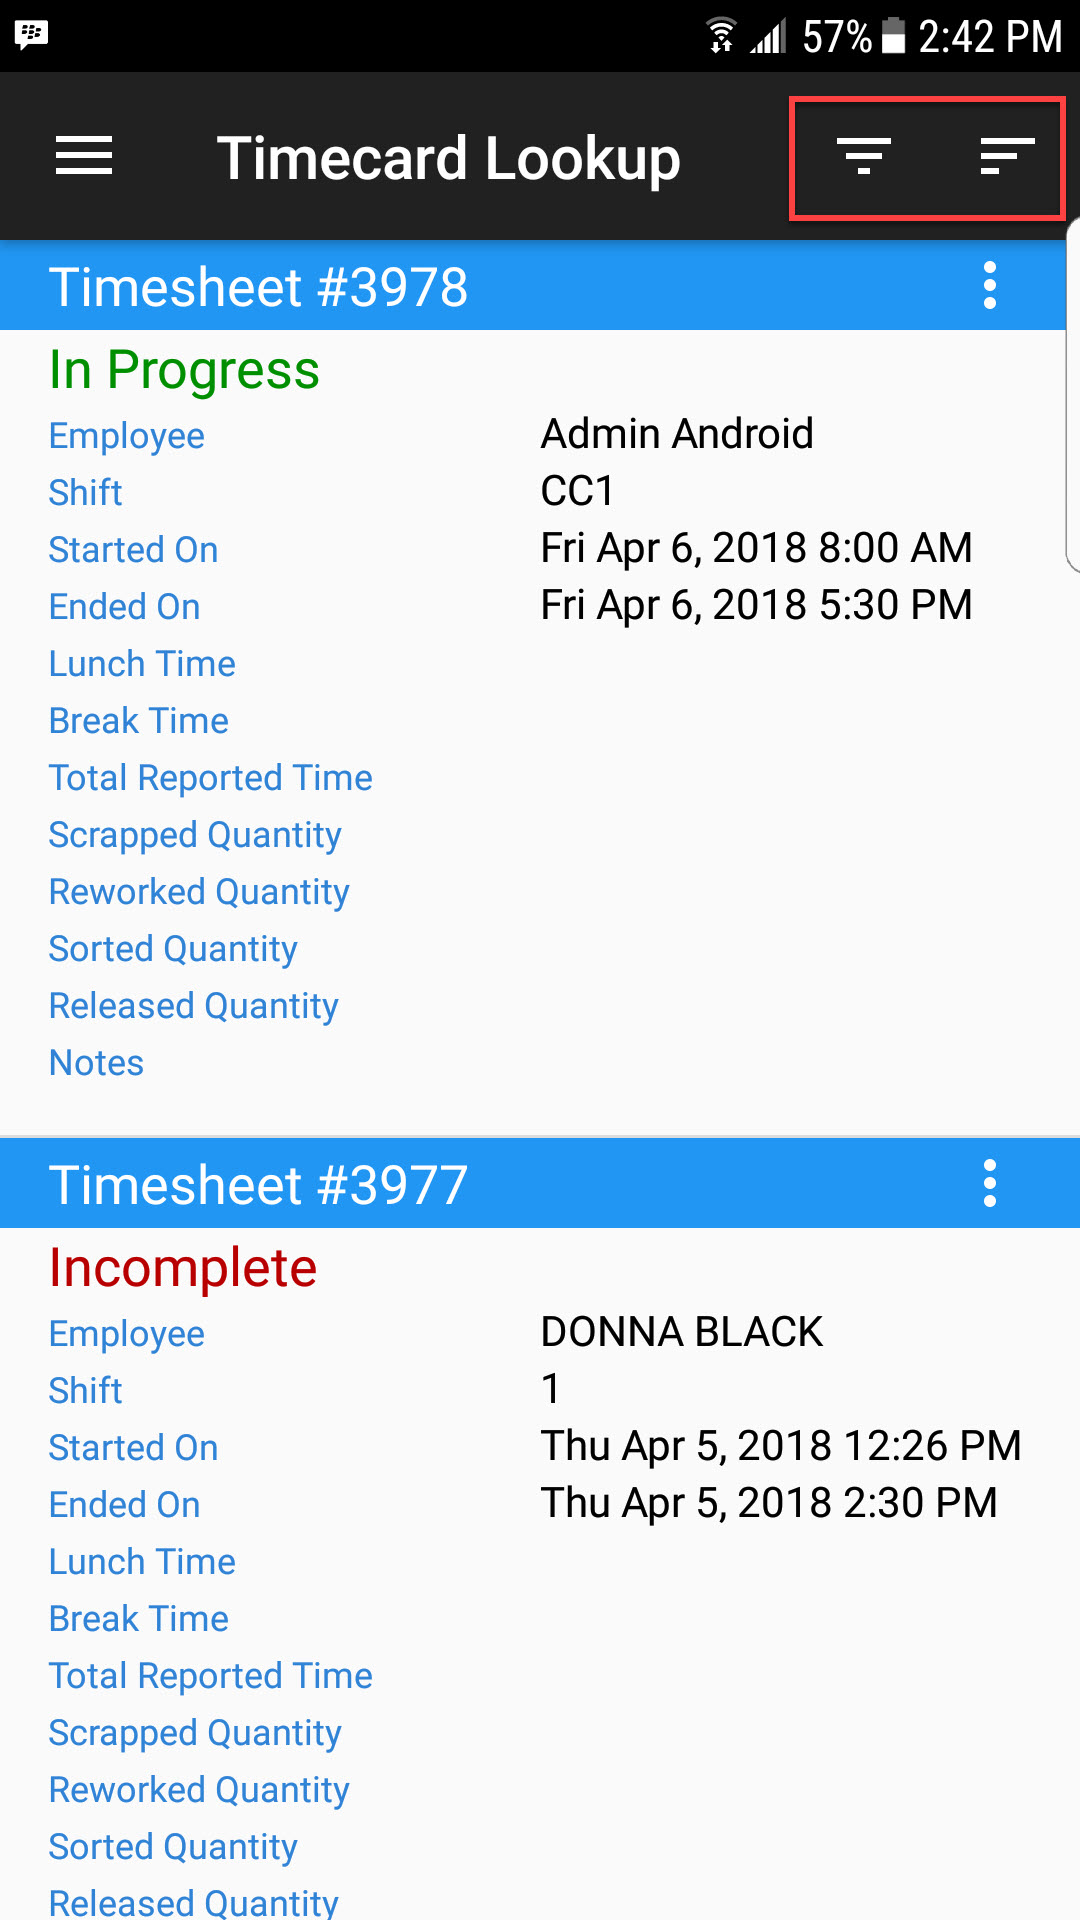
When selecting the Filter option, users can select from a variety of options including by Reject #, In Progress, Shift Start or End, or Employee. Once an option or options are selected, users can enter in the filter information for the selected option(s). Touch APPLY to filter or CANCEL.

When selecting the Sort option, users can select from a variety of sort options from the dropdown menu, including Timesheet #, Shift Start or End, and Employee.
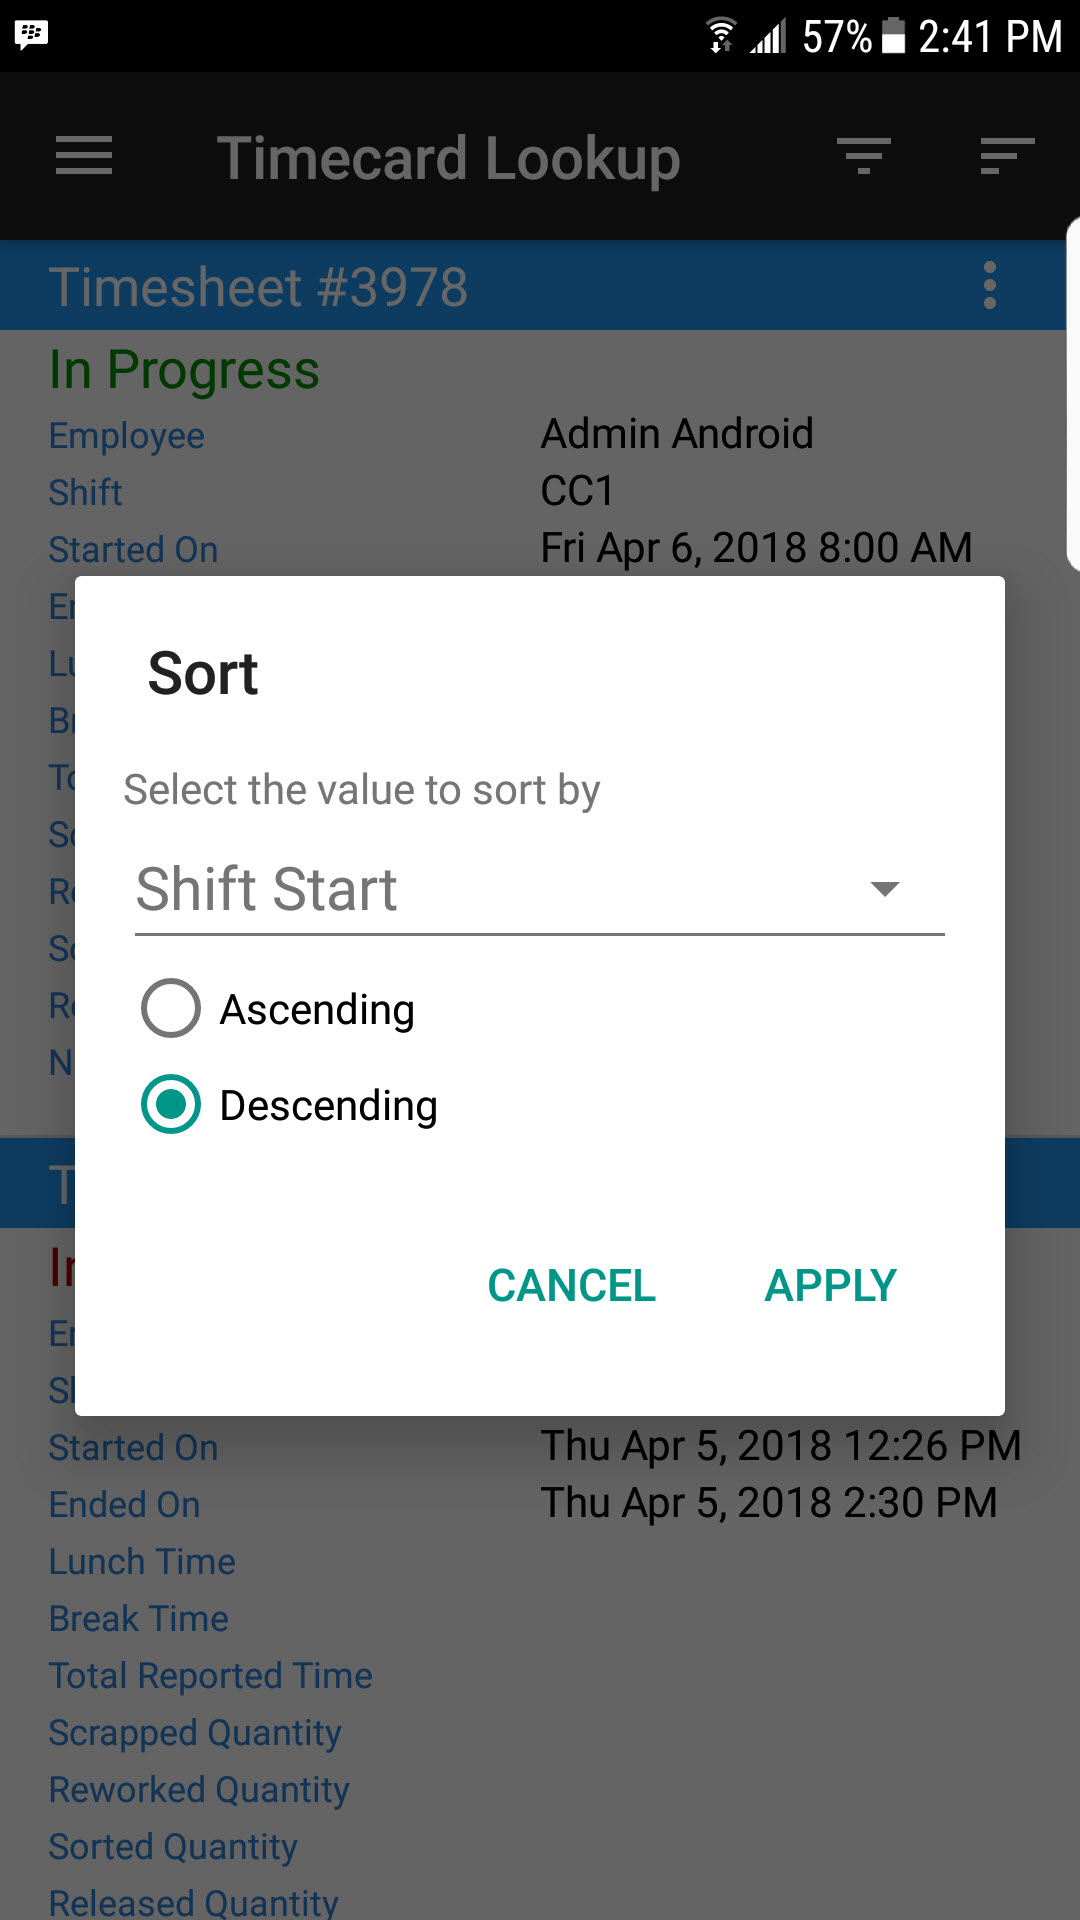
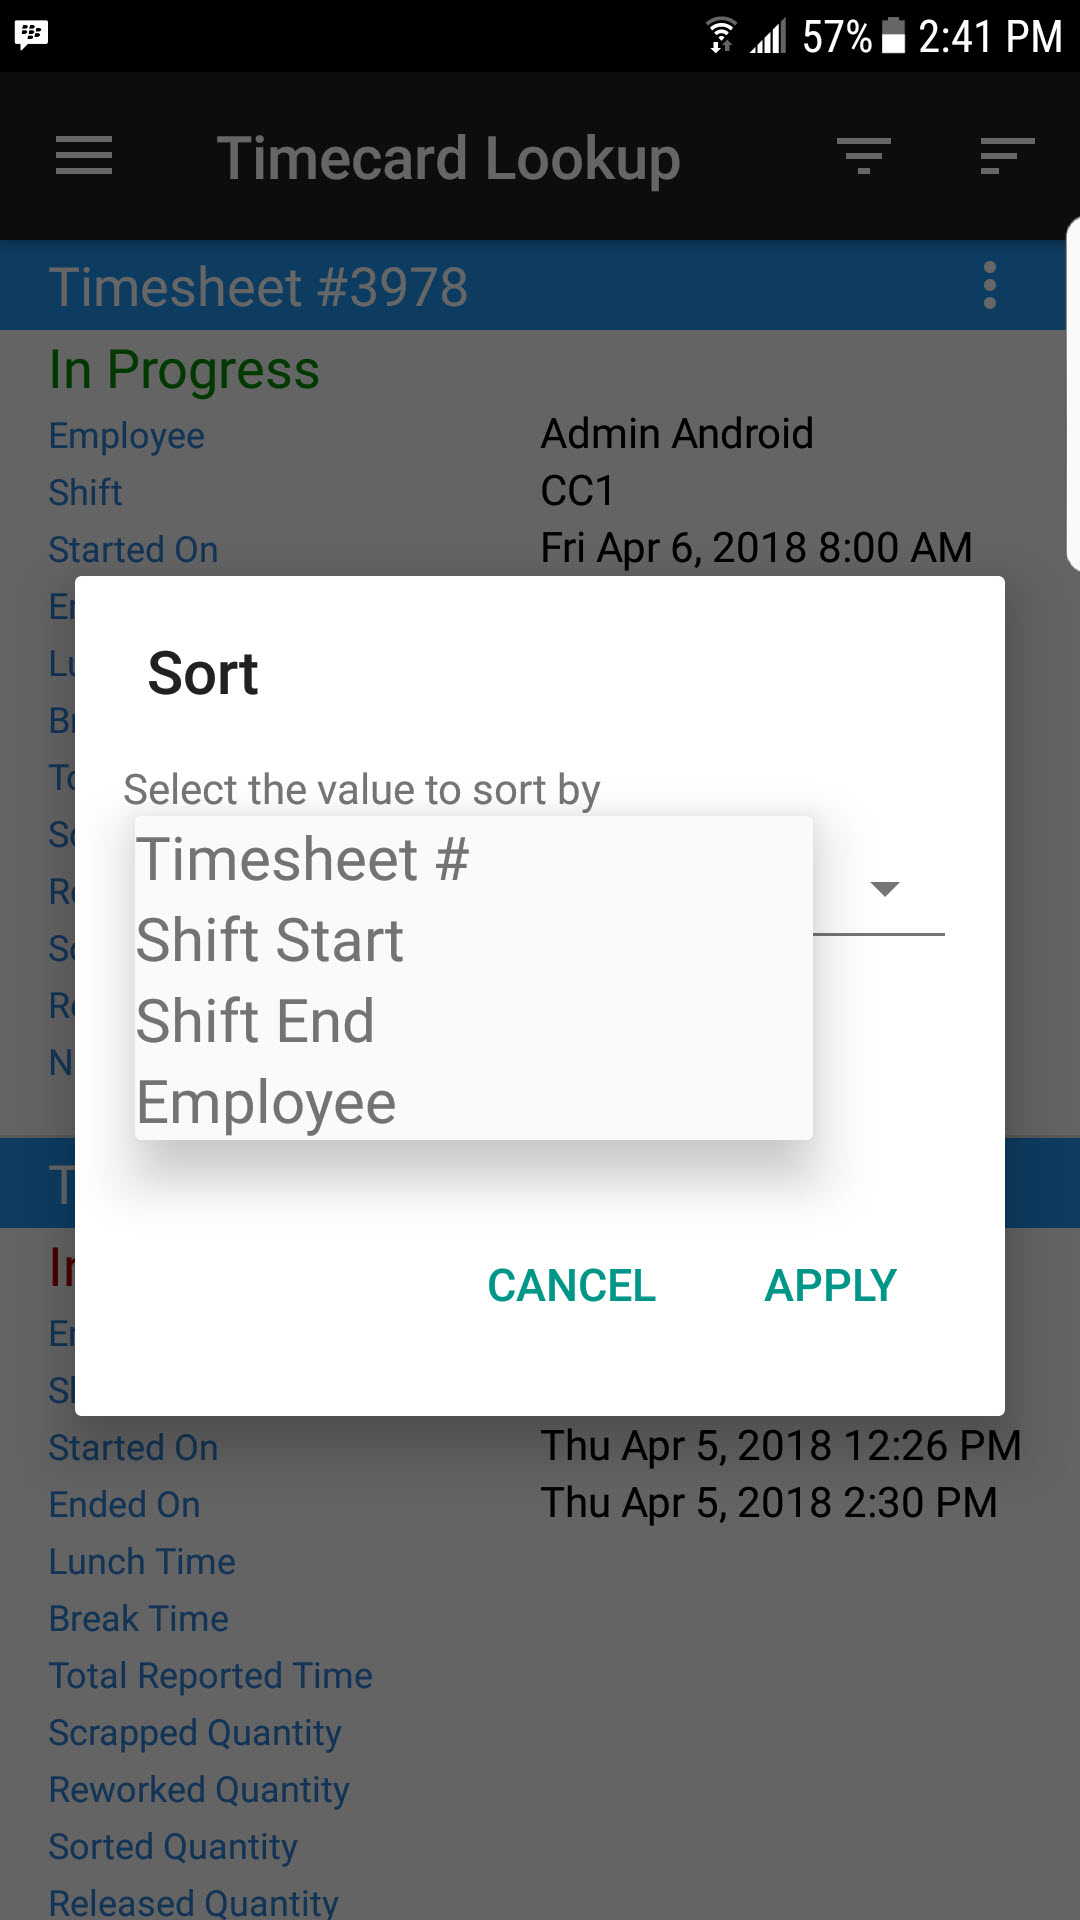
Then users can select either Ascending or Descending from the options provided. The sort results will be displayed according to the option selected.
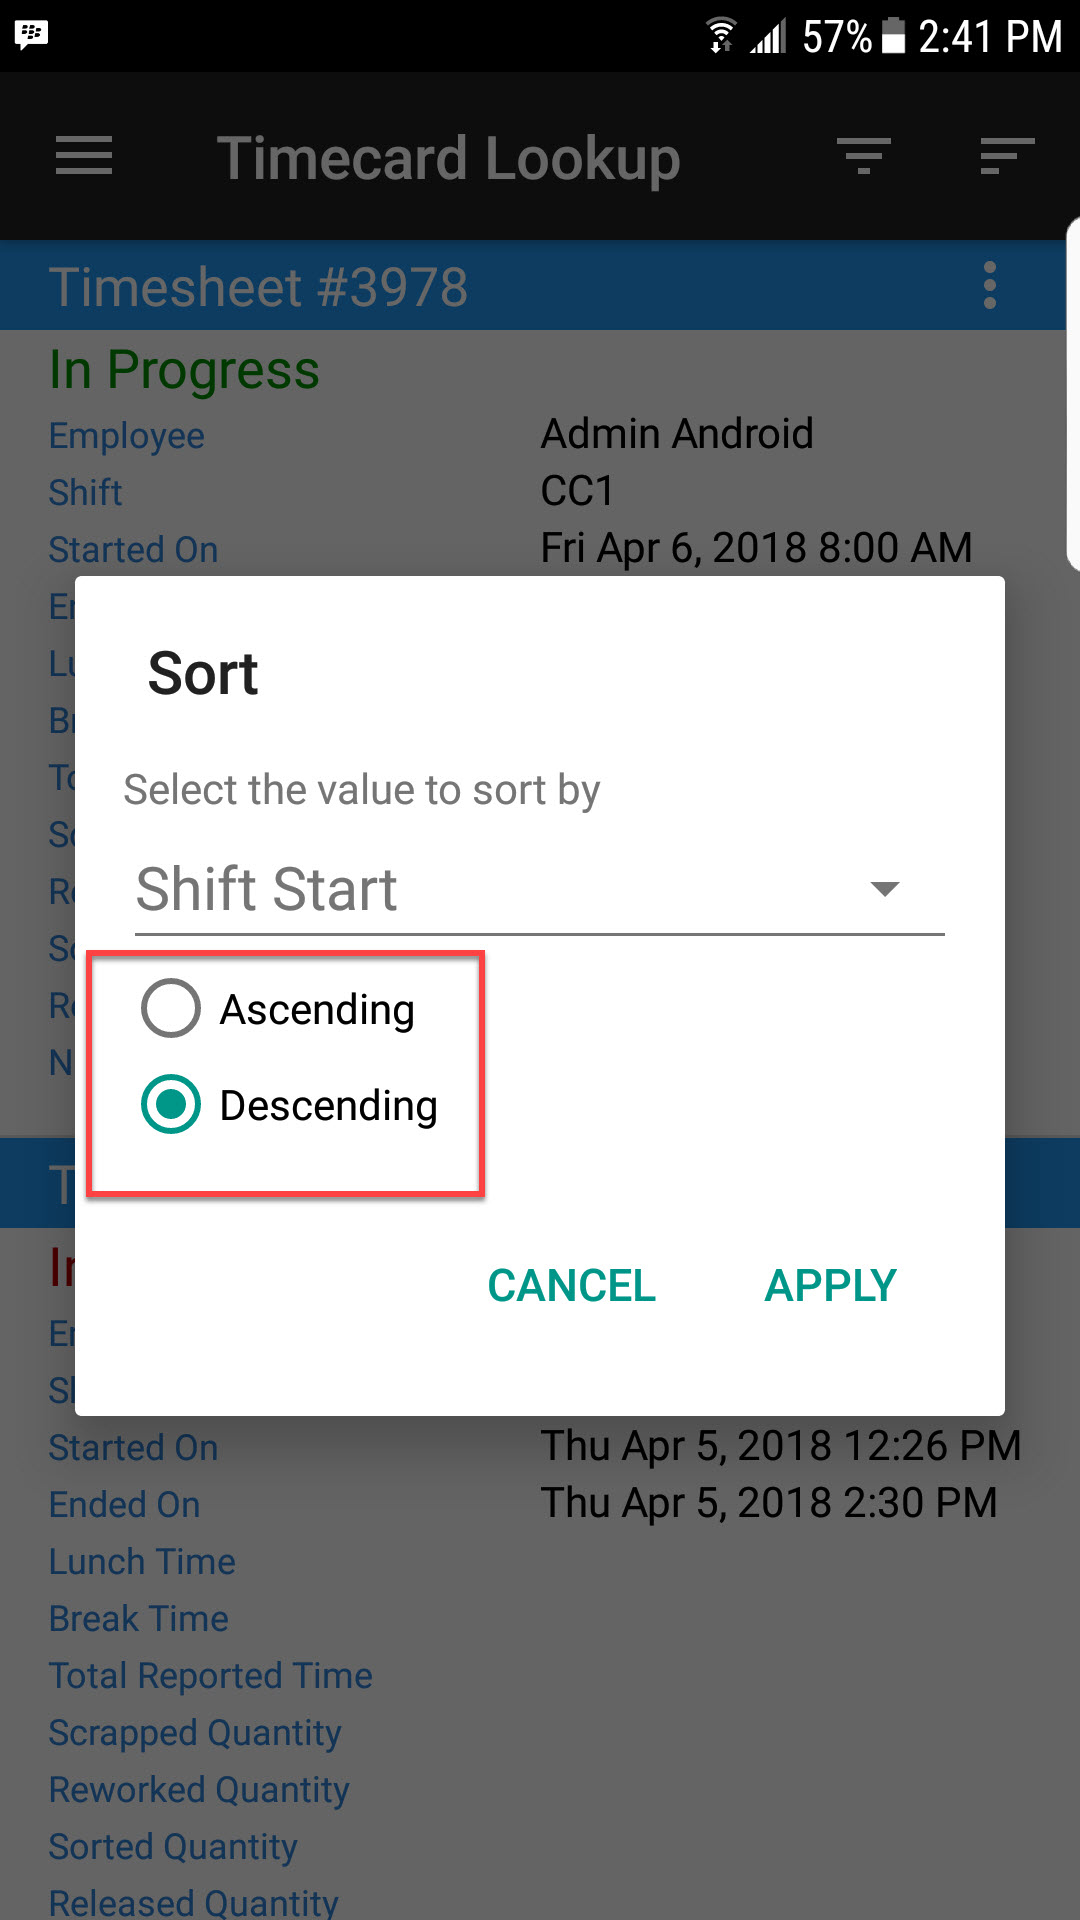
Touch APPLY to sort or CANCEL.
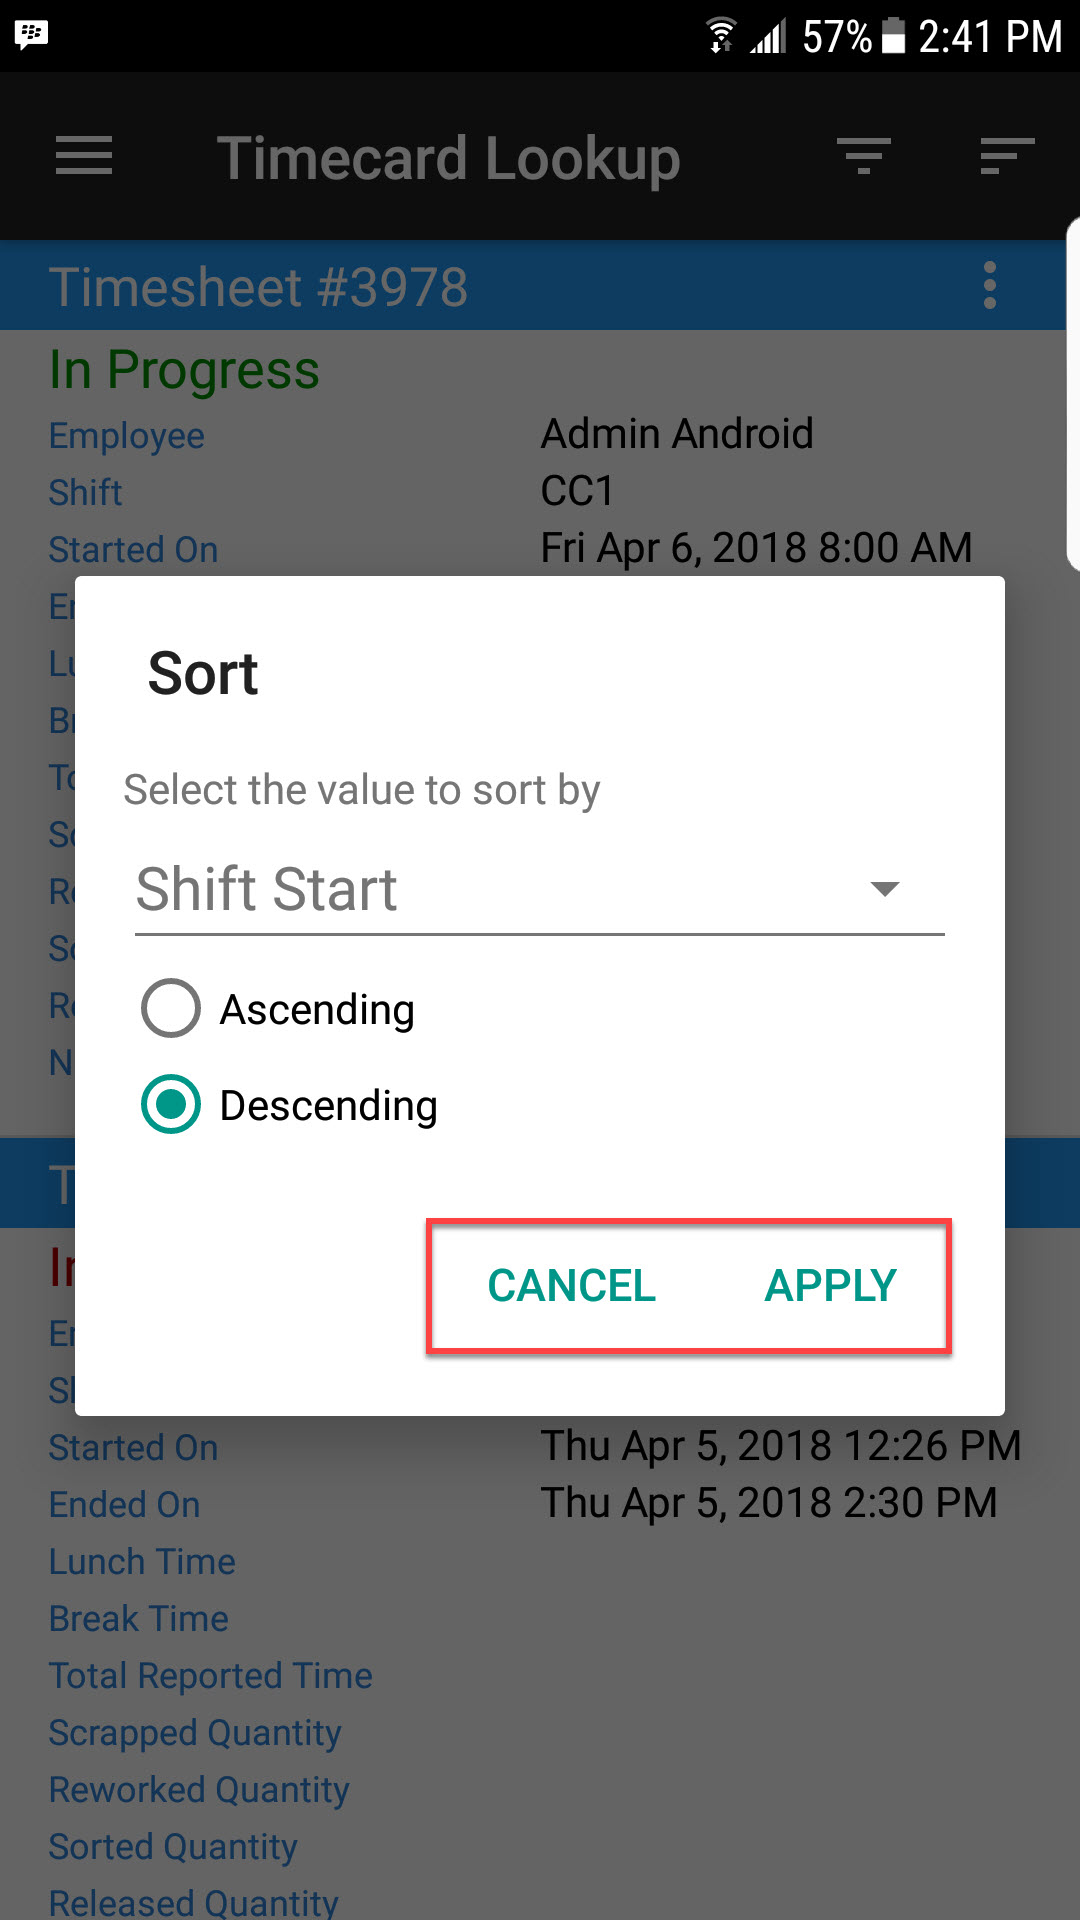
Users can open a timecard from the lookup screen by touching the action menu for a particular timecard, and selecting the Open option.

Opening a Current Quality Timecard
If users wish to view their current Quality Timecard, they can navigate to the Quality module, and select the Timecard option.

This will open the Quality Timecard screen where users can view their current timecard and any timesheet items. Users can also stop or delete Quality Rejects they might be working on from this screen, edit timesheet items that are completed, re-open close timecards, edit or delete a timecard, and end their shift.