Cycle Count
Use the Cycle Count module to perform a cycle count.
How to use the Android App for a cycle count
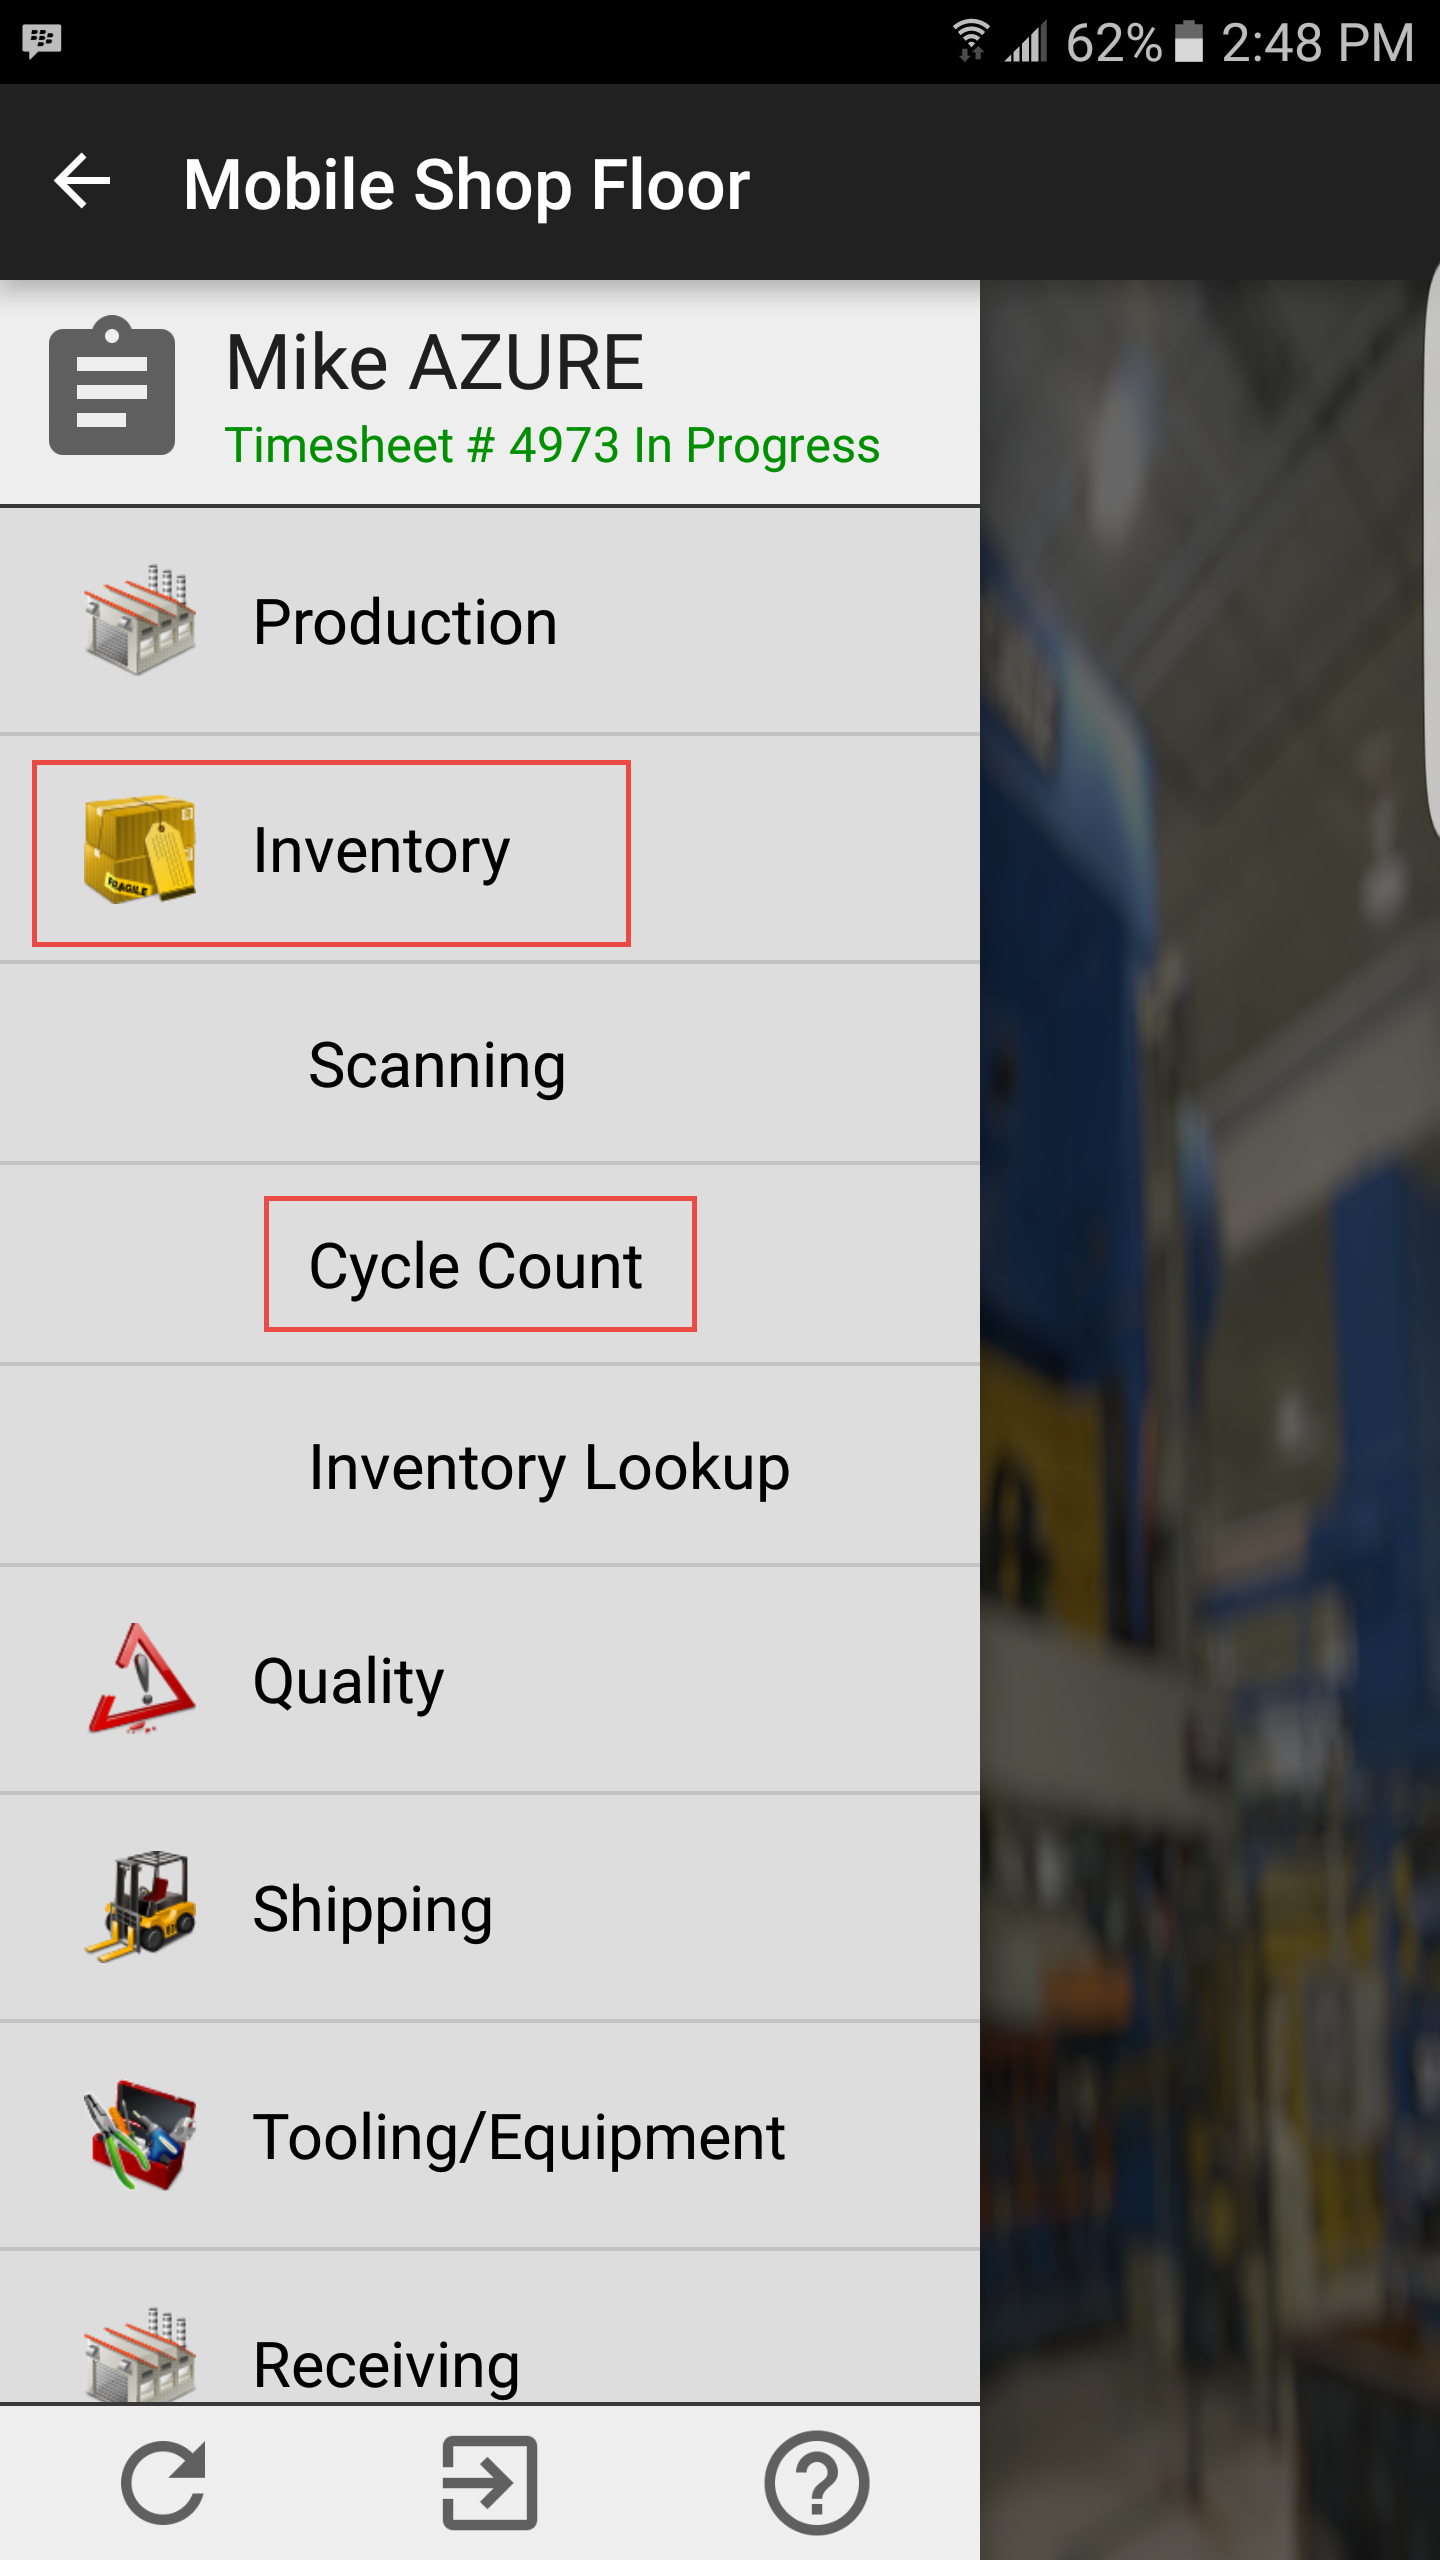
To use the Android Application for a cycle count, you first need to create and define cycle count in the main ShopEdge application. Then, you can select it and scan barcodes on the Android Application. To find a cycle count, under the main menu, select Cycle Count under Inventory:
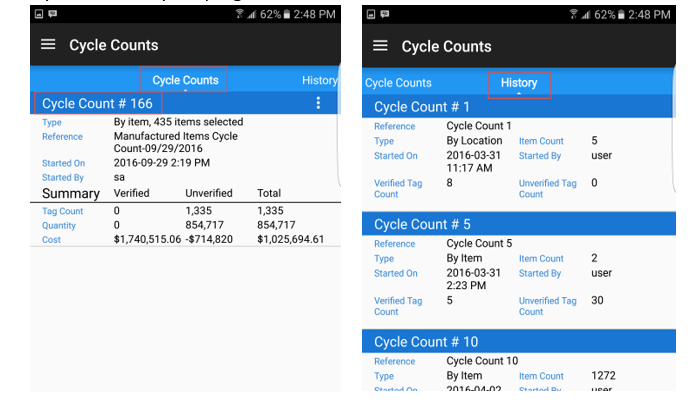
This will open up the Cycle Count listing screen, where you can view all cycle counts that are current, and all historical cycle counts by swiping to the left:
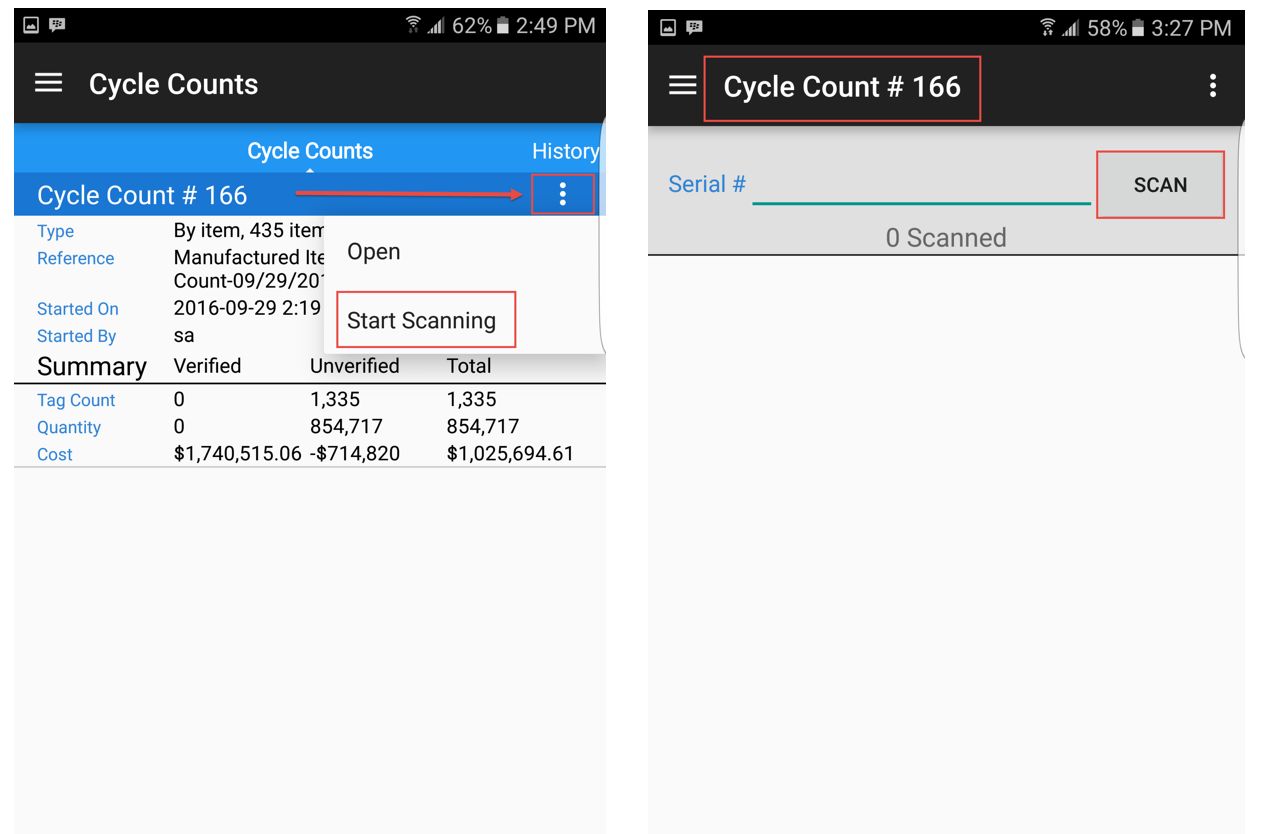
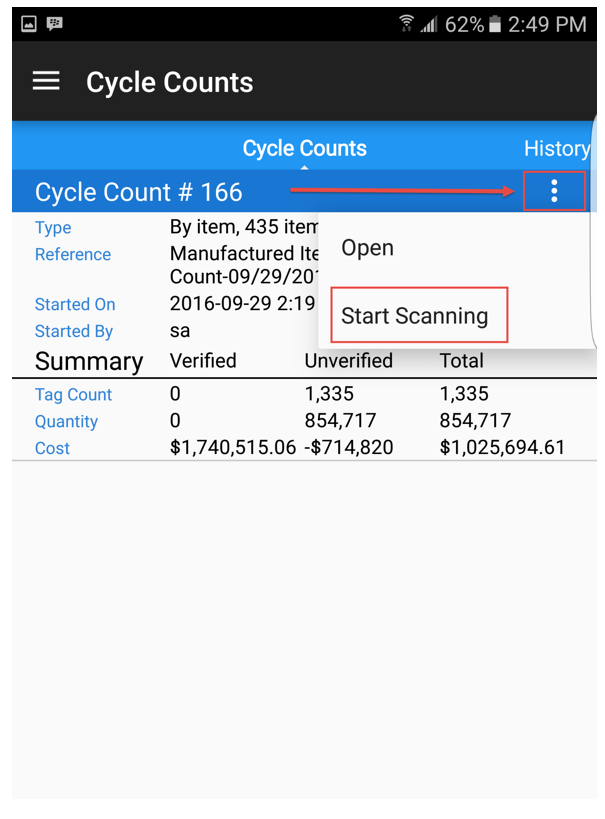
To open a cycle count, touch the action menu and select open:
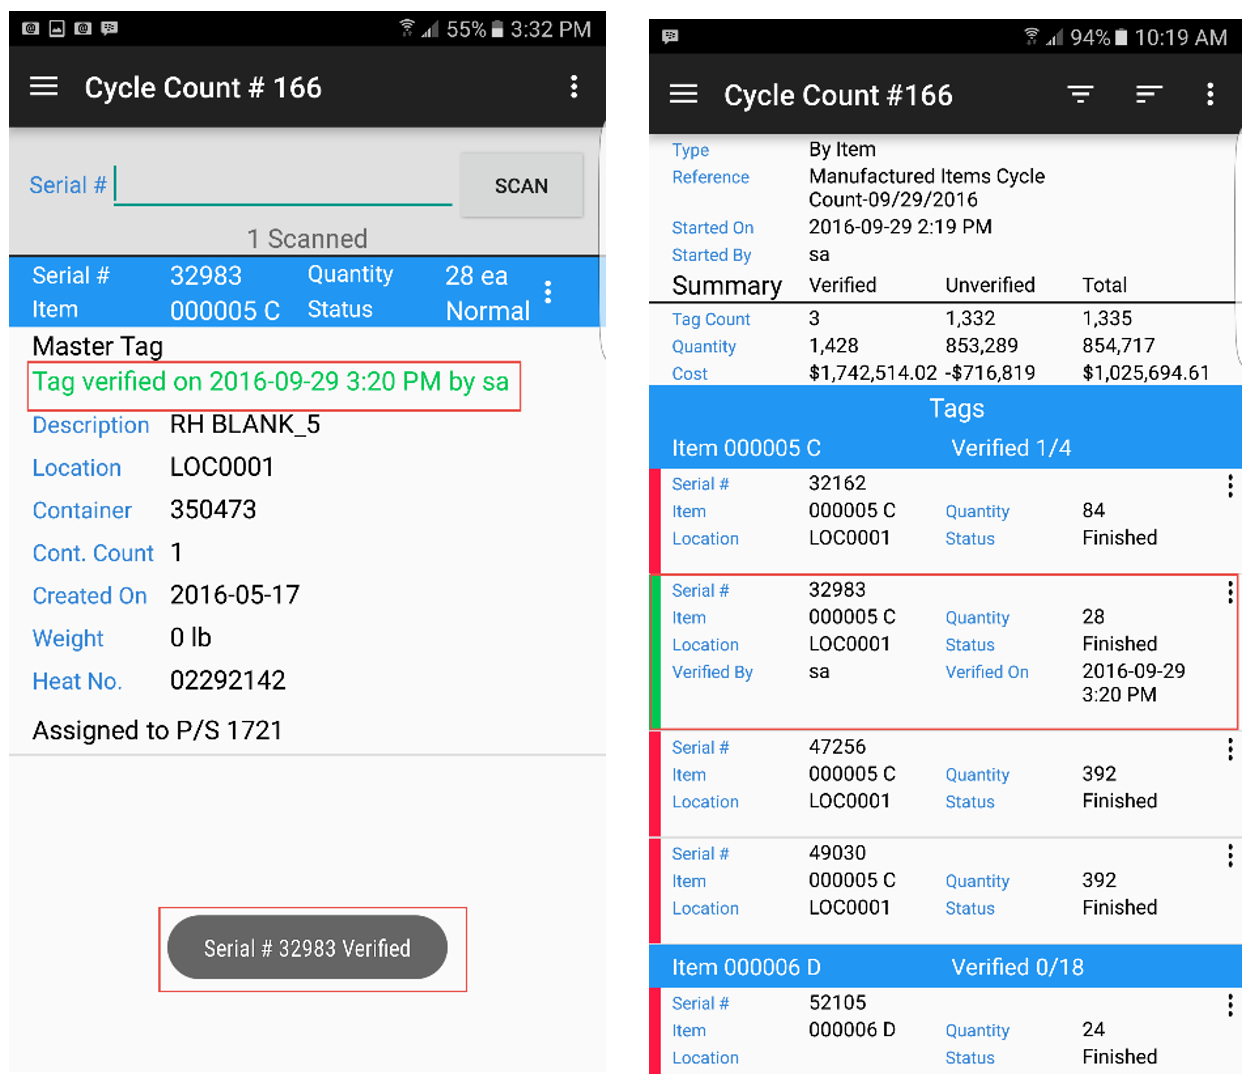
The system shows the name of the cycle count, the summary including the Verified (scanned) tags, and Unverified (unscanned) tags, and total amounts. You will also see the tag information for each item. When a tag is scanned, it will show as green as well the verified by and on information will show. Unscanned tags will show as red in the system:
Scanning Tags as part of a Cycle Count
If you wish to start scanning tags as part of the cycle count, find the cycle count for which you wish to scan tags, and select Start Scanning from the action menu. The scanning window will open:
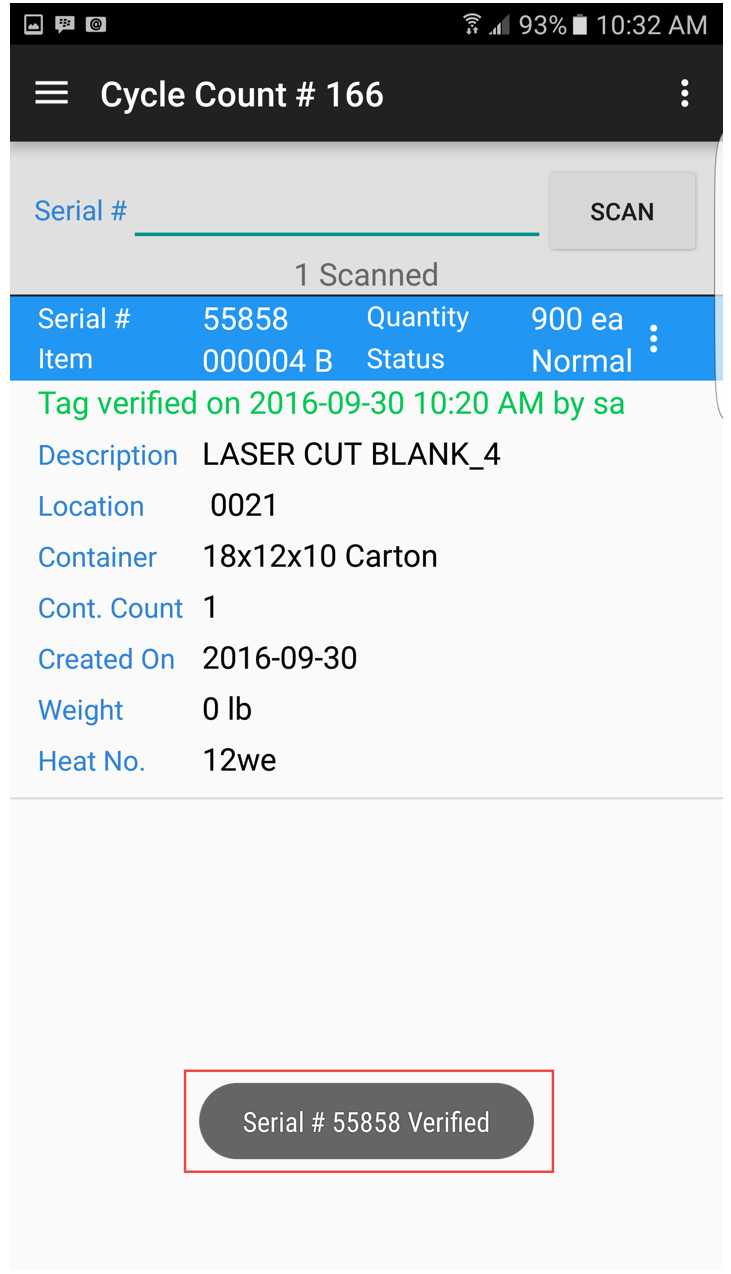
To confirm, make sure the correct cycle count is listed at the top of the screen. Select the Scan button or if you’re using a handheld scanner, just hold the trigger to scan the barcode. You can also type in the serial number. The system will let you know when the serial number has been verified, and the tag will show as green on the cycle count home screen:
Creating Tags as part of a Cycle Count
If you wish to create a tag as part of the cycle count, find the cycle count you wish to create tags as part of, and select Start Scanning from the action menu:
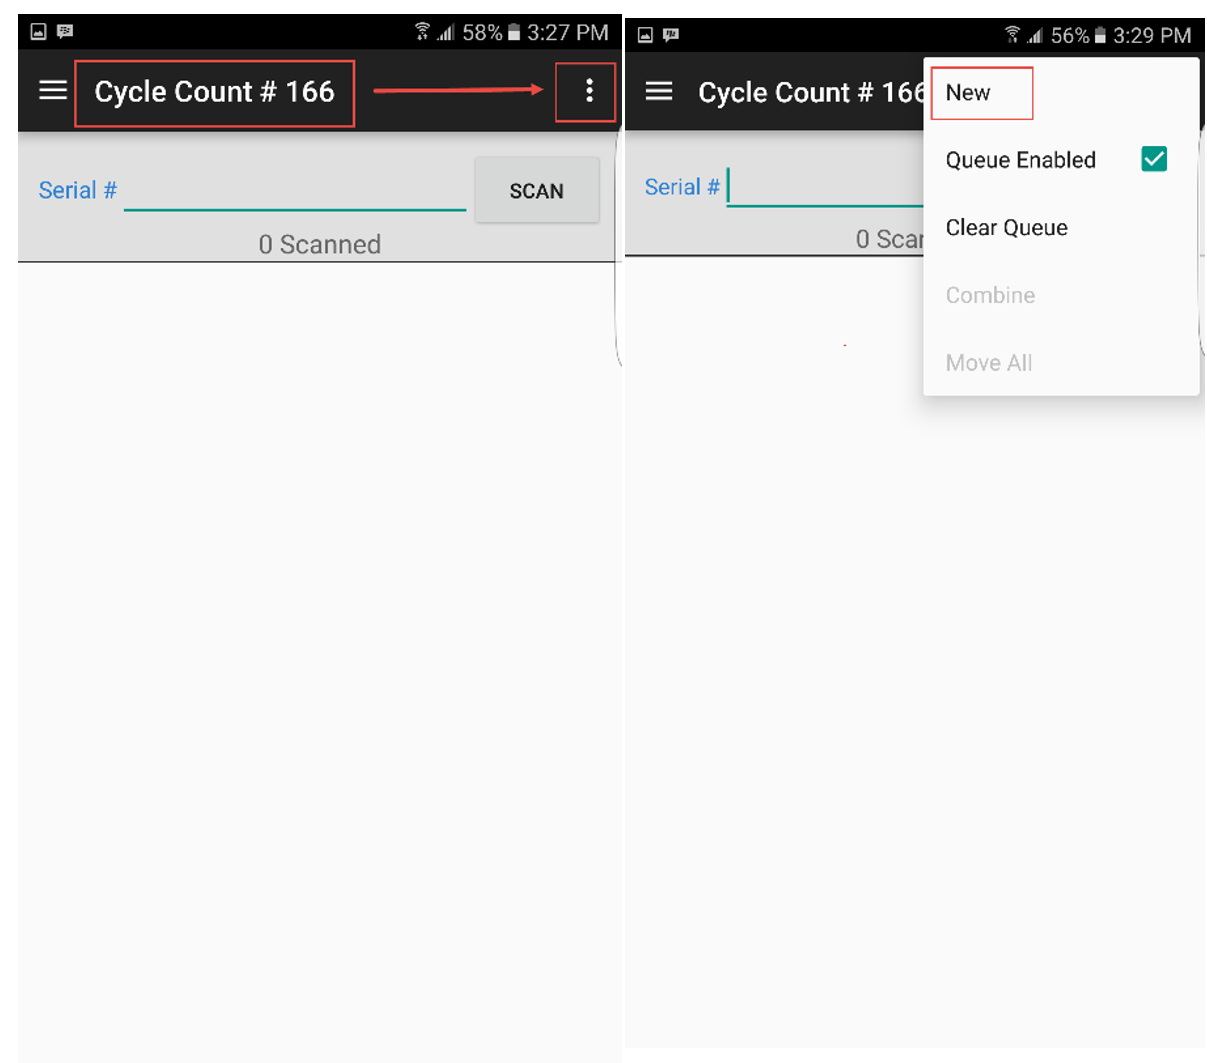
The scanning window will open. To create a new tag, select New from the action menu at the top right side of the screen:
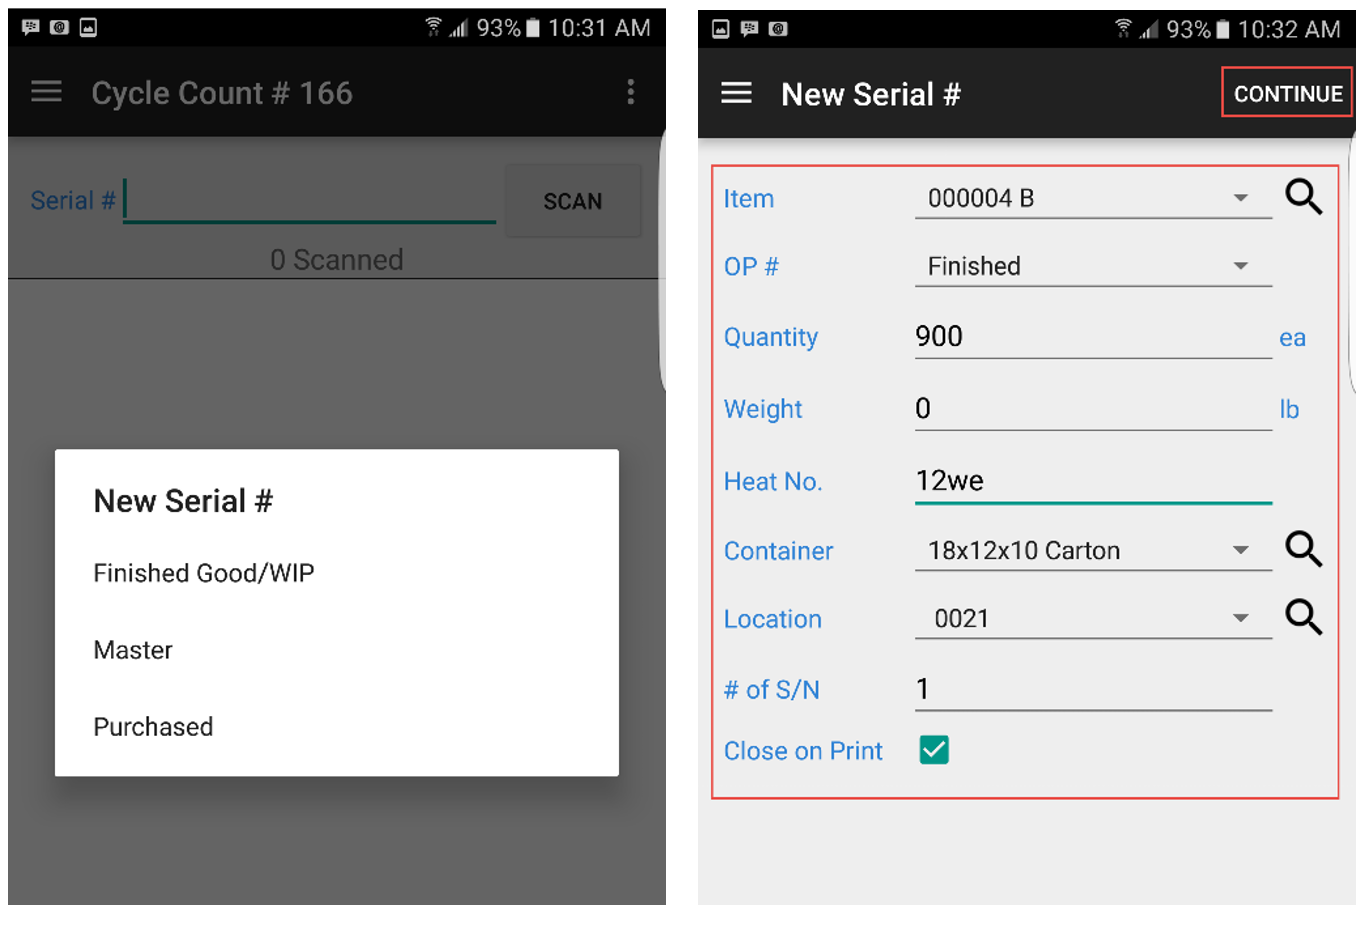
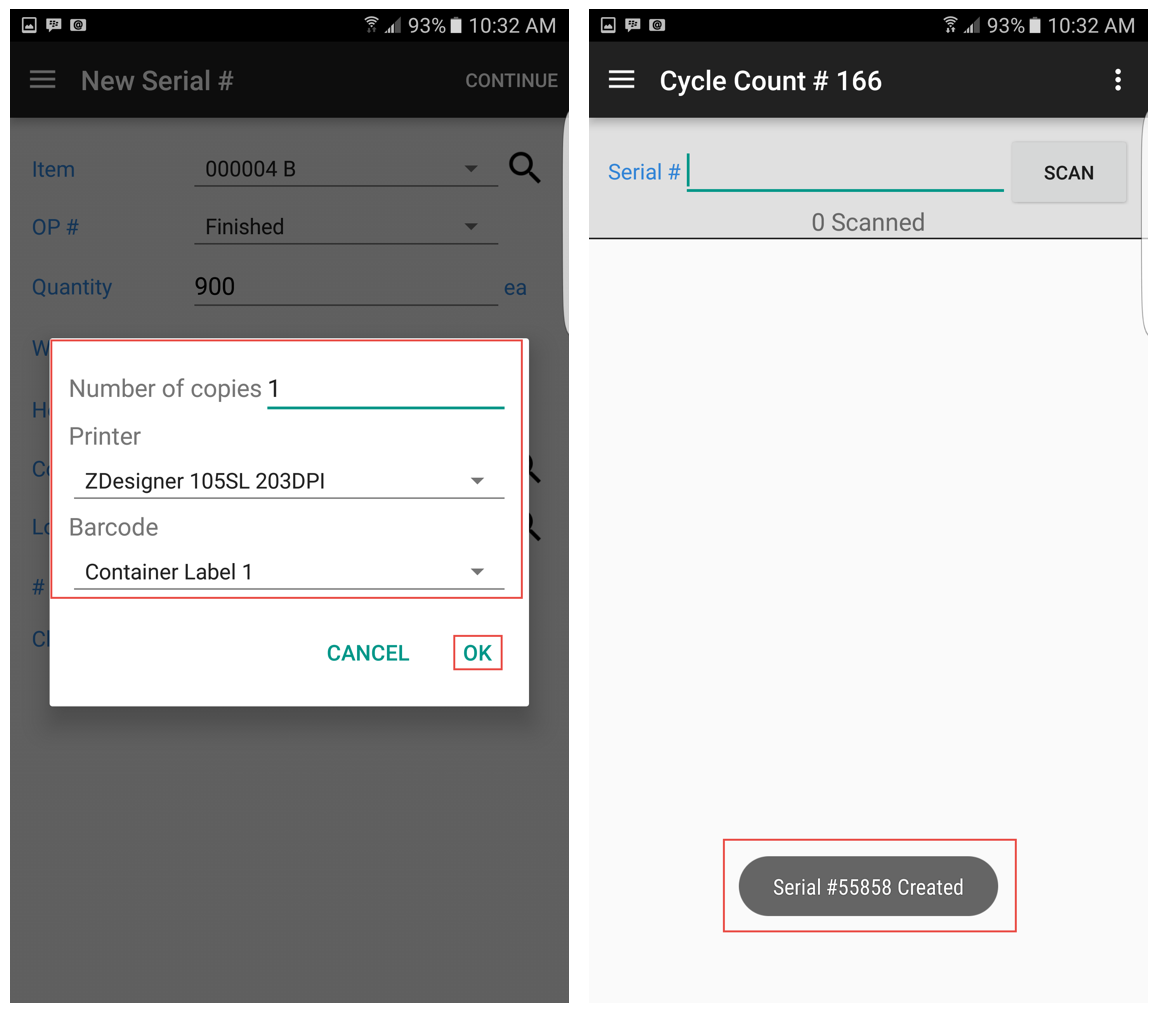
Select the type of label you are creating, and complete the information on the New Serial # screen. You can search for the item, container and location using the search function. If you wish to create more than 1 serial number for the same item, enter the number in the # of S/N field. If you wish the New Serial # screen to close on print, select the Close on Print box. Select Continue on the top right of the screen to print the label:
Enter in the number of copies, select the printer, and select the container label. Touch OK to print. The system will let you know that the label was created successfully:
You must scan the label so it is included and verified as part of the cycle count. Touch the SCAN button, hold the trigger of your scanning device, or enter in the serial #. The system will give you and message and verify that the serial number is included in the cycle count: