Timecard Entry
Equipment Timecards are created in the system to record time against Work Orders or Equipment Items.
Creating a New Timecard Entry
There are four ways to create a new Timecard Entry. The first way is to click on the Ctrl + Shift + X keys.
The second way is to navigate to File > New > Equipment Timecard.
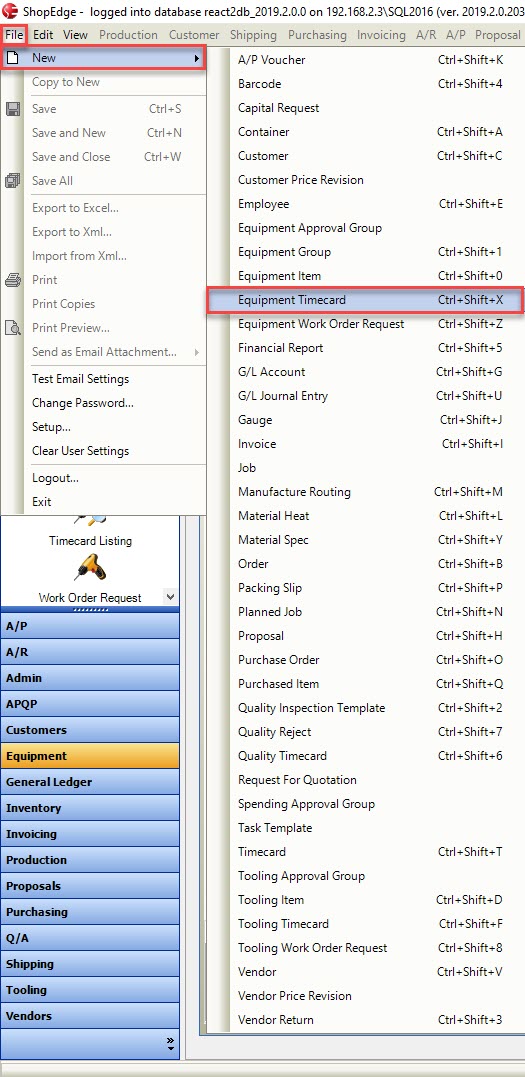
The third way is to click on the  button and then select the Equipment Timecard option.

The last way is to navigate to the  tab and click on the
 ![]() icon.
icon.
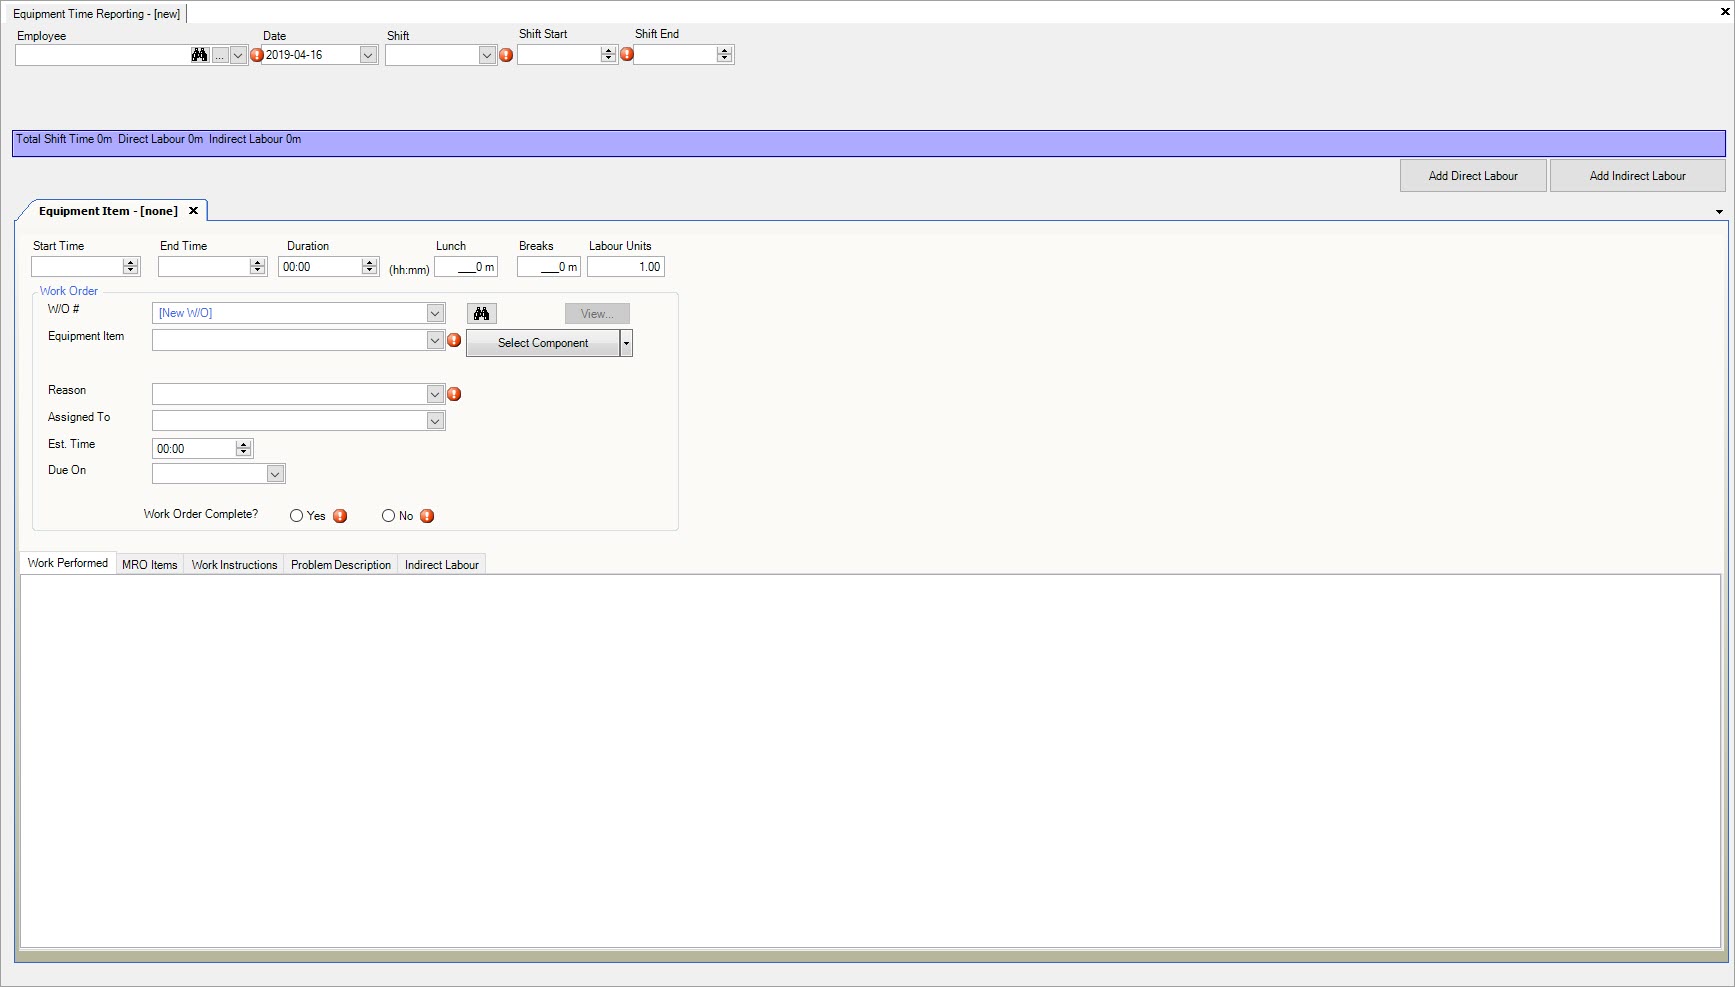
All of these options will open a new Equipment Time Reporting screen.
Entering Equipment Timecard Header Information
The first step to creating a new Equipment Timecard is to enter in the necessary header information. First, users must select an Associate (Employee). There are three different
ways to do this. The first way is to click on the  button. The Employee Lookup window will be displayed.
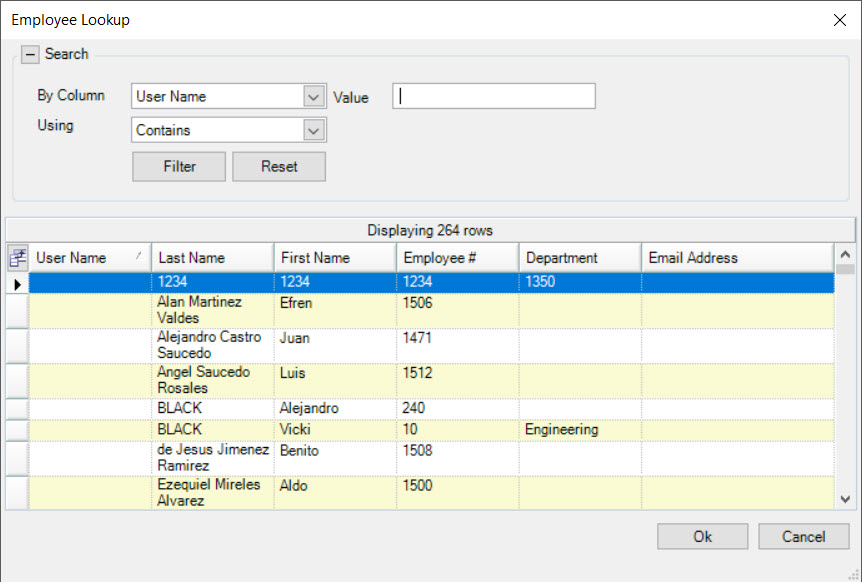
Locate and highlight the row of the appropriate Associate you wish to make the Equipment Timecard for. Once you have highlighted the row, click on the  button. The Associate’s number will be placed in the Associate textbox.
The second way to select an Associate is to click on the  button. The Employees window will appear.
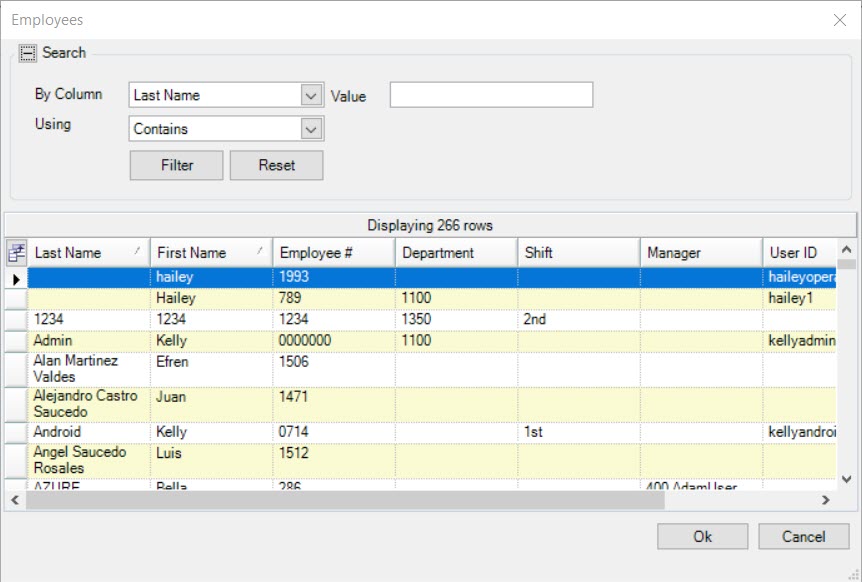
Users will then have to click on the  button and then select an Employee using the available drop-down menu.
Once an Employee has been selected, click on the  button.
The last way to select an Employee is to use the available drop-down menu.
Note
Based on Admin settings, only certain Employees, or all Employees in a Department will be able to have Equipment Maintenance Requests assigned to them. Therefore, when the Employee creates a Equipment Timecard, the Work Orders are filtered based on those Admin settings and only certain Work Order Numbers will be available to select from the drop-down menu.
The Date of the Equipment Timecard will default to the current date but can be overridden if needed.
Users must select a Shift by using the available drop-down menu. The Shift Start and Shift End must be selected as well by using the available arrows to select the correct times.
Note
Once a Shift has been selected, the Shift Start and Shift End times will default but can be overridden if needed.
Completing the Equipment Item Tab
The next step is to complete the Equipment Item tab on the Equipment Timecard.
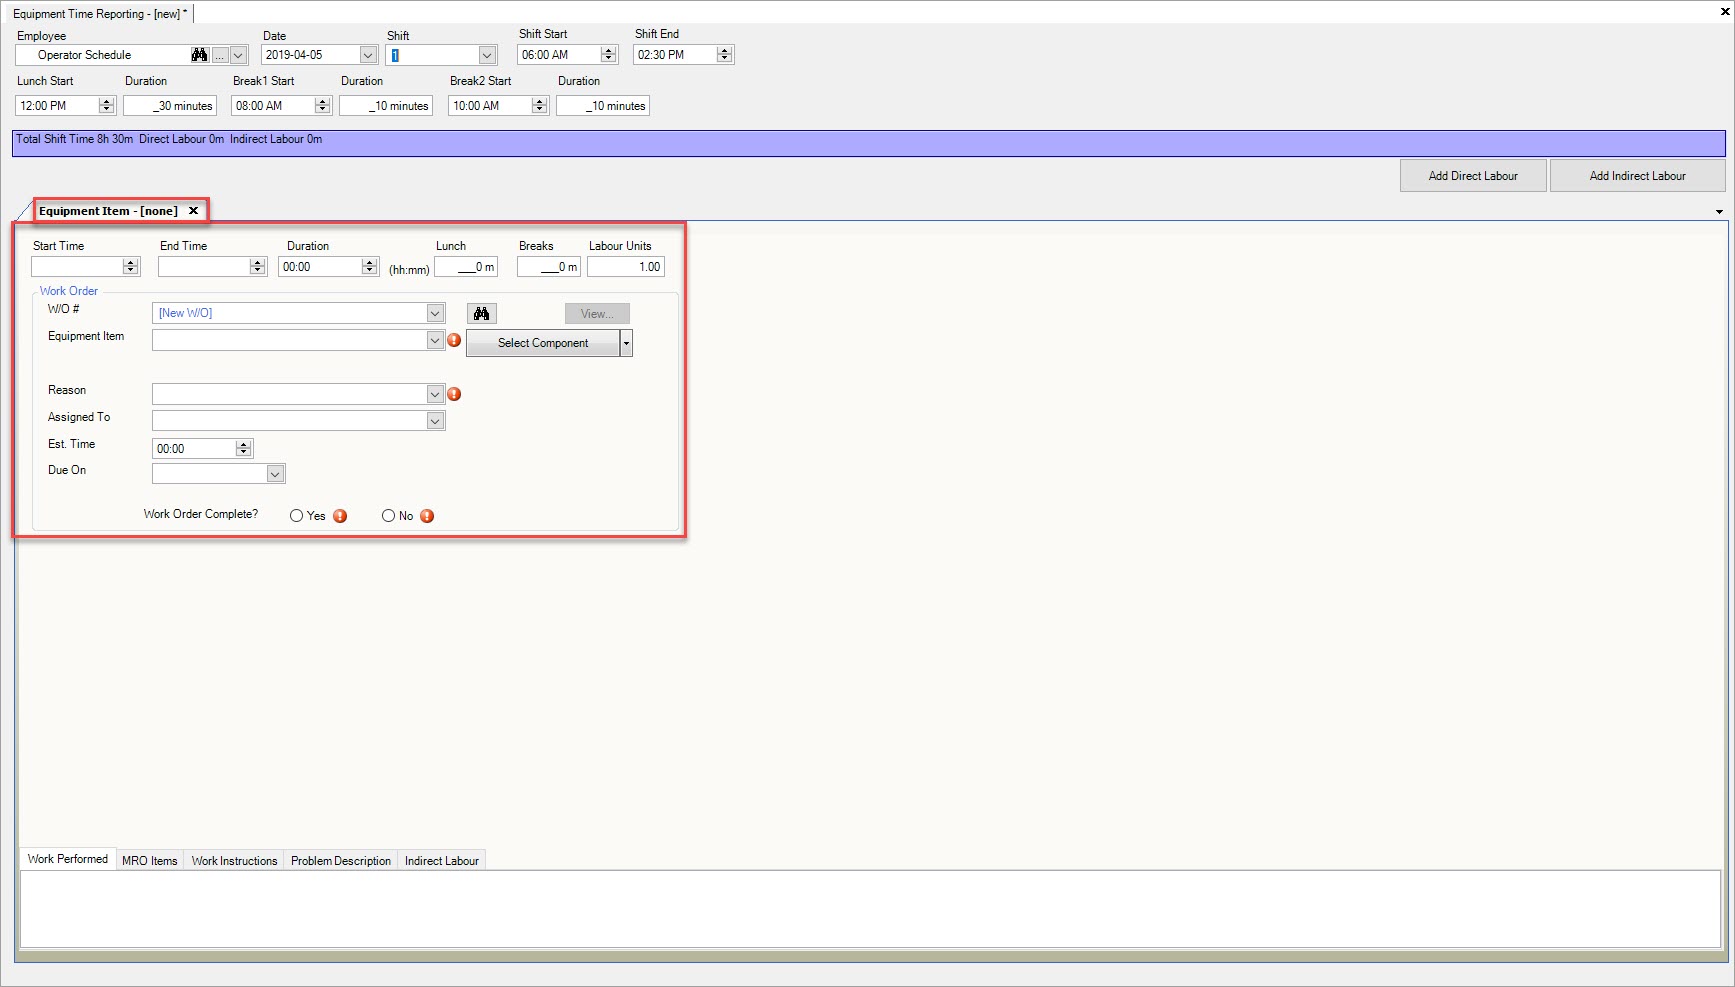
Users must select a Start Time, End Time, and enter in the Duration in hours and minutes, Lunch, Breaks, and Labour Units.
Next, users have the option to select a W/O #. This can be done by using the available drop-down menu OR by clicking on the  button.
By clicking on the  button, the Work Order Lookup window will appear where users can select the appropriate Work Order and then,
click on the
  button.
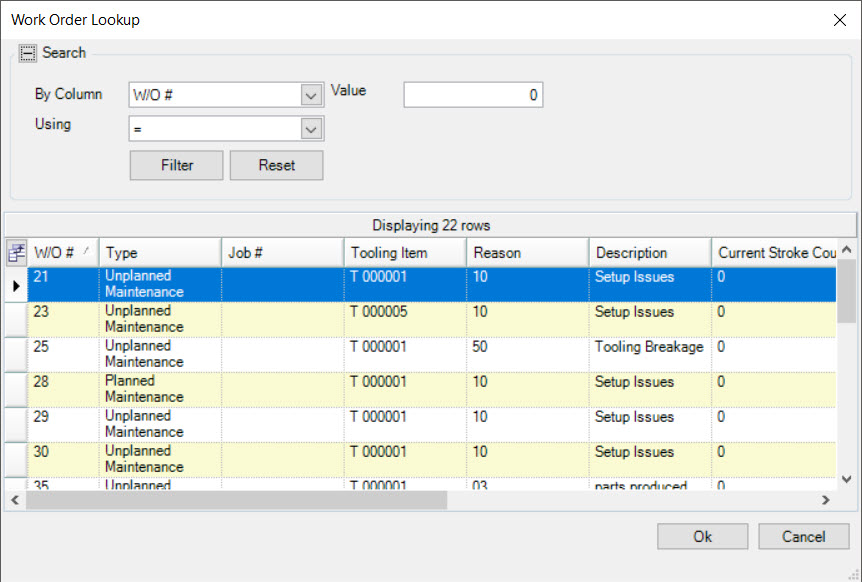
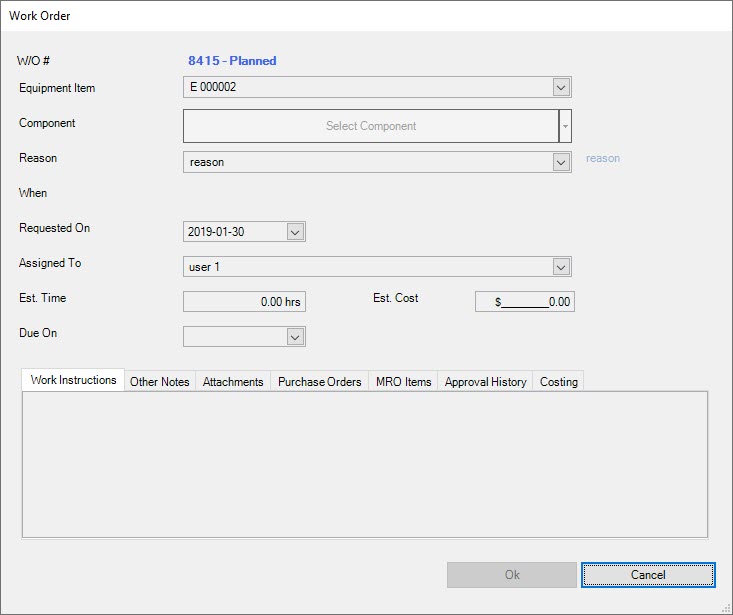
Once a Work Order has been selected, users have the ability to view it by clicking on the  button.
The Work Order window will appear as read-only, including all of the Work Order details.
If there is not a W/O # attached to the Equipment Item, users can select a Equipment Item using the available drop-down menu and the system will create a W/O # for it.
Users can then select a Job #, Reason (which is mandatory), Assigned To, enter in an Est. Time, and select a Due On date.
Users will need to indicate whether a Work Order is complete or not. If they select Yes, the Work Order will be flagged as closed in the system, and will not be available to record any additional Equipment Timecard entries against it. It will also be hidden from the Open Work Orders screen.
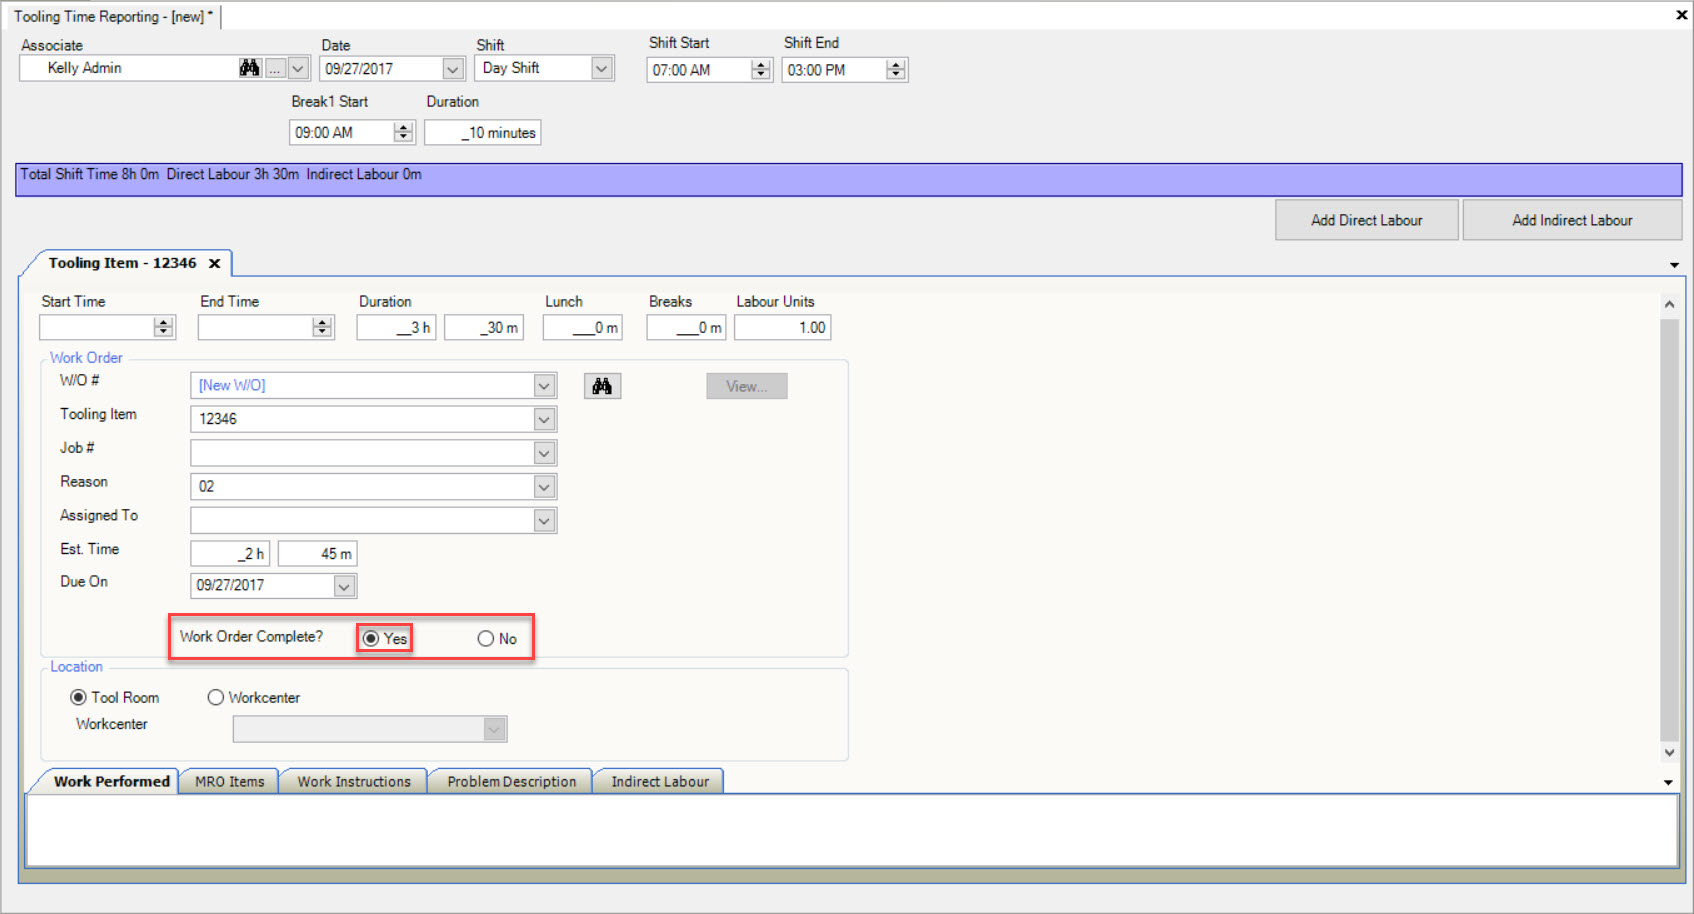
If the Work Order is not complete, and No is selected, it will remain open in the system. Leaving a Work Order open will allow users to record additional Equipment Timecard entries against it.
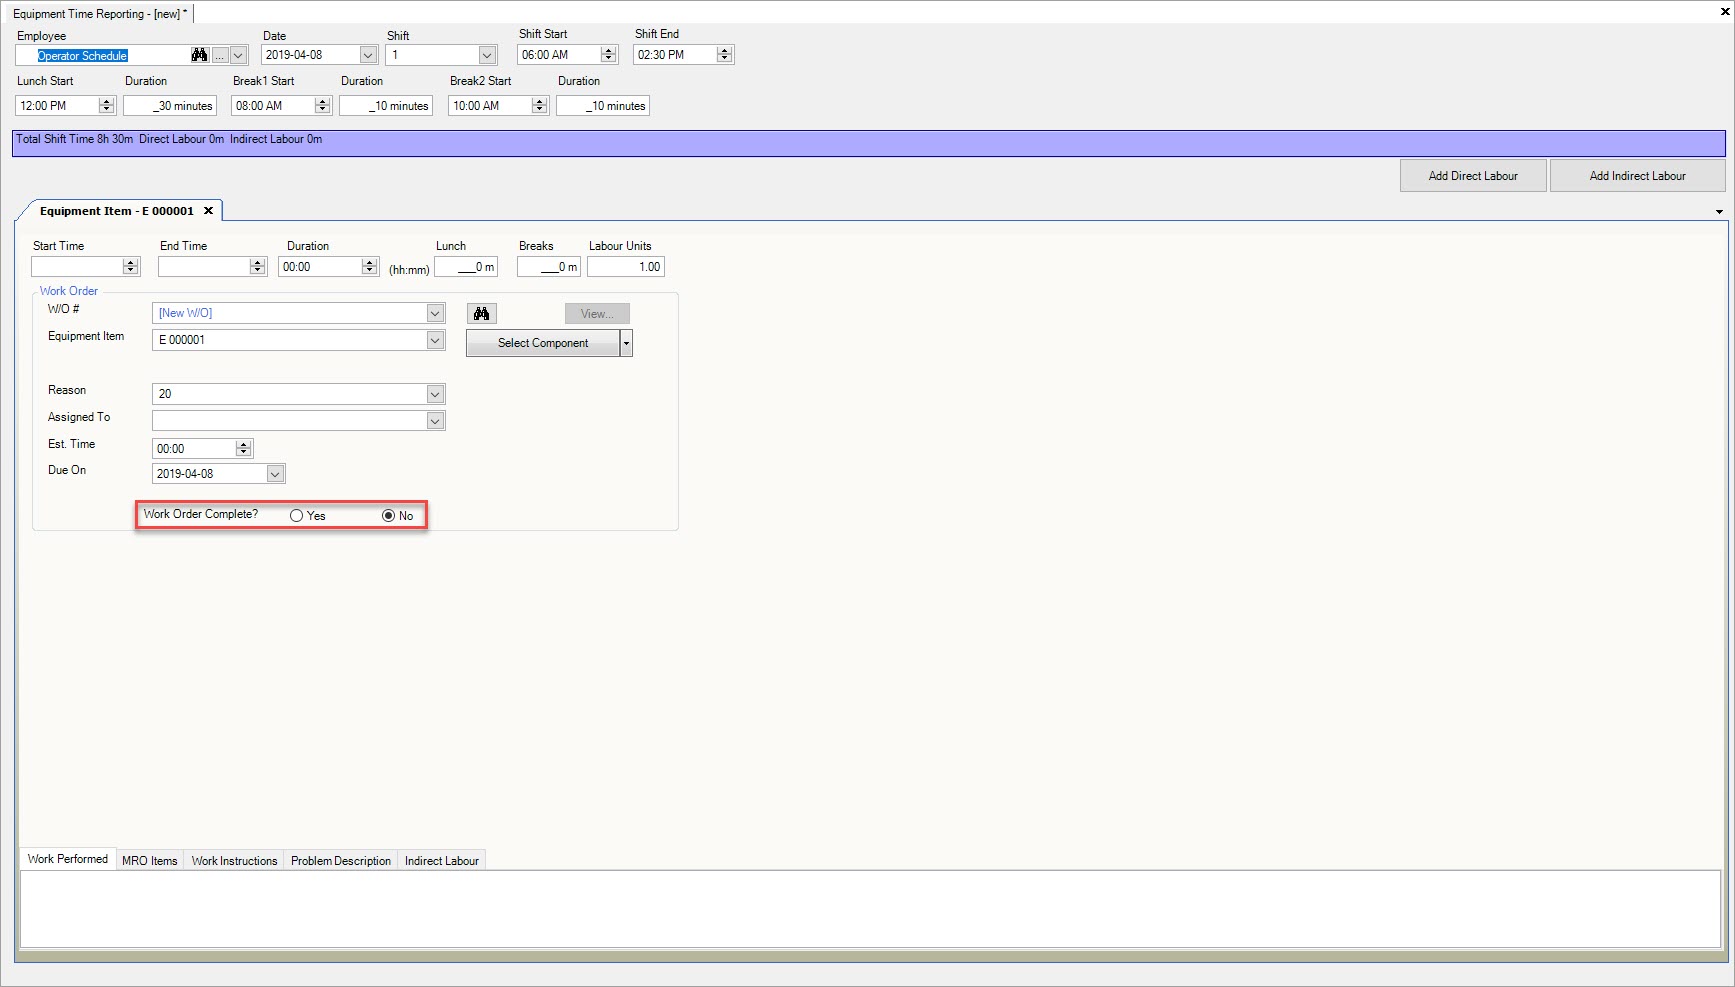
Once all of the necessary information has been completed, make sure to save before exiting the screen.
Work Performed Tab
The Work Performed tab on an Equipment Timecard allows users to enter in a description of the work that was completed for the Work Order.
To view the description, make sure to select the  tab.
tab.
The description will be displayed in the available textbox.
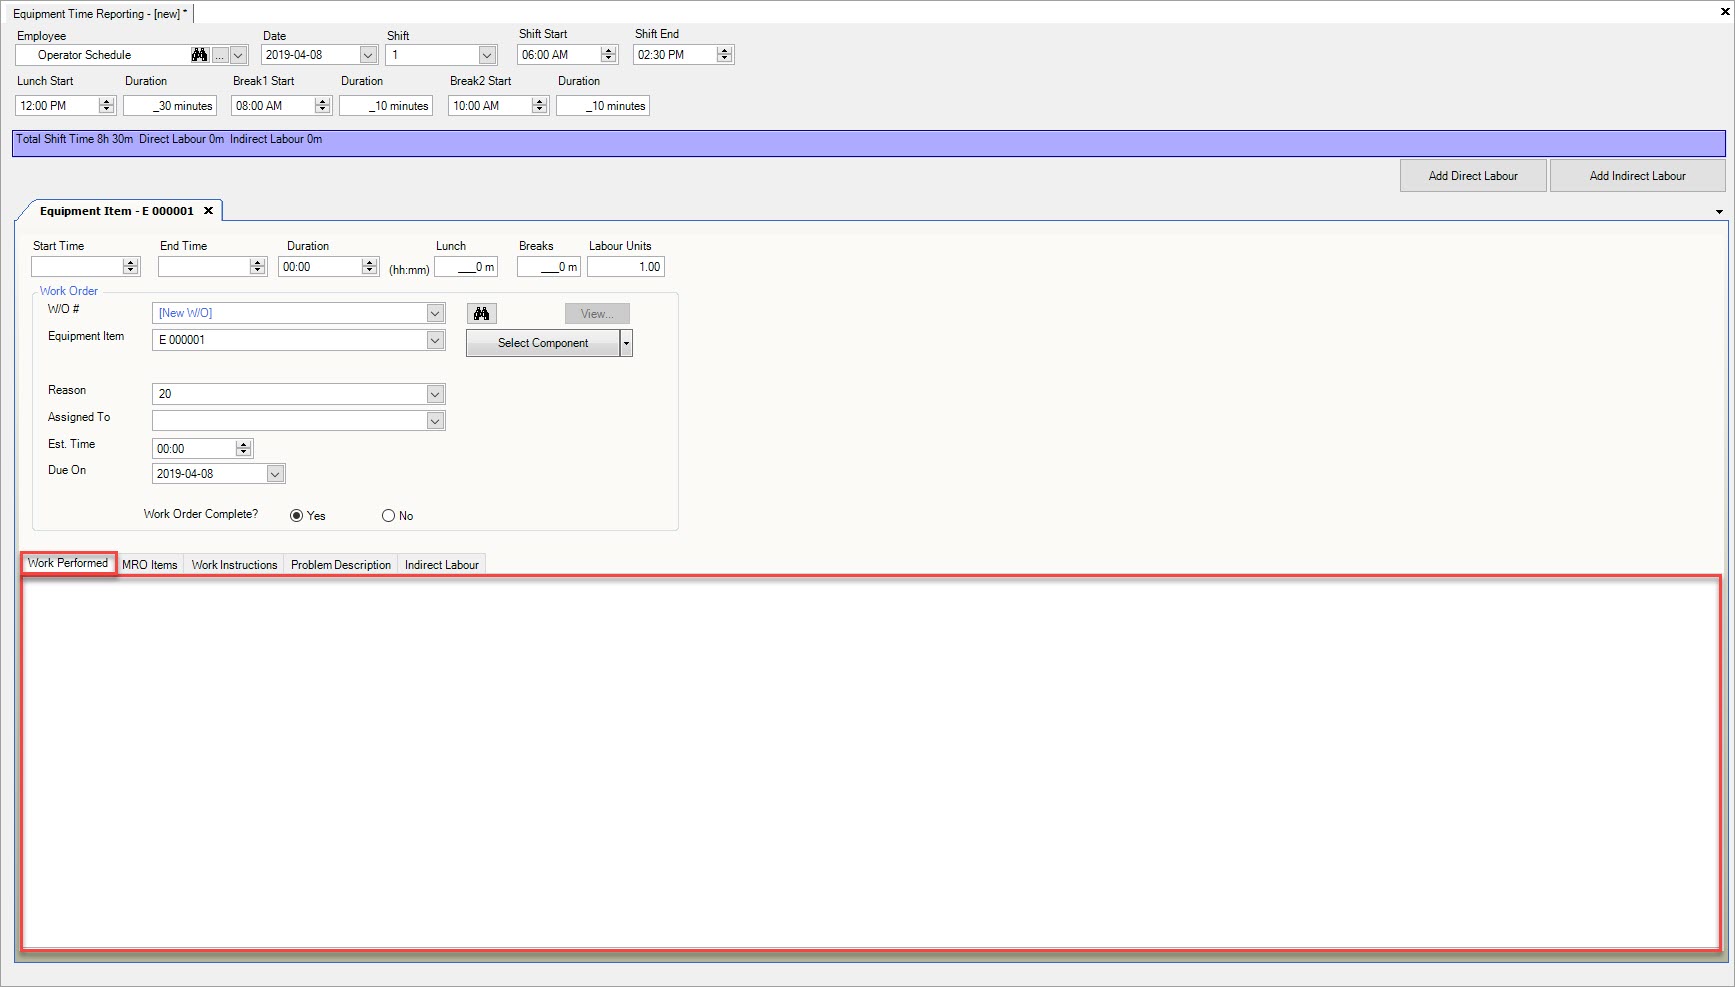
Users can also add, edit, or delete the description if necessary by using the available textbox.
If changes are made, just make sure to save before exiting the screen.
MRO Items Tab
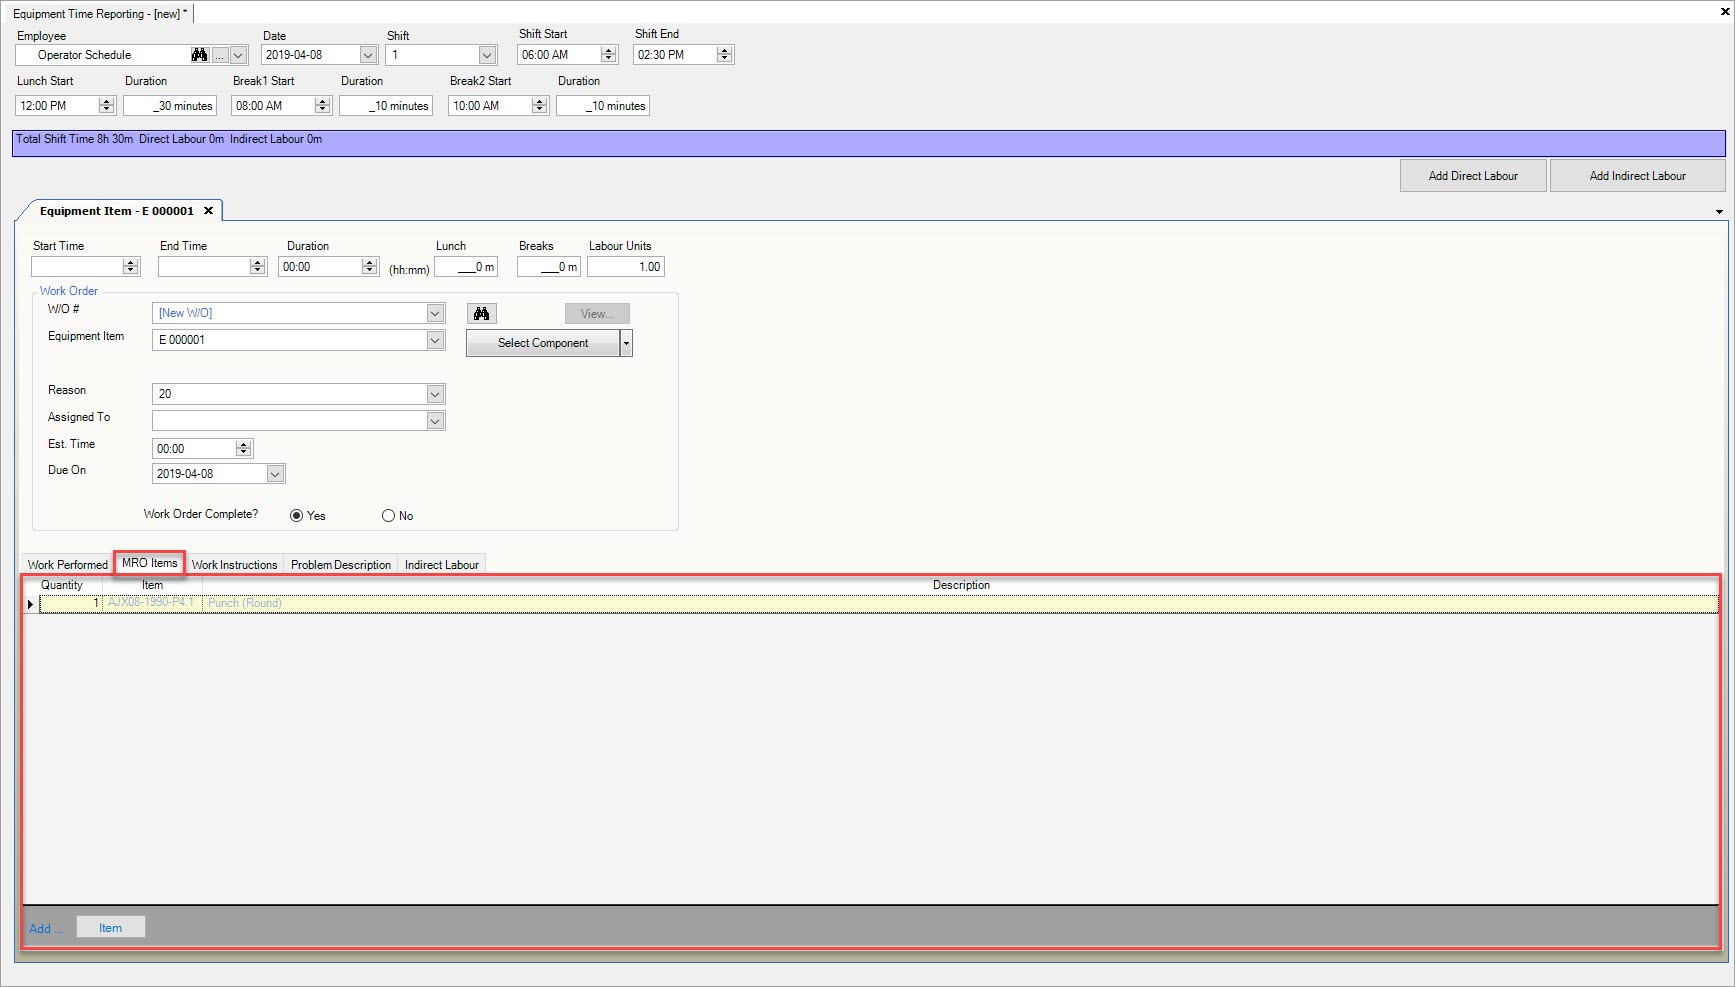
The MRO Items tab allows users to record the usage of purchased MRO Items that are in the system on an Equipment Timecard.
To view MRO Items, make sure to select the  tab.
tab.
The MRO Items associated with the Equipment Item will be displayed.
Adding an Item
To add an MRO Item to an Equipment Timecard, make sure to select the  tab.
tab.
Then, click on the  button located at the bottom of the screen.
The Item Lookup window will be displayed, displaying all of the available MRO Items.
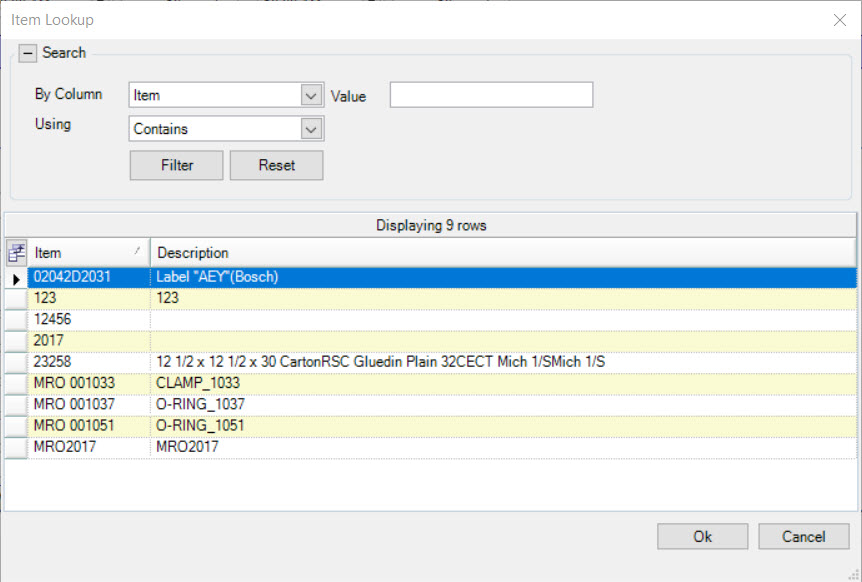
Users can then select an MRO Item by highlighting the appropriate row and clicking on the  button.
The selected MRO Item will be added to the Equipment Timecard.
Users have the option of entering in a Quantity on the MRO Item if necessary.
Make sure to save your changes before exiting the screen.
Editing an MRO Item Quantity
To edit an MRO Item Quantity on an Equipment Timecard, make sure to select the  tab.
tab.
Then, locate the MRO Item you wish to edit the Quantity for and make the necessary changes using the available textbox located below the Quantity column.
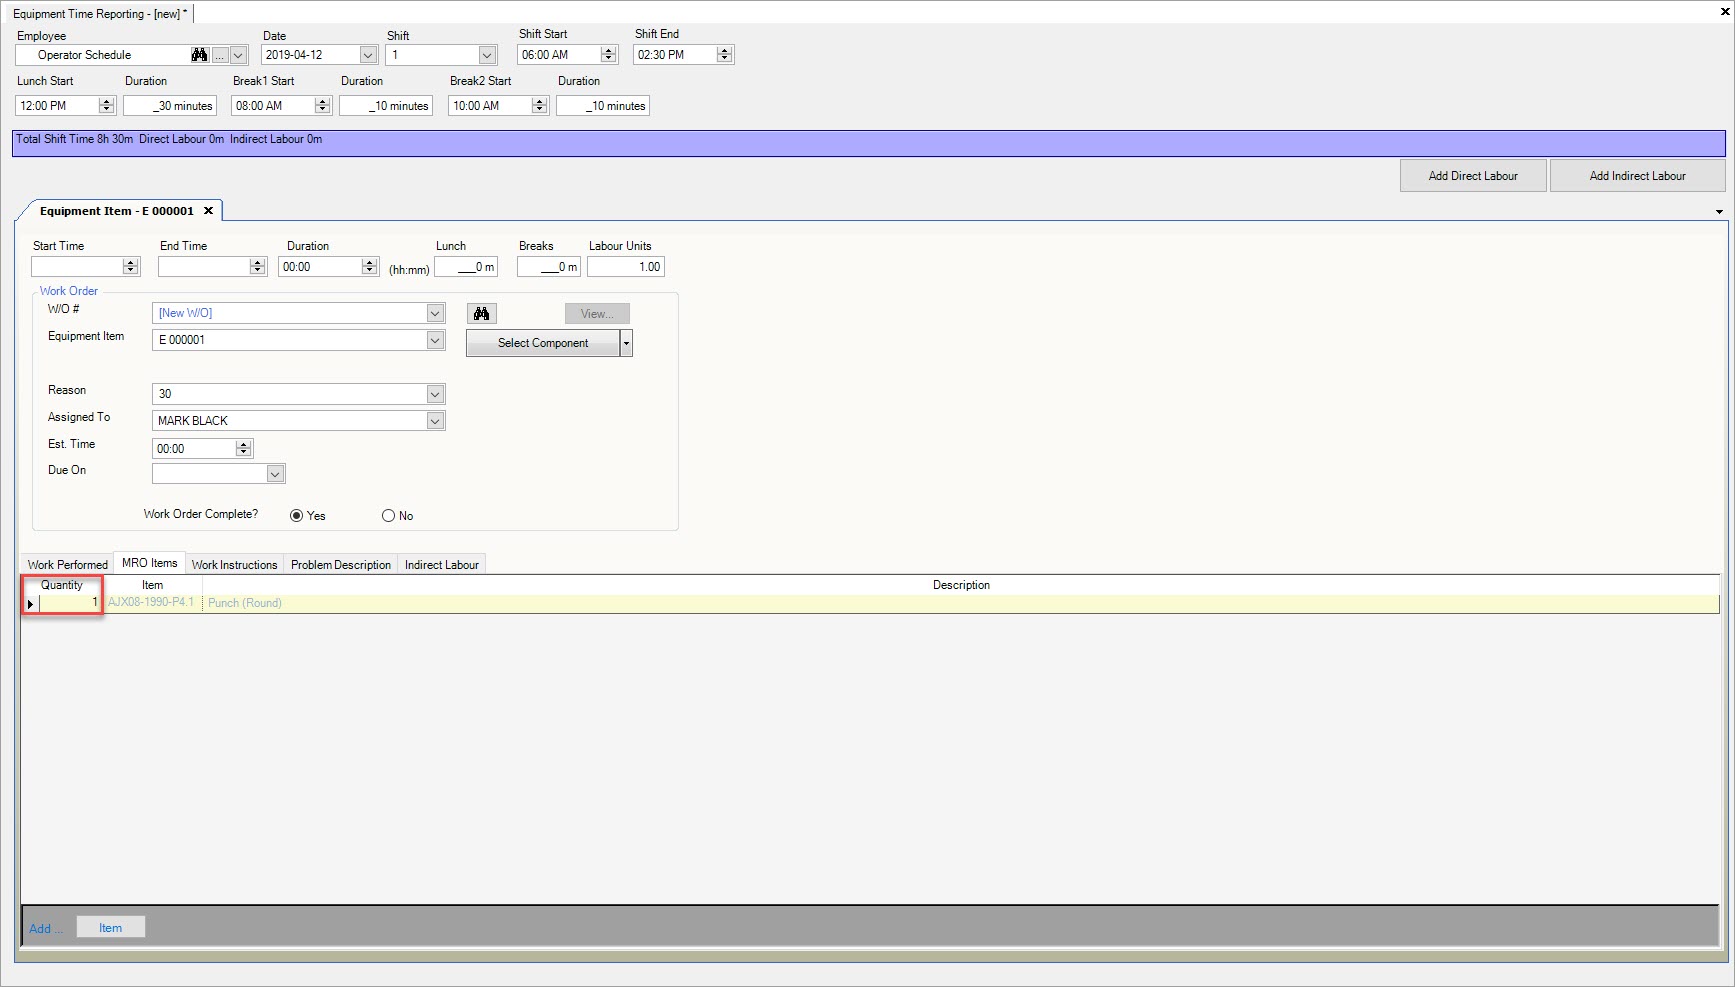
Once the necessary changes have been made, make sure to save before exiting the screen.
Deleting an MRO Item
To delete an MRO Item from an Equipment Timecard, make sure to select the  tab.
tab.
Then, locate the MRO Item you wish to delete and highlight the appropriate row. Use your Delete key and when the system prompts you, select Yes.
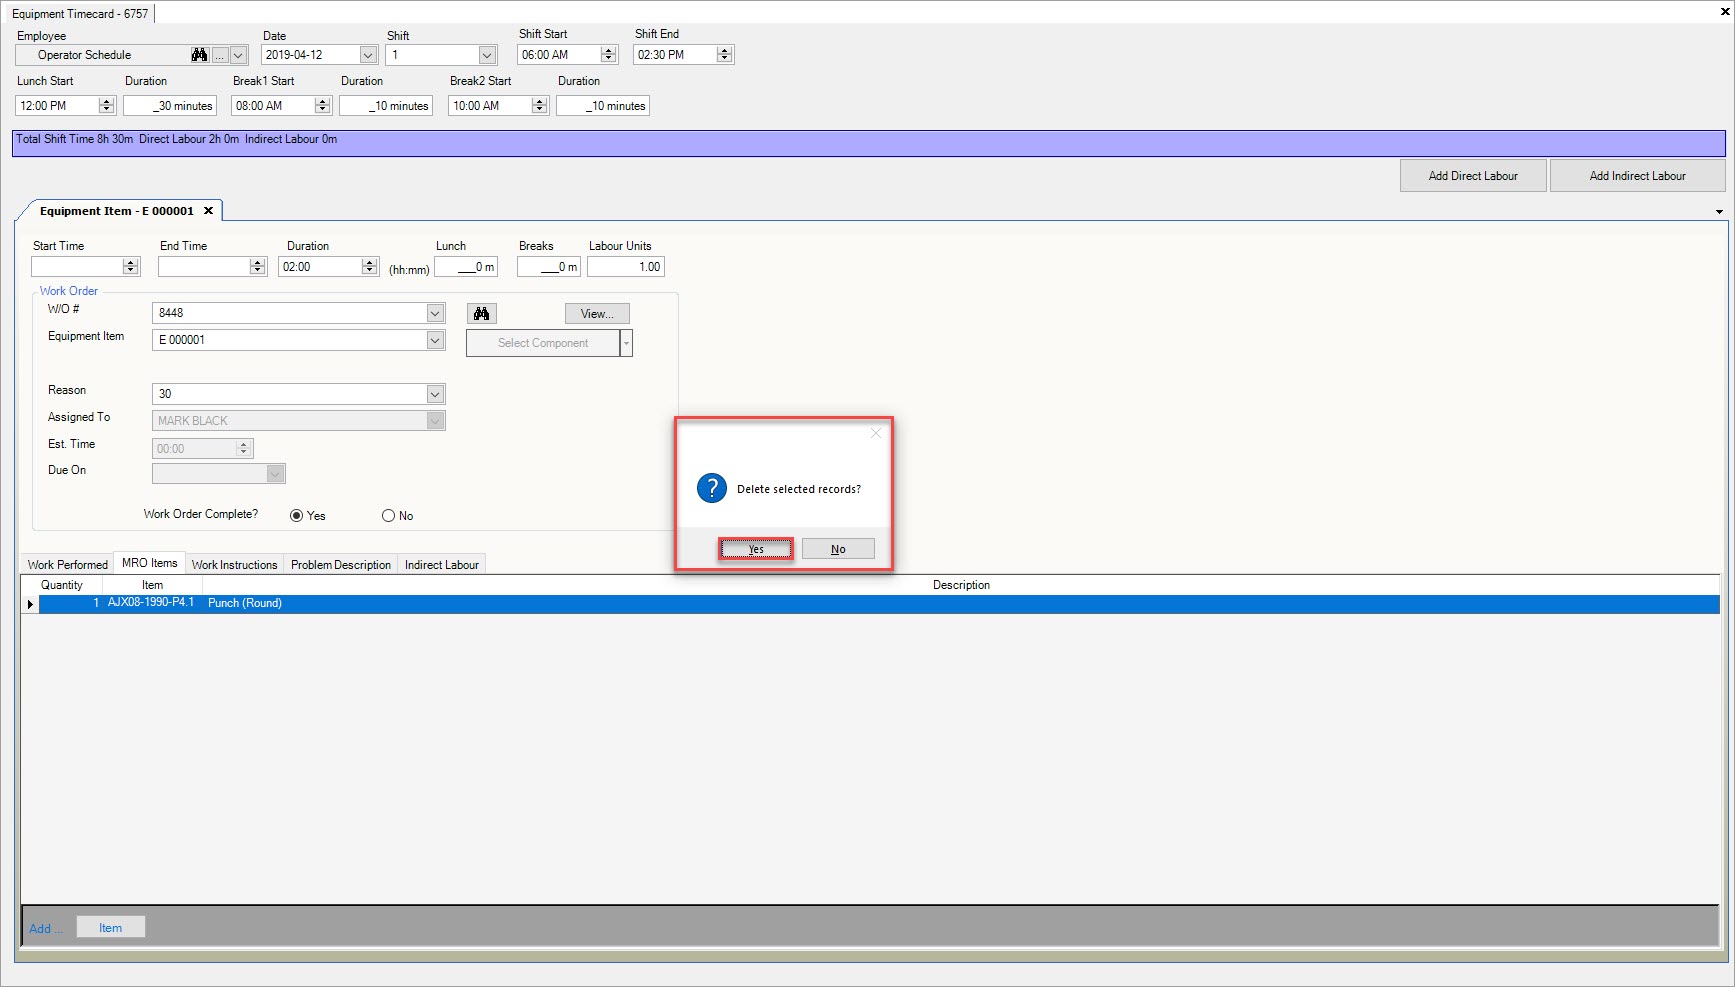
The selected MRO Item will be deleted from the Equipment Timecard.
Make sure to save your changes before exiting the screen.
Work Instructions Tab
The Work Instructions tab on an Equipment Timecard allows users to enter in a description of what needs to be completed on the Work Order. The Work Instructions are used as a reference for users.
To view Work Instructions, make sure to select the  tab.
tab.
The Work Instructions will be displayed in read-only form in the available textbox.
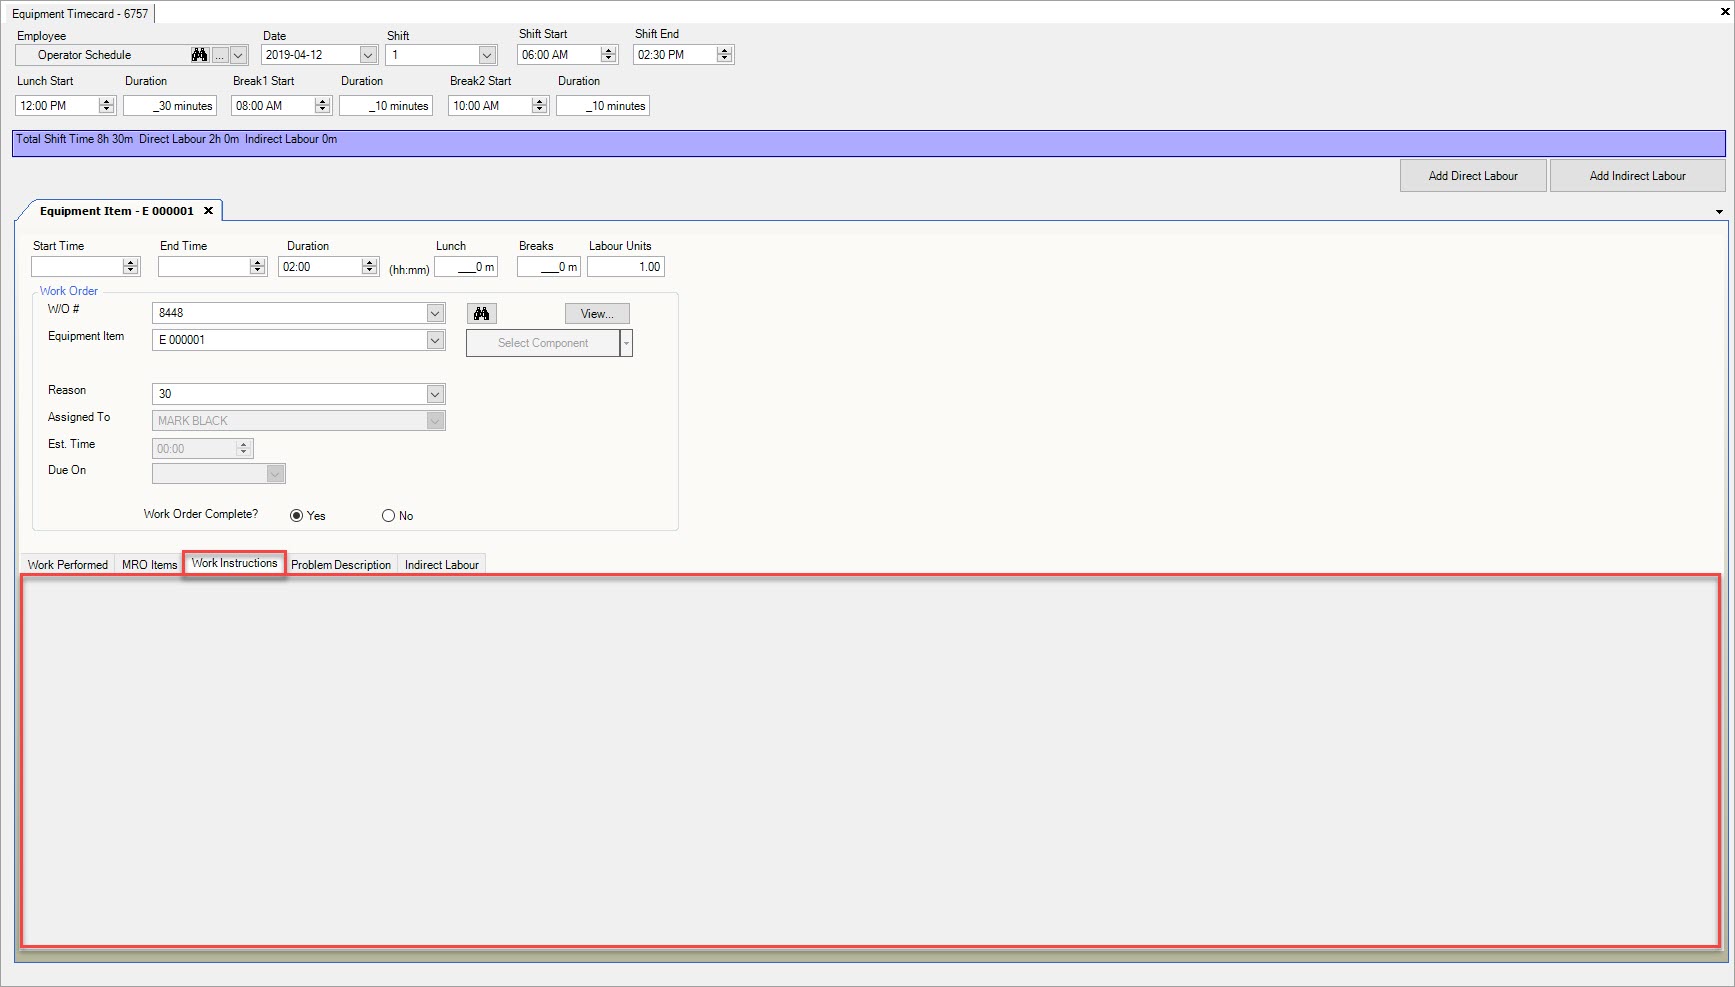
Adding Work Instructions to an Equipment Timecard
To add Work Instructions when creating an Equipment Timecard, make sure to select the  tab.
tab.
Users can then use the available textbox to enter in any necessary Work Instructions.
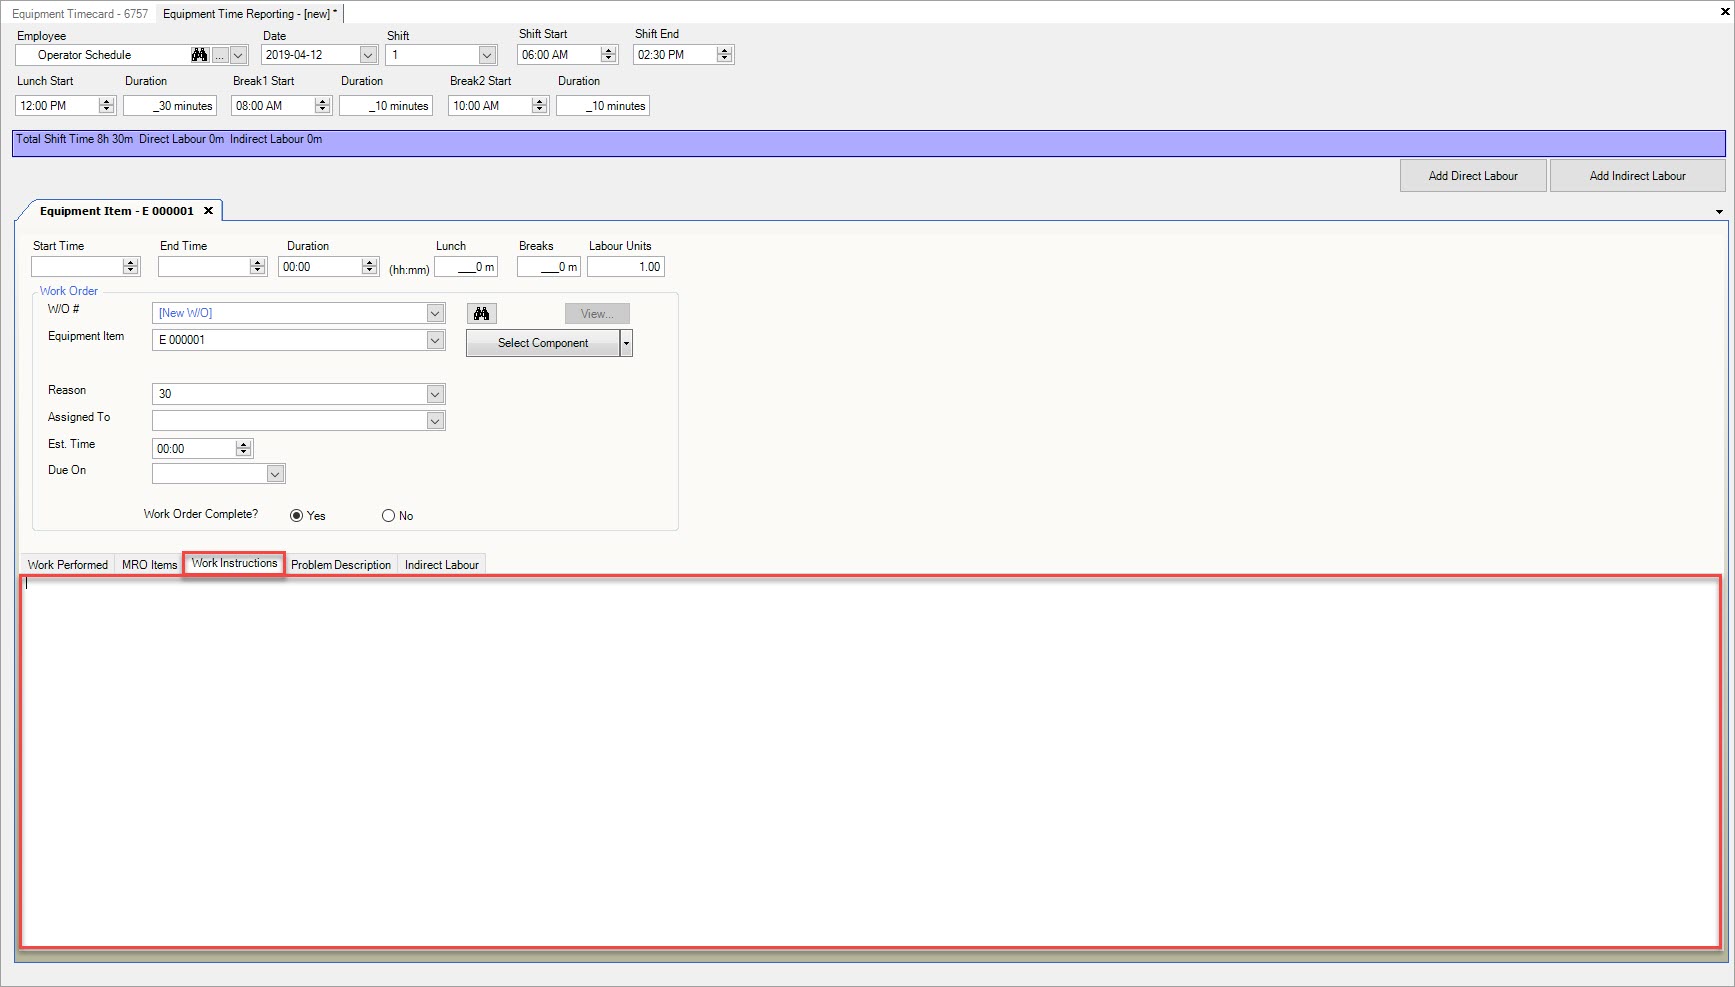
Once the necessary changes have been made, make sure to save exiting the screen.
Problem Description Tab
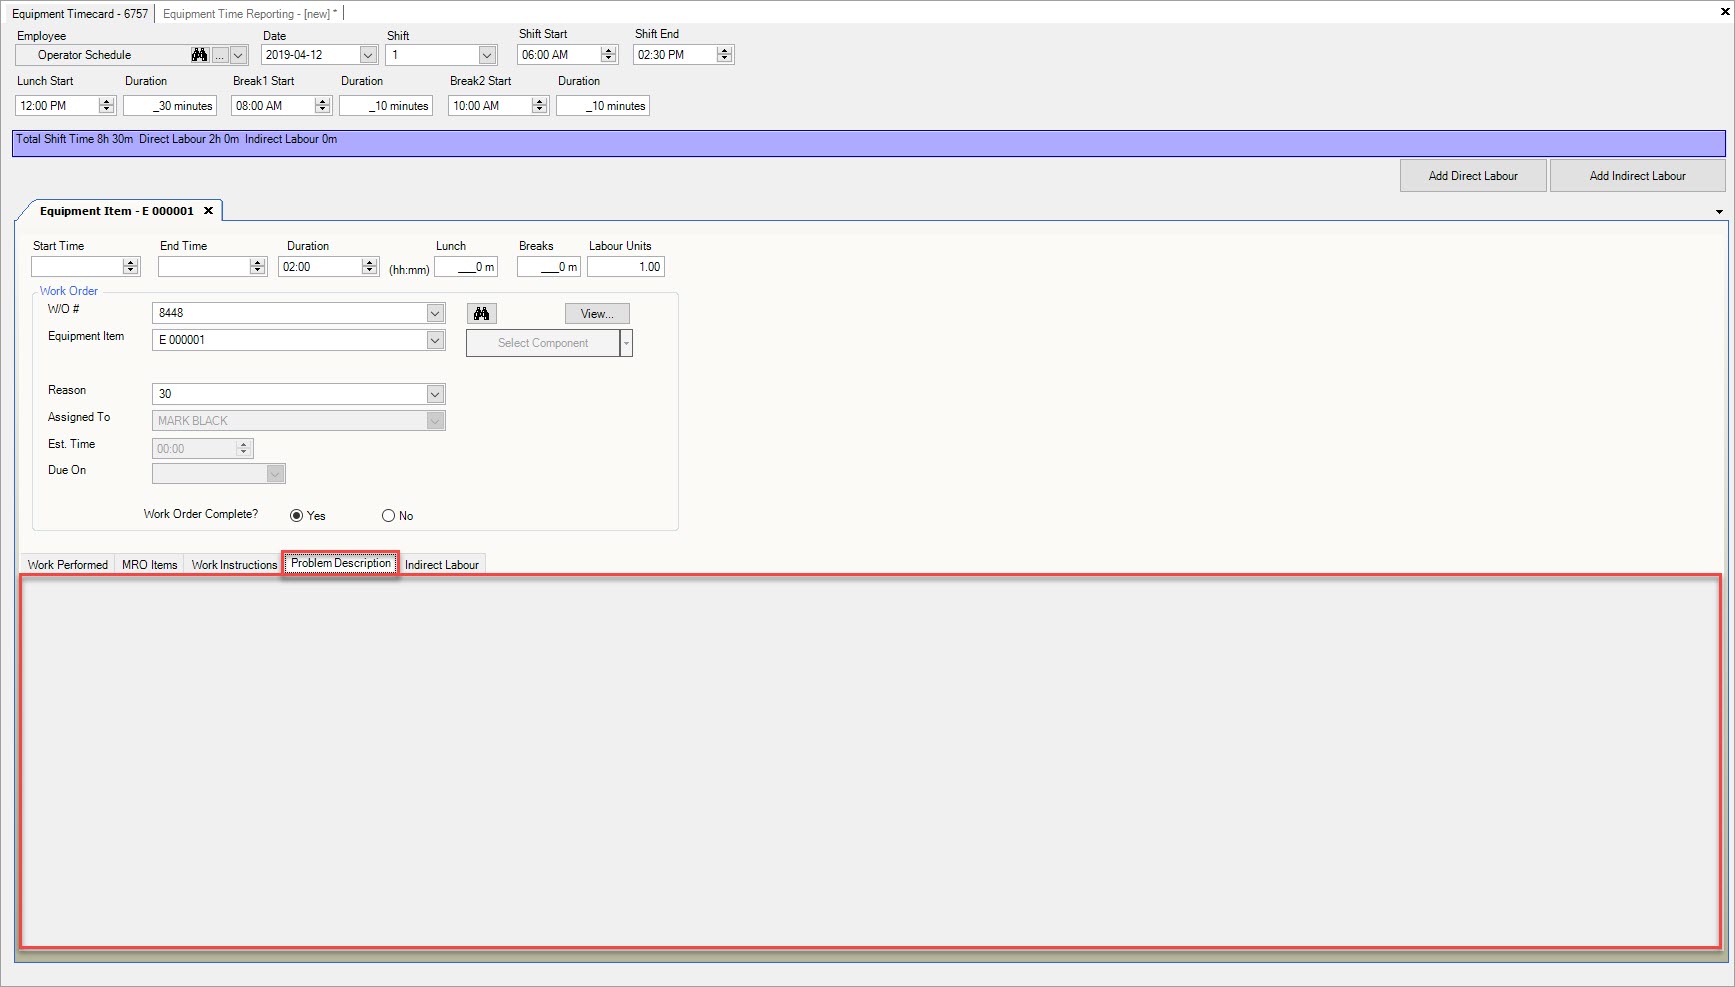
The Problem Description tab on an Equipment Timecard allows users to enter in a description of the problem when a new Work Order is created.
To view the Problem Description, make sure to select the  tab.
tab.
The Problem Description will be displayed as read-only in the available textbox.
Adding a Problem Description when a New Work Order is Created
To add a Problem Description to an Equipment Timecard when a new Work Order is created, select the  tab when creating a new Equipment Timecard.
Using the available textbox, enter in the necessary information for the Problem Description.
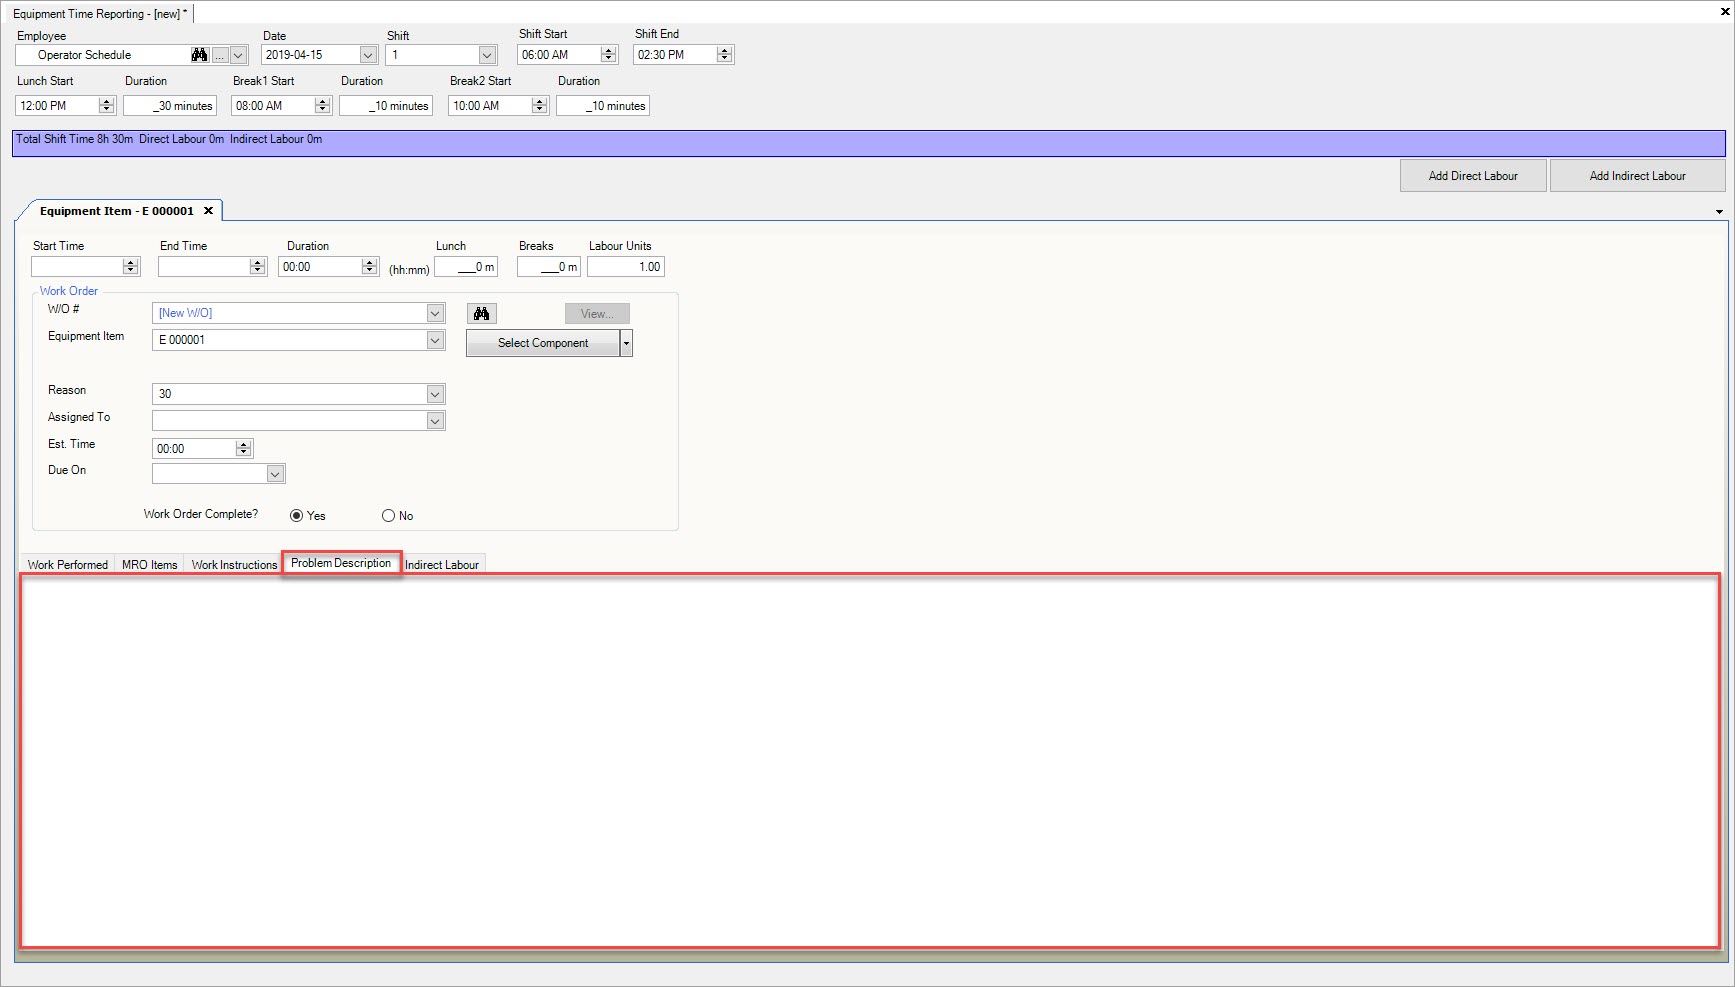
Once the necessary Problem Description has been entered in, make sure to save before exiting the screen.
Note
Users can also add a Problem Description when adding Unplanned Maintenance to an Equipment Item under the Problem Description tab on the New Work Order window. By entering a Problem Description when adding Unplanned Maintenance to an Equipment Item, it will be displayed when an Equipment Timecard is created with an existing Work Order.
Indirect Labour Tab
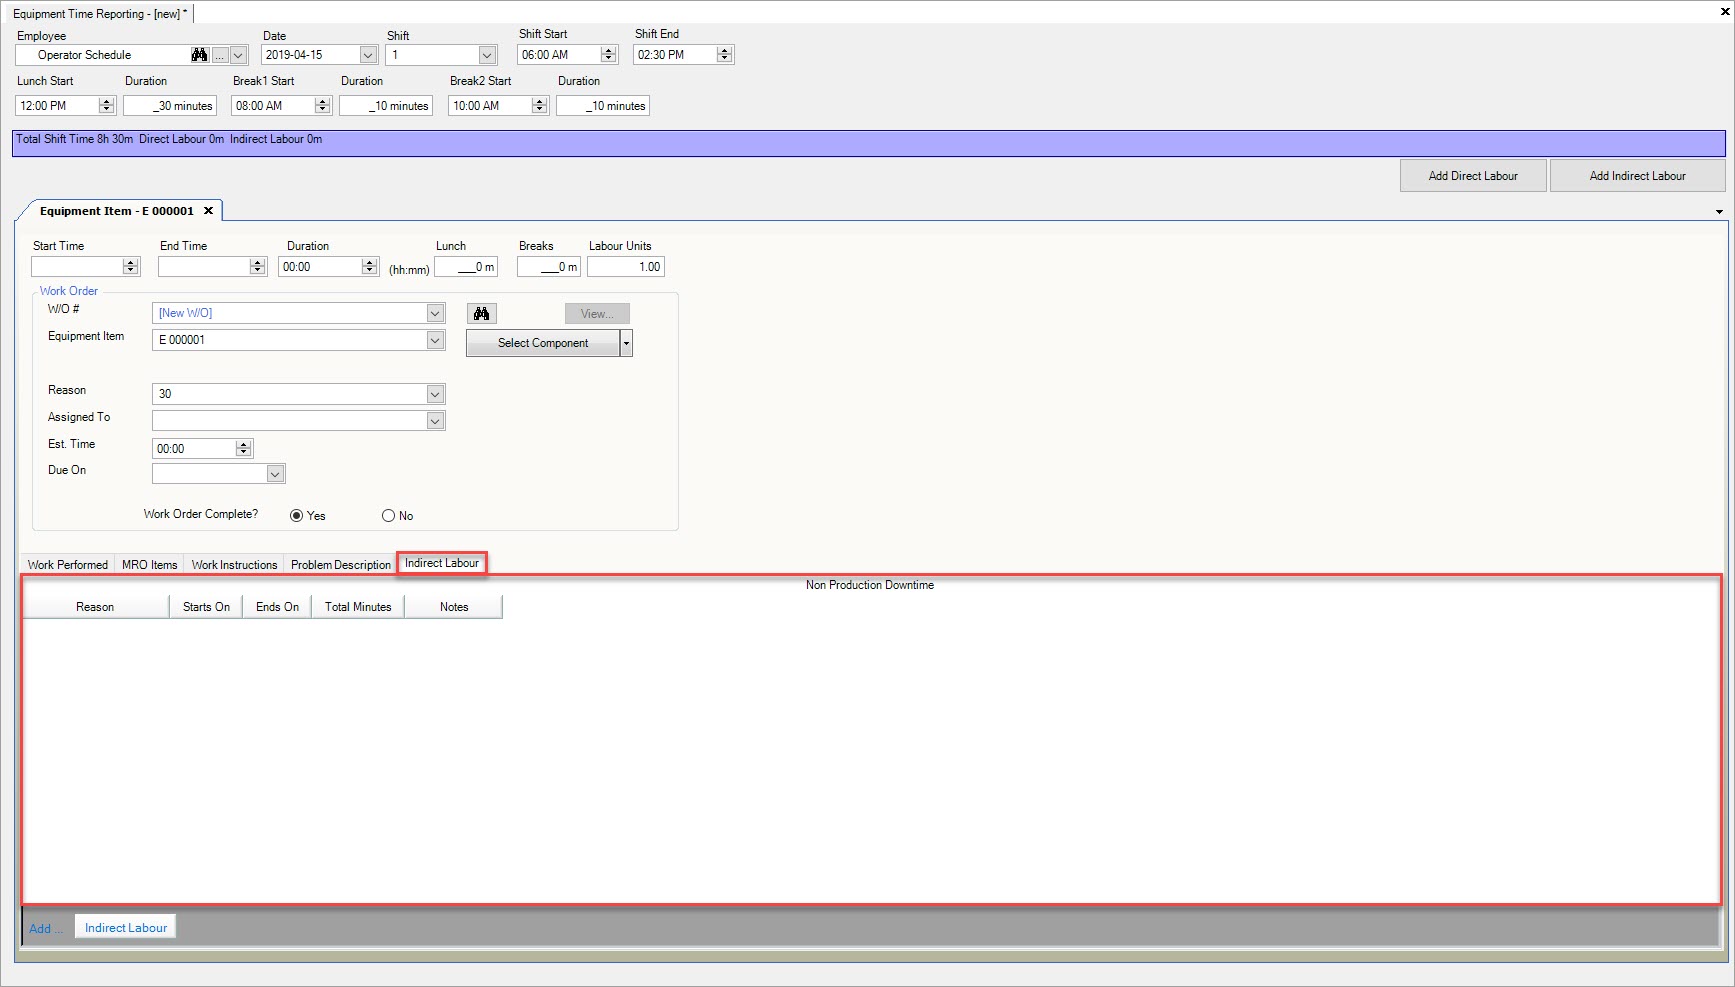
The Indirect Labour tab allows users to record Indirect Labour as part of the Direct Labour (Timecard Equipment Item tab). For example, users may have worked on a particular Work Order, but while completing the Work Order, they had to attend a meeting (Indirect Labour).
To view Indirect Labour on an Equipment Timecard, make sure to select the  tab.
tab.
Any Indirect Labour added to the Direct Labour (Timecard Equipment Item tab) will be displayed.
Adding Indirect Labour
To add Indirect Labour to a Timecard Equipment Item, select the  tab.
tab.
Then, click on the  button located at the bottom of the screen.
A new row will appear where users must select a Reason using the available drop-down menu. Next, users can either enter in a Starts On and Ends On time, OR enter in Total Minutes. Any necessary Notes can be entered in as well.
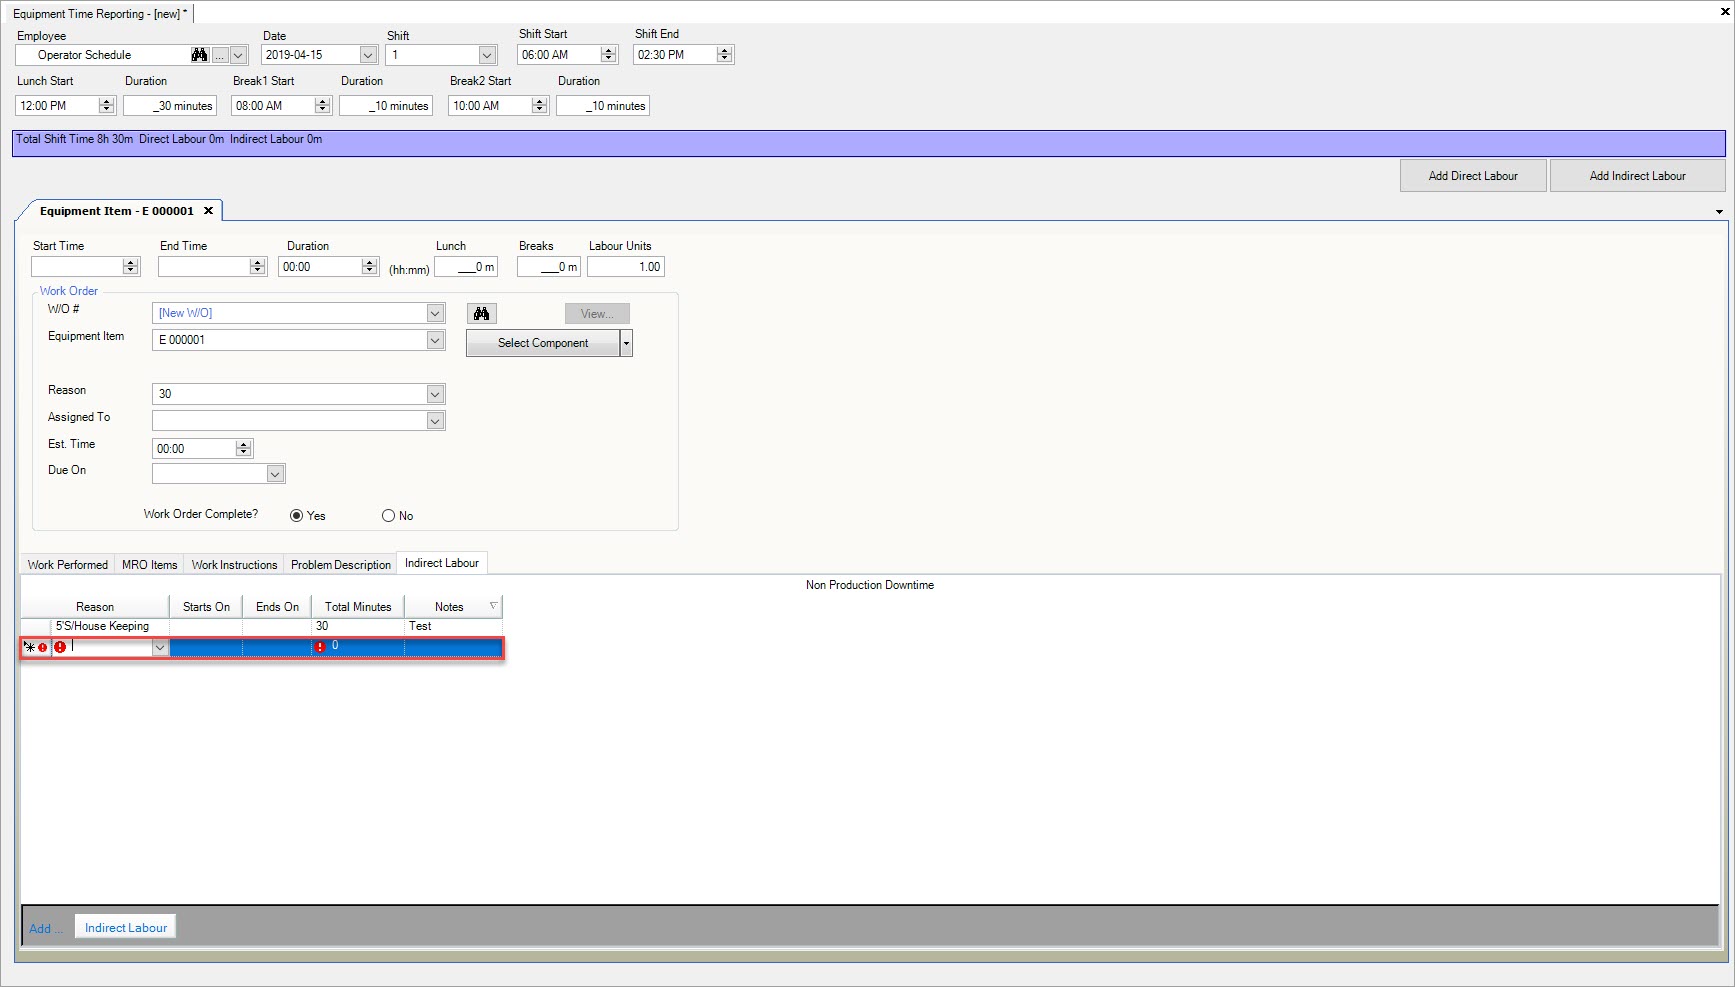
Once the necessary information has been entered, make sure to save before exiting the screen.
Editing Indirect Labour
To edit Indirect Labour on a Timecard Equipment Item, make sure to select the  tab.
tab.
Locate the Indirect Labour you wish to edit and make the necessary changes using the available drop-down menu and textboxes.
Make sure to save your changes before exiting the screen.
Deleting Indirect Labour
To delete Indirect Labour from a Timecard Equipment Item, make sure to select the  tab.
tab.
Locate and highlight the Indirect Labour you wish to delete. Use your Delete key and when the system prompts you, select Yes.
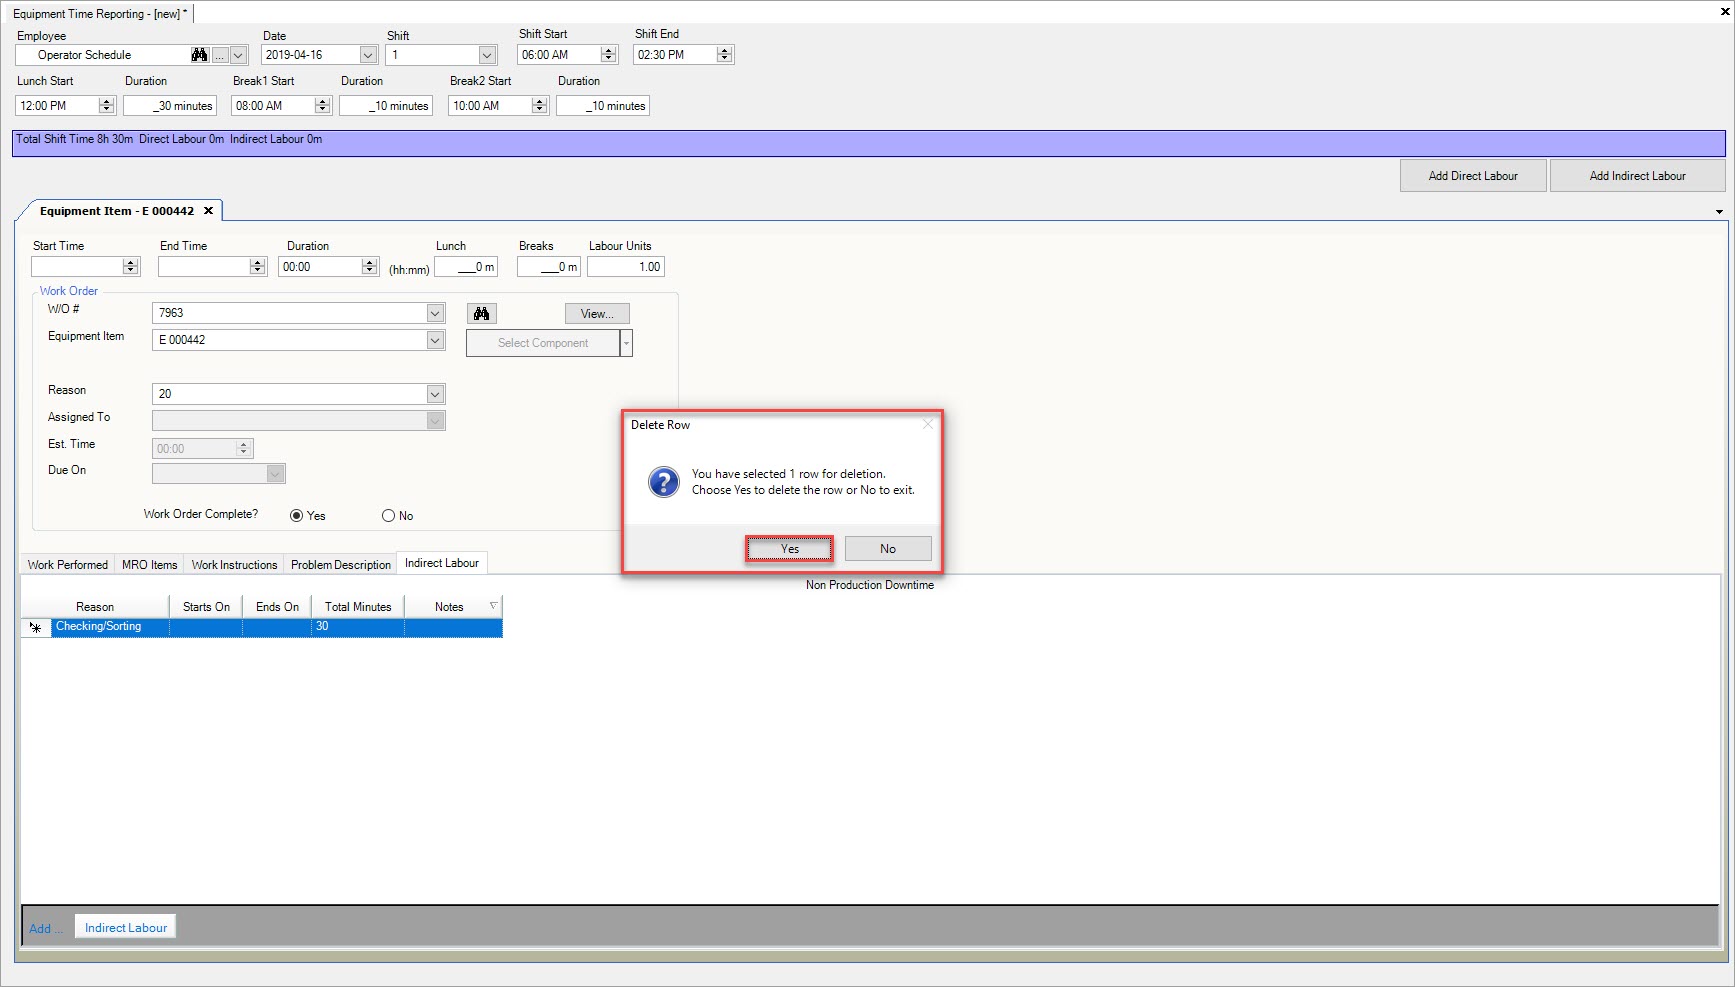
The selected Indirect Labour will be deleted.
Make sure to save your changes before exiting the screen.
Additional Direct Labour
Throughout a shift, users may work on more than one Equipment Item at a time. If this occurs, users have the ability to add multiple Equipment Items to an Equipment Timecard which is known as Direct Labour.
Adding Additional Direct Labour
To add additional Direct Labour to an Equipment Timecard, click on the  button.
A new Equipment Item tab will appear on the Equipment Timecard.
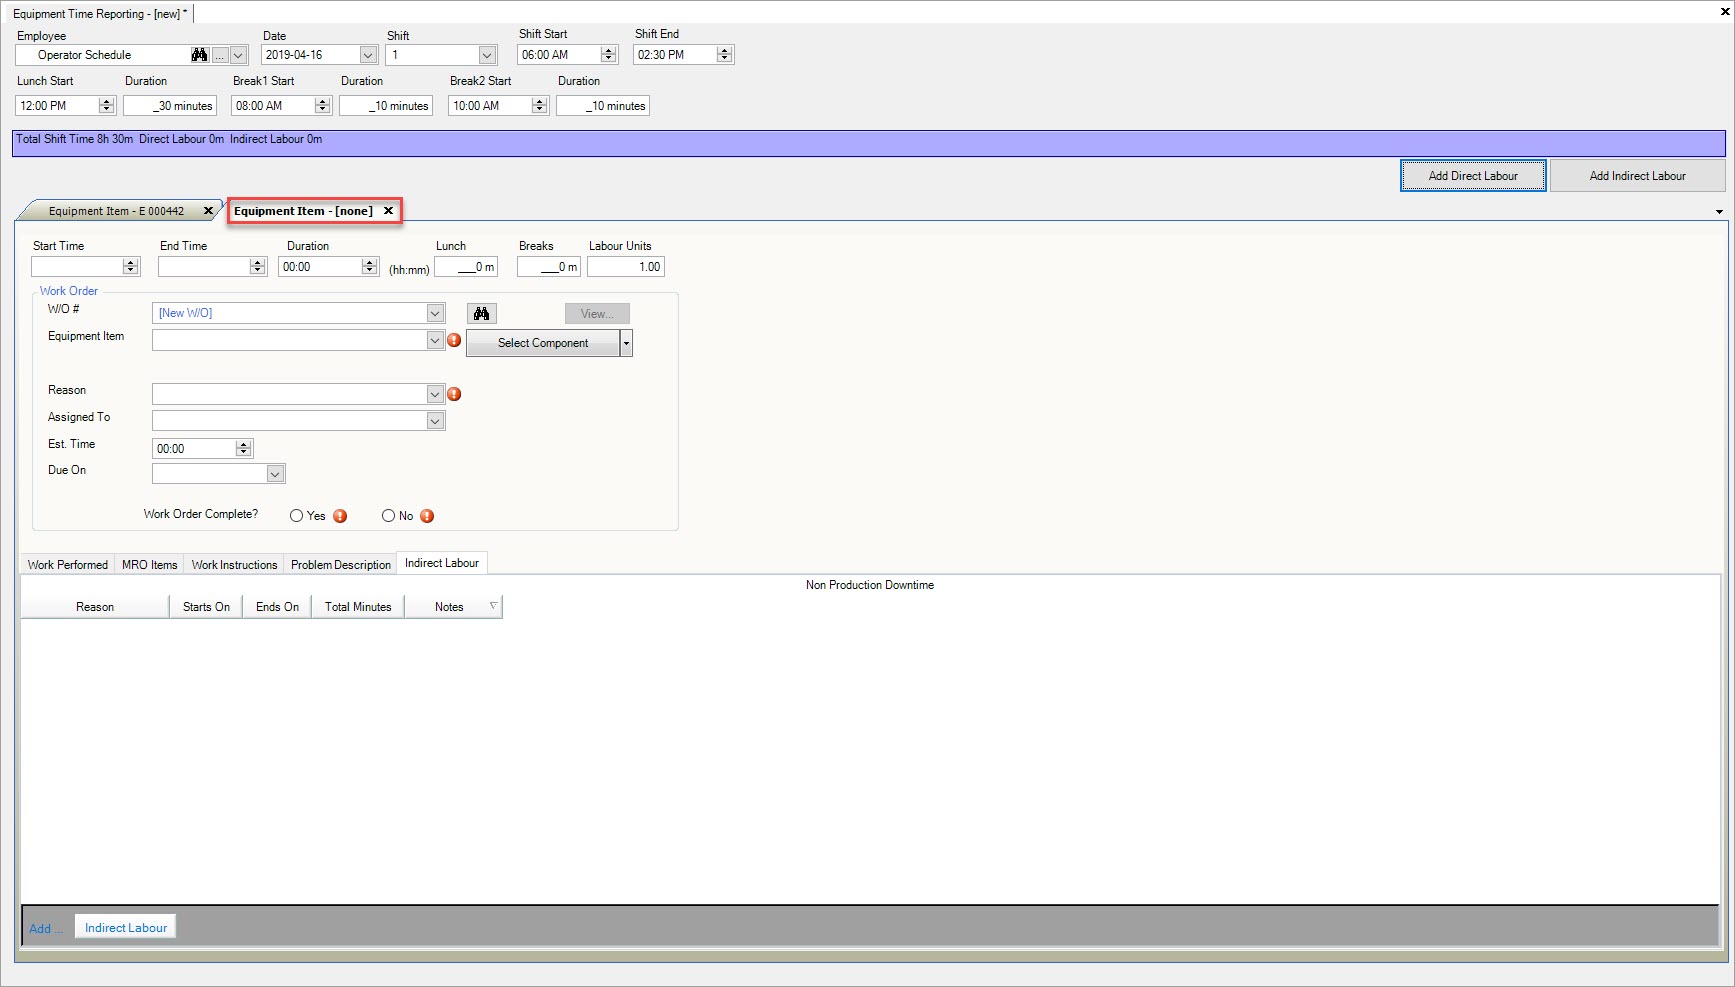
Users must complete the necessary fields. Please see the above section called Completing the Equipment Item Tab for more detailed steps on how to complete the tab.
Once the necessary information has been entered, make sure to save before exiting the screen.
Deleting Direct Labour
To delete Direct Labour from an Equipment Timecard, simply click on the  located in the right corner of the Direct Labour (Equipment Item Tab) that you wish to
delete.
The selected Direct Labour will be deleted from the Equipment Timecard.
Make sure to save your changes before exiting the screen.
Note
The Equipment Timecard screen will remain open after it has been saved so users are able to add, edit, or delete other fields.
Indirect Labour
Users have the ability to add Indirect Labour to an Equipment Timecard that is not necessarily related to the Equipment Item but was completed during the shift duration.
Adding Indirect Labour
To add Indirect Labour to an Equipment Timecard, click on the  button.
A new Indirect Labour tab will appear on the Equipment Timecard.
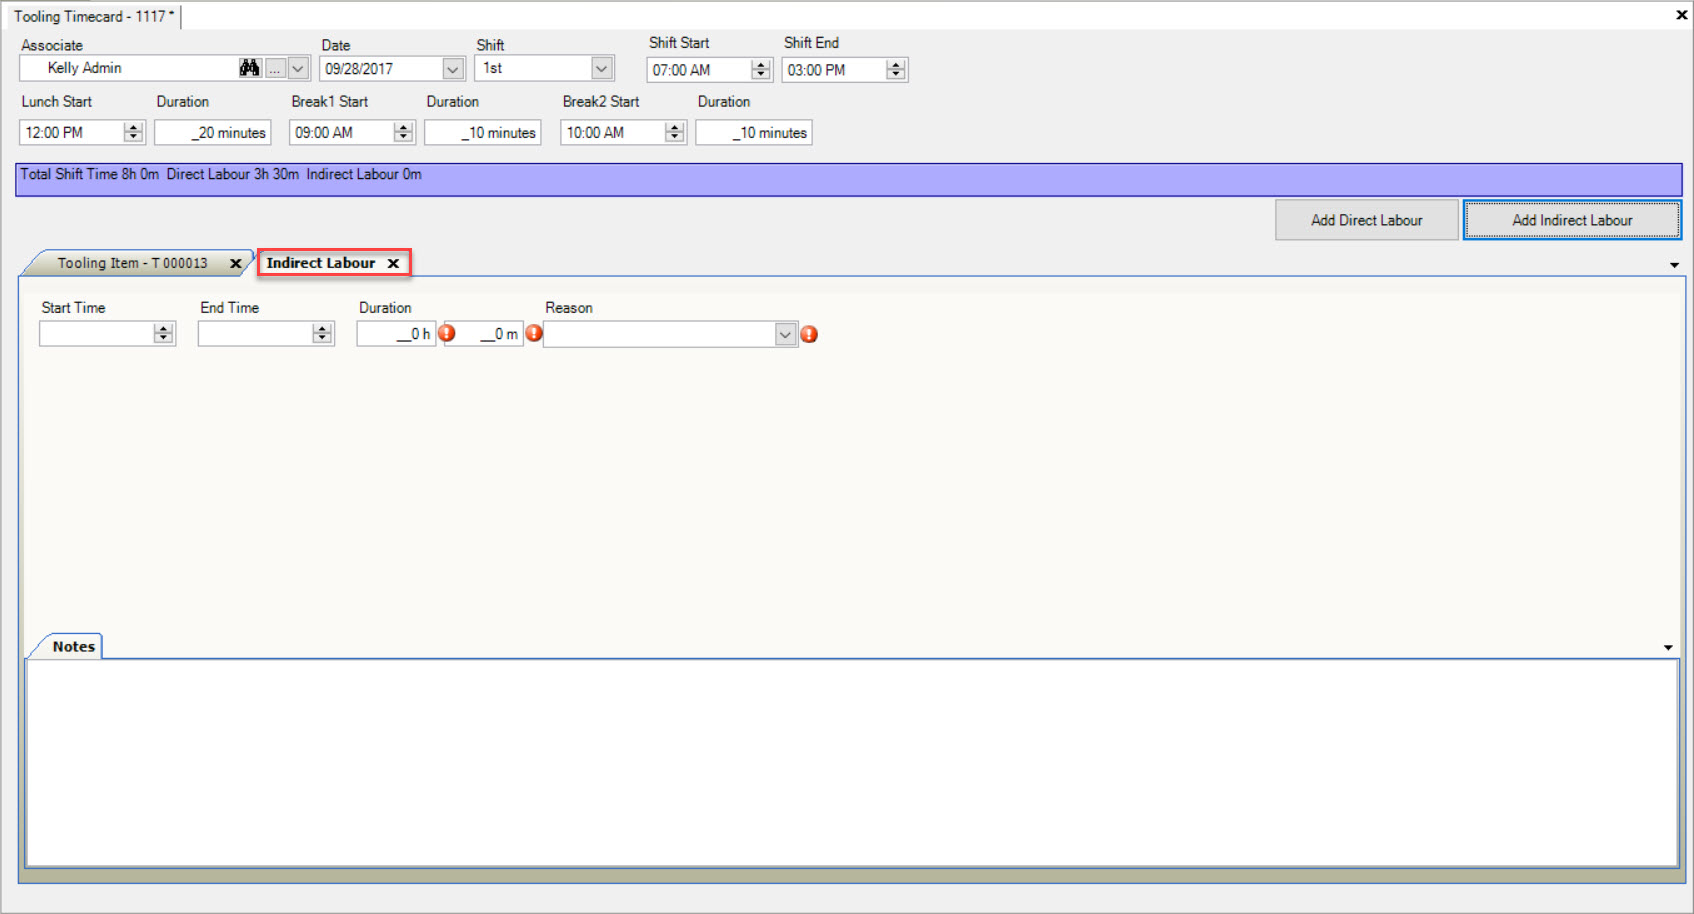
Users can either enter in a Start Time and End Time, OR a Duration using hours and minutes. Next, users must select a Reason using the available drop-down menu and enter in any necessary Notes.
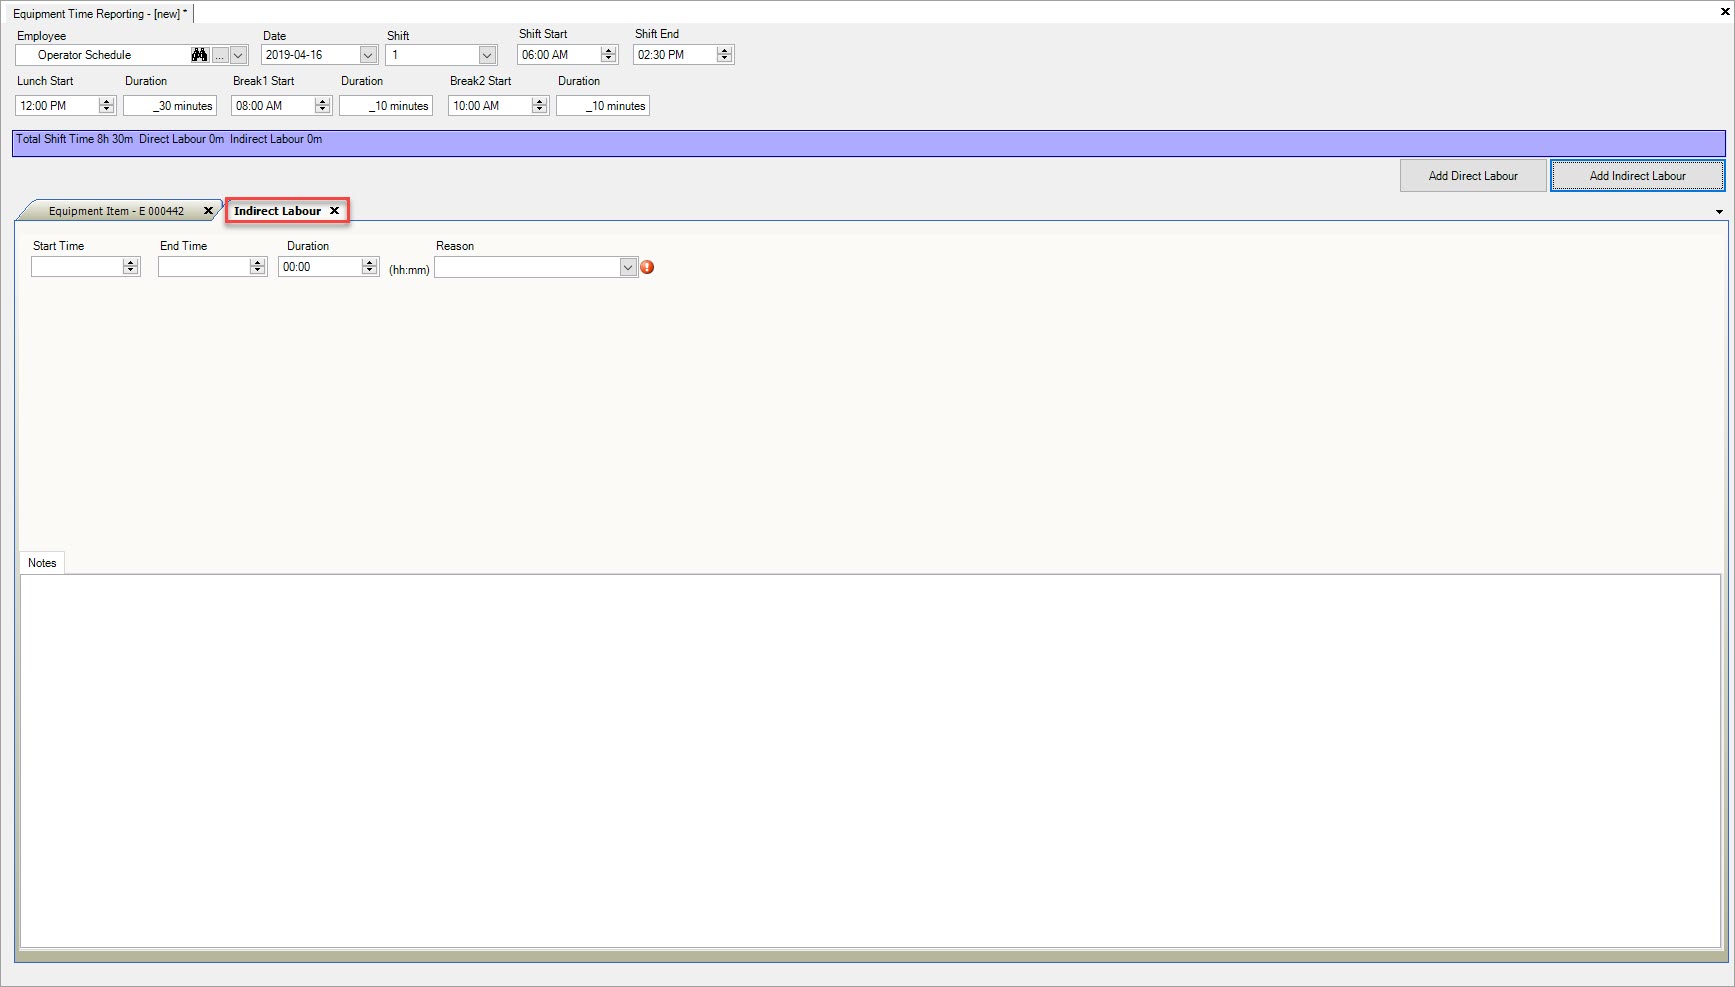
Once the necessary information has been entered, make sure to save before exiting the screen.
Deleting Indirect Labour
To delete Indirect Labour from an Equipment Timecard, simply click on the  button of the Indirect Labour you wish to delete.
The selected Indirect Labour will be deleted from the Equipment Timecard immediately.
Make sure to save your changes before exiting the screen.
Deleting an Equipment Timecard
To delete an Equipment Timecard directly from the Equipment Timecard screen, click on the  button located at the top of the screen.
A window will appear for users to confirm the deletion of the selected Equipment Timecard. Select Yes to confirm.
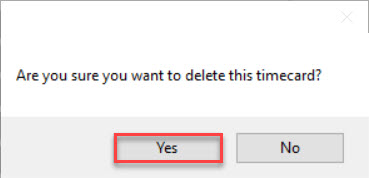
The selected Equipment Timecard and any associated Work Orders will be deleted from the system.