Equipment Items
To view Tooling Items in the system, navigate to the  tab and click on the
 ![]() icon.
The Tooling Items lookup screen will be displayed.
icon.
The Tooling Items lookup screen will be displayed.

All available Tooling Items in the system will be displayed.
To open an existing Tooling Item, simply locate and double-click on the appropriate row.
The Tooling Item detail screen will be displayed.

Adding New Equipment
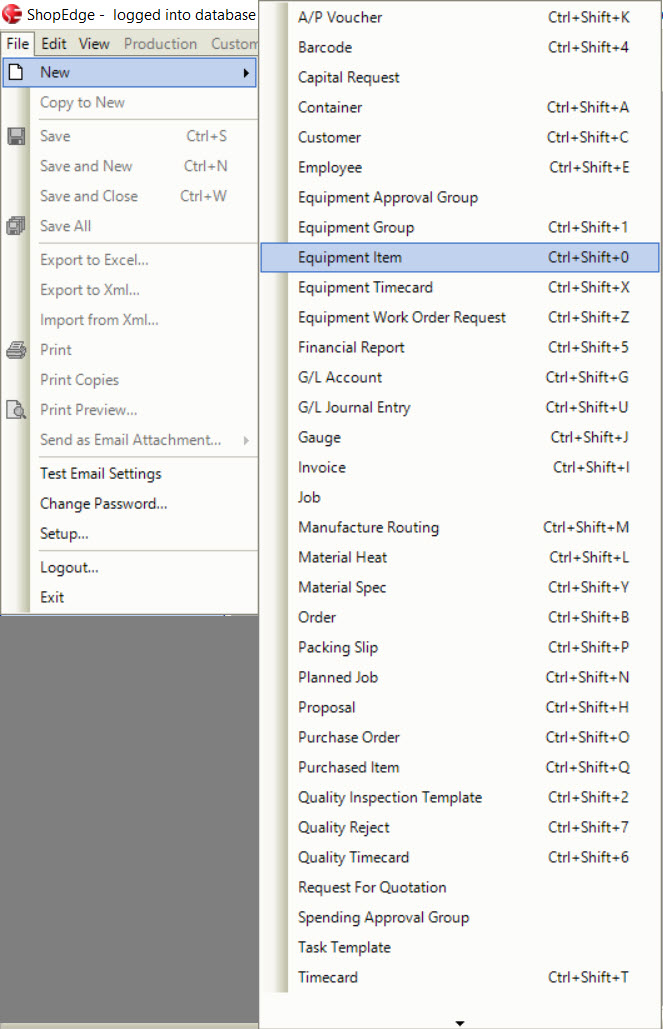
When you add a workcenter to the ShopEdge system, it is automatically added to the Equipment module. If you wish to add a new piece of equipment, you can do so by navigating to File > New > Equipment Item.
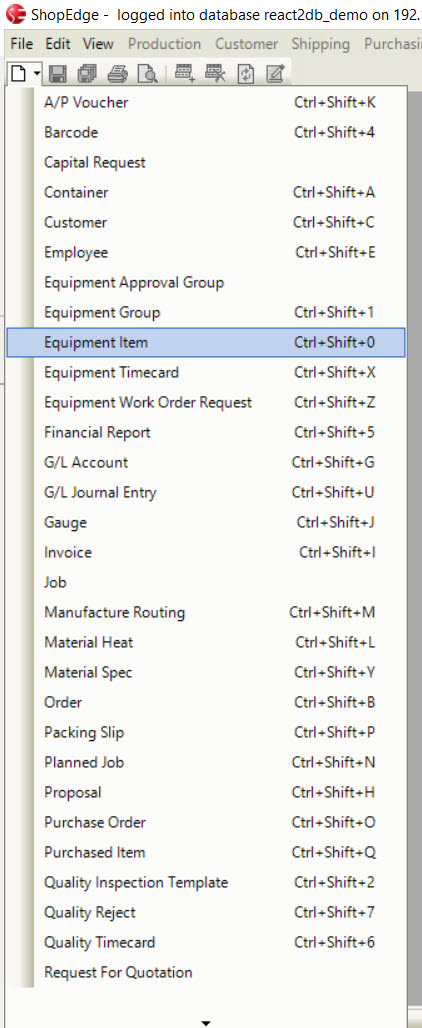
You can also click on the  button, and select the “Equipment Item” option.
Both of these options will open a “New Equipment Screen”.
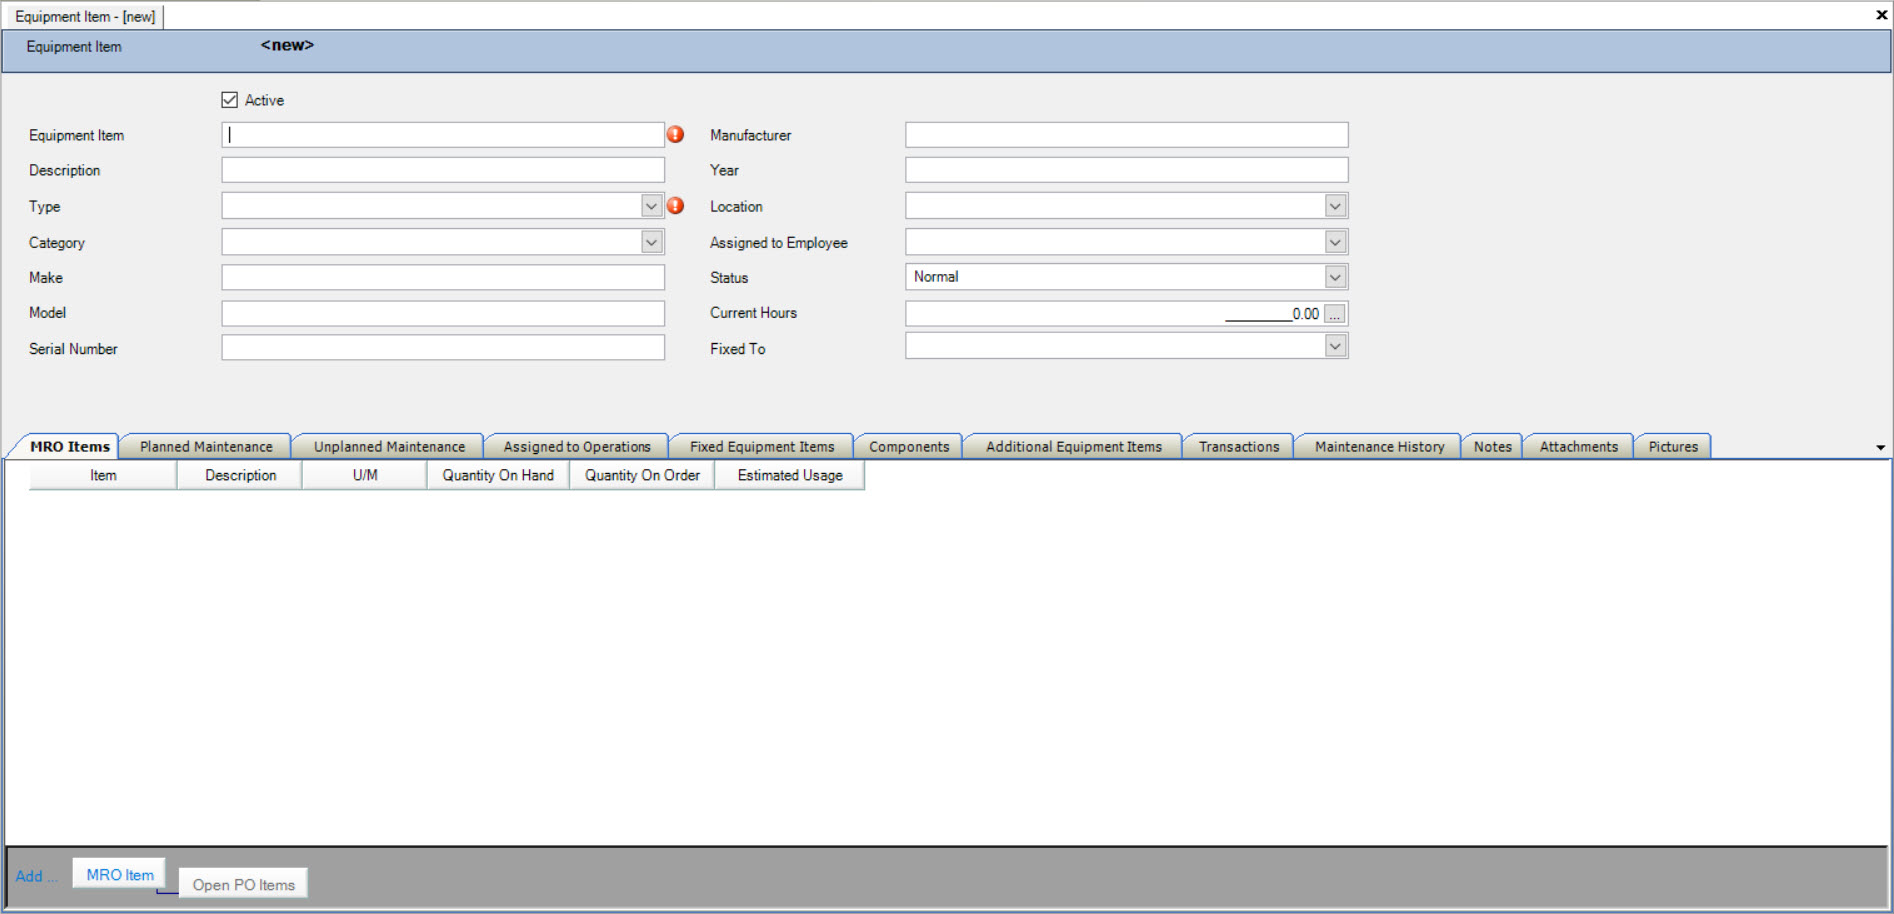
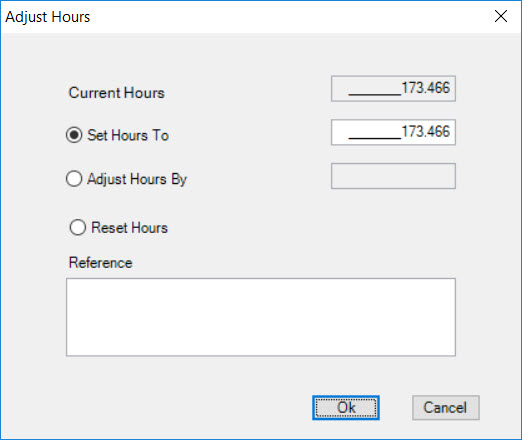
Fill out the appropriate header information, including the “Current Hours”. You can set the current hours by clicking on the button beside the text box to bring up the “Adjust Hours” screen.
Once the header information is completed, you can save the new equipment item, or fill out the tabs at the bottom of the screen.
MRO Items
MRO Items allows you to attach certain purchased items to a piece of equipment. Any item that you associate with a piece of equipment will show on the MRO screen for purchasing (under MRO items), and will also show on the timecard entry where you can keep track on what was used.
To add a new MRO item, make sure the  tab is selected, and click on the
  button at the bottom of the screen.
This will open the “Item Lookup Screen” where you can search for an MRO item to add to the MRO tab.
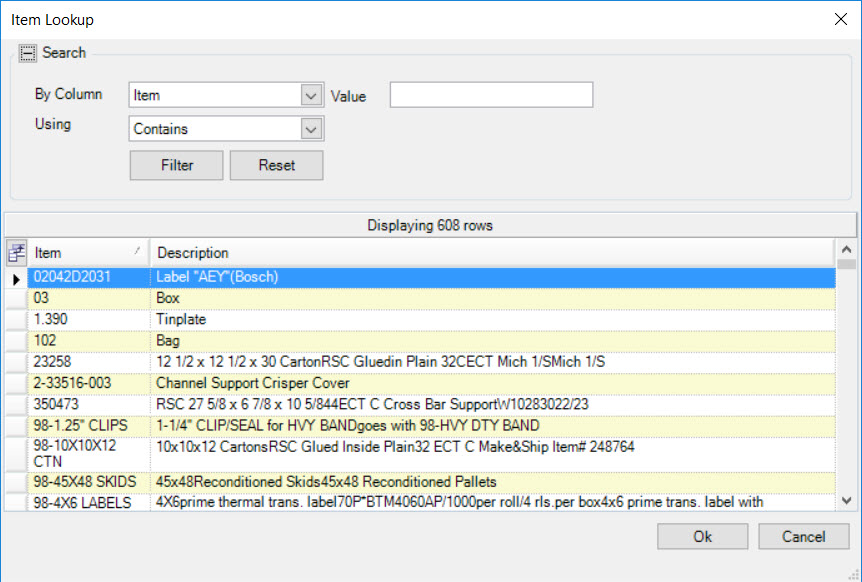
Add as many MRO items to the equipment that are necessary, and save your changes.
Note
***Once you add a purchased item to the MRO item section, it becomes an MRO item assigned to the piece of equipment. You will be able to view all assigned MRO items by navigating to the  icon.***
Planned Maintenance
Planned Maintenance allows you to schedule maintenance for a piece of equipment in the system. To add Planned Maintenance, make sure the  tab is selected, and click on the
  button at the bottom of the screen.
This will open the “Planned Maintenance Screen” where you can define a new planned maintenance to the equipment.
Note
***Before Planned Maintenance can be added, you have to select a “Type” of Equipment Item as the Planned Maintenance “Reason” is filtered by “Type”.***
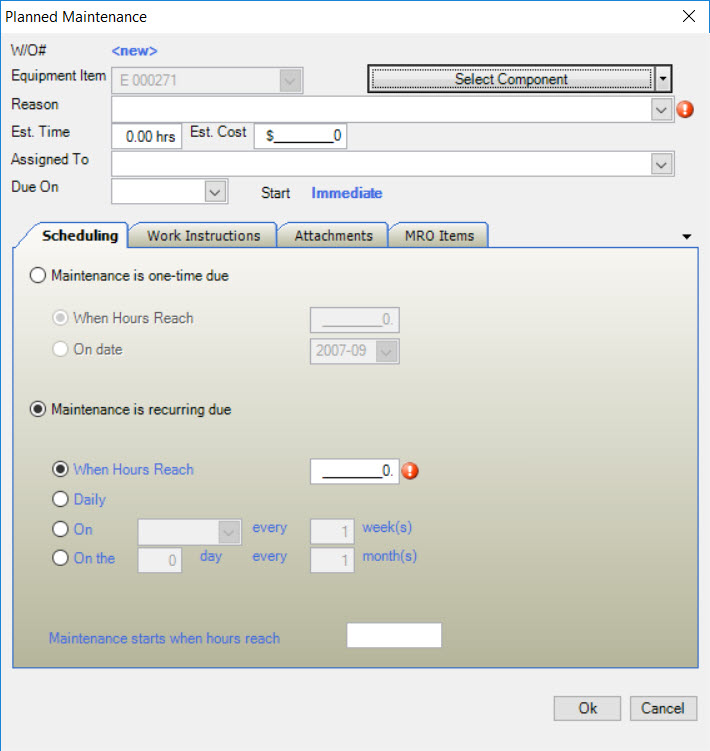
Fill out the Planned Maintenance including the header information and type of planned maintenance (recurring or one-time), as well as adding any notes or attachments before clicking on the  button to add the preventative maintenance to the equipment item.
Note
***You have the ability to add Planned Maintenance for each Component in the system including all sibling and children, or the whole component. And equipment requests can be made against a component at the work center level.***
Unplanned Maintenance
Unplanned Maintenance allows an employee to create a work order for unscheduled maintenance that may be necessary for a piece of equipment in the system. Once the work order is created, timecards can be recorded against it in order to track time and MRO items.
You can create an “Unplanned Maintenance” entry on an equipment screen, or at the operator level on the Operator Schedule screen. Once the unplanned maintenance request is added at the operator level, it will be able to be viewed once it is managed and a work order is created.
To add Unplanned Maintenance, make sure the  tab is selected, and click on the
  button at the bottom of the screen.
This will open the “UnPlanned Maintenance Screen” where you can define a new unplanned maintenance or work order related to the equipment.
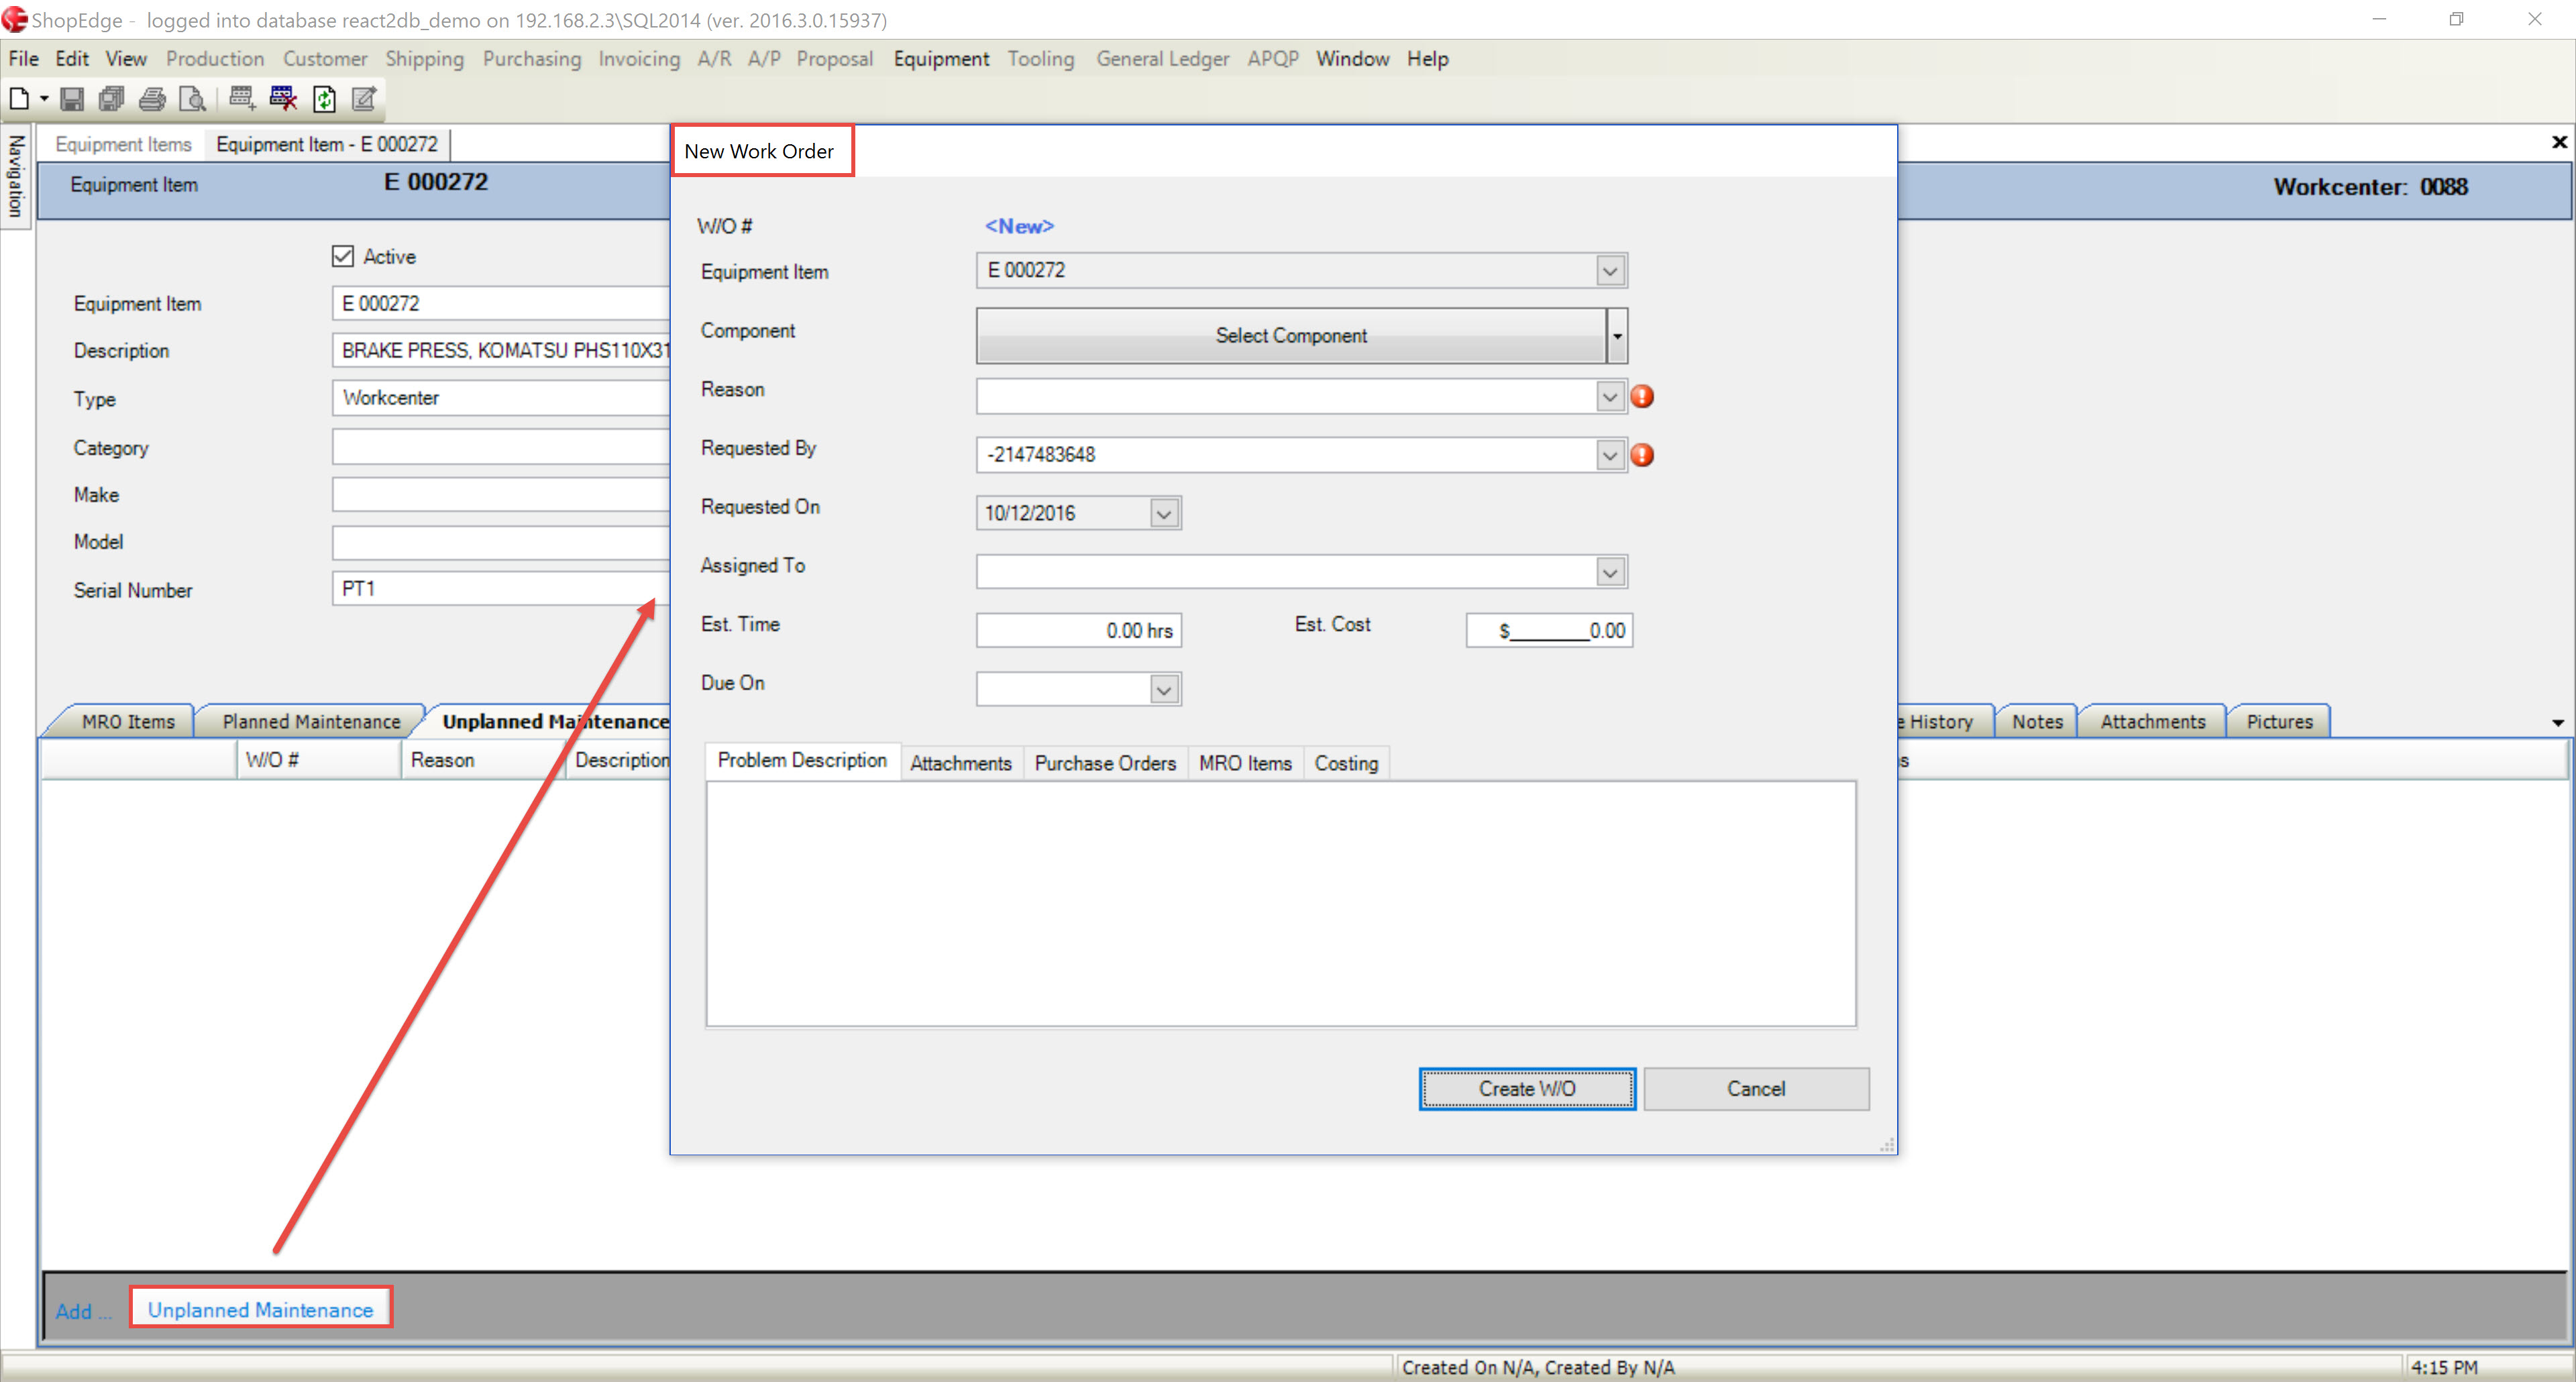
Fill out the Unplanned Maintenance screen including the header information and notes, before clicking on the  button to add the unplanned maintenance to the equipment item.
You can maintain the work order or unplanned maintenance directly on the screen by double clicking on the row to open and modify the order, or closing the work order.
Note
***You have the ability to add Unplanned Maintenance for each Component in the system including all sibling and children, or the whole component. And equipment requests can be made against a component at the work center level.***
Fixed Equipment Item
A Fixed Equipment Item allows you to add individual items to an equipment item that you may want to track separate maintenance for. For example, a decoiler may be part of a press, and you may wish to track production and maintenance for it separately in the system every time it is used.
To add a Fixed Equipment item, make sure the  tab is selected, and click on the
  button at the bottom of the screen.
This will open the a lookup screen where you are able to search and select a new fixed equipment item.
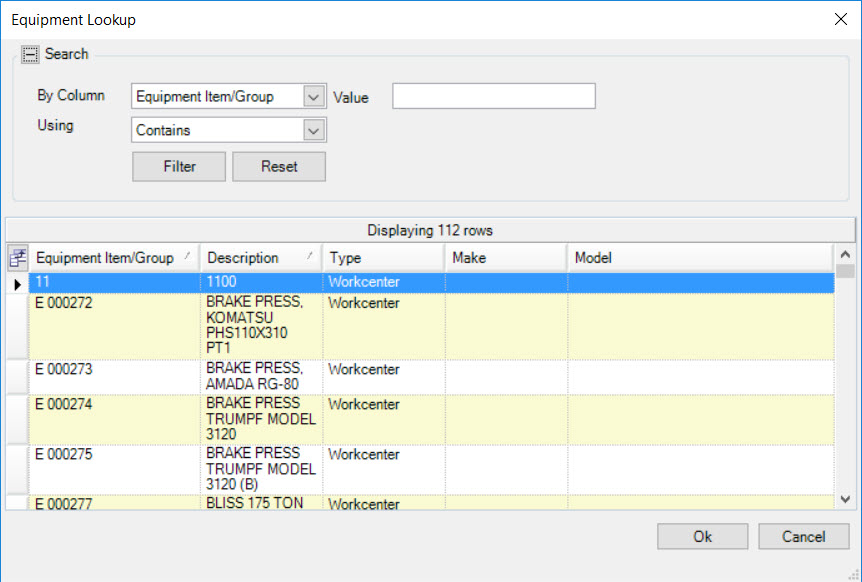
Find the item you wish to add and select the  button to add it to the screen. Save your changes.
Components
The Components section allows you to add various parts of a piece of equipment to the system, and arrange them in a parent/child relationship. Components are different than other equipment in that they are fixed items, and a way to organized parts of a piece of equipment.
To add a parent component, make sure the  tab is selected, and click on the
  button at the bottom of the screen.
This will add a new line, where you can type the component identifier in the text box provided.
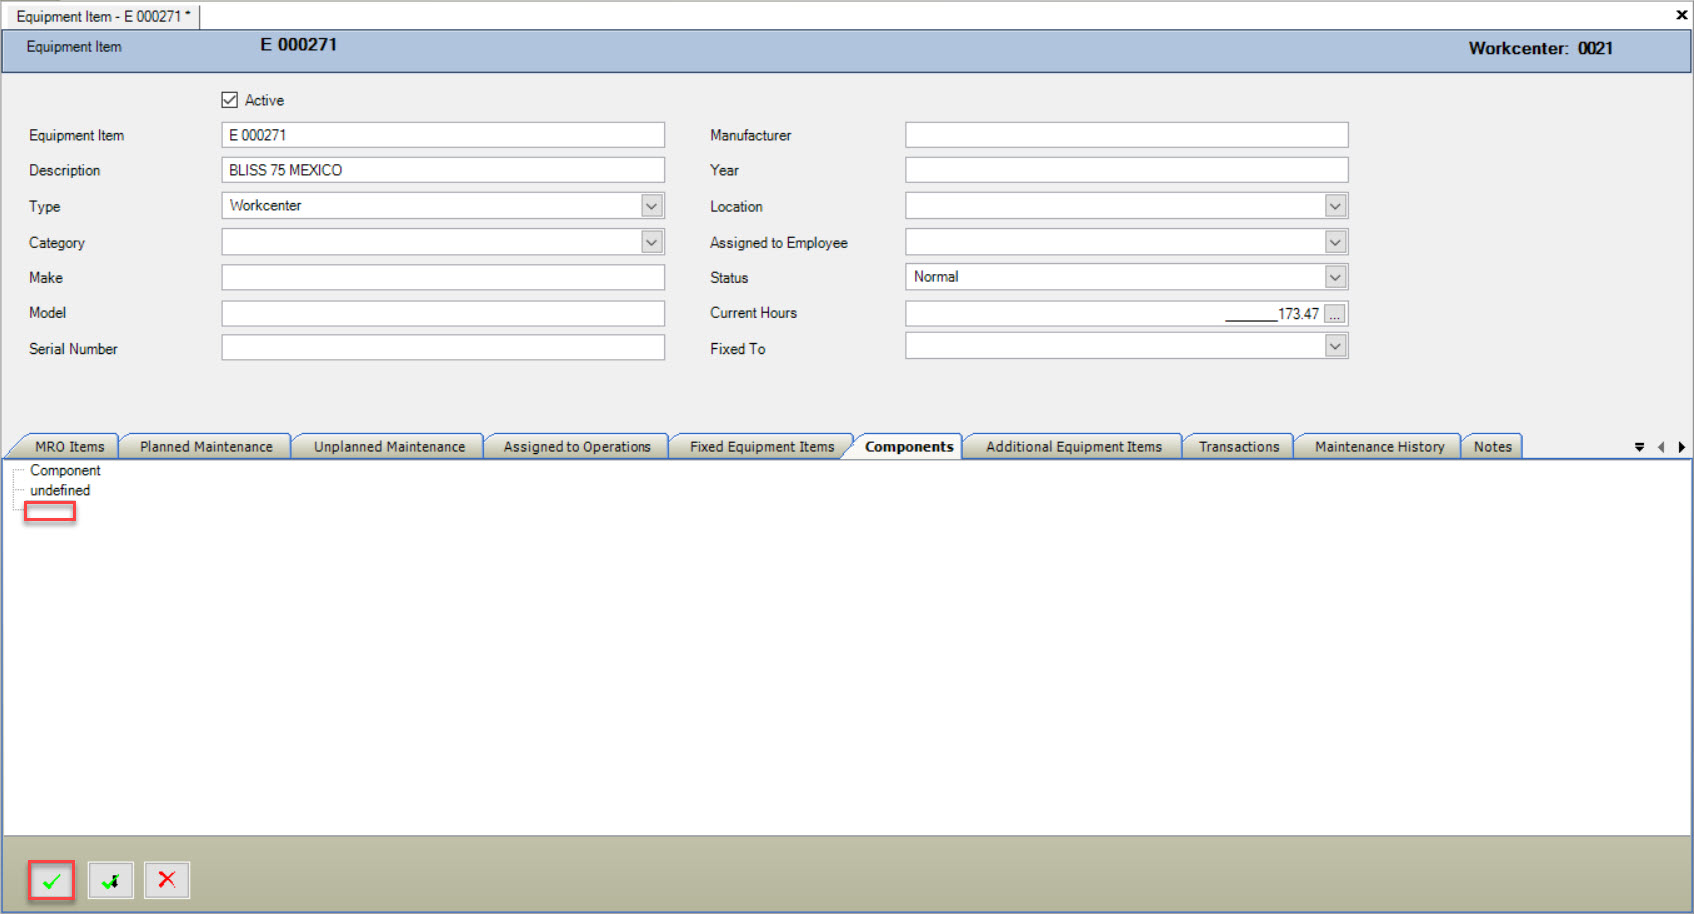
To add a child component, make sure the parent component is highlighted, and click on the  button. Type in the child component identifier in the text box provided.
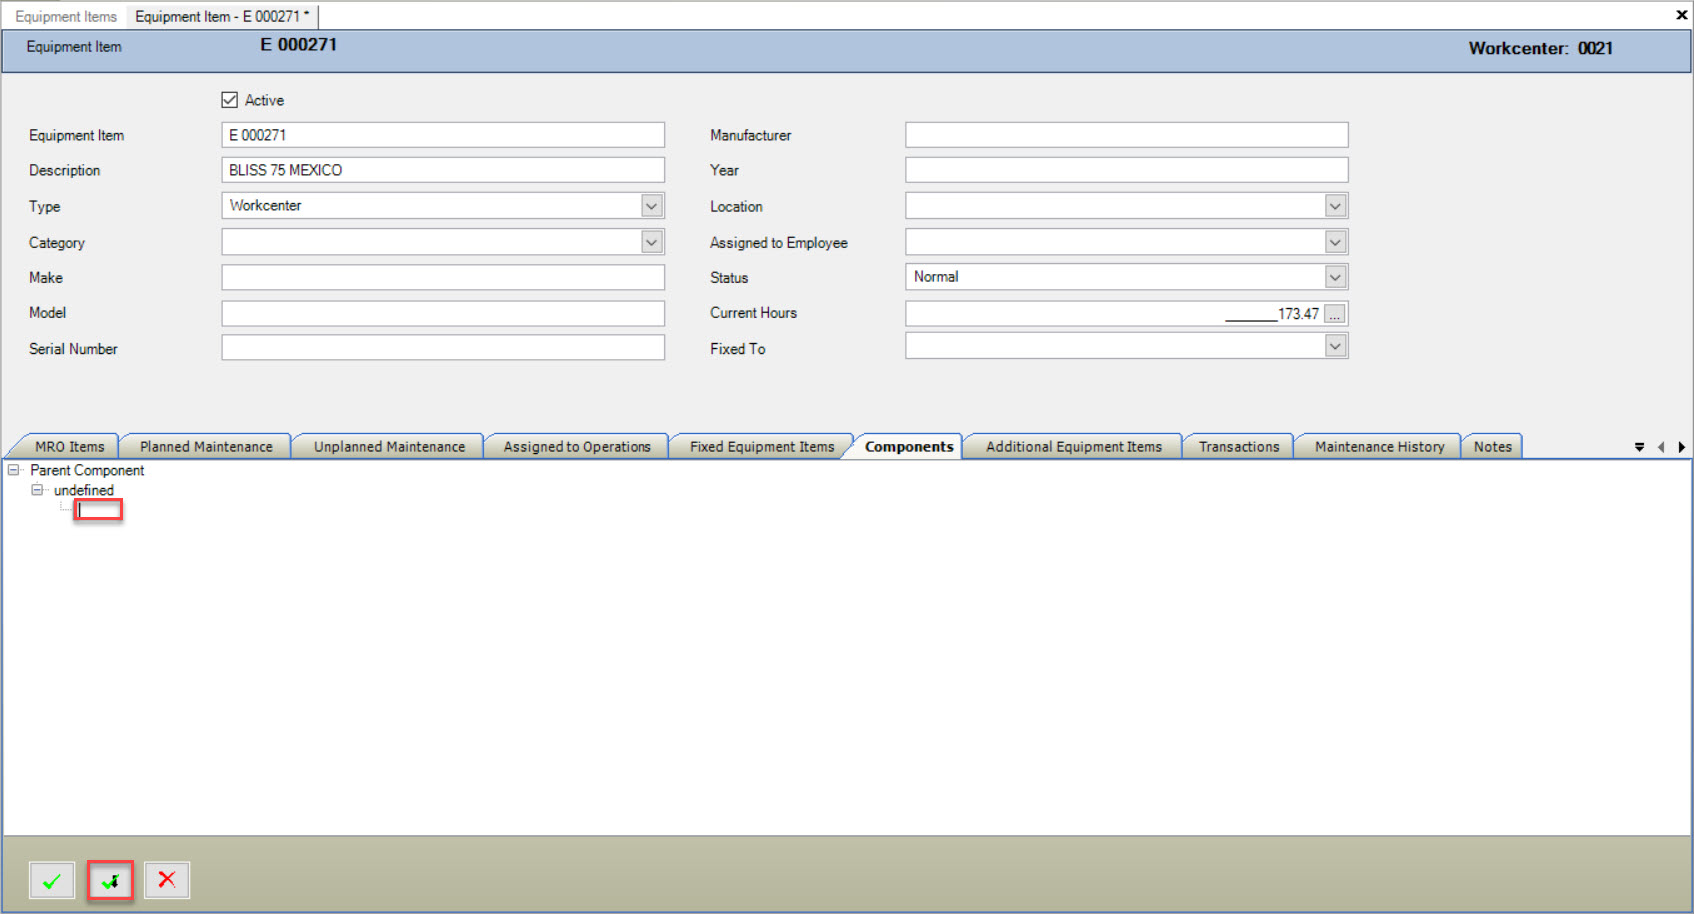
To delete a line, highlight the component and click on the 
Make sure to save your changes before exiting the screen.
Note
***You have the ability to add Planned Maintenance for each Component in the system including all sibling and children, or the whole component. And equipment requests can be made against a component at the work center level.***
Additional Equipment Items
Additional Equipment Items are items any other items in the system that may be used in equipment. These items are not part of the equipment, and may only be used time to time by operators. The operator can select this equipment or equipment group before running a job.
To add an Additional Equipment item, make sure the  tab is selected, and click on the
  button at the bottom of the screen.
This will open the a lookup screen where you are able to search and select an additional equipment item.
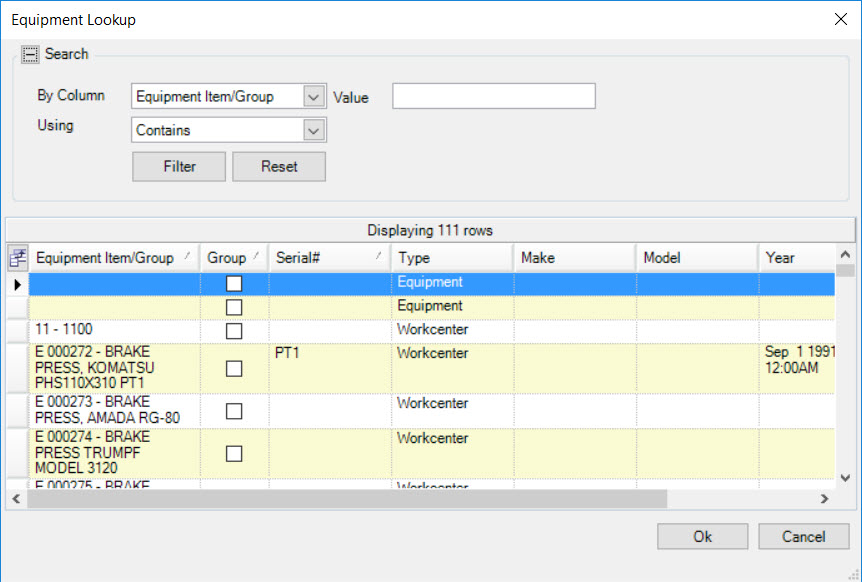
Find the item you wish to add and select the  button to add it to the screen. Save your changes.
Transactions
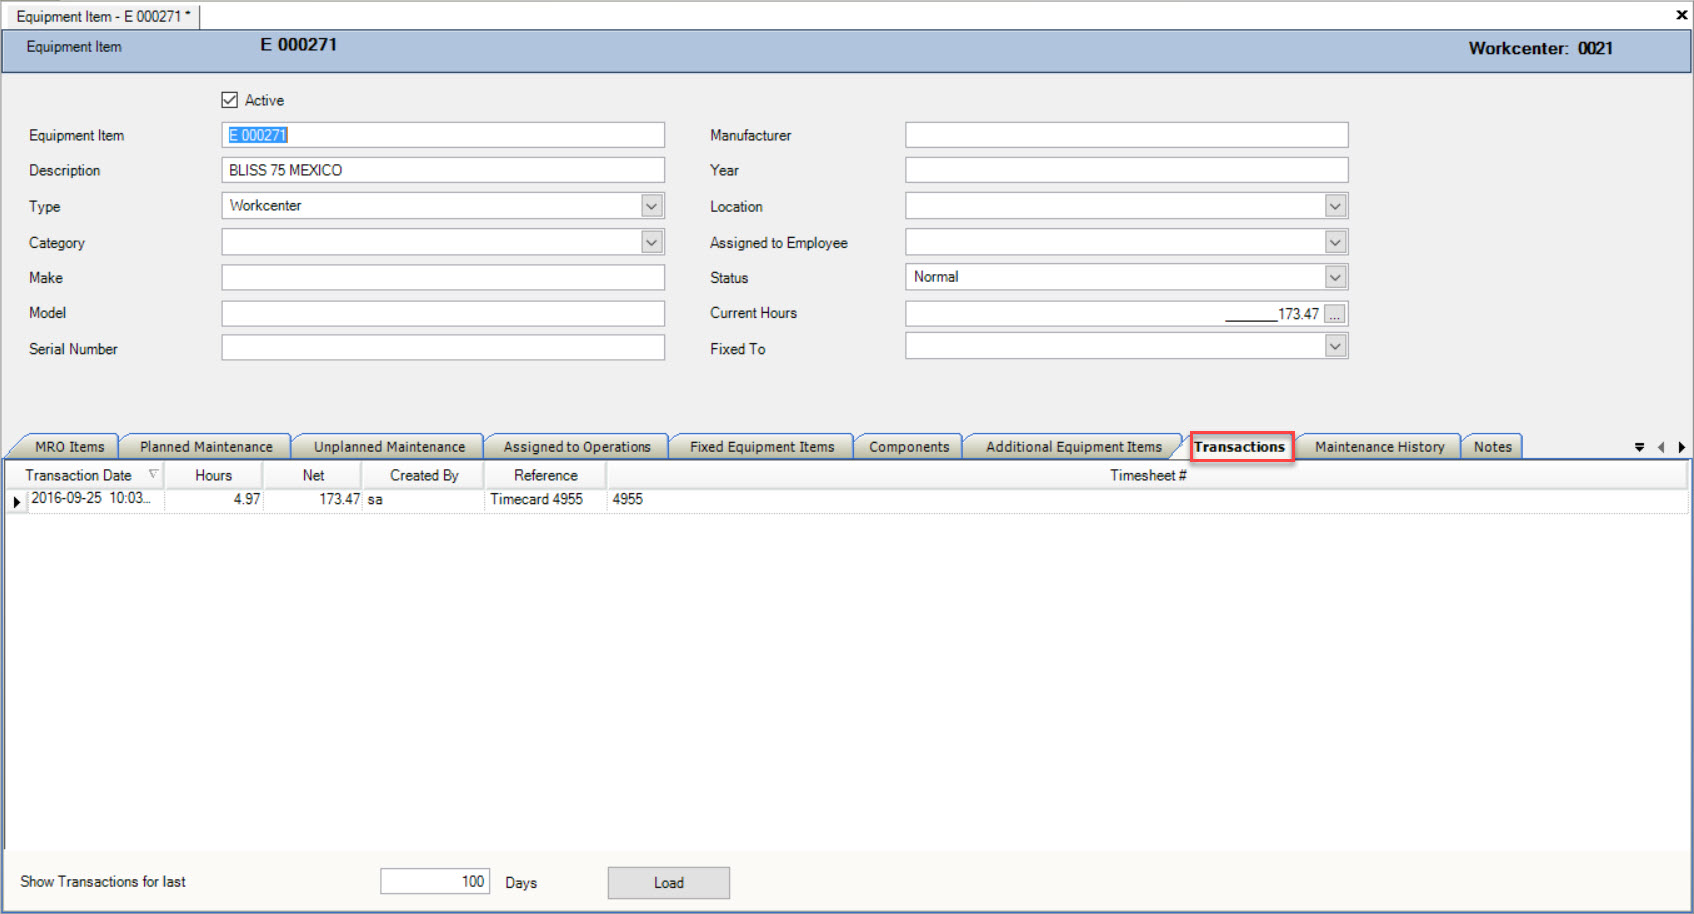
Transactions for an equipment item are recorded in the system at the time of production and viewed under the  tab. The system tracks all transactions related to the selected item that take place in production, and you have the option to
view transactions for a user-defined amount of time (i.e. for 30 days, 60 days, 100 days, etc.).
Adding a New Equipment Group
Equipment Groups are created in ShopEdge in order to group like pieces of equipment together. If you wish to add a new equipment group, you can do so by navigating to File > New > Equipment Group.
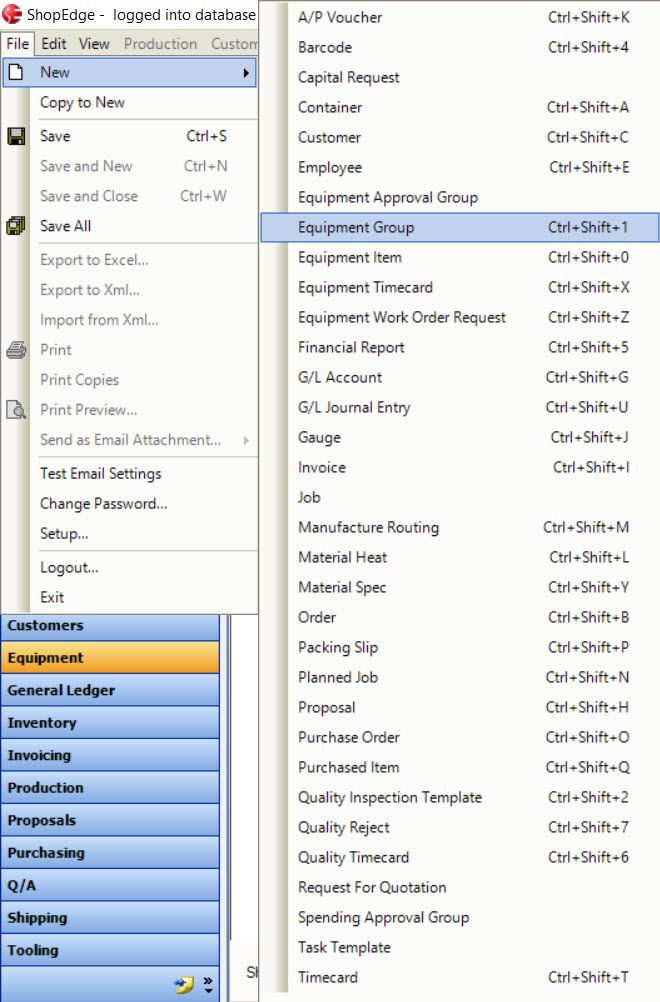
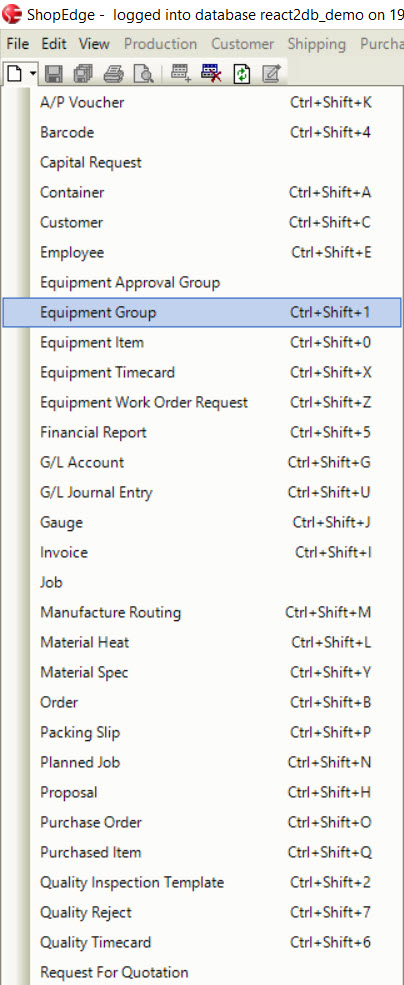
You can also click on the  button, and select the “Equipment Group” option.
Both of these options will open a “New Equipment Group Screen”.
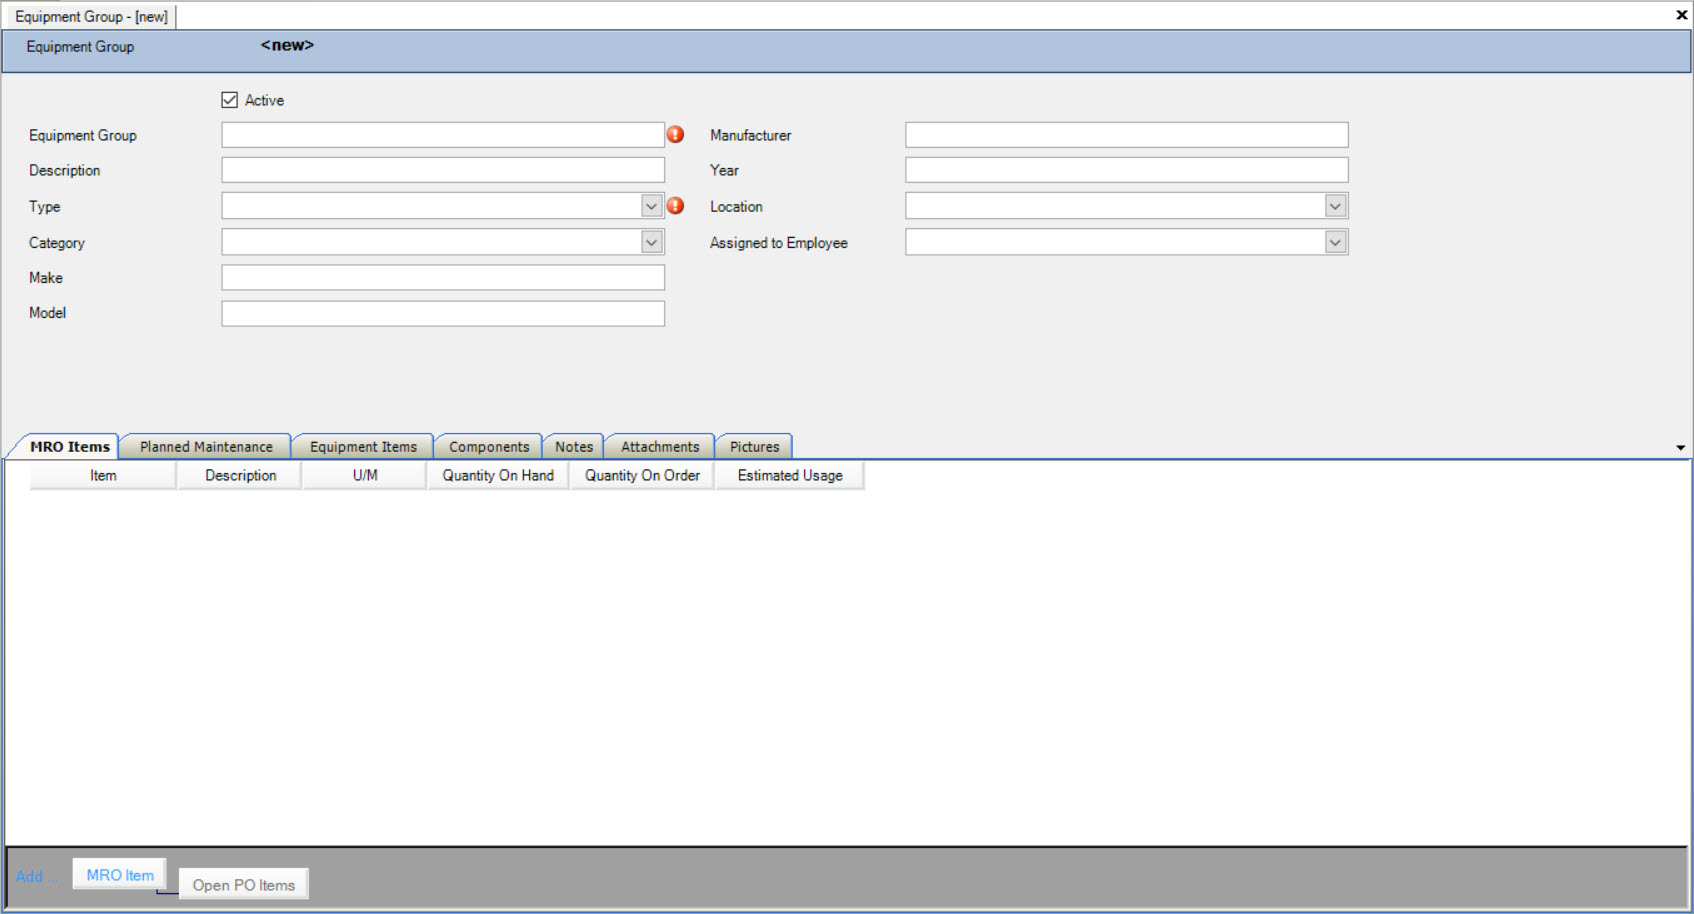
Fill out the appropriate header information. Once the header information is completed, you can save the new equipment item, or fill out the tabs at the bottom of the screen.
MRO Items
MRO Items allows you to attach certain purchased items to the equipment group. Any item that you associate with a piece of equipment will show on the MRO screen for purchasing (under MRO items),
and will also show on the timecard entry where you can keep track on what was used.To add a new MRO item, make sure the  tab is selected, and click on the
  button at the bottom of the screen.
This will open the “Purchased Item Lookup Screen” where you can search for an MRO item to add to the MRO tab.
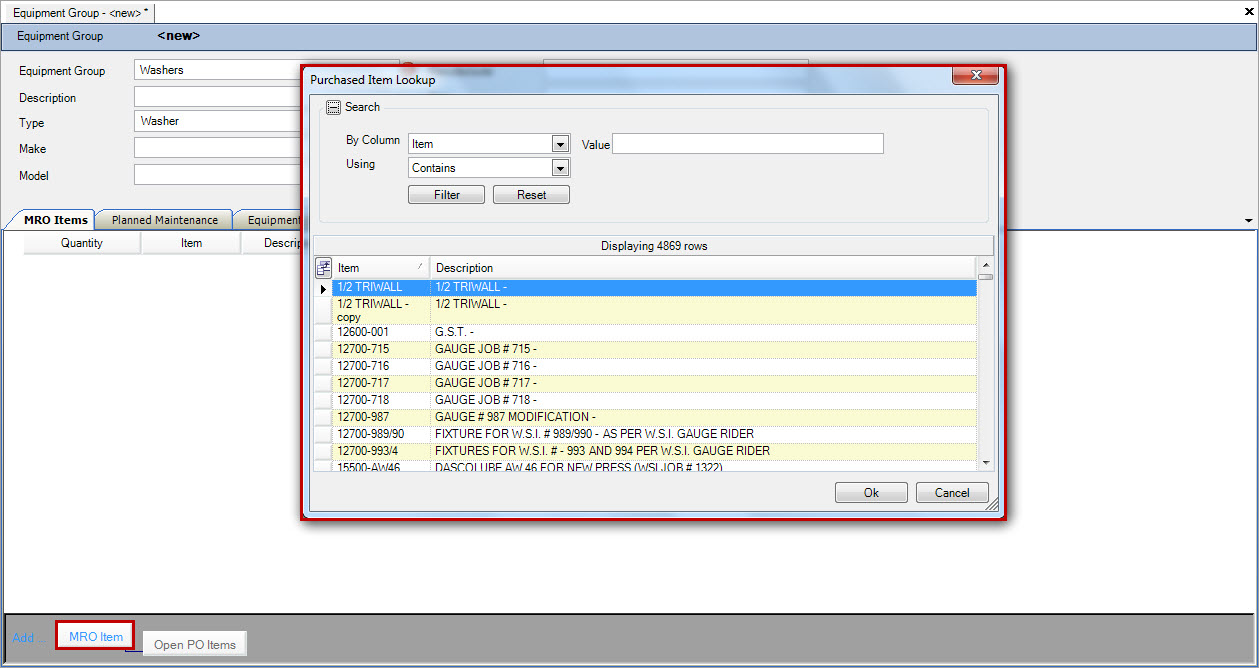
Add as many MRO items to the equipment that are necessary, and save your changes.
Note
***Once you add a purchased item to the MRO Item section, it becomes an MRO item assigned to the equipment group. You will be able to view all assigned MRO items by navigating to the  icon.***
Planned Maintenance
Planned Maintenance allows you to schedule maintenance for an equipment group in the system. To add Planned Maintenance, make sure the  tab is selected, and click on the
  button at the bottom of the screen.
This will open the “Planned Maintenance Screen” where you can define a new planned maintenance to the equipment.
Note
***Before Planned Maintenance can be added, you have to select a “Type” of Equipment Item as the Planned Maintenance “Reason” is filtered by “Type”.***
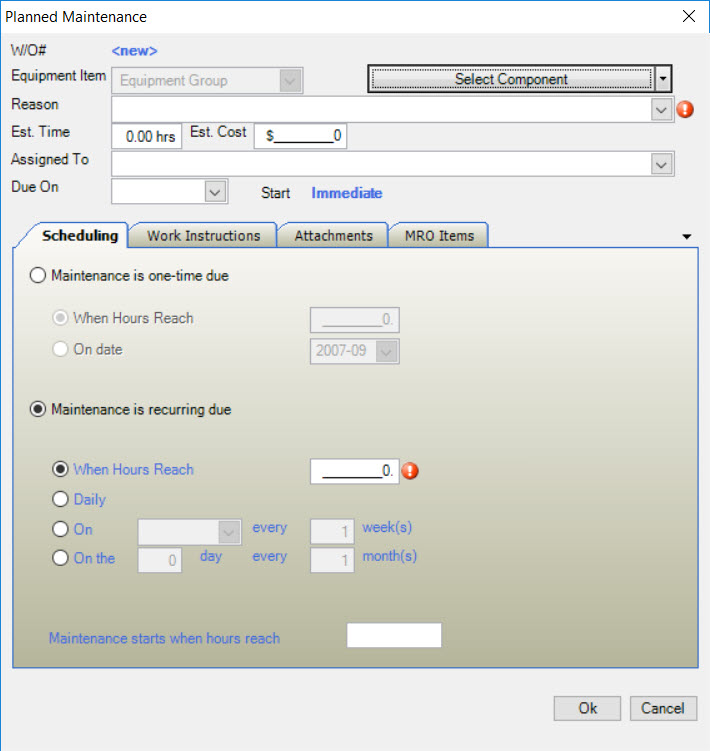
Fill out the Planned Maintenance including the header information and type of planned maintenance (recurring or one-time), as well as adding any notes or attachments before clicking on the  button to add the planned maintenance to the equipment group.
Note
***If wish to have different Planned Maintenance scheduled for individual items in a group, you must add the items to the Equipment Items tab, and then add the Planned Maintenance for individual items.***
Note
***You have the ability to add Planned Maintenance for each Component in the system including all sibling and children, or the whole component.***
Equipment Items
Equipment Items allows you to add all individual items that make up an equipment group. For example, you may have a group of washers in an equipment group, but each washer has a separate barcode and you want to track separate maintenance for each individual washer. The system will track production information and
therefore maintenance information for each item in a group every time it is used.
To add an Equipment Item, make sure the  tab is selected, and click on the
  button at the bottom of the screen.
This will add a new line item to the tab. You can enter in the item manually, or if the items are in the system and match the header information, you can click on the lookup button to open a lookup screen where you are able to search and select an existing equipment item.
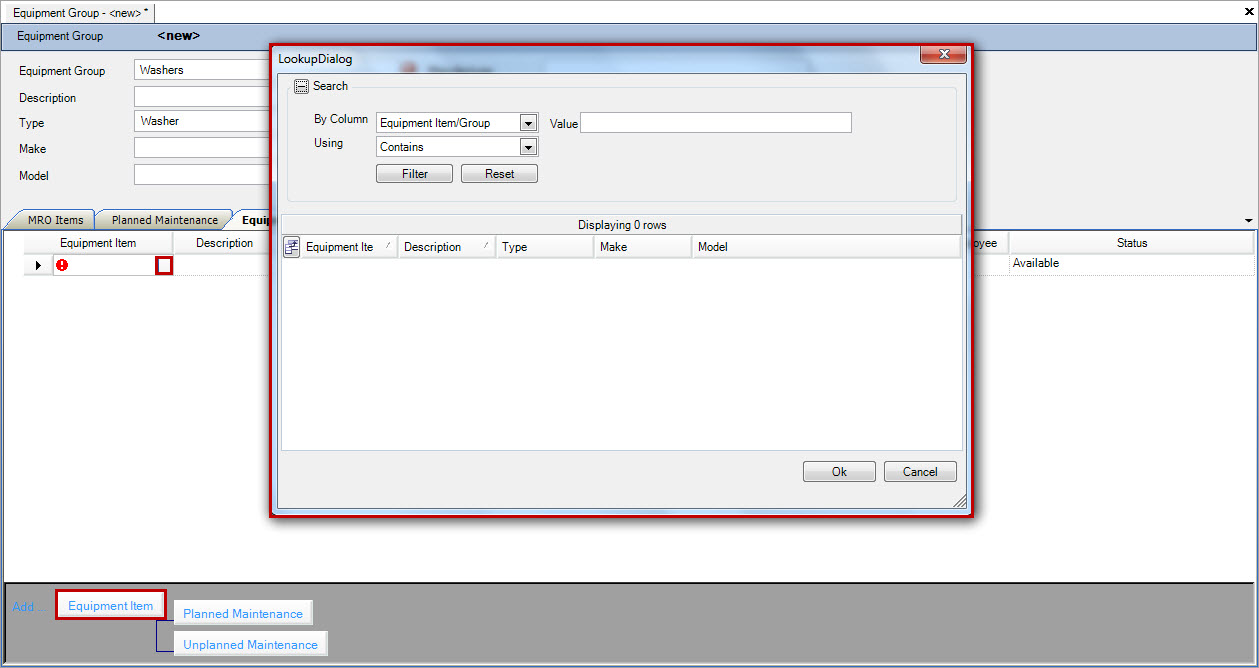
Find the item you wish to add and select the  button to add it to the screen, or type the information in each of the spaces provided. Save your changes.
Note
***Once you add an equipment item to a group, it can also be viewed by navigating to the  icon. You can also view unplanned maintenance and open work orders for the item this way.***
Adding Planned Maintenance to an Equipment Item in a Group
Once you add an Equipment Item to a group, you can add Planned Maintenance to the item. Make sure the  tab is selected, and select the item you wish to add planned maintenance to by highlighting the row.
Click on the
  button at the bottom of the screen. This will open the Planned Maintenance window.
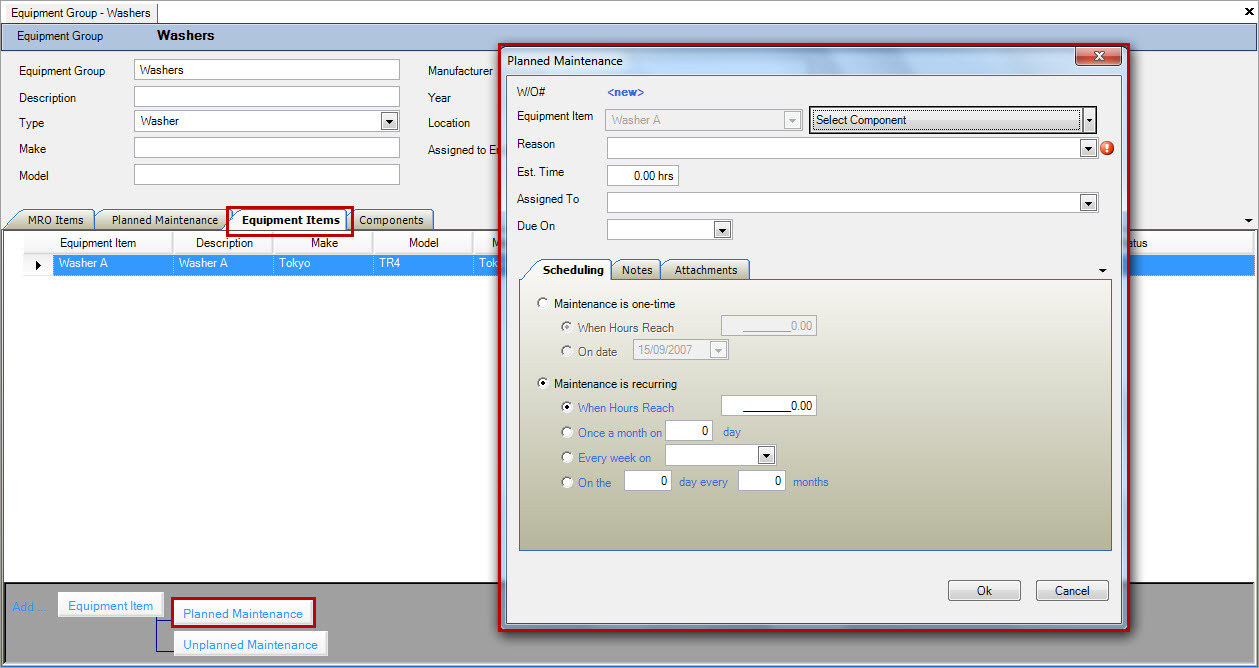
Fill out the Planned Maintenance including the header information and type of planned maintenance (recurring or one-time), as well as adding any notes or attachments before clicking on the  button to add the planned maintenance to the equipment item.
Adding Unplanned Maintenance to an Equipment Item in a Group
Once you add an Equipment Item to a group, you can add Unplanned Maintenance to the item. Unplanned Maintenance allows an employee to create a work order for unscheduled maintenance that may be necessary for a piece of equipment in the system. Once the work order is created, timecards can be recorded against it in order to track time and MRO items.
You can create an “Unplanned Maintenance” entry on an equipment group screen, or at the operator level on the Operator Schedule screen. Make sure the  tab is selected, and select the item you wish to add planned maintenance to by highlighting the row.
Click on the
  button at the bottom of the screen. This will open the Unplanned Maintenance window.
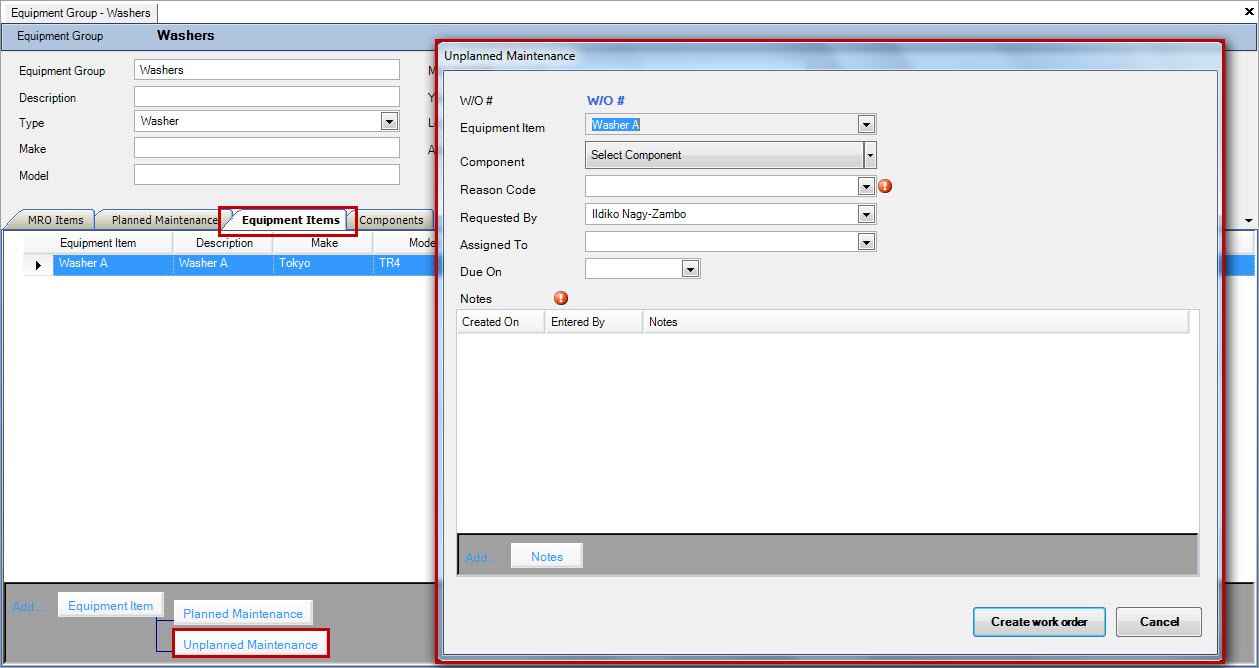
Fill out the Unplanned Maintenance screen including the header information and notes, before clicking on the  button to add the unplanned maintenance to the equipment item.
You can maintain the work order or unplanned maintenance directly on the screen by double clicking on the row to open and modify the order, or closing the work order.
Note
***You have the ability to add Planned Maintenance for each Component in the system including all sibling and children, or the whole component.***
Components
The Components section allows you to add various components to an equipment group in the system, and arrange them in a parent/child relationship. Components are different than other equipment in that they are fixed items, and really a way to organized parts of a piece of equipment.
To add a parent component, make sure the  tab is selected, and click on the
  button at the bottom of the screen.
This will add a new line, where you can type the component identifier in the text box provided.
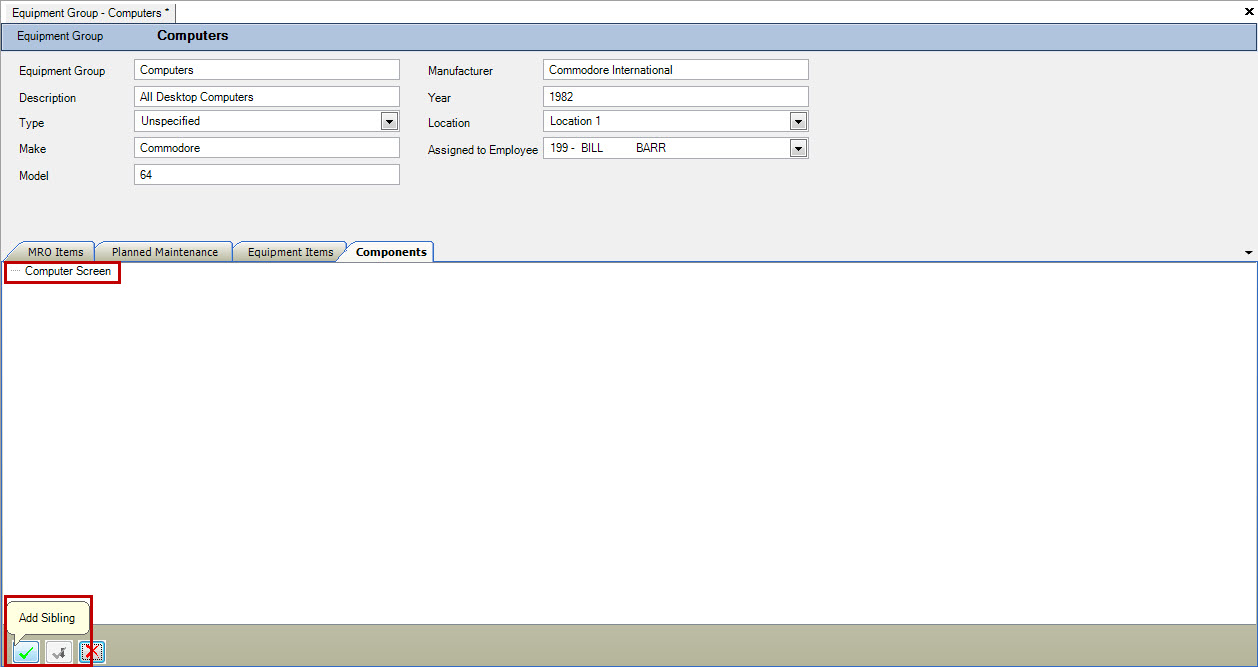
To add a child component, make sure the parent component is highlighted, and click on the  button. Type in the child component identifier in the text box provided.
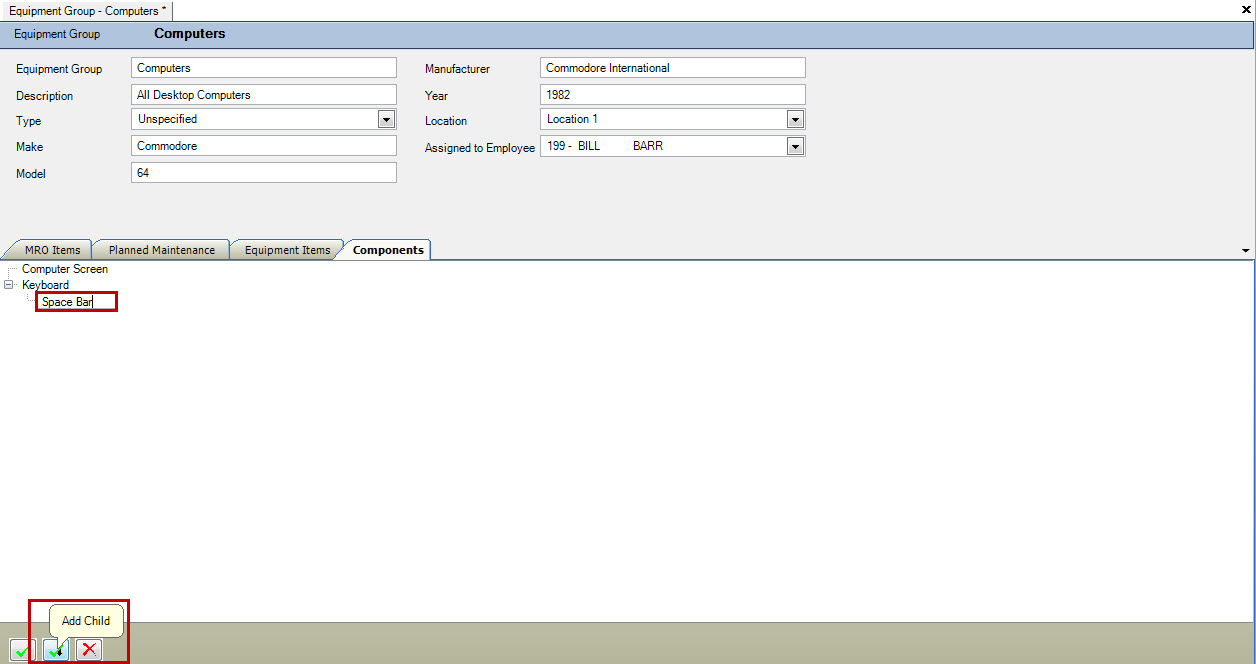
To delete a line, highlight the component and click on the 
Make sure to save your changes before exiting the screen.
Maintaining Equipment
Once equipment is created in the system, users can use the “Equipment Lookup” screen to maintain and make changes to current equipment. To find a piece of equipment, navigate to the |images/equipment.jpg| module, and click on the  icon.
This will open the equipment lookup screen.

Use the filter or query function to find the equipment you wish to modify. Once you find it, highlight the row and use the “Enter” key to open it, or double click on the row.

Make the changes to the equipment required, and save your changes before exiting.