Admin
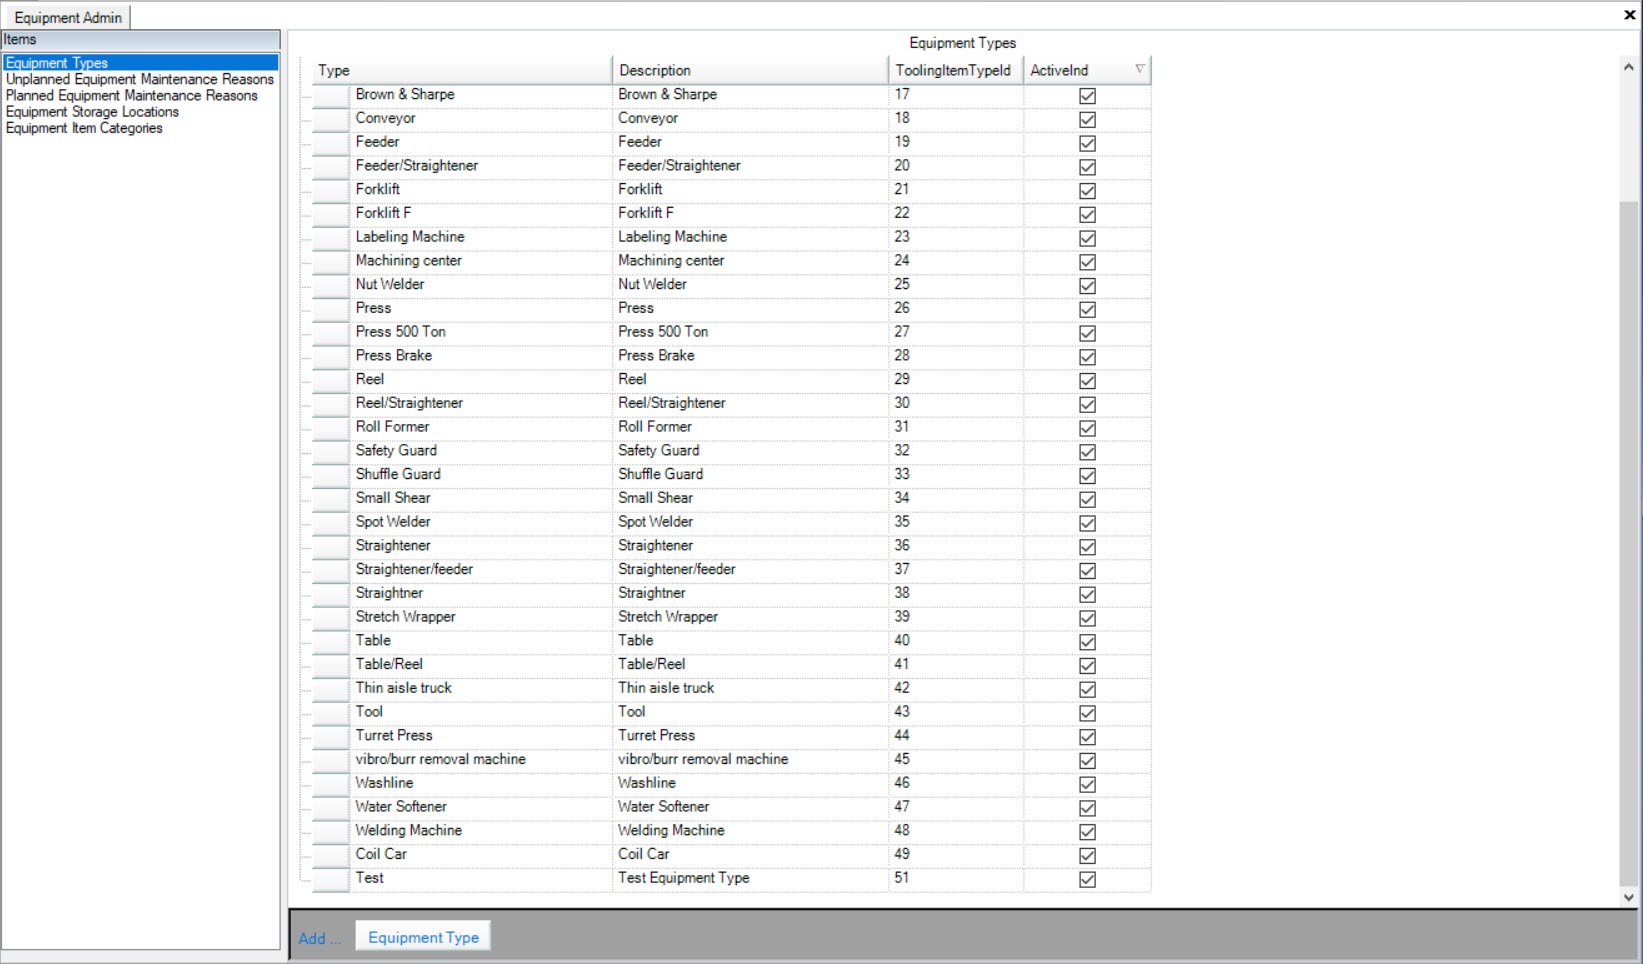
Equipment Admin is used to add and maintain Equipment Types, Unplanned Equipment Maintenance Reasons, Planned Equipment Maintenance Reasons, Equipment Storage Locations, and Equipment Item Categories.
To view Equipment Admin, navigate to the  tab and click on the
 ![]() tab.
tab.
The Equipment Admin screen will be displayed.
Equipment Types
Equipment Types are required when entering a new Equipment Item in the system.
To view Equipment Types, navigate to the  tab and click on the
 ![]() tab.
tab.
The Equipment Admin screen will be displayed.

Make sure to select Equipment Types located below the Items pane to the left of the screen.
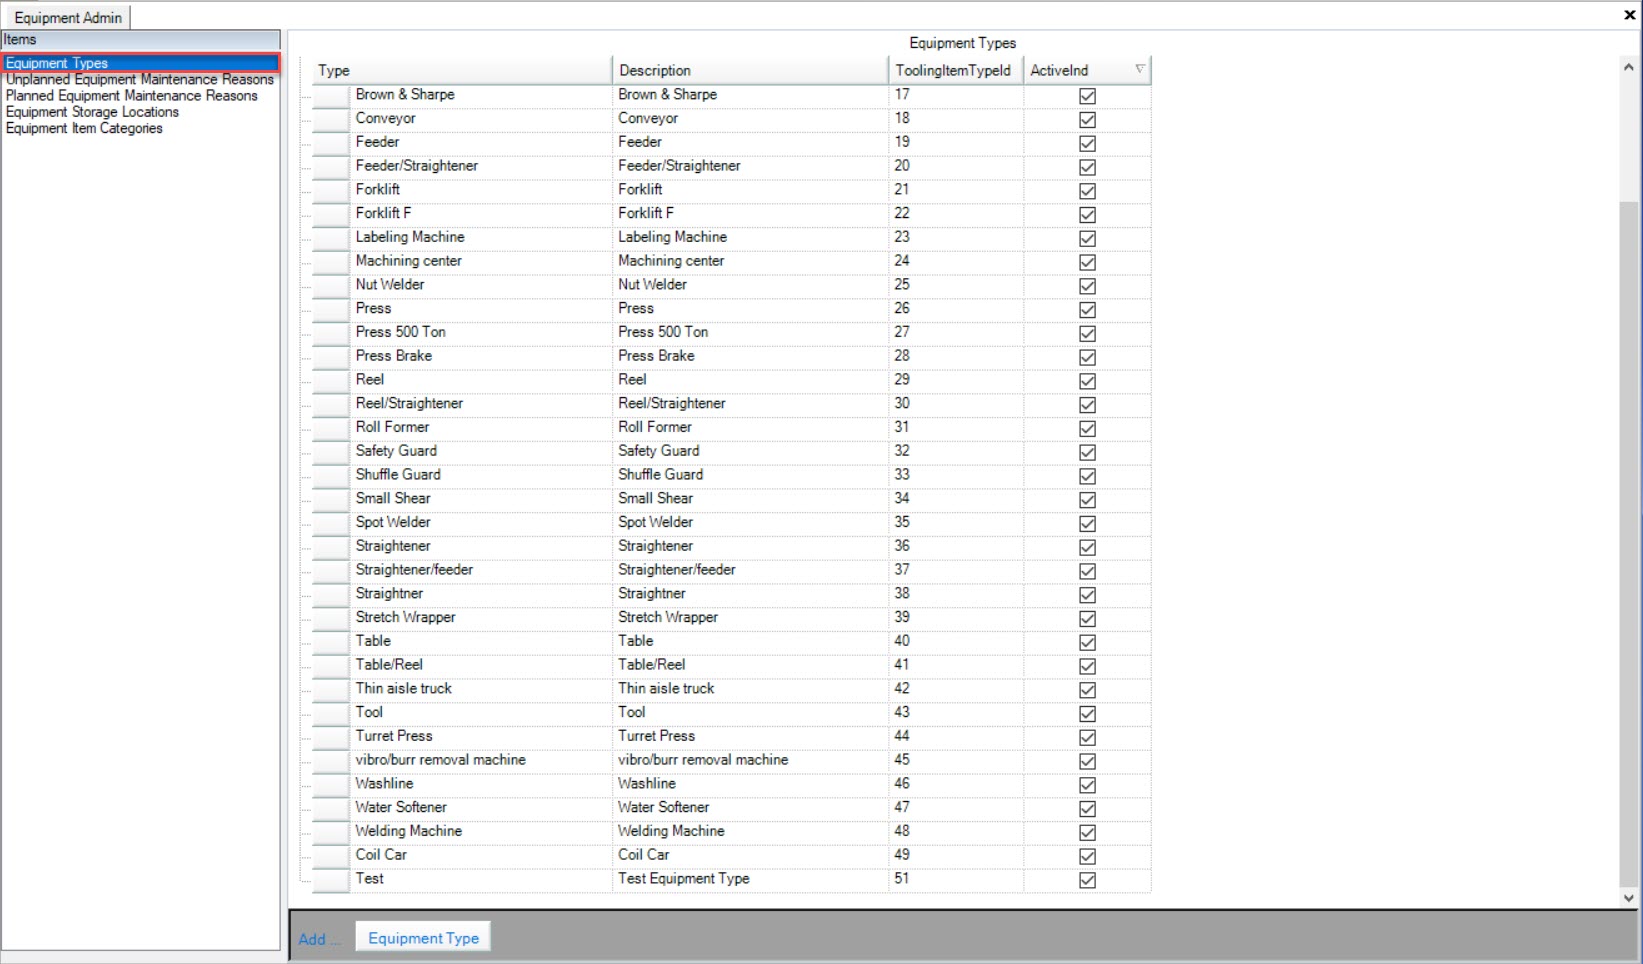
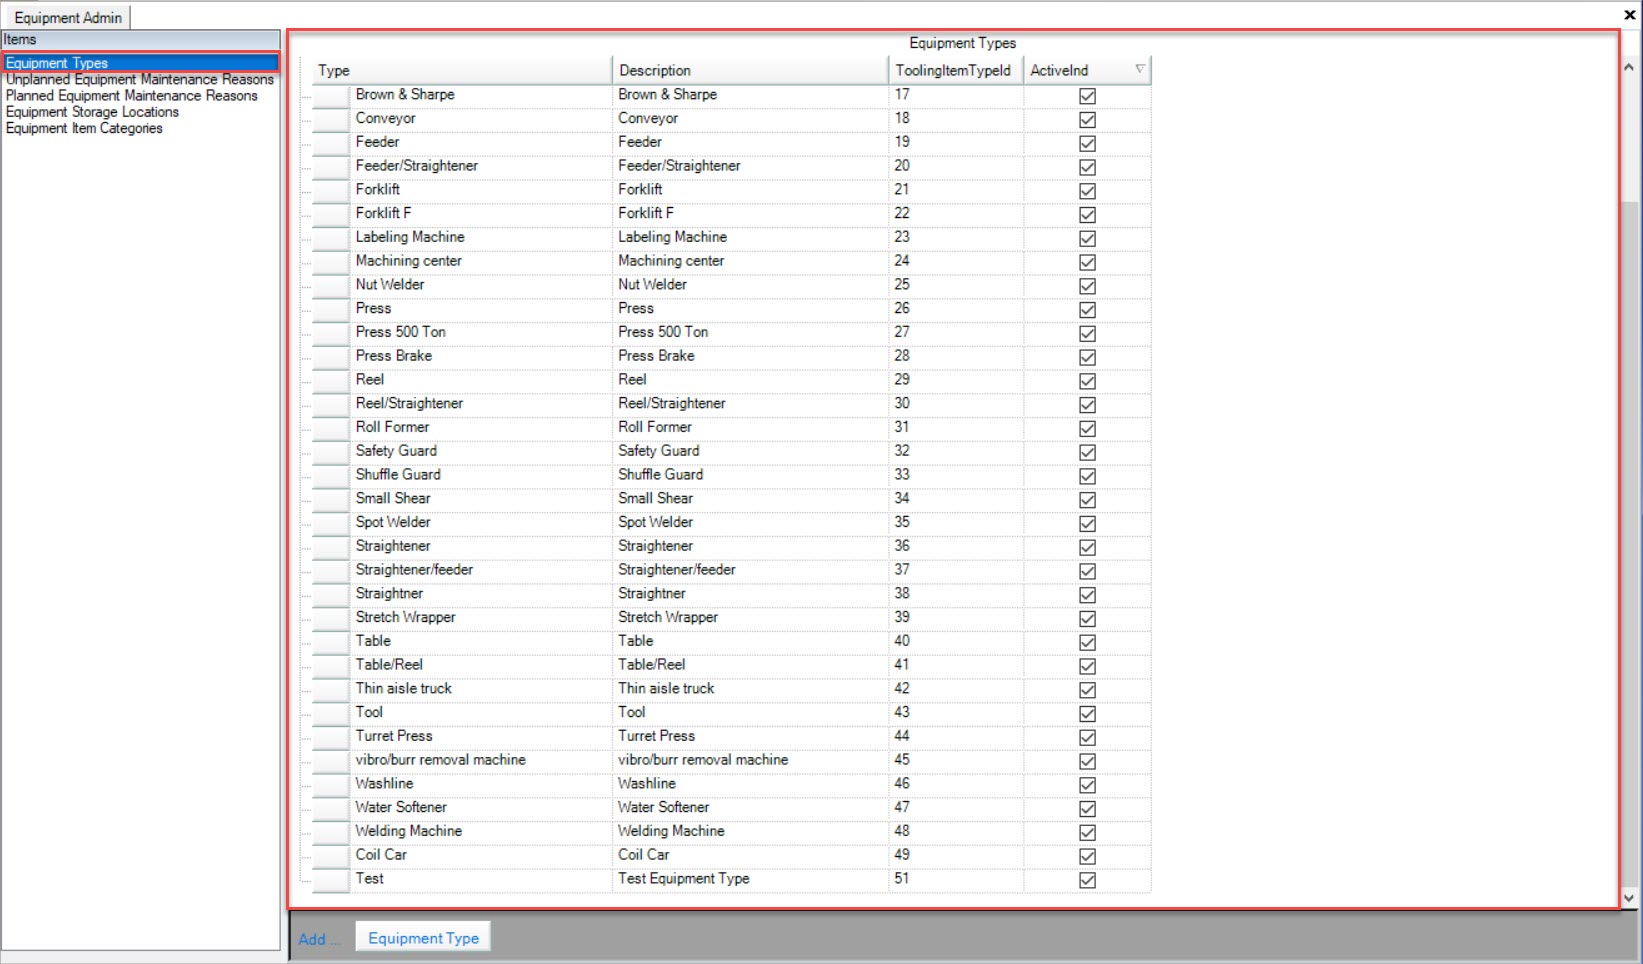
All of the available Equipment Types in the system will be displayed.
Adding an Equipment Type
To add an Equipment Type, navigate to the  tab and click on the
 ![]() tab.
tab.
The Equipment Admin screen will be displayed.

Make sure to select Equipment Types located below the Items pane to the left of the screen.

Then, click on the  button located at the bottom of the screen.
A new row will appear when users must enter in the Type, Description, Tooling Item Type, and whether it’s Active using the available textboxes.
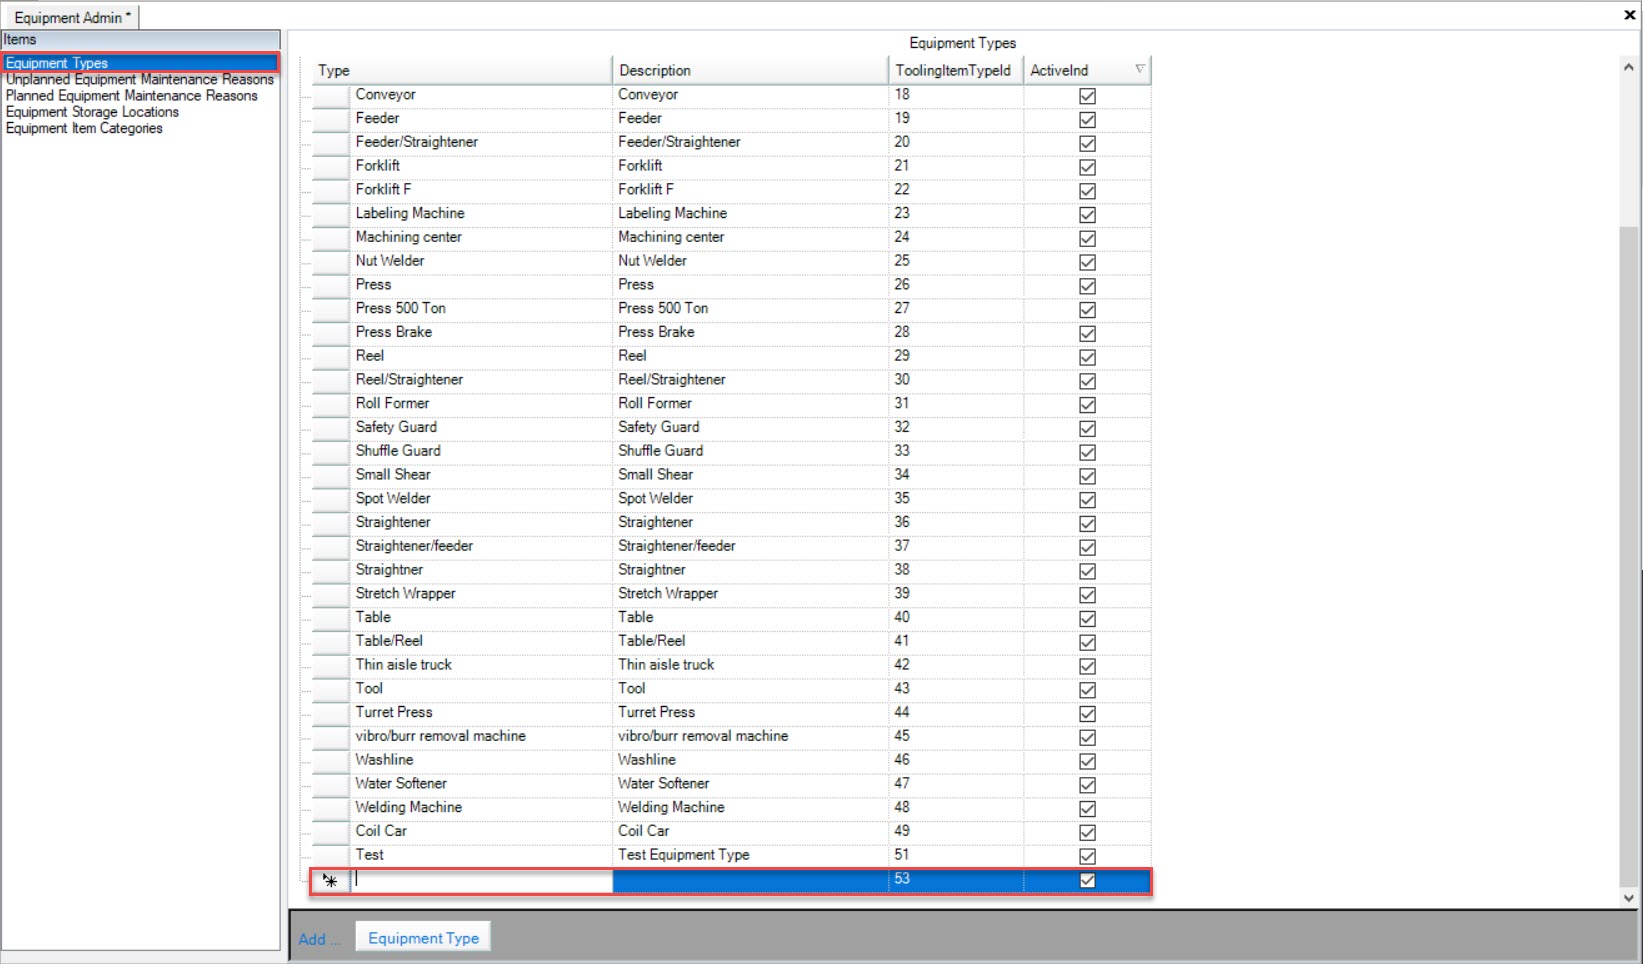
Make sure to save your changes before exiting the screen.
Editing an Equipment Type
To edit an Equipment Type, navigate to the  tab and click on the
 ![]() tab.
tab.
The Equipment Admin screen will be displayed.

Make sure to select Equipment Types located below the Items pane to the left of the screen.

Locate the Equipment Type you wish to edit and make the necessary changes using the available textboxes.
Make sure to save your changes before exiting the screen.
Deleting an Equipment Type
To delete an Equipment Type, navigate to the  tab and click on the
 ![]() tab.
tab.
The Equipment Admin screen will be displayed.

Make sure to select Equipment Types located below the Items pane to the left of the screen.

Locate the Equipment Type you wish to delete and highlight the appropriate row. Use your Delete key and when the system prompts you, select Yes.
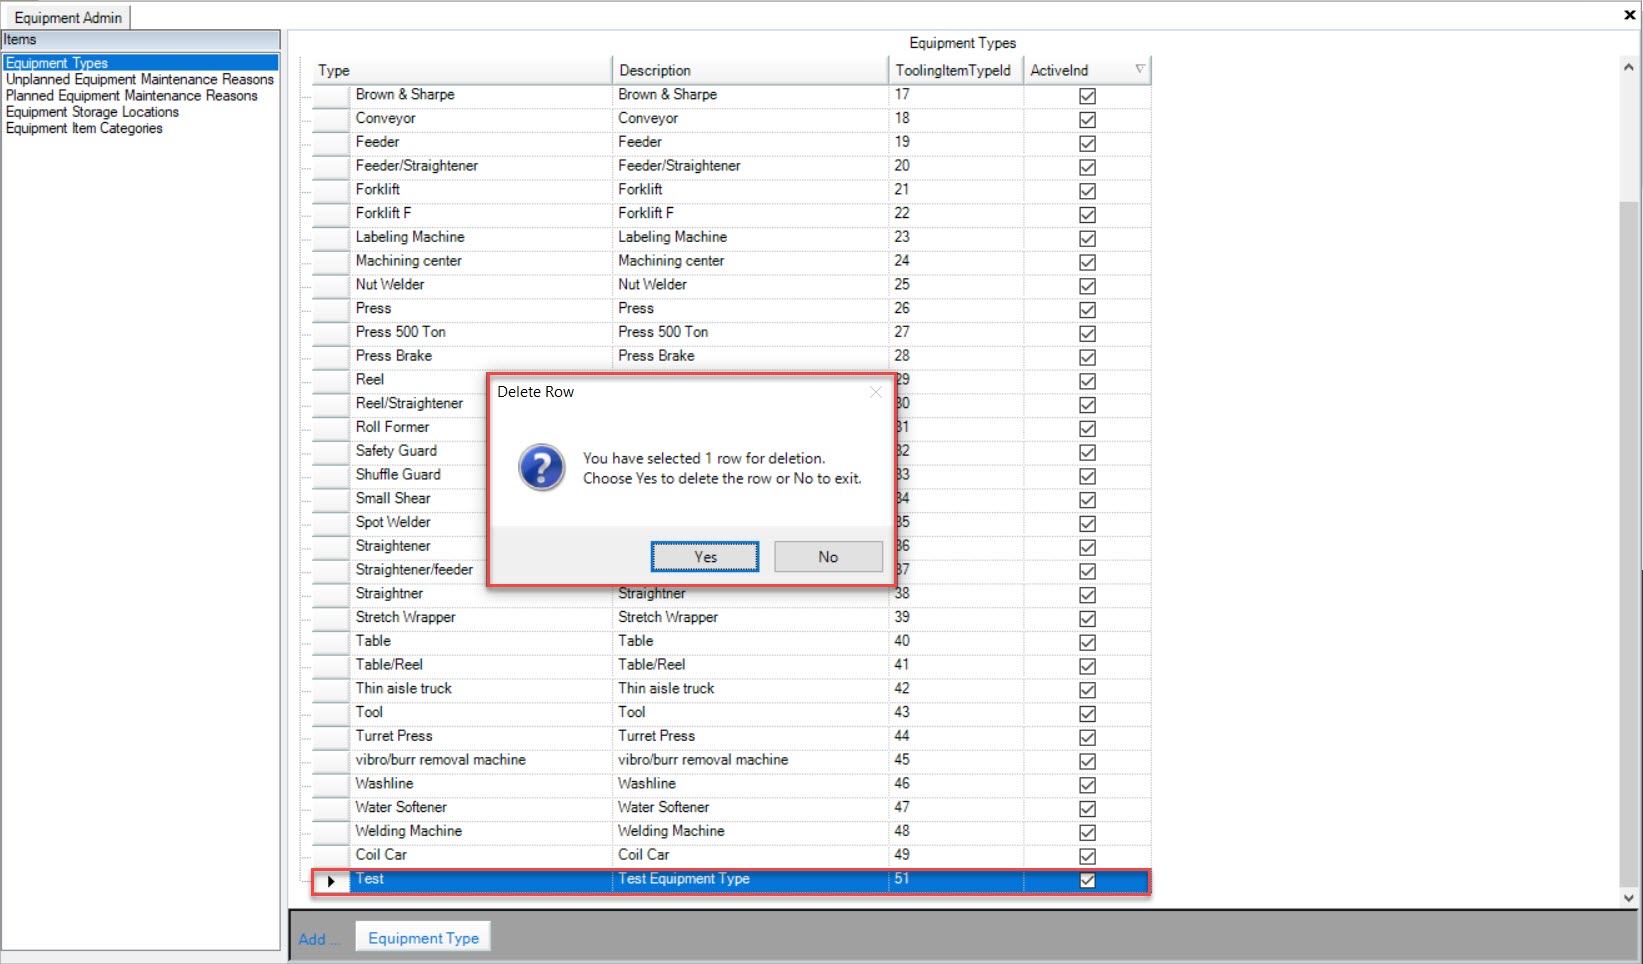
The selected Equipment Type will be deleted.
Make sure to save your changes before exiting the screen.
Unplanned Equipment Maintenance Reasons
Unplanned Equipment Maintenance Reasons must be selected when users create a new Work Order or Work Order Request in the system.
To view Unplanned Equipment Maintenance Reasons, navigate to the  tab and click on the
 ![]() tab.
tab.
The Equipment Admin screen will be displayed.

Make sure to select Unplanned Equipment Maintenance Reasons located below the Items pane to the left of the screen.
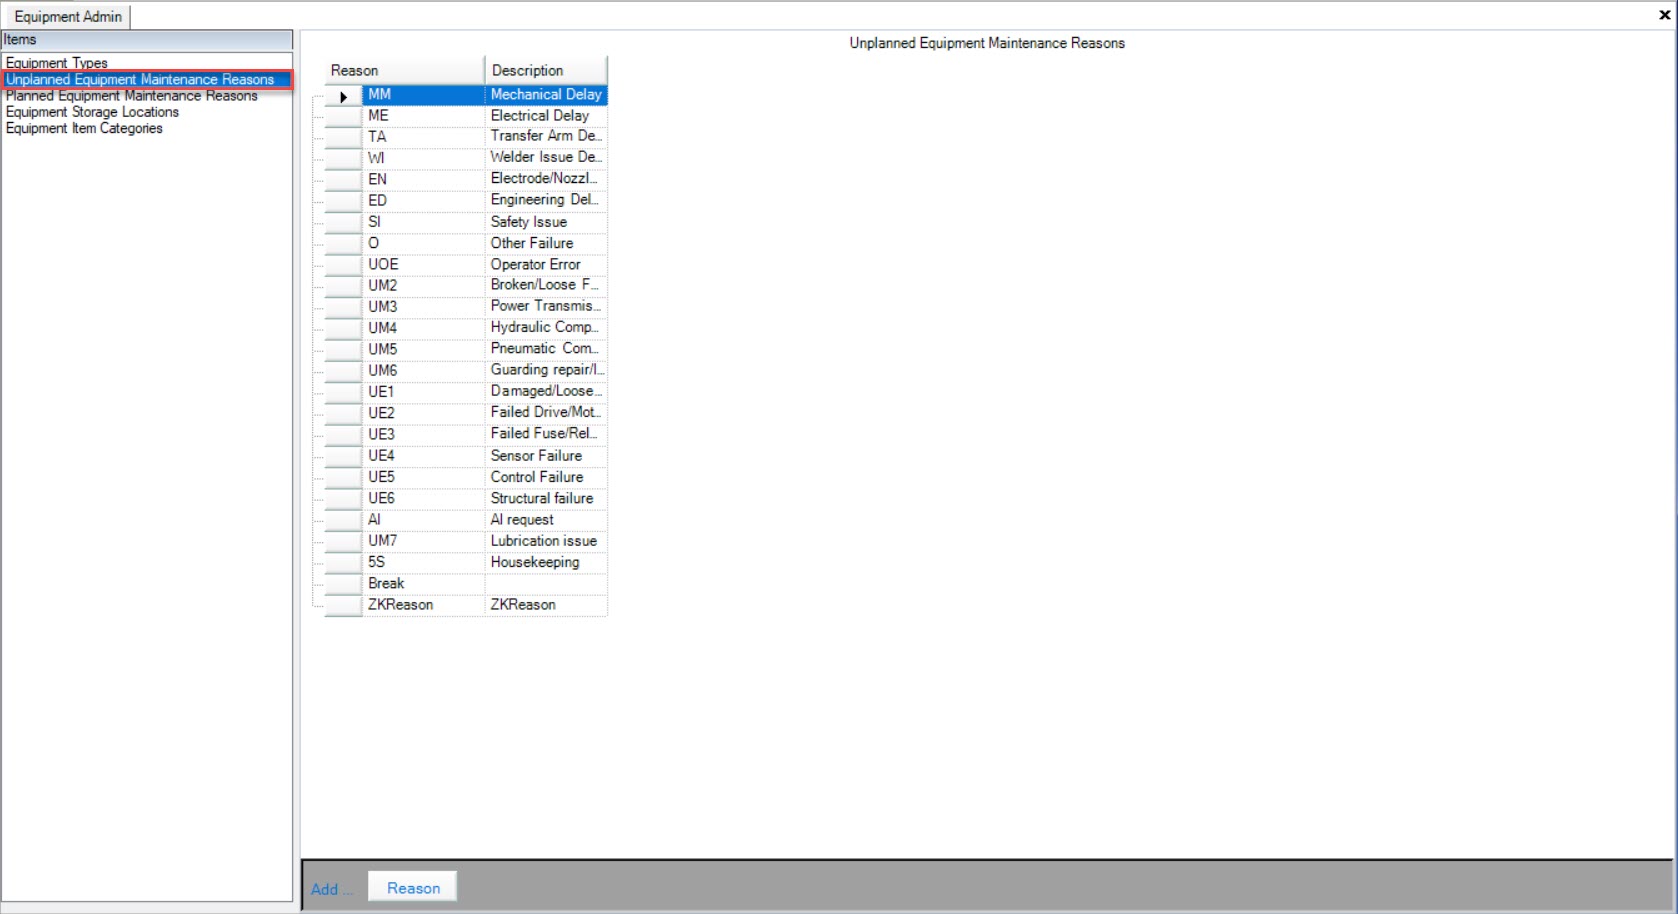
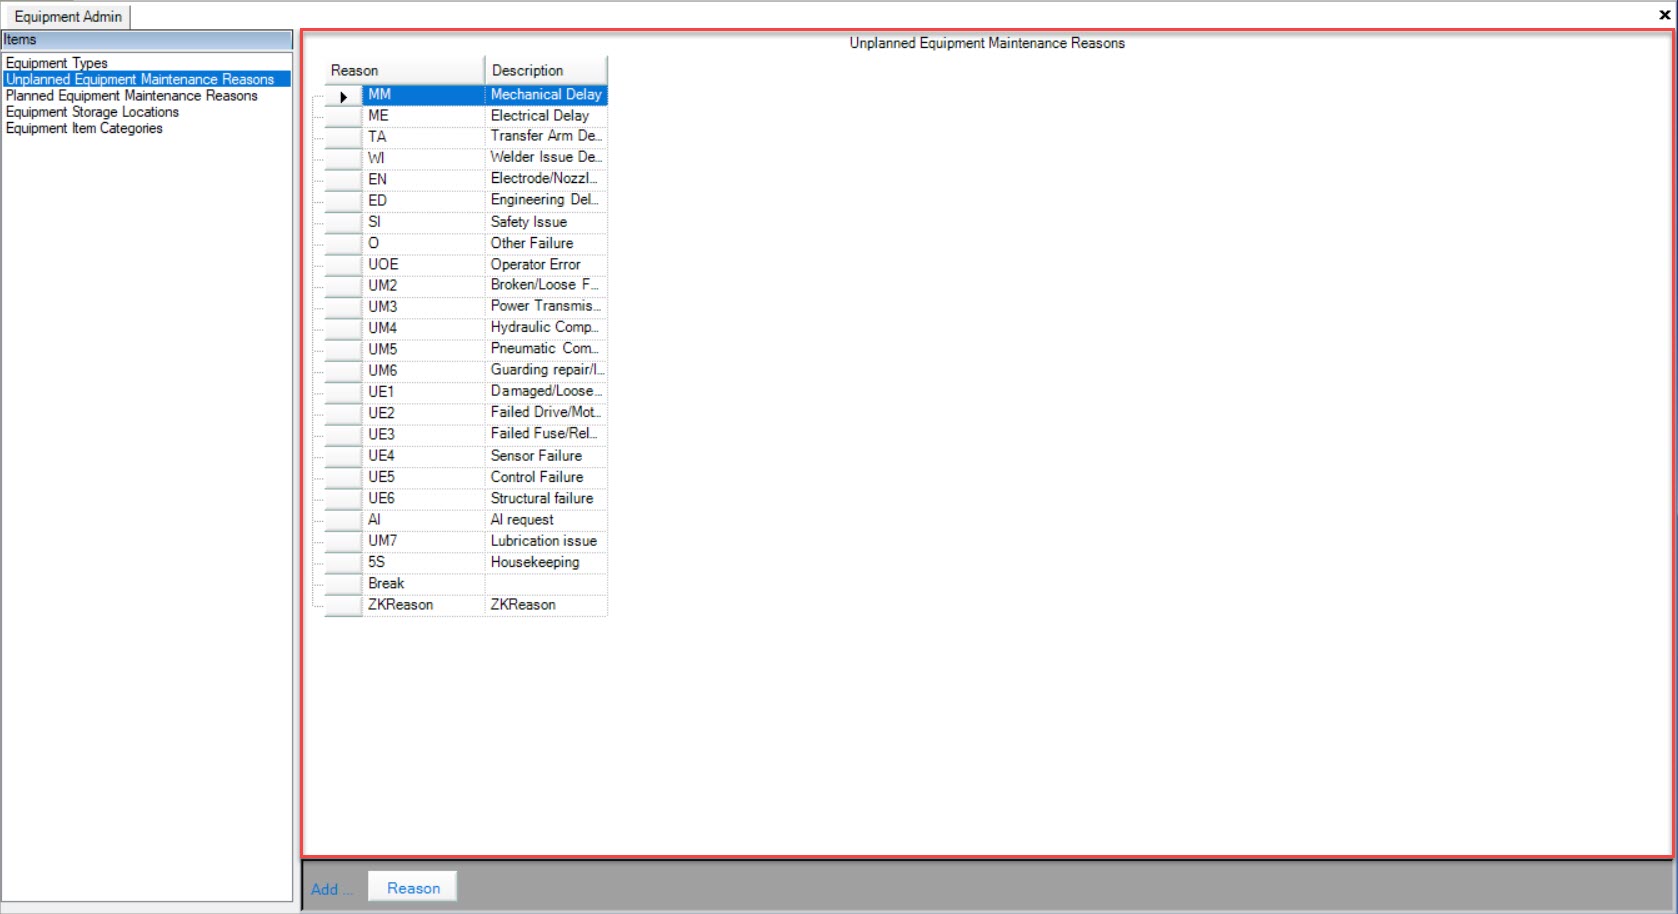
All of the Unplanned Equipment Maintenance Reasons in the system will be displayed.
Adding Unplanned Equipment Maintenance Reasons
To add an Unplanned Equipment Maintenance Reason, navigate to the  tab and click on the
 ![]() tab.
tab.
The Equipment Admin screen will be displayed.

Make sure to select Unplanned Equipment Maintenance Reasons located below the Items pane to the left of the screen.

Then, click on the  button located at the bottom of the screen.
A new row will appear where users must enter in a Reason and Description.
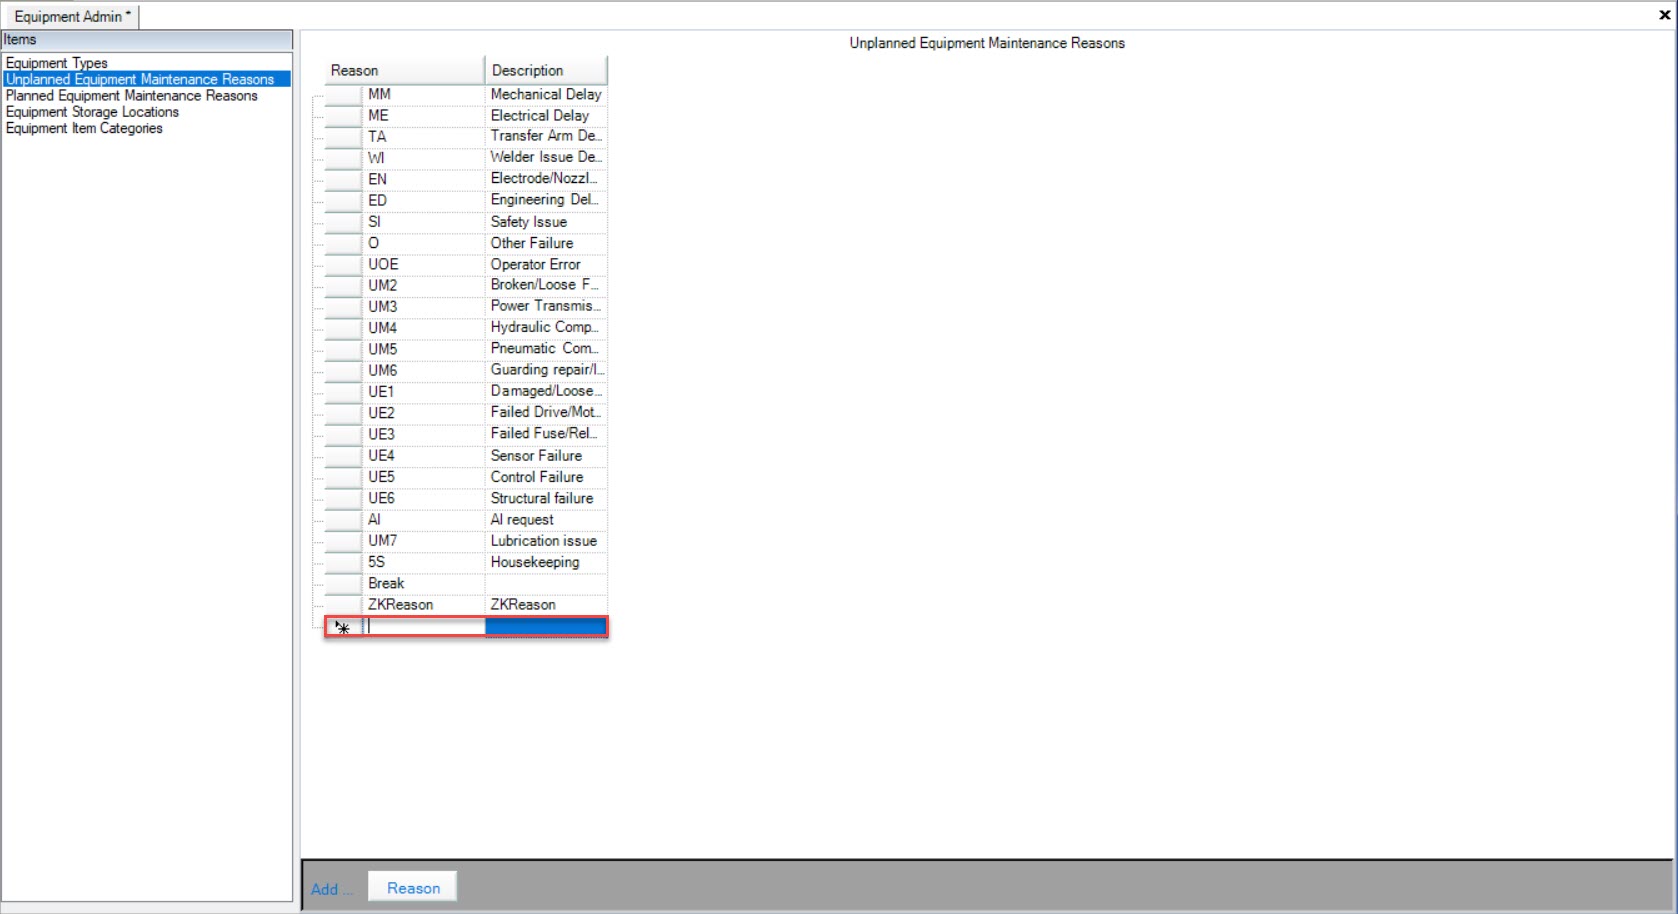
Make sure to save your changes before exiting the screen.
Editing Unplanned Equipment Maintenance Reasons
To edit an Unplanned Equipment Maintenance Reason, navigate to the  tab and click on the
 ![]() tab.
tab.
The Equipment Admin screen will be displayed.

Make sure to select Unplanned Equipment Maintenance Reasons located below the Items pane to the left of the screen.

Locate the Unplanned Equipment Maintenance Reason you wish to edit and make the necessary changes using the available textboxes.
Make sure to save before exiting the screen.
Deleting Unplanned Equipment Maintenance Reasons
to delete an Unplanned Equipment Maintenance Reason, navigate to the  tab and click on the
 ![]() tab.
tab.
The Equipment Admin screen will be displayed.

Make sure to select Unplanned Equipment Maintenance Reasons located below the Items pane to the left of the screen.

Locate the Unplanned Equipment Maintenance Reason you wish to delete and highlight the appropriate row. Use your Delete key and when the system prompts you, select Yes.
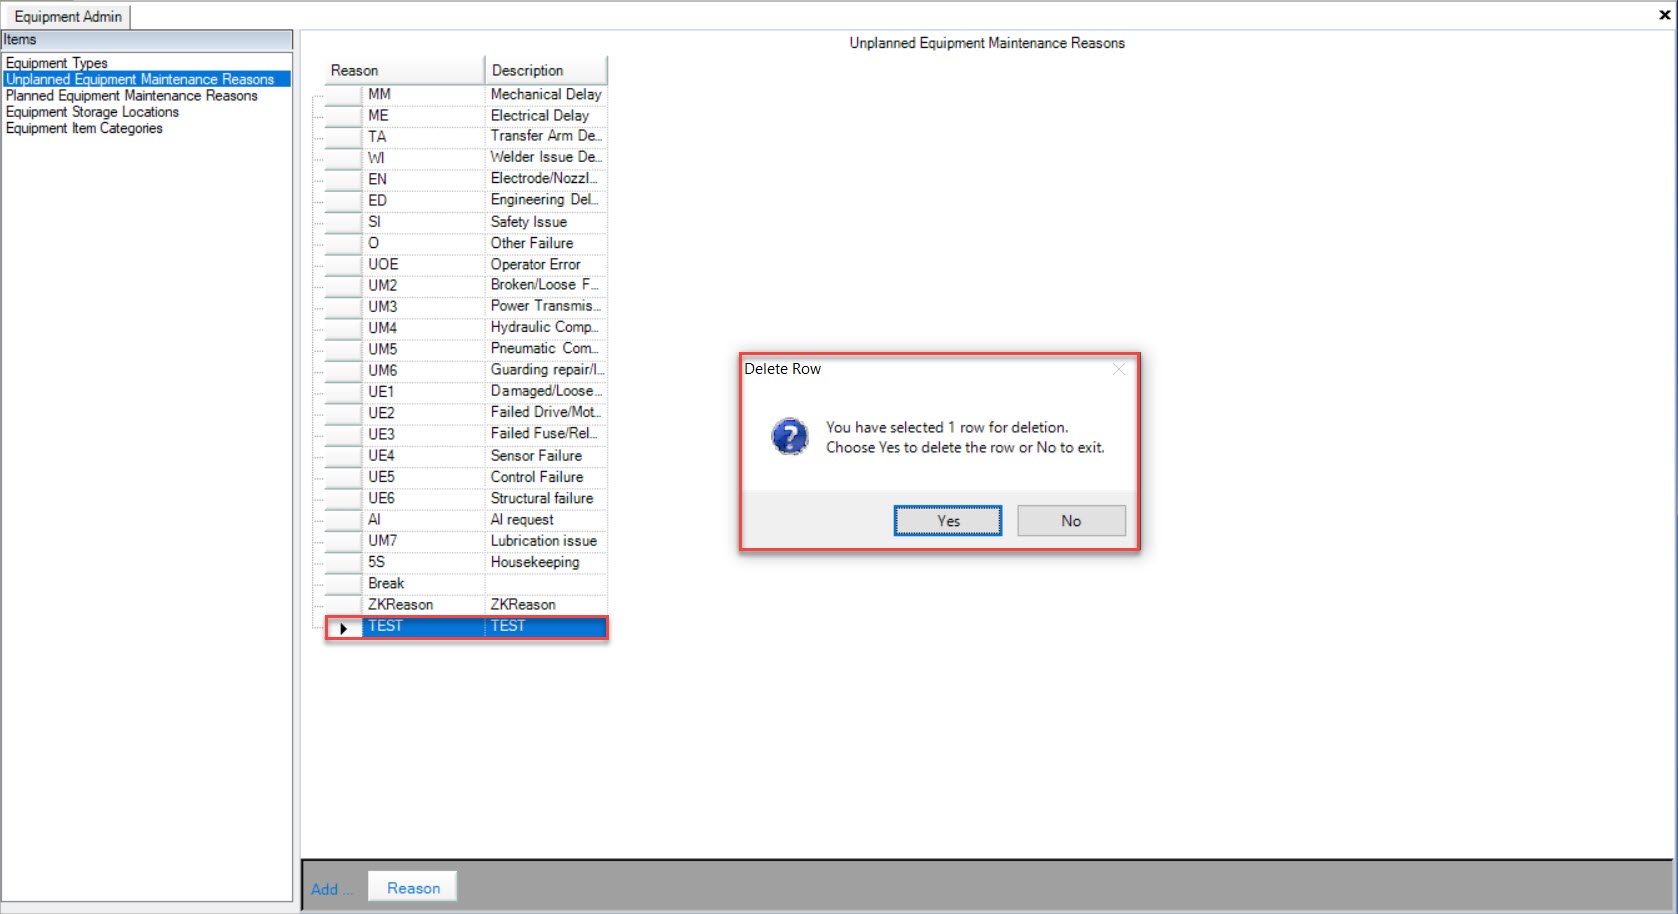
The selected Unplanned Equipment Maintenance Reason will be deleted.
Make sure to save your changes before exiting the screen.
Planned Equipment Maintenance Reasons
Planned Equipment Maintenance Reasons must be selected when users add Planned Maintenance to the system. These Reasons can be assigned to an Equipment Item, meaning that when users select a Type for an Equipment Item, only the Planned Equipment Maintenance Reasons assigned to the Equipment Item Type (or not assigned to any Equipment Item Types) will be found in the drop-down menu.
To view Planned Equipment Maintenance Reasons, navigate to the  tab and click on the
 ![]() tab.
tab.
The Equipment Admin screen will be displayed.

Make sure to select Planned Equipment Maintenance Reasons from the Items pane to the left of the screen.
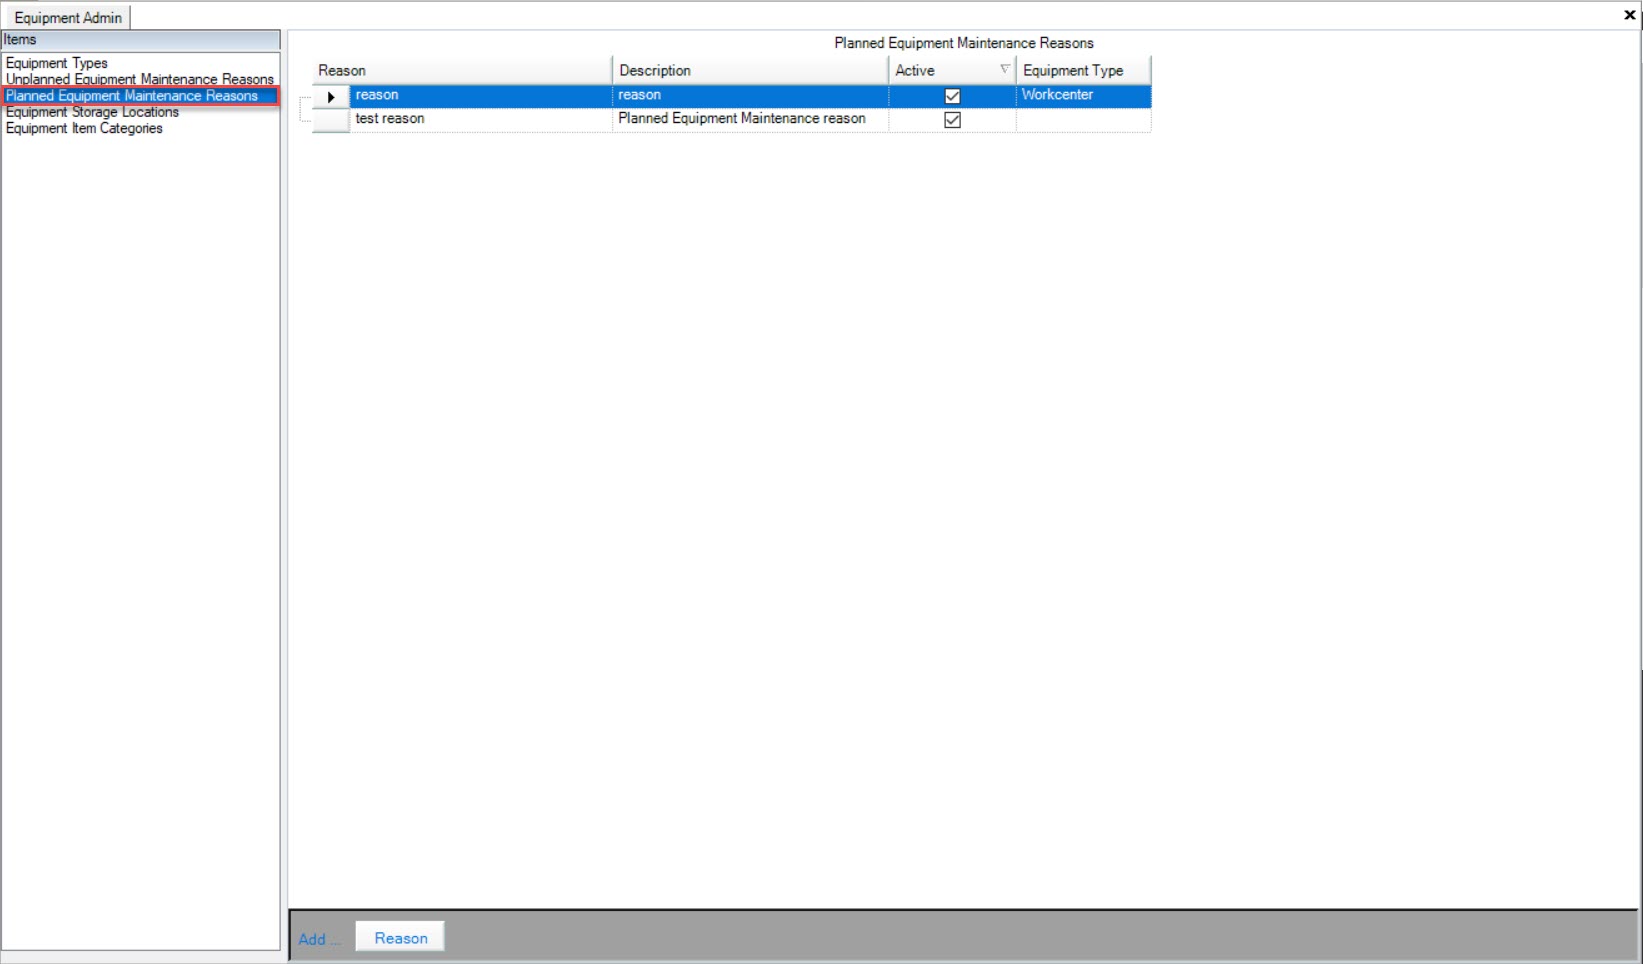
All of the available Planned Equipment Maintenance Reasons in the system will be displayed.
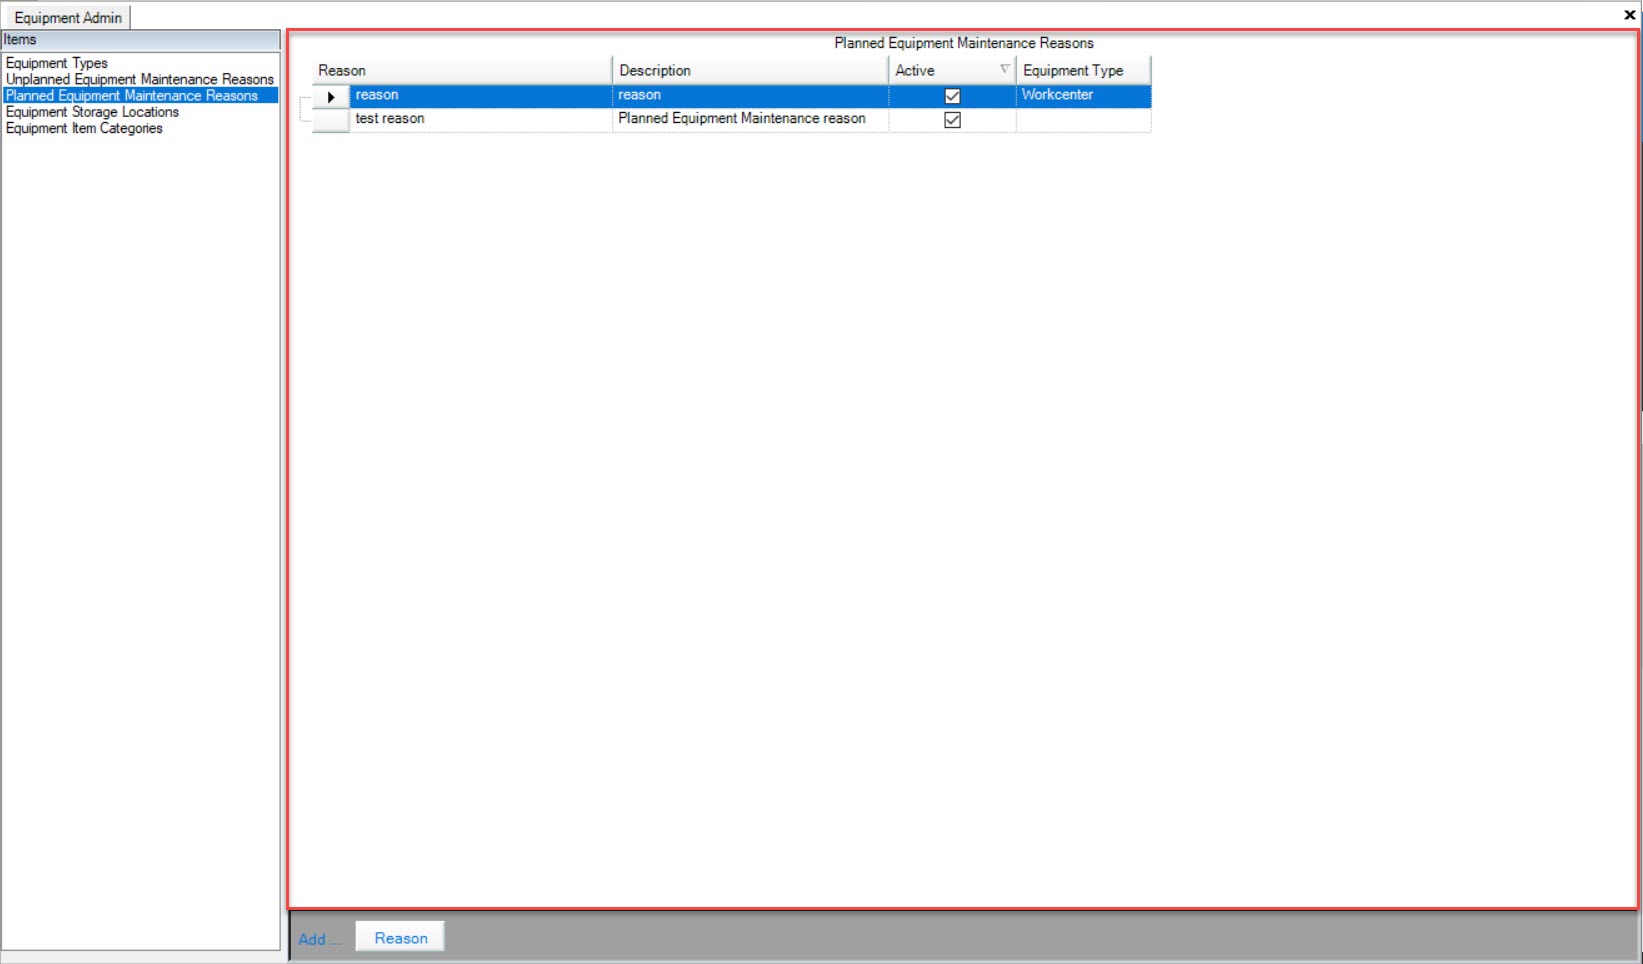
Adding Planned Equipment Maintenance Reasons
To add a Planned Equipment Maintenance Reason, navigate to the  tab and click on the
 ![]() tab.
tab.
The Equipment Admin screen will be displayed.

Make sure to select Planned Equipment Maintenance Reasons from the Items pane to the left of the screen.

Then, click on the  button located at the bottom of the screen.
A new row will appear where users must enter in a Reason and Description using the available textboxes.
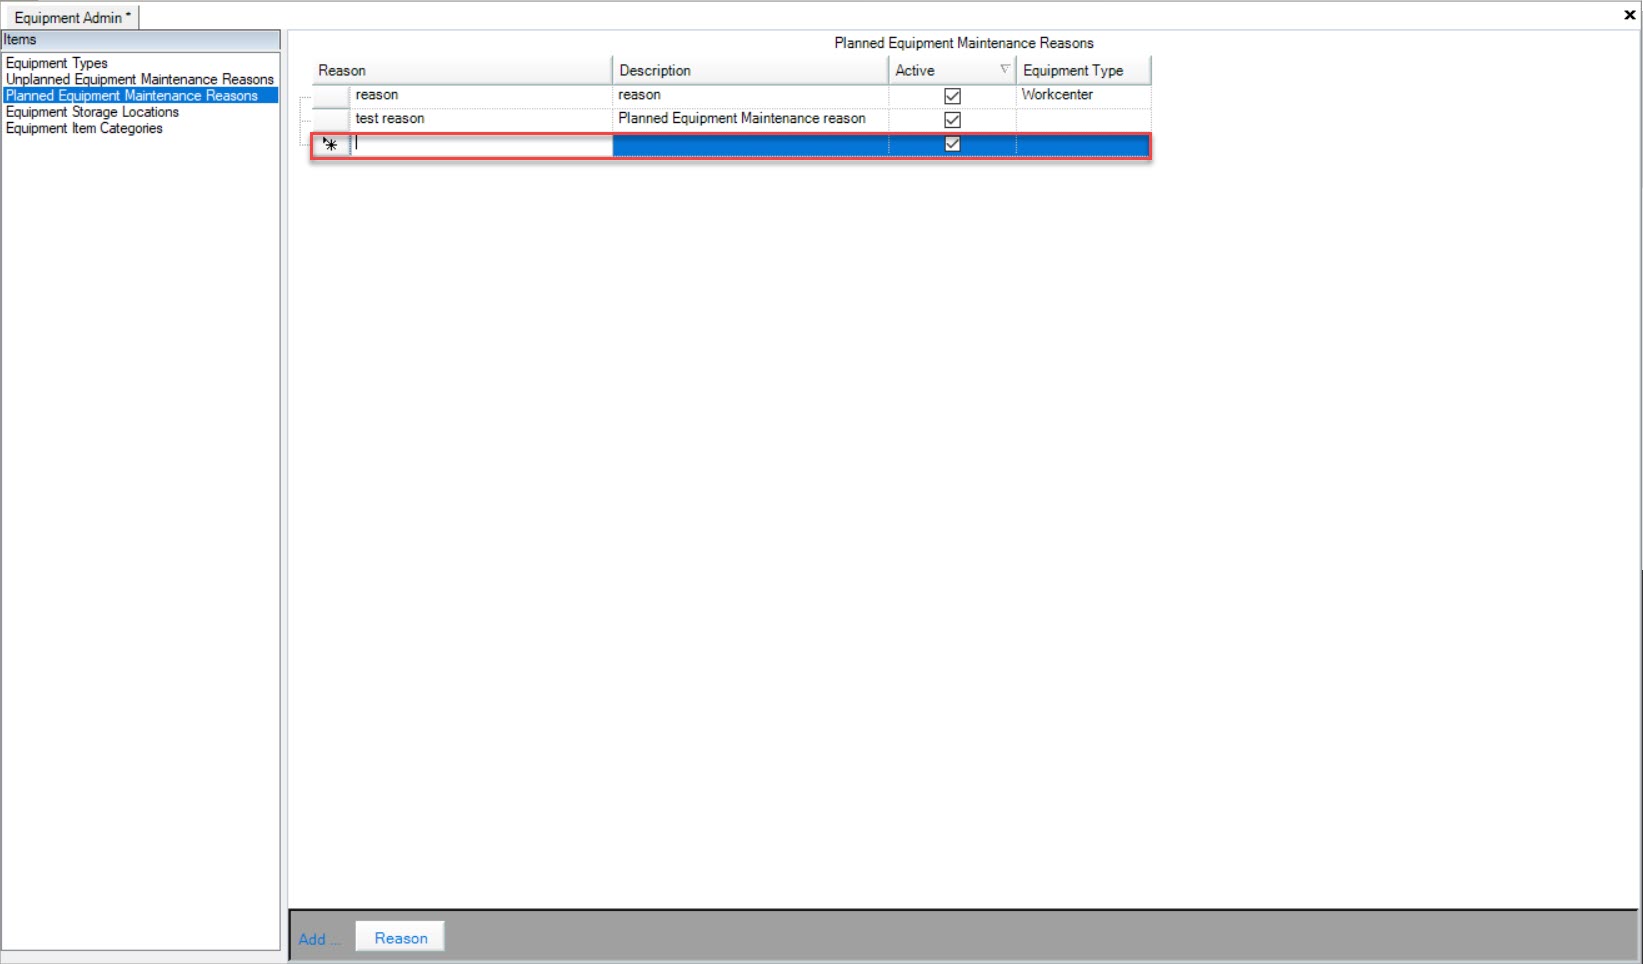
Make sure to save your changes before exiting the screen.
Editing Planned Equipment Maintenance Reasons
To edit a Planned Equipment Maintenance Reason, navigate to the  tab and click on the
 ![]() tab.
tab.
The Equipment Admin screen will be displayed.

Make sure to select Planned Equipment Maintenance Reasons from the Items pane to the left of the screen.

Locate the Planned Equipment Maintenance Reason you wish to edit and make the necessary changes using the available textboxes.
Make sure to save your changes before exiting the screen.
Deleting Planned Equipment Maintenance Reasons
To delete a Planned Equipment Maintenance Reason, navigate to the  tab and click on the
 ![]() tab.
tab.
The Equipment Admin screen will be displayed.

Make sure to select Planned Equipment Maintenance Reasons from the Items pane to the left of the screen.

Locate the Planned Equipment Maintenance Reason you wish to delete and highlight the appropriate row. Use your Delete key and when the system prompts you, select Yes.
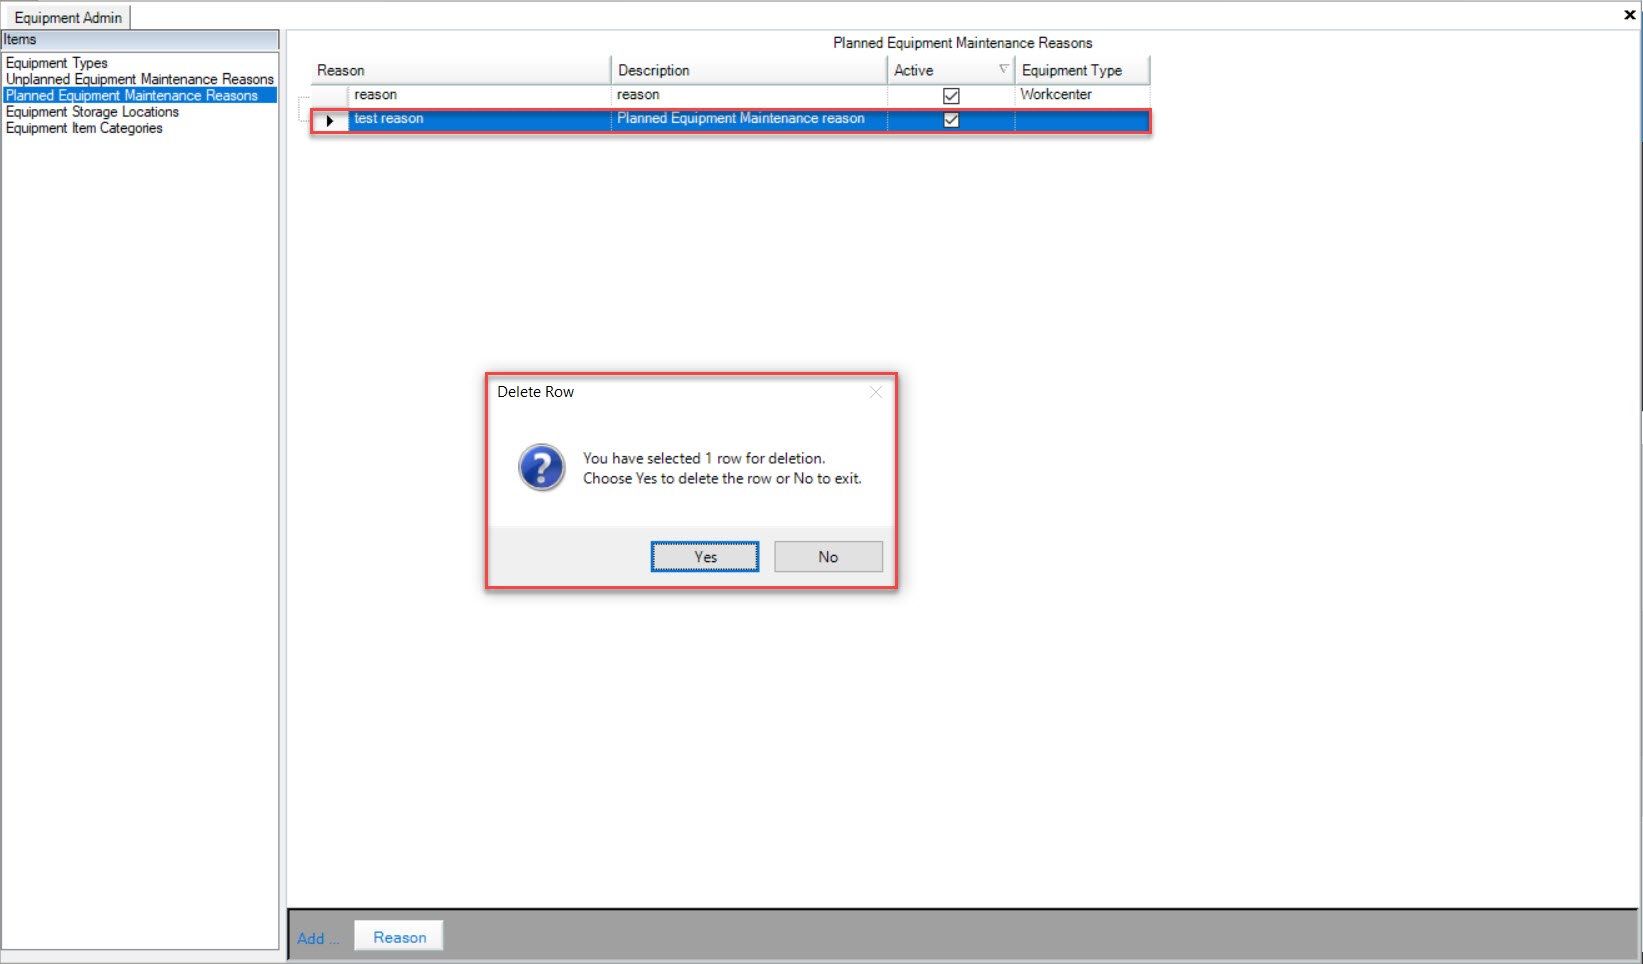
The selected Planned Equipment Maintenance Reason will be deleted.
Make sure to save your changes before exiting the screen.
Equipment Storage Locations
Equipment Storage Locations can be added to the system to keep track of the location of Equipment Items.
To view Equipment Storage Locations, navigate to the  tab and click on the
 ![]() tab.
tab.
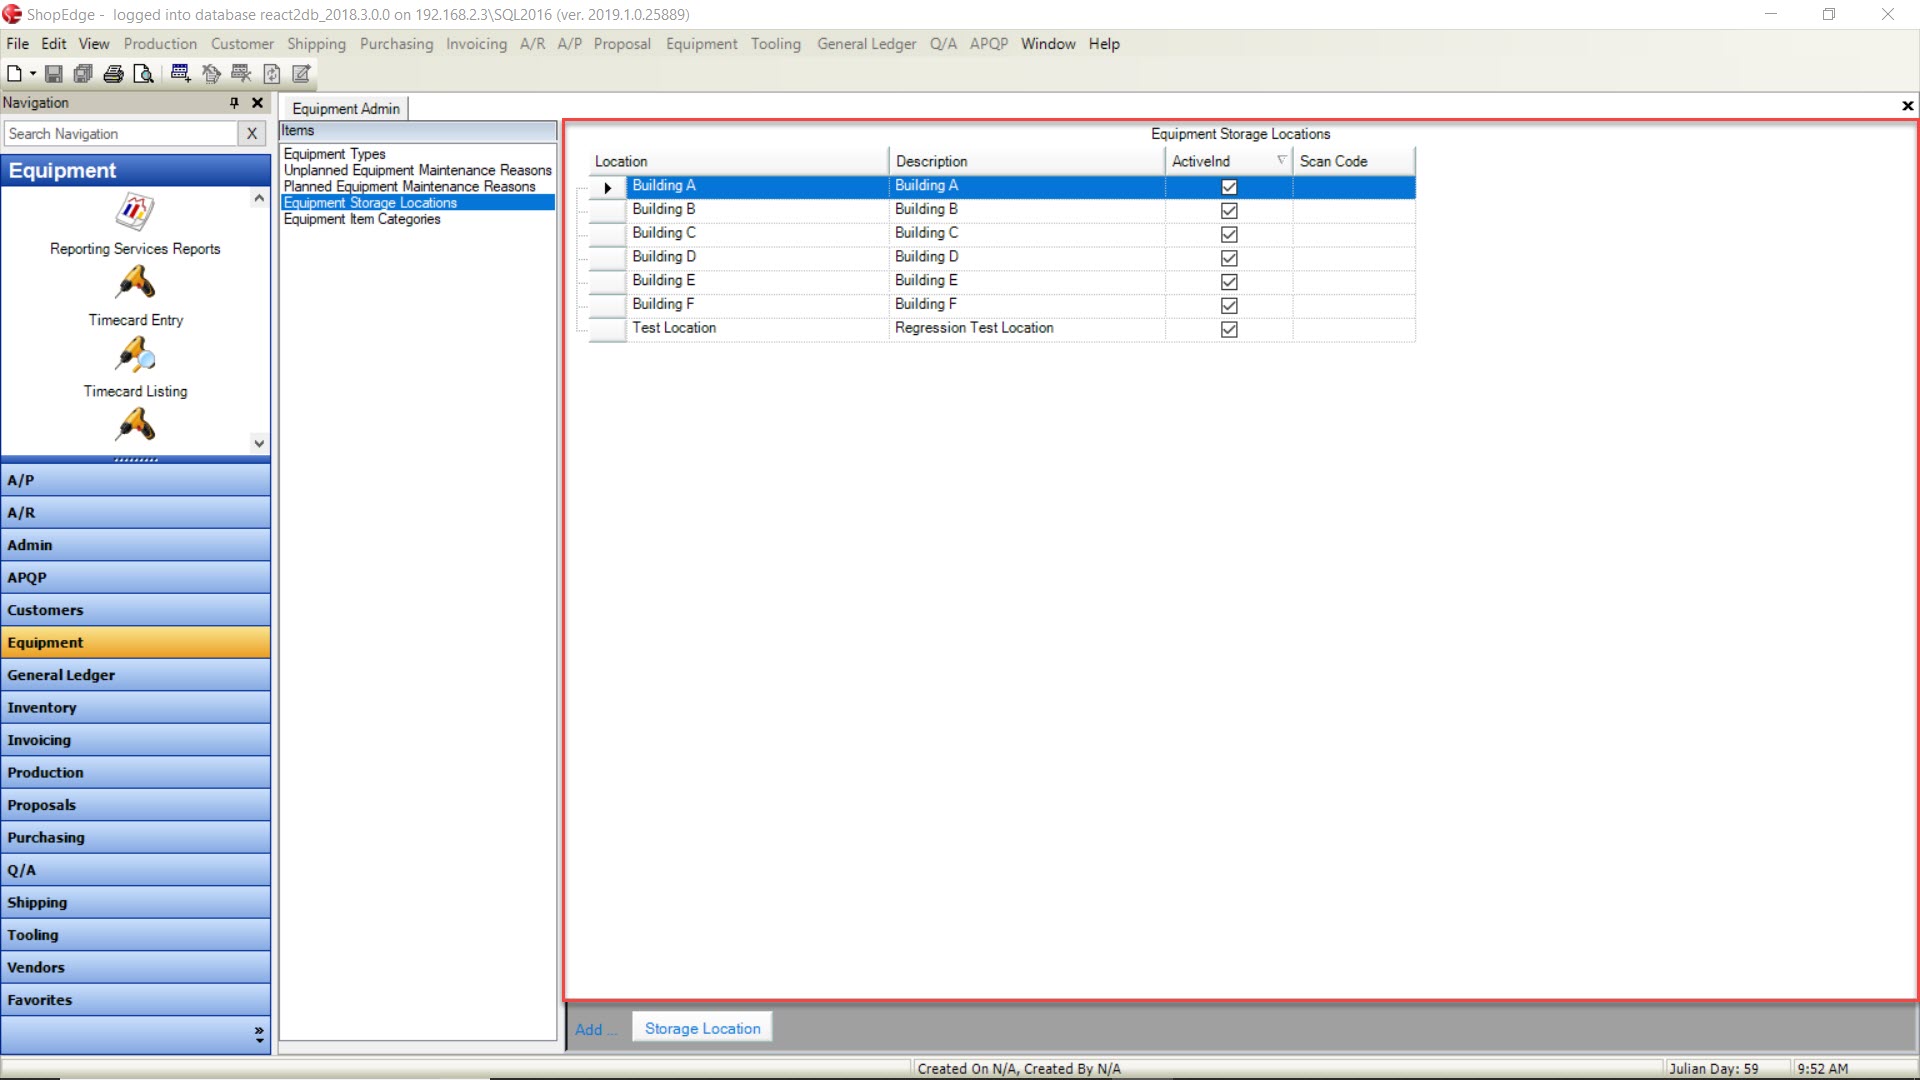
The Equipment Admin screen will be displayed.

Make sure to select Equipment Storage Locations from the Items pane to the left of the screen.
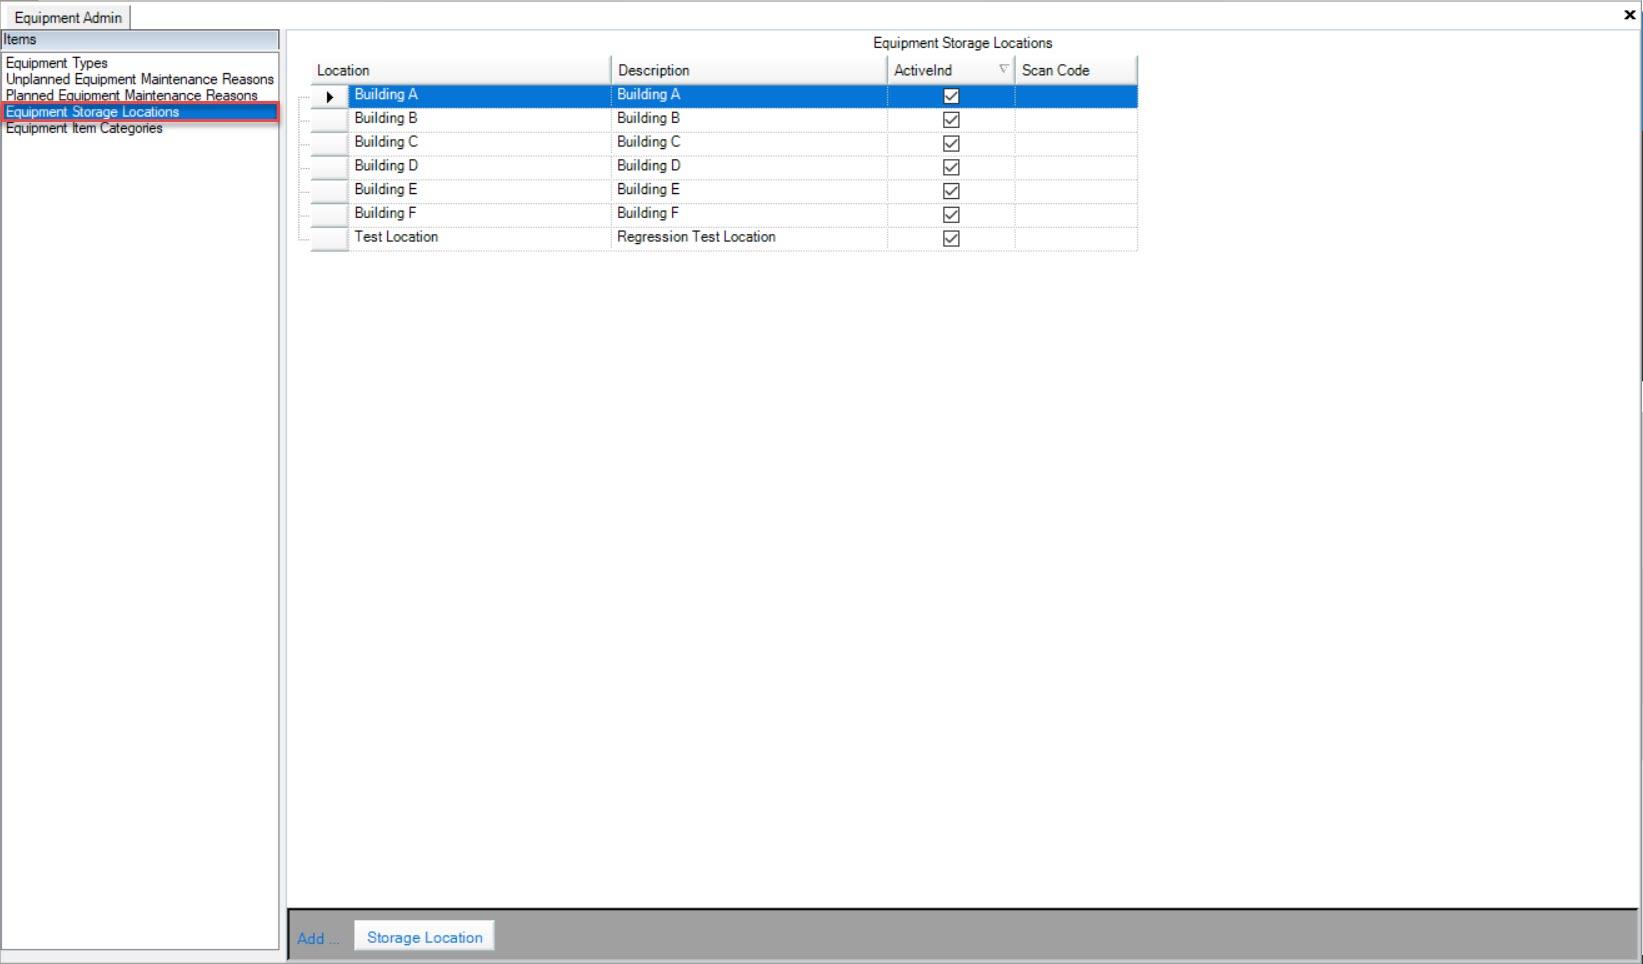
All of the available Equipment Storage Locations in the system will be displayed.
Adding Equipment Storage Locations
To add an Equipment Storage Location, navigate to the  tab and click on the
 ![]() tab.
tab.
The Equipment Admin screen will be displayed.

Make sure to select Equipment Storage Locations from the Items pane to the left of the screen.

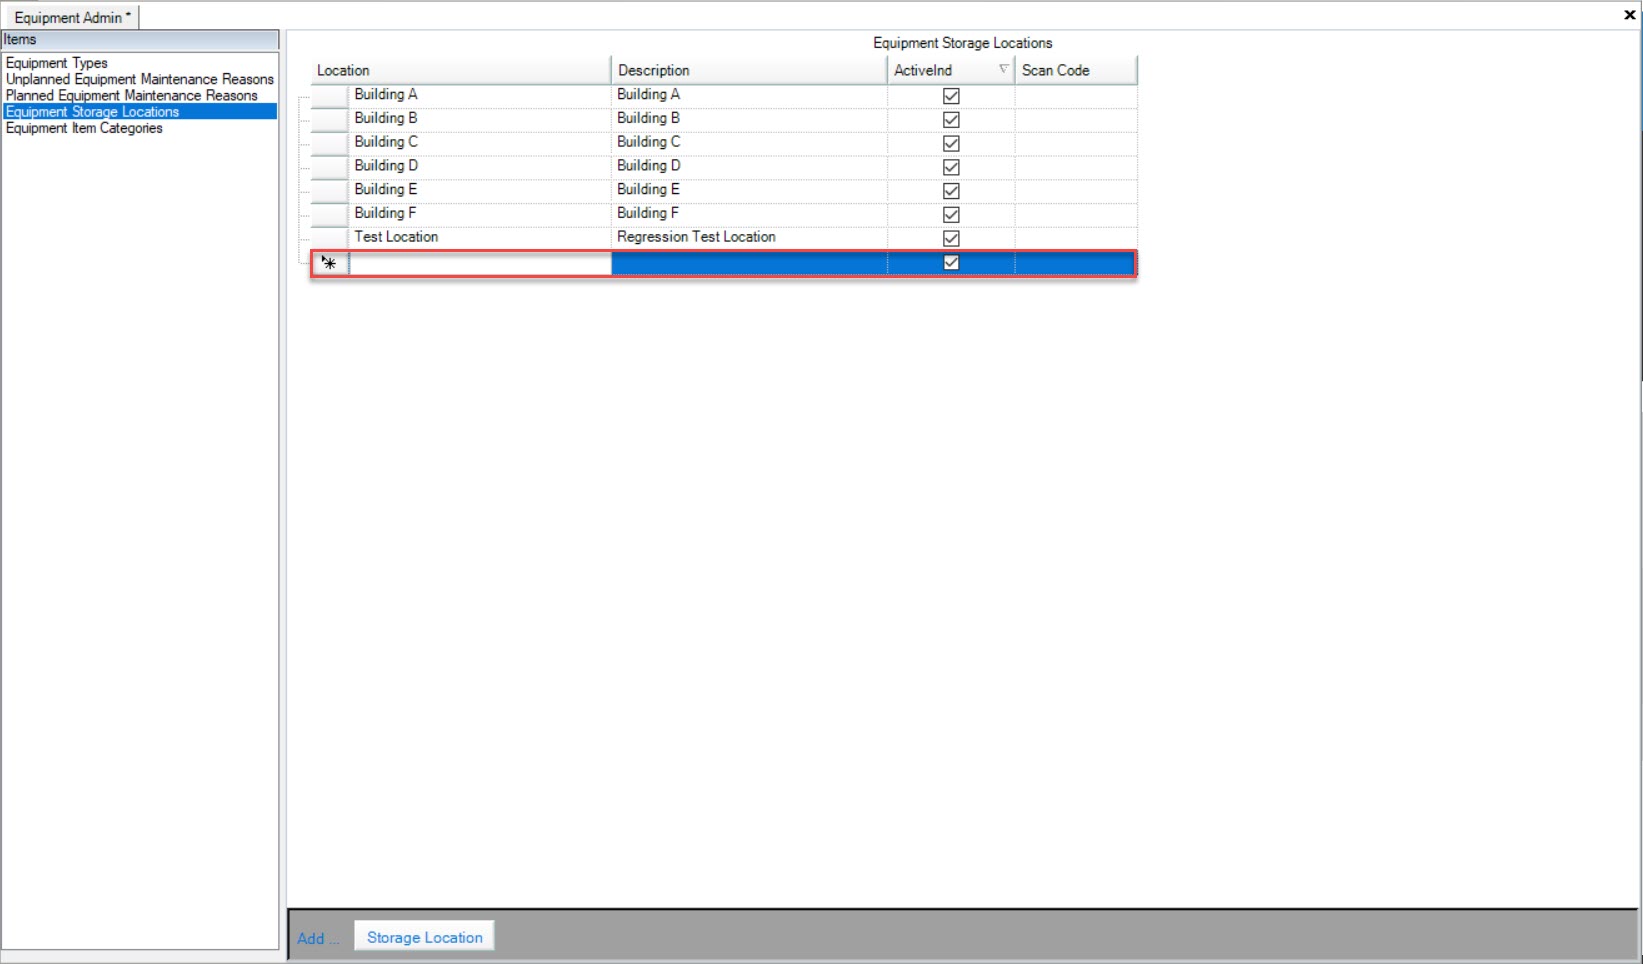
Then, click on the  button located at the bottom of the screen.
A new row will appear where users must enter in the Location, Description, select whether it’s Active, and Scan Code.
Make sure to save your changes before exiting the screen.
Editing Equipment Storage Locations
To edit an Equipment Storage Location, navigate to the  tab and click on the
 ![]() tab.
tab.
The Equipment Admin screen will be displayed.

Make sure to select Equipment Storage Locations from the Items pane to the left of the screen.

Locate the Equipment Storage Location you wish to edit and make the necessary changes using the available textboxes.
Make sure to save your changes before exiting the screen.
Deleting Equipment Storage Locations
To delete an Equipment Storage Location, navigate to the  tab and click on the
 ![]() tab.
tab.
The Equipment Admin screen will be displayed.

Make sure to select Equipment Storage Locations from the Items pane to the left of the screen.

Locate the Equipment Storage Location you wish to delete and highlight the appropriate row. Use your Delete key and when the system prompts you, select Yes.
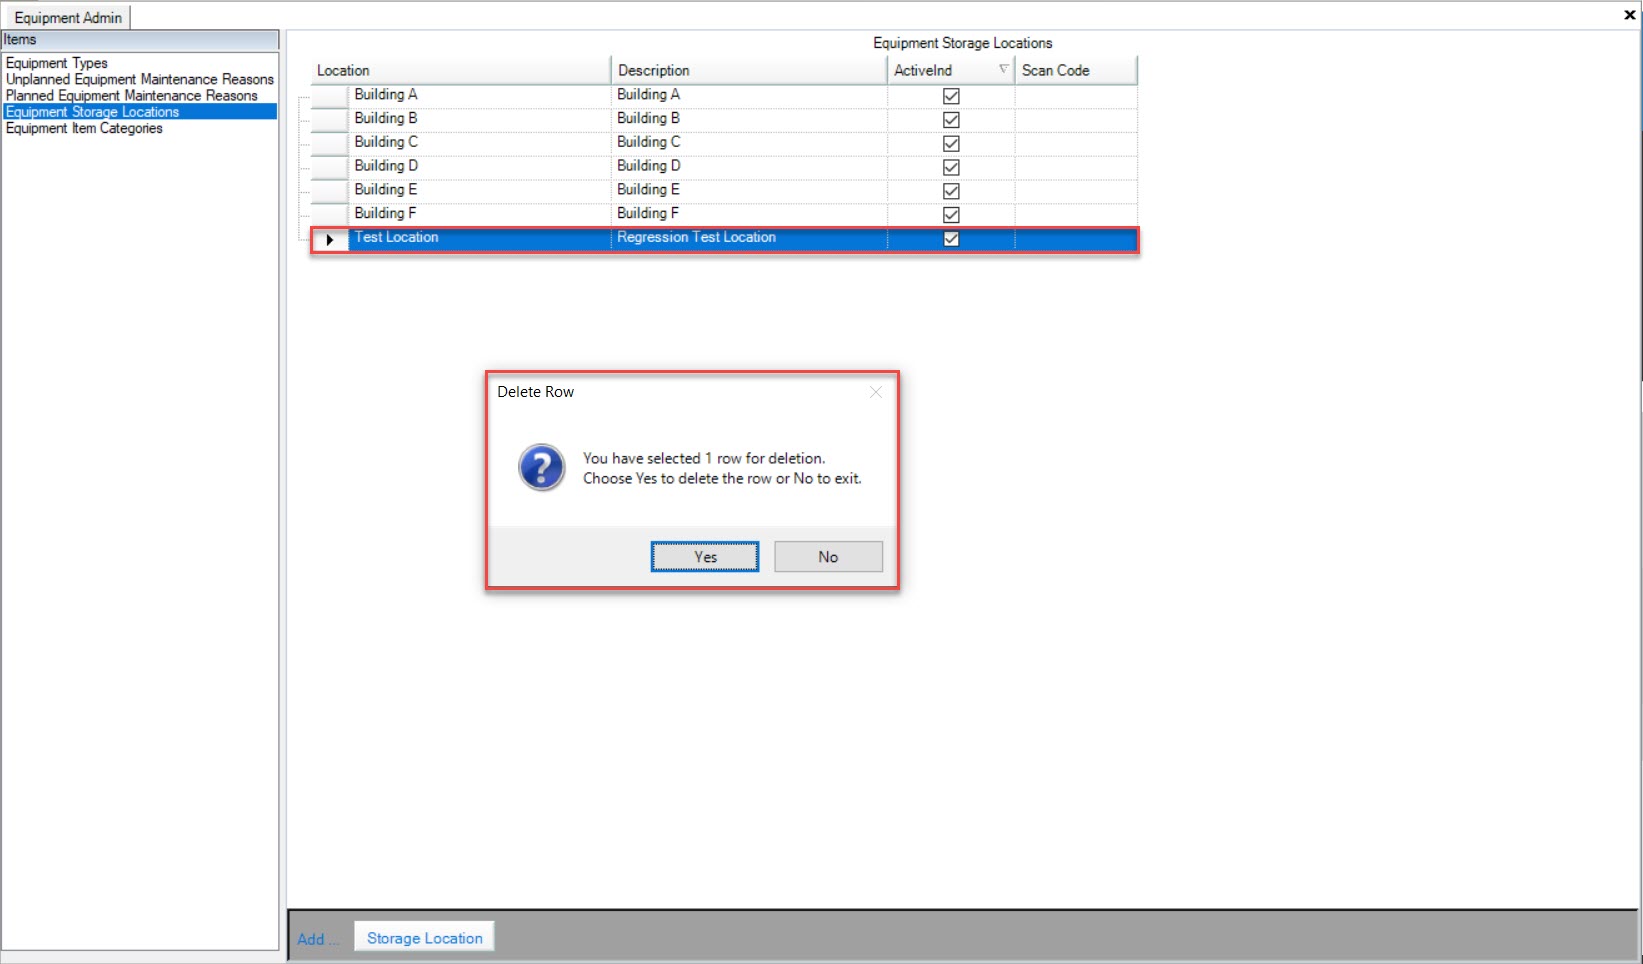
The selected Equipment Storage Location will be deleted.
Make sure to save your changes before exiting the screen.
Equipment Item Categories
Equipment Item Categories can be selected when entering an Equipment Item.
To view Equipment Item Categories, navigate to the  tab and click on the
 ![]() tab.
tab.
The Equipment Admin screen will be displayed.

Make sure to select Equipment Item Categories from the Items pane to the left of the screen.
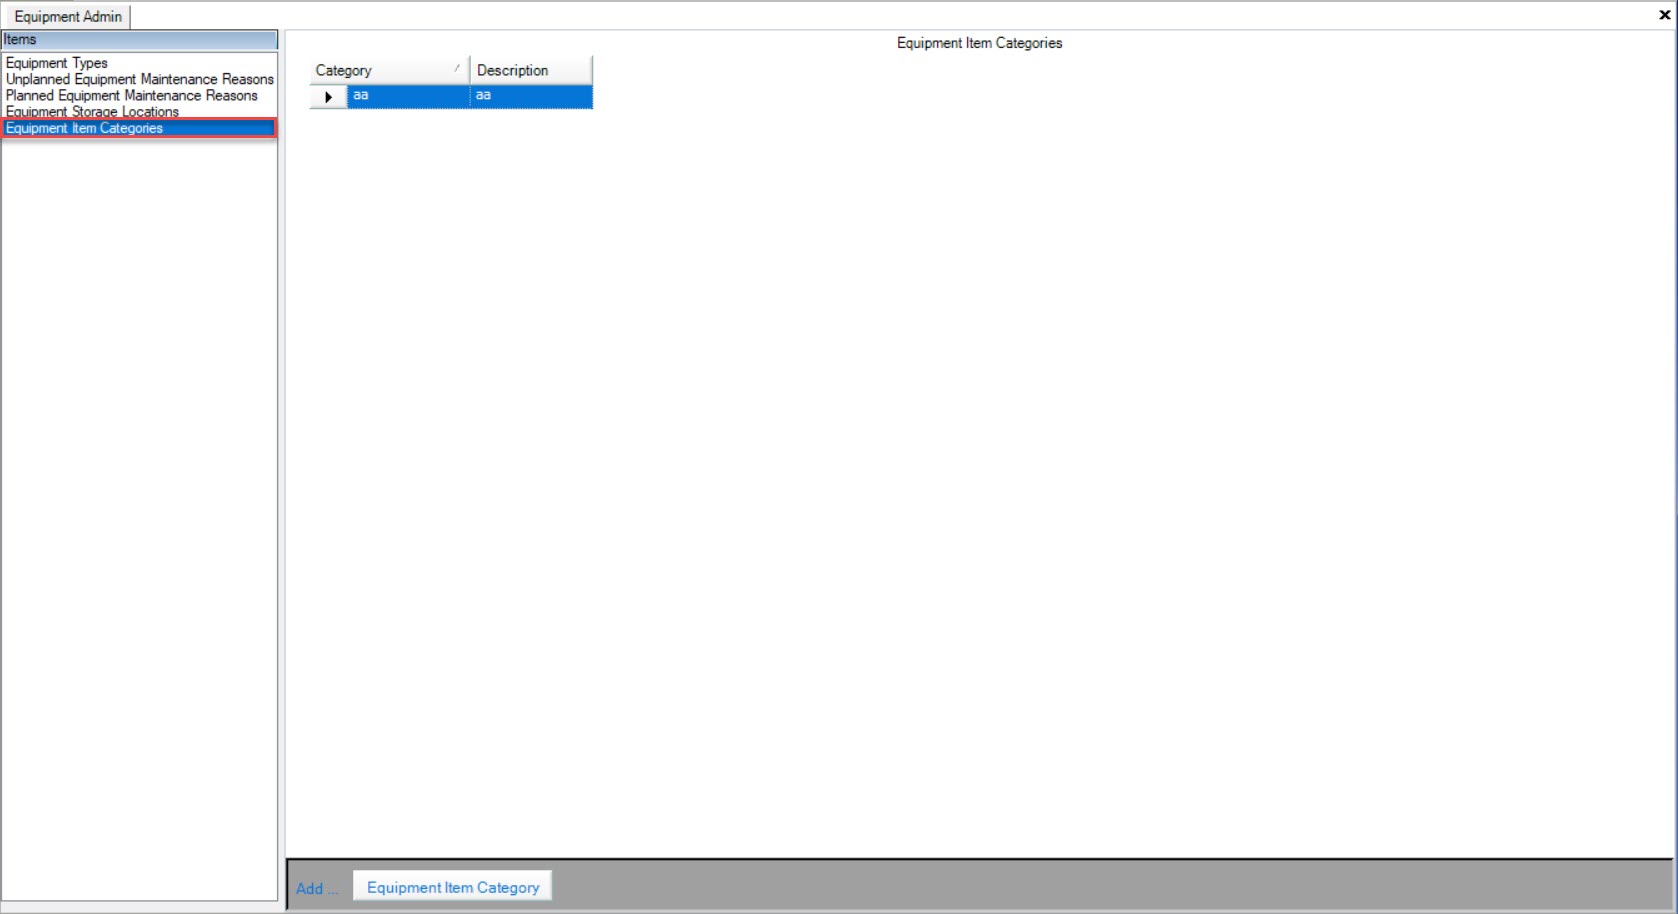
All of the available Equipment Item Categories in the system will be displayed.
Adding Equipment Item Categories
To add an Equipment Item Category, navigate to the  tab and click on the
 ![]() tab.
tab.
The Equipment Admin screen will be displayed.

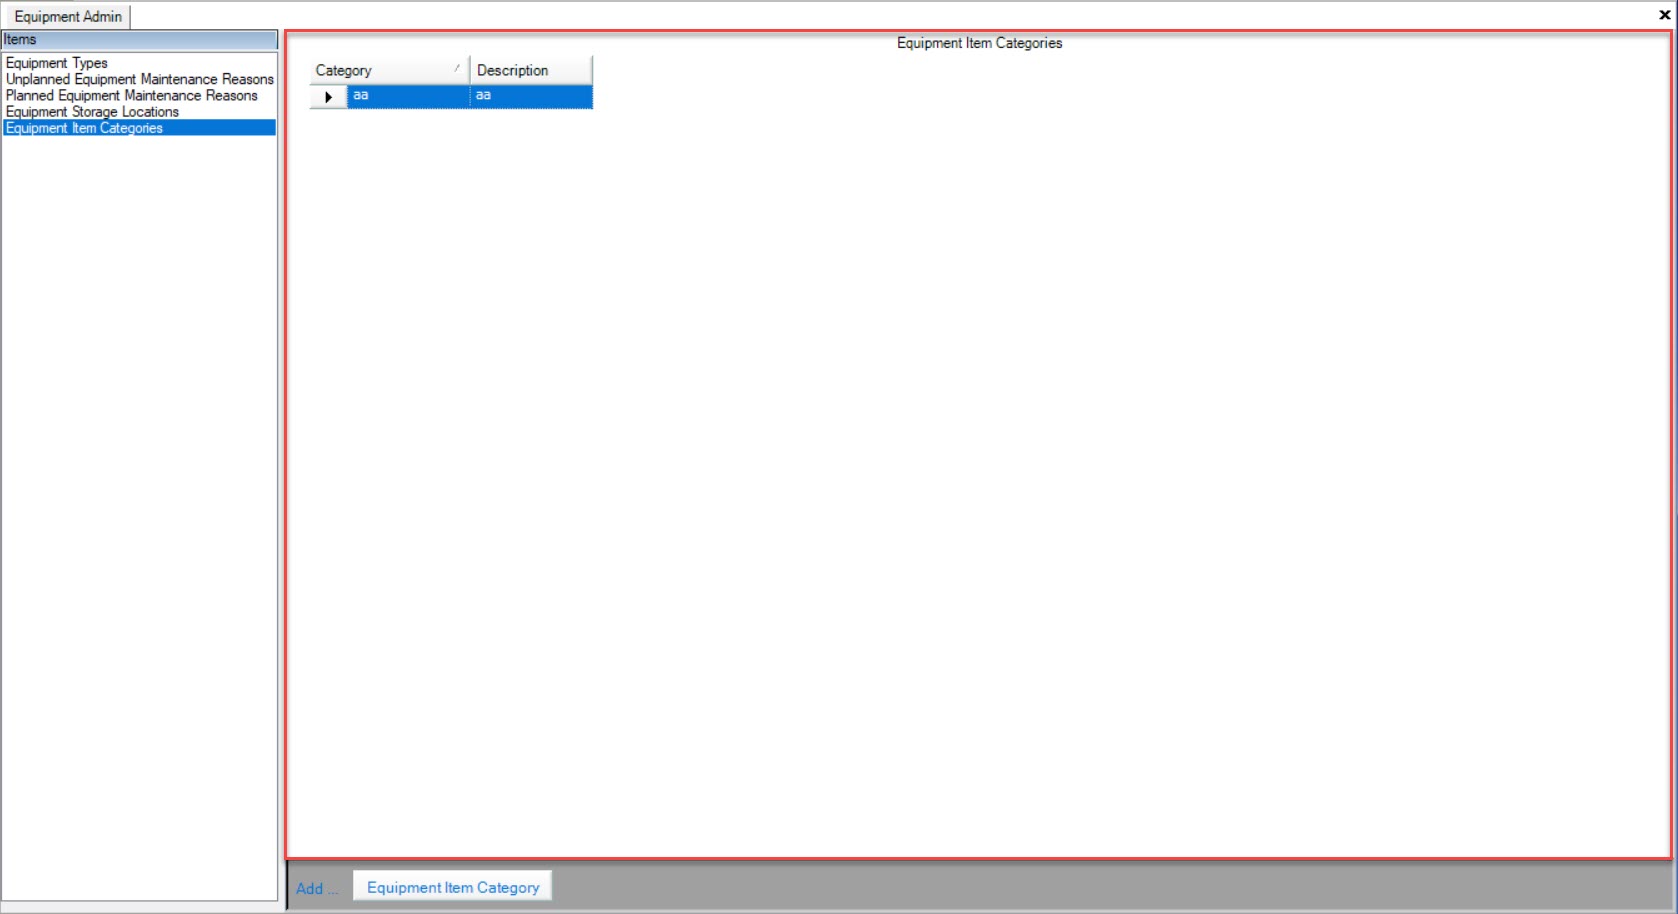
Make sure to select Equipment Item Categories from the Items pane to the left of the screen.

Then, click on the  button located at the bottom of the screen.
A new row will appear where users must enter in the Category and Description using the available textboxes.
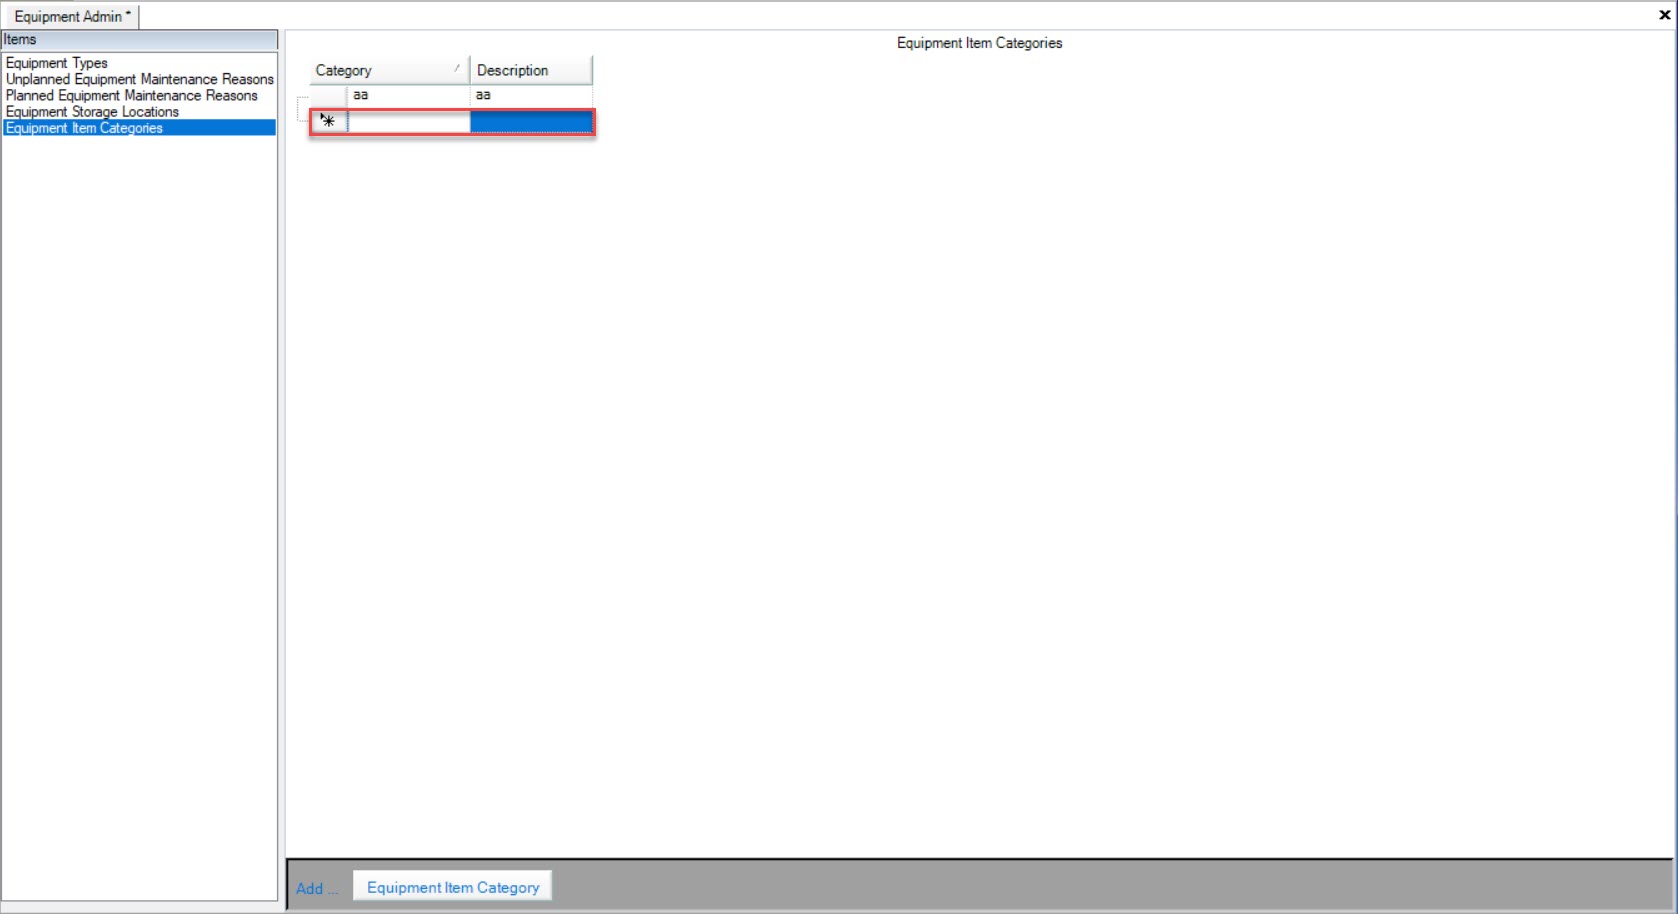
Make sure to save your changes before exiting the screen.
Editing Equipment Item Categories
To edit an Equipment Item Category, navigate to the  tab and click on the
 ![]() tab.
tab.
The Equipment Admin screen will be displayed.

Make sure to select Equipment Item Categories from the Items pane to the left of the screen.

Locate the Equipment Item Category you wish to edit and make the necessary changes using the available textboxes.
Make sure to save your changes before exiting the screen.
Deleting Equipment Item Categories
To delete an Equipment Item Category, navigate to the  tab and click on the
 ![]() tab.
tab.
The Equipment Admin screen will be displayed.

Make sure to select Equipment Item Categories from the Items pane to the left of the screen.

Locate the Equipment Item Category you wish to delete and highlight the appropriate row. Use your Delete key and when the system prompts you, select Yes.
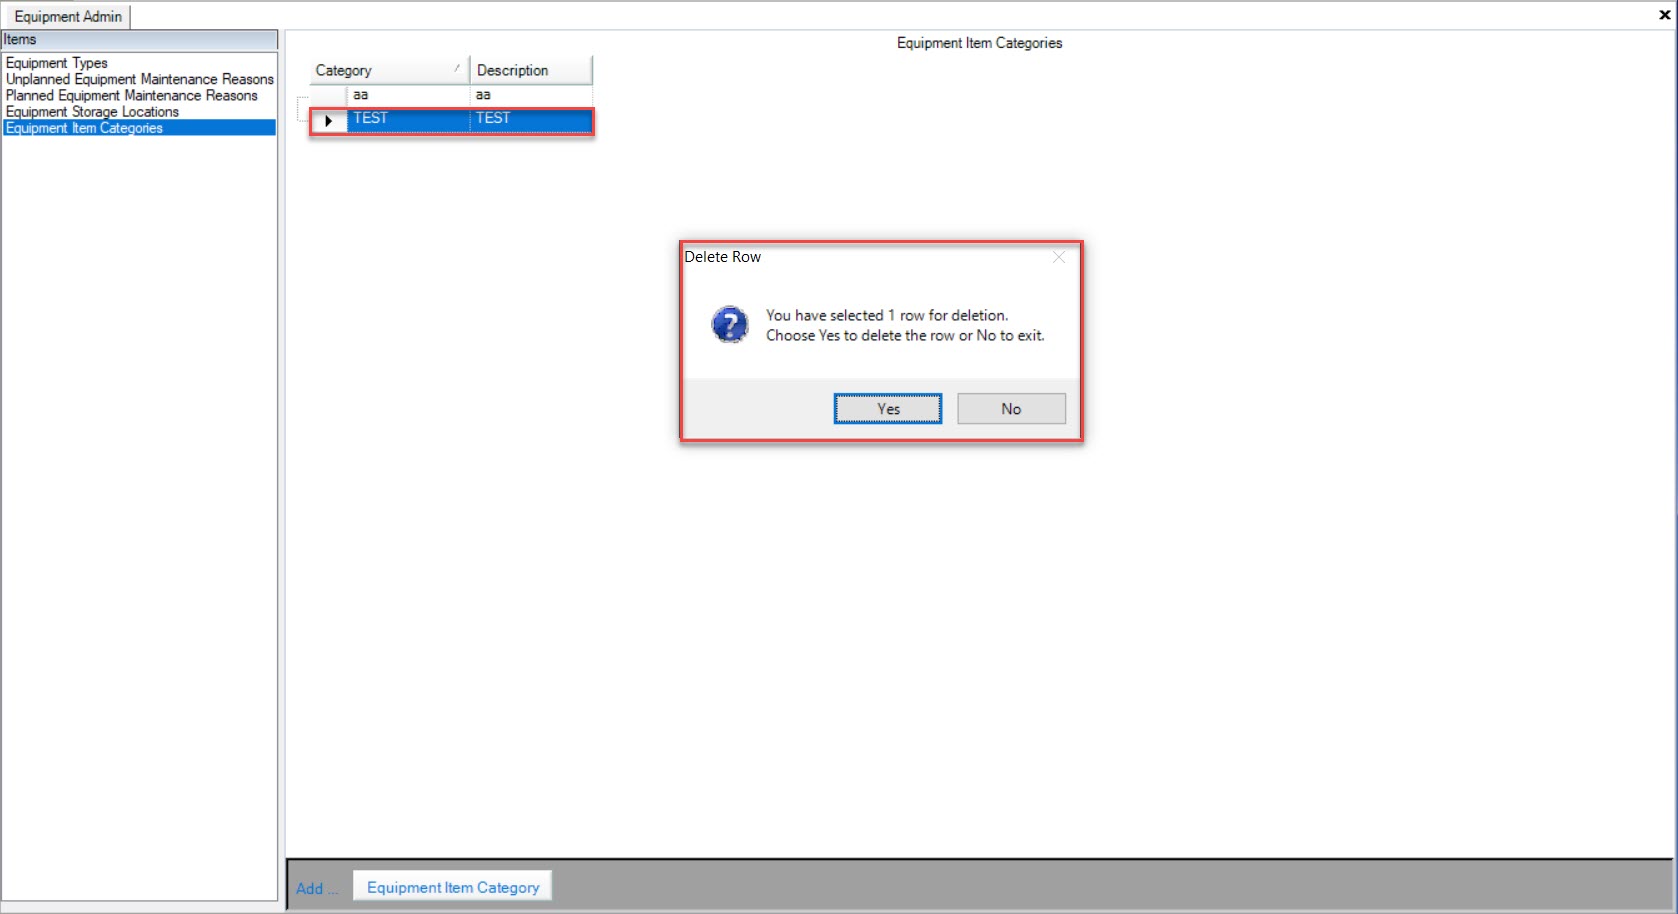
The selected Equipment Item Category will be deleted.
Make sure to save your changes before exiting the screen.