Approval Groups
The Equipment request approval workflow provides a means to notify a designated approval group whenever a Work Order Request is generated. Work Order Request can either be approved or denied. If denied, the original requester is notified by email and the request is closed. If approved, then the Work Order Request becomes an Open Work Order.
The requester is also notified by email. At any time, the approval status and approval history can be viewed by opening the request or the work order.
To view all available Approval Groups in the system, navigate to the  tab and click on the
 ![]() icon. The Equipment Approval Groups lookup screen will be displayed.
icon. The Equipment Approval Groups lookup screen will be displayed.
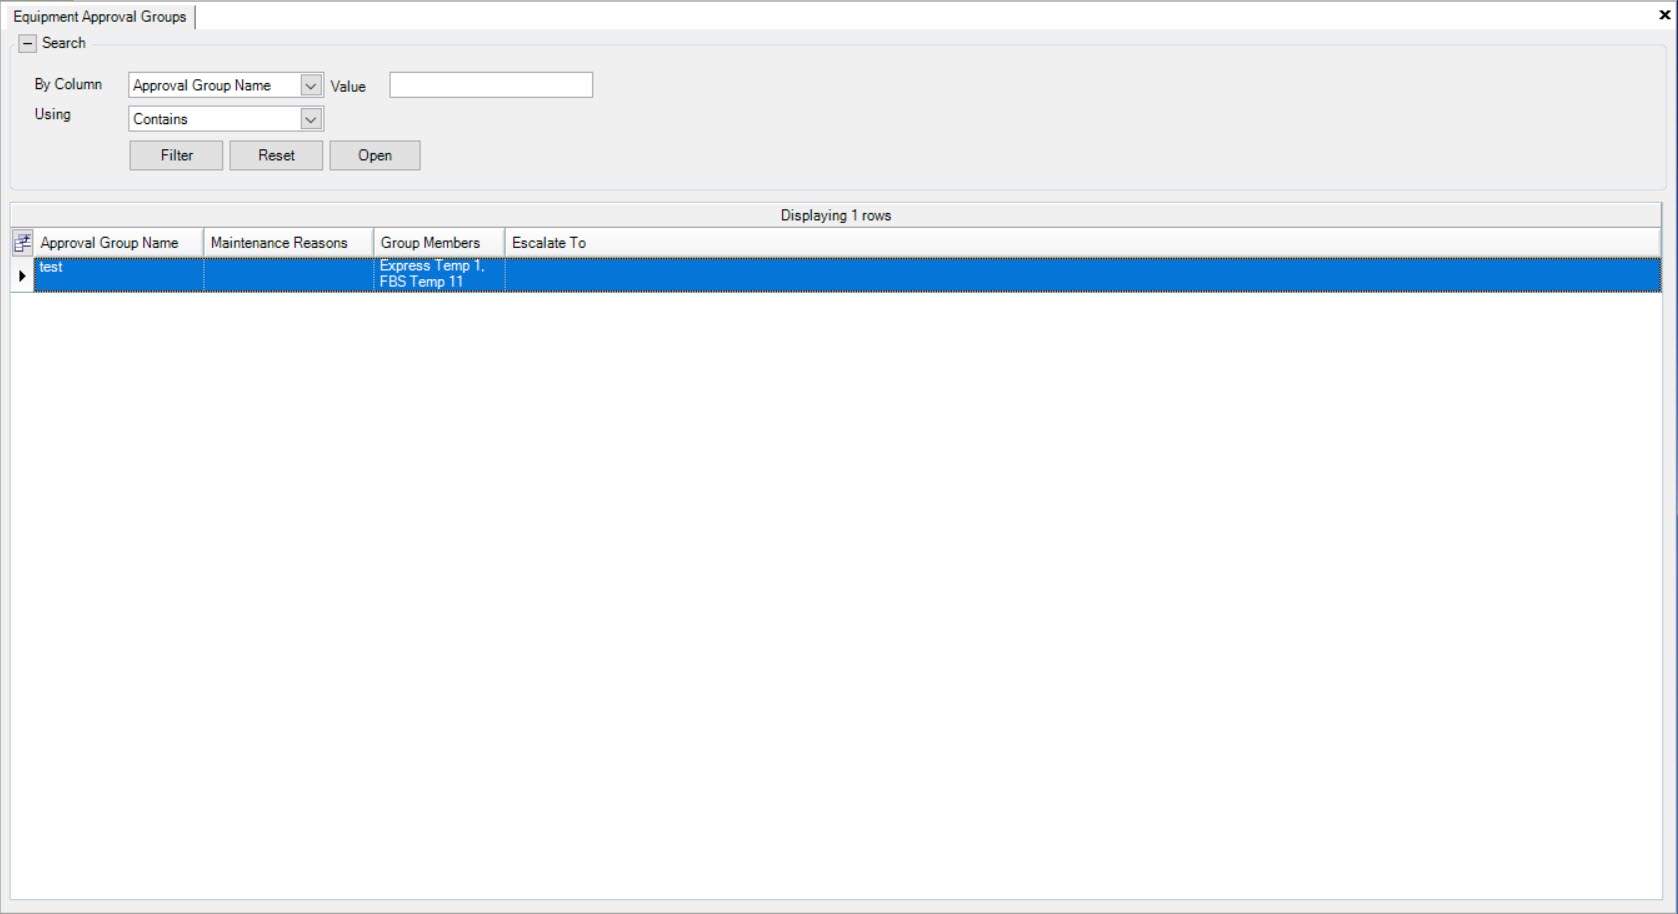
All of the available Approval Groups will be displayed.
To open an Approval Group, simply locate the one you wish to open and double-click on the appropriate row. The Equipment Approval Group detail screen will be displayed.
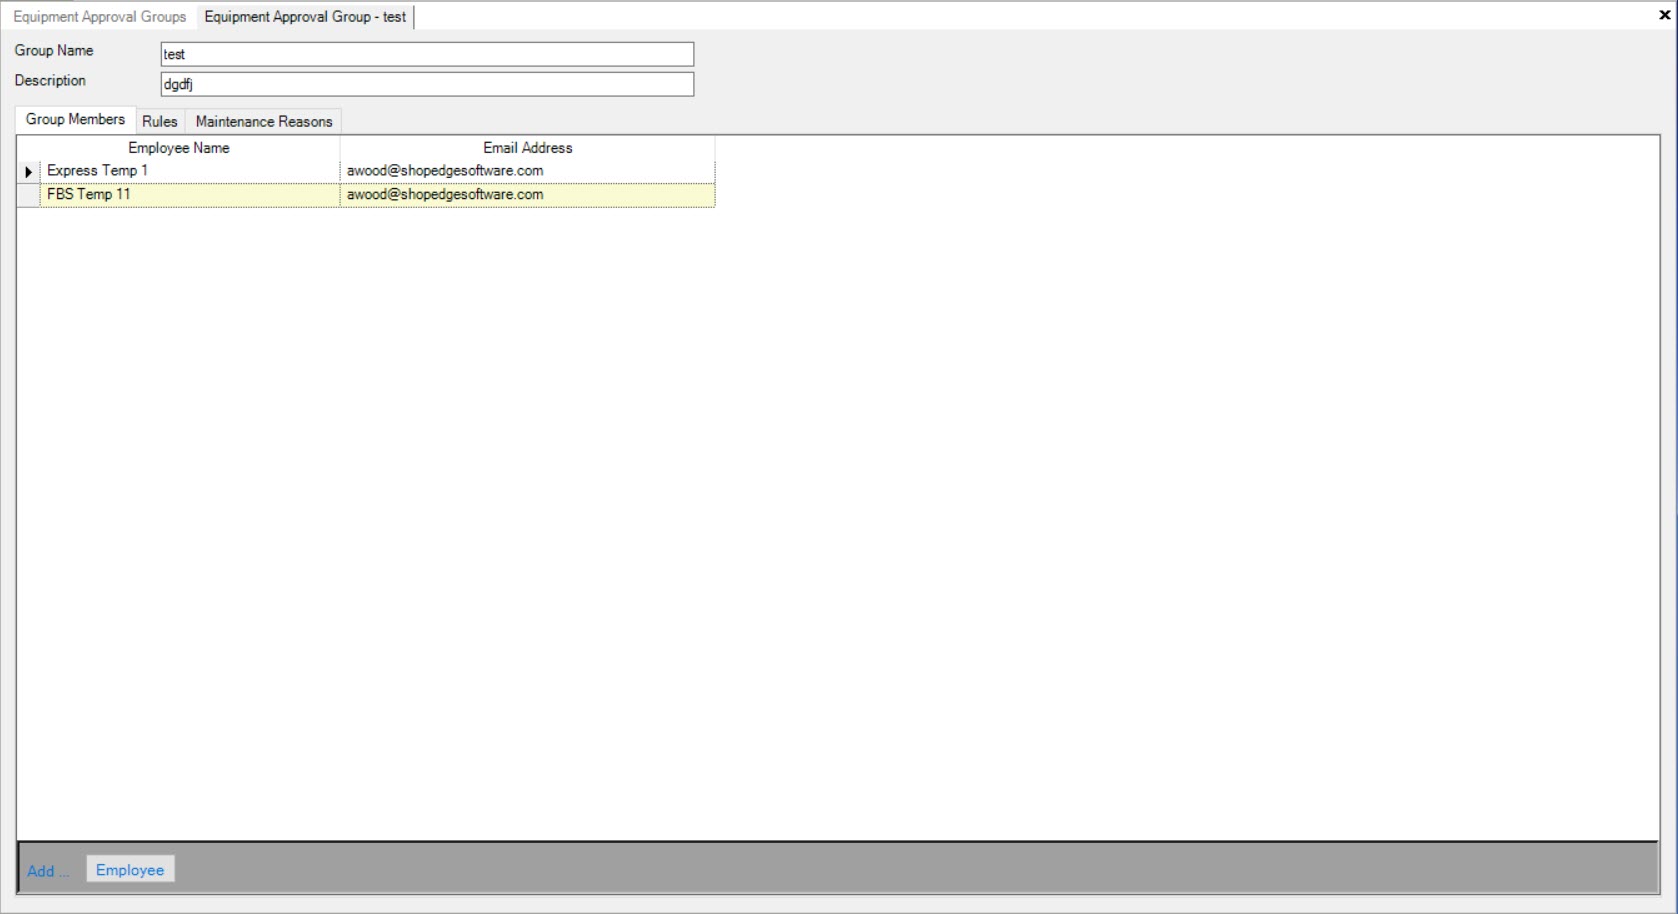
Creating an Equipment Approval Group
The first step to enable the approval functionality is to create one or more Approval Groups. Each Approval Group can be assigned multiple users that can approve the requests. The Approval Group can be assigned one or more Maintenance Reasons that the group is responsible for approving.
There are two ways to create a new Approval Group in the system. The first way is to navigate to File > New > Equipment Approval Group.
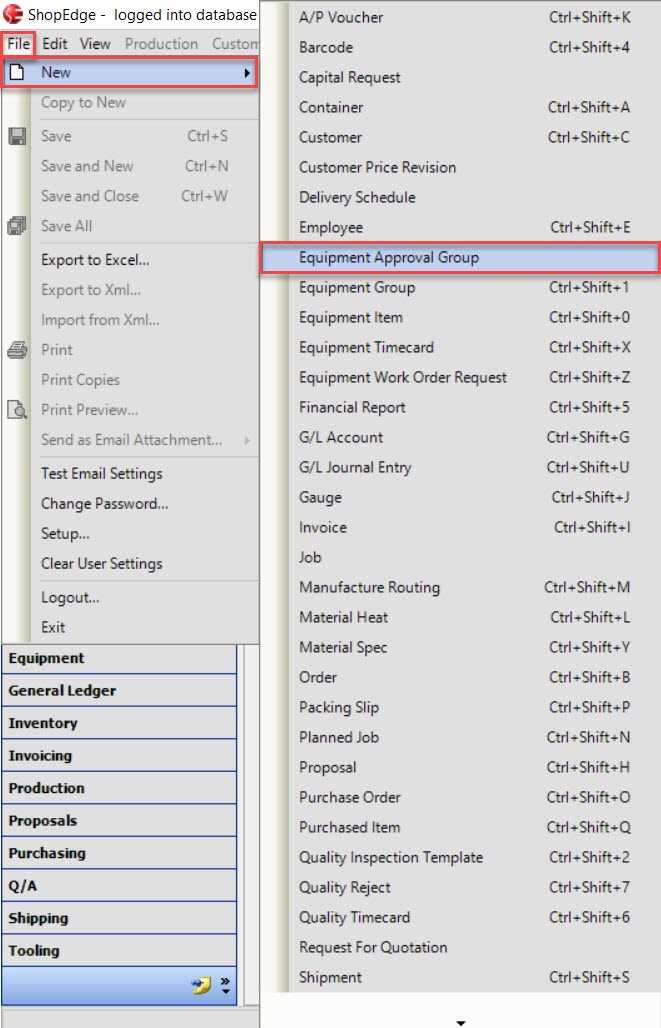
The second way is to click on the  button and select the Equipment Approval Group option.
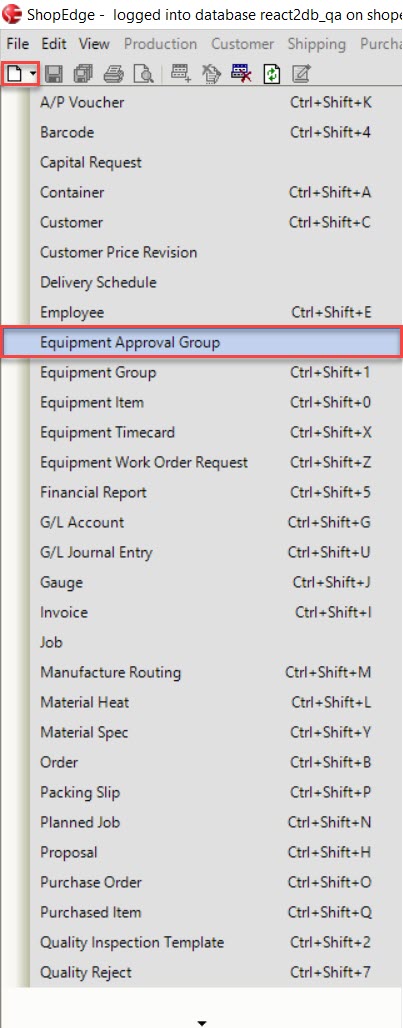
Both of these ways will open a new Equipment Approval Group screen.
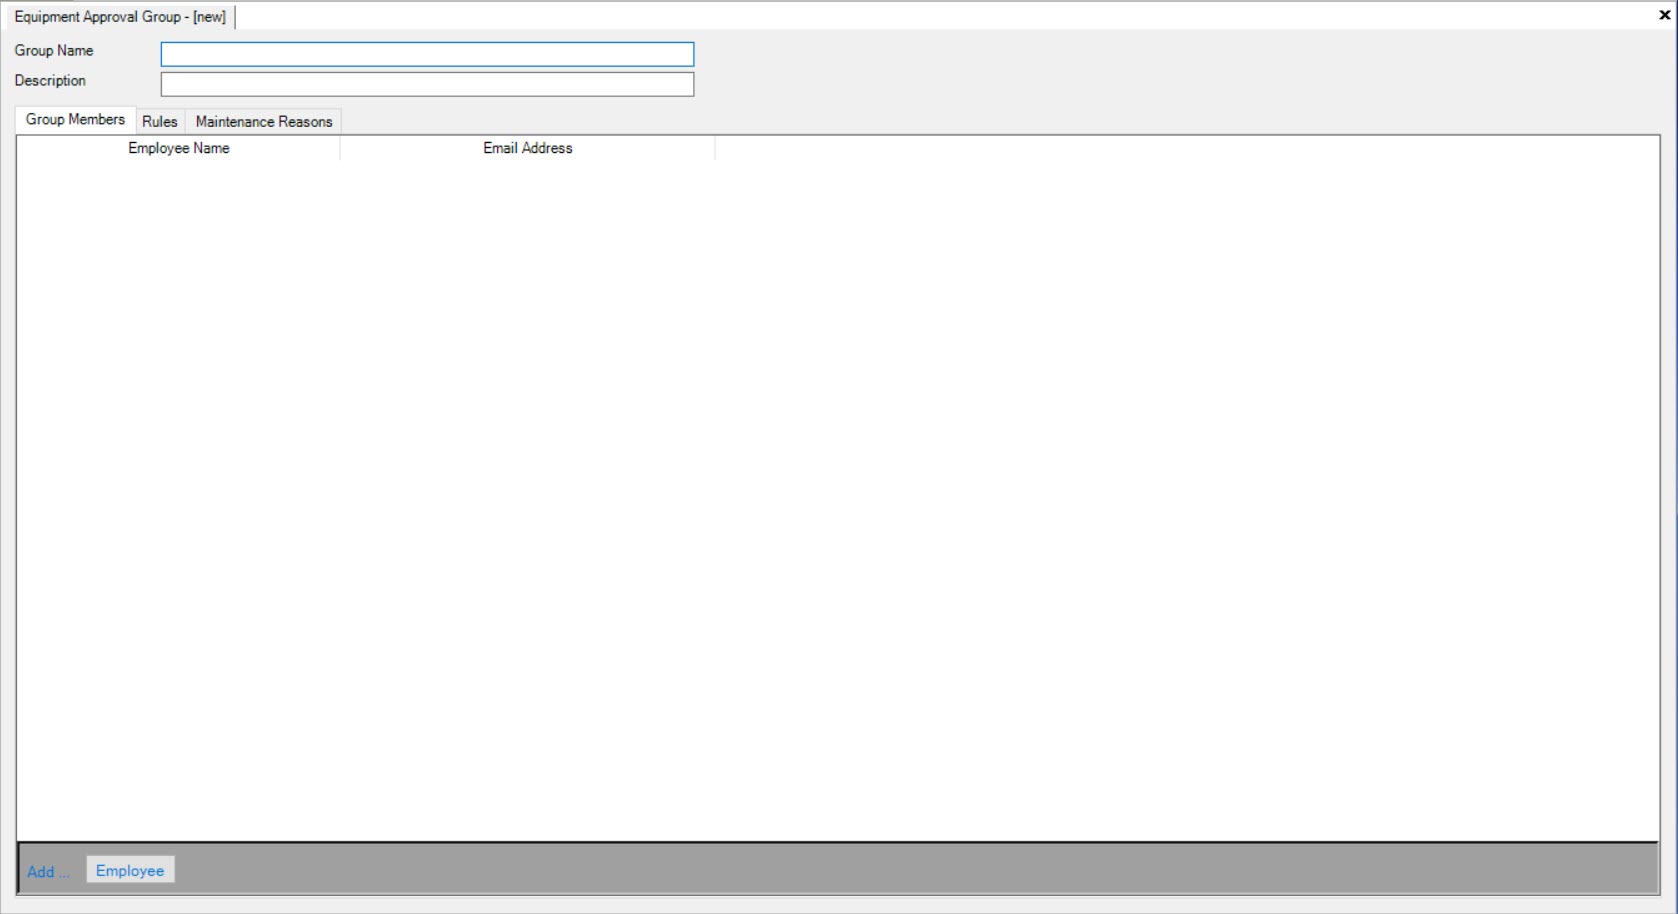
Users must enter in a Group Name and Description using the available textboxes.
Make sure to save before exiting the screen.
Approval Group Members
Users have the ability to add group members (employees) to Approval Groups. The group members that are added to Approval Groups are responsible for approving requests.
To add a group member to an Approval Group, click on the  button located at the bottom of the screen.
The Employees window will appear where users can select one or more Employees to add to the Approval Group. Then, click on the  button.

The selected Employees will be added as group members to the Approval Group.
Note
Selected Employees must have a Department in order to be added to Approval Groups in the system.
Once the appropriate group members have been added, make sure to save your changes before exiting the screen.
Setting Approval Group Rules
To set Approval Group Rules, make sure to select the  tab.
tab.
Users have the option to select Approval Rules and/or Escalation Rules.

The Approval Rules are broken down into two categories: Approval and Email Notifications. Under the Approval category, users have the option to select the following:
- Any one in group can approve requests - requests can be approved by any individual group member.
- All group members must approve requests - requests must be approved by all individual group members.
Under the Email Notifications category, users have the option to select the following:
- Requests are approved - the approval requester will receive an email notification if the request has been approved.
- Requests are denied - the approval requester will receive an email notification if the request has been denied.
- Request partially approved - the approval requester will receive an email notification if the request has been partially approved.
- Request escalated - the approval requester will receive an email notification if the request has escalated.
The Escalation Rules consist of the following options:
- No Escalation
- Automatic Escalation
- Manual Escalation (if this is selected, users must then select a group using the available drop-down menu)
Once the appropriate Approval Group Rules have been selected, make sure to save your changes before exiting the screen.
Approval Group Maintenance Reasons
To determine which Maintenance Reasons are assigned or not assigned to an Approval Group, make sure to select the  tab.
tab.
Users can either select Any Reason, or Selected Reasons. Any Reason meaning that regardless of the Maintenance Reason, the Approval Group can view and approve requests. When this option is selected, the screen will appear blank.

Selected Reasons meaning that the selected Maintenance Reasons will specifically be assigned to the Approval Group. When this option is selected, users will be able to view unassigned and assigned Maintenance Reasons.

If users wish to assign Maintenance Reasons, simply highlight the row(s) and click on the  button. The selected Maintenance Reason(s)
will be moved to assigned.

To unassign Maintenance Reasons, simply highlight the row(s) and click on the  button. The selected Maintenance Reasons(s) will be
unassigned.
Once the appropriate Maintenance Reasons have been assigned or unassigned, make sure to save your changes before exiting the screen.