Accounts
There are two ways to view a Customer’s Open Receivable account. The first way is to navigate to the  tab and click on the
![]() icon. This brings up the Open Receivables screen where users can search for a particular Customer.
icon. This brings up the Open Receivables screen where users can search for a particular Customer.
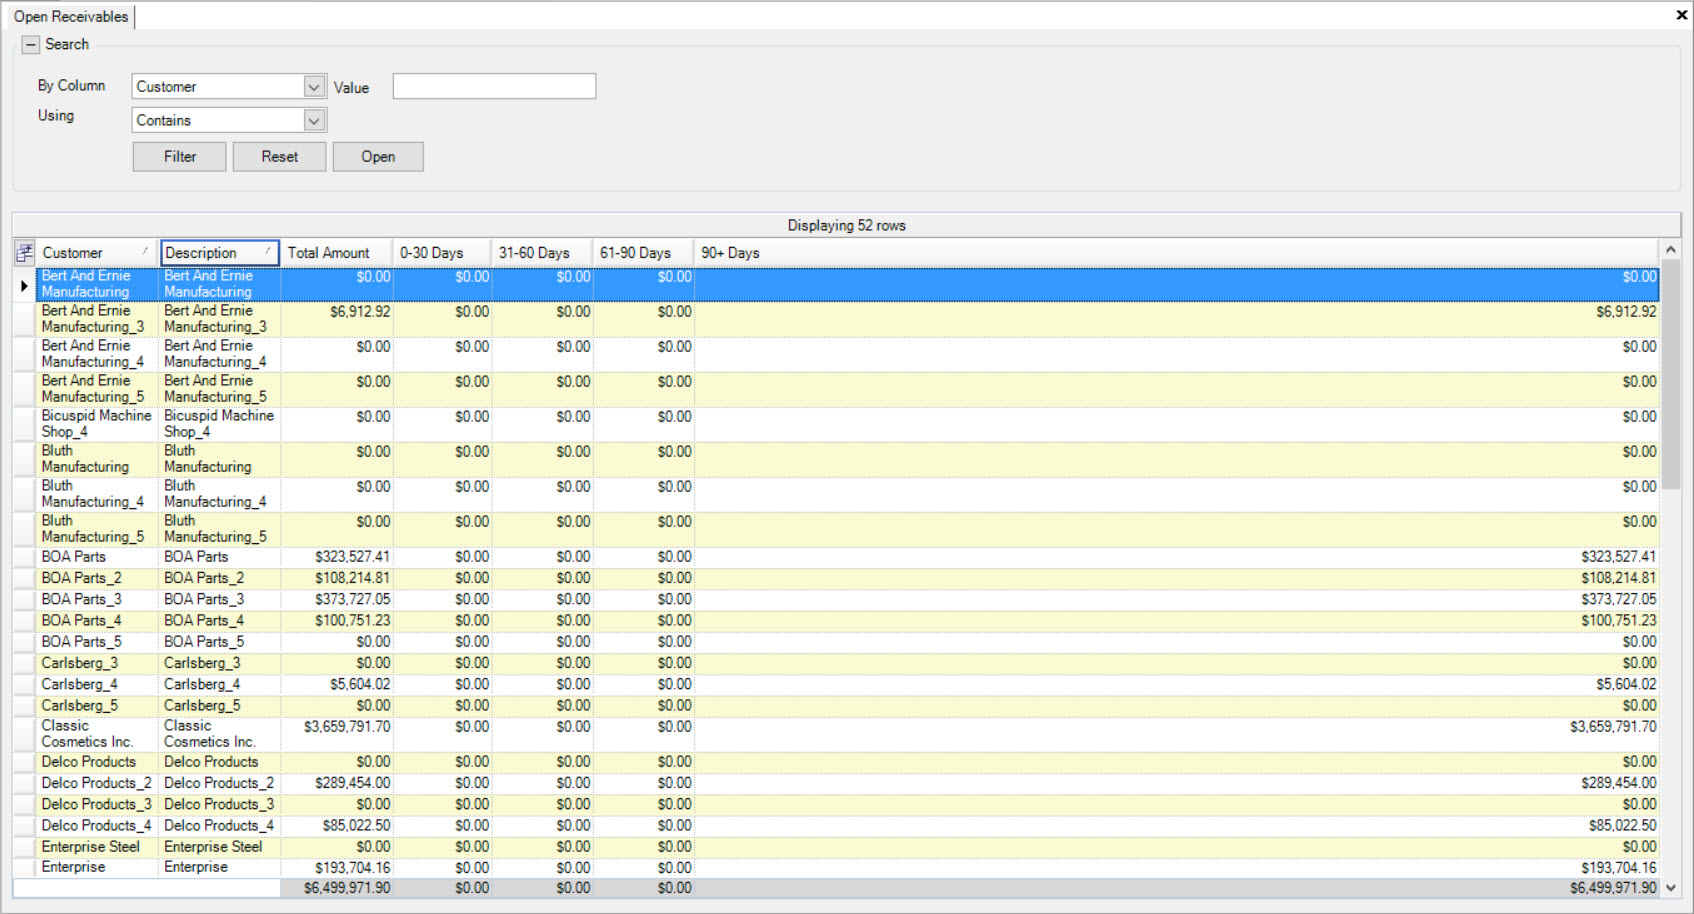
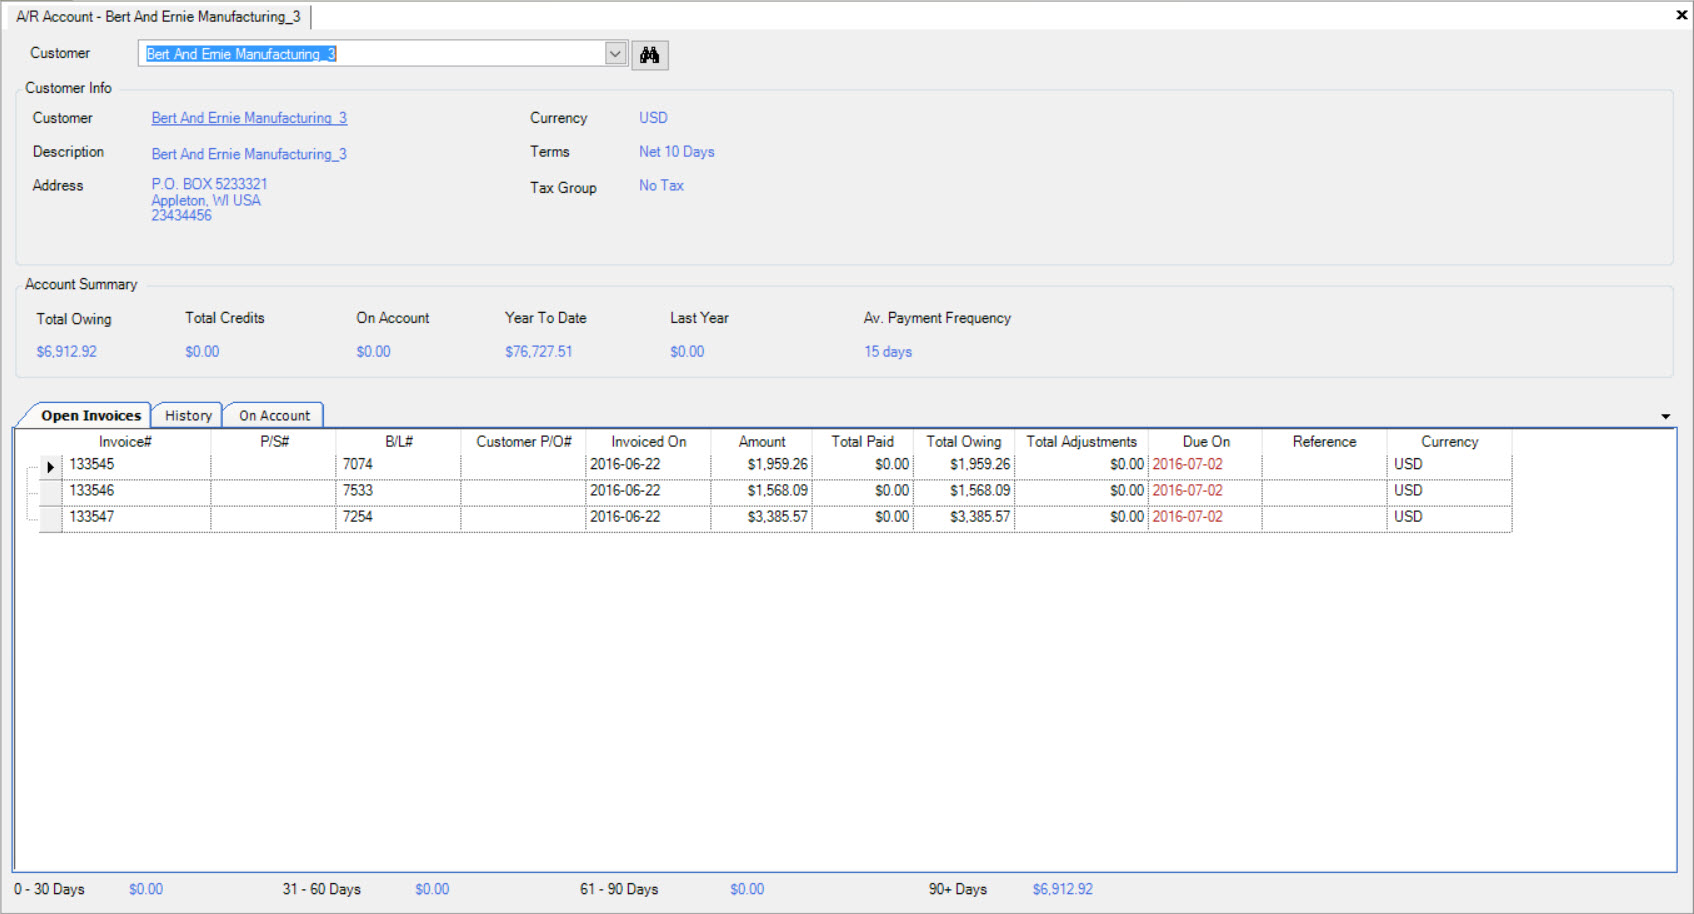
This screen will only display the Customers that have Open Receivables. You can perform a search, and then double-click on the Customer you wish to view details for. This will open the A/R Account detail screen for that particular Customer.
The second way to view an A/R account is to navigate to the  tab and click on the
 ![]() icon.
This will bring up the A/R Account screen but allows users to use the drop-down menu to select the Customer you wish to view.
icon.
This will bring up the A/R Account screen but allows users to use the drop-down menu to select the Customer you wish to view.
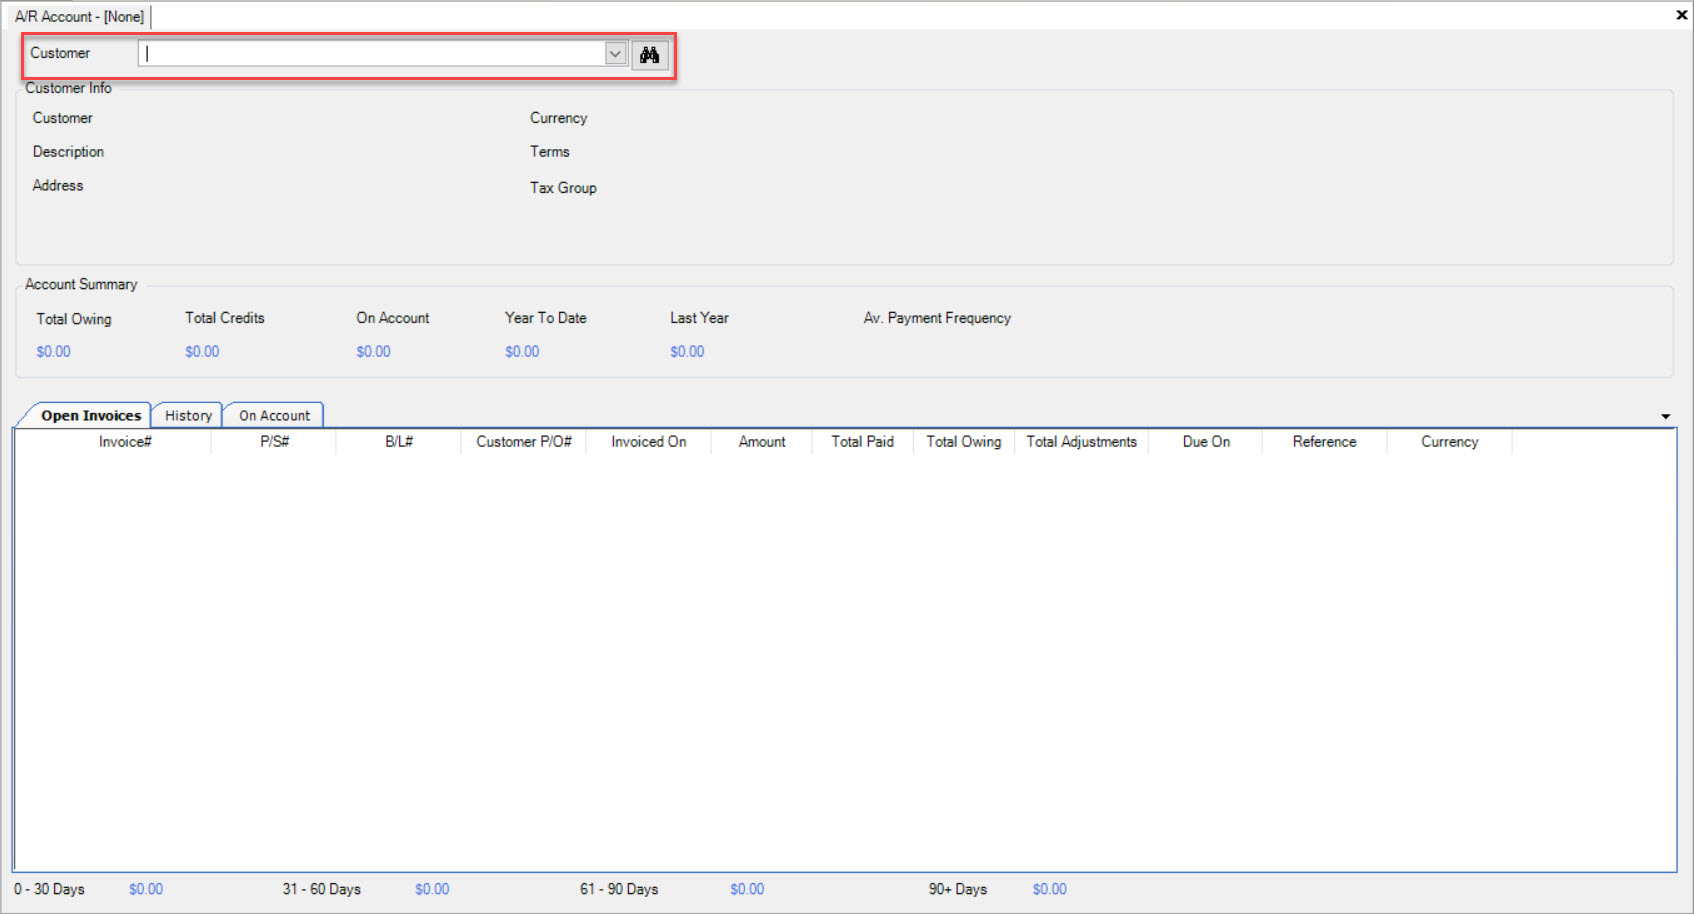
Once a Customer is selected, the system will populate the Open Receivables.

Viewing A/R Account History
In order to view the A/R Account History, navigate to the  tab and click on the
 ![]() icon.
This will bring up the A/R Account screen which allows users to use the drop-down menu to select the Customer you wish to view.
icon.
This will bring up the A/R Account screen which allows users to use the drop-down menu to select the Customer you wish to view.

Once a Customer is selected, the system will populate the Open Receivables for their account.

In order to view the History, make sure to select on the History tab.
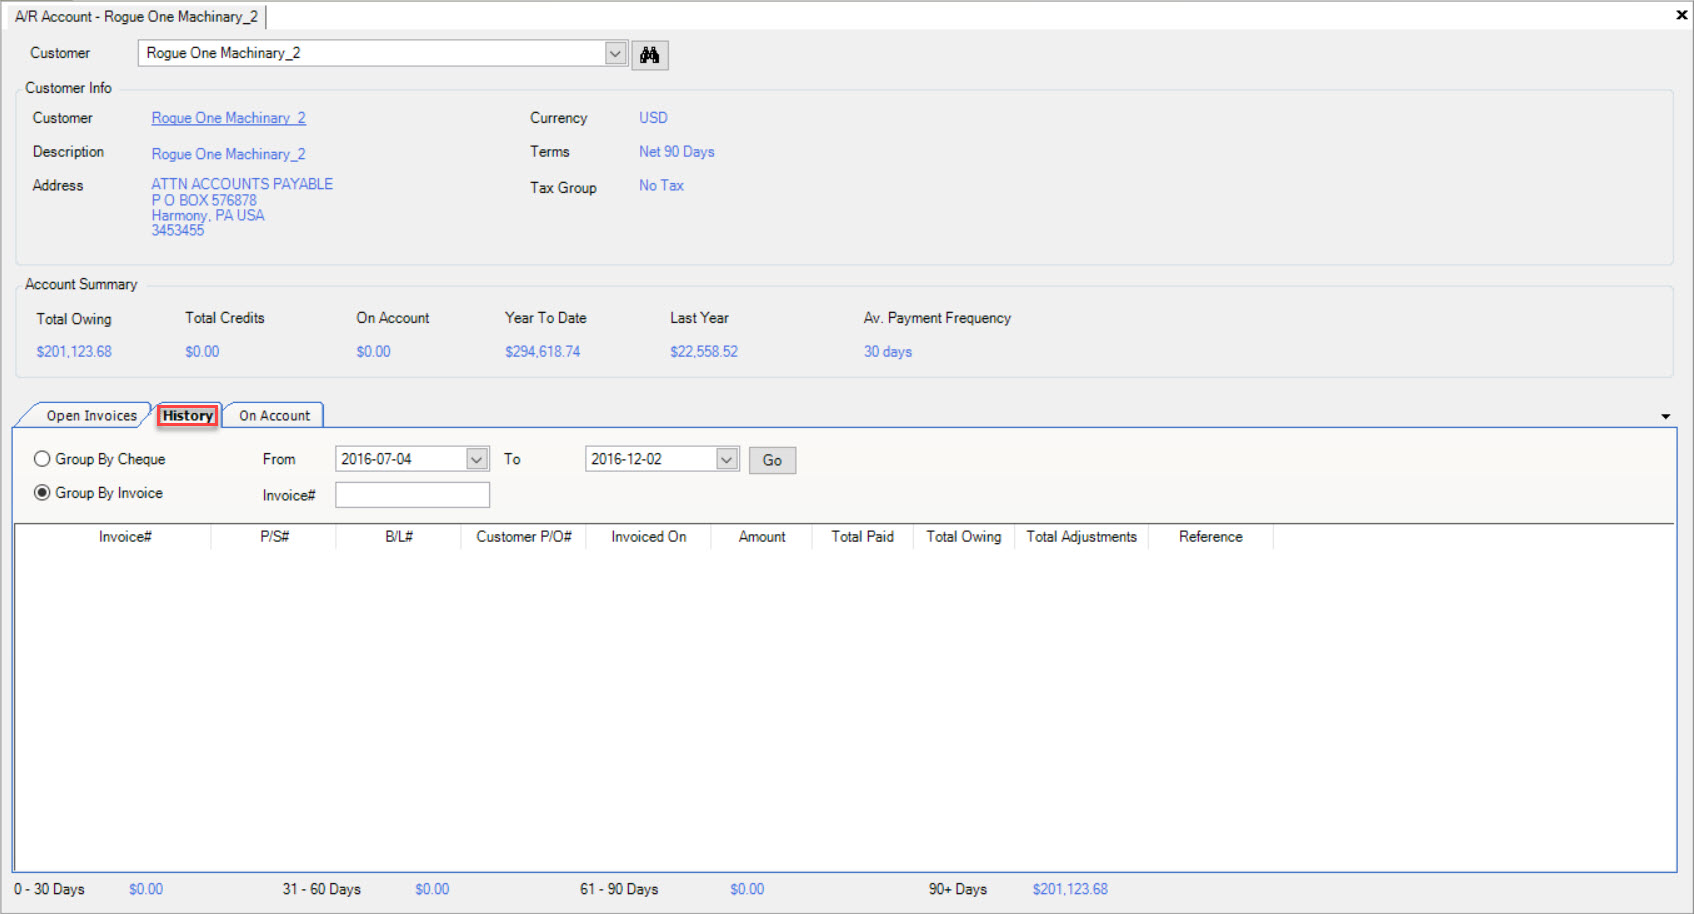
From here, users are able to select whether the History is Grouped by Cheque, or Grouped by Invoice. Users will be able to set the date to search for and, if available the Cheque # or Invoice # (depending on Group by Cheque or Invoice selection).
By selecting Group By Cheque you have the ability to view the details of the Cheque(s).

However, if you simply just wish to view the details of the Invoice, select Group By Invoice. You will be able to view the Cheques that were applied to the Invoice.
Additionally, you have the ability to double-click on an Invoice row, and open the original Invoice for further details.

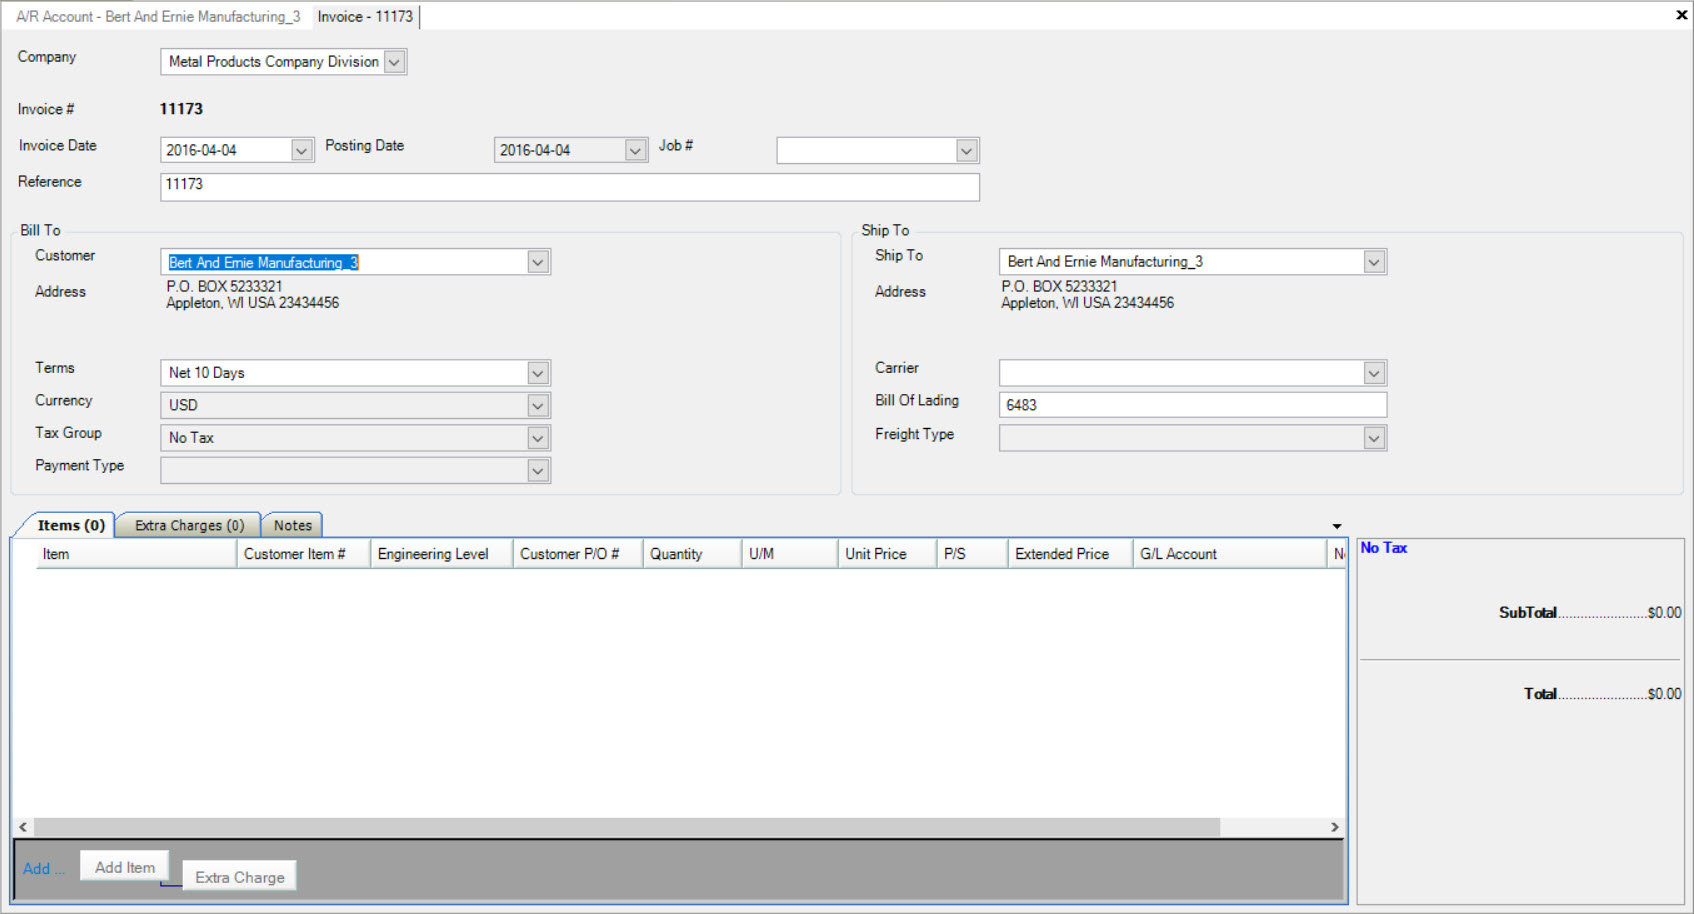
Note
The Invoice you open will be a Read Only copy as the it has been paid and closed.
Printing Customer Statements
The system allows users to print Customer A/R Statements. To select an Account to print, navigate to the  tab and click on the
 ![]() icon.
Select the Customer you wish to print a statement from. Find the Invoice # and highlight the appropriate row.
icon.
Select the Customer you wish to print a statement from. Find the Invoice # and highlight the appropriate row.
Next, select A/R at the top of the screen and select Print Statement....
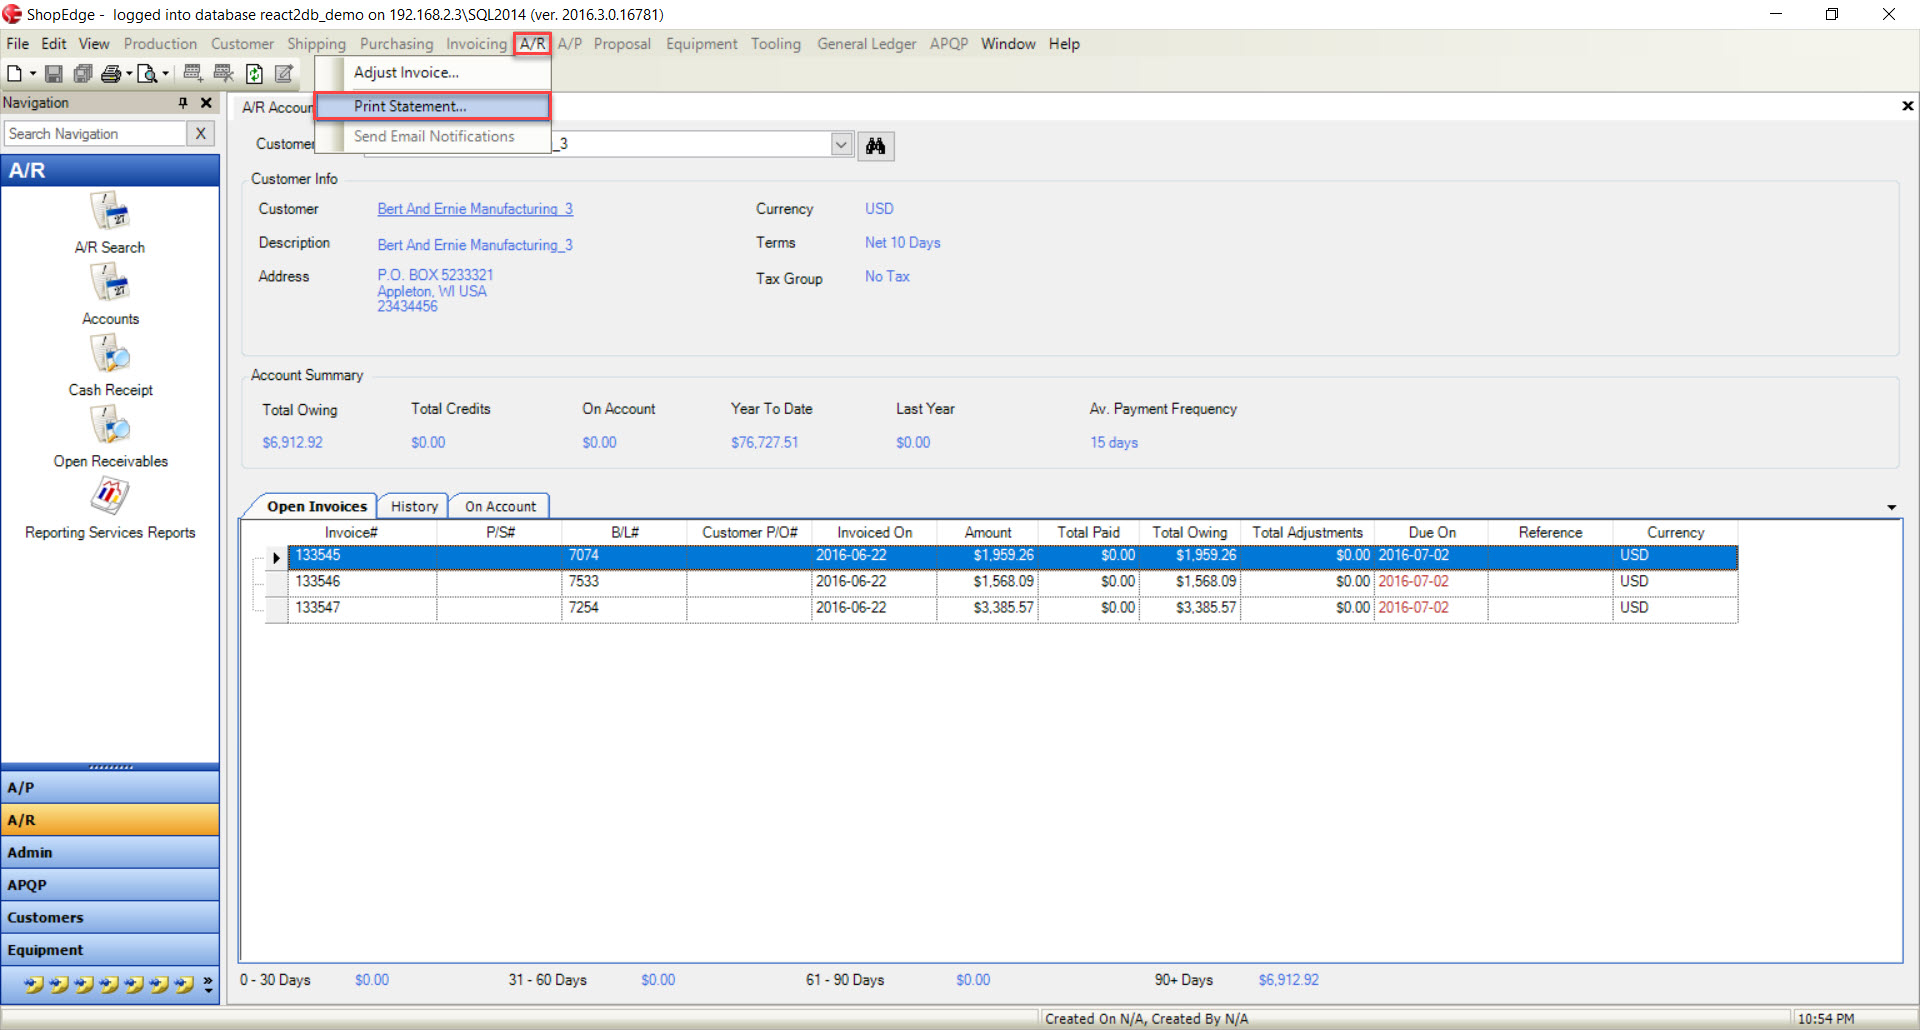
The Print window will appear. If all settings and preferences are correct for printing, select the  button. Your A/R Statement will then
be printed.

Emailing Customer Statements
The system also allows users to Email Customer A/R Statements. To do so, navigate to the  tab and click on the
 ![]() icon.
Select the Customer you wish to select a statement from, to Email. Find the Invoice # and highlight the appropriate row.
icon.
Select the Customer you wish to select a statement from, to Email. Find the Invoice # and highlight the appropriate row.
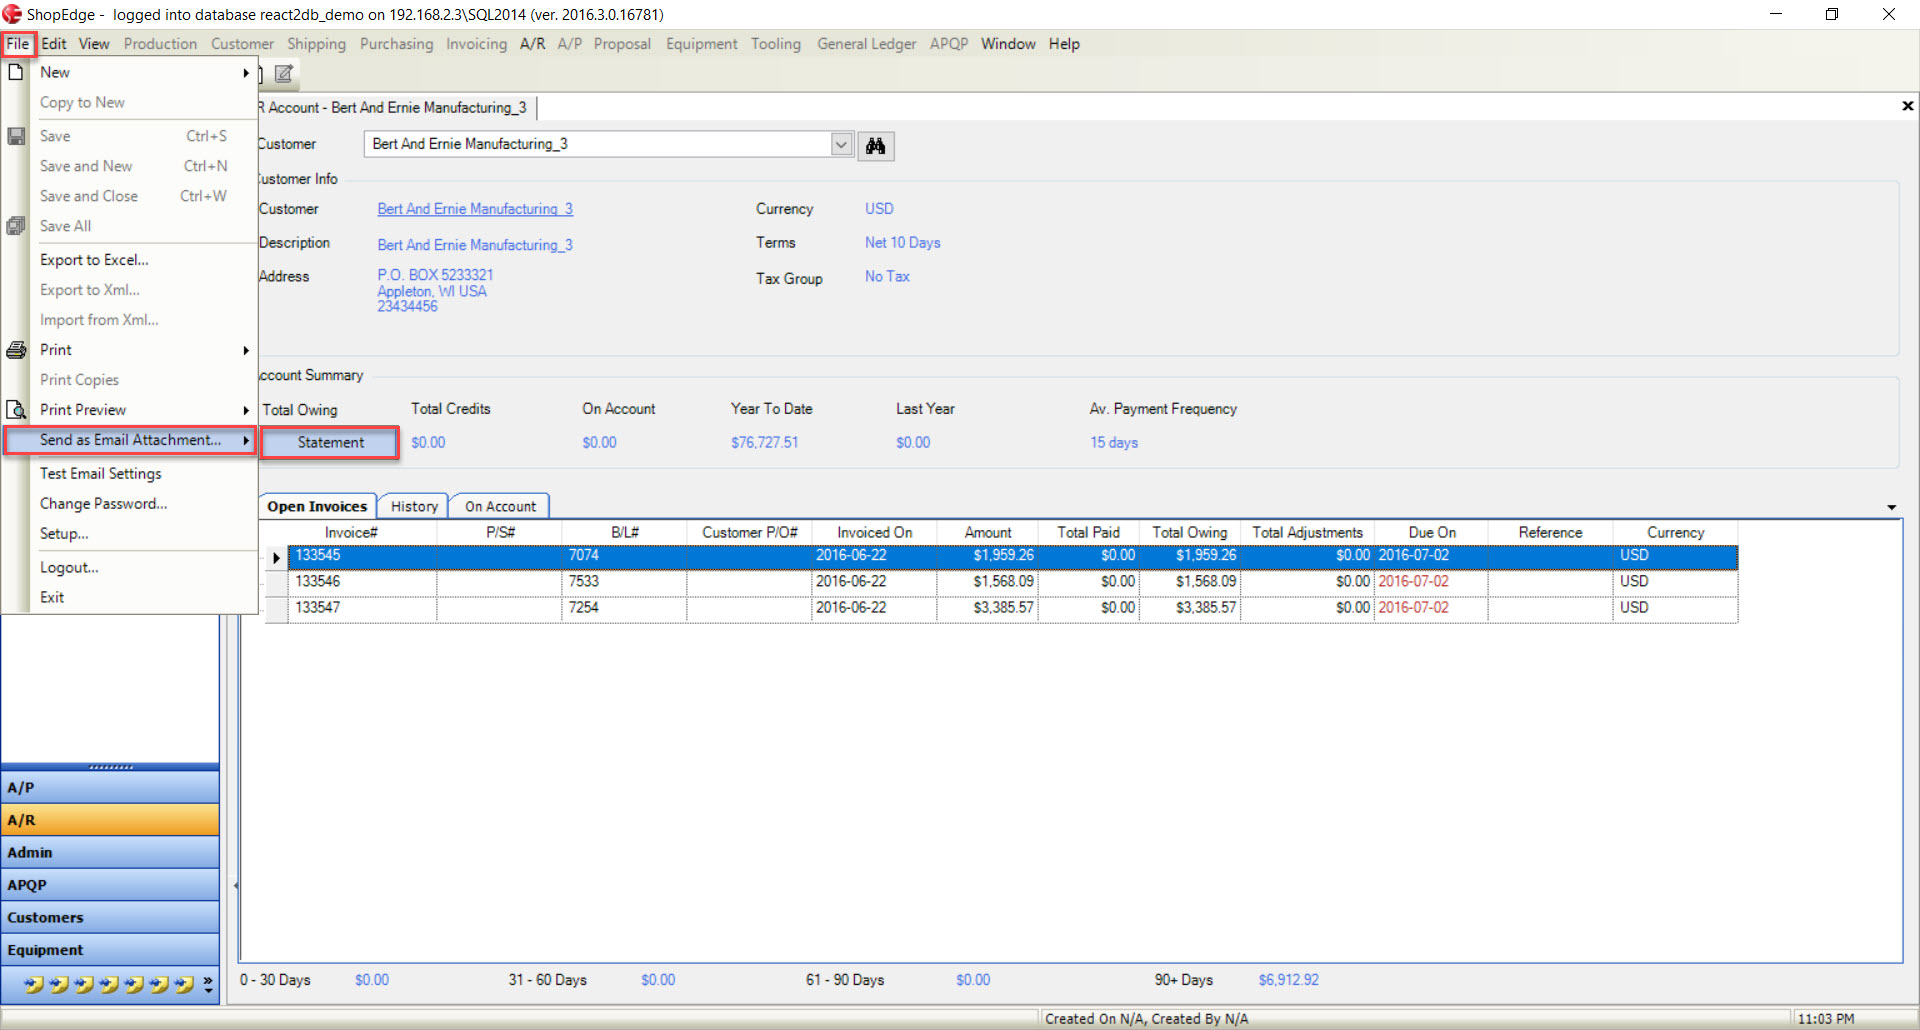
Next, click File > Send as Email Attachment > Statement.
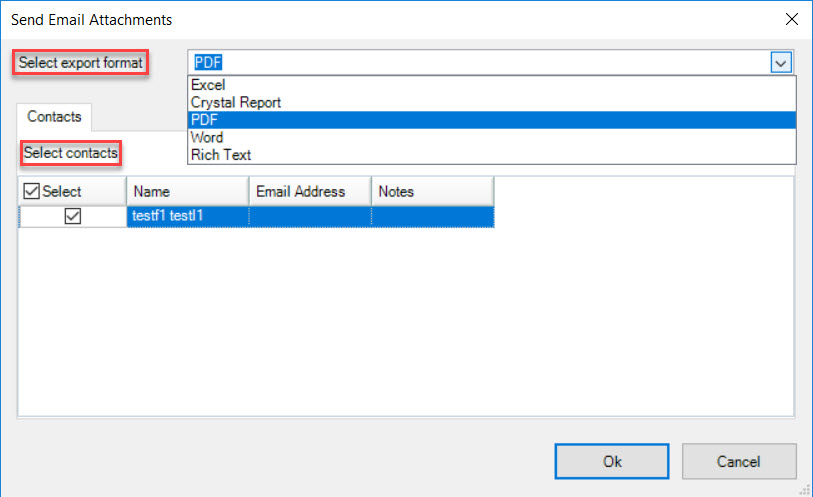
The system will prompt you to select the format of the attachment. You will also be able to select available users that will receive this Email. Click on the  button.
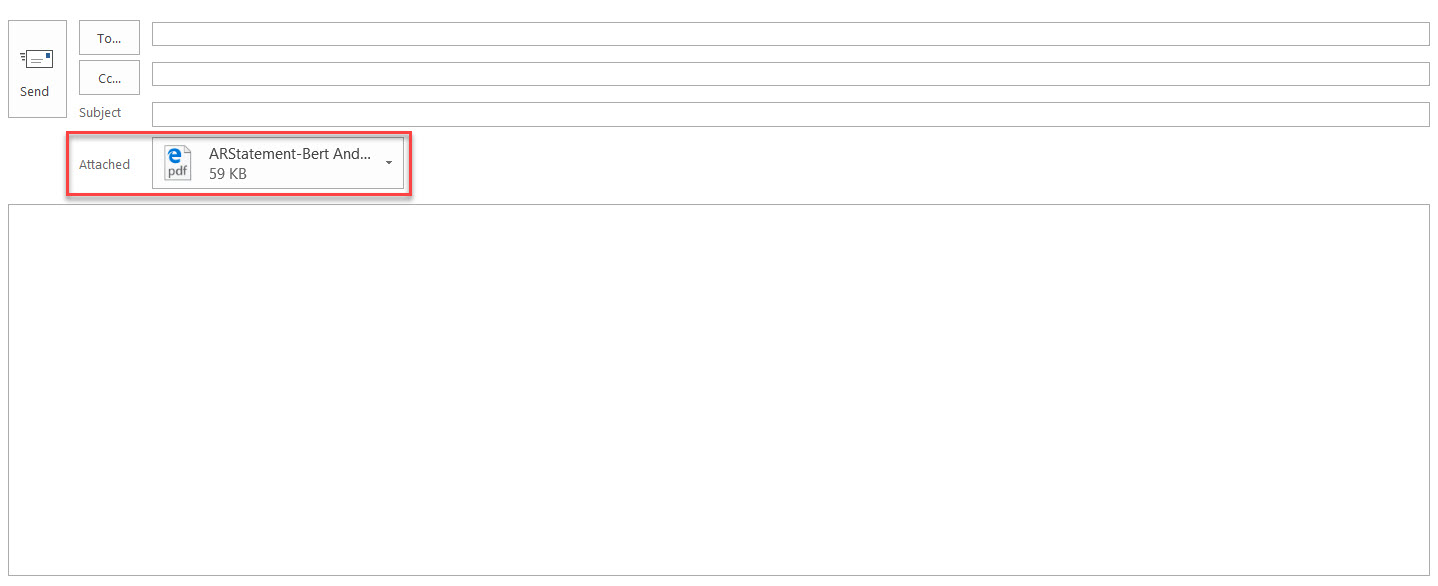
You Email will pop-up with the selected A/R Statement attached. Create the necessary Email and send.
Adjusting a Customer Invoice
To adjust an open Invoice, navigate to the  tab and click on the
![]() icon. This will bring up the A/R Account screen which allows users to use the drop-down
to select the Customer you wish to view.
icon. This will bring up the A/R Account screen which allows users to use the drop-down
to select the Customer you wish to view.

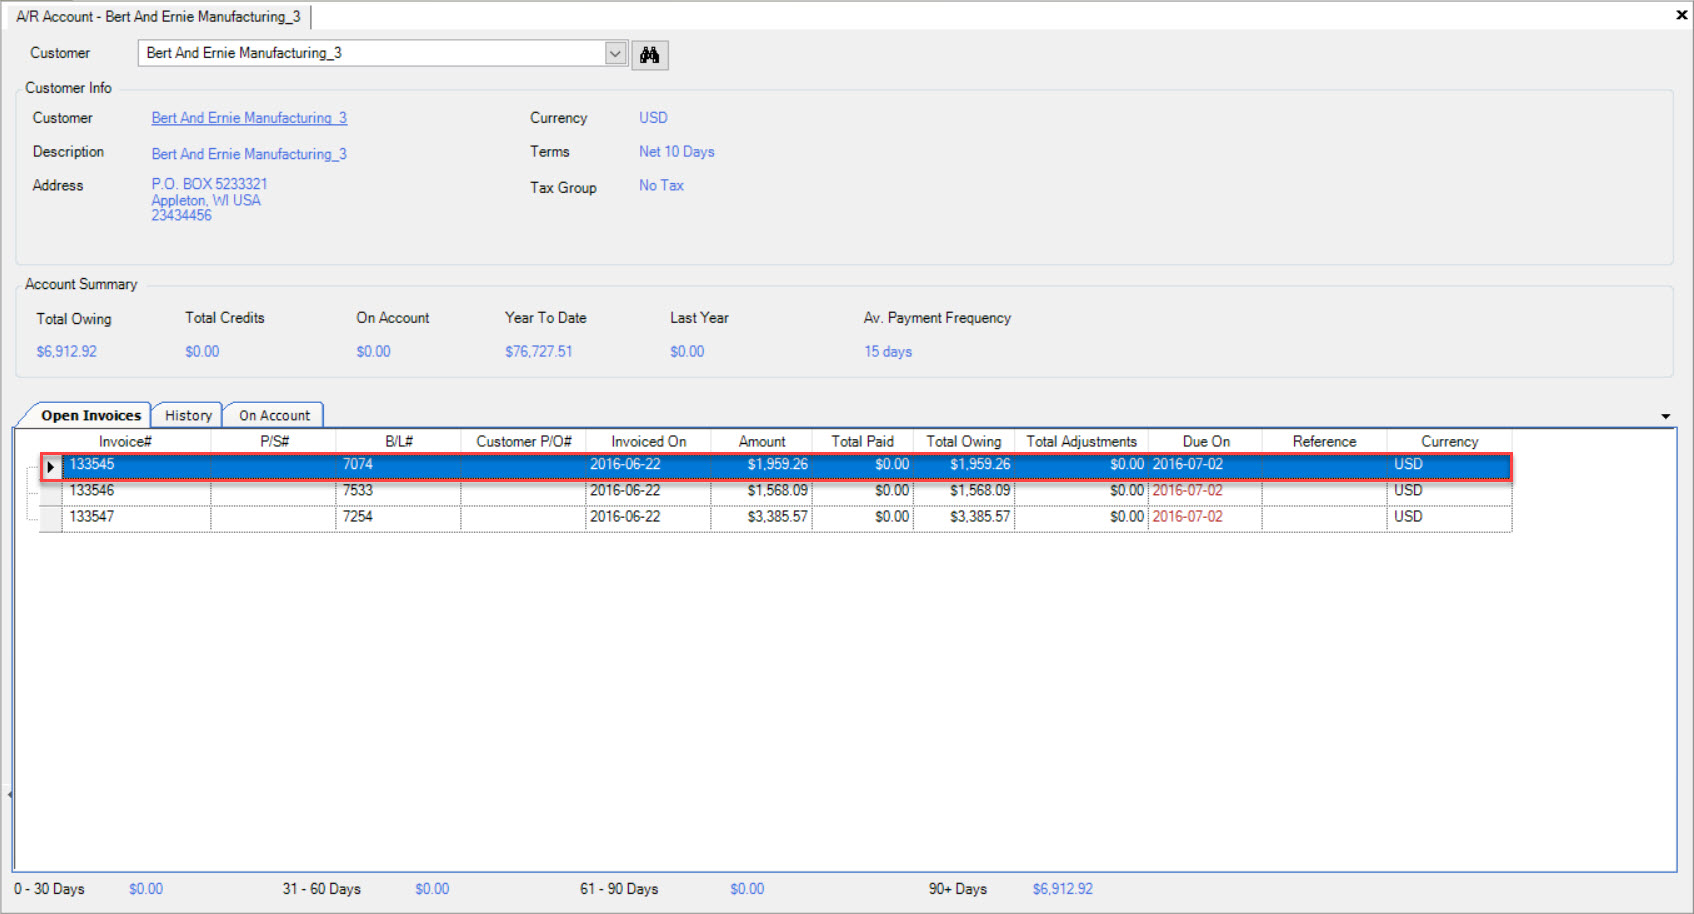
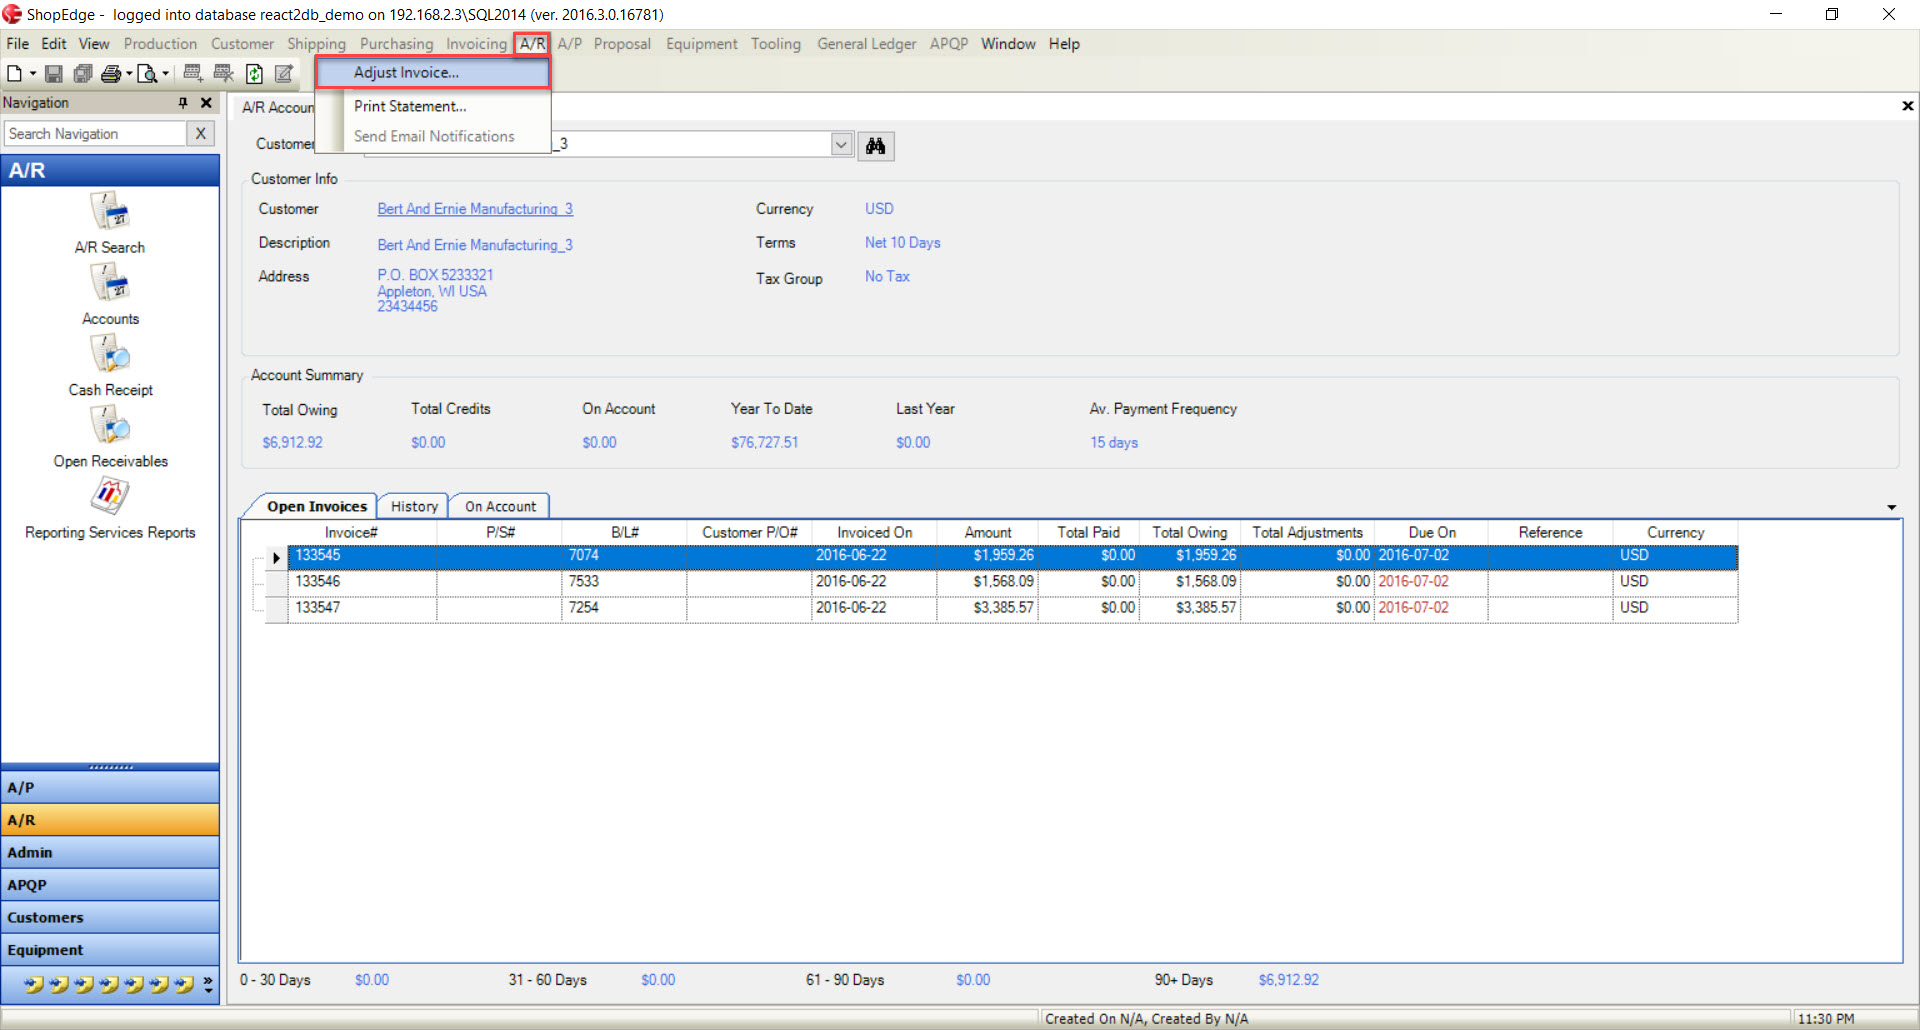
Once you have selected the Customer you wish to adjust the Invoice for, all open Invoices should show on the lower half of the screen. Select the Invoice that you wish to adjust by clicking in the appropriate row to highlight it. You can either right-click on the Invoice, or highlight the Invoice and then click on the A/R menu at the top of your screen and select Adjust Invoice.
The A/R Adjustment window will appear.
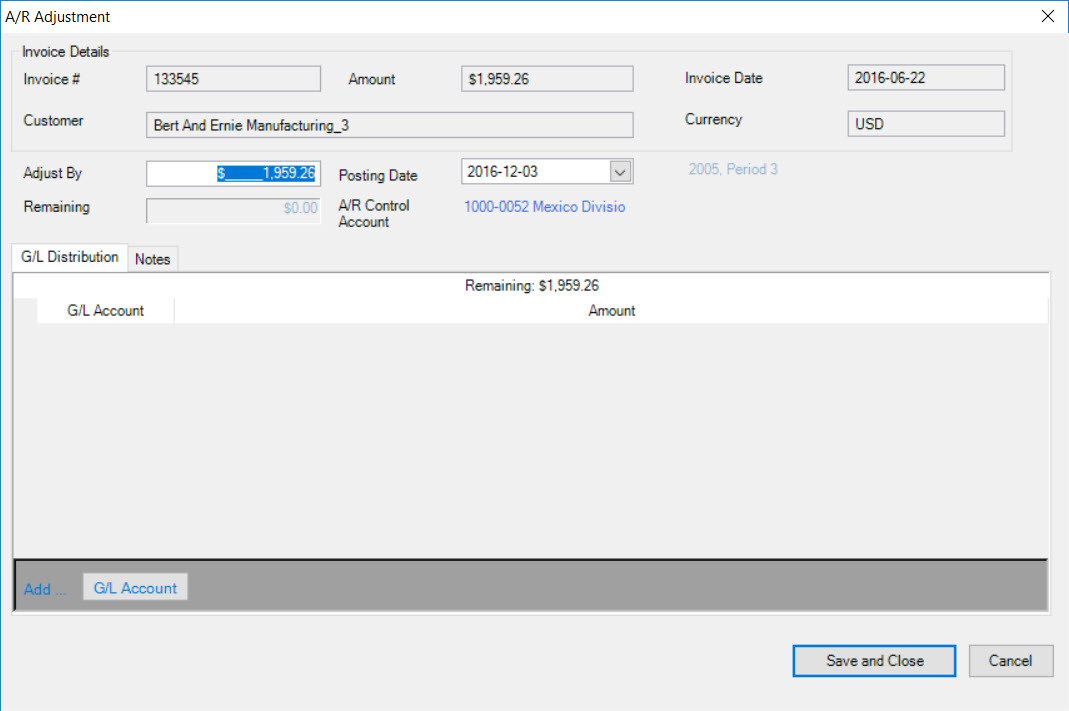
To increase the amount of the Invoice, you need to enter a negative amount and expense negative amounts against the various accounts. To decrease the open amount of the Invoice, enter a positive amount. You also have the option to add a G/L Account if necessary.
When ready to update the Invoice, make sure the Posting Date is correct. Click on the  button.
The Invoice will now be updated with the adjustment, the G/L is updated, and the screen displaying the open Invoices will be refreshed.
Un-posting a Customer Invoice
If a user needs to unpost an Invoice that has already been posted to the A/R module, they may do so from the Accounts screen or the Open Receivables icon.
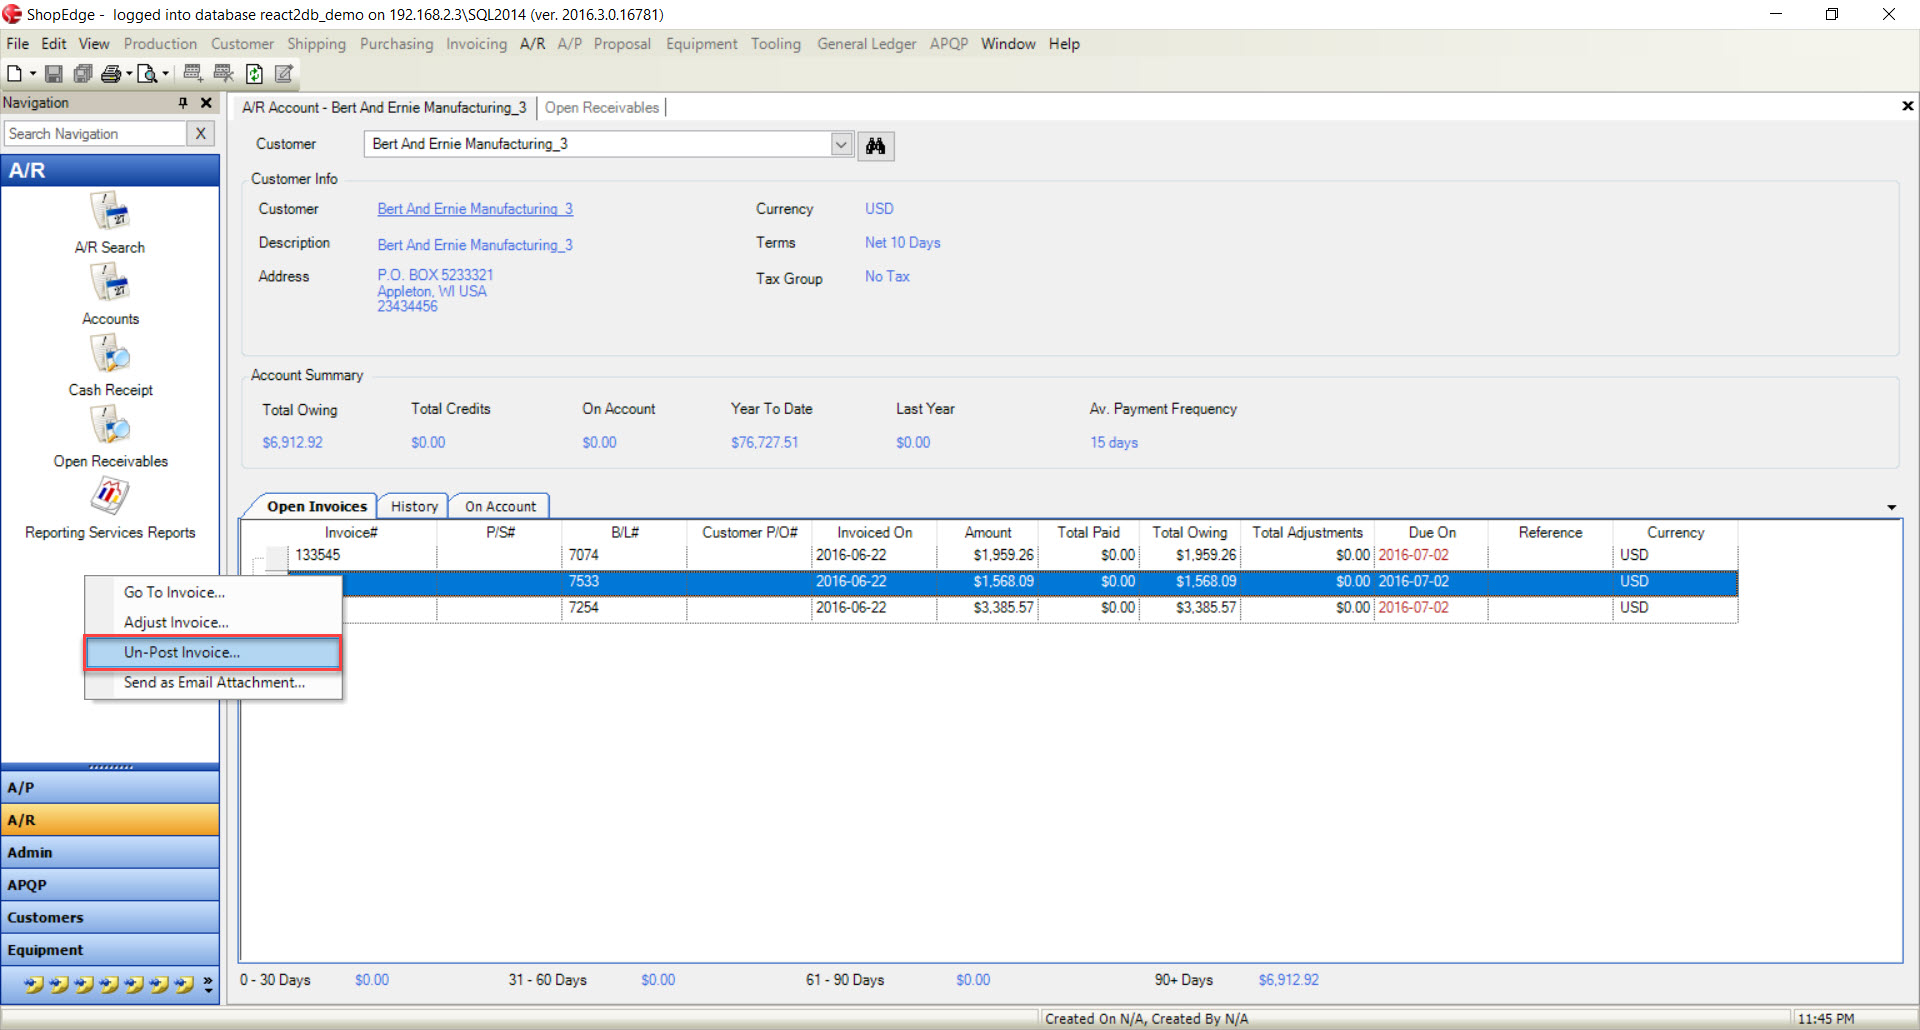
From the Accounts screen, select a Customer using the drop-down menu.
Users will then have to locate the Invoice and right-click on it.
A menu will appear where you will need to select Un-post Invoice.
An Un-post Invoice window will appear to confirm. Click on the  button to proceed.

Another confirmation screen will pop-up to verify that users wish to unpost the Invoice, and update the G/L. Click on the  button.