Workcenter Schedule Navigation
The Workcenter Schedule screen has many navigation features for users. Each one is described below in order for users to understand how to navigate the Workcenter Schedule.
Field Chooser
The Field Chooser option allows users to view and/or hide available columns on the Workcenter Schedule.
The Field Chooser can be found on the schedule table located at the top left side of the screen, beside the M (Material) column.
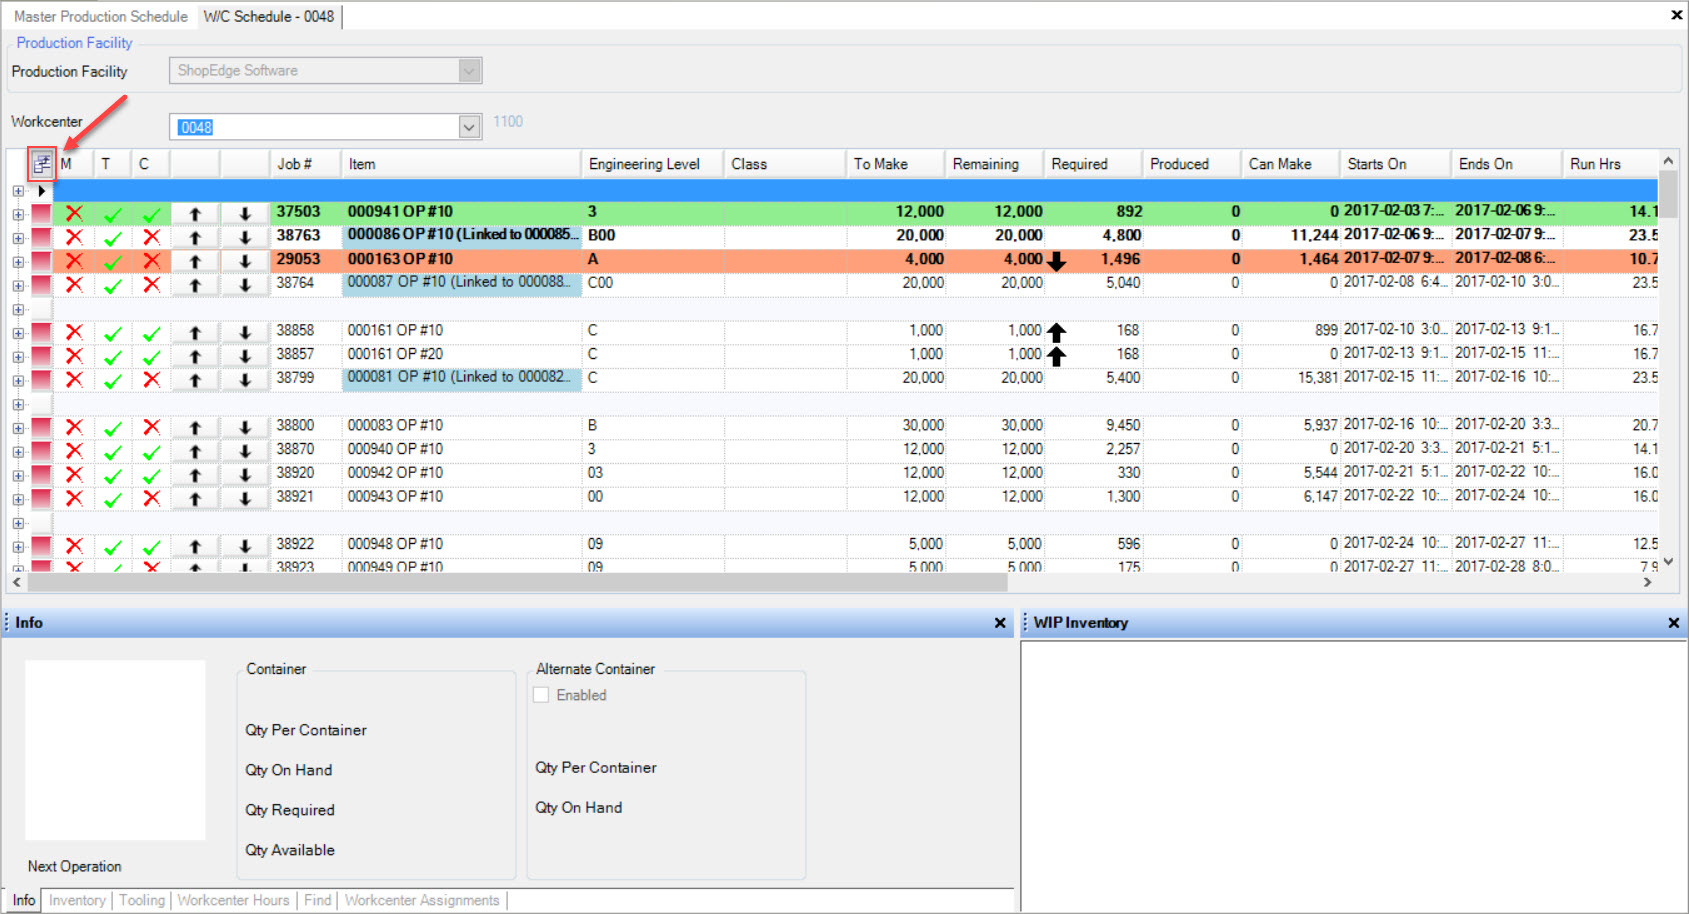
Simply click on the Field Chooser button and select or de-select the columns you wish to view and/or hide on the Workcenter Schedule.
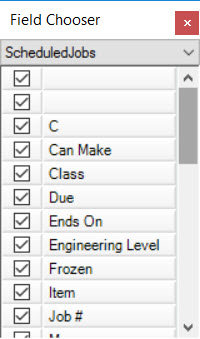
The Workcenter Schedule screen will change accordingly.
Manufacture Routing/Production Inventory Shortcut
Users can navigate directly to a Manufacture Routing or the Production Inventory screen for an Item on the Workcenter Schedule.
To do so, right click on the row of the Item in the far left column below the Field Chooser.
Select either the Manufacture Routing or Production Inventory option from the available drop-down menu.
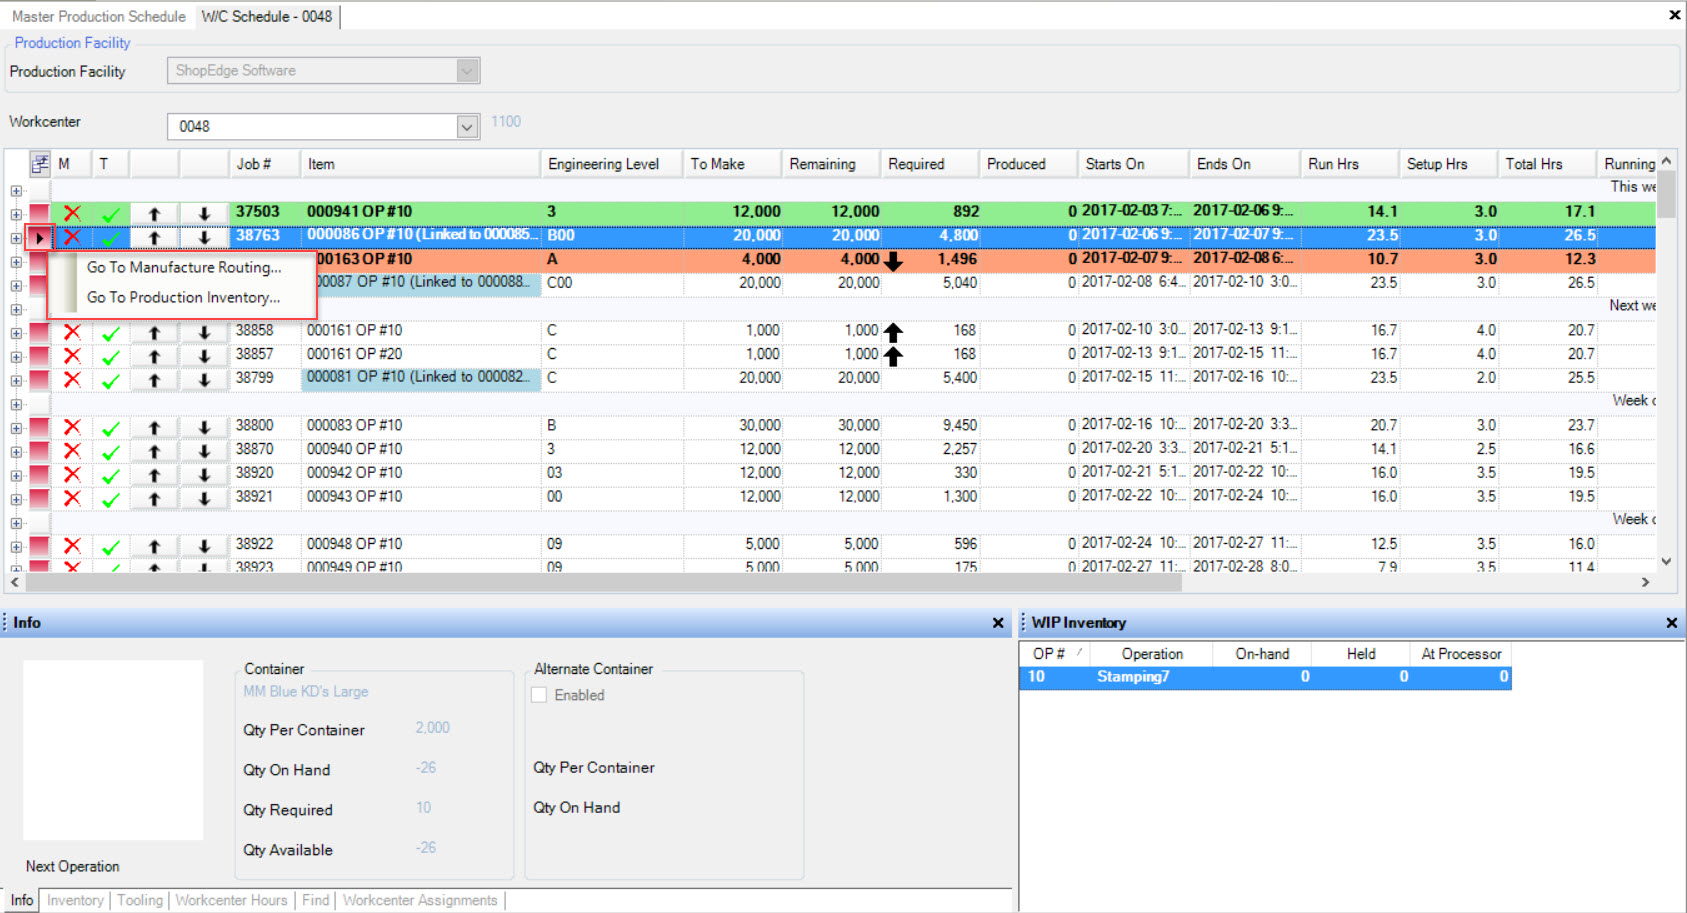
The system will open the appropriate screen.
Note
This option will only work if the Workcenter Schedule screen is NOT Read-Only.
Material, Tooling, and Container Availability
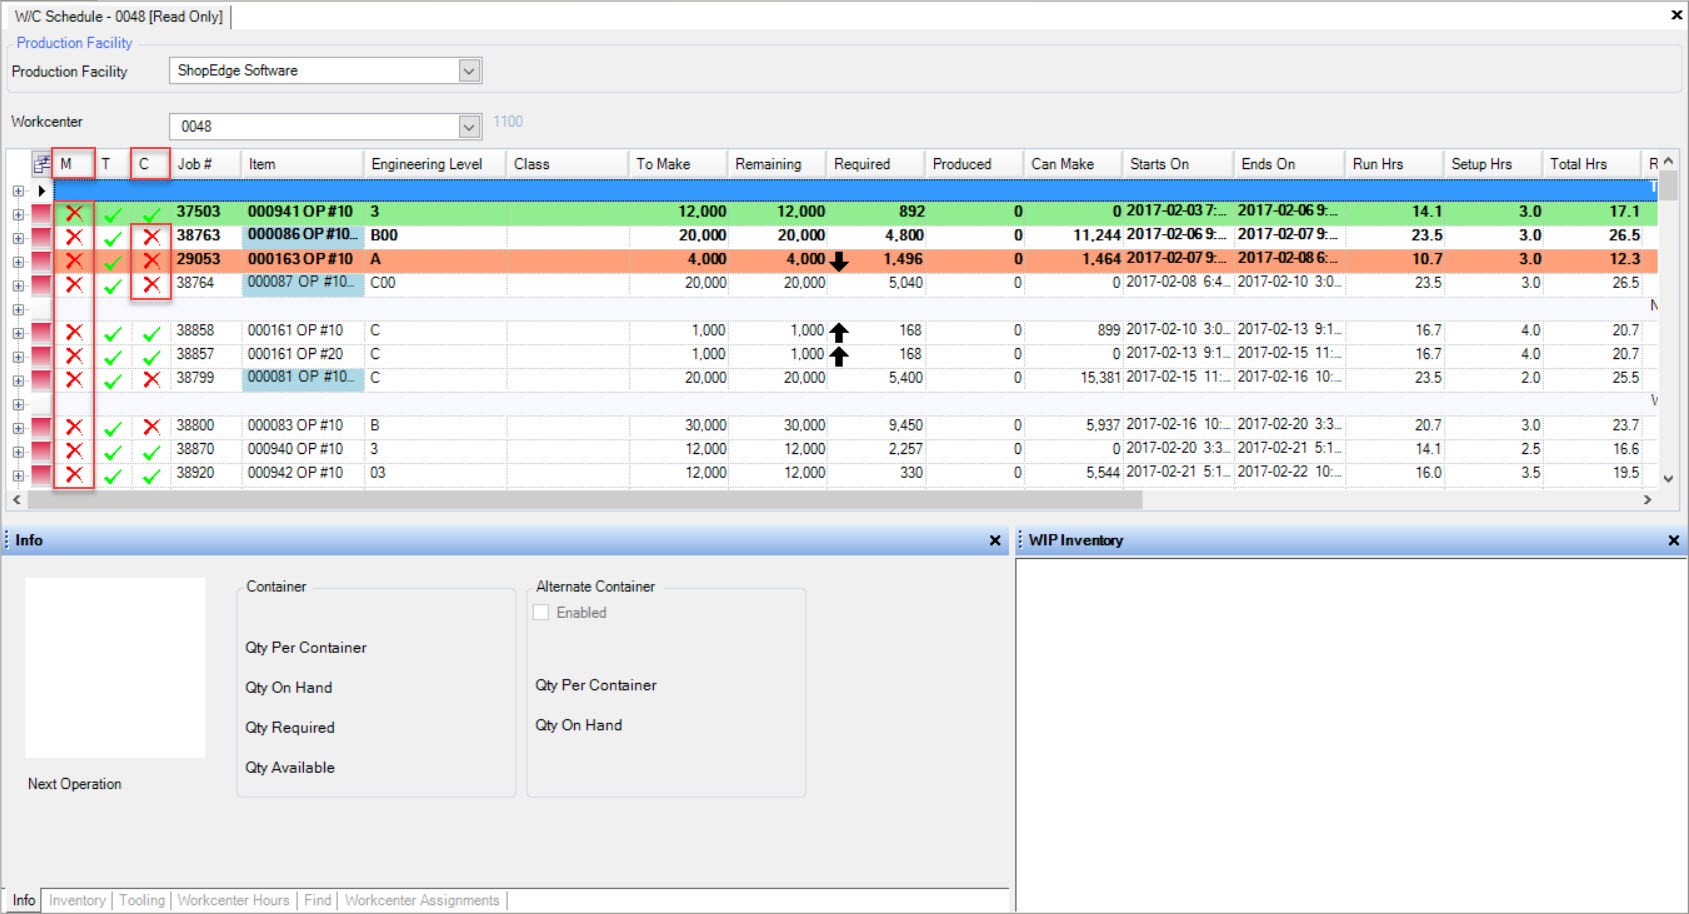
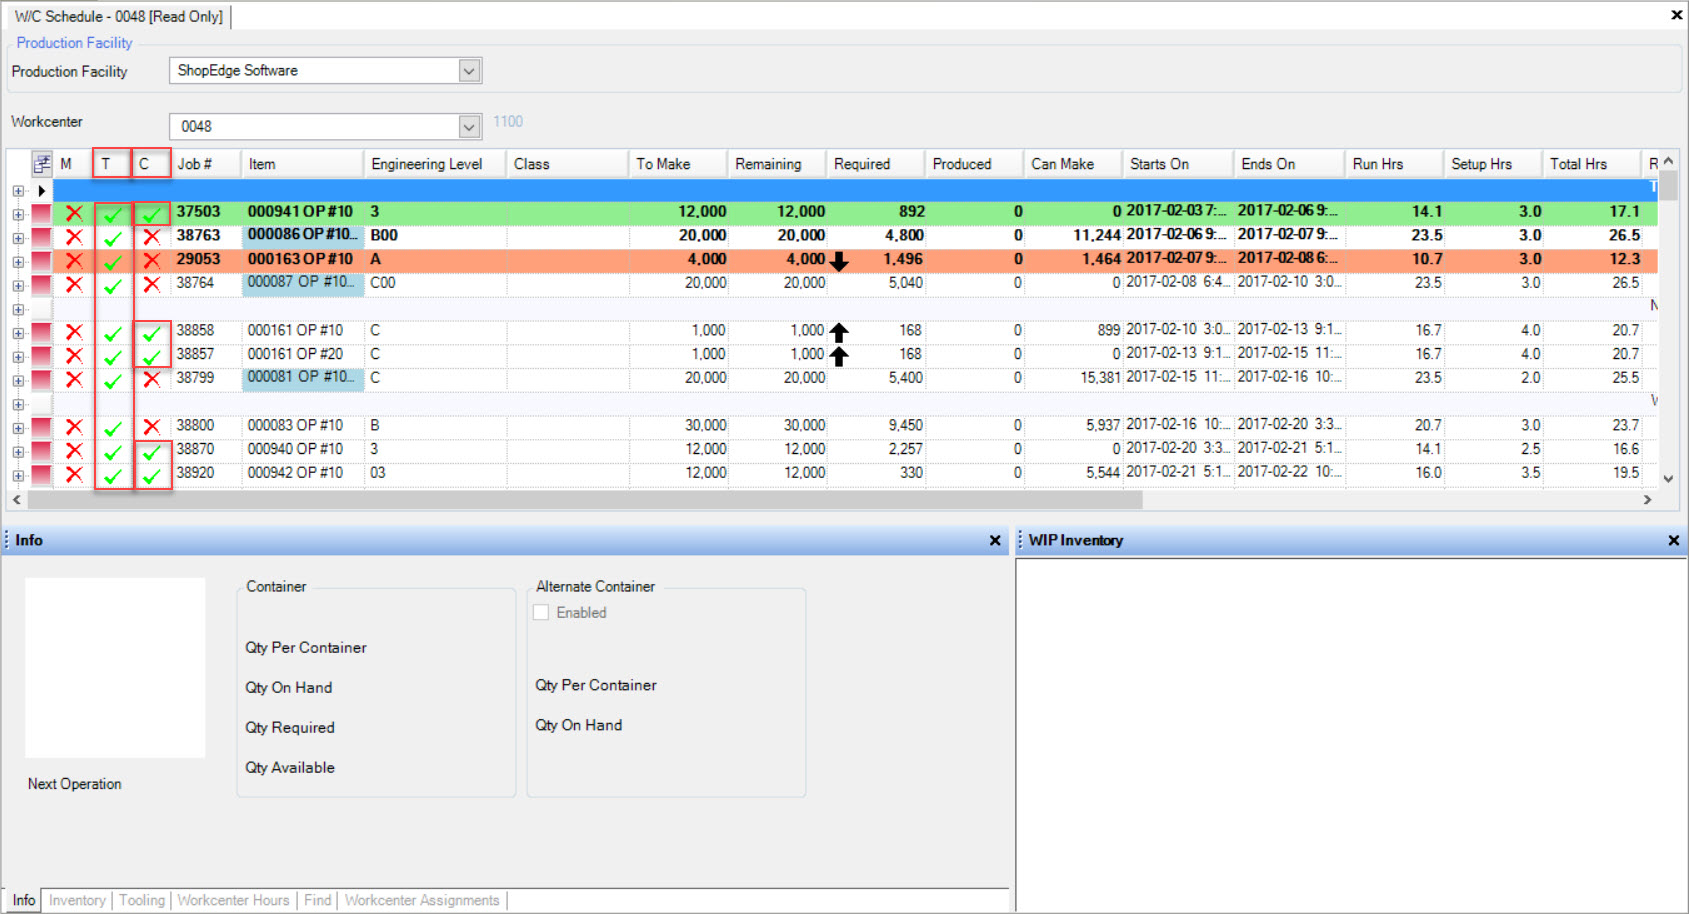
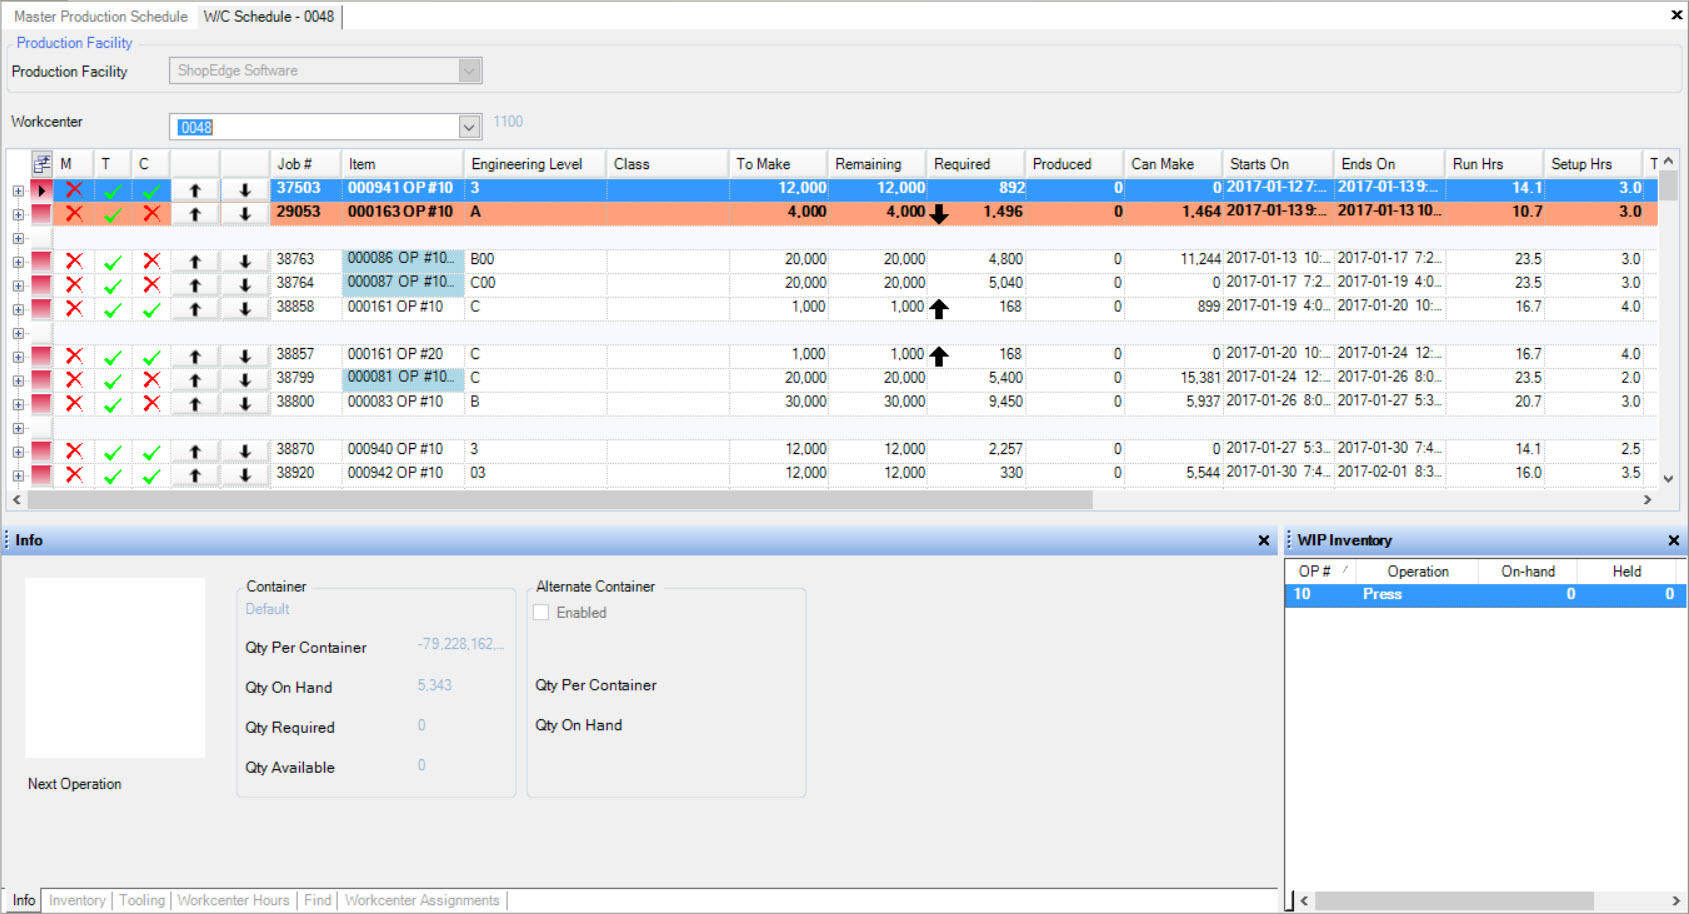
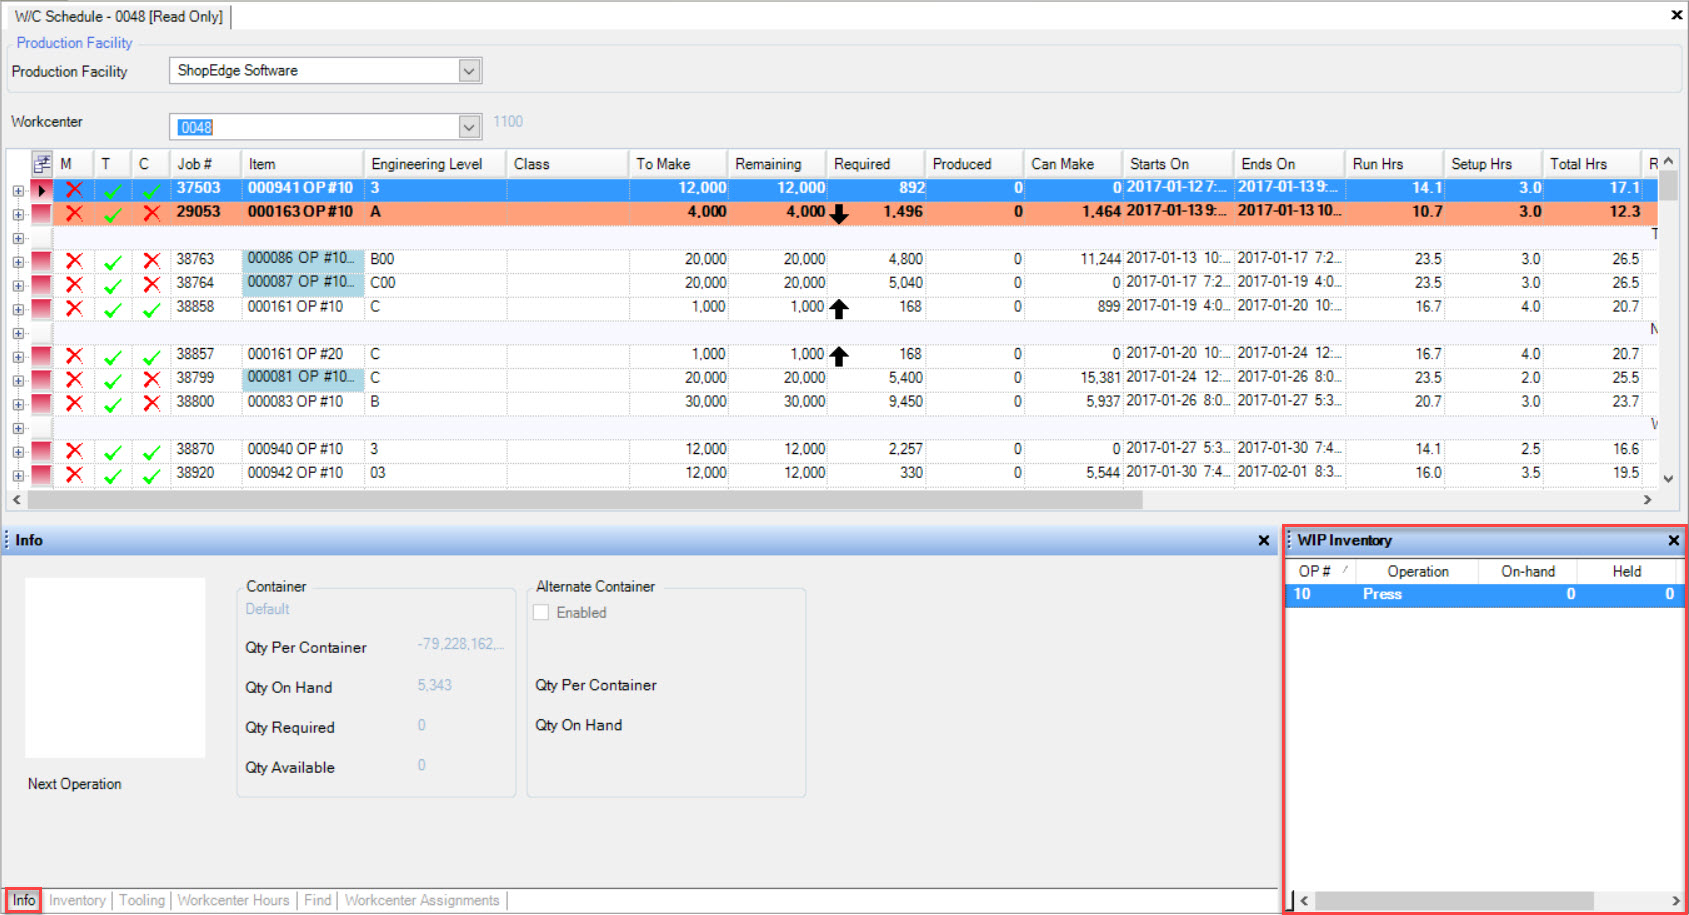
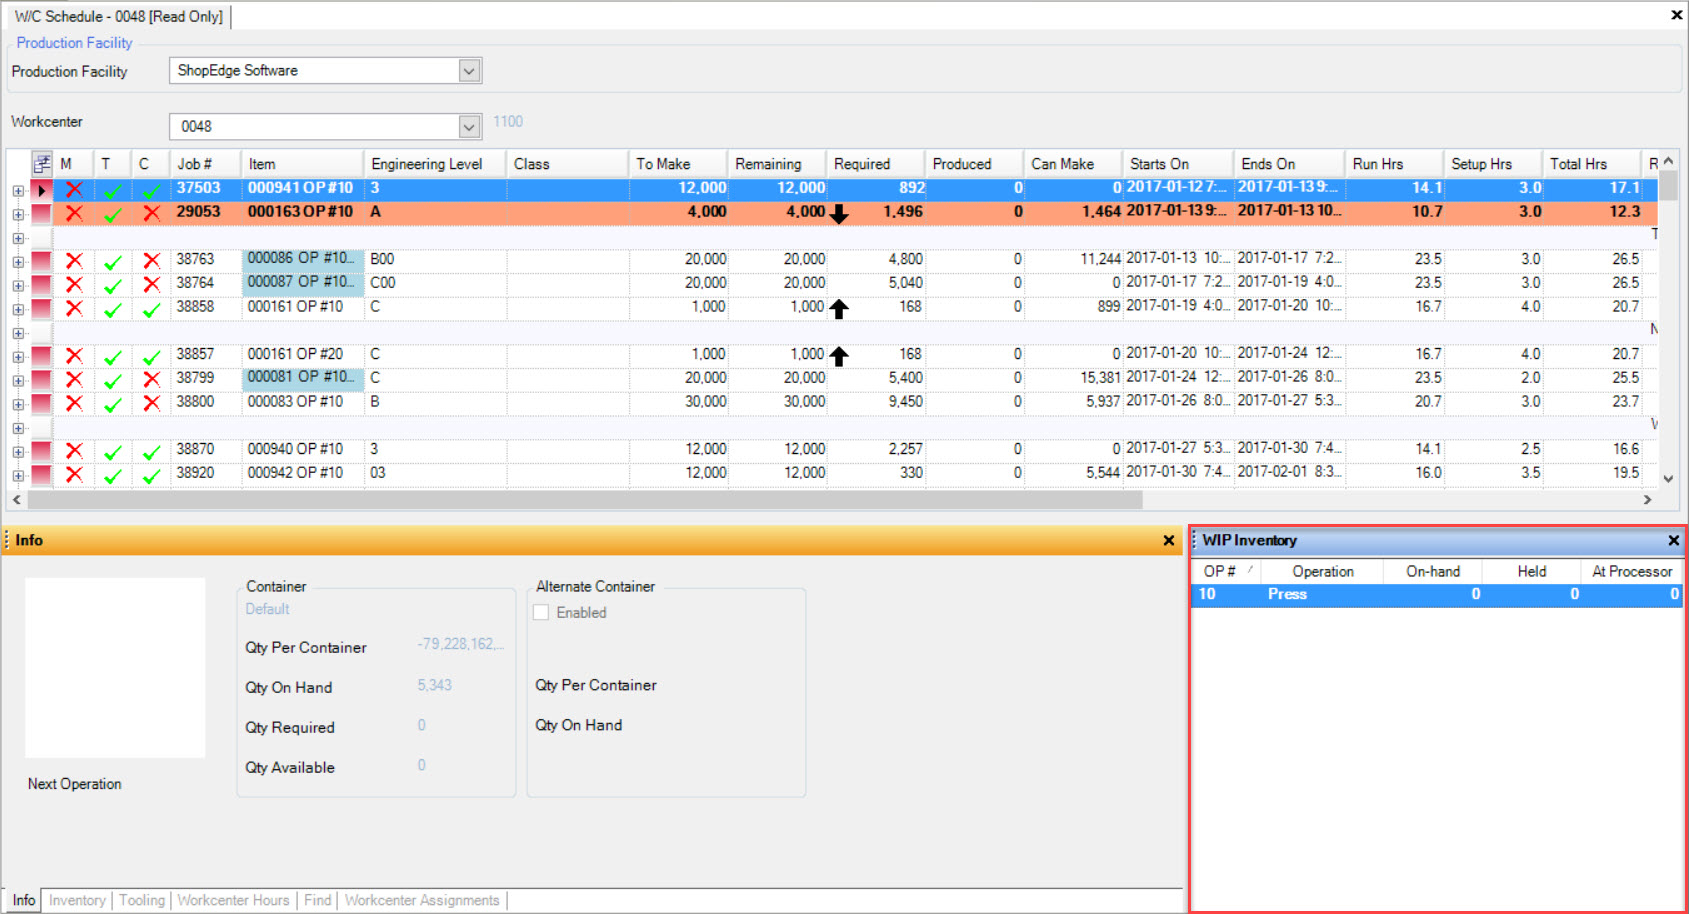
The Workcenter Schedule screen displays current Material (M), Tooling (T), and Container (C) availability for a Job on the left side of the schedule.
To view this, navigate to the  tab and click on the
  icon. This will open a Read-Only copy of the
Workcenter Schedule with the M, T, and C columns located to the left of the screen.
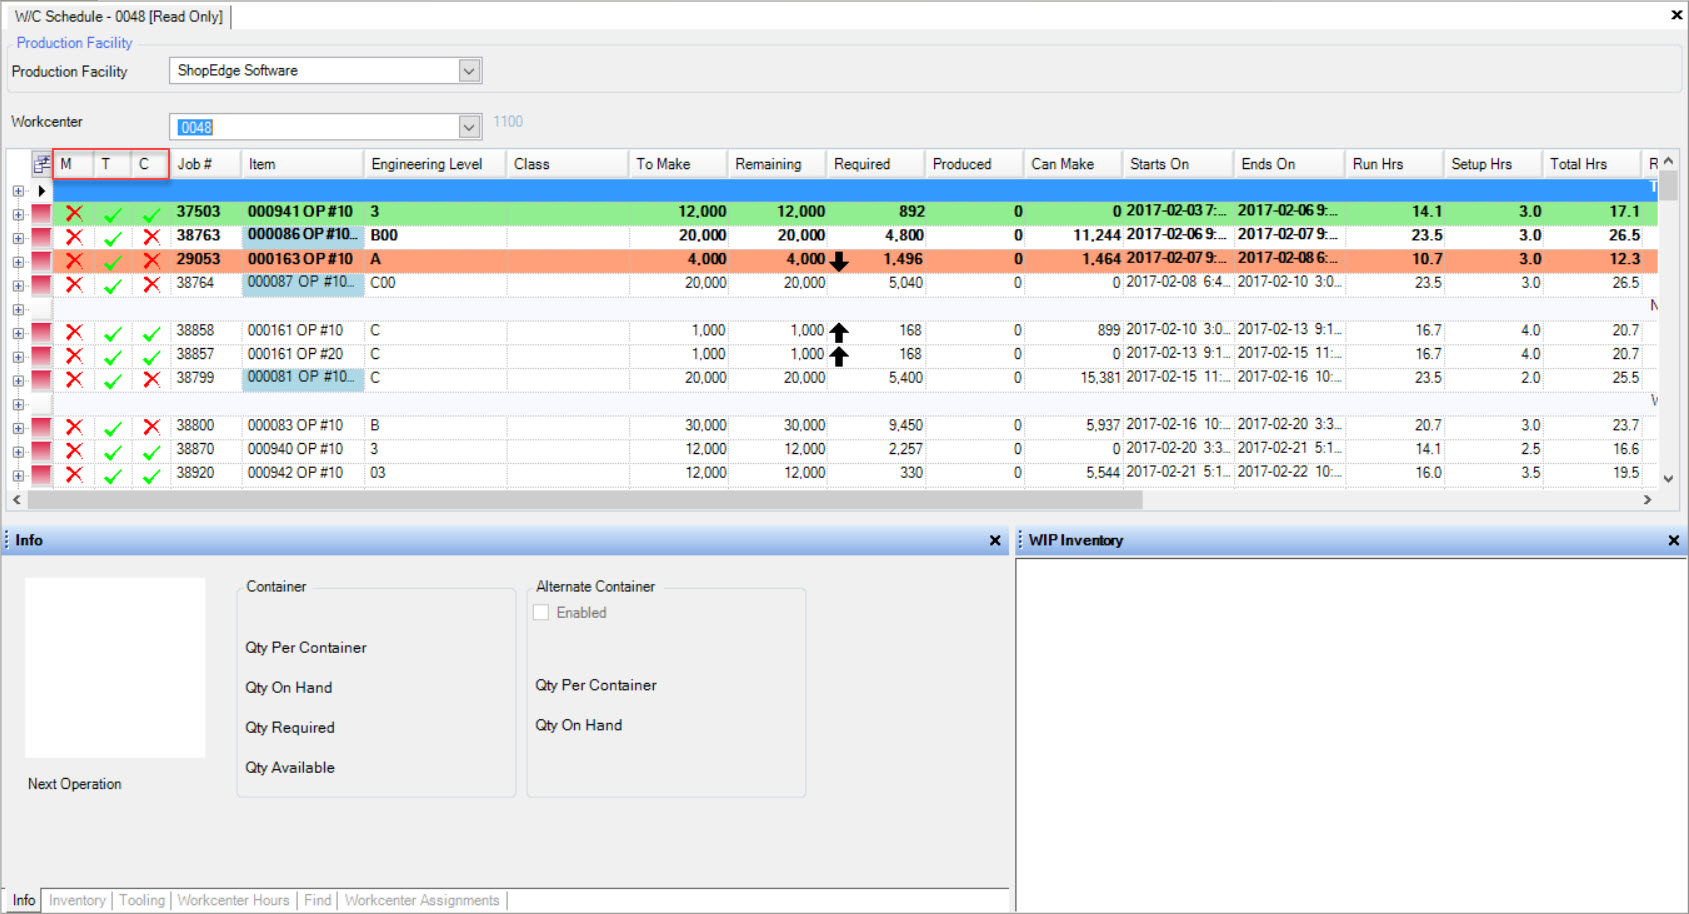
If there is a Material, Tooling, or Container issue, you will notice a  in the appropriate column.
If there is enough Materials, Tooling, and/or Containers available, you will notice a  in the appropriate column.
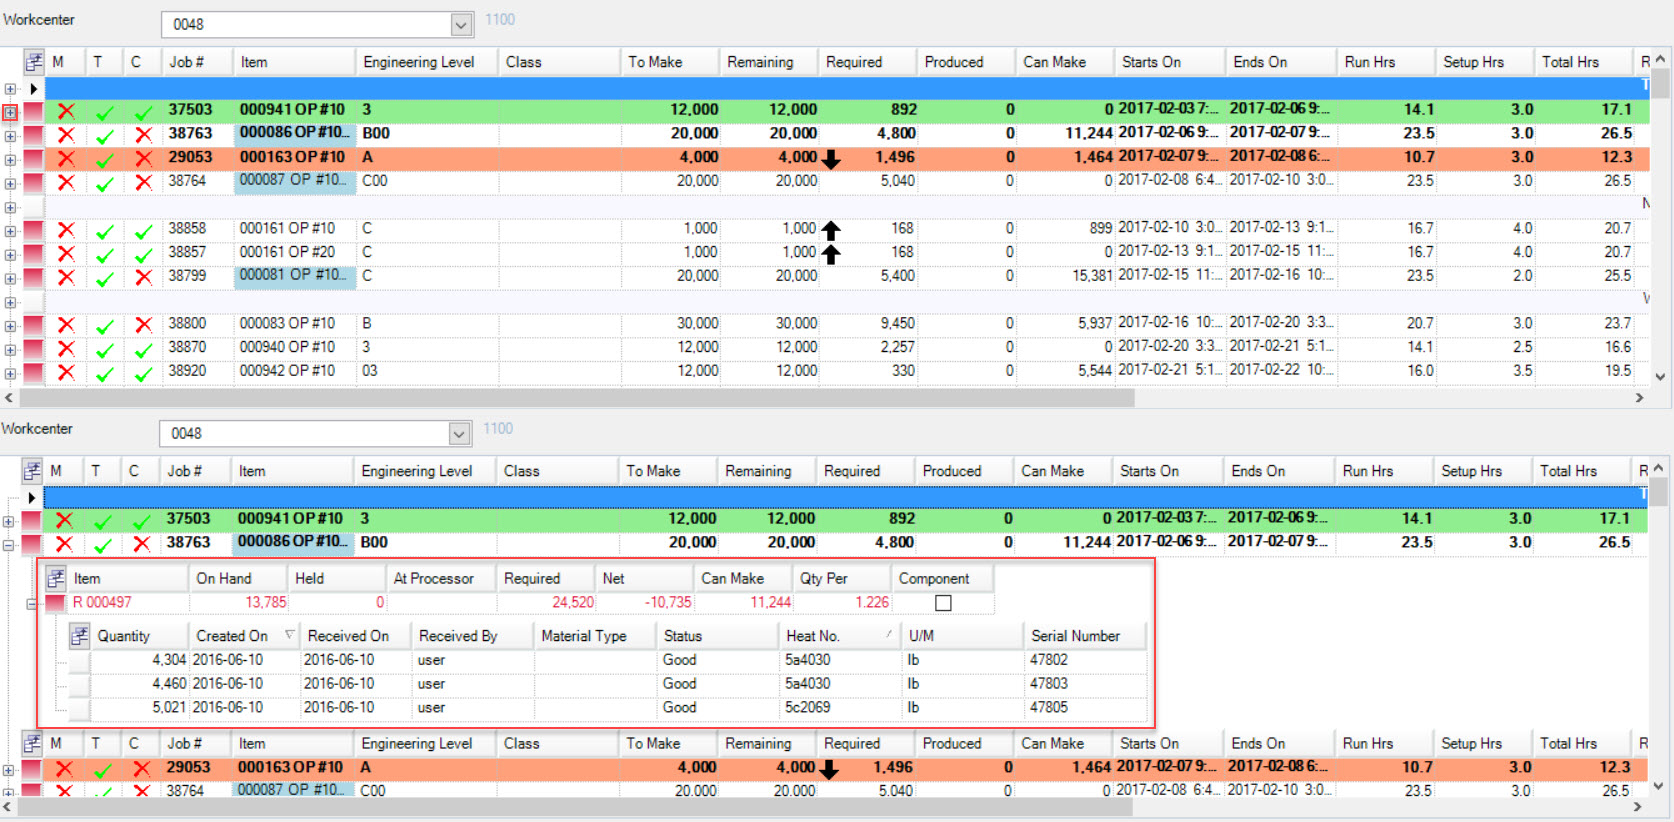
To view Material details (if these is an issue or not), simply click on the plus sign to expand the details. You can then expand the details further to view the On-Hand Tags and Quantities by clicking
on the plus sign located beside the Item #.
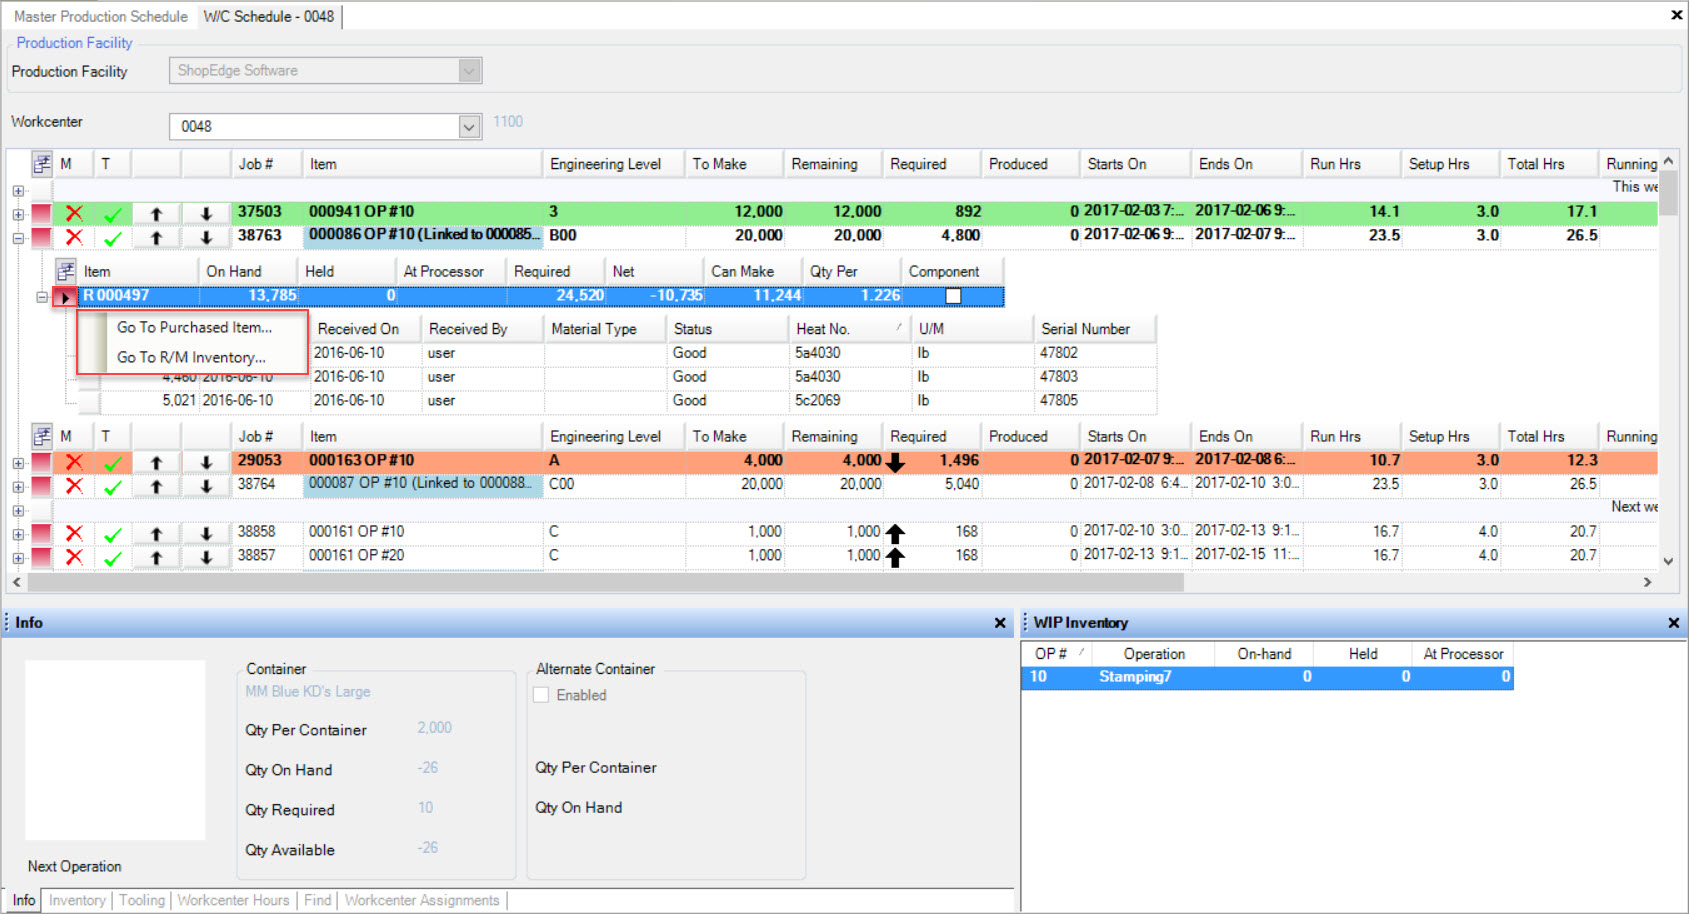
Users can also navigate directly to the Purchased Item, or R/M Inventory screen for an Item by right clicking on the Material Item row when it is expanded on the Workcenter
Schedule screen if it is not in a Read-Only format.
If the Tooling column has a  , then there are one or more Preventative Maintenance work orders that are overdue for a particular Tooling Item linked
to the Production Item.
If a user places the cursor over the  in the Container column, the system will show how many Containers are needed for the Job, and how many Containers
are available.

Alerts
Alerts are used on the Workcenter Schedule to let users know that there have been order changes either related to Order Quantity or Dates.
Quantity changes will be reflected by arrows in the Required column on the schedule. If an arrow is pointing up  , it indicates that an Order Quantity
has increased.

If an arrow is pointing down  , it indicates that an Order Quantity has decreased.

If users place the cursor over the arrows, the system will provide more details about the Quantity change including the new Quantity, the previous Quantity, and the Change Amount.

Date changes are reflected by arrows in the Ship On column. If an arrow is pointing to the right  , the Date has been changed to a later Date.

If the arrow is pointing to the left  , the Date of the Order has been changed to an earlier Date.

If users place the cursor over the arrows, the system will provide additional details including the new Due Date, the old Due Date, the Change, Order Amount, Customer, and any Transit Days for the
Customer.

Note
Alerts stay on the Workcenter Schedule until they are manually reset. Users can reset or clear the Alerts when viewing the Master Production Schedule. Navigate to the  tab and click on the
  icon. Click on the Production menu located at the top of the screen, and select Reset All Alerts.
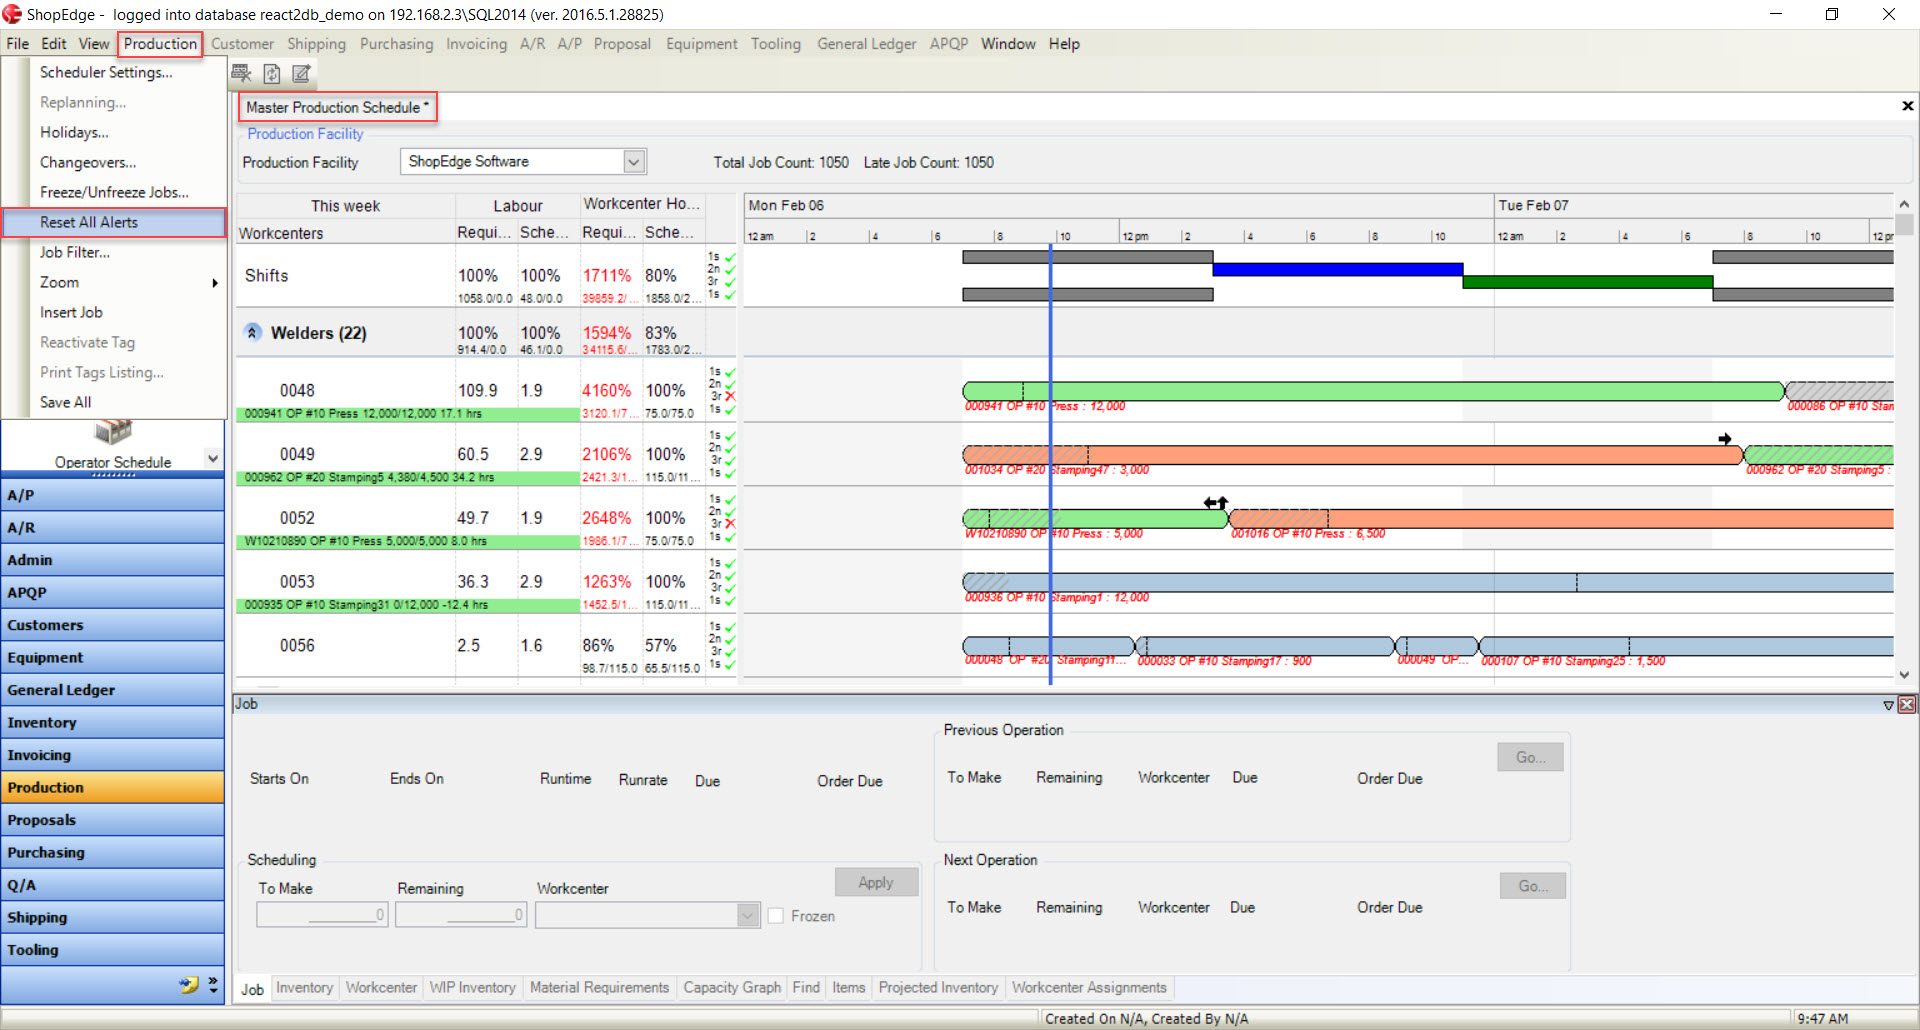
Replanning the Workcenter Schedule
The Workcenter Schedule must be replanned periodically to take the Order and Inventory changes into consideration. It is entirely up to users on how often replanning is done. If Releases and
Inventory changes occur often, users might wish to replan the Workcenter Schedule on a daily basis. If Releases and Inventory changes only occur once in a while, users might wish to replan once
or twice a week.
To perform a replan of the Workcenter Schedule, navigate to the Production menu located at the top of the screen and select Replanning....
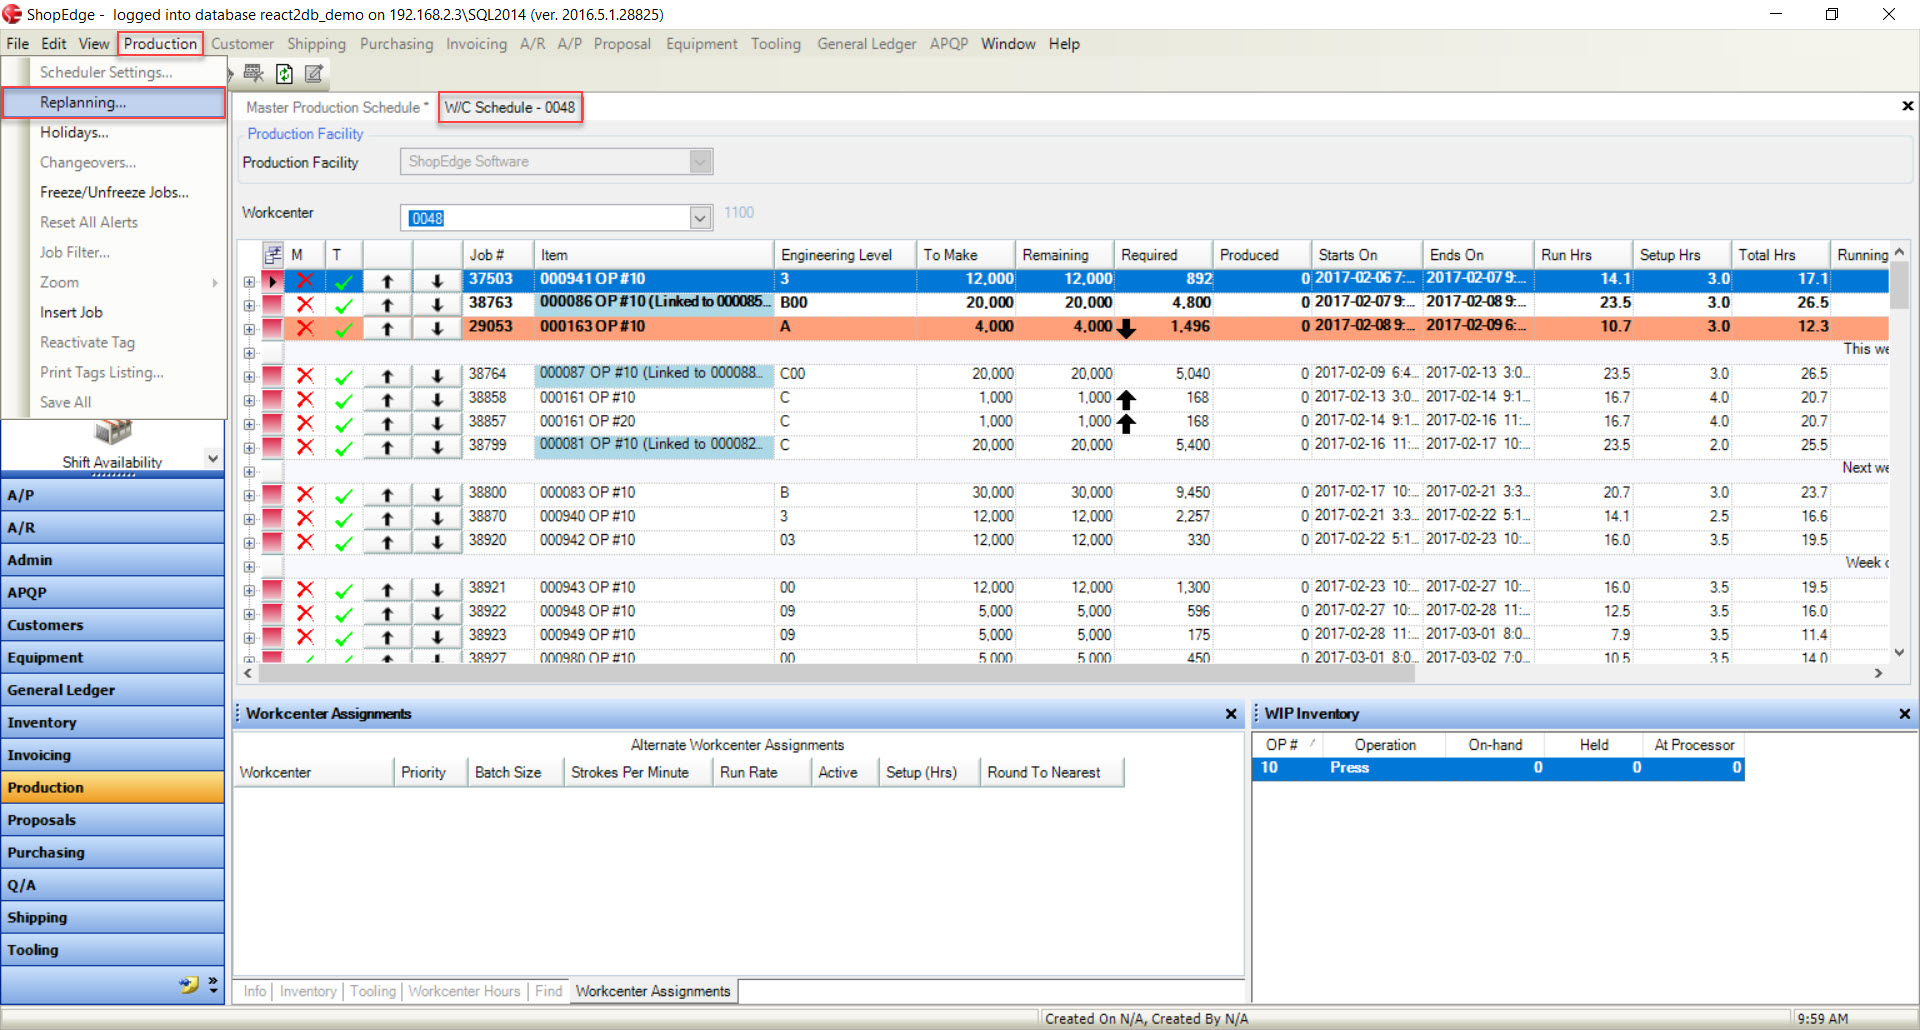
Note
Users must open the Workcenter Schedule by clicking on the  tab and then on the
  icon in order to select the Replanning... option from the Production menu.
The Schedule Planning window will appear with two options to modify. The first option allows users to decide how far out they wish to plan a Release. Users can manually enter in a Date or use the
available drop-down menu to select the Date instead.
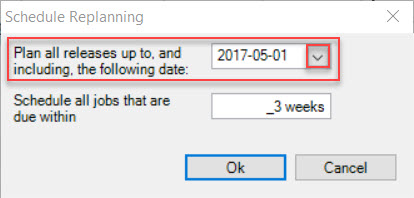
The second option allows users to determine how many weeks they wish to replan the schedule for. Simply enter in the number of weeks you would like Jobs to be scheduled for in the textbox provided.
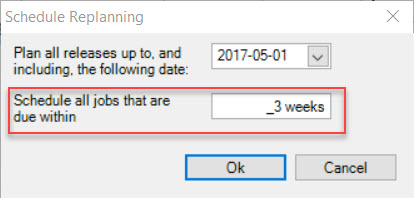
When the necessary fields have been filled in, click on the  button to perform the replan.
Make sure to save your changes before exiting the screen.
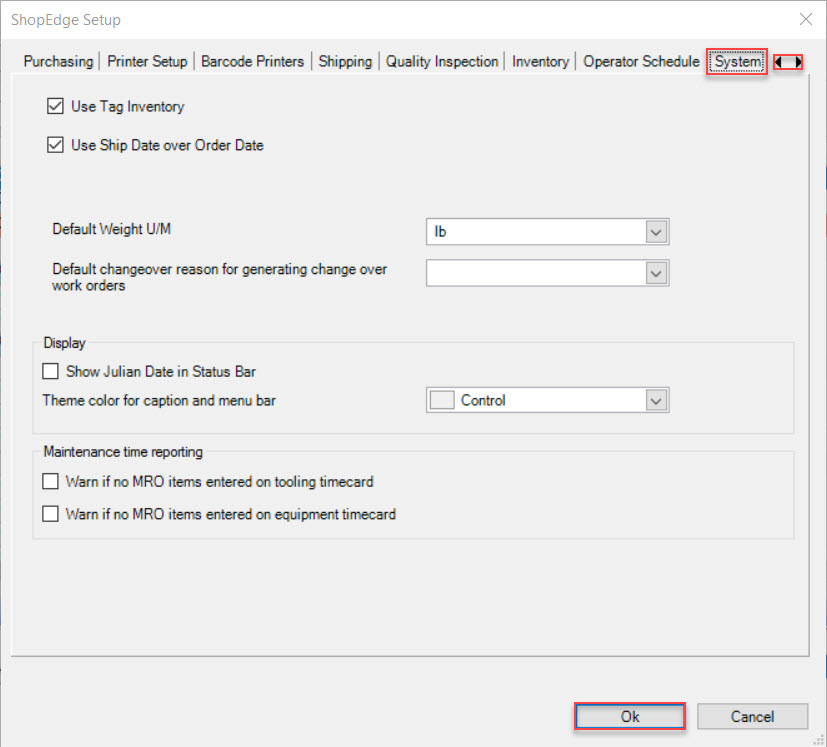
Initially, the system will consider the Due Date at the Customer site, and provide users with an Order Due Date or Ship On Date on the Workcenter Schedule, and schedule backwards from there. To make
sure users are provided with an Order Due Date or Ship On Date on the Workcenter Schedule, click on File > Setup.
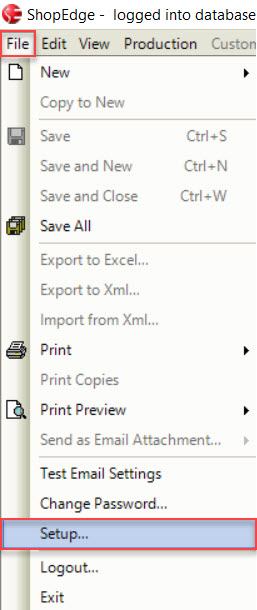
Next, click on the  tab by using the arrow to scroll over. Select the appropriate boxes and click on the
  button.
It will consider any On-Hand Inventory Finished Good and WIP before a Job on the Workcenter Schedule. The system will not consider Held Inventory.
The system will include any Transit Days for the Customer. It will look at each Operation on the Manufacture Routing and include Lead Times, Processing Times, Batch Sizes, Setup Time, and
Standard Run Rates when placing a Job on the Workcenter Schedule. It will also calculate a Start and End Date for each Job.
Make sure to save your changes before exiting the screen.
Resequencing Jobs on the Workcenter Schedule
Jobs can be resequenced on the Workcenter Schedule by using the up and down arrows.

To move a Job up on the Workcenter Schedule, simply click on the  arrow.
To mow a Job down on the Workcenter Schedule, simply click on the  arrow.
Make sure to save your changes before exiting the screen.
Once the changes have been saved, they will be reflected to the Operators.
Changing a Job Quantity
Users have the ability to modify a Job To Make quantity by clicking in the To Make column in the appropriate row of the Job they wish to modify.
Simply locate the Job and enter in the new Quantity in the To Make column.

Make sure to save your changes before exiting the screen. Once the changes have been saved, they will be reflected to the Operators.
Deleting a Job
Jobs can be deleted from the Workcenter Schedule.
To do so, simply highlight the Job row you wish to delete. Use your Delete key and when the system prompts you, select the  button.
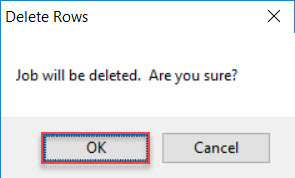
The highlighted Job will be deleted.
Make sure to save your changes before exiting the screen. These changes will then be reflected to the Operators.
Note
Jobs remain on the Workcenter Schedule, even completed Jobs, until they have been deleted.
Inserting a Job
There may be times when users need to insert a Job on the Workcenter Schedule without doing a replan of the whole schedule.
To insert a Job, navigate to the Production menu located at the top of the screen on the Workcenter Schedule and select Inset Job.
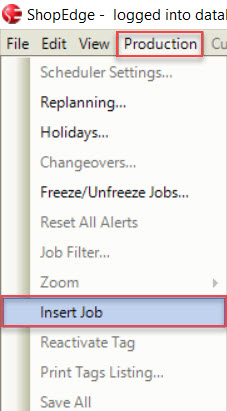
The New Job window will appear.
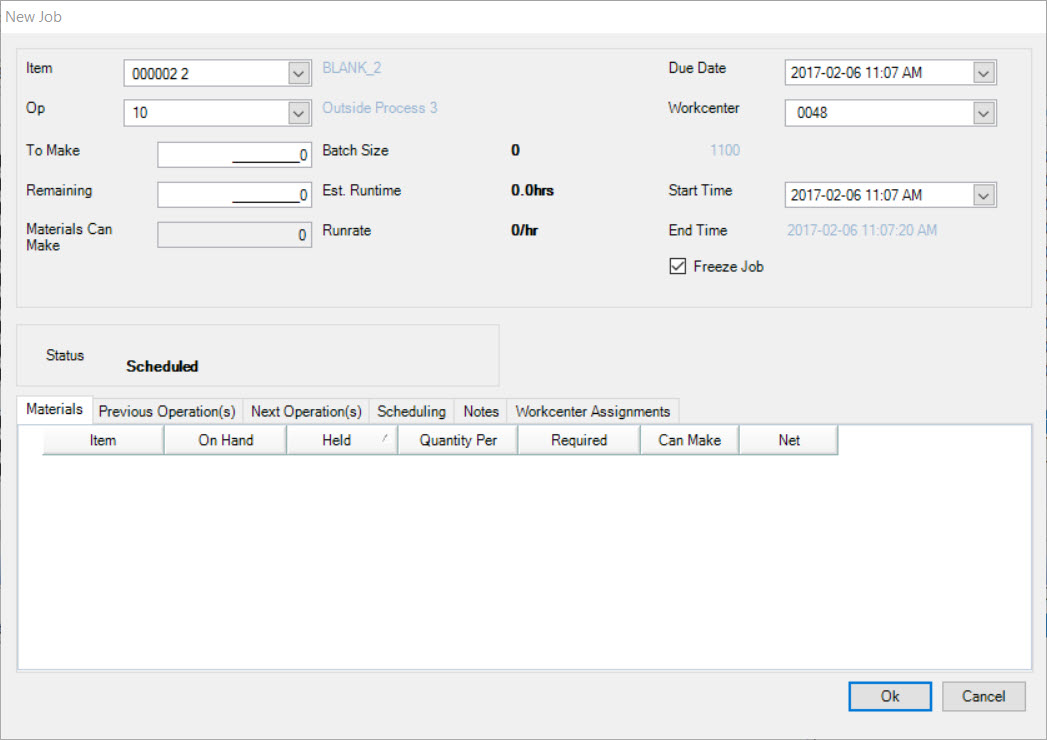
Users must select the Item and Operation. If there is a Batch Size on the Manufacture Routing, the system will default to the Quantity in the To Make textbox. Users
have the ability to override this number and enter in an appropriate Quantity.
The system will default to the current Date and Time for the Due Date and Start Time fields. The Workcenter field will default to the Workcenter you are viewing the Schedule for. All of these fields
can be overridden by using the provided drop-down menus.
The system will also check the  checkbox. Users have the ability to de-select the checkbox if necessary.
Once you have entered in all of the new Job details, click on the  button to insert the Job onto the Workcenter Schedule.
Make sure to save your changes before exiting the screen. The saved changes will be reflected to the Operators.
Freezing and Unfreezing Jobs
Freezing and Unfreezing Jobs is an important part of the Workcenter Schedule. Jobs that have been frozen will not be moved when performing a replan. Frozen Jobs are also the only Jobs that the
Operators see on the Operator Schedule or on the Android Application.
It is important to remember not to freeze too many Jobs on the Workcenter Schedule, or when you perform a replan, as the system will not adapt to changing Order or Inventory Quantities.
Jobs that are frozen will remain on the Workcenter Schedule when performing a replan regardless of changes to Releases, or updated Inventory numbers.
To freeze or unfreeze a Job on the Workcenter Schedule, scroll to the right of the screen until the Frozen column is in view.

If a Job is frozen, the checkbox will be checked and it will be bolded on the Workcenter Schedule. To unfreeze a Job, simply uncheck the checkbox in the appropriate row.
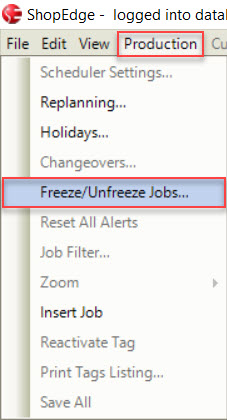
To freeze multiple Jobs at a time, navigate to the Production menu located at the top of the Workcenter Schedule screen and select Freeze/Unfreeze Jobs.... The Freeze Jobs window will
appear.
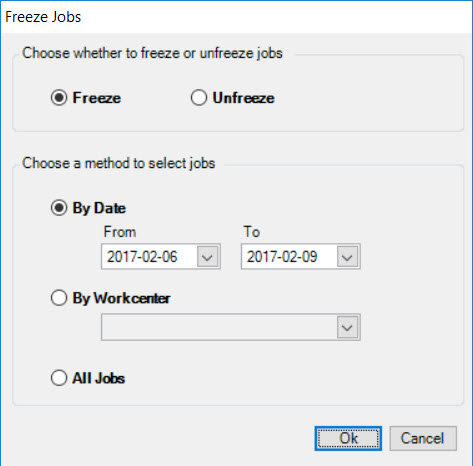
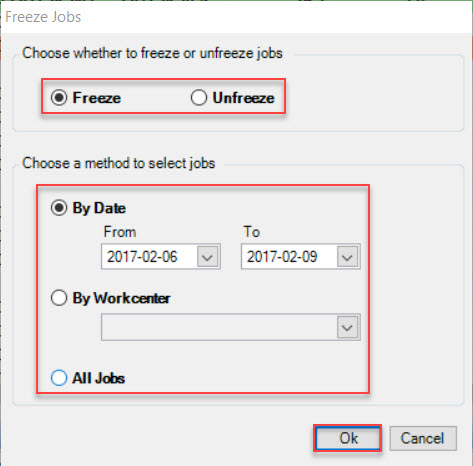
On the Freeze Jobs window, users can select whether they would like to freeze or unfreeze Jobs by Date range, by Workcenter, or all Jobs. Once the selections have been made, click on the
 button.
Make sure to save your changes before exiting the screen.
The saved changes will be reflected to the Operators.
Adding a Holiday
Users have the ability to add Holidays to the Workcenter Schedule or the Master Production Schedule. After adding a Holiday to the system, Jobs will not be scheduled, or Jobs will be
moved from the Holiday Date added.
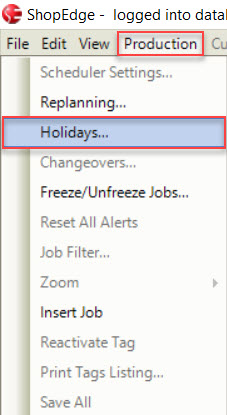
To add a Holiday, navigate to the Production menu located at the top of the screen and select Holidays.... The Holidays window will appear where users can select the Day(s) they wish
to include in the Holiday.
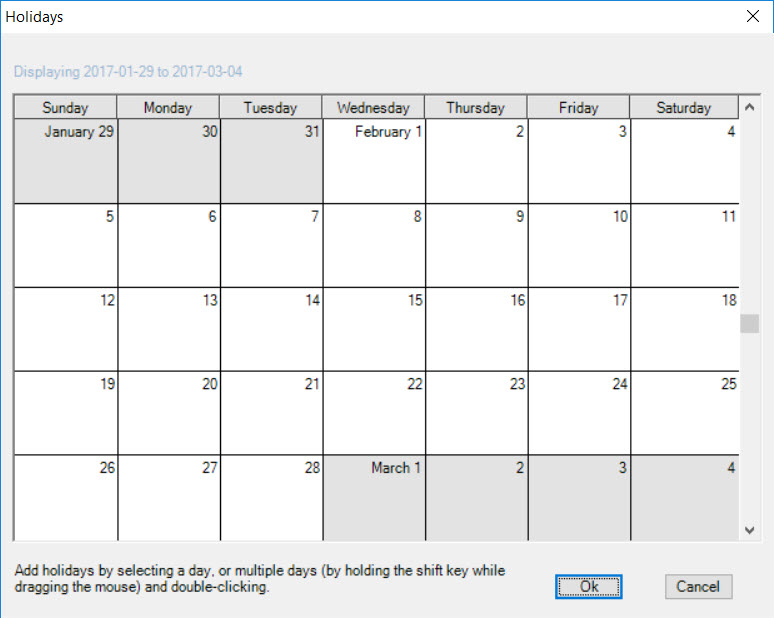
Double-click on a Day or select multiple Days to open the Holiday Details window.
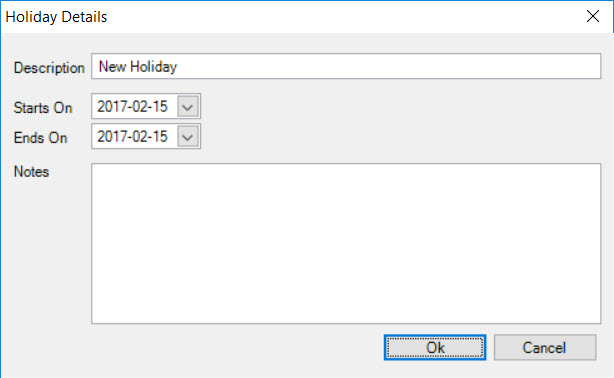
Users can enter in a Holiday Description, select the Start and End Dates (if required), and enter in any necessary Notes. Click on the  button when the necessary
fields are completed. Then, click on the
  button again to close the Holidays window.
Make sure to save your changes before exiting the screen. The saved changes will be reflected to the Operators.
Deleting a Holiday
To delete a Holiday from the Workcenter Schedule, navigate to the Production menu located at the top of the screen and select Holidays.... The Holidays window will appear.


Highlight the Day you wish to delete the Holiday from. Use your Delete key and when the system prompts you, select Yes.
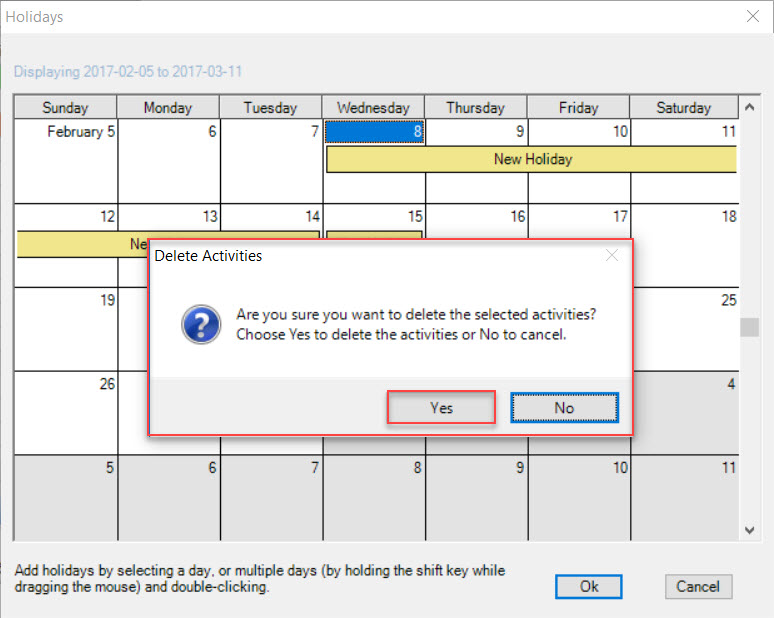
Then, click on the  button to close the Holidays window.
Make sure to save your changes before exiting the screen. The saved changes will be reflected to the Operators.
Job Detail Screen
To view the Job Detail window, double-click on a job on the Workcenter Schedule.
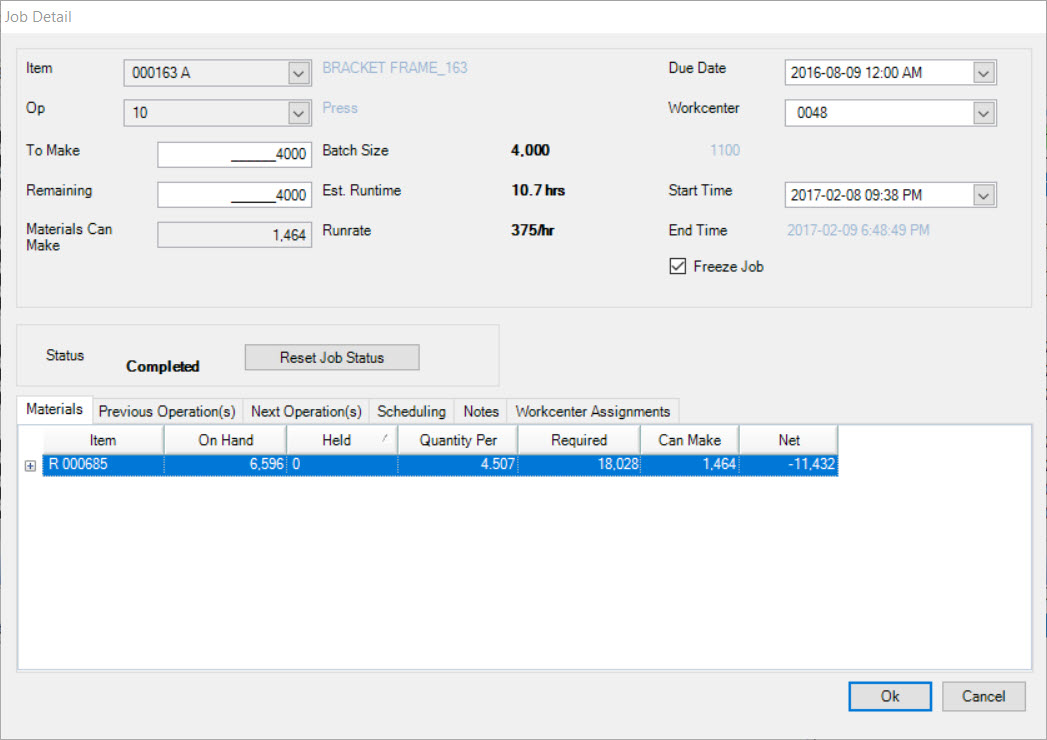
The Job Detail screen will provide users with some of the same information that is displayed on the Workcenter Schedule screen except it has more details in regards to the Materials,
Previous Operation(s), Next Operation(s), Scheduling, Notes, and Workcenter Assignments.
Users can use the Job Detail screen to change the To Make quantity, move the Job to a different Workcenter, and Freeze or Unfreeze a Job.
Materials Tab
The Material details for a job can be viewed by selecting the  tab.
tab.
Here, users can view the Materials used for the job, including any Raw Materials, Components, or WIP Materials.
You can also use the “+” button to expand each Material to see their P/O numbers, and P/O details.
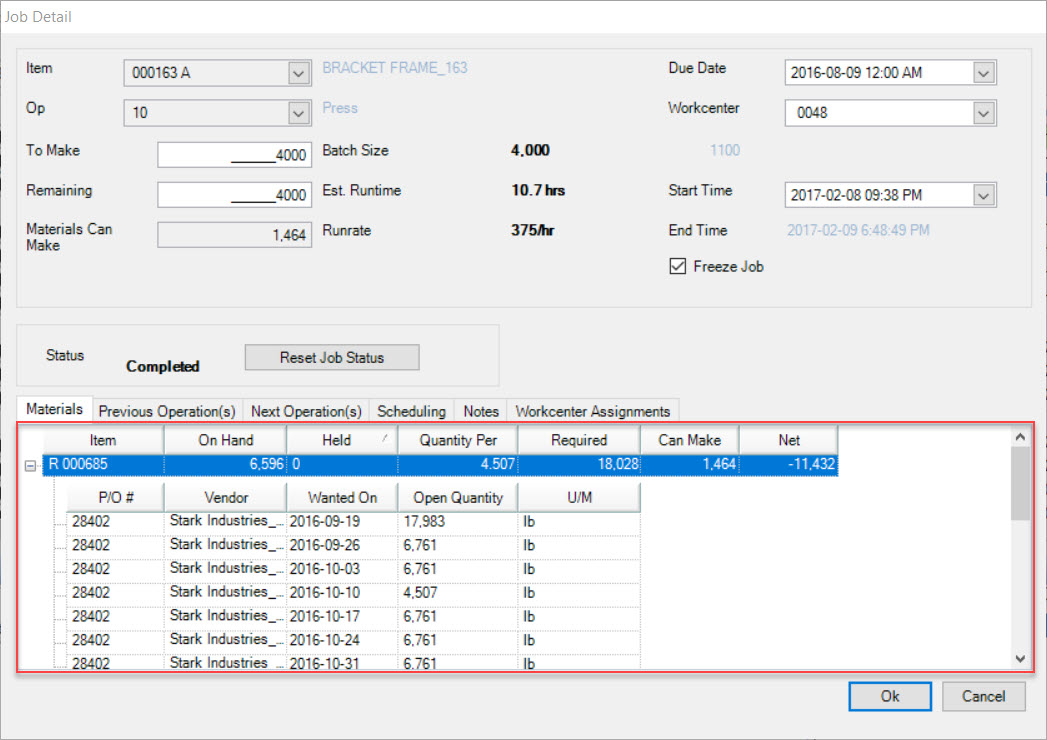
This screen is helpful in determining how much Materials you have on-hand, as well as, how much you will use in production (i.e. you may wish to run
out a coil or bin of parts).
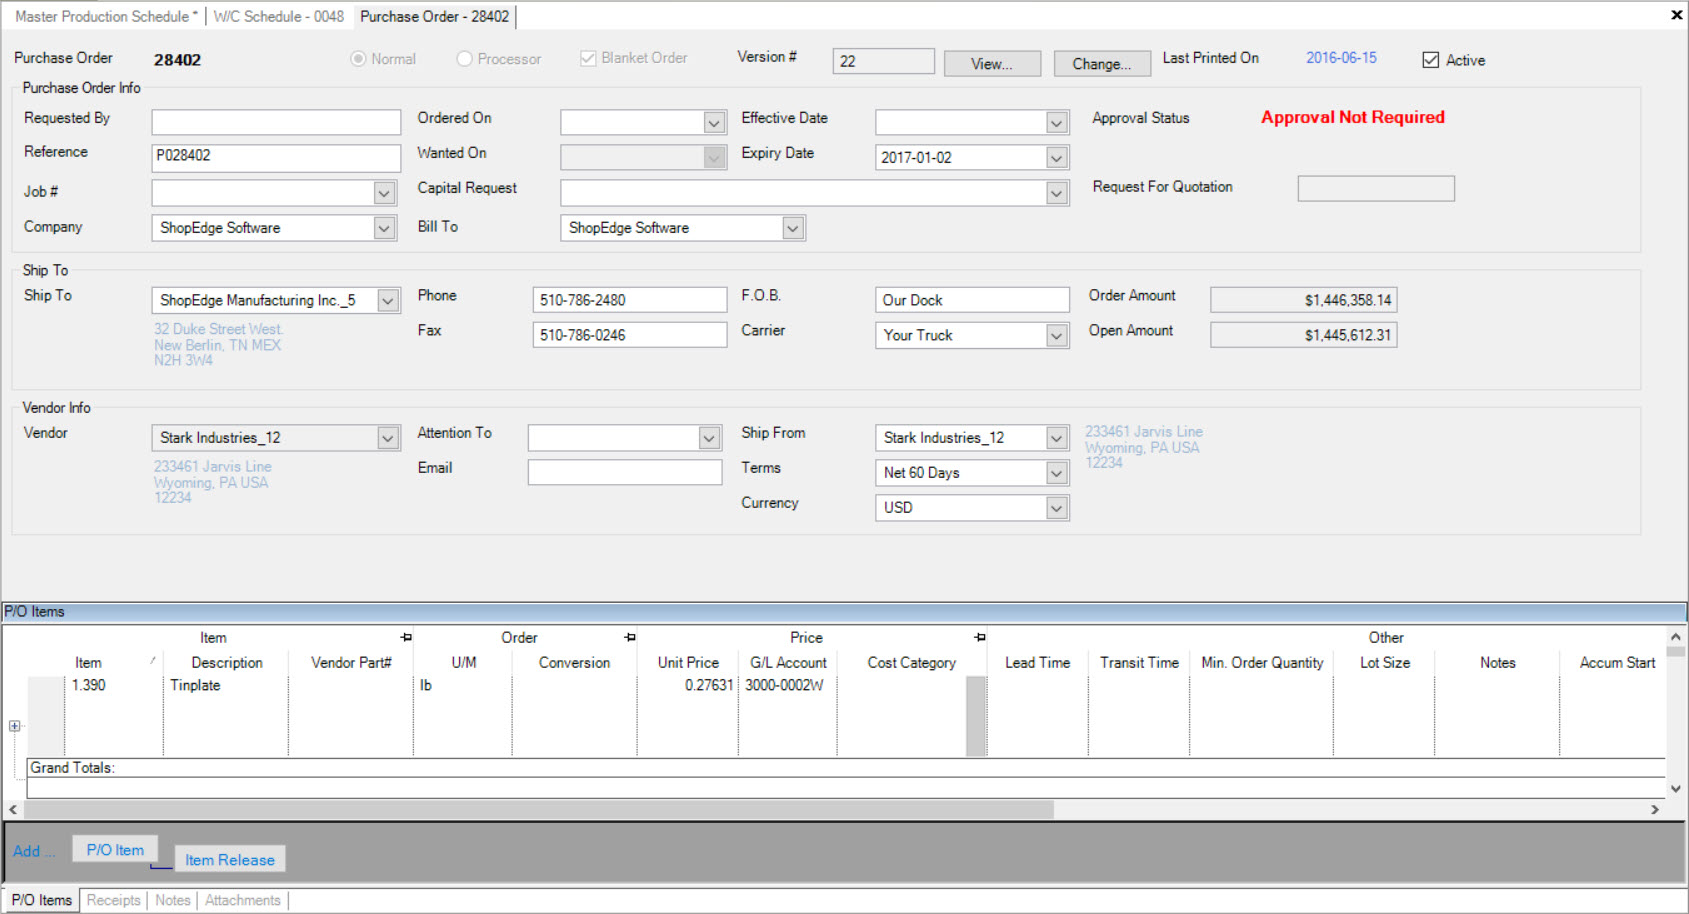
Double-click on a P/O row if you wish to open the P/O.
Previous Operation(s) Tab
The Previous Operation(s) details for a job can be viewed by clicking on the  tab.
tab.
Here, users are able to view any Previous Operation(s) for a job.
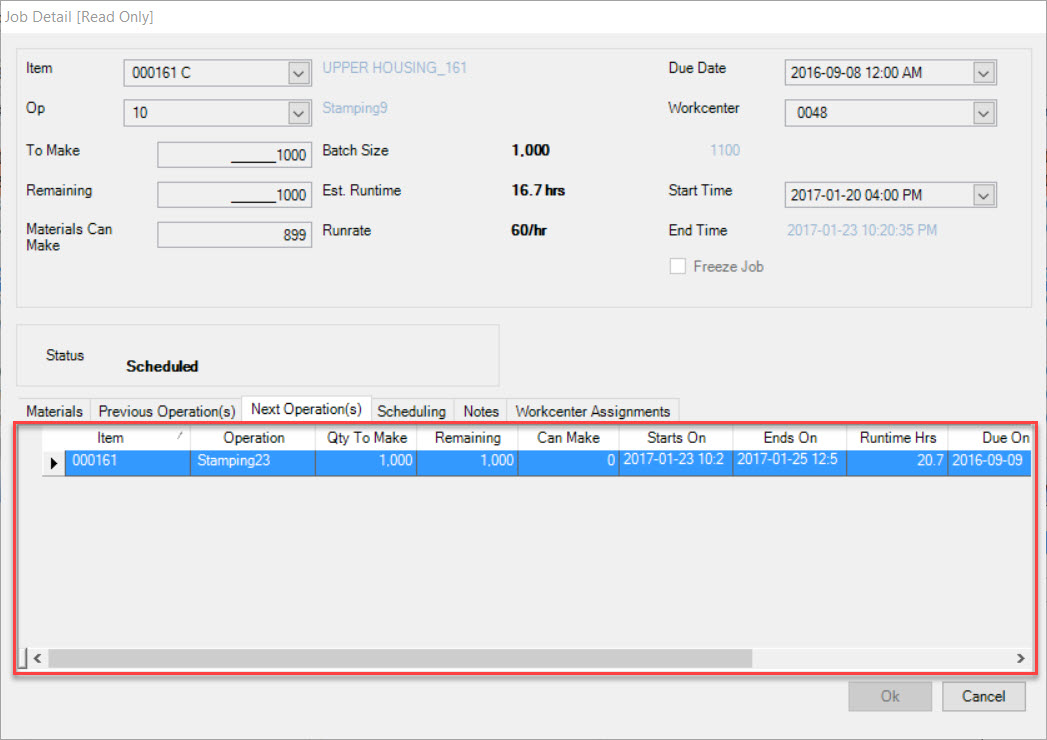
Next Operation(s) Tab
The Next Operation(s) details for a job can be viewed by clicking on the  tab.
tab.
Here, users can view any upcoming operations for a job.
Scheduling Tab
The Scheduling details for a job can be viewed by clicking on the  tab.
tab.
Here, users can view the Workcenter, Container, Setup, Minimum Quantity, Batch Size, and the Job Must Start After date.
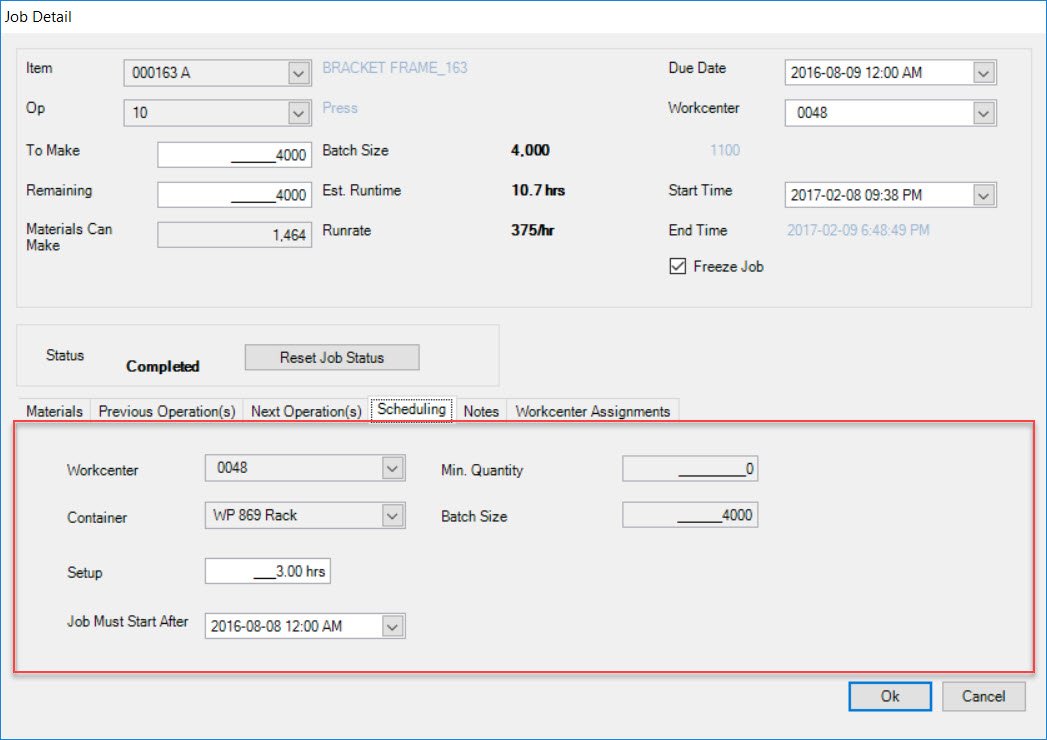
Users can enter or modify Setup Hours and set a Date that the Job must begin after. By design, all Jobs will be scheduled back to back in the system, maximizing equipment utilization.
If users wish to schedule a Job to begin after a particular Date or Time, they may use this field.
Notes Tab
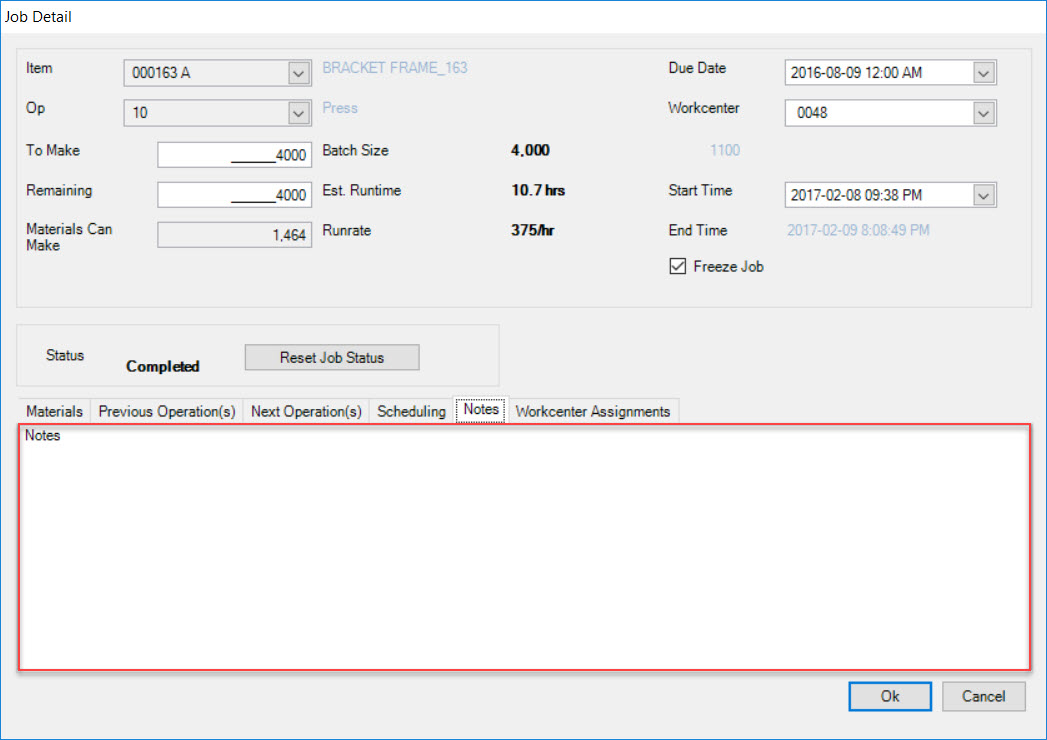
The Notes for a job can be viewed by clicking on the  tab.
tab.
Here, users can enter and view any Notes for a job. When there is a Note entered in this field, a small Note icon will appear to the left of the Job row on the Workcenter Schedule screen.

Workcenter Assignments Tab
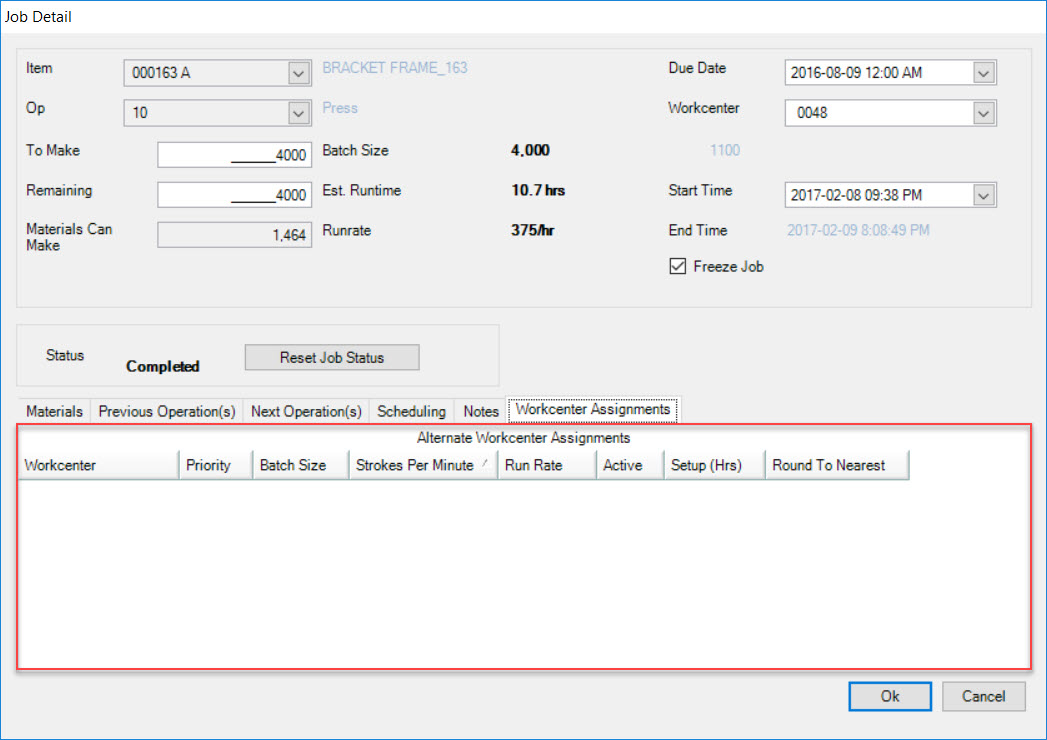
The Workcenter Assignments details for a job can be viewed by clicking on the  tab.
tab.
Here, users can view the Workcenter Assignment or Alternate Workcenters that have been entered on the Manufacture Routing.
 tab and click on the
![]() icon. This will open a Read-Only copy of the Workcenter Schedule; you will not be able to make any changes on this screen.
icon. This will open a Read-Only copy of the Workcenter Schedule; you will not be able to make any changes on this screen.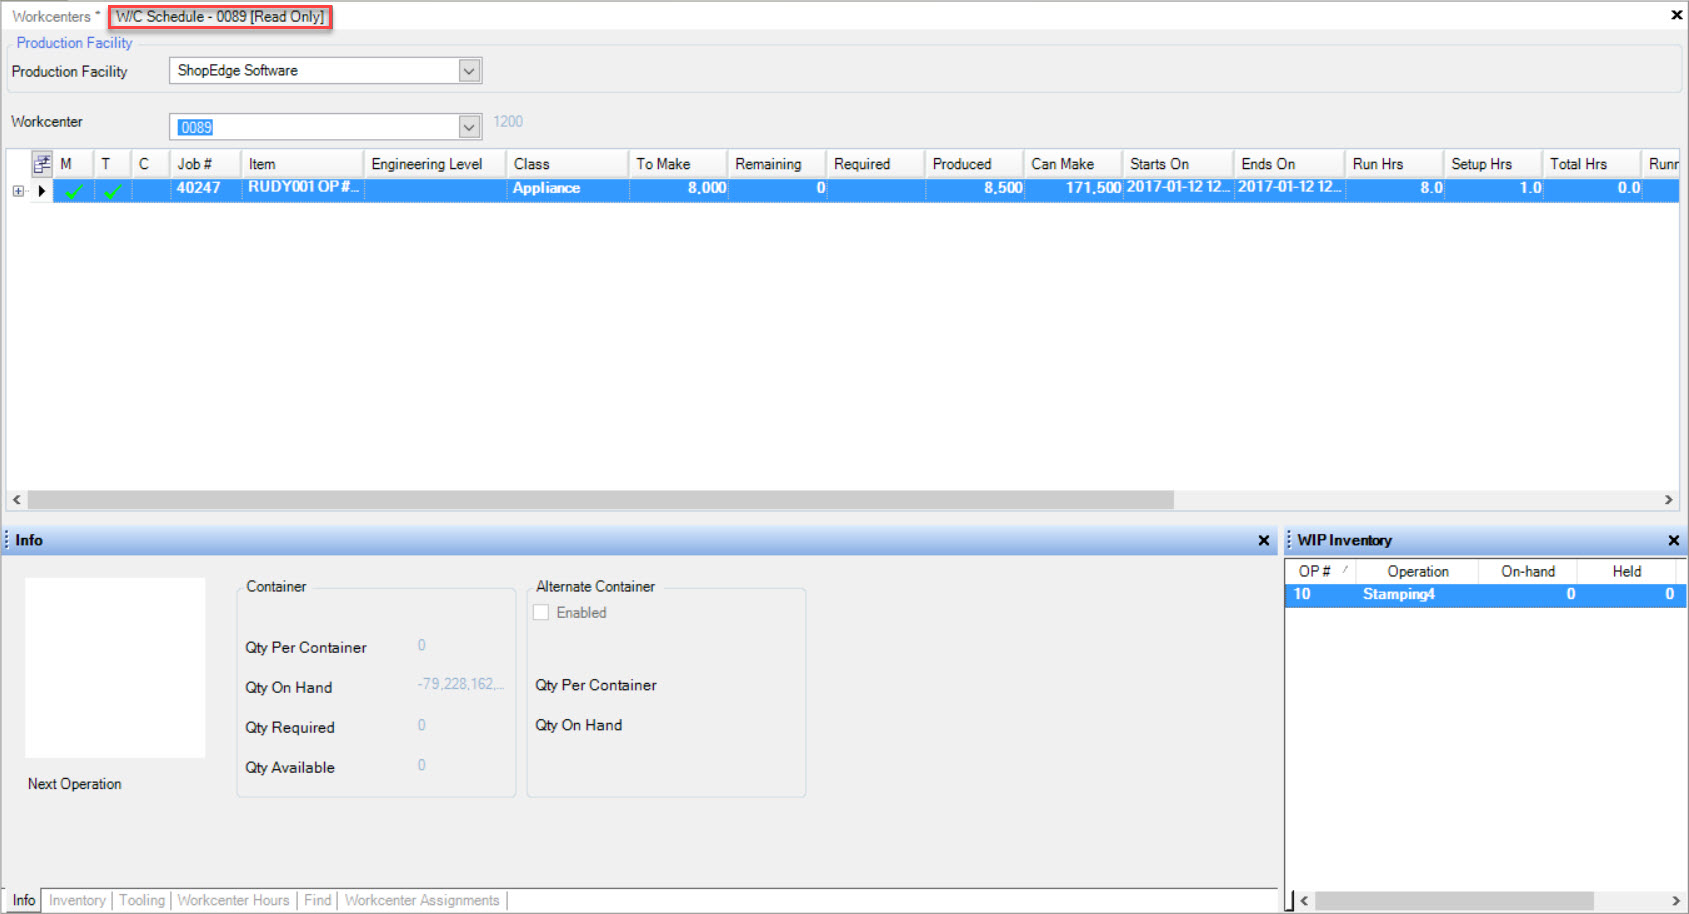
 tab and click on the
 ![]() icon. This will open the
Master Production Schedule screen.
icon. This will open the
Master Production Schedule screen.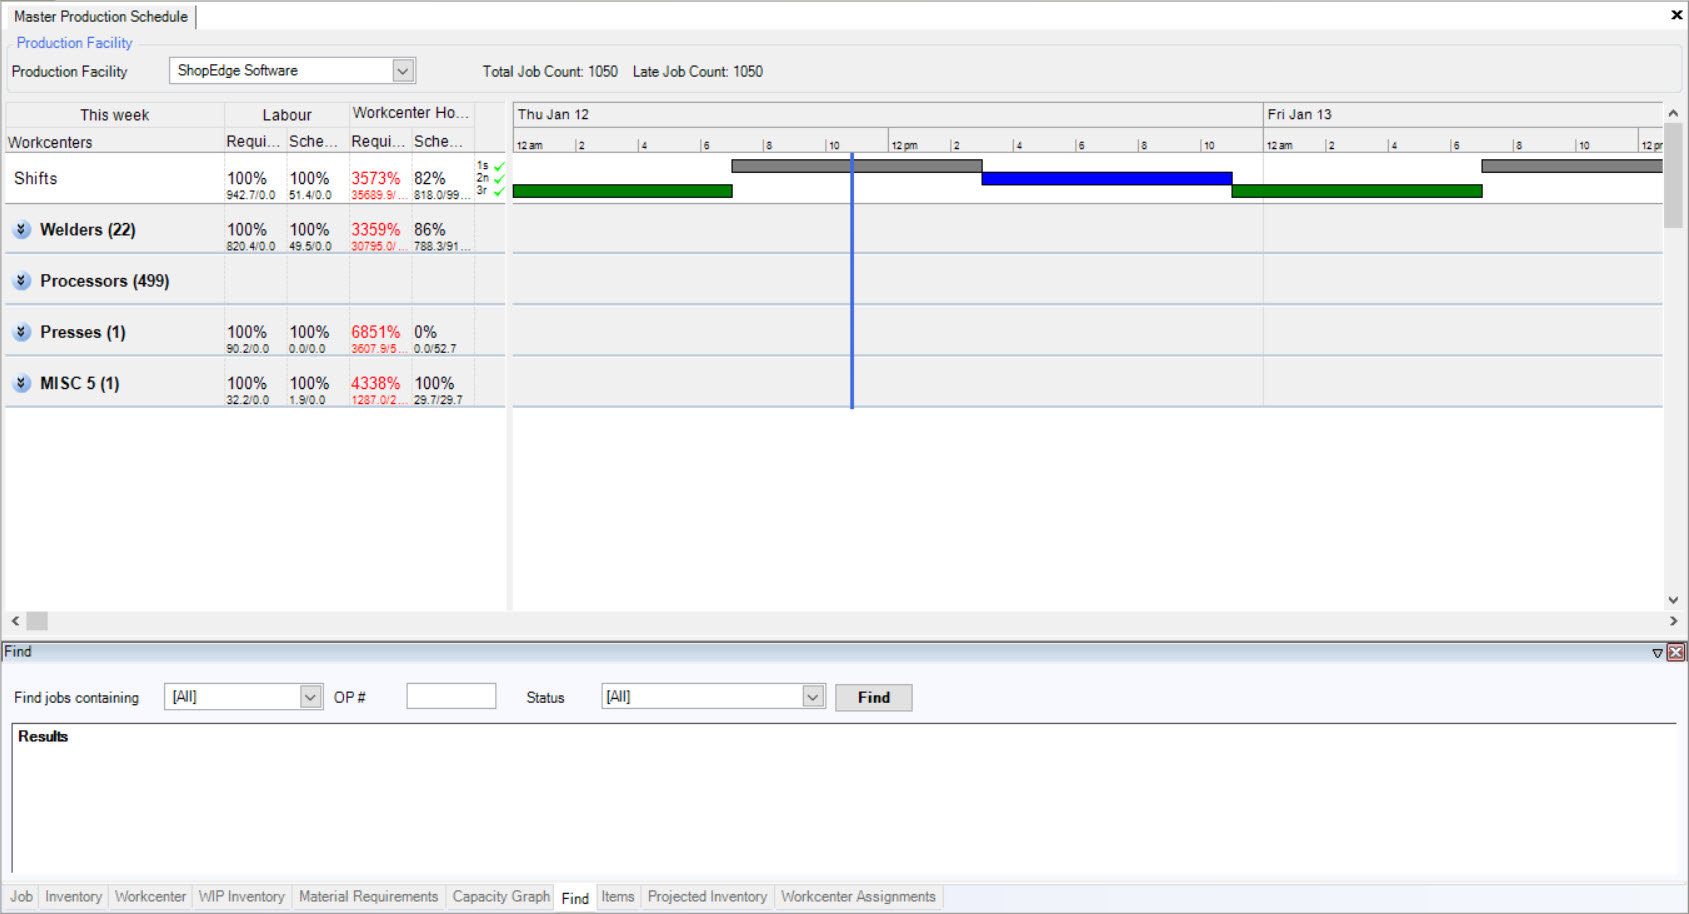

 tab.
tab.

 tab.
tab.
 tab.
tab.
 tab.
tab.
 tab.
tab.
 tab.
tab.
 tab and click on the
 ![]() icon. This will open the Workcenter Schedule screen in a read-only
format.
icon. This will open the Workcenter Schedule screen in a read-only
format.
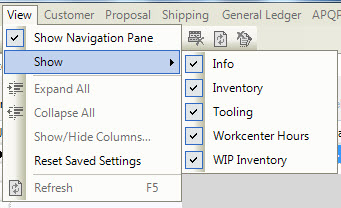
 tab located at the bottom of the screen.
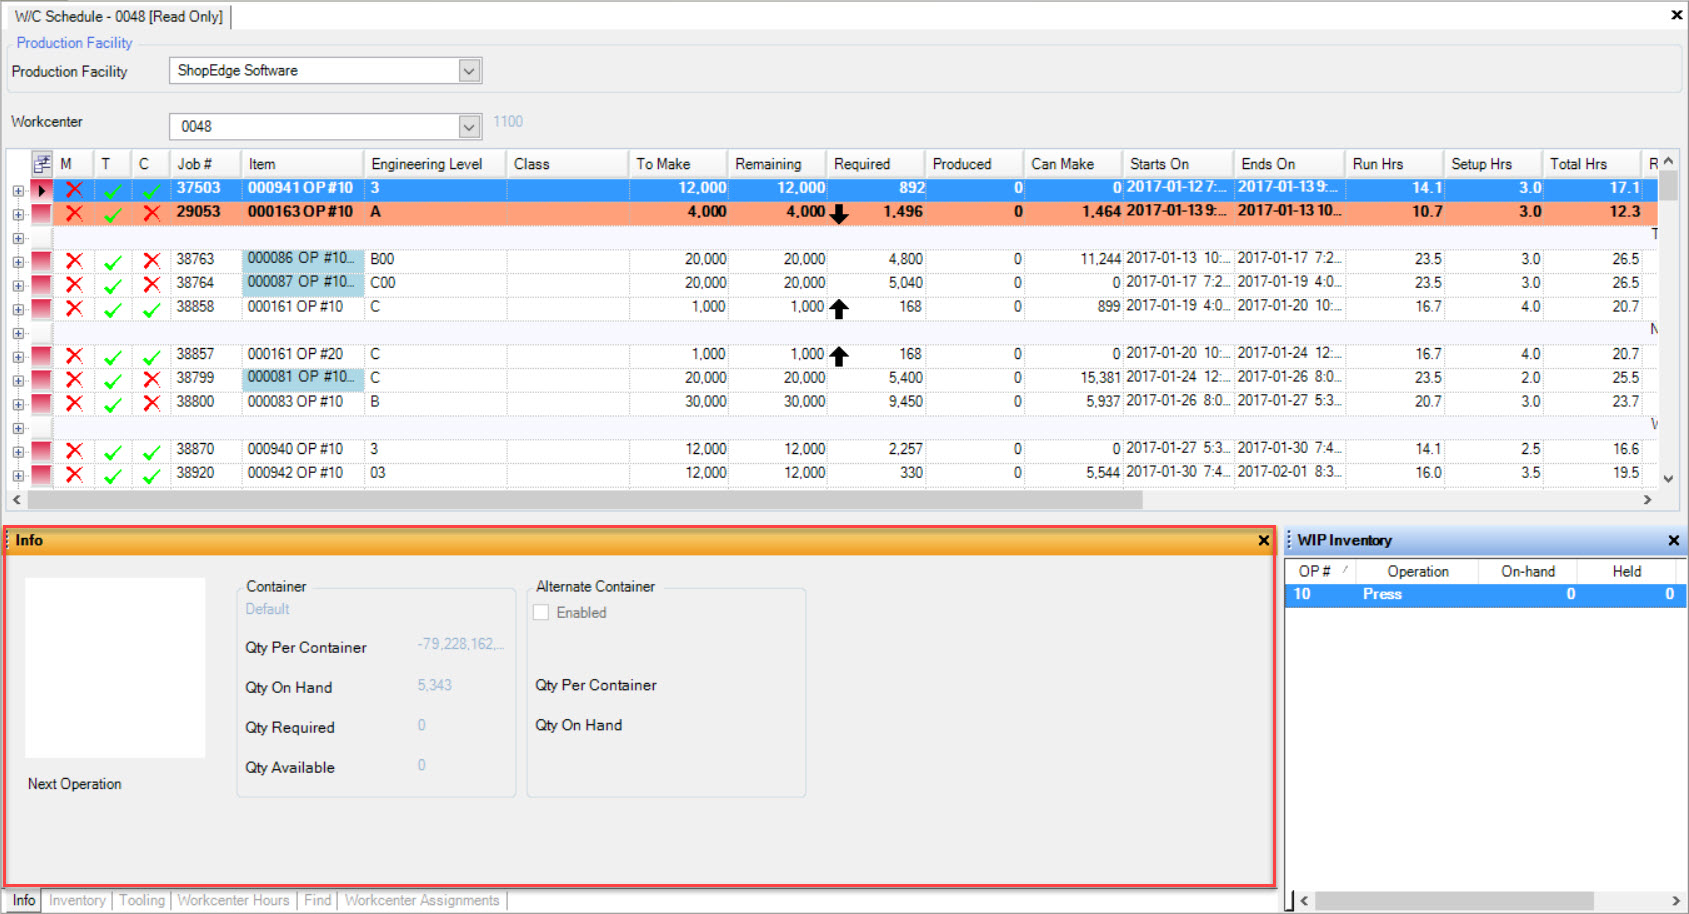
 tab located at the bottom of the screen.
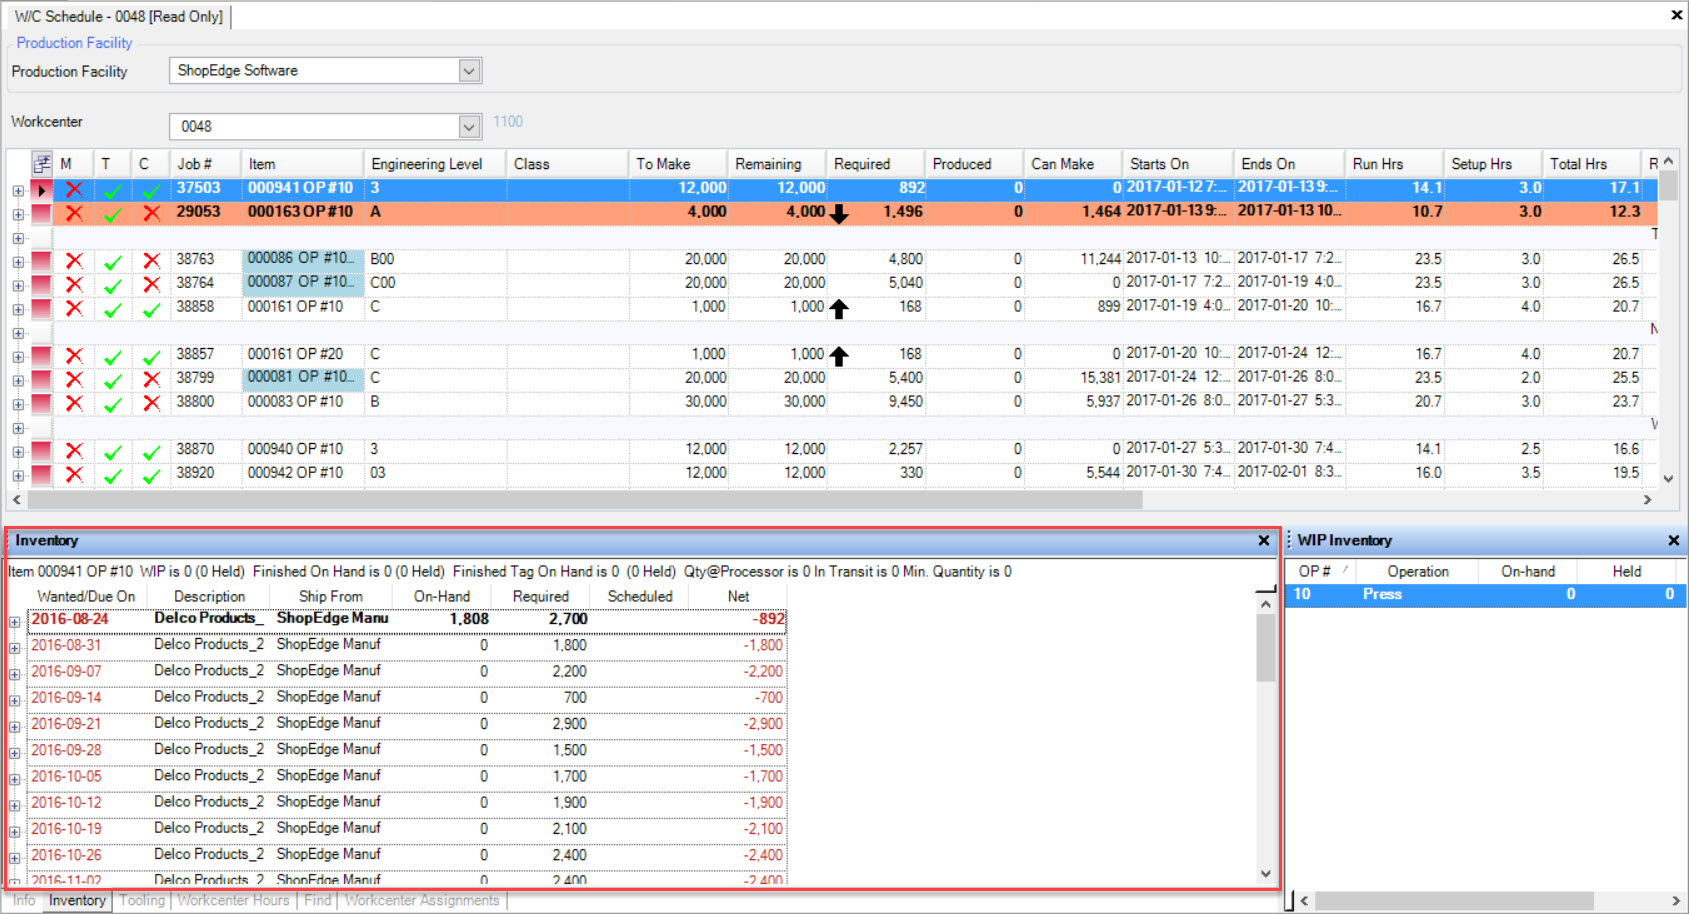
 tab located at the bottom of the screen.
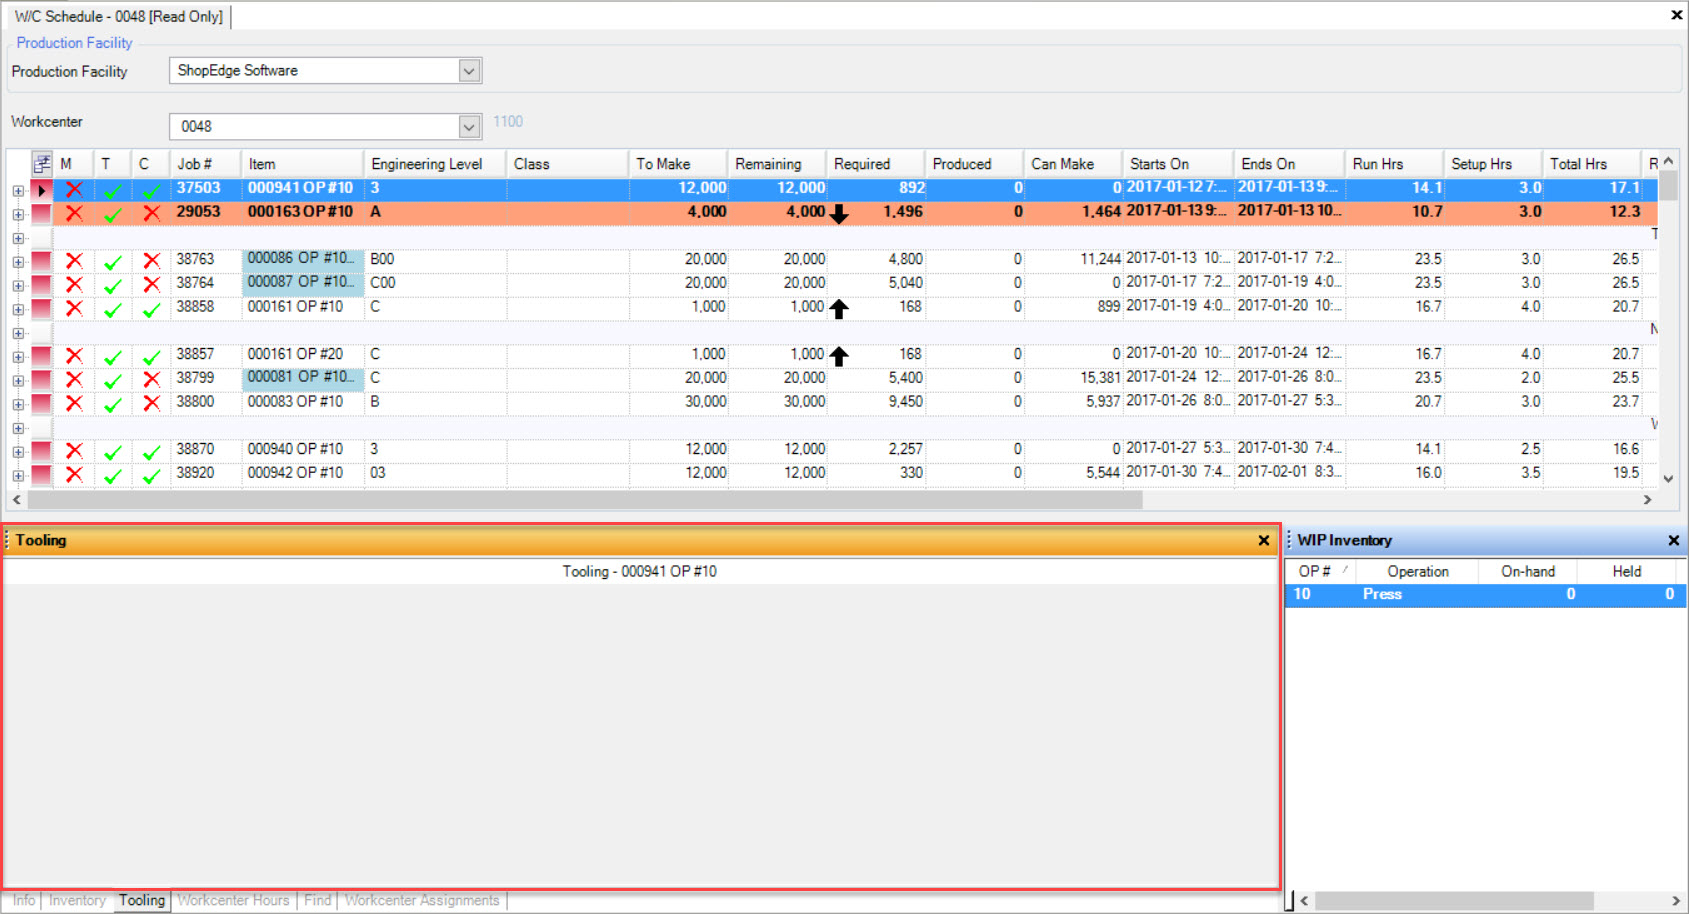
 tab located at the bottom of the screen.
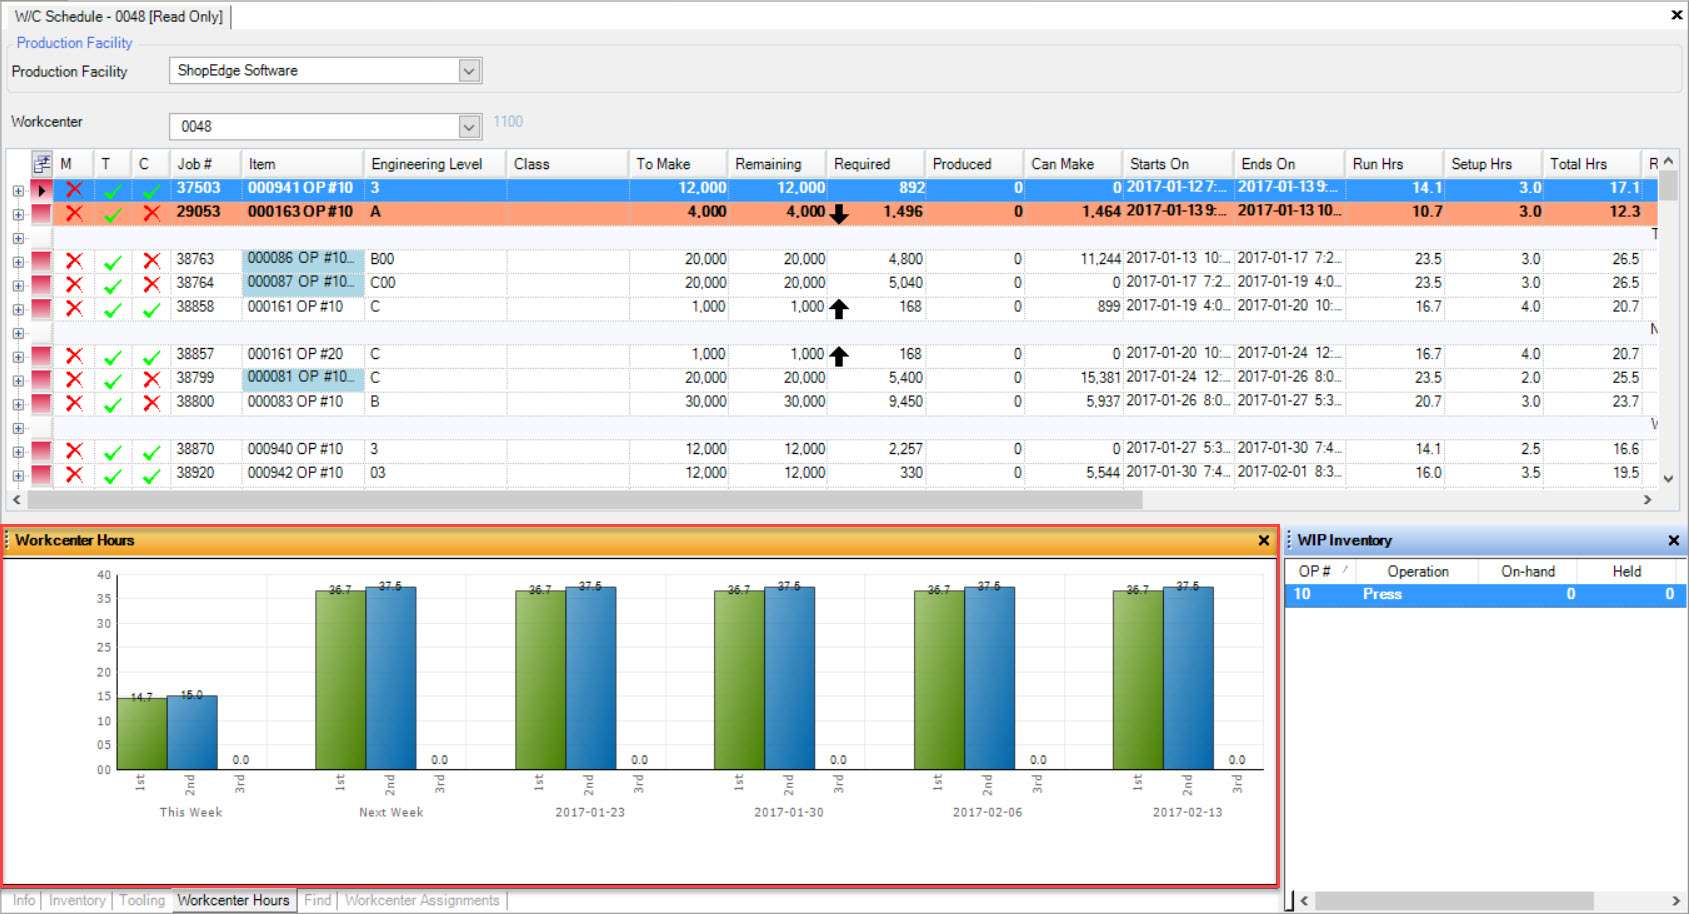
 tab located at the bottom of the screen.
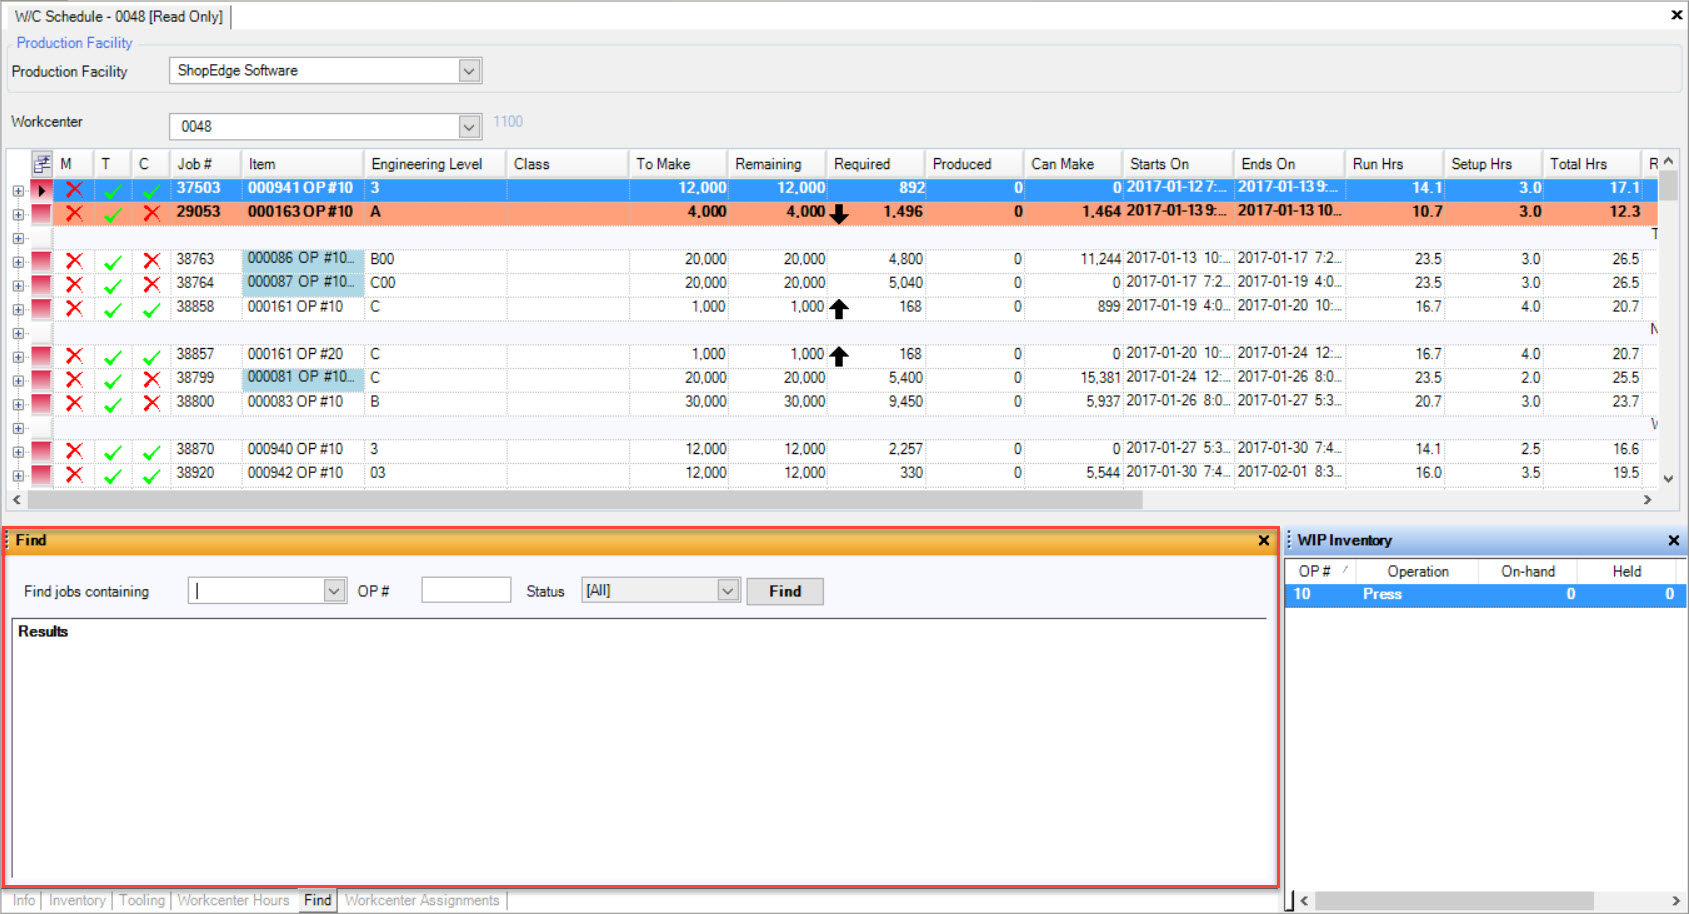
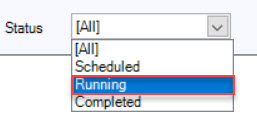
 button and all of the running Jobs will be displayed below.
 tab located at the bottom of the screen.
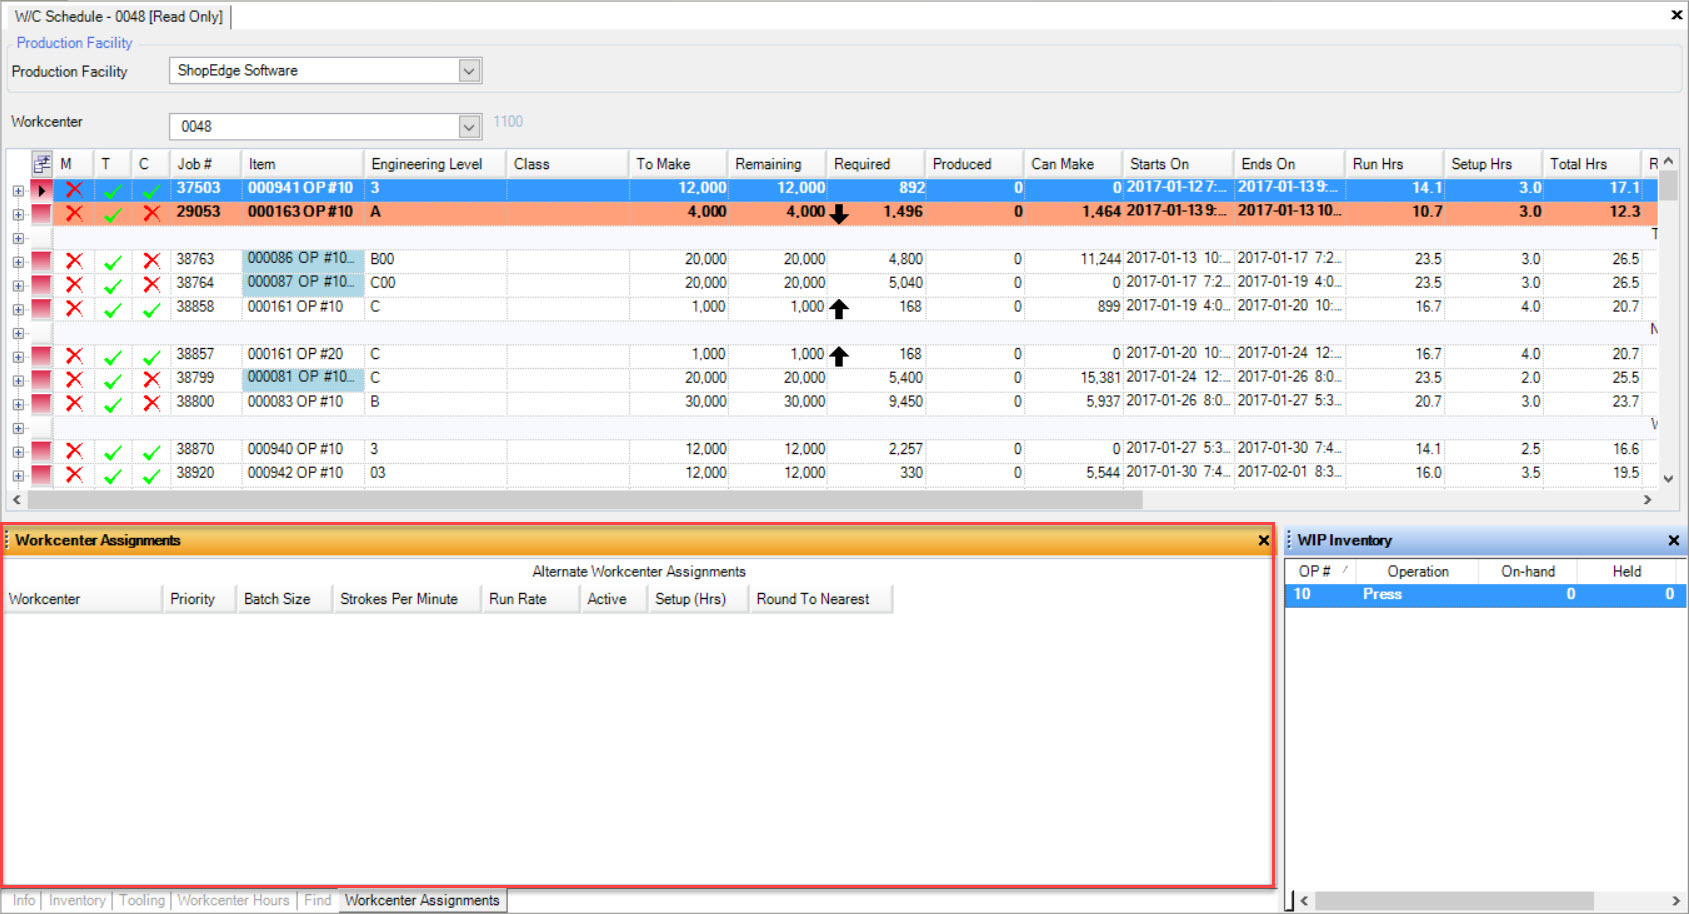


 in the appropriate column.
 in the appropriate column.


 , then there are one or more Preventative Maintenance work orders that are overdue for a particular Tooling Item linked
to the Production Item.
 , it indicates that an Order Quantity
has increased.
 , it indicates that an Order Quantity has decreased.

 , the Date has been changed to a later Date.
 , the Date of the Order has been changed to an earlier Date.


 button to perform the replan.
 tab by using the arrow to scroll over. Select the appropriate boxes and click on the

 arrow.
 arrow.


 checkbox. Users have the ability to de-select the checkbox if necessary.


