Containers
Containers are managed and tracked in the system under the Production module in the system. Containers are linked to Manufacture Routings under Other Info located on the Manufacture Routing screen. Once linked, the system will know which Items use which Containers, and can track On-Hand and Off-Site Container Inventory.
When a serial number is created for a Production item, selecting a Container is a required field, and the On-Hand Container Quantity is decremented. When a serial number is deleted, the On-Hand Container Quantity is incremented.
When Items in a Container are shipped to a Customer or Processor, the Off-Site Quantity is incremented. Users can receive Containers back into the system to increment On-Hand Quantities, or adjust the On-Hand Quantity manually on the Container screen.
To view the Container Lookup screen, navigate to the  tab and click on the
 ![]() icon. The Container Lookup screen
will be displayed.
icon. The Container Lookup screen
will be displayed.
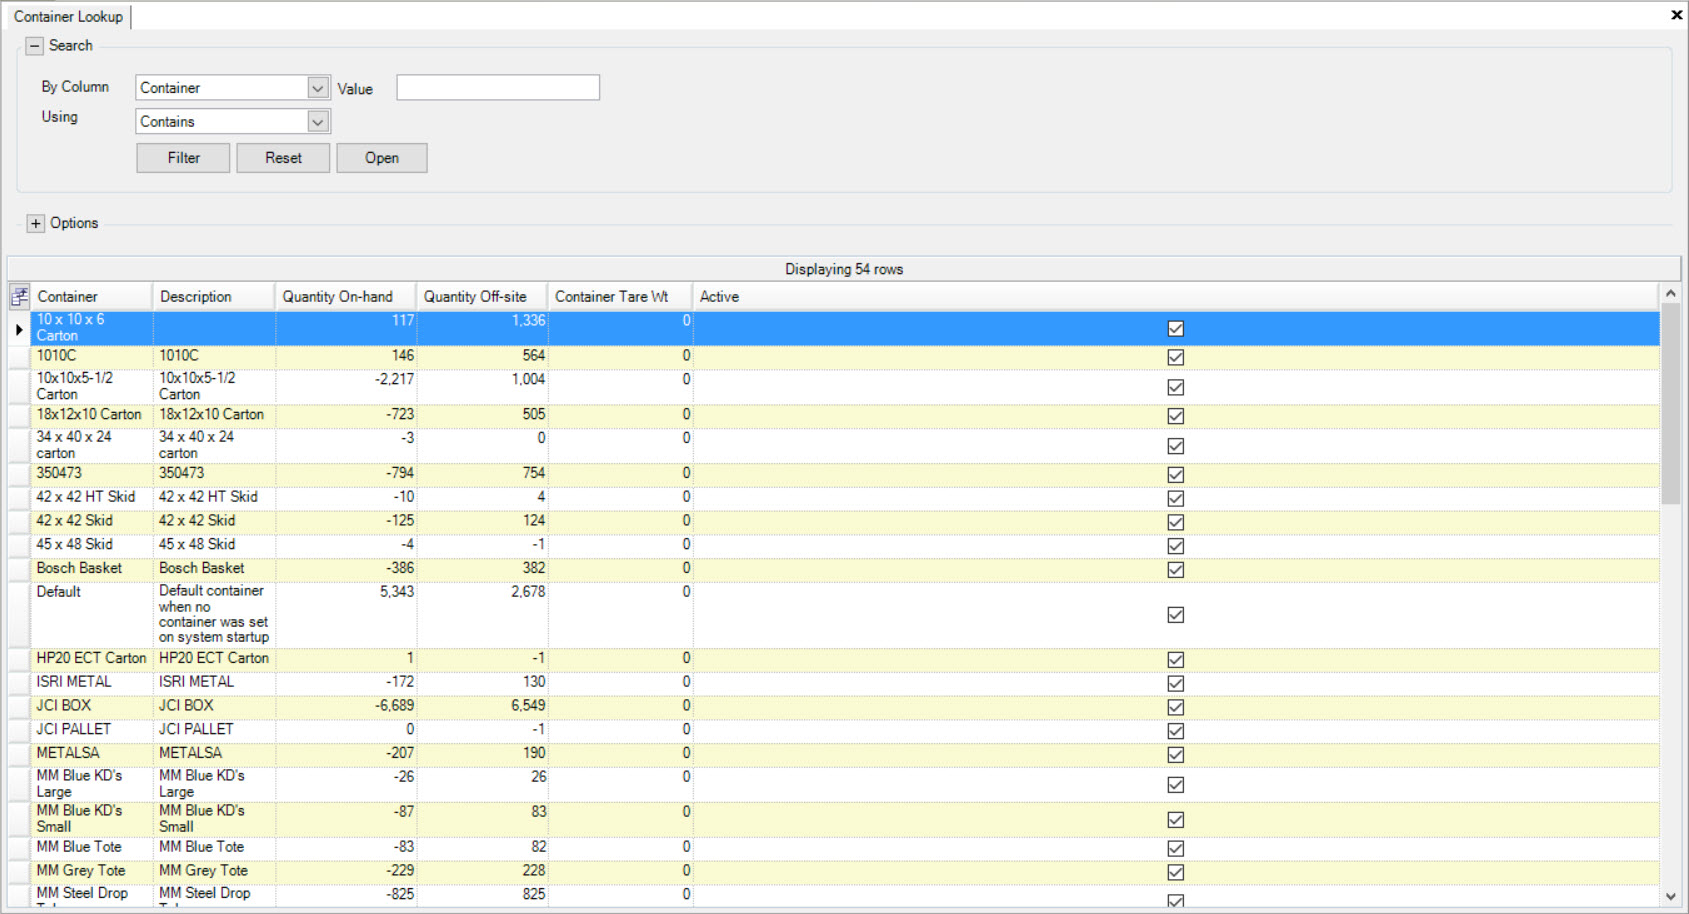
Users will be able to view all available Containers in the system.
Creating New Containers
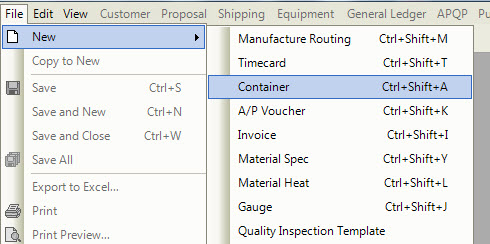
There are three ways to create a new Container in the system. The first way is to press Ctrl + Shift + A keys. The second way is to navigate to File > New > Container.
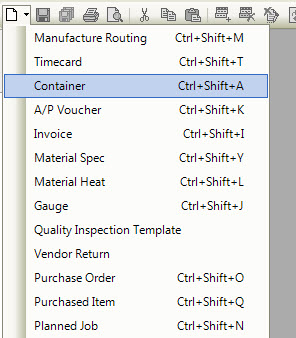
The last way is to click on the  button and select the Container option.
Each of these options will open a new Container screen.
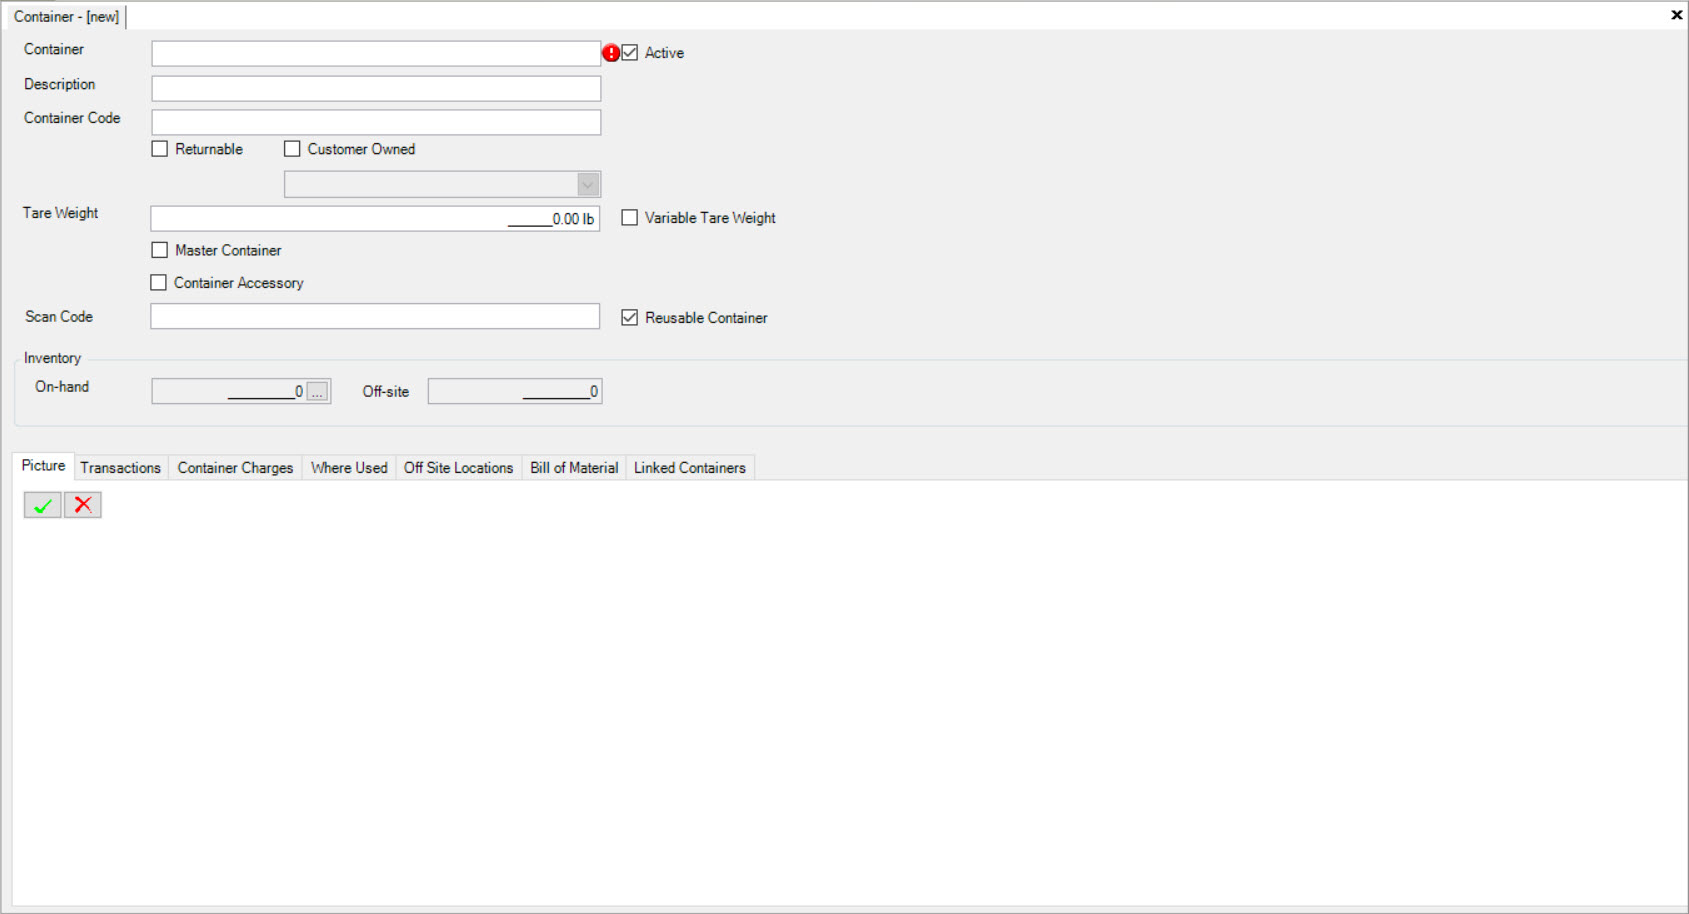
Fill out the header information such as the Container, Description, Container Code and whether the Container is Returnable and/or Customer Owned (and who it is owned by). Select or de-select the Active box.
Make sure to add the Tare Weight, and select the Variable Tare Weight if you wish the Operation to enter the Tare Weight of the Container when printing Barcodes at the time of Produciton. Select whether the Container is a Master Container and/or a Container Accessory (ie. Lid) if necessary. Fill in the Scan Code and select the Reusable Container box if applicable. The Scan Code can be entered for Barcode scanning purposes which can make Containers easier to receive into the system.
- Tare Weight: The Tare Weight (weight of the Container) is used to calculate the weight of a tag based on the number of parts, and the net finished piece weight and the container Tare Weight.
- Variable Tare Weight: The Variable Tare Weight is used to indicate that the container does not have a fixed Tare Weight. The shop floor operator can record the Tare Weight when printing a Barcode using the Operator Schedule. An example of a Variable Tare Weight container might be a skid.
There are various tabs on the bottom of the new Container screen where users have the ability to view or add additional information.
To add a picture, make sure that the  tab is selected. Then, click on the
  button. to browse and add a picture.
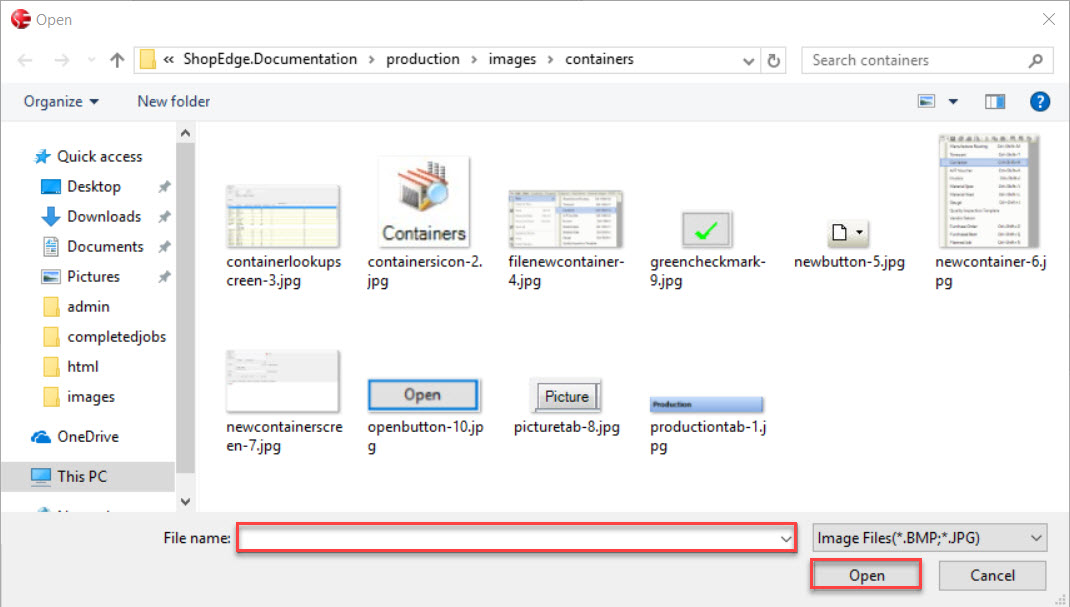
A window will open where you are able to search your computer for a picture. Once you have selected a picture, click on the  button.
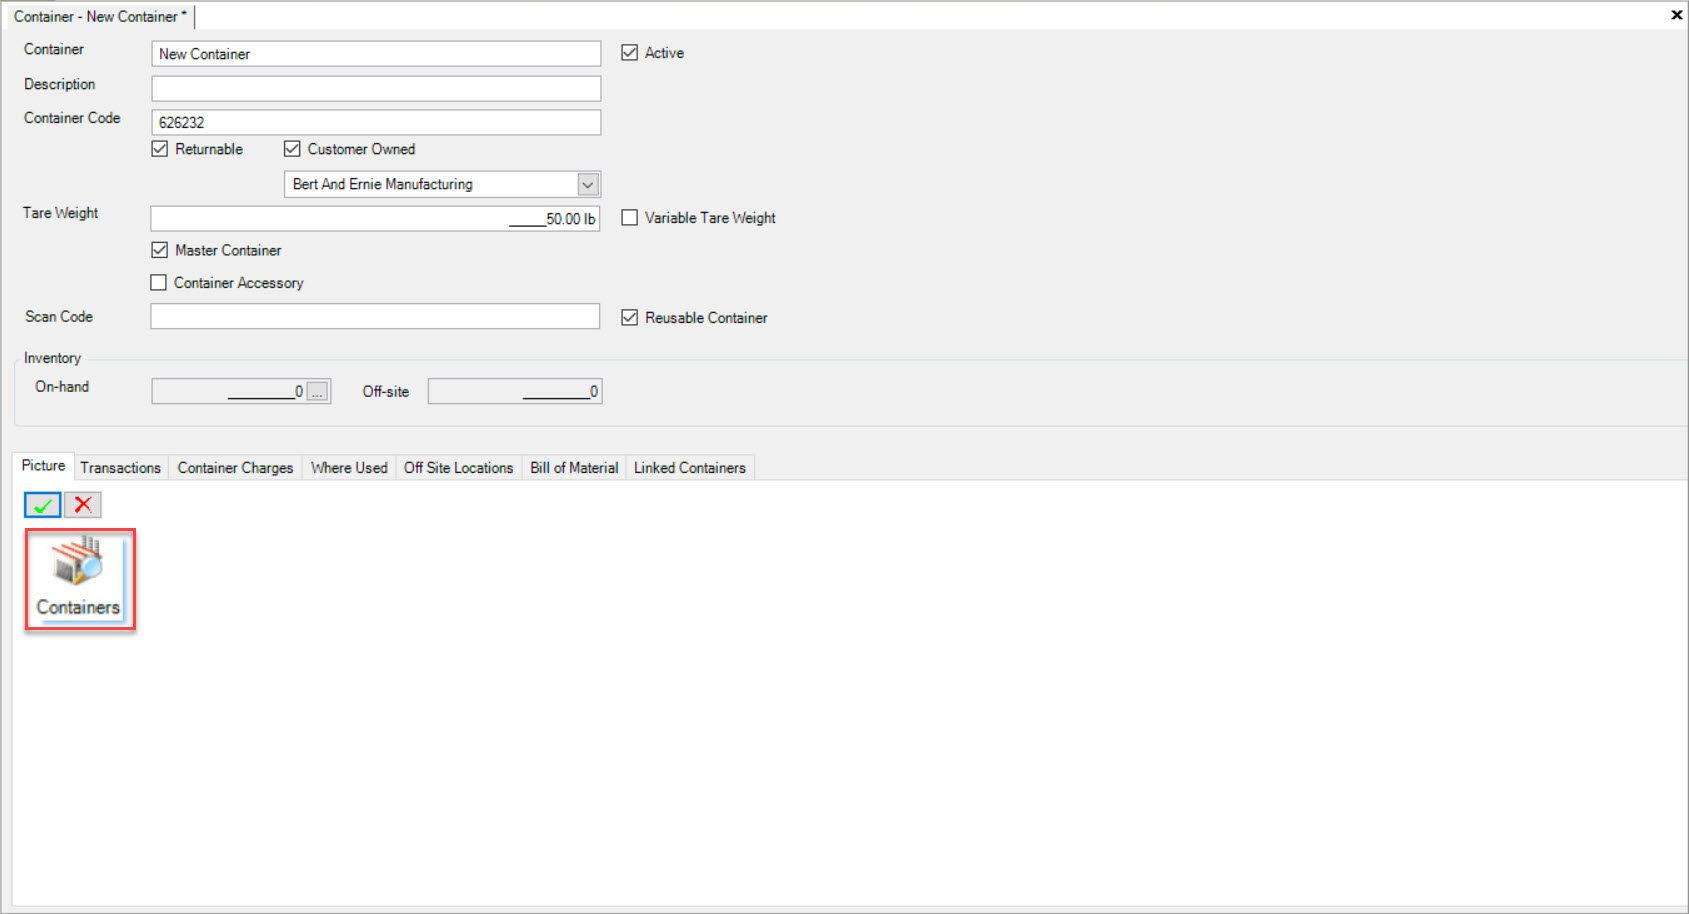
The picture will appear under the  tab on the Container screen.
The  tab is where all Transactions for a particular Container are located. These include Containers that move on the shop floor and in Production,
to Shipping and Receiving. You can use the filter option at the bottom of the screen to view Transactions as far back as necessary.
The  tab lists all of the Charges for a particular Container that are created under the Customer module.
The  tab lists all of the Manufactured Items that use the current Container, established at the Manufacture Routing Level.
The  tab allows users to enter in a Customer/Vendor, Plant, and Quantity at Site for off-site inventory tracking purposes. Click on the
 button to add an Off-Site Location.
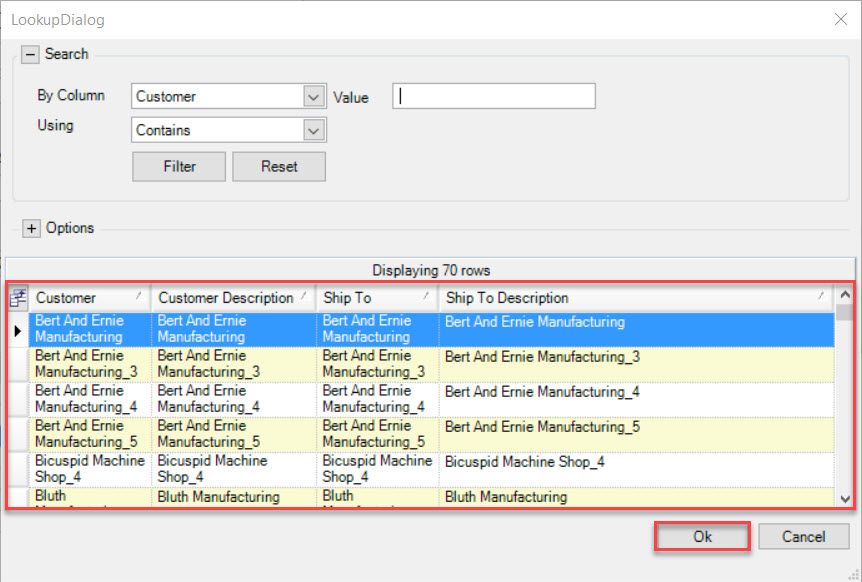
The Lookup Dialog window will appear where users can select the appropriate Customer(s). To select multiple at a time, use your Ctrl key and then click on the  button.
The Customer(s) will be added to the  tab.
tab.
Note
To add a Vendor as an Off-Site Location, expand the Options section and select Vendors.
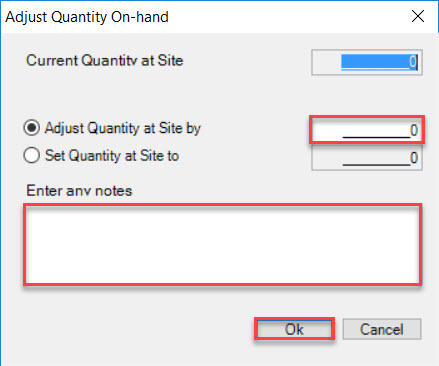
To adjust the quantity at the site location, click on the  button. The Adjust Quantity On-hand window will appear. Fill in the Adjust Quantity at Site By box
and enter in any necessary notes. Click on the
  button.
The Quantity at Site column will update.
The  tab allows users to add a Purchased Item from the system as part of a Container Bill of Material. Click on the
  button to open the Purchased Item lookup screen and add an Item to the Container Bill of Material.
The Item Lookup window will appear. Select the Item(s) you wish to add and click on the  button.
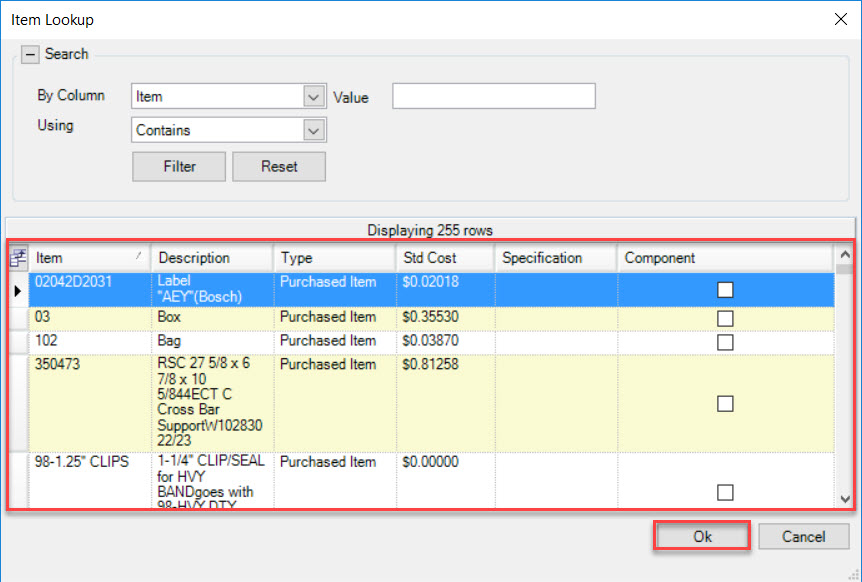
The Item(s) will be added to the  tab. Enter in a Quantity under the Qty Required column.
The  tab allows users to add a Master Container to another Container in the system. To do so, click on the
  button
to link a Container.
The Find Container window will appear. Select the Master Container you wish to add and click on the  button.
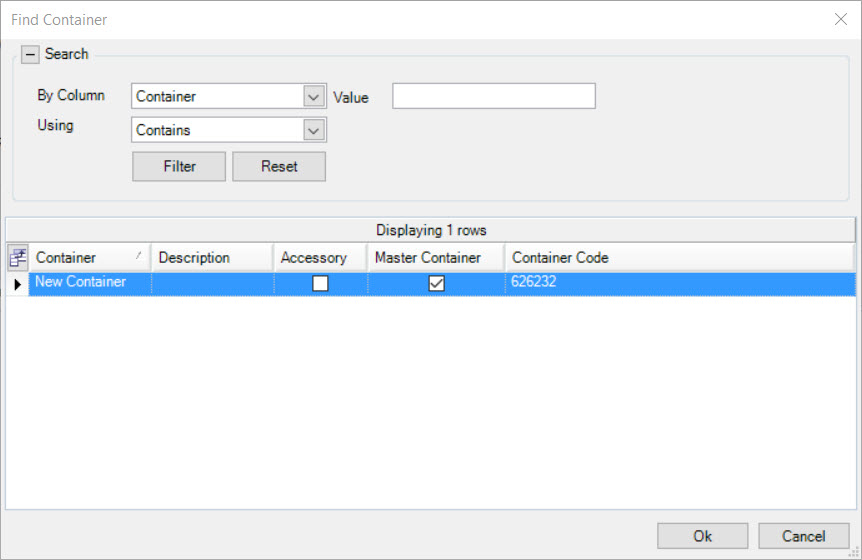
The Container that you wish to link, will be added to the  tab. Enter in a Quantity under the Qty Required column.
Once all necessary information has been added to the new or existing Container, make sure to save your changes before exiting the screen.
Note
To remove a Picture, Off-Site Location, Bill of Material, or a Linked Container, simply highlight the appropriate row and click on the  button and the system will remove it.
Container Inventory
ShopEdge tracks Container Inventory based on the number of empty Containers available. ShopEdge can also track the Containers that have been shipped to a Customer or Vendor site. Container transactions are created in the Production, Shipping, and Receiving modules.
Every time an inventory tag is created using a particular Container, a transaction is recorded against it that consumes the Container Inventory. When the Container is modified on an inventory tag, a transaction will be created to put the original Container into inventory, while consuming the new Container. Deleted tags will also put the Container back into inventory. When shipping product, Container transactions are created that record the movement of the Container to the Customer or Vendor location. You can receive empty Containers by using the container receiving module.
To view Container Inventory, navigate to the  tab and click on the
 ![]() icon. This will open the Container Lookup screen.
icon. This will open the Container Lookup screen.

This screen displays a quick view of Container Inventory, including the number of containers on-hand, and off-site. To view a more detailed explanation of inventory, find the specific Container using the filter function, and double click on the row to open the Container detail screen.
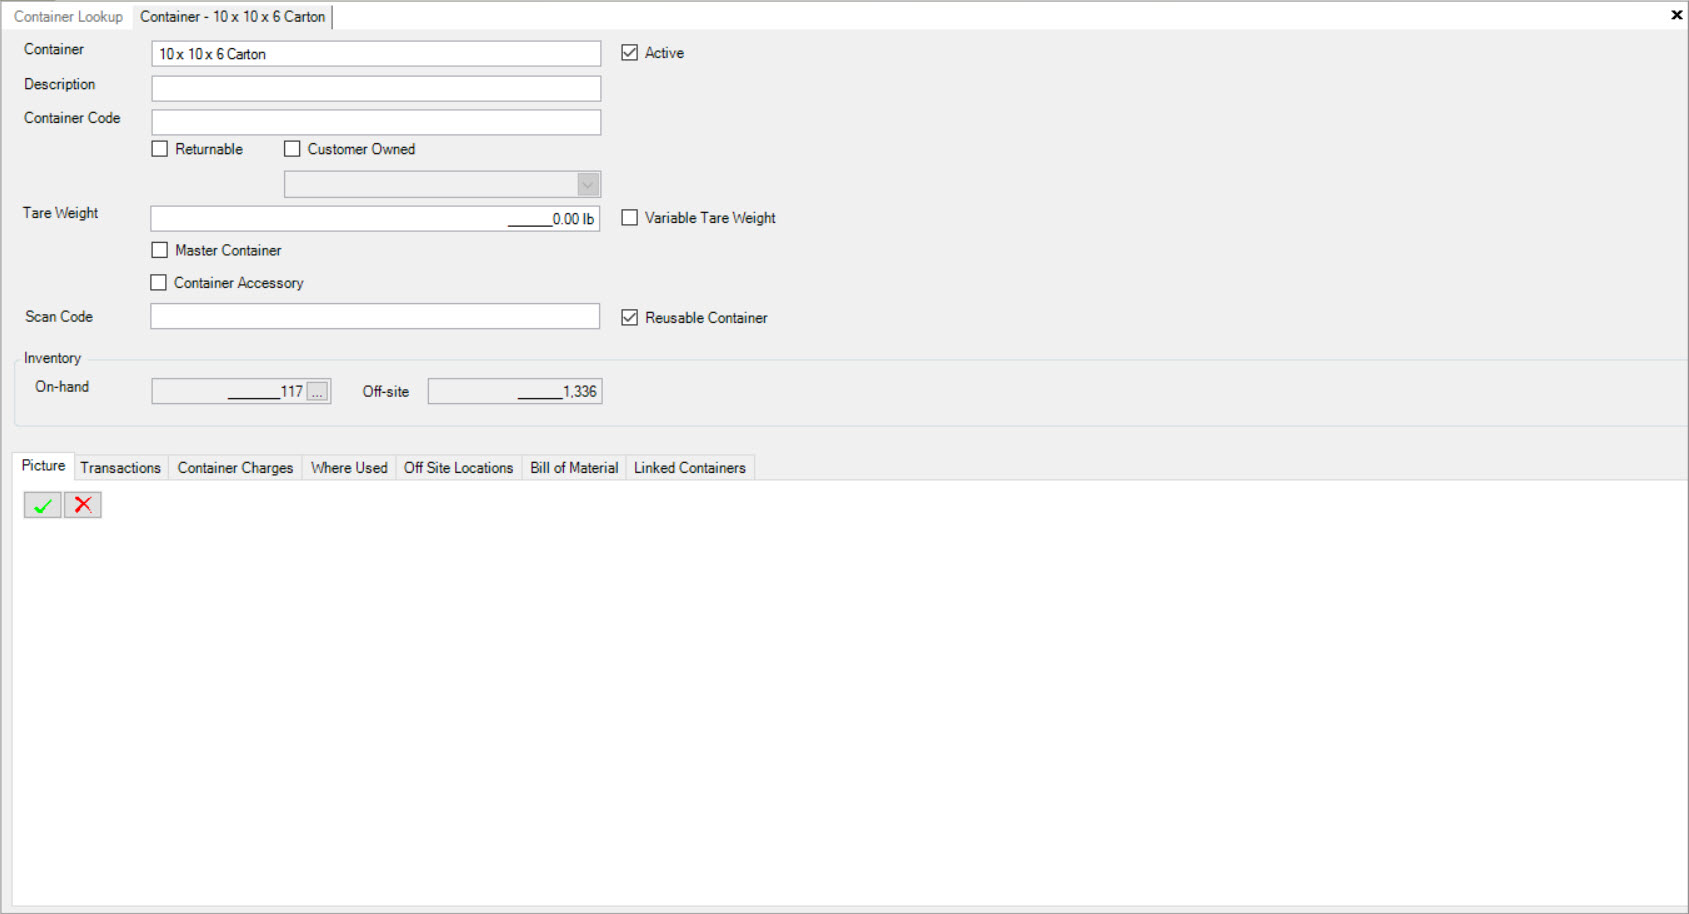
You can see the Container Inventory position at the top of the screen. To view the inventory positions at each off-site location, make sure the  tab
is selected.
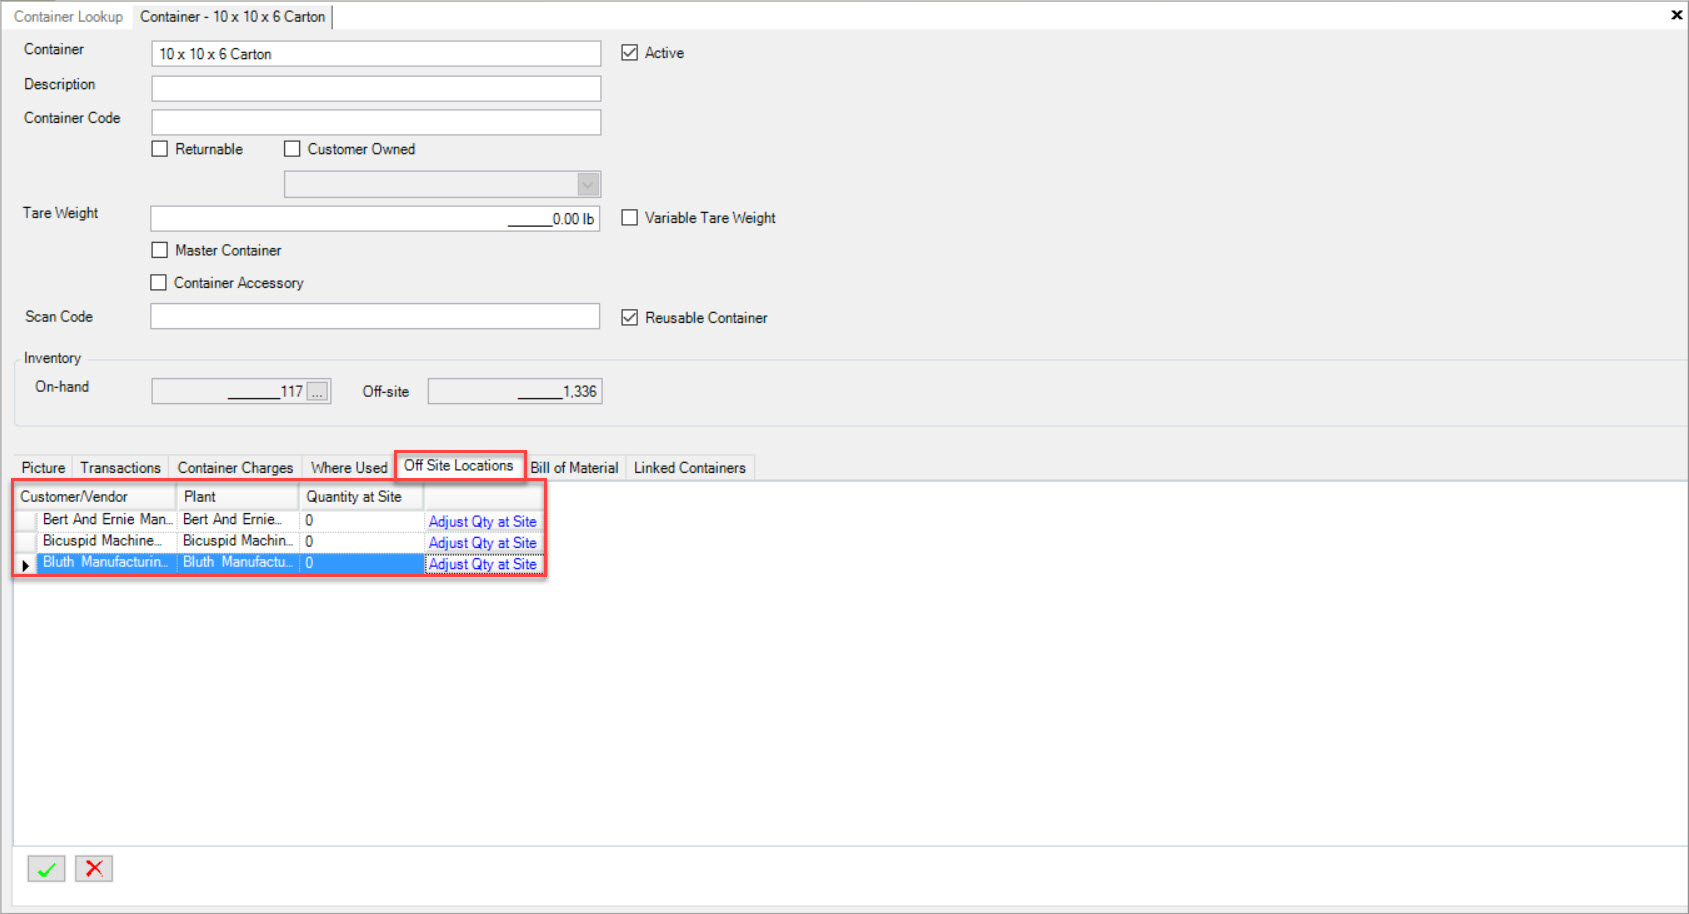
ShopEdge will only track inventory at an Off-Site Location if the location has been added to the list. To add an Off-Site Location, follow the listed steps above.
Transactions at a Workcenter
Container transactions are tracked at the Workcenter level. Operators have the ability to select a Container at the Workcenter (the system will always default to the assigned container, and also list any alternate Containers if applicable that have been set up on the Manufacture Routing). When a tag is printed and scanned into the system, the Container is tracked as well, and the Transaction is recorded.
Note
If Items are placed in a Container that is not assigned, the Container of parts may automatically be placed on hold if the option is selected at the Manufacture Routing Level.
To view the Operator Schedule screen, navigate to the  tab and click on the
 ![]() icon. The Operator Schedule
screen will be displayed.
icon. The Operator Schedule
screen will be displayed.
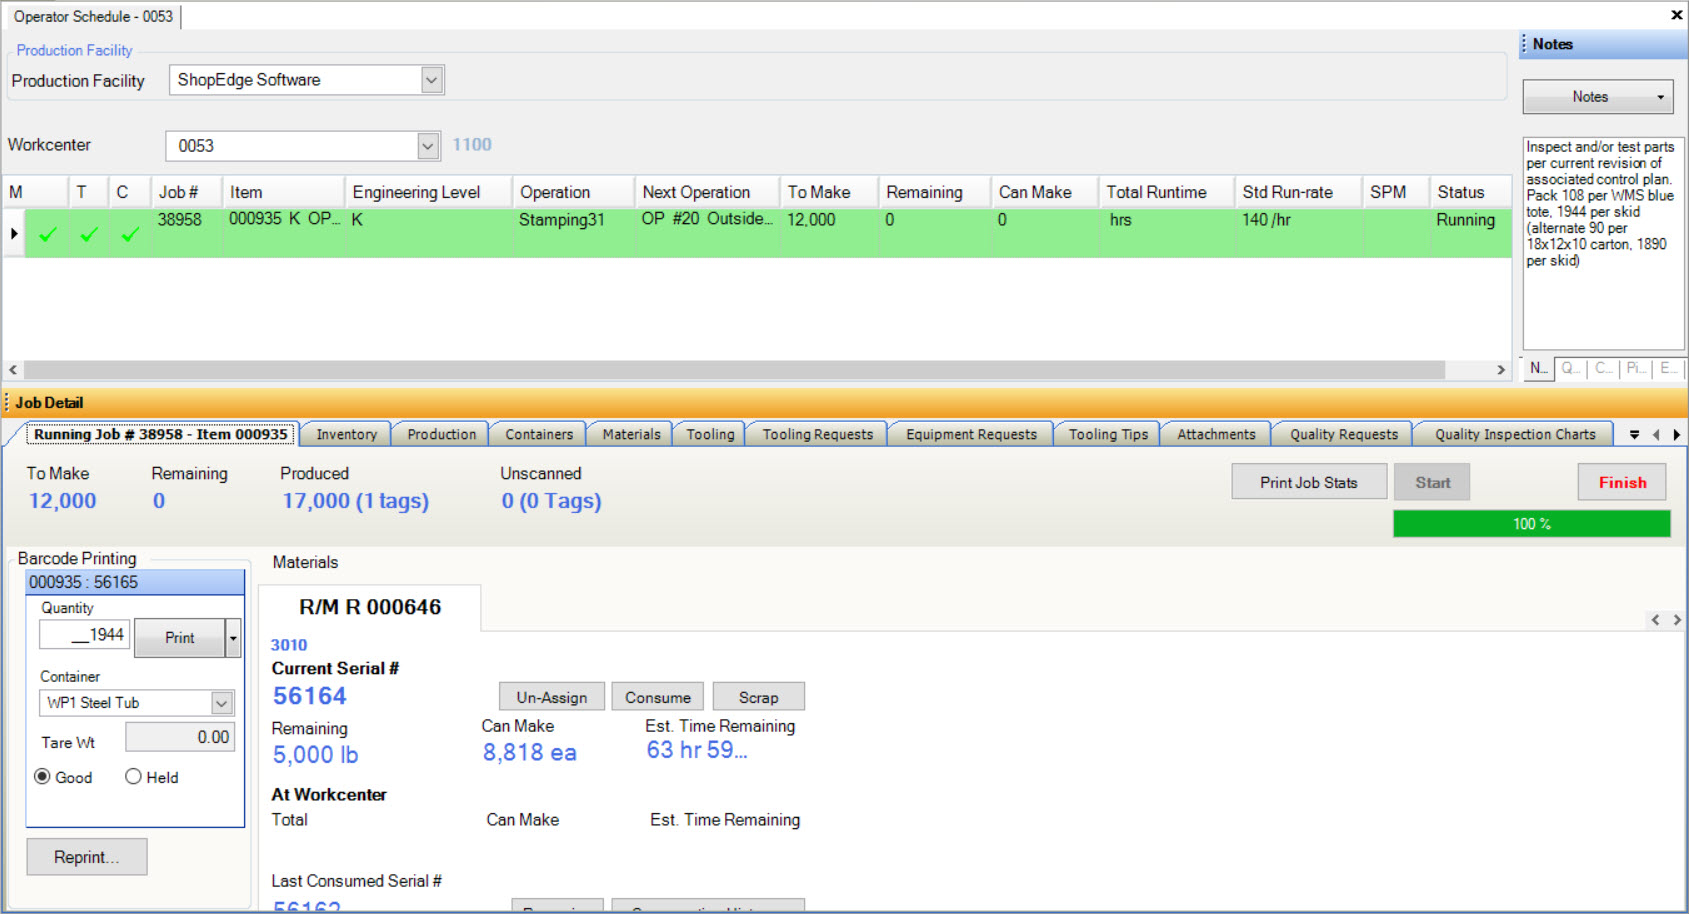
Container inventory and availability are located under the Containers tab on the Operator Schedule screen. A picture of the Container is displayed, along with the Container Description, Quantity Per Container (the number of parts that go in a Container), Quantity On Hand, and the Quantity Required (represents the number of Containers needed to run the Job).
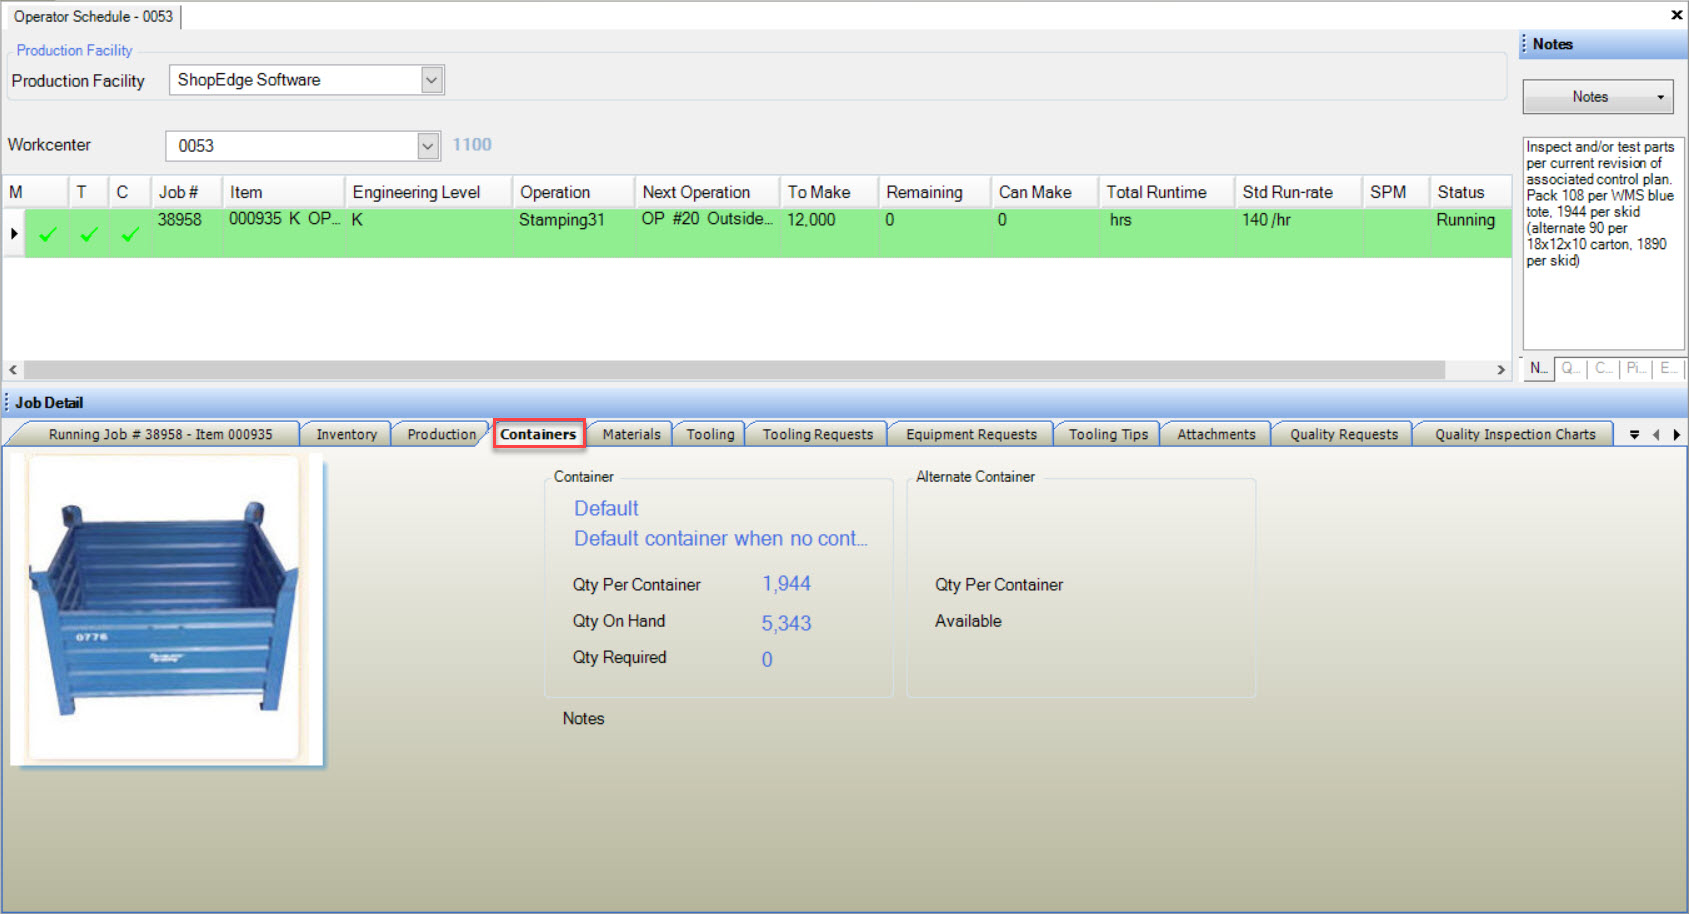
All Container Transactions can be found by navigating to a Container detail screen. To do so, navigate to the  tab and click on the
 ![]() icon.
The Containers Lookup screen will be displayed.
icon.
The Containers Lookup screen will be displayed.

Double-click on the specific Container to open the Container detail screen. Select the  tab to view all transactions related to the selected Container.
Shipping Containers
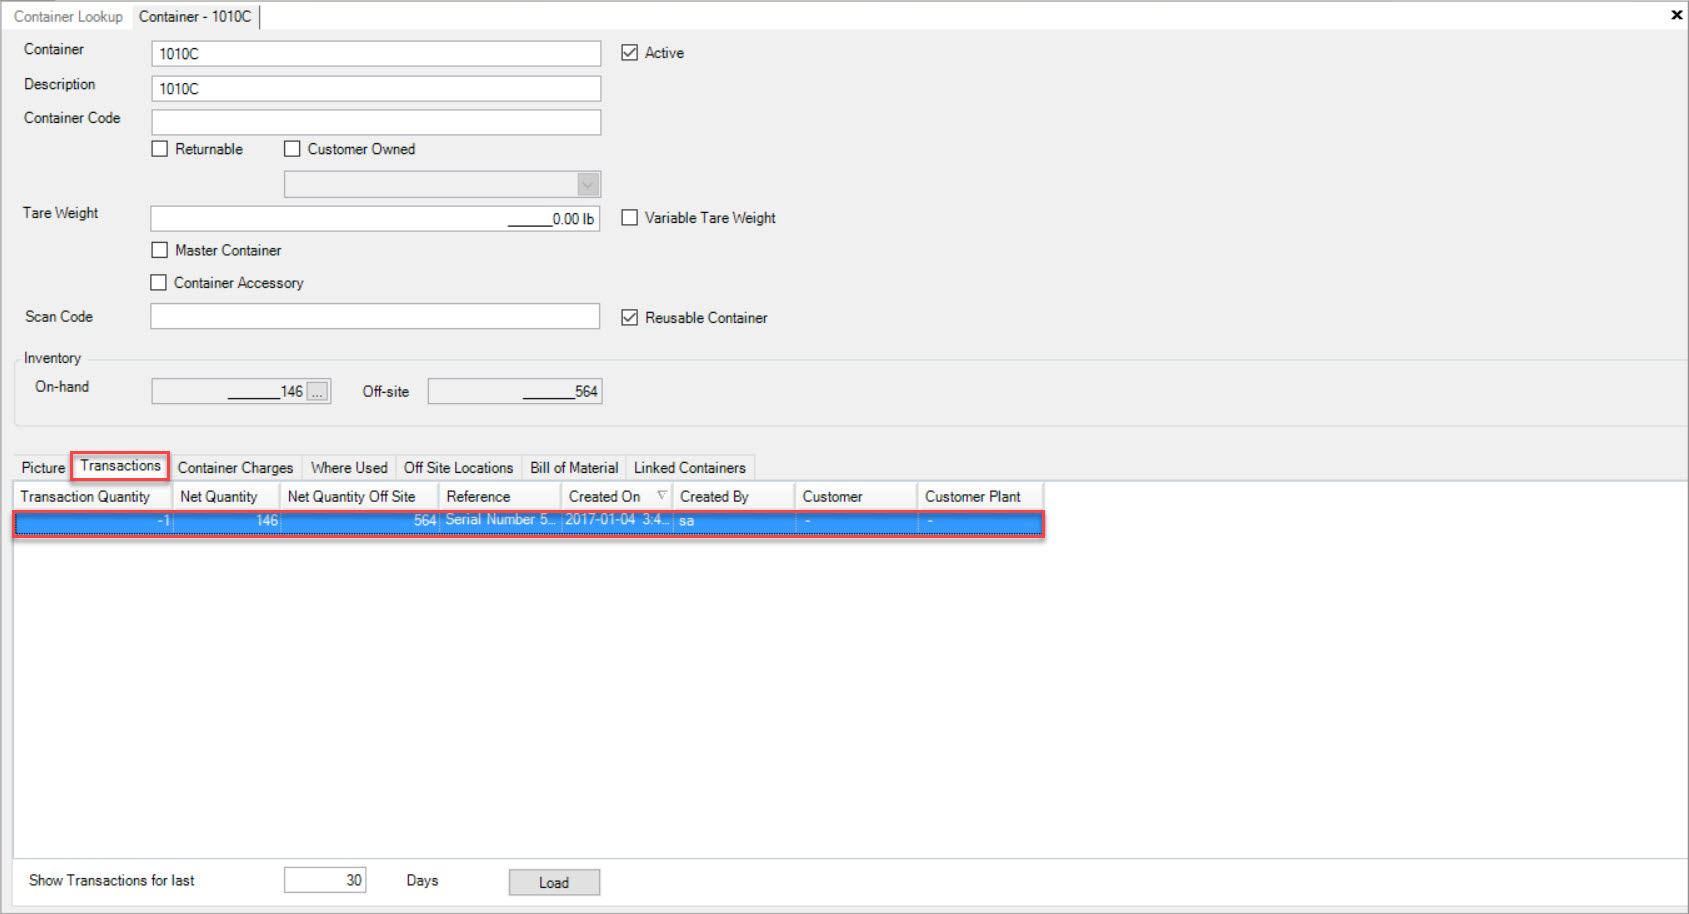
The ShopEdge system tracks Containers as they move out the door to Customer and Vendor locations. When a tag is scanned and added to a packing slip, the Container is added as well. When the order is shipped, Container Inventory will be updated, and the transaction will be displayed on the Container detail screen.
Shipping Empty Containers on a Packing Slip
Users may need to ship Containers that are empty on a packing slip to a Customer or Vendor. To accommodate empty Containers, you can add a non-stock Item to a packing slip.
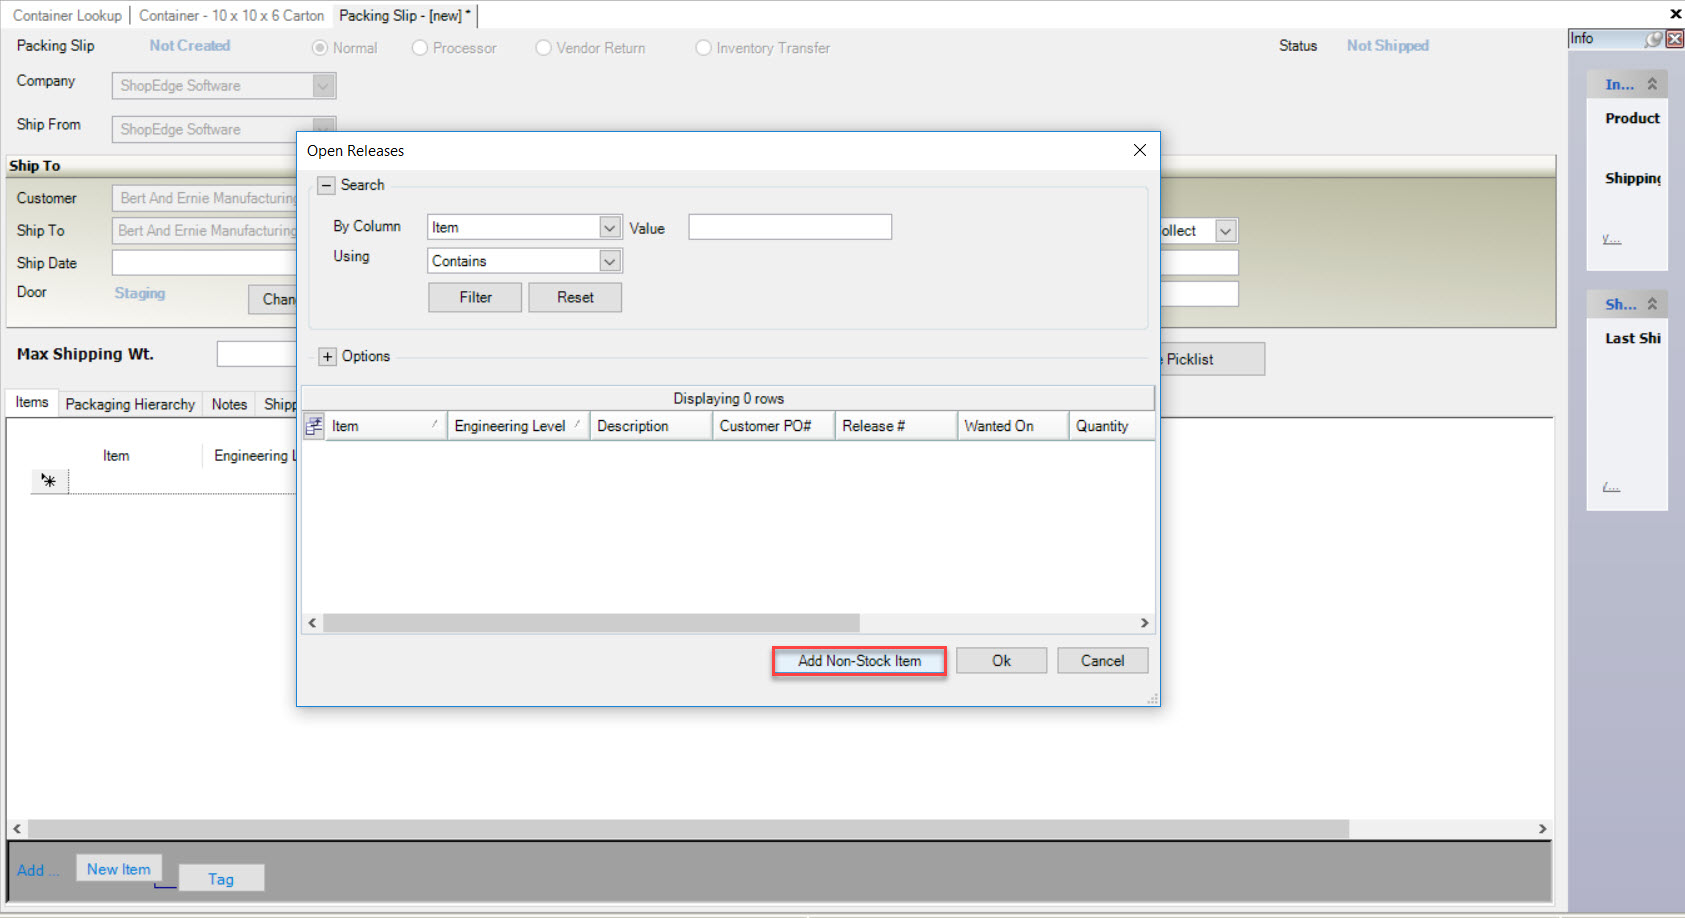
A new row will be added to the packing slip where users can fill in the appropriate information such as the Item, Engineering Level, Description, and Customer P/O #.
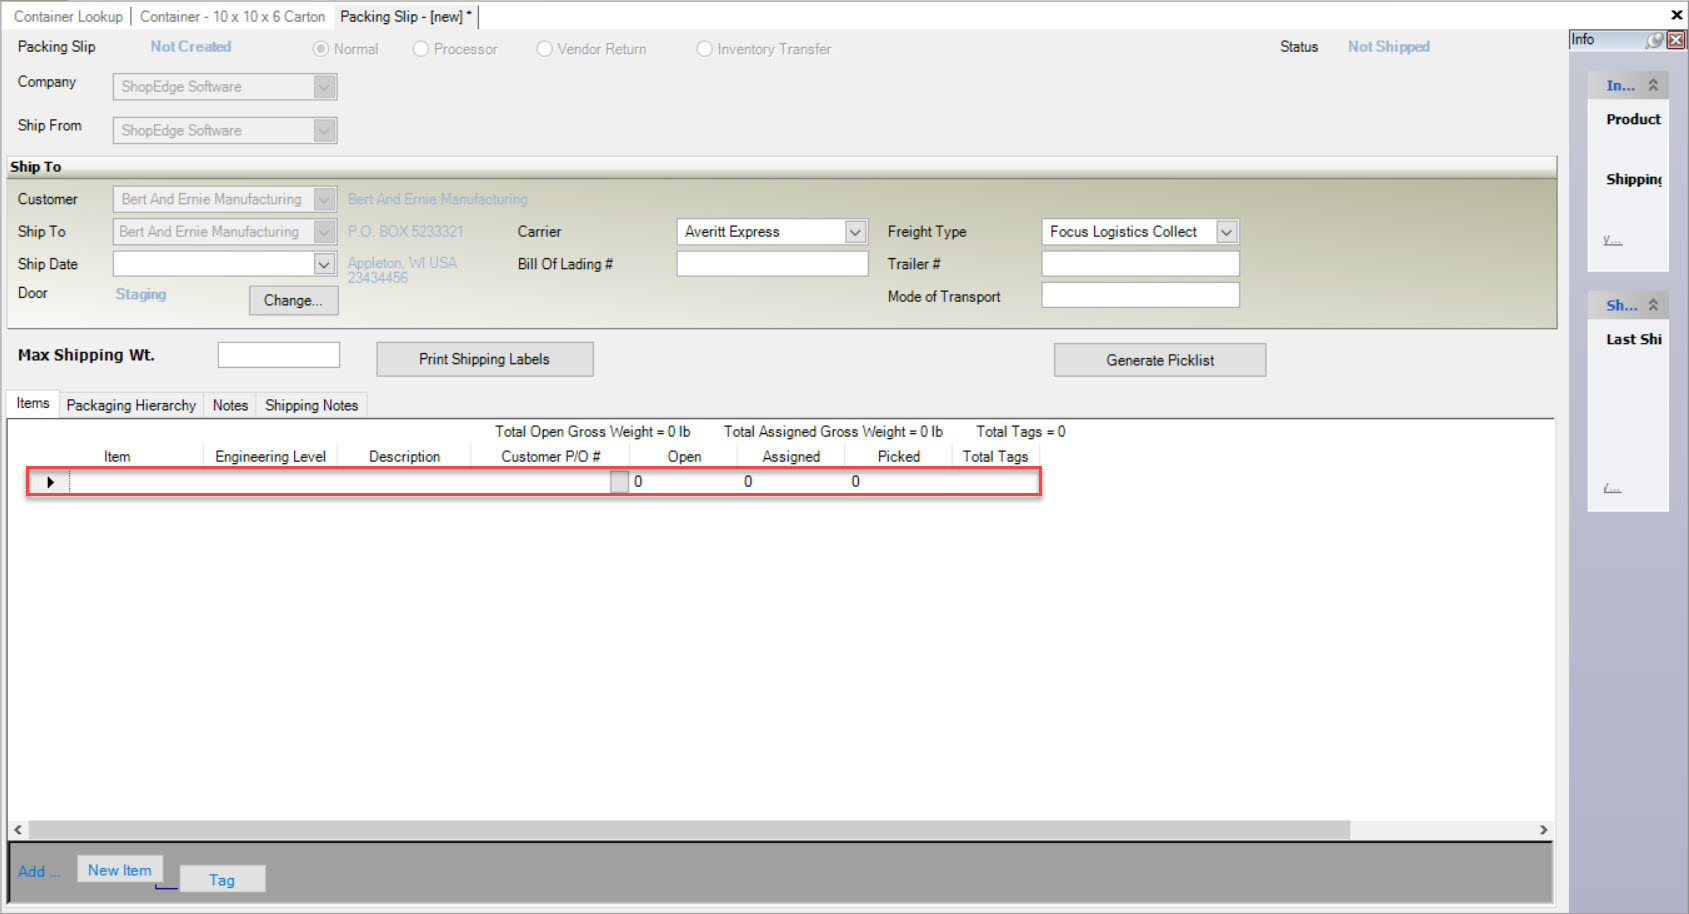
To add the empty Containers, simply add a new tag to the non-stock Item with zero Quantity, select the appropriate Container, and enter the correct Container Quantity.
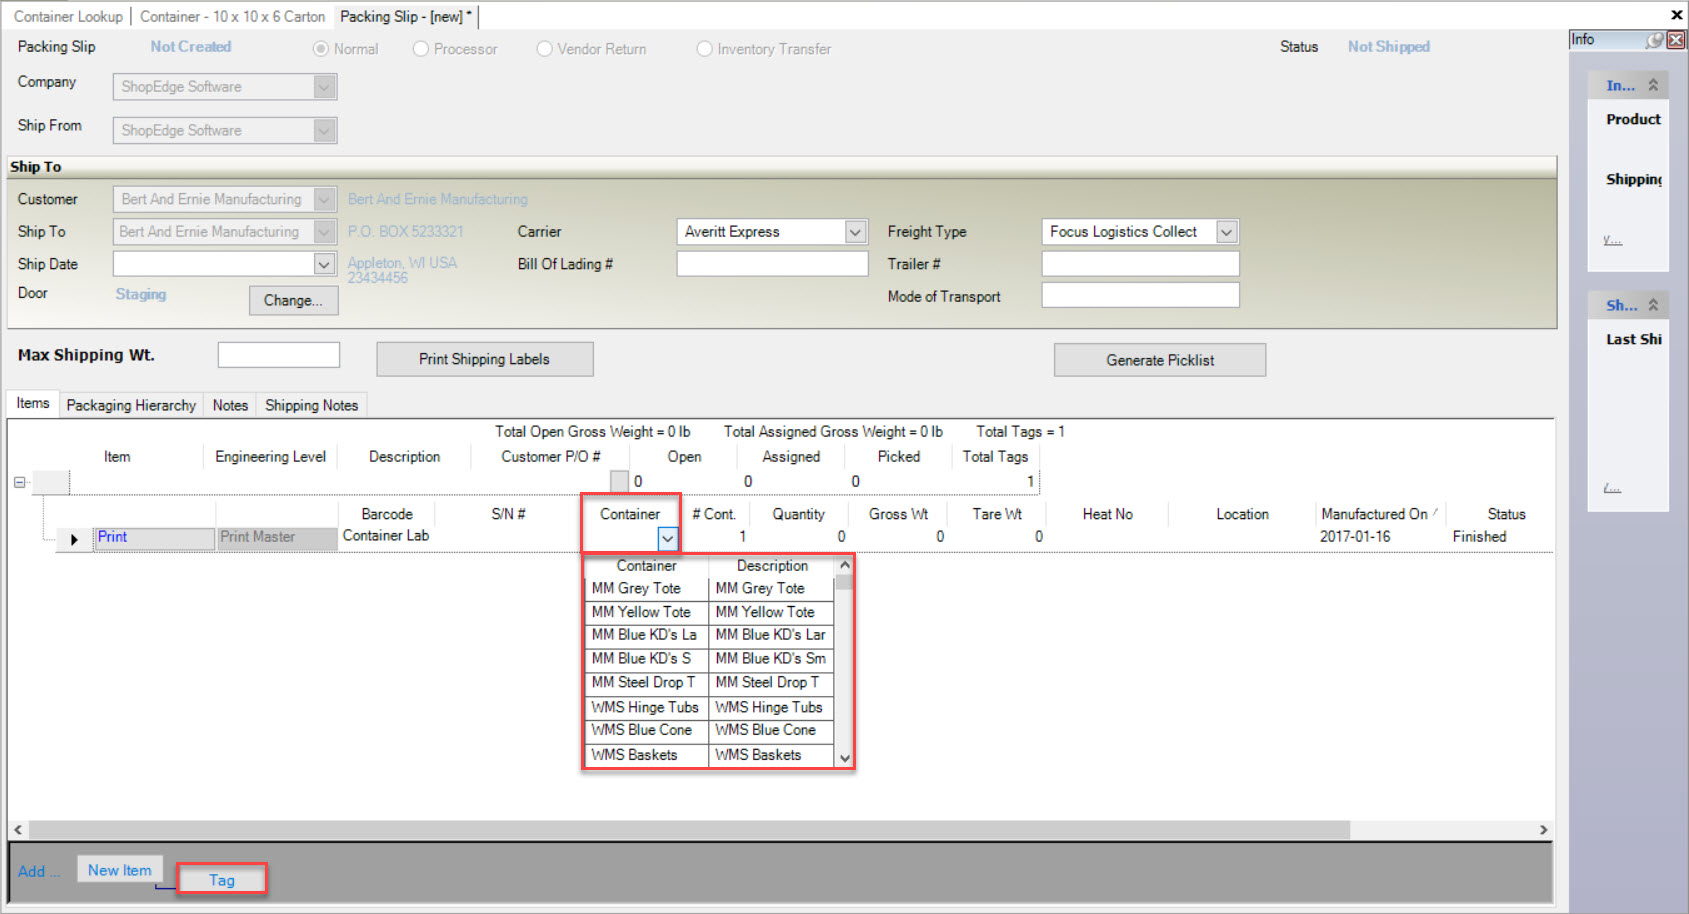
When the packing slip is shipped, ShopEdge will record the movement of the Containers to the Customer or Vendor location.
Make sure to save your changes before exiting the screen.
Container Availability at a Workcenter
To view Container Availability, navigate to the  tab and click on the
 ![]() icon. The Workcenter Schedule screen
will be displayed.
icon. The Workcenter Schedule screen
will be displayed.
The Material and Tooling columns will contain either a  which indicates that the Container is available OR a
  which
indicates a shortage of that Container. To view additional information about the selected Item at a Workcenter make sure the
  tab is selected located at the bottom
of the screen.
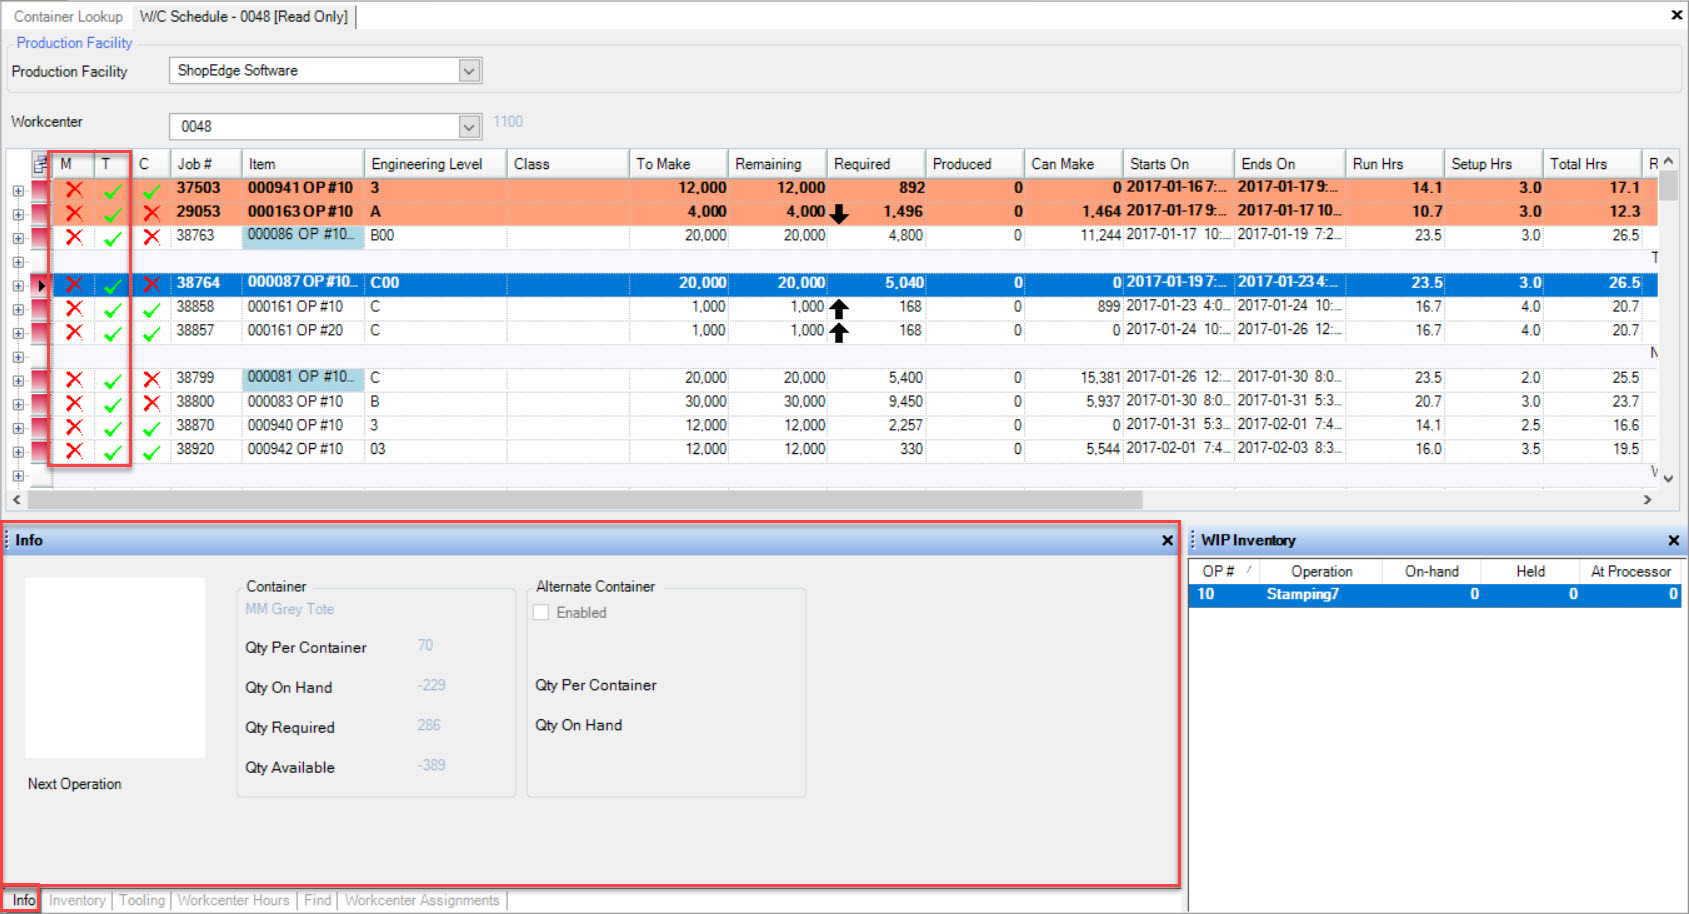
The  tab displays Container Availability based on the number of Containers that are empty as well as the inventory for the Alternate Container.
The Container Availability indicator is displayed based on a running total of Container Inventory, calculated against the scheduled Job Quantities and the Quantity Per Container from the Routing, rounded up to the nearest full Container.
Assigning Containers
Assigning Containers to Items in the system occurs at the Manufacture Routing Level. To find the Routing you wish to assign a Container to, navigate to the  tab and click on the
 ![]() icon. The Manufacture Routing Lookup screen will be displayed.
icon. The Manufacture Routing Lookup screen will be displayed.
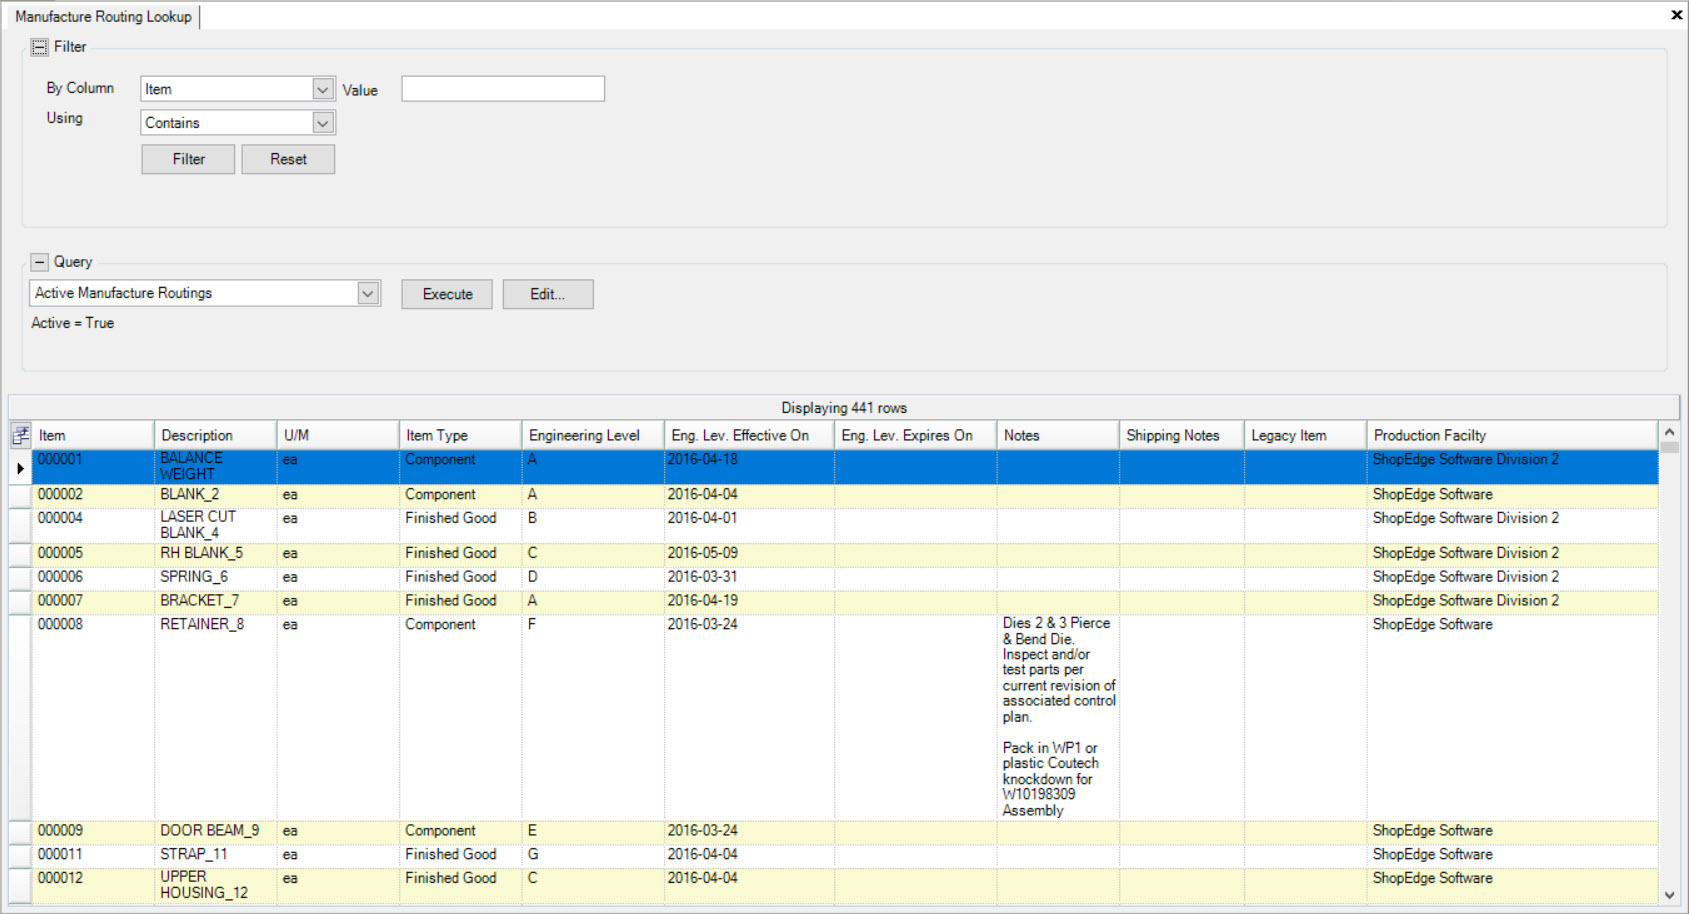
Double-click on the row to open the appropriate Item. Container Assignment can be found by clicking on the  button. The Other Info window will appear.
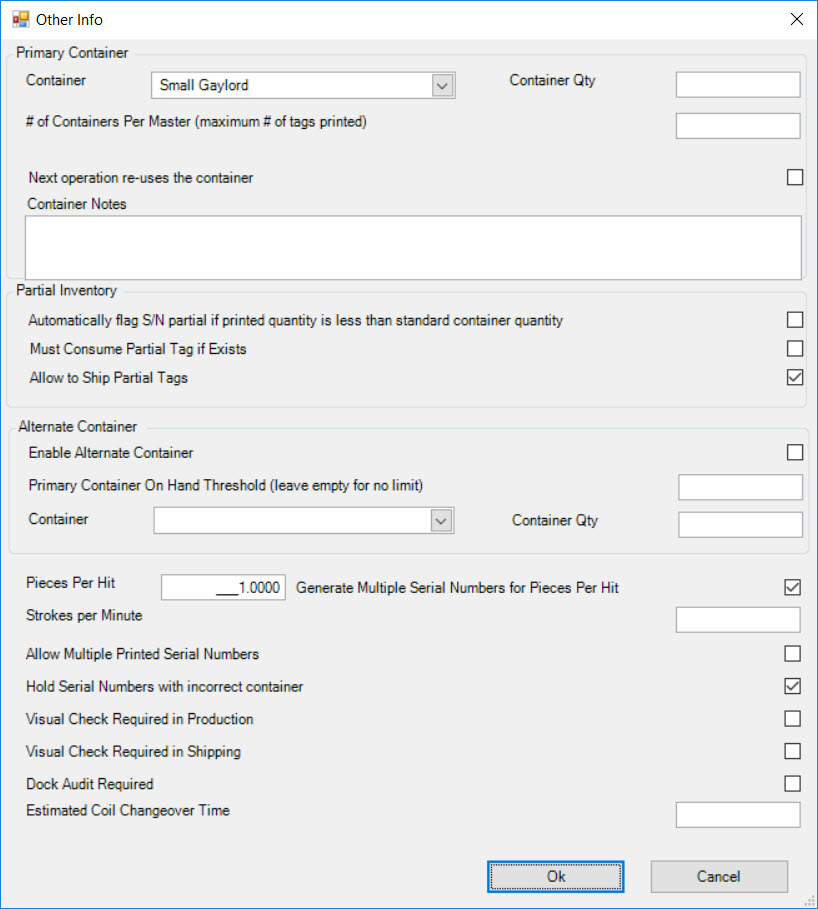
Use this window to assign Primary and Alternate Containers, Container Quantities, and Notes. This information will be seen at the Workcenter by the Operators, and also under the
 tab located on the Container detail screen.
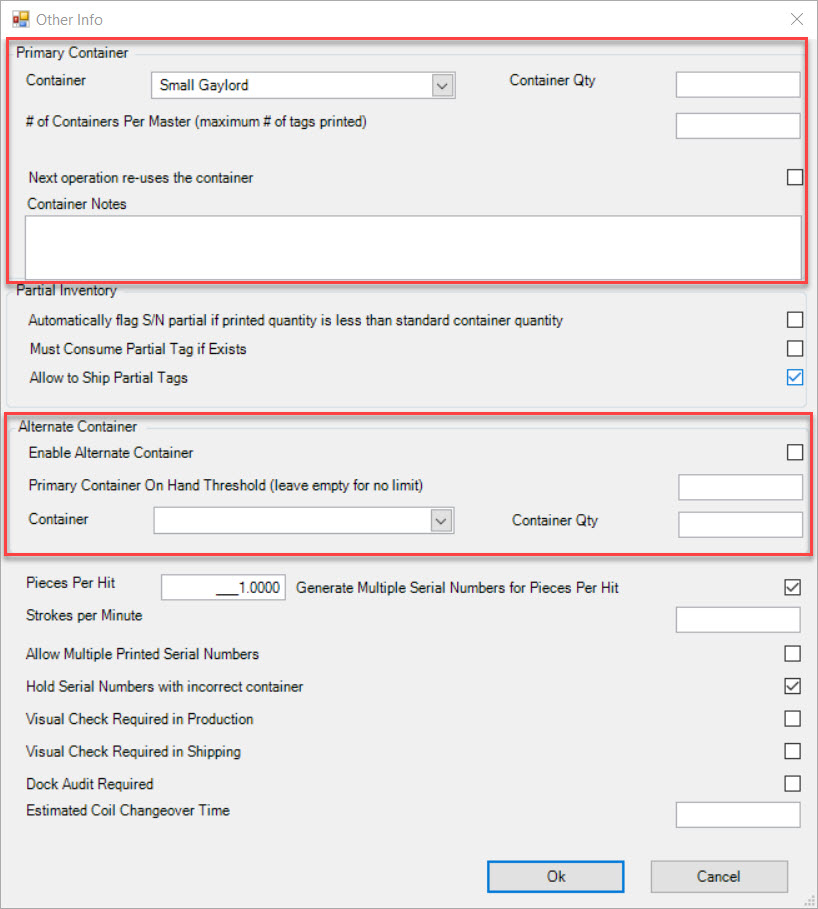
This window is also where users can select the option for controlling, automatically putting tags on hold that are created on the Operator Schedule for a Container that is neither the Primary or Secondary Container. In cases where tags are created for another Container besides the Primary or Secondary, ShopEdge will automatically generate a hold tag, with a held reason of Wrong Container, or another user-defined reason code. The setting is listed as Hold Serial Number with incorrect Containers.
Note
A Container must be entered into the system before they can be assigned to an Item.
Once the assigning is completed, click on the  button.
Make sure to save your changes before exiting the screen.
Receiving Containers
Containers can be received into the ShopEdge system from an Off-Site Location by navigating to the  tab and clicking on
the
 ![]() icon. The Container Receiving screen will be displayed.
icon. The Container Receiving screen will be displayed.
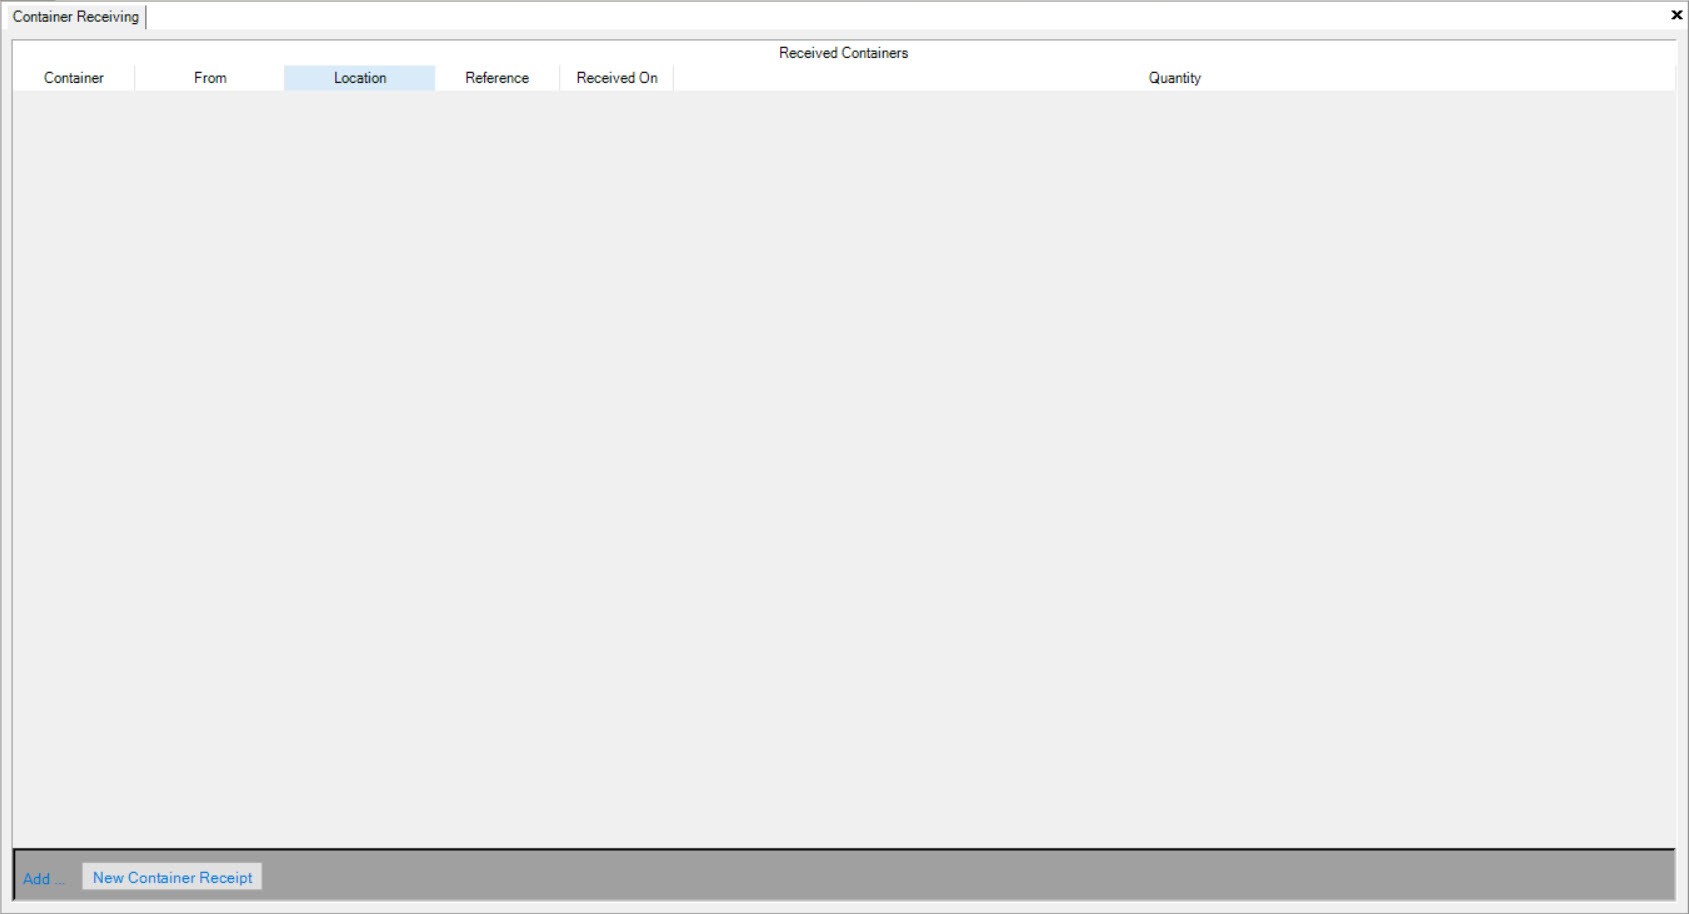
To receive Containers, click on the  button located at the bottom of the screen. A new row will appear where users can complete the Receipt
details including the Container, Location, Reference, Date, and Quantity.
Make sure to save your changes before exiting the screen.
Note
ShopEdge will also automatically record Container Receipts when receiving a Processor Receipt, based on the Containers assigned to the Inventory Tags created as part of the receipt. ShopEdge will record the movement of the Containers from the Vendor site.