Workcenters
Workcenters allows users to view all available Workcenters in the system. Users also have to ability to add new Workcenters, and view, edit, and delete existing ones.
The Workcenters table is where users maintain Labour, Setup, and Overhead Rates that are used in costing calculations.
To view the Workcenters screen, navigate to the  tab and click on the
 ![]() icon. The Workcenters screen will be
displayed.
icon. The Workcenters screen will be
displayed.

Users are able to view:
- Workcenter: the identifier or name of a Workcenter
- Description: the description of a Workcenter
- Department: the department of a Workcenter; this table is maintained under Admin > Admin
- Type: the type of Workcenter; this table is maintained under Production > Admin > Workcenter Type
- Labour Rate /hr.: the labour rate you wish to use for the Workcenter; this is used as part of the labour cost calculation for an Item
- Active: indicated if a Workcenter is active (box checked) or inactive (box unchecked) in the system
- Backflush on Scan: select this option if you wish to have the system backflush Raw Material or WIP and update Inventory on the scan of the F/G or WIP Barcode Label. If this option is not selected, the system will backflush when the label is printed by the Operator
- Setup Rate /hr.: the setup rate you wish to use for a Workcenter; this is used as part of the labour cost calculation for an Item
- Setup Overhead Rate /hr.: the setup overhead rate you wish to use for a Workcenter; this is used as part of the overhead cost calculation for an Item
- Overhead Rate %: the overhead rate % you wish to use for a Workcenter; this is used as part of the overhead cost calculation for an Item. The system needs an overhead % OR an hourly rate
- Overhead Rate /hr.: the overhead rate you wish to use for a Workcenter; this is used as part of the overhead cost calculation for an Item. The system needs an overhead % OR an hourly rate
- Sort Index: the order you would like to see the Workcenters listed on the Master Production Schedule screen
- Location: this option is related to the ShopEdge Workcenter monitor screen, and allows grouping Workcenter into locations or areas viewed on the screen
- Filter Material Tag: select this option if you wish the Operator to only see serial numbers to assign to a job that has been scanned to a Workcenter (not all available materials)
- Materials Assigned on Scan: select this option if you wish for materials that are scanned to a Workcenter location, to be automatically assigned to the running job (if no other material is currently assigned)
- Warn on Over Production: select this option if you wish to have a warning message appear for the Operator when they try and print a Barcode Label for a quantity that is greater than the To Make quantity for a job
- Assign Material By Scanning Only: select this option if users with to enforce assigning material by scanning only; Operators will not be able to select material from a drop-down list or table
If a Workcenter has a plus sign to the left of it, users can click on the button to view the Item(s) the run on a Workcenter based on the Manufacture Routing. Users can also open the Manufacture Routing screen for an Item by double-clicking on an Item row.
Adding a New Workcenter
To add a new Workcenter, navigate to the  tab and click on the
 ![]() icon. The Workcenters screen will be
displayed.
icon. The Workcenters screen will be
displayed.

Click on the  button located at the bottom of the screen. A new row will appear where users can fill in the necessary information.
Make sure to save your changes before exiting the screen.
Viewing an Existing Workcenter
To view an existing Workcenter, navigate to the  tab and click on the
 ![]() icon. The Workcenters screen will be
displayed with a list of all Workcenters in the system.
icon. The Workcenters screen will be
displayed with a list of all Workcenters in the system.

Users can double-click on the appropriate row of the Workcenter you wish to view.
The Workcenter detail screen will appear.
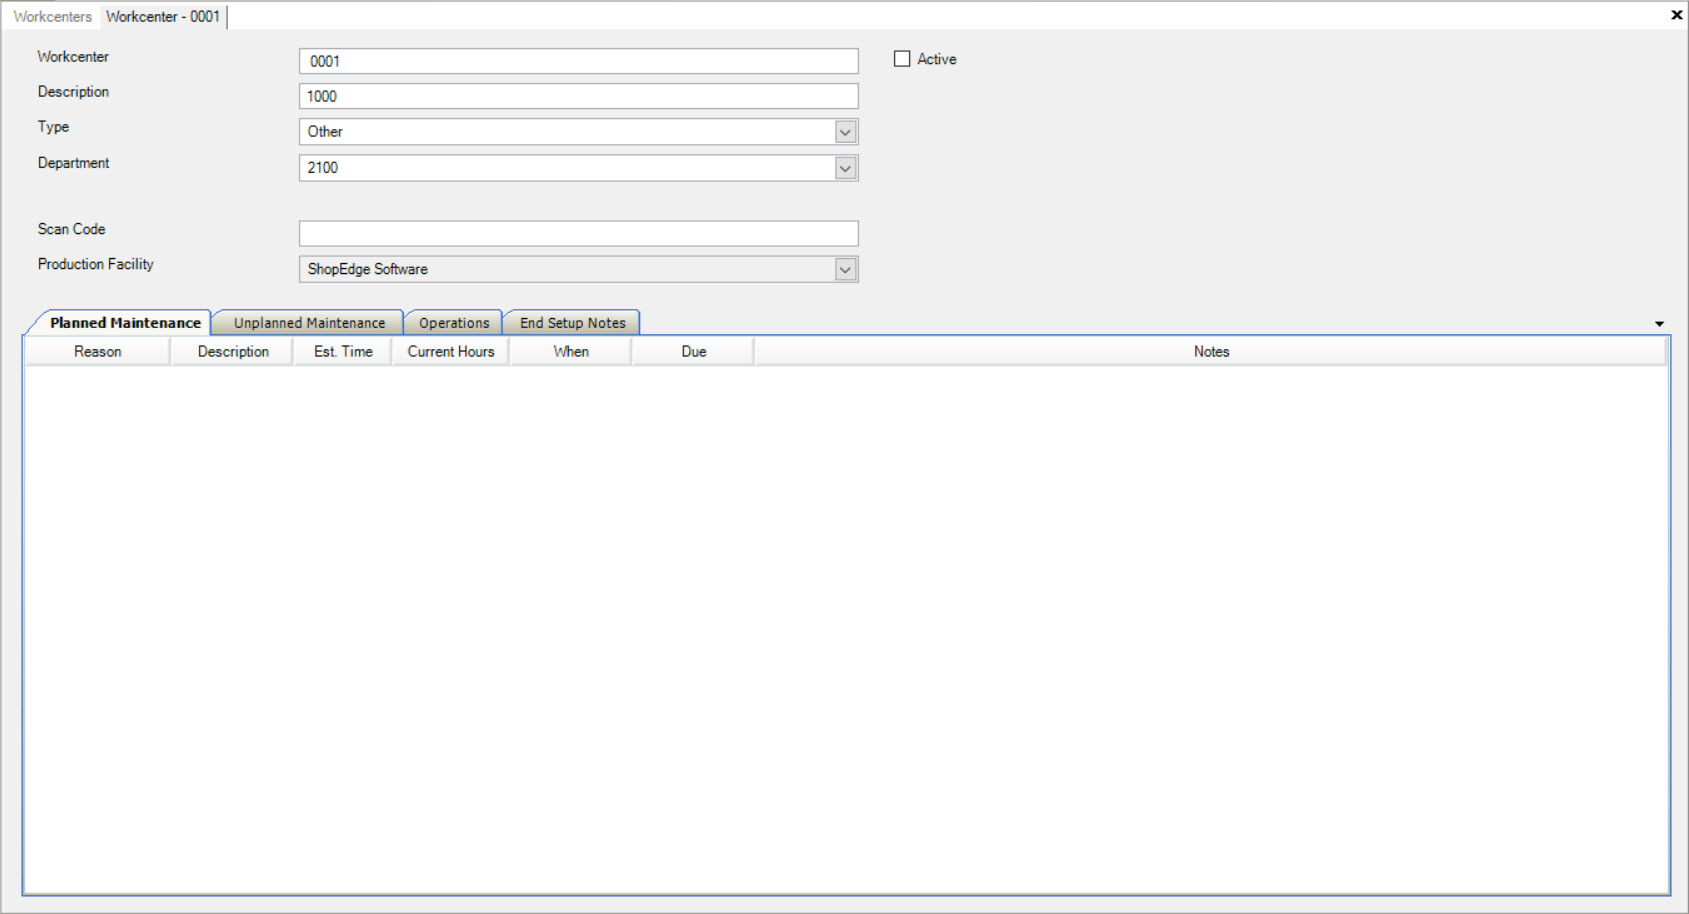
Users will now be able to view more details regarding a particular Workcenter such as Planned Maintenance, Unplanned Maintenance, and End Setup Notes.
Editing a Workcenter
To edit a Workcenter, navigate to the  tab and click on the
 ![]() icon. The Workcenters screen will be
displayed.
icon. The Workcenters screen will be
displayed.

Here, users can locate the Workcenter they wish to edit. Users can make changes to any of the fields, simply by using the appropriate textboxes, drop-down menus, and checkboxes.
Once any changes have been made, make sure to save before exiting the screen.
Users can also double-click a Workcenter to open the detail screen. Here, users can add or edit End Setup Notes for a Workcenter.
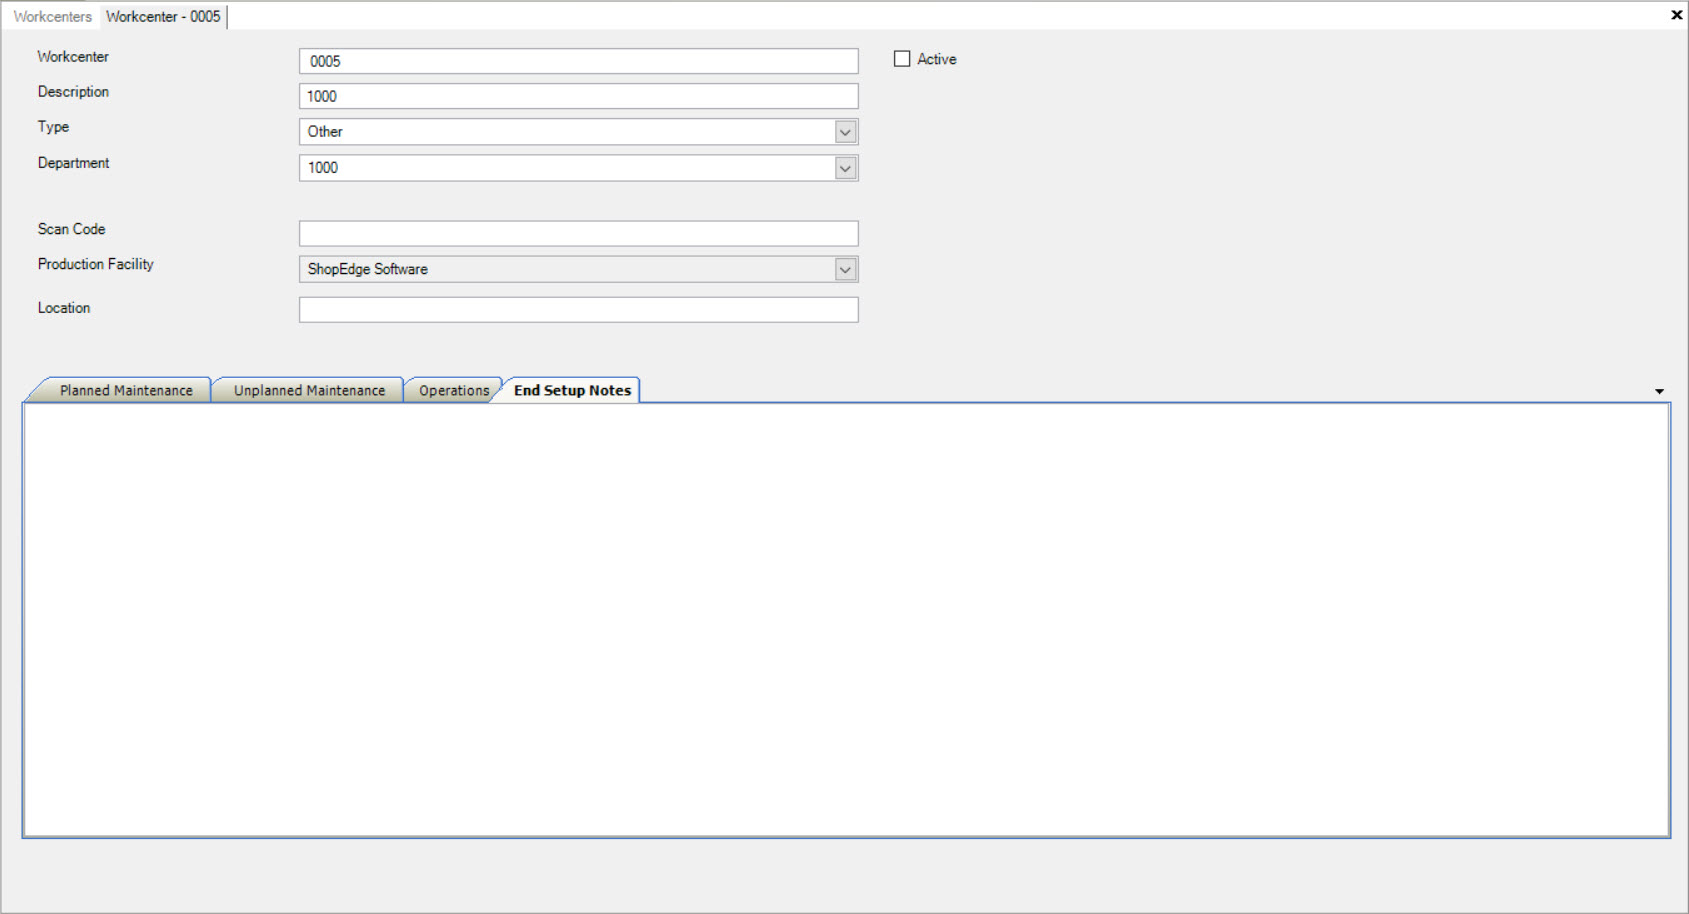
Simply type in the note you wish to have the Operators view every time they End Setup while working on a job in the system for that particular Workcenter.
When an Operator clicks on the End Setup button to the right of the screen, the End Setup Notes window will be displayed.
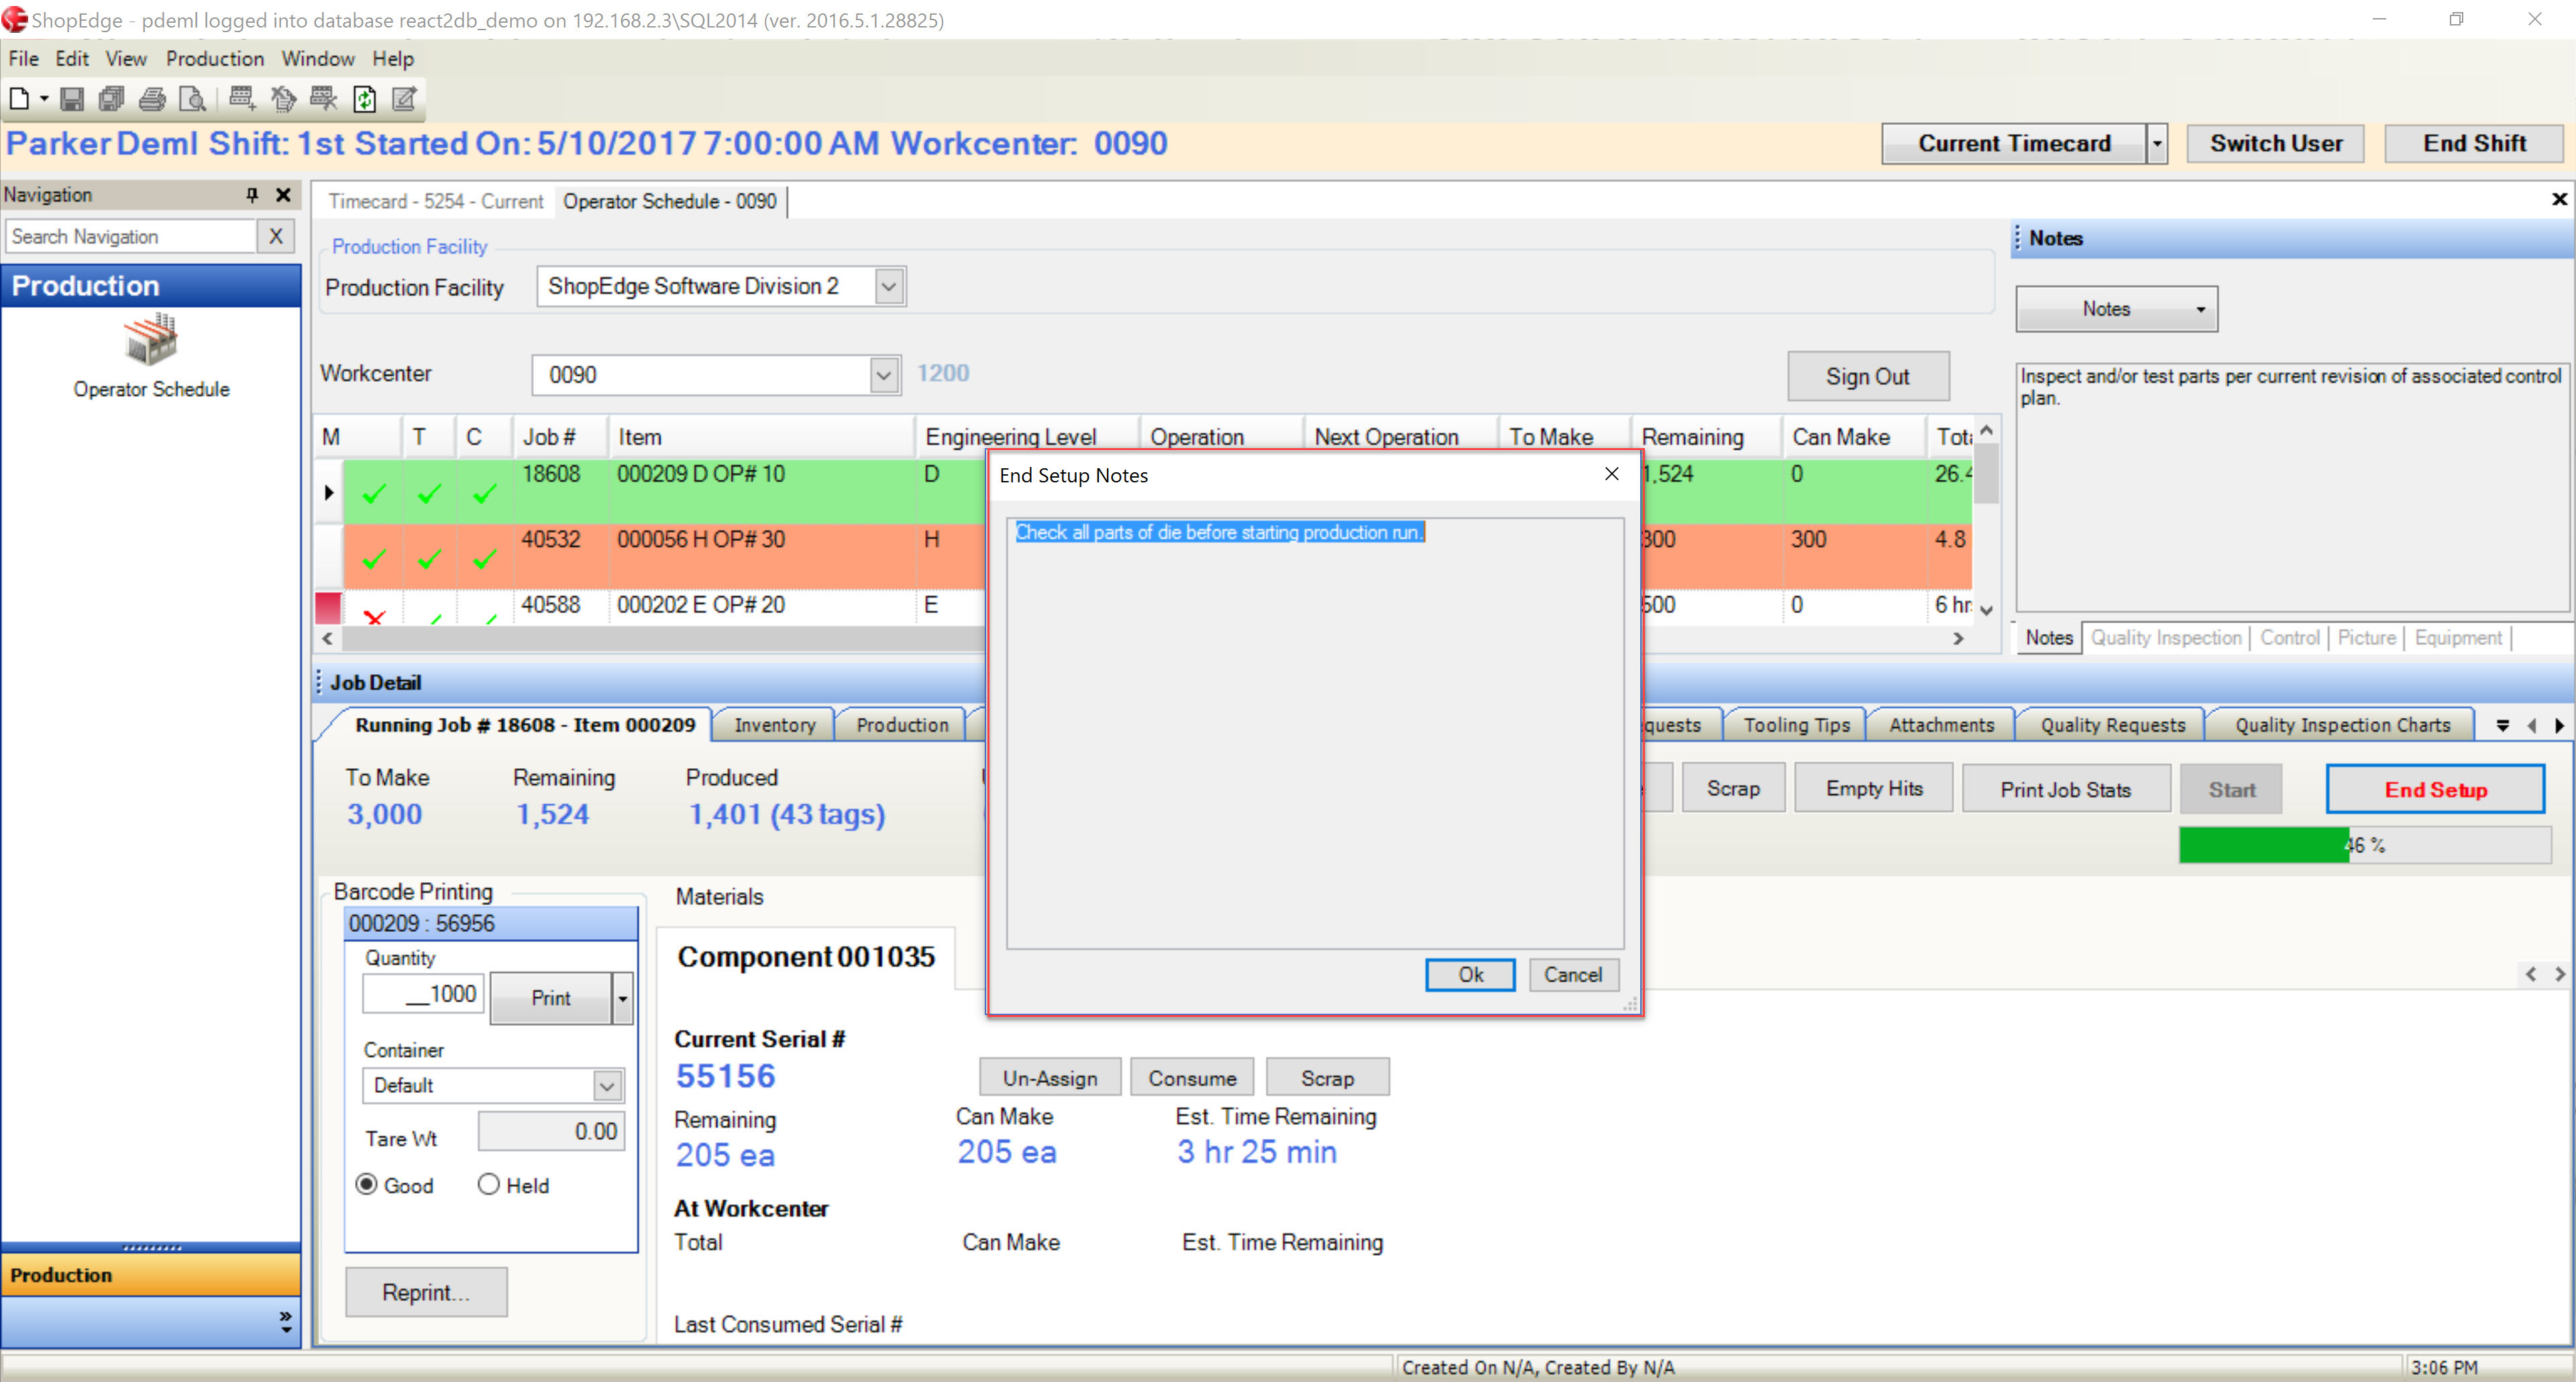
If the Operator clicks on the  button, they will be prompted to end setup. If they click
  , the will still
remain in setup mode.
On the Workcenter detail screen, users can also add or edit a Scan Code for a Workcenter which is used on a Barcode Label that has been created for a Workcenter.
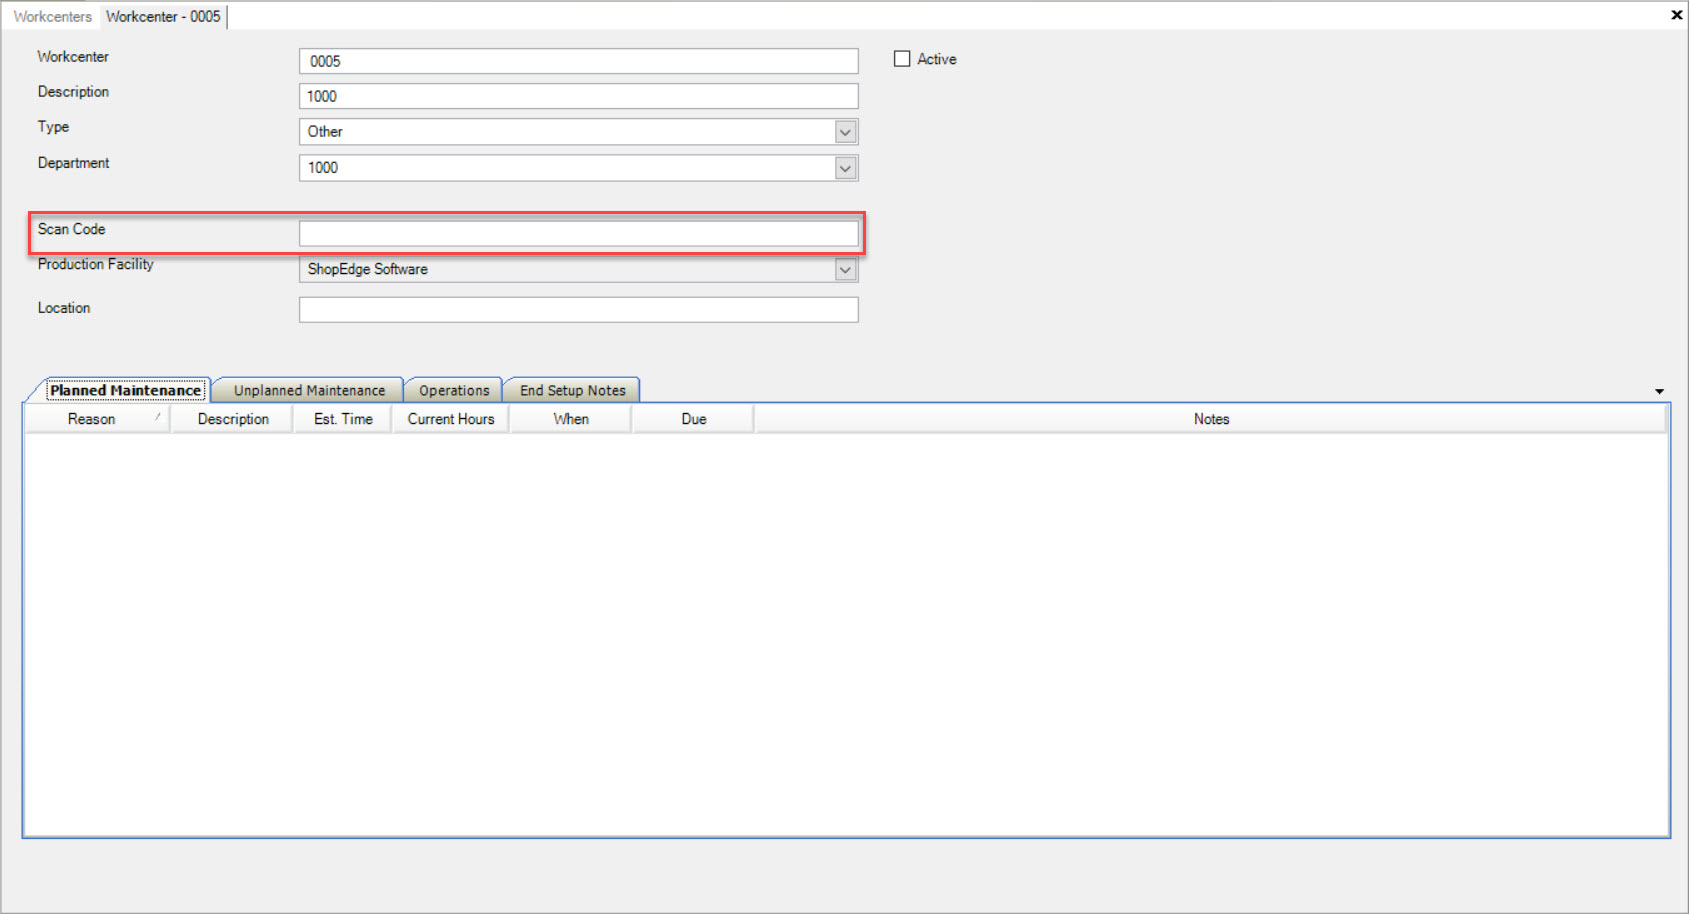
This allows locating materials and Items to a Workcenter by scanning the label instead of selecting the Workcenter Name from a drop-down menu, either on a Barcode Scanned or the Android Application.
Deleting a Workcenter
To delete a Workcenter, navigate to the  tab and click on the
 ![]() icon. The Workcenters screen will be
displayed.
icon. The Workcenters screen will be
displayed.

Locate the Workcenter you wish to delete and highlight the appropriate row. Use your Delete key and when the system prompts you, select Yes.
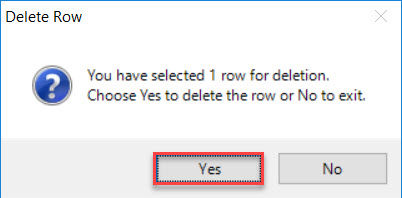
The selected Workcenter will be deleted. Make sure to save your changes before exiting the screen.