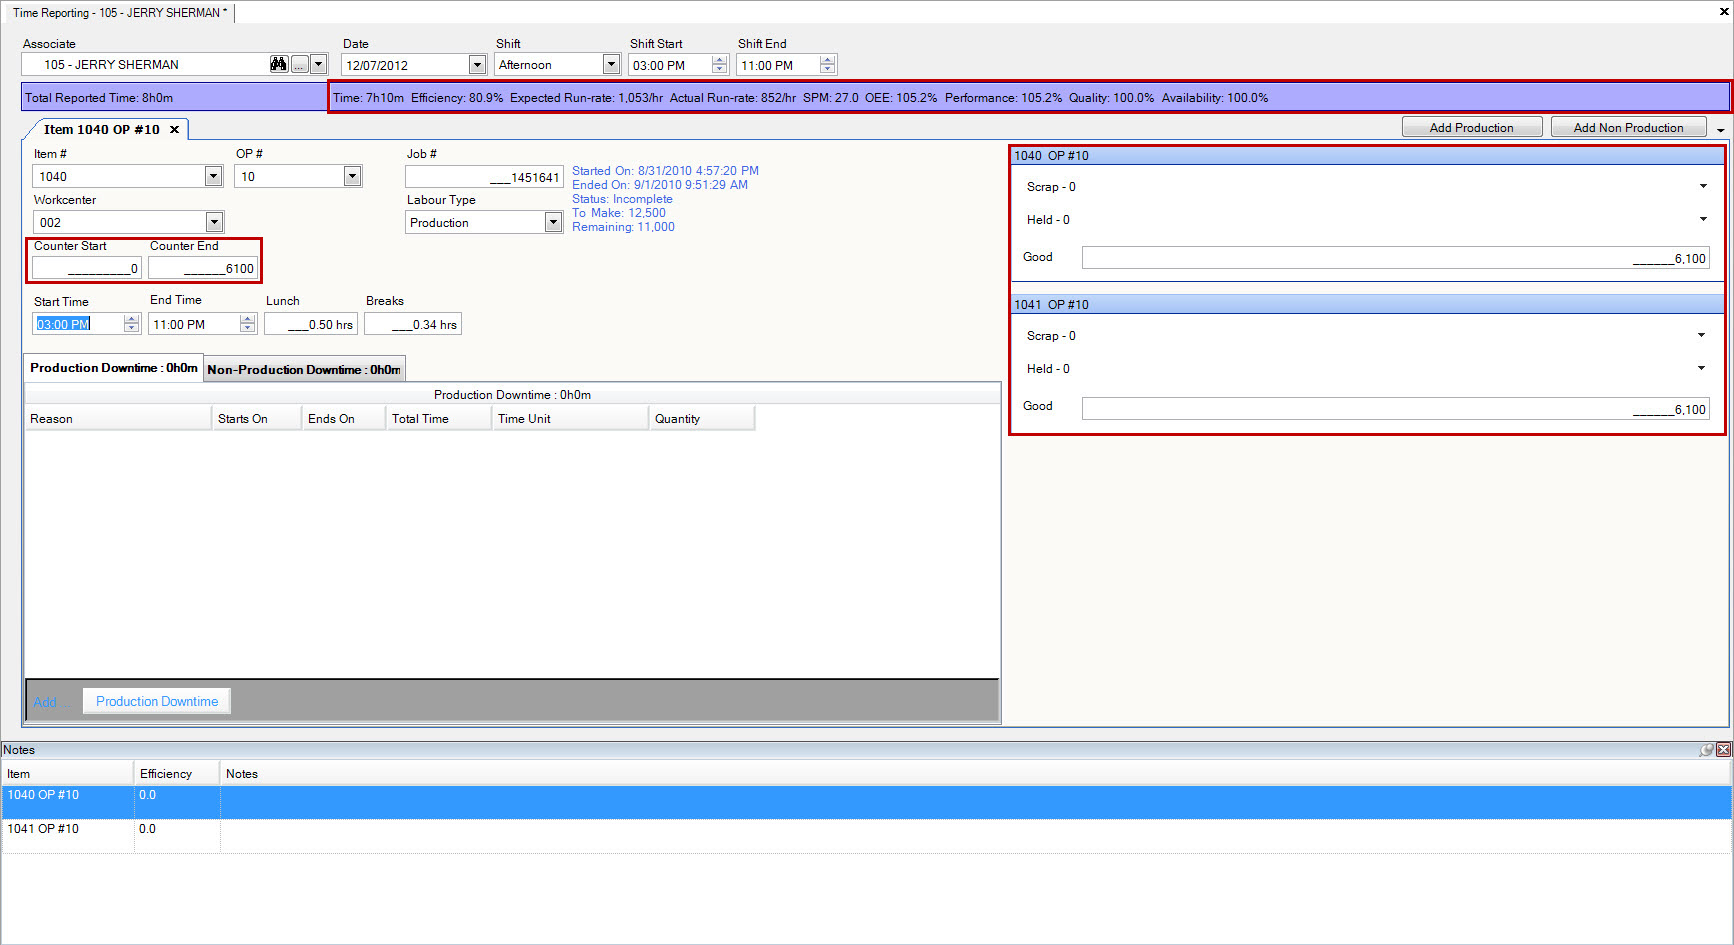
Timecards
Timecards are used in the ShopEdge system to record Production hours for Employees for Time Tracking, Report Production Units, Record Scrap, and Held and Downtime (Non-Production and Production). This information is critical for Production reporting and verifying Production Inventory numbers against Tag Inventory that is captured by scanning Tags.
To view all available Timecards in the system, navigate to the  tab and click on the
 ![]() icon. The Timecards screen will
be displayed.
icon. The Timecards screen will
be displayed.
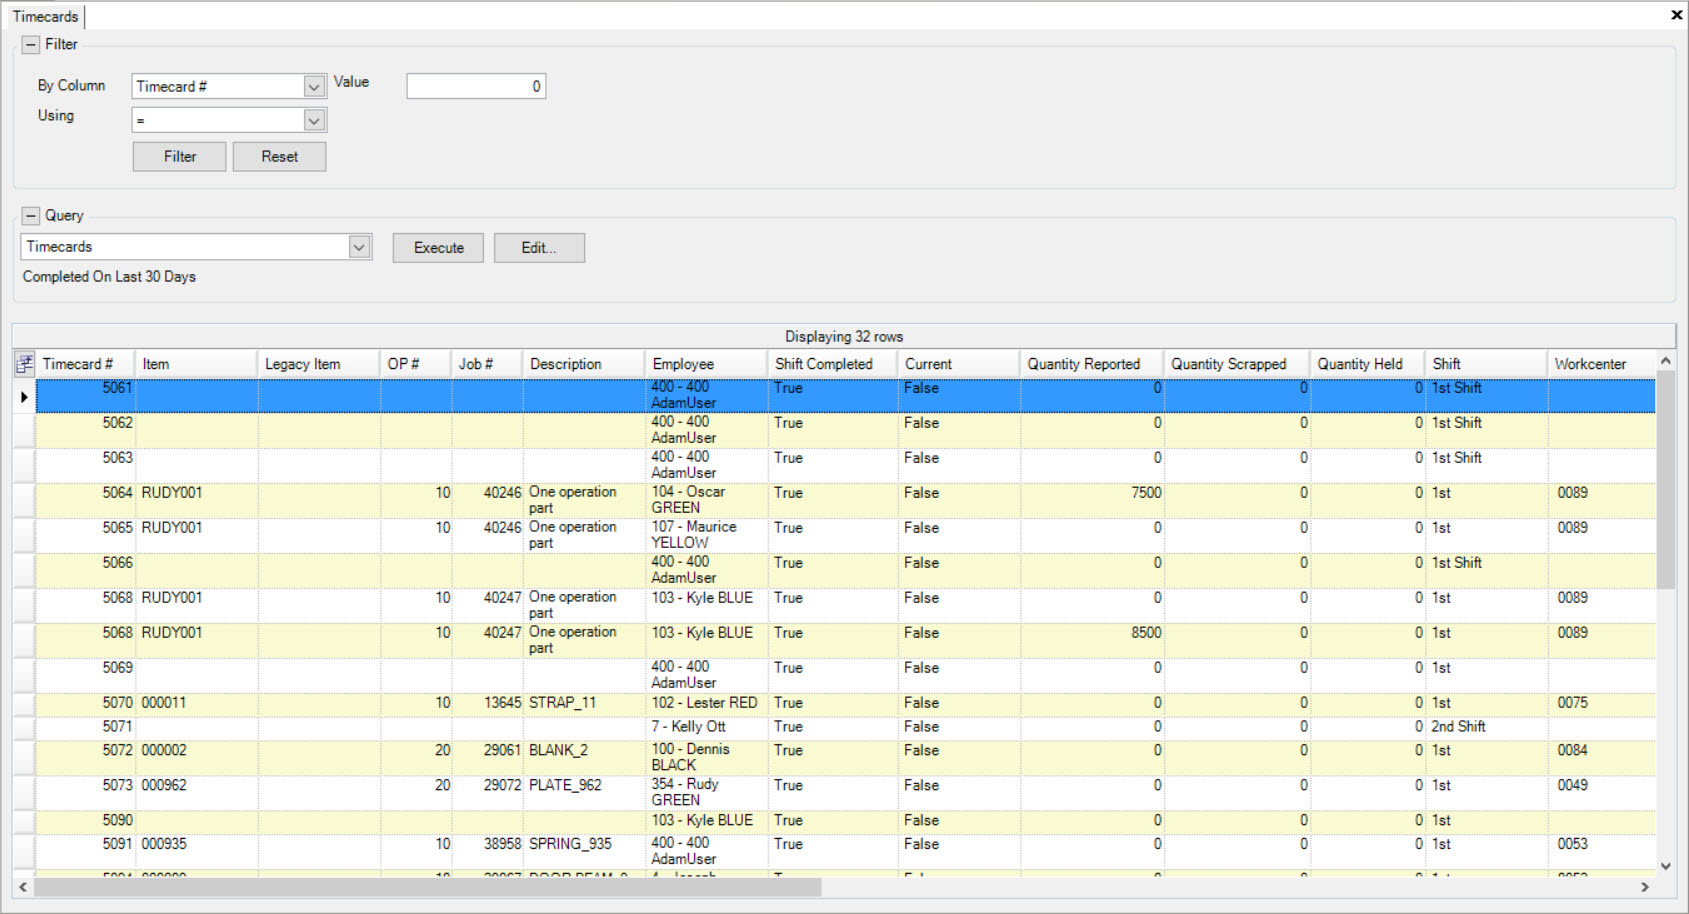
Users will be able to view a list for all of the available Timecards in the system. To open a Timecard, locate the one you wish to view and double-click on the appropriate row. The Timecard screen will be displayed, displaying details regarding that specific Timecard.
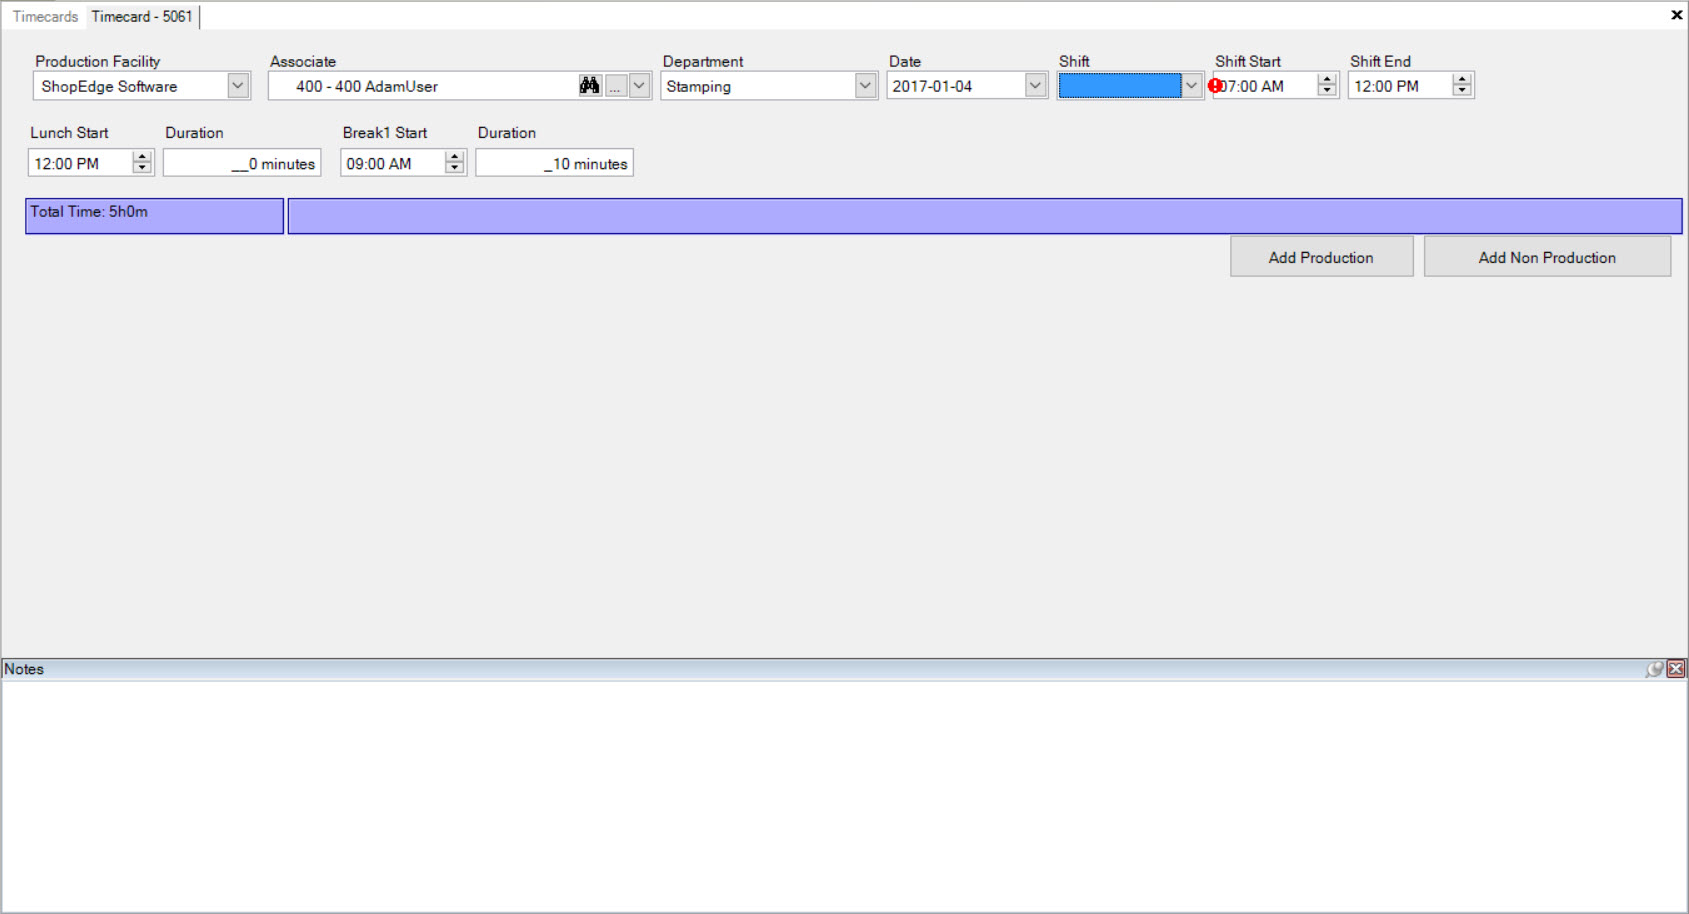
Adding a New Timecard
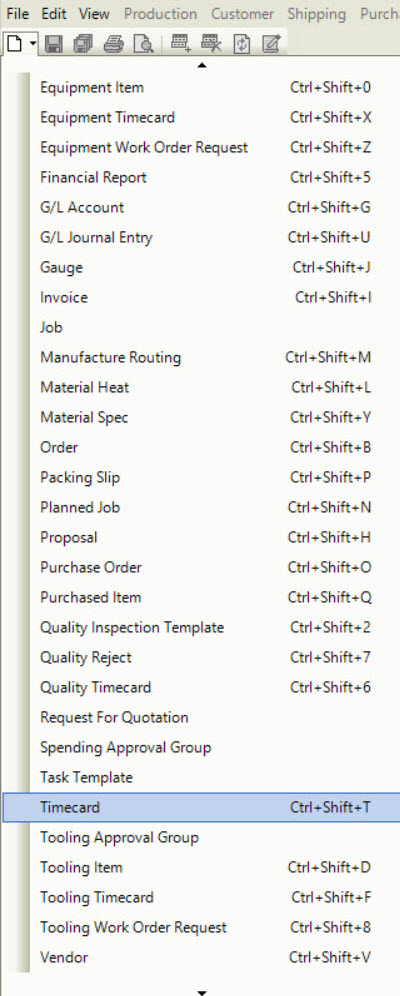
There are three different ways to add a new Timecard to the system. The first way is to press the Ctrl + Shift + T keys. The second way is to navigate to File > New > Timecard.
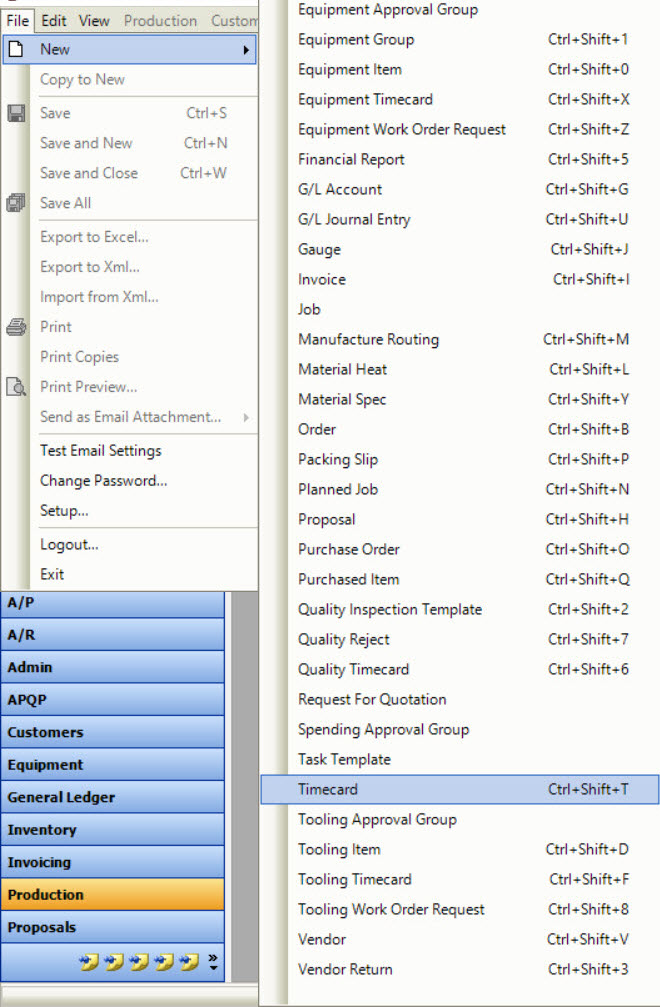
The last way is to click on the  button, and then on the Timecard option.
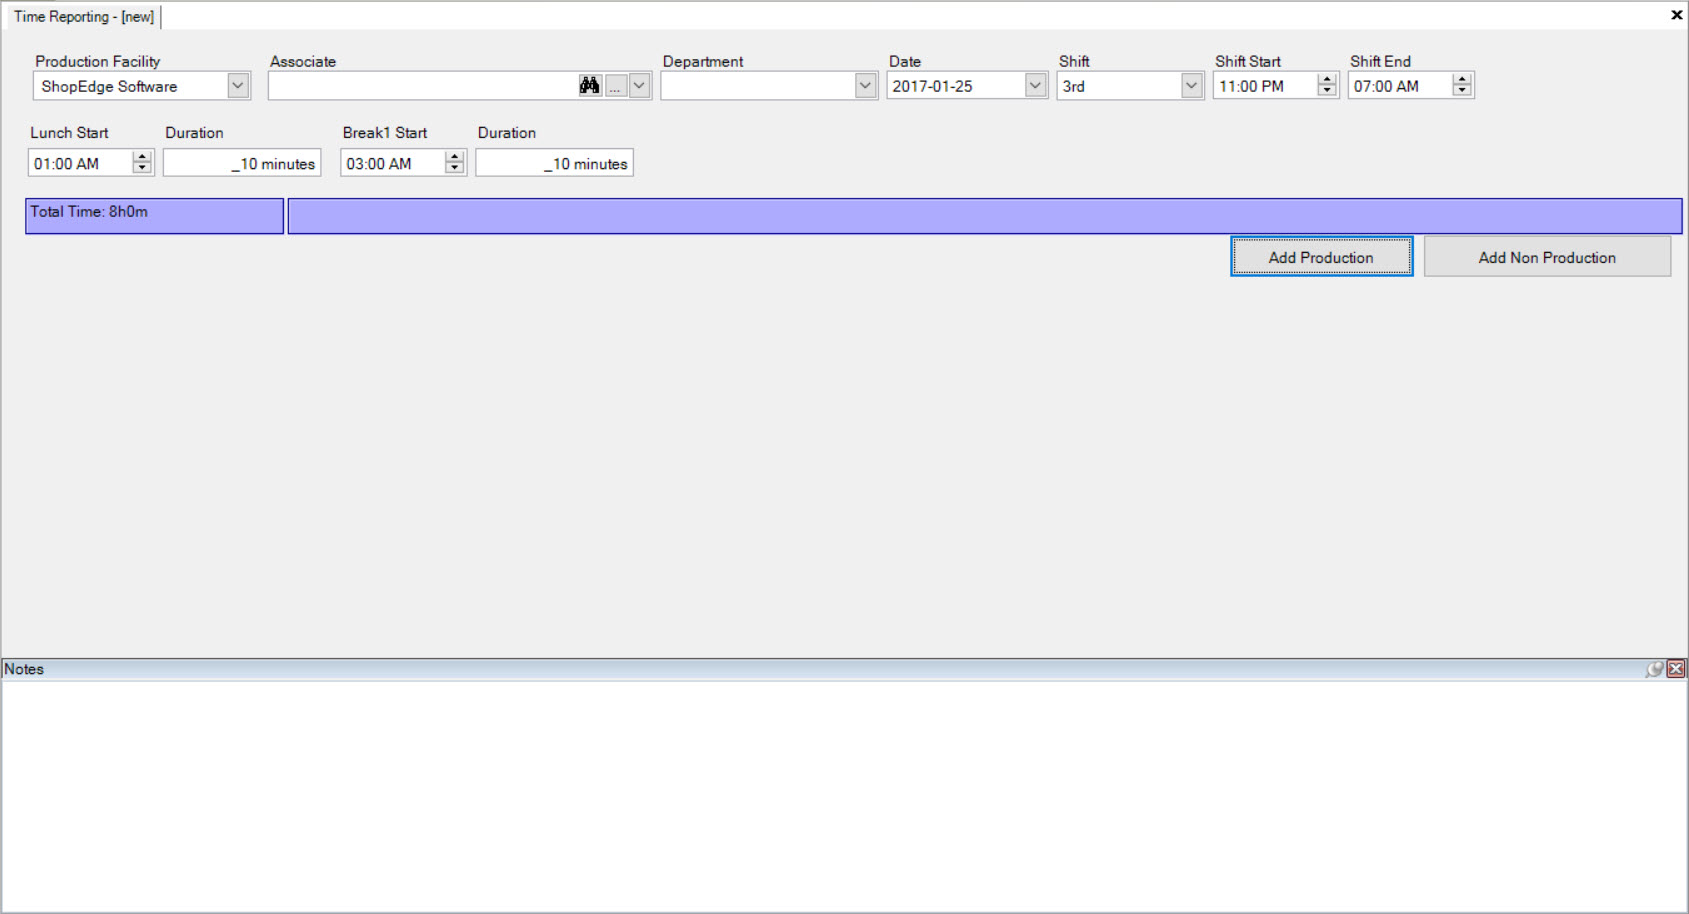
All of these options will open a new Time Reporting screen.
Entering Header Information
The first step to filling out a Timecard is to enter in the necessary Header Information. First, select the Production Facility using the available drop-down menu.
Next, you must select an Associate (Employee). There are two different ways to do this. The first way is to click on the  button. A Lookup Dialog window will
be displayed.
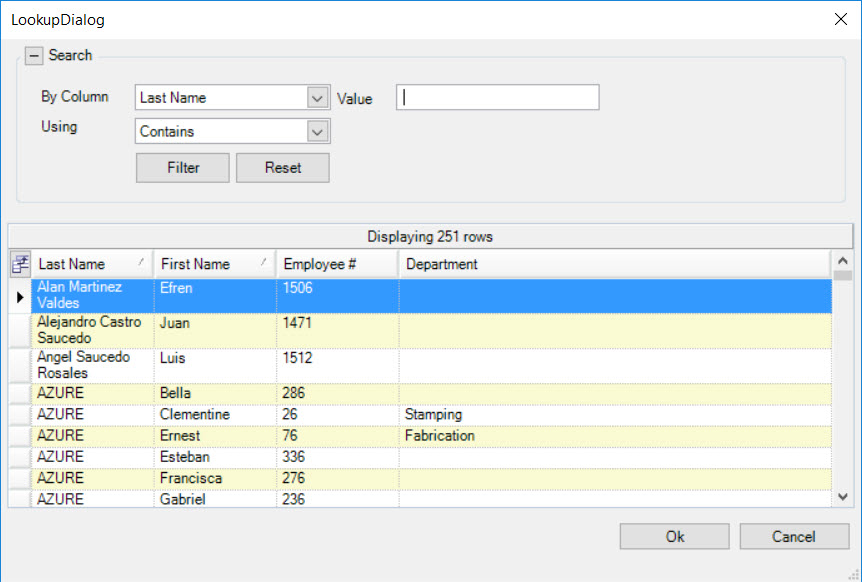
Locate and highlight the row of the appropriate Associate you wish to make the Timecard for. Once you have highlighted the row, click on the  button. The Associate’s
number will be placed in the Associate textbox.

Note
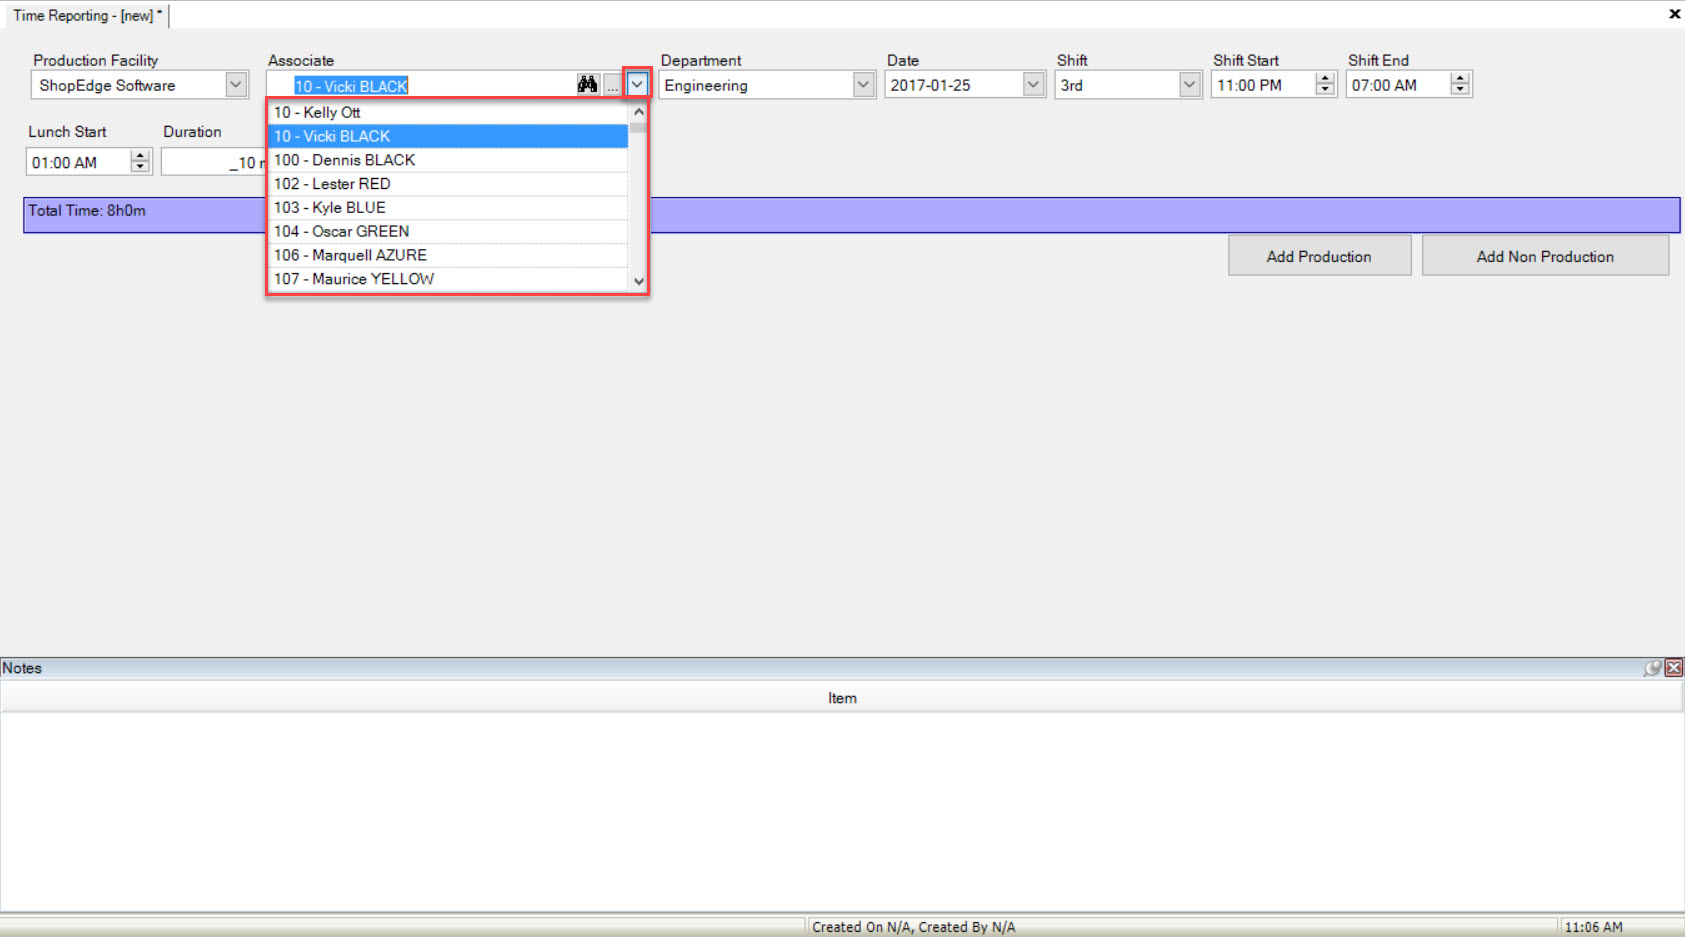
If you have selected an Associate that already has a Department listed, the Department textbox will automatically default to the Department of the selected Associate. If the Associate does not have a Department, you must select one using the available drop-down menu for the Department textbox.
The second way to select an Associate it to use the drop-down menu. Select an Associate from the list and the system will then populate the Department.
The last entry to fill in is the Date and Shift that the Associate (Employee) worked. The Date and Shift can be selected by using the available drop-down menus. The Shift Start and Shift End times have to be entered in manually but the Up and Down arrows can be used for selecting AM, PM, or changing the time.

Enter in the Lunch Start and Break Start times as well as the Duration of each.

Note
If a default Shift has been specified for an Employee in the  module under the
 ![]() icon, then when the Employee was selected in the first step of entering Header Information on the Timecard, the system will automatically populate the Shift details. The Shift Start and End time, as well as Lunch and Breaks will be populated based on the Shift information defined in the
icon, then when the Employee was selected in the first step of entering Header Information on the Timecard, the system will automatically populate the Shift details. The Shift Start and End time, as well as Lunch and Breaks will be populated based on the Shift information defined in the  module under the
 ![]() icon.
icon.
Adding Production to a Timecard
To add Production to a Timecard, click on the  button.
A new tab will appear where you must fill in all of the necessary fields. The Production information such as the Item # must be selected. Once this is complete, the system will automatically fill in the OP #, Job #, and Workcenter.
Once an Item is selected, the Item textbox will appear on the Timecard so that you can record Scrap and Held totals.
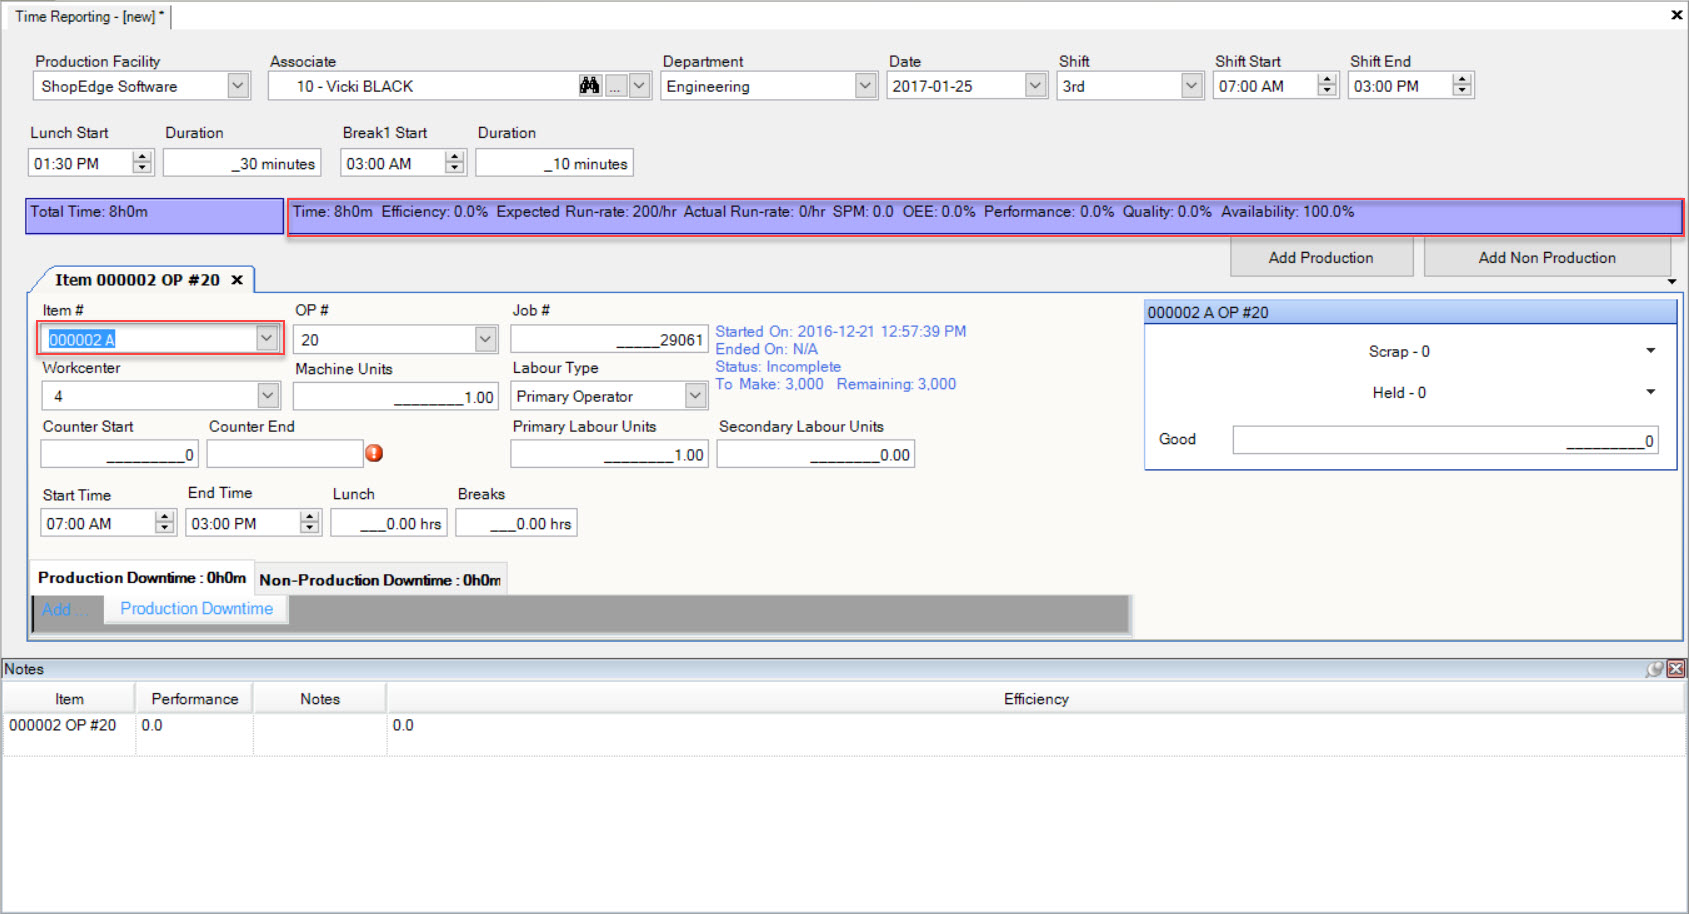
The Counter Start and Counter End (number of pieces produced) also need to be filled out when adding Production to a Timecard. Once this number is recorded, the Efficiency will be calculated in the system based on the Standard Run Rate. If you are not using Counter Starts and Counter Ends, just keep the Counter Start box at 0, and enter in the number of pieces produced in the Counter End textbox. The pieces will then be calculated and added to the Quantity Good on the Item box to the right side of the screen.
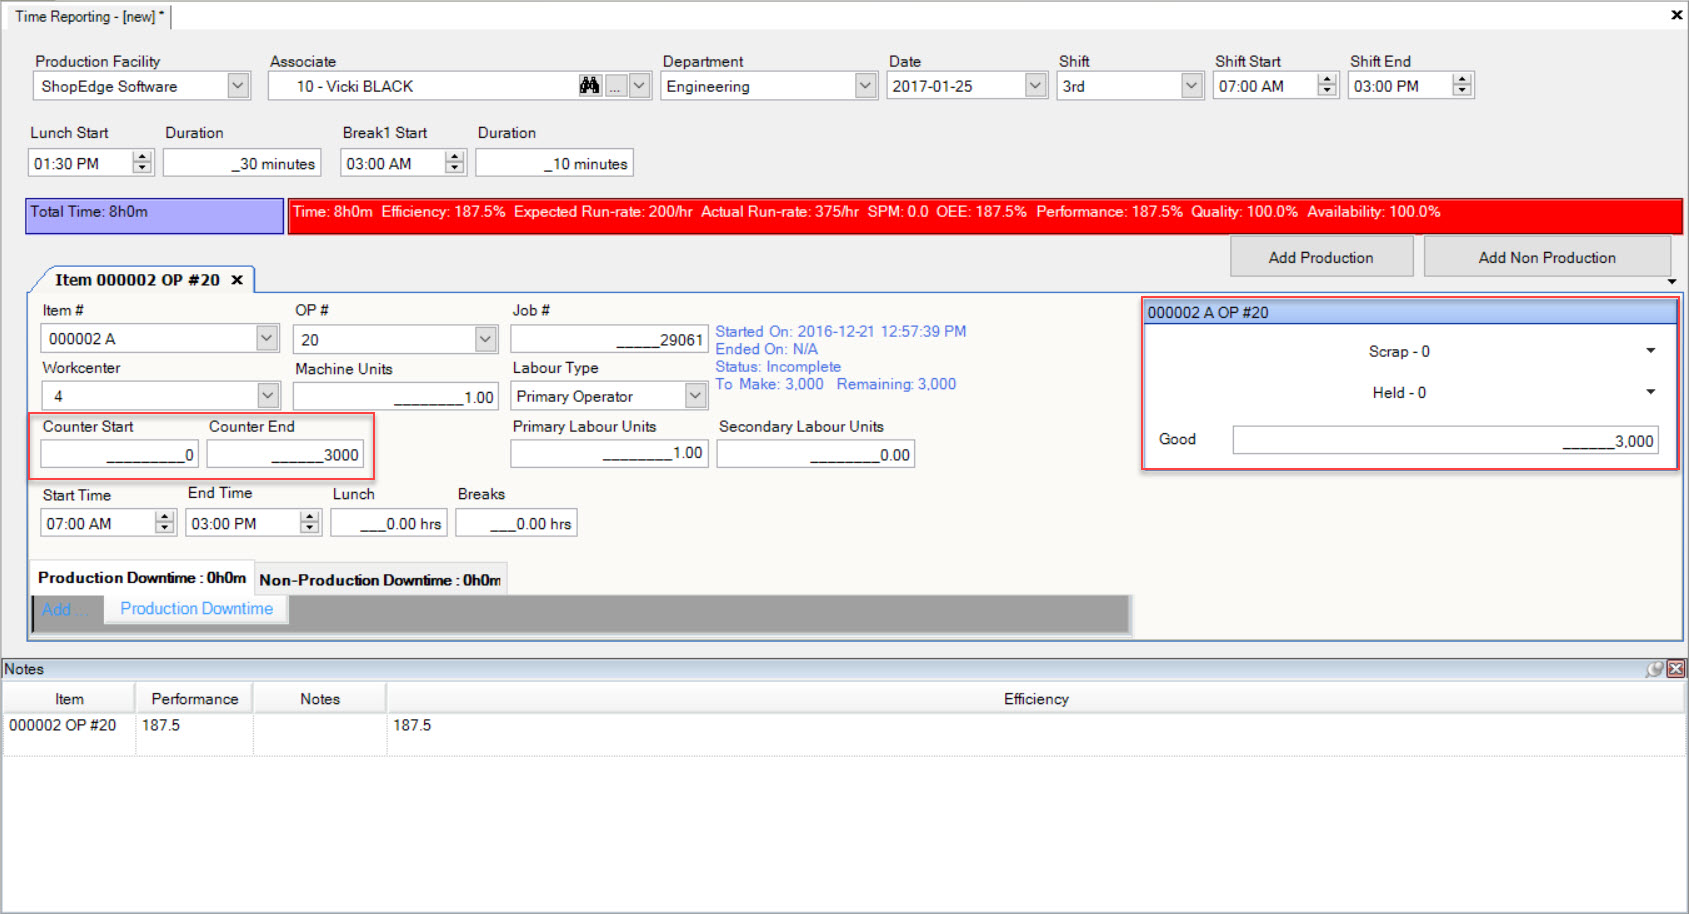
Note
The system will automatically calculate if an Operation produces two or more of the same Item with one hit (i.e. twins, multiple out parts, etc.) as defined in the Manufacture Routing (under Other Info in the Pieces Per Hit field). For example, if you enter 4,600 pieces, and 2 pieces are defined in the Pieces Per Hit field, the system will calculate 9,200 pieces in total were produced in the time allotted.
Note
The system will automatically detect if there are multiple part numbers produced on a Job. In this case, it is apparent once you select or enter in an Item #, two Item boxes will appear on the right side of the screen. Each Item box will indicate at the top, the part number that it pertains too. Also note that the total piece count based on the Counter Start and Counter End is duplicated for each part number. For example, if your Counter reads 6,100 pieces total, each Item will have the same totals in the Good textbox.
Note
If you wish to add more than one Production to a Timecard, simply click on the  button.
Adding Production Downtime
The Timecard tracks Production Downtime as it is important to understand why and how Downtime affects Production runs; Production Downtime also affects the OEE calculation.
To add Production Downtime, click on the  tab.
tab.
Note
You may need to use the cursor to expand the Production Downtime view.
Click on the  button and a new row will appear where the Downtime information can be entered.
Select the Downtime reason and Equipment Item, and enter in the Start and End On times or a time periods. Once these are entered, the system will automatically calculate the Total Time.
You have the option to select the Time Unit (either Minutes or Hours). The Quantity field is for entering more than one reason for Production Downtime if necessary (i.e. 2 coil changes, or 3 sensor issues). The system will average the amount of time over the Quantity of issues.
For example, if you had two coil changes and the Total Time was 1 hour, each coil change will be recorded as 30 minutes. This is important for Production Downtime reports and Downtime accuracy.
You can also enter in the Number of Employees for the Production Downtime and any Notes that are necessary.
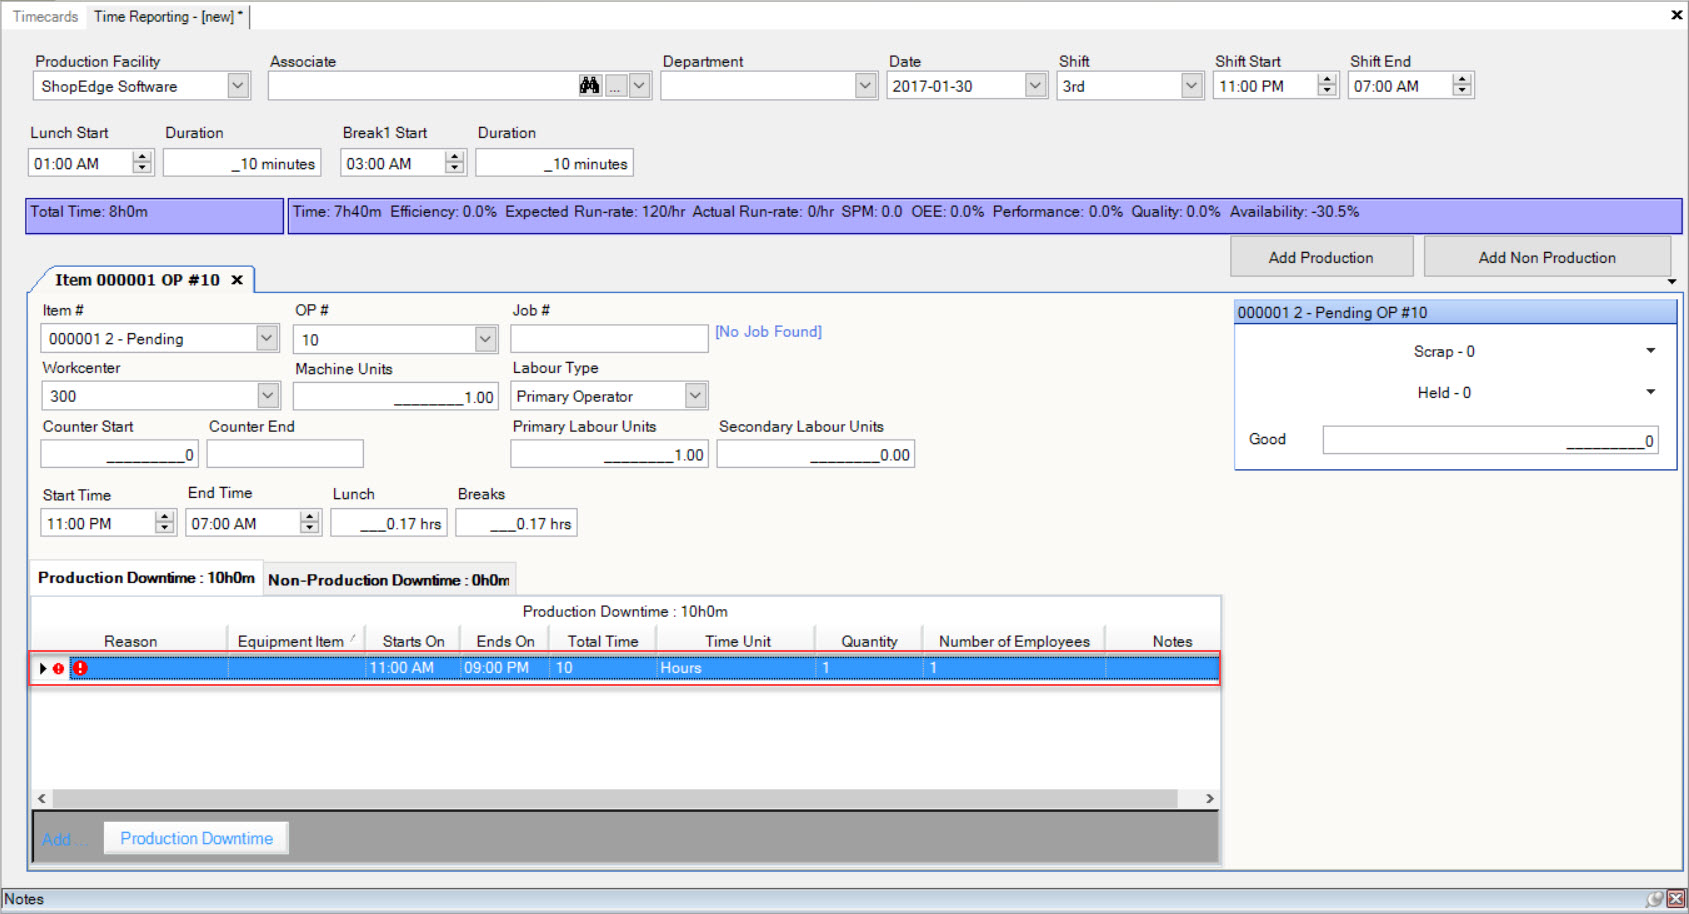
Make sure to save your changes before exiting the screen.
Deleting Production Downtime
To delete Production Downtime, make sure the  tab is selected.
Locate and highlight the appropriate row of the Production Downtime you wish to delete. Use your Delete key and when the system prompts you, click on the  button
to confirm.
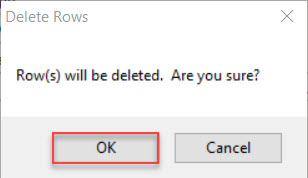
The selected Production Downtime will be deleted.
Make sure to save your changes before exiting the screen.
Adding Non-Production Downtime
You can track Non-Production Downtime on a Timecard. Non-Production Downtime does not affect the OEE calculation, but it is still important in time tracking for Employees.
To enter in Non-Production Downtime, make sure to click on the  tab.
tab.
Note
You may need to use the cursor to expand the Production Downtime view.
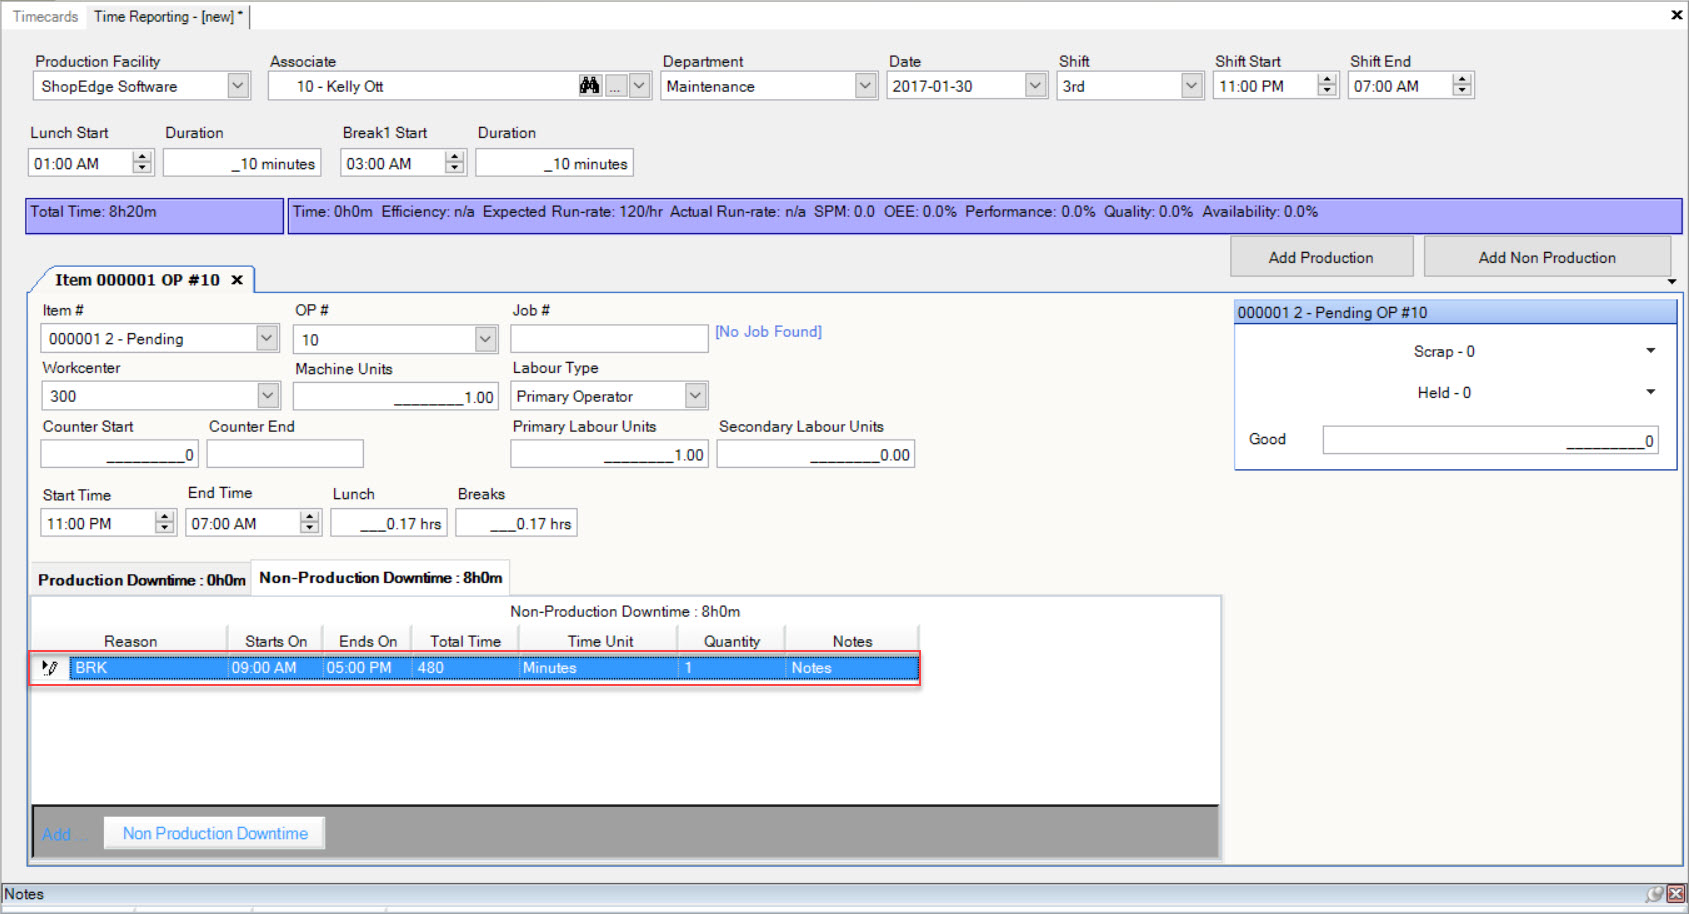
Click on the  button and a new row will appear so that the Non-Production Downtime information can be entered.
Select the Reason, and enter in the Start and End On times or a time periods. Once these are entered, the system will automatically calculate the Total Time.
You also have the option to select the Time Unit (either Minutes or Hours). The Quantity field is available for entering more than one reason for Non-Production Downtime if necessary (i.e. 2 coil changes, or 3 sensor issues). The system will average the amount of Time over the Quantity of issues.
For example, if you had two coil changes and the total time was 1 hour, each coil change will be recorded as 30 minutes.
Any necessary Notes can also be added to the Non-Production Downtime.
Deleting Non-Production Downtime
To delete Non-Production Downtime, make sure the  tab is selected.
Locate and highlight the Non-Production Downtime you wish to delete. Use your Delete key and when the system prompts you, click on the  button
to confirm.

The selected Non-Production Downtime will be deleted.
Make sure to save your changes before exiting the screen.
Deleting Production from a Timecard
To delete Production from a Timecard, select the tab of the Production you wish to delete. Click on the  button.
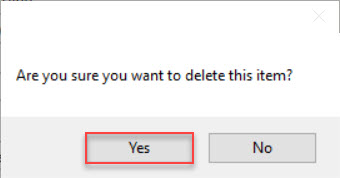
A confirmation window will appear making sure you wish to delete the selected Production Item. Click on the  button to confirm.
The selected Production will be deleted from the Timecard.
Make sure to save your changes before exiting the screen.
Adding Non-Production to a Timecard
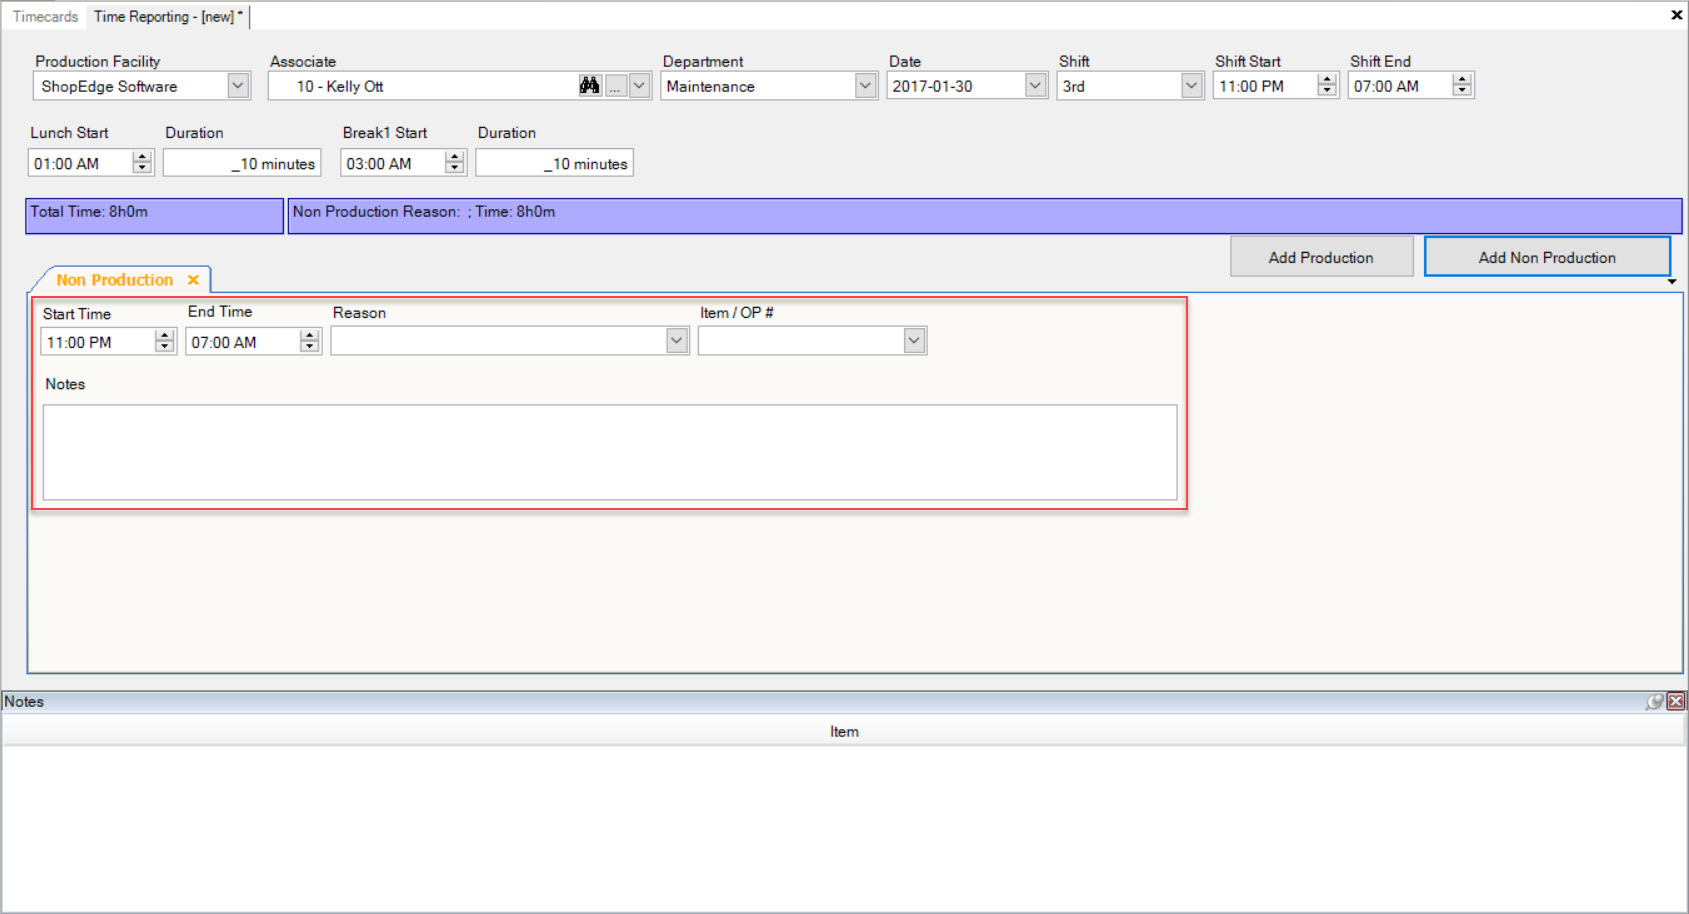
To add Non-Production to a Timecard, click on the  button.
A new tab will appear where users can enter in the Start and End Times, and select the Reason and Item/OP # using the drop-down menus.
Any necessary Notes can also be entered in the available textbox.
Make sure to save your changes before exiting the screen.
Deleting Non-Production from a Timecard
To delete Non-Production from a Timecard, make sure to select the one you wish to delete. Click on the  button.
A confirmation window will appear making sure you wish to delete the selected Non-Production Item. Click on the  button to confirm.

The selected Non-Production will be deleted from the Timecard.
Make sure to save your changes before exiting the screen.
Recording Scrap and Held Material
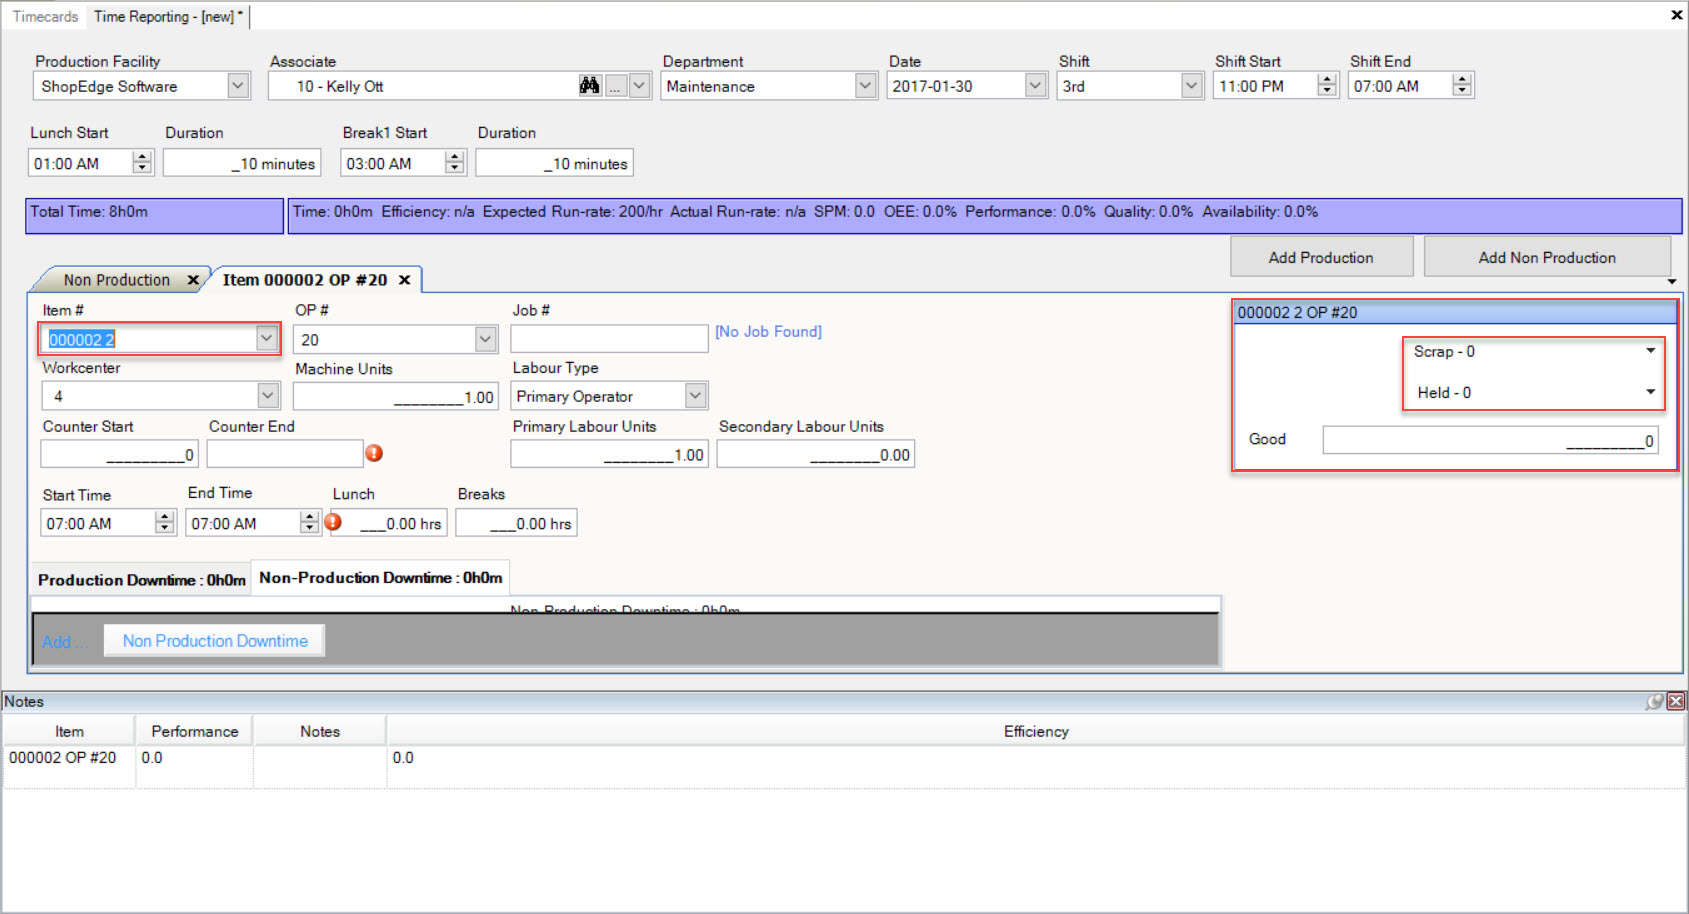
The function of recording Scrap and Held material on a Timecard becomes available when the Item # field is complete when adding Production.
Note
If two or more Item boxes appear, the tool for the Item produces two or more part numbers. The system allows you to capture Scrap and Held counts for each Item produced.
To record scrap or held Quantities, click on the appropriate drop-down menu. You will be able to view all scrap and held Reasons in the system.
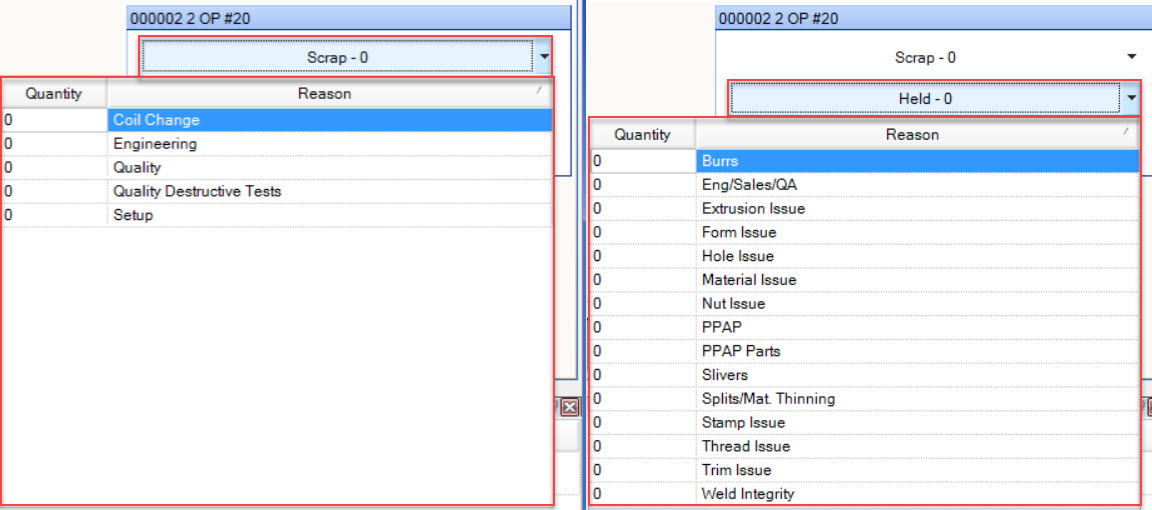
Click in the Quantity textbox and enter in the correct amount. Click anywhere on the Scrap or Held button to close the drop-down menu. The number of pieces recorded will be added to the system and then subtracted from the Good textbox.
Note
Scrap and Held Reasons are added and maintained in the system under Production > Admin.
Adding Additional Employees to a Timecard
In some instances, you may have two or more Employees working together in a Shift for particular Jobs. In this case, you would add another Employee to a Timecard.
To do this, click on the  button beside the field where you would enter the Associate (Employee) name. The Employees window will appear.
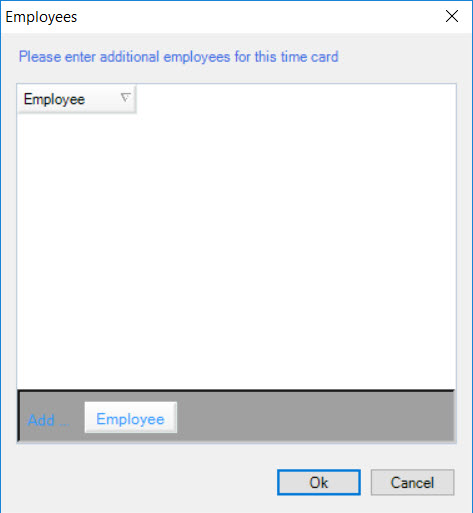
Click on the  button and a new row will appear. Using the drop-down menu, select the Employee to add to the Timecard.
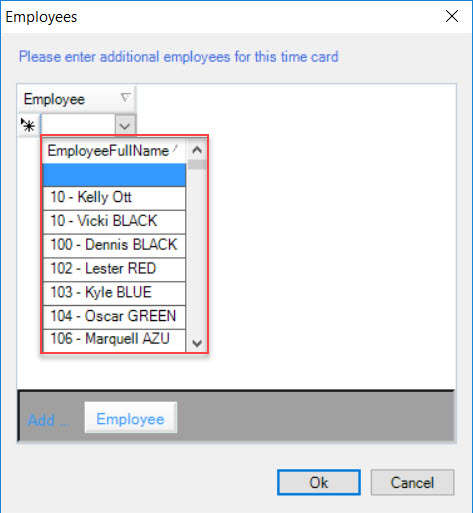
Once you have selected an Employee(s), click on the  button. The Employee(s) will be added to the Timecard.
Make sure to save your changes before exiting the screen.
Efficiencies in Production
Production Efficiencies are calculated in the system based on a number of pieces produced, divided by the actual runrate. The Efficiency percentage is based on the standard runrate entered in the system for the Item in the Manufacture Routing.
You will notice as you fill out areas of the Timecard, the Efficiency information at the top of the screen is updated.
For example, when you add a piece count to the Timecard, based on the pieces entered and the time, the system will work out an Efficiency percentage. As an administrator, you have the ability to set tolerances in the system, so that when a Timecard is saved and is out of the defined tolerance you will need to enter in a Reason.
For example, if your tolerance is set at 10%, and your Efficiency is 89%, you will be prompted when trying to save the Timecard, to enter a Note into the system.
Editing a Timecard
To edit a Timecard, navigate to the  tab and click on the
 ![]() icon. The Timecards screen will be displayed.
icon. The Timecards screen will be displayed.

Locate and double-click on the Timecard that you wish to edit. The Timecard detail screen will appear.
Make the necessary changes to the Timecard.
Make sure to save your changes before exiting the screen.
Deleting a Timecard
To delete a Timecard, navigate to the  tab and click on the
 ![]() icon. The Timecard screen will be displayed.
icon. The Timecard screen will be displayed.

Search for the Timecard you wish to delete. Double-click on the appropriate Timecard row to open the Timecard detail screen. Click on the  button
located at the top of the screen.
A confirmation window will appear making sure you wish to delete the selected Timecard. Click on the  button to confirm.

The selected Timecard will be deleted from the system.
Make sure to save your changes before exiting the screen.

