Admin
Admin allows users to view, add, edit, or delete Operation Types, Workcenter Types, Manufactured Item Classes, Manufactured Item Types, Production Downtime Reasons, Non-Production Downtime Reasons, Production Scrap Reasons, Production Held Reasons, Material Held Reasons, Inventory Adjustment Reasons, Job Completion Reasons, and Attachment Types.
To view Admin, navigate to the  tab and click on the
 ![]() icon. The Production Admin screen will be displayed.
icon. The Production Admin screen will be displayed.
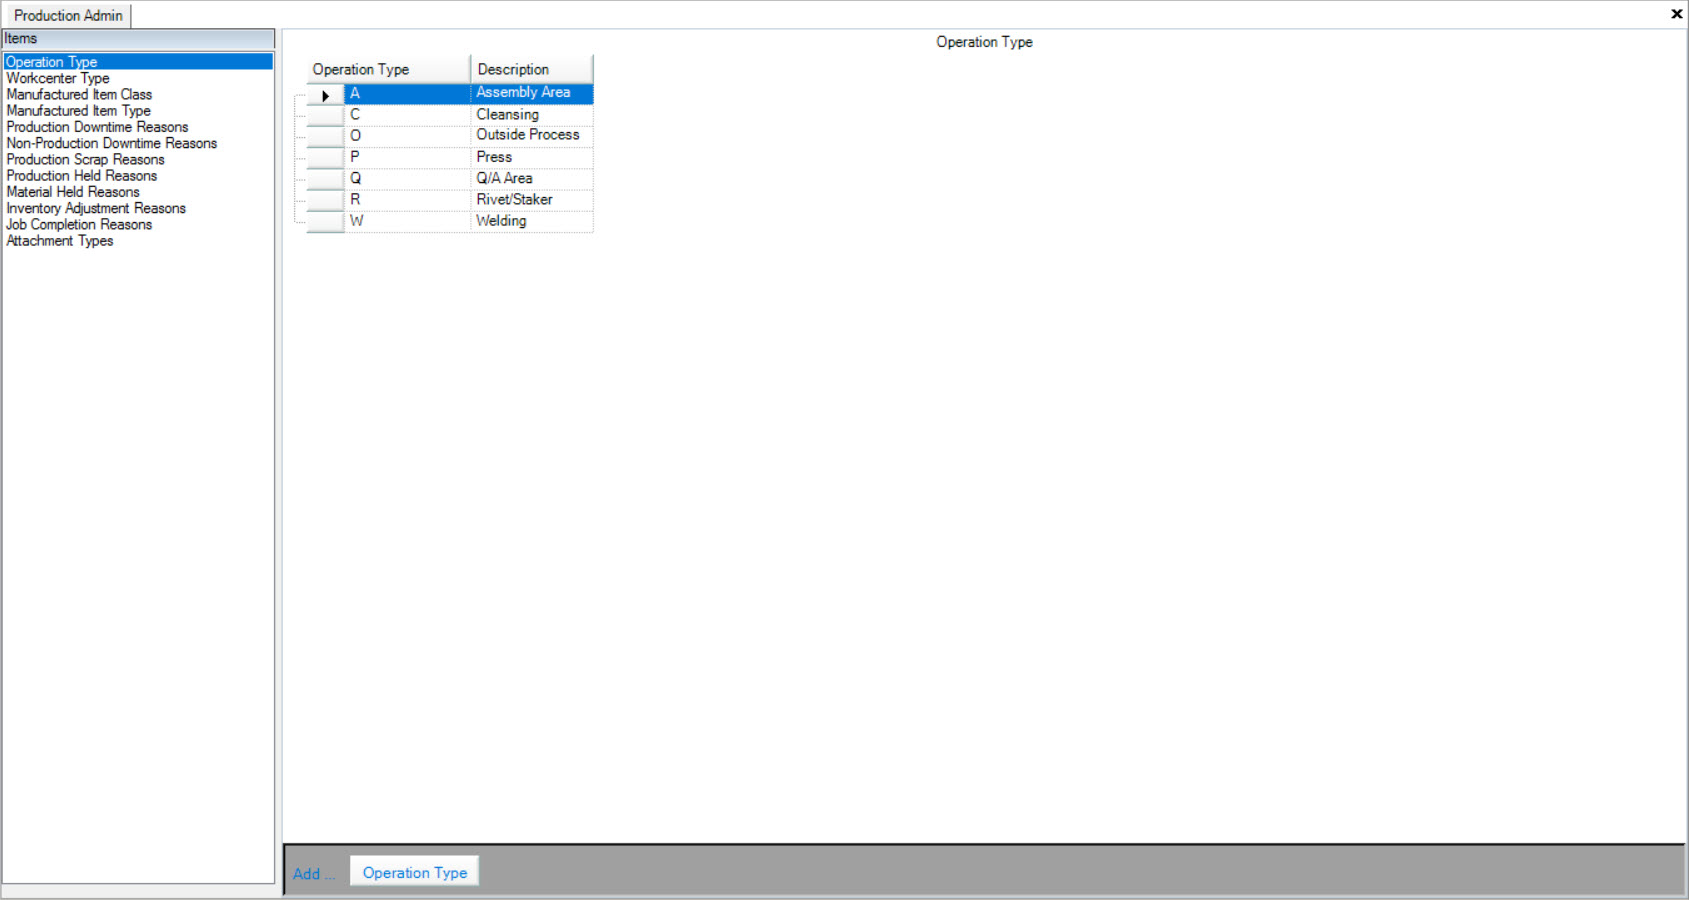
Viewing Operation Types
To view Operation Types, navigate to the  tab and click on the
 ![]() icon. The Production Admin screen will be displayed. Operation
Types are assigned to Plant Operations, which are selected on a Manufacture Routing Operation.
icon. The Production Admin screen will be displayed. Operation
Types are assigned to Plant Operations, which are selected on a Manufacture Routing Operation.

Make sure to select the Operation Type tab located to the left of the screen.
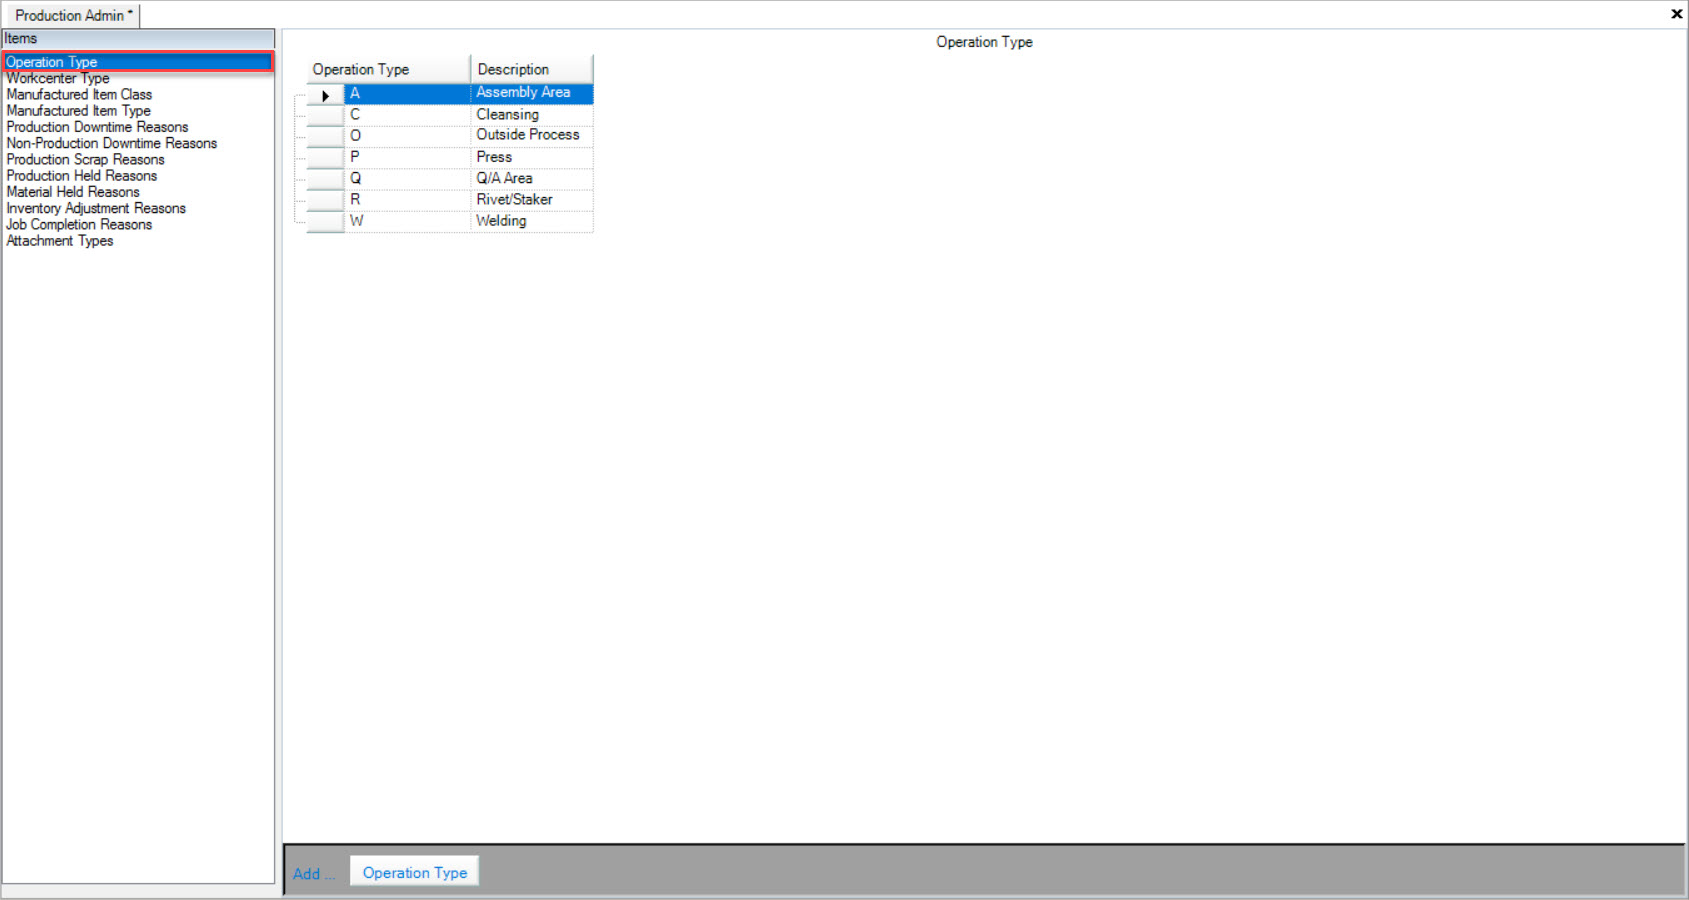
Users are able to view the available Operation Types, and Descriptions in the system.
Adding Operation Types
To add an Operation Type, navigate to the  tab and click on the
 ![]() icon. The Production Admin screen will be displayed.
icon. The Production Admin screen will be displayed.

Make sure to select the Operation Type tab located to the left of the screen.

Click on the  button located at the bottom of the screen. A new row will appear where users can fill in the appropriate Operation Type and Description.
Make sure to save your changes before existing the screen.
Editing Operation Types
To edit an Operation Type, navigate to the  tab and click on the
 ![]() icon. The Production Admin screen will be displayed.
icon. The Production Admin screen will be displayed.

Make sure to select the Operation Type tab located to the left of the screen.

Locate the Operation Type that you wish to edit. Using the appropriate textboxes, make the necessary changes.
Make sure to save your changes before exiting the screen.
Deleting Operation Types
To delete an Operation Type, navigate to the  tab and click on the
 ![]() icon. The Production Admin screen will be displayed.
icon. The Production Admin screen will be displayed.

Make sure to select the Operation Type tab located to the left of the screen.

Locate the Operation Type that you wish to delete and highlight the appropriate row. Use your Delete key and when the system prompts you, select Yes.
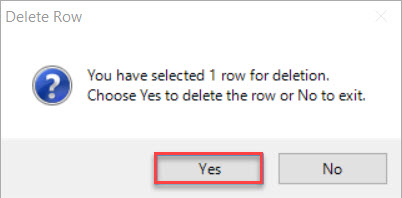
The selected Operation Type will be deleted. Make sure to save your changes before exiting the screen.
Note
Users will not be able to delete Operation Types that are currently assigned to a Manufacture Routing Operation. The system will provide a pop-up message letting users know that the Operation Type cannot be deleted.
Viewing Workcenter Types
Workcenter Types are used in the system to separate Workcenters into areas such as Press, Weld, Assembly, etc. Workcenters will be categorized into designated Workcenter Types on the Master Production Schedule. A Workcenter Type must be selected when adding new Workcenters to the system.
To view Workcenter Types, navigate to the  tab and click on the
 ![]() icon. The Production Admin screen will be displayed.
icon. The Production Admin screen will be displayed.

Make sure to select the Workcenter Type tab located to the left of the screen.
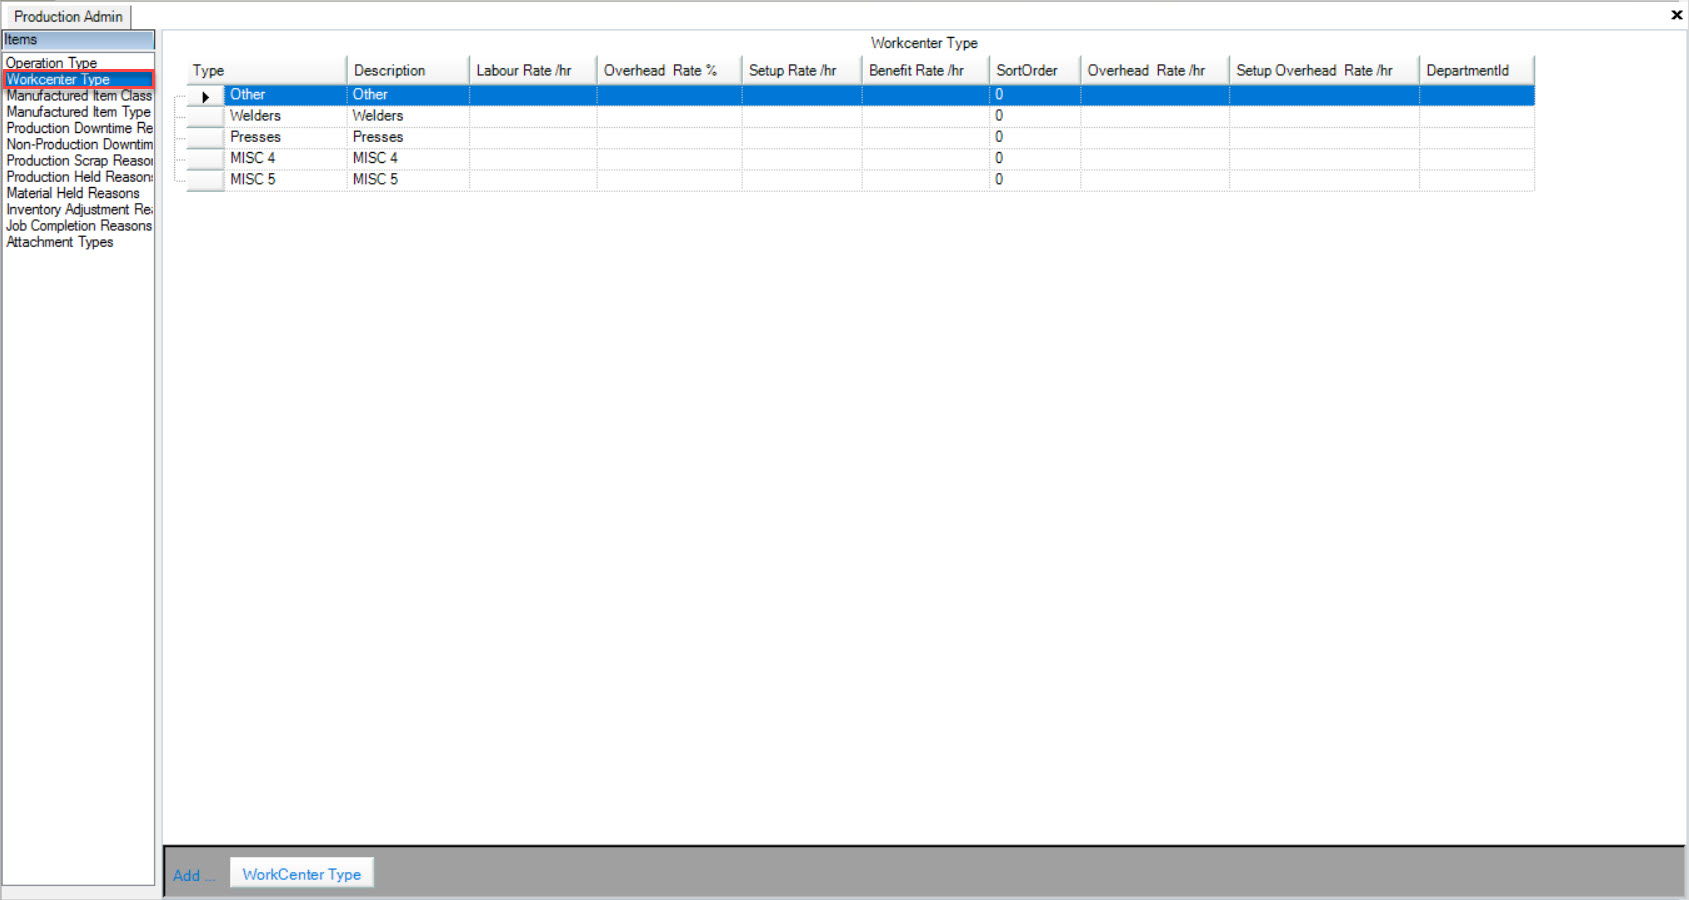
Users will be able to view and enter the Type, Description, Labour Rate /hr, Overhead Rate %, Setup Rate /hr, Benefit Rate /hr, Sort Order, Overhead Rate /hr, Setup Overhead Rate /hr., and Department ID. for each Workcenter Type in the system. These fields are not required in the system, and can be filled out by Workcenter instead of Workcenter Type, on the Workcenters screen in the Production module.
Adding Workcenter Types
To add a Workcenter Type, navigate to the  tab and click on the
 ![]() icon. The Production Admin screen will be displayed.
icon. The Production Admin screen will be displayed.

Make sure to select the Workcenter Type tab located to the left of the screen.

Click on the  button located at the bottom of the screen. A new row will appear where users can fill in the appropriate fields.
Make sure to save your changes before existing the screen.
Editing Workcenter Types
To edit a Workcenter Type, navigate to the  tab and click on the
 ![]() icon. The Production Admin screen will be displayed.
icon. The Production Admin screen will be displayed.

Make sure to select the Workcenter Type tab located to the left of the screen.

Locate the Workcenter Type that you wish to edit. Using the appropriate textboxes, make the necessary changes.
Make sure to save your changes before exiting the screen.
Deleting Workcenter Types
To delete a Workcenter Type, navigate to the  tab and click on the
 ![]() icon. The Production Admin screen will be displayed.
icon. The Production Admin screen will be displayed.

Make sure to select the Workcenter Type tab located to the left of the screen.

Locate the Workcenter Type that you wish to delete and highlight the appropriate row. Use your Delete key and when the system prompts you, select Yes.

The selected Workcenter Type will be deleted. Make sure to save your changes before exiting the screen.
Note
Users will receive a Save Error if they try to delete and then save a Workcenter Type that has been assigned to a Workcenter. You must first remove the Workcenter Type from the Workcenter, and then delete the row.
Viewing Manufactured Item Classes
Manufactured Item Classes can be selected on a Manufacture Routing for further classification of your routings.
To view Manufactured Item Classes, navigate to the  tab and click on the
 ![]() icon. The Production Admin screen will be displayed.
icon. The Production Admin screen will be displayed.

Make sure to select the Manufactured Item Class tab located to the left of the screen.
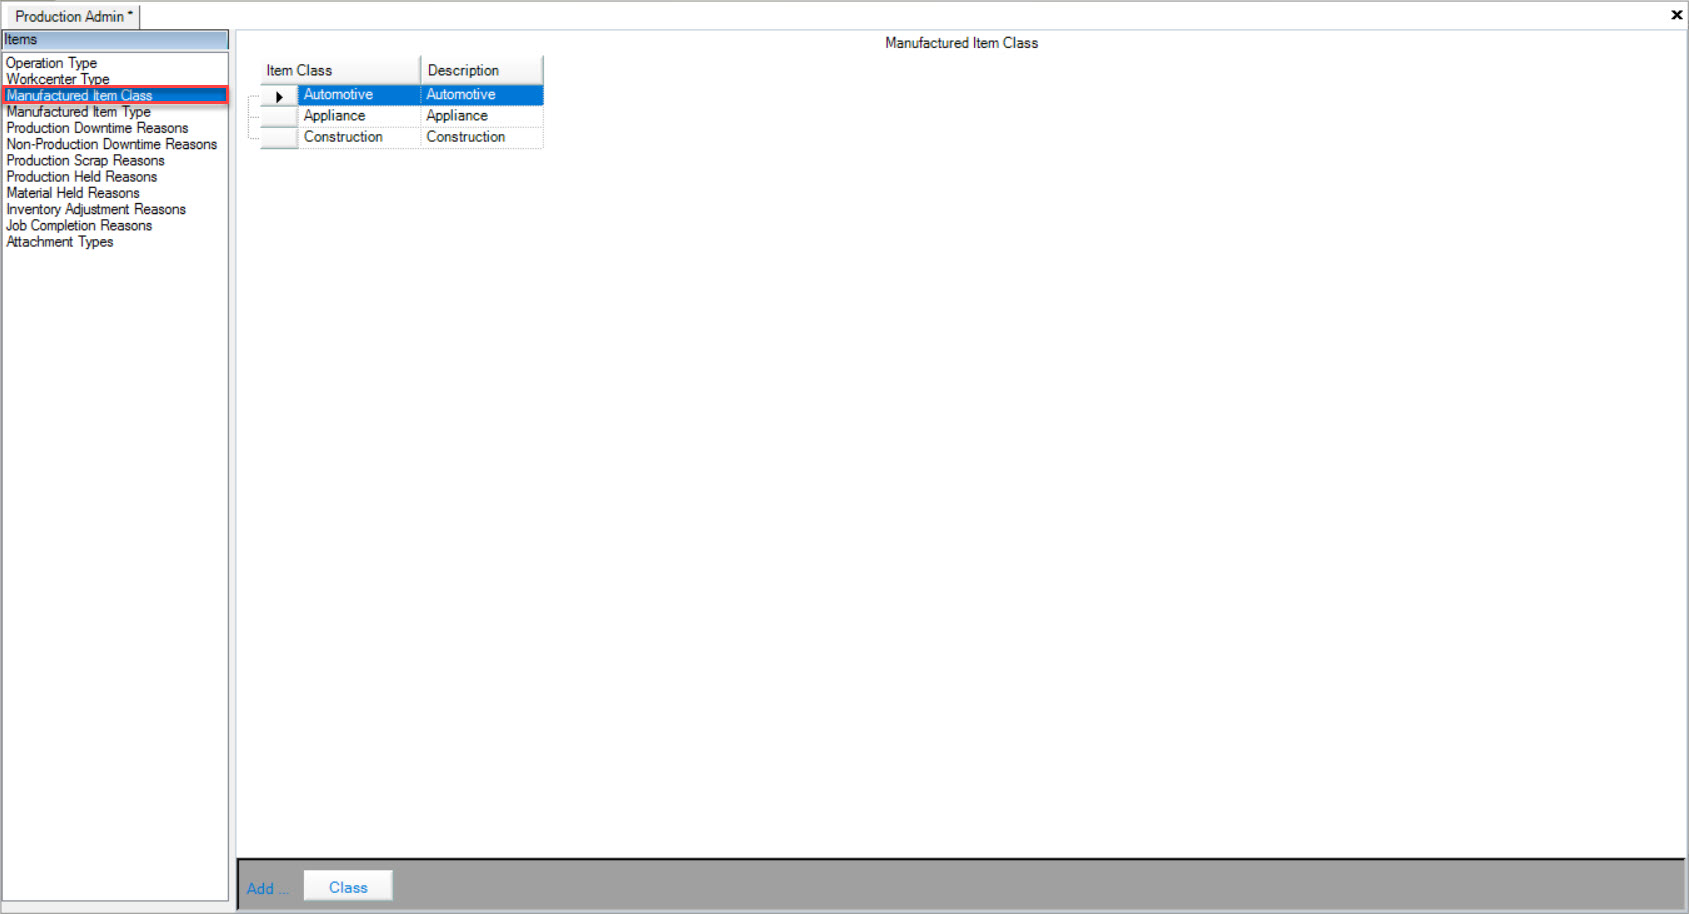
Users will be able to view the Item Class and Description of all available Manufactured Item Classes in the system.
Adding Manufactured Item Classes
To add a Manufactured Item Class, navigate to the  tab and click on the
 ![]() icon. The Production Admin screen will be displayed.
icon. The Production Admin screen will be displayed.

Make sure to select the Manufactured Item Class tab located to the left of the screen.

Click on the  button located at the bottom of the screen. A new row will appear where users can fill in the appropriate Item Class and Description.
Make sure to save your changes before exiting the screen.
Editing Manufactured Item Classes
To edit a Manufactured Item Class, navigate to the  tab and click on the
 ![]() icon. The Production Admin screen will be displayed.
icon. The Production Admin screen will be displayed.

Make sure to select the Manufactured Item Class tab located to the left of the screen.

Locate the Manufactured Item Class that you wish to edit. Use the appropriate textboxes to make the necessary changes.
Make sure to save your changes before exiting the screen.
Deleting Manufactured Item Classes
To delete a Manufactured Item Class, navigate to the  tab and click on the
 ![]() icon. The Production Admin screen will be displayed.
icon. The Production Admin screen will be displayed.

Make sure to select the Manufactured Item Class tab located to the left of the screen.

Locate the Manufactured Item Class that you wish to delete and highlight the appropriate row. Use your Delete key and when the system prompts you, select Yes.

The selected Manufactured Item Class will be deleted. Make sure to save your changes before exiting the screen.
Note
Users will receive a Save Error if you try to delete and then save a Manufactured Item Class that has been assigned to a routing. Users must first remove the class from the routings, and then delete it from the table.
Viewing Manufactured Item Types
Manufactured Item Types can be created in the system for managing Production Items into different Type categories such as Finished Goods and Components. You can also assign Inventory Asset G/L Accounts for Finished Goods and WIP to each Manufactured Item Type.
The WIP Inventory Asset G/L Account is used for Inventory at the Operation Level. The Finished Goods Inventory Asset G/L Account is used for Inventory at the Item Level. For Component Items, if users want all of the Inventory to be considered WIP (either Inventory at the Item or Operation Level), then the Finished Goods and WIP Inventory Asset G/L Accounts for the Component Item Type need to be set to the WIP Inventory Asset G/L Account.
When users run the Inventory Evaluation Report, the Finished Goods and WIP Inventory Asset G/L Accounts will be displayed for each Item and Operation that is shown on the Report.
To view Manufactured Item Types, navigate to the  tab and click on the
 ![]() icon. The Production Admin screen will be displayed.
icon. The Production Admin screen will be displayed.

Make sure to select the Manufactured Item Types tab located to the left of the screen.
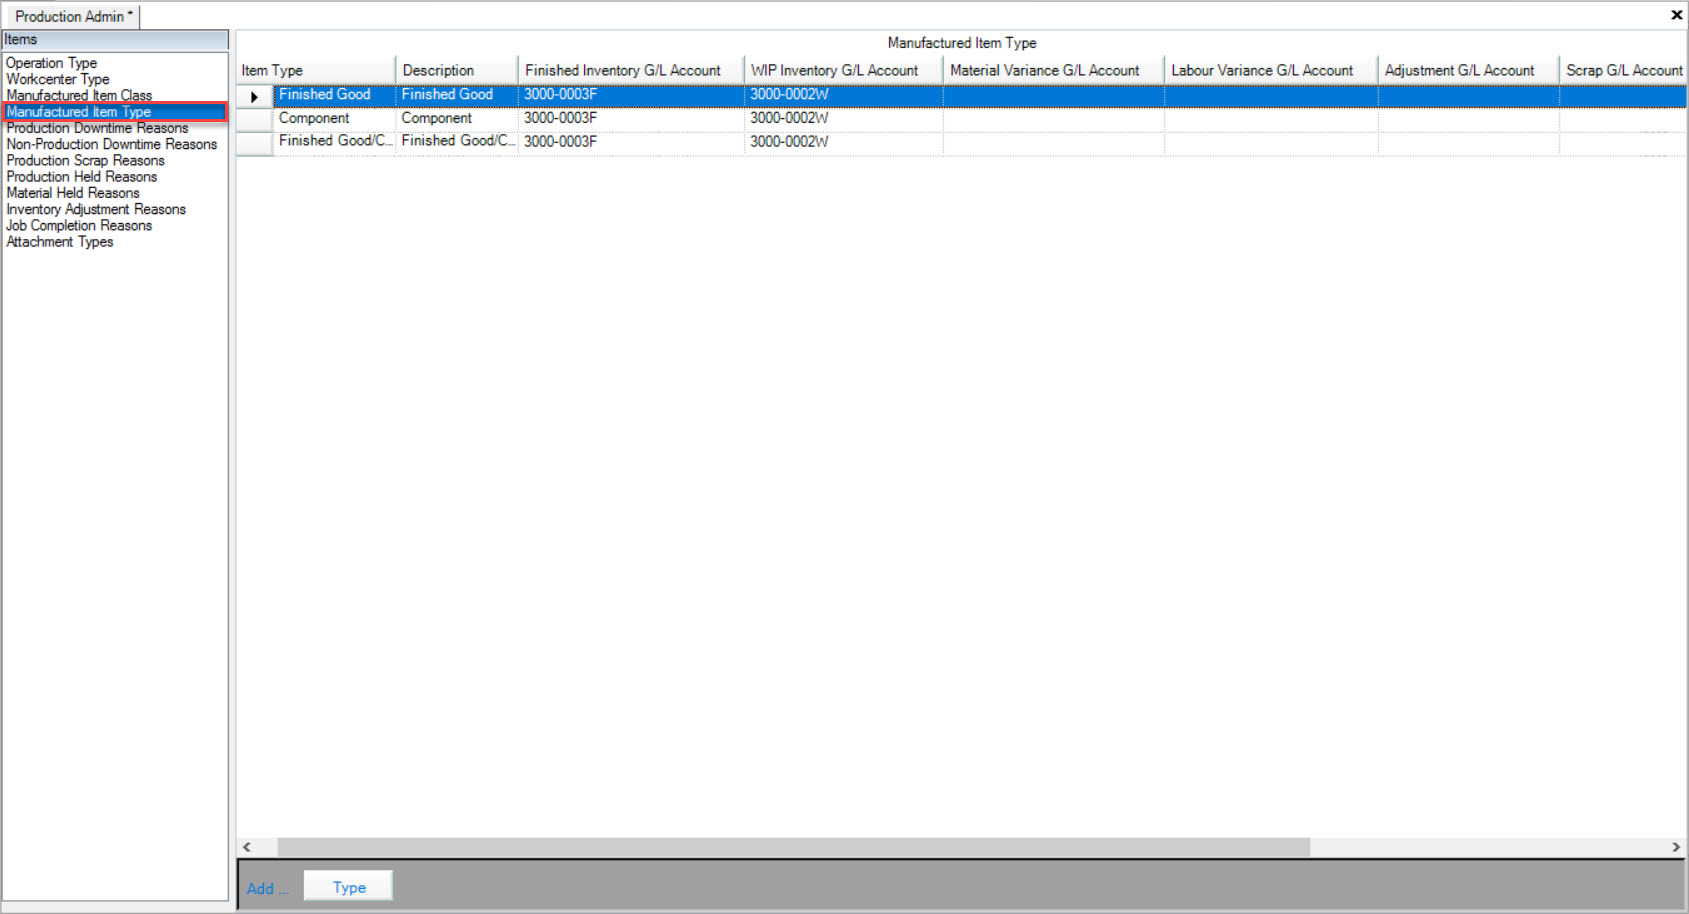
Users will be able to view the Item Type, Description, Finished Inventory G/L Account, WIP Inventory G/L Account, Material Variance G/L Account, Labour Variance G/L Account, Adjustment G/L Account, Scrap G/L Account, Overhead Variance G/L Account, and Cost of Sales G/L Account for the available Manufactured Item Types in the system.
Adding Manufactured Item Types
To add a Manufactured Item Type, navigate to the  tab and click on the
 ![]() icon. The Production Admin screen will be displayed.
icon. The Production Admin screen will be displayed.

Make sure to select the Manufactured Item Types tab located to the left of the screen.

Click on the  button located at the bottom of the screen. A new row will appear where users can fill in the necessary fields.
Make sure to save your changes before exiting the screen.
Editing Manufactured Item Types
To edit a Manufactured Item Type, navigate to the  tab and click on the
 ![]() icon. The Production Admin screen will be displayed.
icon. The Production Admin screen will be displayed.

Make sure to select the Manufactured Item Types tab located to the left of the screen.

Locate the Manufactured Item Type that you wish to edit. Use the appropriate textboxes and drop-down menus to make the necessary changes.
Make sure to save your changes before exiting the screen.
Deleting Manufactured Item Types
To delete a Manufactured Item Type, navigate to the  tab and click on the
 ![]() icon. The Production Admin screen will be displayed.
icon. The Production Admin screen will be displayed.

Make sure to select the Manufactured Item Types tab located to the left of the screen.

Locate the Manufactured Item Type that you wish to delete and highlight the appropriate row. Use your Delete key and when the system prompts you, select Yes.

The selected Manufactured Item Type will be deleted. Make sure to save your changes before exiting the screen.
Note
Users will not be able to delete a Manufactured Item Type that is assigned to a Manufacture Routing. First, they must assign the routing to a different Manufactured Item Type, and then they will be able to delete the Manufactured Item Type from the system.
Viewing Production Downtime Reasons
To view Production Downtime Reasons, navigate to the  tab and click on the
 ![]() icon. The Production Admin screen will be displayed.
icon. The Production Admin screen will be displayed.

Make sure to select the Production Downtime Reasons tab located to the left of the screen.
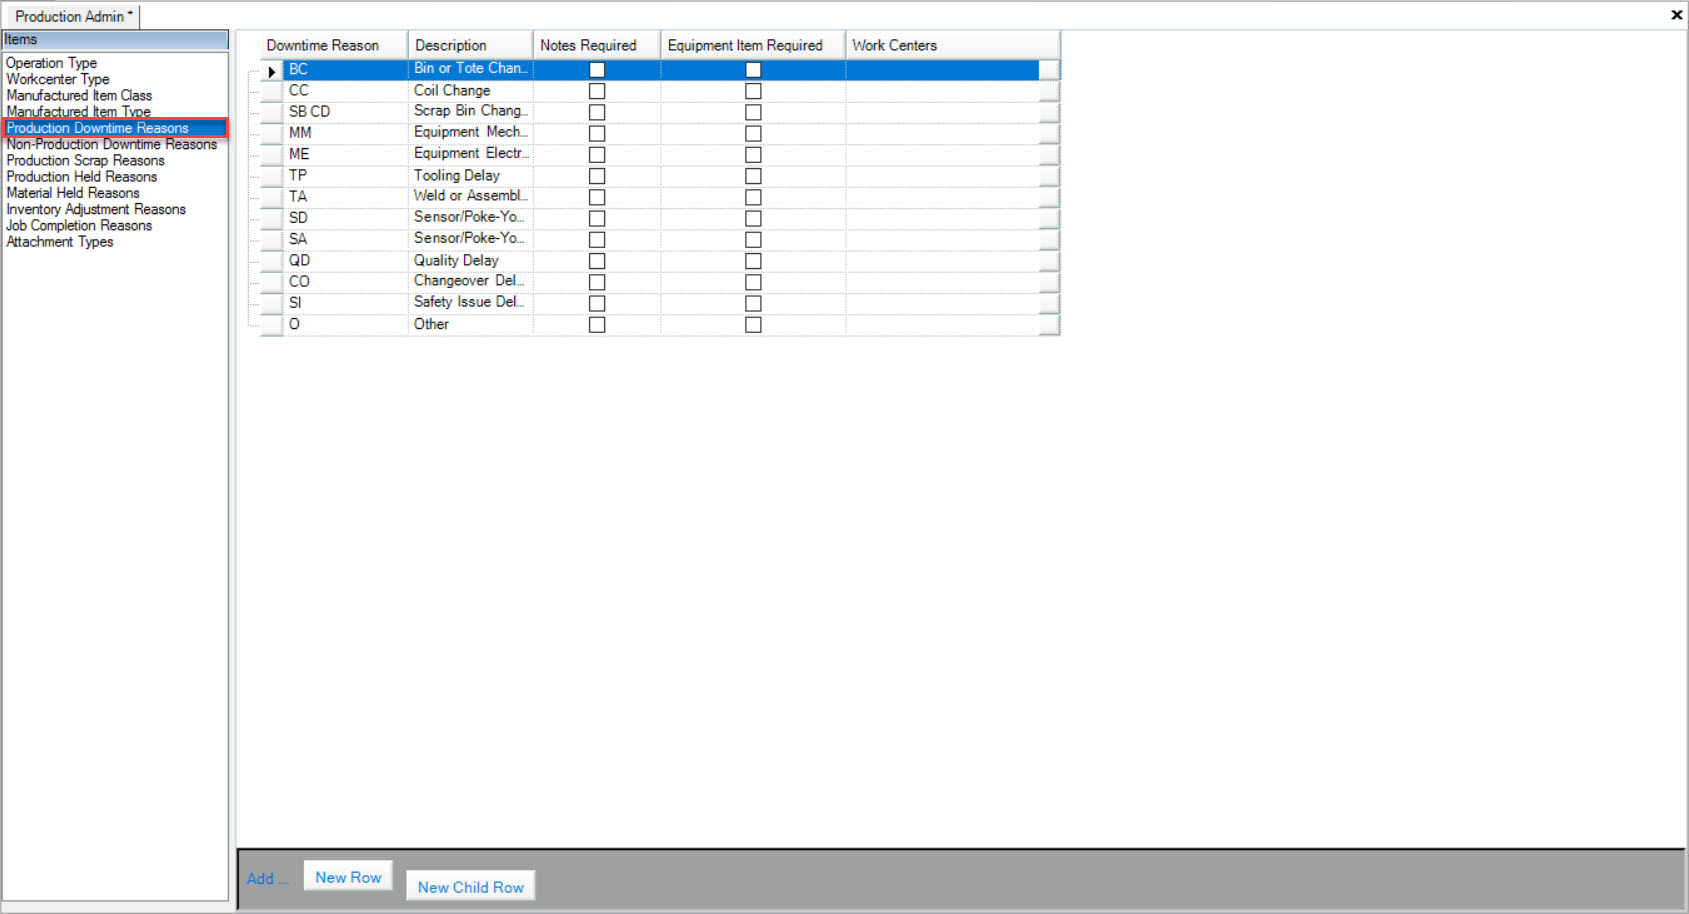
Users will be able to view the Downtime Reason, Description, Notes Required (checked or unchecked), Equipment Item Required (checked or unchecked), and Workcenters for the available Production Downtime Reasons in the system.
Adding Production Downtime Reasons
To add a Production Downtime Reason, navigate to the  tab and click on the
 ![]() icon. The Production Admin screen will be displayed.
icon. The Production Admin screen will be displayed.

Make sure to select the Production Downtime Reasons tab located to the left of the screen.

Click on the  button located at the bottom of the screen. A new row will appear where users can fill in the appropriate textboxes, check the appropriate boxes, and
select the appropriate Workcenter(s) by clicking on the grey square in the Workcenters column.
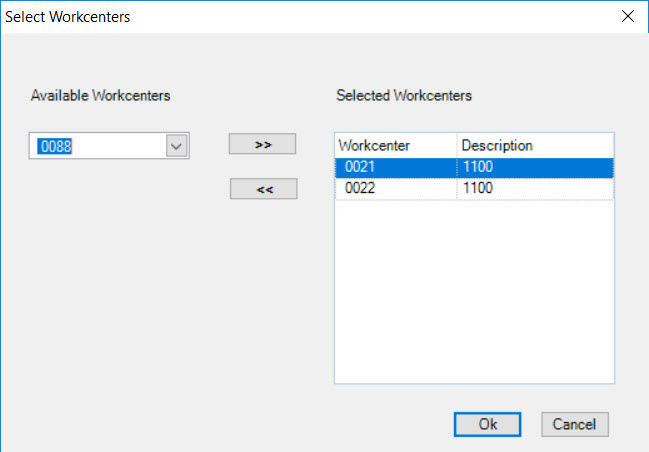
The Select Workcenters window will appear. Using the drop-down menu, select the Workcenter(s) and click on the  button. Once you have selected the necessary
Workcenter(s), click on the
  button. The Workcenter(s) will be added to the column.
Note
In the Select Workcenters window, if users have selected a Workcenter by mistake simply highlight the Workcenter row and click on the  button to remove it from the list.
Users also have the ability to add a new child row to a Production Downtime Reason. To do so, highlight the row that you wish to add the child row to and click on the  button
located at the bottom of the screen.
A new row will appear where users can fill in the appropriate information.
Make sure to save your changes before exiting the screen.
Editing Production Downtime Reasons
To edit a Production Downtime Reason, navigate to the  tab and click on the
 ![]() icon. The Production Admin screen will be displayed.
icon. The Production Admin screen will be displayed.

Make sure to select the Production Downtime Reasons tab located to the left of the screen.

Locate the Production Downtime Reason you wish to edit and make the necessary changes using the appropriate textboxes, checking or unchecking the boxes, and selecting or removing Workcenters.
Note
If you would like to make changes to a child row, follow the same steps.
Once all necessary changes have been made, make sure to save before exiting the screen.
Deleting Production Downtime Reasons
To delete a Production Downtime Reason, navigate to the  tab and click on the
 ![]() icon. The Production Admin screen will be displayed.
icon. The Production Admin screen will be displayed.

Make sure to select the Production Downtime Reasons tab located to the left of the screen.

Locate the Production Downtime Reason you wish to delete and highlight the appropriate row. Use your Delete key and when the system prompts you, select Yes.

The selected Production Downtime Reason will be deleted. Make sure to save your changes before exiting the screen.
Note
You can also delete a child row if necessary by following the same steps.
Viewing Non-Production Downtime Reasons
To view Non-Production Downtime Reasons, navigate to the  tab and click on the
 ![]() icon. The Production Admin screen will be displayed.
icon. The Production Admin screen will be displayed.

Make sure to select the Non-Production Downtime Reasons tab located to the left of the screen.
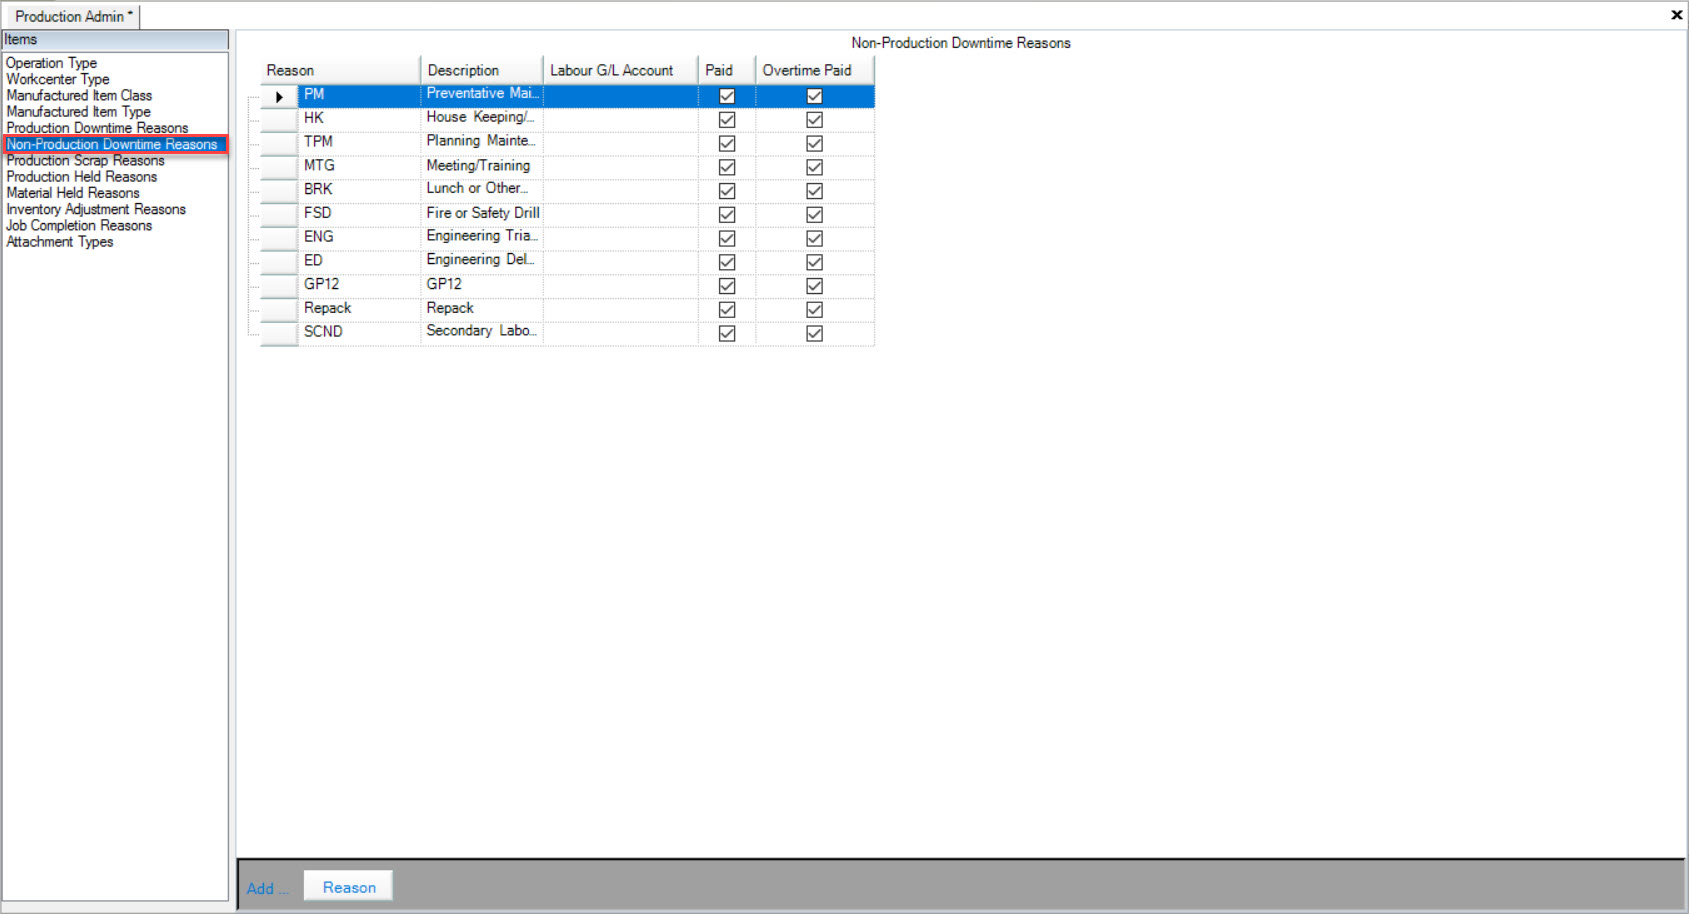
Users will be able to view the Reason, Description, Labour G/L Account, Paid (checked or unchecked), and Overtime Paid(checked or unchecked) for the available Non-Production Downtime Reasons in the system.
Adding Non-Production Downtime Reasons
To add a Non-Production Downtime Reason, navigate to the  tab and click on the
 ![]() icon. The Production Admin screen will be displayed.
icon. The Production Admin screen will be displayed.

Make sure to select the Non-Production Downtime Reasons tab located to the left of the screen.

Click on the  button located at the bottom of the screen. A new row will appear where users can fill in the Reason, Description, select the Labour G/L Account,
and select or de-select Paid, and Overtime Paid.
Make sure to save your changes before exiting the screen.
Editing Non-Production Downtime Reasons
To edit a Non-Production Downtime Reason, navigate to the  tab and click on the
 ![]() icon. The Production Admin screen will be displayed.
icon. The Production Admin screen will be displayed.

Make sure to select the Non-Production Downtime Reasons tab located to the left of the screen.

Locate the Non-Production Downtime Reason you wish to edit and make the necessary changes.
Make sure to save your changes before exiting the screen.
Deleting Non-Production Downtime Reasons
To delete a Non-Production Downtime Reason, navigate to the  tab and click on the
 ![]() icon. The Production Admin screen will be displayed.
icon. The Production Admin screen will be displayed.

Make sure to select the Non-Production Downtime Reasons tab located to the left of the screen.

Locate the Non-Production Downtime Reason you wish to delete and highlight the appropriate row. Use your Delete key and when the system prompts you, select Yes.

The selected Non-Production Downtime Reason will be deleted. Make sure to save your changes before exiting the screen.
Viewing Production Scrap Reasons
To view Production Scrap Reasons, navigate to the  tab and click on the
 ![]() icon. The Production Admin screen will be displayed.
icon. The Production Admin screen will be displayed.

Make sure to select the Production Scrap Reasons tab located to the left of the screen.
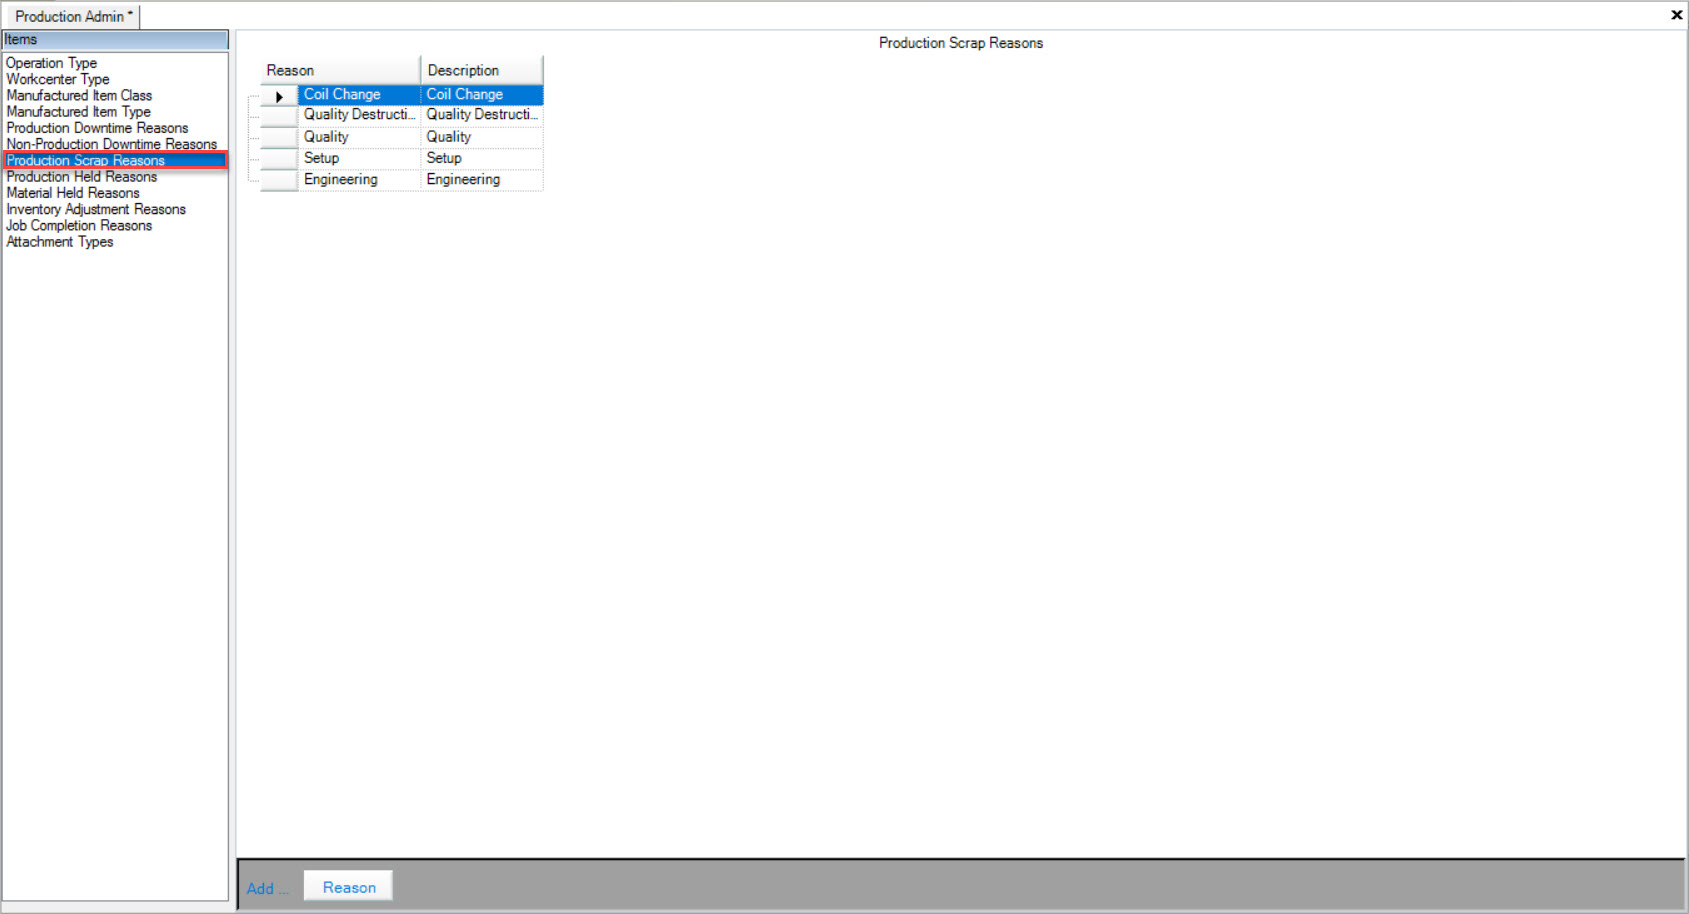
Users will be able to view the Reason and Description for the available Production Scrap Reasons in the system.
Adding Production Scrap Reasons
To add a Production Scrap Reason, navigate to the  tab and click on the
 ![]() icon. The Production Admin screen will be displayed.
icon. The Production Admin screen will be displayed.

Make sure to select the Production Scrap Reasons tab located to the left of the screen.

Click on the  button located at the bottom of the screen. A new row will appear where users can fill in the Reason and Description.
Make sure to save your changes before exiting the screen.
Editing Production Scrap Reasons
To edit a Production Scrap Reason, navigate to the  tab and click on the
 ![]() icon. The Production Admin screen will be displayed.
icon. The Production Admin screen will be displayed.

Make sure to select the Production Scrap Reasons tab located to the left of the screen.

Locate the Production Scrap Reason you wish to edit. Make the necessary changes using the appropriate textboxes.
Make sure to save your changes before exiting the screen.
Deleting Production Scrap Reasons
To delete a Production Scrap Reason, navigate to the  tab and click on the
 ![]() icon. The Production Admin screen will be displayed.
icon. The Production Admin screen will be displayed.

Make sure to select the Production Scrap Reasons tab located to the left of the screen.

Locate the Production Scrap Reason you wish to delete and highlight the appropriate row. Use your Delete key and when the system prompts you, select Yes.

The selected Production Scrap Reason will be deleted. Make sure to save your changes before exiting the screen.
Viewing Production Held Reasons
To view Production Held Reasons, navigate to the  tab and click on the
 ![]() icon. The Production Admin screen will be displayed.
icon. The Production Admin screen will be displayed.

Make sure to select the Production Held Reasons tab located to the left of the screen.
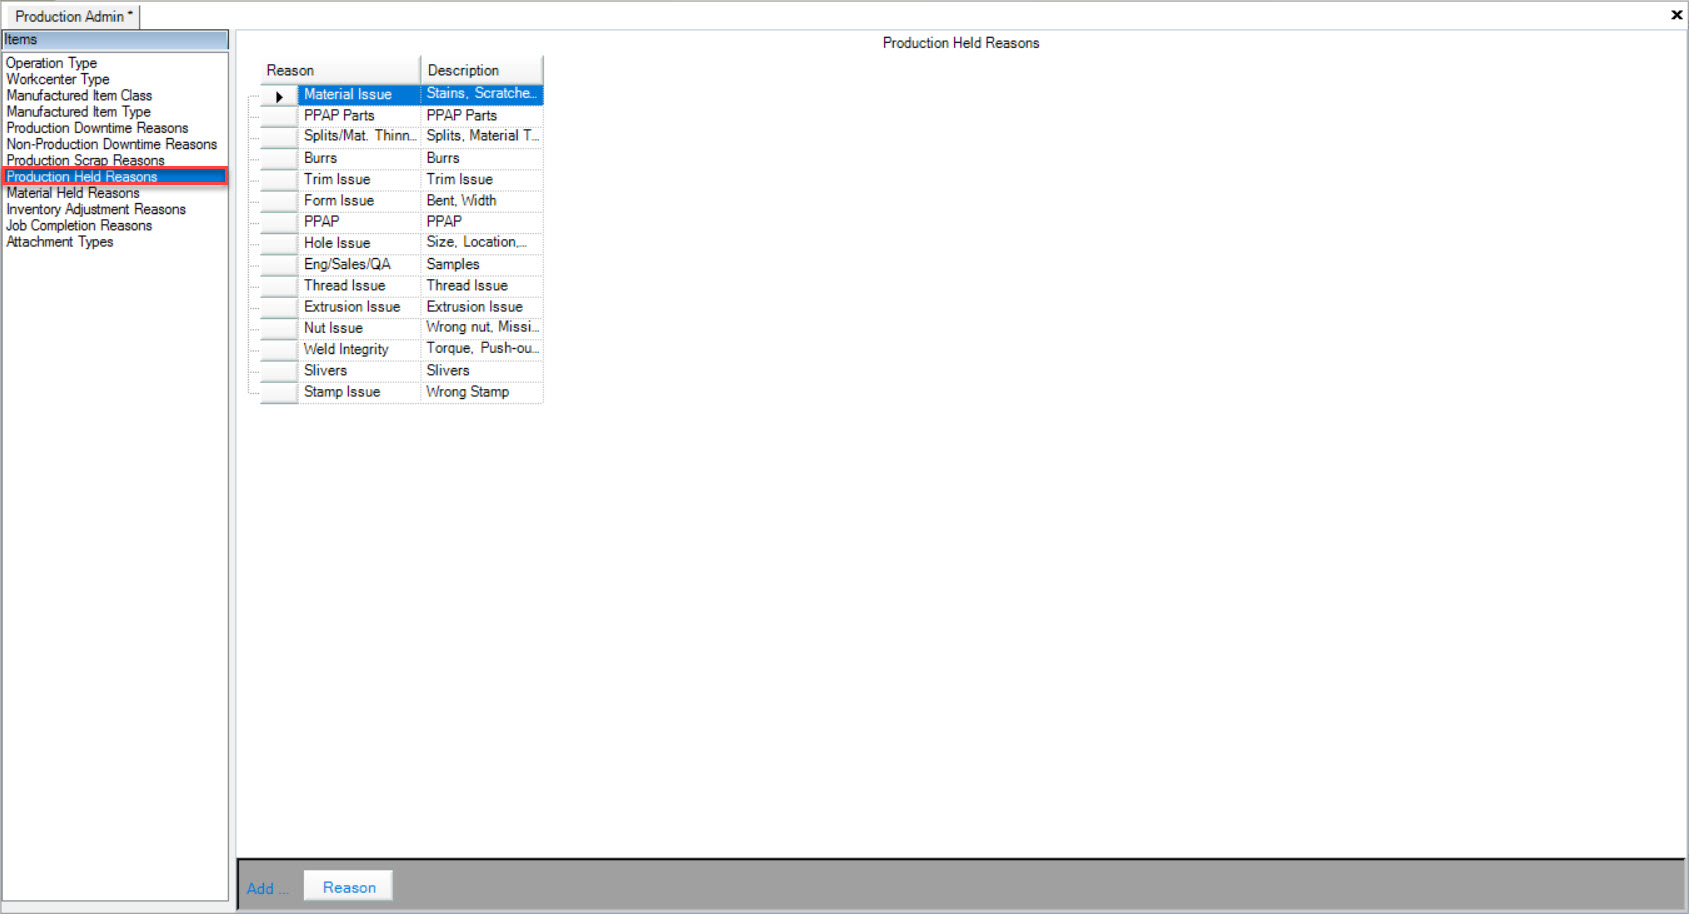
Users will be able to view the Reason and Description for the available Production Held Reasons in the system.
Adding Production Held Reasons
To add a Production Held Reason, navigate to the  tab and click on the
 ![]() icon. The Production Admin screen will be displayed.
icon. The Production Admin screen will be displayed.

Make sure to select the Production Held Reasons tab located to the left of the screen.

Click on the  button located at the bottom of the screen. A new row will appear where users can fill in the Reason and Description.
Make sure to save your changes before exiting the screen.
Editing Production Held Reasons
To edit a Production Held Reason, navigate to the  tab and click on the
 ![]() icon. The Production Admin screen will be displayed.
icon. The Production Admin screen will be displayed.

Make sure to select the Production Held Reasons tab located to the left of the screen.

Locate the Production Held Reason you wish to edit. Make the necessary changes using the appropriate textboxes.
Make sure to save your changes before exiting the screen.
Deleting Production Held Reasons
To delete a Production Held Reason, navigate to the  tab and click on the
 ![]() icon. The Production Admin screen will be displayed.
icon. The Production Admin screen will be displayed.

Make sure to select the Production Held Reasons tab located to the left of the screen.

Locate the Production Held Reason you wish to delete and highlight the appropriate row. Use your Delete key and when the system prompts you, select Yes.

The selected Production Held Reason will be deleted. Make sure to save your changes before exiting the screen.
Viewing Material Held Reasons
To view Material Held Reasons, navigate to the  tab and click on the
 ![]() icon. The Production Admin screen will be displayed.
icon. The Production Admin screen will be displayed.

Make sure to select the Material Held Reasons tab located to the left of the screen.
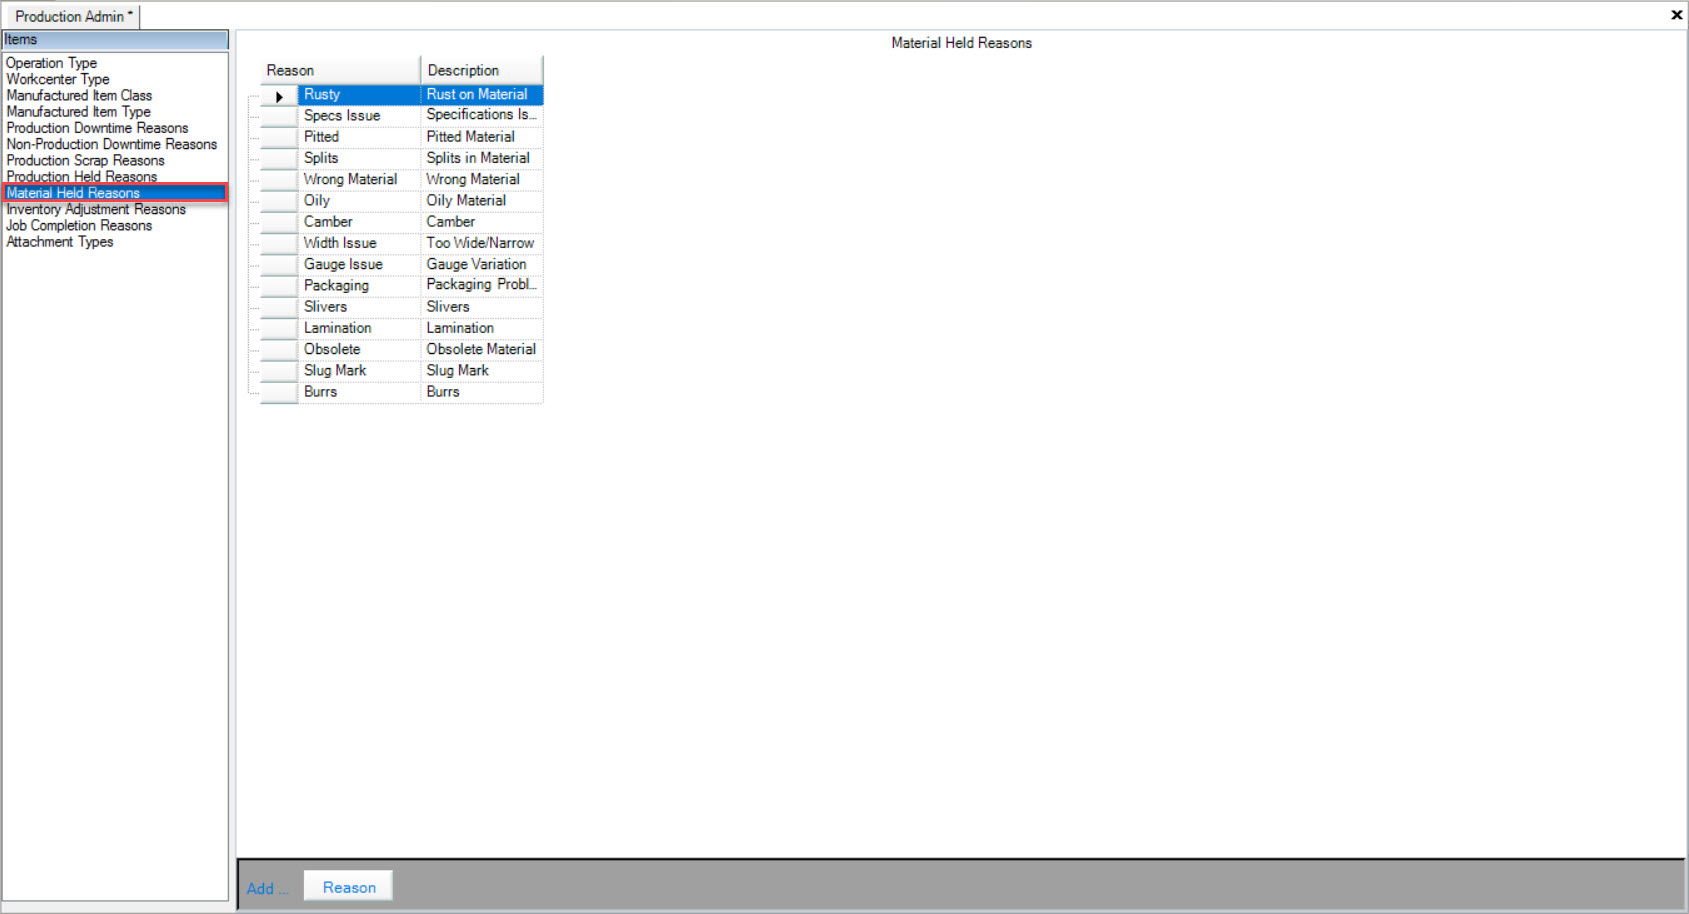
Users will be able to view the Reason and Description for the available Material Held Reasons in the system.
Adding Material Held Reasons
To add a Material Held Reason, navigate to the  tab and click on the
 ![]() icon. The Production Admin screen will be displayed.
icon. The Production Admin screen will be displayed.

Make sure to select the Material Held Reasons tab located to the left of the screen.

Click on the  button located at the bottom of the screen. A new row will appear where users can fill in the Reason and Description.
Make sure to save your changes before exiting the screen.
Editing Material Held Reasons
To edit a Material Held Reason, navigate to the  tab and click on the
 ![]() icon. The Production Admin screen will be displayed.
icon. The Production Admin screen will be displayed.

Make sure to select the Material Held Reasons tab located to the left of the screen.

Locate the Material Held Reason you wish to edit. Make the necessary changes using the appropriate textboxes.
Make sure to save your changes before exiting the screen.
Deleting Material Held Reasons
To delete a Material Held Reason, navigate to the  tab and click on the
 ![]() icon. The Production Admin screen will be displayed.
icon. The Production Admin screen will be displayed.

Make sure to select the Material Held Reasons tab located to the left of the screen.

Locate the Material Held Reason you wish to delete and highlight the appropriate row. Use your Delete key and when the system prompts you, select Yes.

The selected Material Held Reason will be deleted. Make sure to save your changes before exiting the screen.
Viewing Inventory Adjustment Reasons
To view Inventory Adjustment Reasons, navigate to the  tab and click on the
 ![]() icon. The Production Admin screen will be displayed.
icon. The Production Admin screen will be displayed.

Make sure to select the Inventory Adjustment Reasons tab located to the left of the screen.
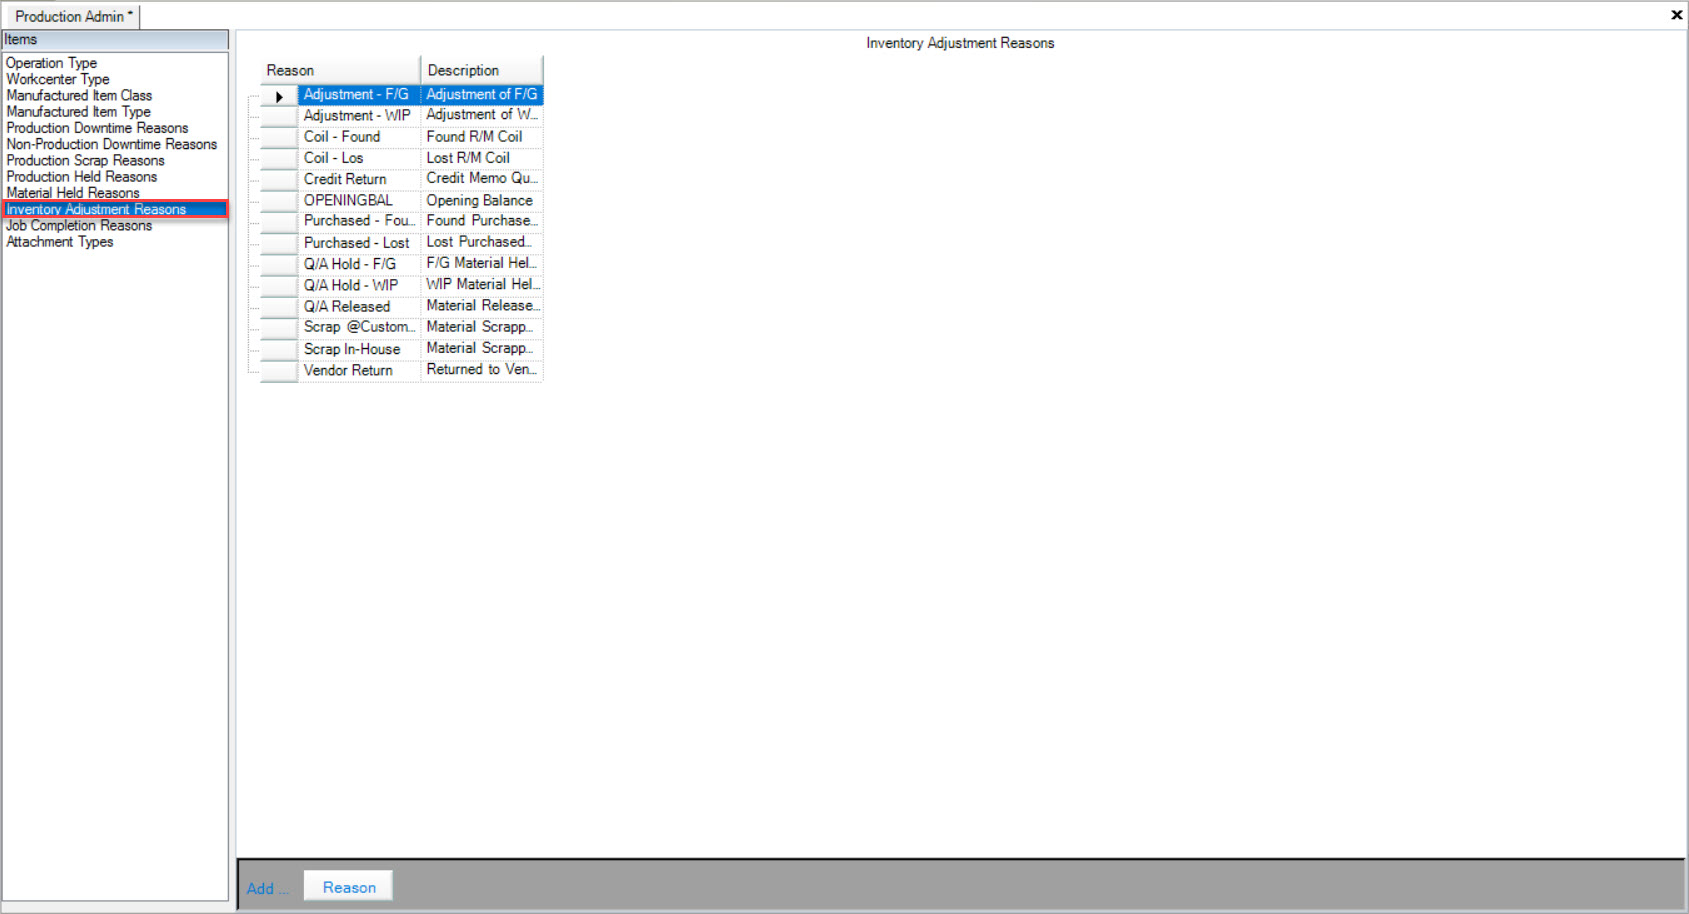
Users will be able to view the Reason and Description for all of the available Inventory Adjustment Reasons in the system.
Adding Inventory Adjustment Reasons
To add an Inventory Adjustment Reason, navigate to the  tab and click on the
 ![]() icon. The Production Admin screen will be displayed.
icon. The Production Admin screen will be displayed.

Make sure to select the Inventory Adjustment Reasons tab located to the left of the screen.

Click on the  button located at the bottom of the screen. A new row will appear where users can fill in the Reason and Description.
Make sure to save your changes before exiting the screen.
Editing Inventory Adjustment Reasons
To edit an Inventory Adjustment Reason, navigate to the  tab and click on the
 ![]() icon. The Production Admin screen will be displayed.
icon. The Production Admin screen will be displayed.

Make sure to select the Inventory Adjustment Reasons tab located to the left of the screen.

Locate the Inventory Adjustment Reason that you wish to edit. Make the necessary changes using the appropriate textboxes.
Make sure to save your changes before exiting the screen.
Deleting Inventory Adjustment Reasons
To delete an Inventory Adjustment Reason, navigate to the  tab and click on the
 ![]() icon. The Production Admin screen will be displayed.
icon. The Production Admin screen will be displayed.

Make sure to select the Inventory Adjustment Reasons tab located to the left of the screen.

Locate the Inventory Adjustment Reason that you wish to delete and highlight the appropriate row. Use your Delete key and when the system prompts you, select Yes.
The selected Inventory Adjustment Reason will be deleted. Make sure to save your changes before exiting the screen.
Viewing Job Completion Reasons
To view Job Completion Reasons, navigate to the  tab and click on the
 ![]() icon. The Production Admin screen will be displayed.
icon. The Production Admin screen will be displayed.

Make sure to select the Job Completion Reasons tab located to the left of the screen.
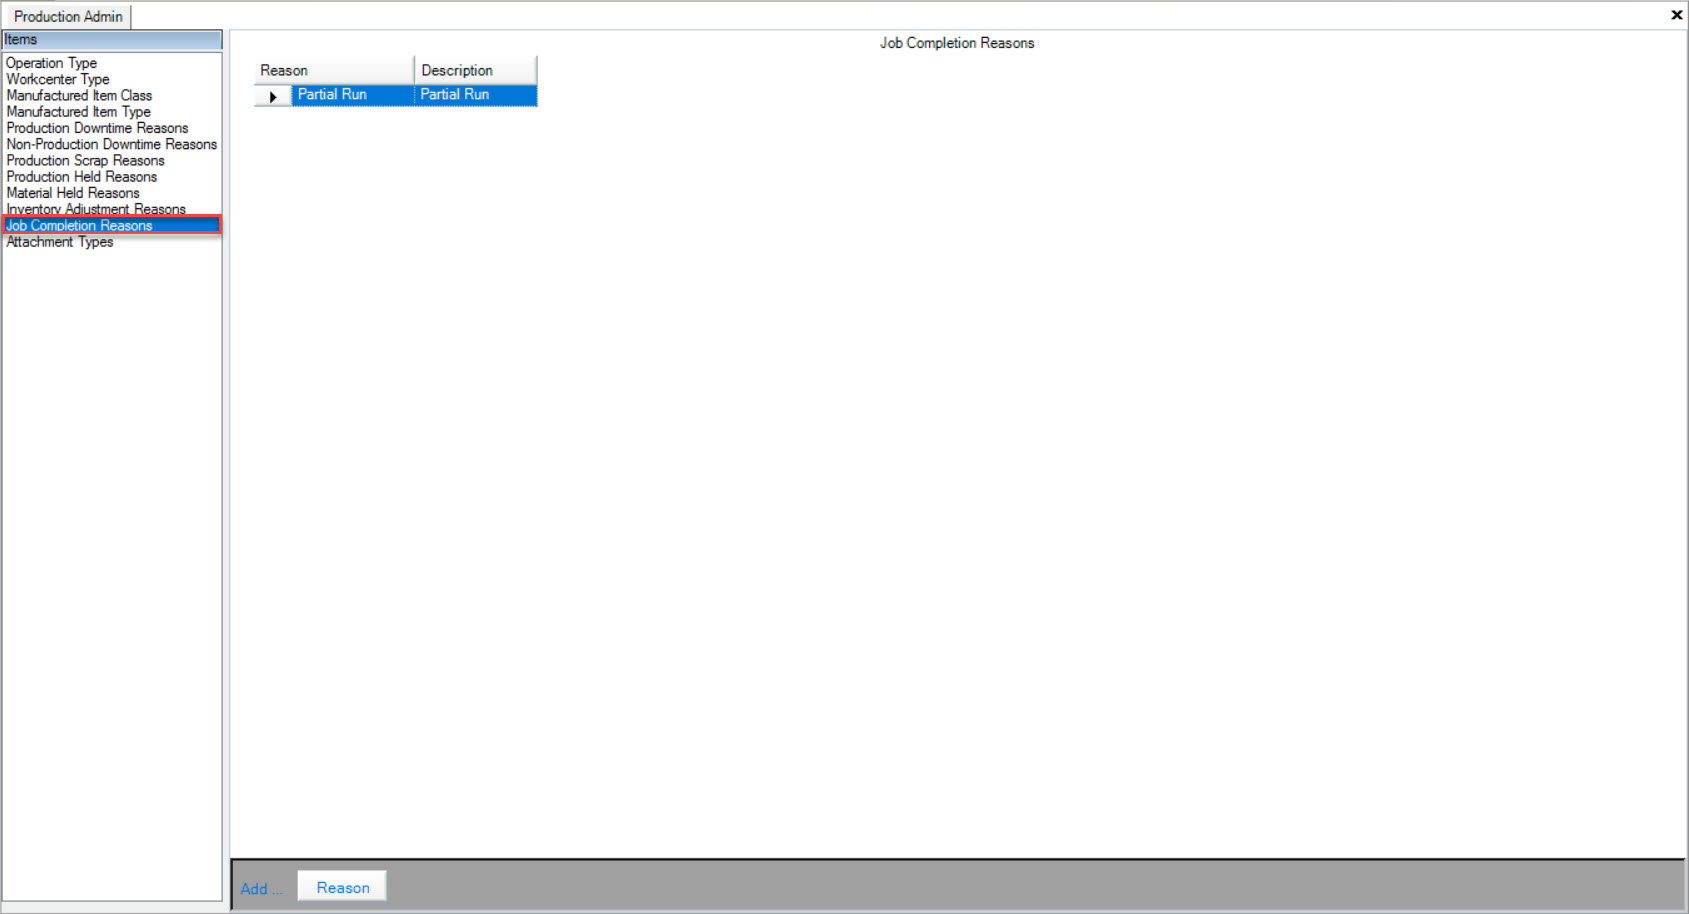
Users will be able to view the Reason and Description of all available Job Completion Reasons in the system.
Adding Job Completion Reasons
To add a Job Completion Reason, navigate to the  tab and click on the
 ![]() icon. The Production Admin screen will be displayed.
icon. The Production Admin screen will be displayed.

Make sure to select the Job Completion Reasons tab located to the left of the screen.

Click on the  button located at the bottom of the screen. A new row will appear where users can fill in the Reason and Description.
Make sure to save your changes before exiting the screen.
Editing Job Completion Reasons
To edit a Job Completion Reason, navigate to the  tab and click on the
 ![]() icon. The Production Admin screen will be displayed.
icon. The Production Admin screen will be displayed.

Make sure to select the Job Completion Reasons tab located to the left of the screen.

Locate the Job Completion Reason you wish to edit. Make the necessary changes using the appropriate textboxes.
Make sure to save your changes before exiting the screen.
Deleting Job Completion Reasons
To delete a Job Completion Reason, navigate to the  tab and click on the
 ![]() icon. The Production Admin screen will be displayed.
icon. The Production Admin screen will be displayed.

Make sure to select the Job Completion Reasons tab located to the left of the screen.

Locate the Job Completion Reason you wish to delete and highlight the appropriate row. Use your Delete key and when the system prompts you, select Yes.

The selected Job Completion Reason will be deleted. Make sure to save your changes before exiting the screen.
Viewing Attachment Types
To view Attachment Types, navigate to the  tab and click on the
 ![]() icon. The Production Admin screen will be displayed.
icon. The Production Admin screen will be displayed.

Make sure to select the Attachment Types tab located to the left of the screen.
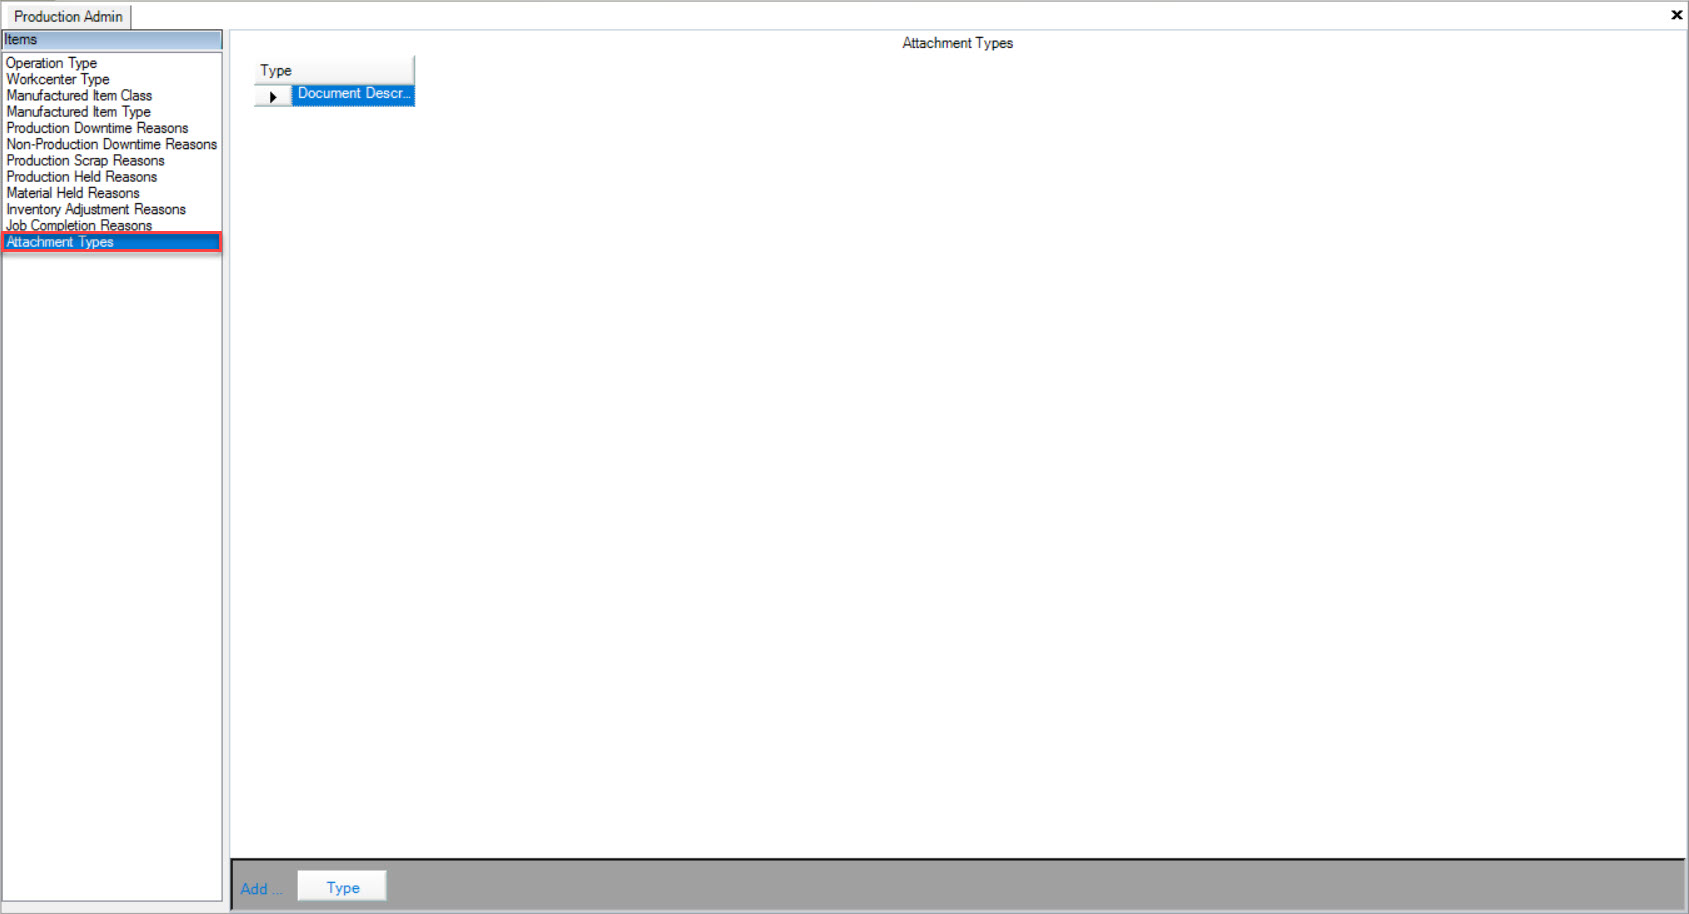
Users will be able to view the Type of all available Attachment Types in the system.
Adding Attachment Types
To add an Attachment Type, navigate to the  tab and click on the
 ![]() icon. The Production Admin screen will be displayed.
icon. The Production Admin screen will be displayed.

Make sure to select the Attachment Types tab located to the left of the screen.

Click on the  button located at the bottom of the screen. A new row will appear where users can fill in the Type.
Make sure to save your changes before exiting the screen.
Editing Attachment Types
To edit an Attachment Type, navigate to the  tab and click on the
 ![]() icon. The Production Admin screen will be displayed.
icon. The Production Admin screen will be displayed.

Make sure to select the Attachment Types tab located to the left of the screen.

Locate the Attachment Type you wish to edit. Make the necessary changes using the textbox available.
Make sure to save your changes before exiting the screen.
Deleting Attachment Types
To delete an Attachment Type, navigate to the  tab and click on the
 ![]() icon. The Production Admin screen will be displayed.
icon. The Production Admin screen will be displayed.

Make sure to select the Attachment Types tab located to the left of the screen.

Locate the Attachment Type you wish to delete and highlight the appropriate row. Use your Delete key and when the system prompts you, select Yes.

The selected Attachment Type will be deleted. Make sure to save your changes before exiting the screen.