R/M Inventory
The R/M (Raw Material) Inventory screen is used to view current Inventory Levels of a particular Purchased Item. It also displays all of the Transactions that transpired for a Purchased Item to arrive at its current Inventory quantity. A user can verify and view details for both Inventory Counts, On Hand, and On Hand Tags.
To view the R/M Inventory screen, navigate to the  tab and click on the
 ![]() icon.
This will open the R/M Inventory screen.
icon.
This will open the R/M Inventory screen.
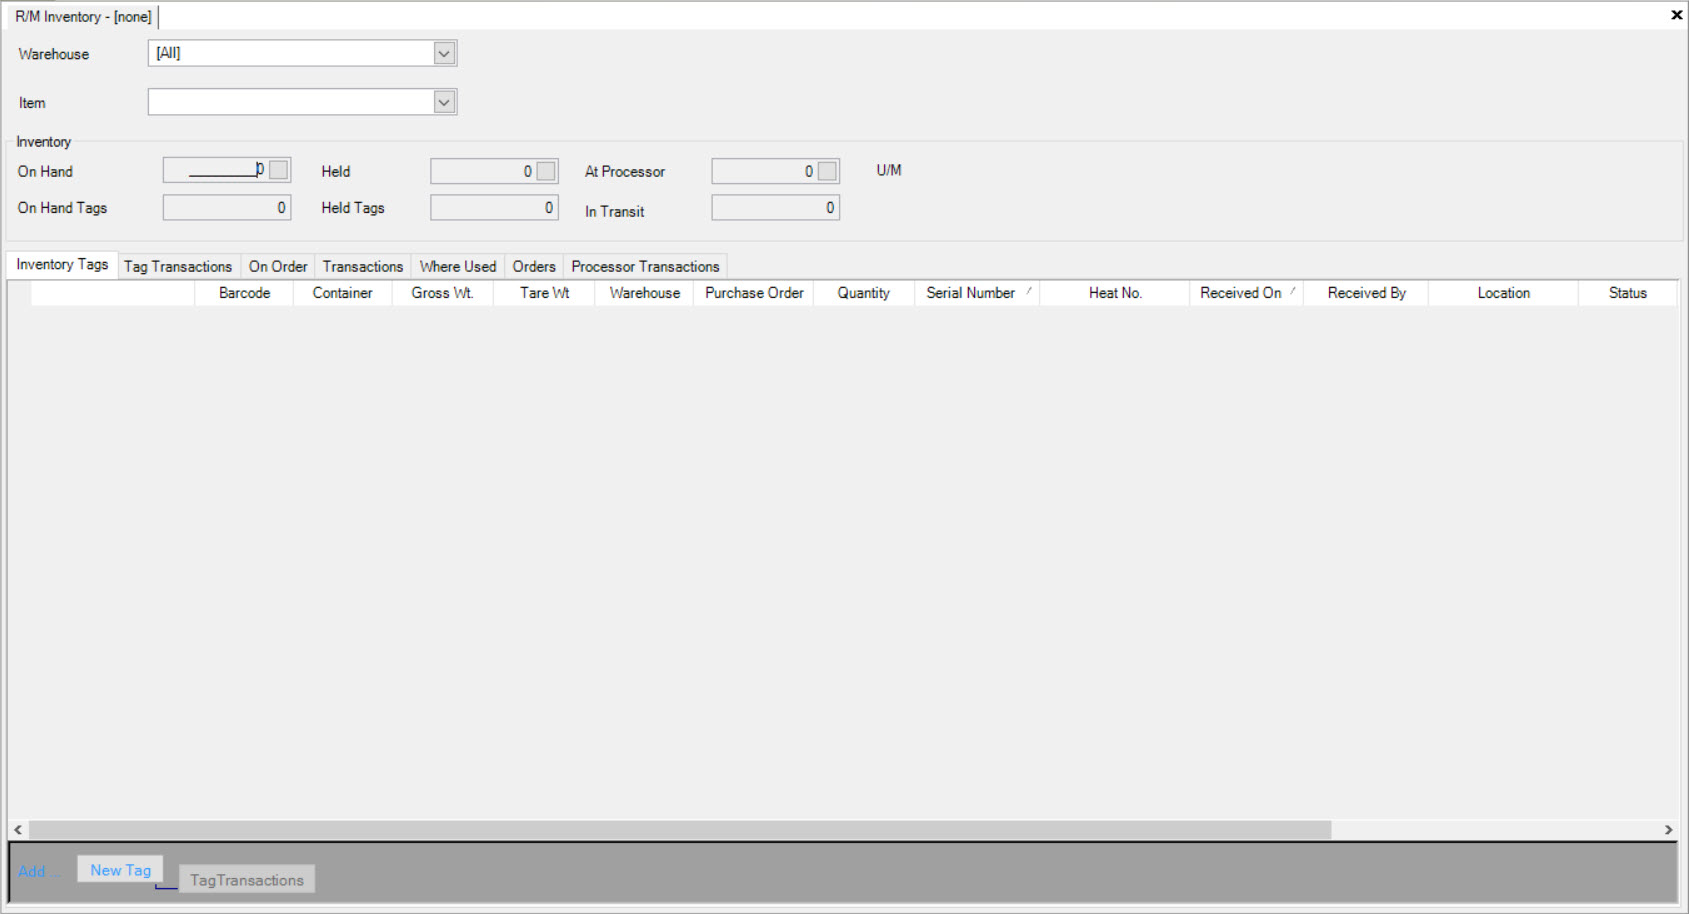
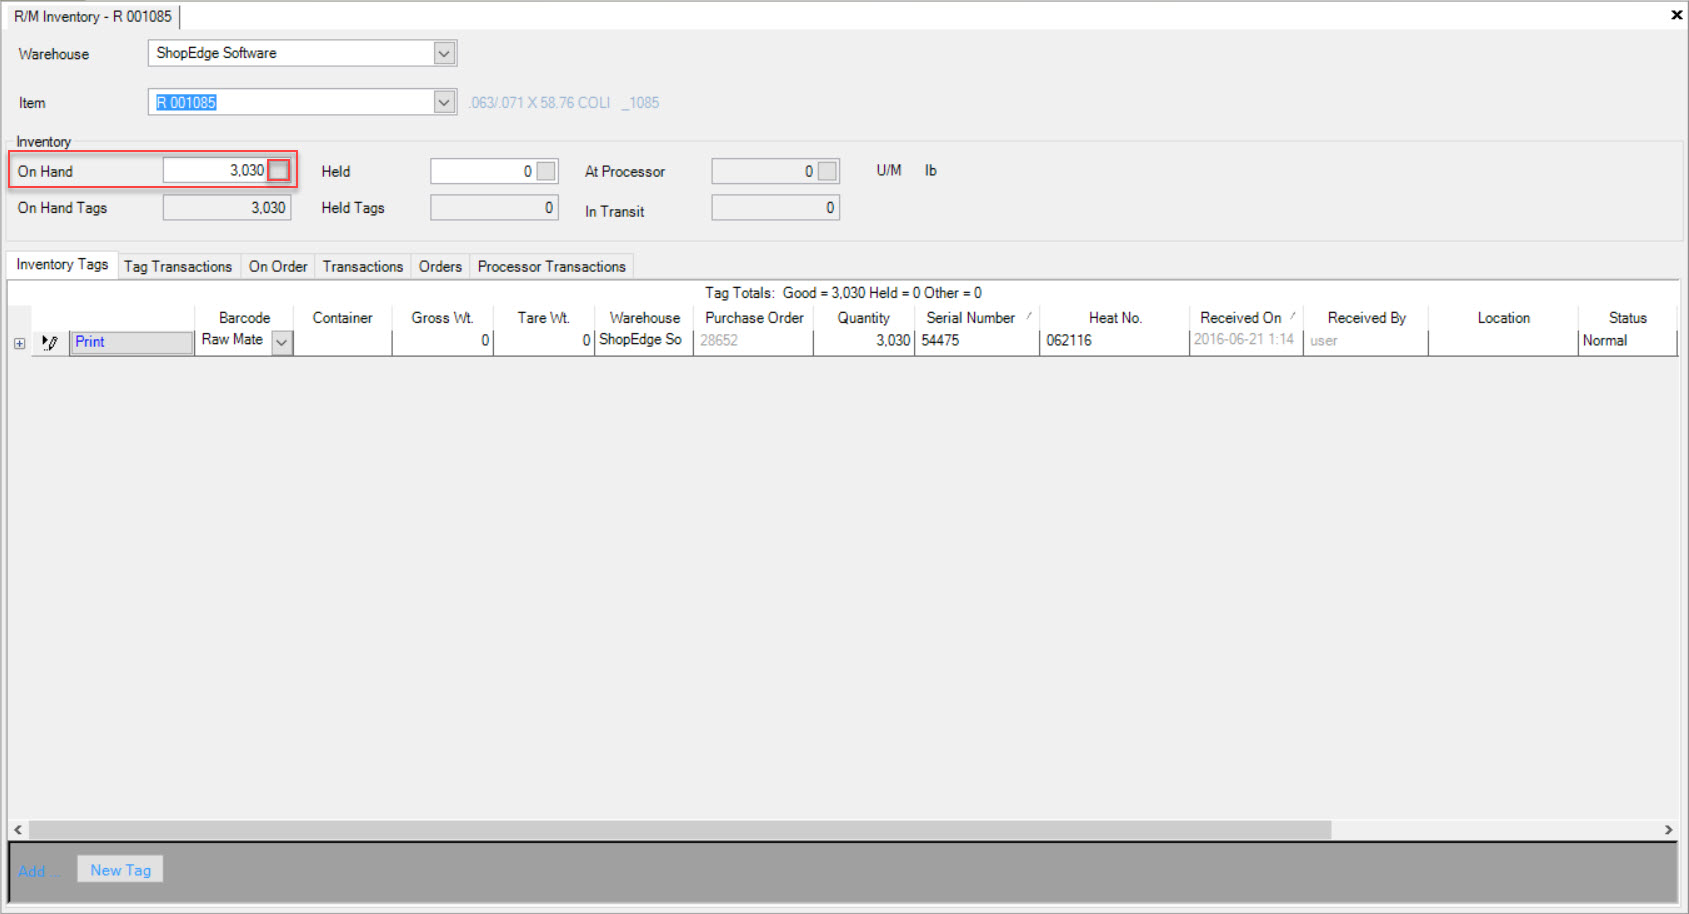
To find the Item you wish to view, select the Warehouse and Item using the drop-down menus. The system will then populate the Inventory Counts (if they exist).
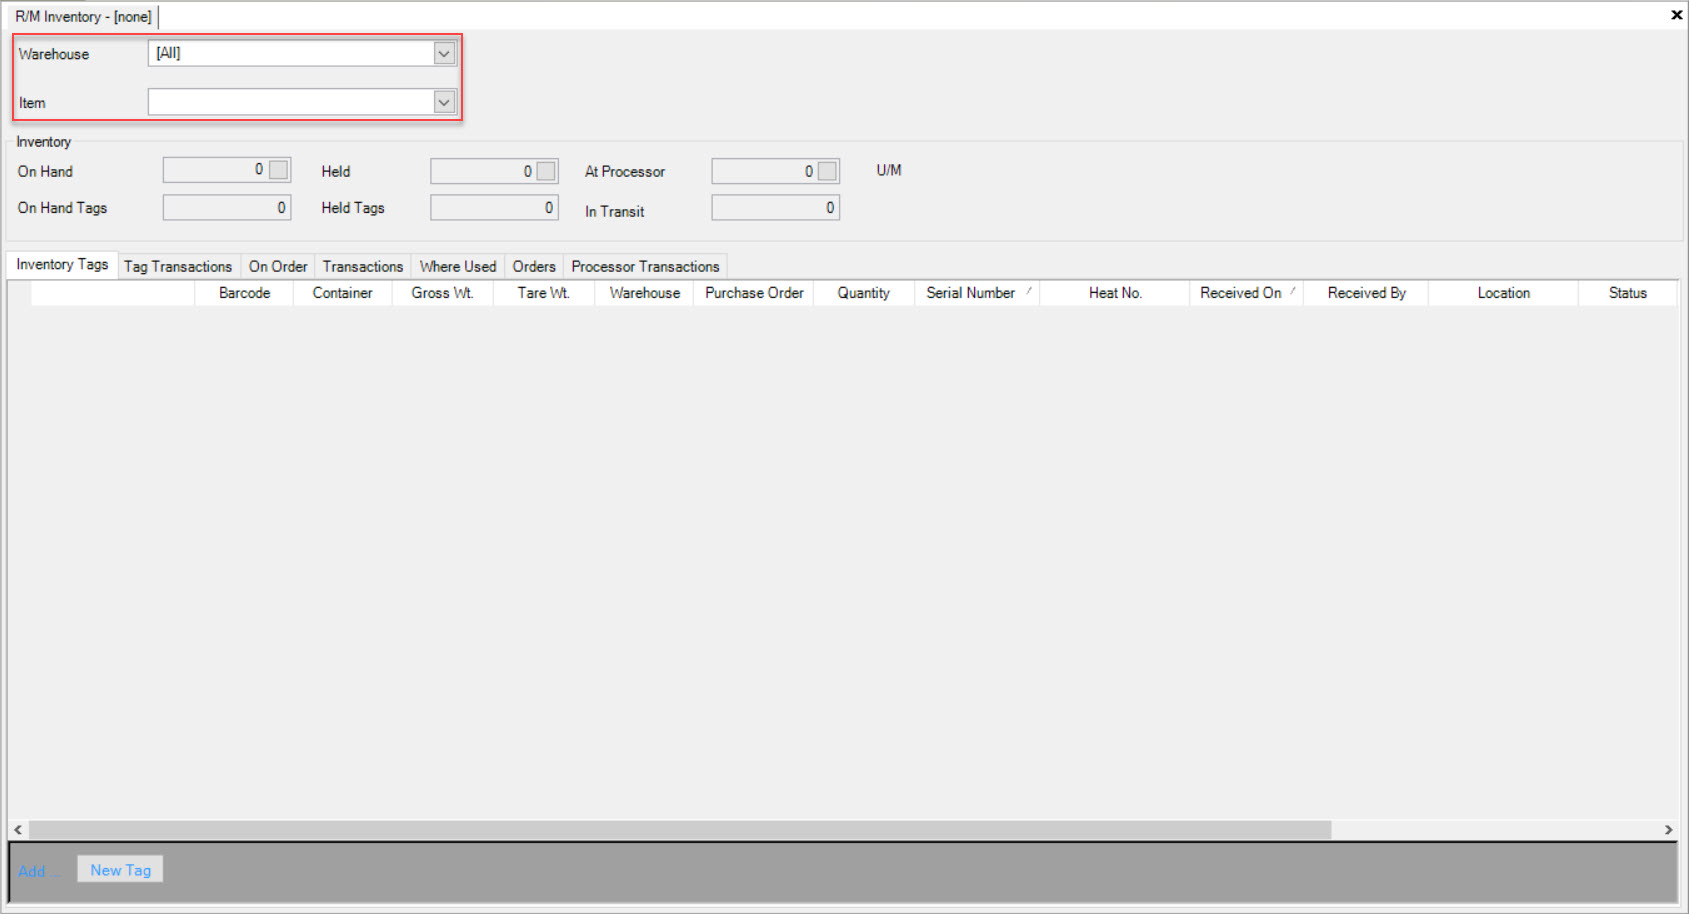
There are two ways the system can populate the Inventory Counts for the selected Item.
- If the
 box is selected on the Purchased Item screen, then the system will populate both of the Inventory Counts and all available tabs on the R/M Inventory screen.
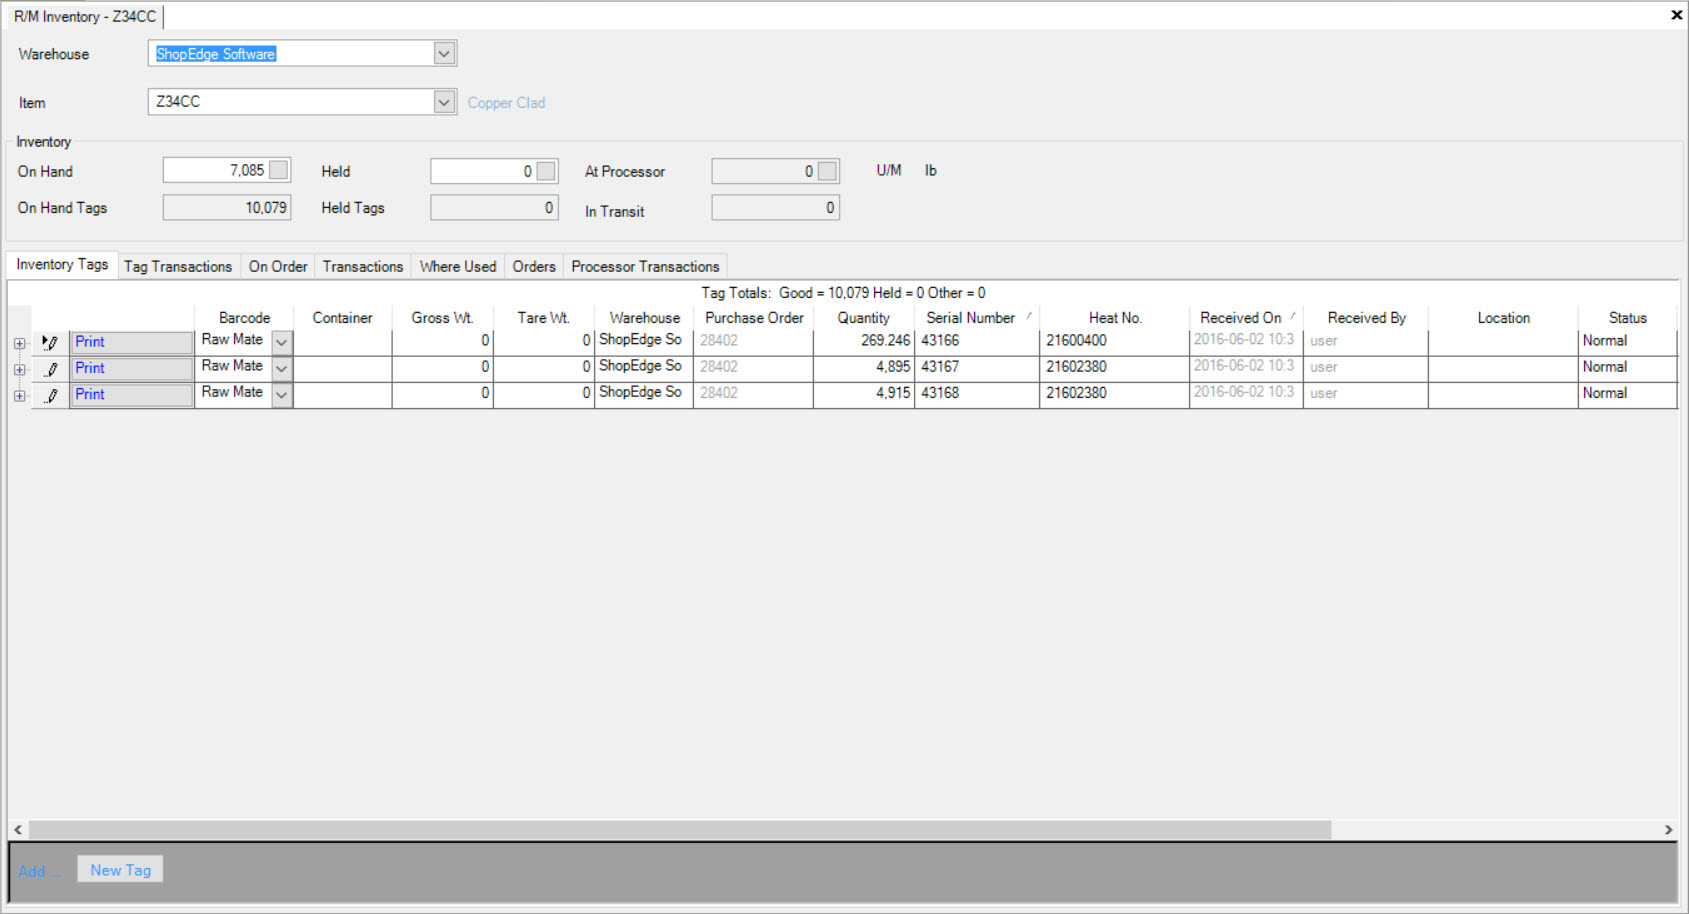
- If the
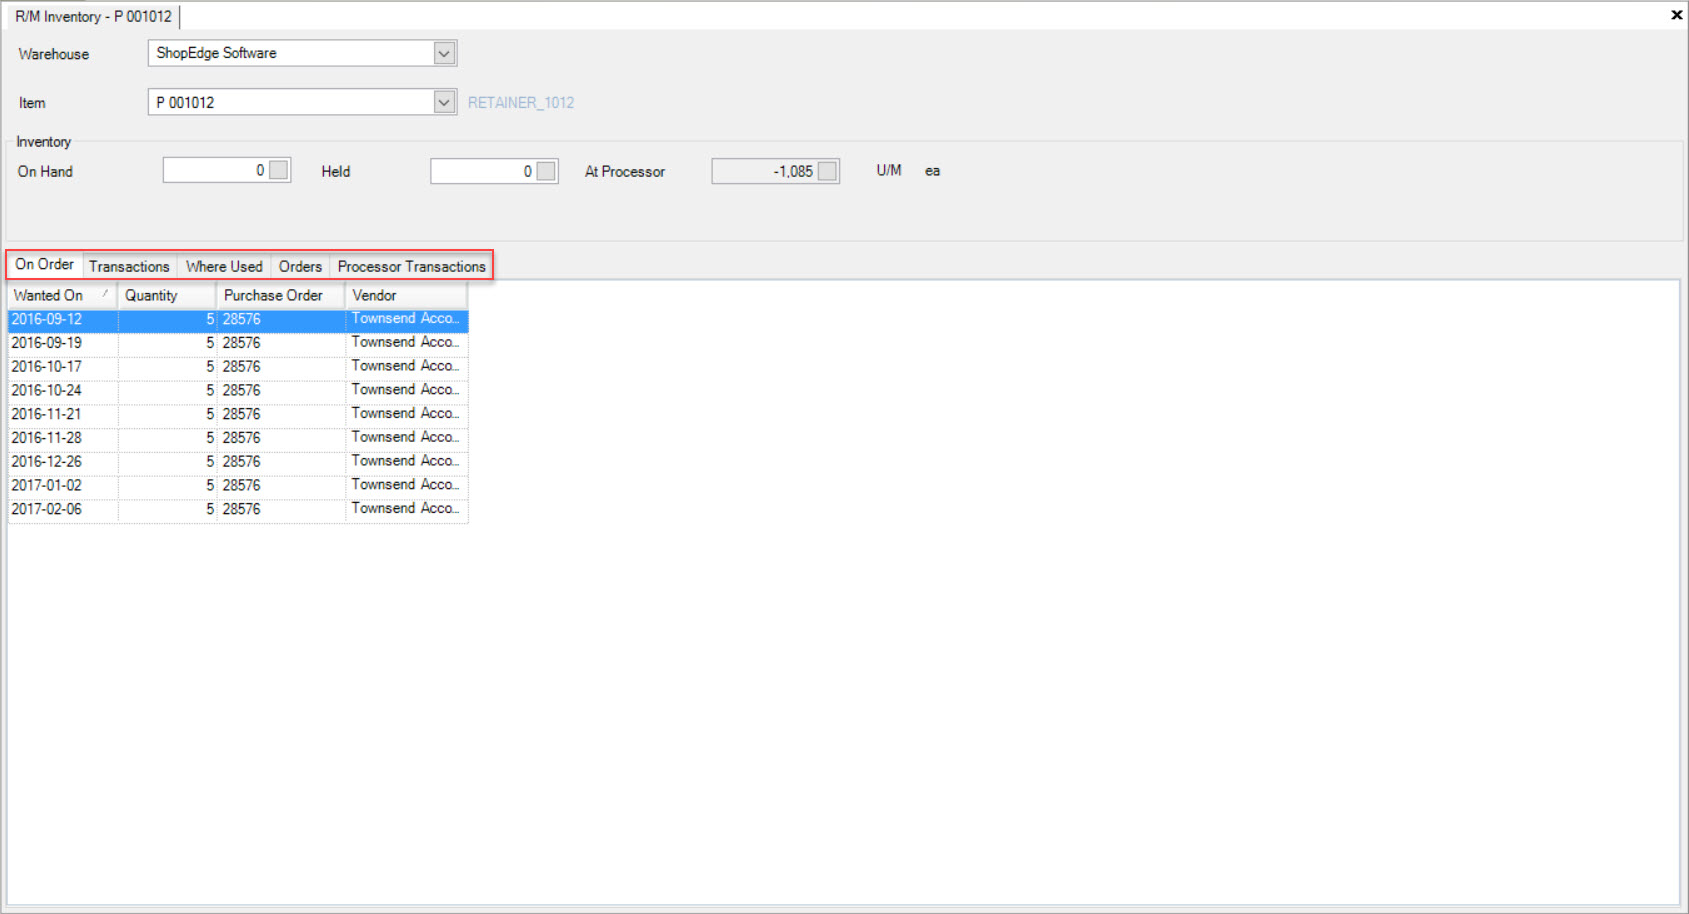
 box is not selected on the Purchased Item screen, then the system will populate the On Hand Inventory Counts but not the tabs related to Tag Inventory.
Inventory Adjustments
Users have the ability to adjust Inventory quantities on the R/M Inventory screen. To do so, make sure a Warehouse and Item are selected using the available drop-down menus.
On Hand Inventory Adjustments
To adjust an On Hand Inventory Quantity, click on the  button located in the On Hand Quantity textbox.
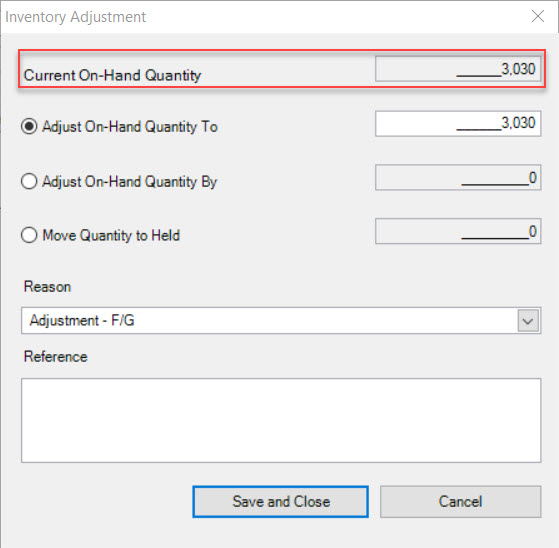
The Inventory Adjustment window will appear displaying the Current On Hand Quantity.
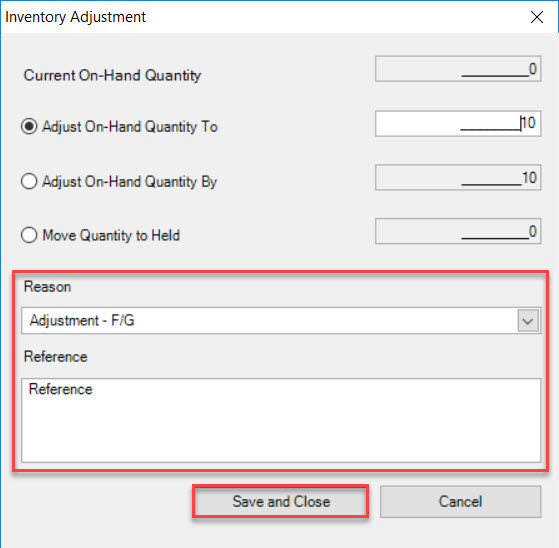
Users can adjust the On Hand Inventory Quantity by entering in an appropriate Quantity in the  textbox.
You will notice that the Quantity in the  textbox will adjust accordingly.
Once the On Hand Quantity has been adjusted, users must select a Reason using the available drop-down menu and enter in a Reference in the textbox. Then, click on the  button.
The R/M Inventory screen for the selected Item will be updated.
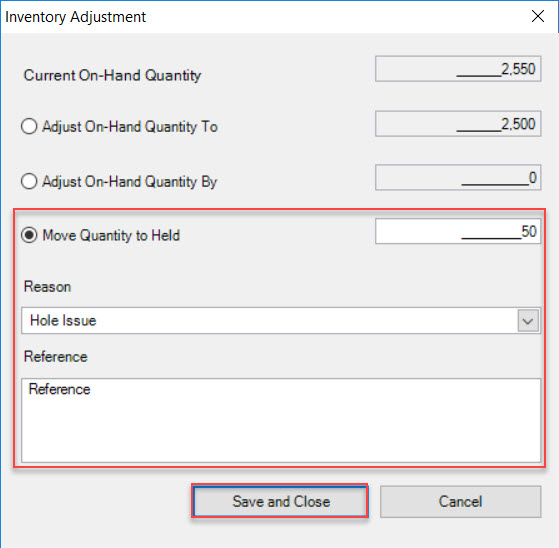
If users wish to change the  Quantity for the On Hand Inventory Quantity, simply click on the
  button located in the
On Hand Quantity textbox.

Enter in the appropriate Quantity, select a Reason, and enter in a Reference. Then, click on the  button.
The R/M Inventory screen for the selected Item will be updated.
Held Inventory Adjustments
To adjust Held Inventory Quantities, click on the  button located in the Held Quantity textbox.
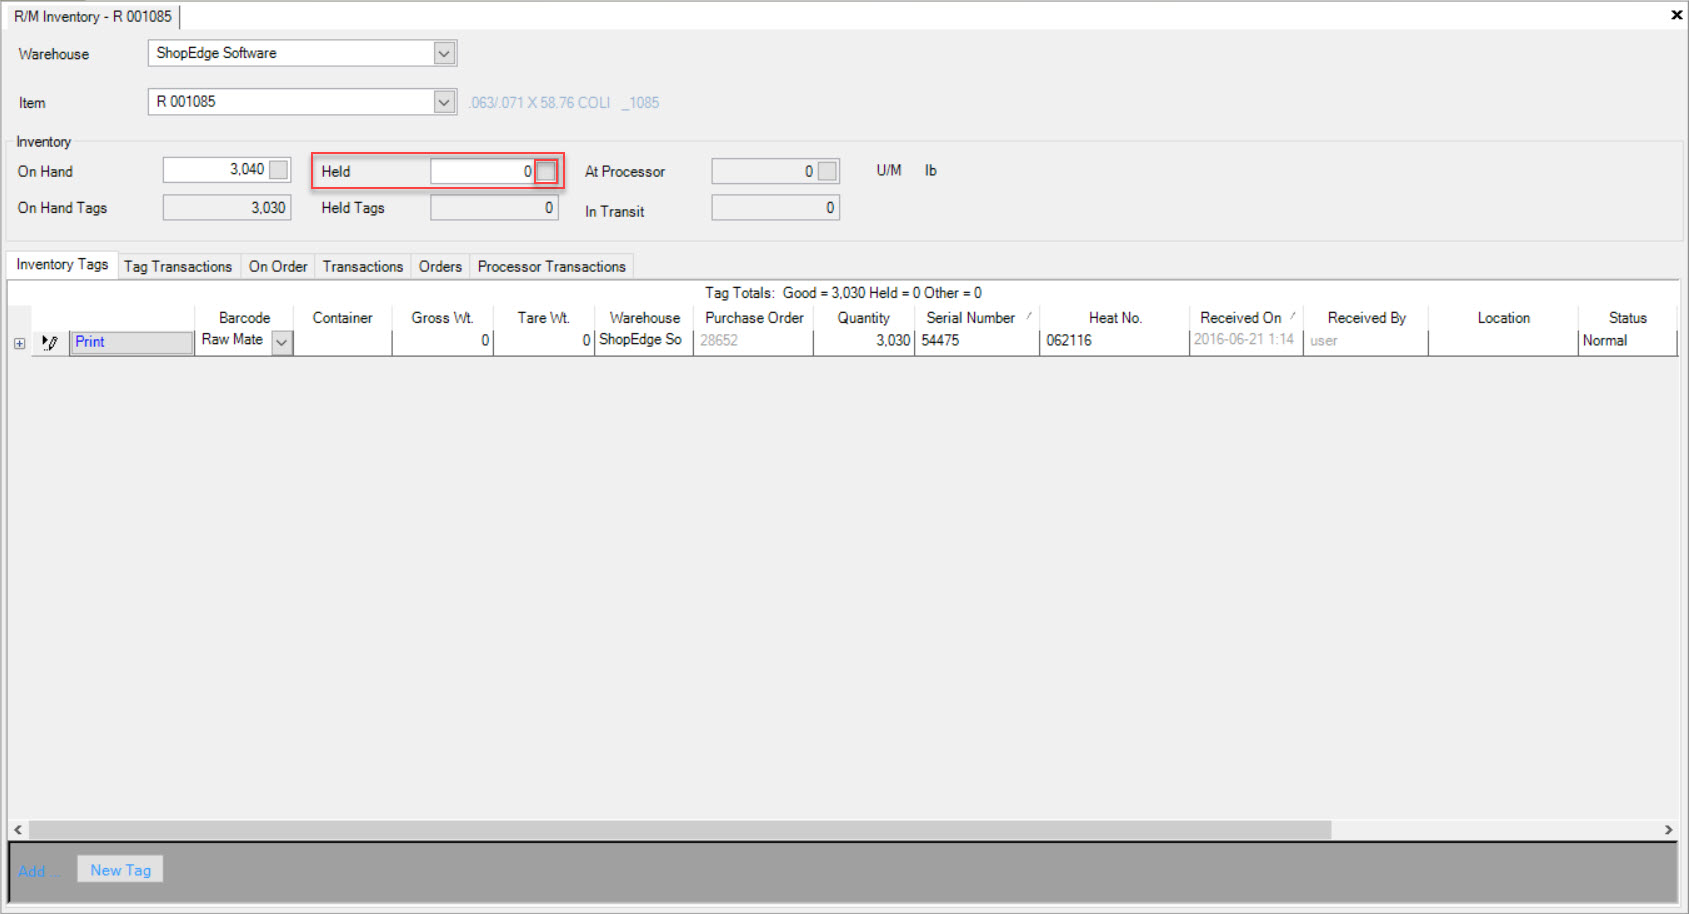
The Inventory Adjustment window will appear displaying the Item and Current Quantity Held amount.
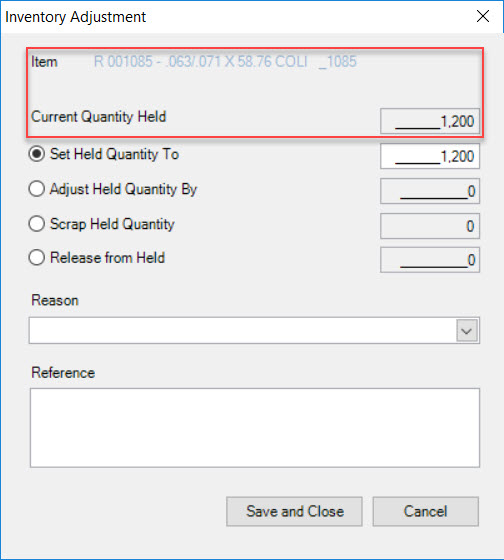
Adjust the Held Quantity by entering in an appropriate Quantity in the  textbox.
You will notice that the  Quantity will adjust accordingly. Select a Reason and enter in a Reference. Then, click on the
  button.
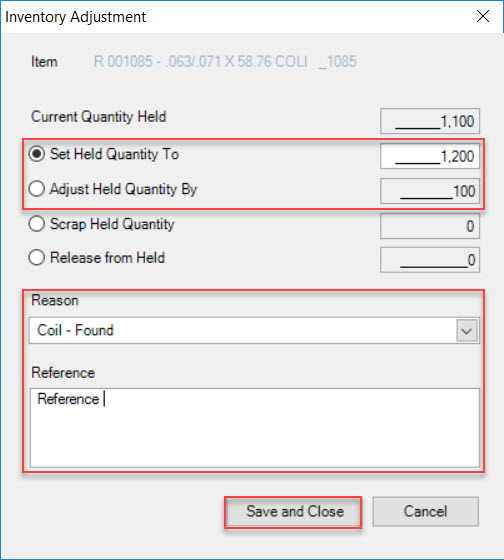
The R/M Inventory screen for the selected Item will be updated.
If users wish to adjust the  Quantity, simply click on the
  button located in the
Held Quantity textbox.

Adjust the Scrap Held Quantity, select a Reason, and enter in a Reference. Then, click on the  button.
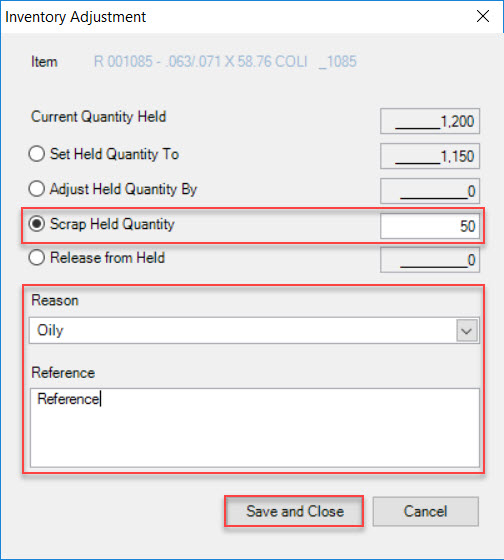
The R/M Inventory screen for the selected Item will be updated.
If users wish to adjust the  Quantity, simply click on the
  button located in the
Held Quantity textbox.

Adjust the Release from Held Quantity, select a Reason, and enter in a Reference. Then, click on the  button.
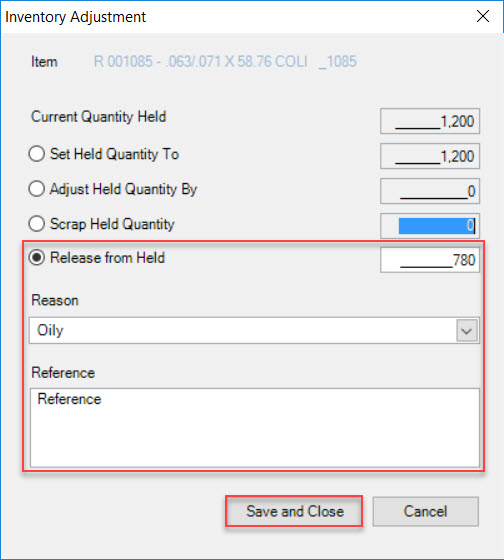
The R/M Inventory screen for the selected Item will be updated.
At Processor Adjustments
To adjust At Processor Inventory, click on the  button located in the At Processor textbox.
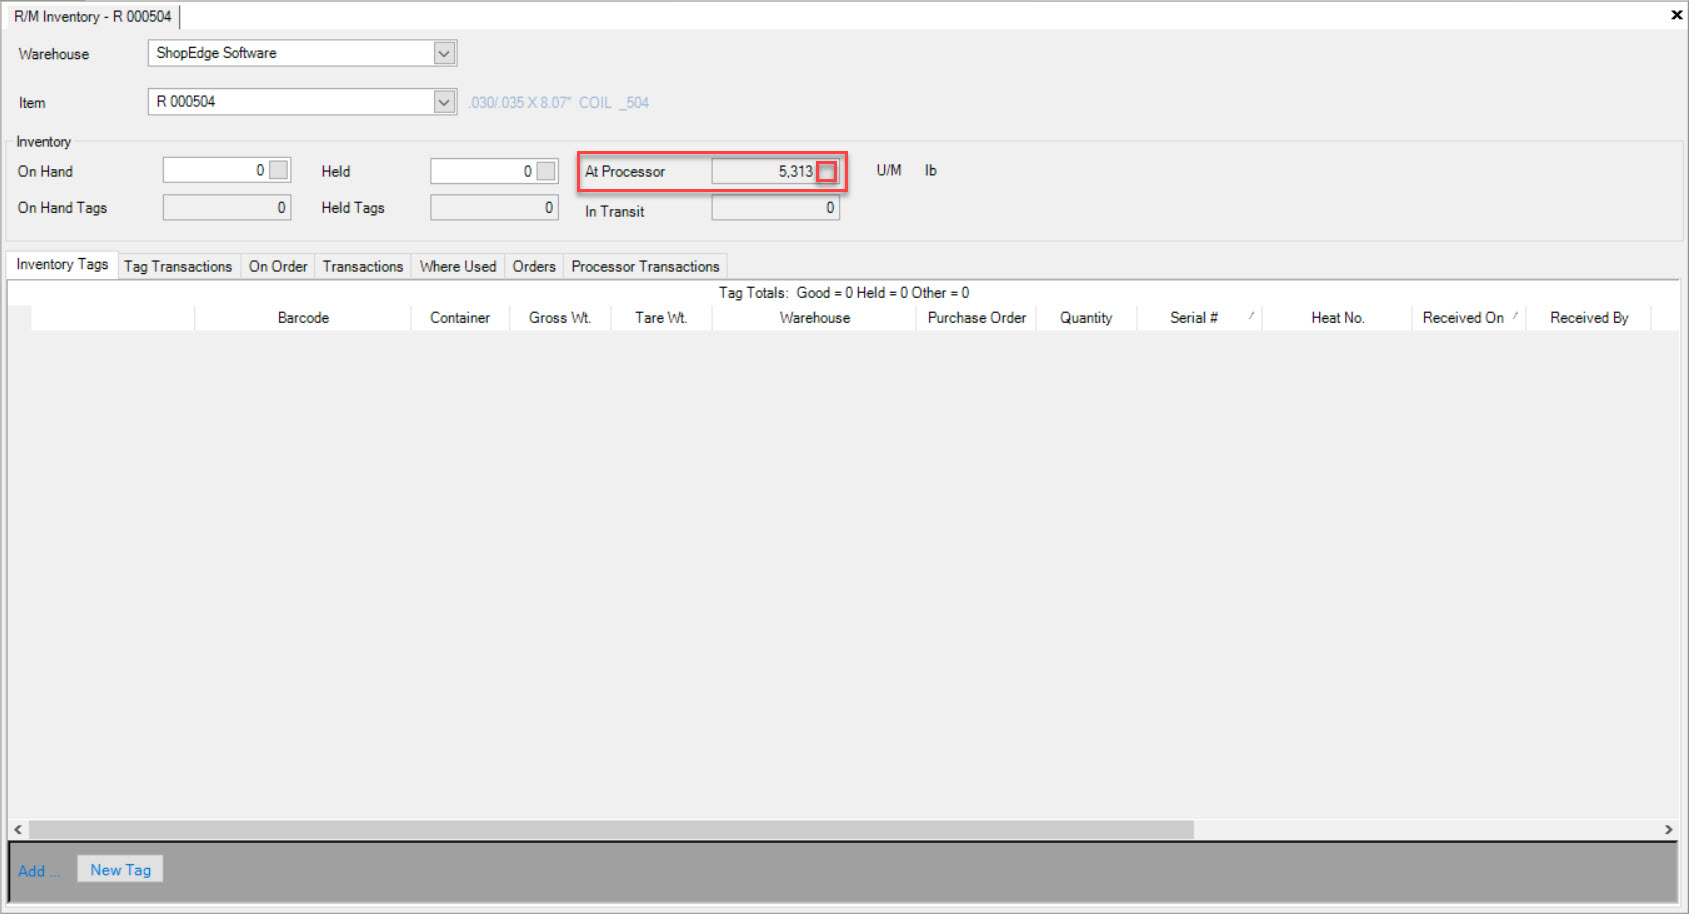
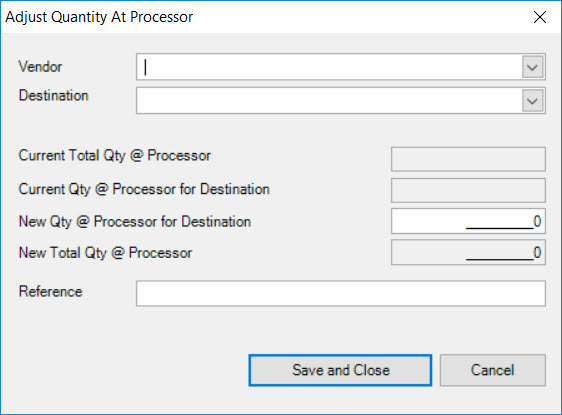
The Adjust Quantity at Processor window will appear.
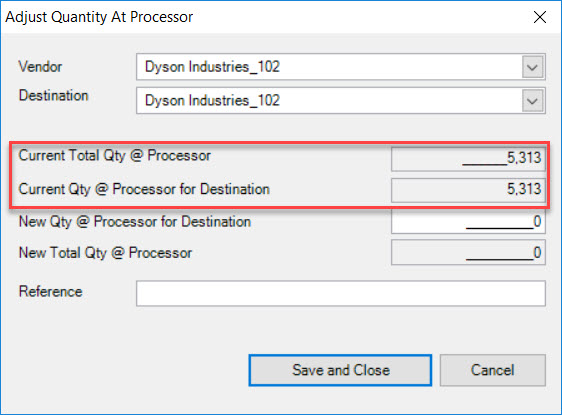
Users must select or enter in a Vendor and Destination. Once a Vendor has been selected, the Current Total Qty. @ Processor and Current Qty. @ Processor for Destination will automatically populate.
To adjust the New Qty. @ Processor for Destination, simply enter in a quantity in the textbox. The New Total Qty. @ Processor will adjust accordingly to match the New Qty. @ Processor for
Destination. Users must enter in a Reference and then click on the  button.
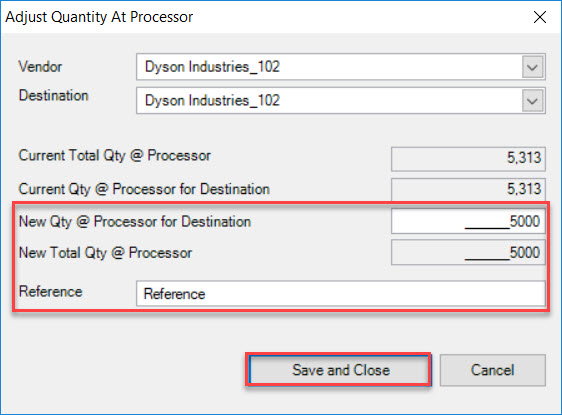
The R/M Inventory screen for the selected Item will be updated.
On Hand Inventory Tags Adjustments
To adjust an On Hand Inventory Tag Quantity, make sure to select the  tab.
tab.
Locate the Tag you wish to adjust the On Hand Quantity for.
Next, click in the textbox of the appropriate Tag row under the Quantity column. Enter in the adjusted Quantity and click out of the row.
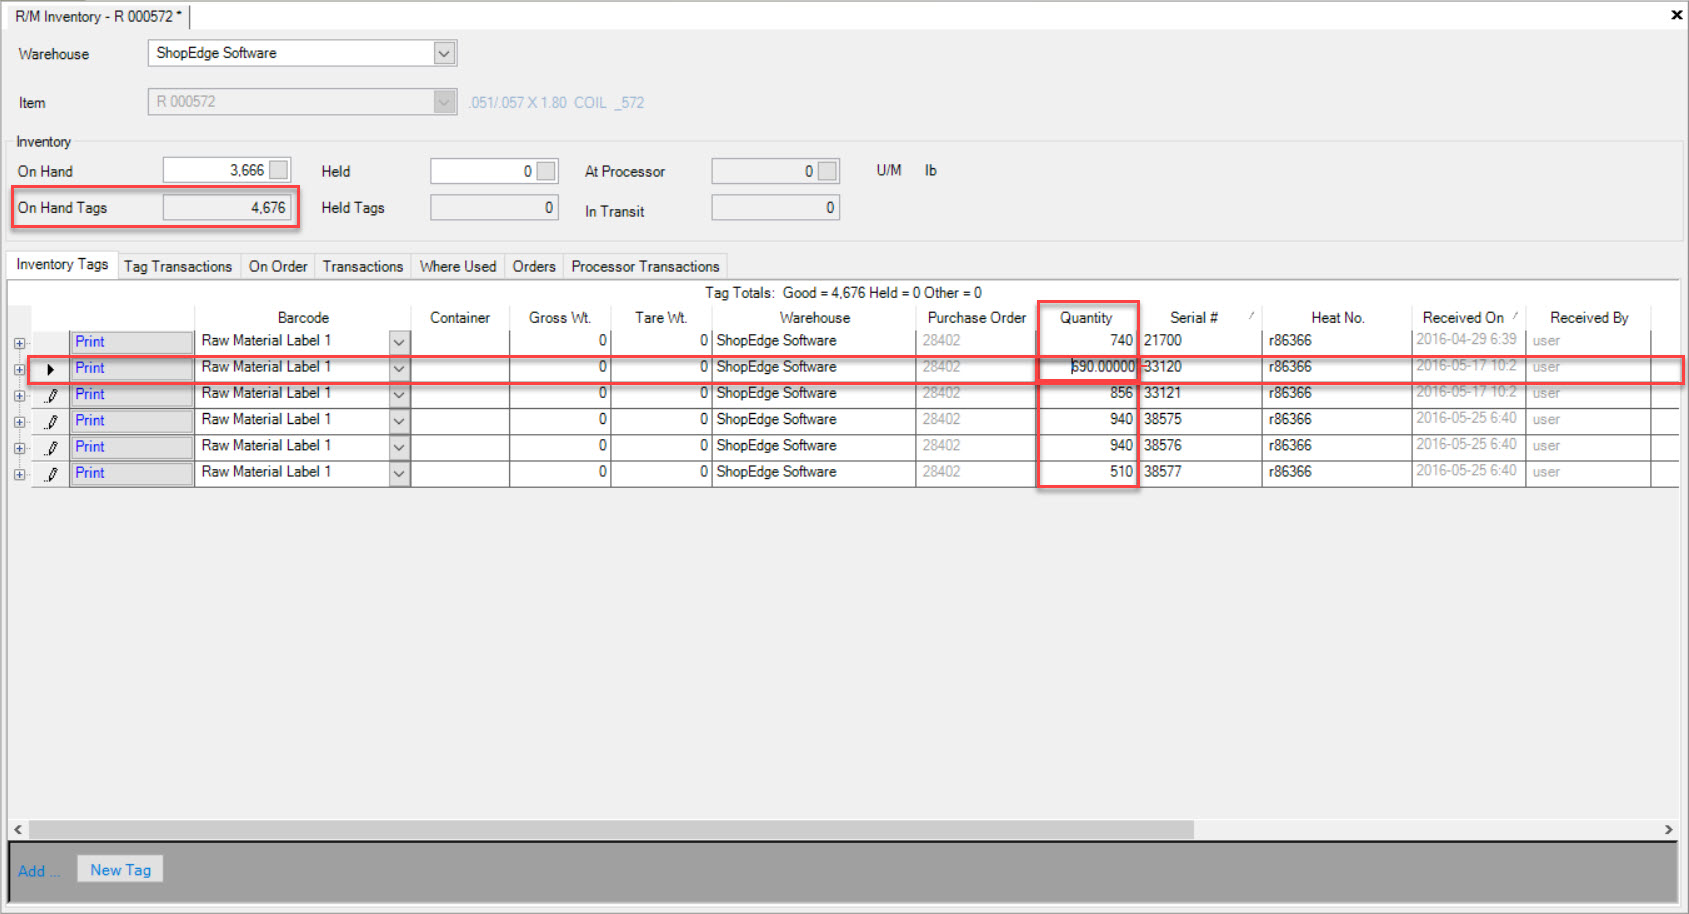
The Inventory Adjustment window will appear where users must select a Reason and enter in a Reference. Then, click on the  button.

The On Hand Tags Inventory will be adjusted accordingly.
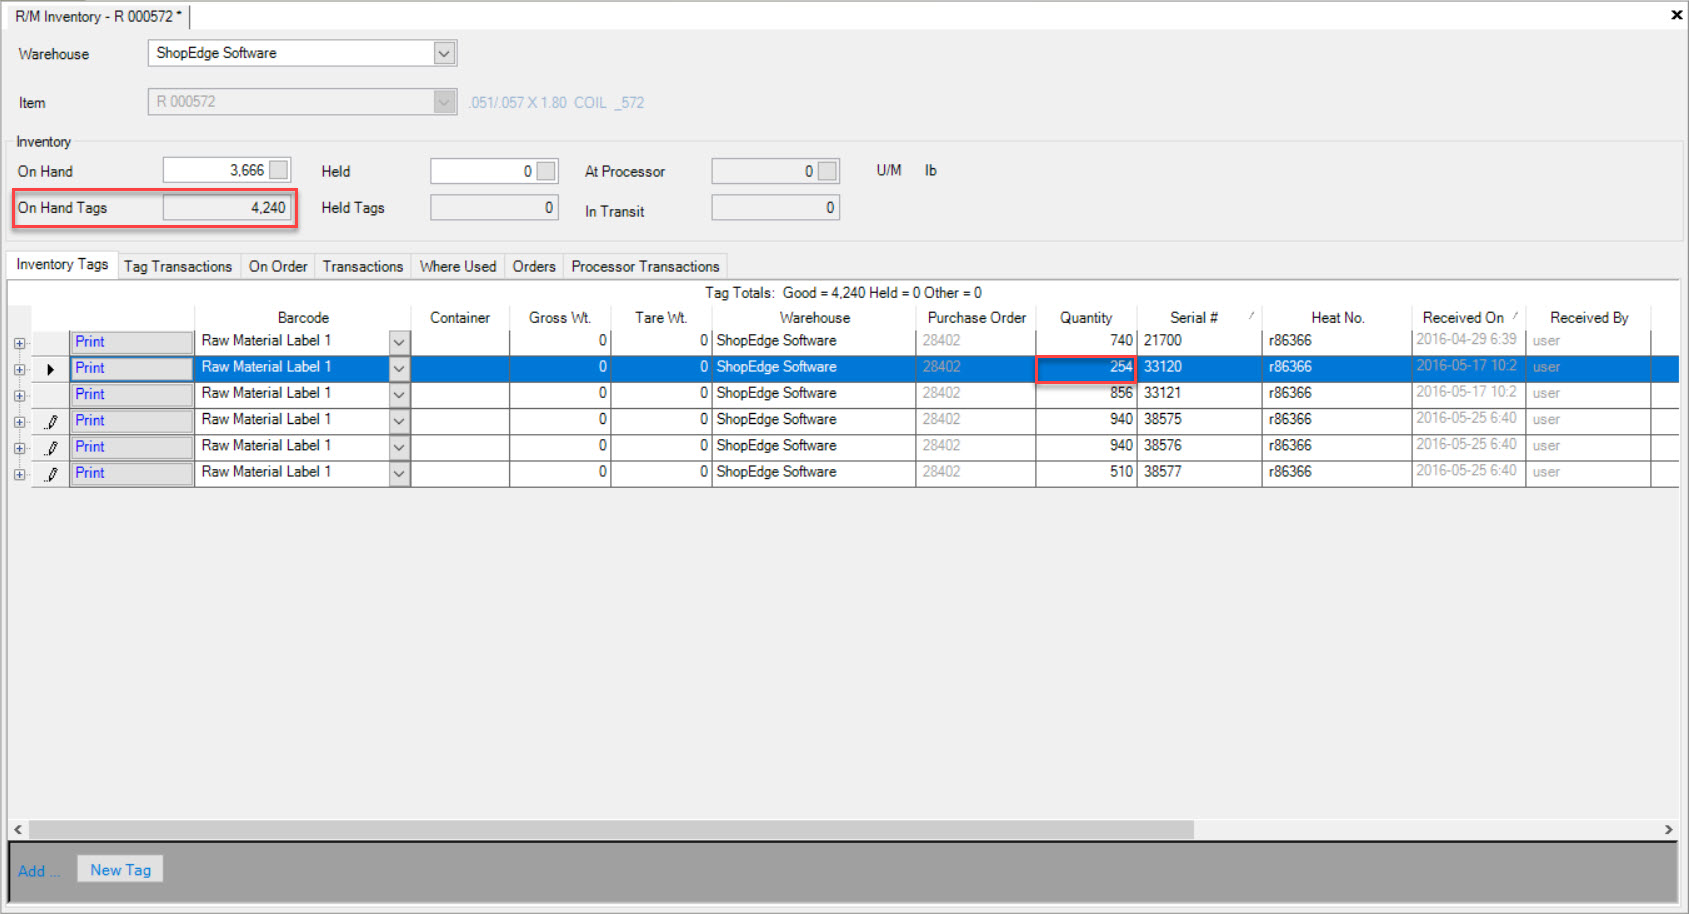
Make sure to save your changes before exiting the screen.
Adding a New Tag
To add a new Inventory Tag, click on the  button located at the bottom of the R/M Inventory screen when the Inventory Tags tab is selected.
The Lookup Dialogue window will appear where users can select the appropriate Tag by highlighting the row. Then, click on the  button.
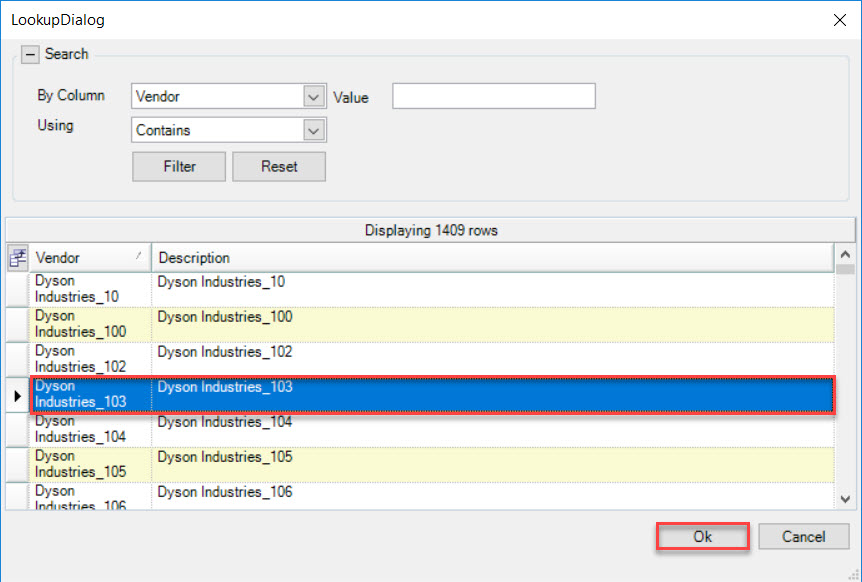
Once the necessary information is completed, make sure to save your changes before exiting the screen.
Deleting a Tag
To delete an Inventory Tag, simply highlight the row of the appropriate Inventory Tag you wish to delete. Use your Delete key.
The Inventory Adjustment window will appear where users must select a Reason and Reference. Then, click on the  button.
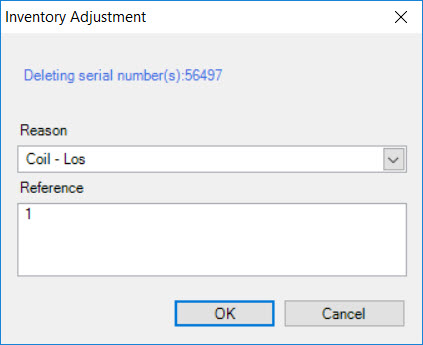
The selected Tag will be deleted.
Make sure to save your changes before exiting the screen.
Moving a Tag to Held
Users have the ability to move a Tag to Held Inventory. To do so, make sure to select the  tab.
tab.
Locate the Tag you wish to move to Held and click in the textbox under the Status column.

Use the available drop-down menu and select the Held option. Then, select a Reason from the Reason column using the available drop-down menu.
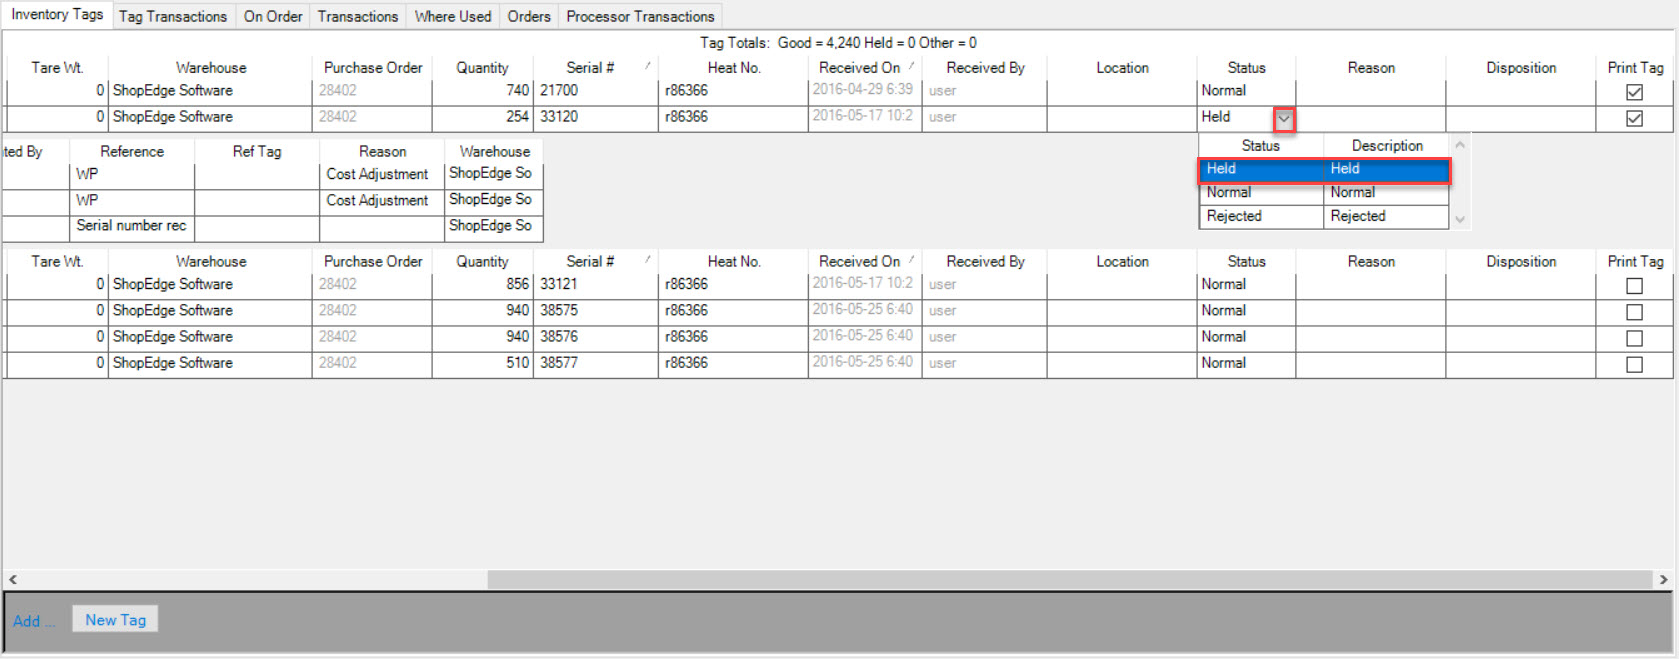
The Held Tags Inventory header textbox will adjust accordingly.
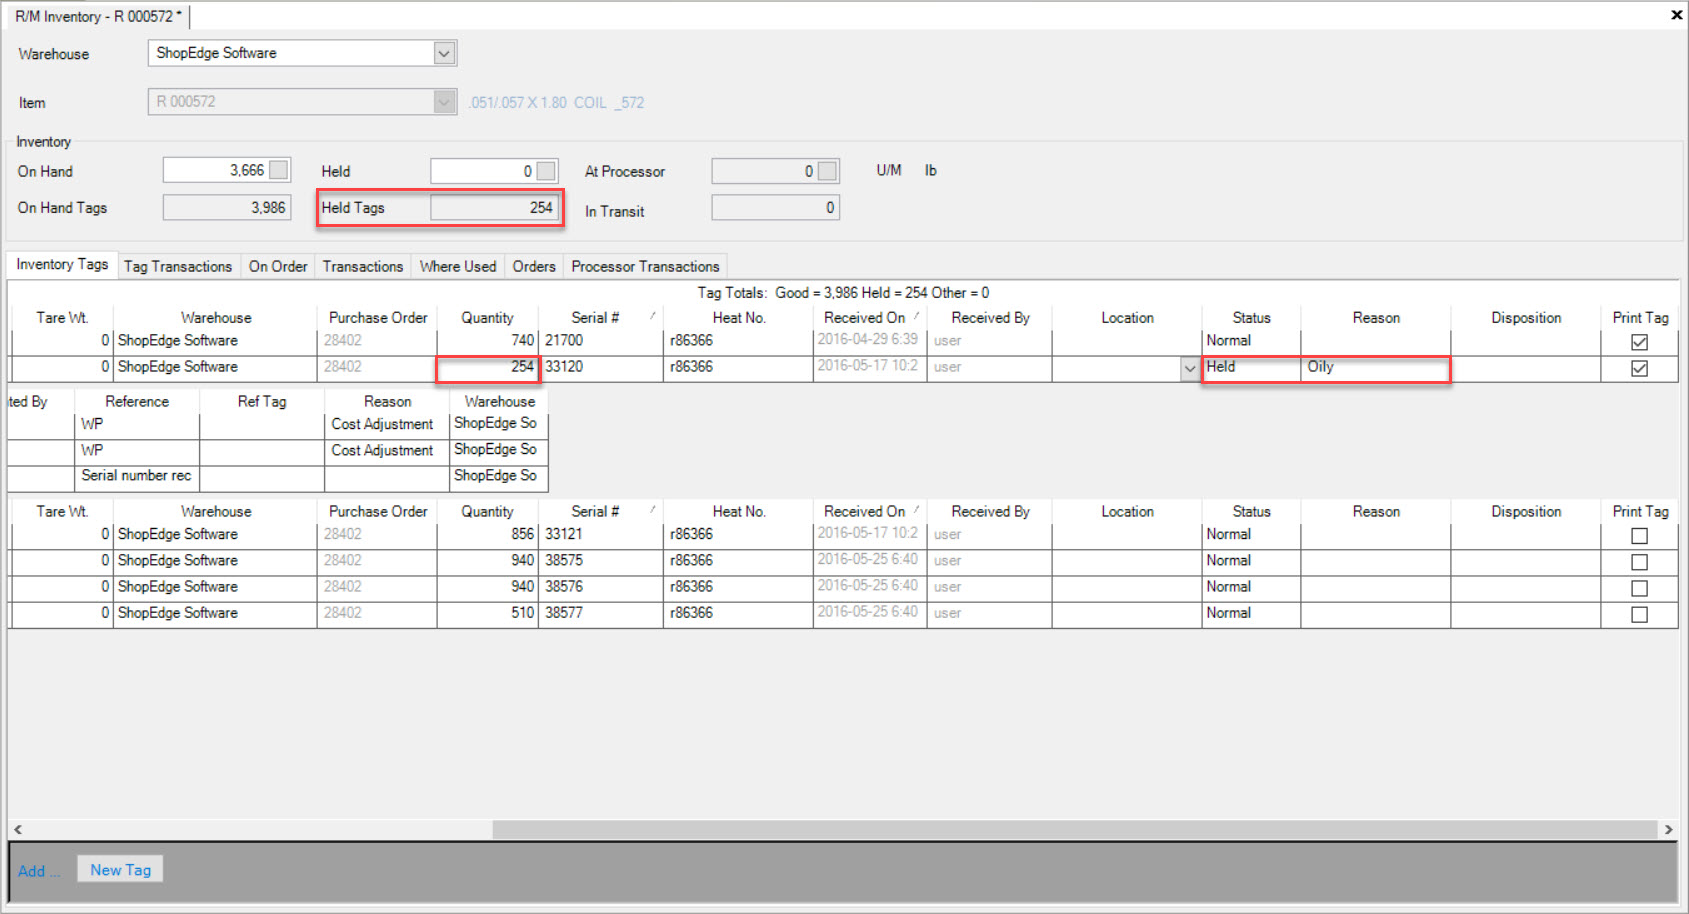
Make sure to save your changes before exiting the screen.
Inventory Tags Tab
To view Inventory Tags on the R/M Inventory screen, make sure to select the  tab.
tab.
The Inventory Tags tab is useful for viewing all On Hand Inventory Tags, and detailed information about each Tag such as the Barcode, Container, Gross Wt., Tare Wt., Warehouse, Purchase order, Quantity, Serial Number, Heat No., Received On date, Received By date, Location, Status, Reason, Description, and whether or not the Tag can be printed.

These fields can be edited except for the Purchased Order, Received On Date, and Received By. To edit the fields, simply click in the appropriate textbox or use the available drop-down menus to make the appropriate changes.
Make sure to save your changes before exiting the screen.
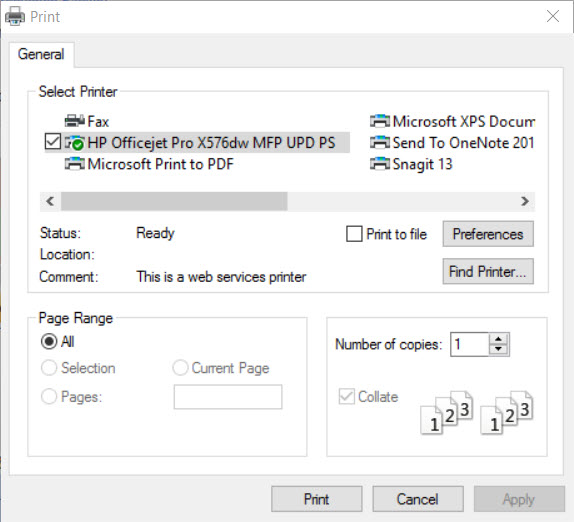
Users also have the ability to Print Inventory Tags from the Inventory Tags tab. To do so, simply click on the  button for the one you wish to Print.
A Print window will appear where users can select the correct Printer and Printer Settings. Then, click on the  button to Print the selected Inventory Tag.
Users can also expand Inventory Tags when there is a plus sign available located to the left of the rows. The details displayed when an Inventory Tag is expanded include the Transaction Date, Tag Quantity, Trx Type, Trx Quantity, Created By, Reference, Reference Tag, Reason, and the Warehouse.
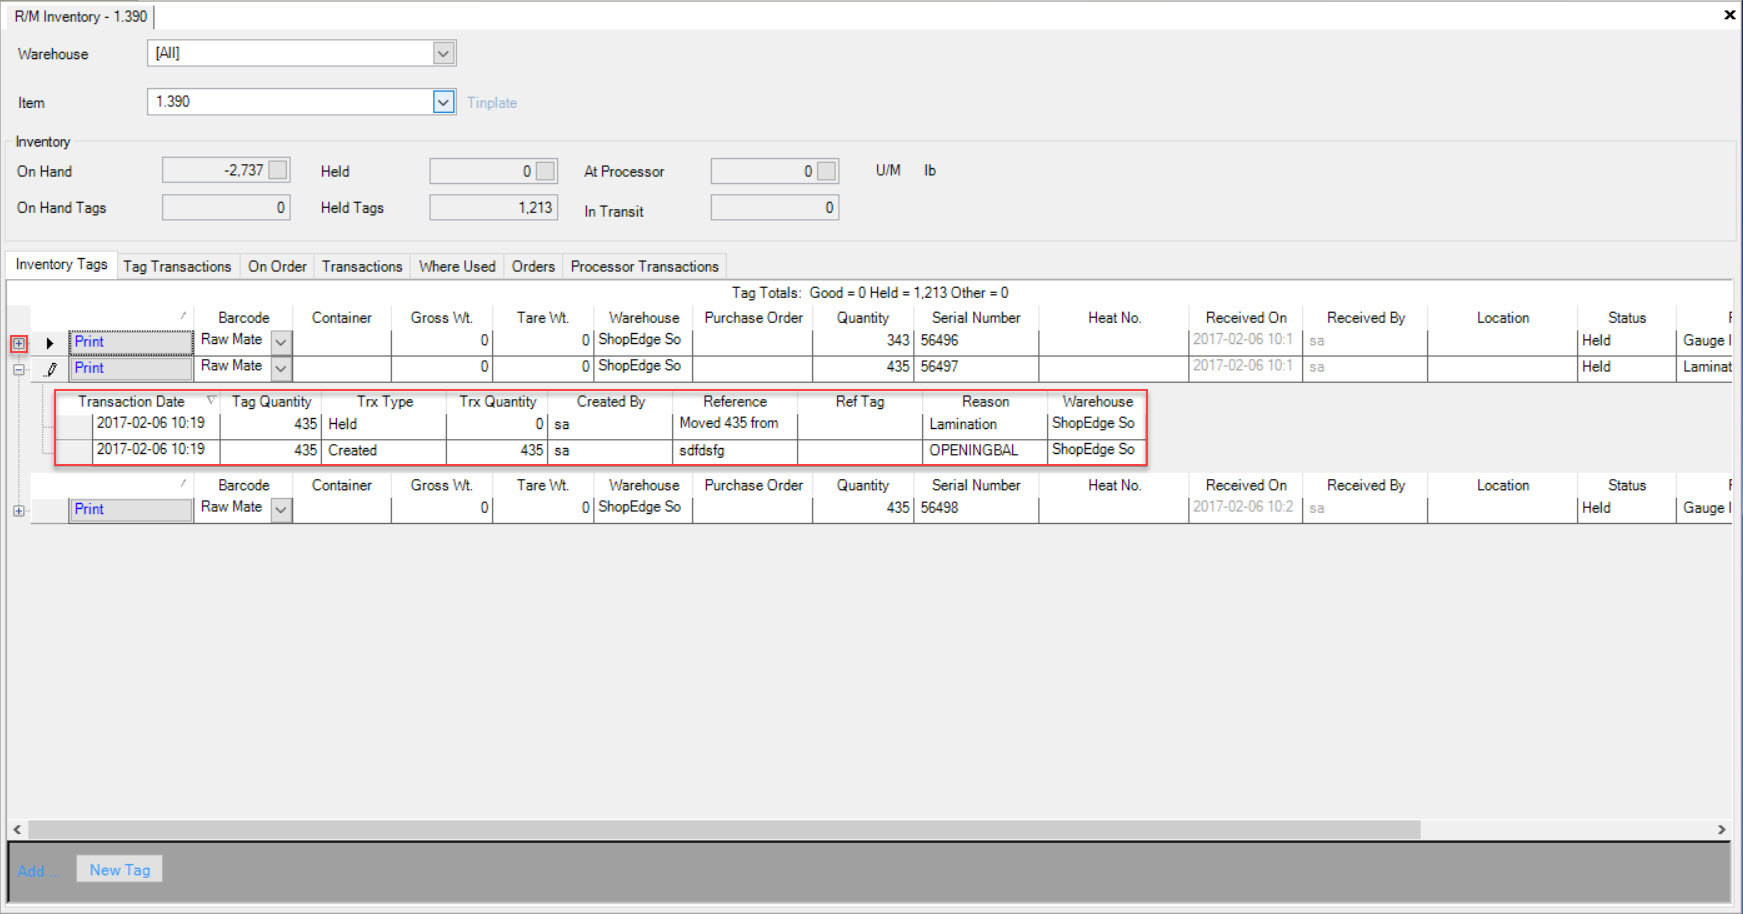
There are additional options if you right-click on a Tag row. These options include:
- Open Inventory...: allows users to move the current Serial Number Inventory quantity to another Purchased Item in the system.
- View Details...: will open the Purchased Item Tag detail screen where users can change the Tag Status, delete the Tag, and view Tag Transactions.
- Go to Heat...: will open the Heat detail screen if there is a Heat associated with the Serial Number.
- Go to Material Spec...: will open the Material Spec detail screen if there is one associated with the Purchased Item.
Note
Please see the Production Inventory > On Hand Tags Inventory Adjustments section on how to add and delete Tags.
Tag Transactions Tab
To view Tag Transactions on the R/M Inventory screen, make sure to select the  tab.
tab.
The Tag Transactions tab is useful in viewing all Tag Transactions that have been scanned. Details include the Serial Number, Heat Number, Tag Quantity, Trx Quantity, Net On Hand, Net Held, Net In-Transit, Total Net On Hand, Told Net Held, Total New In-Transit, Created On date, Created By, Reference, Reason, Warehouse, and Trx Type.
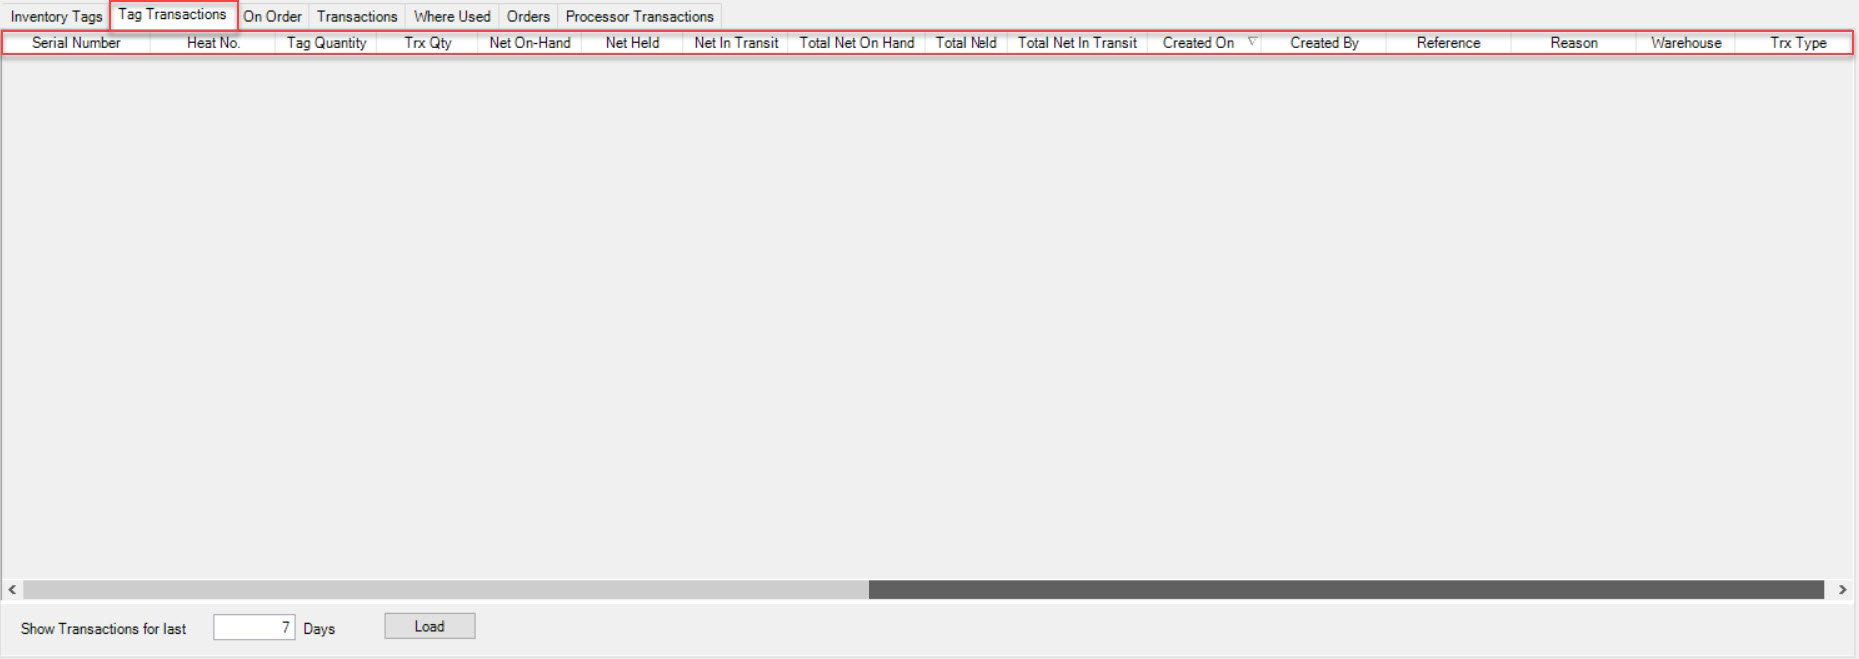
Users also have the ability to view Tag Transactions are far back as necessary. Simply enter in the number of Days in the textbox located at the bottom of the screen and click on the
 button.
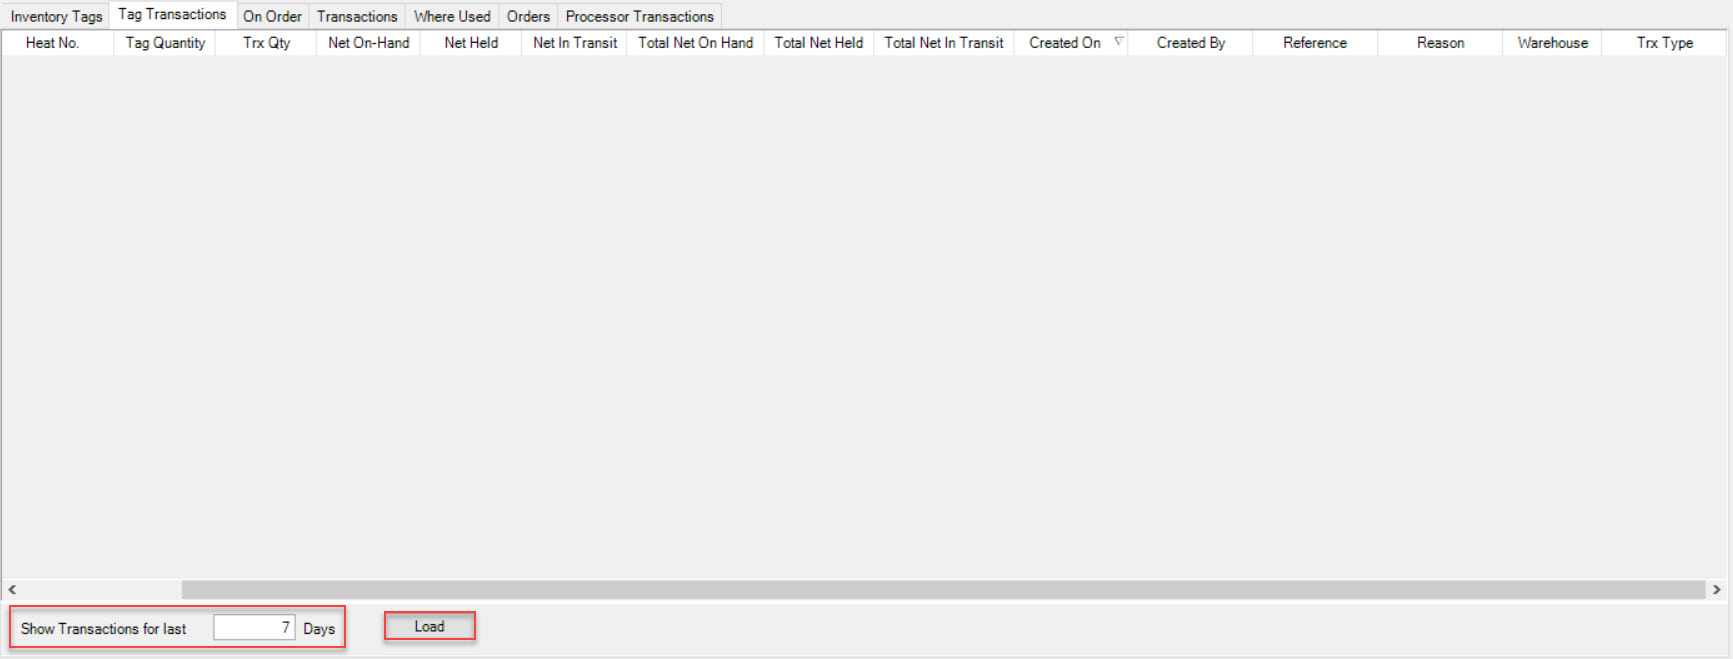
The system will population the Tag Transactions accordingly.
On Order Tab
To view On Order information on the R/M Inventory screen, make sure to select the  tab.
tab.
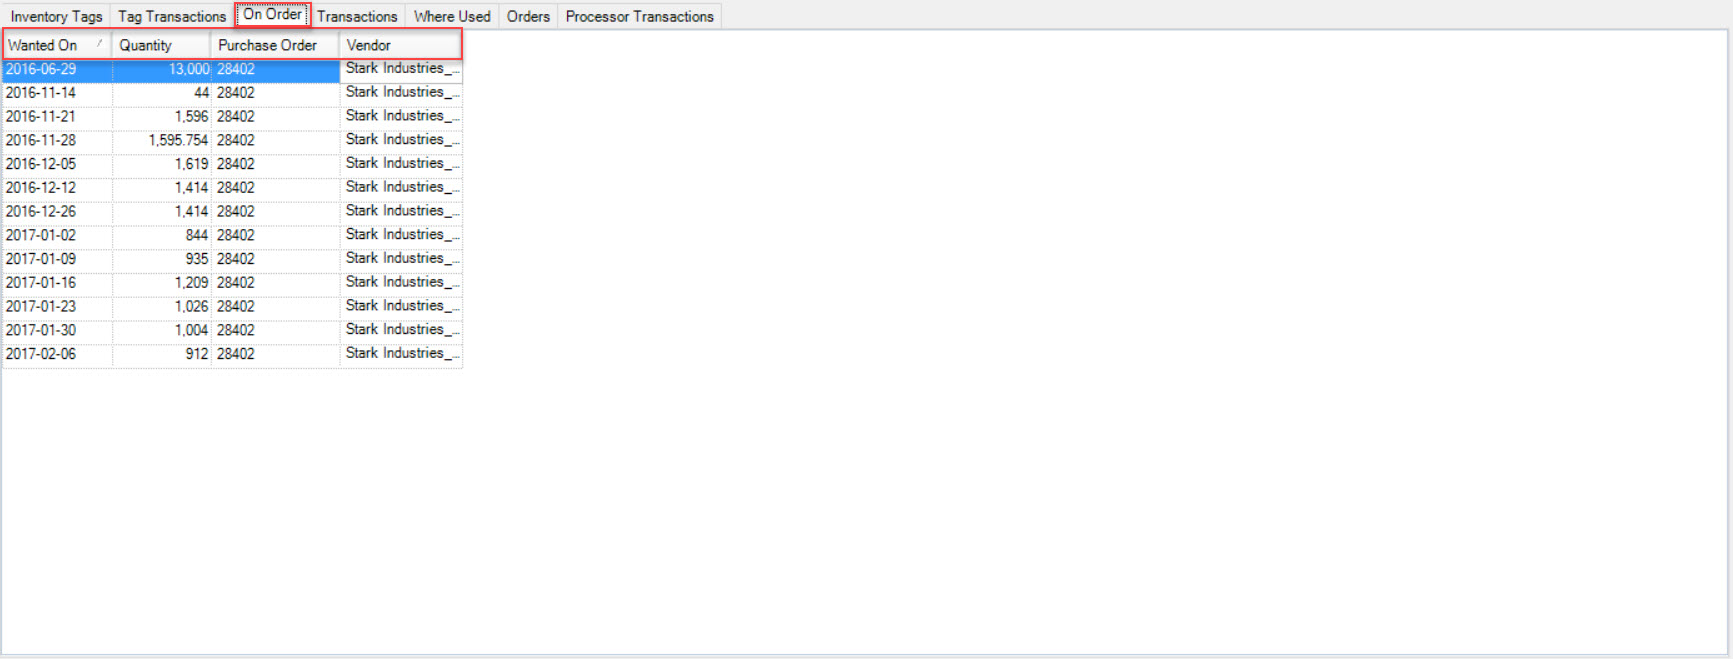
The information displayed in this tab reflects all upcoming Orders for an Item. Details include the Wanted On date, Quantity, Purchase Order, and the Vendor.
Transactions Tab
To view Transactions on the R/M Inventory screen, make sure to select the  tab.
tab.
This tab is useful for determining exactly how an Item arrived at the current On Hand balance. All of the Timecards, P/O Receipts, and Inventory Adjustments are recorded.
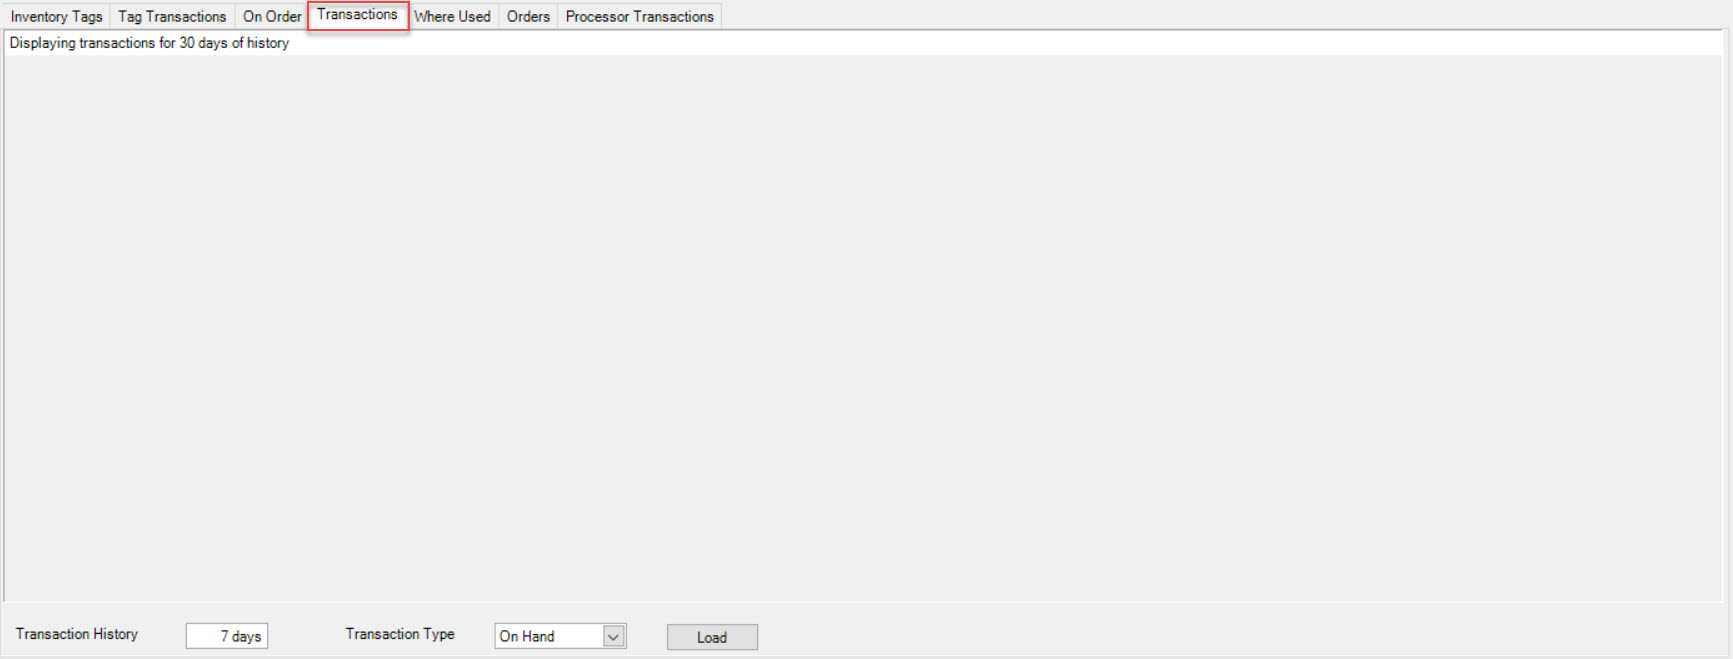
Users have the ability to view Transactions as far back as necessary. Simply enter in the number of Days, select the Transaction Type you wish to view from the available drop-down
menu (On Hand, Scrap, or Held) and then click on the  button.
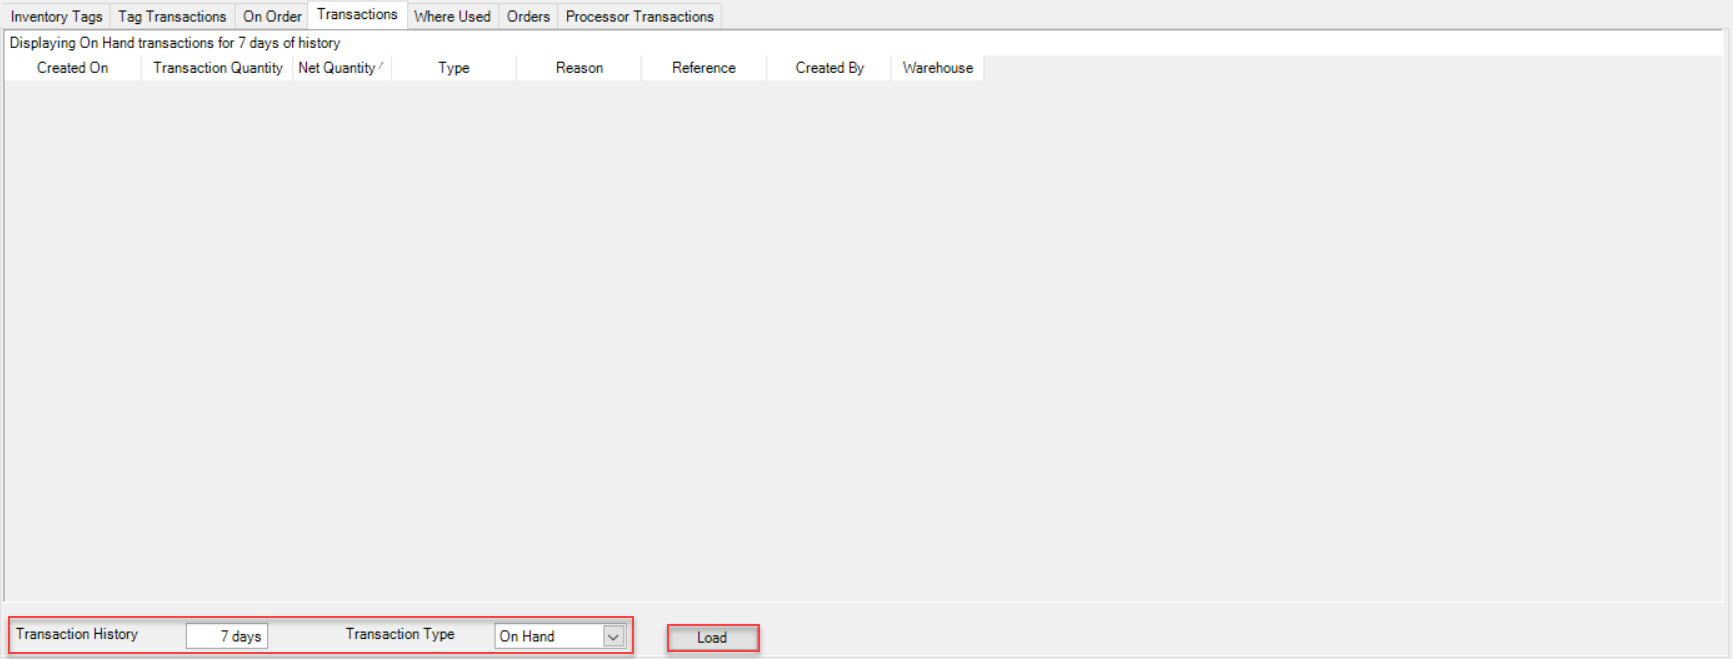
The system will populate the Transactions accordingly.
Where Used Tab
To view Where Used information on the R/M Inventory screen, make sure to select the  tab.
tab.
This tab is useful for viewing all Items or Manufacture Routings that Raw Material is used for in the system. Details include the Item, Description, OP #, Operation, Quantity Per, and the Unit of Measure (U/M).
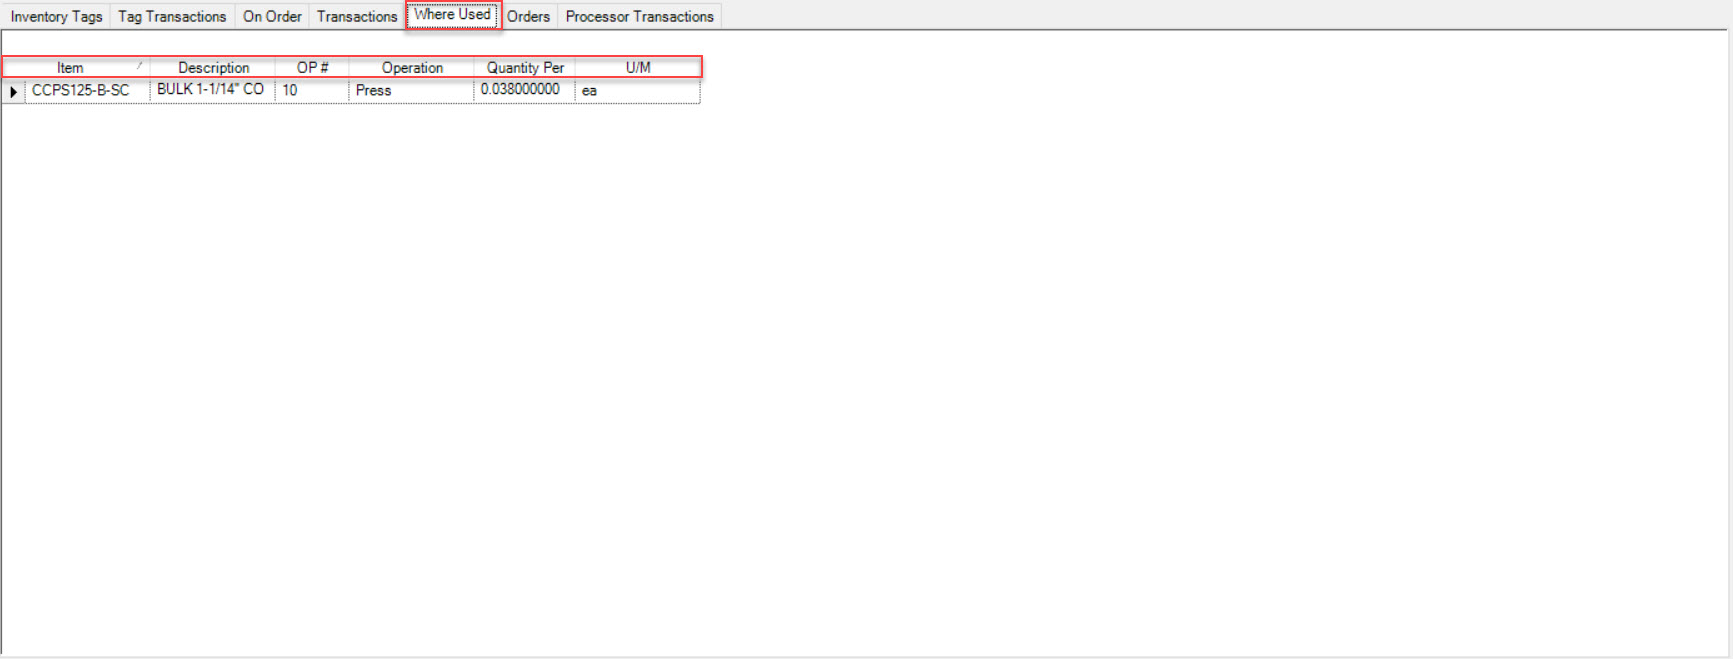
If users wish to view or edit (based on system permissions) a Manufacture Routing screen for one of the Items listed, double-click on the Item row and the screen will be displayed.
Orders Tab
To view Orders on the R/M Inventory screen, make sure to select the  tab.
tab.
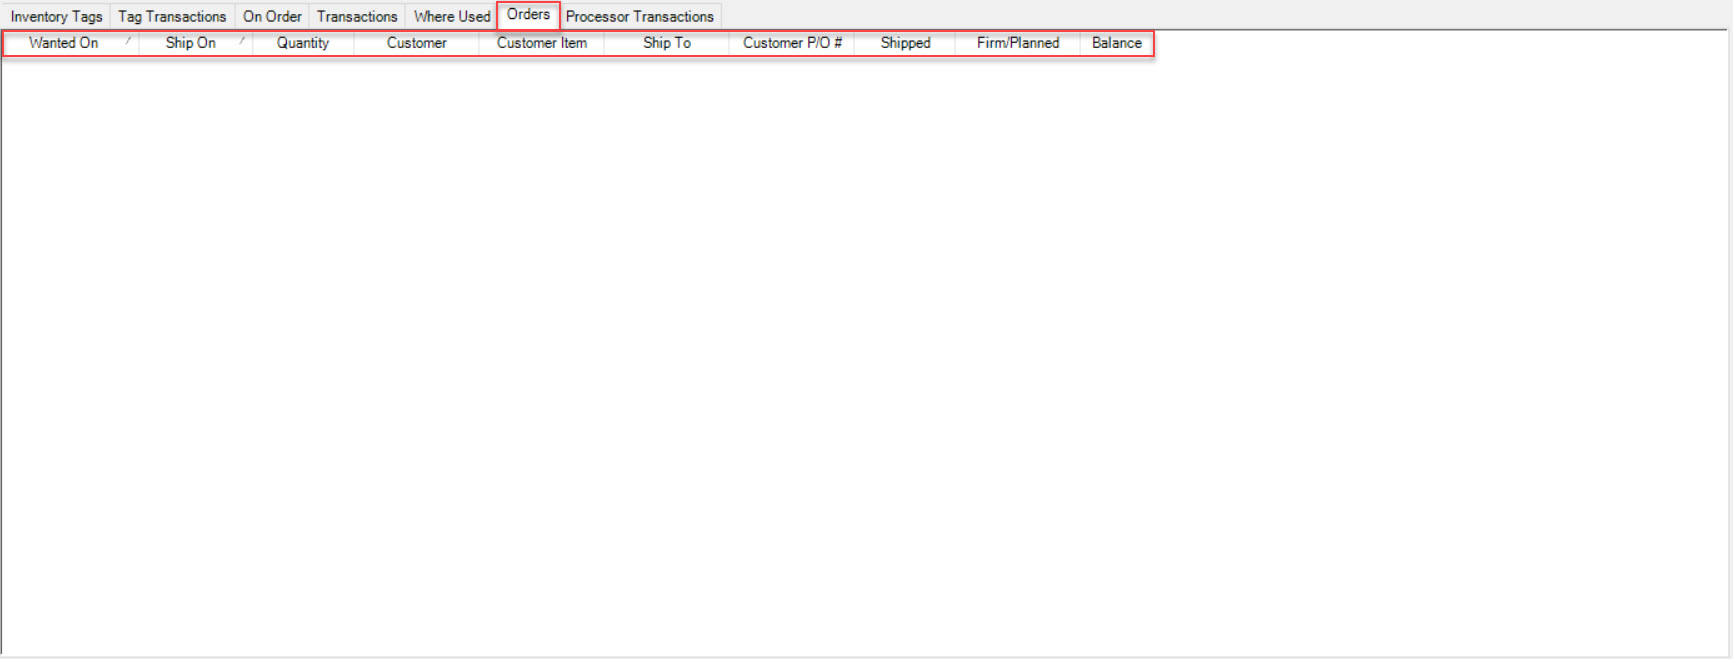
This tab is useful for users to view all of the Orders for a particular Item that is marked by as Buy/Sell on the Purchased Item screen. Details include the Wanted On date, Ship On date, Quantity, Customer, Customer Item, Ship To, Customer P/O #, Shipped, Firm/Planned, and the Balance.
Processor Transactions Tab
To view Processor Transactions on the R/M Inventory screen, make sure to select the  tab.
tab.
This tab is useful to view all transactions that occur between a Company and Outside Processors for a particular Item. Details include the Transaction Date, In quantity (in at the Processor), Out quantity (out from the Processor), Net Quantity, Vendor, Destination, Reference, Created By, and the Transaction Type.
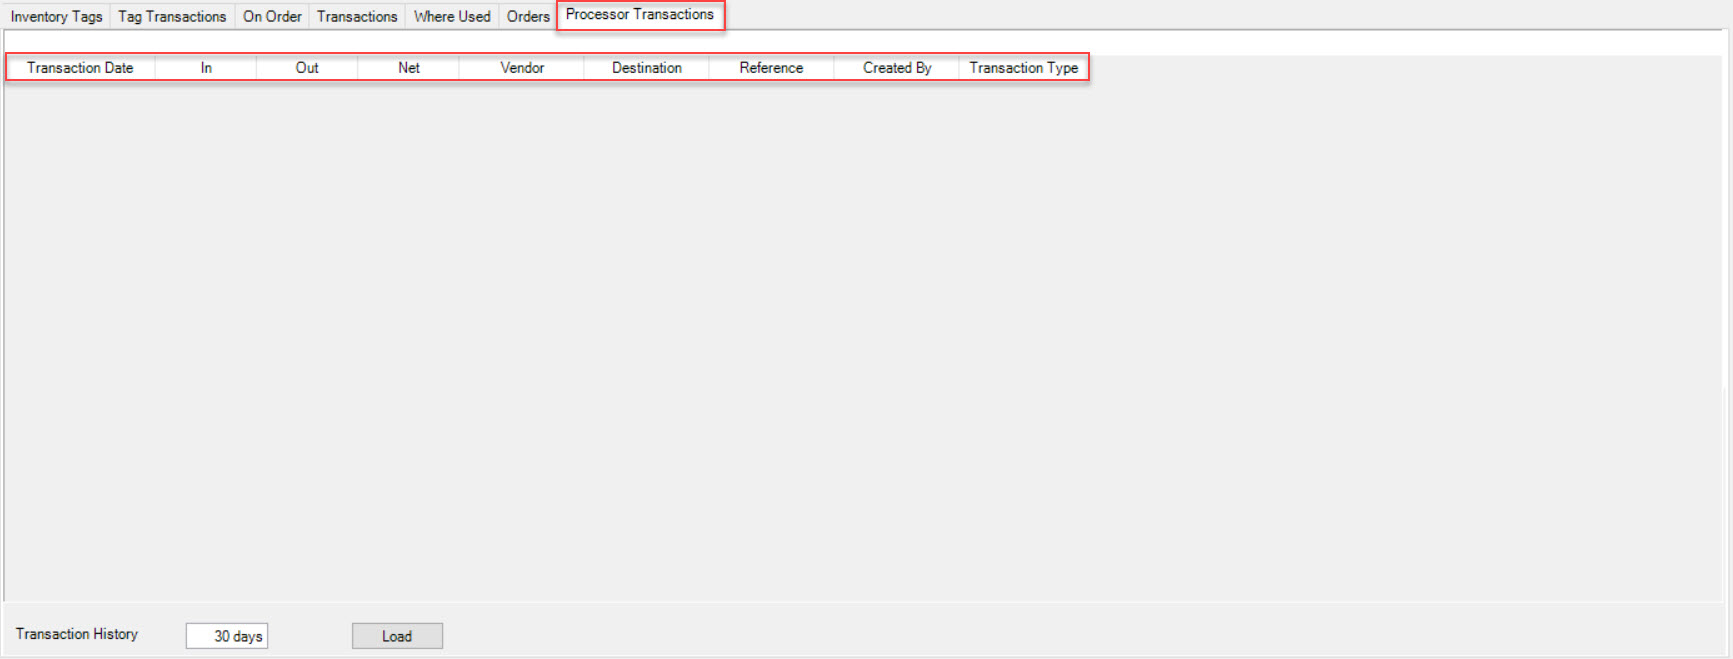
Users have the ability to view Processor Transactions as far back as necessary. Simply enter in the number of Days and click on the  button.
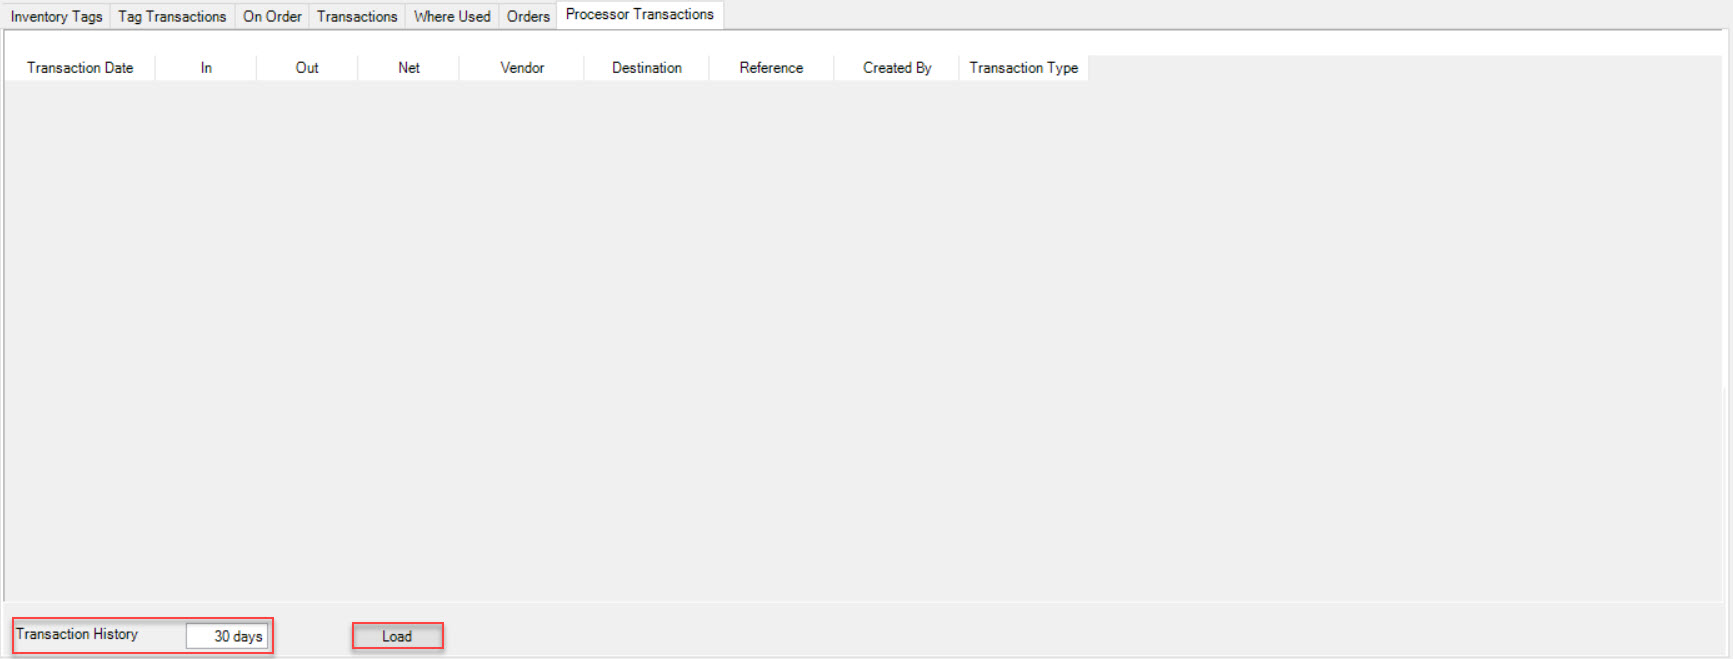
The system will populate the Transactions accordingly.
Projected Inventory
The demand is driven by the orders, so the items that require the material are listed on the top level. You have to options: you can drill down to the material on each demand to see how much of the material is needed (you can click on Expand All) or you can switch to ‘Columns’ in which case each item that has a role in the material demand will be listed on it’s own row, as well as the material. Please see the attached screenshots.