Purchased Items
Purchased Items in the system include Raw Material, Components, and Non-Stock Items. To view all available Purchased Items in the system, navigate to the  tab and click on the
  icon. The Purchased Items screen will be displayed.
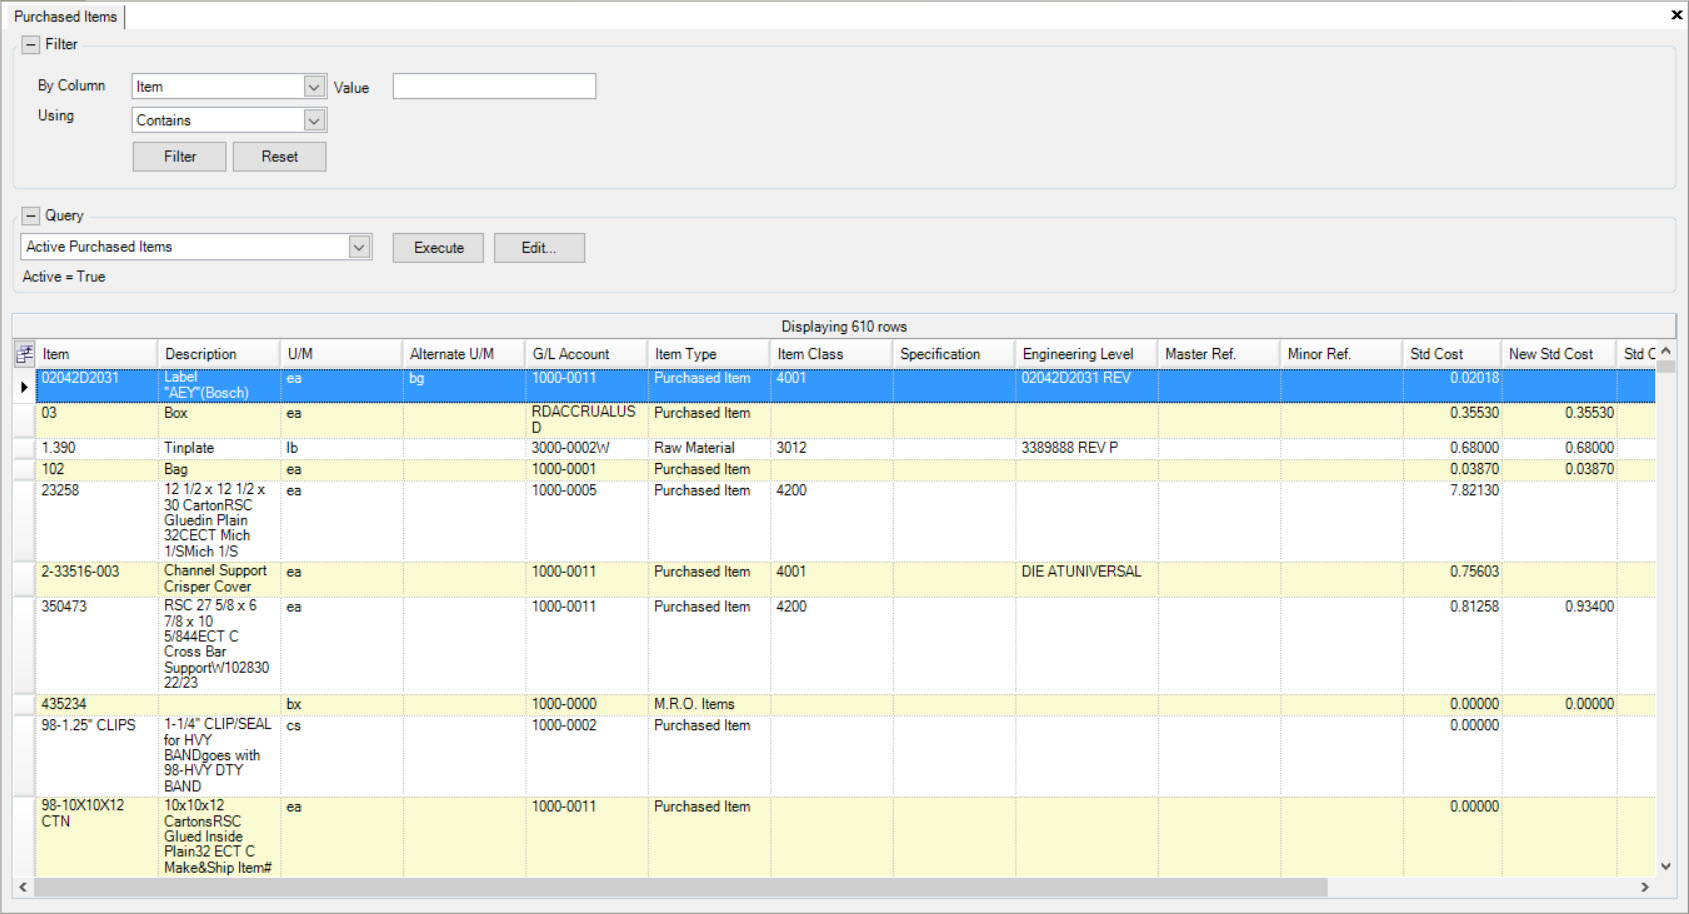
Users will be able to view all Purchased Items in the system.
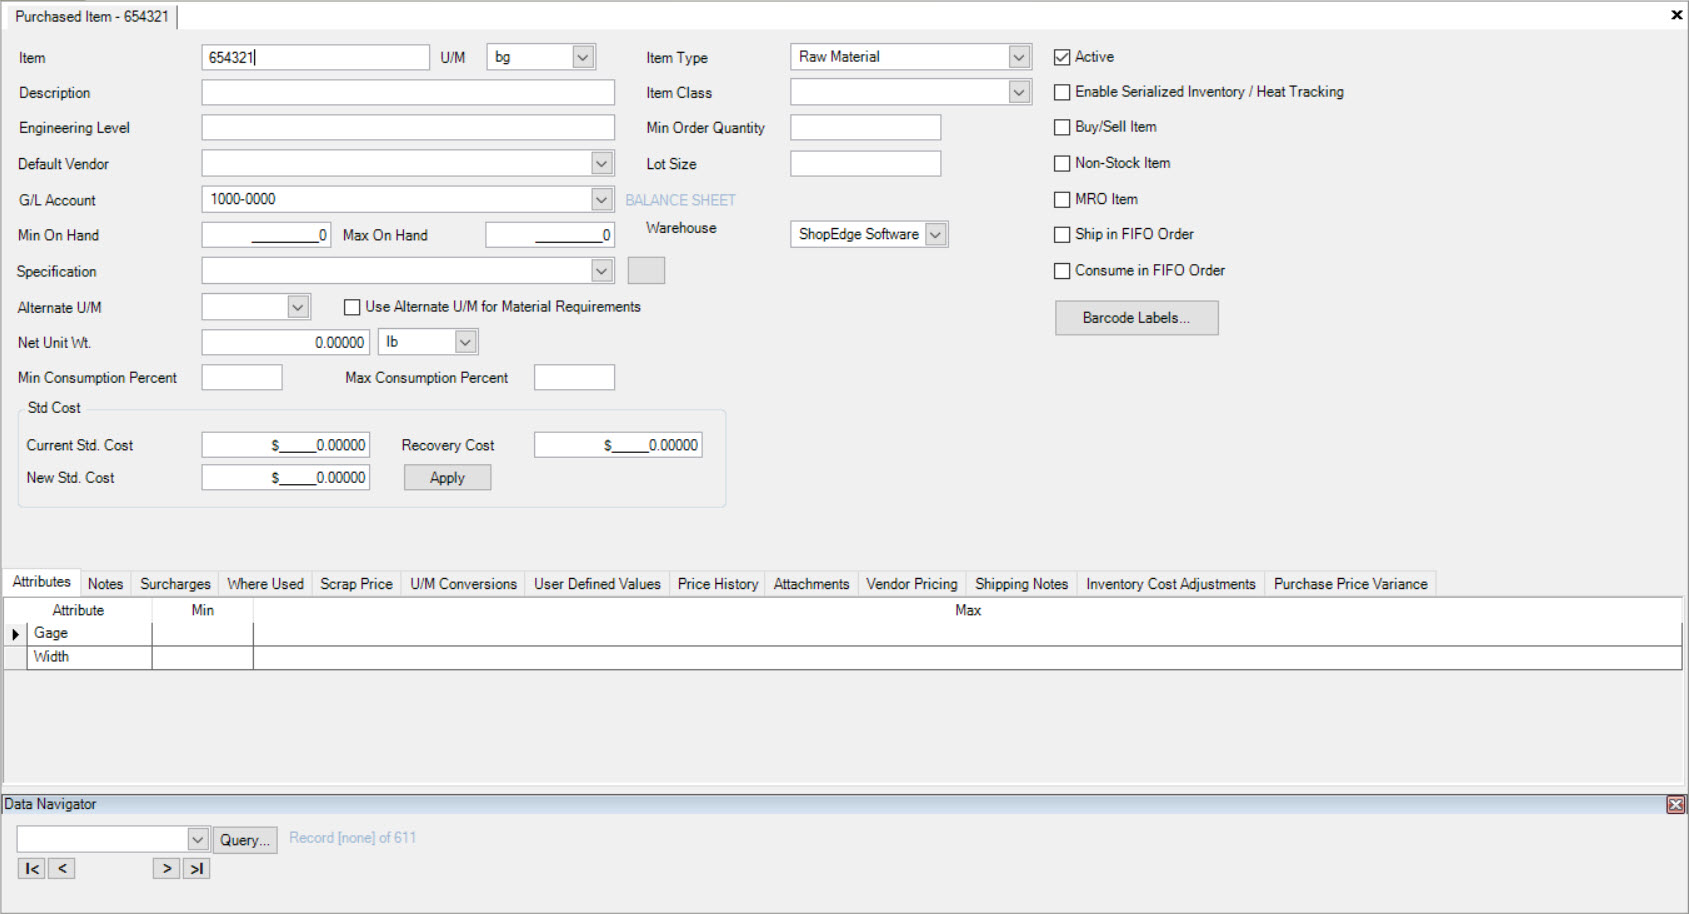
To open a Purchased Item, simply double-click on the appropriate row. The Purchased Item detail screen will appear.
Data Navigator
For new and existing Purchased Items in the system, users have the ability to use the Data Navigator which is located at the bottom of every Purchased Item detail screen.
The Data Navigator is a simple tool for users to view and/or modify Purchased Items.
To view the Data Navigator, navigate to the tab and click on the icon. The Purchased Items screen
will be displayed.
Locate and double-click on any Purchased Item. The Purchase Item detail screen will open.
Located at the bottom of the screen, users will find the Data Navigator. Simply use the drop-down menu to locate another Purchased Item that you wish to view. Users also have the ability to
use the Left and Right Arrows as well as the  button.

Once a Purchased Item has been selected, the screen will change accordingly to match the detail information of the selected Purchased Item.
Note
Users have the ability to exit the Data Navigator based on personal preference. To do so, simply click on the Exit button located in the bottom right corner of the screen.
Creating a New Purchased Item
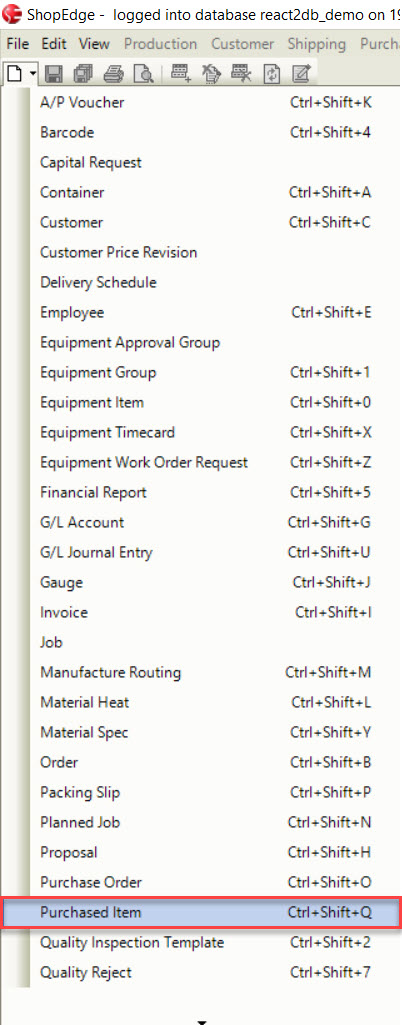
There are three ways to create a new Purchased Item in the system. The first way is to press Ctrl + Shift + Q keys. The second way is to navigate to File > New > Purchased Item.
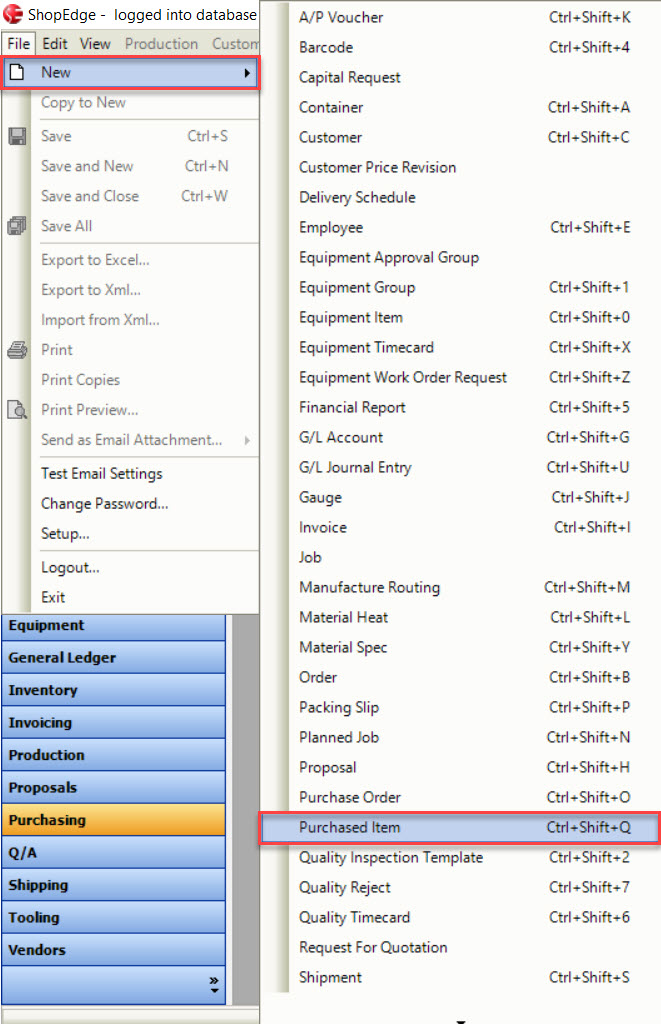
The last way is to click on the  button and then on the Purchased Item option.
All of these options will open a new Purchased Item screen.
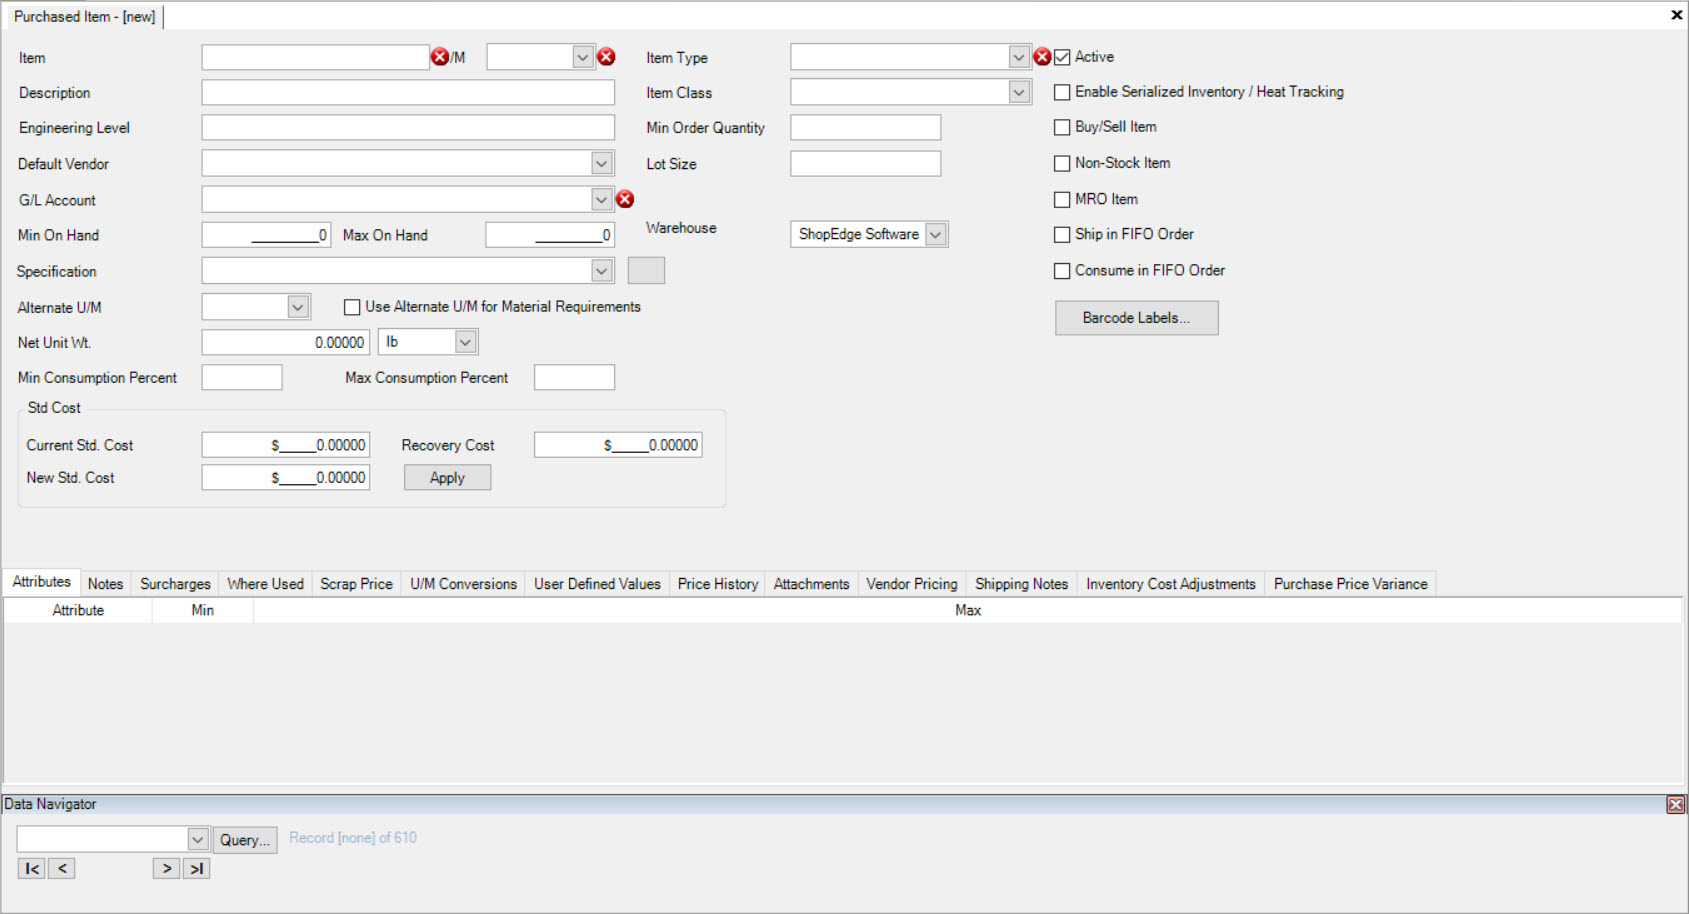
There are mandatory fields that need to be completed before a user is able to save the new Purchased Item such as the Item, U/M, G/L Account, Net Unit Wt., and the Item Type. All other fields are optional.
The Min. On Hand and the Max. On Hand are used for ordering material. When re-planning the Material Requirements screen, if a Customer demand that would bring the On Hand quantity below the Min. On Hand quantity set on the Purchased Item; if only the minimum is specified, or the maximum is less than the minimum, the releases quantity will default to the Min. On Hand quantity plus the demand. If both the Min. and Max. On Hand are specified, and the maximum is greater than the minimum, the release quantity will be set to the Max. On Hand plus the demand.
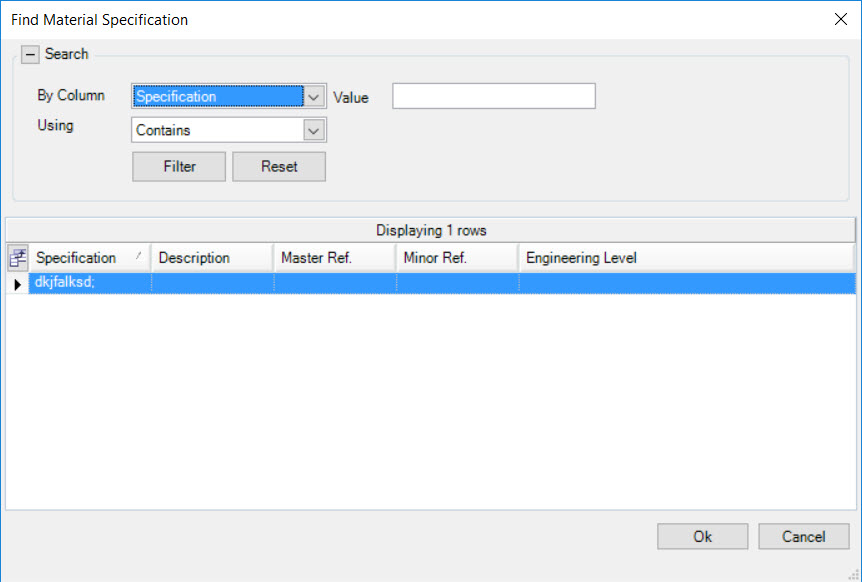
Users can also select a Specification by using the available drop-down menu or by clicking on the  box located beside the drop-down menu.
The Find Material Specification window will appear where users can search for and highlight the appropriate Specification. Once a Specification has been highlighted, click on the
 button.
Next, users can select an Alternate Unit of Measure (U/M), and whether or not the Alternate U/M should be used for Material Requirements. The Net Unit Wt., Max. Consumption Percent, and Std. Cost information can be entered in as well.
When entering in a New Std. Cost, users must enter in a Base Cost along with the Currency using the available drop-down. Users may choose to enter in a Surcharge, but it is not necessary.
The New Std Cost value will update. Users must save the Purchased Item and then select the  button.
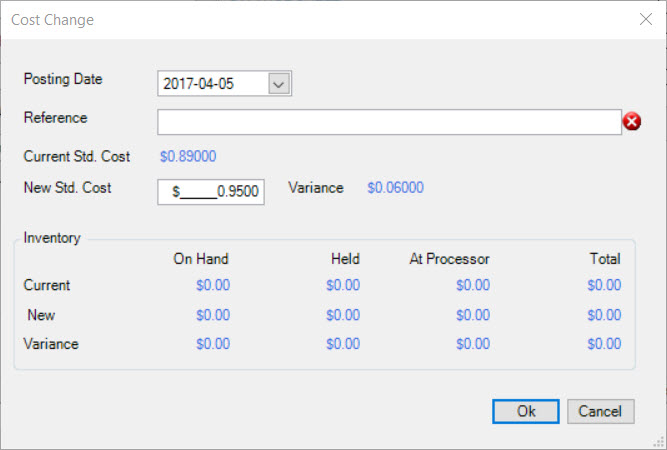
Users must select a Posting Date and enter in a Reference, then click on the button. A message will appear so users can confirm the cost change.
Once the cost change has been confirmed, the Purchased Item will update the Current Std Cost.

Note
Once the cost change has been updated, users can then navigate to Production > Std Cost Lookup to view the change for a particular Purchased Item under the Purchased Items tab.
Users have the ability to check or un-check multiple settings such as Active, Enable Serialized Inventory/Heat Tracking, Buy/Sell Item, Non-Stock Item, MRO Item, Ship in FIFO Order, and Consume in FIFO Order.
Note
In order for an MRO Item to be visible on the Item Lookup when adding an MRO Item to a Tooling Item, the MRO Item checkbox must be selected.
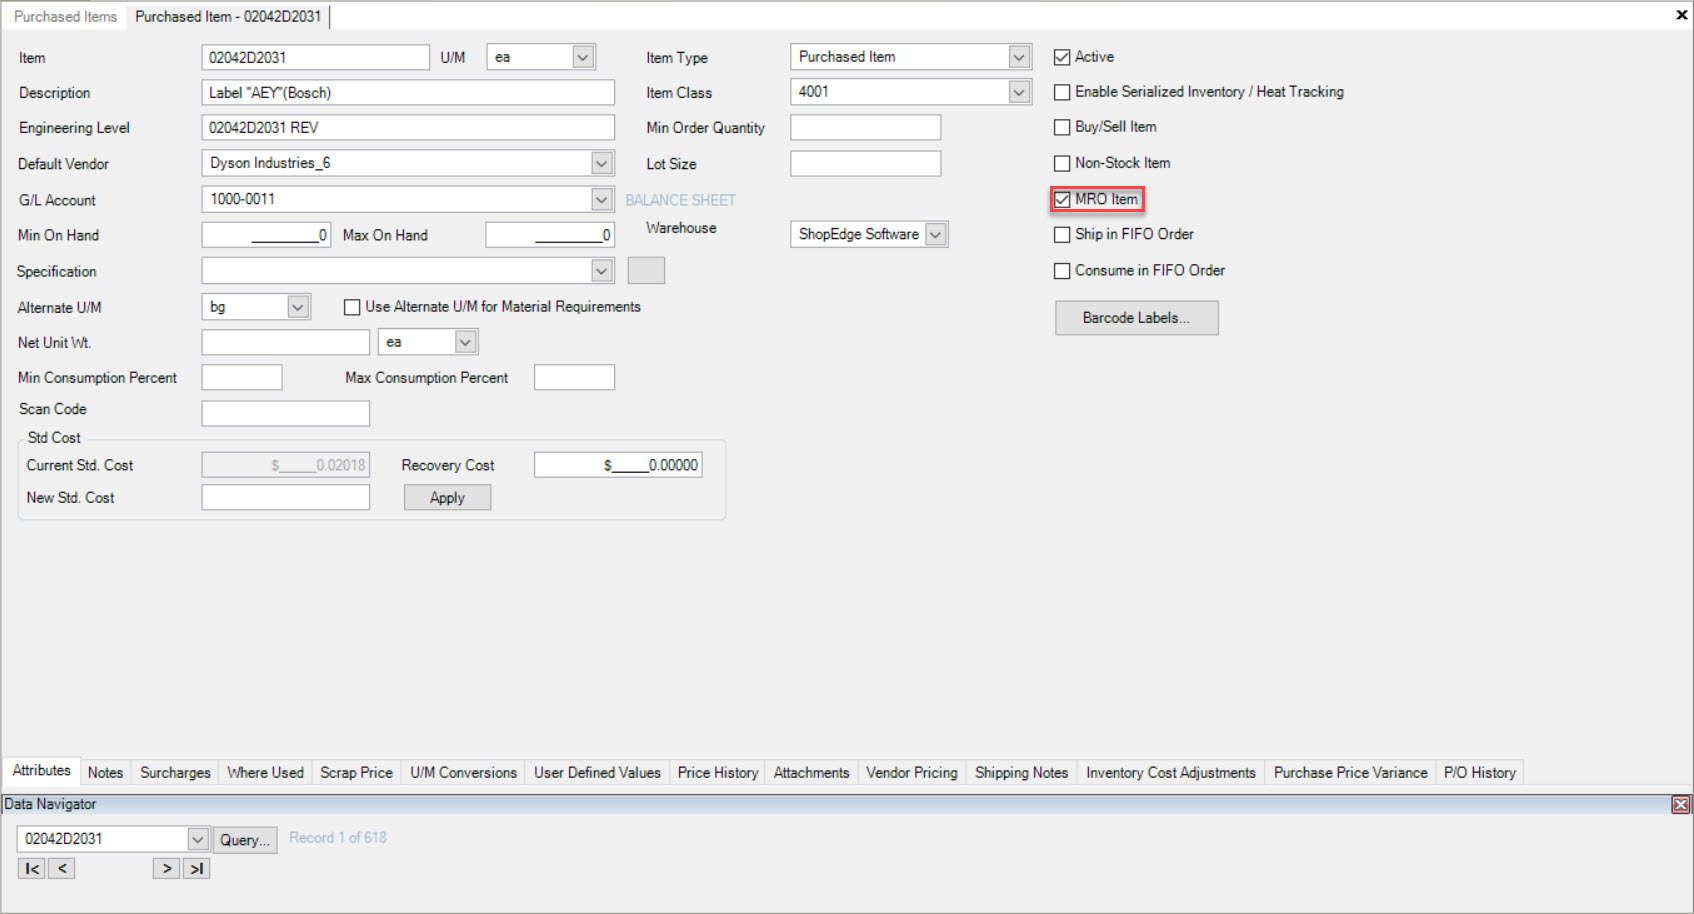
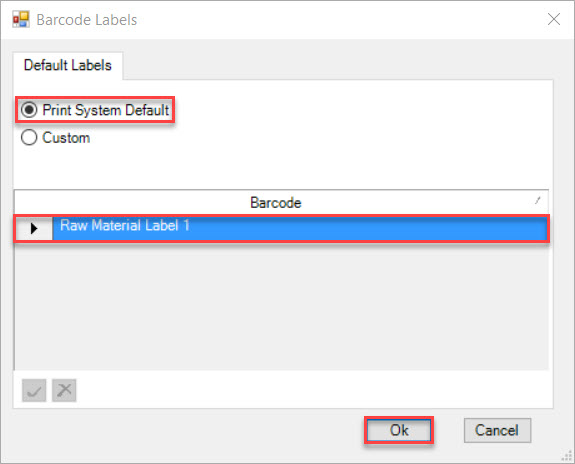
Users can then click on the  button. The Barcode Labels window will appear where users are able to Print a System Default Barcode or select a Custom
Barcode Label.
button. The Barcode Labels window will appear where users are able to Print a System Default Barcode or select a Custom
Barcode Label.
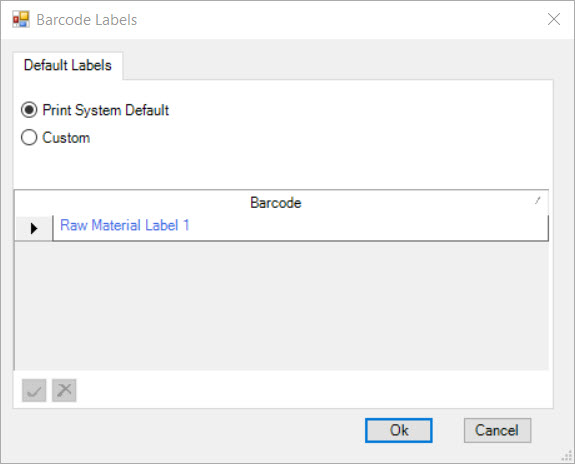
If users wish to Print the System Default Barcode, select that option, highlight the appropriate Barcode, and then click on the button.
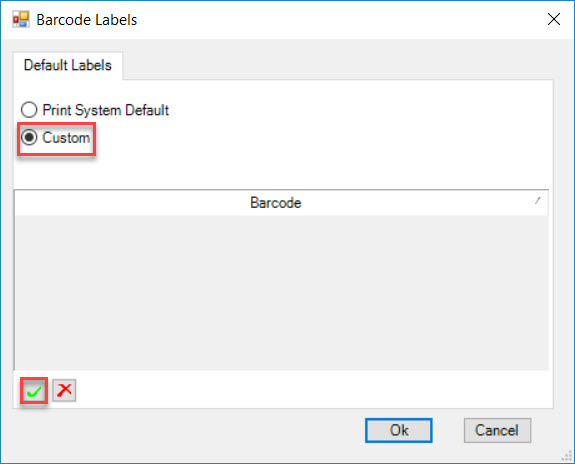
If users wish to select a Custom Barcode, select the Custom option and click on the  button and a new row will appear.
Note
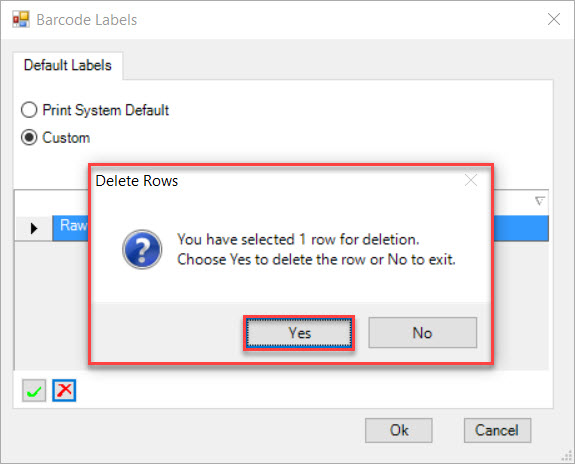
To remove a Custom Barcode, simply highlight the Custom Barcode you wish to delete and click on the  button. A Delete Rows confirmation window will appear where users must select Yes in order to confirm. The highlighted Custom Barcode will be removed.
Once the header information on the new Purchased Item has been entered, make sure to save your changes before exiting the screen.
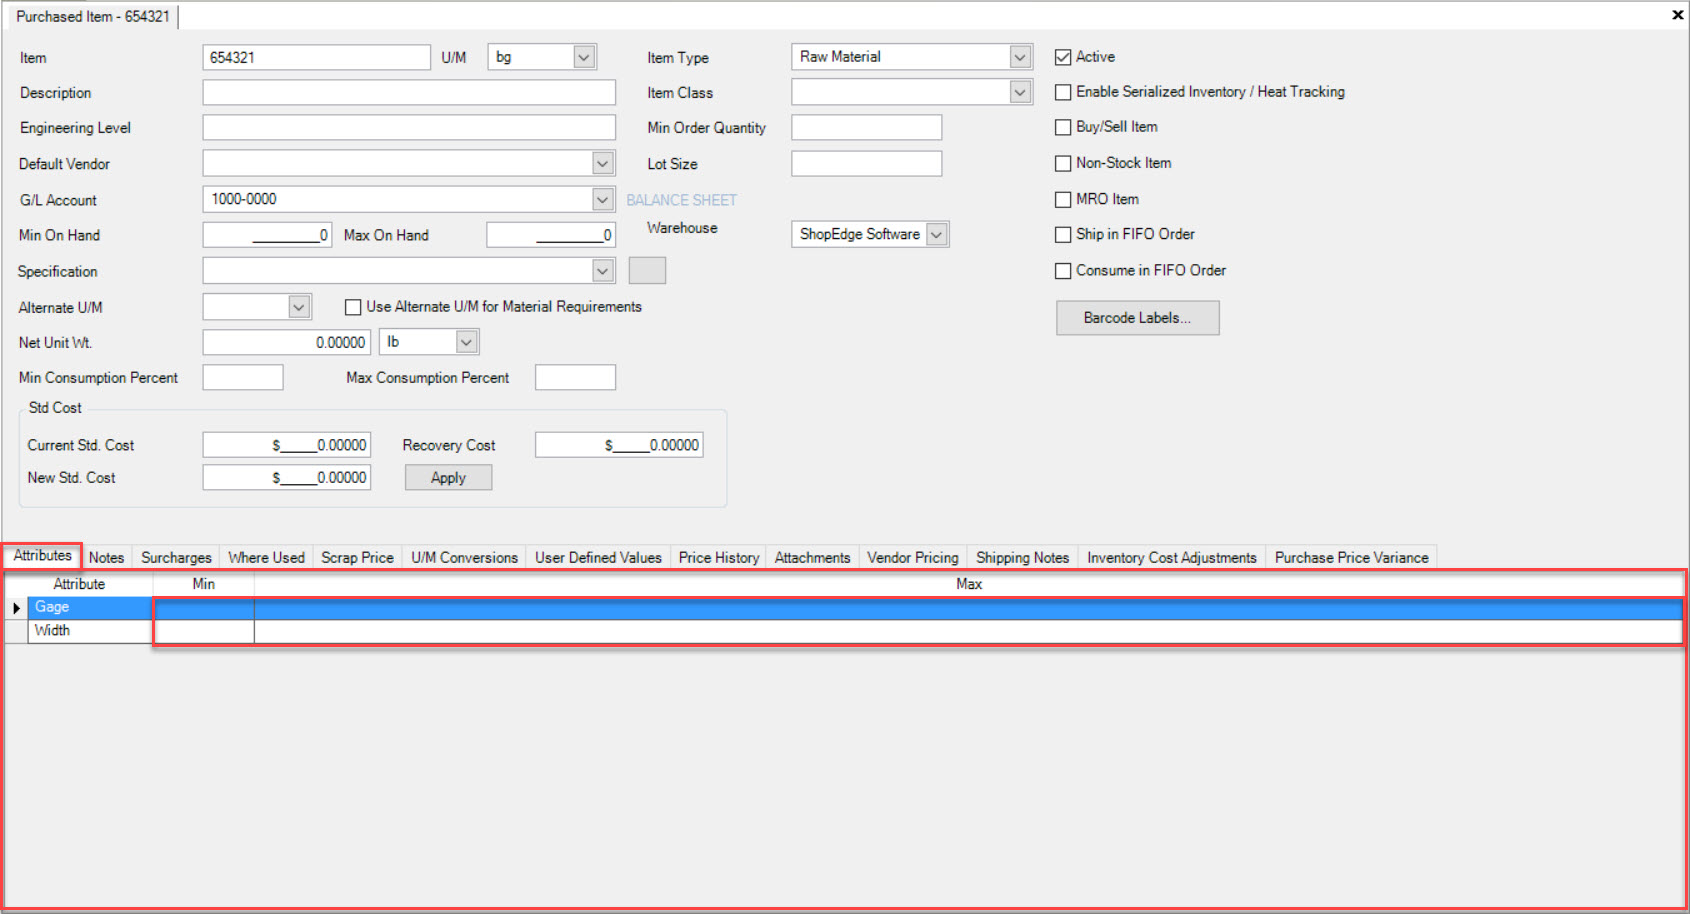
Attributes Tab
Attributes on a Purchased Item are established automatically based on the selected Item Type. Once an Item Type has been selected, the Attributes will be displayed under the
 tab.
tab.
Users have the ability to control an Attribute’s measurements (Min. and/or Max.) so that on the receipt of the Purchased Item, if it is out of tolerance, it will be given a Held status.
Note
A user can only adjust the Min. and/or Max. measurements on a Purchased Item, not the Attributes.
To make adjustments to an Attribute on a new or existing Purchased Item, navigate to the tab and click on the
icon. The Purchased Items screen will be displayed.
Locate and double-click on the Purchased Item that you wish to adjust. The Purchase Item detail screen will open.
Make sure to select the tab located near the bottom of the screen.
The Attributes specific to the selected Item Type will be displayed. Locate the Attribute you wish to adjust and make the necessary adjustments using the Min. and Max. textboxes.
Once the necessary Attribute adjustments have been made, make sure to save your changes before exiting the screen.
Notes Tab
To add, edit, or delete a Note to a new or existing Purchased Item, make sure to select the  tab located near the bottom of the Purchased Item detail
screen.
tab located near the bottom of the Purchased Item detail
screen.
Simply use the available Notes textbox to add, edit, or delete any Notes regarding the Purchased Item.
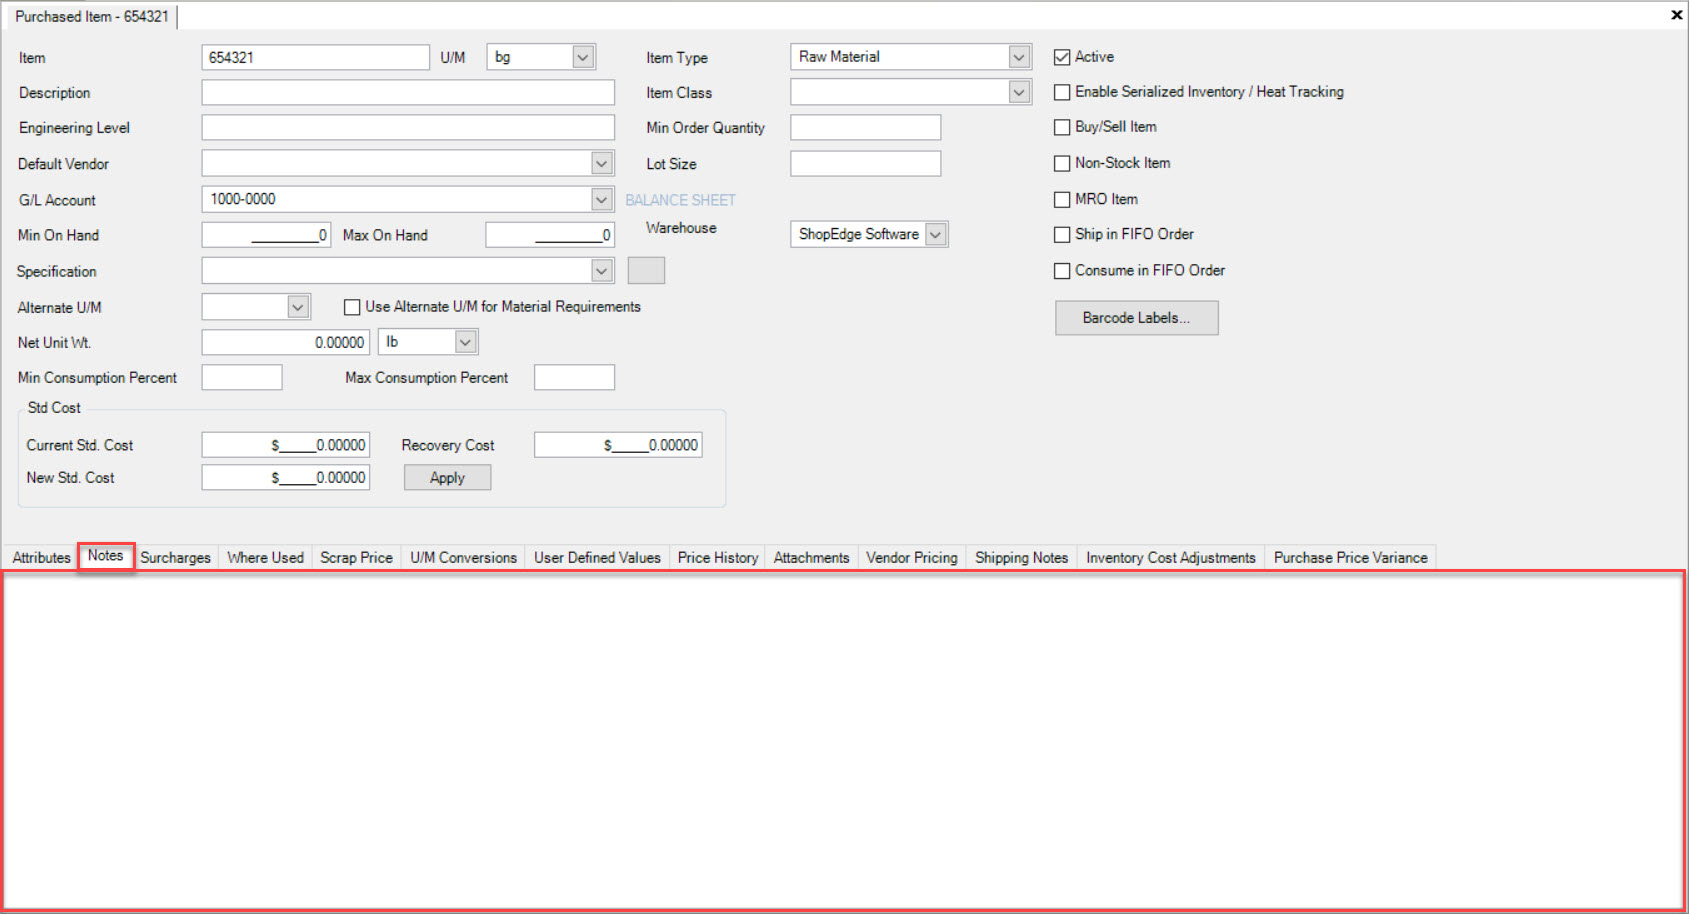
Once the Notes have been added, edited, or deleted, make sure to save your changes before exiting the screen.
Surcharges Tab
Users have the ability to add, edit, or delete Surcharges on a new or existing Purchased Item.
To add a Surcharge to a Purchased Item, make sure to select the  tab located near the bottom of the screen.
Then, click on the button. A new row will appear where users must enter in the necessary information.
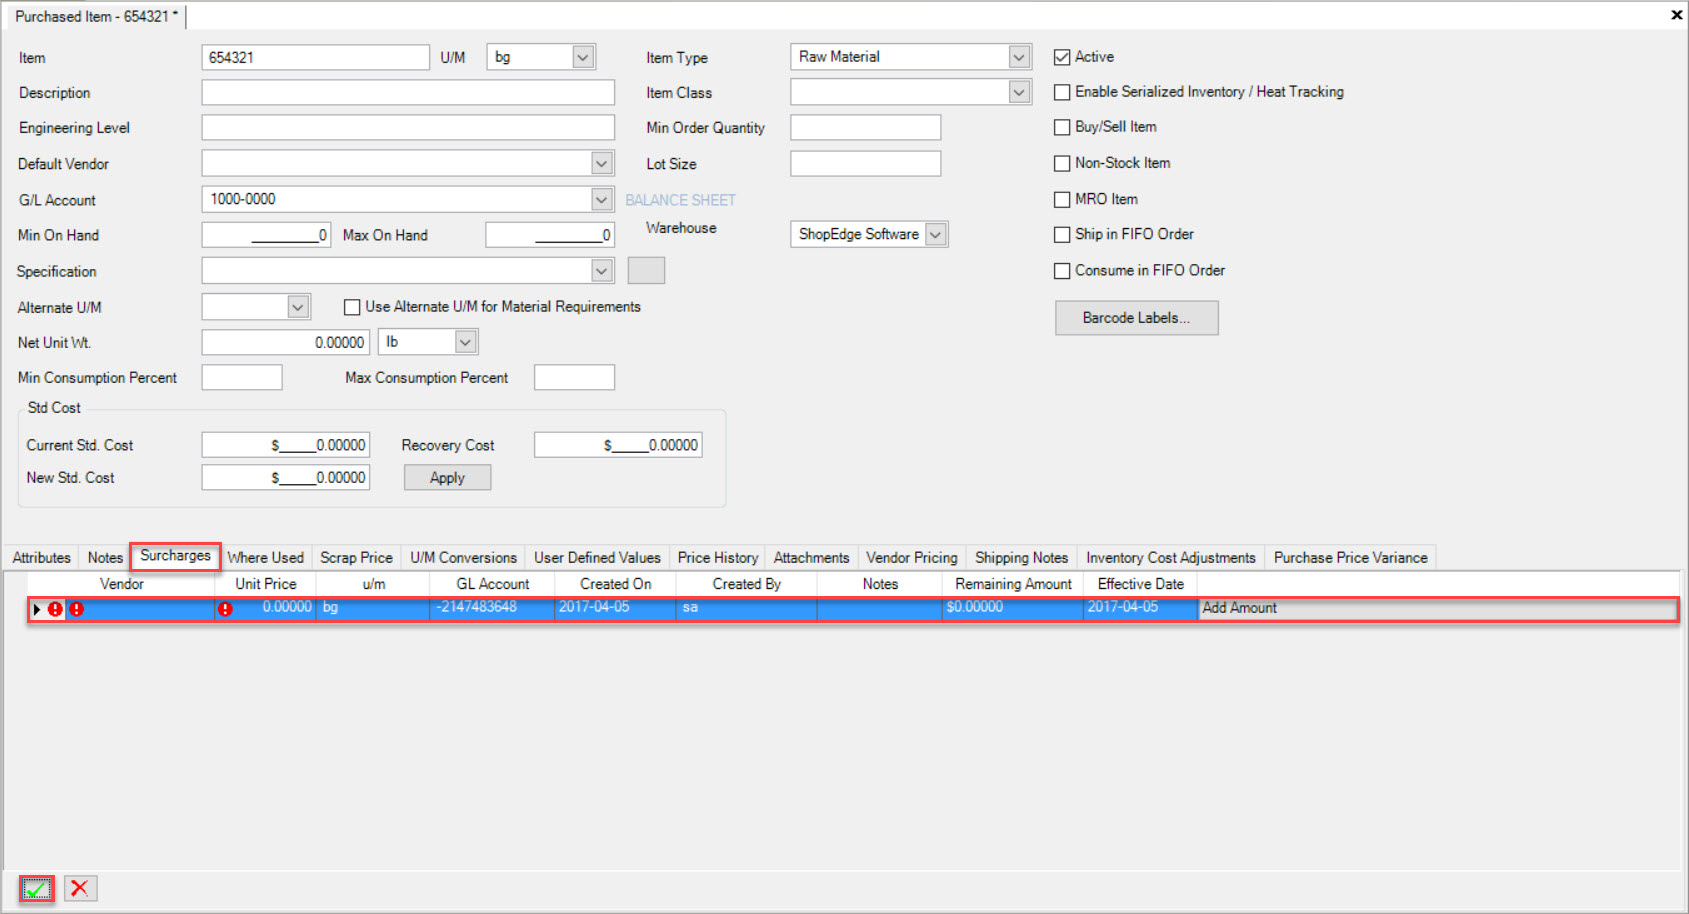
Once the necessary information is entered in, users can click on the  button to add an additional amount to the Surcharge.
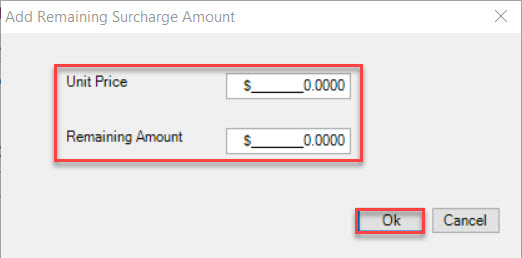
The Add Remaining Surcharge Amount window will appear. Users will need to enter in a Unit Price and Remaining Amount. Then, click on the button.
Once the additional amount has been added, a plus sign will appear beside the row of the Surcharge that it was added to. Clicking on the plus sign will expand the Surcharge and display the details of the additional amount.

Make sure to save your changes before exiting the screen.
To edit a Surcharge, make sure to select the tab located near the bottom of the screen.
Locate the Surcharge you wish to edit and use the available drop-down menus and textboxes to make the necessary changes.
Once the necessary changes have been made, make sure to save your changes.
To delete a Surcharge, make sure to select the tab located near the bottom of the screen.
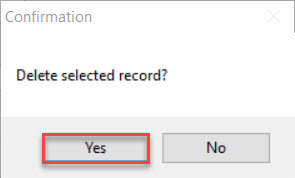
Locate the Surcharge you wish to delete and highlight the appropriate row. Click on the button. A confirmation will appear where users must select Yes.
The highlighted Surcharge as well as any additional amounts attached to that Surcharge, will be deleted.
Make sure to save your changes before exiting the screen.
Where Used Tab
To view where a Purchased Item will be used, select the  tab located near the bottom of the screen.
Users will be able to view the Item, Description, OP #, Quantity Per, Quoted Quantity Per, Progression, and Scrap Per details.
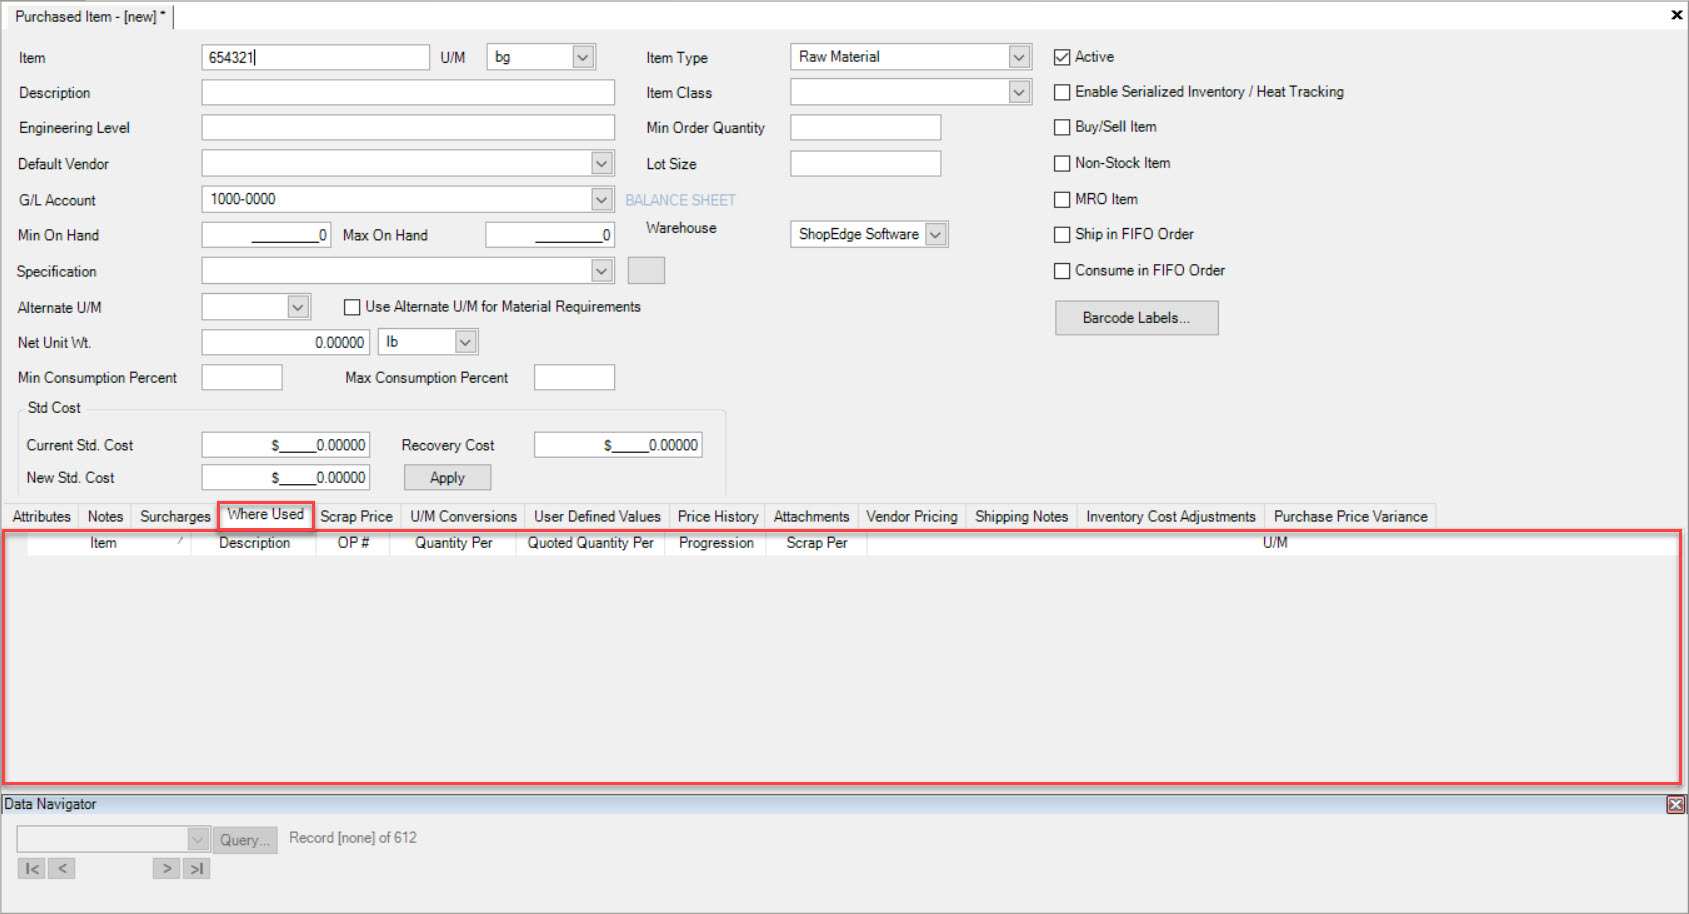
Note
The tab will only be visible when a new Purchased Item is created. Once a Purchased Item has been saved, the tab will be removed.
Scrap Price Tab
Users have the ability to enter in a Scrap Price in a situation where a Customer owns the Material and there happens to be scrap leftover.
To do so, make sure to select the  tab located near the bottom of the Purchased Item detail screen.
Click on the button. The Scrap Price window will appear.
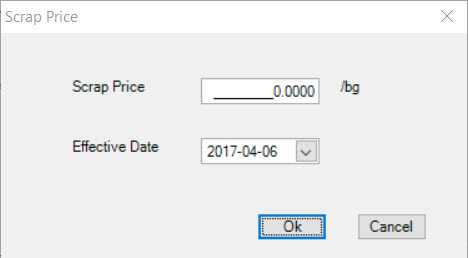
Users must enter in a Scrap Price /bg. and select an Effective Date (which will automatically default to the current date). Then, click on the button.
The Scrap Price will be added to the screen.
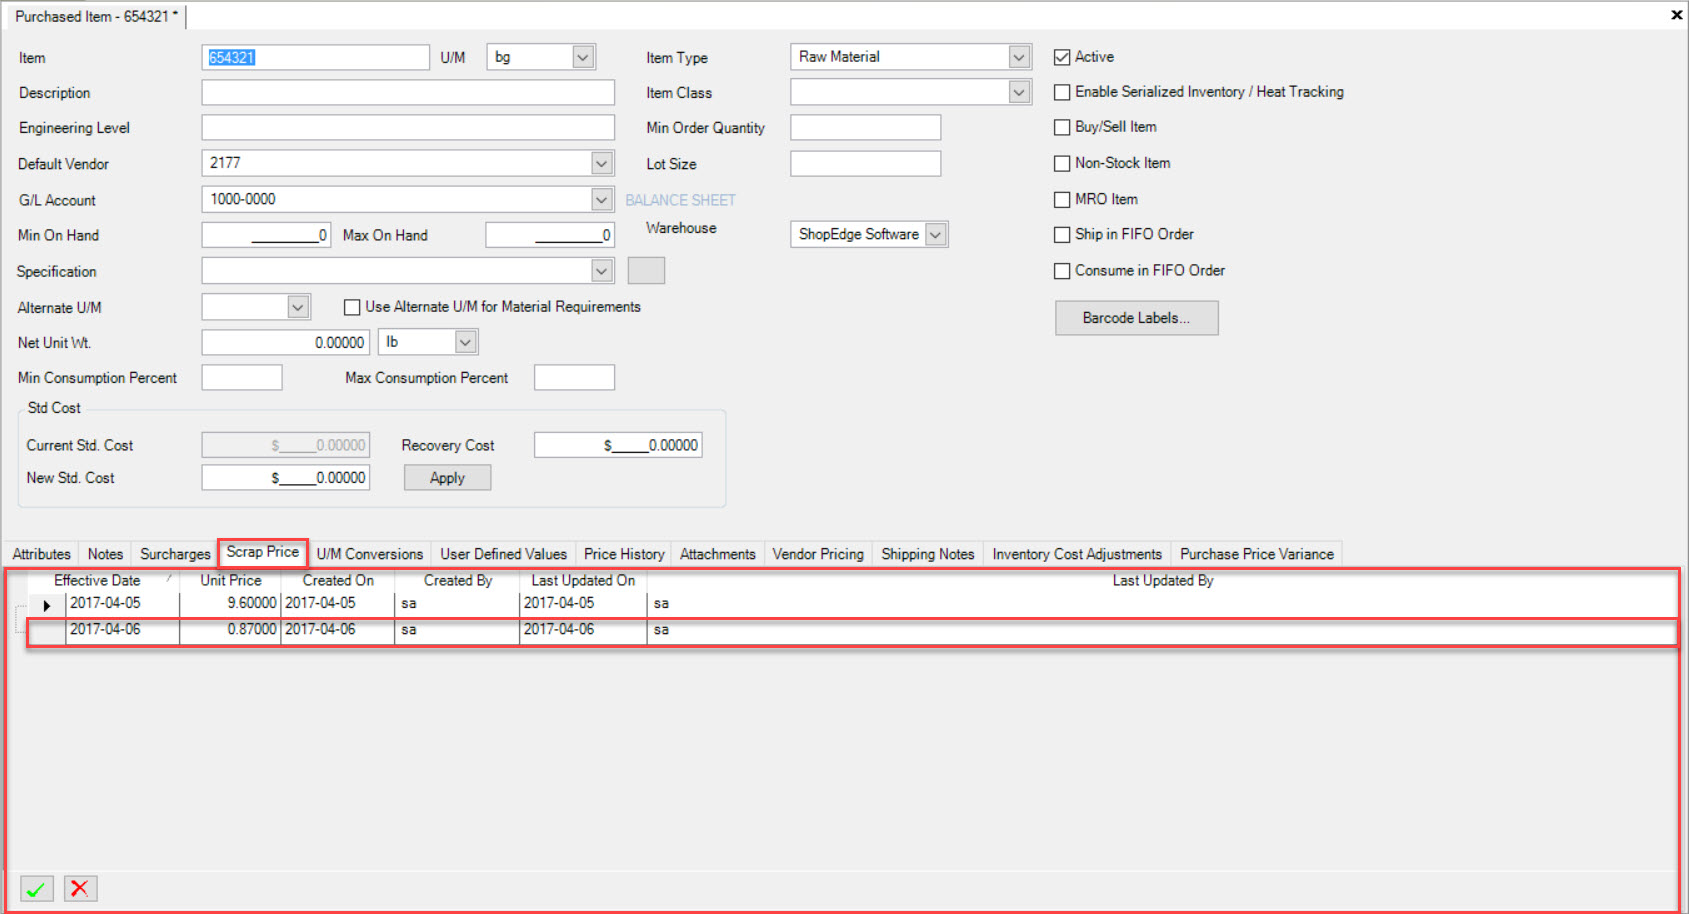
Make sure to save your changes before exiting the screen.
Note
If users need to edit a Scrap Price, simply click in the appropriate textboxes to make the necessary changes and then save.
To delete a Scrap Price, simply highlight the appropriate row of the Scrap Price you wish to delete. Then, click on the button. The highlighted Scrap
Price will be deleted immediately.
Make sure to save your changes before exiting the screen.
U/M Conversions Tab
U/M Conversions allows users to enter in a Conversion for a Purchased Item for Purchasing purposes. For example, users can convert from lbs. to coil if necessary.
To add a U/M Conversion, make sure to select the  tab located near the bottom of the Purchased Item detail screen.
Then, click on the 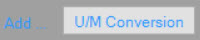 button located at the bottom of the screen. A new row will appear where users must select and enter in the necessary information.
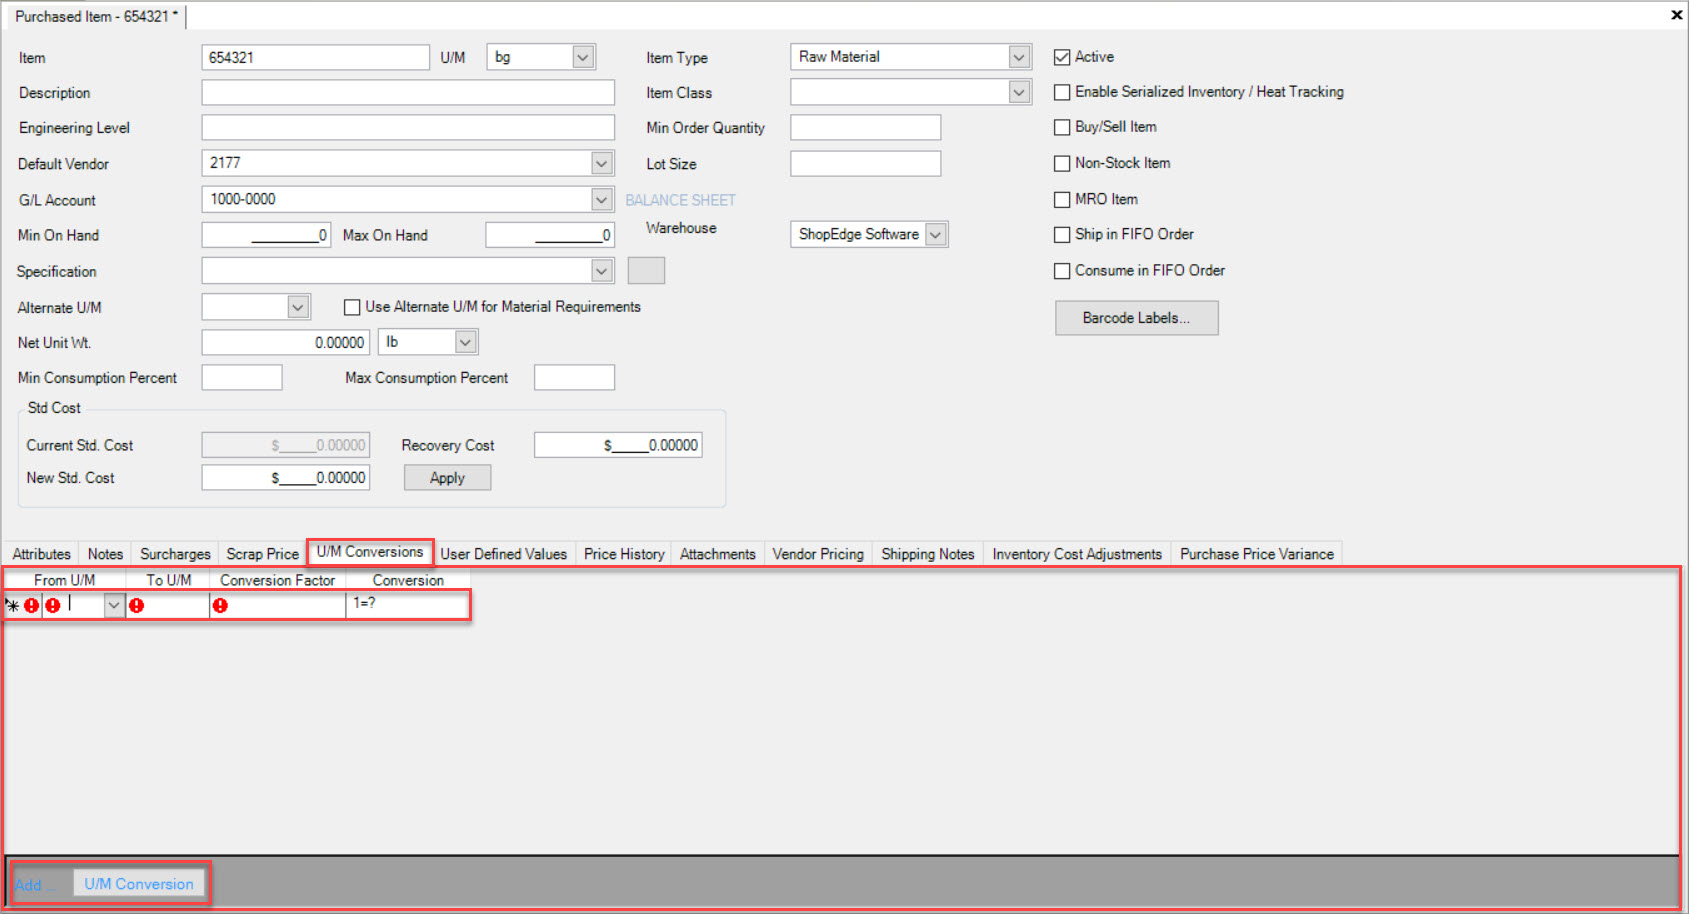
Once the necessary information has been entered, make sure to save your changes before exiting the screen.
Note
If users wish to make changes to a U/M Conversion, simply use the available drop-down menus and textboxes to make the necessary changes. Then, make sure to save your changes before exiting the screen.
To delete a U/M Conversion, highlight the appropriate row of the U/M Conversion you wish to delete. Use your Delete key and when the system prompts you, select Yes.
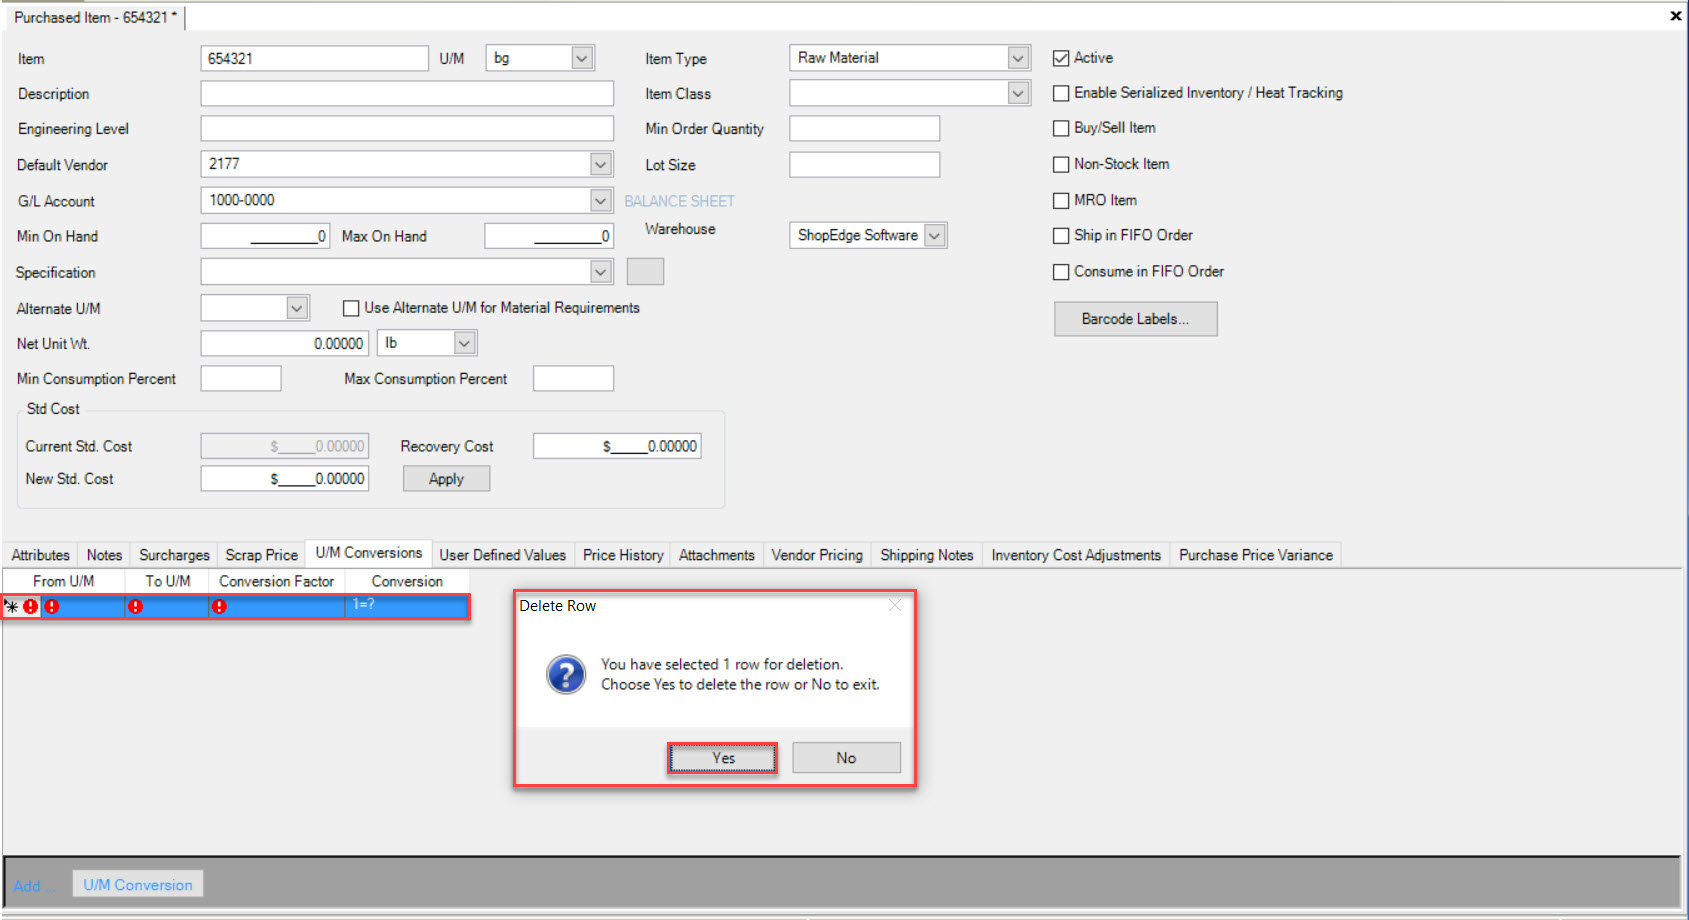
The highlighted U/M Conversion will be deleted. Make sure to save your changes before exiting the screen.
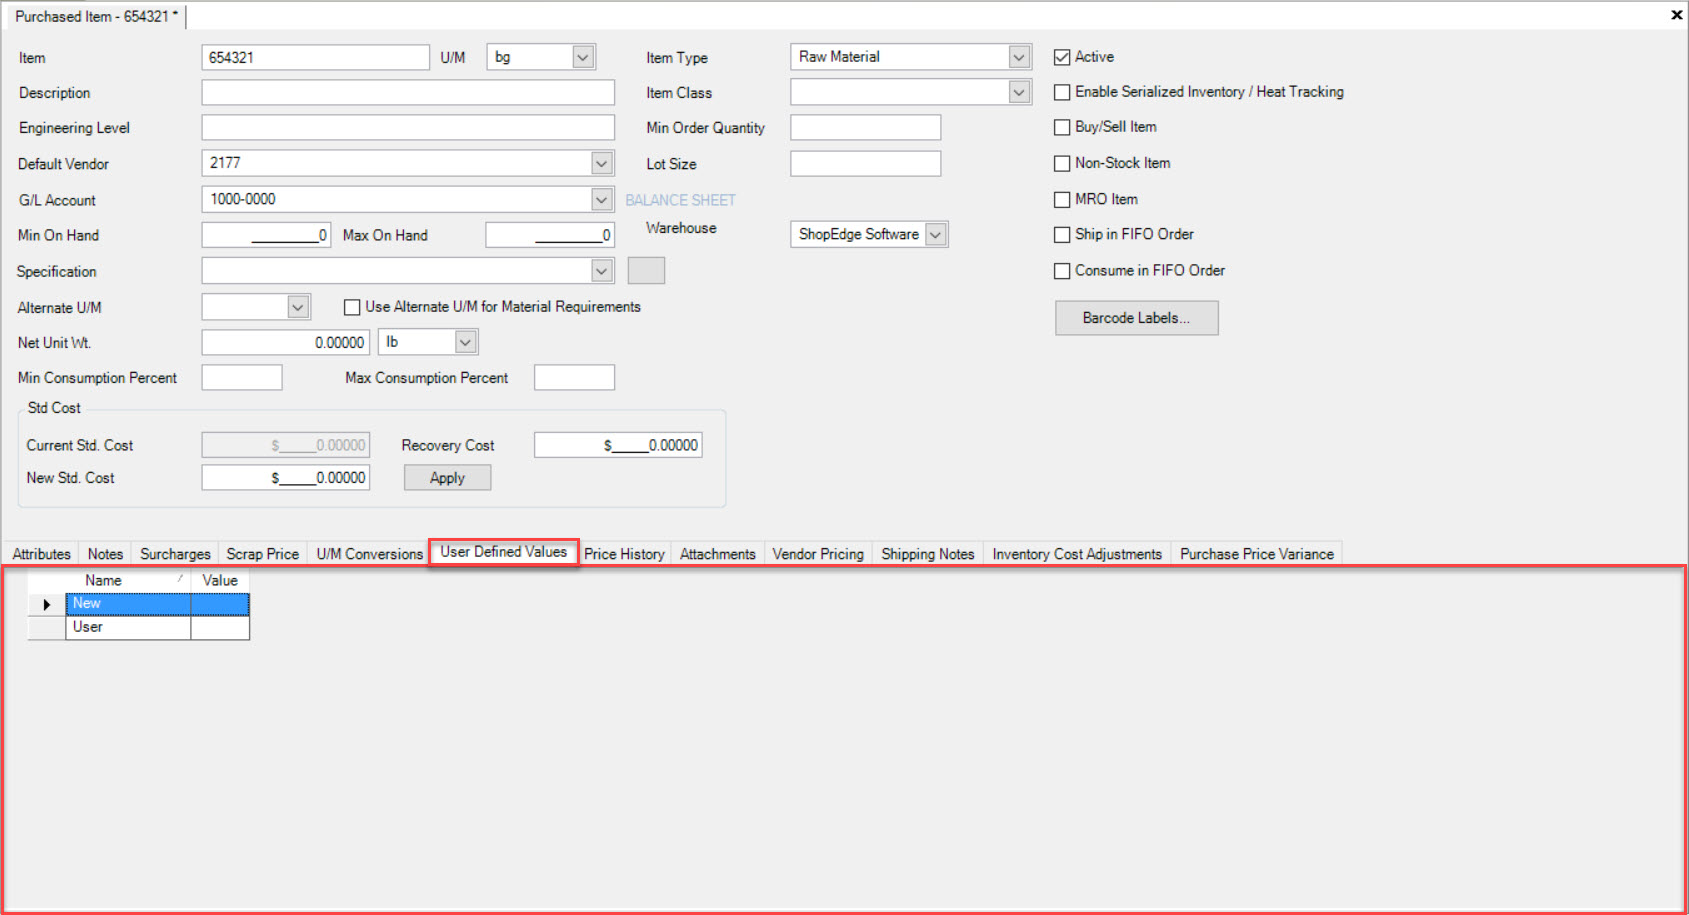
User Defined Values Tab
To view the User Defined Values for a Purchased Item, make sure to select the  tab located near the bottom of the Purchased Item detail
screen.
tab located near the bottom of the Purchased Item detail
screen.
Based on the Used Defined Values added in Purchasing > Admin > User Defined Fields, they will be displayed.
Note
To add, edit, or delete User Defined Values, please see Purchasing > Admin > User Defined Fields.
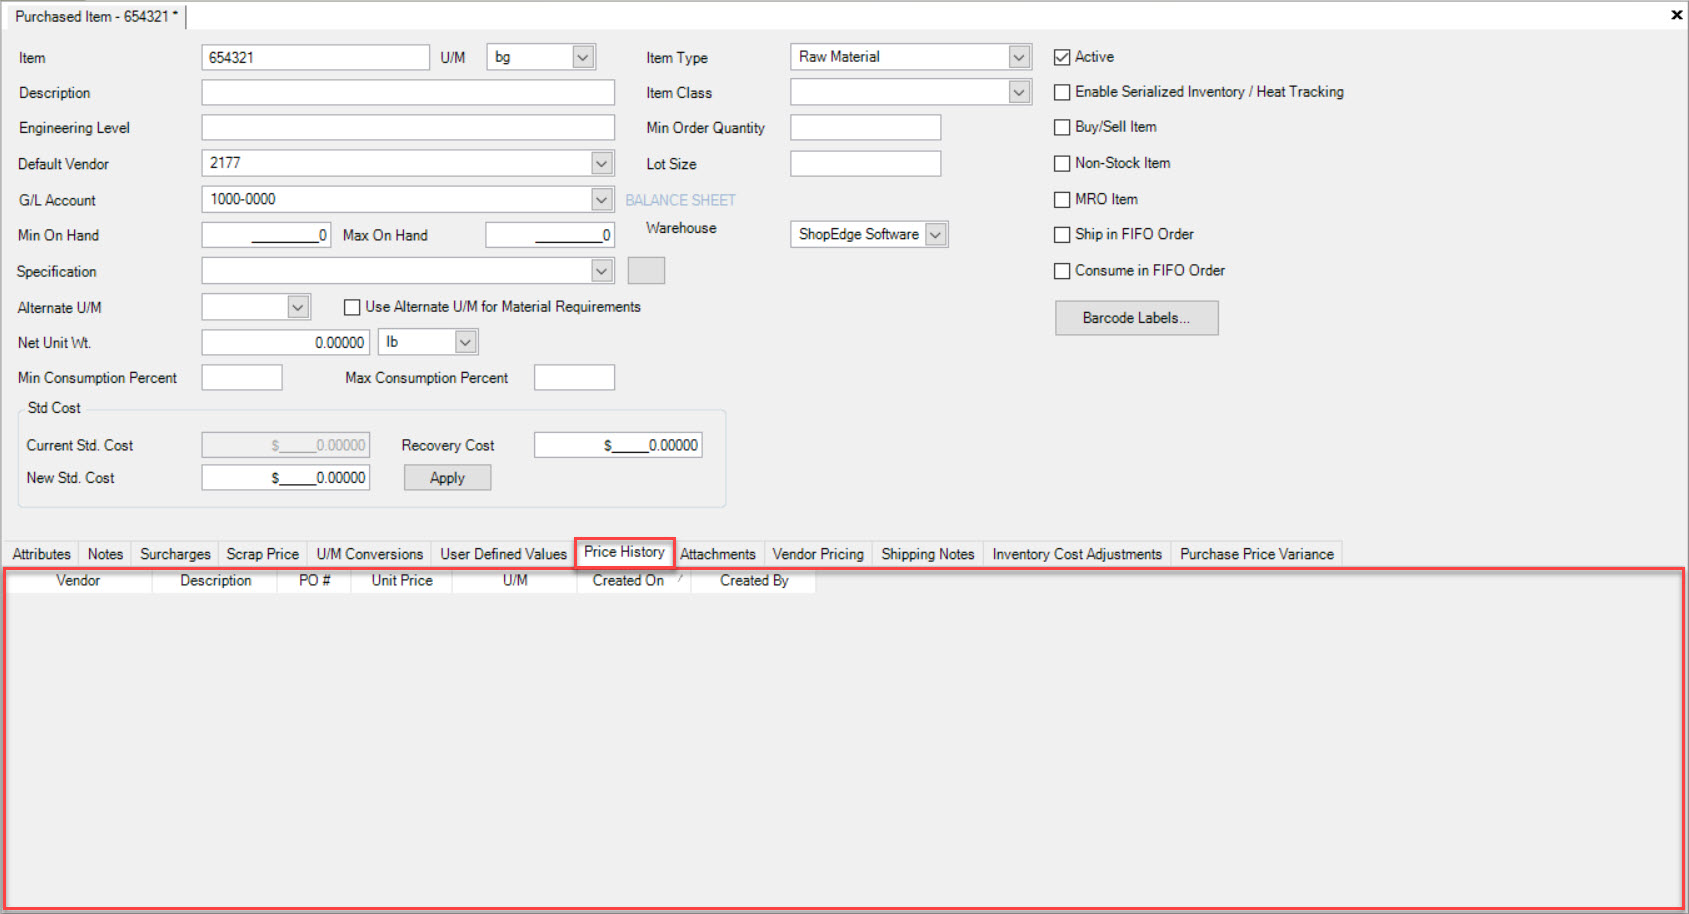
Price History Tab
If users wish to view Price History for a Purchased Item, make sure to select the  tab located near the bottom of the Purchased Item detail
screen.
tab located near the bottom of the Purchased Item detail
screen.
The recorded Price History of the selected Purchased Item will be displayed with details including the Vendor, Description, PO #, Unit Price, U/M, Created On date, and Created By.
Attachments Tab
Users have the ability add or delete Attachments to a Purchased Item.
To add an Attachment, make sure to select the  tab located near the bottom of the Purchased Item detail screen.
Click on the  button located at the bottom of the screen.
Users will then be able to select an Attachment from their computer. Once an Attachment has been selected, click on the 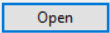 button.
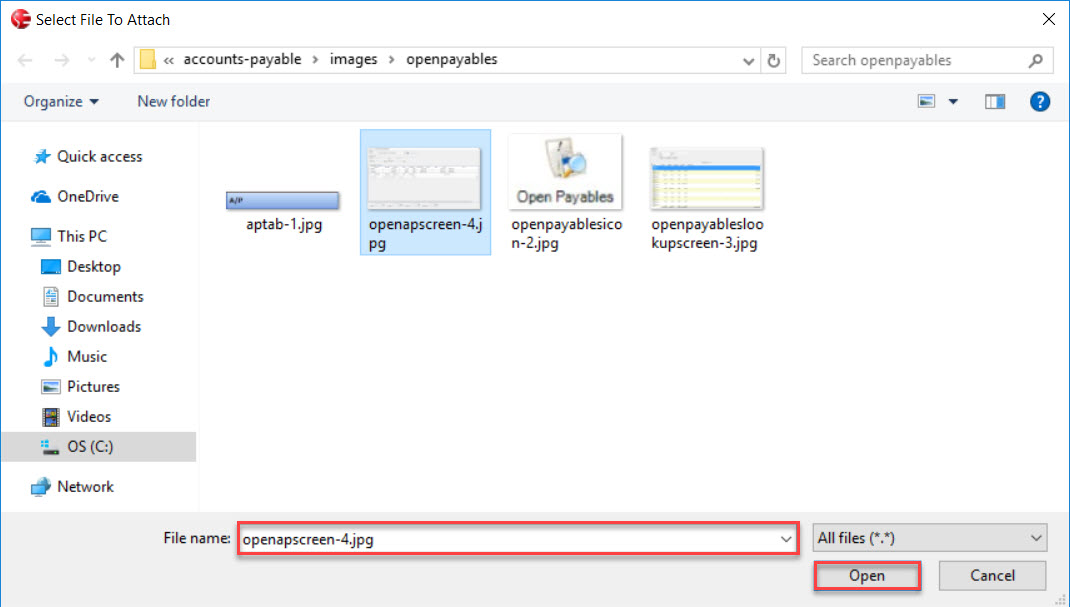
The selected Attachment will be added to the Purchased Item.
Make sure to save your changes before exiting the screen.
To delete an Attachment, make sure to select the tab located near the bottom of the Purchased Item detail screen.
Highlight the appropriate row of the Attachment you wish to delete. Use your Delete key and when the system prompts you, select Yes.
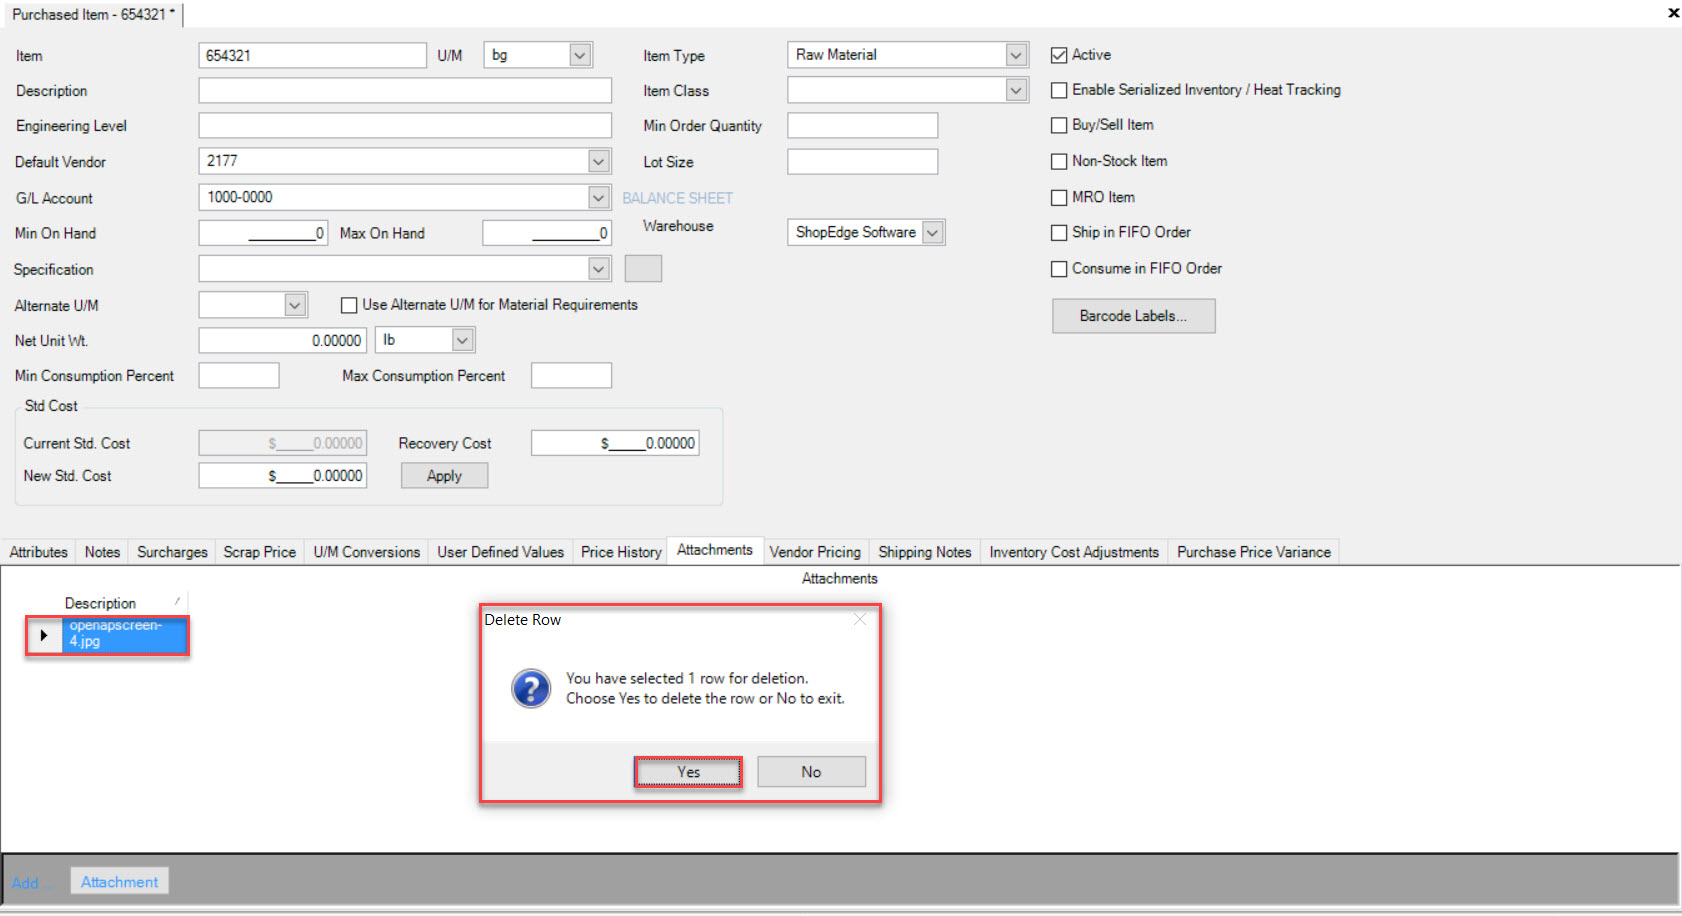
The highlighted Attachment will be deleted.
Make sure to save your changes before exiting the screen.
Vendor Pricing Tab
Users have the ability add, edit, or delete Vendor Pricing for a Purchased Item.
To add a Vendor Pricing, make sure to select the  tab located near the bottom of the Purchased Item detail screen.
Then, click on the  button located at the bottom of the screen. A new row will appear where users must select and enter the necessary information such as
the Vendor, Unit Price, U/M, Vendor Part #, Lead Time, Transit Time, Min. Order Quantity, Lot Size, Under Receive %, Allowed Over Received %, Created On date, Created By, and Notes.
button located at the bottom of the screen. A new row will appear where users must select and enter the necessary information such as
the Vendor, Unit Price, U/M, Vendor Part #, Lead Time, Transit Time, Min. Order Quantity, Lot Size, Under Receive %, Allowed Over Received %, Created On date, Created By, and Notes.
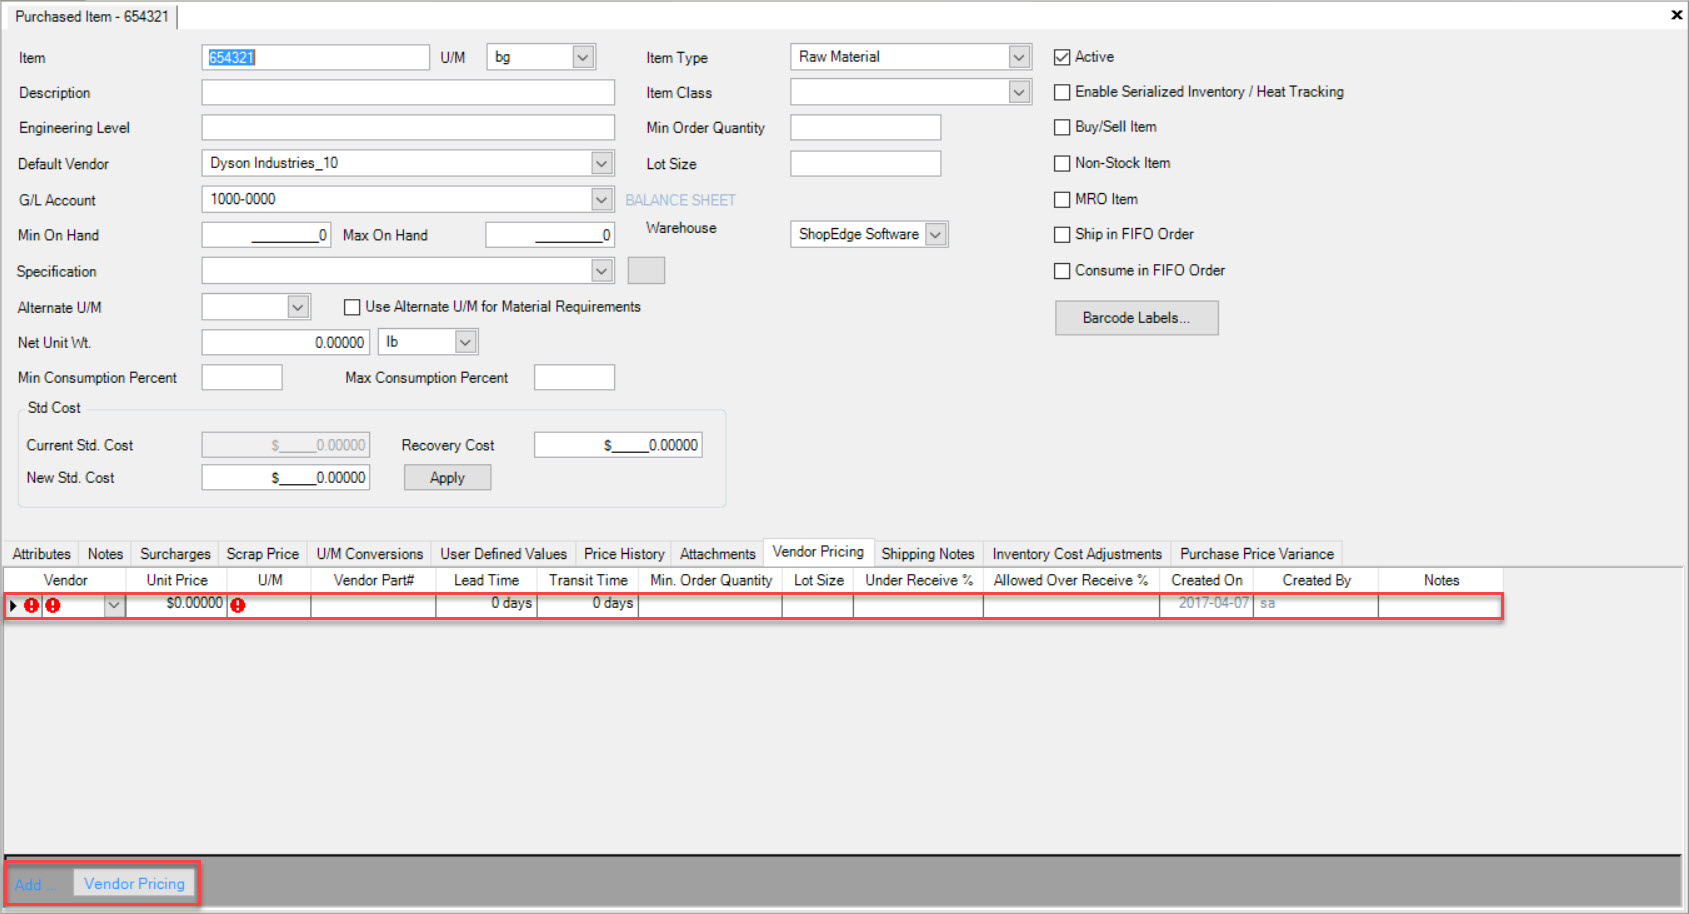
Once the necessary information has been entered, make sure to save your changes before exiting the screen.
To edit a Vendor Pricing for a Purchased Item, simply use the available drop-down menus and textboxes to make the necessary changes.
Once the necessary changes have been made, make sure to save before exiting the screen.
To delete a Vendor Pricing, locate and highlight the appropriate row of the Vendor Pricing you wish to delete.
Use your Delete key and when the system prompts you, select Yes.
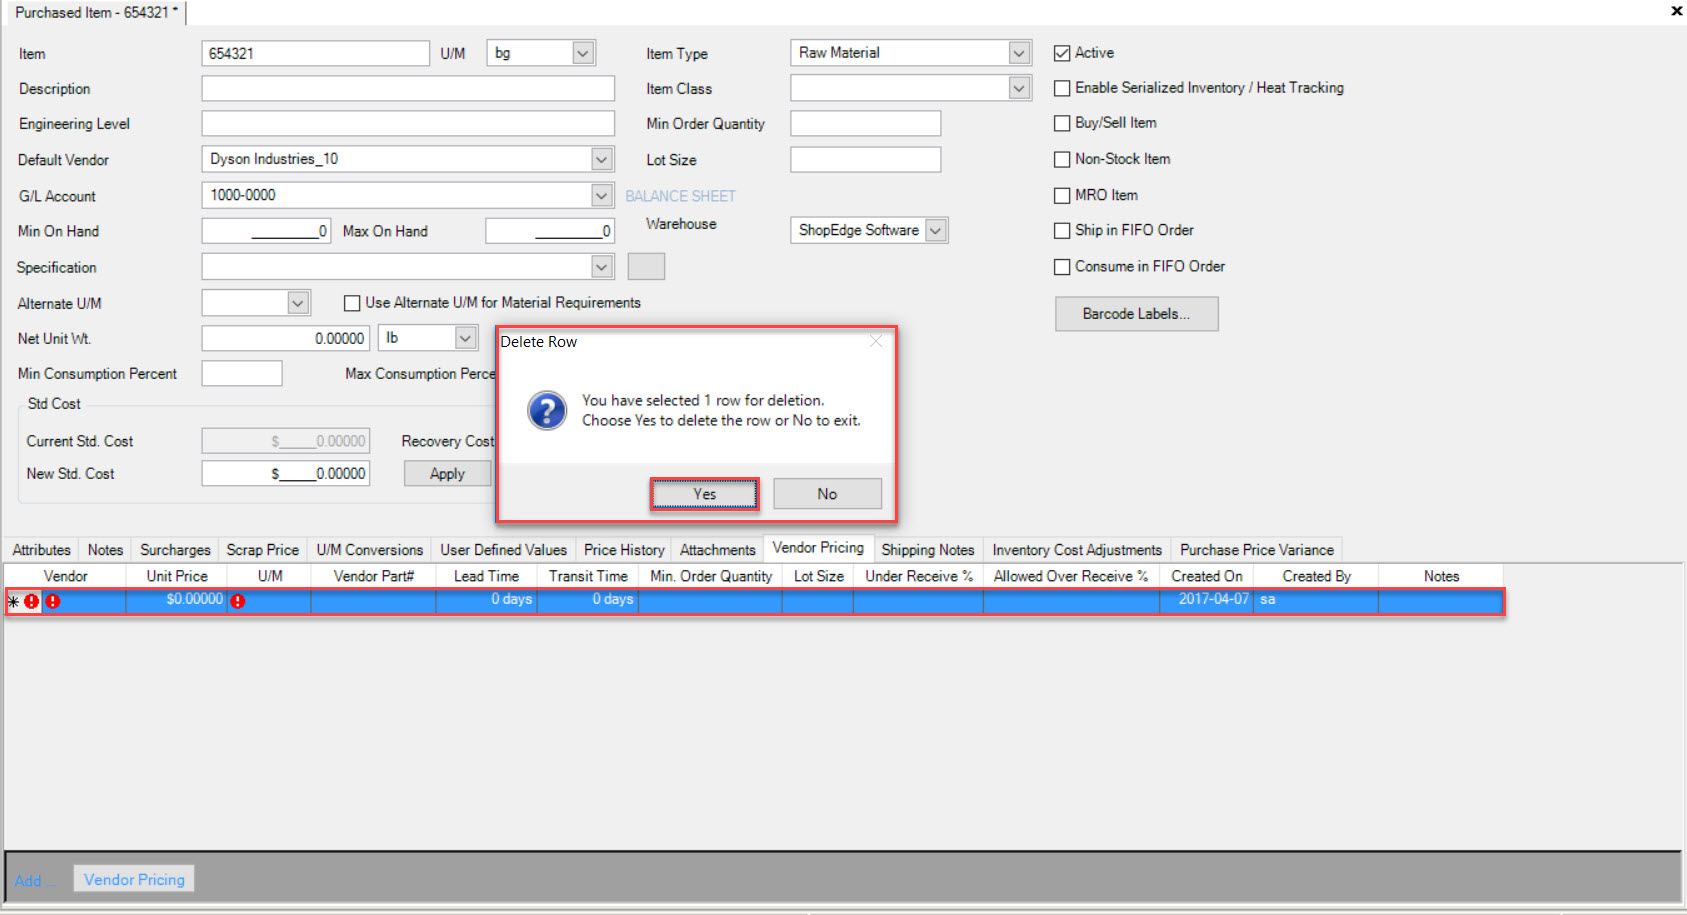
The highlighted Vendor Pricing will be deleted.
Make sure to save your changes before exiting the screen.
Shipping Notes Tab
Users have the ability to add, edit, and/or delete Shipping Notes to a Purchased Item if there are specific details on how to ship the Item.
To do so, make sure to select the  tab located near the bottom of the Purchased Item detail screen.
Use the available textbox to add, edit, or delete any necessary Shipping Notes for the Purchased Item.
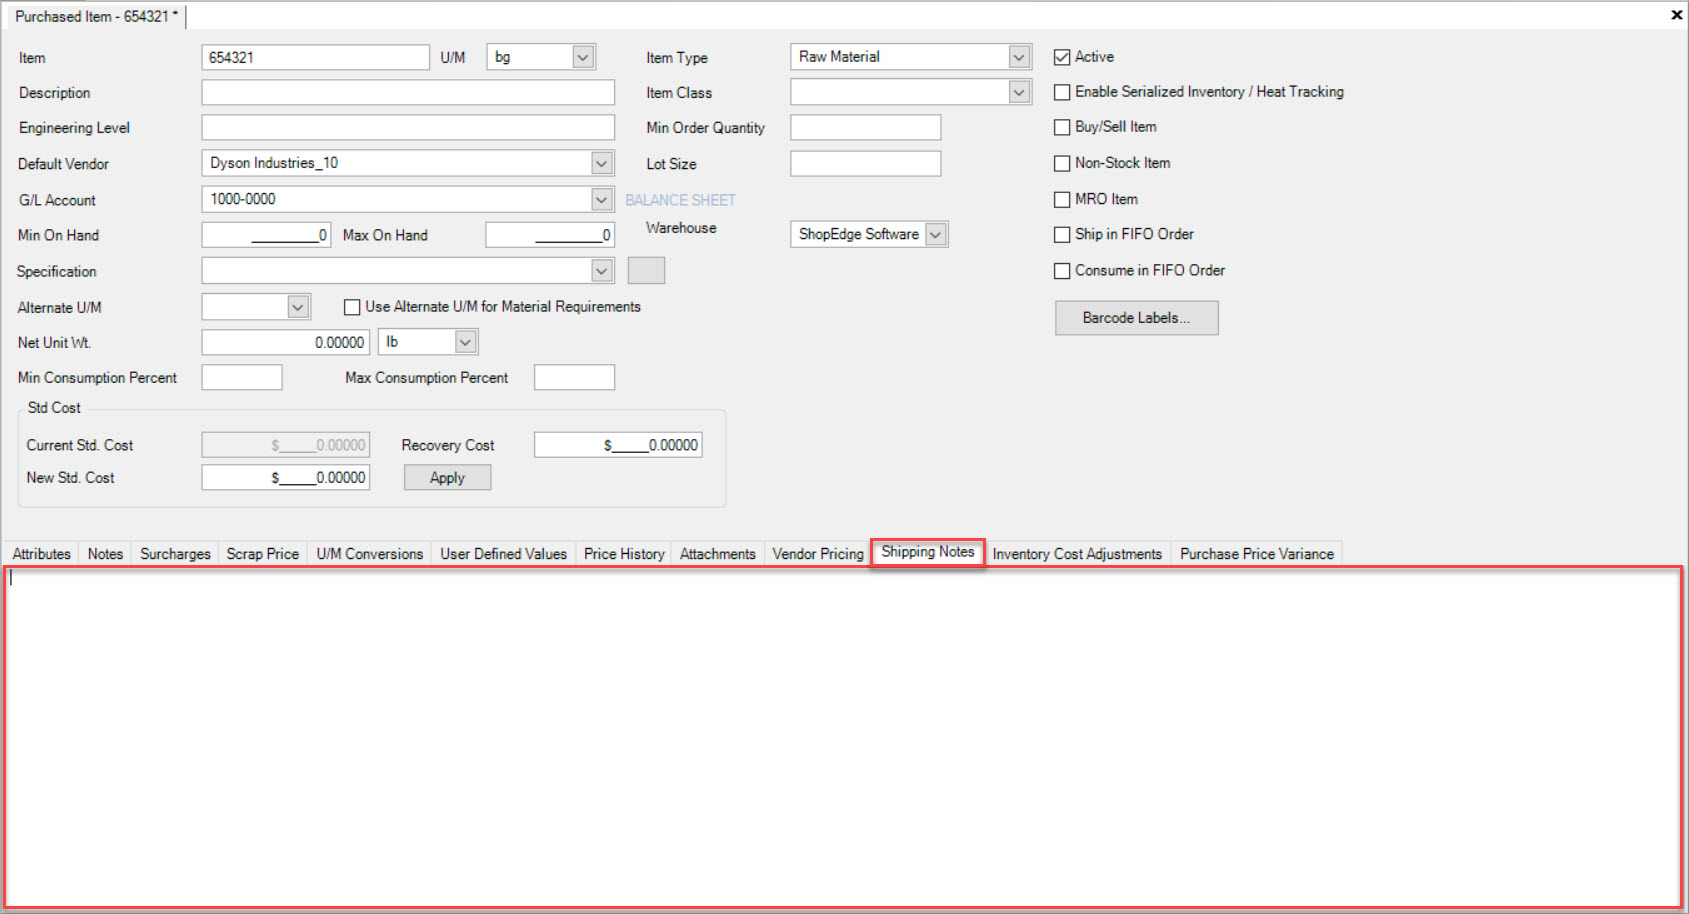
Make sure to save your changes before exiting the screen.
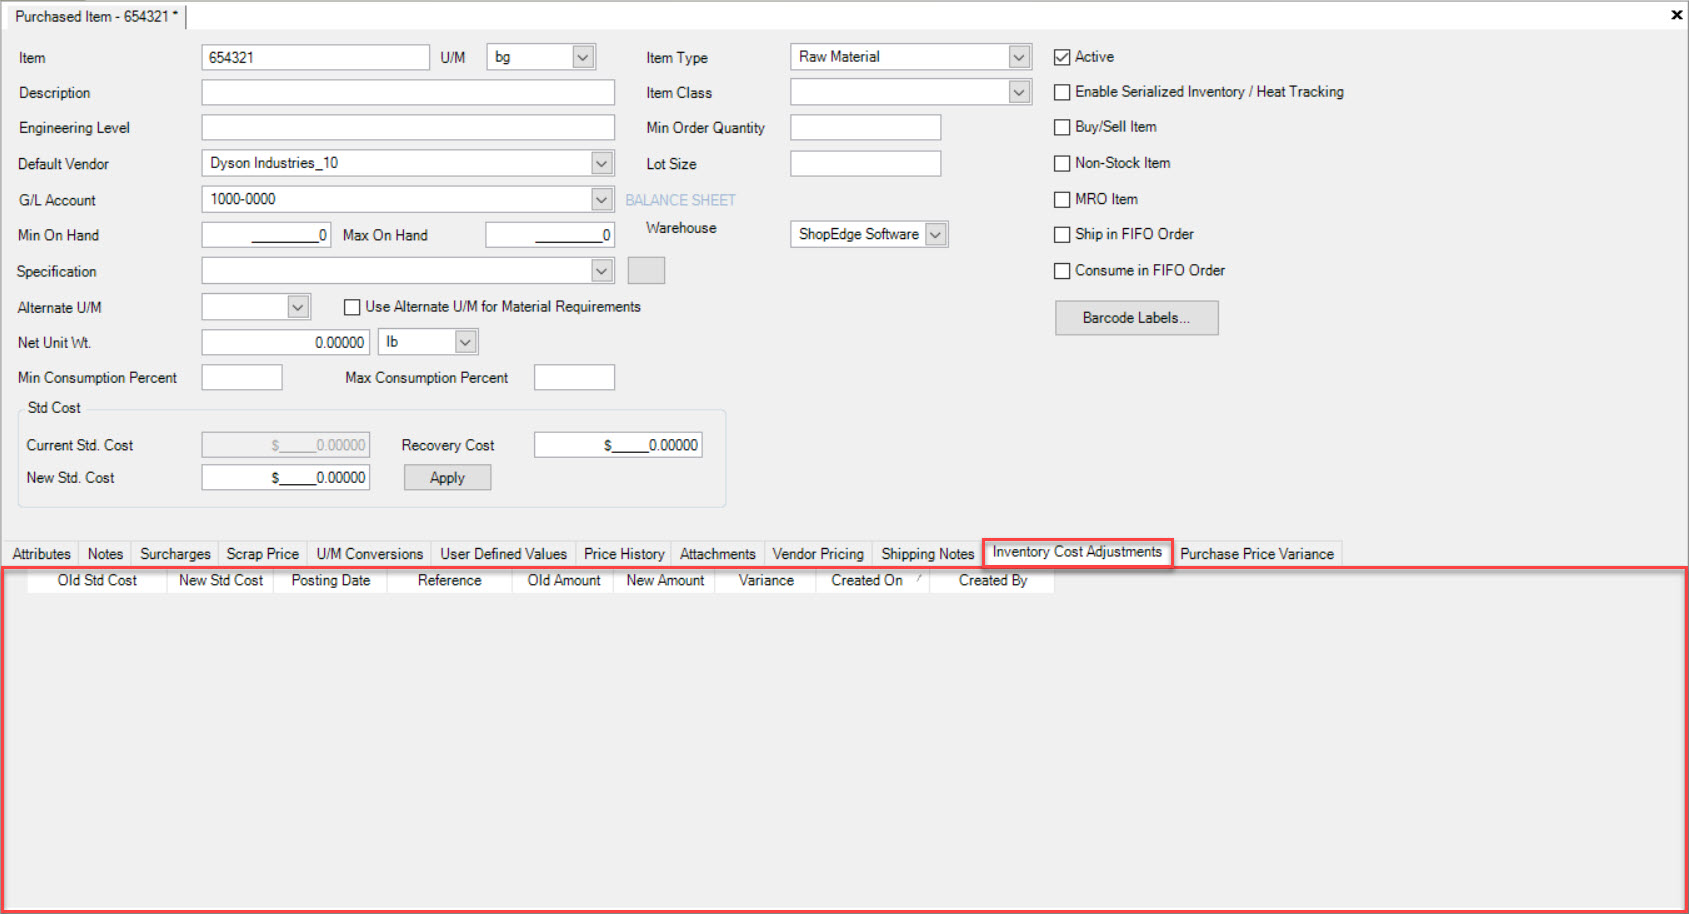
Inventory Cost Adjustments Tab
If users wish to view Inventory Cost Adjustments for a Purchased Item, make sure to select the  tab located near the bottom of the
Purchased Item detail screen.
tab located near the bottom of the
Purchased Item detail screen.
Users will be able to view Inventory Cost Adjustment details such as the Old Std. Cost, New Std. Cost, Posting Date, Reference, Old Amount, New Amount, Variance, Created On date, and Created By.
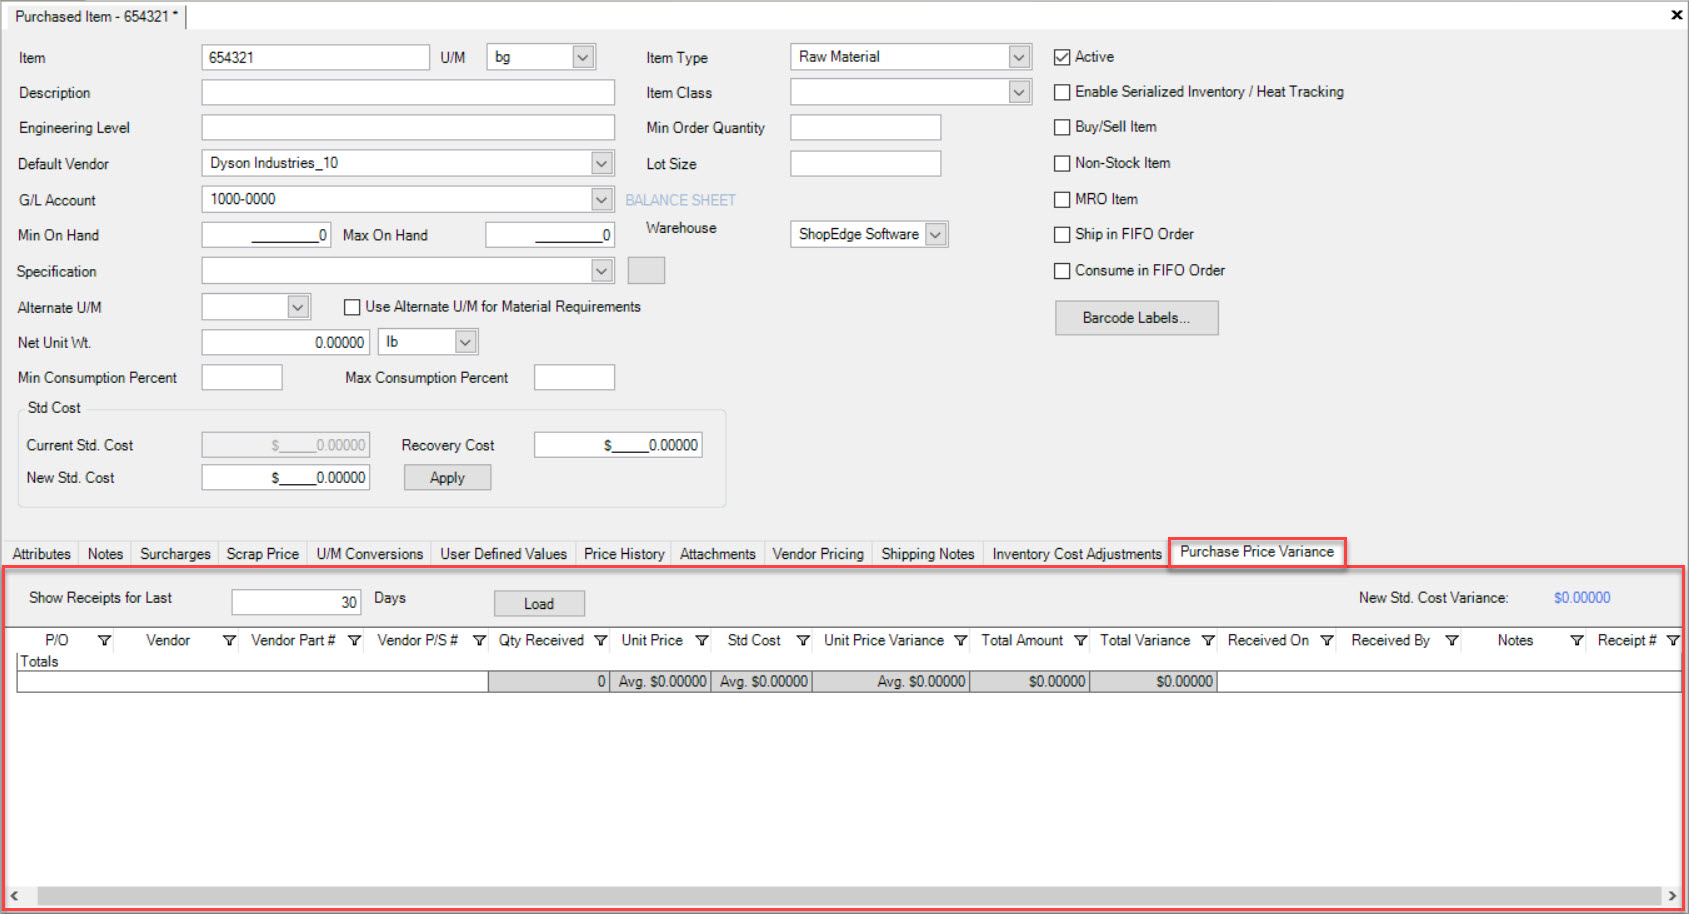
Purchase Price Variance Tab
If users wish to view the Purchase Price Variance for a Purchased Item, make sure to select the  tab located near the bottom of the
Purchased Item detail screen.
tab located near the bottom of the
Purchased Item detail screen.
You must enter in a number for the amount of Days you wish to view the Purchase Price Variances for and then click on the  button. The system will populate
the Purchase Price Variances accordingly.
button. The system will populate
the Purchase Price Variances accordingly.
Making a Purchased Item Active or In-Active
A Purchased Item cannot be deleted in the ShopEdge system, it can only be made Active or In-Active.
To make a Purchased Item Active, make sure to select the Active checkbox located on the Purchased Item detail screen.
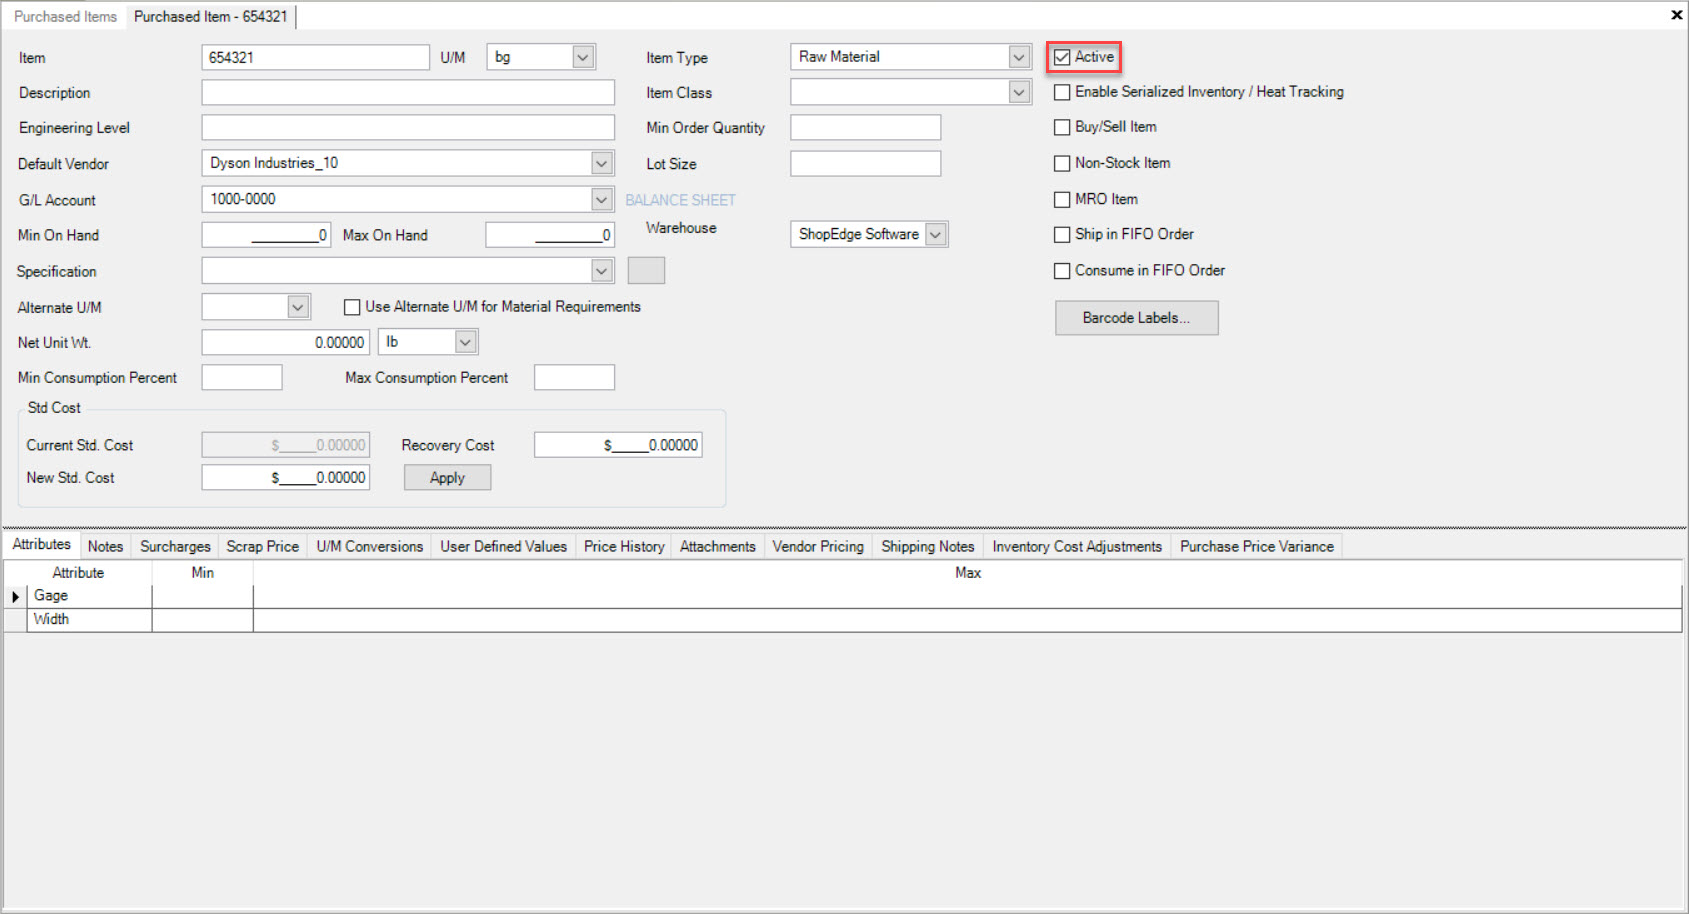
To make a Purchased Item In-Active, make sure to de-select the Active checkbox on the Purchased Item detail screen.
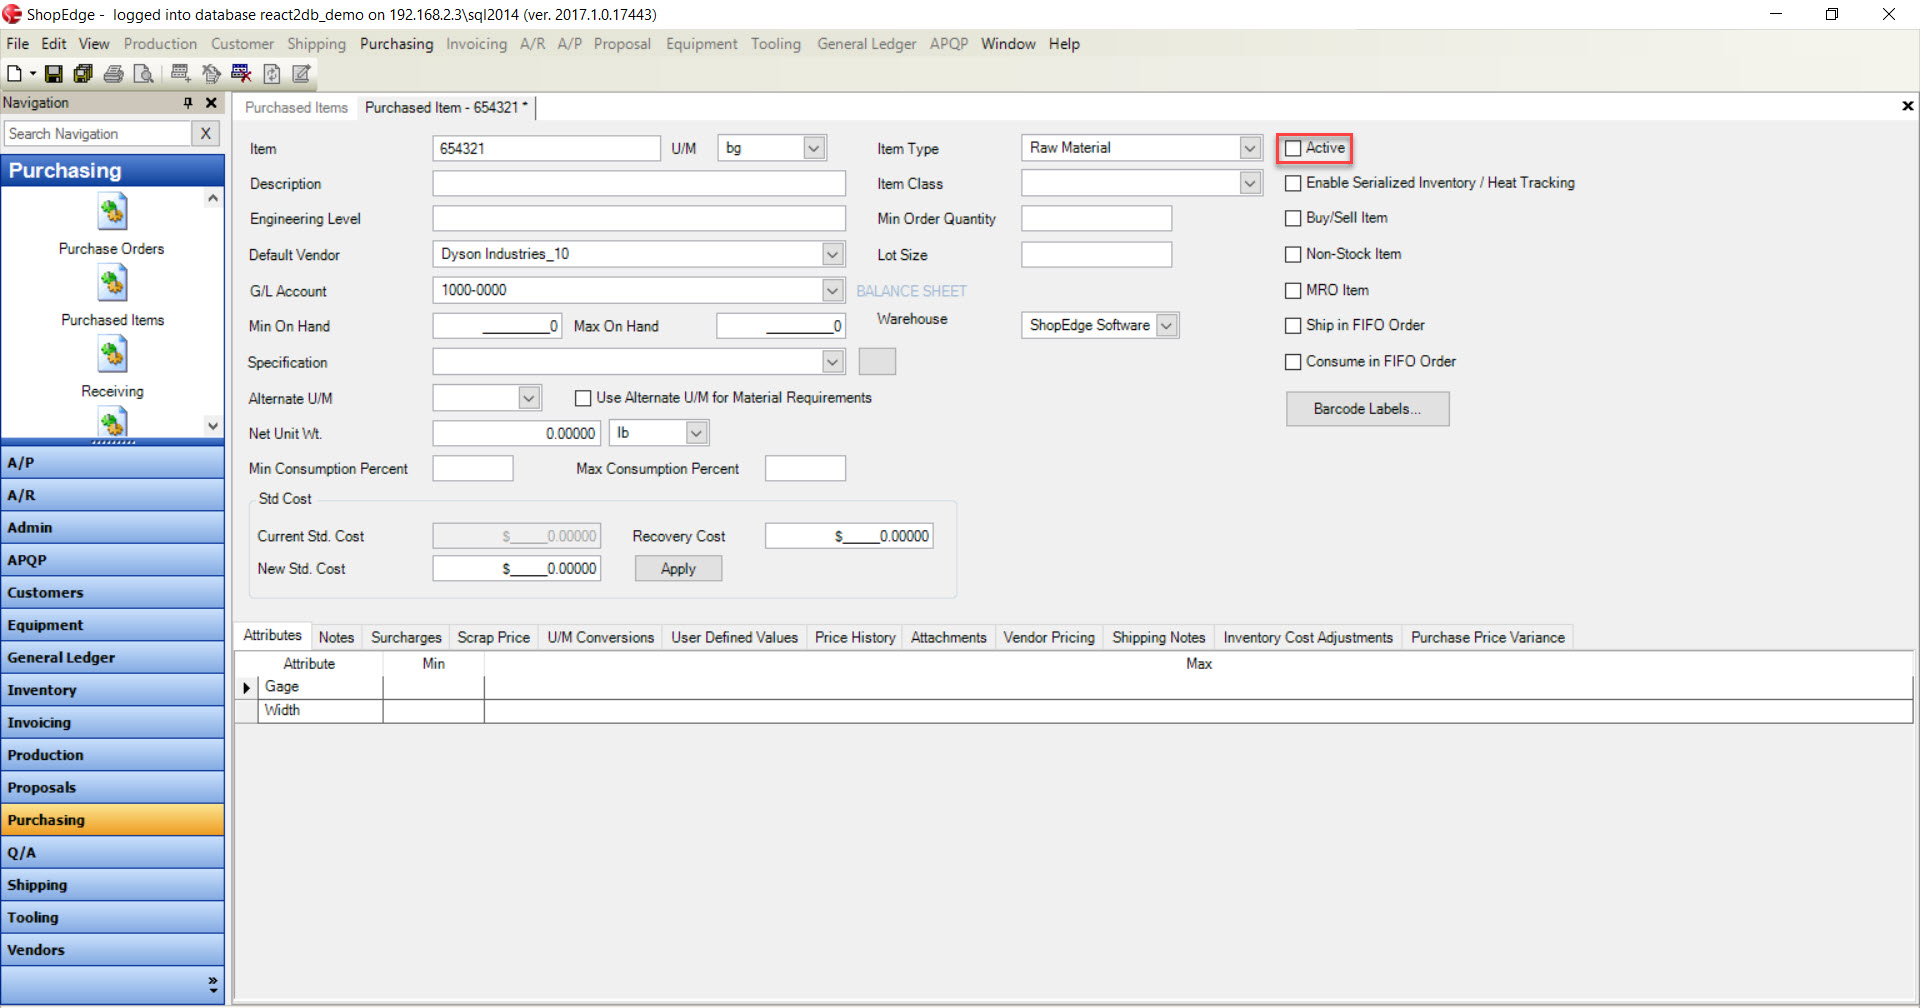
Make sure to save your changes before exiting the screen.