Vendors
Adding a New Vendor
There are three different ways to add a new Vendor to the system. The first way is to press the Ctrl + Shift + V keys. The second way is to navigate to File > New > Vendor.
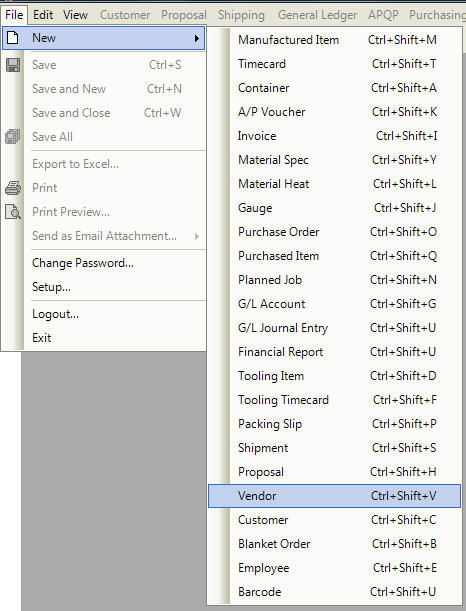
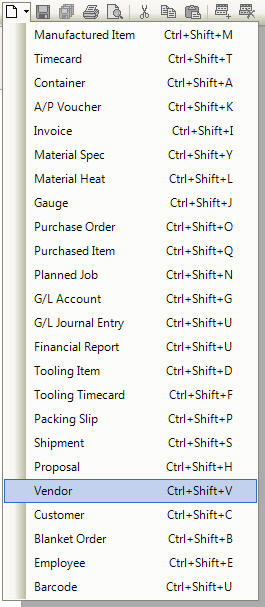
The last way is to click on the  button, and then on the Vendor option.
All of these three options will open a New Vendor screen.
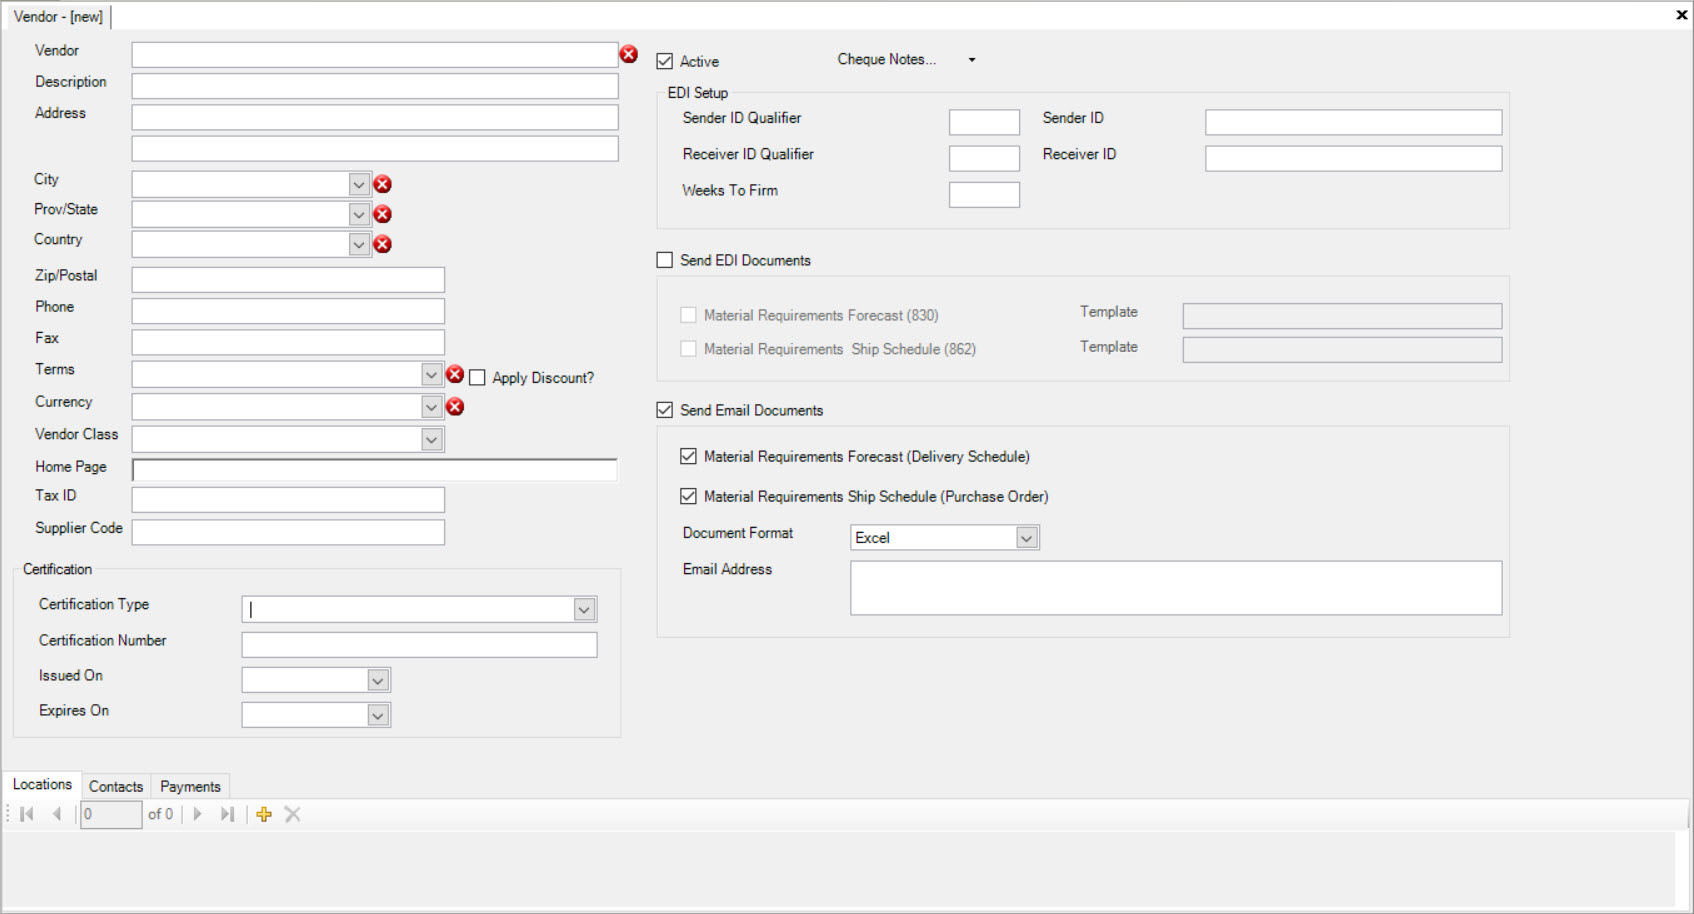
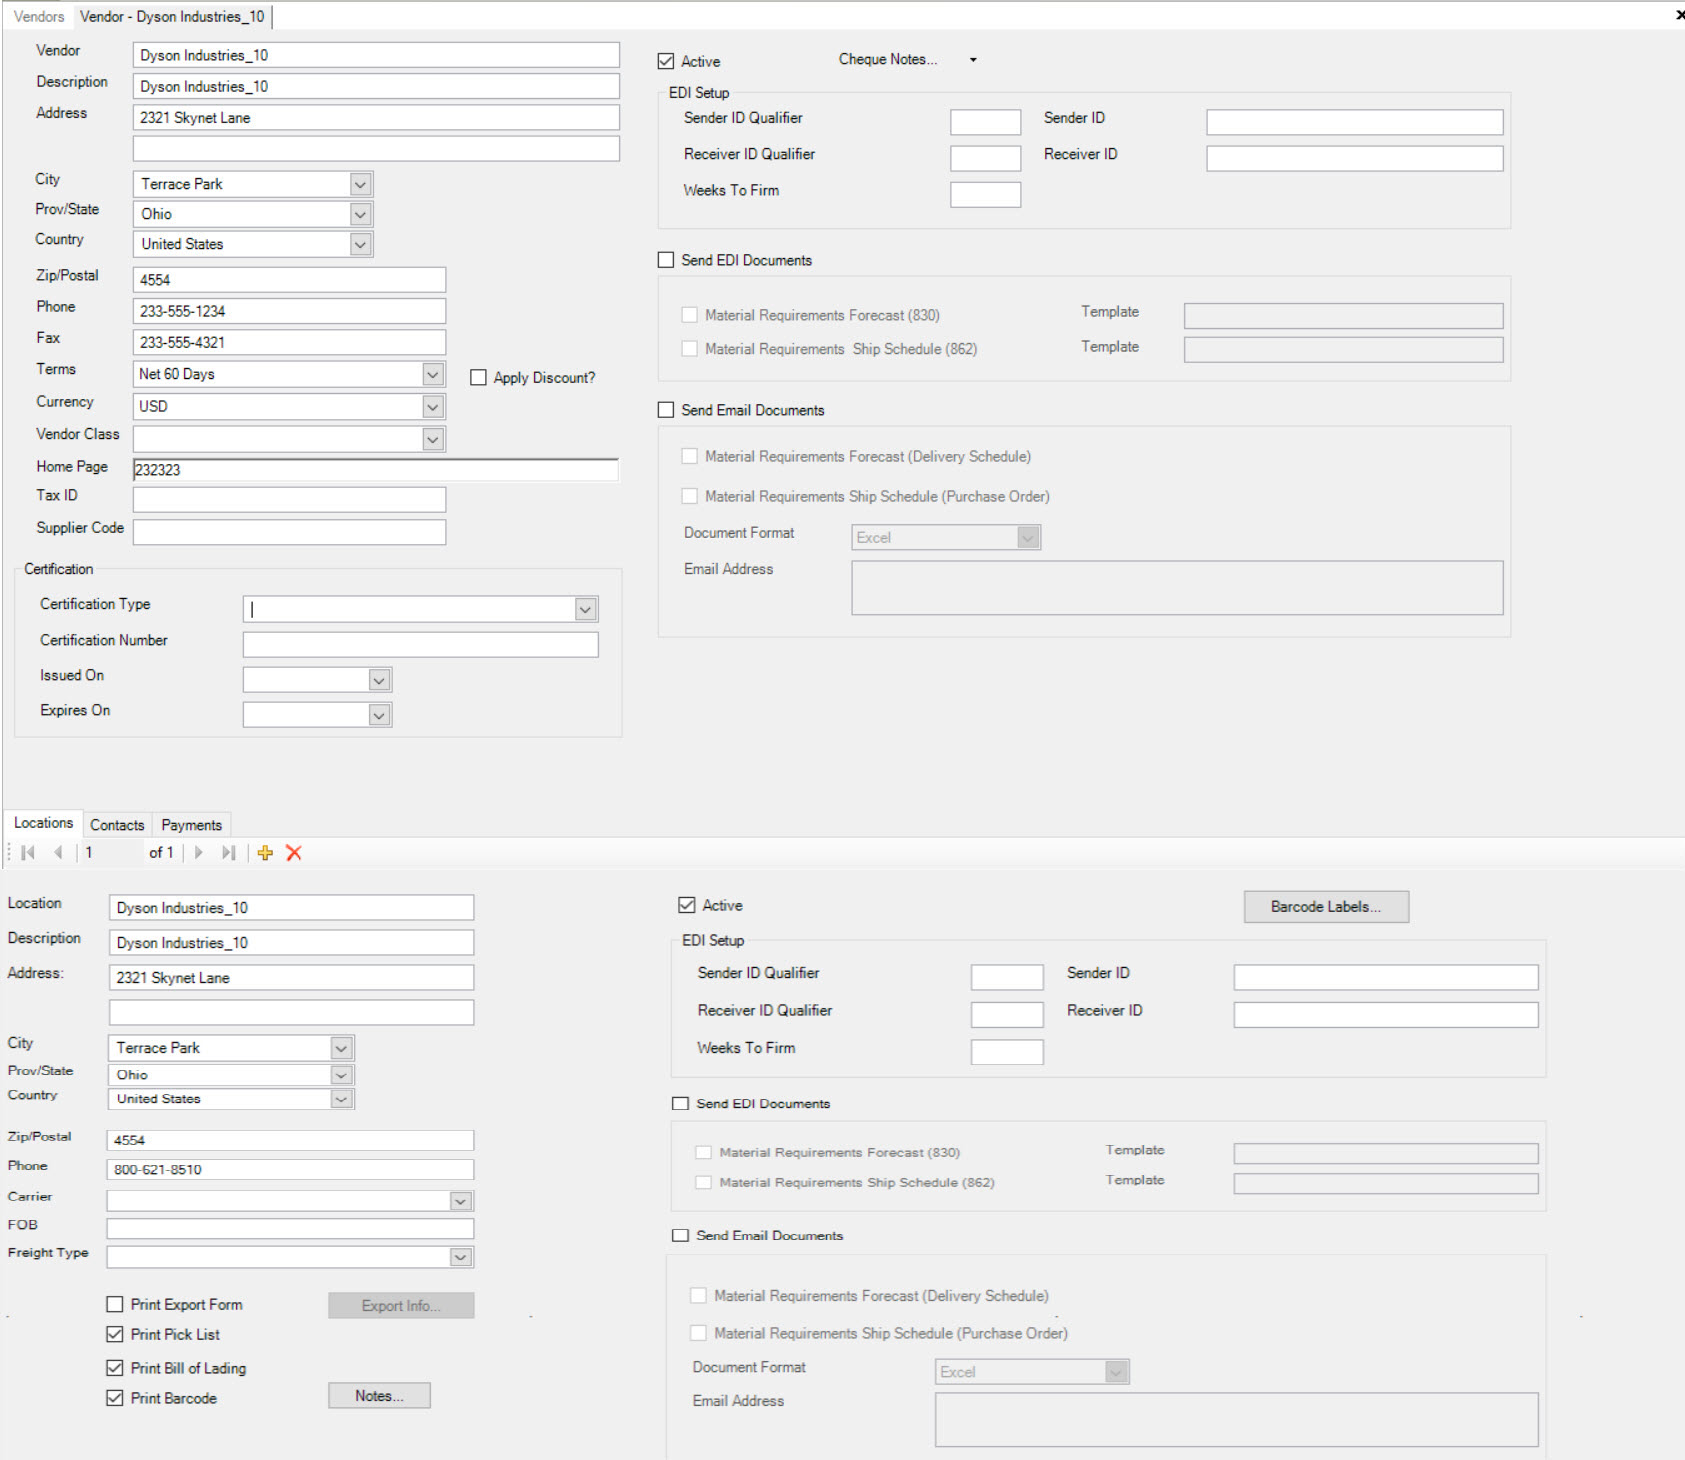
The user must fill in the necessary fields such as Vendor, Description, City, Prov/State, Country, Zip/Postal Code, Terms, and Currency.
If all necessary fields are not filled in, the user will be prompted for this information when they perform a save.
Once the proper fields have been entered and saved, the user can find this Vendor along with other Vendors in the Vendor Lookup screen.
Adding a New Vendor Location
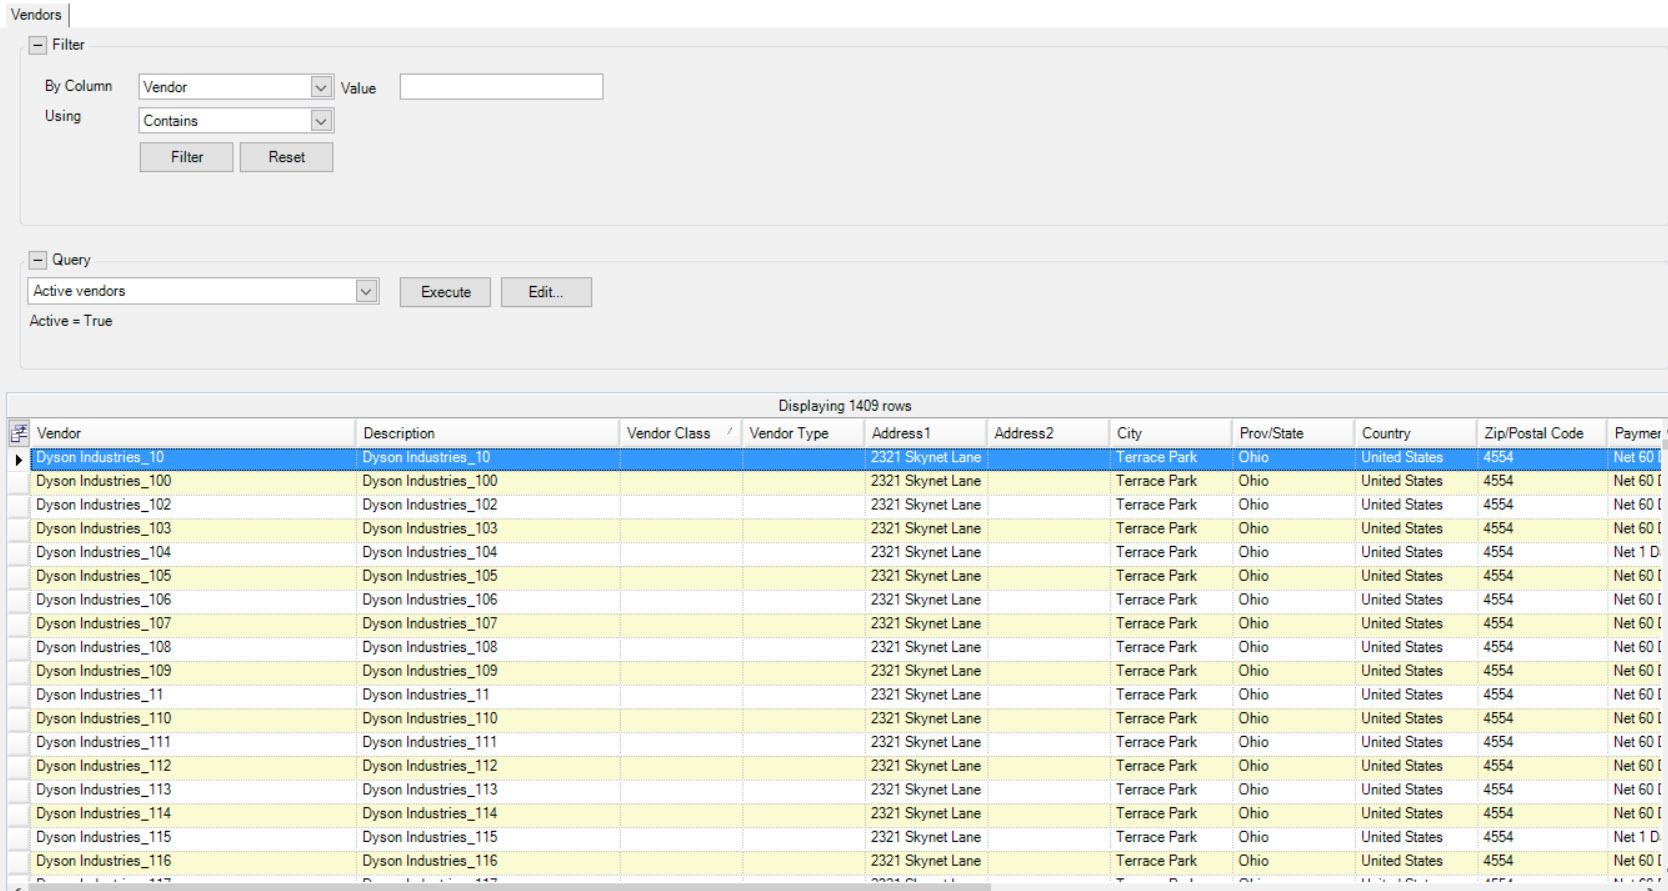
If you wish to add more than one location for a Vendor, simply use the Vendor Lookup to find the Vendor you are looking for,
or to add a new one. You can access the Vendor Lookup screen by navigating to the  tab, and clicking on the
 icon. The Vendors screen will be displayed.
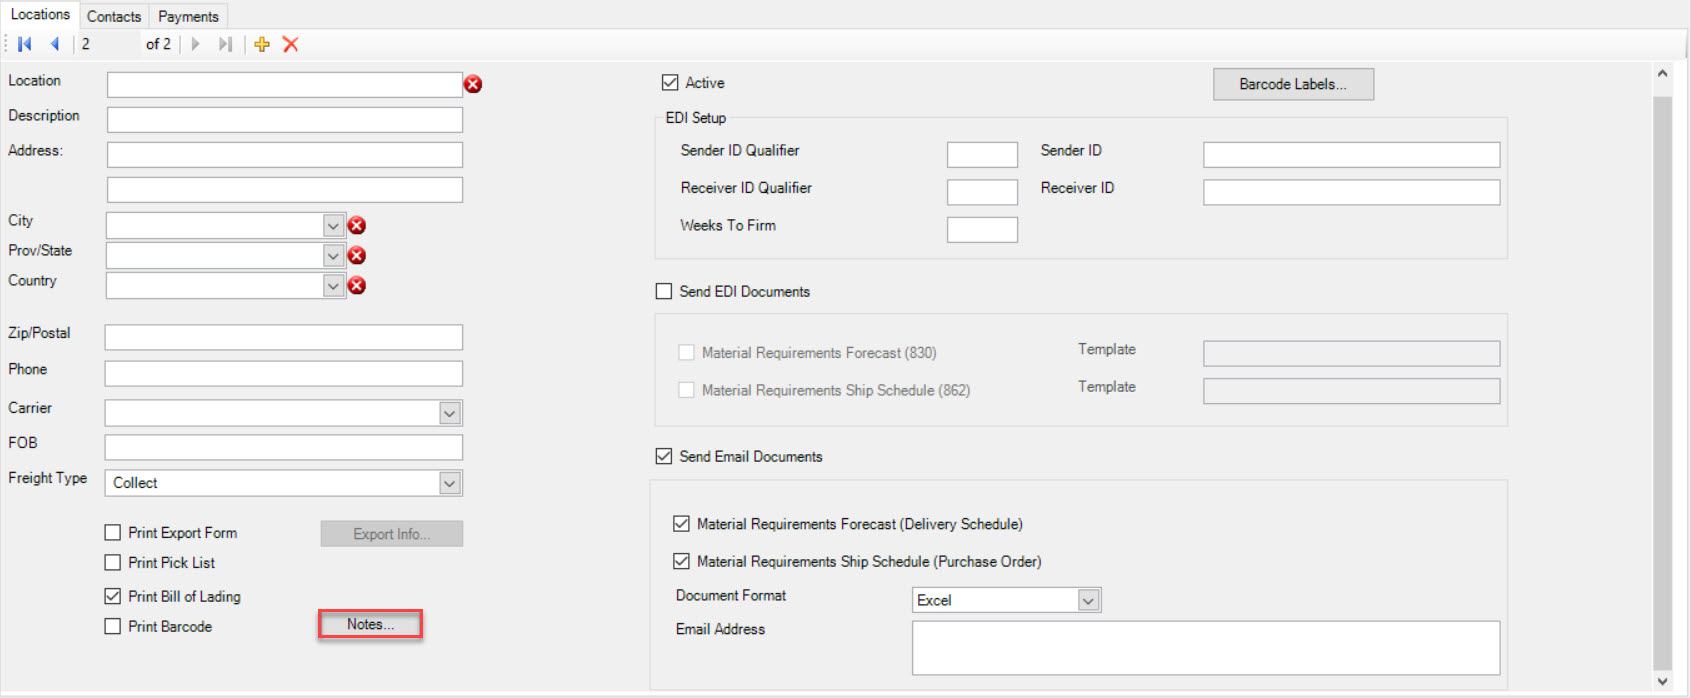
Once you have found the Vendor you are looking for, double-click on the appropriate row. On the Vendor Detail screen click on the Locations tab and then click on the + sign.

A new Location screen will be displayed, where you can fill out the necessary information.

While adding a new Location to a Vendor, users also have the ability to add Location Notes. To do so, click on the Notes button in the Locations screen.
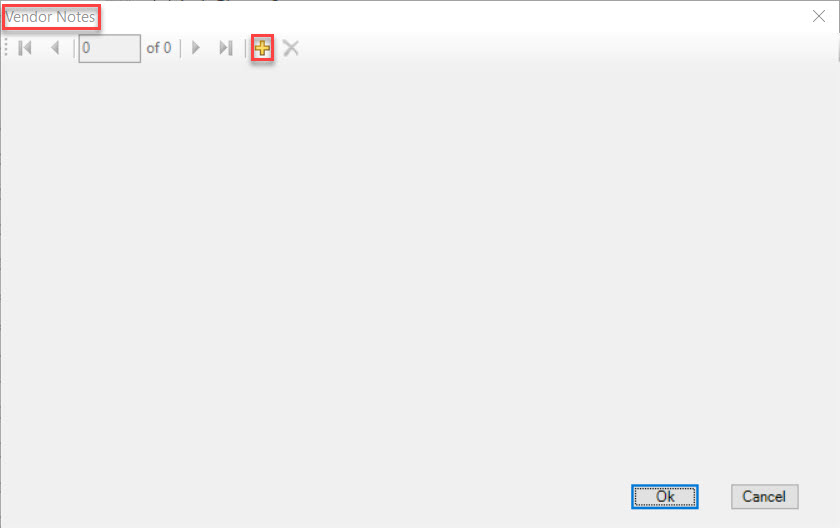
This will open the Vendor Notes window. Click on the + button.
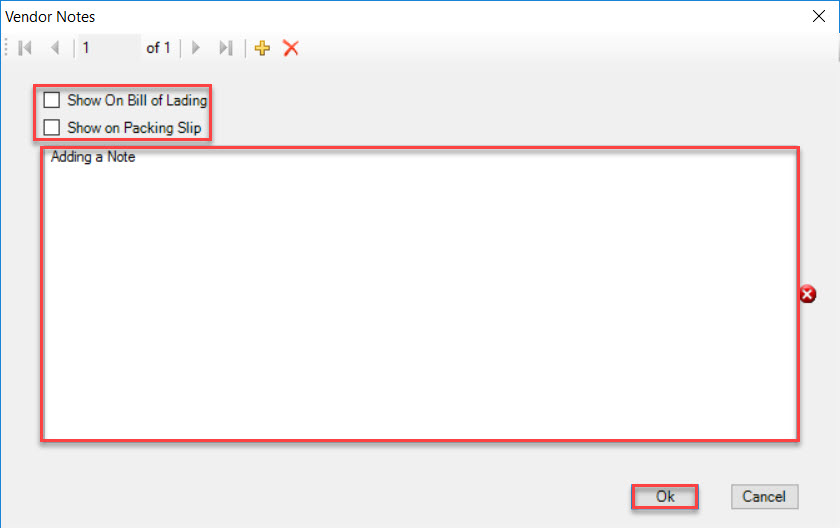
Users will be able to add a note and select or de-select whether or not they would like the note to Show On Bill of Lading or Show on Packing Slip. Add the Note and click Ok.
Make sure to save your changes before exiting the screen.
Adding a New Vendor Contact
If you wish to add more than one contact for a vendor, simply use the Vendor Lookup to find the vendor you are looking for,
or to add a new one. You can access the Vendor Lookup screen by navigating to the tab, and clicking on the
icon. This will open the Vendors screen.
Once you have found the Vendor you are looking for, double-click on the appropriate row. On the Vendor Detail screen click on the Contacts tab and then click on the + sign.
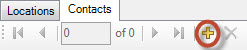
A new Contact screen will be displayed, where you can fill out the necessary information.
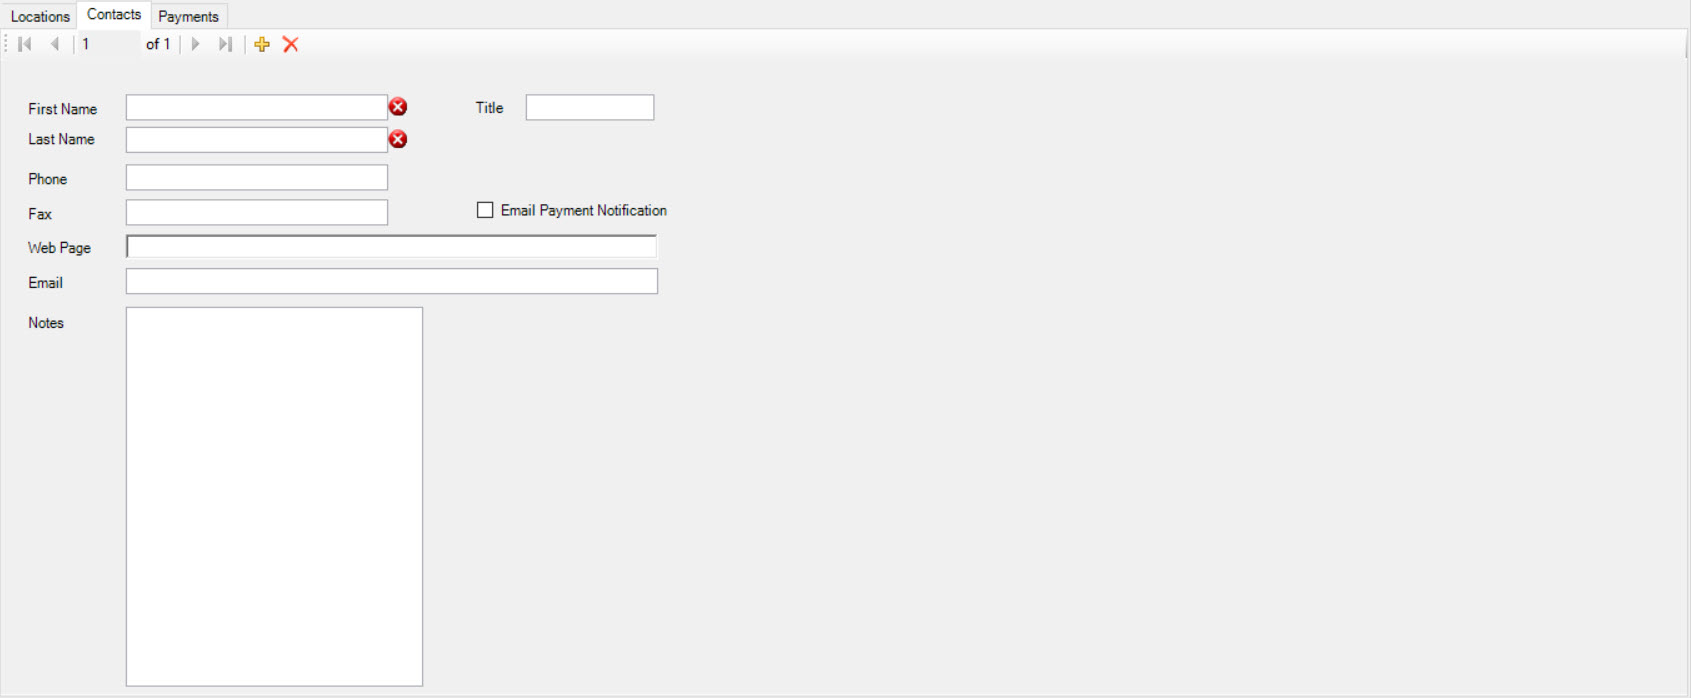
Make sure to save your changes before exiting the screen.
Maintaining a Vendor
To find and maintain a Vendor, navigate to the tab, then click on the
icon. This will open the Vendors screen.
Once the Vendor screen is open, you can search for a particular Vendor using the search filter at the top of the screen. Once you have found the Vendor you wish to open, double-click on the appropriate row. The Vendor Detail screen will be displayed.
Make any necessary changes to the Vendor information, and make sure to save your changes before exiting the screen.