Admin
Vendors Admin allows users to view, add, edit, or delete Vendor Types, Vendor Classes, Carriers, Cities, Regions, Countries, Certificate Types, and Payment Types.
Vendor Admin
To view the Vendor Admin screen, navigate to the  tab and click on the
 ![]() icon.
icon.
This will open the Vendor Admin screen.
Vendor Types
To view Vendor Types, navigate to the  tab and click on the
 ![]() icon.
icon.
This will open the Vendor Admin screen.

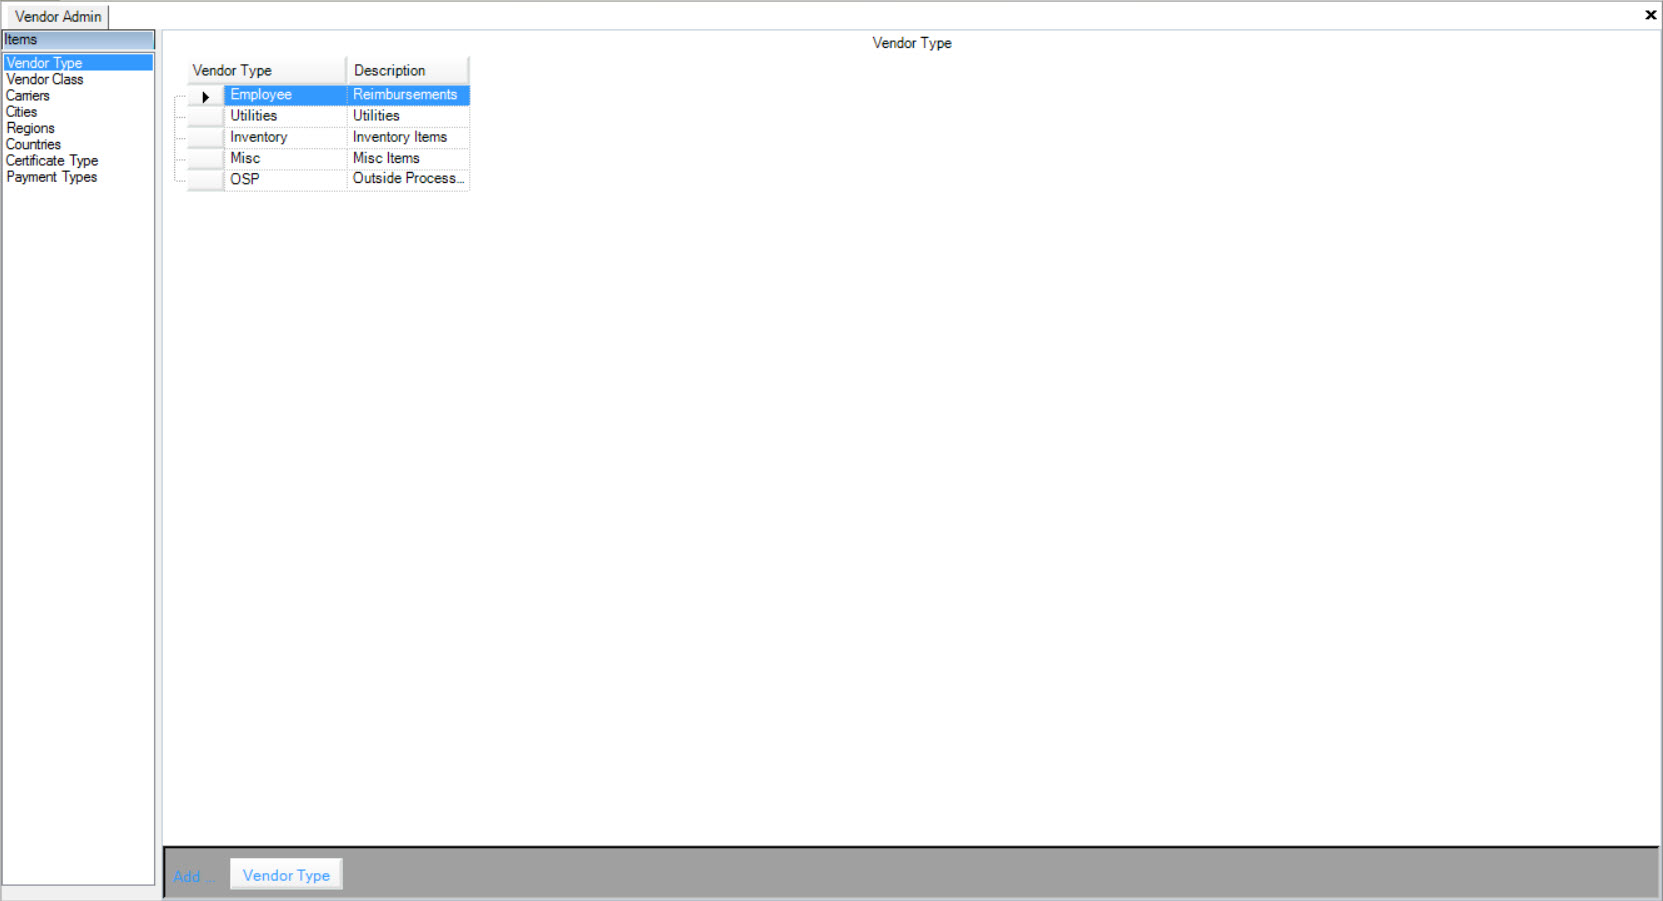
Make sure the Vendor Types tab is selected to the left of the screen. Here, users will be able to view Vendor Types and Descriptions.
Adding Vendor Types
To add a Vendor Type, navigate to the  tab and click on the
 ![]() icon.
icon.
This will open the Vendor Admin screen.

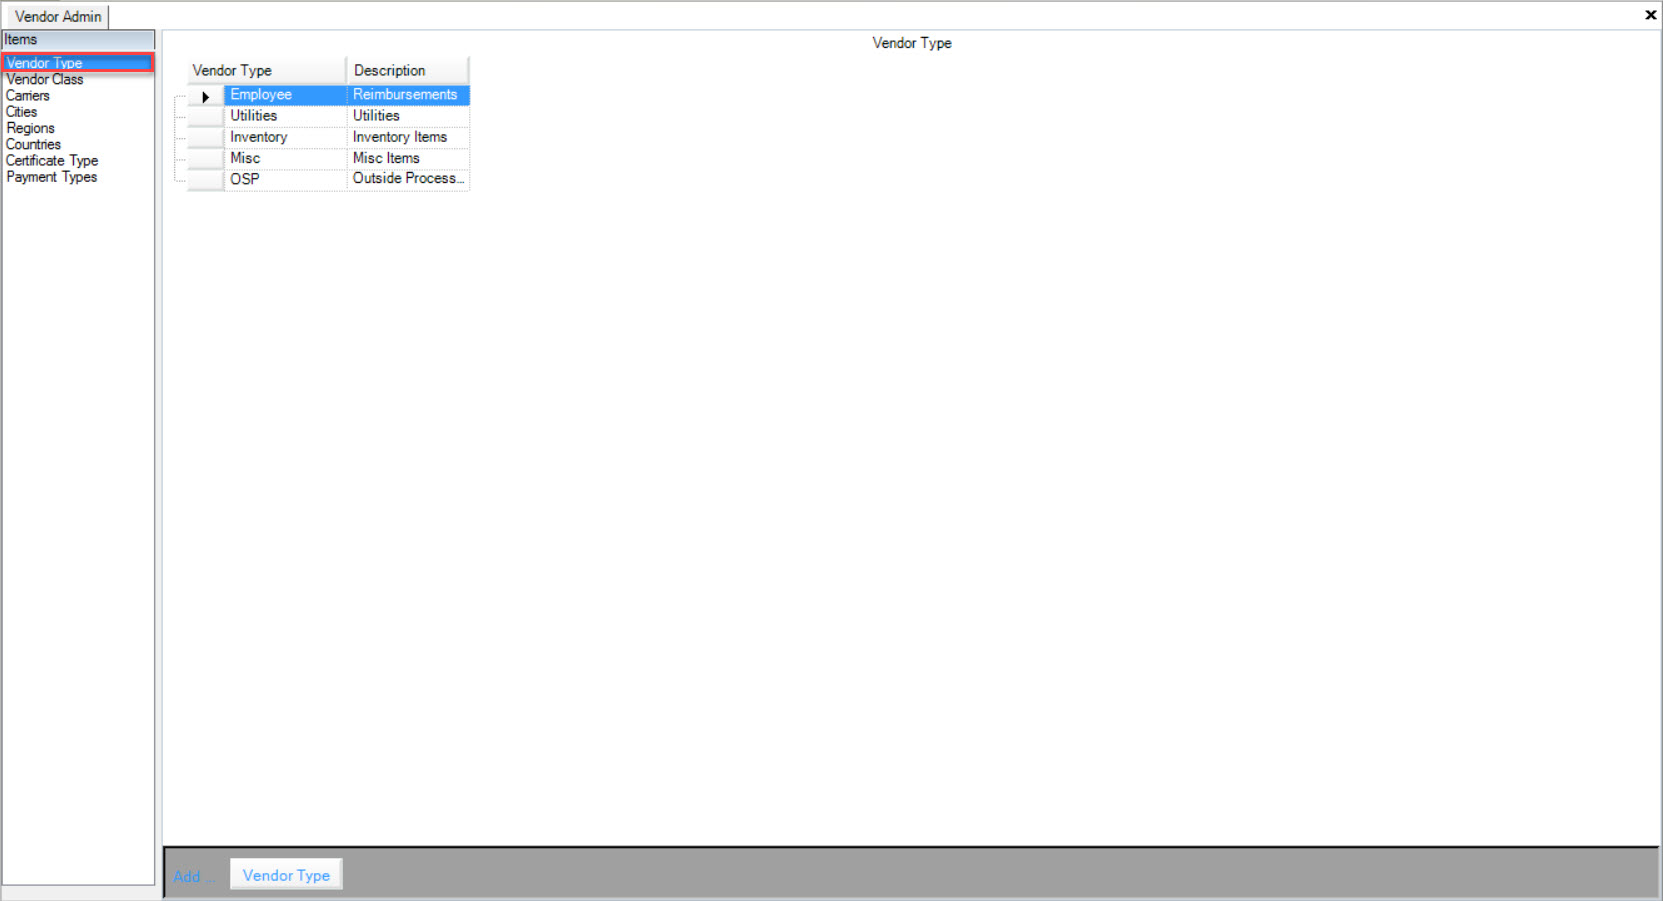
Make sure the Vendor Types tab is selected to the left of the screen.

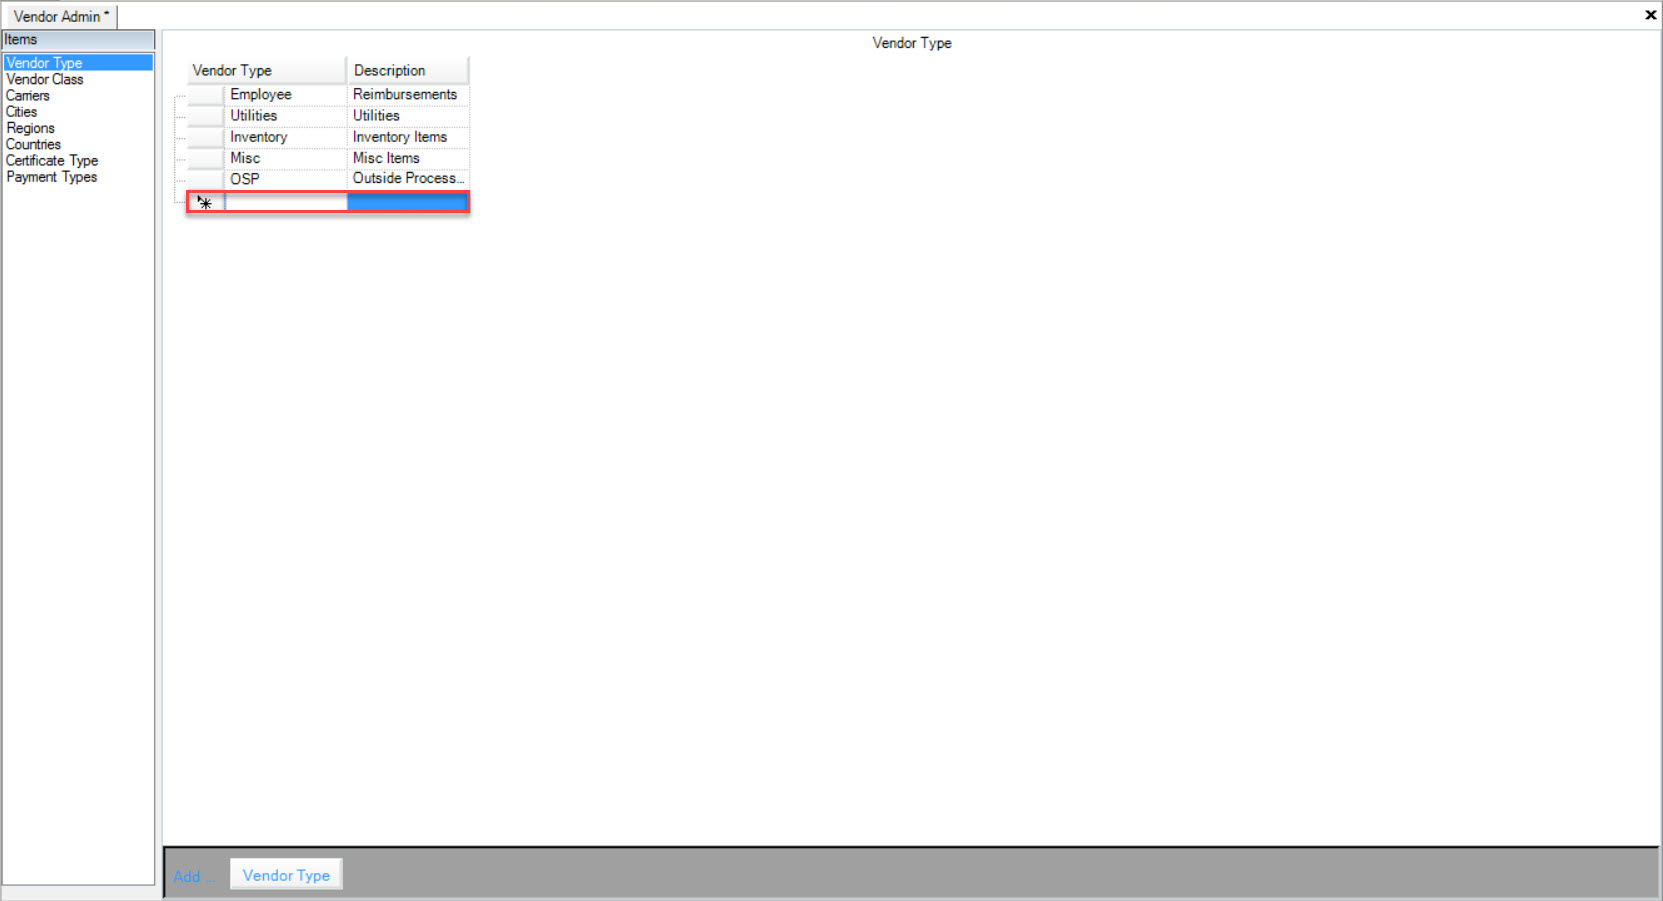
Click on the  button located at the bottom of the screen.
A new row will be added where users can fill in the Vendor Type and Description.
Make sure to save your changes before exiting the screen.
Editing Vendor Types
To edit a Vendor Type, navigate to the  tab and click on the
 ![]() icon.
icon.
This will open the Vendor Admin screen.

Make sure the Vendor Types tab is selected to the left of the screen.

Locate the Vendor Type you wish to edit and click in boxes accordingly to the specific changes you wish to make.
Make sure to save your changes before exiting the screen.
Deleting Vendor Types
To delete a Vendor Type, navigate to the  tab and click on the
 ![]() icon.
icon.
This will open the Vendor Admin screen.

Make sure the Vendor Types tab is selected to the right of the screen.

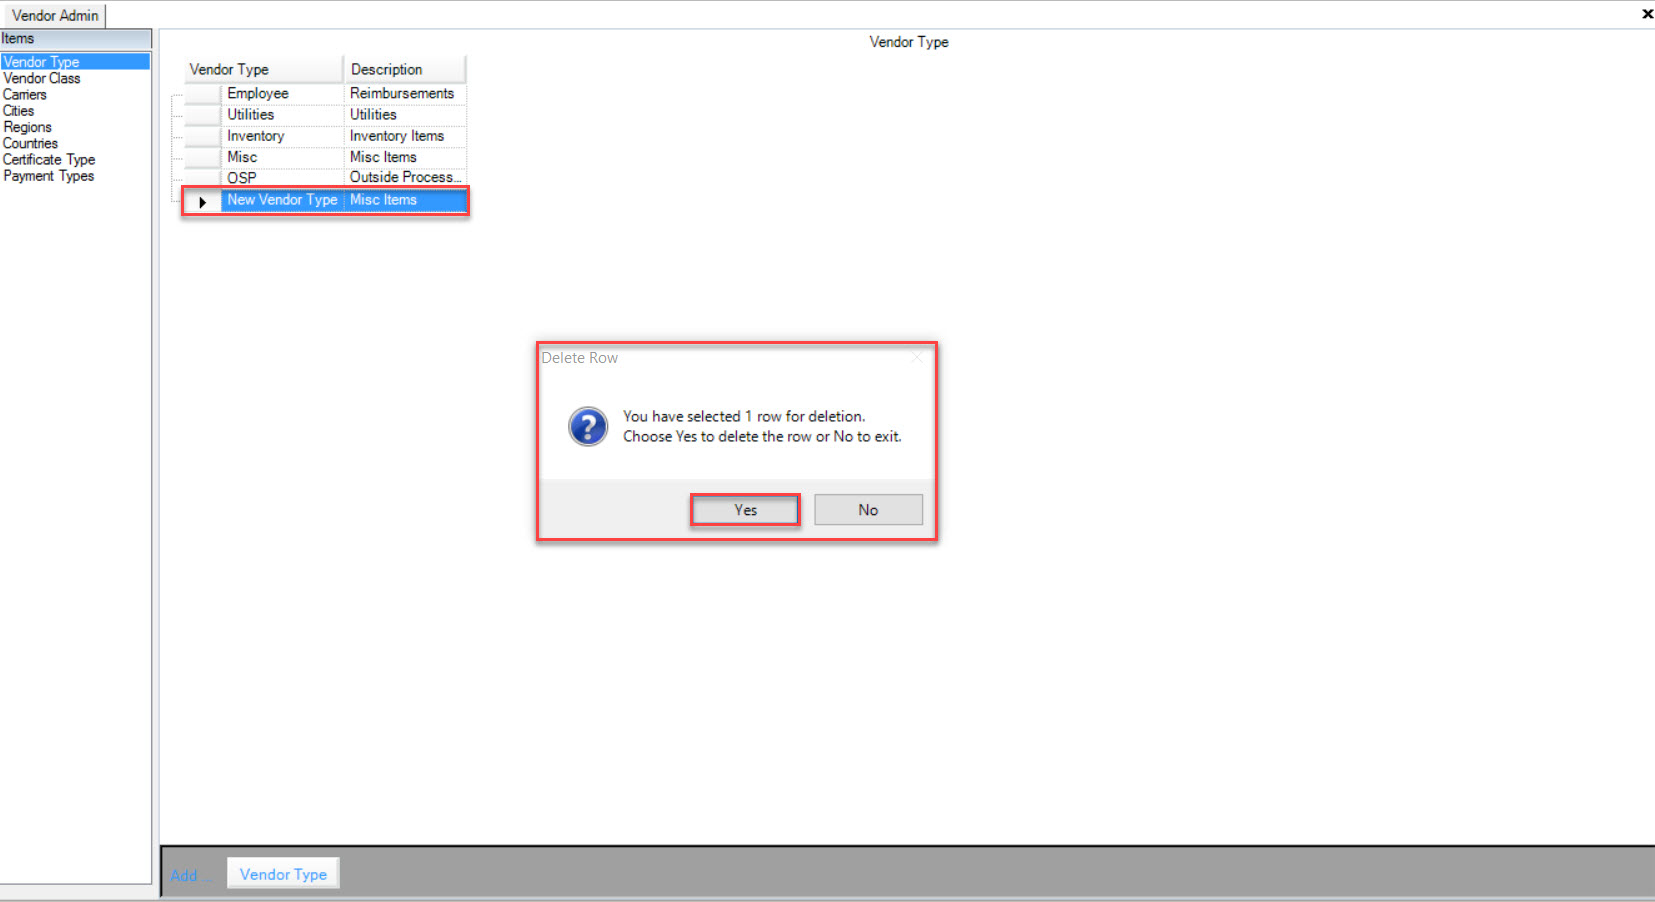
Select the Vendor Type you wish to delete by highlighting the appropriate row. Use the Delete key and when the system prompts you, select Yes.
Make sure to save your changes before exiting the screen.
Vendor Classes
Vendor Classes can be added to the system once you have Vendor Types created. You can select the Vendor Class when on the Vendor screen.
To view Vendor Classes, navigate to the  tab and click on the
 ![]() icon.
icon.
This will open the Vendor Admin screen.

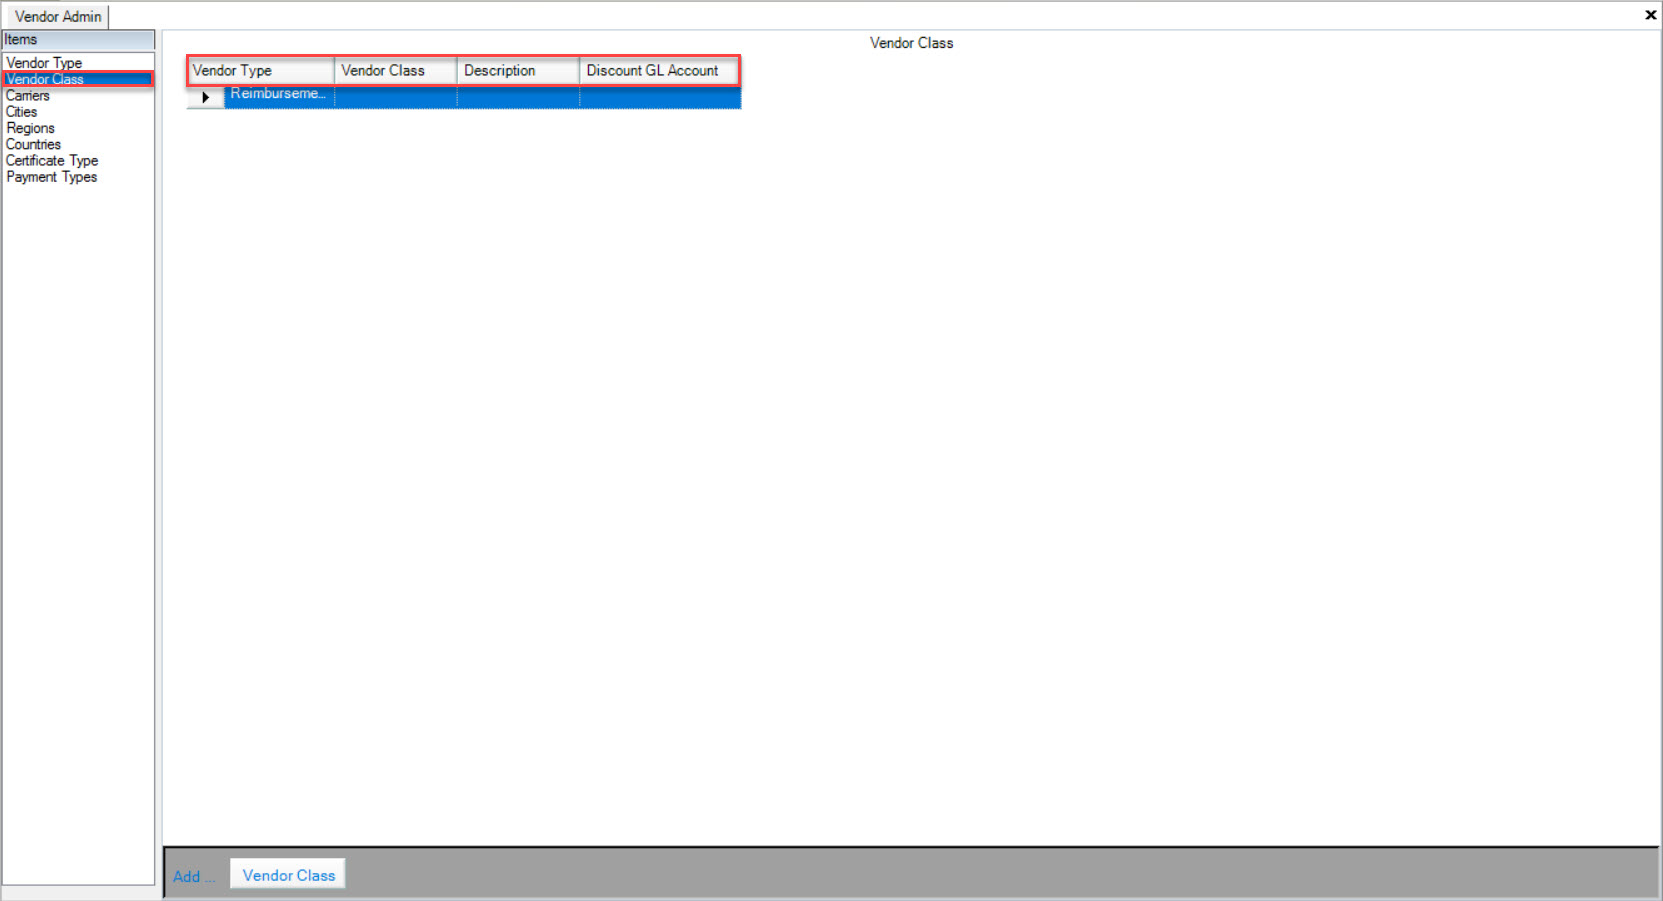
Make sure that the Vendor Class tab is selected to the left of the screen. Users will be able to view the Vendor Type, Vendor Class, Description, and the Discount G/L Account.
Adding Vendor Classes
To add a Vendor Class, navigate to the  tab and click on the
 ![]() icon.
icon.
This will open the Vendor Admin screen.

Make sure that the Vendor Class tab is selected to the left of the screen.

Click on the  button located at the bottom of the screen. A new row will appear where users can fill in the necessary fields.
Make sure to save your changes before exiting the screen.
Editing Vendor Classes
To edit a Vendor Class, navigate to the  tab and click on the
 ![]() icon.
icon.
This will open the Vendor Admin screen.

Make sure that the Vendor Class tab is selected to the left of the screen.

Click in the text boxes and use the drop-down menus for the appropriate Vendor Class that you wish to edit.
Make sure to save your changes before exiting the screen.
Deleting Vendor Classes
To delete a Vendor Class, navigate to the  tab and click on the
 ![]() icon.
icon.
This will open the Vendor Admin screen.

Make sure that the Vendor Class tab is selected to the left of the screen.

Once you have found the Vendor Class you wish to delete, highlight the appropriate row. Use your Delete key and when the system prompts you, select Yes.
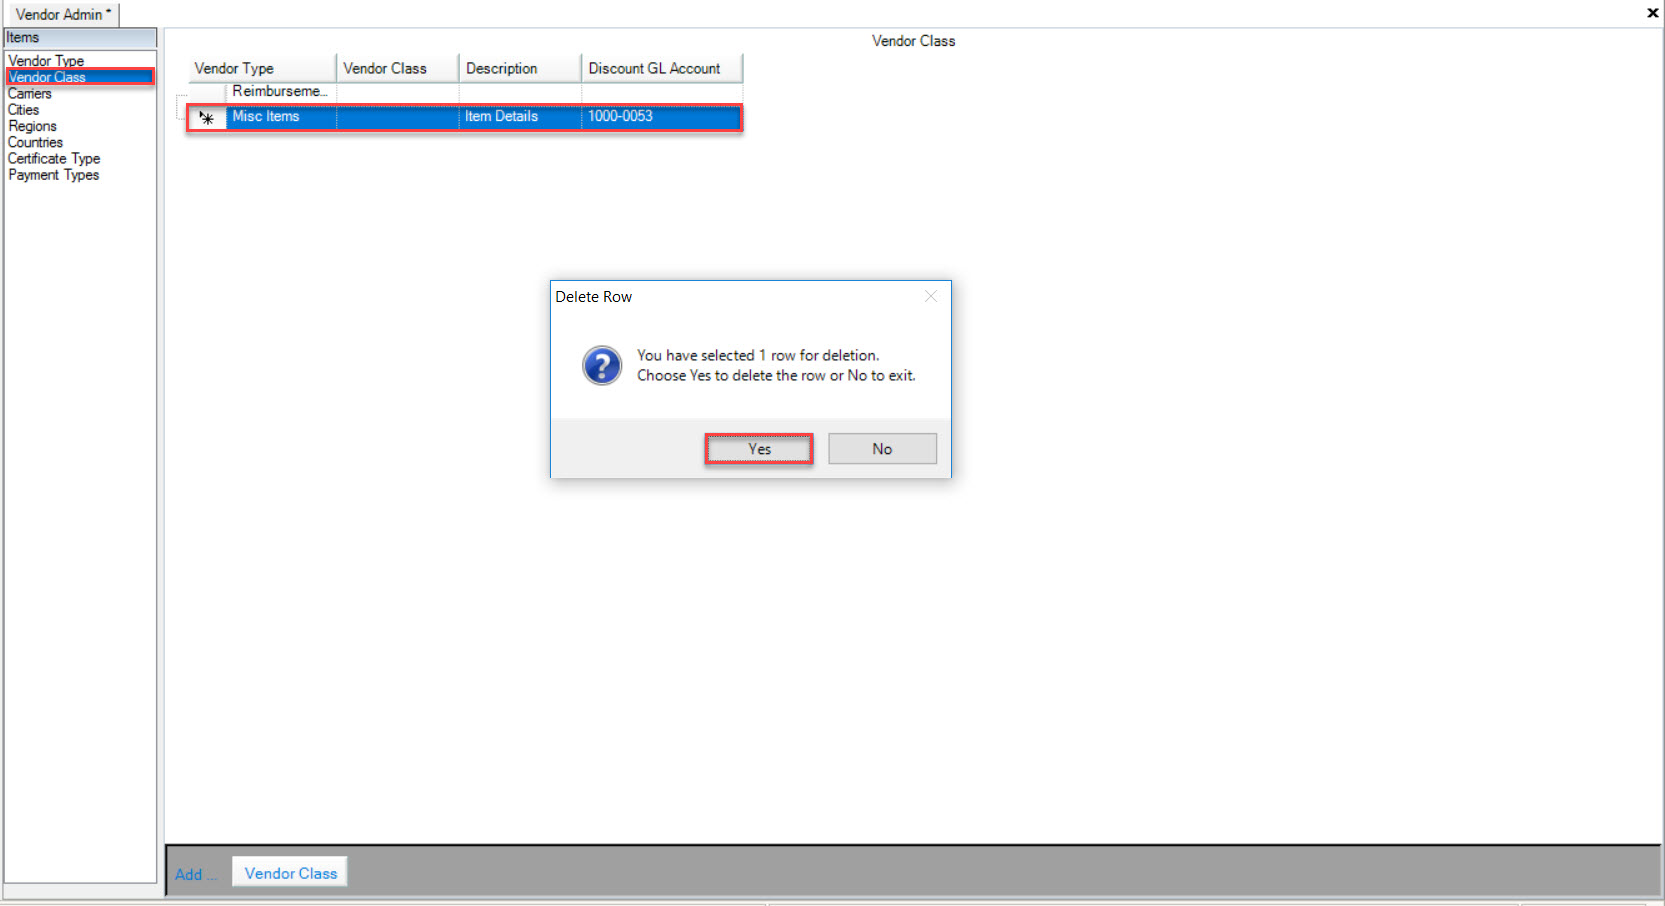
The row will be deleted immediately. Make sure to save your changes before exiting the screen.
Carriers
To view Carriers, navigate to the  tab and click on the
 ![]() icon.
icon.
This will open the Vendor Admin screen.

Make sure that the Carriers tab is selected to the left of the screen.
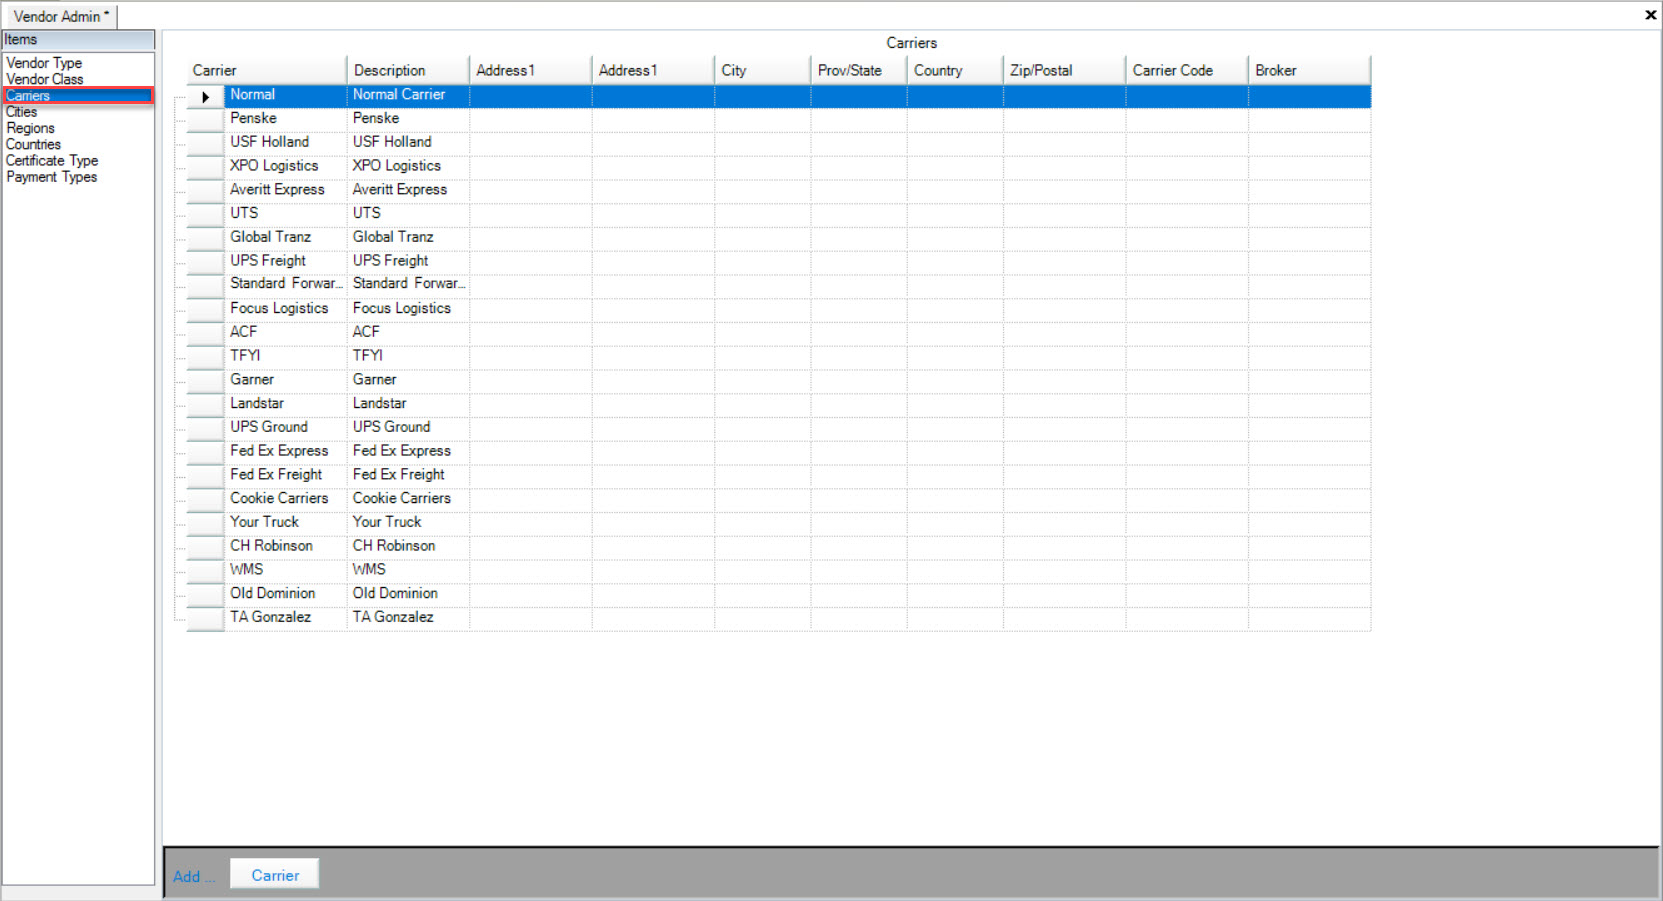
Users will be able to view the Carrier, Description, Addresses, City, Prov/State, Country, Zip/Postal Code, Carrier Code, and Broker.
Adding Carriers
To add a Carrier, navigate to the  tab and click on the
 ![]() icon.
icon.
This will open the Vendor Admin screen.

Make sure that the Carriers tab is selected to the left of the screen.

Click on the  button located at the bottom of the screen.
A new row will appear where users can fill in the necessary fields.
Make sure to save your changes before exiting the screen.
Editing Carriers
To edit a Carrier, navigate to the  tab and click on the
 ![]() icon.
icon.
This will open the Vendor Admin screen.

Make sure that the Carriers tab is selected to the left of the screen.

Once you have found the Carrier you wish to edit, click on the text boxes or use the appropriate drop-down menus to make your changes.
Make sure to save your changes before exiting the screen.
Deleting Carriers
To delete a Carrier, navigate to the  tab and click on the
 ![]() icon.
icon.
This will open the Vendor Admin screen.

Make sure that the Carriers tab is selected to the left of the screen.

Find the Carrier you wish to delete and highlight the appropriate row. Use your Delete key and when the system prompts you, select Yes.
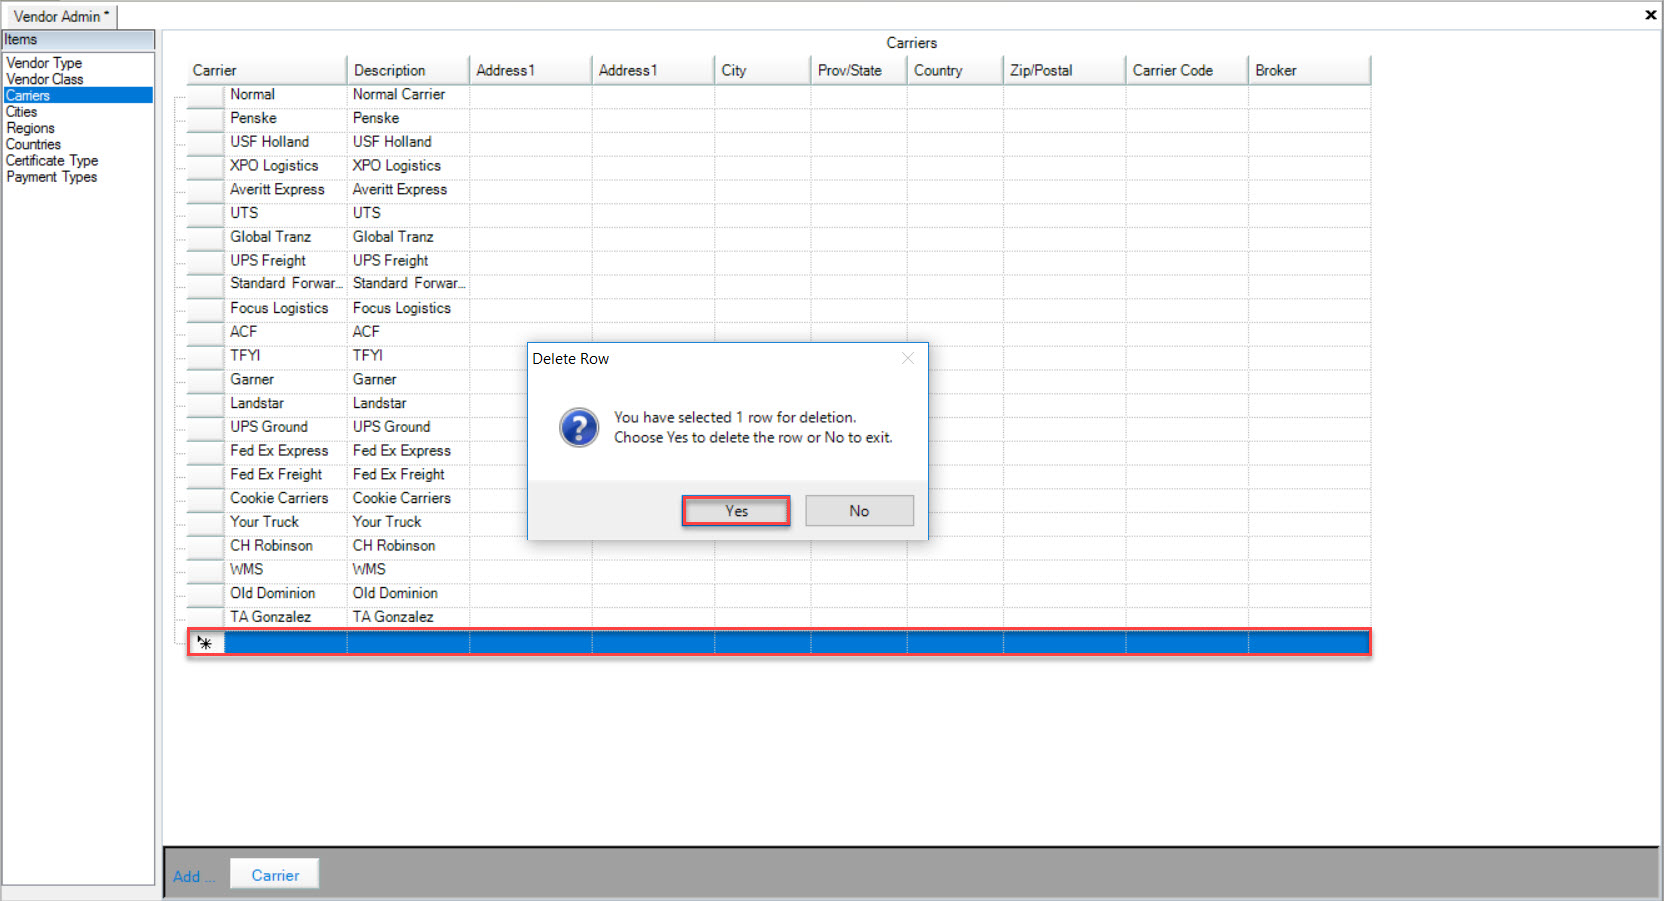
The row will be deleted immediately. Make sure to save your changes before exiting the screen.
Cities
To view Cities, navigate to the  tab and click on the
 ![]() icon.
icon.
This will open the Vendor Admin screen.

Make sure that the Cities tab is selected to the left of the screen.
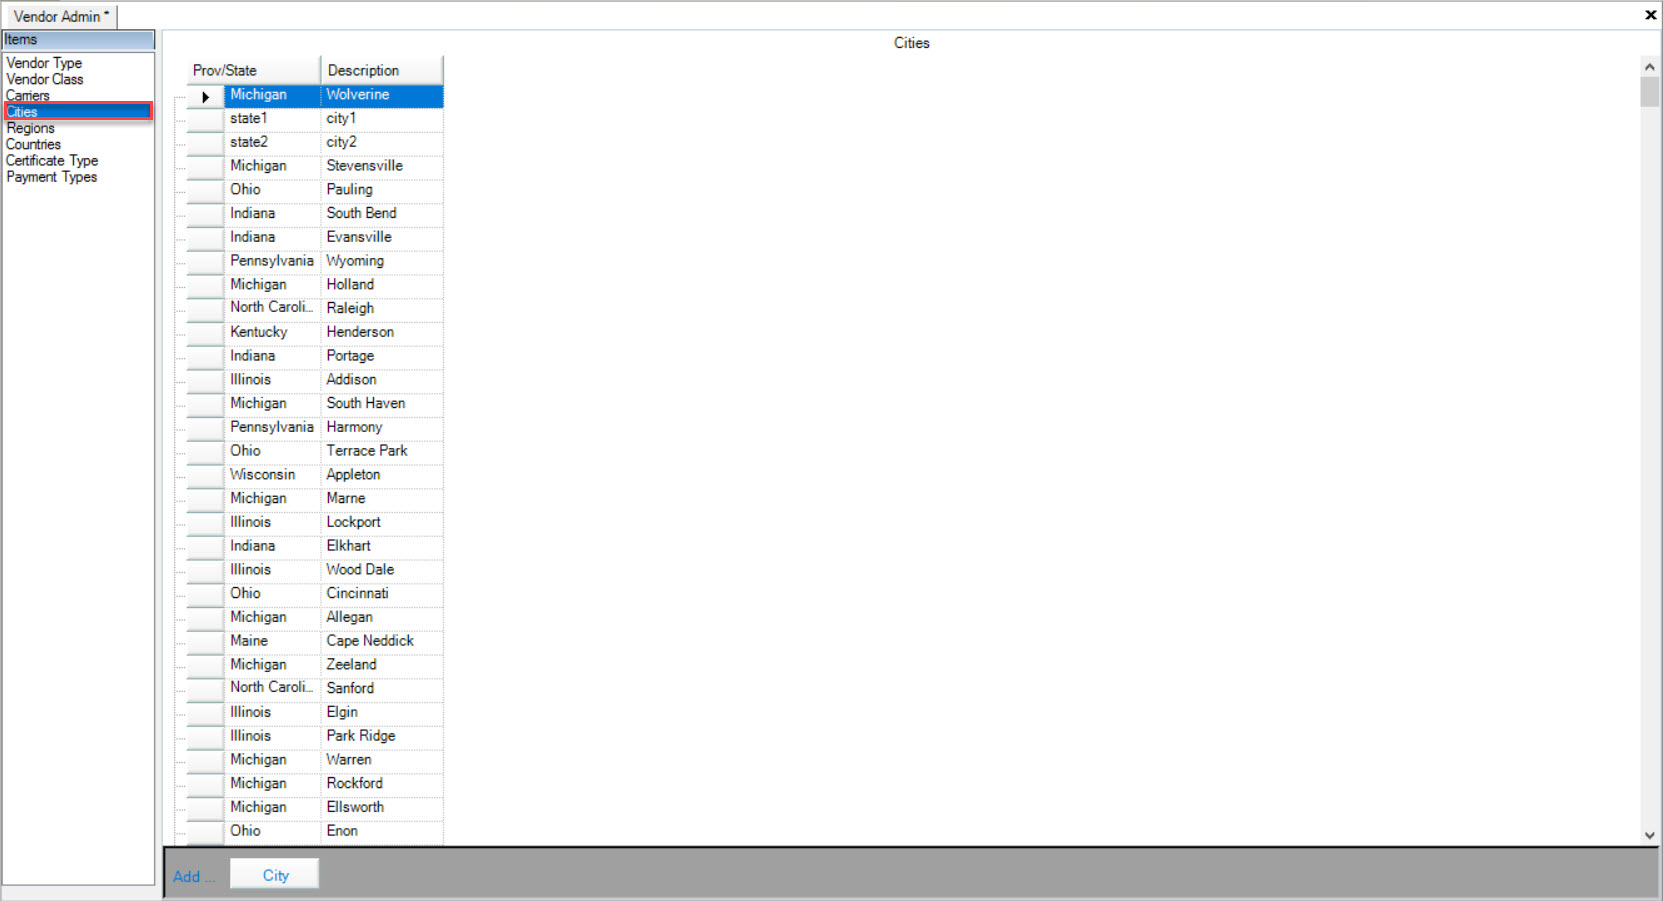
Users will be able to view the Prov/State and Description.
Adding Cities
Cities will automatically be added to the system when you create a new Vendor, but you can also add them to the Cities table.
To add a City, navigate to the  tab and click on the
 ![]() icon.
icon.
This will open the Vendor Admin screen.

Make sure that the Cities tab is selected to the left of the screen.

Click on the  button located at the bottom of the screen.
Fill in the necessary fields and make sure to save your changes before exiting the screen.
Editing Cities
To edit a City, navigate to the  tab and click on the
 ![]() icon.
icon.
This will open the Vendor Admin screen.

Make sure that the Cities tab is selected to the left of the screen.

Users can select the City they wish to edit and use the appropriate drop-down menus and text boxes to make the necessary changes.
Make sure to save your changes before exiting the screen.
Deleting Cities
To delete a City, navigate to the  tab and click on the
 ![]() icon.
icon.
This will open the Vendor Admin screen.

Make sure that the Cities tab is selected to the left of the screen.

Find the City you wish to delete and highlight the appropriate row. Use your Delete key and when the system prompts you, select Yes.
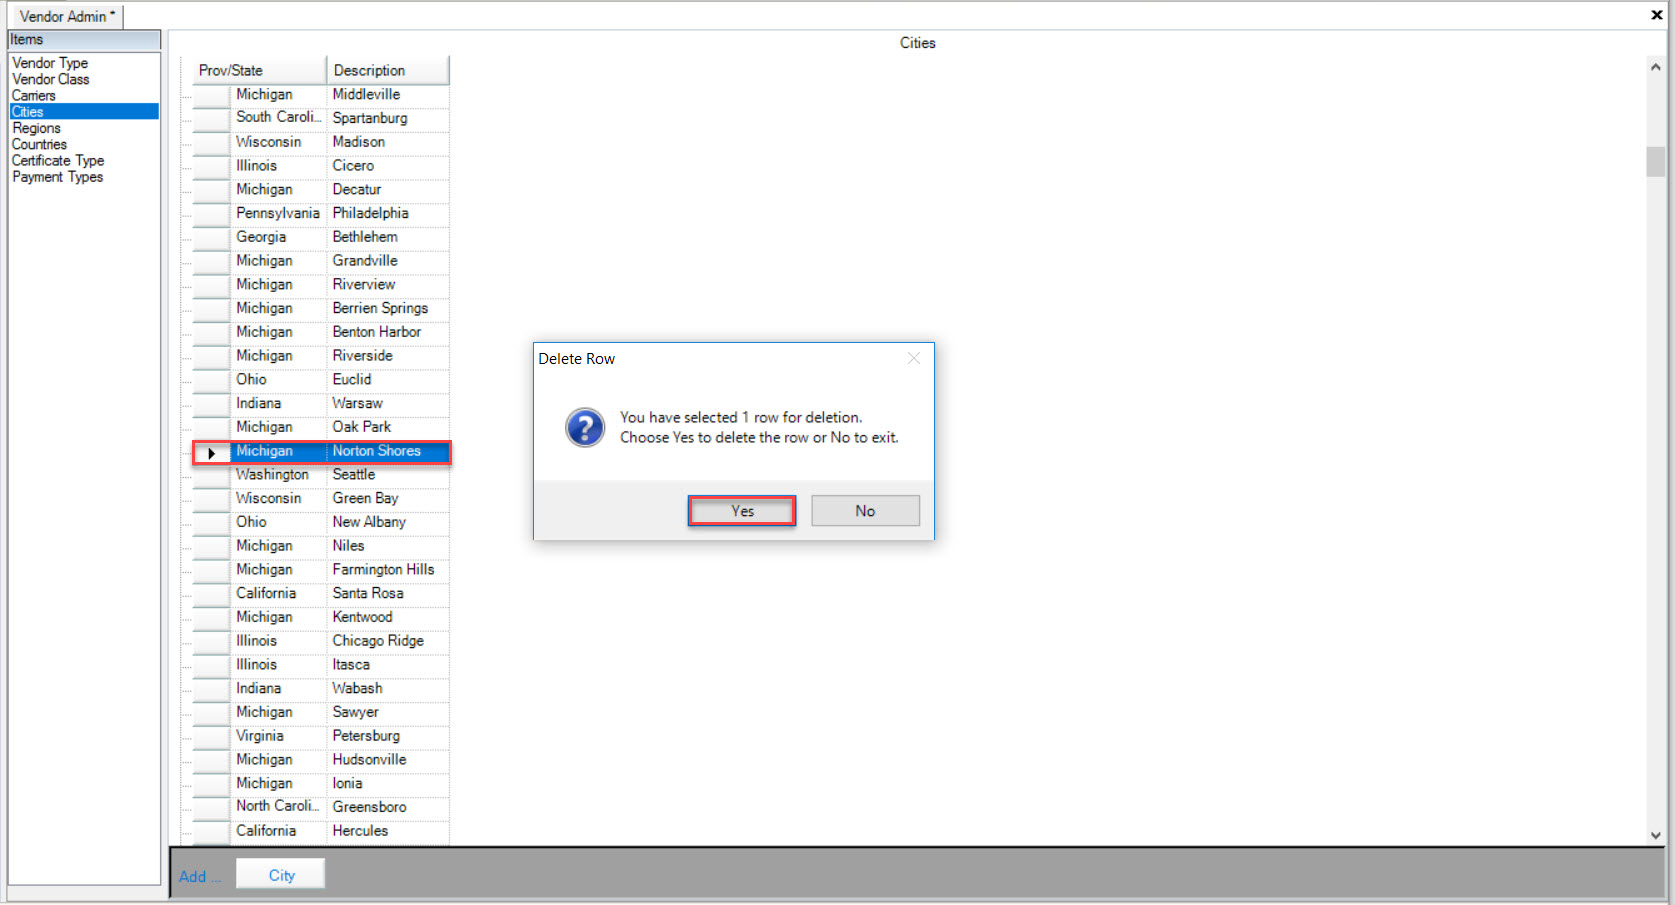
Make sure to save your changes before exiting the screen.
Regions
To view a Region, navigate to the  tab and click on the
 ![]() icon.
icon.
This will open the Vendor Admin screen.

Make sure that the Regions tab is selected to the left of the screen.
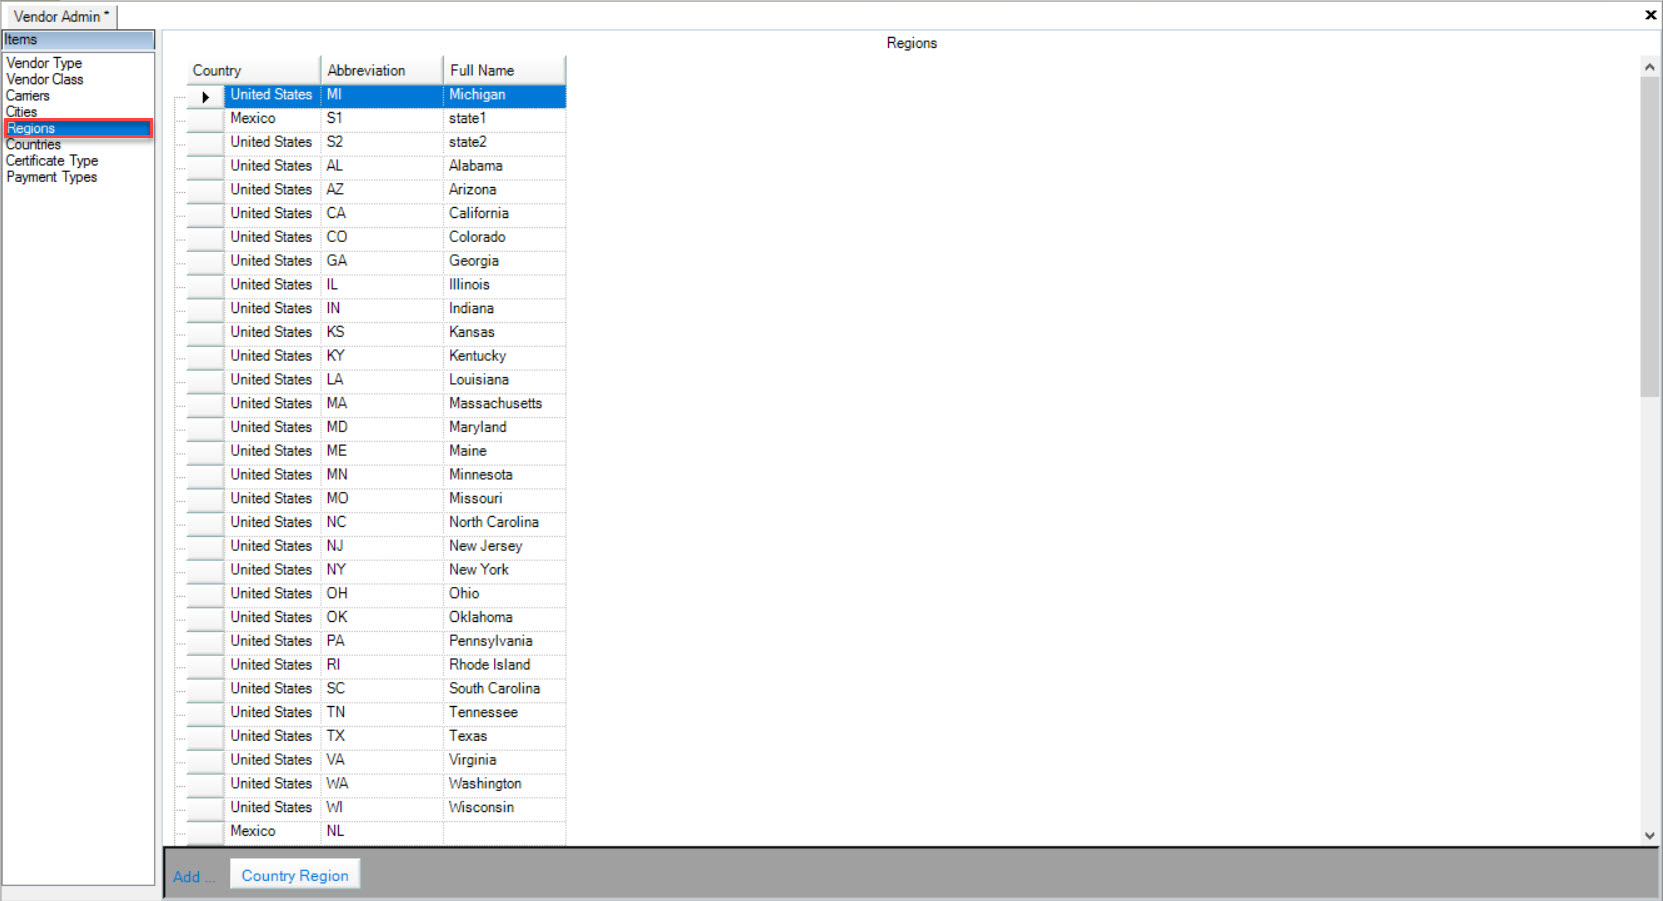
Users will be able to view the Country, Abbreviation, and Full Name.
Adding Regions
Regions will be added to the table when you add a new Vendor, but you can also add them to the Regions table in the system.
To add a Region, navigate to the  tab and click on the
 ![]() icon.
icon.
This will open the Vendor Admin screen.

Make sure that the Regions tab is selected to the left of the screen.

Click on the  button located at the bottom of the screen.
A new row will appear where users can fill in the necessary fields.
Make sure to save your changes before exiting the screen.
Editing Regions
To edit a Region, navigate to the  tab and click on the
 ![]() icon.
icon.
This will open the Vendor Admin screen.

Make sure that the Regions tab is selected to the left of the screen.

Find the Region you wish to edit and use the appropriate drop-down menus and text boxes to make the necessary changes.
Make sure to save your changes before exiting the screen.
Deleting Regions
To delete a Region, navigate to the  tab and click on the
 ![]() icon.
icon.
This will open the Vendor Admin screen.

Make sure that the Regions tab is selected to the left of the screen.

Find the Region you wish to delete and highlight the appropriate row. Use your Delete key and when the system prompts you, select Yes.
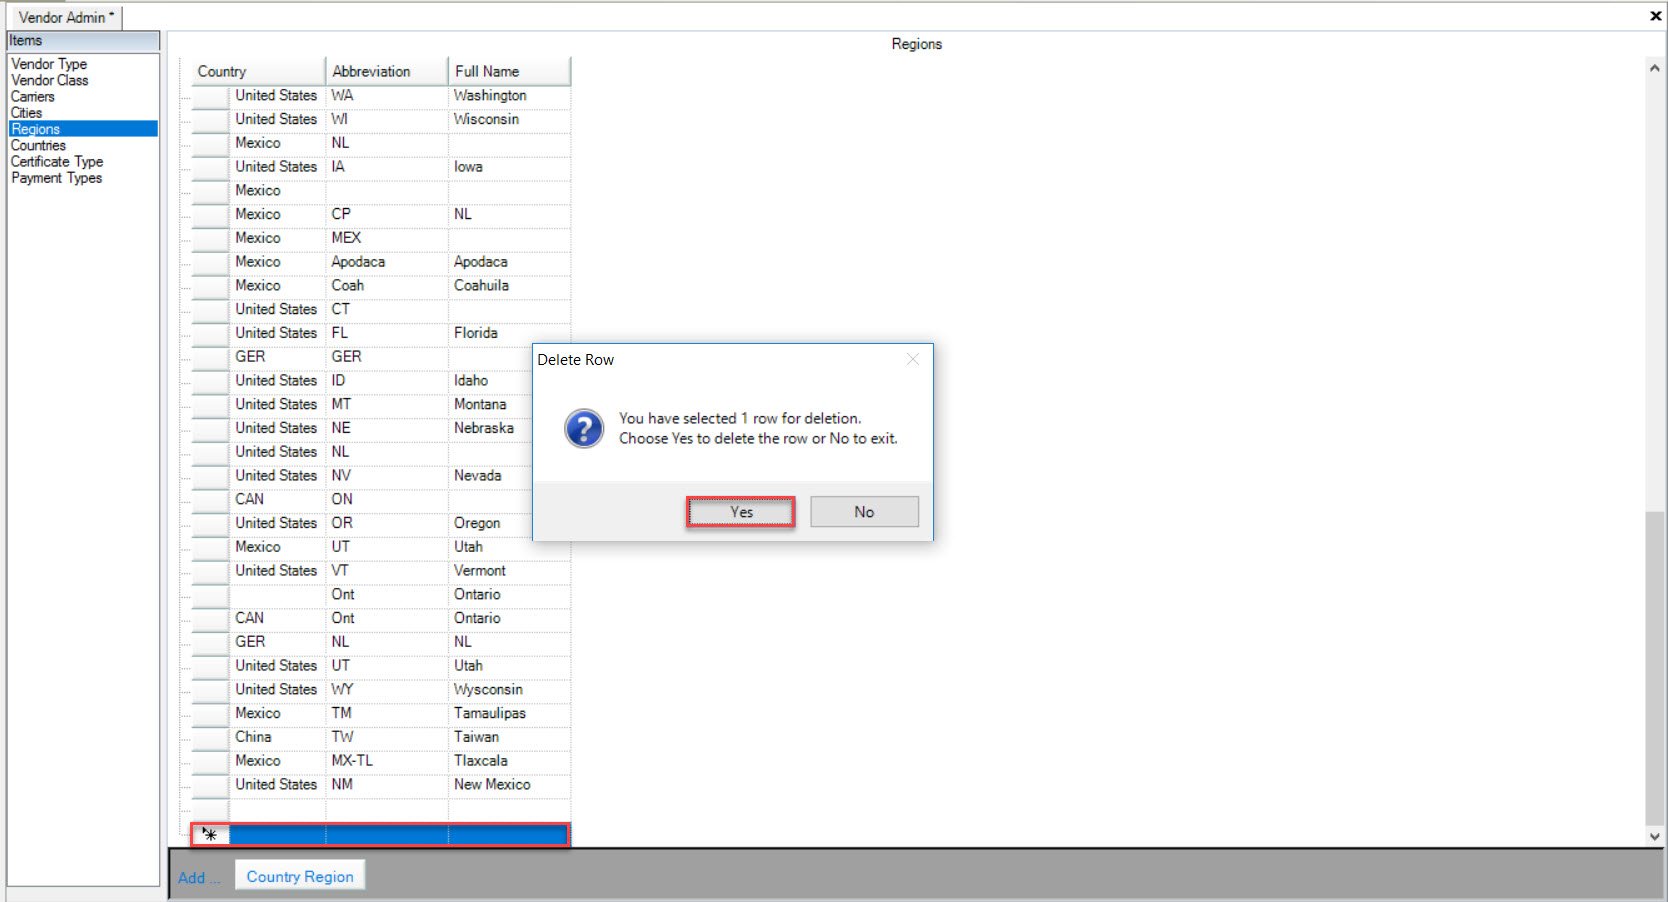
The row will be deleted immediately. Make sure to save your changes before exiting the screen.
Note
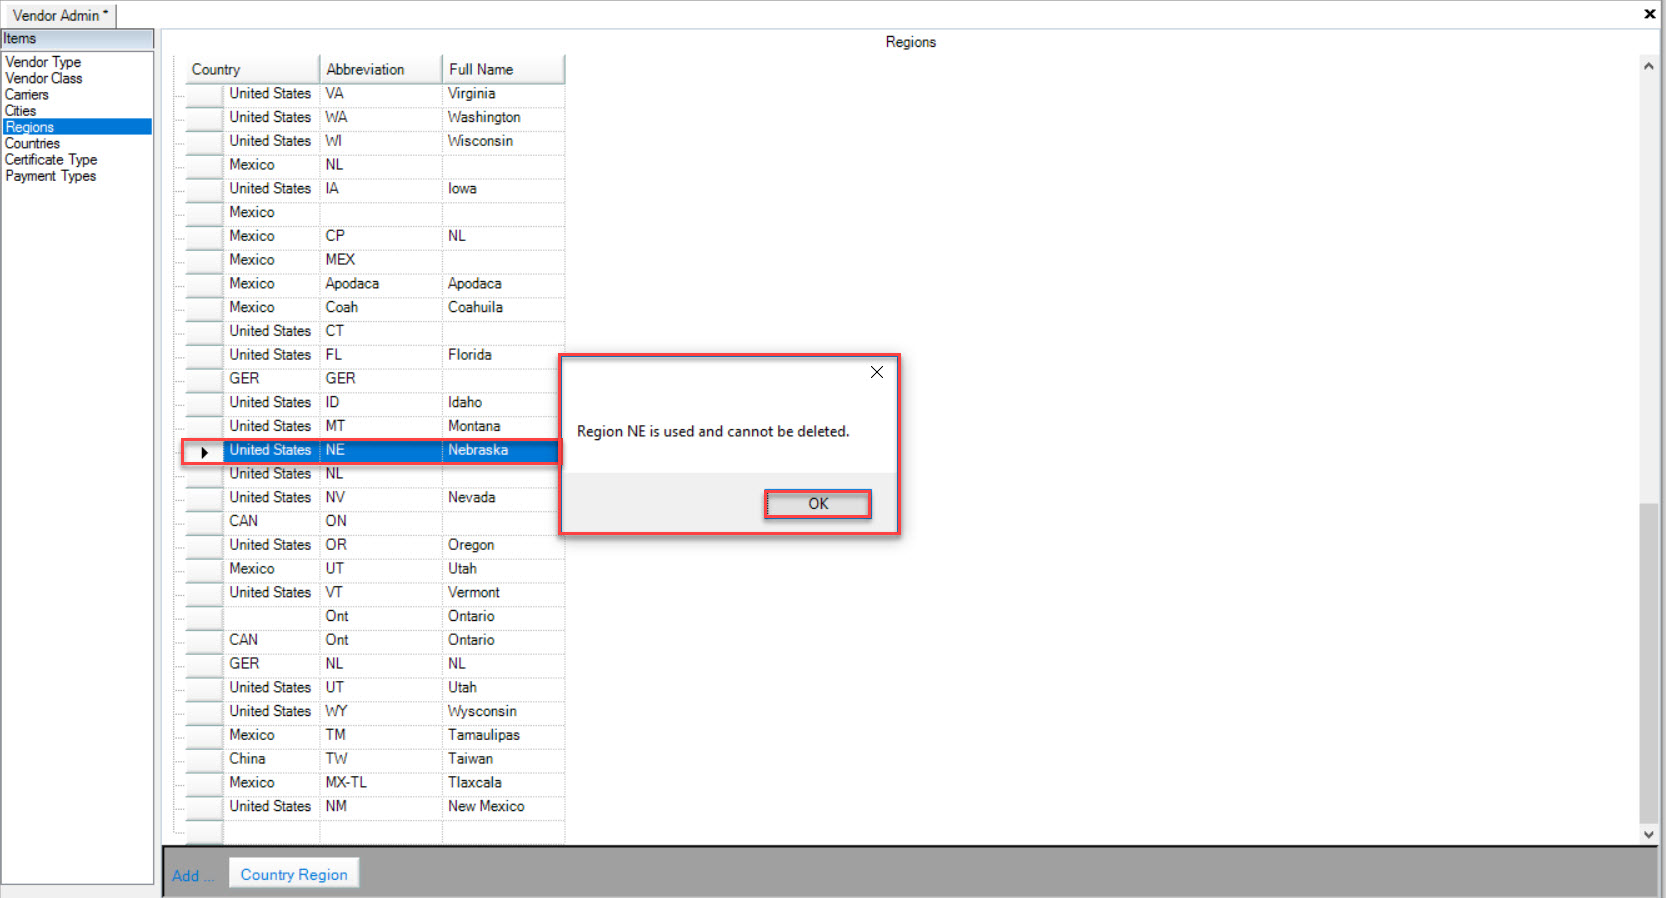
If a Region is used, you will not be able to delete it. A message window with pop up where you must select Ok.
Countries
To view Countries, navigate to the  tab and click on the
 ![]() icon.
icon.
This will open the Vendor Admin screen.

Make sure to select the Countries tab to the left of the screen.
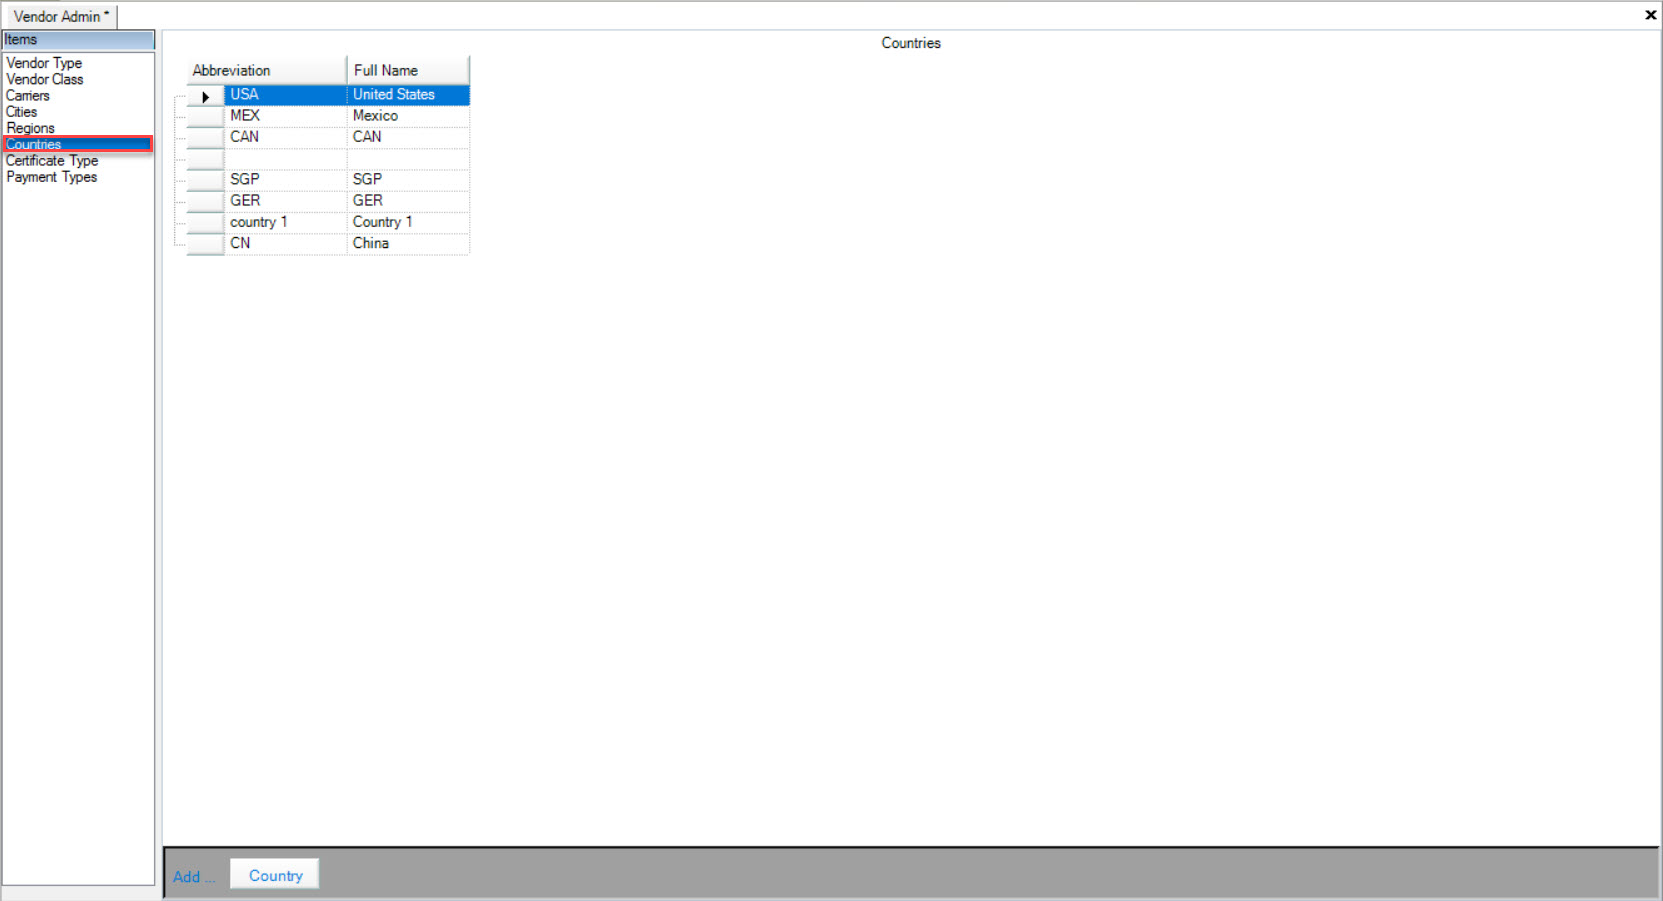
Users will be able to view the Abbreviations and Full Name of the Countries.
Adding Countries
Countries will be added to the system as you add a new Vendor, but you can also add them to the Countries table.
To add a Country, navigate to the  tab and click on the
 ![]() icon.
icon.
This will open the Vendor Admin screen.

Make sure to select the Countries tab to the left of the screen.

Click on the  button located at the bottom of the screen.
A new row will appear where users can fill in the necessary fields.
Make sure to save your changes before exiting the screen.
Editing Countries
To edit a Country, navigate to the  tab and click on the
 ![]() icon.
icon.
This will open the Vendor Admin screen.

Make sure to select the Countries tab to the left of the screen.

Find the Country you wish to edit and use the appropriate text boxes to make the necessary changes.
Make sure to save your changes before exiting the screen.
Deleting Countries
To delete a Country, navigate to the  tab and click on the
 ![]() icon.
icon.
This will open the Vendor Admin screen.

Make sure to select the Countries tab to the left of the screen.

Find the Country you wish to delete and highlight the appropriate row. Use your Delete key and when they system prompts you, select Yes.
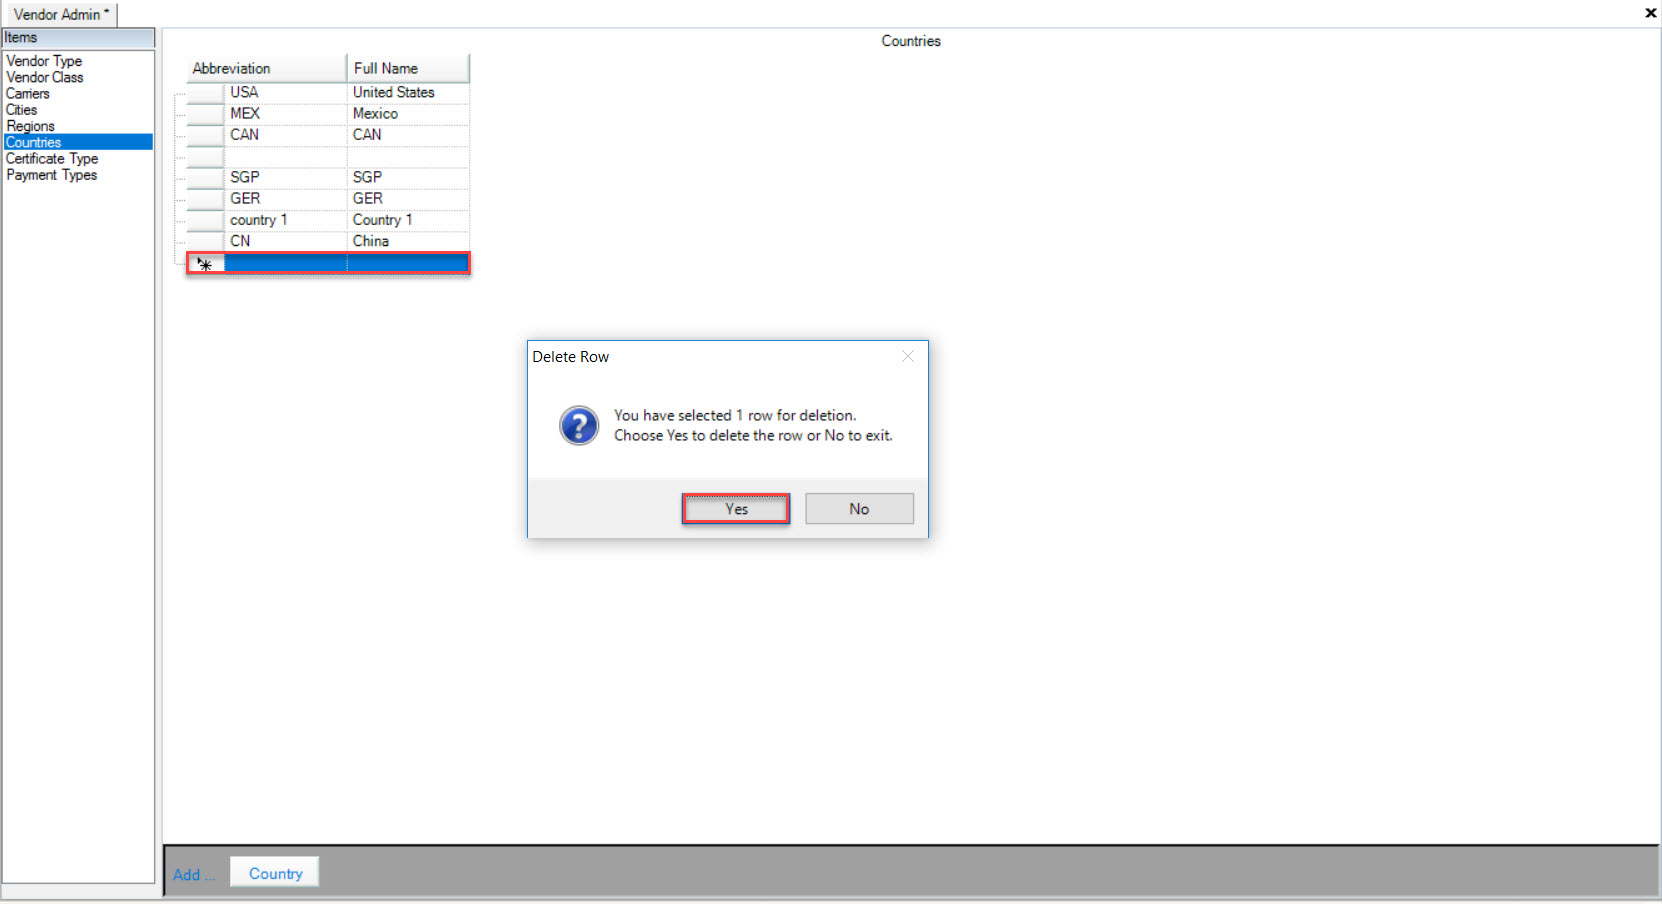
Make sure to save your changes before exiting the screen.
Note
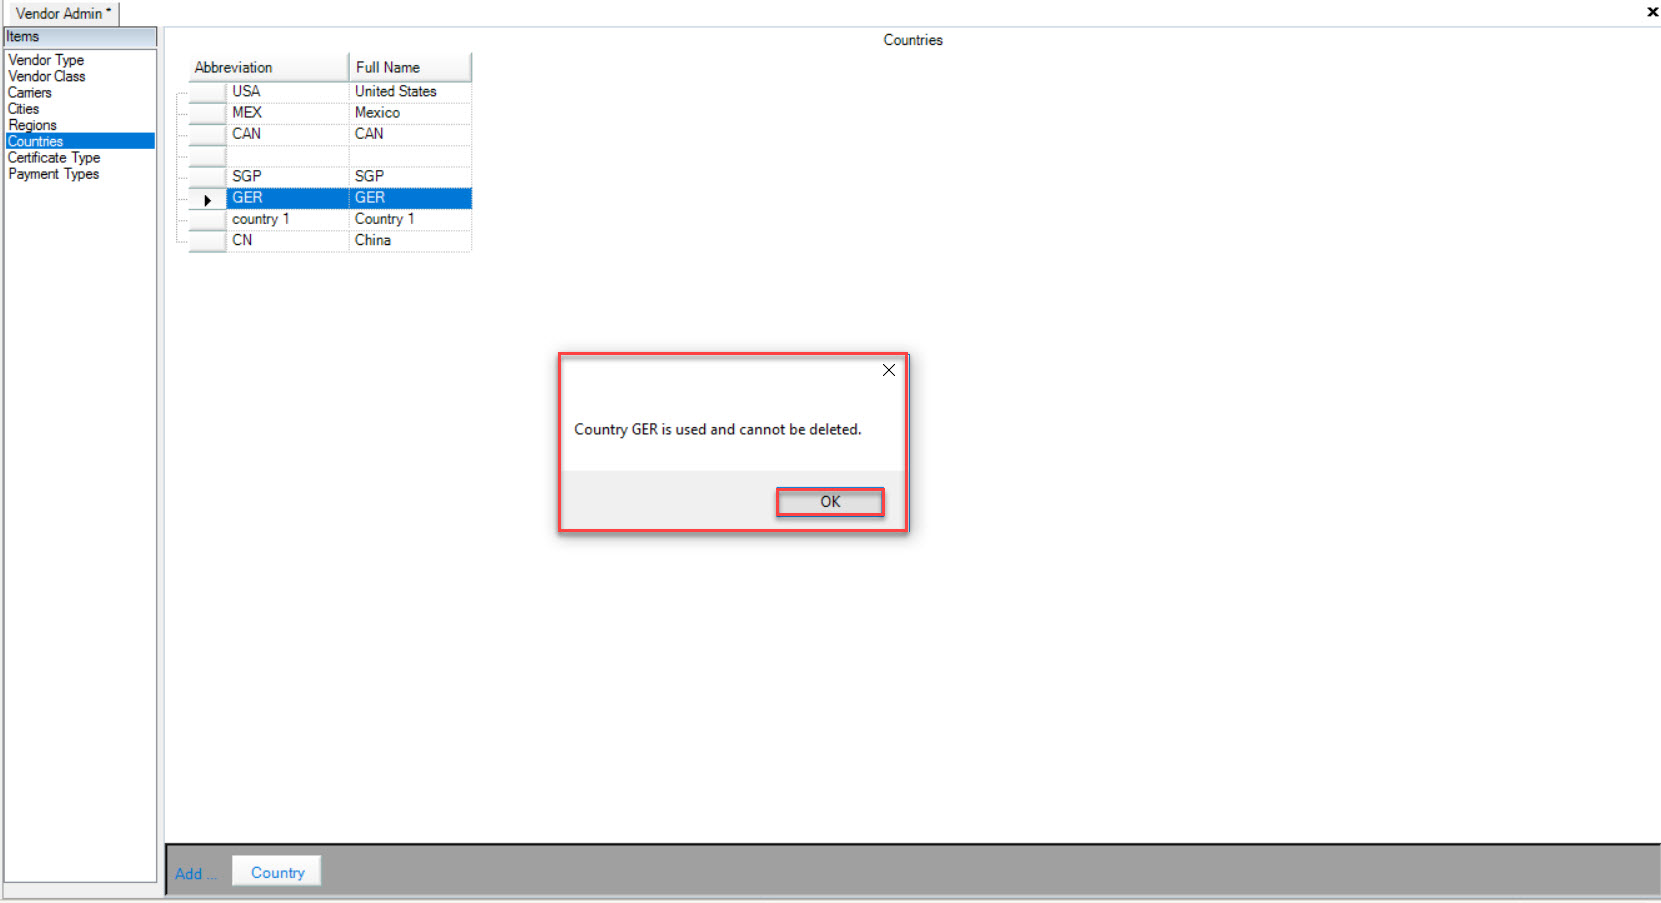
If a Country is used, you will not be able to delete it. A message window with pop up where you must select Ok.
Certificate Types
To view Certificate Types, navigate to the  tab and click on the
 ![]() icon.
icon.
This will open the Vendor Admin screen.

Make sure to select the Certificate Type tab to the left of the screen.
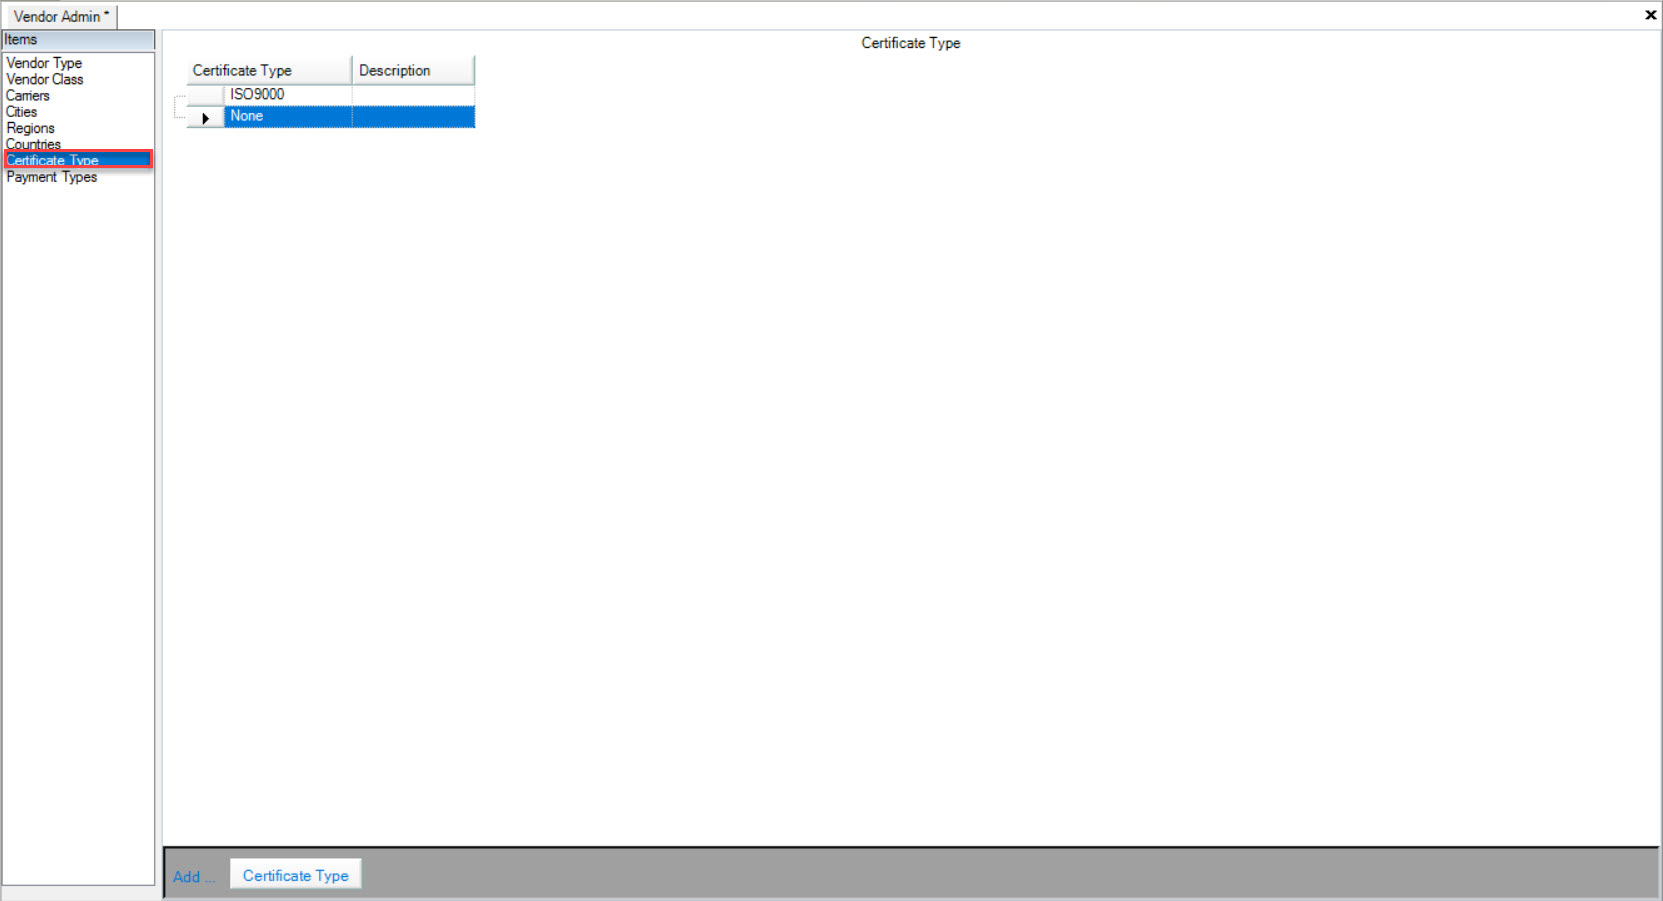
Users will be able to view Certificate Types and Descriptions.
Adding Certificate Types
Users can add Certificate Types for Vendors in the system, and add an expiry date so Purchase Orders with expired Certificate Types cannot be created.
To add a Certificate Type, navigate to the  tab and click on the
 ![]() icon.
icon.
This will open the Vendor Admin screen.

Make sure to select the Certificate Type tab to the left of the screen.

Click on the  button located at the bottom of the screen.
A new row will appear where users can fill in the necessary fields.
Make sure to save your changes before exiting the screen.
Editing Certificate Types
To edit a Certificate Type, navigate to the  tab and click on the
 ![]() icon.
icon.
This will open the Vendor Admin screen.

Make sure to select the Certificate Type tab to the left of the screen.

Find the Certificate Type you wish to edit and use the appropriate text boxes to make the necessary changes.
Make sure to save your changes before exiting the screen.
Deleting Certificate Types
To delete a Certificate Type, navigate to the  tab and click on the
 ![]() icon.
icon.
This will open the Vendor Admin screen.

Make sure to select the Certificate Type tab to the left of the screen.

Find the Certificate Type you wish to delete and highlight the appropriate row. Use your Delete key and when the system prompts you, select Yes.
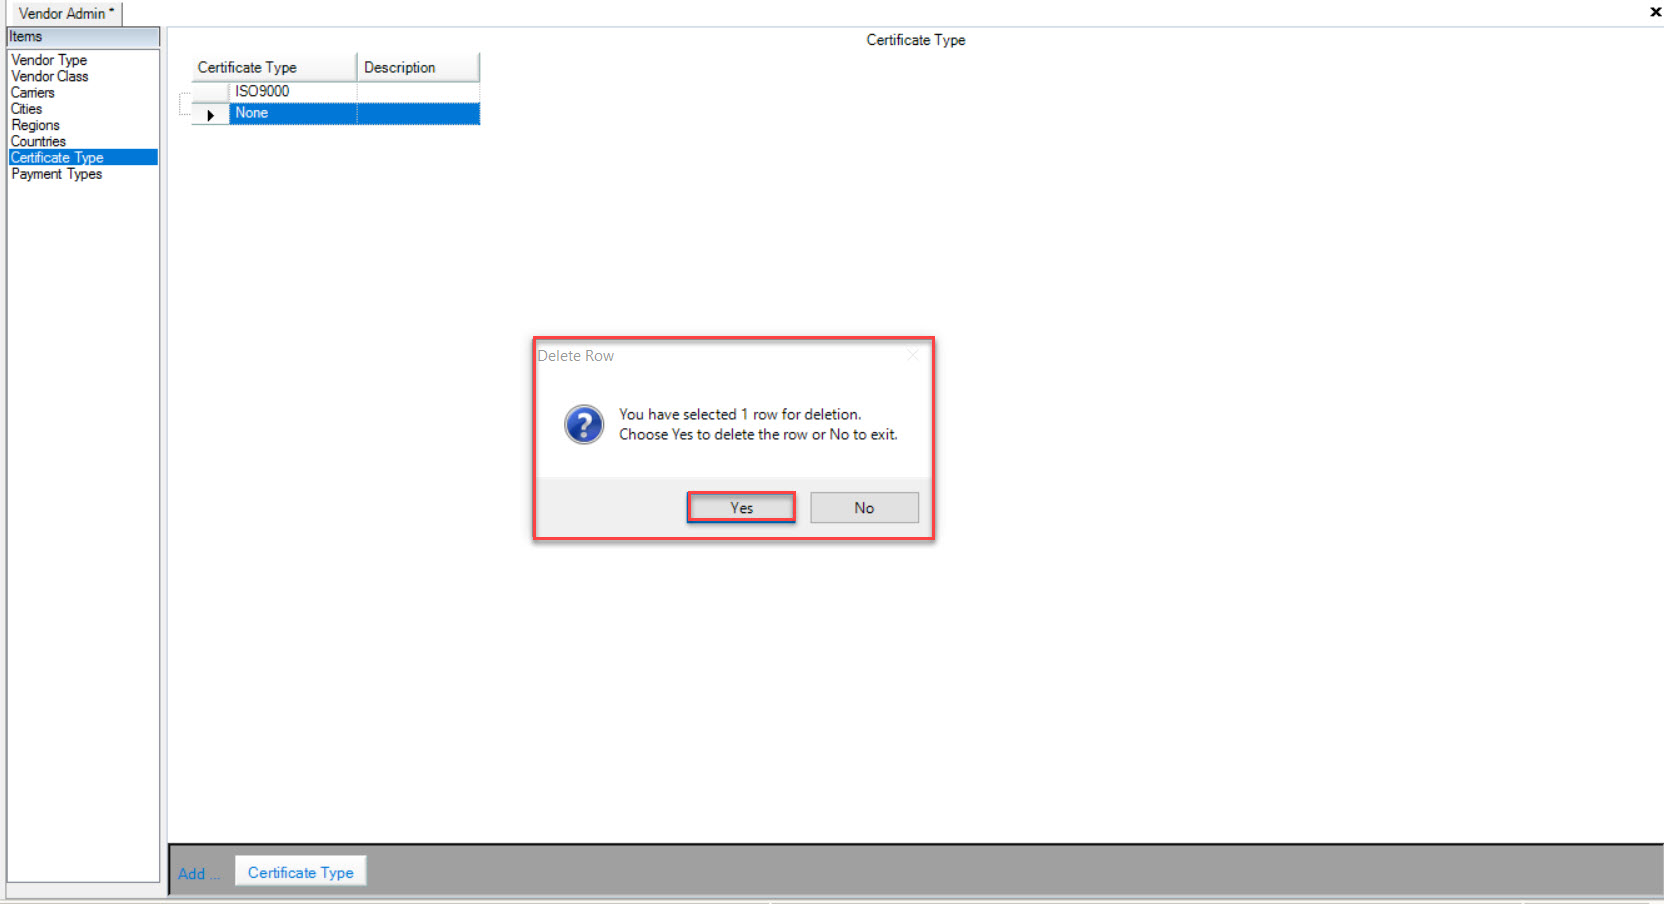
Make sure to save your changes before exiting the screen.
Payment Types
To view Payment Types, navigate to the  tab and click on the
 ![]() icon.
icon.
This will open the Vendor Admin screen.

Make sure to select the Payment Types tab to the left of the screen.
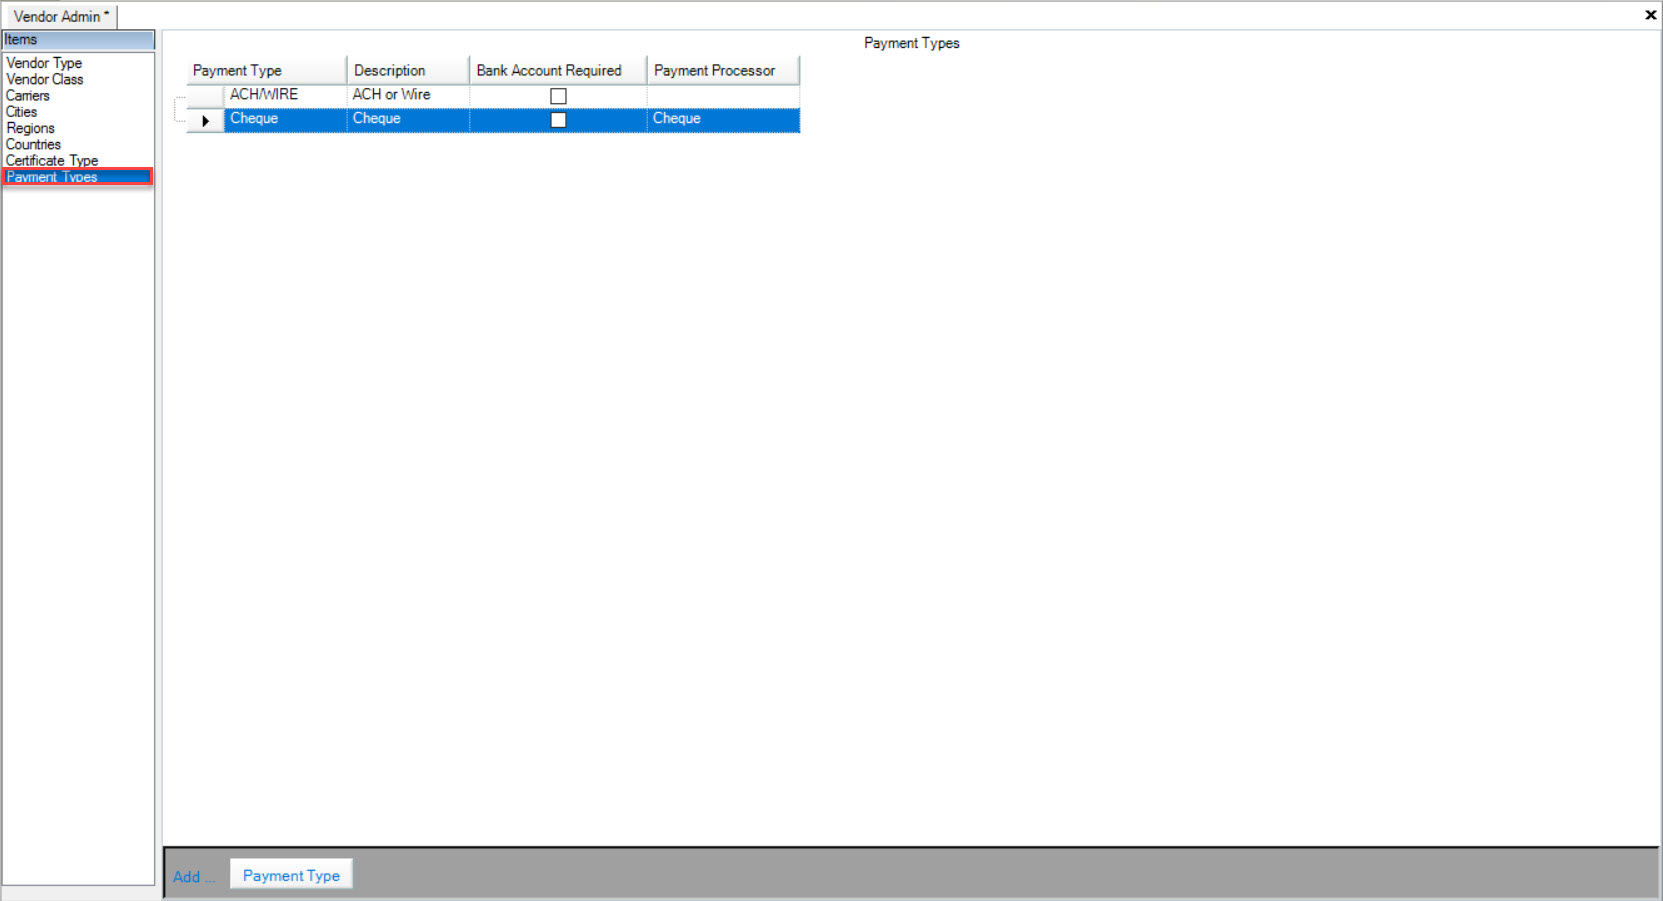
Users will be able to view Payment Types, Description, whether or not a Bank Account is Required, and the Payment Processor.
Adding Payment Types
Payment Types such as Check, Wire Transfar, and ACH can be added to the system to manager on the Vendor and Payment screens. This enables users to add a Payment Type to a Vendor, and group payments by different Payment Types on the Payments screen under the A/R module in ShopEdge.
To add a Payment Type, navigate to the  tab and click on the
 ![]() icon.
icon.
This will open the Vendor Admin screen.

Make sure to select the Payment Types tab to the left of the screen.

Click on the  button located at the bottom of the screen.
A new row will appear where users can fill in the necessary fields.
Make sure to save your changes before exiting the screen.
Editing Payment Types
To edit a Payment Type, navigate to the  tab and click on the
 ![]() icon.
icon.
This will open the Vendor Admin screen.

Make sure to select the Payment Types tab to the left of the screen.

Find the Payment Type you wish to edit and use the appropriate text boxes, check boxes, and drop-down menus to make the necessary changes.
Make sure to save your changes before exiting the screen.
Deleting Payment Types
To delete a Payment Type, navigate to the  tab and click on the
 ![]() icon.
icon.
This will open the Vendor Admin screen.

Make sure to select the Payment Types tab to the left of the screen.

Find the Payment Type you wish to delete and highlight the appropriate row. Use your Delete key and when the system prompts you, select Yes.
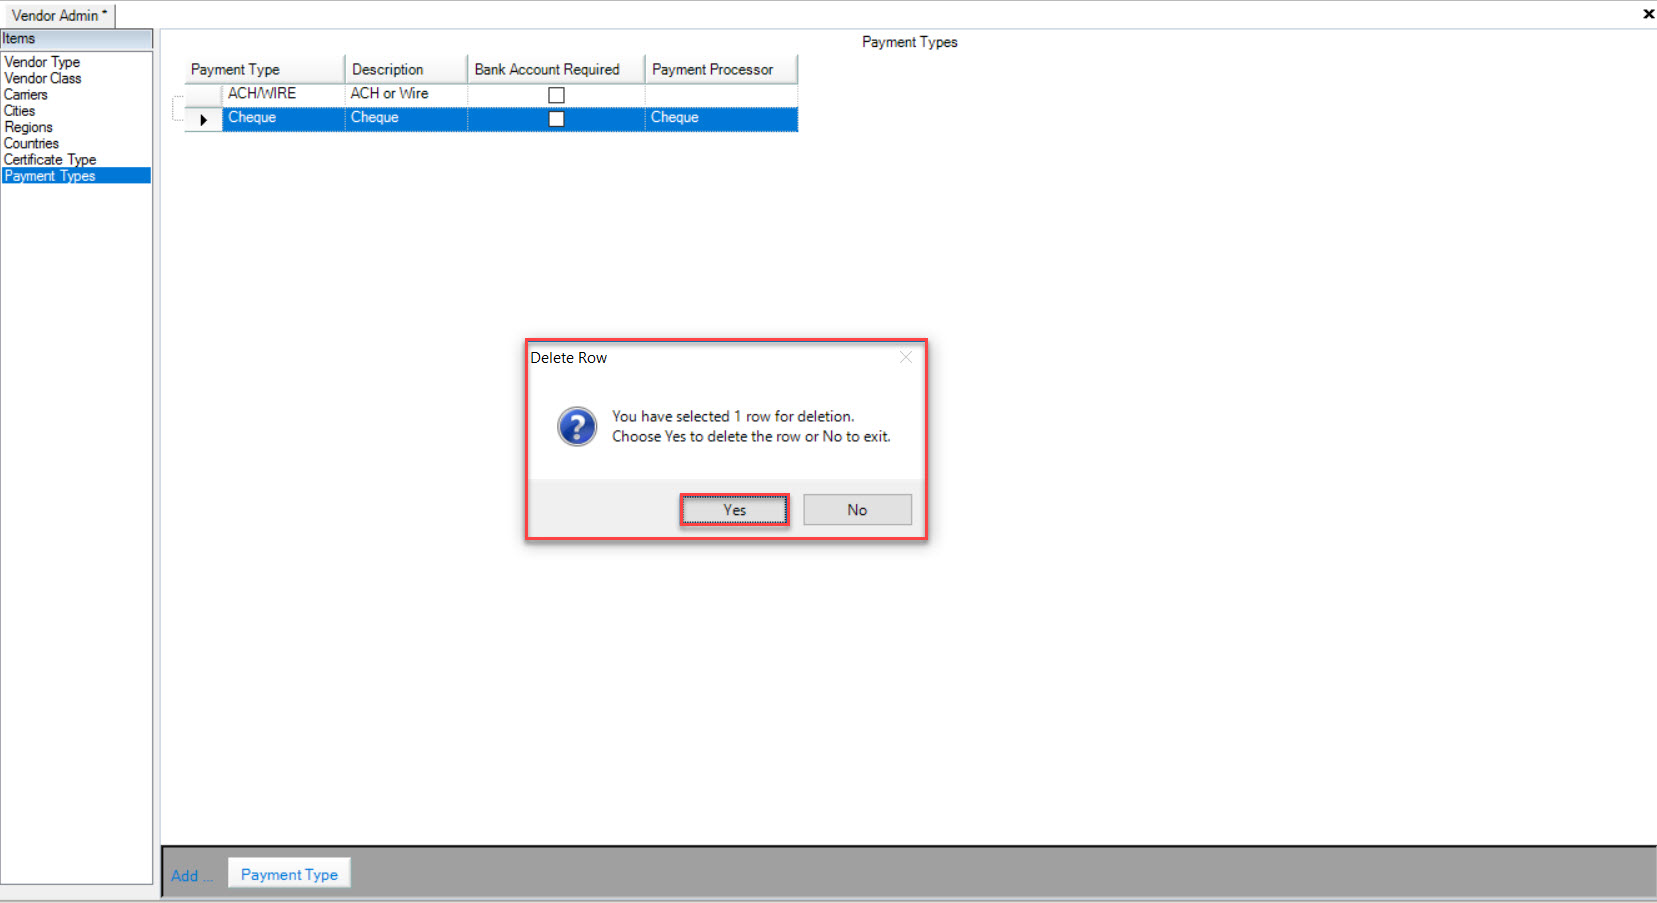
Make sure to save your changes before exiting the screen.