Admin
Shipping Admin allows users to view, add, edit, or delete Carriers, Shipping Doors, Freight Types, and Shipping Holidays.
Carriers
Carriers are added to the Shipping Admin screen so users can add them to a Customer, or to a Packing Slip when shipping.
To view Carriers in the Shipping Admin, navigate to the  tab and click on the
 ![]() icon.
icon.
This will open the Shipping Admin screen. Make sure to click on the Carriers tab under Items.
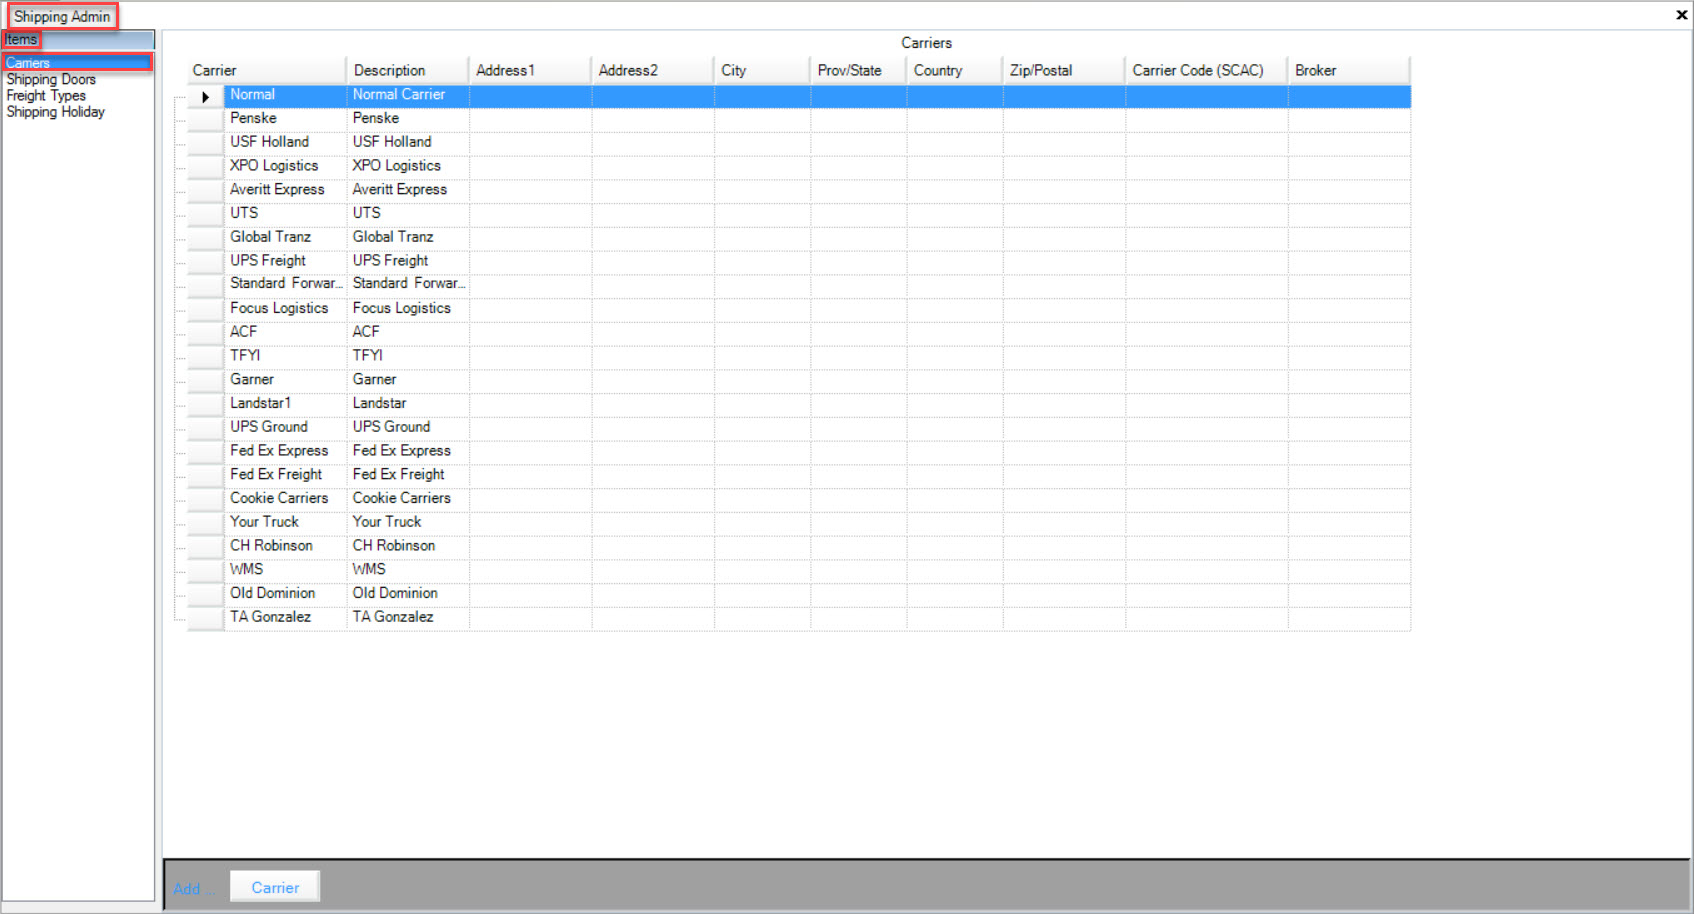
Users will be able to view the Carrier Name, Description, Addresses, City, Prov/State, Country, Zip/Postal Code, Carrier Code (SCAC), and Broker.
Adding Carriers
To add a Carrier in the Shipping Admin, navigate to the  tab and click on the
 ![]() icon.
icon.
This will open the Shipping Admin screen. Make sure to click on the Carriers tab under Items.

Click on the  button located at the bottom of the screen.
A new row will appear where users can fill in the necessary fields such as the Carrier Name and Description.
Make sure to save your changes before exiting the screen.
Editing Carriers
To edit a Carrier in the Shipping Admin, navigate to the  tab and click on the
 ![]() icon.
icon.
This will open the Shipping Admin screen. Make sure to click on the Carriers tab under Items.

Find the Carrier that you wish to edit. Using the appropriate text boxes and drop-down menus, making the necessary changes.
Make sure to save your changes before exiting the screen.
Deleting Carriers
To delete a Carrier in the Shipping Admin, navigate to the  tab and click on the
 ![]() icon.
icon.
This will open the Shipping Admin screen. Make sure to click on the Carriers tab under Items.

Find the Carrier that you wish to delete and highlight the appropriate row. Use your Delete key and when the system prompts you, select Yes.
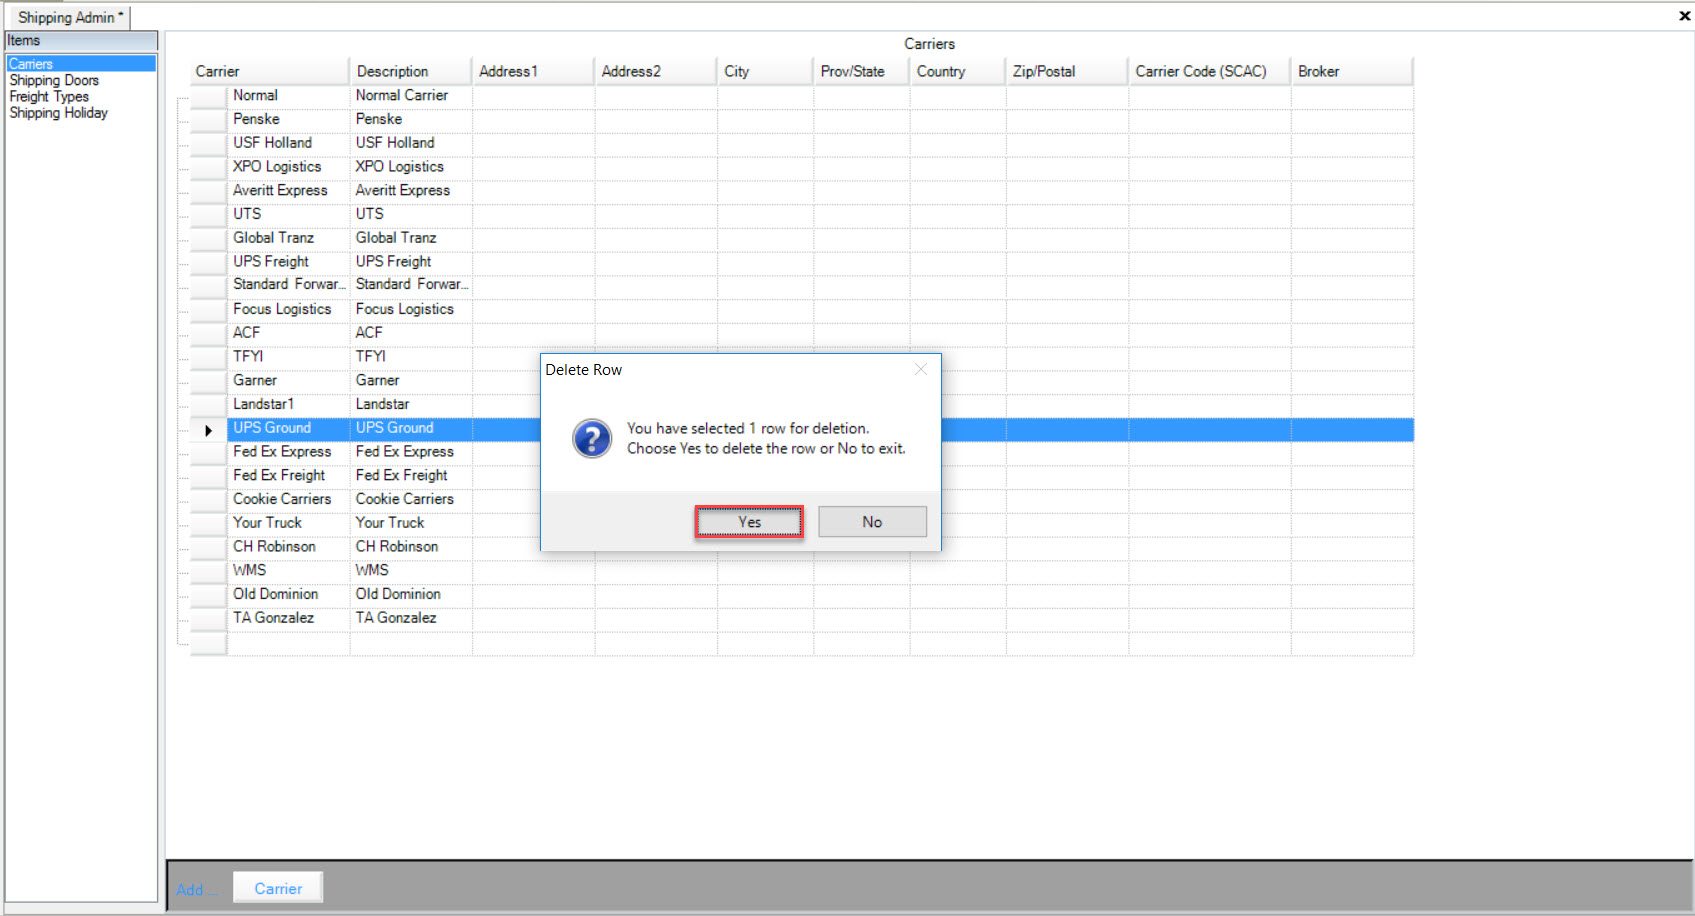
The row will be deleted. Make sure to save your changes before exiting the screen.
Shipping Doors
Shipping Doors allow users to assign Packing Slips to different doors for shipping, assigning, and packing serial numbers.
To view Shipping Doors in the Shipping Admin, navigate to the  tab and click on the
 ![]() icon.
icon.
This will open the Shipping Admin screen. Make sure to click on the Shipping Doors tab under Items.
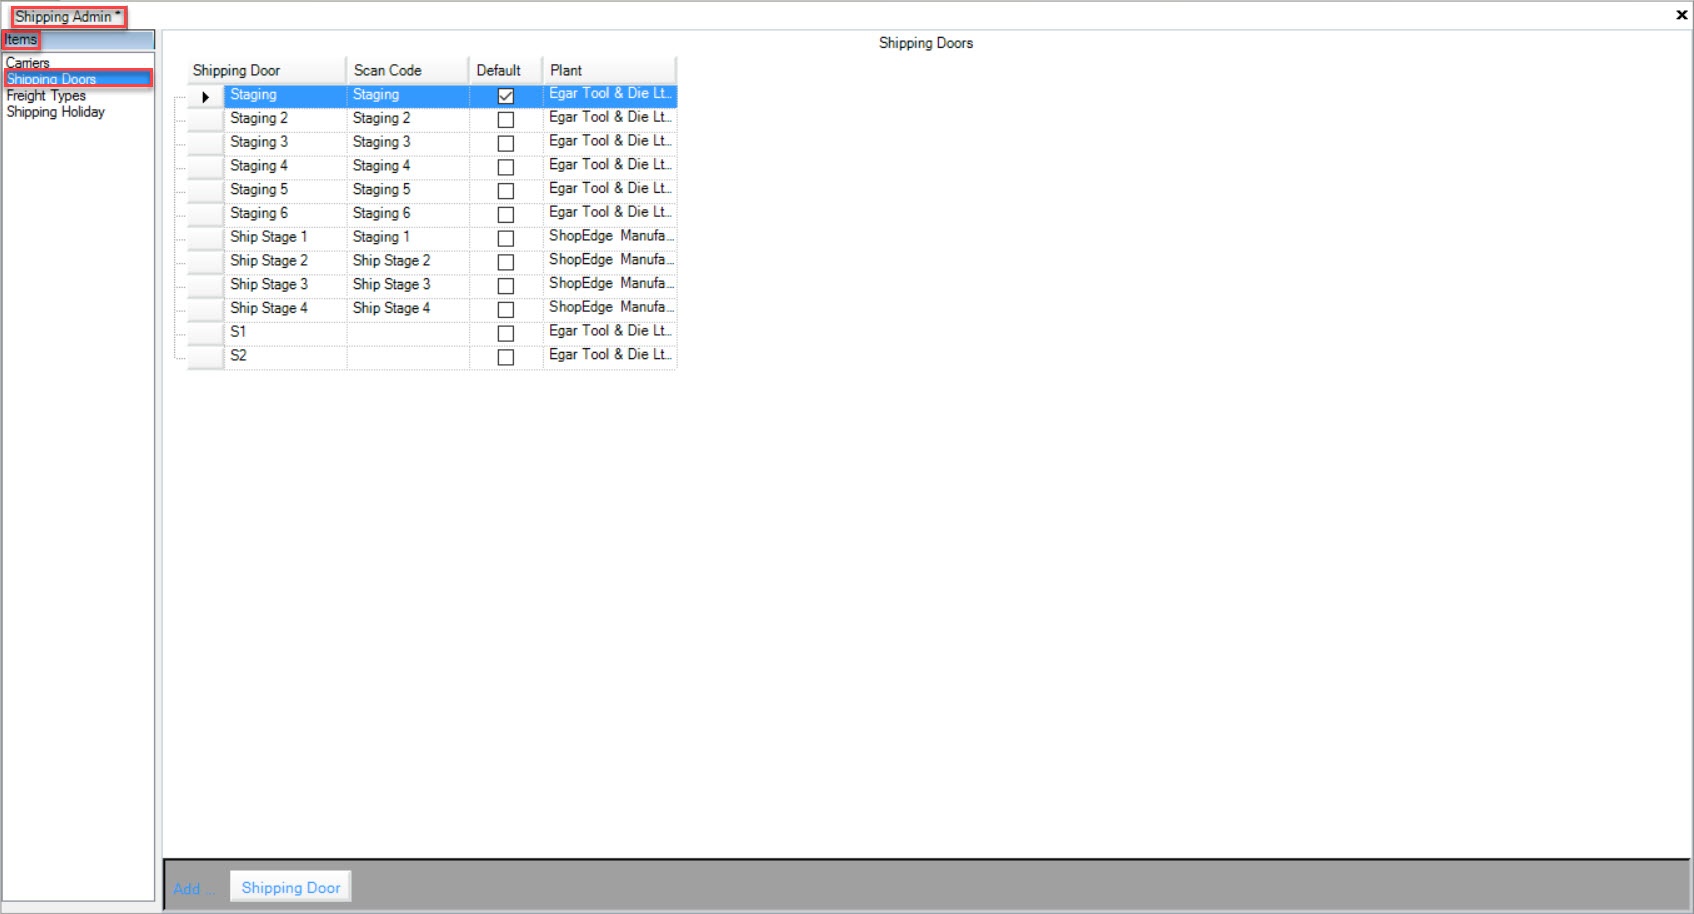
Users will be able to view the Shipping Door, Scan Code, Default (optional), and the Plant.
Adding Shipping Doors
To add a Shipping Door in the Shipping Admin, navigate to the  tab and click on the
 ![]() icon.
icon.
This will open the Shipping Admin screen. Make sure to click on the Shipping Doors tab under Items.

Click on the  button located at the bottom of the screen.
A new row will appear where users can fill in the appropriate fields using the text boxes and drop-down menus.
Make sure to save your changes before exiting the screen.
Editing Shipping Doors
To edit a Shipping Door in the Shipping Admin, navigate to the  tab and click on the
 ![]() icon.
icon.
This will open the Shipping Admin screen. Make sure to click on the Shipping Doors tab under Items.

Find the Shipping Door you wish to edit and make the necessary changes.
Make sure to save your changes before exiting the screen.
Deleting Shipping Doors
To delete a Shipping Door in the Shipping Admin, navigate to the  tab and click on the
 ![]() icon.
icon.
This will open the Shipping Admin screen. Make sure to click on the Shipping Doors tab under Items.

Find the Shipping Door you wish to delete and highlight the appropriate row. Use your Delete key and when the system prompts you, select Yes.
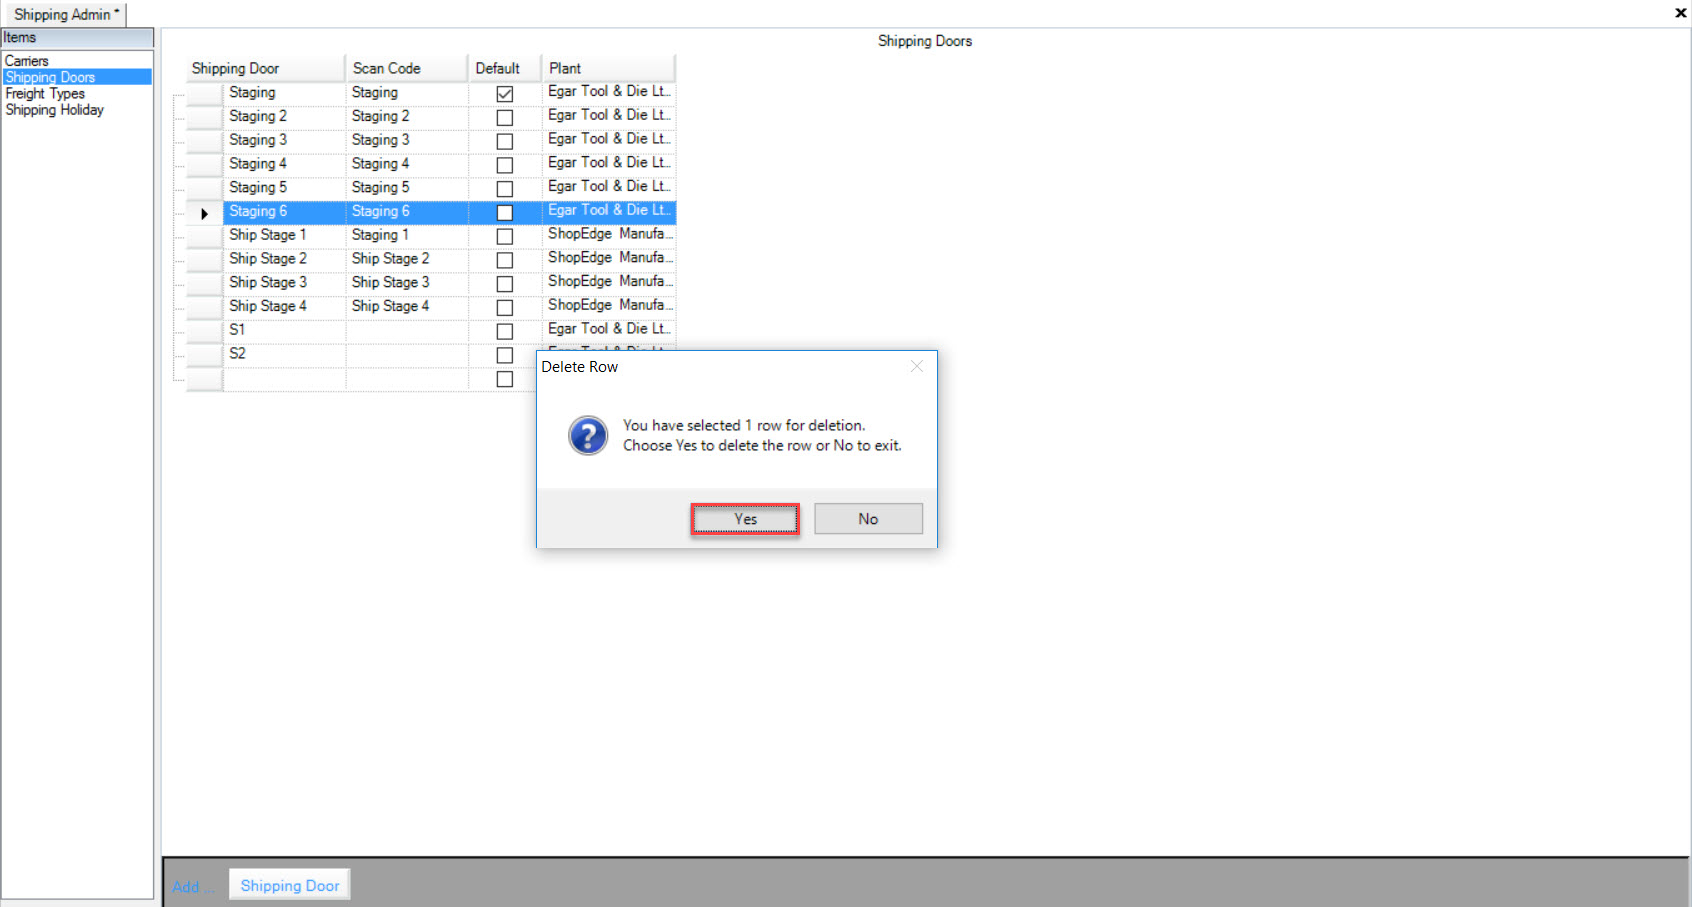
The row will be deleted. Make sure to save your changes before exiting the screen.
Freight Types
Freight Types are created in the system and added to Customers, Vendors, and Packing Slips.
To view Freight Types in the Shipping Admin, navigate to the  tab and click on the
 ![]() icon.
icon.
This will open the Shipping Admin screen. Make sure to click on the Freight Types tab under Items.
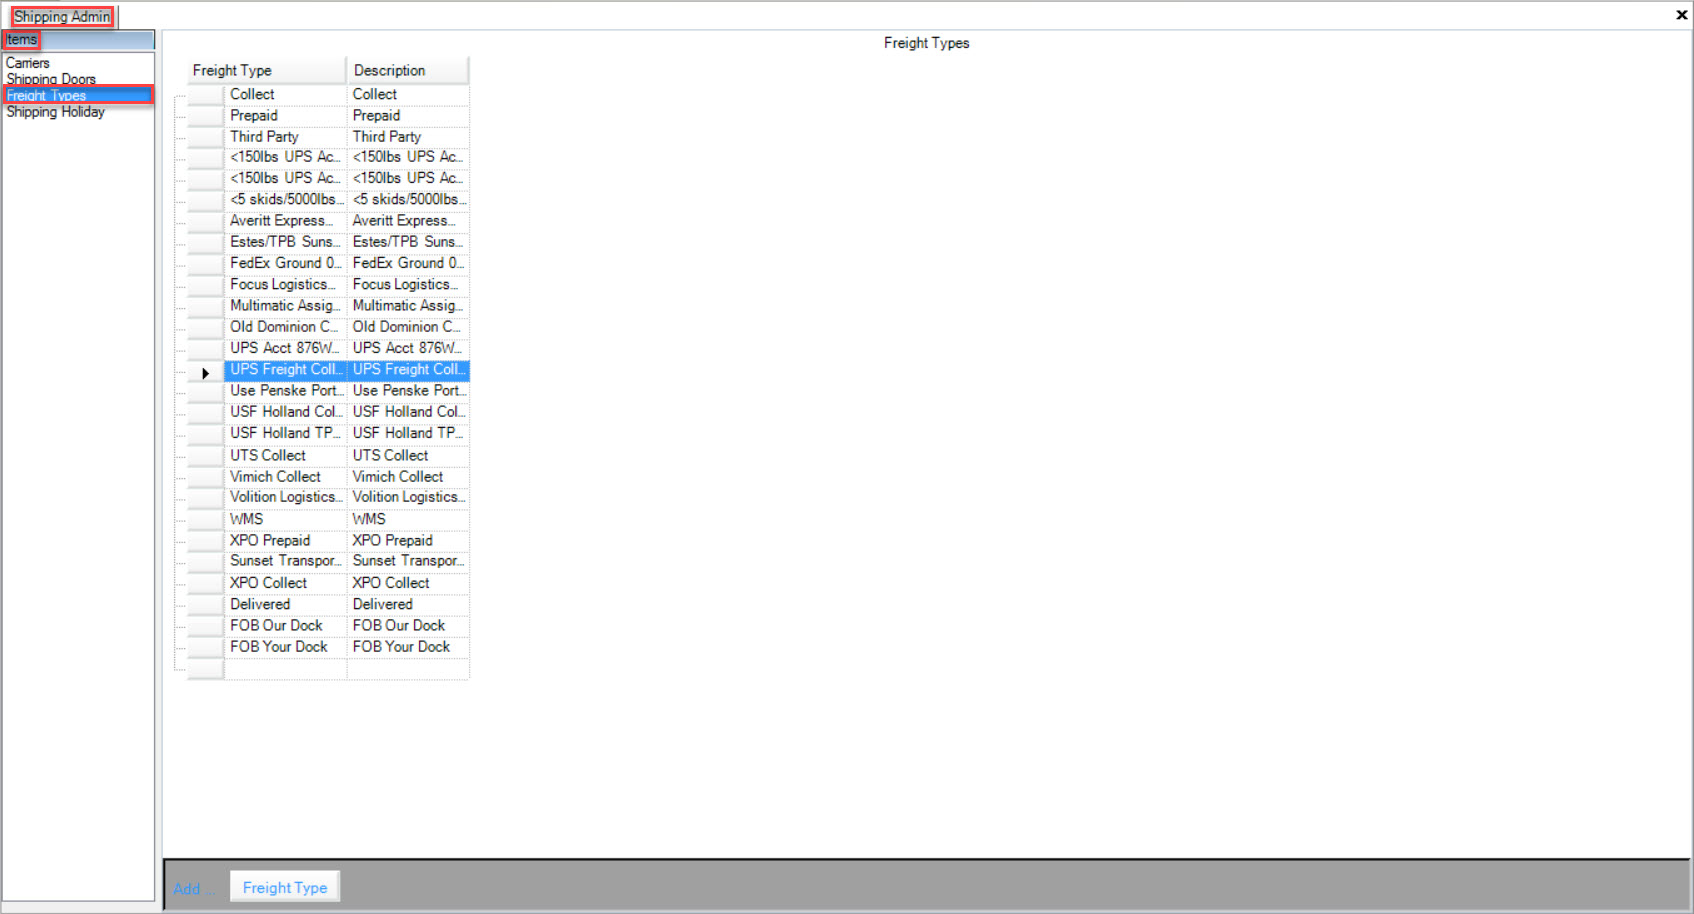
Users will be able to view the Freight Type and Description.
Adding Freight Types
To add a Freight Type in the Shipping Admin, navigate to the  tab and click on the
 ![]() icon.
icon.
This will open the Shipping Admin screen. Make sure to click on the Freight Types tab under Items.

Click on the  button located at the bottom of the screen.
A new row will appear where users can fill in the necessary fields.
Make sure to save your changes before exiting the screen.
Editing Freight Types
To edit a Freight Type in the Shipping Admin, navigate to the  tab and click on the
 ![]() icon.
icon.
This will open the Shipping Admin screen. Make sure to click on the Freight Types tab under Items.

Find the Freight Type you wish to edit and use the text boxes to make the appropriate changes.
Makes sure to save your changes before exiting the screen.
Deleting Freight Types
To delete a Freight Type in the Shipping Admin, navigate to the  tab and click on the
 ![]() icon.
icon.
This will open the Shipping Admin screen. Make sure to click on the Freight Types tab under Items.

Find the Freight Type you wish to delete and highlight the appropriate row. Use your Delete key and when the system prompts you, select Yes.
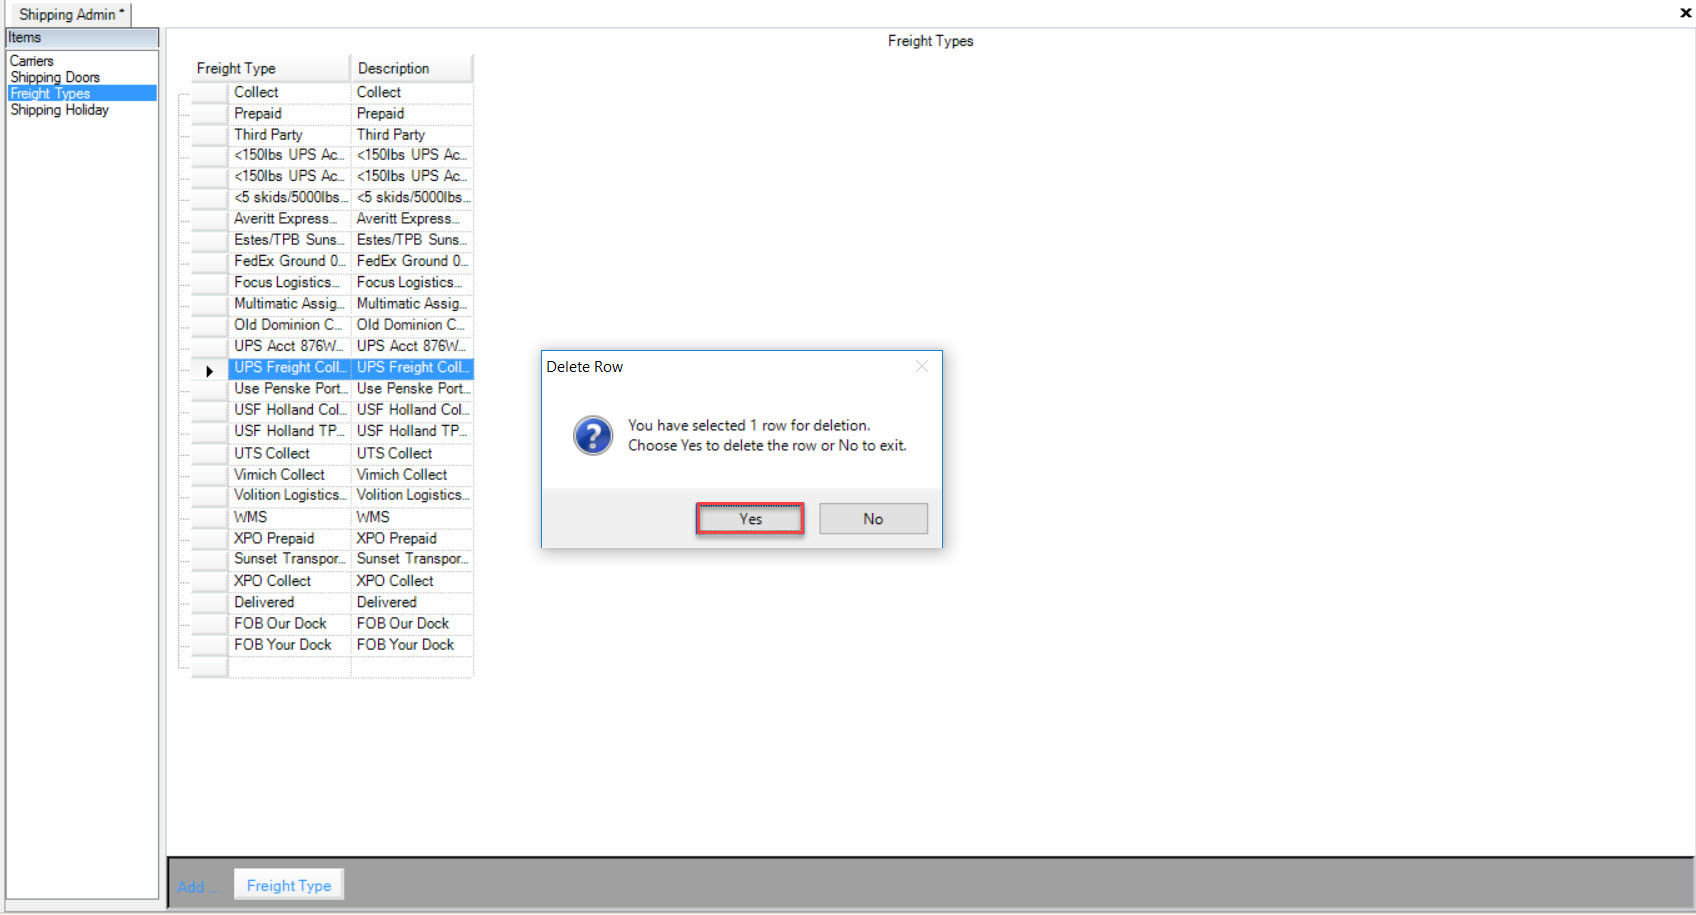
The row will be deleted. Make sure to save your changes before exiting the screen.
Shipping Holidays
**Shipping Holidays* allows users to block off certain days so shipping will not be scheduled in the system.
To view Shipping Holiday in the Shipping Admin, navigate to the  tab and click on the
 ![]() icon.
icon.
This will open the Shipping Admin screen. Make sure to click on the Shipping Holiday tab under Items.
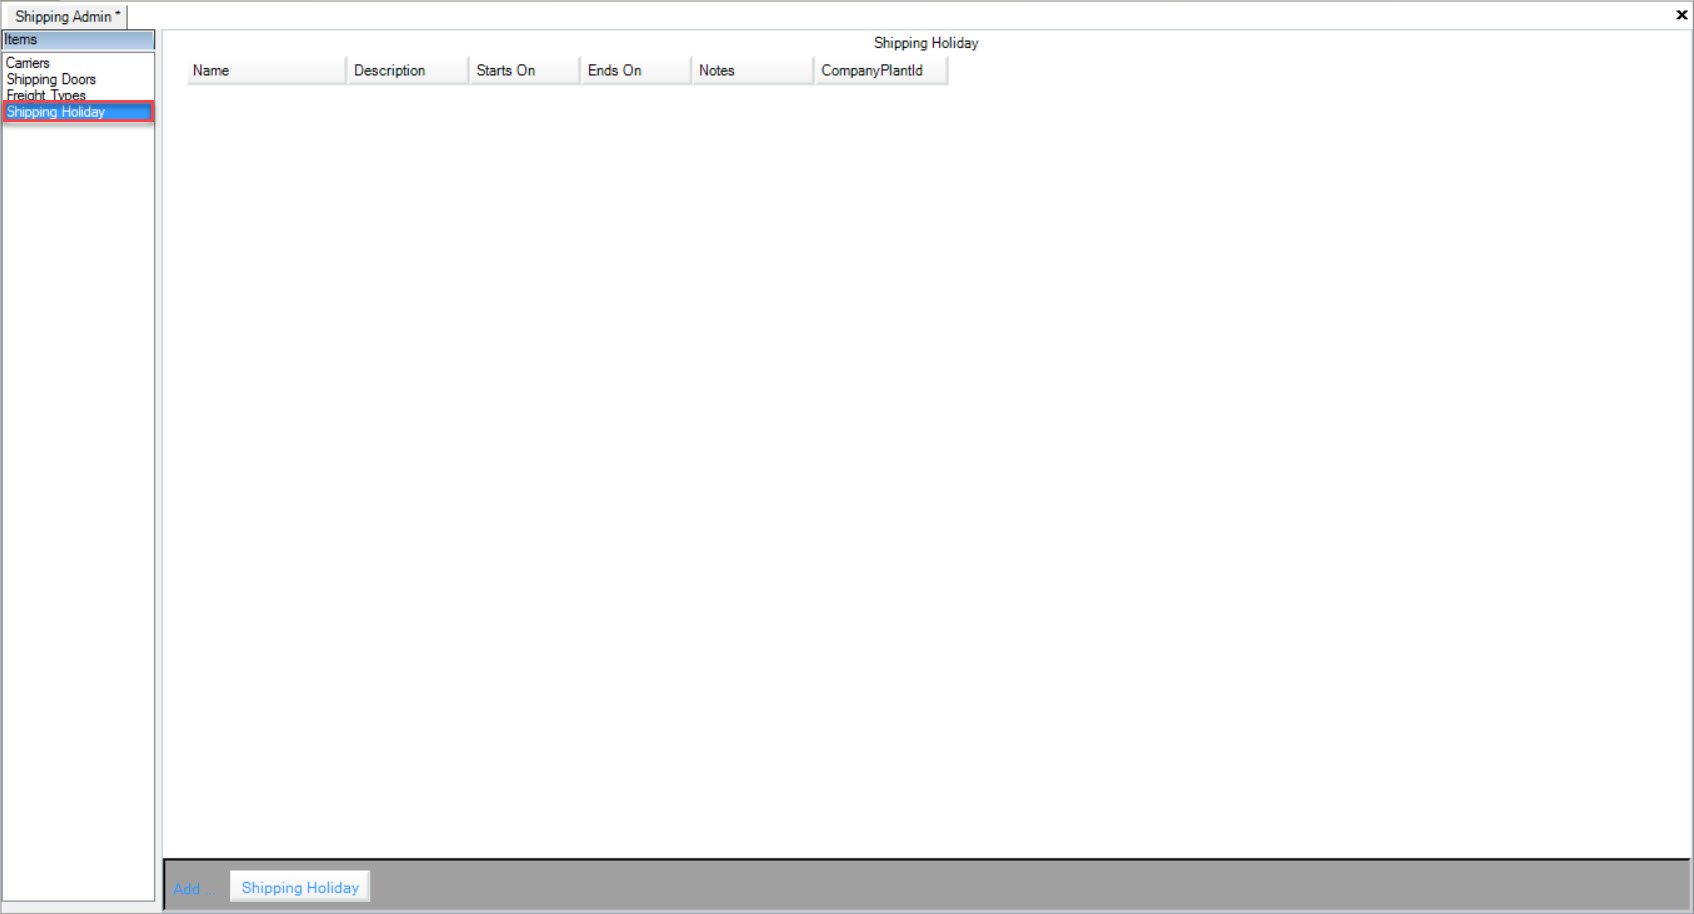
Users will be able to view the Shipping Holiday Name, Description, the Start On date, the End On date, Notes, and Company/Plant ID.
Adding a Shipping Holiday
To add a Shipping Holiday in the Shipping Admin, navigate to the  tab and click on the
 ![]() icon.
icon.
This will open the Shipping Admin screen. Make sure to click on the Shipping Holiday tab under Items.

Click on the  button located at the bottom of the screen.
A new row will appear where users can fill in the appropriate fields.
Make sure to save your changes before exiting the screen.
Editing a Shipping Holiday
To edit a Shipping Holiday in the Shipping Admin, navigate to the  tab and click on the
 ![]() icon.
icon.
This will open the Shipping Admin screen. Make sure to click on the Shipping Holiday tab under Items.

Find the Shipping Holiday you wish to edit and use the appropriate text boxes and drop-down menus to make any necessary changes.
Make sure to save your changes before exiting the screen.
Deleting a Shipping Holiday
To delete a Shipping Holiday in the Shipping Admin, navigate to the  tab and click on the
 ![]() icon.
icon.
This will open the Shipping Admin screen. Make sure to click on the Shipping Holiday tab under Items.

Find the Shipping Holiday you wish to delete and highlight the appropriate row. Use your Delete key and when the system prompts you, select Yes.
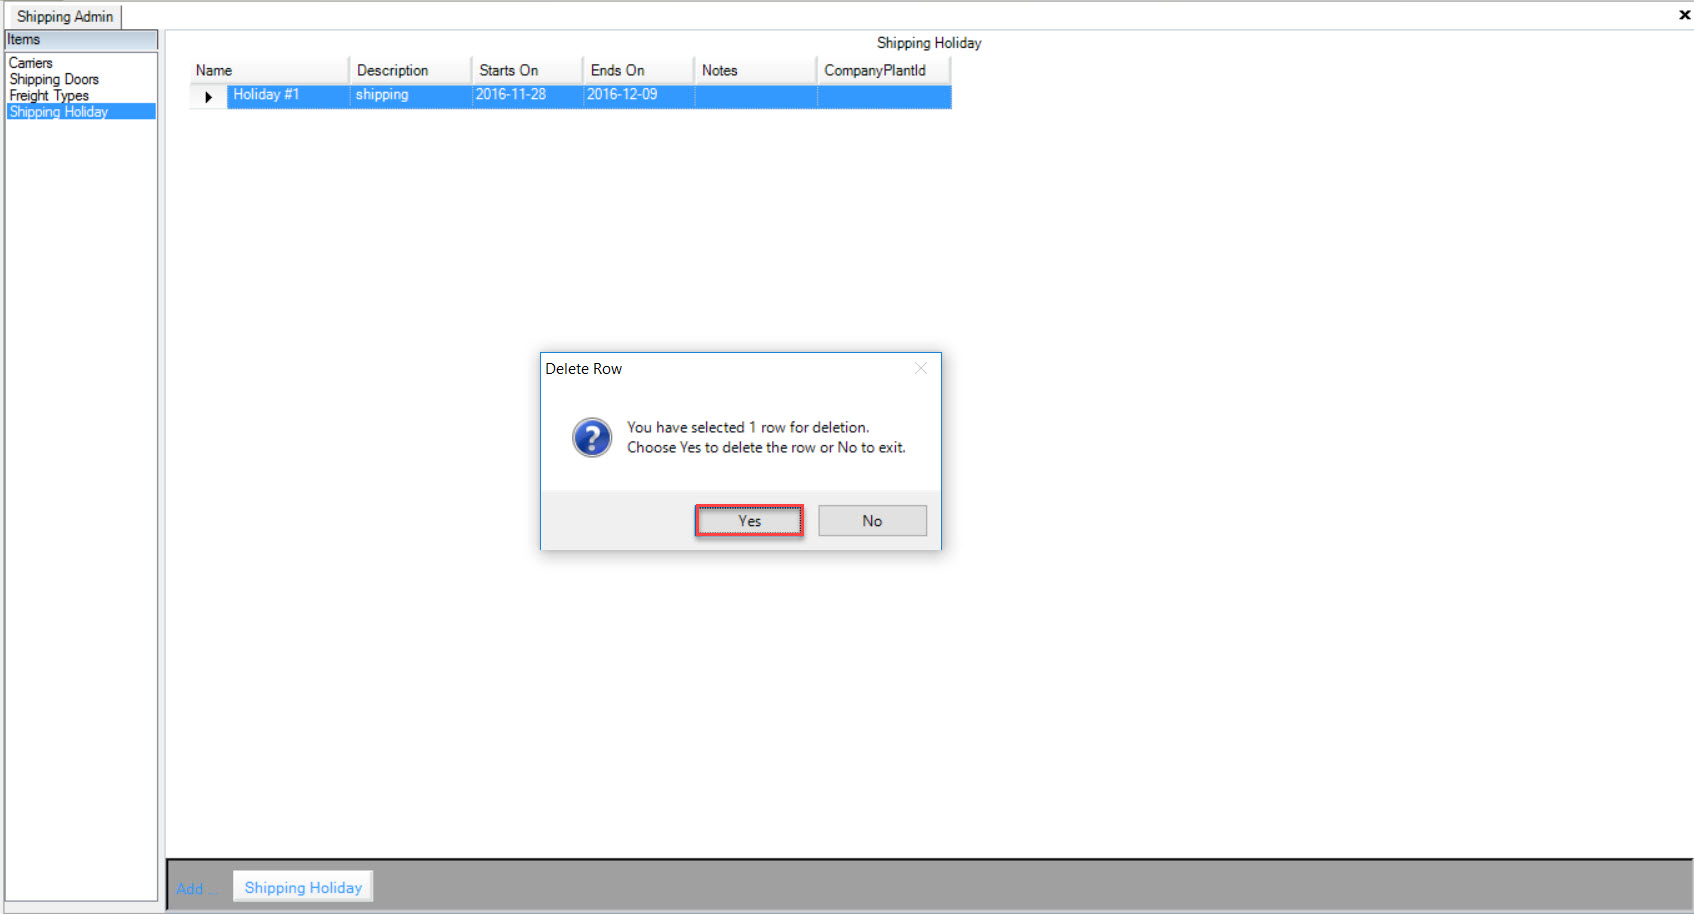
Make sure to save your changes before exiting the screen.