Quality Inspections
Quality Inspections
Quality inspections are an integral part of the Shop Edge system for maintaining quality procedures that lead to quality parts in production.
Creating a New Quality Inspection Template
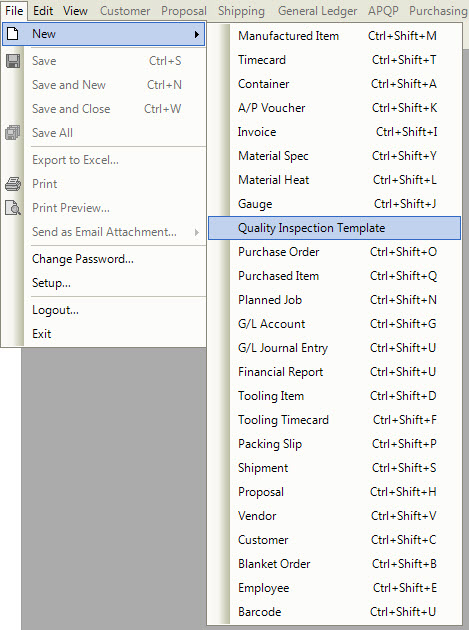
Quality inspection templates can be created in two areas of the system. The first location can be found by navigating to File > New > Quality Inspection Template.
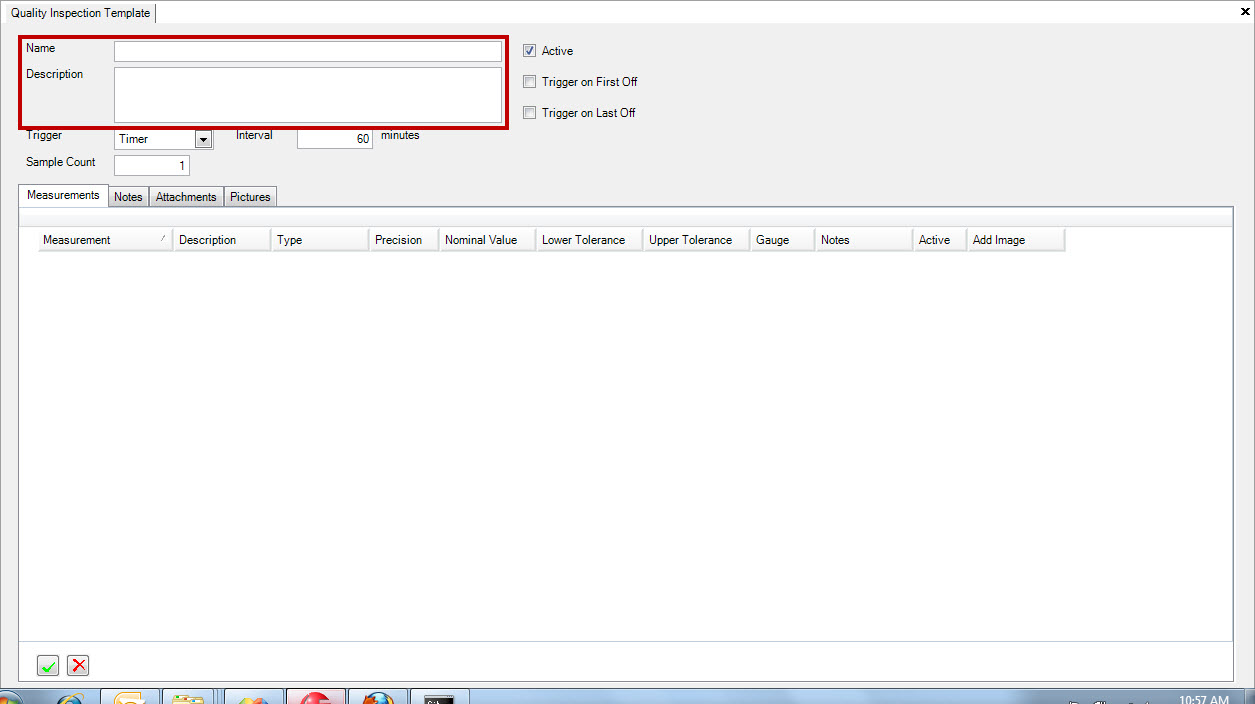
This will bring up the Quality Inspection Template screen.
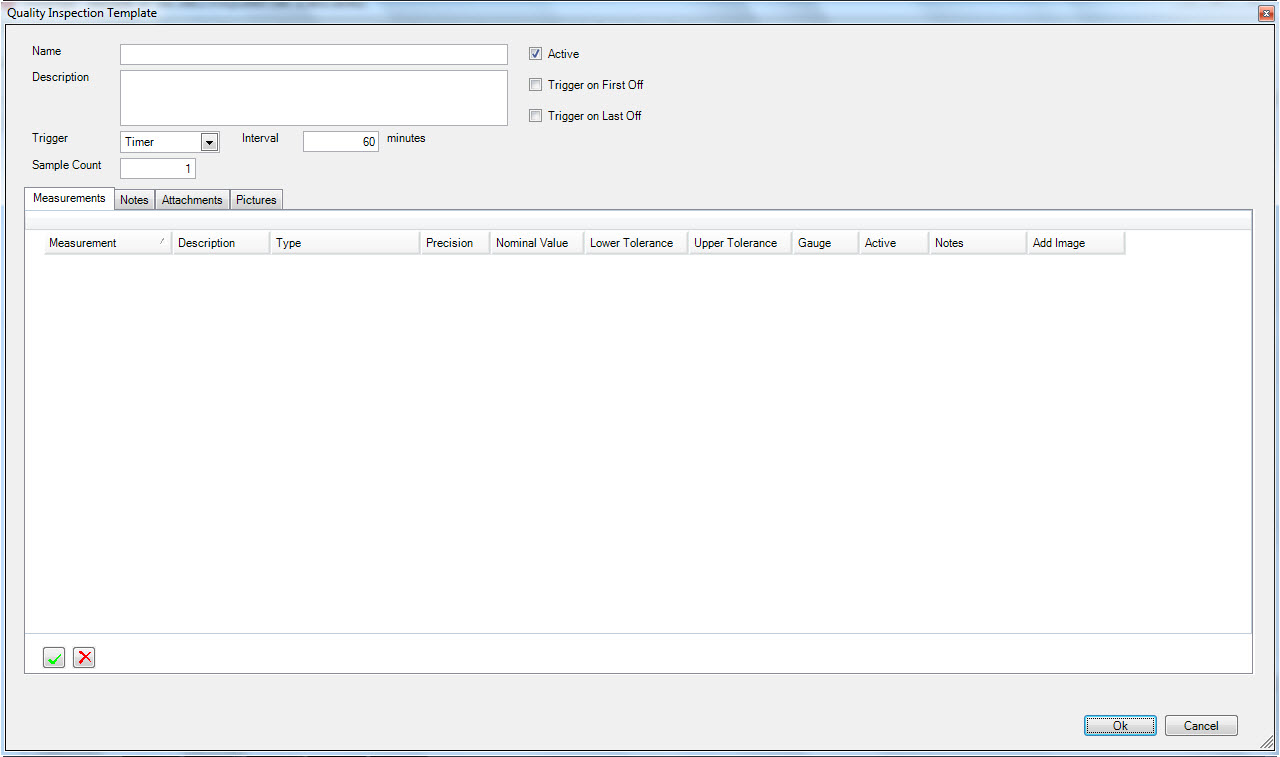
Creating a template this way will add a template to the quality system, but not attach it at the item level. If you wish a add the template to an item,
you must navigate directly to the manufactured item and attach it by clicking on the  button. Creating a template first allows the user to attach
it to as many items as necessary. (i.e. If you have a visual inspection that you want to perform on multiple items, you would add a template to the system, and then apply it at the item level.
The second area that a template can be creating is directly in a manufactured item screen. Navigate to the  tab,
and click on the
  icon. Clicking on the icon will bring up the Manufacture Routings lookup screen. Once you find
the item you wish to add a quality inspection template to, simple double click the item or use the Enter key to open.
Once you have the item open, click on the  button. This will bring up the Quality Inspection Screen.
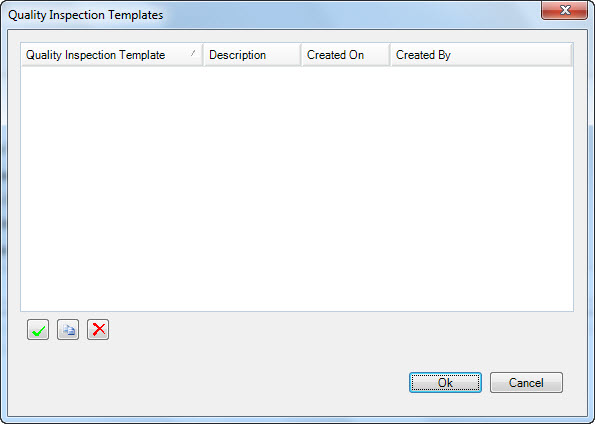
To create a new template, click on the  button located at the bottom left of the screen. This will bring up the
Quality Inspection Template screen.

You can also add an existing template in the system at the item level by clicking on the  button, and clicking on the
 button. This is the ‘copy from template’ button, which allows you to attach an existing template, or use an existing template
as a starting point for creating a new template by populating existing information.
Note
***Making changes to a template after clicking the  button
does not make permanent changes to a template; it allows you to modify and save the copied template in the system for that item.***
Entering in Quality Inspection Template Information
Once you open the template screen, it is now time to define your quality inspection template to be completed by the work center operator.
Defining a Trigger
There are two Triggers defined in the system: a timer-based trigger that allows you to define a time interval related to when the inspections should be preformed, and a manual trigger that is left up to the operator.
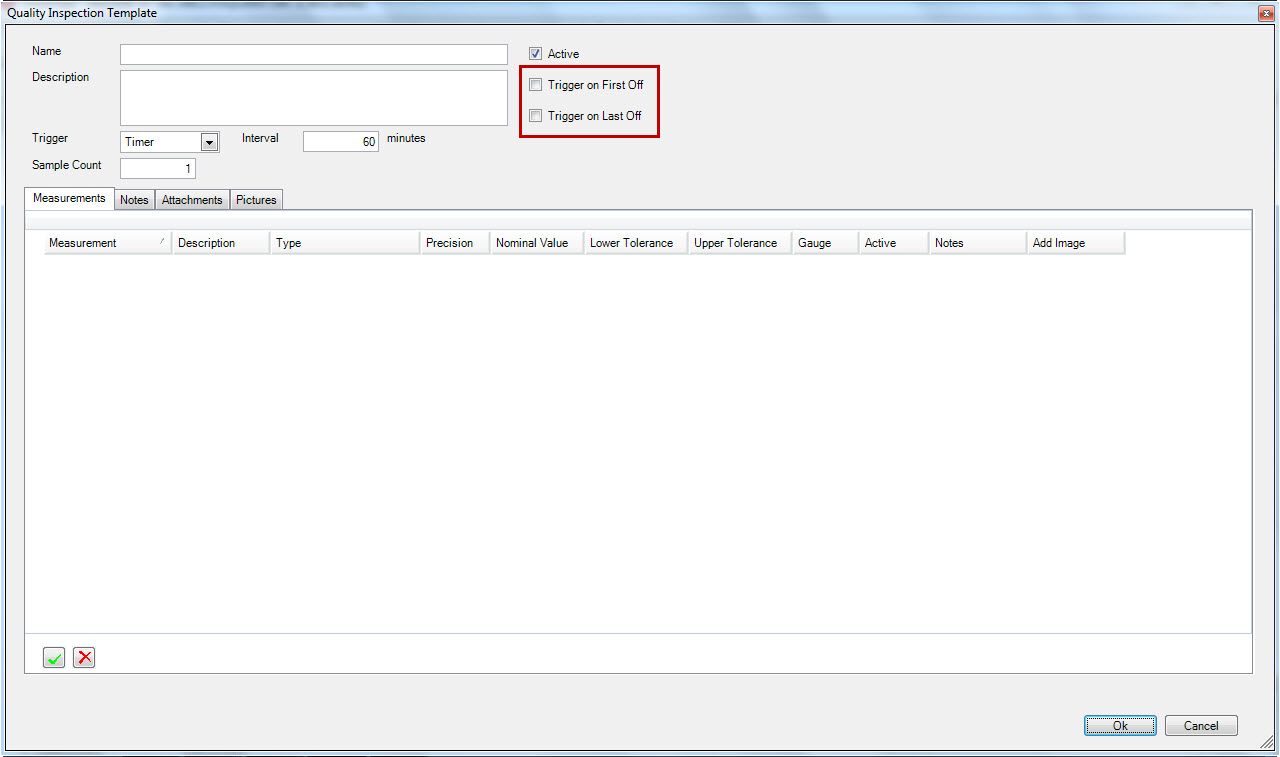
Trigger on First or Last Off
Selecting the option Trigger on First Off or Trigger on Last Off enables a quality inspection at the operator level before a job starts (first off), or before a job is able to be finished (last off). An operator will not be able to print any production tags until the ‘First Off’ check in complete, nor will they be able to finish a job until the ‘Last Off’ check is complete.
Note
***The quality inspection timer will not start until the ‘First Off’ check has been completed by the operator.***
Selecting a Sample Count
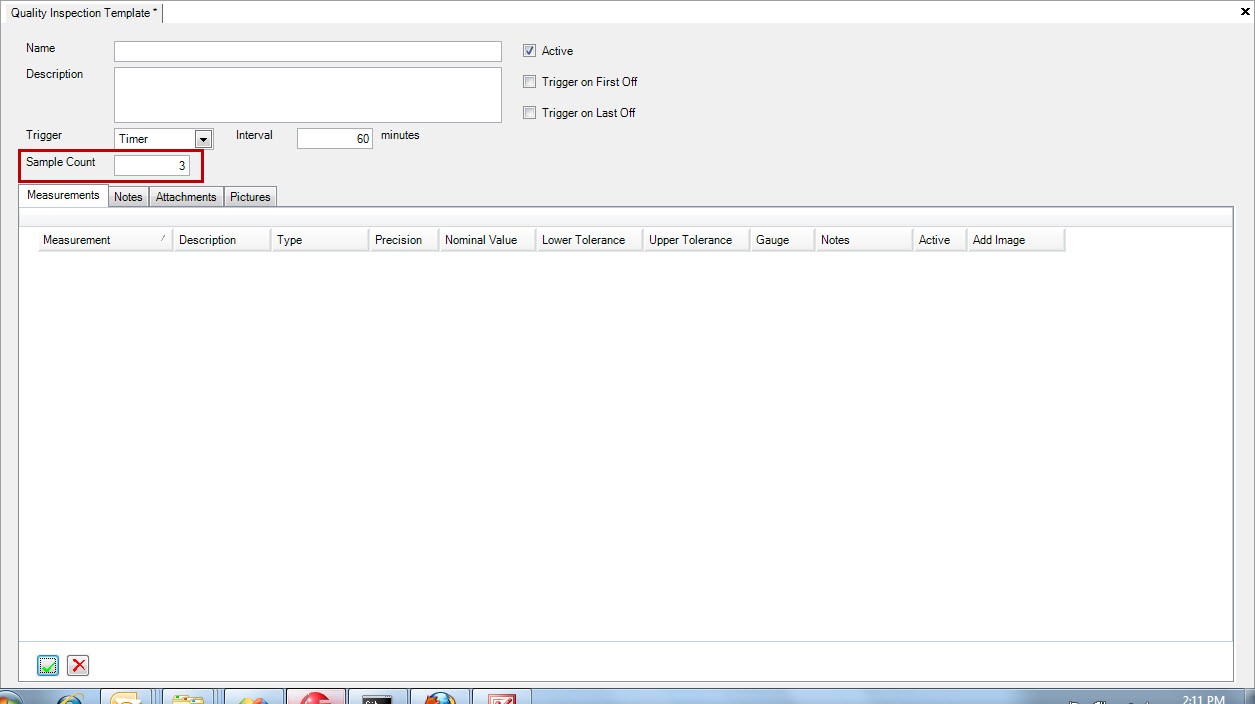
Entering in a number beside ‘Sample Count’ will define how many pieces an operator will perform checks to for their quality inspection.
Defining Measurements in a Template
To define measurements in a template, click on the  tab, and then click on the
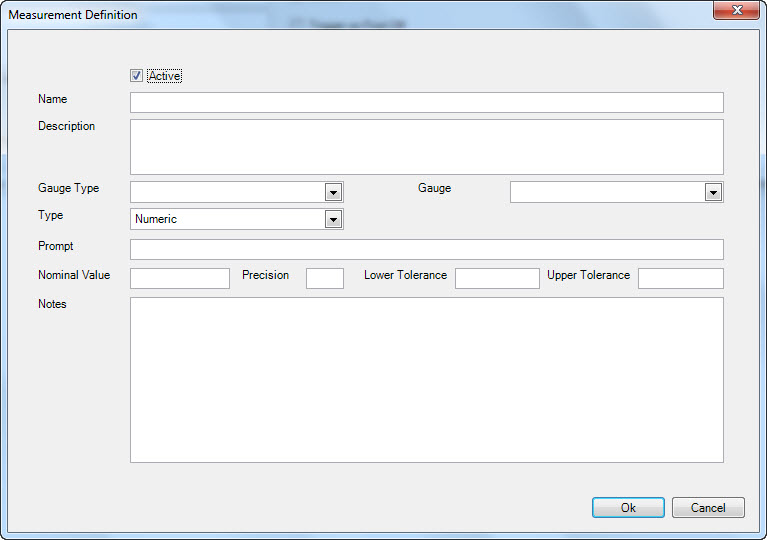
  button at the bottom left of the screen. This will open the Measurement Definition Screen.
Header Information
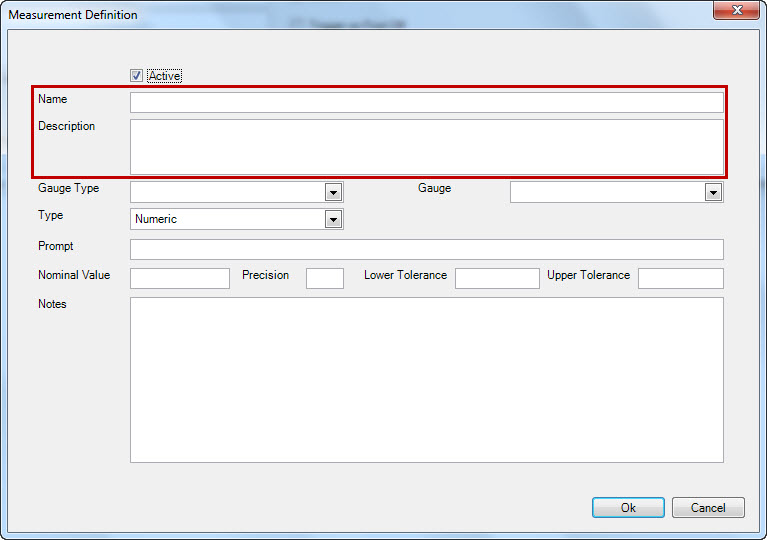
Enter in header information in the Measurement Definition screen such as the name of the measurement, and the desciption.
Assigning a Gauge to a Measurement
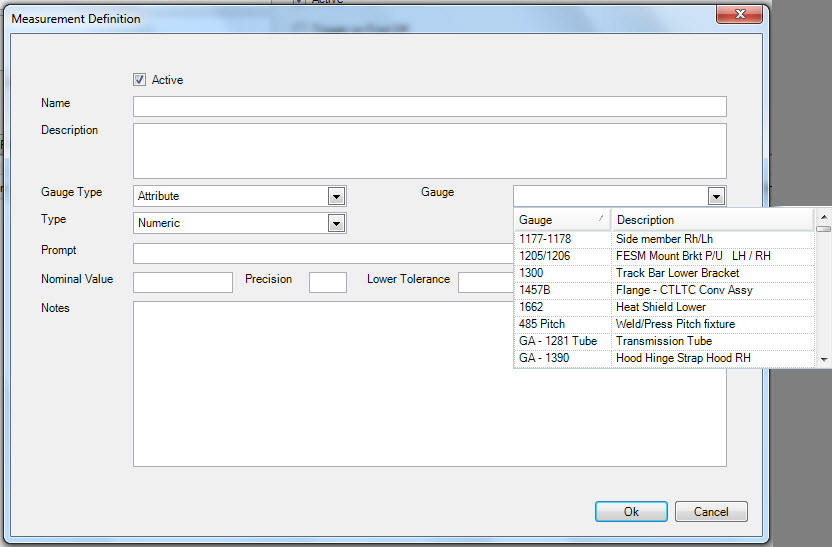
You have the ability to assign a gauge to a measurement in the system. First, select the type of gauge, and then the actual gauge from the listing provided (based on gauge listings in the Q/A module).
Note
***It is not a system requirement to enter in a gauge type or an actual gauge in the system.***
Defining the Type of Measurement
There are three types of measurements in the system:
- Multi-Value-allows the operator to select from multiple available pre set values
- Numeric-the operator must input numeric values
- Yes/No-the operator must complete a simple yes/no check
Depending on the measurement type you select, the system will prompt you to enter in additional information about the type of measurement selected.
zero level title or level too high for title Entering a Multi-Value Measurement and level 7 and len(char) 6
If you selected a Multi-Value measurement, click on the  button to bring up the Measurement Values screen.
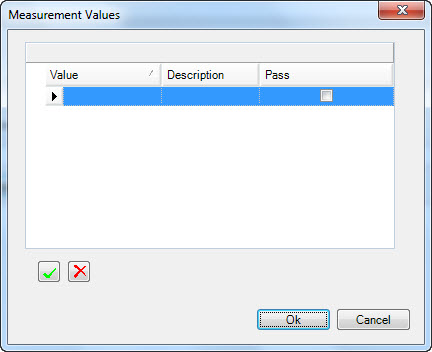
To add a new value to a measurement, click on the  button at the bottom left of the screen. This will add a new value line to the
measurement. You can then enter in the Value and the Description and indicate whether the value entered will be a ‘Pass’.
To delete a value, highlight the row for deletion and click on the  button at the bottom left of the screen.
zero level title or level too high for title Entering a Numeric Measurement and level 7 and len(char) 6
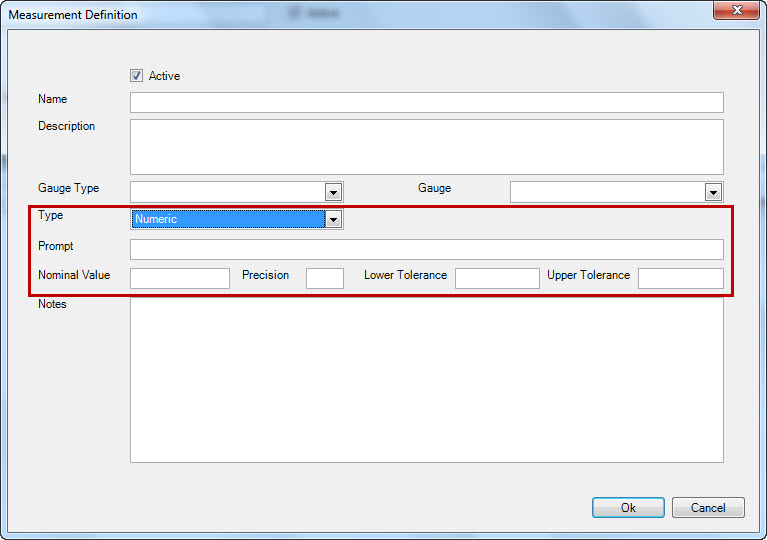
To enter in a ‘Numeric’ measurement, make sure ‘Numeric’ is selected from the drop down beside ‘Type’. You will then be required to enter:
- Nominal Value
- Precision
- Lower Tolerance; and
- Upper Tolerance
zero level title or level too high for title Entering a Yes/No Measurement and level 7 and len(char) 6
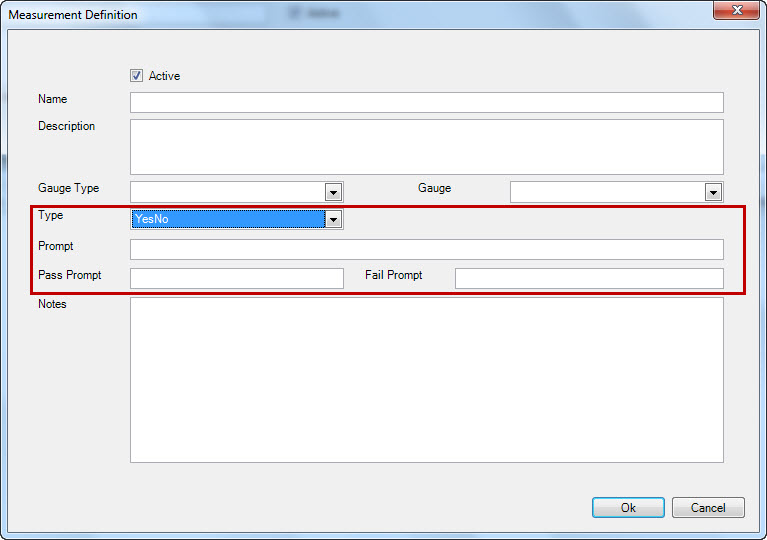
If you select ‘Yes/No’ as your type of measurement, you then have to enter ‘Prompt’ information that the operator will see, as well as the ‘Pass Prompt’ and ‘Fail Prompt’ that the operator will be required to enter.
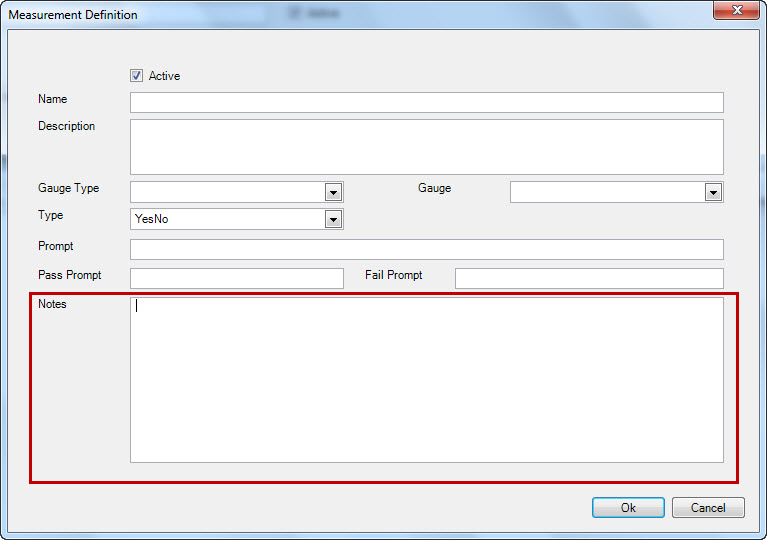
Adding Notes to a Measurement
To enter a note into a measurement, simply type in the text box beside ‘Notes’:
Adding an Image to a Measurement
To add an image to a measurement, find the  button at the end of the measurement you wish
to add the image to and click on it. Navigate to the image you wish to add and click the
  button.

Deleting a Measurement
To delete a measurement, simply hightlight the row for deletion, and click on the  button.
Entering Notes in a Template
To enter a note in a template, navigate to the  tab and click on the
  button at the bottom
left of the screen. Enter in your note and click on the
  button. The system will automtically record when the note was created and who the note was created by.
Adding an Attachment or Picture to a Template
To add an attachment or picture to a template, navigate to either the  tab, and click on the
  button at the bottom left of the screen.
Browse to the item you wish to attach and click the
  button. The system will automatically record when the item was added and who it was added by.
Once you have a template set up in the system and assign the template to an item, an operator can start to perform quality inspections for an item.
Note
*** When a Quality Check is ADDED or MODIFIED on an operation that is currently running, it will not take effect untilt the job is re-started. ***
Operator Input
All of the quality inspection information for an item at a work center can be found by navigating to the  tab on the upper right side of the ‘Operator Schedule’.
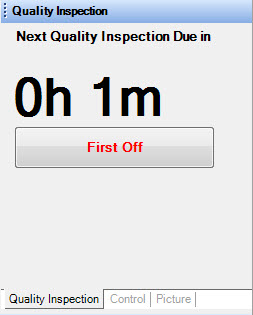
Once an operator ‘Starts’ a job, the quality inspection timer (if required) will become visible to the operator indicating when the next quality inspection is due.
Note
***The timer will not start until the ‘First Off’ check is completed if one is required.***
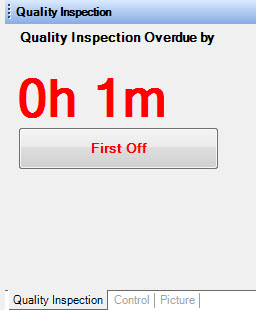
If the timer is red, this indicates that the quality inspection is overdue, and should be completed immediately.
Completing a Quality Inspection
When completing a quality inspection in the system, there are a series of steps you need to go through. First, all of the quality inspections that need to be performed on a part are listed across the top of the Quality Inspection screen.
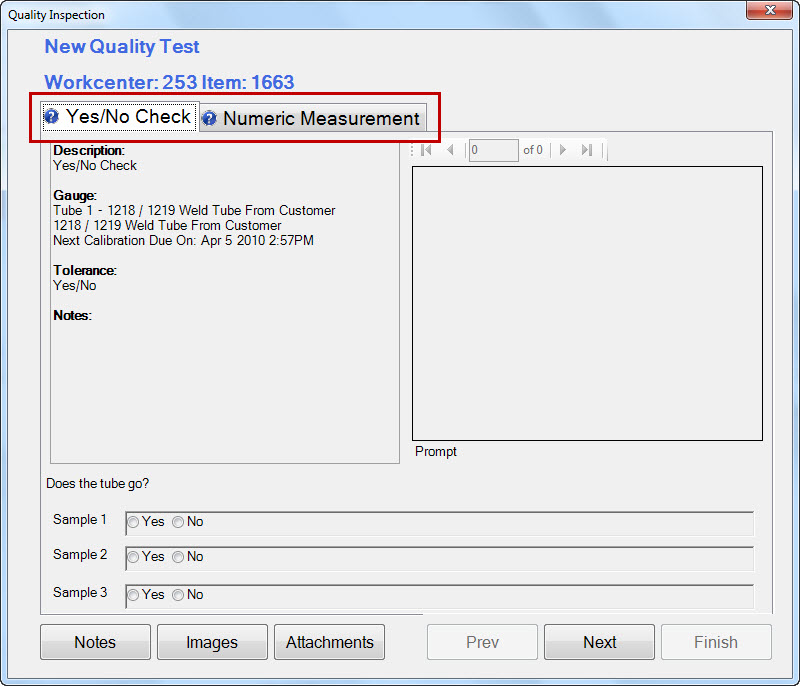
Each measurement has a ‘Description’, ‘Gauge’ (if required), and ‘Tolerance’ (if required). The sample at the bottom of the screen indicates the number of parts you need to perform the inspection to.
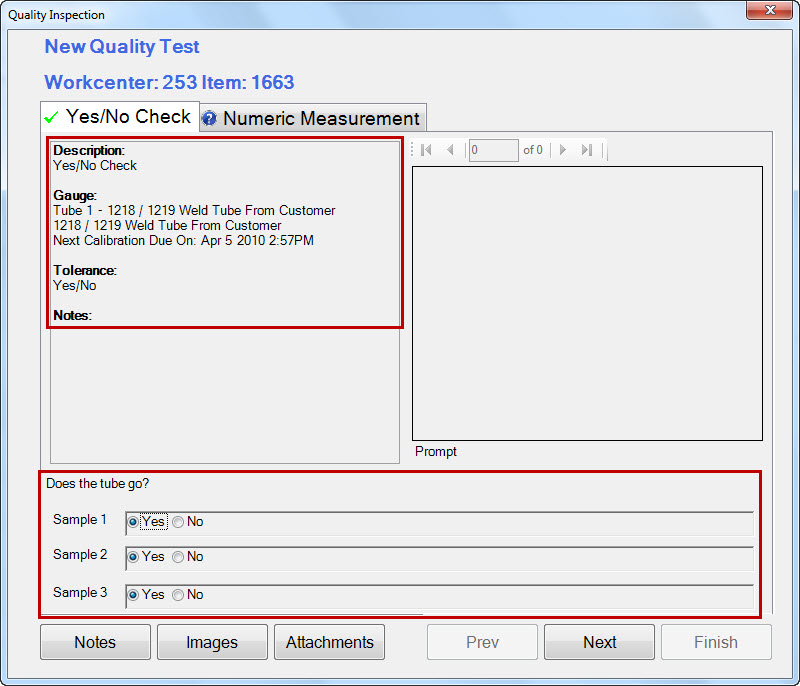
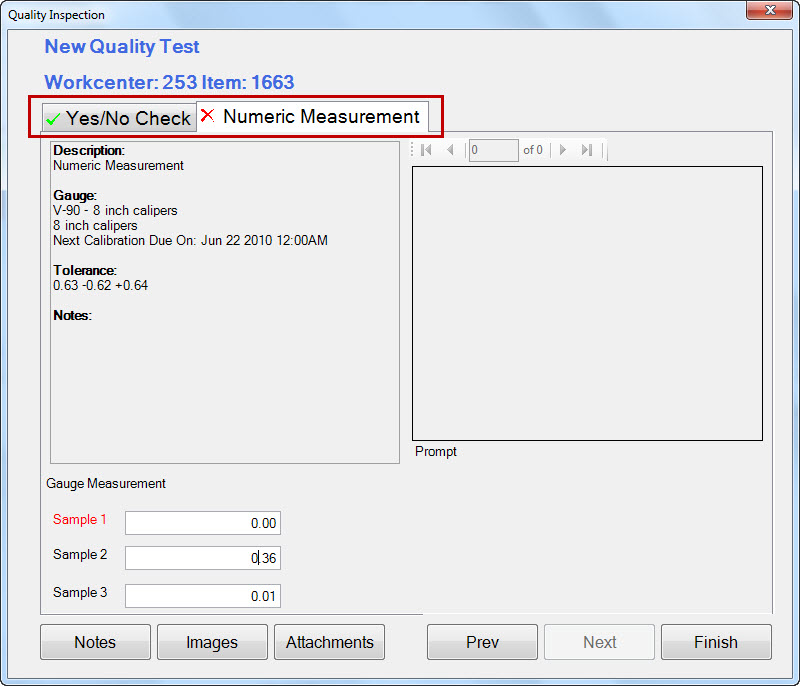
Before completing an inspection, the icon next to the inspection name will remain a  , if you have completed an inspection and the parts tested are within the inspection parameters, a
  will appear beside the inspection name. If you complete the inspection and it is ‘out of spec’, a
  will appear beside the inspection name.
What Happens When a Measurement is ‘Out of Spec’?
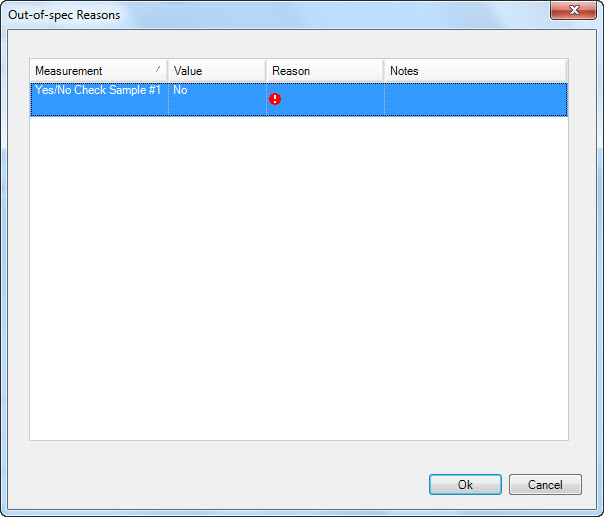
If an inspection you perform is ‘out of spec’, you may be prompted by the system to select an ‘out of spec’ reason, and you can enter in notes for any reason. Once you’re done entering in the appropriate information, click on the  button.
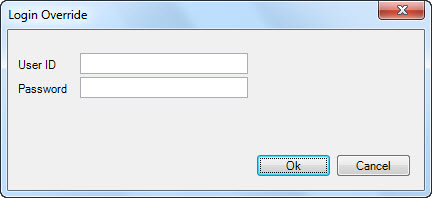
You may also be prompted by the system before saving the ‘out of spec’ reason to obtain an override by a team leader, quality personnel, or other qualified individual. Only this individual can authorize the ovverride by entering in their ‘User ID’ and ‘Password’.
Completing a ‘First off’ Inspection
Once you start a job at a work center, and before the system will allow you to print any bar code tags, you must complete a ‘First Off’ quality inspection if required. To do this, simply click on the  button to open the Quality Inspection screen.
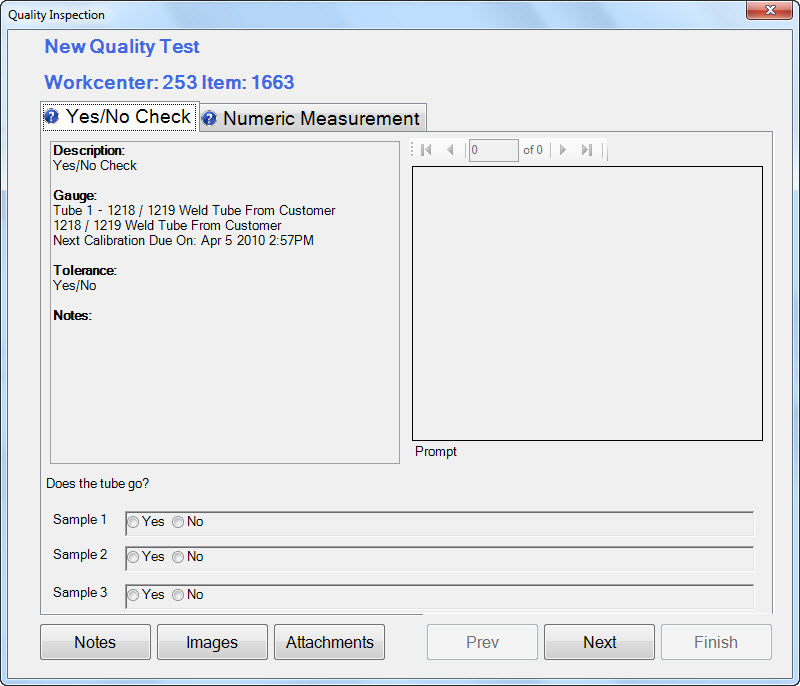
An operator must complete all of the quality inspections-as well as entering the appropriate sample information-listed in the Quality Inspection screen before they will be allowed to click on the  button to complete the quality inspection.
Completing a ‘Last Off’ Inspection
Before finishing a job at a work center, you must complete a ‘Last Off’ quality inspectiong if required. To do this, simply click on the  button to open the Quality Inspection screen.

An operator must complete all of the quality inspections-as well as entering the appropriate sample information-listed in the Quality Inspection screen before they will be allowed to click on the  button to complete the quality inspection.
Viewing Notes, Images and Attachments for a Quality Inspection
To view any notes, images or attachments for a quality inspection simply click on the appropriate button at the bottom of the screen.
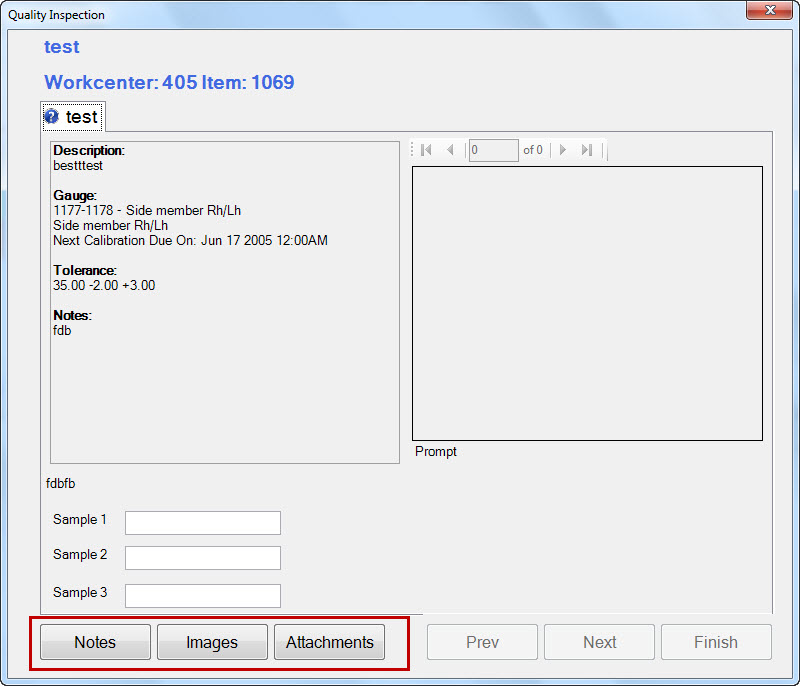
To close the note, image or attachment you were viewing, simply click on the  button.
Pausing the Quality Inspection Timer
If you need to pause the quality inspection timer, click on the  button. The timer will be paused, and indicated on the quality inspection tab.
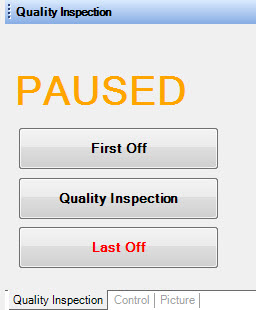
To un-pause the timer, click on the  button and the timer will resume where it left off.
Admin
There are a few quality inspection parameters that need to be set up before quality inspections can occur.
Setting up Permissions for Out of Spec Overrides
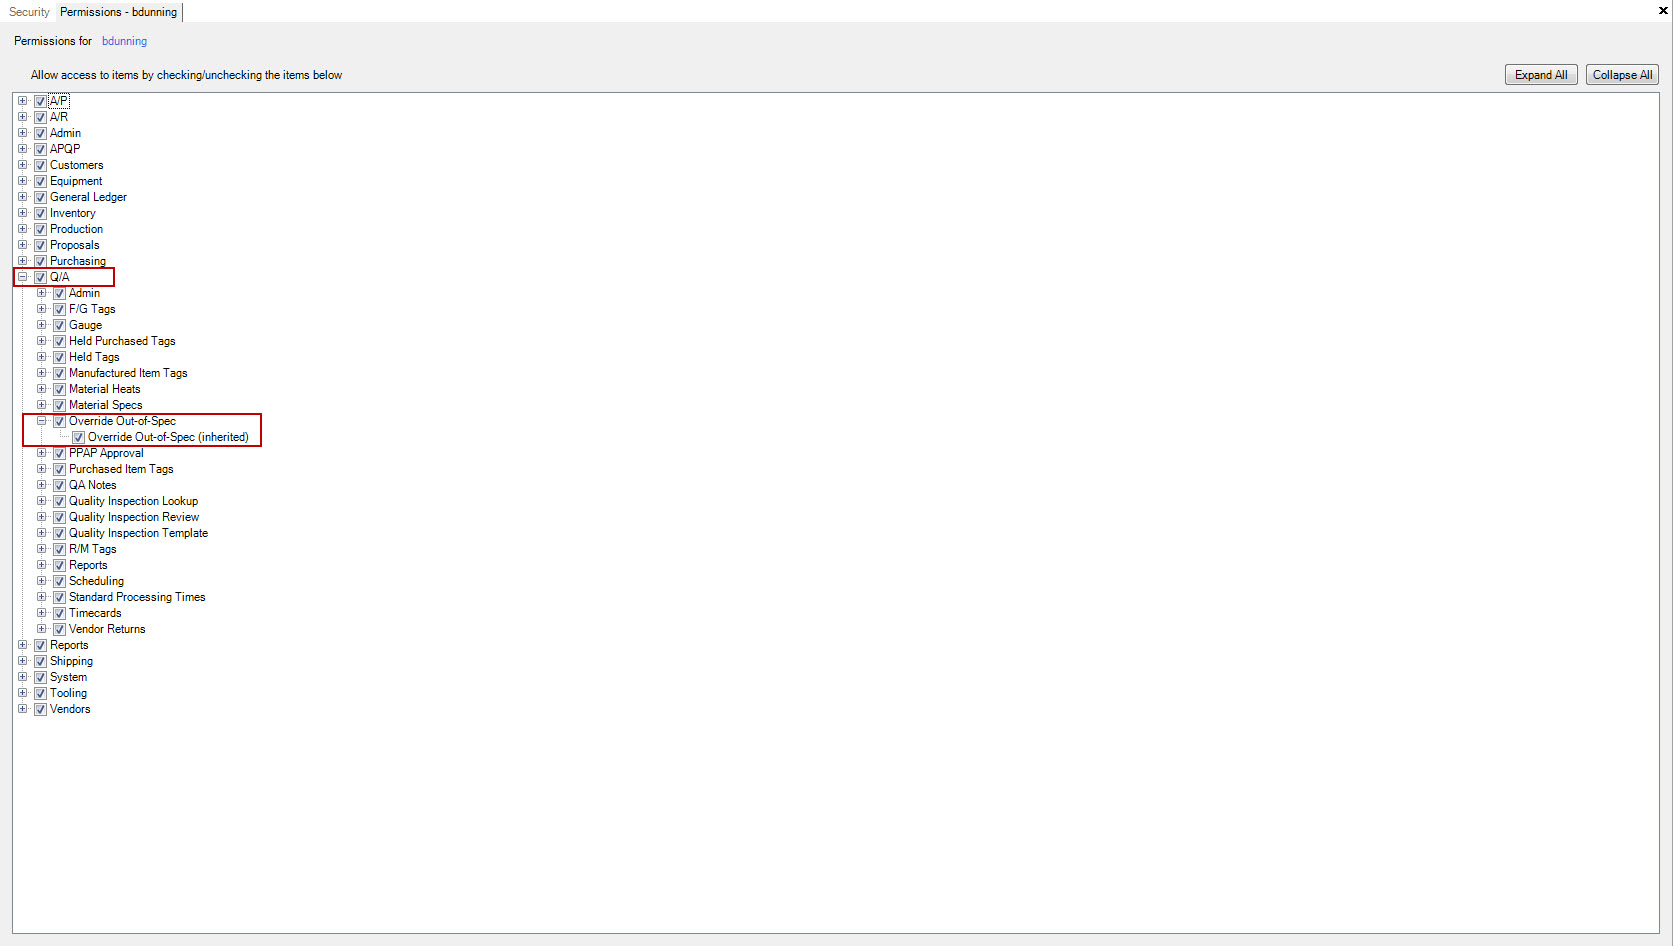
If you wish to have a Team Lead or a Manager override an ‘Out of Spec’ measurement at the operator level, you need to set up a permission for that user in the system.
To do this, navigate to the  tab, and click on the
  button.
This will bring up the security screen.
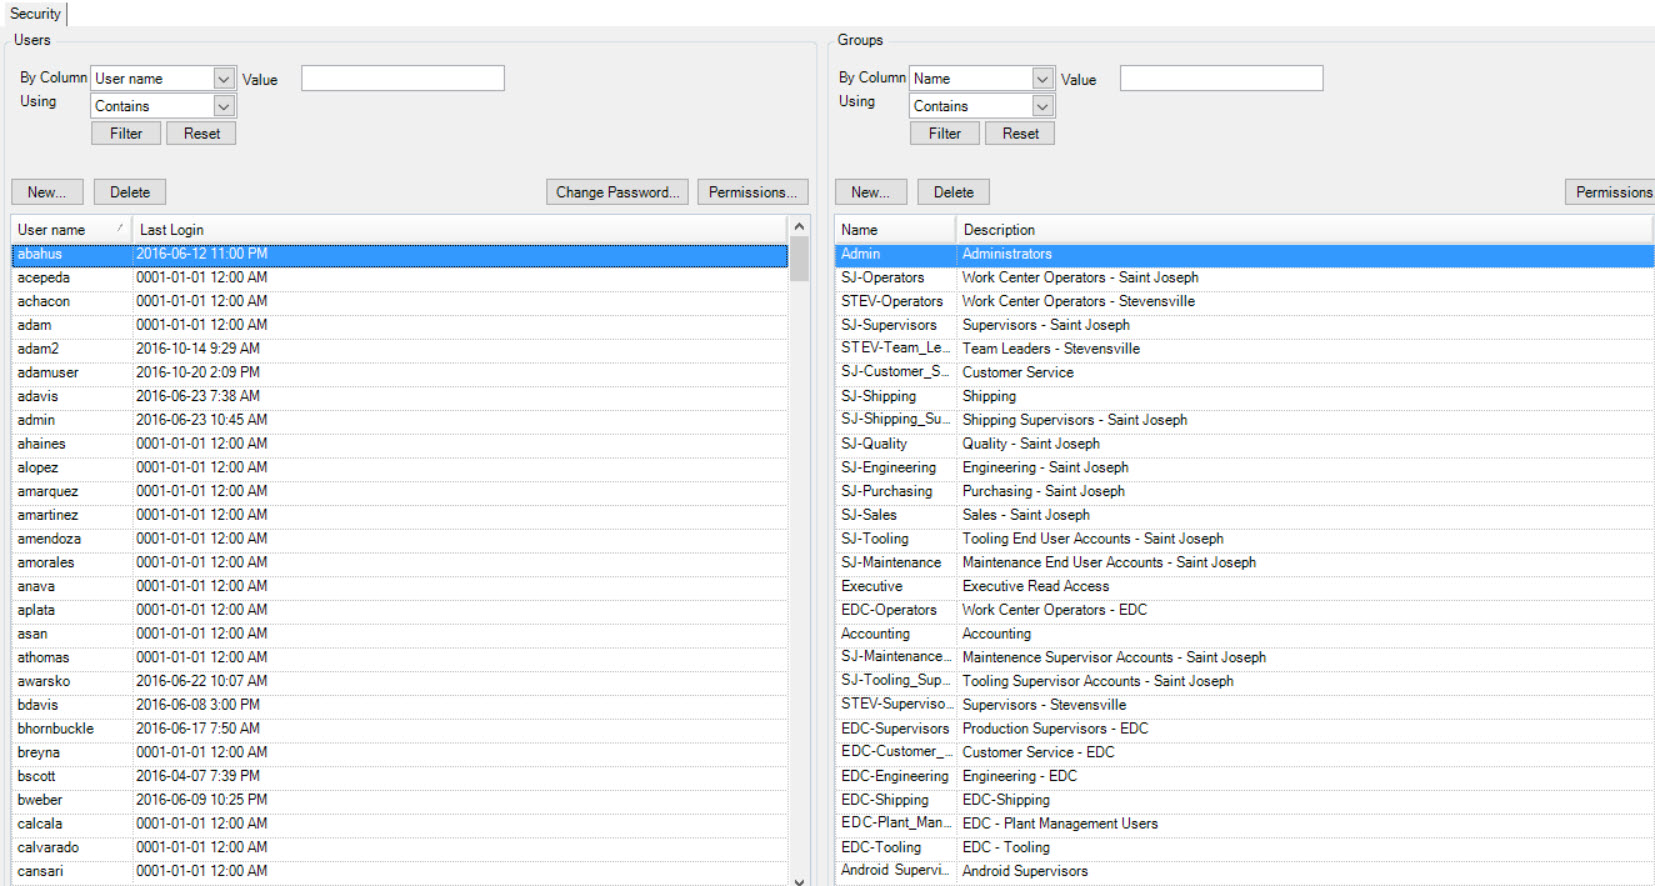
Highlight the user or group you wish to change the permissions to, and click on the  button. This will bring up the
permissions screen.
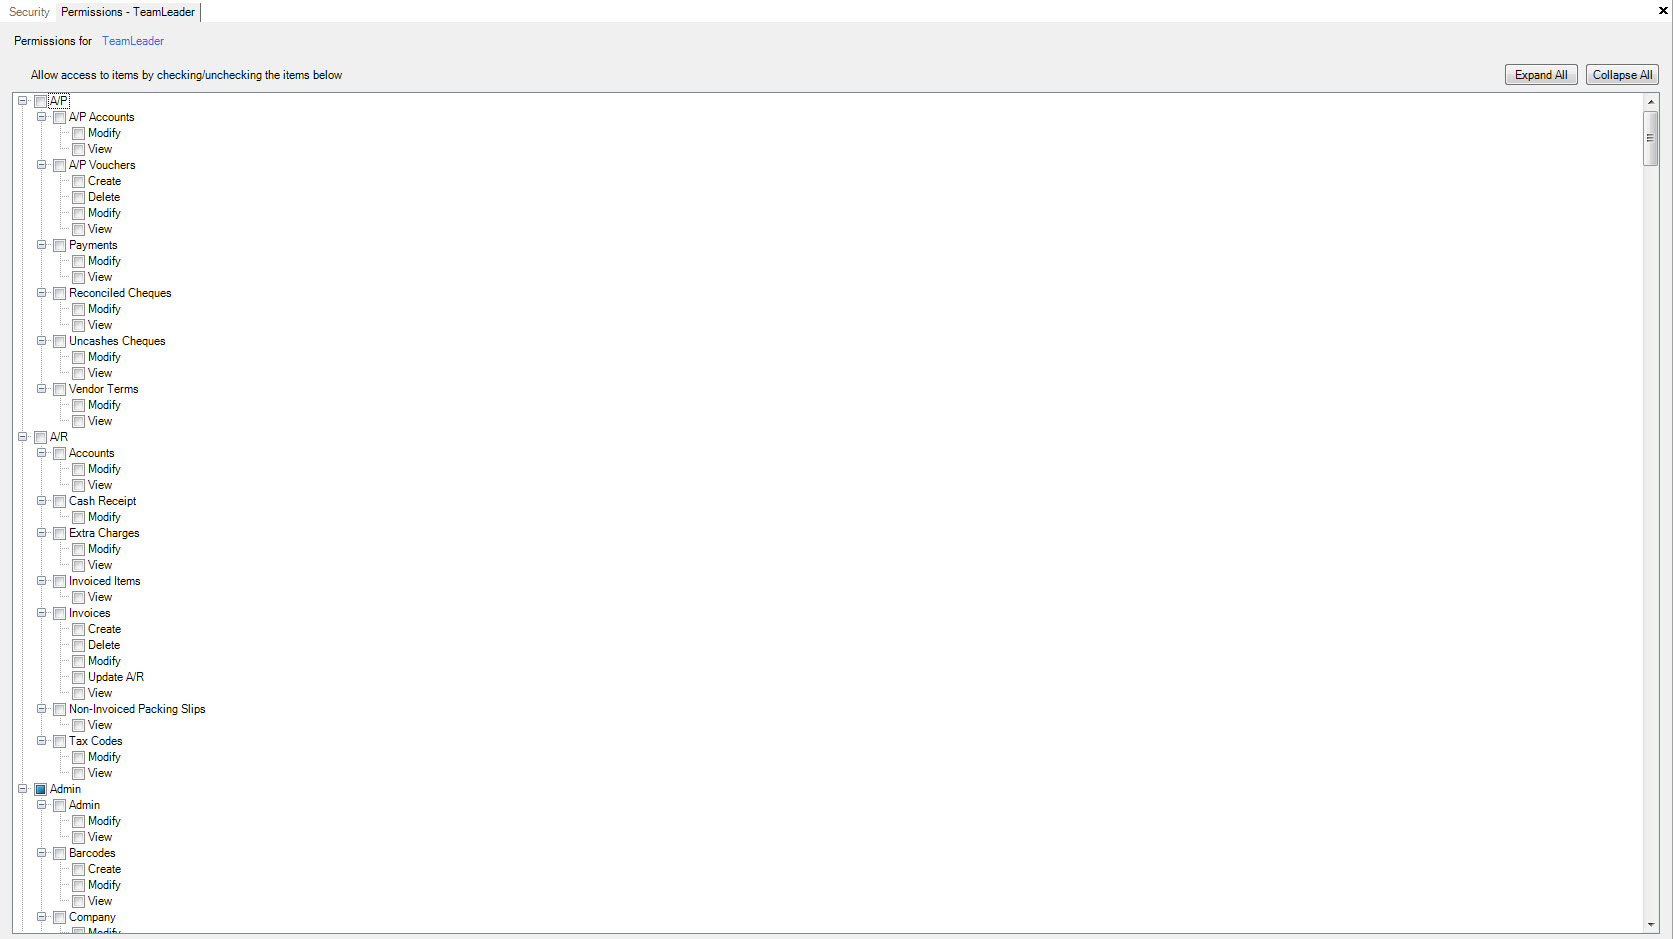
Scroll down to ‘Quality Assurance’ and expand it (if it’s not already) to view the ‘Override Out of Spec’ option. Click in the check box to enable this option.
Setting up Reason Codes for Out of Spec Measurements
If you wish to have an operator select a reason code for an ‘Out of Spec’ measurement, you have to enter them in the system. Navigate to the  tab
and click on the
  button to bring up the Quality Admin screen.
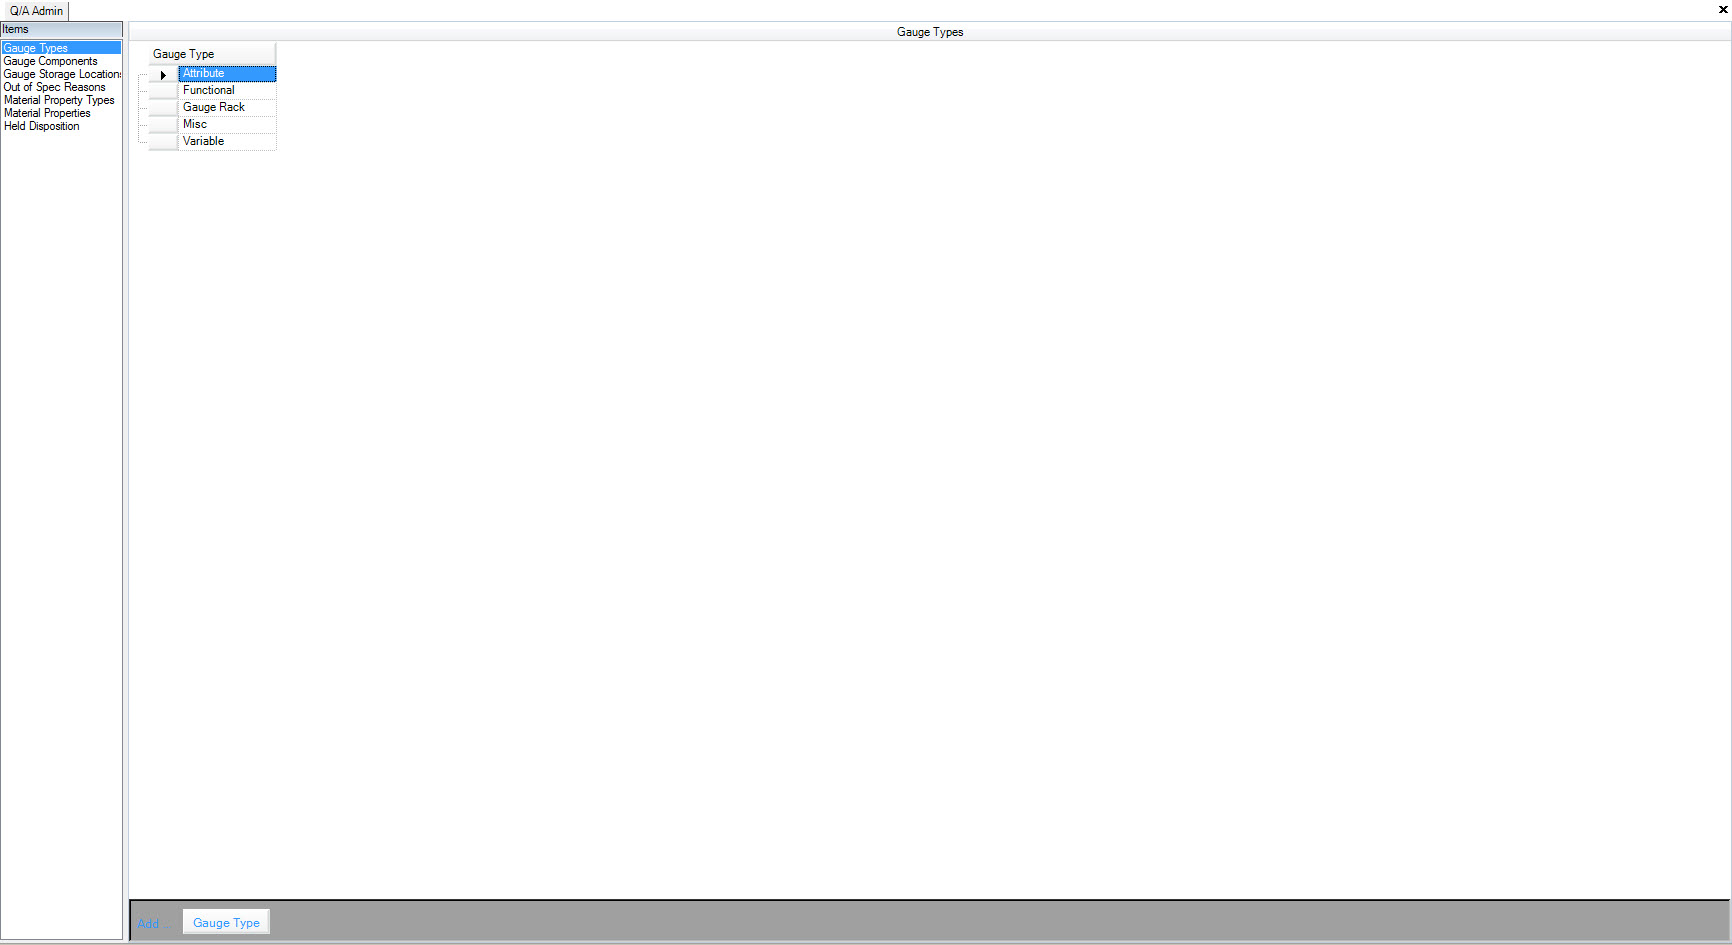
Highlight the option ‘Out of Spec Reasons’ and click on the  button at the bottom of the screen. You will then be able to enter in a reason and
a description. Save the screen before exiting.

‘Out of Spec’ Reason Required
If you wish to have the operator enter in a reason when an ‘out of spec’ measurement is recorded, navigate to File > Setup...
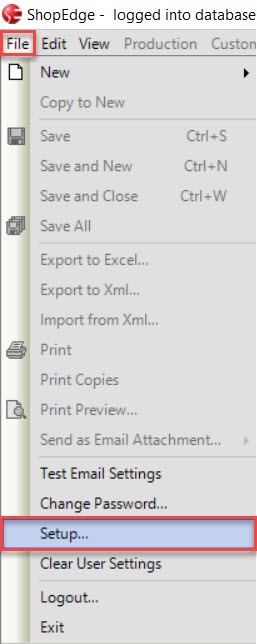
Select the ‘Quality Inspection’ tab, and then click on the box beside ‘Out of Spec Reason Required’.
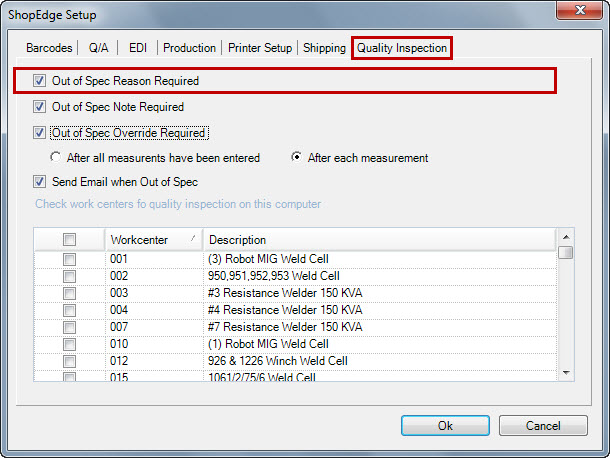
Click on the  button when done.
‘Out of Spec’ Note Required
If you wish to have the operator enter in a note when an ‘out of spec’ measurement is recorded, navigate to File > Setup...

Select the ‘Quality Inspection’ tab, and then click on the box beside ‘Out of Spec Note Required’.
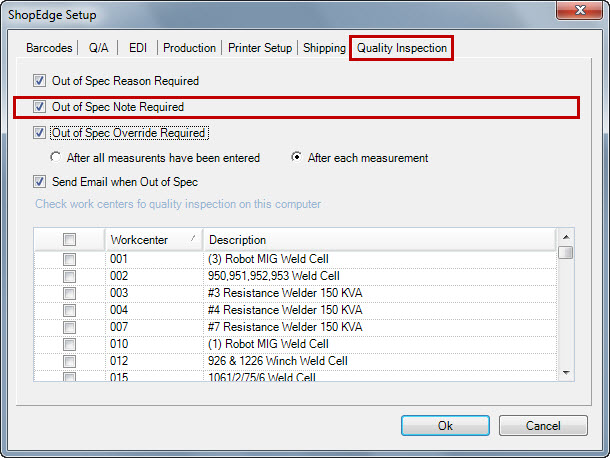
Click on the  button when done.
‘Out of Spec’ Override Required
If you wish to have a supervisor/lead hand override an ‘out of spec’ measurement entered by the operator, navigate to File > Setup...

Select the ‘Quality Inspection’ tab, and then click on the box beside ‘Out of Spec Override Required’. You will then be given two options as to when the override should occur:
- After all measurements have been entered; and
- After each measurement
Select the option that describes the situation you wish to create.
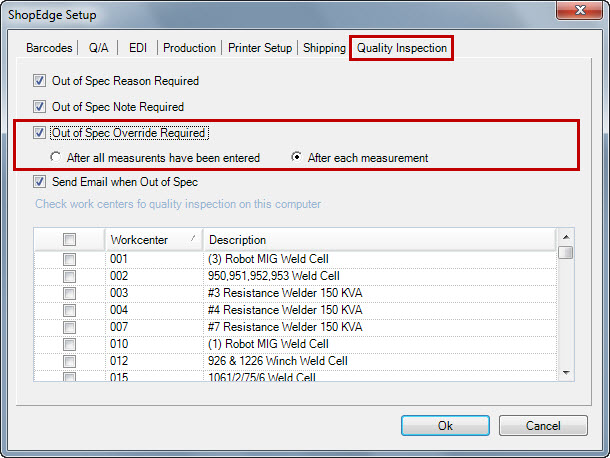
Click on the  button when done.
Note
***You must also set up an override permission in the system for a user/group. Please see “Setting Up Permissions for Out of Spec Overrides”***
Email Notifications when Measurements are ‘Out of Spec’
To set up an email notification from the system when an out of spec measurement is recorded by an operator, navigate to File > Setup...

Select the ‘Quality Inspection’ tab, and then click on the box beside ‘Send Email when Out of Spec’.
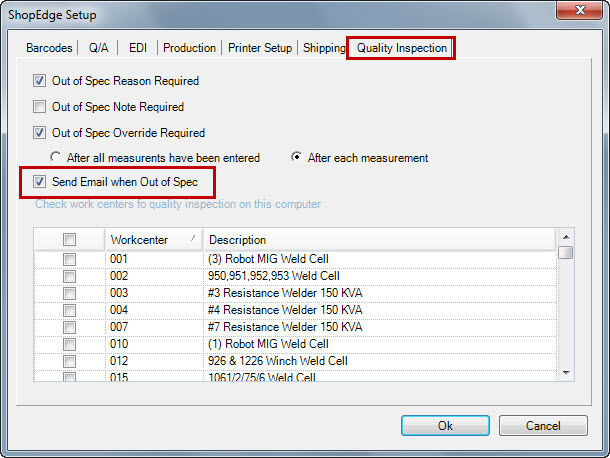
Click on the  button when done.
Assigning a Computer to a Work Center Timer
In order for the system to know which computer belongs to which work center, you need to assign each computer to the appropriate work center. Navigate to File > Setup...

Select the ‘Quality Inspection’ tab, and then click on the box(es) beside the work centers you wish to assign the computer to.
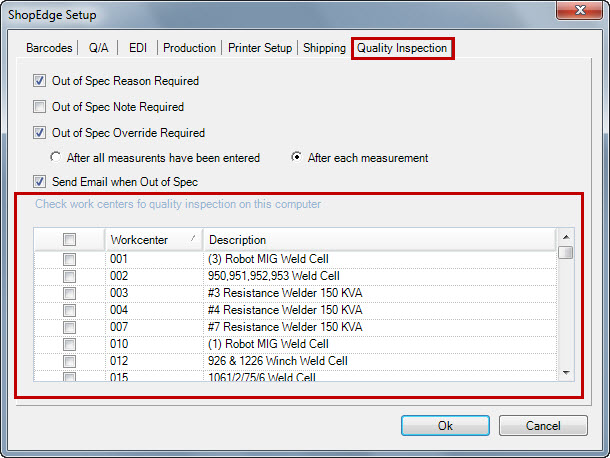
Click on the  button when done.
Note
***If you have a computer that needs to be assigned to two or more work centers, make sure you click all of the appropriate boxes.***
