Admin
The Admin section allows users to view, add, edit, or delete Job Types, Cost Categories, Proposal Cost Categories, and Proposal Statuses.
To view the Admin screen, navigate to the  tab and click on the
 ![]() icon. The Admin screen will be displayed.
icon. The Admin screen will be displayed.
Job Types
To view all available Job Types in the system, navigate to the  tab and click on the
 ![]() icon. The Admin screen will be displayed.
icon. The Admin screen will be displayed.

Make sure to select the  tab located to the left of the screen.
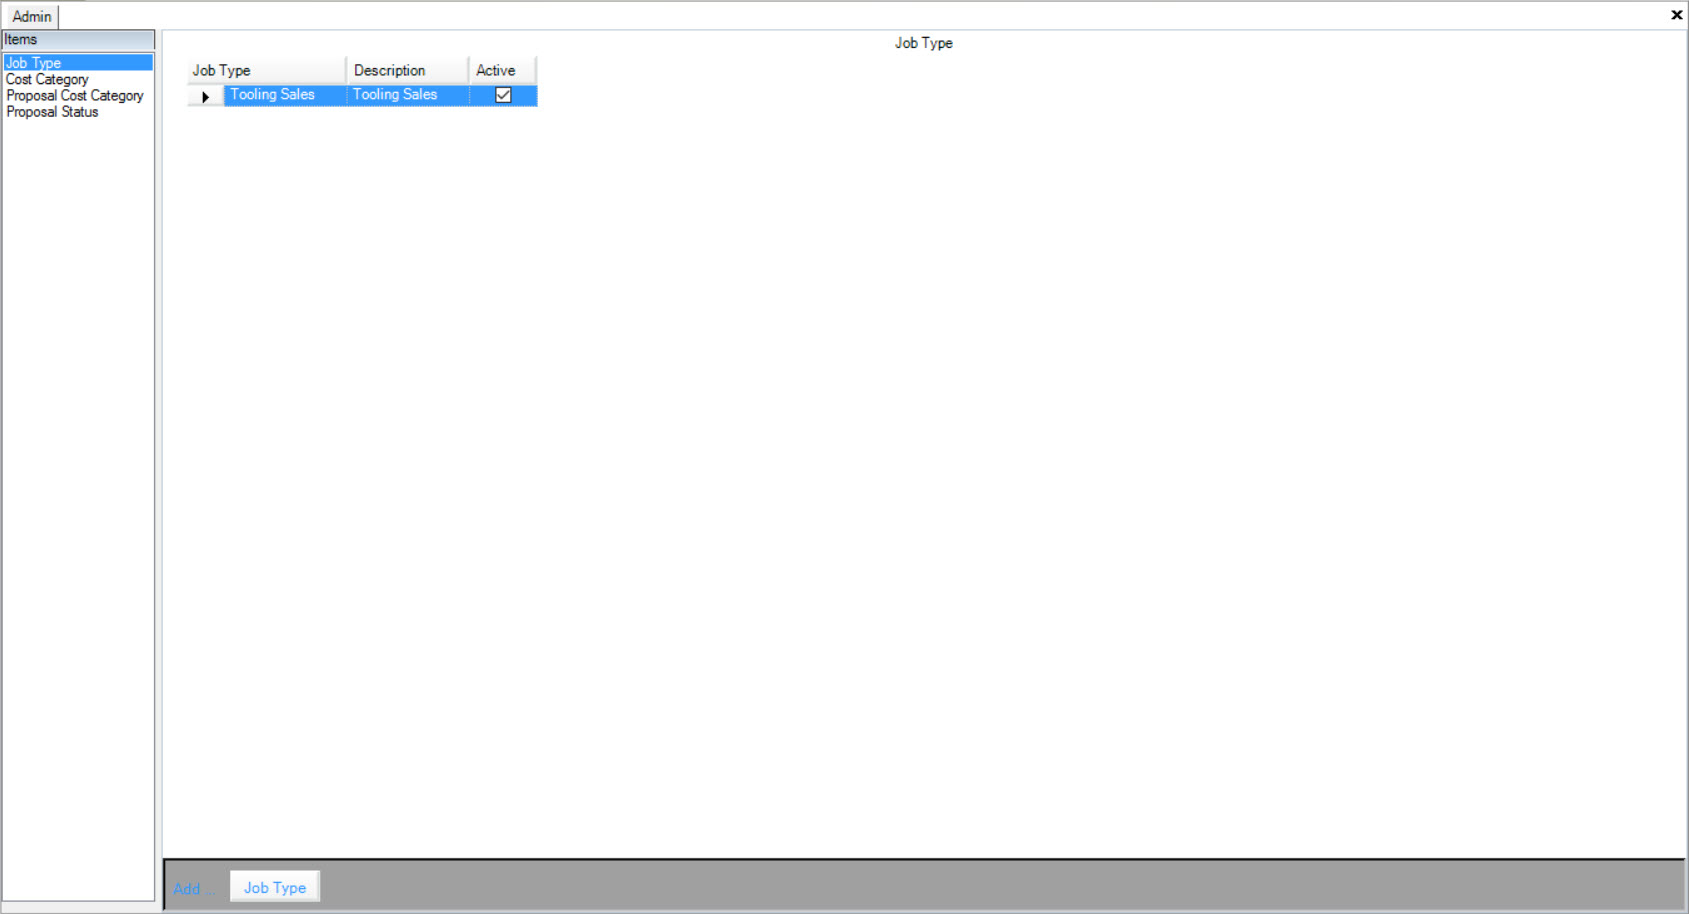
All of the available Job Types will be displayed with details including the Job Type, Description, and whether or not the Job Types are Active.
Adding a Job Type
To add a Job Type, navigate to the  tab and click on the
 ![]() icon. The Admin screen will be displayed.
icon. The Admin screen will be displayed.

Make sure to select the  tab located to the left of the screen.
Located to the bottom of the screen, click on the  button.
A new row will appear where users can fill in the Job Type and Description, and select whether or not the Job Type is Active.
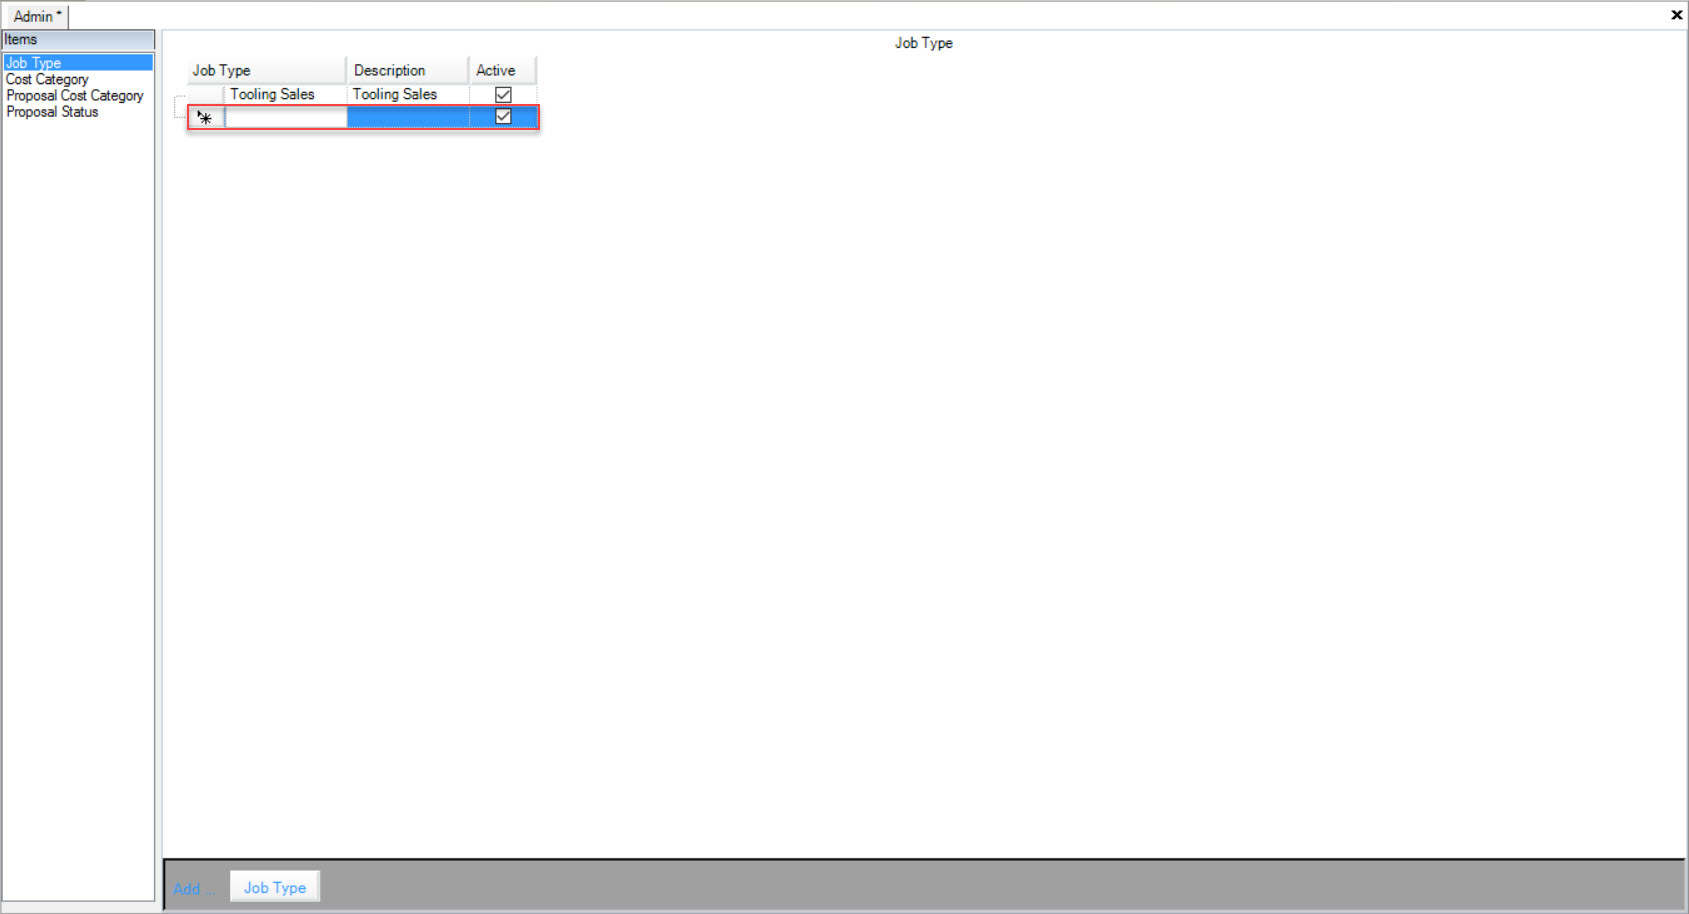
Make sure to save your changes before exiting the screen.
Editing a Job Type
To edit a Job Type, navigate to the  tab and click on the
 ![]() icon. The Admin screen will be displayed.
icon. The Admin screen will be displayed.

Make sure to select the  tab located to the left of the screen.
Locate the Job Type you wish to edit and make the necessary changes by using the available textboxes and checkbox.
Make sure to save your changes before exiting the screen.
Deleting a Job Type
To delete a Job Type, navigate to the  tab and click on the
 ![]() icon. The Admin screen will be displayed.
icon. The Admin screen will be displayed.

Make sure to select the  tab located to the left of the screen.
Locate the Job Type you wish to delete and highlight the appropriate row. Use your Delete key and when the system prompts you, select Yes.
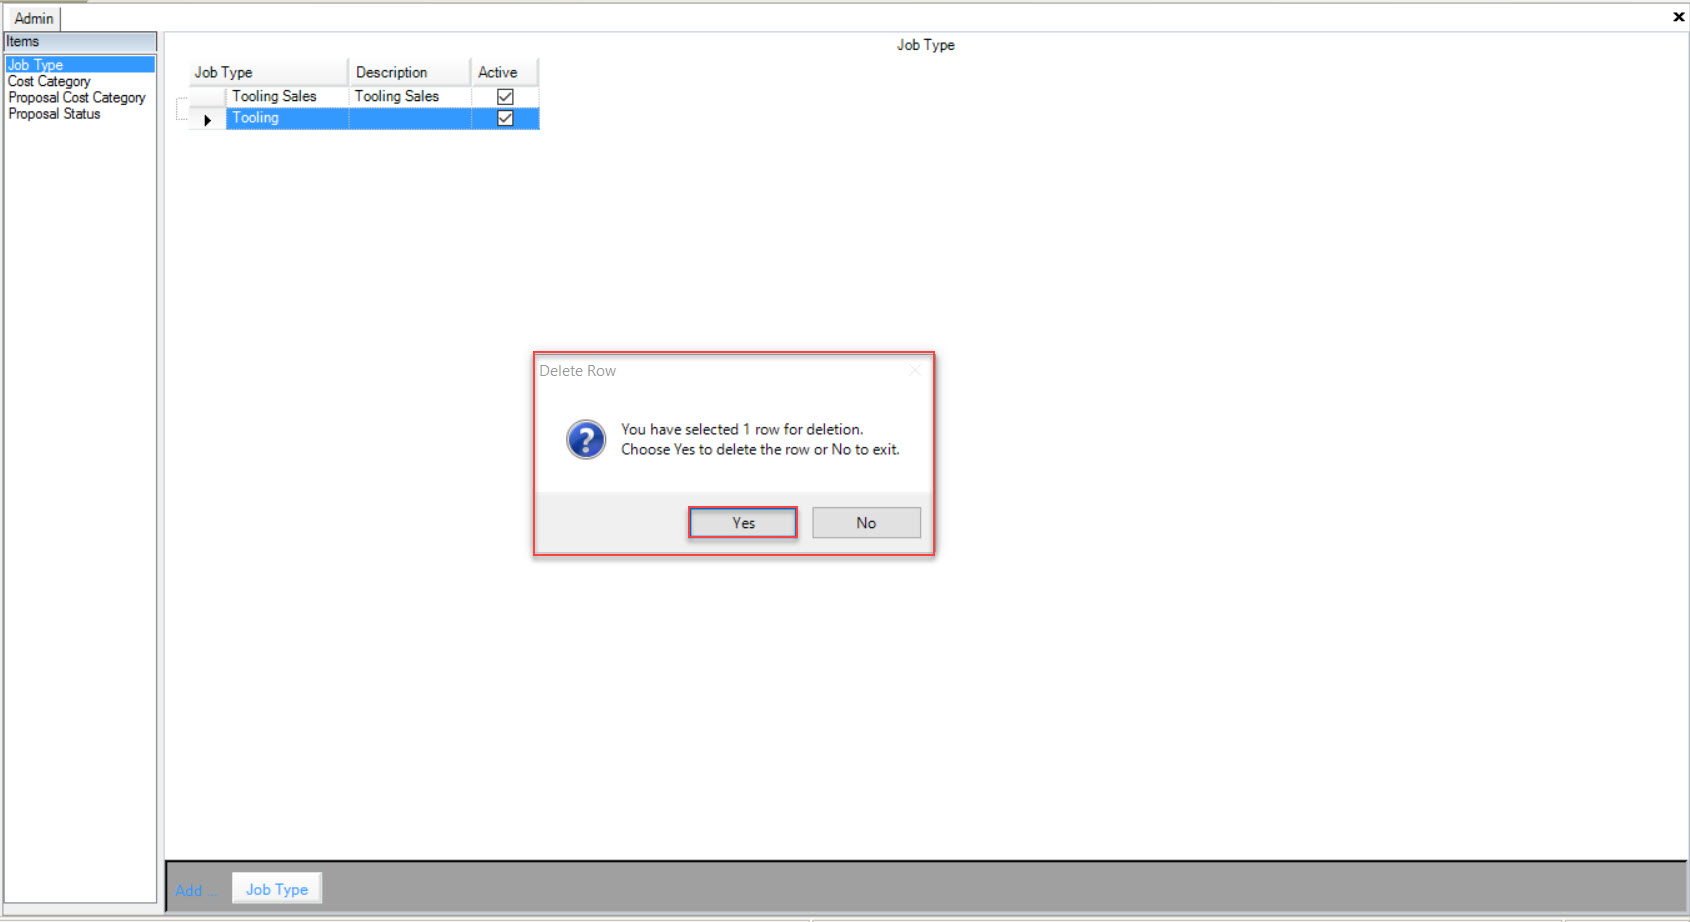
The selected job Type will be deleted.
Make sure to save your changes before exiting the screen.
Cost Categories
To view all available Cost Categories in the system, navigate to the  tab and click on the
 ![]() icon. The Admin screen will be displayed.
icon. The Admin screen will be displayed.

Make sure to select the  tab located to the left of the screen.
All available Cost Categories in the system will be displayed including details such as the Cost Category, Description, whether or not it is Active, the Job Type, Default Unit of Measure, and the Workcenter Required.
Adding a Cost Category
To add a Cost Category, navigate to the  tab and click on the
 ![]() icon. The Admin screen will be displayed.
icon. The Admin screen will be displayed.

Make sure to select the  tab located to the left of the screen.
Click on the  button located at the bottom of the screen.
A new row will appear where users can fill in the Cost Category, Description, whether or not it is Active, the Job Type, Default Unit of Measure, and the Workcenter Required.
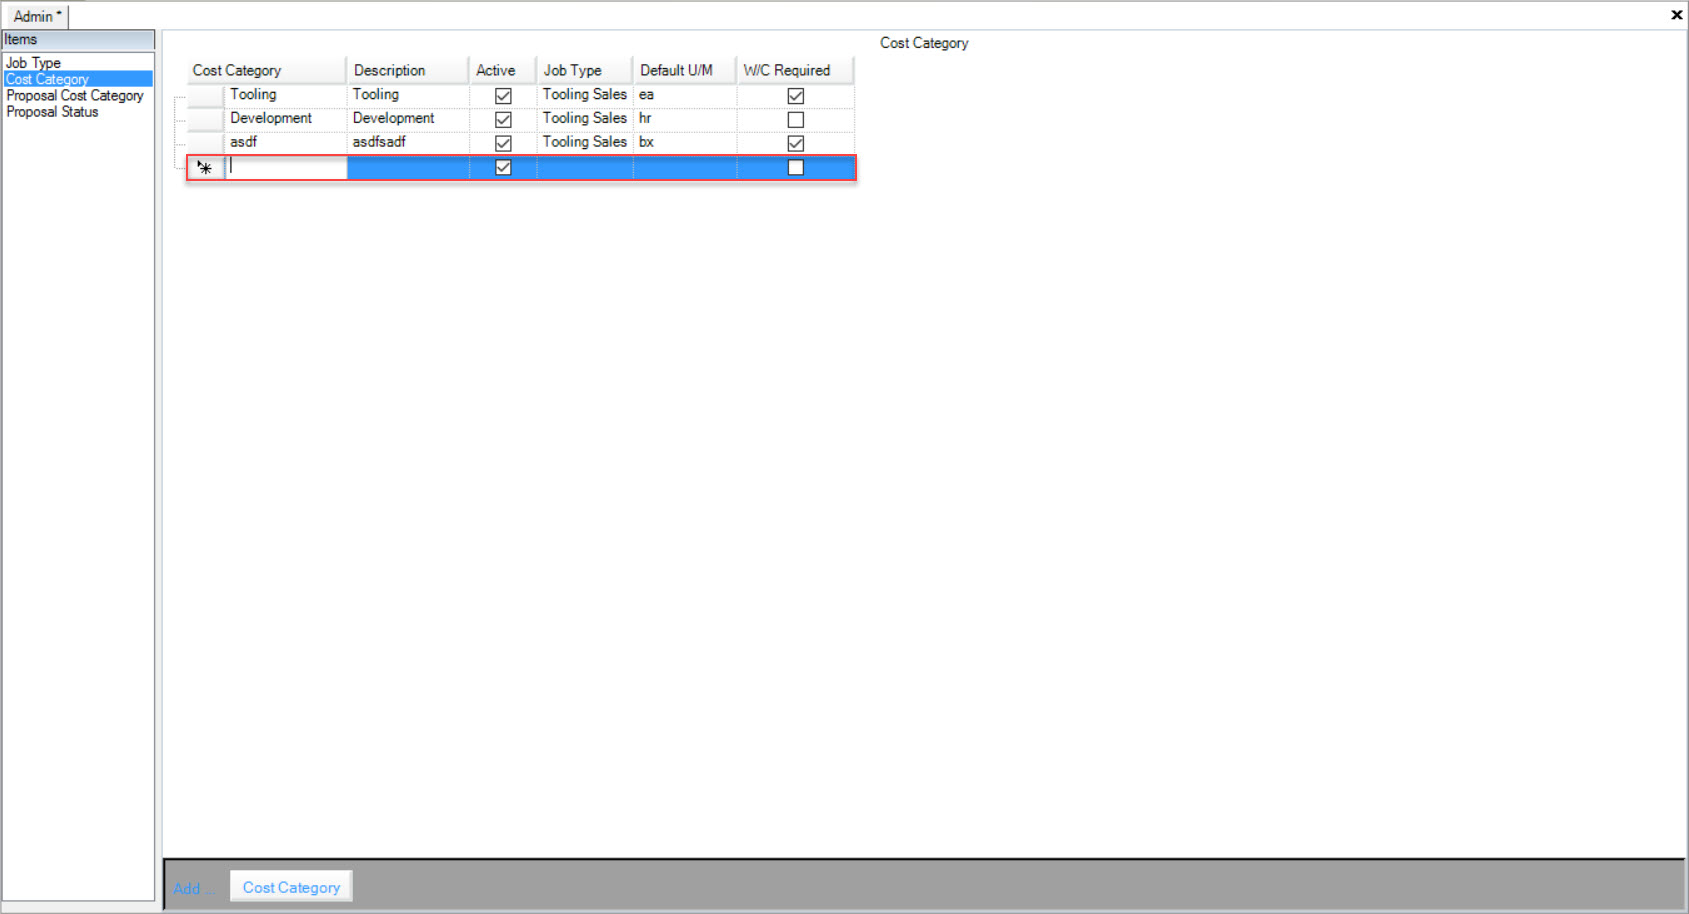
Make sure to save your changes before exiting the screen.
Editing a Cost Category
To edit a Cost Category, navigate to the  tab and click on the
 ![]() icon. The Admin screen will be displayed.
icon. The Admin screen will be displayed.

Make sure to select the  tab located to the left of the screen.
Locate the Cost Category you wish to edit and make the necessary changes using the available textboxes, drop-down menus and checkbox.
Make sure to save your changes before exiting the screen.
Deleting a Cost Category
To delete a Cost Category, navigate to the  tab and click on the
 ![]() icon. The Admin screen will be displayed.
icon. The Admin screen will be displayed.

Make sure to select the  tab located to the left of the screen.
Locate the Cost Category you wish to delete and highlight the appropriate row. Use your Delete key and when they system prompts you, select Yes.
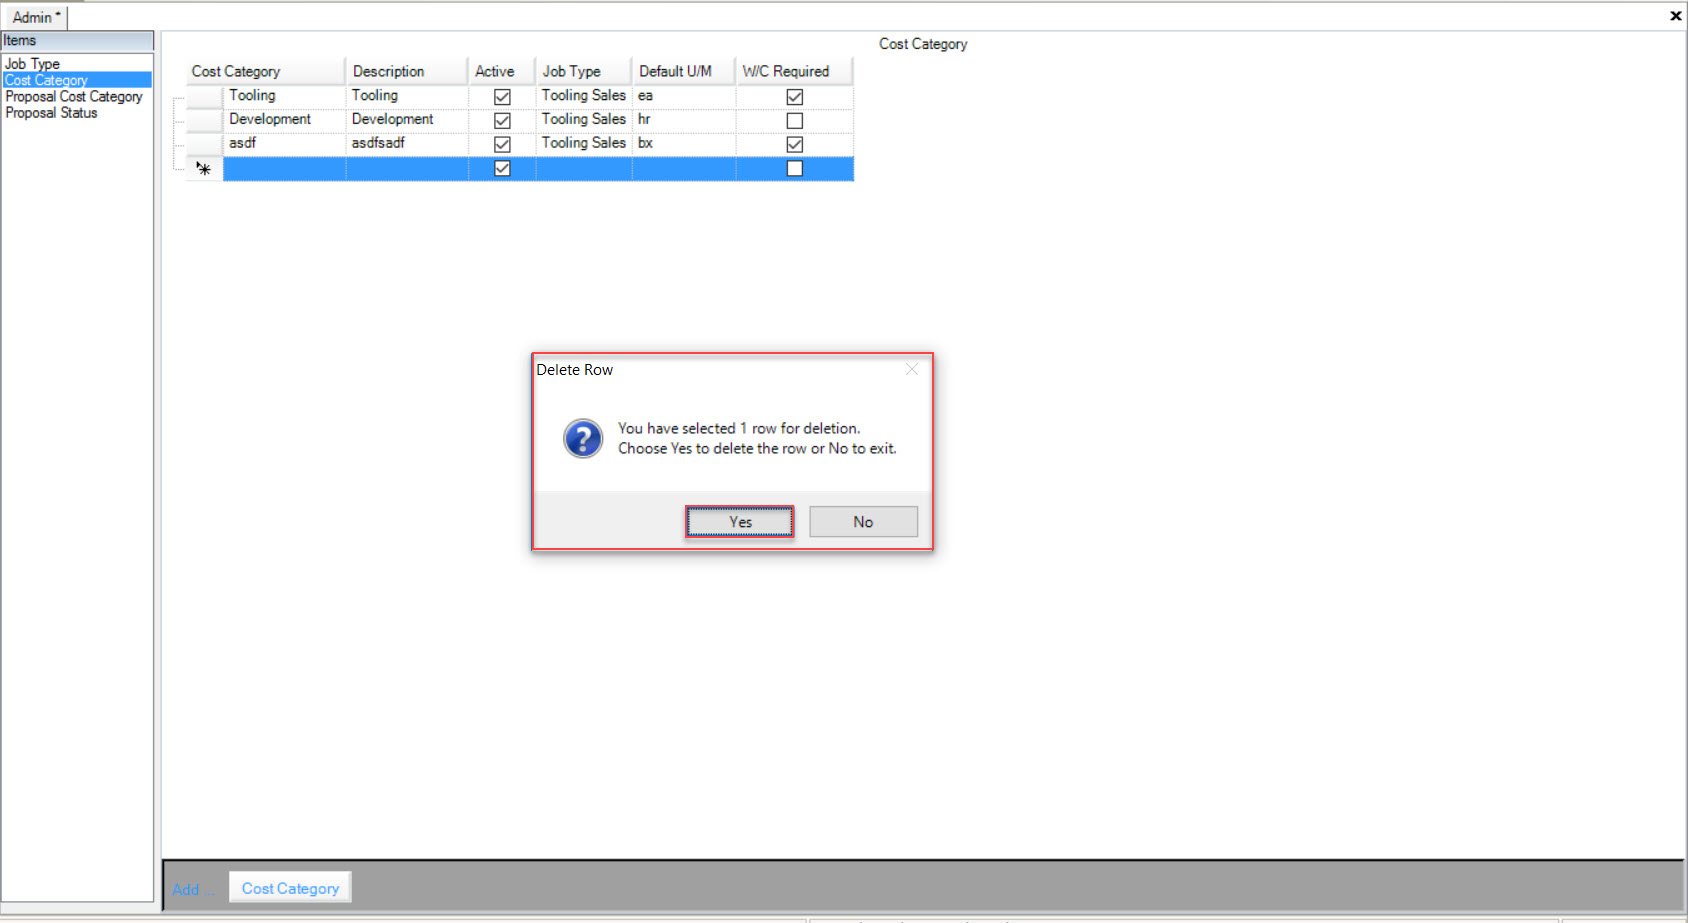
The selected Cost Category will be deleted.
Make sure to save your changes before exiting the screen.
Proposal Cost Categories
To view all available Proposal Cost Categories in the system, navigate to the  tab and click on the
 ![]() icon. The Admin screen will be displayed.
icon. The Admin screen will be displayed.

Make sure to select the  tab located to the left of the screen.
All of the available Proposal Cost Categories will be displayed including details such as the Cost Category, Description, and whether or not it is Active.
Adding a Proposal Cost Category
To add a Proposal Cost Category, navigate to the  tab and click on the
 ![]() icon. The Admin screen will be displayed.
icon. The Admin screen will be displayed.

Make sure to select the  tab located to the left of the screen.
Click on the  button located at the bottom of the screen.
A new row will appear where users can fill in the necessary fields such as the Cost Category, Description, and select whether or not it is Active.
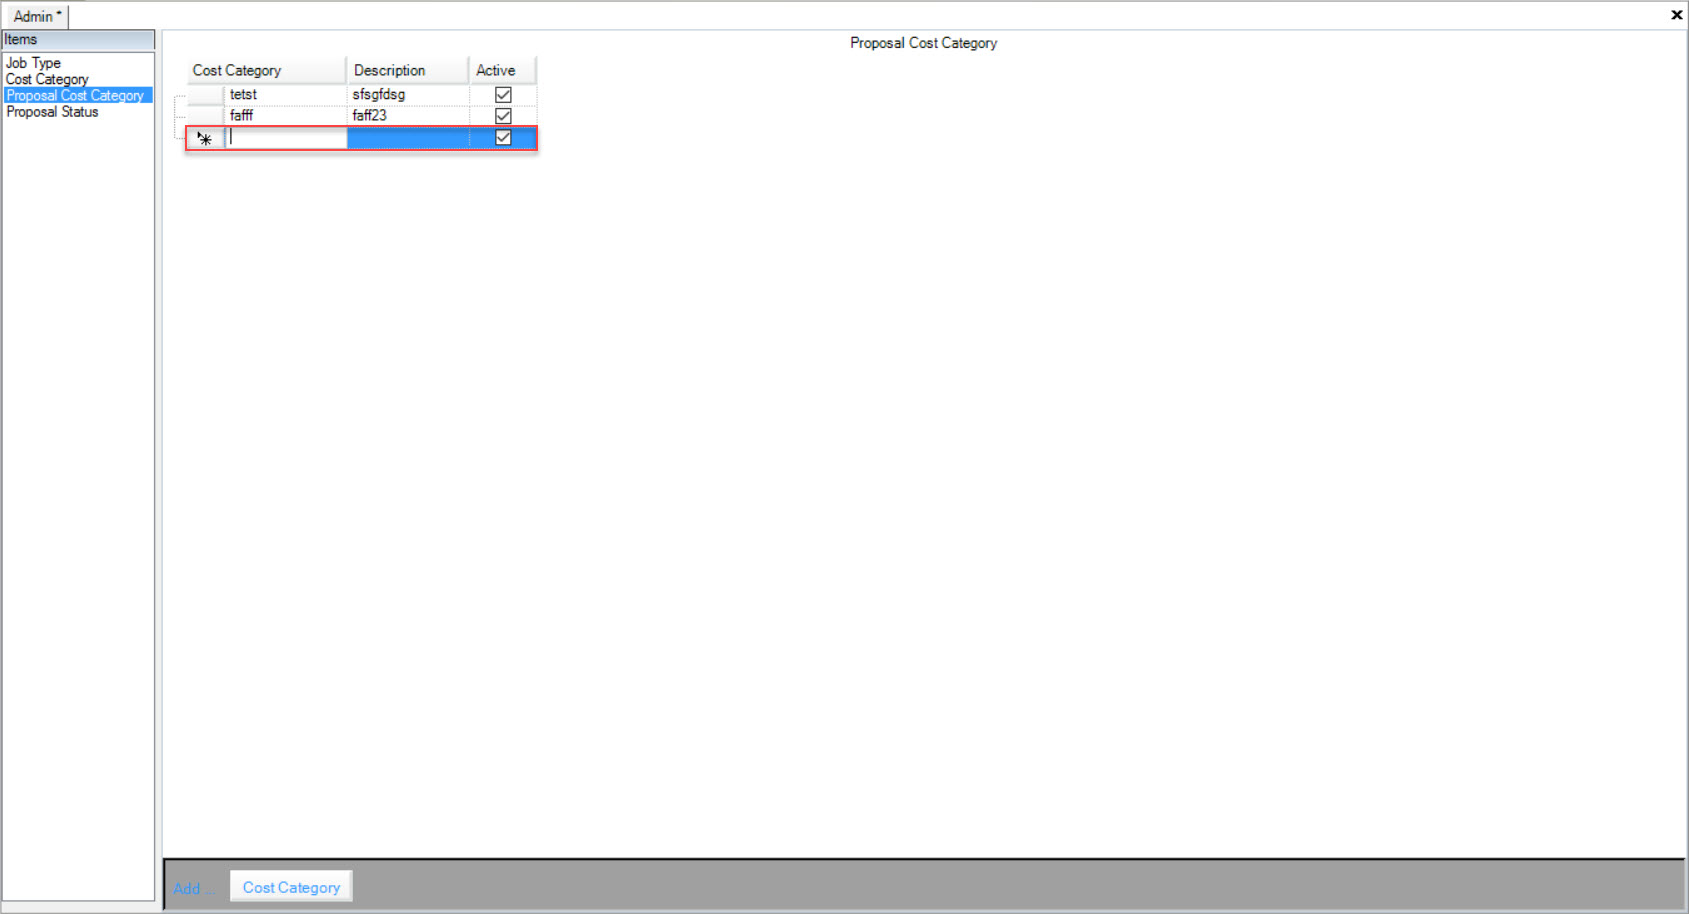
Make sure to save your changes before exiting the screen.
Editing a Proposal Cost Category
To edit a Proposal Cost Category, navigate to the  tab and click on the
 ![]() icon. The Admin screen will be displayed.
icon. The Admin screen will be displayed.

Make sure to select the  tab located to the left of the screen.
Locate the Proposal Cost Category that you wish to edit and make the necessary changes using the available textboxes and checkbox.
Make sure to save your changes before exiting the screen.
Deleting a Proposal Cost Category
To delete a Proposal Cost Category, navigate to the  tab and click on the
 ![]() icon. The Admin screen will be displayed.
icon. The Admin screen will be displayed.

Make sure to select the  tab located to the left of the screen.
Locate the Proposal Cost Category that you wish to delete and highlight the appropriate row. Use your Delete key and when the system prompts you, select Yes.
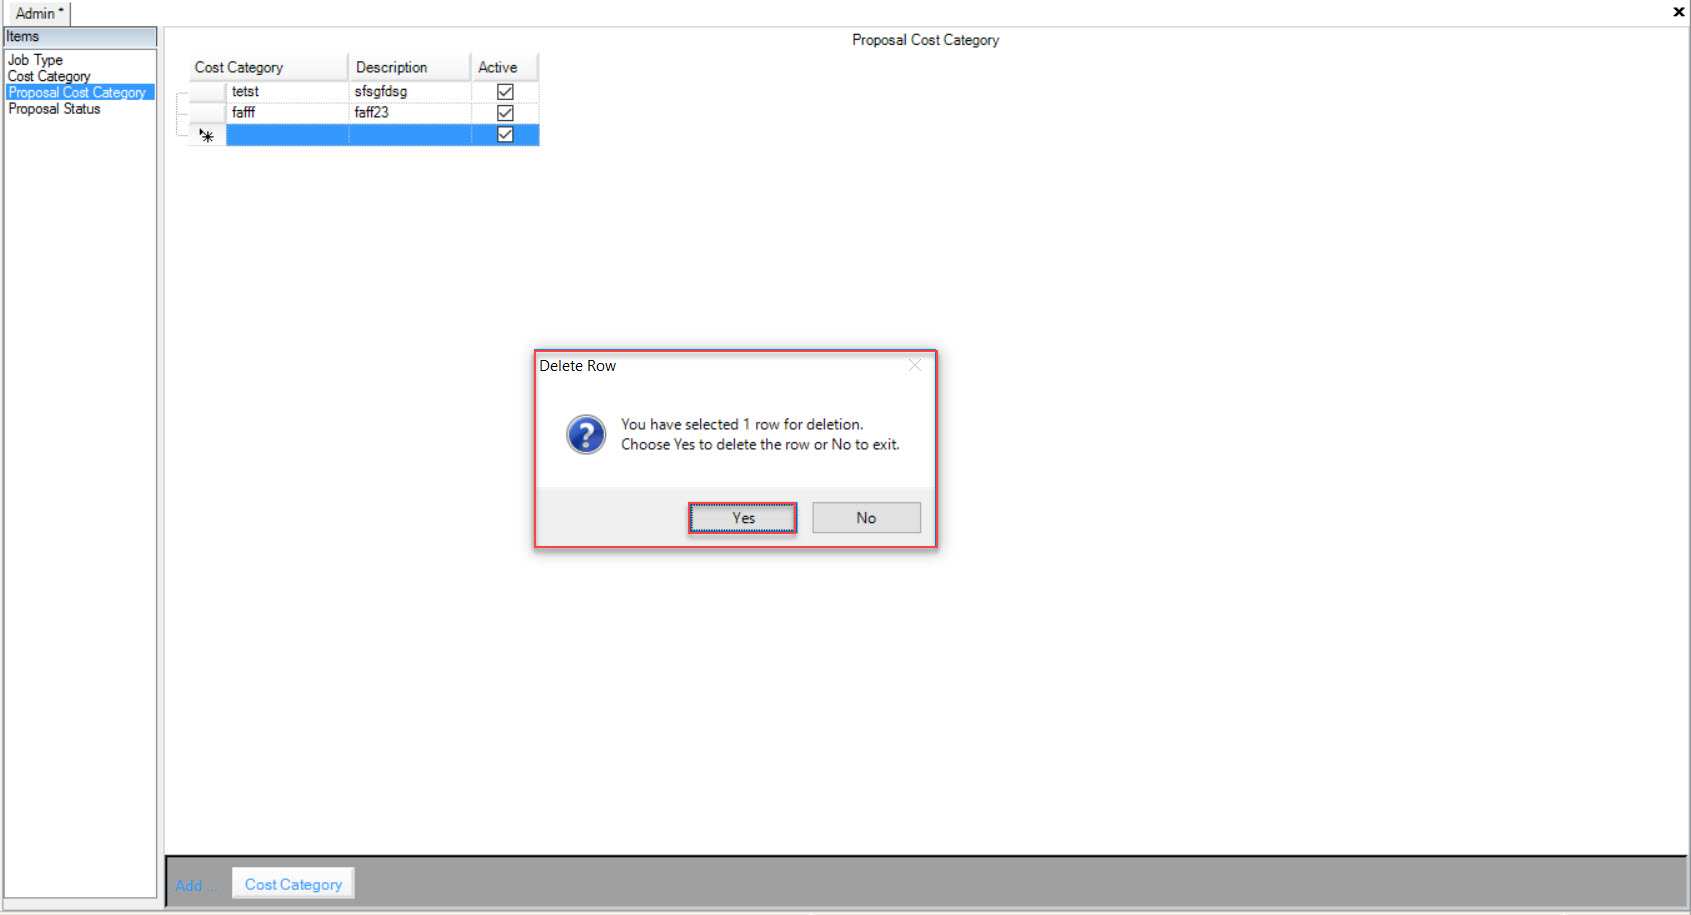
The selected Proposal Cost Category will be deleted.
Make sure to save your changes before exiting the screen.
Proposal Statuses
To view all available Proposal Statuses, navigate to the  tab and click on the
 ![]() icon. The Admin screen will be displayed.
icon. The Admin screen will be displayed.

Make sure to select the  tab located to the left of the screen.
All of the available Proposal Statuses will be displayed including details such as the Status, Description, and whether or not it is Active.
Adding a Proposal Status
To add a Proposal Status, navigate to the  tab and click on the
 ![]() icon. The Admin screen will be displayed.
icon. The Admin screen will be displayed.

Make sure to select the  tab located to the left of the screen.
Click on the  button located at the bottom of the screen.
A new row will appear where users can fill in the necessary fields such as the Status, Description, and select whether or not it is Active.
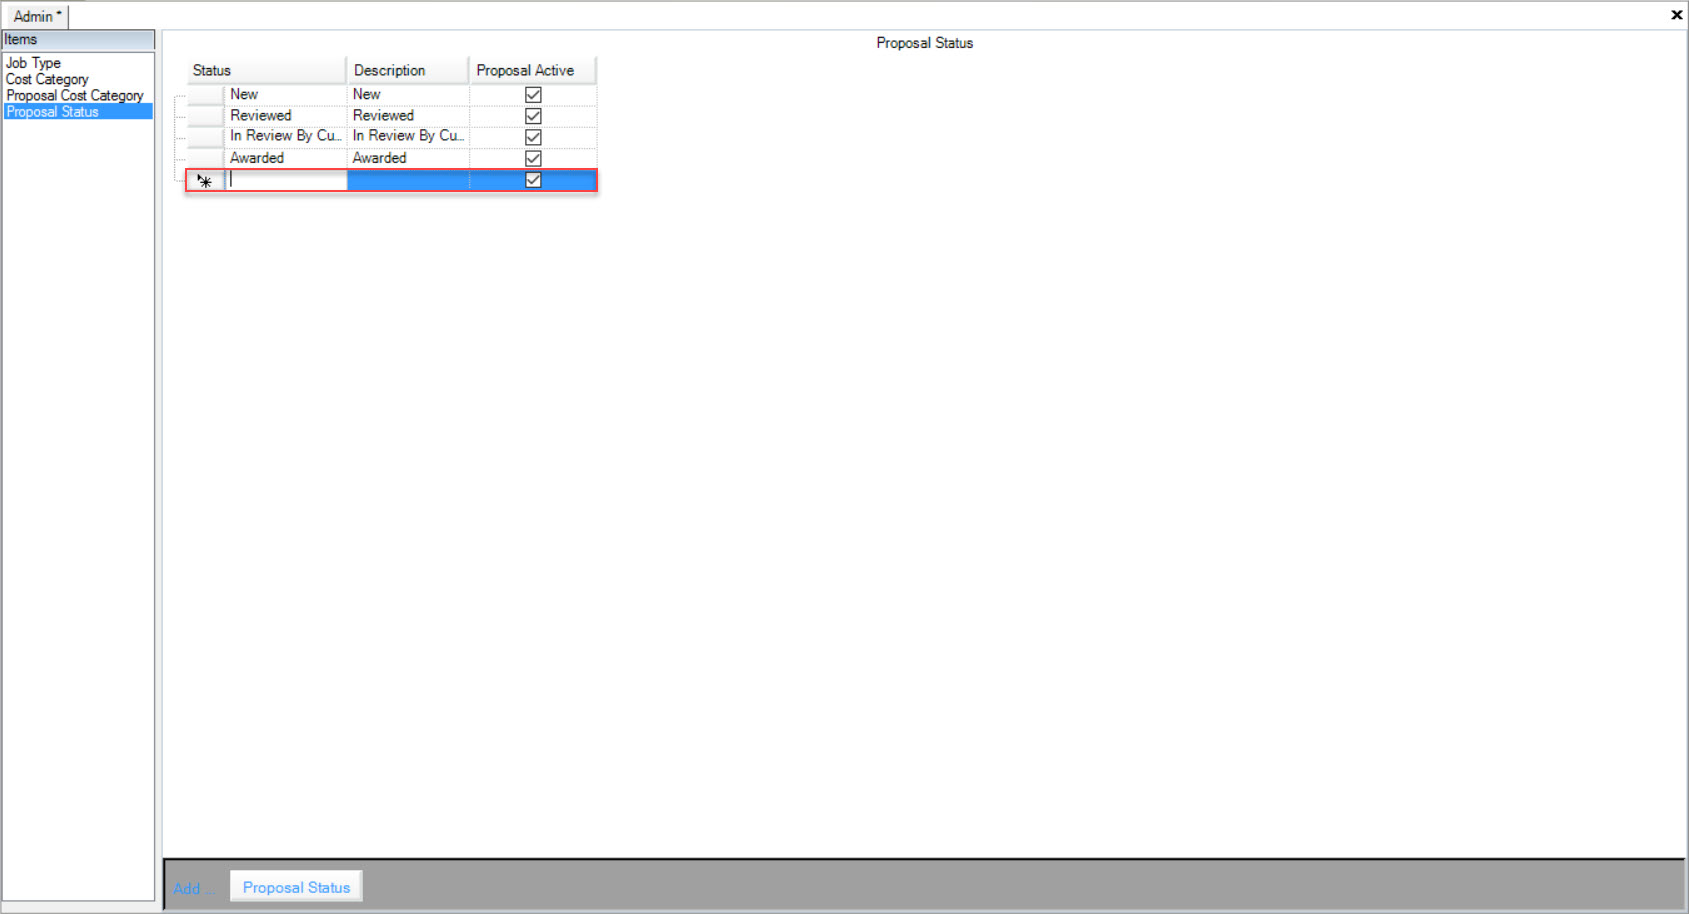
Make sure to save your changes before exiting the screen.
Editing a Proposal Status
To edit a Proposal Status, navigate to the  tab and click on the
 ![]() icon. The Admin screen will be displayed.
icon. The Admin screen will be displayed.

Make sure to select the  tab located to the left of the screen.
Locate the Proposal Status that you wish to edit and make the necessary changes using the available textboxes and checkbox.
Make sure to save your changes before exiting the screen.
Deleting a Proposal Status
To delete a Proposal Status, navigate to the  tab and click on the
 ![]() icon. The Admin screen will be displayed.
icon. The Admin screen will be displayed.

Make sure to select the  tab located to the left of the screen.
Locate the Proposal Status that you wish to delete and highlight the appropriate row. Use your Delete key and when the system prompts you, select Yes.
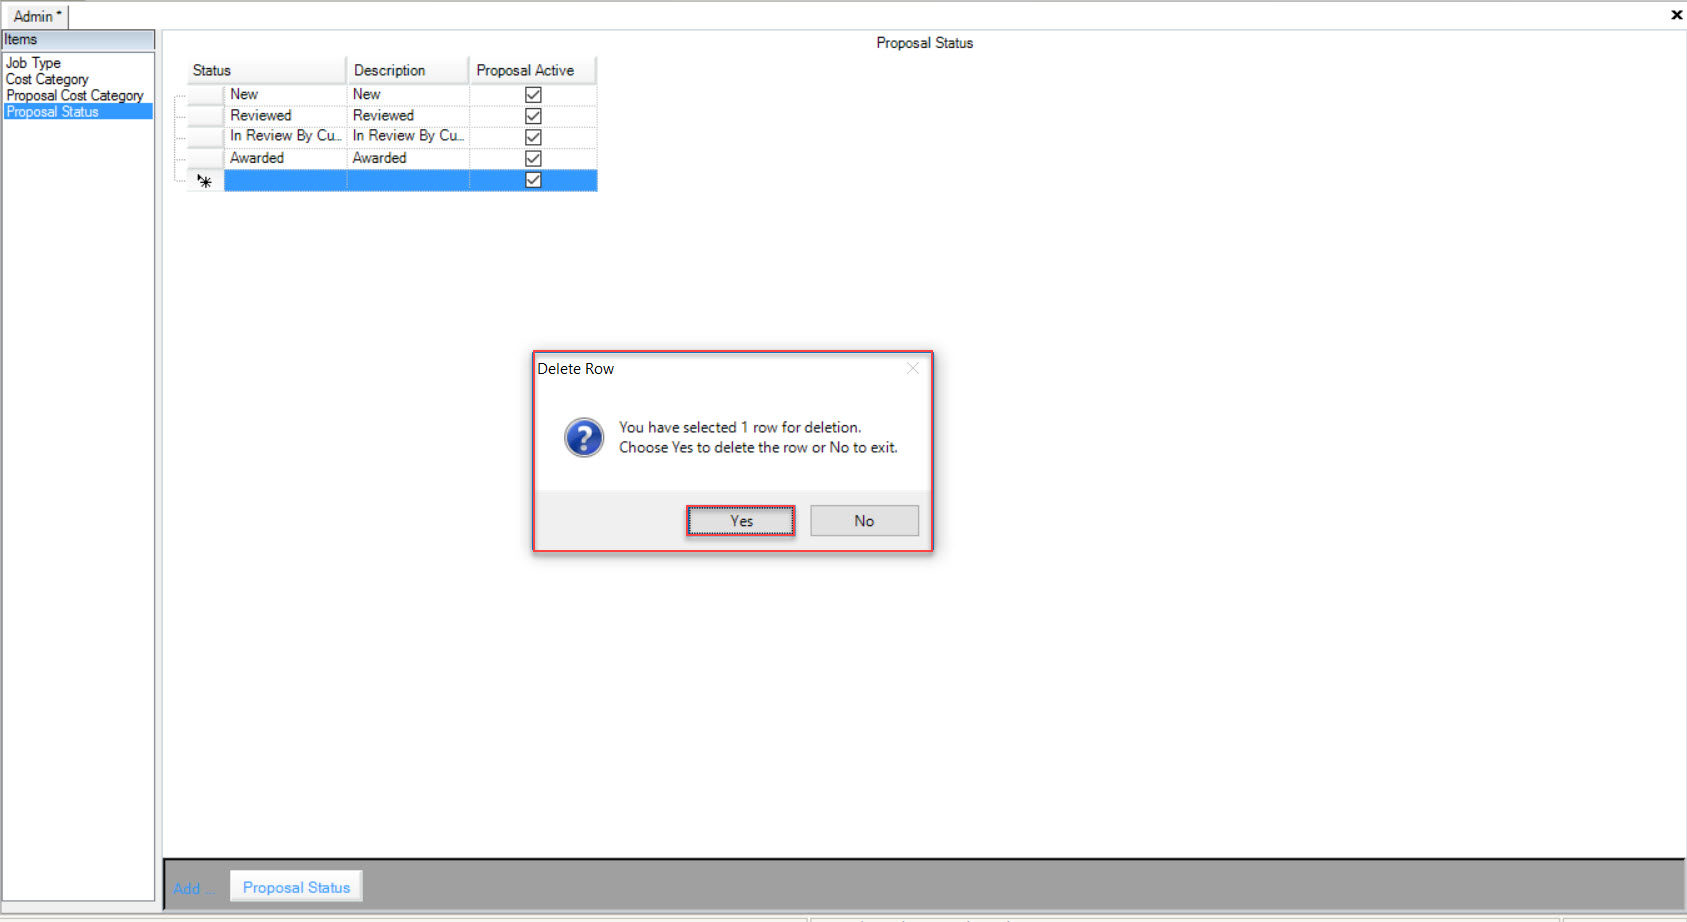
The selected Proposal Status will be deleted.
Make sure to save your changes before exiting the screen.