Planned Job Listing
Finding a Job
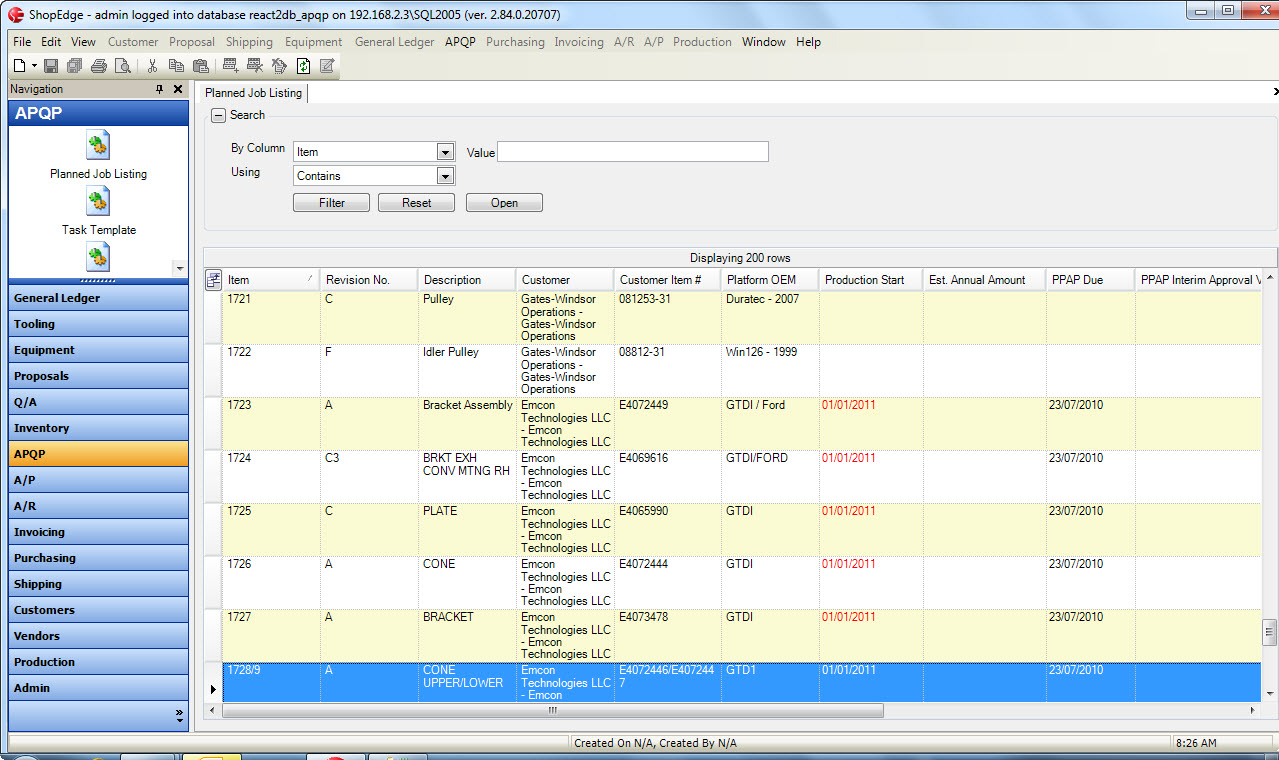
To open an Active Planned Job, navigate to the  tab and click on the
 ![]() icon.
Select the Job you wish to view by double-clicking on the appropriate row. This will open the Planned Job Detail screen.
icon.
Select the Job you wish to view by double-clicking on the appropriate row. This will open the Planned Job Detail screen.
Modifying an Existing Job
To modify an existing Job, navigate to the  tab and click on the
 ![]() icon.
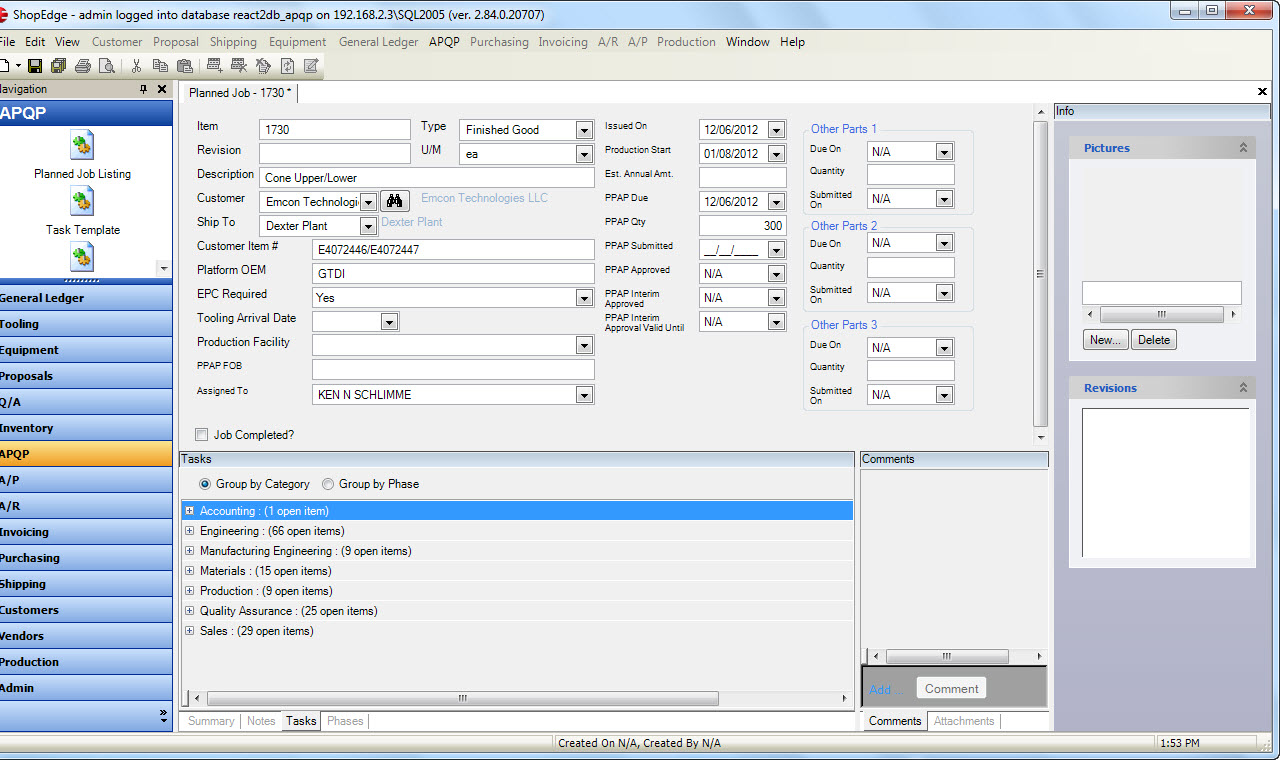
Select the Job you wish to modify by double-clicking on the appropriate row. This will open the Planned Job Detail screen.
icon.
Select the Job you wish to modify by double-clicking on the appropriate row. This will open the Planned Job Detail screen.

Modify all the relevant Planned Job information and click the  icon to save your changes.
Creating a New Revision
To create a new Revision of a job, navigate to the  tab and click on the
 ![]() icon.
Select the job you wish to create the new Revision from by double-clicking on the appropriate row. This will open the Planned Job Detail screen.
icon.
Select the job you wish to create the new Revision from by double-clicking on the appropriate row. This will open the Planned Job Detail screen.

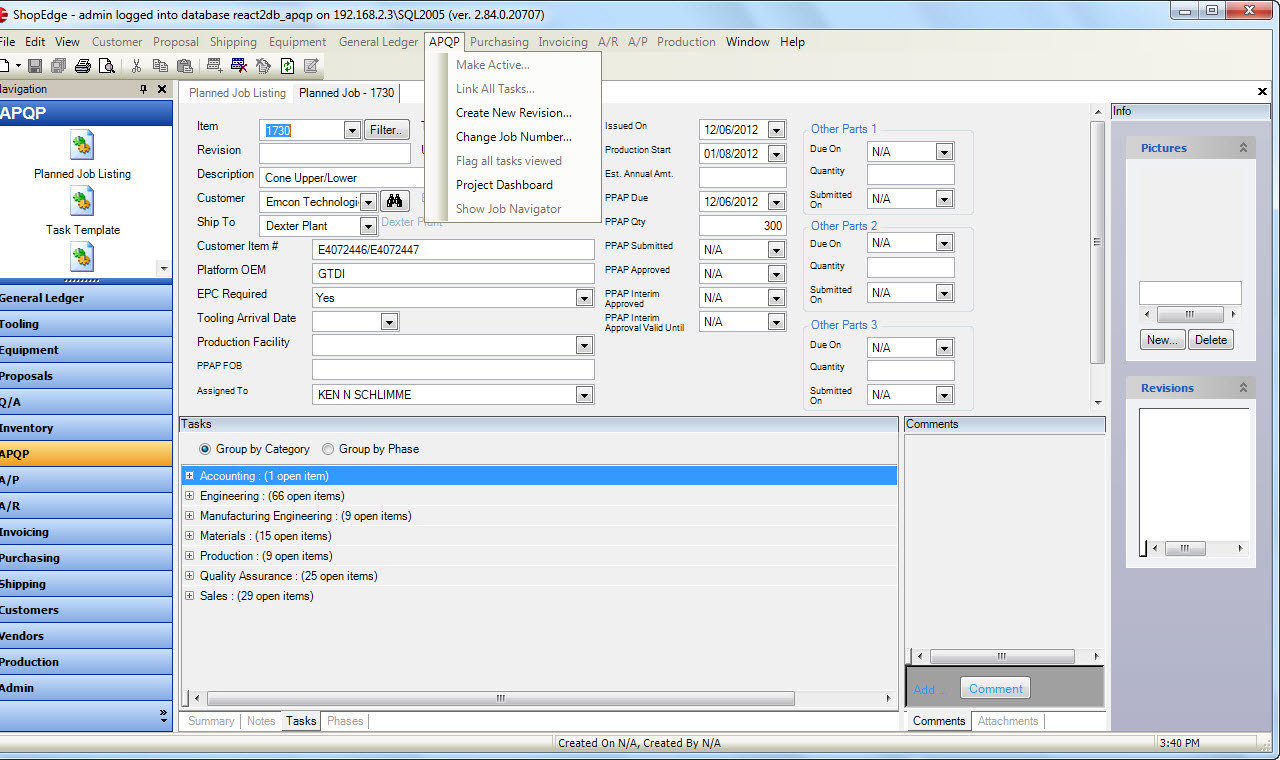
Select the Create New Revision from the APQP menu and a copy of the Planned Job will be created.
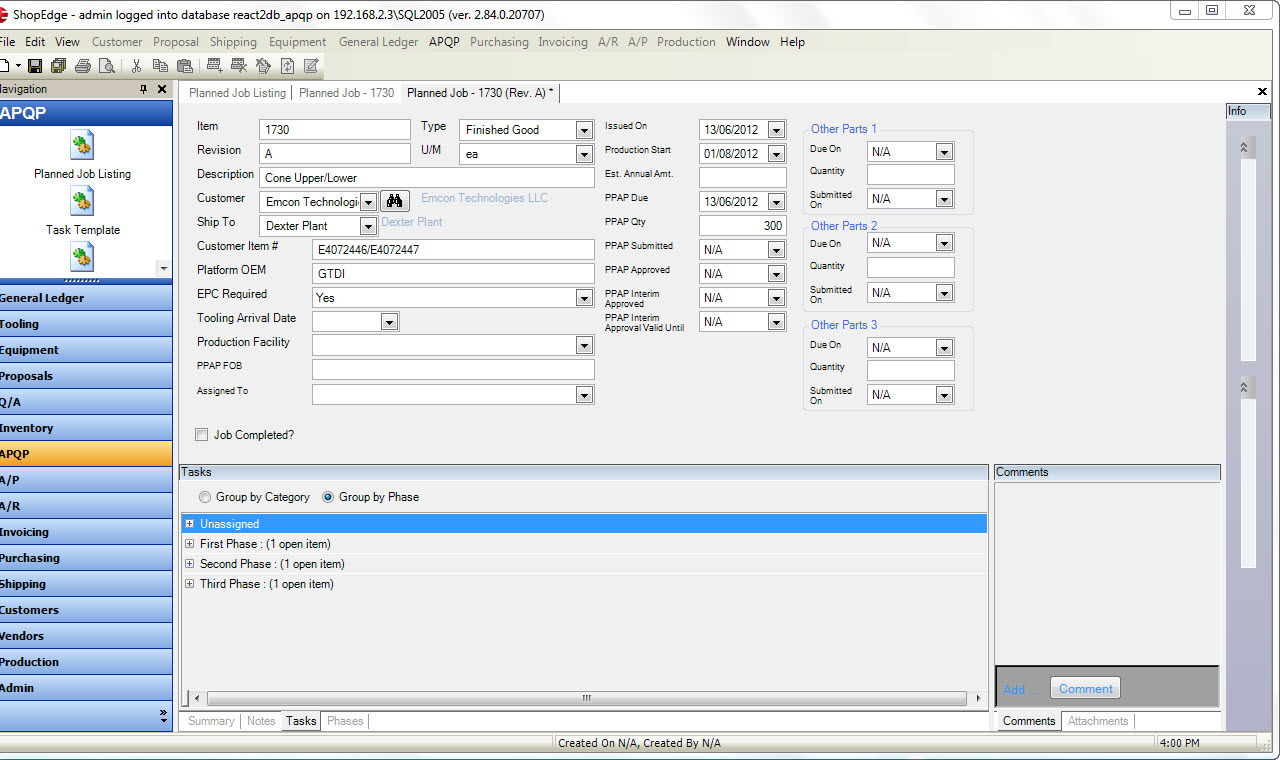
Modify all of the relevant Planned Job information for the Revision and click the  icon to save your changes.
Updating a Task Status
To update a Task Status of a job, navigate to the  tab and click on the
 ![]() icon.
Select the job you wish to update the Task Status on by double-clicking on the appropriate row. This will open the Planned Job Detail screen.
icon.
Select the job you wish to update the Task Status on by double-clicking on the appropriate row. This will open the Planned Job Detail screen.

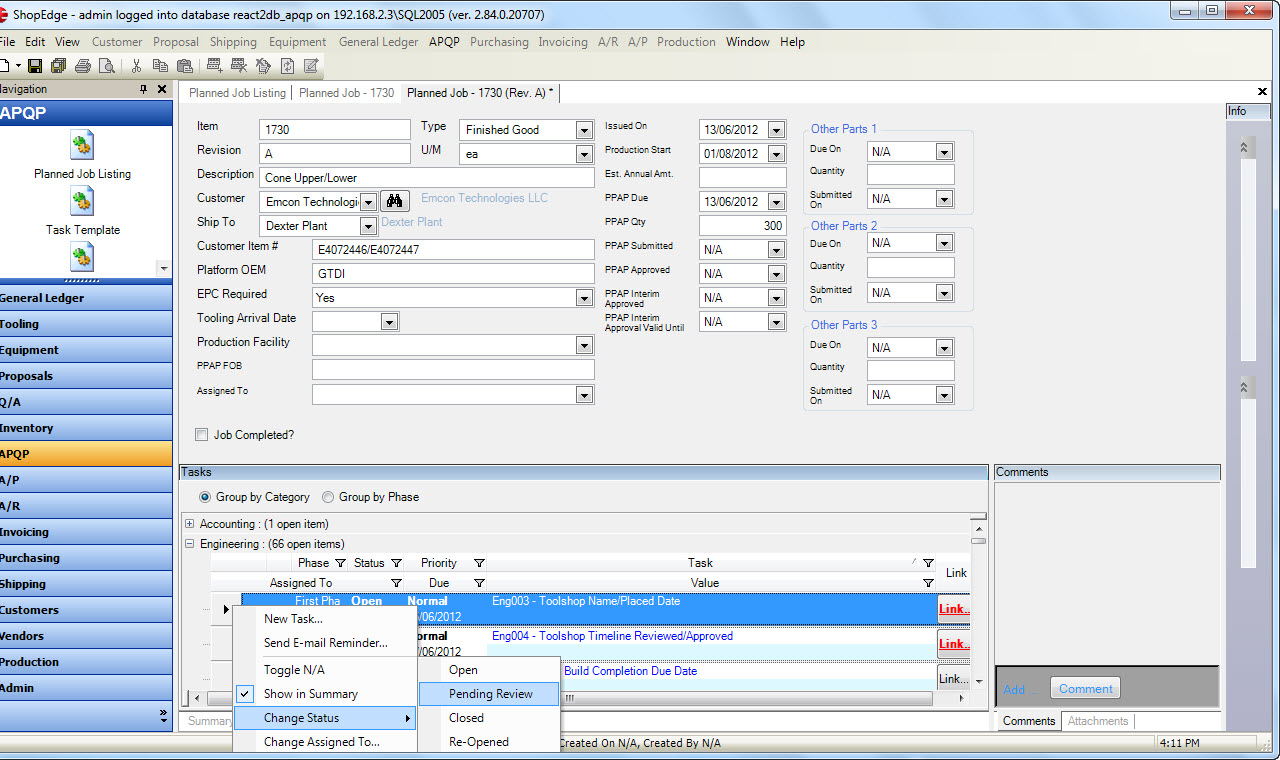
Select the Task that you wish to update the status at the bottom of the screen in the Task panel. Right click, and select Change Status from, the menu. Then select the Status you wish to set the Task to.
Adding a New Task
To create the Task, navigate to the  tab and the
 ![]() icon.
Locate the Item you wish to add the Task Template to and double-click on the appropriate row to open the Planned Job Detail screen.
icon.
Locate the Item you wish to add the Task Template to and double-click on the appropriate row to open the Planned Job Detail screen.
Under the Task panel located at the bottom of the screen, click on the Tasks tab. Right click the mouse on the Category or Task to display the menu and select New Task.
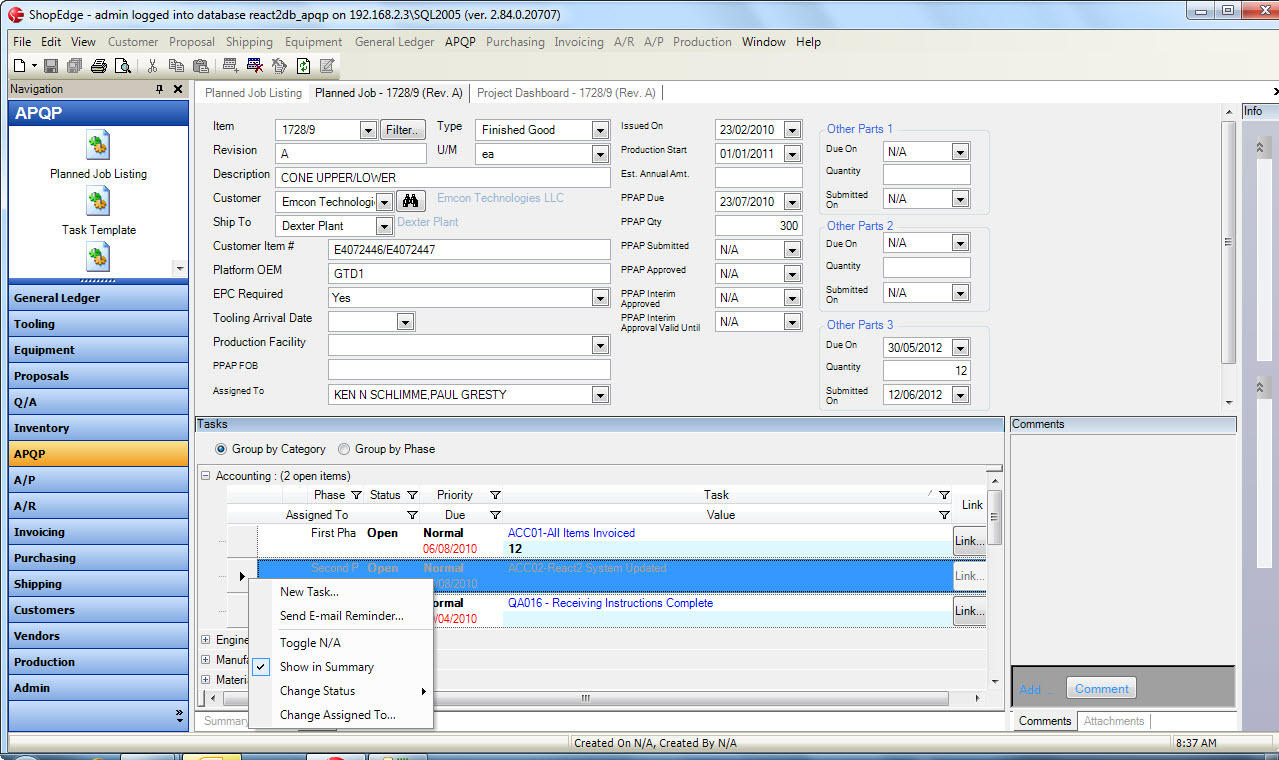
Fill in the Task Name and select a Phase and Category by clicking on the drop-downs in the appropriate columns. You can assign the Task to a User, or leave it blank.
To set the default Due Date for the Task, click on the drop-down menu in the Due Date column. You can make the Task due relative to the issue date, or PPAP date. Enter the number of days.
Click the  icon to save your changes.
Modifying a Task
To modify a Task, navigate to the  tab and the
 ![]() icon.
Locate the Item you wish to modify a Task in and double-click on the appropriate row to open the Planned Job Detail screen.
icon.
Locate the Item you wish to modify a Task in and double-click on the appropriate row to open the Planned Job Detail screen.
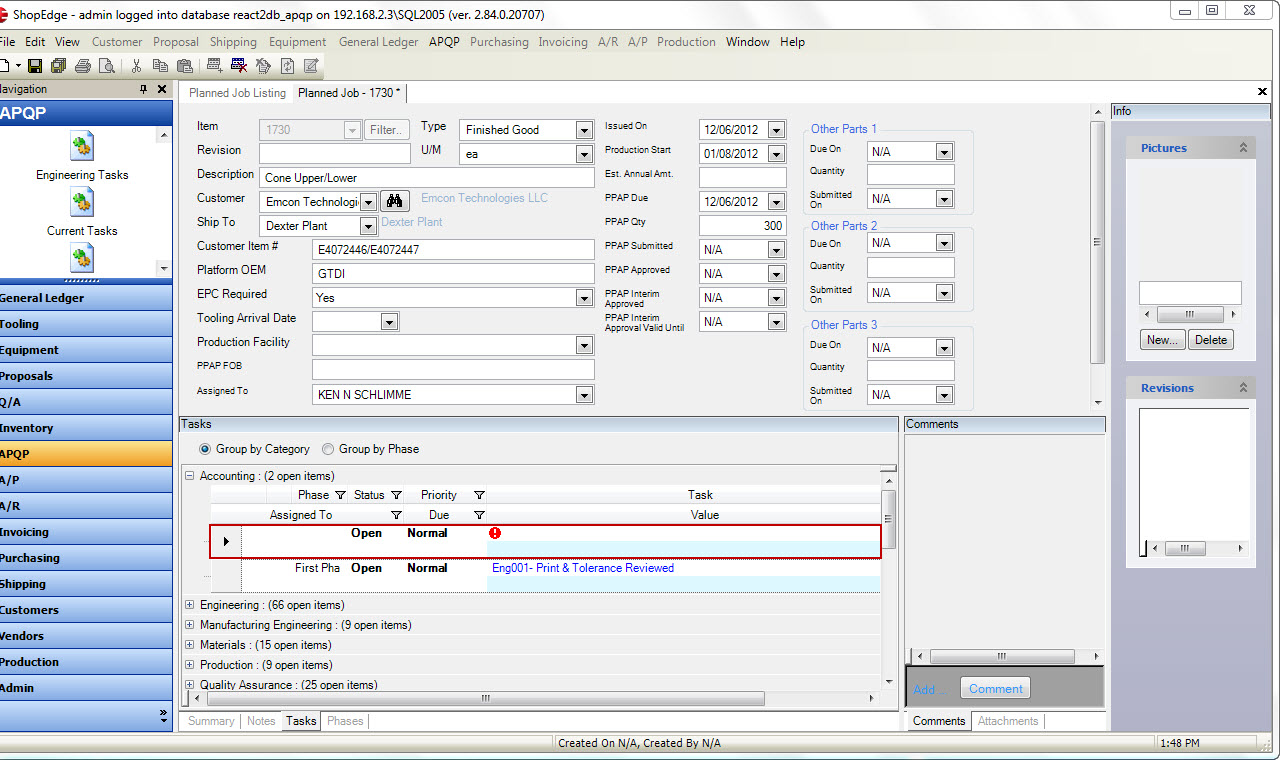
Modify the Phase and Category by clicking on the button in the column located in the Task panel at the bottom of the screen. You can assign the Task to a user, or leave it blank. To set the default Due Date for the Task, click on the button in the Due Date column. You can make the Task due relative to the issue date, or PPAP date. Enter the number of days.
Click the  icon to save your changes.
Linking Tasks
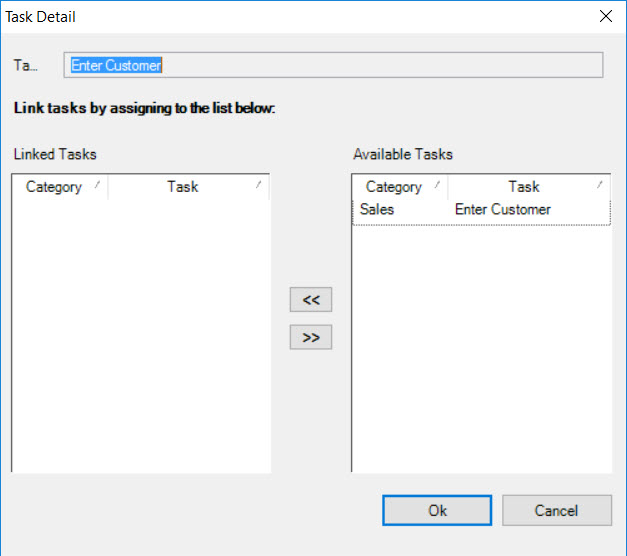
You have the ability to link Tasks to each other in the APQP system. The purpose of this is to link tasks, so that tasks are connected and must be completed together.
To link Tasks, navigate to the  tab and the
 ![]() icon.
Locate the Item you wish to link a Task to and double-click on the appropriate row to open the Planned Job Detail screen.
icon.
Locate the Item you wish to link a Task to and double-click on the appropriate row to open the Planned Job Detail screen.
Located at the bottom of the screen in the Task panel make sure the Tasks tab is select. Click on the Link button.
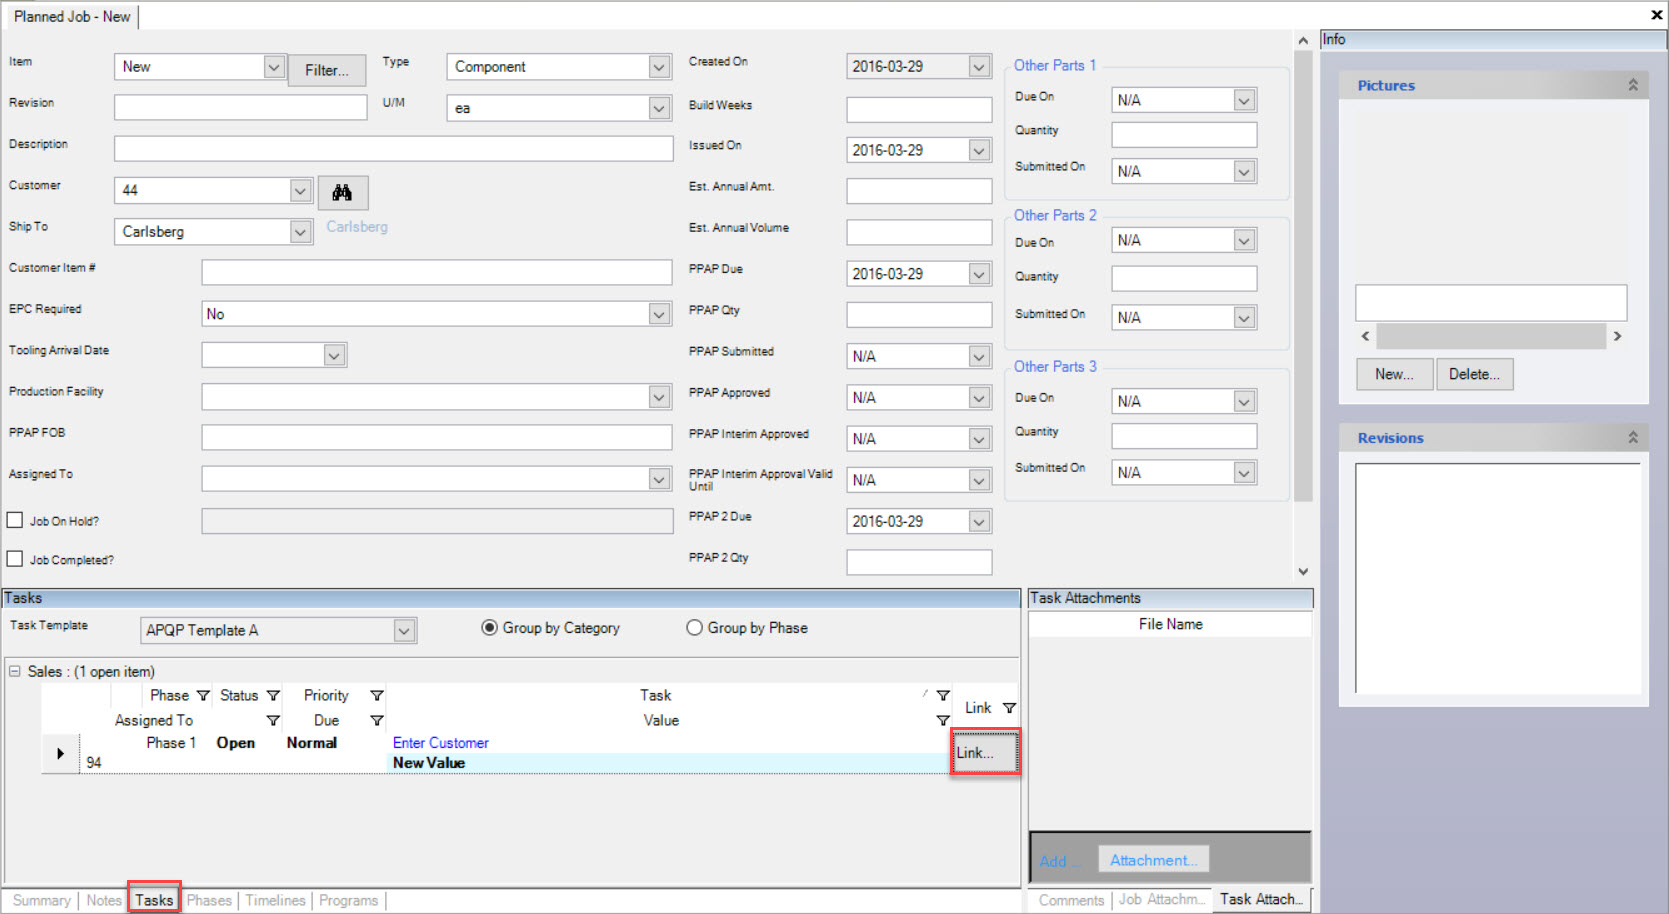
The Task Detail window will be displayed. Select the Tasks that you wish to link and select the  button.
Modifying the Project Phases
To modify the Project Phases start and end dates of an APQP Job, navigate to the  tab and the
 ![]() icon.
Select the Item you wish to modify the Project Phases for and double-click on the appropriate row.
The Planned Job Detail screen will be displayed showing the Tasks in the Task panel located at the bottom of the screen. Click on the Phases
icon.
Select the Item you wish to modify the Project Phases for and double-click on the appropriate row.
The Planned Job Detail screen will be displayed showing the Tasks in the Task panel located at the bottom of the screen. Click on the Phases  tab.
tab.
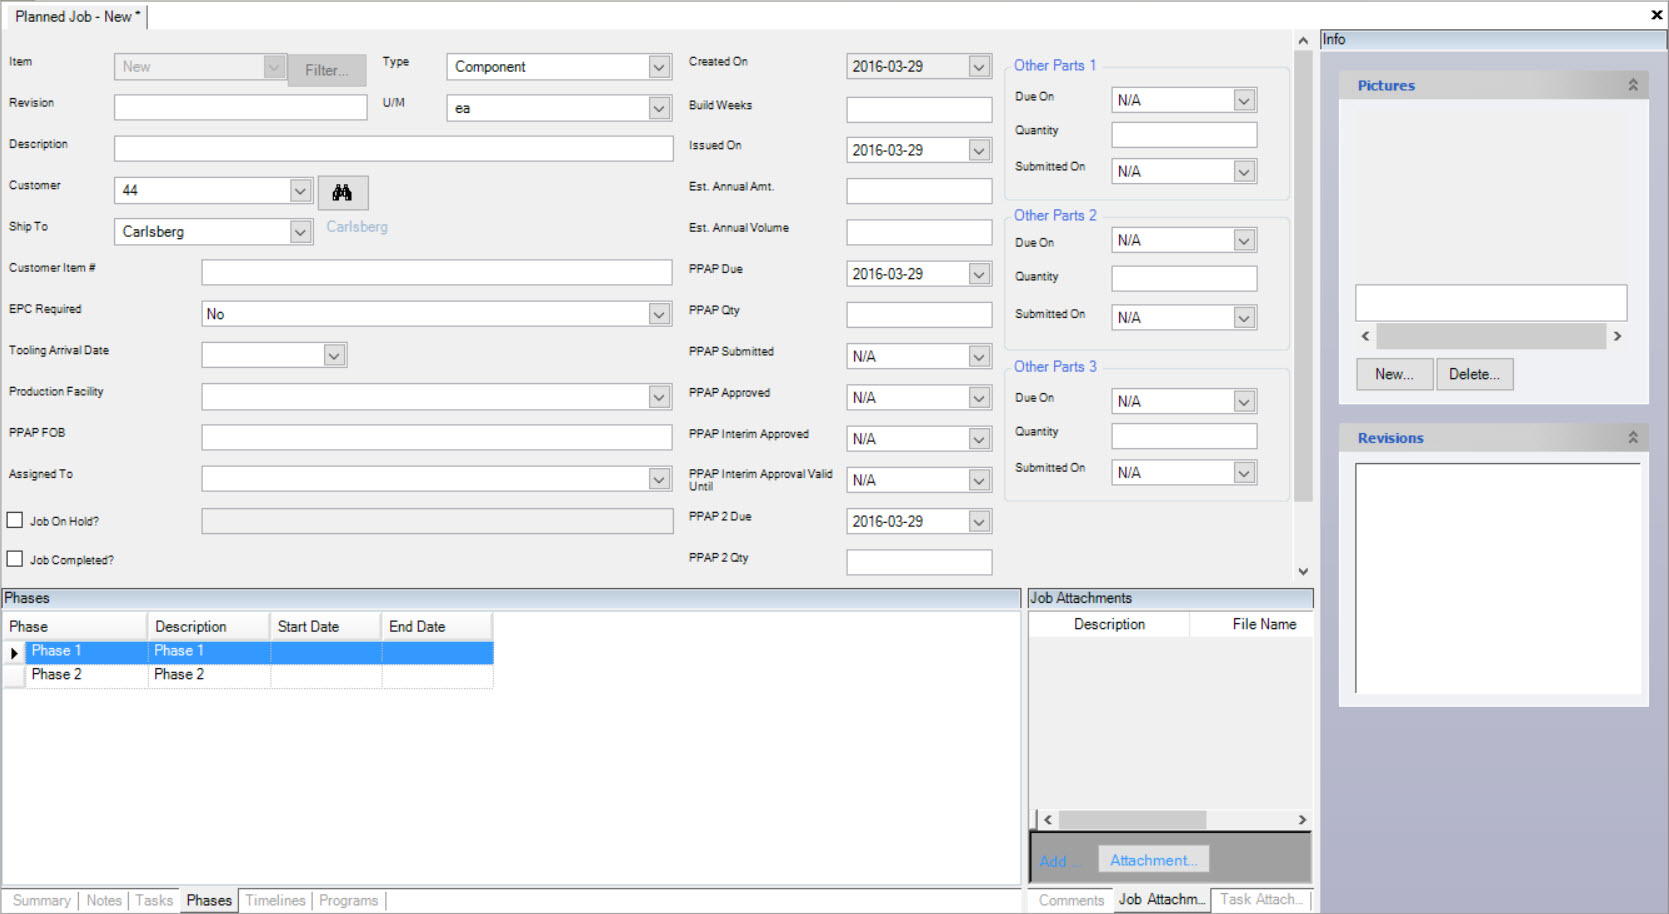
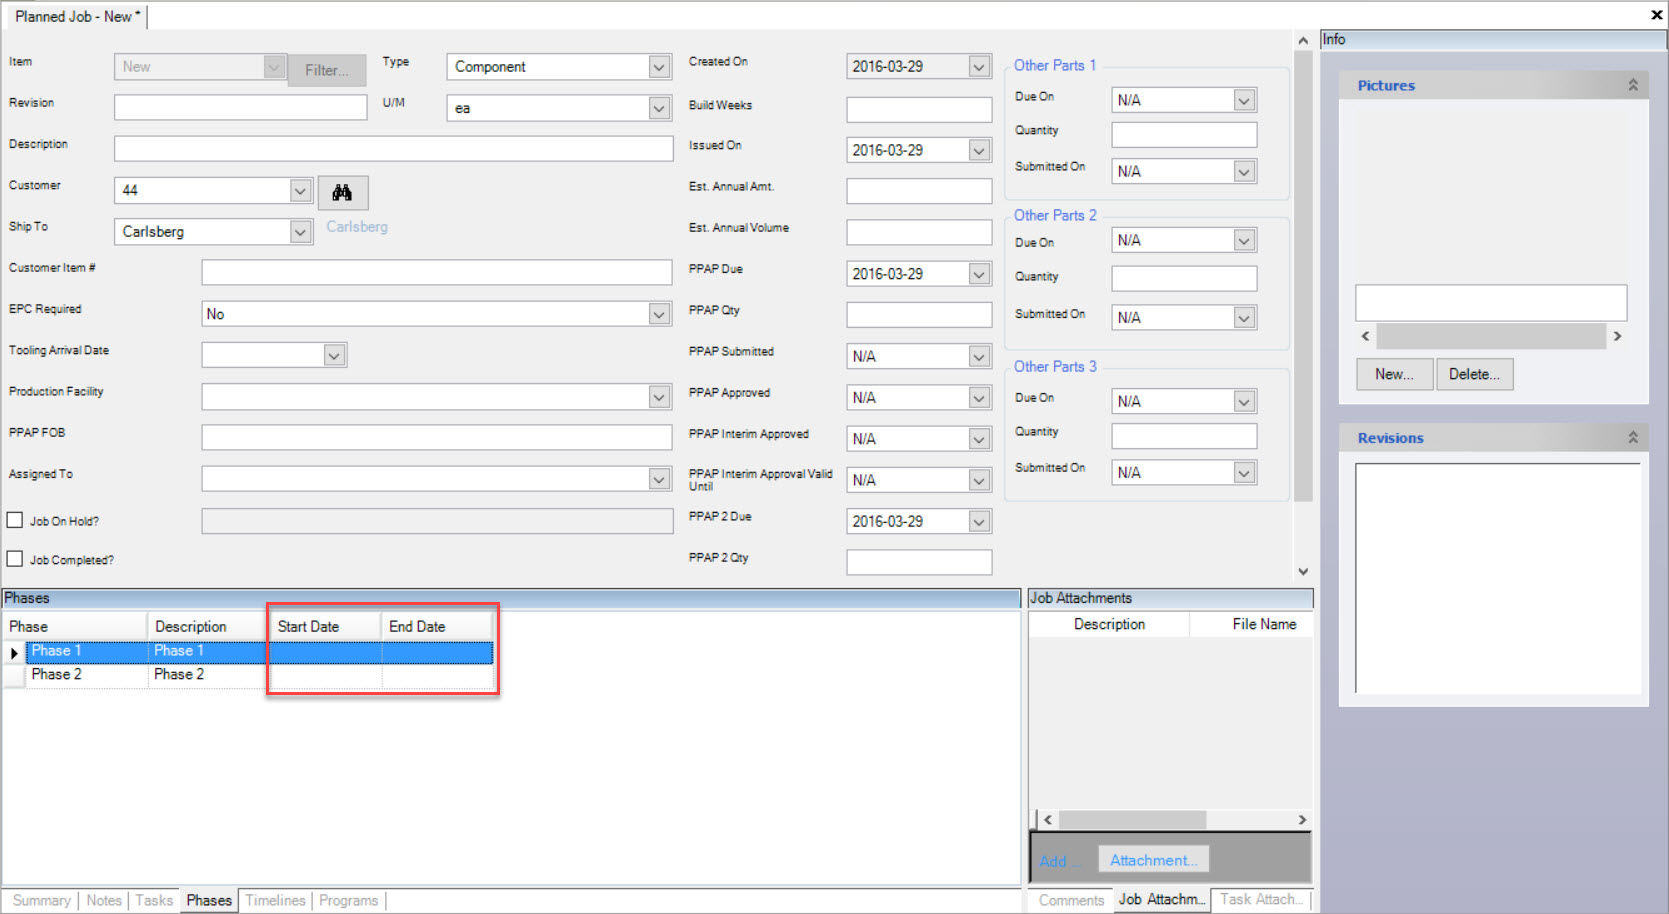
On the Phases panel enter the Start Date and End Date for each of the Phases, or click on the  button
in the Start Date and End Date to select from the calendar. Click the
  icon to save your changes.
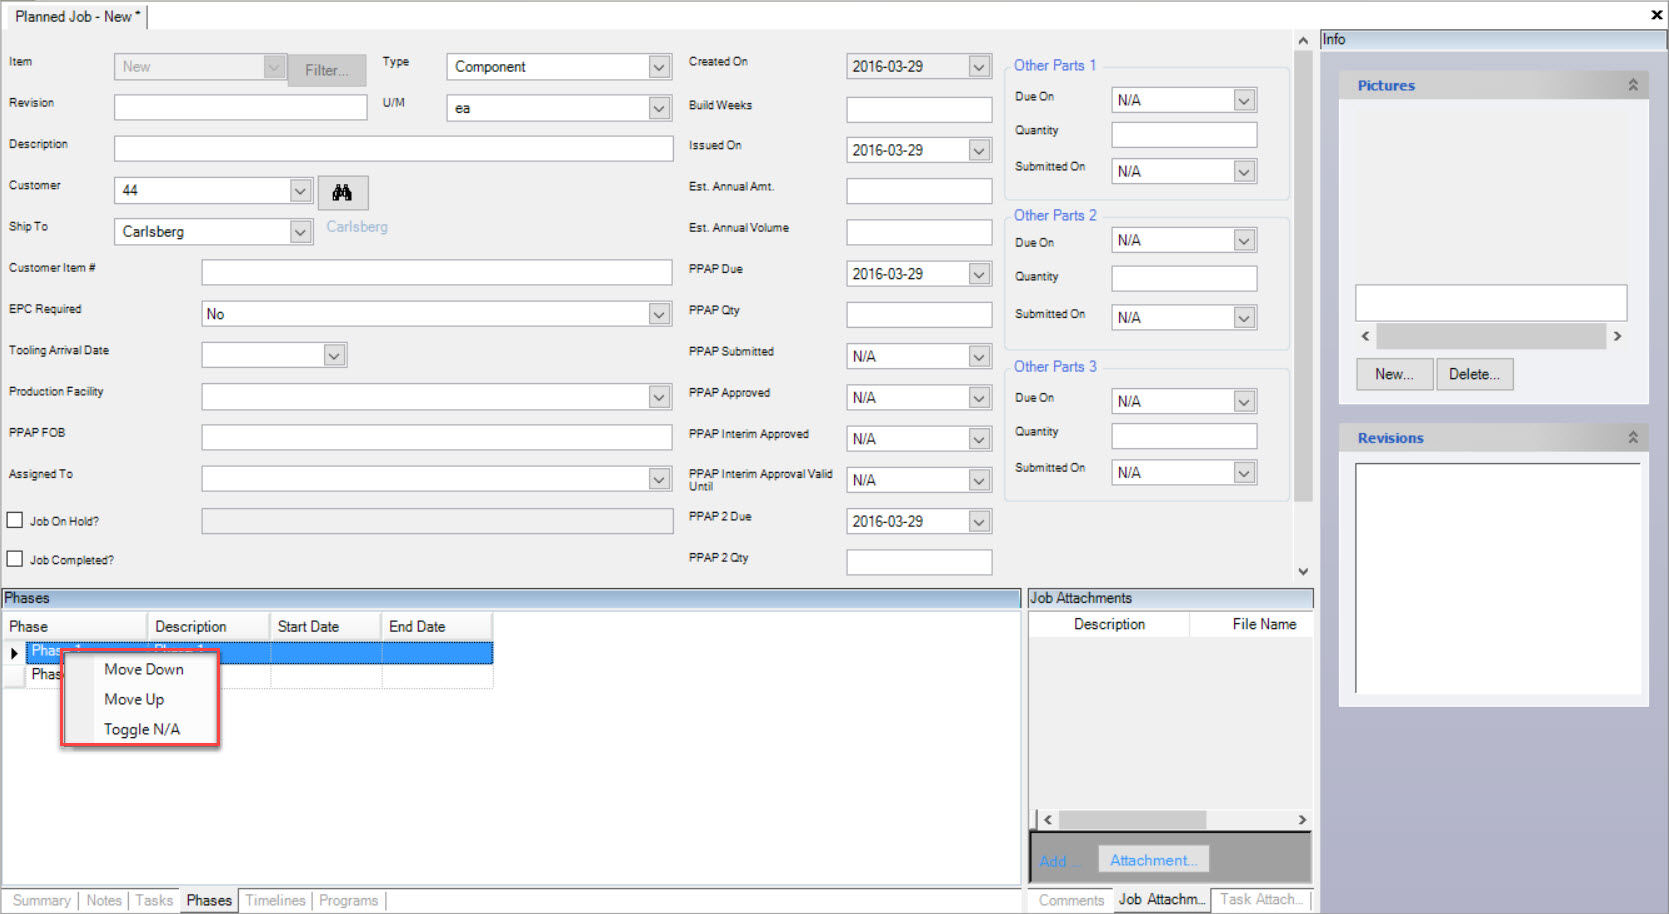
On the Phases panel, right click the mouse on the row to display the menu. You have the ability to select a menu item do the following:
- Move the phase down
- Move the phase up
- Toggle the phase from Available to Not Available and back
Adding Pictures
To add a Picture to an APQP Job, navigate to the  tab and the
 ![]() icon.
Select the Item you wish to add a Picture to and double-click on the appropriate row.
The Planned Job Detail screen will be displayed.
icon.
Select the Item you wish to add a Picture to and double-click on the appropriate row.
The Planned Job Detail screen will be displayed.
The Info panel is located on the right side of the screen. Too add a new Picture, click on the New button.
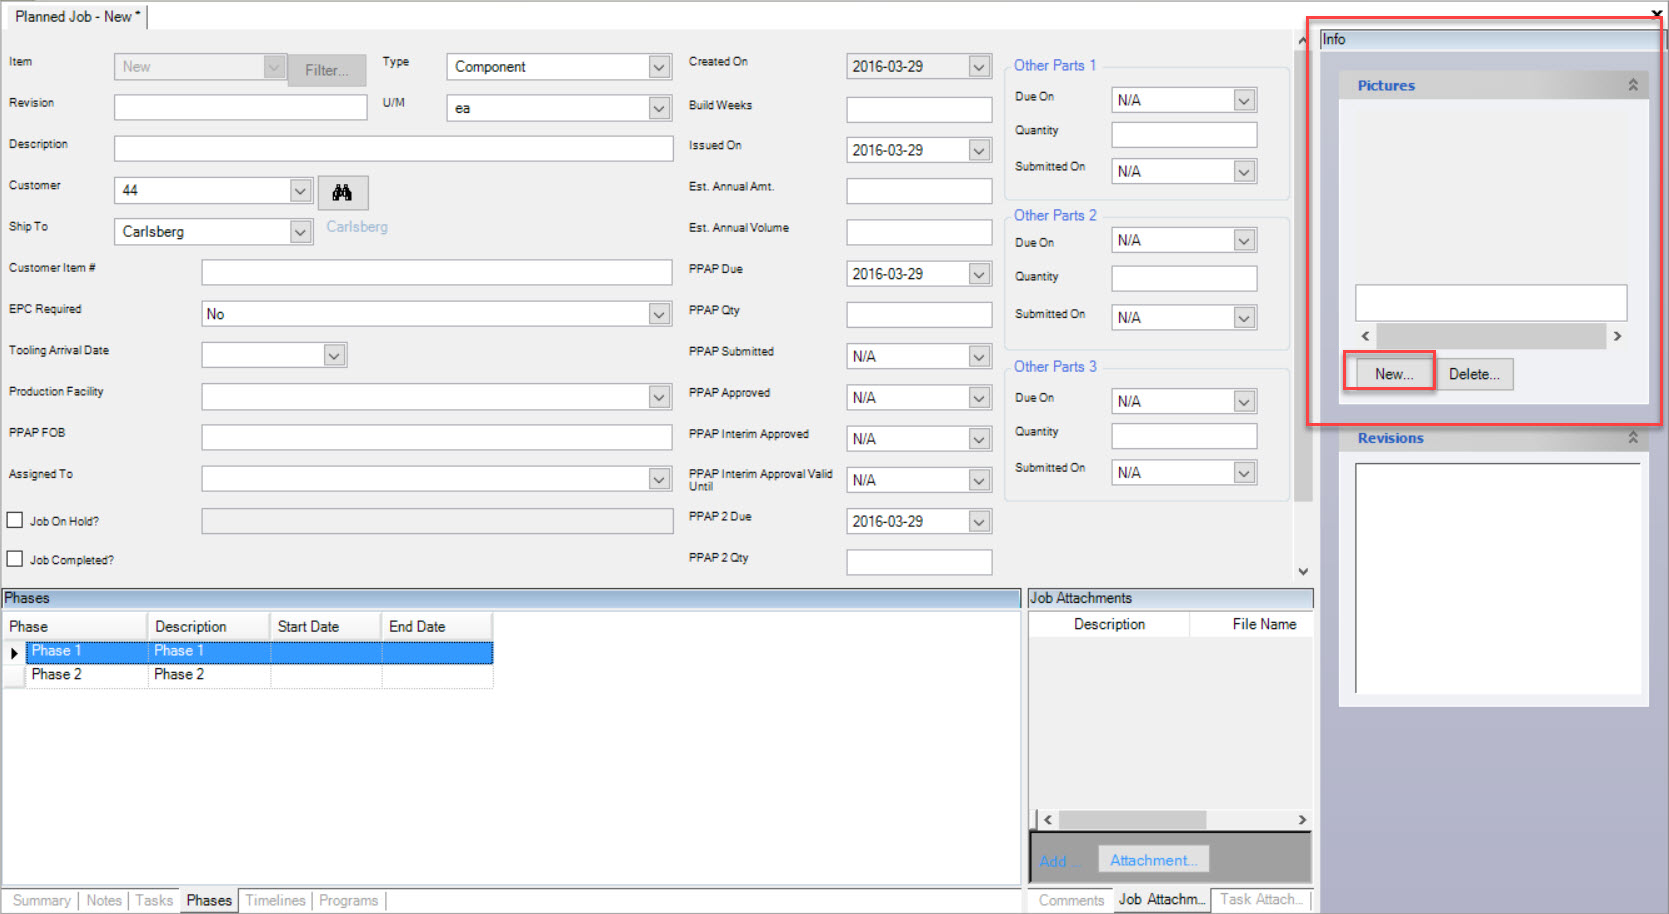
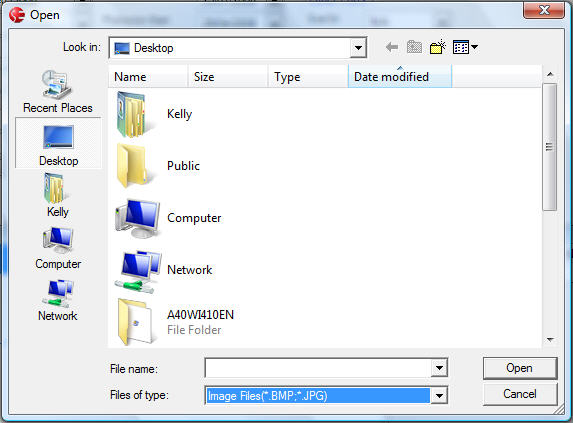
The ShopEdge system will then allow you to browse your computer to find the Picture you wish to add.
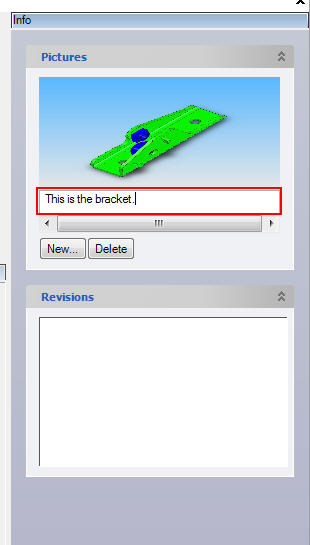
You also have the ability to type in a Description of the Picture you added in the text box beneath it. Do not forget to save your changes before exiting the screen.
Deleting a Picture
To delete a Picture from an APQP Job, navigate to the  tab and the
 ![]() icon.
Select the Item you wish to deleta a Picture from and double-click on the appropriate row.
The Planned Job Detail screen will be displayed.
icon.
Select the Item you wish to deleta a Picture from and double-click on the appropriate row.
The Planned Job Detail screen will be displayed.
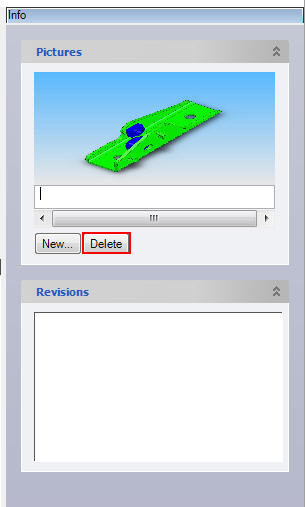
The Info panel is on the right side of the screen. Click on the  button. The Picture will be removed immediately.
Adding Comments to Tasks
To add a Comment to an APQP Job, navigate to the  tab and the
 ![]() icon.
Select the Item you wish to add Comments to Tasks to and double-click on the appropriate row.
The Planned Job Detail screen will be displayed.
icon.
Select the Item you wish to add Comments to Tasks to and double-click on the appropriate row.
The Planned Job Detail screen will be displayed.
Note
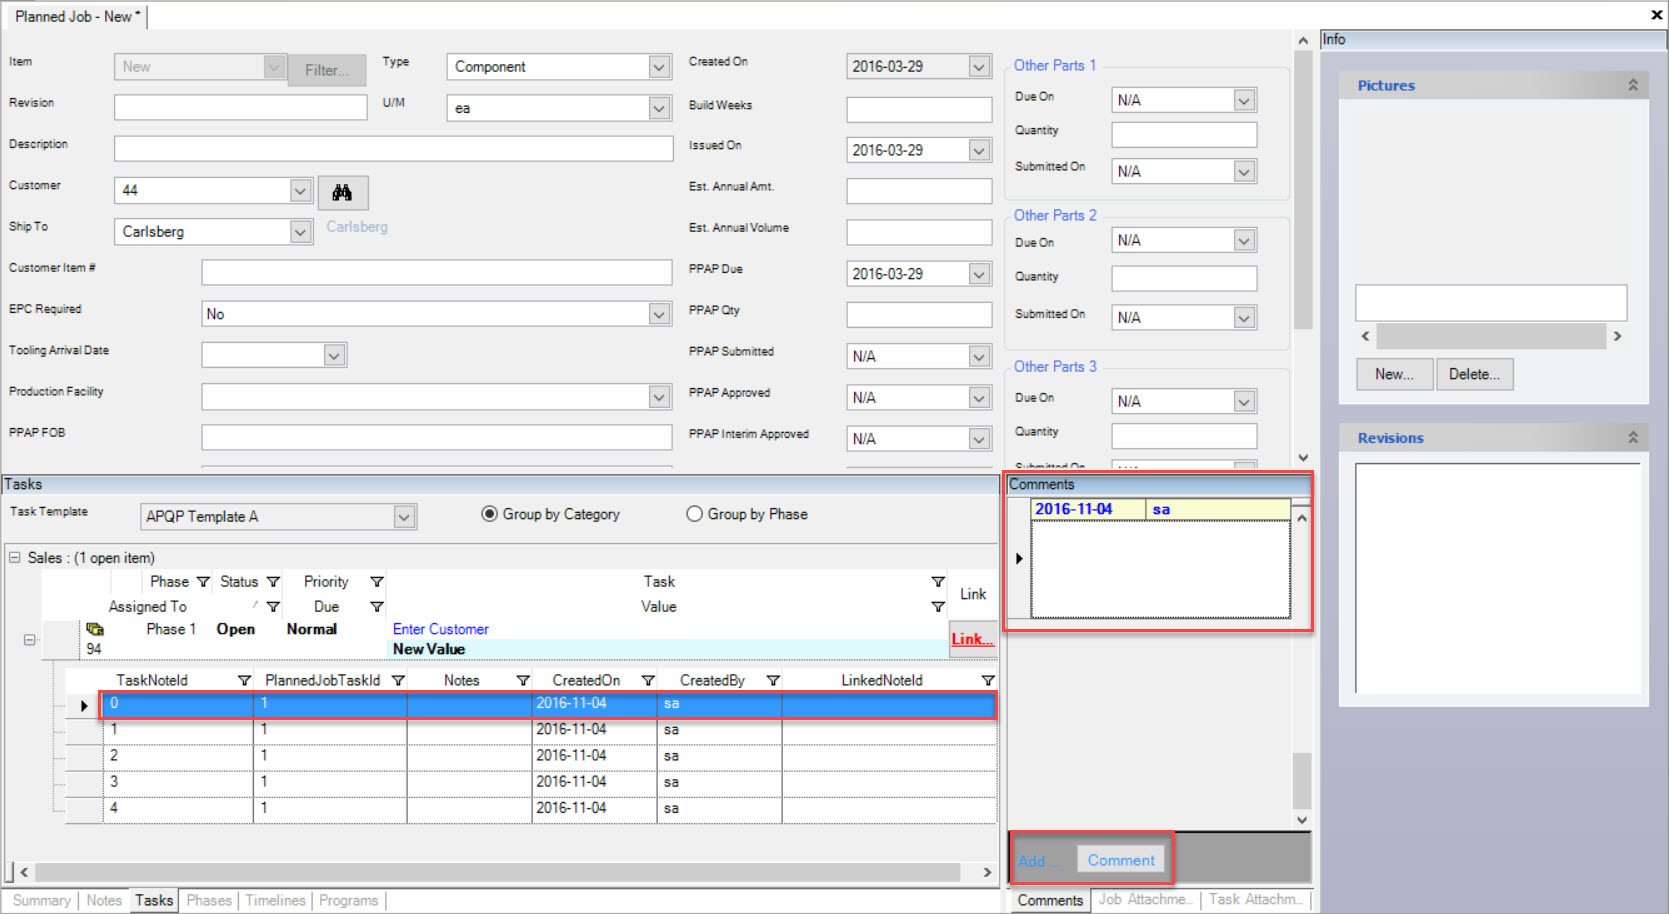
You must have a Task selected before you can add a Comment to it.
Select the  tab, and then the
  button.
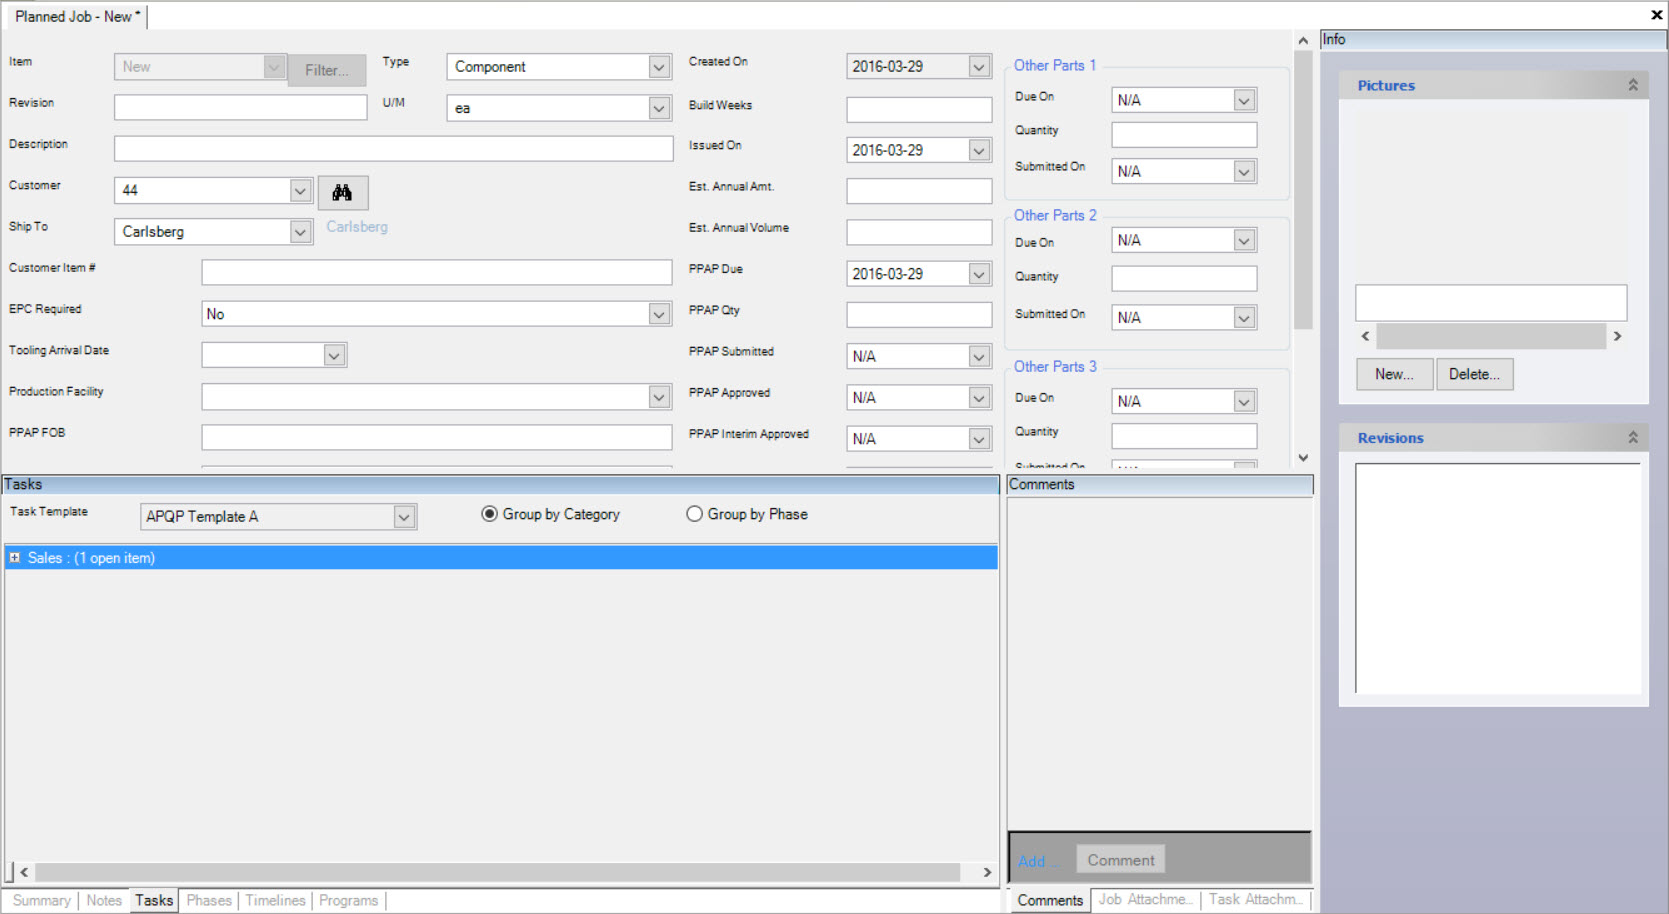
The ShopEdge system will add a table where you can enter your Comments in the text box provided.
Adding Attachments to Tasks
To add an Attachment to an APQP Job, navigate to the  tab and the
 ![]() icon.
Select the Item you wish to add Attachments to Tasks to and double-click on the appropriate row.
The Planned Job Detail screen will be displayed.
icon.
Select the Item you wish to add Attachments to Tasks to and double-click on the appropriate row.
The Planned Job Detail screen will be displayed.
Note
You must have a Task selected before you can add an Attachment to it.
Select the  tab, and then the
  button.
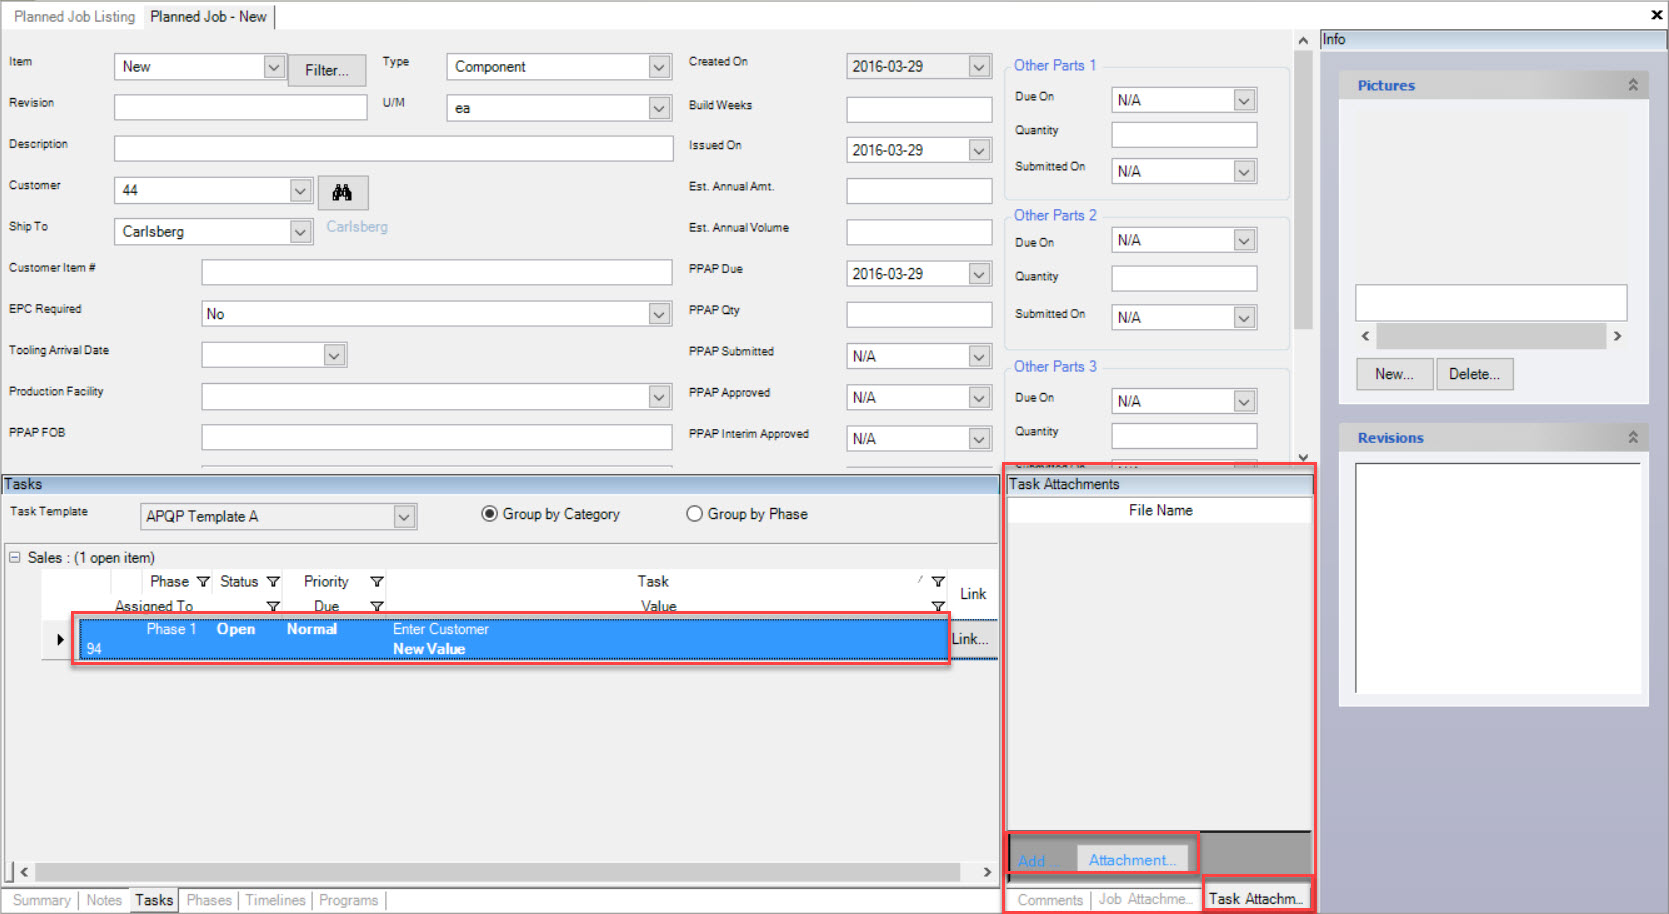
The system will then allow you to browse your computer to find the Attachment you wish to add.

Save your changes before exiting the screen.
Adding Notes to a Job
To add a Note to an APQP Job, navigate to the  tab and the
 ![]() icon.
Select the Item you wish to add a Note to and double-click on the appropriate row.
The Planned Job Detail screen will be displayed.
icon.
Select the Item you wish to add a Note to and double-click on the appropriate row.
The Planned Job Detail screen will be displayed.
At the bottom of the screen, click on the  tab, and then select the
  button.
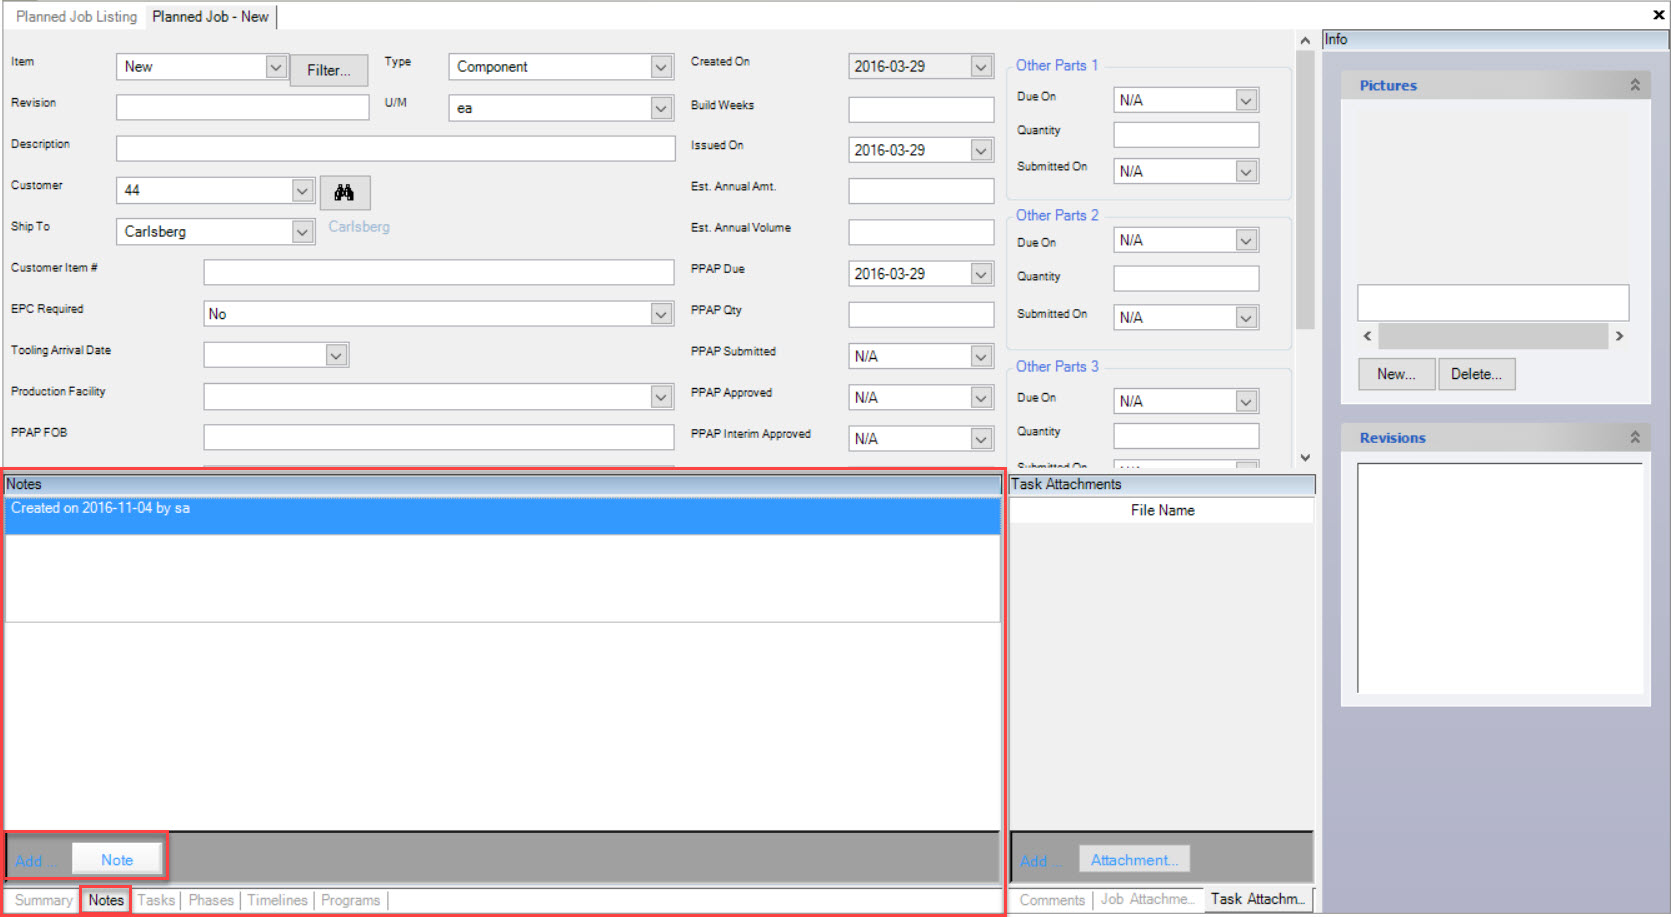
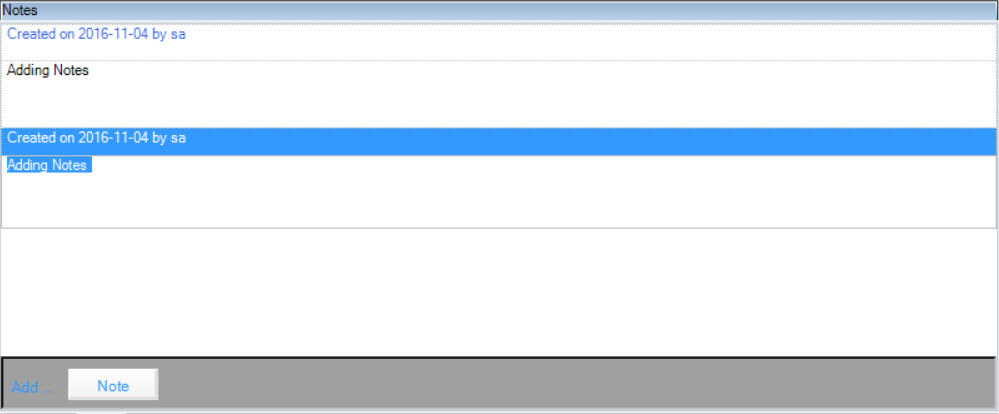
A new table will be added in the Notes section, and you can type in the information you require. Make sure to save your changes before exiting the screen.
Adding Attachments to Notes
To add an Attachment to Notes of an APQP Job, navigate to the  tab and the
 ![]() icon.
Select the Item you wish to add an Attachment to Notes to and double-click on the appropriate row.
The Planned Job Detail screen will be displayed.
icon.
Select the Item you wish to add an Attachment to Notes to and double-click on the appropriate row.
The Planned Job Detail screen will be displayed.
Note
You must have the  tab selected in order to add an Attachment to the Note of a job.
When the  tab is selected, you will notice that the system will show any previous attachments that were added to the job, as well as enable you to select the
 button to add a new attachment to the job.
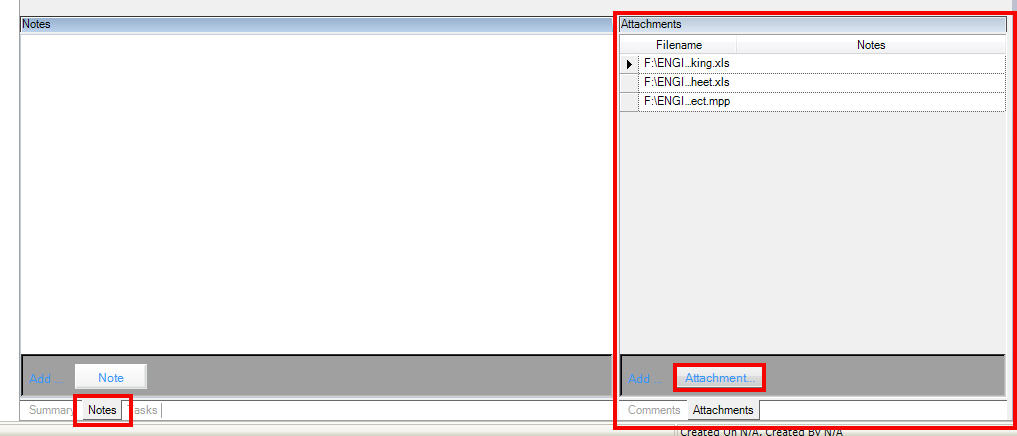
The system will then allow you to browse your computer to find the attachment you wish to add.

Adding a Timeline
To add a Timeline to the Tasks panel, navigate to  tab and the
 ![]() icon.
Select the Item you wish to add a Timeline to and double-click on the appropriate row.
The Planned Job Detail screen will be displayed.
icon.
Select the Item you wish to add a Timeline to and double-click on the appropriate row.
The Planned Job Detail screen will be displayed.
In the Tasks panel, make sure to click on the Timelines tab. This will open the Timelines panel.
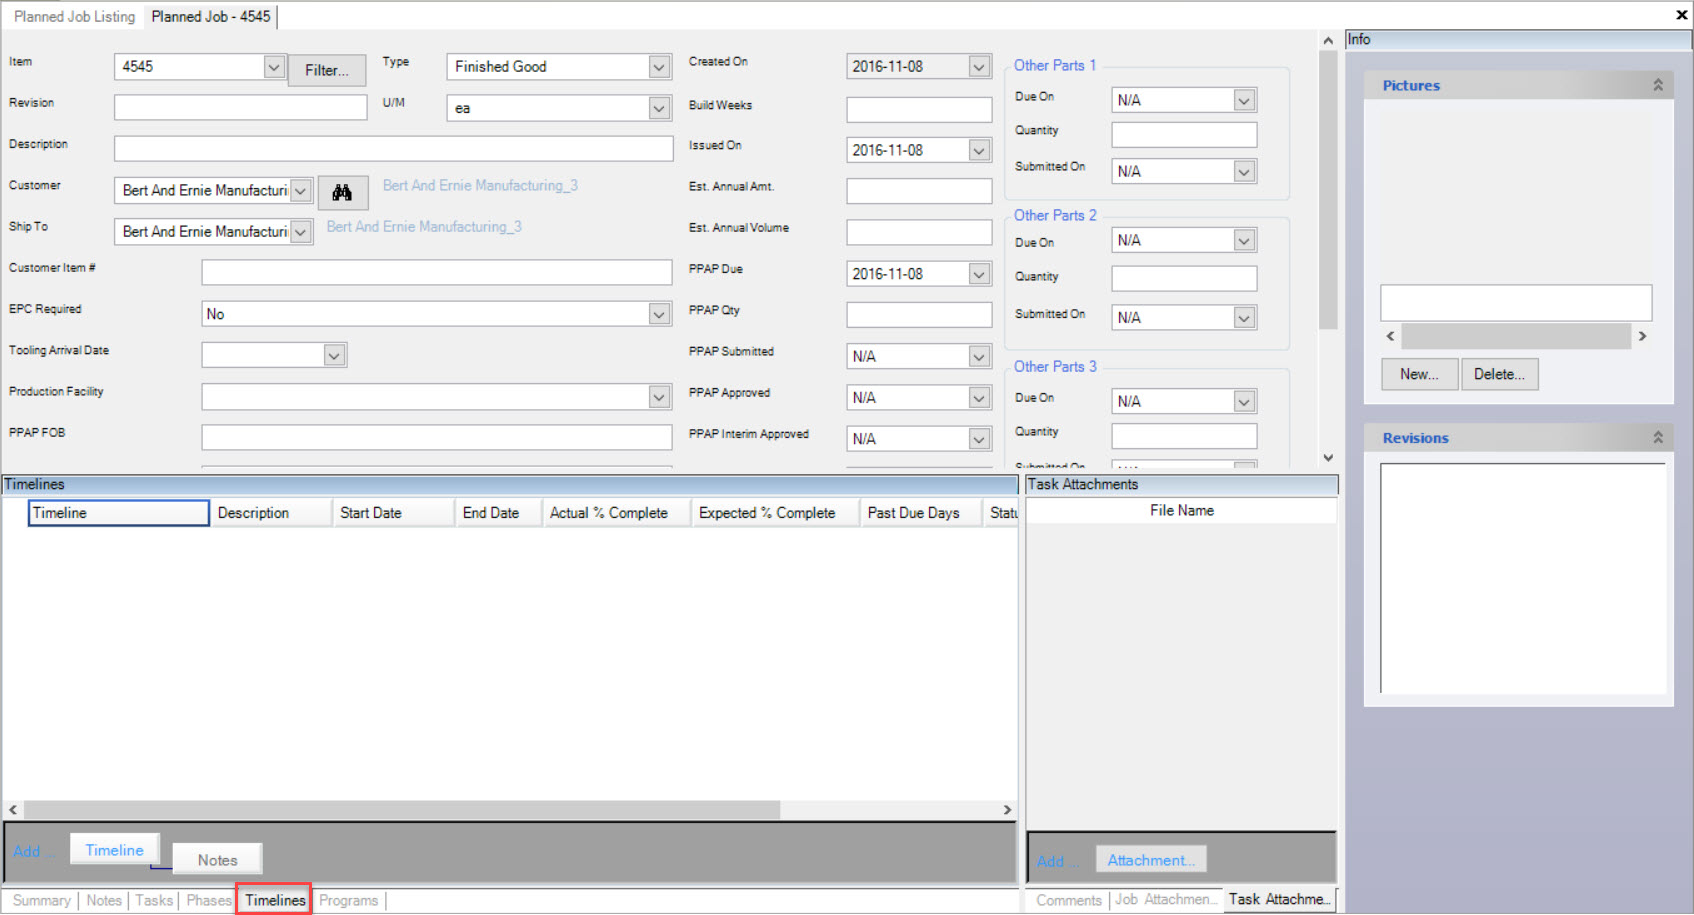
Click on the  button located at the bottom of the screen. This will open the Timeline window. Fill in the necessary fields such as Timeline, Description, and Start and End dates.
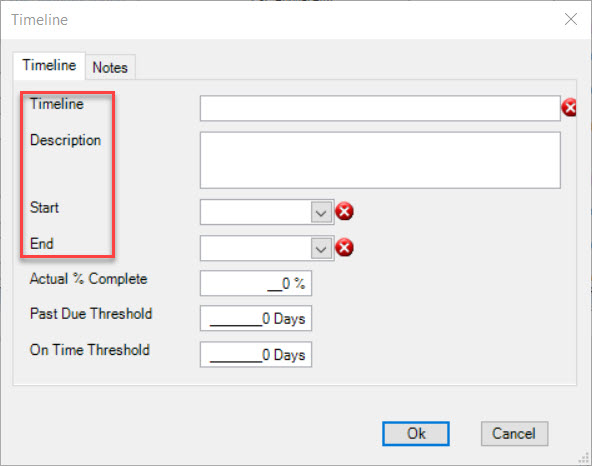
You also have the option to create a Note by clicking on the Notes tab in the Timeline window.
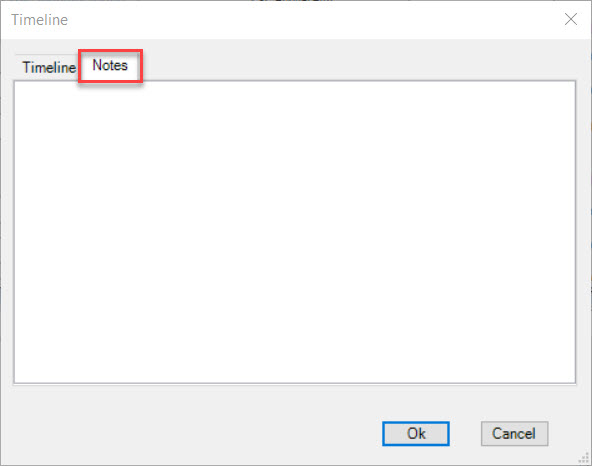
Once you have field in the necessary fields, click the  button.
The new Timeline will be added.

Make sure to save your changes before exiting the screen.
Deleting a Timeline
To delete a Timeline, highlight the one you wish to delete by clicking on the appropriate row. Use your Delete key and when the system prompts you, select Yes.
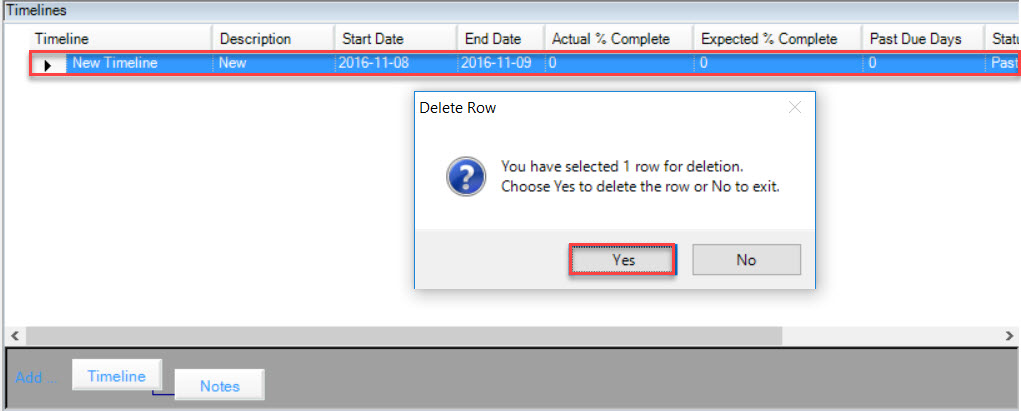
The Timeline will be deleted immediately. Make sure to save your changes before exiting the screen.
Adding Notes to Timelines Panel
To add a Note to a Timeline, find and highlight the appropriate row of the Timeline you wish to add a Note to. Click on the  button located at the bottom of the screen.
This will open the Notes window. Type in the necessary Note and click the  button.
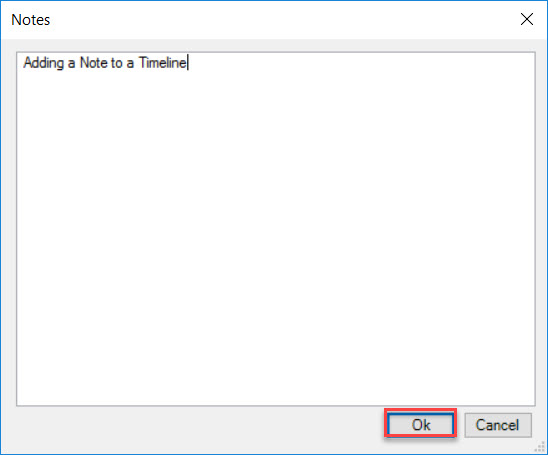
The Note will be added below the Timeline.

Make sure to save your changes before exiting the screen.
Deleting a Note from a Timeline
To delete a Note from a Timeline, find and higlight the appropriate row of the Note you wish to delete. Use your Delete key and when the system prompts you, select Yes.
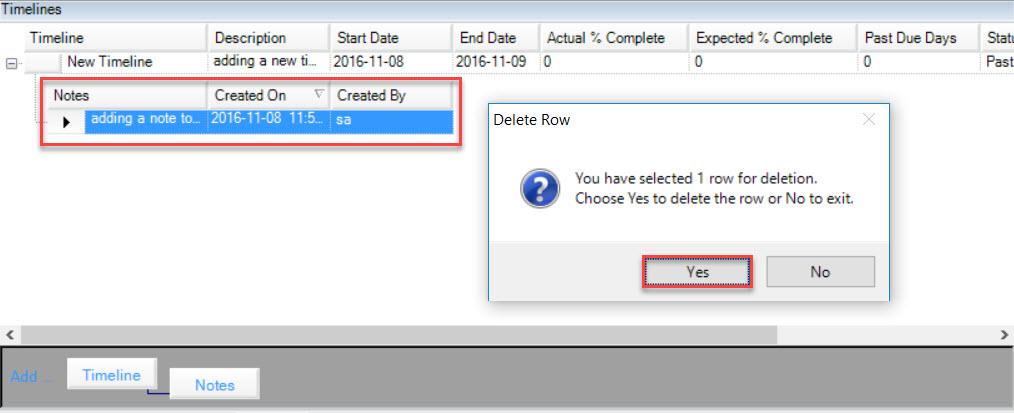
The Note will be deleted immediately. Make sure to save your changes before exiting the screen.
Adding a Program
To add a Program to a job, navigate to  tab and the
 ![]() icon.
Select the Item you wish to add a Program to and double-click on the appropriate row.
The Planned Job Detail screen will be displayed.
icon.
Select the Item you wish to add a Program to and double-click on the appropriate row.
The Planned Job Detail screen will be displayed.
In the Tasks panel, make sure to click on the Programs tab. This will open the Programs panel.

Click on the  button located at the bottom of the screen. A new row will be added.
Once you have filled in the necessary fields, make sure to save your changes before exiting the screen.
Deleting a Program
To delete a Program, highlight the appropriate row of the Program you wish to delete. Use your Delete key and when the system prompts you, select Yes.
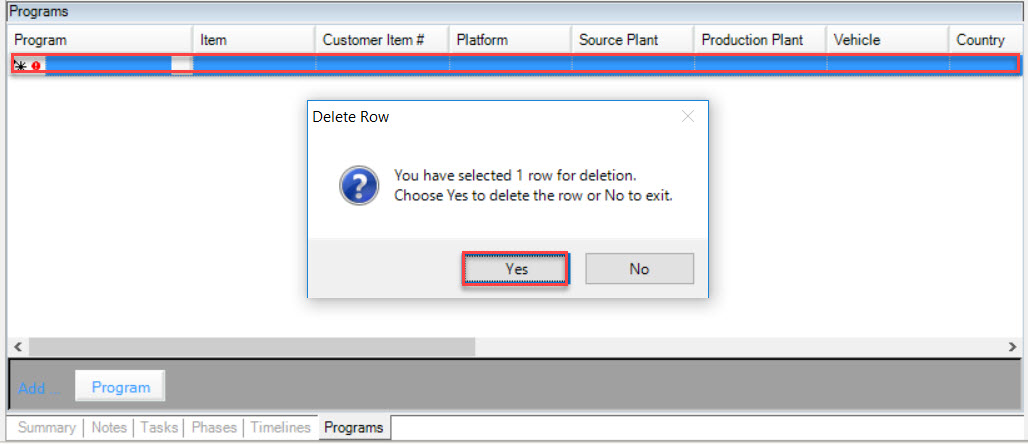
The selected Program* will be deleted immediately. Make sure to save your changes before exiting.
Project Dashboard
The Project Dashboard can be accessed from the Planned Job Listing screen. Navigate to the  tab and the
 ![]() icon.
When the Planned Job Listing screen opens, right click the mouse to display
icon.
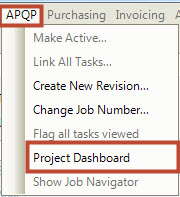
When the Planned Job Listing screen opens, right click the mouse to display 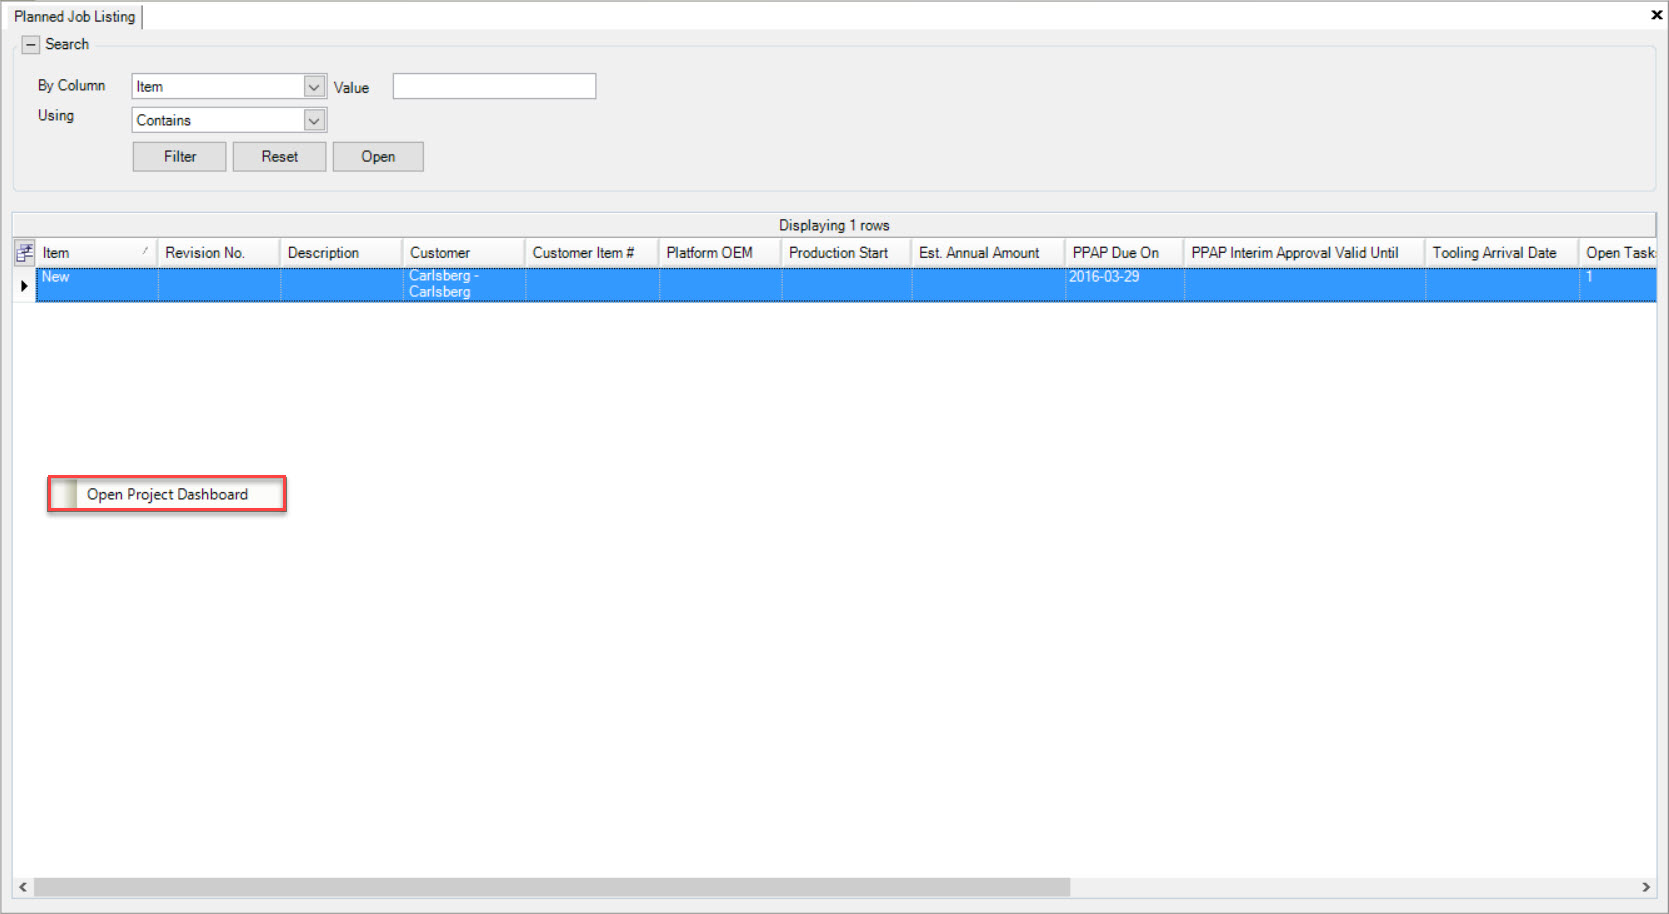 menu item. It can also be selected from the apqp
menu from the Planned Job Detail screen.
The Project Dashboard provides a summary view of project activity. Tasks are assigned to Project Phases, and colour coding is used to highlight Tasks that need attention.
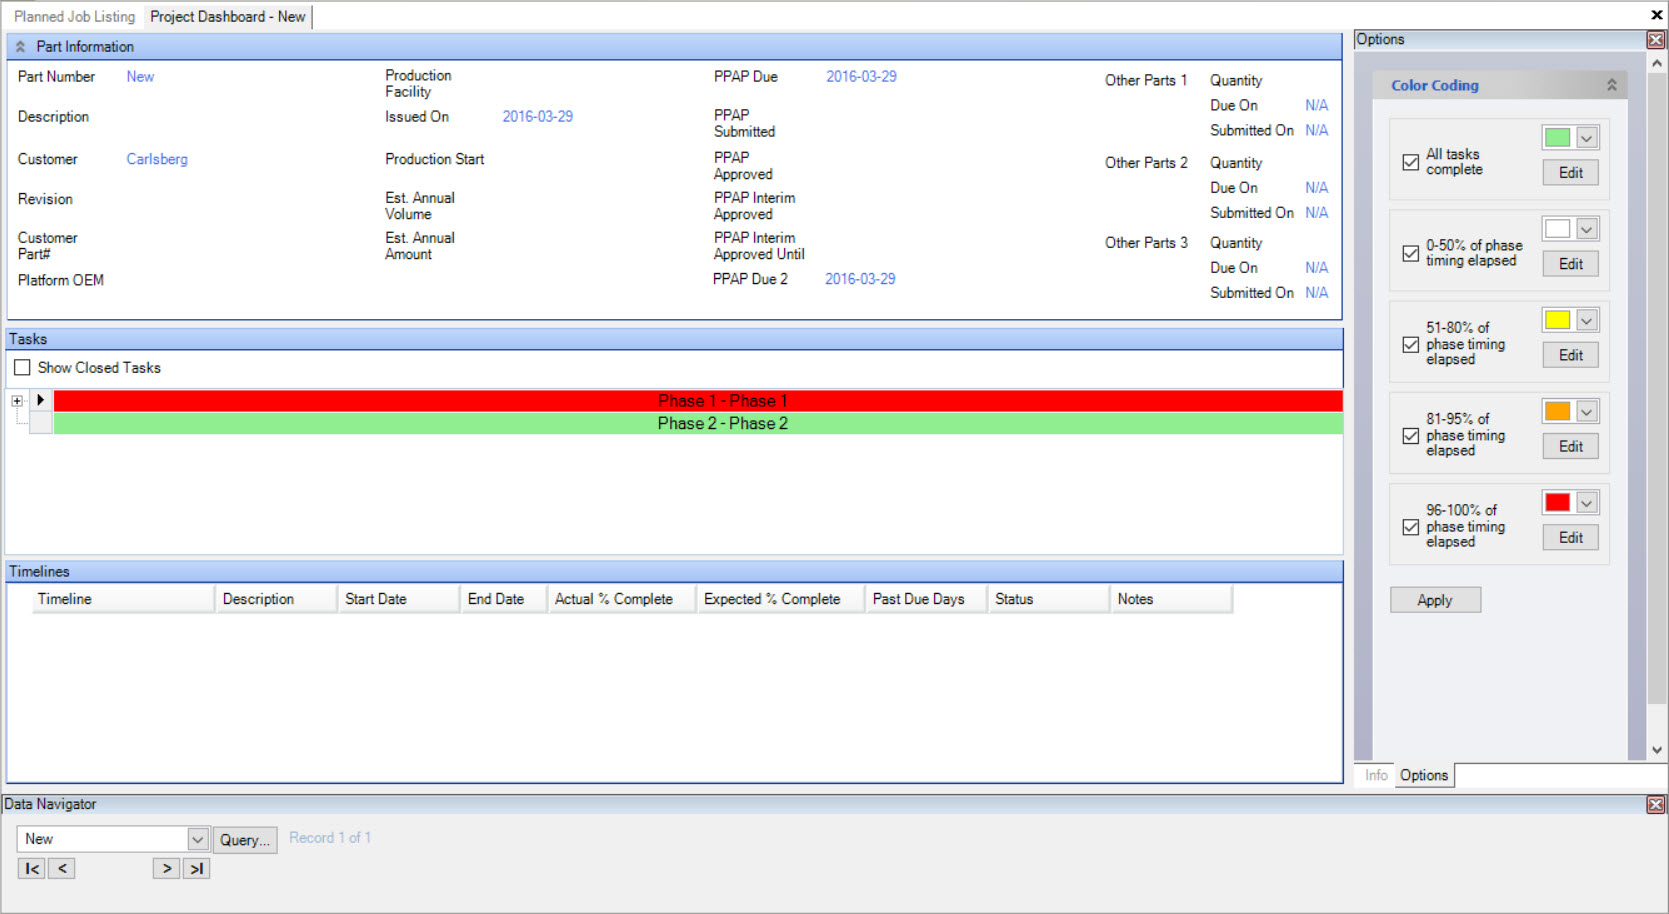
The Project Dashboard detail allows the user to double-click a Task to view the task details. If you want to include Tasks that are already closed, click the Show Closed Tasks option.

By right clicking the mouse on the Task, a menu is displayed. You then have the ability to select a menu item to do the following:
- Move the task down
- Move the task up
- Edit the task
- Change the task status
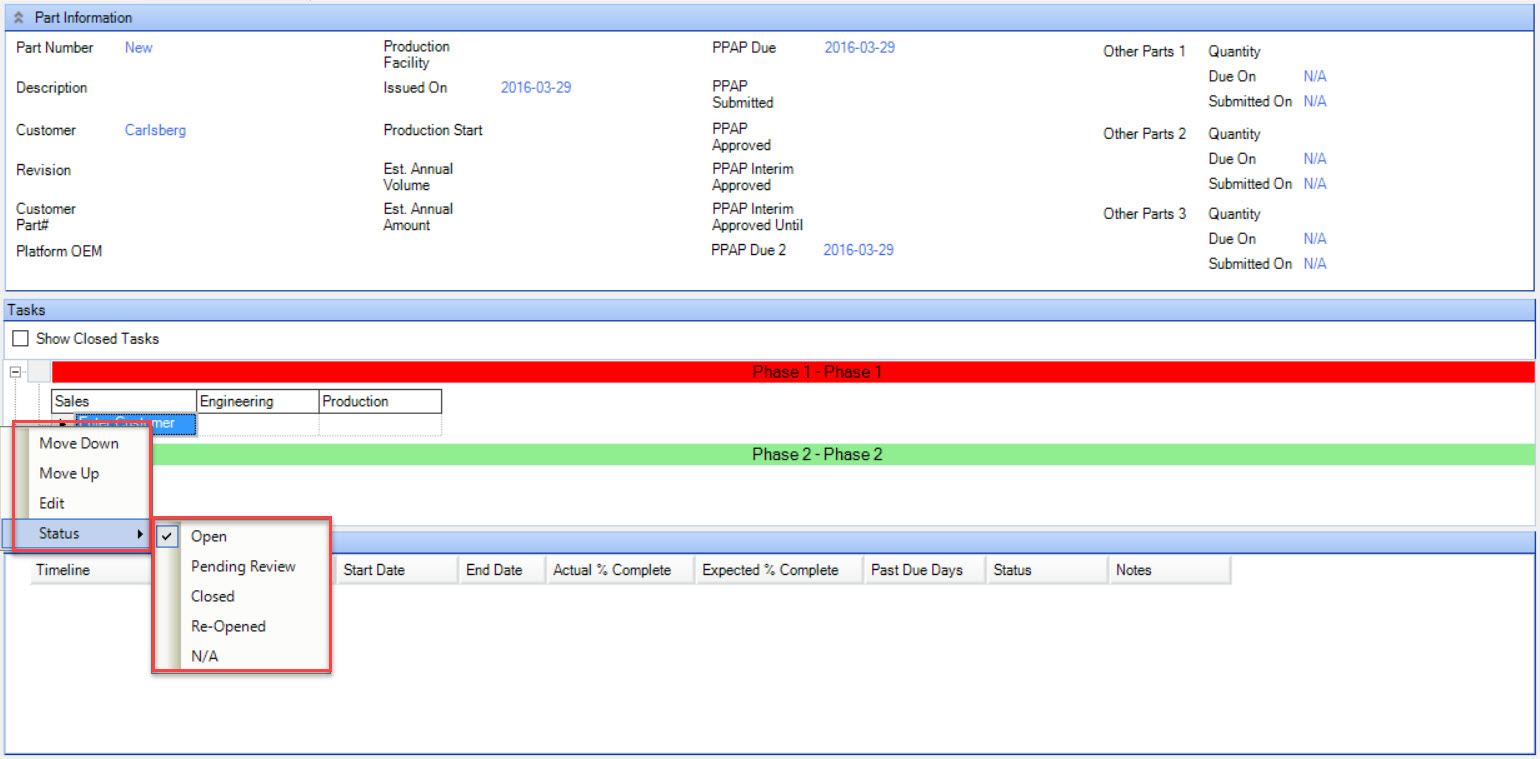
Select the Task you wish to modify by double-clicking on the task row. This will open the Task Details screen.
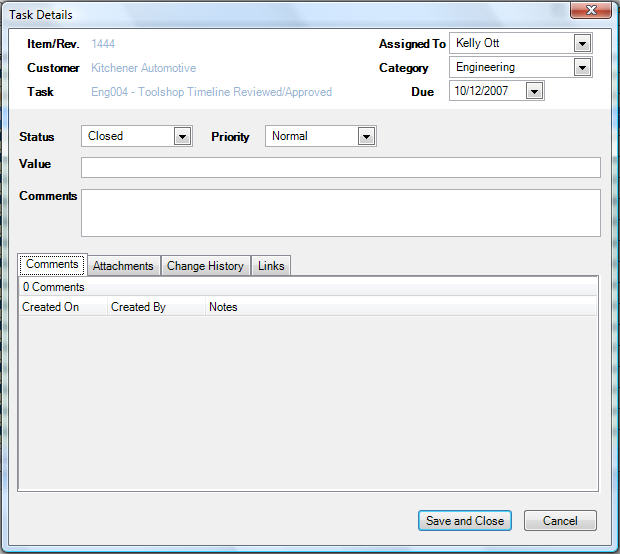
You then have the ability to modify the Task in the following ways:
- Assigned to
- Category
- Due
- Status
- Priority
- Value
- Comments
You also have the ability to view Comments, add an Attachment, view the History of the Changes, and view Linked Tasks.
When you have finished making your changes, click on the  button.